1
Adobe ColdFusion Documentation
This PDF is auto-generated from the Wiki pages
1. Installing Adobe ColdFusion 10 __________________________________________________________________________ 2
1.1 Preparing to Install ColdFusion ______________________________________________________________________ 2
1.2 Installing the Server Configuration ____________________________________________________________________ 4
1.3 Installing the J2EE Configuration _____________________________________________________________________ 25
1.4 Installing Integrated Technologies ____________________________________________________________________ 55
1.5 Configuring your System ___________________________________________________________________________ 61
1.6 Troubleshooting installation issues ___________________________________________________________________ 75
Installing Adobe ColdFusion 10
Installing ColdFusion is intended for anyone who has to installing, configuring, and troubleshooting their
Adobe® ColdFusion® server and the integrated technologies.
Preparing to Install ColdFusion
Installing the Server Configuration
Installing the J2EE Configuration
Installing Integrated Technologies
Configuring your System
Troubleshooting installation issues
Preparing to Install ColdFusion
Preparing to Install ColdFusion
This copy of the installation documentation available on the DVD may be dated, to access
the latest documentation, see ColdFusion Help.
Just before installing Adobe ColdFusion 10, review the ColdFusion product editions, system requirements,
and other high-level considerations.
Preparing to Install ColdFusion
About the ColdFusion installation
Installing ColdFusion 10
ColdFusion 10 product editions
System requirements
Installation considerations
Installation considerations for all platforms
Installation considerations for Windows
Installation considerations for UNIX
#back to top
About the ColdFusion installation
ColdFusion provides a powerful and flexible installation and upgrade process. The ColdFusion installation
process includes the following phases:
1. Plan the installation by determining your installation, configuration, and upgrade options.
2. Run the ColdFusion installer.
3. (J2EE configuration only) Deploy and configure ColdFusion on your J2EE application server. The
ColdFusion installation process supports the following scenarios:
New installation Install ColdFusion on a computer with no earlier ColdFusion installation.
Upgrade installation You can upgrade from ColdFusion 8 or ColdFusion 9. When upgrading, the
installer preserves the existing settings and installs in a new directory, automatically assigning ports
that do not conflict with the existing installation.You can install ColdFusion 10 in any of the following
configurations:
Server configuration Lets you install ColdFusion 10 with an embedded JEE server. This was formerly
known as the stand-alone configuration. For enterprise and developer licenses, you can create and
© 2013 Adobe Systems Incorporated and its licensors. All rights reserved.
manage new ColdFusion instances. For information on installing the server configuration, see Installing
the Server Configuration.
Note
ColdFusion 10 does not offer a separate multi-server mode of installation.
J2EE configuration (Enterprise Edition only) Lets you deploy ColdFusion 10 as a Java application
running on a Java 2 Enterprise Edition (J2EE) application server, using a third-party J2EE server, such
as IBM WebSphere or Oracle WebLogic. When you use the J2EE configuration, you can deploy
ColdFusion 10 multiple times on a single computer. For information on installing the J2EE
configuration, see Installing the J2EE Configuration.
#back to top
Installing ColdFusion 10
ColdFusion 10 product editions
The ColdFusion 10 product editions are available on the Adobe website. To view the product editions, go to w
ww.adobe.com/go/learn_cfu_cfeditions_en.
System requirements
The ColdFusion 10 system requirements are available on the Adobe website. To view the system
requirements, including a list of supported J2EE application servers, see www.adobe.com/go/learn_cfu_cfsys
reqs_en.
Installation considerations
Before installing ColdFusion 10, review the considerations for installing or upgrading on your platforms.
Note
To use VisiBroker for CORBA connections in ColdFusion, see Enabling CORBA support
(refer to Configuring your System) .
ColdFusion 10, ColdFusion 9, and ColdFusion 8 can coexist on the same system.
In the case of ColdFusion cluster setup, any changes to the cluster settings, for example, adding a new
member, or changing member port (in the ColdFusion Administrator) causes web server restart. This
may result in page time-out.Refresh the page to resolve this issue.
If ColdFusion uninstaller is not able to remove the connector for Apache (for example, in the case of
Mac OS X), do the following to manually remove it:
1. Delete the mod_jk.conf found
in {apache_install_location}/conf/ directory.
2. Delete {cfroot}/config/wsconfig/1 folder which has the Apache connector file, mod_jk.so.
3. Remove the following line from {apache_install_location}/conf/httpd.conf file:Include
"{apache_install_location}\conf\mod_jk.conf".
4. Delete the file {apache_install_location}\conf\mod_jk.conf
From the ColdFusion Administrator, when you wish to start multiple instances, start the cfusion insta
nce first, and then start the other instances..
When you run the ColdFusion uninstaller, the logs folder (ColdFusion_Home/cfusion/) is deleted.
When you install ColdFusion, you can install the Administrator Component to start and stop remote
server. Use the Remote Instance Administrator Component credentials to remotely start/stop the
© 2013 Adobe Systems Incorporated and its licensors. All rights reserved.
server from applications such as Server Manager, Instance Manager in ColdFusion Administrator, or
ColdFusion Builder.
J2EE deployment of ColdFusion EAR or WAR on JRun is not supported. The EWS.jar }}must be
present in the {{systemclasspath while deploying on a J2EE server.
Installation considerations for all platforms
The following are installation considerations for all platforms:
Installation considerations for Windows
The following installation considerations are for Windows systems only:
Do not configure the server running ColdFusion as a Primary Domain Controller (PDC) or Backup
Domain Controller (BDC). Adobe follows the Microsoft network model, in which the first level is the
PDC or BDC. These systems only manage the network or domain and are not designed to run
application servers. ColdFusion should reside on the second level of Microsoft Windows stand-alone
systems. Stand-alone servers can participate in a network or domain.
Microsoft Windows XP handles only ten incoming TCP/IP connections concurrently. Therefore, Adobe
does not recommend using this operating system in a production environment; use Microsoft Windows
2003 Server and Windows 2008 Server instead.
Installation considerations for UNIX
The following are installation considerations for UNIX systems only:
For troubleshooting purposes, the installer creates the following log file during an installation or
upgrade in UNIX: cf_root/Adobe_ColdFusion_10_InstallLog.log. If you contact AdobeTechnical
Support for installation support, send them this file.
If you are deploying the J2EE configuration on a platform other than Linux or Solaris, use the
ColdFusion_10_WWEJ_java.jar. This Java-only installer does not include features that require
platform-specific binary files, such as C++ CFX support.
Installing the Server Configuration
Installing the Server configuration
The ColdFusion server configuration contains an embedded copy of Tomcat and is most similar to earlier
versions of ColdFusion.
The cf_root directory refers to your installation directory. By default, this directory is
C:\ColdFusion10 in Windows, and /opt/coldfusion10 in UNIX.
Installing the Server configuration
Gathering information necessary to install the server configuration
Installing ColdFusion using the server configuration
Installing ColdFusion server configuration in Windows or MAC
Install ColdFusion in Windows or MAC
Installing the ColdFusion server configuration in UNIX
Install the ColdFusion server configuration in UNIX
ColdFusion installation directory structure
Modifications to the directory structure
© 2013 Adobe Systems Incorporated and its licensors. All rights reserved.
Using the built-in web server
Change the port of the built-in web server
Configuring the built-in web server (Tomcat)
Starting, stopping, and restarting ColdFusion
On Windows
Editing the JVM settings
Creating and editing a new ColdFusion instance
Registering a remote instance
Adding start and stop functionality to a remote instance over HTTPS
Setting up remote start and stop functionality using HTTPS in Server Manager
Setting up remote start and stop functionality using HTTP in Server Manager
Managing clusters
Adding a remote instance to a cluster
Configuring other web servers
Configuring Secured Socket Layer (SSL)
Changing virtual directory and the doc root
Changing the connector port for cfstat
Enabling Search Engine Safe URLs
Enabling Secure Profile
Changing the log rotation settings
Enabling persistent session
Updating from an earlier version
Uninstalling ColdFusion
Uninstall ColdFusion from Windows
Uninstall ColdFusion from UNIX
#back to top
Gathering information necessary to install the server configuration
Although the ColdFusion 10 installer provides an intuitive interface, it helps to plan your answers to the
questions asked by the installer. Use the following tables to help plan for installing the server configuration of
ColdFusion 10.
Question
Answer
Platform-specific installer name?
_________________________________________
__________
Serial number for ColdFusion?
_________________________________________
__________
Type of installation?
___ Server configuration___ J2EE configuration
Subcomponents to install?
___ ColdFusion 10 ODBC Services___ ColdFusion
10 Solr Services___ Admin Component for Remote
Start and Stop___ .NET Integration Services___
ColdFusion 10 Documentation
ColdFusion installation directory?
_________________________________________
__________
© 2013 Adobe Systems Incorporated and its licensors. All rights reserved.
Configure web server or use built-in web server?
___ Configure web server for ColdFusion ___
Enable ColdFusion built-in web server
Web server to configure? (Only if you do not use the
built-in web server.)
___ IIS___ Apache ___ SunJWS___ Other
Configuration directory? (Apache and Sun Java
Web Server)
_________________________________________
__________
Enable Secure Profile
__Yes__No
Identify a list of IP addresses that will have access
to the ColdFusion Administrator.
Configure OpenOffice
__Yes__No
Path to server binary? (Apache)
_________________________________________
__________
Whether to enable RDS?
___ Yes___ No
Note: RDS allows the server to interact with
remotely connected developers. Adobe
recommends that you disable RDS for production
servers.Disabling RDS also disables the directory
browsing applets in the ColdFusion Administrator.
RDS password?
___________________________________
Automatically check for server updates?
__Yes__No
#back to top
Installing ColdFusion using the server configuration
Once you have determined the answers to the questions in the above section Gathering information
necessary to install the server configuration, you can install the ColdFusion server configuration in Windows
or UNIX, as applicable.
Installing ColdFusion server configuration in Windows or MAC
Note
(Windows only) The Windows installer requires a computer that supports at least 256
colors.
Install ColdFusion in Windows or MAC
1. Read the online version of the Release Notes for any late-breaking information or updates. For more
information, see www.adobe.com/go/learn_cfu_releasenote_en.
2. Ensure that your operating system meets the system requirements described on the Adobe website at
www.adobe.com/go/learn_cfu_cfsysreqs_en.
3.
© 2013 Adobe Systems Incorporated and its licensors. All rights reserved.
3. Review Installation considerations for Windows and Installation considerations for all platforms (Refer
to the Installing Adobe ColdFusion 10).
4. Determine the answers to the questions in the above table in "Gathering information necessary to
install the server configuration" section.
5. Close any applications that are currently running on your computer.
6. If you plan to configure an external web server, ensure that the web server is running.
7. Insert the DVD or download the setup file from the Adobe website.
8. If the installation wizard does not start automatically when you insert the DVD, locate the appropriate
installer file on the DVD and double-click it. If you are installing from a network or a downloaded file,
locate the ColdFusion installer *Windows only:*
coldfusion_10_WWEJ_win32.exe/coldfusion_10_WWEJ_win64.exe and double-click it.*MAC
only:*Extract the coldfusion_10_WWEJ_osx10.dmg file and double-click the installer.
9. Follow the instructions in the installation wizard, and let it run to completion.
10. Click OK to open the ColdFusion Administrator and configure the server.
11. To install any other integrated Adobe or third-party technologies, see Installing Integrated
Technologies.
12. Configure and manage your system, as described in ConfiguringConfiguring your System your
System.
13. To learn about ColdFusion, read the documentation, which is accessible through the Documentation
link on the Resources page of the ColdFusion Administrator.
Installing the ColdFusion server configuration in UNIX
By default, ColdFusion installs into the /opt/coldfusion10 directory. You can also choose to install ColdFusion
10 in a different directory.
Note
The default user is nobody for the UNIX installer running ColdFusion.
Install the ColdFusion server configuration in UNIX
1. Read the online version of the Release Notes for any late-breaking information or updates. For more
information, see www.adobe.com/go/learn_cfu_releasenote_en.
2. Ensure that your operating system meets the system requirements described on the Adobe website at
www.adobe.com/go/learn_cfu_cfsysreqs_en.
3. Review Installation considerations for UNIX and Installation considerations for all platforms (Refer to
the Installing Adobe ColdFusion 10).
4. Determine the answers to the questions in the above section "Gathering information necessary to
install the server configuration".
5. If you plan to configure an external web server, ensure that the web server is running.
6. Log in as root.
Copy the installation file that is appropriate for your platform and locale from the DVD or Adobe
website, and save it to a directory on your local disk. The following installation files are those for the
supported server configuration platforms:
Platform
Linux
File
ColdFusion_10_WWEJ_linux32.bin (for 32-bit
systems)
ColdFusion_10_WWEJ_linux64.bin (64-bit systems)
Solaris
1.
© 2013 Adobe Systems Incorporated and its licensors. All rights reserved.
ColdFusion_10_WWEJ_solaris64.bin
1. Using the cd command, go to the directory that contains the installation file.
2. Ensure that you have executable permission for the installation file. You can change permissions on
the file by using the following command:
chmod 777 ColdFusion_10_WWEJ_solaris64.bin
3. Start the installation with the following command:
./<filename>
Note
To run the Linux installer in GUI mode, type ./<filename> -i gui.
4. Follow the prompts in the installation program, and let it run to completion.
Note
For security reasons, it is crucial that you do not use root for the runtime user.
5. Start ColdFusion with the following command:
/cf_root/cfusion/bin/coldfusion start
If you specified the use of an external web server when you ran the installer, ColdFusion automatically
runs the cf_root/cfusion/bin/cf-connectors.sh script when it starts the first time. This shell script runs the
Web Server Configuration Tool by using the settings that you specified during the installation. If there
are problems running this script, review the configuration and bin directory specifications, modify as
necessary, and rerun the script. You can also configure your web server by using the scripts in cf_root/
cfusion/bin/connectors, as appropriate. To stop ColdFusion, use the following command:
/cf_root/cfusion/bin/coldfusion stop
For more information on managing processes, see Managing the ColdFusion process in UNIX.
6. Open ColdFusion Administrator to run the Configuration wizard.
7. Configure and manage your system, as described in Configuring your System.
8. To install any other integrated Adobe or third-party technologies, see Installing Integrated
Technologies.
9. To learn about ColdFusion, read the documentation, which is accessible through the Documentation
link on the Resources page of the ColdFusion Administrator.
#back to top
ColdFusion installation directory structure
By default, ColdFusion10 is your installation directory. The following table describes the directory structure:
© 2013 Adobe Systems Incorporated and its licensors. All rights reserved.
Directory
Description
cfusion
Contains the following directories:
© 2013 Adobe Systems Incorporated and its licensors. All rights reserved.
bin: Programs for starting, stopping, and viewing
information for ColdFusion, and to run Crystal
Reports (Windows only). It also contains the
password reset scripts for server administrator
and Admin Component for remote server start
and stop.
cache: Repository for temporary files from
ColdFusion.
cfx: Sample C++ and Java CFX files with their
supporting files. You can also store your CFX files
in this directory (although you can put them in any
location that is defined in your classpath).
charting: Files for the ColdFusion graphing and
charting engine.
CustomTags: Repository for your custom tags
db: The sample Apache Derby databases for all
platforms.
gateway: Files for ColdFusion event gateways.
jetty: Solr configuration files and files related to
remote instance start and stop.
jintegra: (Applies only to Windows) JIntegra
programs, libraries, and other supporting files (for
example, to integrate Java and COM code;
manage access to ActiveX controls (OCXs) that
are hosted in a graphical user interface (GUI)
container; and register the JVM and type
libraries). (Applicable only for Windows.)
jnbridge: Files for .NET Integration Services.
lib: JAR, XML, property, and other files that are
the foundation of ColdFusion, for functionality
such as queries, charting, mail, security, Solr, and
system probes.
logs: Repository for ColdFusion log files.
JRE-specific log files are in the runtime/logs
directory. Console outputs are logged in to coldf
usion-out.log instead of cfserver.log.
Mail: Repository for spooled mail and mail that
cannot be delivered.
META-INF: XML metadata for the ColdFusion
Administrator.
MonitoringServer: Contains {{crossdomain.xml
}}used for multi-server monitoring.
registry: (UNIX only) Flat file to store registry
settings
runtime: Programs and supporting files for the
ColdFusion runtime. Also, contains the Tomcat
libraries. The conf directory in runtime contains all
Tomcat configuration files.
stubs: web services.
wwwroot: Default web root directory for the
built-in web server. When running on other web
servers, this directory contains the CFIDE and
WEB-INF directories; do not remove this
directory.
© 2013 Adobe Systems Incorporated and its licensors. All rights reserved.
config
Contains instances.xml and connector configuration
files. Also, contains cluster configuration file, clust
er.xml.
jre
Java runtime files.
uninstall
Files to uninstall ColdFusion.
Modifications to the directory structure
The following table shows the directories in ColdFusion 9 and the corresponding ones in ColdFusion 10:
ColdFusion 9
ColdFusion 10
cfroot
cfusion
ColdFusion9\runtime\jre
ColdFusion10\jre
ColdFusion9\uninstall
ColdFusion10\uninstall
ColdFusion9\runtime\lib\wsconfig
ColdFusion10\config\wsconfig
Note
The ColdFusion_install\cfusion\bin directory contains the Jvm.config file.
#back to top
Using the built-in web server
ColdFusion provides in-built Tomcat application server that you can use to develop ColdFusion applications.
During the ColdFusion installation, choose a web server. If you select the built-in web server, your web root
directory is located in the cfroot/wwwroot directory. By default, the web server runs on port 8500. It means
that to display a page in your application, append:8500 to the host name or IP address in the URL; for
example, http://localhost:8500/YourApp1/index.cfm. If the page does not appear, ensure that the document is
located in the built-in web server's web root directory; for example,
C:\ColdFusion10\cfusion\wwwroot\YourApp1\index.cfm.
Note
If port 8500 is in use, the installer checks up to 100 ports (starting with 8501) to find a port
that is not used. ColdFusion uses that port and displays a message to indicate the
selected port.
If you select an external web server during installation, the built-in web server is deactivated.
Change the port of the built-in web server
1. Back up the server.xml file. This file is in the cfroot\cfusion\runtime\conf directory.
2. Open the original server.xml file for editing.
3. Search for internal webserver start.Update the port number.
© 2013 Adobe Systems Incorporated and its licensors. All rights reserved.
3.
<Connector executor="tomcatThreadPool"
port="8500" protocol="org.apache.coyote.http11.Http11NioProtocol"
connectionTimeout="20000"
redirectPort="8445"/>
4. Save the file and then restart ColdFusion.
#back to top
Configuring the built-in web server (Tomcat)
While installing, if you have configured ColdFusion on an external web server, do the following to configure
ColdFusion on in-built Tomcat:
1. Open the cfroot\cfusion\runtime\conf\server.xml file.
2. Search for internal webserver start.Uncomment the following connector XML.
<Connector executor="tomcatThreadPool"
port="8500" protocol="org.apache.coyote.http11.Http11NioProtocol"
connectionTimeout="20000"
redirectPort="8445"/>
Save the file, and then restart ColdFusion.
Note
To enable OS Symbolic links after switching to Tomcat, edit the context.xml file
found in /cfusion/runtime/conf/ to add allowLinking="true" attribute to
the context element.
#back to top
Starting, stopping, and restarting ColdFusion
On Windows
1. At prompt, go to the directory cfroot\cfusion\bin and run the following command: coldfusion.exe
-start -console. To stop ColdFusion, use the command coldfusion.exe -stop -console.
To restart, use the command coldfusion.exe -restart -console.Alternatively, you could also
start, stop, and restart ColdFusion server using Windows Services.
Note
Paused tasks misfire when restarting ColdFusion.
© 2013 Adobe Systems Incorporated and its licensors. All rights reserved.
Note
As possible in previous versions of ColdFusion, you can also use the cfstart script
to start/stop the ColdFusion sever.
Note
The -console argument is optional. If it is not provided, the logs are saved in the
cfroot\cfusion\logs directory.
On UNIX/Linux/Solaris/MAC OSX
1. At prompt, go to the directory cfroot\cfusion\bin and run the following command: ./coldfusion
start}}To stop ColdFusion, use the command ./{{coldfusion stop. }}To
restart, use the command {{./coldfusion restart.
Note
Paused tasks misfire when restarting ColdFusion.
Note
Use the status command to find the status of ColdFusion server.
#back to top
Editing the JVM settings
To edit the JVM settings, open the cfroot\cfusion\bin\jvm.config file and update the following
details:
java.home: Java home. If not set, ColdFusion verifies the default JRE in the cfroot\jre folder, in
the registry, or in the J{{AVA_HOME}} environment variable.
java.args: Settings for -Xmx, ColdFusion classpath, and so on.
java.library.path: Settings for library path.
java.class.path: Additional classpath settings in a comma-separated list.
application.home: Default is cfroot\cfusion
#back to top
Creating and editing a new ColdFusion instance
After installing ColdFusion in stand-alone mode, create an instance of ColdFusion using the ColdFusion
Administrator.
1.
2.
3.
4.
5.
In the ColdFusion Administrator, go to Enterprise Manager > Instance Manager.
Click Add New Instance.
Enter the server name and server directory.
(Optional) Check Create Windows Service.
Click Submit. In the Instance Manager, start, stop, restart, delete, access website, or access
administrator.
6.
© 2013 Adobe Systems Incorporated and its licensors. All rights reserved.
6. Click the Edit icon to edit the instance manager.
7. Edit the internal webserver port and load balancing factor.Load balancing factor represents the load
the instance takes up. Load balancing factor is applicable only if the instance is part of the cluster.For
example, the load balancing factor for the first instance is 1 and that of the second instance is 2. The
second instance receives two times more requests.
8. Click Submit.
#back to top
Registering a remote instance
Register a new remote instance of ColdFusion using the ColdFusion Administrator.
1. In the ColdFusion Administrator, click Enterprise Manager > Instance Manager > Register Remote
Instance.
2. Specify the details such as instance name, remote host, remote port, http port, and JVM route.
Instance name is a string that is used to identify the instance. Remote port and HTTP port are
displayed in the Instance Manager page. These ports are provided in the server.xml file available in
the runtime\conf folder of the instance. Remote port is the AJP port and the instance port is the
connector port.JVM route is the remote instance name. The JVM route is an attribute that acts as an
identifier for a particular Tomcat worker. JVM route is provided in the server.xml file available in the
runtime\conf folder of the instance. For more information on JVM route, see http://tomcat.apache.o
rg/tomcat-7.0-doc/cluster-howto.html.
Note
A remote instance and a local instance cannot have the same JVM route if they are
added in a cluster with sticky session enabled.
3. If you want remote start and stop functionality over HTTP, enter Admin Component port, Admin
Component user name, and Admin Component password. The default Admin Component port is 8985.
Note
To enable this feature, install admin component on the remote host.
a. In the remote host, open the ColdFusion_installtion\cfusion\jetty\etc\jetty.xm
l.
b. Search for the string, org.mortbay.jetty.bio.SocketConnector.
c. Update the host with the IP address of the remote host.
d. Restart the jetty server.
4. Click Submit.
#back to top
Adding start and stop functionality to a remote instance over HTTPS
You can start and stop a remote instance over HTTPS or HTTP. To enable this feature, install admin
component while installing ColdFusion. You can install Solr, admin component, or both while installing
ColdFusion.
1. Do the following in the remote host.
a. In the remote host, generate a private key in a keystore file. Provide the details at prompt.
© 2013 Adobe Systems Incorporated and its licensors. All rights reserved.
cfroot\jre\bin\keytool -genkeypair -alias certificatekey -keyalg
RSA -validity 7 -keystore keystore.jks
b. Export the certificate. You can have a self-signed certificate or a certificate from a Certificate
Authority.
cfroot\jre\bin\keytool -export -alias certificatekey -keystore
keystore.jks -rfc -file selfsignedcert.cer
c. Copy the jks file created in the jetty\etc directory.
d. Open the jetty\etc\jetty.xml file.
e. Search for the string, To add an HTTPS SSL Listenerand add the following entry:
<Call name="addConnector">
<Arg>
<New class="org.mortbay.jetty.security.SslSocketConnector">
<Set name="Port">8443</Set>
<Set name="maxIdleTime">30000</Set>
<Set name="keystore"><SystemProperty name="jetty.home"
default="." />/etc/jks-file.jks</Set>
<Set name="password">changeit</Set>
<Set name="keyPassword">changeit</Set>
<Set name="truststore"><SystemProperty name="jetty.home"
default="." />/etc/jks-file.jks</Set>
<Set name="trustPassword">changeit</Set>
</New>
</Arg>
</Call>
f.
g.
h.
i.
Update the keystore name, password, key password, and jks file in the entry.
Search for the string org.mortbay.jetty.bio.SocketConnector.
Update the host with the IP address of the remote host.
Restart the jetty server.
Note
If the remote server is running on Windows Vista, Windows 7, or Windows
Server 2008, start the jetty sever with admin privileges.
2. Do the following in the local host from where you add the remote instance:
a. Copy the .cer file created in the remote host to any of the locations.
b. Import the certificate.
cfroot\jre\bin\keytool.exe -importcert -keystore
"cfroot\jre\lib\security\cacerts" -file selfsignedcert.cer
-storepass password
c. Register the remote instance using the ColdFusion Administrator. For more information, see Re
© 2013 Adobe Systems Incorporated and its licensors. All rights reserved.
c.
gistering a remote instance section in this document.
d. In the Register Remote Instance page, enter the admin component port, admin component user
name, and admin component password (user name and password. These details you specified
while installing the Remote Instance Administrator). The default https port is 8443.
e. Select the HTTPS check box.
f. Click Submit.
#back to top
Setting up remote start and stop functionality using HTTPS in Server Manager
You can set up start and stop remote instance functionality in Server Manager. To enable this feature, install
Remote Instance Administrator while installing ColdFusion.
1. Do the following in the remote host.
a. In the remote host, generate a private key in a keystore file. Provide the details at prompt.
cfroot\jre\bin\keytool -genkeypair -alias certificatekey -keyalg
RSA -validity 7 -keystore keystore.jks
b. Export the certificate. You can have a self-signed certificate or a certificate from a Certificate
Authority.
cfroot\jre\bin\keytool -export -alias certificatekey -keystore
keystore.jks -rfc -file selfsignedcert.cer
c. Copy the .jks file created in the remote host to the jetty\etc directory.
d. Open the jetty\etc\jetty.xml file.
e. Search for the string, To add a HTTPS SSL Listenerand then add the following entry:
<Call name="addConnector">
<Arg>
<New class="org.mortbay.jetty.security.SslSocketConnector">
<Set name="Port">8443</Set>
<Set name="maxIdleTime">30000</Set>
<Set name="keystore"><SystemProperty name="jetty.home"
default="." />/etc/server.jks</Set>
<Set name="password">changeit</Set>
<Set name="keyPassword">changeit</Set>
<Set name="truststore"><SystemProperty name="jetty.home"
default="." />/etc/server.jks</Set>
<Set name="trustPassword">changeit</Set>
</New>
</Arg>
</Call>
f.
g.
h.
i.
Update the keystore name, password, key password, and jks file in the entry.
Search for the string, org.mortbay.jetty.bio.SocketConnector.
Update the host with the port number of the remote host.
Restart the jetty server.
© 2013 Adobe Systems Incorporated and its licensors. All rights reserved.
i.
Note
If the remote server is running on Windows Vista, Windows 7, or Windows
Server 2008, start the jetty sever with admin privileges.
2. Do the following in the local host from where you add remote instance:
a. Copy the .cer file created in the remote host to any of the locations.
b. Import the certificate.
cfroot\jre\bin\keytool.exe -importcert -keystore
"cfroot\jre\lib\security\cacerts" -file selfsignedcert.cer
-storepass password
3.
4.
5.
6.
7.
Open wwwroot\CFIDE\ServerManager\ServerManager.air on the local host.
Specify the connection details.
Click Start/Stop Details.
Select HTTPS.
Provide the following information:
App Server Username: User name for the admin component that you specified while installing
ColdFusion. Default value is admin.
App Server Password: Password for the admin component.
Port: ColdFusion remote instances HTTPS port.
Server: ColdFusion remote instance name.
ColdFusion Version: For ColdFusion, 10.
Admin Server Port: Default https port is 8443. Port of the Jetty server.
Context Root: Value is AdminServlet.
8. Click Apply.
#back to top
Setting up remote start and stop functionality using HTTP in Server Manager
You can set up start and stop remote instance functionality in Server Manager. To enable this feature, install
Remote Instance Administrator while installing ColdFusion.
1. Do the following in the remote host:
a. In the remote host, open the ColdFusion_installtion\cfusion\jetty\etc\jetty.xm
l.
b. Search for the string, org.mortbay.jetty.bio.SocketConnector.
c. Update the host with the IP address of the remote host.
d. Start the jetty server. Go to the ColdFusion_installation\cfusion\jetty directory and
use jetty.exe. You can also use the jetty services in the Windows services.
2. Open wwwroot\CFIDE\ServerManager\ServerManager.air on the local host.
3. Specify the connection details.
4. Click Start / Stop Details.
5. Select HTTP.
6. Provide the following information:
App Server Username: User name for the admin component that you specified while installing
ColdFusion. The default value is admin.
App Server Password: Password for the admin component.
Port: ColdFusion remote instance's HTTP port.
Server: ColdFusion remote instance name.
© 2013 Adobe Systems Incorporated and its licensors. All rights reserved.
ColdFusion Version: For ColdFusion 10, the value 10.
Admin Server Port: Default https port is 8985. Port of the Jetty server.
Context Root: Value is AdminServlet.
7. Click Apply.
#back to top
Managing clusters
Manage clusters using the ColdFusion Administrator.
1.
2.
3.
4.
In the ColdFusion Administrator, click Enterprise Manager > Cluster Manager.
Enter a cluster name and then click Add.
Click the cluster name and move the servers to the cluster based on the requirement.
(If necessary) Edit the multicast port.Multicast port is used to group the cluster members together.
Default value of multicast port is 45564. After you create a cluster, the port is added in the cfroot\co
nfig\cluster.xml file. For more information on multicast port, see http://tomcat.apache.org/tomcat7.0-doc/config/cluster-membership.html.
5. Specify if you need sticky session.Sticky session ensures that after a session is established on an
instance, all future requests from the client are mapped to that instance.
Click Submit.
Note
Restart the web server if cluster instances are modified.
#back to top
Adding a remote instance to a cluster
To add a remote instance to a cluster, add the cluster block to the remote instance's server.xml. Then,
register the remote instance and add the instance to the cluster. For more information on configuring clusters
on Tomcat, see http://tomcat.apache.org/tomcat-7.0-doc/cluster-howto.html.
1.
2.
3.
4.
Register the remote instance to the local machine.
Create a cluster in the local machine.
Open the cfroot_instance-name_runtime\conf\server.xml file of the remote instance.
Add the following block between the entries </host> }}and {{</engine>:
© 2013 Adobe Systems Incorporated and its licensors. All rights reserved.
<Cluster className="org.apache.catalina.ha.tcp.SimpleTcpCluster"
channelSendOptions="8">
<Manager notifyListenersOnReplication="true"
expireSessionsOnShutdown="false"
className="org.apache.catalina.ha.session.DeltaManager">
</Manager>
<Channel className="org.apache.catalina.tribes.group.GroupChannel">
<Membership port="45565" dropTime="3000" address="228.0.0.4"
className="org.apache.catalina.tribes.membership.McastService"
frequency="500">
</Membership>
<Receiver port="4003" autoBind="100" address="auto"
selectorTimeout="5000" maxThreads="6"
className="org.apache.catalina.tribes.transport.nio.NioReceiver">
</Receiver>
<Sender
className="org.apache.catalina.tribes.transport.ReplicationTransmitter">
<Transport
className="org.apache.catalina.tribes.transport.nio.PooledParallelSender"
>
</Transport>
</Sender>
<Interceptor
className="org.apache.catalina.tribes.group.interceptors.TcpFailureDetect
or">
</Interceptor>
<Interceptor
className="org.apache.catalina.tribes.group.interceptors.MessageDispatch1
5Interceptor">
</Interceptor>
</Channel>
<Valve className="org.apache.catalina.ha.tcp.ReplicationValve"
filter="">
</Valve>
<Valve className="org.apache.catalina.ha.session.JvmRouteBinderValve">
</Valve>
<ClusterListener
className="org.apache.catalina.ha.session.JvmRouteSessionIDBinderListener
">
</ClusterListener>
<ClusterListener
className="org.apache.catalina.ha.session.ClusterSessionListener">
</ClusterListener>
</Cluster>
5. In the entry, update the membership port with the multicast port of the cluster.
6. Using the ColdFusion Administrator of the local host, add the local instance and the remote instance to
the cluster.
Note
If you enable sticky session, the JVM route of the remote instance and local
instance must not be the same.
7.
© 2013 Adobe Systems Incorporated and its licensors. All rights reserved.
7. Restart all the instances.
Note
When adding a remote instance in a cluster, ensure that you comment out <Manag
er pathname="" /> in content.xml file located in <cf_home>\runtime\conf
directory.
#back to top
Configuring other web servers
Use the Web Server Configuration Tool to configure other web servers.
1. Run cfroot\runtime\bin\wsconfig.exe.
You can also configure web servers using the command-line interface as follows.
Configuring IIS
wsconfig.exe -ws iis -site <site_no>
or
wsconfig.exe -ws iis -site <site_name>
Configuring cluster
wsconfig.exe -ws iis -site <site_no> -cluster <cluster-name>
Configuring Apache
(Windows only) wsconfig.exe ws apache dir <apache_conf_directory>
(Linux or MAC only) ./wsconfig ws apache dir <apache_conf_directory>
or
(Windows only) wsconfig.exe ws apache dir <apache_conf_directory> bin
<apache_bin_directory>/httpd script <apache_bin_directory>/apachectl
(Linux or Mac only) ./wsconfig ws apache dir <apache_conf_directory> bin
<apache_bin_directory>/httpd script <apache_bin_directory>/apachectl
Configuring cluster
© 2013 Adobe Systems Incorporated and its licensors. All rights reserved.
(Windows only) wsconfig.exe -ws apache dir <apache_conf_directory>
-cluster <cluster-name>
(Linux or MAC only) ./wsconfig -ws apache dir <apache_conf_directory>
-cluster <cluster-name>
Configuring Sun Java Web Server
(Windows only) wsconfig.exe ws SunJWS dir <SunJWS_conf_directory>
(Linux or MAC only) ./wsconfig ws SunJWS dir <SunJWS_conf_directory>
Configuring cluster
(Windows only) wsconfig.exe -ws SunJWS dir <SunJWS_conf_directory>
-cluster <cluster-name>
(Linux or MAC only) ./wsconfig -ws SunJWS dir <SunJWS_conf_directory>
-cluster <cluster-name>
Unconfiguring IIS
wsconfig.exe -remove -ws iis -site <site_no>
or
wsconfig.exe -remove iis -site <site_name>
Unconfiguring Apache
./wsconfig -remove ws apache dir <apache_conf_directory>
or
./wsconfig -remove ws apache dir <apache_conf_directory> bin <apache_bin
directory>/httpd script <apache_bin_directory>/apachectl
Unconfiguring Sun Java Web Server
./wsconfig -remove ws SunJWS dir <SunJWS_conf_directory>
© 2013 Adobe Systems Incorporated and its licensors. All rights reserved.
Unconfiguring all webservers
./wsconfig -uninstall
Seeing the list of webservers
./wsconfig -list
#back to top
Configuring Secured Socket Layer (SSL)
SSL allows the browser and the server to communicate over a secured connection. Data that is sent is
encrypted at one side, transmitted, and then decrypted at the other end. For more information about SSL
configuration on Tomcat, see http://tomcat.apache.org/tomcat-7.0-doc/ssl-howto.html.
To configure SSL for ColdFusion using the keytool utility, do the following:
1. Create a certificate file:
a. Run the following command:cfroot\jre\bin\keytool -genkey -alias tomcat
-keyalg RSA
b. Type the details as per the instruction.
Note
If you do not provide a password, the default password for keystore and key
is changeit. If you don't want to use the default password, ensure that you
provide the same password for the keystore and the key.
Running this command creates a certificate.keystore in the following location:
Windows: C:\Documents and Settings_user's_director_y
Linux: usr/home
2. Open the cfroot\cfusion\runtime\conf\server.xml file and search for the string Define a
SSL HTTP/1.1.
3. Uncomment the connector details and update the section as follows:
<Connector port="8443" protocol="HTTP/1.1"
SSLEnabled="true" maxThreads="150" scheme="https"
secure="true" keystoreFile="<certificate_location>\.keystore"
keystorePass="<password>" keyAlias="tomcat" clientAuth="false"
sslProtocol="TLS" />
4. Restart ColdFusion.
5. Access ColdFusion using the following URL: https://<ip-address>:8443/CFIDE/administrator
#back to top
Changing virtual directory and the doc root
© 2013 Adobe Systems Incorporated and its licensors. All rights reserved.
Do the following to change the virtual directory and doc root:
1.
2.
3.
4.
Open CFInstallation\cfusion\runtime\conf\server.xml.
Under host block, search for the string, "To add virtual directory."
Uncomment the entry context path below.
To add a virtual directory, add the aliasesattribute as shown below:
<Context path="/" docBase="<absolute_path_to_cfrootectory>\wwwroot"
WorkDir="<cf_home>\runtime\conf\Catalina\localhost\tmp"
aliases="/path1=<absolute_path_to_directory1>,/path2=<absolute_path_to_di
rectory2>"></Context>
Note
Alias path must include a leading /.
5. To change the doc root, change the docBase value in the above entry.For more details on the Context
attributes, see http://tomcat.apache.org/tomcat-6.0-doc/config/context.html.
#back to top
Changing the connector port for cfstat
You can use the connector output for logging cfstat metric. The cfconnector port is defined in the CFInstall
ation/cfusion/lib/neo-metric.xml file. If you have configured a connector, update the port with the
connector port. The connector port (AJP port) is provided in the CFInstallation/cfusion/runtime/co
nf/server.xml.
To update the connector port using the Administrator console:
1. Login ColdFusion Administrator.
2. Click Debugging & Logging > Debug Output.
3. Update the connector port and click Submit Changes.
#back to top
Enabling Search Engine Safe URLs
Search Engine Safe URL (SES) helps the search engines to index dynamic web pages. SES URLs pass
parameters using slashes instead of default URL pattern. By default, SES is enabled for stand-alone
installation of ColdFusion on Tomcat.
Note
SES is applicable only for stand-alone installation of Tomcat. It does not work if
ColdFusion is deployed as a WAR file on Tomcat.
Note
If you wish to use custom SES URLs, also add the URL entry to the uriworkermap.pro
perties file found in the wsconfig folder for your web server.
#back to top
© 2013 Adobe Systems Incorporated and its licensors. All rights reserved.
Enabling Secure Profile
*New for ColdFusion 10*
ColdFusion allows you to secure ColdFusion server furthermore by enabling or disabling certain settings.
When installing ColdFusion, you can enable Secure Profile by selecting the option when prompted on the
Secure Profile screen. Further, you could provide a comma separate list of IP addresses that may be allowed
to access the ColdFusion Administrator. For more information, see Enabling Secure Profile for ColdFusion
Administrator (refer to Administering ColdFusion Security section).
#back to top
Changing the log rotation settings
You can change the log rotation settings such as maximum number of backup files and the size of the backup
files.
1. Specify log file settings in the neo-logging.xml, located in the <ColdFusion_Home>\lib
directory.
2. The size of coldfusion-out.log and coldfusion-error.log is set to 20MB by default. You can change the
size of the log in the neo-logging.xml file by changing the maxOutLogSize setting.
3. You can also change the maximum number of backups of coldfusion-out.log and coldfusion-error.log
that ColdFusion takes during log rotation within the neo-logging.xml file. Change
the maxOutFileBackup setting.
You can change the settings of the remaining files in the ColdFusion Administrator by going to the Debugging
and Logging > Logging Settings section. Change the Maximum file size and Maximum number of Archives
settings accordingly.
#back to top
Enabling persistent session
To persist a session after a Tomcat restart, do the following:
1. Open the cfroot\cfusion\runtime\conf\context.xml file.
Uncomment the Manager pathnamenode.
Note
Flex sessions are not persisted after a Tomcat restart.
#back to top
Updating from an earlier version
If you have skipped the migration or you have to make modifications to the previous installation that has to be
migrated, do the following:
1. Stop the server.
2. Save settings by copying the files cf_webapp_root/WEB-INF/cfusion/lib/neo-*.xml (of previous
installation) to a directory named cf_X_settings (in which X is the earlier version of ColdFusion) in the c
f_webapp_new_installation_root_directory/WEB-INF/cfusion/lib directory.
3. Edit the ColdFusion 10 cfusion/lib/adminconfig.xml file by setting the value of the runmigrationwiza
© 2013 Adobe Systems Incorporated and its licensors. All rights reserved.
3.
rd and the {{migratecf}}X (in which X is the earlier version of ColdFusion) switch to true.
4. Restart the ColdFusion 10 application.
5. Browse to ColdFusion Administrator to run the migration wizard.
#back to top
Uninstalling ColdFusion
Uninstalling ColdFusion deletes all program files and related components from your computer.
Uninstall ColdFusion from Windows
1.
2.
3.
4.
Select Start > Settings > Control Panel > Add/Remove Programs > Adobe ColdFusion 10.
Click Change/Remove.
When the program completes, remove any remaining files and directories in the cf_root directory.
In some cases, the uninstall program may require you to restart the computer. ColdFusion is deleted
from your server.
Uninstall ColdFusion from UNIX
1. Log in as root.
2. Enter the following command to go to the cf_root/uninstall directory:
cd cf_root/uninstall
3. Enter the following command:
./uninstall.sh
4. When the program completes, remove any remaining files and directories in the cf_root directory.
ColdFusion is deleted from your server.
Installing the J2EE Configuration
One of the main advantages of ColdFusion is that you can install it as an integrated server (the server
configuration) or deploy it as a Java application on a standards-based J2EE application server (J2EE
configuration). In addition to greater flexibility, this allows your ColdFusion applications to leverage features of
the J2EE architecture, such as support for multiple application instances and multiple-instance clustering.
Installing the J2EE Configuration
Gathering information necessary to install the J2EE configuration
ColdFusion and J2EE application servers
Choosing EAR or WAR deployment
Context root
Multiple instances
Platforms
Preparing to install using the J2EE configuration
Installing an EAR file or WAR files
Installing an EAR file or WAR files in Windows
Install ColdFusion in Windows (J2EE configuration)
Installing an EAR file or WAR files in UNIX
© 2013 Adobe Systems Incorporated and its licensors. All rights reserved.
Install ColdFusion in UNIX (J2EE configuration)
Installing an EAR file or WAR files in Mac OS X
Install ColdFusion in Mac OS X (J2EE configuration)
Updating from an earlier version for J2EE
ColdFusion J2EE deployment and configuration
J2EE directory structure
Deploying ColdFusion 10 on IBM WebSphere
Expand the EAR file
Deploy ColdFusion 10 on WebSphere 7 or 8 (AS)
Deploy ColdFusion 10 on WebSphere 7 or 8 (ND)
Enable sandbox security
Configure operating system-specific binary support in Windows
Configure search paths
Enable COM support for Windows
Configure operating system-specific binary support for Solaris and Linux
Configure search path
Enable ColdFusion charting and graphing support for UNIX
Disable RDS
Enable web services
Apply application server configuration
Configure ColdFusion 10
Deploying ColdFusion 10 on Oracle WebLogic
Install ColdFusion 10 on WebLogic
Configure operating system-specific binary support in Windows
Enable COM support for Windows
Configure operating system-specific binary support in UNIX
Enable ColdFusion security in Windows
Enable ColdFusion security and graphing support in UNIX
Deploying ColdFusion 10 on Oracle Application Server 11g
Deploy ColdFusion 10 on Oracle 11g
Configure operating system-specific binary support for Windows
Configure operating system-specific binary support for Solaris and Linux
Enable COM support
Enable charting and graphing
Disable the RDS web module
Deploying ColdFusion 10 on JBoss Application Server
Deploy ColdFusion on JBoss
Configure operating system-specific binary support for Windows
Configure operating system-specific binary support for Linux
Enable COM support (Windows only)
Enable communication with Flex
Disable RDS
Prevent security-based errors
Undeploying ColdFusion
Undeploy ColdFusion in the J2EE configuration
Installing the J2EE Configuration
#back to top
Gathering information necessary to install the J2EE configuration
© 2013 Adobe Systems Incorporated and its licensors. All rights reserved.
Although the ColdFusion 10 installer provides an intuitive interface, it helps to plan your answers to the
questions asked by the installer. Use the following tables to help plan for installing the J2EE configuration of
ColdFusion 10.
Question
Answer
Platform-specific installer name?
_________________________________________
__________
Serial number for ColdFusion?
_________________________________________
__________
Type of installation?
___ Server configuration_X_ J2EE configuration
EAR or WAR file?
___ EAR___ WAR
Subcomponents to install?
___ ColdFusion 10 ODBC Services___ ColdFusion
10 Solr Services___ .NET Integration Services___
ColdFusion 10 Documentation
Installation directory for ColdFusion and services?
_________________________________________
__________
Context root for ColdFusion (EAR file only,
default=cfusion)?
_________________________________________
__________
ColdFusion Administrator password?
_________________________________________
__________
Enable Secure Profile
__Yes__No
Identify a list of IP addresses that will have access
to the ColdFusion Administrator.
Configure OpenOffice
__Yes__No
Whether to enable RDS?
___ Yes___ No
Note: RDS allows the server to interact with
remotely connected developers. Adobe
recommends that you disable RDS for production
servers.Disabling RDS also disables the directory
browsing applets in the ColdFusion Administrator.
RDS password?
___________________________________
Automatically check for server updates?
___ Yes___ No
#back to top
ColdFusion and J2EE application servers
© 2013 Adobe Systems Incorporated and its licensors. All rights reserved.
You can deploy ColdFusion in the J2EE configuration by using a J2EE application server, such IBM
WebSphere. When you use the J2EE configuration, you can use an existing J2EE application server; the
installation wizard creates a web application archive (WAR) or enterprise application archive (EAR) file, which
you then deploy by using the tools provided by your application server.
Choosing EAR or WAR deployment
In the J2EE environment, you deploy applications in one of the following formats:
Web application archive fileContains the ColdFusion application. A web application archive (also
called a WAR) uses a directory structure that contains a WEB-INF/web.xml deployment descriptor,
which defines the servlets and context parameters it uses. J2EE application servers can deploy web
applications in this directory structures as-is or in compressed WAR files that contain these directory
structures. However, ColdFusion must run from an expanded directory structure:
cfusion (cfusion.war)
WEB-INF
web.xml
CFIDE
cfdocs
CFIDE (rds.war)
WEB-INF
web.xml
The cfusion.war file contains the ColdFusion web application. The rds.war file is a web application that
redirects RDS requests from /CFIDE to /context-root/CFIDE. It forwards requests to the ColdFusion
Administrator when ColdFusion uses a context root other than a forward slash.
Enterprise application archive fileContains the ColdFusion and RDS redirector web applications. An
enterprise application archive (also called an EAR) uses a directory structure that contains a
META-INF/application.xml deployment descriptor, which defines the web applications that it contains.
J2EE application servers can deploy enterprise applications in these directory structures as-is or in
compressed EAR files that contain these directory structures. However, ColdFusion must run from an
expanded directory structure:
cfusion-ear
META-INF
application.xml
cfusion-war
WEB-INF
web.xml
CFIDE
cfdocs
rds.war
WEB-INF
web.xml
If your J2EE application server supports enterprise applications, install and deploy the EAR file. For
more information, see Installing an EAR file or WAR files section in this page.
Context root
Because the J2EE environment supports multiple, isolated web applications running in a server instance,
© 2013 Adobe Systems Incorporated and its licensors. All rights reserved.
J2EE web applications running in a server are each rooted at a unique base URL, called a context root (or
context path). The J2EE application server uses this initial portion of the URL (that is, the portion immediately
following http://_hostname_) to determine which web application services an incoming request.
For example, if you are running ColdFusion with a context root of cf10, you display the ColdFusion
Administrator using the URL http://localhost/_cf10_/CFIDE/administrator/index.cfm.
Most J2EE application servers allow one application in each server instance to use a forward slash for the
context root. Setting the context root to / for the ColdFusion application is especially useful when serving CFM
pages from the web server, because it supports the functionality most similar to earlier ColdFusion versions.
In addition, the RDS web application is not required if you use a context root of /.
When you deploy the ColdFusion EAR file, it uses the context root that you specified when you ran the
installation wizard, which copied your specification to the context-root element of the
META-INF/application.xml file. When you deploy ColdFusion as a WAR file, you use
application-server-specific functionality to define the context root.
Multiple instances
When you use the J2EE configuration, you can define multiple server instances on a single computer, each
running ColdFusion. Running multiple instances of ColdFusion has the following advantages:
Application isolation You deploy an independent application to each server instance. Each server
instance has separate settings, and because each server instance runs in its own instance of the JVM,
problems encountered by one application have no effect on other applications.
Load balancing and failover You deploy the same application to each server instance and add the
instances to a cluster. The web server connector optimizes performance and stability by automatically
balancing load and by switching requests to another server instance when a server instance stops
running.
Platforms
Full ColdFusion functionality is available for Windows, Macintosh, Linux, and Solaris, except that the following
are Windows-specific: COM, .NET, and ODBC Services. AIX support is provided for WebSphere application
server only. Functionality provided by platform-specific binary files. is not available on AIX. Additionally, you
can install and deploy the all-Java ColdFusion J2EE configuration on other platforms, although without the
functionality provided by platform-specific binary files (C++ CFXs).
#back to top
Preparing to install using the J2EE configuration
Instead of JRun, Tomcat is embedded with a stand-alone ColdFusion 10 installation. Previous versions of
ColdFusion installer allow you to create multi-server installations whereas ColdFusion 10 installer lets you
only install stand-alone installation. After installing ColdFusion in stand-alone mode, you can create multiple
instances and clusters, provided you have an Enterprise or Developer license.
Note
This feature is not available in Standard Edition.
#back to top
Installing an EAR file or WAR files
If your computer is already running a J2EE application server, the installation wizard creates an EAR file or
WAR files, which you deploy using application-server-specific tools.
© 2013 Adobe Systems Incorporated and its licensors. All rights reserved.
The ColdFusion J2EE configuration must run from an expanded directory structure. Different J2EE
application servers have different functionality with regard to deployment and an expanded directory
structure, as follows:
Deploy compressed archive to working directory. On some J2EE application servers (such as IBM
WebSphere), the deployment process expands the EAR/WAR file into a working directory and, from that point
forward, the expanded directory is considered to be the application. For these application servers, you deploy
the compressed EAR/WAR file and work in the resulting directory structure. For more information, see ColdFu
sion J2EE deployment and configuration section in this page.
Deploy expanded archive as working directory On other application servers (such as Oracle
WebLogic), the deployment process expands the EAR/WAR file into a temporary directory and
(conceptually), the compressed EAR/WAR file is still considered to be the application. For these
application servers, expand the EAR/WAR file manually, and then deploy the expanded directory
structure, which becomes your working directory. For more information, see ColdFusion J2EE
deployment and configuration section in this page.
Installing an EAR file or WAR files in Windows
You can install the ColdFusion J2EE configuration in Windows.
Note
The Windows installer requires a computer that supports at least 256 colors.
Install ColdFusion in Windows (J2EE configuration)
1. Read the online version of the Release Notes for any late-breaking information or updates. For more
information, see www.adobe.com/go/learn_cfu_releasenote_en.
2. Ensure that your operating system meets the system requirements described on the Adobe website at
www.adobe.com/go/learn_cfu_cfsysreqs_en.
3. Review the Installation considerations for Windows and Installation considerations for all platforms sect
ions in the Preparing to Install ColdFusionPreparing to Install ColdFusion document.
4. Determine and record environment information, as described in Preparing to install using the J2EE
configuration section of this document.
5. Determine the answers to the questions in the above section Gathering information necessary to install
the J2EE configuration
6. Close any applications that are currently running on your computer.
7. Insert the DVD or download the setup file from the Adobe website.
8. If the installation wizard does not start automatically when you insert the DVD, locate the appropriate
installer on the DVD and double-click it. If you are installing from a network or a downloaded file, locate
the ColdFusion installation executable file (ColdFusion_10_WWEJ_win32.exe (for 32-bit
systems)/ColdFusion_10_WWEJ_win64.exe (for 64-bit systems)) and double-click it.
9. Follow the instructions in the installation wizard, and let it run to completion.
10. Deploy ColdFusion and configure Java settings, as required by your application server. For more
information, see ColdFusion J2EE deployment and configuration section of this document.
11. Open the ColdFusion Administrator to run the Configuration wizard.
12. To install any other integrated Adobe or third-party technologies, see Installing Integrated
Technologies.
13. Configure and manage your system, as described in Configuring your System.
14. To learn about ColdFusion, read the documentation, which is accessible through the Documentation
link on the Resources page of the ColdFusion Administrator.
15. Code ColdFusion CFM pages.Store CFM pages under the web application root (either
cfusion-ear\cfusion-war or cfusion-war) and access these pages using a URL of the form
http://_hostname_:_portnumber_/_context-root_/_filename_.cfm, as follows:
hostname: The machine name, IP address, or localhost.
portnumber: The port number used by your application server's web server.
© 2013 Adobe Systems Incorporated and its licensors. All rights reserved.
contextroot: The context root for the ColdFusion web application. For more information, see Con
text root section in this page.
filename: The directory path and file to display. The path is relative to the cfusion-war directory.
Installing an EAR file or WAR files in UNIX
You can install the ColdFusion J2EE configuration in UNIX. If you are updating an existing deployment of
ColdFusion for J2EE, see Updating from an earlier version for J2EE section of this document before you
continue.
Install ColdFusion in UNIX (J2EE configuration)
1. Read the online version of the Release Notes for any late-breaking information or updates. For more
information, see www.adobe.com/go/learn_cfu_releasenote_en.
2. Ensure that your operating system meets the system requirements described on the Adobe website at
www.adobe.com/go/learn_cfu_cfsysreqs_en.
3. Review the Installation considerations for UNIX and Installation considerations for all platforms section
s in the Preparing to Install ColdFusionPreparing to Install ColdFusion document.
4. Determine and record environment information, as described in Preparing to install using the J2EE
configuration section of this document.
5. Determine the answers to the questions in the section Gathering information necessary to install the
J2EE configuration section of this document.
6. Log in as root.
7. Copy the installation file that is appropriate for your platform and locale from the DVD or Adobe
website, and save it to a directory on your local disk. The following installation files are those for
supported J2EE configuration platforms:
Platform
Linux
File
ColdFusion_10_WWEJ_linux32.bin (for 32-bit
systems)
ColdFusion_10_WWEJ_linux64.bin (64-bit systems)
Solaris
ColdFusion_10_WWEJ_solaris64.bin
UNIX (other than Solaris or Linux)
ColdFusion_10_WWEJ_java.jar
1. Using the cd command, go to the directory with the installation file.
2. Start the installation with the following command:
./<filename> -i console
The installation program starts. To use the ColdFusion_10_WWEJ_java.jar file to install on a UNIX
platform other than Solaris or Linux, enter the following command (for more information, see
Installation considerations for UNIX in Preparing to Install ColdFusion page of this wiki ):
java_home/bin/java -jar ColdFusion_10_WWEJ_java.jar -i console
© 2013 Adobe Systems Incorporated and its licensors. All rights reserved.
Note
To run the Linux installer in GUI mode, type ./<filename> -i gui.
3. Follow the prompts, and let the installation program run to completion.
Note
For security reasons, it is crucial that you do not use root for the run-time user.
Instead, use a nonprivileged user that does not have a login shell, such as the
default user account nobody, which exists for this type of situation.
4. Deploy ColdFusion and configure Java settings, as required by your application server. For more
information, see ColdFusion J2EE deployment and configuration section of this page.
Note
If you deployed the rds.war file, and an error message indicates that RDS is not
installed or not enabled, edit the rds.properties file to match the ColdFusion context
root, restart the application server, and re-open the ColdFusion Administrator.
5. Open the ColdFusion Administrator to run the Configuration wizard.
6. Configure and manage your system, as described in Configuring your System.
7. To learn about ColdFusion, read the documentation, which is accessible through the Documentation
link on the Resources page of the ColdFusion Administrator.
8. Code and test ColdFusion CFM pages. Store CFM pages under the web application root (either
cfusion-ear/cfusion-war or cfusion-war) and access these pages using a URL of the form
http://_hostname_:_portnumber_/_context-root_/_filename_.cfm, as follows:
hostname: The machine name, IP address, or localhost.
portnumber: The port number used by your application server's web server.
contextroot: The context root for the ColdFusion web application. For more information, see Con
text root section of this page.
filename: The directory path and file to display. The path is relative to the cfusion-war directory.
Installing an EAR file or WAR files in Mac OS X
You can install the ColdFusion J2EE configuration for Mac OS X. If you are updating an existing deployment
of ColdFusion 8 for J2EE, see Updating from an earlier version for J2EE section in this page before you
continue.
Install ColdFusion in Mac OS X (J2EE configuration)
1. Read the online version of the Release Notes for any late-breaking information or updates. For more
information, see www.adobe.com/go/learn_cfu_releasenote_en.
2. Ensure that your operating system meets the system requirements described on the Adobe website at
www.adobe.com/go/learn_cfu_cfsysreqs_en.
3. Review the Installation considerations for UNIX and Installation considerations for all platforms in the P
reparing to Install ColdFusionPreparing to Install ColdFusion document.
4. Determine and record environment information, as described in Preparing to install using the J2EE
configuration section of this page.
5. Determine the answers to the questions in the section Gathering information necessary to install the
J2EE configuration section of this page.
6. Log in as root.
7. Copy the installation file that is appropriate for your platform and locale from the DVD or Adobe
website, and save it to a directory on your local disk. The following installation files are those for
© 2013 Adobe Systems Incorporated and its licensors. All rights reserved.
7.
supported J2EE configuration platforms:
ColdFusion_10_WWEJ_osx10.dmg - To install in Mac OS X systems
8. Start the installation by double-clicking the installation file on the desktop. The file ColdFusion 10
Installer.app is installed in the same directory. Double click this APP file to start the installation in GUI
mode.
9. Follow the prompts, and let the installation program run to completion.
Note
For security reasons, it is crucial that you do not use root for the runtime user.
Instead, use a nonprivileged user that does not have a login shell, such as the
default user account nobody, which exists for this type of situation.
10. Deploy ColdFusion and configure Java settings, as required by your application server. For more
information, see ColdFusion J2EE deployment and configuration section in this page.
Note
If you deployed the rds.war file, and an error message indicates that RDS is not
installed or not enabled, edit the rds.properties file to match the ColdFusion context
root, restart the application server, and reopen the ColdFusion Administrator.
11. Open the ColdFusion Administrator to run the Configuration wizard.
12. Configure and manage your system, as described in Configuring your System.
13. To learn about ColdFusion, read the documentation, which is accessible through the Documentation
link on the Resources page of the ColdFusion Administrator.
14. Code and test ColdFusion CFM pages. Store CFM pages under the web application root (either
cfusion-ear/cfusion-war or cfusion-war) and access these pages using a URL of the form
http://_hostname_:_portnumber_/_context-root_/_filename_.cfm, as follows:
hostname -The machine name, IP address, or localhost.
portnumber-The port number used by your application server's web server.
contextroot - The context root for the ColdFusion web application. For more information, see Co
ntext root section in this page.
15. filename - The directory path and file to display. The path is relative to the cfusion-war directory.
#back to top
Updating from an earlier version for J2EE
If you previously deployed the ColdFusion J2EE configuration on your application server, you must also
perform the following steps as part of the installation procedure:
1. As appropriate for your application server, either stop the ColdFusion application and RDS application
(if it is running), or stop the application server before you start the installation wizard.
2. (Windows only) If you installed the SequelLink ODBC Agent, stop the ODBC services before you start
the installation wizard.
3. Copy application files to a backup directory.
4. Save settings by copying the files cf_webapp_root/WEB-INF/cfusion/lib/neo-*.xml to a backup
directory.
5. Before you deploy ColdFusion 10, undeploy the previous ColdFusion application using your
application-server-specific undeploy functionality.
6. Deploy ColdFusion 10 as described in Deploying ColdFusion 10 on IBM WebSphere, Deploying
ColdFusion 10 on Oracle WebLogic, or Deploying ColdFusion 10 on JBoss Application Server sections
of this page.
7. Create a directory named cf_X_settings (in which X is the earlier version of ColdFusion) in the cf_weba
pp_root/WEB-INF/cfusion/lib directory.
8.
© 2013 Adobe Systems Incorporated and its licensors. All rights reserved.
8. Copy the backed up settings files to the ColdFusion 10 cfusion/lib/cf_X_settings directory.
9. Edit the ColdFusion 10 cfusion/lib/adminconfig.xml file by setting the value of the runmigrationwiza
rd and the migratecfX (in which X is the earlier version of ColdFusion) switch to true.
10. Restart the ColdFusion 10 application.
11. Browse to ColdFusion Administrator to run the migration wizard.
Note
The migration wizard supports only the migration of settings from ColdFusion 9.
#back to top
ColdFusion J2EE deployment and configuration
The J2EE specification allows application servers to handle compressed and expanded deployments in a
server-dependent manner; each application server has its own deployment and configuration mechanism, as
the following table shows:
Application server
Deployment mechanism
Expanded or compressed
deployment
Apache Tomcat
Tomcat Deployment Manager
Expanded
IBM WebSphere
IBM WebSphere Administrative
Console
Compressed
Oracle WebLogic
Weblogic Administration
Console/Auto deploy to server
domains
Expanded
JBOSS Application Server
Auto deploy to server root
Expanded
Oracle Weblogic Server
Oracle Weblogic Server
Administration Console
Expanded
For basic deployment information, see your J2EE application server documentation. ColdFusion deployment
instructions differ for each J2EE application server. For more information, see deployment instructions for the
specific application server.
J2EE directory structure
The following table describes the directories under the cf_webapp_root web application directory when you
use the J2EE configuration:
Directory
Description
cfdocs
Documentation for ColdFusion.
CFIDE
Files for the ColdFusion Administrator.
© 2013 Adobe Systems Incorporated and its licensors. All rights reserved.
WEB-INF/cfclasses
Compiled ColdFusion templates in your ColdFusion
applications.
WEB-INF/cfc-skeletons
Support for ColdFusion components that are
exported as web services.
WEB-INF/cfform
Files that support Flash forms.
WEB-INF/cftags
Templates for ColdFusion.
WEB-ING/flex
Configuration and files for LiveCycle Data Services
ES.
WEB-INF/gateway
Files that support event gateways.
WEB-INF/cfusion/bin
Executable files used by ColdFusion.
WEB-INF/cfusion/cfx
CFX tag include file and examples.
WEB-INF/cfusion/charting
Files for the ColdFusion graphing and charting
engine.
WEB-INF/cfusion/Custom Tags
Repository for your custom tags.
WEB-INF/cfusion/db
Sample databases for all platforms. These
databases are Apache Derby databases.
WEB-INF/cfusion/jintegra
JIntegra programs, libraries, and other supporting
files (for example, to integrate Java and COM code;
manage access to ActiveX controls (OCXs) that are
hosted in a graphical user interface (GUI) container;
and register the JVM and type libraries).
WEB-INF/cfusion/lib WEB-INF/lib
andWEB-INF/cfusion/MonitoringServer
JAR, XML, property, and other files that are the
foundation of ColdFusion, including functionality
such as queries, charting, mail, security, Solr
searches, and system probes.
WEB-INF/cfusion/logs
ColdFusion log files.
WEB-INF/cfusion/Mail
Files, including spool files, used by ColdFusion for
mail.
WEB-INF/cfusion/registry
Used only in UNIX, by the cfregistry tag.
WEB-INF/cfusion/stubs
Compiled code for web services.
WEB-INF/cfusion/solr
Solr configuration and Jetty.
Deploying ColdFusion 10 on IBM WebSphere
© 2013 Adobe Systems Incorporated and its licensors. All rights reserved.
The following instructions tell you how to deploy ColdFusion 10 on IBM WebSphere Application Server (AS)
and Network Deployment (ND).
The following terms refer to WebSphere and ColdFusion directories:
websphere_root The directory in which IBM WebSphere Application Server is installed; for example,
C:\Program Files\WebSphere in Windows, and /opt/WebSphere in UNIX.
cf_webapp_root The directory to which the ColdFusion web application is deployed; for example,
C:\Program Files\WebSphere\AppServer\installedApps_<My_Host>\cfusion.ear\cfusion.war in
Windows, and /opt/WebSphere/AppServer/installedApps/<_My_Host>/cfusion.ear/cfusion.war in UNIX.
java_home The root directory of your Java 2 software development kit (J2SDK); for example,
C:\j2sdk1.6.0_29.
Expand the EAR file
1. Open a console window, navigate to the directory that contains the EAR file, and make a new directory
named cfusion-ear:
md cfusion-ear (mkdir cfusion-ear on UNIX)
2. Change to the cfusion-ear directory and expand the cfusion.ear file with the jarcommand:
cd cfusion-ear
java_home/bin/jar -xvf ../cfusion.ear
This expands the cfusion.ear file into cfusion.war and rds.war (rds.war is not included if you specified a
context root of / when you ran the installation wizard).
3. In cfusion-ear, make a new directory named cfusion-war.
md cfusion-war (mkdir cfusion-war on UNIX)
4. Change to the cfusion-war directory and expand the cfusion.war file with the jarcommand:
cd cfusion-war
java_root/bin/jar -xvf ../cfusion.war
This expands the cfusion.war file.
5. (If rds.war exists) Go up one level to cfusion-ear, make a new directory named rds-war.
cd ..
md rds-war (mkdir rds-war on UNIX)
6. (If rds.war exists) Change to the rds-war directory and expand rds.war with the jarcommand:
© 2013 Adobe Systems Incorporated and its licensors. All rights reserved.
cd rds-war
java_root/bin/jar -xvf ../rds.war
This expands rds.war.
7. Go up one level to the cfusion-ear file, and delete the cfusion.war and rds.war files:
cd ..
del cfusion.war (rm cfusion.war on UNIX)
del rds.war (rm rds.war on UNIX)
8. Open the cfusion-ear/META-INF/application.xml file in a text editor.
9. Change the web-uri element from cfusion.war to cfusion-war (or the name of the directory that
contains the expanded cfusion.war file). Change the web-uri element for rds.war to rds-war. A
directory name in the web-uri element cannot contain a dot.
10. Save the application.xml file. To use LiveCycle Data Services ES, you must be running WebSphere
5.1.1 Business Integration.
Deploy ColdFusion 10 on WebSphere 7 or 8 (AS)
1.
2.
3.
4.
5.
6.
7.
8.
9.
10.
11.
12.
Start the IBM WebSphere Application Server, if it is not running.
Open the IBM WebSphere Administrative Console, if it is not running.
Select Applications > Install New Application.
When the Preparing for the Application Installation page appears, in the text box for the local file
system, enter the path to the EAR file that you installed when you installed ColdFusion; for example,
C:\ColdFusion10\cfusion.ear. If you are running the Administrative console from a browser that is not
on the same system on which WebSphere is running, that is, not from localhost, use the Remote file
system option, which enables directory browsing on the server file system.
Leave the Context Root box empty and click Next.
Accept the default values on the second Select Installation Options page, if appropriate for your
WebSphere configuration, and then click Next.WebSphere might display an Application Security
Warnings page with a message at the bottom of the page that starts with "ADMA0080W: A template
policy file without any permission set is included in the 1.2.x enterprise application." You can ignore
this warning.
If you have multiple application servers, select the application server in which to install the ColdFusion
application and RDS support, and then click Next.
When the Map Virtual Hosts for Web Modules panel appears, select the virtual host or hosts in which
to install the ColdFusion 10 application and Remote Development Services (RDS) support, and then
click Next.RDS must be on the same virtual host and port as ColdFusion 10.
When the Summary panel appears, review the installation configuration, and then click Finish.
When the Application Adobe ColdFusion 10 Installed Successfully message appears on the Installing
page, select Save To Master Configuration, and then select Save on the Save page to save your
workspace. If you changed the application name from the default, the message uses your application
name.
Start the enterprise application named Adobe ColdFusion 10.
Browse to the ColdFusion Administrator to run the Configuration Wizard.
Note
Copy the version of tools.jar that the application server uses to the cfusion/lib
directory.
© 2013 Adobe Systems Incorporated and its licensors. All rights reserved.
Deploy ColdFusion 10 on WebSphere 7 or 8 (ND)
1.
2.
3.
4.
5.
6.
7.
8.
9.
10.
11.
12.
Start the IBM WebSphere Application Server, if it is not running.
Open the IBM WebSphere Administrative Console, if it is not running.
Select Applications > Install New Application.
When the Preparing for the Application Installation page appears, in the text box for the local file
system, enter the path to the EAR file that you installed when you installed ColdFusion; for example,
C:\ColdFusion10\cfusion.ear. If you are running the Administrative console from a browser that is not
on the same system on which WebSphere is running, that is, not from localhost, use the Remote file
system option, which enables directory browsing on the server file system.
Leave the Context Root box empty and click Next.
Accept the default values on the second Select Installation Options page, if appropriate for your
WebSphere configuration, and then click Next.WebSphere might display an Application Security
Warnings page with a message at the bottom of the page that starts with "ADMA0080W: A template
policy file without any permission set is included in the 1.2.x enterprise application." You can ignore
this warning.
Select the cluster on which to install the ColdFusion application and RDS support, and then click Next.
When the Map Virtual Hosts for Web Modules panel appears, select the virtual host or hosts in which
to install the ColdFusion 10 application and Remote Development Services (RDS) support, and then
click Next.RDS must be on the same virtual host and port as ColdFusion 10.
When the Summary panel appears, review the installation configuration, and then click Finish.
When the Application Adobe ColdFusion 10 Installed Successfully message appears on the Installing
page, select Save To Master Configuration, and then select Save on the Save page to save your
workspace. If you changed the application name from the default, the message uses your application
name.
Start the enterprise application named Adobe ColdFusion 10.
Browse to the ColdFusion Administrator to run the Configuration Wizard.
Note
You must copy the version of tools.jar that the application server uses to the
cfusion/lib directory.
On WebSphere ND, deploying multiple application server clones on a single computer is commonly
referred to as vertical clustering. Vertical clustering leverages the computer's processing power to
obtain a higher level of efficiency; however, if there is total computer failure, no application server
instances are available. The applications deployed in a vertical cluster share the same file system.
Deploying the multiple application servers on multiple computers is commonly referred as horizontal
clustering; it provides the highest level of failover and scaling. The steps you perform to deploy
ColdFusion 10 in a clustered environment are the same, regardless of clustering method, because the
WebSphere Network Deployment Manager manages the cluster.
Enable sandbox security
1. Do the following to ensure that ColdFusion sandbox security secures Java access to files and network
resources:
a. On the WebSphere Administrative Console Security > Secure Administration panel, ensure that
the Java 2 Security option is selected.
b. Click Apply and then click Save.
2. Add the following lines to the Standard Properties That Can Be Read By Anyonesection of the
JVM's security policy file, java.policy. (For example, this file can be located in C:\Program
Files\WebSphere\AppServer\java\jre\lib\security\java.policy):
© 2013 Adobe Systems Incorporated and its licensors. All rights reserved.
grant {
permission java.security.AllPermission;
};
Configure operating system-specific binary support in Windows
This process is required to support the following features that use binaries that are specific to your operating
system:
CFX tags written in C++
Microsoft Access driver with Unicode supportYou do this by configuring the search paths to find the
required binary files, which are located in the cf_webapp_root\WEB-INF\cfusion\lib directory.
Configure search paths
1. Make a backup copy of the setupCmdLine.bat file, located in the websphere_root\AppServer\bin
directory.
2. Open the original file for editing and add the following on a single line before the line that starts with
SET WAS_CLASSPATH:
SET CF_APPS_PATH=cf_webapp_root\WEB-INF\cfusion\lib
Replace cf_webapp_rootwith the path to your web application directory; for example, enter the
following:
SET CF_APPS_PATH=%WAS_HOME%\installedApps\%WAS_CELL%\
Adobe_ColdFusion_10.ear\cfusion.war\WEB-INF\cfusion\lib;%WAS_HOME%\instal
ledApps\%WAS_CELL%\ Adobe_ColdFusion_10.ear\cfusion.war\WEB-INF\flex\jars
3. Add the CF_APPS_PATH variable to the WAS_CLASSPATH by appending the following text to the
path statement:
;%CF_APPS_PATH%
The WAS_CLASSPATH line should look similar to the following:
SET
WAS_CLASSPATH=%WAS_HOME%/properties;%WAS_HOME%/lib/bootstrap.jar;%WAS_HOM
E%/lib/j2ee.jar;%WAS_HOME%/lib/lmproxy.jar;%WAS_HOME%/lib/urlprotocols.ja
r;%CF_APPS_PATH%
4. Save the file.
5. Add the full path to the cf_webapp_root\WEB-INF\cfusion\lib directory to the WAS_PATH variable in
the setupCmdLine.bat file. The WAS_PATH line should look similar to the following:
© 2013 Adobe Systems Incorporated and its licensors. All rights reserved.
5.
SET
WAS_PATH=%WAS_HOME%\bin;%JAVA_HOME%\bin;%JAVA_HOME%\jre\bin;%PATH%;C:\Pro
gram Files\IBM\WebSphere MQ\bin;C:\Program Files\IBM\WebSphere
MQ\java\bin;C:/Program Files/IBM/WebSphere MQ/WEMPS\bin;%CF_APPS_PATH%;
6. Save the file.
Enable COM support for Windows
You enable Component Object Model (COM) support in Windows after installing ColdFusion 10 so that you
can use the cfreport tag with Crystal Reports. COM support is not required for the ColdFusion Report
Builder or any reports that you create with the ColdFusion reporting feature.
1. Make a backup copy of the setupCmdLine.bat file, which is located in the websphere_root\AppServer\
bin directory.
2. Open the original file and add the following on a single line:
SET
PATH=%PATH%;cf_webapp_root\WEB-INF\cfusion\jintegra\bin;cf_webapp_root\WE
B-INF\cfusion\jintegra\bin\international
Replace cf_webapp_rootwith the path to your web application root directory, for example:
SET
PATH=%PATH%;%WAS_HOME%\installedApps\%WAS_CELL%\AdobeColdFusion10.ear\cfu
sion.ear\cfusion.war\WEB-INF\cfusion\jintegra\bin;%WAS_HOME%\installedApp
s\%WAS_CELL%\Adobe_ColdFusion_10.ear\cfusion.war\WEB-INF\cfusion\jintegra
\bin\international
3. Save the file. In some cases, you might also have to do the following to register the Microsoft Type
viewer:
4. Open a console window and go to the cf_webapp_root\WEB-INF\cfusion\lib directory.
5. Register TypeViewer.dll by issuing the following command:
regsvr32 TypeViewer.dll
Configure operating system-specific binary support for Solaris and Linux
This process is required to support CFX tags written in C++ that use binaries that are specific to your
operating system.
You must configure the search paths to find the required binary files, which are located in the cf_webapp_root
/WEB-INF/cfusion/lib directory.
Configure search path
1. Make a backup copy of the startServer.sh file, which is located in the websphere_root/AppServer/bin
directory. The path specifications in these instructions assume that you deployed ColdFusion using the
standard application name (Adobe ColdFusion 10) and did not rename the application.
2.
© 2013 Adobe Systems Incorporated and its licensors. All rights reserved.
2. Open the original file, and in the PLATFORM case block, just above the LD_LIBRARY_PATH or
LIBPATH line, add the following entry on a single, long line: On Solaris:
CFUSION_APPS_PATH=cf_webapp_root/WEB-INF/cfusion/lib
Replace cf_webapp_rootwith the path to your web application root directory; for example:
CF_APPS_PATH="$WAS_HOME"/installedApps/"$WAS_CELL"/
Adobe_ColdFusion_10.ear/cfusion.war/WEB-INF/cfusion/lib
On Linux:
CF_APPS_PATH=cf_webapp_root/WEB-INF/cfusion/lib
Replace cf_webapp_rootwith the path to your web application root directory; for example:
CF_APPS_PATH="$WAS_HOME"/installedApps/"$WAS_CELL"/
Adobe_ColdFusion_10.ear/cfusion.war/WEB-INF/cfusion/lib
3. Append the CF_APPS_PATH environment variable to the LD_LIBRARY_PATH entry. The resulting
line should be similar to the following:
LD_LIBRARY_PATH="$WAS_LIBPATH":$LD_LIBRARY_PATH:$CF_APPS_PATH
4. Save the file and restart your WebSphere Application Server.
Enable ColdFusion charting and graphing support for UNIX
1.
2.
3.
4.
5.
6.
Open the WebSphere Administrative Console.
In the left navigation bar, select Node_name > Servers > Application Servers.
Select your J2EE application server; for example, Server1.
Under Java and Process Management, select Process Definition.
On the Process Definition page, select Java Virtual Machine in the Additional Properties box.
If you are running ColdFusion 10 on a system without a monitor, do the following:
a. In the Additional Properties box at the bottom of the page, select Custom Properties.
b. On the Custom Properties page, select New and add a system property, completing the fields
as follows:
Name java.awt.headless
Value true
7. Click OK.
8. Save the master configuration file.
© 2013 Adobe Systems Incorporated and its licensors. All rights reserved.
Disable RDS
For security reasons, Adobe recommends that you disable RDS on a production server. If you enable RDS
when you install ColdFusion 10, you can disable it at a later time, as the following instructions describe.
If you disable RDS, the following ColdFusion 10 features do not work:
The Browse Server button in the ColdFusion Administrator (for example, on the ColdFusion Mappings
page)
The Query Builder and charting in the ColdFusion Report Builder
To disable RDS on UNIX,
1. Stop ColdFusion.
2. In the WebSphere Administrative Console, select the Applications > Enterprise Applications panel,
select the Adobe ColdFusion 10 application, and then click Stop.
3. Do the following in both the cf_webapp_root\WEB-INF\web.xml and the websphere_root\AppServer\co
nfig\cells\NodeName\applications\cf_application_name.ear\
deployments\cf_application_name\cfusion.war\WEB-INF\web.xml files (or the equivalent paths in
UNIX). For example, change the following files:
To disable RDS on Windows,
1. Back up the ColdFusion web module web.xml file (available in either C:\Program
Files\WebSphere\AppServer\installedApps_<MY_NODE>\cfusion.ear\cfusion.war\WEB-INF\we
b.xml or C:\Program Files\WebSphere\AppServer\config\cells_<MY_NODE>\applications\cfusio
n.ear\deployments\Adobe ColdFusion 10\cfusion.war\ WEB-INF\web.xml).
2. Open the original web.xml file for editing.
3. Comment out the RDS Servlet definition, as follows:
<!-- <servlet id="coldfusion_servlet_8789">
<servlet-name>RDSServlet</servlet-name> <display-name>RDS
Servlet</display-name><servlet-class>coldfusion.bootstrap.Bootstrap
Servlet</servlet-class> <init-param
id="InitParam_103401311065856789"><param-name>servlet.class</paramname>
<param-value>coldfusion.rds.RdsFrontEndServlet</param-value></initparam> </servlet> -->
The text in the servlet definition might vary.
4. Comment out the RDS Servlet mapping, as the following example shows:
<!-<servlet-mapping id="coldfusioon_mapping_9">
<servlet-name>RDSServlet</servlet-name>
<url-pattern>/CFIDE/main/ide.cfm</url-pattern>
</servlet-mapping>
-->
The servlet-mapping id value might vary.
5. Save the file.
6. Restart the ColdFusion 10 application.
7. If your ColdFusion 10 application context root is something other than /, disable or undeploy the
RDS redirector web module by doing the following:
8. In the WebSphere Administrative Console, select cell_name > Applications > Enterprise
Applications.
9.
© 2013 Adobe Systems Incorporated and its licensors. All rights reserved.
9. Stop the Adobe ColdFusion 10 application if it is running.
10. Select Adobe ColdFusion 10 Application, select Manage Modules and then select the check box
for ColdFusion RDS application, and then click Remove.
Enable web services
To enable web services, copy the tools.jar file from Java home that WebSphere uses to the cfusion/lib
directory.
Apply application server configuration
To apply application server configuration, restart the application server.
Configure ColdFusion 10
Ensure that the following settings and practices are in place before using WebSphere Application Server ND:
Event Gateway Ensure that the startup mode of the Socket gateway instances is set to manual. In
particular, do not set it to Automatic when using a vertical cluster. Select one of the instances in the
vertical cluster and start the Socket gateway on that instance manually.
Session ReplicationEither avoid ColdFusion-specific data types or serialize them to WDDX and store
them in session scope as strings. ColdFusion Administrator:
In a vertical cluster environment, avoid concurrent changes to the same service.
In a horizontal cluster environment, each server has its own ColdFusion Administrator. You
must make changes once per server.
In a vertical cluster environment, the ColdFusion Administrator scheduled tasks are scheduled
on all servers.
Solr Server Only one Solr Search Server can run on each server computer.
Compilation Use precompiled classes and ensure that the Trusted Cache setting is enabled.
Deploying ColdFusion 10 on Oracle WebLogic
The following instructions tell you how to deploy ColdFusion 10 on Oracle WebLogic 11g. You can deploy
ColdFusion 10 on WebLogic using either an expanded EAR file or WAR files.
The following terms refer to ColdFusion directories:
cfusion_install_directory The directory that contains the files extracted by the ColdFusion install, for
example, C:\cf10 or /opt/cf10.
wl_root The directory that contains WebLogic, for example, C:\Oracle.
wldomain_root The directory that contains the WebLogic domain into which you deployed
ColdFusion.
cf_webapp_root The directory into which you deployed the ColdFusion web application, for example,
C:\Oracle\user_projects\cfdomain\applications\cfusion-war.
java_home The root directory of your Java 2 software development kit (J2SDK); for example,
C:\jdk1.6.0.
Install ColdFusion 10 on WebLogic
1. Run the ColdFusion installation wizard, choosing the J2EE configuration. The installation wizard places
the WAR files in the install directory.
2. Determine the WebLogic domain in which to deploy ColdFusion 10. Optionally, create a domain.
3. Because ColdFusion 10 must run from an expanded directory structure, expand the cfusion.war and
rds.war files manually, and expand the web applications by doing the following:
a. Open a console window, navigate to the directory that contains the WAR files, and create a
directory for the ColdFusion WAR file (named whatever you want the context root to be) and the
RDS WAR file (named CFIDE):
© 2013 Adobe Systems Incorporated and its licensors. All rights reserved.
a.
cd cf_install_directory
md cfusion (Windows, mkdir cfusion on UNIX)
md CFIDE (Windows, mkdir CFIDE on UNIX)
b. Change to the cfusion directory and expand the cfusion.war file with the jar command:
cd cfusion
java_home/bin/jar -xvf ../cfusion.war
c. Go up one level to the install directory:
cd ..
d. Go to the CFIDE directory and expand the rds.war file with the jar command:
cd CFIDE
java_home/bin/jar -xvf ../rds.war
4. Open the weblogic.policy file. On WebLogic 11g, the file is located in the WebLogic_HOME/wlserver_1
0.0/server/lib/ directory. In a text editor, comment out the restrictive permissions, and add permission
java.security.AllPermission; to the default permissions section, as the following example shows:
...
// default permissions granted to all domains
grant {
permission java.security.AllPermission;
/*
permission java.util.PropertyPermission "java.version", "read";
permission java.util.PropertyPermission "java.vendor", "read";
...
permission java.util.PropertyPermission "java.vm.name", "read";
*/
};
...
5. Deploy the cfusion and CFIDE directory structures using your site-specific WebLogic deployment
method.
6. Ensure that the following jars are in the startup script's classpath.
WEB-INF/cfusion/lib/jintegra.jar
WEB-INF/flex/jars/cfgatewayadapter.jar
WEB-INF/flex/jars/concurrent.jar
7.
© 2013 Adobe Systems Incorporated and its licensors. All rights reserved.
7. Review the console messages and server log to ensure that ColdFusion 10 deployed successfully.
8. Start the ColdFusion Administrator, which runs the Configuration wizard.
9. To install any other integrated Adobe or third-party technologies, see Installing Integrated
Technologies.
10. Configure and manage your system, as described in Configuring your System.
11. To learn about ColdFusion, read the documentation, which is accessible through the Documentation
link on the Resources page of the ColdFusion Administrator.
Note
You must copy the version of tools.jar that the application server uses to the
cfusion/lib directory.
Configure operating system-specific binary support in Windows
1. Locate the startup script for the WebLogic domain, which is typically the startWebLogic cmd file, which
is located in the wldomain_root\bin directory.
2. Make a backup copy of this file.
3. Open the startup script.
4. Establish the following basic variables at the beginning of the script:
CF_WEB_INF
CF_SHARED_LIBFor example:
SET CF_WEB_INF=cf_webapp_root\WEB-INF
SET CF_SHARED_LIB=%CF_WEB_INF%\cfusion\lib
5. Save the startup script and restart the WebLogic Server.
Enable COM support for Windows
1. Open the startup script for the WebLogic domain, which is typically the startWebLogic cmd file, which
is located in the wldomain_root\bin directory.
2. Establish the following variables:
JINTEGRA_PATH
PRE_CLASSPATH
PRE_PATHFor example:
SET JINTEGRA_PATH= %CF_WEB_INF%\cfusion\jintegra\bin;
%CF_WEB_INF%\cfusion\jintegra\bin\international
SET PRE_CLASSPATH=%CF_SHARED_LIB%\jintegra.jar
SET PRE_PATH=%CF_SHARED_LIB%;%JINTEGRA_PATH%
Configure operating system-specific binary support in UNIX
1. Locate the startup script for the WebLogic domain, which is typically the startWebLogic.sh file, which is
located in the wldomain_root\bin directory.
2. Make a backup copy of this file.
3. Open the startup script.
4. Establish the following basic variables at the beginning of the script:
CF_WEB_INF
CF_SHARED_LIBFor example:
© 2013 Adobe Systems Incorporated and its licensors. All rights reserved.
CF_WEB_INF=cf_webapp_root/WEB-INF
CF_SHARED_LIB=${CF_WEB_INF}/cfusion/lib
5. Save the startup script and restart the WebLogic Server.
Enable ColdFusion security in Windows
1. Open the startup script for the WebLogic domain, which is typically the startWebLogic cmd file, which
is located in the wldomain_root\bin directory.
2. Establish or append to the following variable:
CF_SECURITY_JVM_OPTIONS
MEM_ARGSIf you are not using JRockit, append -Xms32m -Xmx512m -Xss64k
-XX:MaxPermSize=128m to the existing MEM_ARGS line of the startup script. If you are using
JRockit, append -Xms32m -Xmx512m -Xss64k to the existing MEM_ARGS line of the startup
script.
JAVA_OPTIONS Append the CF_SECURITY_JVM_OPTIONS variable to the existing
JAVA_OPTIONS line of the startup script)For example:
@rem Security options are only required if enabling sandbox
security
SET CF_SECURITY_JVM_OPTIONS="-Djava.security.manager"
@rem You must append %CF_SECURITY_JVM_OPTIONS% to the existing
JAVA_OPTIONS value.
set
JAVA_OPTIONS=-Dweblogic.security.SSL.trustedCAKeyStore=C:\WebLogic_
HOME\server\lib\cacerts %CF_SECURITY_JVM_OPTIONS%
%CF_COM_JVM_OPTIONS%
@rem You must append the following to the existing MEM_ARGS value.
@rem -Xms32m -Xmx512m -Xss64k -XX:MaxPermSize=128m
3. Save the startup script and restart the WebLogic Server.
Enable ColdFusion security and graphing support in UNIX
1. Open the startup script for the WebLogic domain, which is typically the startWebLogic.sh file, which is
located in the wldomain_root\bin directory.
2. Establish or append to the following variables:
CF_SECURITY_JVM_OPTIONS
CF_GRAPHING_JVM_OPTIONS
MEM_ARGSIf you are not using JRockit, append -Xms32m -Xmx512m -Xss64k
-XX:MaxPermSize=128m to the existing MEM_ARGS line of the startup script. If you are using
JRockit, append -Xms32m -Xmx512m -Xss64k to the existing MEM_ARGS line of the startup
script.
JAVA_OPTIONS Append the CF_SECURITY_JVM_OPTIONS variable to the existing
JAVA_OPTIONS line of the startup script)For example:
© 2013 Adobe Systems Incorporated and its licensors. All rights reserved.
# Security options are only required if enabling sandbox security
CF_SECURITY_JVM_OPTIONS="-Djava.security.manager"
CF_GRAPHING_JVM_OPTIONS="-Djava.awt.headless=true"
# You must append ${CF_SECURITY_JVM_OPTIONS} and
${CF_GRAPHING_JVM_OPTIONS}
# to the existing JAVA_OPTIONS value.
# JAVA_OPTIONS="default java options ${CF_SECURITY_JVM_OPTIONS}
${CF_GRAPHING_JVM_OPTIONS}"
# You must append the following to the MEM_ARGS variable coded
# in the server startup file:
# "-Xmx512m -XX:MaxPermSize=128m"
3. Save the startup script and restart the WebLogic Server.
Deploying ColdFusion 10 on Oracle Application Server 11g
The following instructions assume that you installed the J2EE configuration of ColdFusion 10 and that the
EAR file to deploy is under C:\ColdFusion_J2ee\cfusion.ear.
Before you deploy ColdFusion on Oracle 11g, ensure that the following is true:
Oracle Application Server 11g is installed and running.
You set up an OC4J J2EE container for the ColdFusion installation. Adobe recommends that you
create an OC4J instance for ColdFusion to avoid potential classpath issues with other applications.
(Recommended, but not required) You created an OC4J instance. To do so, connect to the Oracle
Application Server using Enterprise Manager and create an OC4J instance. By default the HTTP URL
is http://machineName:1810. If 1810 is unavailable, the next available port in sequential order is used.
You increased the heap size to at least 256 MB (although 512 MB is preferred). To do so, select the
OC4J instance in Enterprise Manager, and select Administration / Server Properties. Under the
Command Line Options category, add -Xmx256M to the Java Options, and then restart the OC4J
instance.
Deploy ColdFusion 10 on Oracle 11g
1. Ensure that the application server and the OC4J instance are running.
2. Open a Windows command prompt and go to the oracle_root/dcm/bin directory.
3. Deploy the ColdFusion 10 application by using the command-line tool dcmctl.bat, as follows:
Dcmctl deployapplication -application cf_app -file
c:\ColdFusion_J2ee\cfusion.ear -component oc4j_instance
4. Edit the oracle_root/j2ee/oc4j_instance/config/java2.policy file by adding the following to the end of the
file:
grant { permission java.security.AllPermission; };
5. Start the ColdFusion Administrator, which runs the Configuration and Settings Migration wizard.
© 2013 Adobe Systems Incorporated and its licensors. All rights reserved.
Note
To enable Livecycle Data Services ES on Oracle AS, specify the following JVM
argument in the ColdFusion Administrator: -Doc4j.jmx.security.proxy.off
=true
You must perform some configuration steps to enable support for CFX tags written in C++, which
binary files that are specific to your operating system.
Configure operating system-specific binary support for Windows
1.
2.
3.
4.
5.
Connect to Oracle AS 11g using Enterprise Manager.
Go to oc4j_instance/Administration/Server Properties.
Under the Environment Variables category, select Add Environment Variable.
Enter PATH as the name.
Enter $ORACLE_HOME\j2ee\ oc4j_instance\applications\ cf_app\cfusion\WEB-INF\cfusion\lib; as the
value.
6. Ensure that the Append option is selected.
7. Select Apply.
8. When the Enterprise Manager prompts you to restart, select the restart option.
Configure operating system-specific binary support for Solaris and Linux
1.
2.
3.
4.
5.
Connect to Oracle AS 11g using Enterprise Manager.
Go to oc4j_instance/Administration/Server Properties.
Under the Environment Variables category, select Add Environment Variable.
Enter LD_LIBRARY_PATH as the name.
Enter $ORACLE_HOME/j2ee/oc4j_instance /applications/cf_app /cfusion/WEB-INF/cfusion/lib; as the
value.
6. Ensure that the Append option is selected.
7. Select Apply.
8. When the Enterprise Manager prompts you to restart, select the restart option.You must enable
Component Object Model (COM) support in Windows after installing ColdFusion 10 to use the cfrepo
rt tag with Crystal Reports. It is not required for the ColdFusion Report Builder or any reports that you
create with the ColdFusion reporting feature.
Enable COM support
1. In Oracle AS 11g Enterprise Manager, go to oc4j_instance /Administration/Server Properties.
2. In the Environment Variables category, ensure that the entry PATH exists. If not, follow the instructions
to enabling features with operating system-specific binaries.
3. Add {{$ORACLE_HOME\j2ee\oc4j_instance\applications\cf_app\cfusion\WEB-INF\cfusion\jintegra\bin;
$ORACLE_HOME\j2ee\oc4j_instance\applications\cf_app
\cfusion\WEB-INF\cfusion\jintegra\bin\international }}as the value.
4. Ensure that the Append option is enabled.
5. Select Apply.
6. When the Enterprise Manager prompts you to restart, select the restart option.
7. In some cases, you might also have to do the following to register the Microsoft Type viewer:
a. Open a console window and go to cf_webapp_root\WEB-INF\cfusion\lib.
b. Register TypeViewer.dll by issuing the following command:
regsvr32 TypeViewer.dll
The following steps configure your application server to useColdFusion 10 charting and
© 2013 Adobe Systems Incorporated and its licensors. All rights reserved.
graphing on AIX, Linux, and Solaris systems. This step is not required to enable charting and
graphing in Windows.
Enable charting and graphing
1. In Oracle AS 11g Enterprise Manager, go to oc4j_instance/Administration/Server Properties.
2. If the following entry does not exist in the Java Option under the Command Line Options category, add
it:
-Djava.awt.headless=true
3. Select Apply.
4. When the Enterprise Manager prompts you to restart, select the restart option.
Disable the RDS web module
If you installed ColdFusion 10 at a context root other than /, use the following procedure to disable the RDS
redirector web module without undeploying it.
If you disable (or undeploy) the RDS redirector and do not disable the RDS servlet, RDS services are still
available using the ColdFusion application context root, but tools that use RDS and require a context root of /,
such as Dreamweaver and earlier versions of HomeSite, do not work.
1.
2.
3.
4.
5.
In the Oracle AS 11g Enterprise Manager, select oc4j_instance /Applications.
Select Adobe ColdFusion 10 application and select Edit.
In the Administration category, select Advanced Properties.
In the Configuration Files category, select orion-application.xml.
Comment out the RDS web module as the following example shows:
<!-<web-module id="rds" path="rds.war" />
-->
6. Apply the changes.
7. Restart the OC4J instance.You can enable the RDS web module by repeating this procedure and
selecting the Enabled option.
Deploying ColdFusion 10 on JBoss Application Server
ColdFusion 10 supports JBoss with the following specifications:
JBoss 5.1,6.x,7.0, 7.1
JRE 1.5 or 1.6
ColdFusion 10 has not been tested using JBoss under the following conditions:
1. JBoss using a servlet container other than Tomcat
2. Deploying ColdFusion to a JBoss cluster
© 2013 Adobe Systems Incorporated and its licensors. All rights reserved.
Note
If you are already using an application with context root of /, use a context root
other than / for the cfusion-ear file. If you specified / when you installed ColdFusion,
you can change it by opening the cfusion-ear/META-INF/application.xml file in a
text editor and modifying the context-root element. After you deploy the cfusion-ear
file, you access ColdFusion pages by specifying http://hostname:portnumbe
r/contextroot/pagename.cfm.
If you are updating an existing deployment of ColdFusion, undeploy it for J2EE before you deploy
ColdFusion 10.
When you deploy ColdFusion on an existing version of JBoss, expand the EAR file or WAR files
manually before deployment.
This document uses the following conventions:
JBOSS_HOME Directory where JBoss is installed, for example, C:\jboss-as-7.1.1.Final in Windows or
/usr/local/jboss-as-7.1.1.Final on UNIX
JBOSS_DEPLOY_DIR Application deployment directory in JBoss, for example,
C:\jboss-as-7.1.1.Final\standalone\deployments in Windows
CF_WEBAPP_ROOT Directory where ColdFusion is deployed, for example:
C:\jboss-as-7.1.1.Final\standalone\deployments\cfusion.ear\cfusion.war
TEMP_LOCATION Temporary location where you extract the cfusion.ear file.
Deploy ColdFusion on JBoss
1. Set JAVA_HOME to the appropriate JDK.
2. Install ColdFusion by using the J2EE deployment option and selecting to create an EAR file (the
default). The installation program creates the cfusion.ear file in the install directory.
3. Extract the cfusion.ear file into a TEMP_LOCATION\cfusion.ear folder. This step creates cfusion.war
and rds.war files and a META-INF folder in the cfusion.ear folder.
4. In the cfusion.ear folder, extract the cfusion.war and rds.war files into folders named cfusion and rds,
respectively.
5. Delete the compressed cfusion.war and rds.war files.
6. Rename the cfusion and rds folders to cfusion.war and rds.war, respectively.
7. Stop JBoss if it is running.
8. Copy or move the {{TEMP_LOCATION\cfusion.ear }}folder into the {{JBOSS_DEPLOY_DIR }}folder.
For JBoss 7, place the exploded ear in the {{JBOSS_HOME/standalone/deployments }}directory and
create an empty file cfusion.ear.dodeploy (if your EAR directory name is cfusion.ear.) The resulting
directory structure will appear as follows:
© 2013 Adobe Systems Incorporated and its licensors. All rights reserved.
JBoss 5.1 or 6.x
server
default
deploy
cfusion.ear
cfusion.war
META-INF
rds.war
JBoss 7.x
standalone
deployments
cfusion.ear
cfusion.war
META-INF
rds.war
cfusion.ear.dodeploy
9. (Windows)Edit the JBOSS_HOME\bin\run.bat file for JBoss 5.1 and 6.x and
JBOSS_HOME\standalone.bat for JBoss 7.x by doing the following:
a. If not present, add the JVM (-Xmx512m) parameter to JAVA_OPTS.
b. Ensure that the permanent generation heap size is set by adding -XX:MaxPermSize=128m to
JAVA_OPTS.Without this parameter, the JVM can generate a java.lang.OutOfMemoryError
error. For more information, see (http://wiki.jboss.org/wiki/Wiki.jsp?page=PermanentGeneration)
.
c. Ensure that the jars available in WEB-INF/flex/jars are in the classpath.
d. Save the run.bat file.
e. Start the server by running the JBOSS_HOME\bin\run.bat file.
Note
If you use Apache Derby database, add the following in run.bat: JAVA_OPTS
=%JAVA_OPTS% -Djboss.platform.mbeanserver. This is to ensure
that Apache Derby do not start a JMX management server that might conflict
with JBoss.
10. (Linux) Edit the JBOSS_HOME/bin/run.conf file by doing the following:
a. In JAVA_OPTS, change -Xmx128m. to -Xmx512m.
b. Add -XX:MaxPermSize=128m to JAVA_OPTS.
c. Save the run.conf file.
d. Start the server by running the JBOSS_HOME/bin/run.sh file. To enable features with operating
system-specific binaries, configure ColdFusion. This step is required to support the following
features that use binaries that are specific to your operating system:
CFX tags written in C++
Microsoft Access driver with Unicode support (Windows only)Use the following procedure for
your operating system to configure the search paths to find the required binary files. These files
are located in the CF_WEBAPP_ROOT\WEB-INF\cfusion\lib directory.
Note
If you use Apache Derby database, add the following in run.bat: JAVA_OPTS
="$JAVA_OPTS -Djboss.platform.mbeanserver". This is to ensure
that Apache Derby do not start a JMX management server that might conflict
with JBoss.
© 2013 Adobe Systems Incorporated and its licensors. All rights reserved.
Note
(JBoss 7.x only) If cfusion.ear is not deployed before JBoss times out for
deployment, you can change the deployment timeout of JBoss in
JBOSS_HOME\standalone\configuration\standalone.xml file.{{<subsystem
xmlns="urn:jboss:domain:deployment-scanner:1.0"> <deployment-scanner
scan-interval="5000" relative-to="jboss.server.base.dir" path="deployments"
deployment-timeout="120",/> </subsystem>}}
Note
(JBoss 7.x only) After CF is deployed in JBoss 7.x, web services will not
function. To resolve this, add <path
name="javax/annotation/processing"/> in JBOSS_HOME\modules
\sun\jdk\main\module.xml file. For more information, see https://comm
unity.jboss.org/message/627008
Note
If
you are running ColdFusion on MAC, documents and PDF functionality may
fail with {{ClassNotFound for com.aqua.LookAndFeel }}error.
To resolve this, add the following entry to JBOSS_HOME\modules\sun\jd
k\main{color}module.xml file:<path name="com/apple/laf"/>
Note
In JBOSS 7.x, if OpenOffice is not functioning, start JBoss with the following
flag:
-Djava.ext.dirs=JBOSS_DEPLOY_DIR/cfusion.ear/cfusion.war/WEB-INF/cfu
sion/lib/oosdk/;<java-home>/lib/ext/ (use ':' for Unix based machines and ';'
for ColdFusion running on Windows) Also add the following to the
JBOSS_HOME\modules\sun\jdk\main\module.xml.
Configure operating system-specific binary support for Windows
1. Ensure that JBoss Server is stopped.
2. Edit JBOSS_HOME\bin\run.bat by adding the following:
set
CF_LIB_PATH=JBOSS_DEPLOY_DIR\cfusion.ear\cfusion.war\WEB-INF\cfusion\lib
set PATH=%PATH%;%CF_LIB_PATH%
3. Edit the run.bat file that is located in the JBOSS_DEPLOY_DIR by doing the following:
a. Locate the following text:
© 2013 Adobe Systems Incorporated and its licensors. All rights reserved.
@echo off
rem ----------------------------------------------rem JBoss Bootstrap Script for Win32
rem -----------------------------------------------
4. Below this text, insert three lines and paste.
set
CF_LIB_PATH=JBOSS_DEPLOY_DIR\cfusion.ear\cfusion.war\WEB-INF\cfusion\lib
set PATH=%PATH%;%CF_LIB_PATH%
5. Save the file and start the server.
Note
You must copy the version of tools.jar that the application server uses to the
cfusion/lib directory.
Configure operating system-specific binary support for Linux
1. Ensure that JBoss Server is stopped.
2. Edit JBOSS_HOME/bin/run.sh by adding the following:
export
LD_LIBRARY_PATH=$LD_LIBRARY_PATH:CF_WEBAPP_ROOT/WEB-INF/cfusion/lib
3. Save the file and start the server.
Enable COM support (Windows only)
1. Ensure that JBoss Server is stopped.
2. Edit JBOSS_HOME\bin\run.bat by adding the following:
set
CF_LIB_PATH=%CF_LIB_PATH%;CF_WEBAPP_ROOT\WEB-INF\cfusion\jintegra\bin;CF_
WEBAPP_ROOT\WEB-INF\cfusion\jintegra\bin\international
3. Save the file and start the server.
Enable communication with Flex
When ColdFusion is configured to use RMI for LiveCycle Data Services ES, ColdFusion listens on port 1099
by default. However JBoss typically starts listening on this port before ColdFusion does; as a result, an
exception is thrown. To configure ColdFusion to use a different RMI port, on the Java and JVM page of the
ColdFusion Administrator, specify the following in the JVM arguments text area:
-Dcoldfusion.rmiport=nnnn
© 2013 Adobe Systems Incorporated and its licensors. All rights reserved.
Replace nnn with the value of an unused port. If you try to connect from a LiveCycle Data Services ES server
that is running in another JVM server to ColdFusion over RMI, the Flex server must start with the same JVM
argument.
Disable RDS
1. Stop ColdFusion.
2. Edit JBOSS_DEPLOY_DIR\cfusion.ear\cfusion.war\WEB-INF\web.xml by commenting out the
following:
<!-- <servlet id="macromedia_servlet_8789">
<servlet-name>RDSServlet</servlet-name>
<display-name>RDS Servlet</display-name>
<servlet-class>coldfusion.bootstrap.BootstrapServlet</servlet-class>
<init-param id="InitParam_103401311065856789">
<param-name>servlet.class</param-name>
<param-value>coldfusion.rds.RdsFrontEndServlet</param-value>
</init-param>
</servlet> -->
<!-- <servlet-mapping id="macromedia_mapping_9">
<servlet-name>RDSServlet</servlet-name>
<url-pattern>/CFIDE/main/ide.cfm</url-pattern>
</servlet-mapping> -->
3. Save the file and start ColdFusion.
Prevent security-based errors
If you notice security-based errors when JBOSS is starting (errors that mention Java and security), edit the
run.bat file as follows:
1. Go to the line that contains the -Xmx512m parameter.
2. Change the text: -Dprogram.name=%PROGNAME% to be -Dcoldfusion.disablejsafe=true
%JAVA_OPTS%. These security errors occur because some versions of JBOSS cannot handle
additional encryption software that ColdFusion uses for higher security standards. Some features, such
as EJB3, require JDK 1.5.
#back to top
Undeploying ColdFusion
To undeploy ColdFusion in the J2EE configuration, you use application-server specific undeploy tools and
methods.
Undeploy ColdFusion in the J2EE configuration
1. Remove all ColdFusion specifications from the java.args and java.library.path JVM
arguments used by your application server.
2. (Windows only) If you installed ODBC support, remove the ODBC Windows services by navigating to
the cf_webapp_root\WEB_INF\cfusion\db\SequeLink Setup directory and executing the
RemoveSequeLink.bat file.
3. If necessary, copy and save CFM pages from the ColdFusion web application root.
4. Undeploy the ColdFusion web application using application-server-specific undeploy functionality.
a. On WebLogic, open the WebLogic Administrator., open the WebLogic Administration Console (
http://hostname:portnumber/console) and go to domainname > Deployments > Applications.
Click the trash can to the right of the ColdFusion application, and then click Yes. Open the
© 2013 Adobe Systems Incorporated and its licensors. All rights reserved.
4.
a.
startup script for the WebLogic domain and remove ColdFusion-specific entries, as follows:
CF_WEB_INF
CF_SHARED_LIB_DIR (also remove CF_SHARED_LIB_DIR from PRE_PATH)
LD_LIBRARY_PATH (UNIX only, remove ${CF_SHARED_LIBS})
(Windows only) JINTEGRA_PATH (also remove JINTEGRA_PATH from
PRE_PATH)
(Windows only) Remove jintegra.jar from PRE_CLASSPATH
CF_SECURITY_JVM_OPTIONS
CF_GRAPHING_JVM_OPTIONS
Remove ColdFusion arguments from MEM_ARGS
Remove CF_SECURITY_JVM_OPTIONS and CF_GRAPHING_JVM_OPTIONS from
JAVA_OPTIONS
5. If necessary, restart the application server.
Installing Integrated Technologies
ColdFusion 10 provides integration capabilities with several Adobe and third-party technologies. In some
cases, you can install these components when you install ColdFusion 10. In other cases, you might have to
follow some steps outside the ColdFusion installation.
Integrated Adobe and third-party technologies
Installing Dreamweaver extensions
Installing Report Builder
Install the ColdFusion Report Builder
Installing Solr search server
Install the Solr search server separately
Using Solr Search Server
Non-Windows platforms
Windows platform
Enabling Flash Remoting
Enable Flash Remoting to access web services through ColdFusion 10
Installing Flash Remoting Update
Install Flash Remoting Update
Installing the ColdFusion .NET Integration Services
Installing ColdFusion .NET Integration Services with ColdFusion
Installing ColdFusion .NET Service separately
Installing using the ColdFusion 10 .NET Service installer
Uninstall the ColdFusion 10 .NET Service
Installing ColdFusion Extensions for Eclipse
Install the ColdFusion Extensions for Eclipse
Uninstall the ColdFusion Extensions for Eclipse
Configuring OpenOffice
Configuring OpenOffice for stand-alone
Configuring OpenOffice for J2EE servers
Configuring OpenOffice remotely
Configuring OpenOffice post ColdFusion 10 installation
© 2013 Adobe Systems Incorporated and its licensors. All rights reserved.
#back to top
Integrated Adobe and third-party technologies
ColdFusion 10 provides integration capabilities with several Adobe and third-party technologies.
#back to top
Installing Dreamweaver extensions
1. Make a backup copy of the configuration/taglibraries/content/codehints folder and its contents.
2. Download the cf10dreamweaverextensions.mxp from the Adobe website or copy it from the
ColdFusion 10 DVD.
3. Double-click the ColdFusion10_Tags_for_DW.mxp file.
You can update Dreamweaver to include all the new and updated tag and function hints and Help for
ColdFusion 10.
#back to top
Installing Report Builder
ColdFusion reporting consists of server-side run-time processing and the ColdFusion Report Builder. The
server-side processing is available on any platform, however, the ColdFusion Report Builder runs in Windows
only.
Install the ColdFusion Report Builder
1. Access the ColdFusion Report Builder installer from one of the following locations:
DVD - Use the DVD browser to select the ColdFusion reporting option.
The Adobe website - Go to www.adobe.com/go/report_builder/.
2. Double-click the ColdFusion_10_ReportBuilder_WWEJ.exe file.
3. Follow the instructions in the installation.
#back to top
Installing Solr search server
By default, the installer installs the Solr search server on the same computer as ColdFusion.
Note
In the case of J2EE deployments, if you deploy ColdFusion multiple times, then the Solr
Home path must be updated in the ColdFusion Administrator. To do this, go to Data &
Services > Solr Server and then update the path in Solr Home in the Configure Solr
Server section.
If you plan to install the Solr search server on a different computer from the one where you install ColdFusion,
you must install it separately.
Install the Solr search server separately
1. Download your platform-specific installer from the Adobe website or copy it from the ColdFusion 10
DVD, as follows:
© 2013 Adobe Systems Incorporated and its licensors. All rights reserved.
1.
Platform
Installer
Windows
ColdFusion_10_Jetty_Solr_win.exe
Linux
ColdFusion_10_Jetty_Solr_linux.bin
ColdFusion_10_Jetty_Solr_linux64.bin
Solaris
ColdFusion_10_Solr_Jetty_solaris.bin
OSX
ColdFusion_10_Solr_Jetty_osx10.zip
AIX
ColdFusion_10_Solr_Jetty_aix.bin
1. Close any applications that are currently running on your computer.
2. Run the platform-specific installer using the appropriate command.
Note
Only console installations are available for UNIX systems.
Using Solr Search Server
Use the following steps to start and stop Solr.
Non-Windows platforms
Start Solr using the following command:sudo ./cfsolr start
Stop Solr using the following command:sudo ./cfsolr stop
Windows platform
Start or stop the Solr service ColdFusion 10 Solr Service using Microsoft Management
Console.
#back to top
Enabling Flash Remoting
To interact with ColdFusion pages and components from an Adobe Flash SWF file, you can use the Flash
Remoting service in ColdFusion 10. To develop applications that use Flash Remoting, install the Flash
Remoting components in the Flash authoring environment. The Flash authoring environment or Adobe Flex is
required to build applications that connect to and interact with the Flash Remoting service in ColdFusion 10.
By default, Adobe Flash Remoting cannot access web services through ColdFusion 10.
Enable Flash Remoting to access web services through ColdFusion 10
1. Open the cf_root/cfusion/wwwroot/WEB-INF/gateway-config.xml file in a text editor.
2. Locate the following line.
<!--<adapter>coldfusion.flash.adapter.CFWSAdapter</adapter>-->
3. Remove the comments so that the line appears as follows.
© 2013 Adobe Systems Incorporated and its licensors. All rights reserved.
3.
<adapter>coldfusion.flash.adapter.CFWSAdapter</adapter>
4. Save the file.
5. Restart ColdFusion.For more information on Flash Remoting, see the Developing Adobe ColdFusion
10 Applications guide.
#back to top
Installing Flash Remoting Update
Flash Remoting Update lets you create rich Internet applications by using Adobe Flash Builder, with the
advanced data retrieval features of ColdFusion, such as the c{{fpop}}, cfldap, and cfquery tags. Also, you
can use Flash Remoting Update to create Flash Forms and SWF applications that contain features, such as
server callbacks and customized user interface.
Install Flash Remoting Update
1. Install ColdFusion 10.
2. If your ColdFusion server uses something other than port 8500, do the following:
a. Open the file <cf_root>\wwwroot\Web-INF\flex\services-config.xml.
Change the following to specify the port that you are using in the endpoint URL:
<endpoint uri="http://localhost:8500/flex2gateway/" in
flex-services.xml
b. Save the file.
c. Restart the ColdFusion server.
#back to top
Installing the ColdFusion .NET Integration Services
You install Adobe ColdFusion 10 .NET Integration Service to access .NET assemblies from ColdFusion. The
.NET assemblies can exist either locally on the computer on which ColdFusion is running or on a remote
machine. If the computer on which you are installing ColdFusion does not have Microsoft .NET framework
installed, the .NET Integration Services option is disabled in the ColdFusion installer.
Installing ColdFusion .NET Integration Services with ColdFusion
If .NET assemblies exist locally, select the .NET Integration Services option when you install ColdFusion.
Doing so installs the Adobe Coldfusion 10 .NET Integration Services with ColdFusion. You can access .NET
assemblies locally only if you are running ColdFusion on a Windows computer; on other operating systems,
the .NET assemblies must be on a remote Windows computer.
The ColdFusion installer puts the .NET Integration software in the cf_root\jnbridge directory. If you install the
ColdFusion J2EE configuration, you can specify the directory in which to install the .NET Integration software.
The installer automatically determines your Windows system .NET Framework version (1.x or 2.0) and installs
the appropriate .NET integration software. Both 32-bit and 64-bit systems are supported. If you upgrade your
.NET Framework, reinstall Adobe Coldfusion 10 .NET Integration Servies. Proxies that you generate for .NET
Framework 1.x work with .NET Framework 2.0 and .NET Framework 3.0, but proxies generated for .NET
Framework 2.0 do not work with 1.x frameworks.
© 2013 Adobe Systems Incorporated and its licensors. All rights reserved.
Installing ColdFusion .NET Service separately
If the .NET assemblies are on a remote computer, you use the .NET Service Installer
(ColdFusion_10_DotNetIntegration_WWEJ.exe) to install Adobe Coldfusion 10 .NET Service. Similarly, to
install the ColdFusion .NET Service when Coldfusion is already installed, you use the
ColdFusion_10_DotNetIntegration_WWEJ.exe.
Installing using the ColdFusion 10 .NET Service installer
1. Open the installer.
2. Select the directory in which to install the .NET Service files.
3. Do one of the following:
a. To install the .NET Service on the computer that is running ColdFusion, select the Install .NET
Service With ColdFusion option and specify the ColdFusion root directory.
b. To install the .NET Service remotely, select the Install .NET Service As Standalone option.
4. Review the Summary and click Install.
5. Restart ColdFusion.
Uninstall the ColdFusion 10 .NET Service
1. Select Start > Settings > Control Panel > Add or Remove Programs.
2. Select Adobe Coldfusion 10 .NET Service.
3. Click Uninstall. Alternatively, you can uninstall the Adobe Coldfusion 10 .NET Service by running the
Uninstall Adobe ColdFusion 10 .NET Integration Services.exe program. The program is located in the
cf_root\jnbridge\uninstall directory on ColdFusion server configurations. On J2EE configuration and on
computers where you installed the Integration software without ColdFusion, it is in the
C:\ColdFusionDotNetService\uninstall directory by default.
#back to top
Installing ColdFusion Extensions for Eclipse
The ColdFusion Extensions for Eclipse include wizards that help generate code for common tasks and an
extension that lets you connect to remote servers from Flash Builder and Eclipse. If you previously installed
ColdFusion Extensions for Eclipse, you should uninstall them before installing a later version.
Note
The Query Builder and some of the wizards in the ColdFusion Extensions for Eclipse are
Windows-only.
Install the ColdFusion Extensions for Eclipse
1. In Eclipse, in the Update Sites to Visit dialog box, deselect the Ignore Features Not Applicable To This
Environment option.
2. Download the ColdFusion Extensions for Eclipse from the Adobe website.
3. Select Help > Software Updates > Find and Install.
4. Select the Search For New Features To Install option, and then click Next.
5. Click New Archive Site.
6. Navigate to the location where you downloaded the ColdFusion_FlexBuilder_Feature.zip file, select the
file, and then click Open.
7. When the Edit Local Site dialog box appears, click OK.
8. Ensure that the ColdFusion Flash Builder feature is selected, and then click Finish.
9. Select the check box next to ColdFusion_FlexBuilder_Feature.zip, and then click Next.
10. Select the I Accept The Terms In This License Agreement option, and then click Next.
11. Click Finish.
12. Click Install All.
13.
© 2013 Adobe Systems Incorporated and its licensors. All rights reserved.
13. When the installation is complete, click Yes to restart Flash Builder or Eclipse. To uninstall the
ColdFusion Extensions for Eclipse, you must first disable them, and then uninstall them.
Uninstall the ColdFusion Extensions for Eclipse
1.
2.
3.
4.
5.
6.
Select Help > Software Updates > Manage Configuration.
Select the ColdFusion Plug-in feature.
Click Disable, and then click OK.
Click Yes to restart Flash Builder or Eclipse.
When Eclipse or Flash Builder restarts, select Help > Software Updates > Manage Configuration.
Ensure that the Show Disable Features button is selected, select the ColdFusion Flash Builder feature,
and then click Uninstall.
7. Click Yes to confirm that you want to uninstall.
8. Click Yes and restart Flash Builder or Eclipse.
#back to top
Configuring OpenOffice
Configuring OpenOffice with ColdFusion 10 lets you use the cfdocument tag to convert Word documents to
PDF and PowerPoint presentations to PDF/HTML.
Configuring OpenOffice for stand-alone
Download and install OpenOffice from http://download.openoffice.org/. When you install ColdFusion 10 in a
non-Windows platform, the installer prompts you with the directory path where OpenOffice is installed. If you
want to specify a different installation path, you can specify the directory path as follows:
For Macintosh platform:
/Applications/openoffice.org3
For UNIX platform: Depends on the UNIX flavor. The location of OpenOffice installation might vary
depending on the operating system that you use. In most cases, the location would be
/usr/lib/openoffice.org3 or/usr/lib/ooo3.x.
You can also specify the OpenOffice installation path in the ColdFusion Administrator as follows:
1. Log in to ColdFusion Administrator.
2. Navigate to Server Settings > Document, and enter the OpenOffice directory.
Configuring OpenOffice for J2EE servers
The following instructions are not applicable for stand-alone ColdFusion 10.
1. Download and install OpenOffice from http://download.openoffice.org/.
2. For all other J2EE servers:
Add the following classes and JAR files in the class path:
[cfusionhome]/lib/oosdk/classes
[cfusionhome]/lib/oosdk/lib/juh.jar
[cfusionhome]/lib/oosdk/lib/jurt.jar
[cfusionhome]/lib/oosdk/lib/ridl.jar
[cfusionhome]/lib/oosdk/lib/unoil.jar
© 2013 Adobe Systems Incorporated and its licensors. All rights reserved.
For Windows platform, add the following directory to the library path (java.library.path):
[cfusionhome]/lib/oosdk/classes
Replace cfusionhome}}with the path to the cfusion directory. For
example, for Jboss,
{{/opt/jboss-7.1.GA/standalone/deployments/cfusion.ear/cfusion.war/WEB
-INF/cfusion
Configuring OpenOffice remotely
1. Run the following command in the command prompt:
soffice -nologo -nodefault -norestore -nofirststartwizard -headless
-accept="socket,host=<ip>,port=8900;urp;StarOffice.ServiceManager"
Specify the IP address (of the remote machine in which you want to configure OpenOffice) in the host
attribute.
2. Log in to ColdFusion Administrator.
3. Navigate to Server Settings > Document, and enter the host, and port details.
Configuring OpenOffice post ColdFusion 10 installation
If you have a version of ColdFusion 10 already installed on your system, for all platforms, follow these
instructions to configure OpenOffice:
1. Log in to ColdFusion Administrator.
2. Navigate to Server Settings > Document, and specify the OpenOffice directory.
3. Restart the ColdFusion server.
Configuring your System
You can manage ColdFusion services and processes, configure web servers manually, and change user
accounts and configure databases for ColdFusion.
Note
The term cf_root refers to your installation directory in the server configuration. By default,
this directory is C:\ColdFusion10 in Windows, /opt/coldfusion10 in UNIX, and
/Applications/ColdFusion10 in OSX.
#back to top
Overview of configuration tasks
Managing ColdFusion services in Windows
Start or stop a ColdFusion service
Set ColdFusion 10 to start automatically or manually
Managing the ColdFusion process in UNIX
Manage the ColdFusion process in UNIX
© 2013 Adobe Systems Incorporated and its licensors. All rights reserved.
Managing the ColdFusion process in Mac OS X
Manage the ColdFusion process in UNIX
Configuring web servers
Configuring web servers in Windows
Configuring IIS in Windows
Configure IIS for ColdFusion in Windows
Verify your IIS configuration
Configure Sun Java System Web Server for ColdFusion in Windows
Verify your configuration
Configuring Apache web server in Windows
Configure Apache for ColdFusion in Windows
Verify your Apache configuration
Configuring web servers in UNIX
Configuring Apache web server in UNIX
Configure the Apache web server for ColdFusion in UNIX
Verify your Apache configuration
Configure Sun Java System Web Server 7 on UNIX
Unconfigure Sun Java Web Server 6.0/Sun Java System Web Server 7 on UNIX
Enabling CORBA support
System requirements
Installing Visibroker for CORBA connections
Disabling Remote Development Services
Disable the RDSServlet mapping
Disabling JSP functionality (server configuration only)
Disable JSP functionality
Changing the ColdFusion user account in Windows
Change the ColdFusion user account
Overview of configuration tasks
Configuration task
When to do it
Managing ColdFusion services in Windows and
Managing the ColdFusion process in UNIX
For your changes to take effect when you stop and
restart ColdFusion, for example after you enable or
disable security in the ColdFusion Administrator or
change any of the Java and JVM settings. You can
do this at any time after you install ColdFusion.
Configuring web servers
When moving to a production server or when the
built-in web server no longer meets your needs.
Enabling CORBA support
If you must make CORBA invocations from
ColdFusion. You can do this after you install
ColdFusion and before you make a CORBA call
from ColdFusion.
Disabling Remote Development Services
For security reasons, disable RDS when you move
an application to the production environment.
© 2013 Adobe Systems Incorporated and its licensors. All rights reserved.
Disabling JSP functionality (server configuration
only)
When running ColdFusion Enterprise Edition in a
hosted environment, you might want to disable JSP
processing.
Changing the ColdFusion user account in Windows
Iif you discover that the account under which
ColdFusion is running has inappropriate access
rights; for example, to interact with remote data
sources, other application pages, or COM objects.
You must also do this to be able to print to a printer
using the cfprint tag. You can do this after you
install ColdFusion and before you deploy your
application.
For information about additional configuration tasks, see the Configuring and Administering ColdFusion guide.
#back to top
Managing ColdFusion services in Windows
The ColdFusion installation creates the following services in the configuration indicated:
Service
Purpose
Configuration
ColdFusion 10 Application Server
The main ColdFusion service.
ColdFusion pages cannot be
processed if this service is not
running.
Server
ColdFusion 10 ODBC Agent
The service used to configure
data sources for the ColdFusion
10 ODBC Server.
All
ColdFusion 10 ODBC Server
The middle-tier service for ODBC
connections that use the
DataDirect drivers for Microsoft
Access and ODBC Socket.
All
ColdFusion 10 Jetty Service
Provides support for the
ColdFusion 10 search tags.. You
cannot use the ColdFusion 10
search tags if this process is not
running.
All
ColdFusion 10 .NET Service
Lets you access local .NET
assemblies on a Windows system
that runs ColdFusion.
All
© 2013 Adobe Systems Incorporated and its licensors. All rights reserved.
Note
In the ColdFusion Administrator, if you enable or disable security or change any option in
the Java and JVM Settings page, stop and restart ColdFusion 10 for your changes to take
effect.
Start or stop a ColdFusion service
1. Open the Services dialog box by selecting Start > Settings > Control Panel > Administrative Tools >
Services. If a service is running, its status appears as Started in the Status column. If it is not running,
no status appears for the service.
2. Right-click a service, and select Stop, Start, or Restart. The Services window refreshes.
Set ColdFusion 10 to start automatically or manually
1. Open the Control Panel > Services dialog box.
2. Right-click the service to configure, and select Properties.
3. In the Properties dialog box, on the General tab, select one of the following options in the Startup Type
frame or pop-up menu, and click OK:
Automatic - Starts the service automatically when you start the computer.
Manual - Requires a user or dependent service to manually start the service.
#back to top
Managing the ColdFusion process in UNIX
The ColdFusion installation creates a single process in UNIX called coldfusion10. To check whether it is
running, use the following command:
ps -eaf | grep coldfusion10
If it is running, your computer returns something similar to the following line:
nobody 4528 1 10 12:44 pts/0 00:00:07 /opt/coldfusion10/bin/coldfusion10
The ColdFusion process starts automatically when you start your computer and shuts down automatically
when you shut down your computer, if you specified that it should do so in the installation.
In the ColdFusion Administrator, if you enable or disable security or change any option in the Java and JVM
Settings page, stop and restart the ColdFusion process for your changes to take effect. This applies to the
server configuration only; in the J2EE configurations, you use application-server-specific methods to update
Java settings.
Manage the ColdFusion process in UNIX
1. Log in as root, if you have not already done so.
2. Enter the following command:
cd cf_root/bin
3. Enter the appropriate command, as the following table describes:
© 2013 Adobe Systems Incorporated and its licensors. All rights reserved.
3.
Task
Command
Start ColdFusion 10
./coldfusion start
Stop ColdFusion 10
./coldfusion stop
Restart ColdFusion 10
./coldfusion restart
View status of ColdFusion server
./coldfusion status
#back to top
Managing the ColdFusion process in Mac OS X
The ColdFusion installation creates a single process in UNIX called cfusion. To check whether it is running,
use the following command:
ps -eaf | grep coldfusion10
If it is running, your computer returns something similar to the following line:
nobody 4528 1 10 12:44 pts/0 00:00:07 /opt/coldfusion10/bin/coldfusion10
Note
This discussion applies to the ColdFusion 10 server configuration only. With the J2EE
configuration, you start and stop ColdFusion 10 by starting the application server.
The ColdFusion process starts automatically when you start your computer and shuts down automatically
when you shut down your computer, if you specified that it should do so in the installation.
In the ColdFusion Administrator, if you enable or disable security or change any option in the Java and JVM
Settings page, stop and restart the ColdFusion process for your changes to take effect. This applies to the
server configuration only; in the J2EE configurations, you use application-server-specific methods to update
Java settings.
Manage the ColdFusion process in UNIX
1. Log in as root, if you have not already done so.
2. Enter the following command:
cd cf_root/bin
3. Enter the appropriate command, as the following table describes:
Task
© 2013 Adobe Systems Incorporated and its licensors. All rights reserved.
Command
3.
Start ColdFusion 10
./coldfusion start
Stop ColdFusion 10
./coldfusion stop
Restart ColdFusion 10
./coldfusion restart
View performance information for ColdFusion 10
./coldfusion status
#back to top
Configuring web servers
You configure a web server to serve ColdFusion pages, for Windows and UNIX if you did not configure a web
server automatically during installation, if you want to change your web server, or to configure a web server
for a cluster.
You configure an external web server connection by using the Web Server Configuration Tool, which you can
run through a graphical user interface (GUI) or the command line. The Windows discussions describe GUI
mode, and the UNIX instructions describe command-line mode; however, you can use GUI mode in UNIX if
you have access to a graphical environment.
ColdFusion 10 provides batch files and shell scripts in the cf_root/cfusion/bin/connectors
directory to help you get started with command-line usage.
For more information on the Web Server Configuration Tool, including information on multihoming and
distributed usage, see the Configuring and Administering ColdFusion guide.
Note
If you cannot verify your configuration, repeat the procedure. If the problem persists,
contact Adobe Technical Support for assistance, or manually create the element that you
cannot verify in the configuration (for example, manually add an entry to the Apache
httpd.conf file, as described here.).
Configuring web servers in Windows
You configure web servers in Windows by doing the following:
Configuring IIS in Windows
Configuring Sun Java System Web Server in Windows
Configuring Apache web server in Windows
Configuring IIS in Windows
You configure IIS using the Web Server Configuration Tool in GUI or command-line mode. This discussion
describes how to use GUI mode.
(Server configuration only) To use the command line, open the batch files located in
cf_root\cfusion\bin\connectors or by navigating to <ColdFusion_Home>\runtime\bin
directory.
For more information, see the Web Server Management chapter in the Configuring and Administering
ColdFusion guide.
© 2013 Adobe Systems Incorporated and its licensors. All rights reserved.
Configure IIS for ColdFusion in Windows
Note
If you are configuring IIS 7 or IIS 7.5, before you proceed, ensure that you have the
options ISAPI Extensions (Internet Information Service > Web Management Tools >
World Wide Web Services > Application Development Features), ASP.NET , and CGI sele
cted in the Windows Features dialog box (Start > Control Panel > Programs and Features
> Turn Windows features on or off).
1. Start the Web Server Configuration Tool by selecting Start > Programs > Adobe > ColdFusion 10 >
Web Server Configuration Tool.
2. Click Add.
3. In the Server pop-up menu, enter the host name and the cluster name to configure.
Note
The server or cluster does not have to reside on the web server computer.
4. In the Web Server Properties area, select IIS and specify the website. For IIS, you typically specify All.
Verify your IIS configuration
1. Verify that the following folder was created: cf_root/config/wsconfig/number.
2. To set the connectionpooltimeout and reuseconnectioncount click on Advanced Setting tab.
The option to enable buffering and verbose debugging is available on the same page.
Configuring IIS:
Creates a folder 1 in cfroot\config\wsconfig, that contains all connector-related files.
Creates a virtual directory Jakarta in cfroot\config\wsconfig (in IIS).
Adds an entry, tomcat, under the{{ ISAPI FILTERS}}. This points to cfroot\config\wsconfig\1\
isapi_redirect.dll.
Adds an entry, tomcat, to cfroot\config\wsconfig\1\isapi_redirect.dll with permission
allowed under ISAPI and CGI Restrictions. It is applicable for global sites in IIS manager.
Adds the following isapi handlers: cfcHandler, cfmHandler, cfmlHandler, cfrHandler, and c
fswfHandler.
For debugging issues, set the log level to debug, in the isapi_redirect.properties file present
in the {{cfroot\config\wsconfig\1\ }}directory.
To disable webserver buffer, change the is_buffer_enable to false in the cfroot\config\wsc
onfig\1\isapi_redirect.properties file. Disable webserver buffer if you want cfflush to
work over an IIS connector. If your application does not use cfflush, set it to true for increase in the
performance.
Configure Sun Java System Web Server for ColdFusion in Windows
You configure Sun Java Web Server 6.x/Sun Java System Web Server 7 for ColdFusion in Windows, and
verify your configuration, by using the Web Server Configuration Tool in GUI or command-line mode. This
discussion describes how to use GUI mode.
Note
On Windows, only 32-bit Sun ONE is available.
© 2013 Adobe Systems Incorporated and its licensors. All rights reserved.
Note
(Server configuration only) To use the command line, open the batch files located in cf
_root/bin/connectors.
For more information, see the Web Server Management topic in the Configuring and Administering
ColdFusion guide.
1. Start the Web Server Configuration Tool by selecting Start > Programs > Adobe > ColdFusion 10 >
Web Server Configuration Tool.
2. Click Add.
3. In the Server pop-up menu, enter the host name and the cluster name to configure.
Note
The server or cluster does not have to reside on the web server computer.
4. In the Web Server Properties area, select Sun Java Web Server (iPlanet), and specify the path to the
directory that contains the obj.conf and magnus.conf files.
Verify your configuration
1. Verify that the following folder was created: cf_root/config/wsconfig/number.
2. To set the connectionpooltimeout and reuseconnectioncount click on Advanced Setting tab.
The option to enable verbose debugging also is available on this page.
Configuring Sun ONE:
Note
On Windows and Linux 64-bit, only 32-bit Sun ONE is available. While using a
64-bit configurator, provide 32-bit Sun ONE properties.
Creates a folder 1 in the config\wsconfig folder that contains all connector-related files.
Adds the following entry in the magnus.conffile of Sun ONE. Change the log level to{{ debug}} for
debugging issues.
Init fn="load-modules"
shlib="C:/ColdFusion10/config/wsconfig/1/nsapi_redirect.dll"
funcs="jk_init,jk_service"
Init fn="jk_init"
worker_file="C:/ColdFusion10/config/wsconfig/1/workers.properties"
log_level="info" log_file="C:/ColdFusion10/config/wsconfig/1/nsapi.log"
shm_file="C:/ColdFusion10/config/wsconfig/1/jk_shm"
Adds the entries for all extensions in the obj.conffile of Sun ONE. For example,
NameTrans fn="assign-name" from="/*.cfc/*" name="jknsapi"
NameTrans fn="assign-name" from="/*.cfc" name="jknsapi"
NameTrans fn="assign-name" from="/*.cfml" name="jknsapi"
<Object name="jknsapi">
Service fn="jk_service" method="*" worker="server1"
</Object>
© 2013 Adobe Systems Incorporated and its licensors. All rights reserved.
Note
64-bit Sun One and iPlanet WebServer are not supported on 64-bit Windows
machines.
Configuring Apache web server in Windows
You configure Apache by using the Web Server Configuration Tool in GUI or command-line mode. This
discussion describes how to use GUI mode.
Note
To configure Apache connector in UNIX platforms, APXS installation is a prerequisite.
(Server configuration only) To use the command line, open the batch files located in
cf_root\cfusion\bin\connectors.
For more information, see the Web Server Management topic in the Configuring and Administering
ColdFusion guide.
Configure Apache for ColdFusion in Windows
1. Start the Web Server Configuration Tool by selecting Start > Programs > Adobe > ColdFusion 10 >
Web Server Configuration Tool.
2. Click Add.
3. In the Server pop-up menu, enter the host name and the cluster name to configure.
Note
The server or cluster does not have to reside on the web server computer.
4. In the Web Server Properties area, select Apache and specify the path to the directory that contains
the httpd.conf file.
Verify your Apache configuration
1. Verify that one of the following files was created:
cf_root\config\wsconfig_number_
Configuring Apache:
Note
To configure Apache connector in UNIX platforms, APXS installation is a
prerequisite.
Note
Configuring Apache is not supported on Mac 10.5.
Creates a folder 1 in cfroot\config\wsconfig that contains all connector-related files.
Creates a file mod_jk.conf in Apache_root_folder\conf. This file has paths to all files in the cf
root\config\wsconfig\1 directory.
Adds an entry in the httpd.conf file of Apache to include mod_jk.conf.
The following files are significant:
© 2013 Adobe Systems Incorporated and its licensors. All rights reserved.
uriworkermap.properties: Mapped extensions based on which the connector forwards
requests to Tomcat.
mod_jk.conf: Contains paths to all files in the \config\wsconfig\1 directory. Change the
entry JKloglevel info to JKloglevel debugfor debugging purposes.
Note
For virtual host configuration, add the following entry in each of the virtual
blocks: JkMountFile "cfroot\config\wsconfig\1\uriworkermap
.properties:".
*Configure Apache virtual host for each ColdFusion instance:*
Assume that you have two instances: cfusion and server1.
1. Configure Apache webserver for cfusion instance using the wsconfig tool. This step creates the
connector-related files in the cfroot\config\wsconfig\1 folder. It also creates the mod_jk.conf
in the <Apacheroot>\conf folder. The mod_jk.conf file is included in the httpd.conf.
2. Configure Apache virtual hosts.
3. In workers.properties of cfroot\config\wsconfig\1, add server1 to workers.list. For
example, worker.list=cfusion,server1.
4. Add the following block of code:
worker.server1.type=ajp13
worker.server1.host=localhost
worker.server1.port=8014
Note
The port is the AJP port for server1 and that can be found in server1.server.xml in
the cfroot\server1\runtime\conf\server.xml.
5. Copy the content of uriworkermap.properties in cfroot\config\wsconfig\1 to uriworkermap1.properties.
Replace the cfusion with server1.
6. Now add the following line in each of the virtual host: For example, VH1 is the ColdFusion instance. It
should have: JkMountFile "cfroot\config\wsconfig\1\uriworkermap.properties" VH2
is the server1 instance. It should have JkMountFile "cf_root\config\wsconfig\1".
Configuring web servers in UNIX
You configure web servers in UNIX by doing one of the following:
Configuring Apache web server in UNIX
Configure Sun Java System Web Server 7 on UNIX
Configuring Apache web server in UNIX
You can configure and verify the Apache web server for ColdFusion in UNIX.
Configure the Apache web server for ColdFusion in UNIX
1. Enter the following command on a single line:
© 2013 Adobe Systems Incorporated and its licensors. All rights reserved.
1.
./ wsconfig -ws Apache -dir <apache config directory> -v
Note
You must enter the wsconfig command and all switches as a single (long) line.
The following is a sample command:
/opt/coldfusion10/cfusion/runtime/bin/wsconfig -ws Apache -dir
/etc/httpd/conf -v
Note
For unique configurations (such as the preconfigured Apache web servers from
Redhat or Sun), add the -bin and -script parameters, as described in the
Configuring and Administering ColdFusion guide.
Verify your Apache configuration
1. Verify that one of the following files was created:
cf_root/config/wsconfig/number
2. To set the connectionpooltimeout and reuseconnectioncount click on Advanced Setting tab.
The option to enable verbose debugging also is available on this page.
Configuring Apache:
Note
To configure Apache connector in UNIX platforms, APXS installation is a
prerequisite.
Note
Configuring Apache is not supported on Mac 10.5.
Creates a folder 1 in cfroot\config\wsconfig that contains all connector-related files.
Creates a file mod_jk.conf in Apache_root_folder\conf. This file has paths to all files in the cf
root\config\wsconfig\1 directory.
Adds an entry in the httpd.conf file of Apache to include mod_jk.conf.
The following files are significant:
uriworkermap.properties: Mapped extensions based on which the connector forwards
requests to Tomcat.
mod_jk.conf: Contains paths to all files in the \config\wsconfig\1 directory. Change the
entry JKloglevel info to JKloglevel debugfor debugging purposes.
Note
For virtual host configuration, add the following entry in each of the virtual
blocks: JkMountFile "cfroot\config\wsconfig\1\uriworkermap
.properties:".
© 2013 Adobe Systems Incorporated and its licensors. All rights reserved.
Configure Sun Java System Web Server 7 on UNIX
You can configure and verify Sun Java Web Server (6.x)/Sun Java System Web Server (7.0) for ColdFusion
in UNIX.
1.
2.
3.
4.
Launch the cfroot/cfusion/runtime/bin launch wsconfig tool.
Click Add, and then select Sun Web Server 7.
Select conf dir from the Sun Web Server root (created instance).
Select the Configure Web Server For ColdFusion Applications option and click Add.
Note
Use the following command to configure Sun Java Web Server using the
command-line: ./wsconfig -ws iplanet -dir config_folder_of_web_s
erver_instance
Unconfigure Sun Java Web Server 6.0/Sun Java System Web Server 7 on UNIX
1. Go to <cf_home>/runtime/bin directory.
2. Execute the following command:./wsconfig -ws SunJWS -dir <Directory path> -remove
#back to top
Enabling CORBA support
ColdFusion supports third-party Object Request Brokers (ORBs) through its integration with Borland
Visibroker. However, you must acquire the Common Object Request Broker Architecture (CORBA) software
separately from Borland.
System requirements
You must have all of the following components installed on your computer before you can make CORBA
invocations from ColdFusion:
Borland Visibroker 4.5.1 for Java
Java Runtime Environment (JRE) 1.4 for the Visibroker Interface Repository
JRE 1.6 or later for ColdFusion 10
Installing Visibroker for CORBA connections
1. Install Visibroker on the CORBA server side. For more information, see the Borland Visibroker
documentation.
2. Add the vbjorb.jar file to the ColdFusion classpath, as follows:
a. In the ColdFusion Administrator, select Server Settings > Java and JVM. When using the J2EE
configuration, you add the vbjorb.jar file to the J2EE application server classpath, using the
server-specific method.
b. On the Java and JVM Settings page, in the Class Path text box, enter the path to your vbjorb.jar
file (for example, C:\Inprise\vbroker\lib\vbjorb.jar). Add Xbootclasspath/a:"C:/Inprise/v
broker/lib/vbjorb.jar", to the JVM Args text box.
You require only the JAR file on the computer that is running ColdFusion; you do not need the
full Visibroker installation.
c. Click Submit Changes.
3. Configure a Visibroker connector in ColdFusion, as follows:
a. In the ColdFusion Administrator, select Extensions > CORBA Connectors.
b. In the CORBA Connectors page, click Register CORBA Connector.
c. In the CORBA Connector page, enter information for the connector.
© 2013 Adobe Systems Incorporated and its licensors. All rights reserved.
3.
c.
The following is an example of a correctly configured connector:
Field
Value
ORB Name
visibroker
ORB Class Name
coldfusion.runtime.corba.VisibrokerConnecto
r
Classpath
(none)
ORB Property File
C:\ColdFusion10\lib\vbjorb.properties
The ORB Property File points to a Java properties file that contains the correct ORB settings for
Visibroker. The contents of the vbjorb.properties file look like the following:
org.omg.CORBA.ORBClass=com.inprise.vbroker.orb.ORB
org.omg.CORBA.ORBSingletonClass=com.inprise.vbroker.orb.ORB
SVCnameroot=namingroot
d. When you finish editing the page, click Submit. The CORBA Connectors page appears.
e. Select the radio button to the left of your new CORBA connector and click Select ORB
Connector. This sets the new connector to be the default.
4. Prepare your CORBA server side, as follows:
a. Start your Visibroker osagent service or process, if it is not already running, by entering the
following command:
osagent
Note
If you must connect to an osagent in another subnetwork, include the
following lines in the vbjorb.properties file:
vbroker.agent.addr=<IP address of machine running OSAGENT>
vbroker.agent.port=<port>
b. Start the Interface Repository and load it with the IDL file that you plan to use, by entering an ir
epcommand, as in the following example:
irep myir MyIDLFile.idl
c. (Optional) Start the Naming Service by entering a command like the following:
© 2013 Adobe Systems Incorporated and its licensors. All rights reserved.
c.
nameserv namingroot
Note
The name of the Naming Service (namingroot in the previous example) must
match the value for SVCnameroot in the vbjorb.properties file.
d. Start Visibroker on your CORBA server.For more information, see the Borland Visibroker
documentation.
5. Restart ColdFusion for your changes to take effect.
For more information, see Managing ColdFusion services in Windows and Managing the ColdFusion
process in UNIX.
You can now make CORBA invocations from ColdFusion. For more information about integrating
CORBA objects into ColdFusion, see the Developing ColdFusion Applications guide.
#back to top
Disabling Remote Development Services
If you use Adobe Dreamweaver, Macromedia HomeSite, Adobe Flash Builder, or Eclipse to develop your
applications, you can access a remote ColdFusion server using HTTP. However, you must configure Remote
Development Services (RDS) in your integrated development environment (IDE), and RDS must be enabled
in ColdFusion. Using RDS, IDE users can securely access remote files and data sources, build SQL queries
from these data sources, and debug CFML code.
Note
The ColdFusion Report Builder uses RDS for the Query Builder and for charting support.
However, for security reasons, Adobe recommends that you disable RDS on a production server. To disable
it, disable the RDSServlet mapping.
Disable the RDSServlet mapping
1. Back up the web.xml file. This file is in the cf_root\cfusion\wwwroot\WEB-INF directory in Windows and
in the _cf_root/_cfusion/wwwroot/WEB-INF directory in UNIX.
2. Open the original web.xml file for editing.
3. Comment out the RDSServlet mapping, as the following example shows:
<!-<servlet id="coldfusion_servlet_8789">
<servlet-name>RDSServlet</servlet-name>
<display-name>RDS Servlet</display-name>
<servlet-class>coldfusion.bootstrap.BootstrapServlet</servlet-class>
<init-param id="InitParam_103401311065856789">
<param-name>servlet.class</param-name>
<param-value>coldfusion.rds.RdsFrontEndServlet</param-value>
</init-param>
</servlet>
-->
4. Save the file.
5.
© 2013 Adobe Systems Incorporated and its licensors. All rights reserved.
5. Restart ColdFusion.RDS is disabled on the ColdFusion server.
For more information, see Managing ColdFusion services in Windows, or Managing the ColdFusion
process in UNIX.
#back to top
Disabling JSP functionality (server configuration only)
ColdFusion Enterprise Edition provides support for JavaServer Pages (JSP) technology through the
underlying J2EE application server on which it runs. Because JSP code runs outside the realm of the
ColdFusion security framework and, therefore, is not subject to ColdFusion sandbox security, you do not
typically deploy JSPs in a shared, hosted environment where more than one customer shares a single server.
Disable JSP functionality
1. Open cf_root/cfusion/runtime/conf/web.xml in a text editor.
2. Find the servlet-mapping entry for JspLicenseServlet.
3. Comment out this entry, as the following example shows:
<!-<servlet-mapping>
<servlet-name>jsp</servlet-name>
<url-pattern>*.jsp</url-pattern>
-->
4. Save and close the file.
5. Restart ColdFusion.
#back to top
Changing the ColdFusion user account in Windows
The ColdFusion services, by default, run under the highly privileged system accounts. For an extra level of
security, Adobe recommends that you create a Windows user under which you run the services and only give
necessary privileges to run the web application (for example, folder permissions for the web root.)
Change the ColdFusion user account
1. Open the Services Control Panel. (For example, select Start > Settings > Control Panel >
Administrative Tools > Services.)
2. Right-click ColdFusion 10 Application Server, and select Properties. The ColdFusion 10 Application
Server Properties (Local Computer) dialog box appears.
3. On the Log On tab, select This account, and enter the account information.
4. Click OK.
In the Services control panel, right-click ColdFusion 10 Application Server, and select Restart.
Note
Do not rename your Windows Administrator account. This causes problems with
security policies and profiles.
Troubleshooting installation issues
Troubleshooting
© 2013 Adobe Systems Incorporated and its licensors. All rights reserved.
If you encounter any of the common installation problems, you may be able to resolve the issue by following
the steps indicated for that issue.
#back to top
Common installation problems
Spaces in the TEMP or TMP environment variables (Windows only)
Problem:
A space in the path of the TMP or TEMP environment variables in Windows causes the installer to stop after
extracting from the archive.
Solution:
Change the TEMP or TMP environment variable so it does not include spaces.
Incomplete download
Problem:
InstallAnywhere displays a message to choose another install location. No matter what location you choose,
the install doesn't succeed.
Solution:
Ensure that you downloaded the complete installation file; if not, download the file again.
Problem:
When you try to download the ColdFusion installation file on an Apple Macintosh, the download stops before
it is complete, but the browser indicates that the download is complete.
Solution:
If you are using Safari:
1.
2.
3.
4.
5.
Start the download.
Open the download window (Option-Command-L).
When the download looks like it has stalled, click the Stop (X) button.
Click the Resume button.Safari continues the download from where it stalled.
Repeat Steps 3 and 4 as necessary
Server error
Problem:
When trying to access any CFM page either from the server itself, or remotely, the following error appears:
© 2013 Adobe Systems Incorporated and its licensors. All rights reserved.
Server Error
The server encountered an internal error and was unable to complete your
request.
Solution:
Run the Web Server Configuration Tool to unconfigure and reconfigure your web server connectors, as
described in Configuring web servers at Configuring your System.
Cannot start ColdFusion Server
Problem:
After installing Windows SP2 firewall, you cannot start ColdFusion services.
Solution:
After installing Windows XP Service Pack 2, the Windows Firewall is enabled by default. This prevents
ColdFusion from functioning correctly. For more information, see the Tech Note at www.adobe.com/go/tn_19
518.
Errors displaying Flash forms
Problem:
When you try to browse a ColdFusion page that contains a Flash form, the following errors appear:
2 Errors found.
Error /CFIDE/gettingstarted/community/webroot/index.cfm:-1
macromedia.css.LocatorParser
Error /CFIDE/gettingstarted/community/webroot/inde.mxml:381
The class 'mx.rpc.RemoteClassRelayResponder' could not be loaded.
Solution:
If you are using an external web server, such as Apache or IIS, run the Web Server Configuration Tool by
selecting Start > Programs > Adobe > ColdFusion 10 > Web Server Configuration Tool; also, try using the
built-in server, using port 8500. For more information, see Configuring web servers at Configuring your
System.
Browsing a ColdFusion page displays a download window
Problem:
In earlier versions of ColdFusion, you used IIS to map the filename extension .cfm to ICSF.dll. In ColdFusion,
you have not mapped the .cfm filename extension to any .dll file. As a result, ColdFusion pages do not
execute running under IIS 5.0, but display a download window instead.
Solution:
© 2013 Adobe Systems Incorporated and its licensors. All rights reserved.
Run the Web Server Configuration Tool by selecting Start > Programs > Adobe > ColdFusion 10 > Web
Server Configuration Tool. For more information, see Configuring web servers at Configuring your System.
ColdFusion Administrator displays as an encrypted page
Problem:
After you install ColdFusion, you install Windows XP SP2. When you start ColdFusion Administrator, the
Administrator displays as an encrypted page.
Solution:
The Windows XP SP2 update may have undone the IIS mapping for ColdFusion. Run the batch scripts to
uninstall, and then reinstall the IIS connectors. For more information, see Configuring web servers at Configur
ing your System.
ColdFusion doesn't start
Problem:
ColdFusion doesn't start when you have McAfee Privacy Service installed on system.
Solution:
Remove McAfee Privacy Service.---#back to top
Data source problems
Unable to add a Microsoft Access data source
Problem:
When you try to add a Microsoft Access data source, an error appears:
Solution:
Install and start up the ODBC service, or use the Microsoft Access with Unicode driver.
ODBC services do not install properly
Problem:
ODBC services do not install properly.
Solution:
Remove the existing ODBC services using the following code:
© 2013 Adobe Systems Incorporated and its licensors. All rights reserved.
<cfscript>
writeOutput("Installing ODBC Services...<br>");
returnValue = myObj.installODBCservice();
writeOutput("ODBC Services installed");
</cfscript>
You then reinstall the ODBC services using the following code:
<cfscript>
writeOutput("Removing ODBC Services...<br>");
returnValue = myObj.removeODBCservice();
writeOutput("ODBC Services removed");
</cfscript>
Unable to INSERT or UPDATE an Oracle 10 database when there is a CLOB field
Problem:
Columns have a 4 KB size limit in Oracle. If a column is larger that the 4 KB size limit, when you try to use
either the cfinsert or cfupdate tag, the following error is generated:
ORA-01704: string literal too long
Solution:
To avoid this error, use either the cfquery or cfqueryparam tag.---#back to top
Migration problems
Data sources not recognized
Problem:
When you migrate from an earlier version of ColdFusion to ColdFusion 10, your application does not
recognize data sources.
Solution:
Redefine the data sources.
CFCs not recognized in Dreamweaver
Problem:
When you migrate from an earlier version of ColdFusion to ColdFusion 10, the CFCs do not appear in the
Components panel of Dreamweaver.
© 2013 Adobe Systems Incorporated and its licensors. All rights reserved.
Solution:
Check the mappings and update them as necessary.
Installation fails
Problem:
On UNIX and Linux systems, when you try to install ColdFusion on systems where the /tmp partition is
mounted noexec, the installation fails.
Solution:
This is because the install attempts to use the /tmp directory for unpacking and running the installer runtime.
To avoid this issue, set the IATEMPDIR environment variable to a directory on the system that has execute
permissions before running the installer.
Problem:
When you try to install ColdFusion, the installation fails and generate the error:
"java.lang.OutOfMemoryError Invocation of this Java Application has caused an
InvocationTargetException. This application will now exit. (LAX)"
Solution:
You must clean up the directory to which the installer is trying to extract the JRE, for example, /tmp.---#back to top
J2EE configuration problems
Problem:
When you install ColdFusion on Red Hat Enterprise Linux 4, the installation script incorrectly report a warning
regarding the C++ compatibility pack.
Solution:
If you plan to use C++ based custom CFX tags, you should interrogate your system for compat-libstdc++ and
glibc packages and install them if necessary. Either query all packages and use the grep command as a filter
or query the exact package name. For example, the command rpm -qa | grep compat-libstdc+ queri
es all packages and filters or greps on the string compat-libstdc. This command might produce two
results, compat-libstdc-33-3.2.3-47.3 and compat-libstdc+-296-2.96-132.7.2. ---#back to top
Postinstallation problems
CLOB and data corruption
Problem:
You are using the Japanese version of ColdFusion and Oracle 8/9 with NLS_Characterset JA16SJJS, and
© 2013 Adobe Systems Incorporated and its licensors. All rights reserved.
encounter CLOB corruption and data corruption.
Solution:
Set codepageoverride=MS932 in the JDBC URL.
Unsupported keysize or algorithm parameters
Problem:
You are running ColdFusion on WebSphere 5.1 on IBM JVM 1.4.1 and encounter an "Unsupported keysize or
algorithm parameters" exception.
Solution:
Install unlimited jurisdiction policy files, as follows:
1. Download and install Unrestricted JCE Policy files for IBM SDK 1.4 from https://www6.software.ibm.co
m/dl/jcesdk/jcesdk-p.
2. Unzip the file.
3. Copy files unzipped from this link to the jre/lib/security directory.
4. Restart WebSphere.
Virtual mapping resource path of /* does not work
Problem:
You add a virtual mapping resource path of /* which does not work{{.}}
Solution:
Do not map any directories to wildcard resource paths that contain WEB-INF as a virtual mapping. In
ColdFusion MX 6.1, the fact that this worked was a side-effect of the particular way the classloader was
configured. For ColdFusion MX 7 and later, the classloader is consistent across all editions; the ColdFusion
classloader is no longer blended with the application server's classloader. This change was made to ensure
that ColdFusion MX 7 worked consistently in stand-alone server as well as deployed as an EAR/WAR to any
certified J2EE application server.---#back to top
Uninstall problems
COM disabled
Problem:
You have an earlier version of ColdFusion on the system. When you uninstall ColdFusion, COM is disabled.
Solution:
Re-register the typeviewer.dll file associated with the earlier version of ColdFusion.
© 2013 Adobe Systems Incorporated and its licensors. All rights reserved.
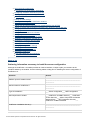
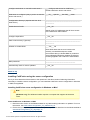
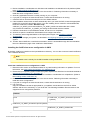
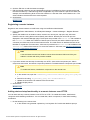
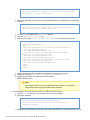
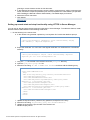
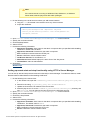
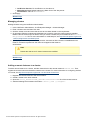
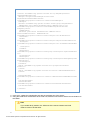


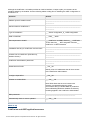
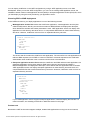

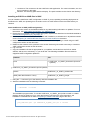
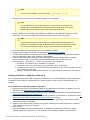
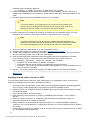
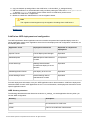
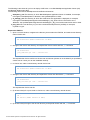
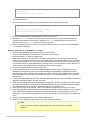
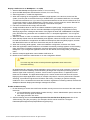
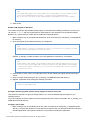
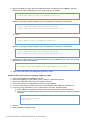
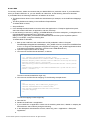
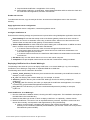
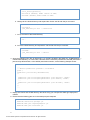
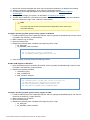
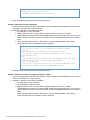
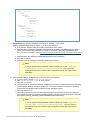
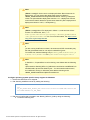
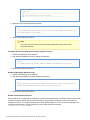
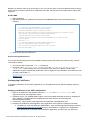

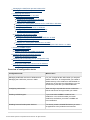
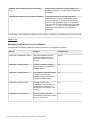
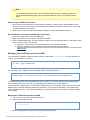
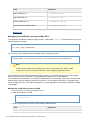
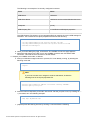


![Avoir Un Androphone Samsung, [Presque] Parfait !](http://vs1.manualzilla.com/store/data/006489743_1-76e9273a20736a9d4f6ee1c8e33b3e57-150x150.png)