1
Enterprise IP Solutions
OfficeServ
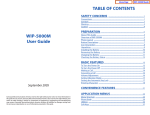
WIP-5000M
User
Guide
416, Maethan 3-Dong, Paldal-Ku, Suwon-City, Kyung-ki-Do, KOREA
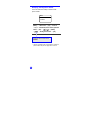
EC Declaration of Conformity
For the following named product:
(product name)
:
WLAN Phone
(model name)
:
WIP-5000M, Sinus Pro 800M
( name)
:
J-TECHNOLOGY
(address)
:
#293-15 Gongdan-Dong, Gumi-City, Gyeong-buk,
Korea, 730-906
Manufactured at:
To which this declaration relates, is in conformity with the following standards and/or other
normative documents.
(1)
(2)
(3)
(4)
EN 60950:2000
EN 301 489-1: V.1.4.1
EN 301 489-17: V.1.2.1
EN 300 328: V.1.4.1
EN 50371:2002
We, Samsung Electronics, hereby declare that [all essential radio test suites have been
carried out and that] the above named product is in conformity with all the essential
requirements of Directive 1999/5/EC.
The conformity assessment procedure referred to in Article 10 and detailed in Annex [III]
or [IV] of Directive 1999/5/EC has been followed with the involvement of the following
Notified Body(ies);
The equipment will
NEMKO AS
0470
also carry the Class 2
equipment identifier
Identification mark :
(Notified Body number)
Technical Documentation kept at :
Samsung Electronics Co.,Ltd.
Nemko Certificate No. : 36728
KOREA
/
(Place and date of issue)
EUROPE / MARCH 2005
(Place and date of issue)
0470
Hagyoun Bae / Association
(full name and position)
(authorized signature)
David Norton / MD STUK
(full name and position)
(authorized signature)
Intended Use
This WIP-5000M telephone handset is intended to communicate with a
Samsung telephone system, where such a telephone system is provided with the
appropriate wireless LAN interface. It allows the user to make and receive voice
calls. An optional ear-microphone (headset) unit can be connected. The
telephone is powered by an integral battery which is charged through the base
unit provided. It should not be used for any other purpose.
Publication Information
Samsung Business Communications reserves the
right without prior notice to revise information in this
publication for any reason.
Samsung Business Communications also reserves
the right without prior notice to make changes in
design or components of equipment as engineering
and manufacturing may warrant.
Disclaimer
Samsung Business Communications is not responsible for errors or problems arising from customers
not installing, programming or operating their
Samsung systems as described in this manual.
Copyright 2005
Samsung Business Communications
All rights reserved. No part of this manual may be
reproduced in any form or by any means – graphic,
electronic or mechanical, including recording, taping,
photocopy or information retrieval system – without
express written permission of the publisher of this
material.
2005/6/WIP5000M
Version 1.1
User Guide
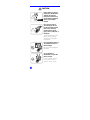
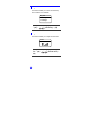
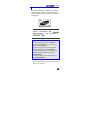
SAFETY CONCERNS
For your safety and to ensure your phone works correctly, read the following information before installing
and operating your phone.
Conventions
WARNING
Provides information or instructions that you
should follow in order to avoid personal injury or
death.
CAUTION
CAUTION
Provides information or instructions that you
should follow in order to avoid service failure or
damage to the system.
NOTE
Indicates additional information as a reference.
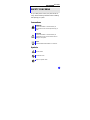
Symbols
General caution
Prohibits an action
Requires a specific action
1
WARNING
Do not place conductive
objects (e.g. coins) on the
charging terminals of the
battery (metallic part).
May cause fire due to overheating.
Use only the charger
provided with the WIP5000M phone.
Using other chargers may
result in overheating or
explosion.
The battery should be used
only for the WIP-5000M
phone.
Using the battery for other
purposes may cause malfunction, fire, or electric shock.
Do not put objects that
contain water (such as
vases, cups, cosmetics, and
medicines) or metals near
the phone.
Moisture in the phone can
cause a fire and electric
shocks.
2
User Guide
Do not place the phone in a
dusty area or in fluctuating
temperature environments.
May cause a fire or electric
shocks.
Do not install the phone
near a heater (e.g.
cigarette lighter,
heating apparatus, etc.)
May cause a fire or electric
shocks.
Do not use or store
inflammable solvents or
materials near the phone.
May cause a fire or electric
shocks.
If the phone makes a noise,
a bad smell or smoke,
immediately call your
supplier.
May cause a fire or electric
shocks.
3
CAUTION
Before clearing a phone’s
registration, double check
whether this function
should be executed since
all information registered
on the system will be
deleted.
Use a soft dry cloth to
clean the phone. Do not
use any chemical solvents
such as wax, benzene,
alcohol, thinner, insect
spray, aerosol, lubricant, or
detergent.
The use of chemicals on the
phone may cause fading/
discolouring or damage to
components.
Do not install the phone on
an unstable surface or in
direct sunlight.
May cause severe damage to
the phone.
Do not attempt to
disassemble or repair the
phone yourself.
If repair is needed, please return it to where it was purchased or call your supplier.
4
User Guide
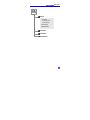
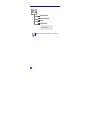
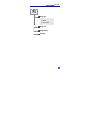
TABLE OF CONTENTS
SAFETY CONCERNS
1
Conventions........................................................... 1
Symbols ................................................................ 1
WARNING.............................................................. 2
CAUTION .............................................................. 4
PREPARATION
7
About This Guide ................................................... 7
Overview of WIP-5000M ......................................... 7
Phone Layout......................................................... 8
Unpacking ........................................................... 11
Installing the Battery............................................ 12
Removing the Battery........................................... 12
Charging the Battery ............................................ 13
Checking the Battery Status .................................. 14
BASIC FEATURES
15
Turn the Power On ............................................... 15
Turn the Power Off............................................... 16
Making a Call ....................................................... 17
Answering a Call .................................................. 19
Volume Adjustment .............................................. 19
Setting the Etiquette Mode ................................... 21
5
Setting the Automatic Key Lock ............................. 22
Entering Characters.............................................. 23
CONVENIENT FEATURES
26
Features for Call Failures....................................... 26
Features Used During a Call .................................. 29
APPLICATION MENUS
30
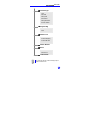
Menu Structure .................................................... 30
Phone Book ......................................................... 37
Utilities................................................................ 44
Soft Keys............................................................. 49
Volume / Ring...................................................... 55
Phone Settings..................................................... 58
System................................................................ 70
ANNEX
76
Troubleshooting ................................................... 76
Product Specifications .......................................... 79
6
User Guide
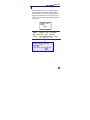
PREPARATION
About This Guide
This guide provides instructions for using Samsung’s
latest WIP-5000M mobile phone. Please take the time
to study this guide and become familiar with the operation of your WIP-5000M and the benefits this new
phone can provide. Keep this guide handy. You may
need to look up instructions for infrequently used features.
Overview of WIP-5000M
The WIP-5000M (Wireless IP-Phone Mobile type) allows voice communication through an IEEE 802.11b
wireless LAN.
WIP-5000M supports voice communication using
IEEE802.11b WLAN. Based on IEEE802.11b standard,
VoIP voice signals received are compressed to a voice
CODEC and transferred as data packets.
Data terminals such as PDAs and laptop PCs that support wireless connection can be used along with the
WIP-5000M.
7
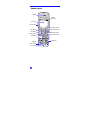
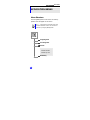
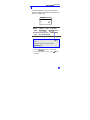
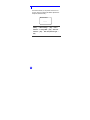
Phone Layout
Speaker
Headset
Connection
LCD Screen
Volume Button
Navigation Buttons
Menu Button
Send Button
Transfer Button
Hold Button
Cancel/Mute Button
End/Power Button
Conference Button
Dial Buttons
Etiquette
Mode Button
Microphone
8
User Guide
Button Descriptions
Button
Description
Used when calling or receiving an
outside trunk call / when transferring a call
Volume
MENU
Used when controlling voice or key
tone volume
Used when entering the menu mode
Used when moving the menu bar
upward
Used when moving the menu bar
downward
Used when moving the menu bar to
the right /Directory/Call on Hold
Used when moving the menu bar to
the left/Message/Conference call
OK
Used when selecting or saving the
selected item for function settings
C/MUTE
Used when (1) muting the microphone and (2) erasing characters or
moving to an upper menu
TRSF
Used when connecting to another
phone number while a phone call is
in progress
HOLD
Used when holding a call
CONF
Used when making a conference
Used when applying the etiquette
mode
0~9
Used when dialing or entering characters
9
Description
Button
Used when applying the automatic key
lock
Used when turning the power on/off,
when returning to the initial screen or
when terminating the call
Icon (Display) Descriptions
Icon
Description
Signal intensity.
: weak signal
: strong signal
Service not available.
Flashes when trying to make a call and
lights steady when a call is connected.
Alarm is set.
Message received.
Etiquette function or Vibration function is
enabled.
Automatic key lock is enabled.
Battery charging level.
: fully charged
: sufficient
: insufficient
: needs to be charged immediately
10
User Guide
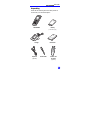
Unpacking
Check that the following items have been packed in
the box with your WIP-5000M phone.
WIP-5000M
Battery
(1 standard type)
Charger
User Guide
Earphone
(optional)
Hand holder
Leather case
for phone
(optional)
11
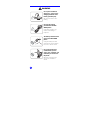
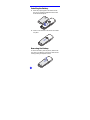
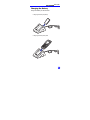
Installing the Battery
1. Insert the projecting part at the bottom of battery into the recessed compartment at the back
of the WIP-5000M phone.
2. Press it in the direction of the arrow until it clicks
into place.
Removing the Battery
To remove the battery from the phone, slide the battery cover in the direction of the arrow while simultaneously pressing the separator button.
12
User Guide
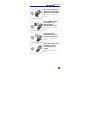
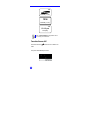
Charging the Battery
Charge the battery as shown below.
y Charging the battery separately
y Charging the battery with phone
13
Checking the Battery Status
The battery status can be checked by looking at the
battery status icons (shown below) that appear on the
LCD panel of the phone.
▶
▶
Fully charged
Partially
discharged
▶
Almost
discharged
Fully
discharged
When using the phone for the first time after purchase, fully charge the battery before use as the
battery may be discharged.
Low Battery Indication
When the battery is completely discharged, the
phone makes a warning sound and the battery icon
starts to flash. It is recommended you either change
to a new battery or charge the battery immediately.
If the phone is used after the warning sound, the
battery will be completely discharged and the power
will automatically go off.
14
User Guide
BASIC FEATURES
Turn the Power On
Press and hold the
button for more than 2 sec-
onds.
- When turning the power on for the very first time,
the ‘UNREGISTERED’ message will show up on the
top of the initial screen. You should register the
phone using [MENU] Æ 6. System Æ 1. Registration.
- If registration has failed, a ‘registration failed’
message will display on the top of the screen. You
should consult the System Administrator.
- The initial screen display can be selected from the
three displays shown below.
15
1234
Wed12 May 03:12p
1234
Wed12 May 03:12p
1234
03 :12 pm
05/12 [Wed]
Refer to Phone Settings in ‘Application Menus’
for selecting the initial screen.
Turn the Power Off
Press and hold the
button for more than 2 sec-
onds.
The phone automatically turns off.
16
User Guide
Making a Call
There are several ways to make a call. However, only
the basic call functions are discussed in this guide.
Refer to Phone Book in ‘Application Menus’ for
how to use the latest calling number, latest called
number, directory or abbreviated dial numbers.
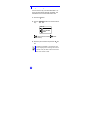
Using the Dial Keypad
1. Dial the phone number.
y Dial only the extension number for internal calls (e.g.
3345). For external calls, press [9] first, then dial the
phone number (e.g. 9 023459568)
y If you enter an incorrect number, press the [C/MUTE]
button to modify the number, digit by digit. Press and
hold down the [C/MUTE] button to delete all entered
digits.
3310
2. Press the
y Press the
button to make the call.
button to disconnect the call.
17
Using the Call Logs
You can view not only your latest calls made or received, but also absent subscriber messages. This
information can be used to make another call.
1. Press the
button.
2. Use the
tory.
buttons to view the call his-
Call List
1:
2:
3:
06-6702-5322
411-1204-5688
#9876
(
: Latest received number,
called number)
: Latest
3. Select the phone number and press the
ton.
but-
A maximum of 64 dialled or received phone numbers (32 outgoing and 32 incoming) can be saved
in the list. If full, the oldest number will be erased
when a new number is saved.
18
User Guide
Answering a Call
Press any button, except [Volume] button or
button, to answer a ringing call.
Volume Adjustment
You can adjust the bell volume, key button volume
and voice volume of the phone.
Bell Volume Adjustment
You can adjust the bell volume while the phone is
ringing by pressing the [MENU] button.
Refer to Volume section in ‘Application Menus’ for
how to adjust the bell volume.
Volume
19
Key Button Volume Adjustment
You can adjust the volume of key buttons while on
the phone.
Select the one of 5 volume levels you want by
pressing the [Volume] button at the initial screen.
KeyTone Volume
If a key is pressed during a call, the key tone will
not be heard unless you are using an earphone.
Voice Volume Adjustment
While on a call, you can adjust the voice volume of
the other party.
Select one of 5 volume levels you want by pressing
the [Volume] button during the call.
Call Volume
20
Call Volume
User Guide
Setting the Etiquette Mode
To avoid the phone ringing (e.g. during a meeting),
you can set the phone to vibrate instead of ringing.
To Set Up the Etiquette Mode
Press and hold the
button for more than 2
seconds at the initial screen. The etiquette mode
icon
will be displayed at the top of the screen
and the phone will vibrate instead of ringing for an
incoming call.
To Disable the Etiquette Mode
Press and hold the
button for more than 2
seconds at the initial screen. The etiquette mode
disappears and the etiquette mode will be
icon
disabled.
21
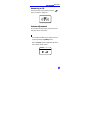
Setting the Automatic Key Lock
For privacy, this function prevents others from viewing
your information. When the automatic key lock is set,
no buttons will work, and functions other than
answering a call cannot be used until you enter the
password.
To Set Up the Automatic Key Lock
Press and hold the
button for more than 2
seconds at the initial screen. The screen will display
.
the automatic key lock icon
To Disable the Automatic Key Lock
Enter the password. The phone returns to the initial
screen and the automatic key lock function is disabled.
22
1234
07/12[Sa] 4 : 05 PM
User Guide
Entering Characters
This section describes how to enter uppercase/
lowercase English characters and special characters.
Buttons Used for Entering Characters
The buttons used for entering the characters are as
follows.
y [MENU] button: Displays the screen for entering uppercase English [ENG].
A menu bar [eng/Sym] which allows you to select lowercase English or special characters (symbols) appears in
the lower part of the screen.
y
button: Select the desired character set.
For example, if you select lowercase English [eng], the
lower menu changes to [ENG/Sym].
23
How to Enter Uppercase and Lowercase
in English
Pressing the [MENU] button allows you to enter
English uppercase, [ENG], letters automatically. To
select lowercase, [eng], from the lower part of the
screen, use the
buttons.
Use this table to select characters to enter.
Count
1
Dial Button
2
3
0
‘space’
1
.
2
A
B
C
3
D
E
F
4
G
H
I
5
J
K
L
6
M
N
O
7
P
Q
R
8
T
U
V
9
W
X
Y
*
*
/
#
#
@
4
S
Z
y To enter a character, press the button on which it is displayed the required number of presses. For example,
press [5] once to enter the character ‘J’. Press [5] again
to enter ‘K’, and so on. If a character to be entered is the
same as the last character entered, move the cursor
right one space before selecting the character.
24
User Guide
To enter * or #, press and hold the [*] button or
the [#] button.
Press the
buttons to move the
cursor, if required.
Modify characters using the [C/MUTE] button and
place the cursor on the appropriate location to insert
characters.
How to Enter Special Characters
Press the [MENU] button and select [Sym] from
the menu bar on the lower part of the screen. The
special characters are displayed.
Select desired special character using the
buttons and press the [OK] button to enter the
character on the screen.
Special characters are:
+-/*=.,
!?_:;[]()”&@~‘^%#$
<>|’{}
How to Enter Numbers
Press and hold the relevant dial button for more
than 2 seconds to enter a number.
25
User Guide
CONVENIENT FEATURES
Features for Call Failures
This section describes functions that can be used for
internal calls when the called party is busy or when a
call cannot be connected because features such as ‘Do
Not Disturb’ have been set by the called party.
Call Back
If an internal call cannot be connected, you can reserve the call.
1. Press the [MENU] button.
2. Press the
[1:Call Back].
button and move to
Soft Keys
1 : Call Back
2 : Message
3 : Camp On
3. Press the [OK] button.
y Your phone will ring when the other party either finishes
the call or clears the DND function. When you pick up
your phone, the other party’s phone will ring.
26
User Guide
Message
If an internal call cannot be connected, you can
leave a message (phone number).
1. Press the [MENU] button.
2. Press the
[2:Message].
button and move to
Soft Keys
1 : Call Back
2 : Message
3 : Camp On
3. Press the [OK] button.
y The
icon appears on the other party’s phone.
The other party can view the message (phone number)
by pressing [MENU] Æ [3] Æ [1].
27
Camp On
If an internal call cannot be connected, you can
make the other party’s phone play an ‘urgent’ sound
and wait for them to answer your call.
The urgent sound cannot be heard while the other
party is busy. The bell rings only when they hang up
their current call.
1. Press the [MENU] button.
2. Press the
[3:Camp On].
button and move to
Soft Keys
1 : Call Back
2 : Message
3 : Camp On
3. Press the [OK] button.
28
User Guide
Features Used During a Call
These features may be used during a call.
Call Transfer
This is used to transfer the current call to a designated phone.
1. Press the [Transfer] button.
2. Dial the phone number to transfer the call to,
and press the
button.
Holding a Call
This is used to hold the current call.
1. Press the [Hold] button.
2. Press the [Hold] button again to resume your
conversation.
Mute on a Call
This is used to prevent your voice being heard during a call. You can still hear the other party.
1. Press the [C/MUTE] button during a phone
conversation.
2. Press the [C/MUTE] button again to allow your
voice to be heard.
29
User Guide
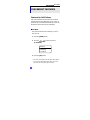
APPLICATION MENUS
Menu Structure
Press the [MENU] button in idle mode. The main application menu will appear on the screen.
The [_ _] sign appears at the bottom of the LCD
screen if a sub-menu is found. You can select a
sub-menu by using the [MENU] button.
Phone book
1 Outgoing Calls
2 Incoming Calls
3 Search
1. Search Name
2. Search Number
3. Search Sp. Dial
4 New Entry
30
User Guide
Utilities
1 Alarm
1. Set Alarm
1) Ring One time
2) Ring Always
2. Reset Alarm
3. Alarm Melody
2 Schedule
3 Calculator
4 World Clock
31
Soft Keys
1 Station MSG
2 Do Not Disturb
3 Page
4 Conference
1. Group Conf
2. Conference
OfficeServ SOHO does not support the ‘Page’ function.
32
User Guide
Volume/Ring
1 Ring Type
1. Ring
2. Vibrate
3. Ring+Vibrate
2 Ring Tone
3 Ring Volume
4 Warning
33
Phone Settings
1
Edit Name
2 Display
1. Samsung Logo
2. Display Name
3. Display Time
3 Change PIN
4 Language (see Note)
1. Korean
2. English
3. Italian
5 Delete Lists
1. Del Phone Book
2. Del Outgoing
3. Del Incoming
6 Back Light
1. Light Time
1) 8 seconds
2) 20 seconds
3) Always Off
2. Power Save
W
34
1) On
2) Off
User Guide
7 Forward Type
1. Off
2. All Calls
3. Busy Calls
4. No Answer
5. Busy/No Answer
6. Do Not Disturb
8 Program Msg
1. On
2. Off
9 Station Lock
1. Unlocked
2. Locked Outgoing
3. Locked All Calls
0 Station Number
* Reset
1. Reset All
2. Reset Func.
# LCD Contrast
The Language selection in Phone Settings may be
different to that shown.
35
System
1 Registration
2 System Setting
1. System1
2. System 2
3. Encryption Key
3 Unregistration
36
User Guide
Phone Book
Press the [MENU] button in idle mode, then select the
[1. Phone book] icon to use the Phone Book functions.
Outgoing Calls
View the latest dialed phone numbers, select the
desired phone number and make a call.
Outgoing Calls
1:
2:
3:
(
06-6702-5322
#4321
#9876
: Latest dialed number,
: Failed call)
[MENU] ▶ 1. Phone book ▶ [OK] ▶ 1. Outgoing
Calls ▶
(Select the phone number)
▶ [OK] or
y A maximum of 32 phone numbers can be saved in the
list. If full, the oldest phone number is erased when a
new dialed phone number is saved.
Press the
button to turn off the power. If
you remove the battery from the phone, all recently dialed numbers will be deleted.
37
Incoming Calls
View the latest received phone numbers, select the
desired phone number and make a call.
Incoming Calls
1:
2:
3:
(
06-6702-5322
411-1204-5688
#9876
: Latest called number,
: Failed call)
[MENU] ▶ 1. Phone book ▶ [OK] ▶ 2. Incoming
Calls ▶
(Select the phone number)
▶ [OK] or
y A maximum of 32 phone numbers can be saved in the
list. If full, the oldest phone number is erased when a
new received phone number is saved.
Press the
button to turn off the power. If
you remove the battery from the phone, all recently received numbers will be deleted.
38
User Guide
Search Phone Number
You can search for a phone number from the saved
phone number list.
Search Name
You can search for and call the desired phone number using a name.
06-6702-5322
Jack
James
Jane
[MENU] ▶ 1. Phone book ▶ [OK] ▶ 3. Search
▶ 1. Search Name ▶ Enter a name ▶ [OK]
▶
▶
If you press the [OK] button without entering a name, all the numbers in the list
will be displayed.
y When entering a name, you can press the first letter of
the name only and press the [OK] button. The names
and numbers of all entries starting with that letter will be
displayed for you to select the one required.
y Refer to Entering Characters in ‘Basic Features’ for
how to enter characters.
39
06-6702-5322
Jack
James
Jane
Search Number
You can search for and call the desired phone number using a phone number.
06-6702-5322
Jack
James
Jane
[MENU] ▶ 1. Phone book ▶ [OK] ▶ 3. Search
▶ 2. Search Number ▶ Enter a phone number ▶
[OK] ▶
▶
If you press the [OK] button without entering a number, all the numbers in the list will
be displayed.
y The phone number list will be displayed (e.g., if ‘2’ is entered, the phone numbers which include ‘2’ will be displayed).
40
User Guide
Search Speed Dial Number
You can search for and call the desired phone number using a speed dial number.
411-1204-568
Jack
[MENU] ▶ 1.Phone book ▶ [OK] ▶ 3. Search
▶ 3. Search Sp. Dial ▶ Enter a speed dial number
▶ [OK] ▶
If you press the [OK] button without
entering a speed dial number, all the
numbers in the list will be displayed.
y This function allows you to make a call to the desired
party by simply pressing a speed dial number for longer
than 2 seconds. For example, if the number ‘123456’ is
saved to the [1] button, you can simply press the [1]
button to make a call to ‘123456’. This function works
only at the initial screen.
y If the speed dial number is two digits, press and hold the
second digit for longer than 2 seconds.
41
Modifying / Deleting Phone Number
This is the method to modify or delete a saved
phone number.
Menu
1 : Edit
2 : Delete
[MENU] ▶ 1. Phone book ▶ [OK] ▶ 3. Search
▶ 1/2/3 ▶ Enter Name/Phone number/Speed dial
number ▶ [OK] ▶
▶ [MENU]
▶ 1:Edit ▶ Modify phone number ▶ [OK]
To delete the phone number, select
‘2:Delete’.
y Using the [C/MUTE] button and dial buttons, modify the
phone number and press the [OK] button to save it.
42
User Guide
New Entry
This function allows you to save a new phone number using the menu function.
Jack
[__]
[__]
[__]
[MENU] ▶ 1. Phone book ▶ [OK] ▶ 4. New Entry
▶ Enter name, phone number (home, station, mobile), speed dial number ▶ [OK]
y You can directly enter the phone number in idle
mode, and save that number using the
button.
y Enter the name that you want to save by using the dial
buttons (up to 10 characters). Refer to Entering Characters in ‘Basic Features’ for how to enter characters.
43
Utilities
Press the [MENU] button in idle mode, and then select
the [2. Utilities] icon.
Alarm
You can set or disable the alarm.
Set Alarm Time
12/05/2004 15:40
[__:__]
[MENU] ▶ 2. Utilities ▶ [OK] ▶ 1. Alarm
▶ [OK] ▶ 1. Set Alarm ▶ [OK] ▶
(Select alarm interval) ▶ [OK] ▶ Enter alarm time
▶ [OK]
To disable the alarm, select ‘2. Reset Alarm’.
To change the alarm melody, select ‘3. Alarm
Melody’. You can choose from 10 melodies.
y When the alarm is set, the alarm icon
the screen.
44
will appear on
User Guide
Schedule
This function allows you to enter important task or
appointment dates and then set the phone alarms
for those dates. You can easily use this function to
manage a personal schedule. If the alarm is set up
as mute, you can directly check what the schedule is
on the screen.
12/05/2004 15:40
Contents
Melody 1
[MENU] ▶ 2. Utilities ▶ [OK] ▶ 2. Schedule ▶
[OK] ▶ Select dates ▶ [OK] ▶ Enter time,
contents ▶ Select Melody/No Melody ▶ [OK]
- Select melody or No melody using
button.
- Select melody type using
button.
45
Modifying / Deleting Schedule
This function allows you to modify or delete the registered schedule.
[MENU] ▶ 2. Utilities ▶ [OK] ▶ 2. Schedule
▶ [OK] ▶ Select dates ▶ [OK] ▶ [MENU]
▶ 1:Modify ▶ Modify Time/contents/melody ▶
[OK]
To delete a schedule, select ‘2:Delete’.
46
User Guide
Calculator
This function allows you to carry out arithmetical
operations (addition, subtraction, multiplication and
division) in a simple way.
Calculator
[+]
=
1204.
30
1234
[MENU] ▶ 2. Utilities ▶ [OK] ▶ 3. Calculator
▶ [OK] ▶ Enter number ▶
(Select
arithmetical operation symbol) ▶ Enter number
▶ [OK] ▶ The result is displayed.
When entering negative numbers, press the
button.
If incorrect numbers are entered, press the
[C/MUTE] button.
y Press the
button to reuse the result.
y Press the [C/MUTE] button to reset or the
button
to terminate.
47
World Clock
This function allows you to check the current date
and time in each region of the world.
Seoul, Tokyo
05/12/2004
15:30
[MENU] ▶ 2. Utilities ▶ [OK] ▶ 4. World Clock
▶ [OK] ▶
(Move the meridian line) ▶ the
corresponding time of each capital city will be
shown.
48
User Guide
Soft Keys
Press the [MENU] button in idle mode, then select the
[3. Soft Keys] icon.
The submenus for [Soft Keys] are set by the system.
Station Message
You can check messages received from extensions
and reply to them.
Message
1 : 1204
2 : 9876
3 : 5678
[MENU] ▶ 3. Soft Keys ▶ [OK] ▶ 1. Station MSG
▶ [OK] ▶
(Select a station number)
▶ [OK] ▶ 1:Reply ▶ Call is connected.
To delete the message, select
‘2:Delete’.
49
Do Not Disturb
You can block all incoming calls at any time using
DND.
DND
1234
Wed12 May 03:12p
[MENU] ▶ 3. Soft Keys ▶ [OK] ▶ 2. Do Not Disturb ▶ [OK] ▶ 1: On ▶ DND mode is set up.
To disable DND mode, select 2:Off’.
y When DND (Do Not Disturb) mode is set, the ‘DND’ message and the
50
icon will appear on the initial screen.
User Guide
Paging
This function allows you to page through your
phone to specified page zone(s).
Page
* : All Page Zone
0 : Int. Zone 0
1 : Int. Zone 1
[MENU] ▶ 3. Soft Keys ▶ [OK] ▶ 3. Page ▶ [OK]
▶
(Select page zone) ▶ [OK] ▶ My
voice is announced through the phone.
51
Conference
You can call multiple parties in a conference conversation. Up to five persons, including yourself, can
participate in a conference call.
Loading a Conference Group
You can load a conference group saved in the system and have a conference with the group. (A group
can be saved in the system as described below in
Saving Conference Group.)
Group Conf
1 : Drivers
2 : Applications
3 : Test
[MENU] ▶ 3. Soft Keys ▶ [OK] ▶ 4. Conference
▶ [OK] ▶ 1. Group Conf ▶ [OK] ▶ 1:Load ▶
[OK] ▶ Group list is displayed. ▶
(Se-
lect a group) ▶ [OK] ▶ Group members are connected. ▶
To modify or delete the group, press the [MENU]
button and then select ‘1:Edit’, or ‘2:Delete’.
OfficeServ SOHO supports up to nine 3-person
conference calls (including the person making the
conference call).
52
User Guide
Saving Conference Group
Members that are frequently called upon for a meeting can be saved to the system as a group. A group
saved to the system can be conveniently used later
by selecting ‘Group Conference’.
3405
5688
5474
2_
[MENU] ▶ 3. Soft Keys ▶ [OK] ▶ 4. Conference
▶ [OK] ▶ 1. Group Conf ▶ [OK] ▶ 2:Save
▶ [OK] ▶ Enter group name ▶ [OK] ▶ Enter
phone number of member ▶
▶ Enter phone
number of next member ▶ [OK]
53
Entering Each Member
You can have a conference by entering the phone
number of each member directly.
3441
1874
8205
[MENU] ▶ 3. Soft Keys ▶ [OK] ▶ 4. Conference
▶ [OK] ▶ 2. Conference ▶ [OK] ▶ Enter phone
number of member ▶ [OK] ▶
▶ Enter
phone number of next member ▶ [OK] ▶
y
means that you have completed entering the phone
number.
54
y
means that you have failed to connect the call.
y
means that you have connected with the member.
User Guide
Volume / Ring
Press the [MENU] button in idle mode, then select the
[4. Volume/Ring] icon.
Ring Type
You can select the ring type as ring, vibration, or
ring after vibration.
Ring Type
1 : Ring
2 : Vibrate
3 : Ring + Vibrate
[MENU] ▶ 4. Volume/Ring ▶ [OK] ▶ 1. Ring Type
▶ [OK] ▶
(Ring/Vibrate/Ring
+ Vibrate) ▶ [OK]
For information about how to set the etiquette
mode, refer to Setting the Etiquette Mode in
‘Basic Features’.
55
Ring Tone
This function enables you to select one bell melody
from a selection of 10 melodies.
Ring Tone
01 : Melody 1
02 : Melody 2
03 : Melody 3
[MENU] ▶ 4. Volume/Ring ▶ [OK] ▶ 2. Ring Tone
▶ [OK] ▶
(Select Melody) ▶ [OK]
Ring Volume
This function enables you to adjust the bell volume.
Volume
[MENU] ▶ 4. Volume/Ring ▶ [OK] ▶ 3. Ring Volume ▶ [OK] ▶
[OK]
56
(Select bell volume) ▶
User Guide
Warning
This function enables a warning tone when you
move to a ‘shadow zone’ during a call.
Warning
: On
1. On
2. Off
[MENU] ▶ 4. Volume/Ring ▶ [OK] ▶ 4. Warning
▶ [OK] ▶
(Select On/Off) ▶ [OK]
57
Phone Settings
Press the [MENU] button in idle mode, then select the
[5. Phone Settings] icon. The submenus are not
displayed until a password is entered.
Editing Name
This function enables you to enter characters to be
displayed on the initial screen.
Edit Name
_
[MENU] ▶ 5. Phone Settings ▶ [OK] ▶ Enter a
Password ▶ 1. Edit Name ▶ [OK] ▶ Enter your
name ▶ [OK]
y Refer to Entering Characters in ‘Basic Features’ for
how to enter characters.
58
User Guide
Display
This function enables you to select the background
of the initial screen that appears when the phone is
switched on.
Display
1 : Samsung Logo
2 : Display Name
3 : Display Time
[MENU] ▶ 5. Phone Settings ▶ [OK] ▶ Enter a
Password ▶ 2. Display ▶ [OK] ▶
(Se-
lect a screen) ▶ [OK]
59
Password
This function allows you to prevent others from using your phone by changing the default password of
the phone (default=1234).
New Password
____
[MENU] ▶ 5. Phone Settings ▶ [OK] ▶ Enter a
Password ▶ 3. Change PIN ▶ [OK] ▶ Enter new
password ▶ [OK] ▶ Enter new password again ▶
[OK]
60
User Guide
Language
This feature allows you to set the language displayed on the screen.
Language
1 : Korean
2 : English
3 : Italian
[MENU] ▶ 5. Phone Settings ▶ [OK] ▶ Enter a
Password ▶ 4. Language ▶ [OK] ▶
(Select language) ▶ [OK]
The language selection displayed on your phone
may be different to that shown above.
61
Delete Lists
This function allows you to delete phone numbers
saved in the Phone Book.
Confirm?
1 : Yes
2 : No
[MENU] ▶ 5. Phone Settings ▶ [OK] ▶ Enter a
Password ▶ 5. Delete Lists ▶ [OK] ▶ 1. Del
Phone Book ▶ Enter a Password ▶
(Yes/No) ▶ [OK]
- To delete the list of called numbers saved
in the Phone Book, select ‘2. Del Outgoing’.
- To delete the list of calling numbers saved
in the Phone Book, select ‘3. Del Incoming’.
62
User Guide
Screen Back Light
This function allows you to set the mode of the
background lighting on the screen or turn it off.
Lighting Time
Set the time for background lighting (which
automatically lights when buttons are pressed or a
message appears).
Light Time
1 : 8 seconds
2 : 20 seconds
3 : Always Off
[MENU] ▶ 5. Phone Settings ▶ [OK] ▶ Enter a
Password ▶ 6. Back Light ▶ [OK] ▶ 1. Light Time
▶ [OK] ▶
(Select light time) ▶ [OK]
y The back lighting turns off automatically unless a button
is pressed within 8 seconds. You can also set the lighting
duration to 20 seconds, or turn off the lighting altogether.
63
Power Save
You can turn on the Power Save mode to switch off
the background lighting.
Power Save : Off
1 : On
2 : Off
[MENU] ▶ 5. Phone Settings ▶ [OK] ▶ Enter a
Password ▶ 6. Back Light ▶ [OK] ▶ 2. Power
Save ▶ [OK] ▶ 1:On ▶ [OK]
To disable the Power Save mode, select ‘2:Off’.
64
User Guide
Forward Type
This feature enables you to forward your incoming
calls to a specific extension, group of extensions or
external number when you are unable to receive an
incoming call.
FWD
3754
Wed 12 May 03:12p
[MENU] ▶ 5. Phone Settings ▶ [OK] ▶ Enter a
password ▶ 7. Forward Type▶ [OK] ▶
( Select forward type) ▶ [OK] ▶ Enter a forwarded number ▶ [OK]
- To disable the forward mode, select ‘1: Off’.
- To forward all incoming calls, select ‘2: All Calls’.
- To forward incoming calls when you are using the
phone, select ‘3: Busy Calls’.
- To forward incoming calls when you cannot answer
within the specified time, select ‘4: No Answer’.
- To forward incoming calls when you are busy or cannot answer within the specified time, select ‘5:
Busy/No Answer’.
- To forward incoming calls when DND mode is set, select ‘6: Do Not Disturb’.
y When the forward mode is set, the ‘FWD’ message will
appear on the initial screen.
65
Programmed Message
When you will be away from your phone, you can
leave an absence message to advise internal callers
of your status. Internal callers will receive the message on their phone screen when they call you.
Set Val. : 0
1:
IN A MEETING
[MENU] ▶ 5. Phone Settings ▶ [OK] ▶ Enter a
password ▶ 8. Program Msg ▶ [OK] ▶ 1:On ▶
(Select a message) ▶ [OK]
To disable the programmed
message, select ‘2:Off’.
The number of programmed
messages is 20.
y If anyone tries to call you, they will see the message on
their phone.
IN A MEETING
66
User Guide
Station Lock
When you will be away from your phone, you can
lock any outgoing trunk calls or incoming/outgoing
calls to prevent others from using your phone without permission.
LCK
3541
Wed 12 May 04:05p
[MENU] ▶ 5. Phone Settings ▶ [OK] ▶ Enter a
password ▶ 9. Station Lock ▶ [OK] ▶
(Select lock option) ▶ [OK]
- To disable the lock mode, select
‘1:Unlock’.
- To lock any outgoing trunk calls, select
‘2:Lock Outgoing’. Outgoing internal
calls are not locked.
- To lock any outgoing/incoming trunk and
internal calls, select ‘3:Lock All Calls’.
y If the lock mode is set, the ‘LCK’ message will appear on
the screen.
67
Station Number
This feature allows you to view your phone number
on the screen.
Station Number
3541
[MENU] ▶ 5. Phone Settings ▶ [OK] ▶ Enter a
password ▶ 0. Station Number ▶ [OK] ▶ My
phone number is displayed on the screen.
68
User Guide
Reset
This function allows you to initialize all functions and
the status of a phone.
Reset All
1 : Yes
2 : No
[MENU] ▶ 5. Phone Settings ▶ [OK] ▶ Enter a
password ▶ *. Reset ▶ [OK] ▶
(Select reset option) ▶ [OK] ▶ Enter a password
▶
(Yes/No) ▶ [OK]
- To reset the status of a phone, select ‘1:Reset
All’. All the saved records as well as the phone options are deleted.
- To reset the options for the phone functions, select
‘2:Reset Func.’.
69
LCD Contrast
This feature sets the LCD contrast.
LCD Contrast
Bright
[
Dark
]
[MENU] ▶ 5. Phone Settings ▶ [OK] ▶ Enter a
password ▶ #. LCD Contrast ▶ [OK] ▶
(Control ‘Bright/Dark’ density)
System
Press the [MENU] button in idle mode, then select the
[6. System] icon.
The systems which support the WBS24 (Access
Point) and WIP-5000M are:
- OfficeServ 12
- OfficeServ 100
- OfficeServ 500
- OfficeServ 7200
- OfficeServ SOHO
Some systems may not be available in your country
70
User Guide
Phone Registration
This function allows you to register a phone via the
system.
Registering on a DHCP System
This function allows your phone to be registered on
a system which supports dynamic IP mode.
[MENU] ▶ 6. System ▶ [OK] ▶ 1. Registration
▶ [OK] ▶
(Select system to register)
▶ [OK] ▶ 1:DHCP mode ▶ Enter SSID ▶ [OK]
▶ Enter user ID ▶ [OK] ▶ Enter password ▶
[OK] ▶ Enter encryption key ▶ [OK]
y SSID: Enter the ESSID set on the WBS24 (Wireless LAN
access device).
y User ID: Enter the ID of the phone user registered to the
system.
y Password: The default password is 0000.
y Encryption key: This is an encryption key for security.
Use the 128-bit WEP key. When the encryption key is set
on the system, consult the system administrator and enter the value set on the system.
71
Registering on a Static IP System
This function allows your phone to be registered on
a system which supports static IP mode.
[MENU] ▶ 6. System ▶ [OK] ▶ 1. Registration ▶
[OK] ▶
(Select system to register) ▶
[OK] ▶ 2: Static IP mode ▶ [OK] ▶
(Select AP type) ▶ [OK] ▶ Enter phone IP address
▶ [OK] ▶ Enter system IP address ▶ [OK] ▶ Enter system gateway address ▶ [OK] ▶ Enter system subnet mask address ▶ [OK] ▶ Enter SSID ▶
[OK] ▶ Enter user ID ▶ [OK] ▶ Enter password
▶ [OK] ▶ Enter encryption key ▶ [OK]
When registering to a system set to Static IP
mode, be careful not to enter an IP address already being used by another phone.
y If you enter nothing and press the [OK] button, the default IP address is entered.
y SSID: Enter the ESSID set on the WBS24 (Wireless LAN
access device).
y User ID: Enter the ID of a user registered to the system.
y Password: The default password is 0000.
y Encryption key: This is an encryption key for security.
Use the 128 bit WEP key. When the encryption key is set
on the system, consult the system administrator and enter the value set on the system.
72
User Guide
System Setting
While using a phone registered to a system, you can
transfer to another system for connection. To use
this function, the phone should already be
registered to the system. (Refer to Phone
Registration above for the procedure to register a
phone.)
System Setting
1 : System1
2 : System2
3 : Encryption Key
[MENU] ▶ 6. System ▶ [OK] ▶ 2. System Setting
▶ [OK] ▶
(Select system) ▶ [OK]
▶ Confirm the information of the system ▶ [OK]
Select [1:System1] or [2:System2]
73
Encryption Key
Set the encryption key (WEP key) in the system
which should be entered when you register the
phone. You can register the phone to the system
only by additionally setting or clearing the
encryption key without having to enter the system
information again.
Encryption Mode
------------------------
**************
[MENU] ▶ 6. System ▶ [OK] ▶ 2. System Setting
▶ [OK] ▶ 3:Encryption Key ▶ [OK] ▶ 1:Enable
▶ [OK] ▶ Enter encryption key ▶ [OK]
To disable the encryption
key, select ‘2:Disable’.
This is a 128-bit WEP key for security. Consult the system administrator and enter the
value set in the system.
WEP is a security protocol defined by the Wi-Fi
standard to provide a wireless LAN security level
similar to that of wired LAN. Wi-Fi devices basically
support WEP, and additionally WPA and 802.11i.
WIP-5000M currently supports Enhanced Security
SSID and 128-bit WEP.
74
User Guide
Clearing a Phone’s Registration
While using a phone registered to the system, you
can delete the phone information from the system.
The user password must be entered before you can
clear a phone’s registration.
Unregistration
1: Yes
2: No
[MENU] ▶ 6. System ▶ [OK] ▶ 3. Unregistration
▶ [OK] ▶ Enter the password ▶ Select
(Yes/No) from the [Unregistration]
menu ▶ [OK] ▶ Reboot after selecting [Unregistering], and the screen changes to [Unregistered]
starting screen.
CAUTION
Double check whether this function should be executed since all phone information registered on
the system will be deleted.
75
User Guide
ANNEX
Troubleshooting
Possible problems and troubleshooting steps for your
phone are described below. Check the following carefully before contacting your supplier for advice.
The LCD does not light.
Battery is discharged. Recharge the battery and
turn the phone on again.
The bell does not ring or the ring volume is too
low.
- Check if the phone is set to etiquette mode.
- Adjust the volume at [MENU] Æ [4.Volume/Ring]
Æ [3.Ring Volume].
The lamp on the charger flashes yellow.
- Take the battery out from the charger and put it
in again.
- If the yellow light continues to flash, clean the
charger’s charging terminals.
- If the yellow light continues to flash despite the
above measures, contact your supplier.
76
User Guide
The battery is not discharged but the phone
does not turn on.
- Take the battery out and put it in again, and turn
the phone on.
- Take the battery out and clean the battery’s
charging terminals. Then put the battery back in
and turn the phone on.
Voices echo during a call.
Press the [Volume] button and adjust the volume
or move to another area.
The
indicator appears on screen and calls
cannot be made.
- Your phone may not be registered on the system. Register the phone.
- Move to an area where service can be provided.
- If the phone does not work despite the above
measures, contact your supplier.
Calls are disconnected frequently.
- Move to another area (since the frequency is unstable).
- If calls are still disconnected, contact your supplier.
77
The phone operates abnormally or does not operate at all.
- Take the battery out and insert it again. Turn the
phone on.
- If the problem persists, contact your supplier.
78
User Guide
Product Specifications
The specifications of the WIP-5000M are as follows.
Item
Specification
Model Name
WIP-5000M
Frequency
2400 ~ 2483.5 MHz
Size (mm)
43 (width) x 126 (length) x 19
(height)
Operating
Temperature
0 ~ 45 ˚C
Operating Humidity
0 ~ 90 %
Weight
95 g
Battery Charge
Time
2 Hours
Battery Duration
Call duration: 2 Hours 30 Minutes
Standby duration: 25 Hours
79
Samsung Business Communications
Brookside Business Park, Greengate, Middleton, Manchester M24 1GS