1
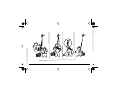
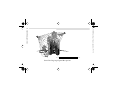
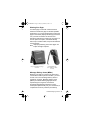
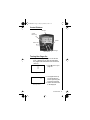
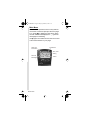
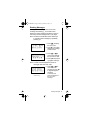
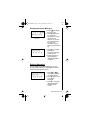
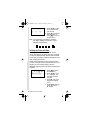
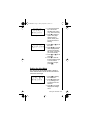
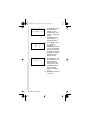
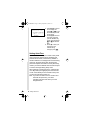
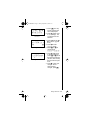
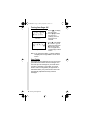
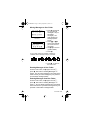
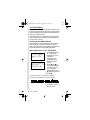
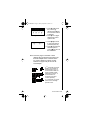
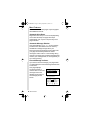
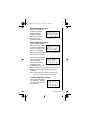
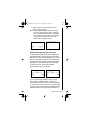
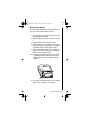
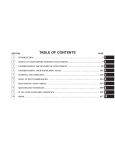
iridugpmr Page 1 Monday, January 4, 1999 11:05 AM
9501 Pager User’s Guide
Your pager will incorrectly indicate
missed messages when it receives a
retransmitted message if your newest
message has a sequence number that is
8, or more, numbers greater than the
original sequence number of the
retransmitted message.
For example, if your newest message is
sequence number 16 and you receive a
retransmitted message with a sequence
number of 4, your pager will indicate
missed messages.
See page 25 for more information about
missed messages.
6881031B15-O
PMR831B15-O1
CNIRIDBook Page i Friday, September 4, 1998 9:31
Table of Contents
Introduction ................................................................... 1
About This User’s Guide .............................................. 1
Satellite Messaging Overview ...................................... 2
Exciting Satellite Receiver Technology ........................ 2
Receiving Satellite Signals .......................................... 2
Wearing Your Pager .................................................... 5
Message Delivery Areas (MDAs) ................................. 5
Motorola Satellite Series Products ............................... 6
OPTIMAX™ EL Display ................................................. 6
Control Buttons ............................................................. 7
Turning Your Pager On .................................................. 7
Main Menu ..................................................................... 8
Reading Messages ........................................................ 9
News and Information Messages .............................. 10
Reading Information Messages ................................. 11
Deleting Messages ...................................................... 11
Setting the Time and Date .......................................... 12
Setting the Alert Mode ................................................ 13
Setting Alarms ............................................................. 15
Setting Quiet Time ....................................................... 16
Turning Your Pager Off ............................................... 18
Your Folder .................................................................. 18
Moving Messages to Your Folder .............................. 19
Reading Messages in Your Folder ............................ 19
Deleting Messages from Your Folder ........................ 19
Your PhoneBook ......................................................... 20
Permanent PhoneBook Entries ................................. 20
Moving Messages to Your PhoneBook ...................... 20
Viewing Messages in your PhoneBook ..................... 21
Deleting PhoneBook Messages ................................. 21
PhoneBook Lookup ................................................... 22
Downloading an Address Book .................................. 22
i
CNIRIDBook Page ii Friday, September 4, 1998 9:31
More Features ..............................................................24
Automatic Alert Reset .................................................24
Automatic Message Deletion ......................................24
Errored Message Indicator .........................................24
Missed Message Segment .........................................25
Missed Message Indicator ..........................................25
Truncated Message Indicator .....................................25
Satellite Features .........................................................26
Checking Satellite Strength (Instant) ..........................26
Satellite Strength Indicator (Average) ........................27
Registration Reminder ................................................28
Battery Information .....................................................28
Battery Gauge ............................................................28
Replacing the Battery .................................................29
Care and Maintenance ................................................31
Cleaning Your Pager ....................................................31
Functionality and Use of Your Pager .........................31
Patent Information .......................................................31
Warranty Information ..................................................32
ii
CNIRIDBook Page 1 Friday, September 4, 1998 9:31
About This User’s Guide
This User’s Guide provides an explanation of how to
operate each function of your pager and provides
helpful suggestions for first-time (as well as for
experienced) pager users.
For your convenience, a quick reference card may
be detached from the back cover and carried in your
wallet.
Please carefully review the User’s Guide to
understand how new features, specifically
designed for reception of direct satellite signals,
can help you to effectively benefit from this
unique device.
Introduction 1
CONTROL BUTTONS
Introduction
Congratulations on your purchase of a Motorola
Satellite Series 9501 Pager, for exclusive use on
the Iridium™ satellite communication system. You
are among a select group of discerning users who
demand global connectivity that is available only
with the latest in communication technology. The
9501 pager integrates advanced messaging
features you’ve come to expect from Motorola into
the world’s first global personal message receiver.
In your world, timely information can be too
important to wait. With a Motorola Satellite Series
9501 pager, you never have to be out of touch.
CNIRIDBook Page 2 Friday, September 4, 1998 9:31
Satellite Messaging Overview
INTRODUCTION
Exciting Satellite Receiver Technology
The Iridium satellite system is a revolution in
wireless communication technology. Satellites that
circle the earth keep you in constant
communication. Together with Iridium WorldPageSM
service, Motorola’s 9501 pager offers the first true
global roaming capability in a small belt-worn
personal message receiver. While it offers the best
in paging features, the 9501 does not operate like a
typical pager.
Receiving Satellite Signals
Most pagers receive messages transmitted from
towers on the ground. The 9501 pager receives
messages transmitted directly from satellite. This
can be more difficult, in some instances, due to the
distance the signal must travel from space.
With most satellite-based communication, such as
satellite TV or the Global Positioning System (GPS),
a satellite dish or hand-held unit must be positioned
outside of buildings to receive information. However,
with Motorola’s Satellite Series 9501 Pager, you can
now receive messages inside buildings.
Note: In some environments, the message signal
may be effectively blocked, preventing
reception. The ability to receive messages
in the interior of large urban buildings will be
particularly limited.
2 Satellite Messaging Overview
CNIRIDBook Page 3 Friday, September 4, 1998 9:31
Satellite Messaging Overview 3
9 5 0 1 P a g e r — Yo u r Pe r s o n a l S a t e l l i t e R e c e i v e r
SATELLITE RECEPTION
SATELLITE RECEPTION
CNIRIDBook Page 4 Friday, September 4, 1998 9:31
4 Satellite Messaging Overview
Satellite Paging Signal Reception
GOOD
POOR
Wearing Your Pager
Your 9501 pager comes with a multi-functional
holster that orients the pager for the best possible
performance. It is recommended that you place the
pager in the holster (display side facing in) and wear
it on your belt. The holster can also be used
effectively off the body as a stand for your pager. To
ensure optimum reception, extend the belt clip,
stand it up on a desk or table, and point it toward the
nearest window.
Note: Improper positioning of the 9501 pager will
impair message reception.
Proper Orientation of Pager
in Holster
Extended Belt Clip
(For standing on table
or desk)
Message Delivery Areas (MDAs)
Because your pager is a receive-only device and
cannot tell the Iridium system its location, you must
choose one or more message delivery areas to
register for coverage. Message delivery areas
(MDAs) are Iridium-defined geographic areas
representing local, regional, and national
boundaries designated by telephone Country
Codes (with optional suffix). For your convenience, a
complete list of Country Codes is permanently
Satellite Messaging Overview 5
SATELLITE RECEPTION
CNIRIDBook Page 5 Friday, September 4, 1998 9:31
CNIRIDBook Page 6 Friday, September 4, 1998 9:31
stored in the PhoneBook of your 9501 pager.
Consult with your Iridium Service Provider for
various methods of MDA registration.
Motorola Satellite Series Products
Using this pager together with Motorola’s Satellite
Series 9500 Portable Phone eliminates the need to
register message delivery areas and provides
additional benefits, such as “follow me” paging
services and the convenience of a global portable
phone. Ask your local authorized Motorola satellite
products dealer about the complete line of Motorola
Satellite Series products to determine which ones
best meet your demanding communication needs.
OPTIMAX™ EL Display
To bring you superior clarity and easy readability,
the Motorola OPTIMAX hologram is included in your
pager’s display. The hologram provides exceptional
contrast between the background of the display and
the pager’s message. In addition, the 9501 pager
uses an electro-luminescent backlighting
technology for improved readability in low-light
environments. The backlight is automatically
activated whenever a button is pressed.
6 OPTIMAX™ EL Display
Control Buttons
Escape
Scroll/
Move Up
Select
Move Left
Scroll/
Move Down
Move Right
Turning Your Pager On
Note: If you are turning the pager on for the first
time, a displays for up to 8 seconds while
the pager loads information from its internal
memory.
a
1. Press Z to turn your
pager on.
Loading Memory
b
Start-Up Screen
2. The pager’s Start-Up
screen displays the
Iridium logo along with
a welcome message.
3. Wait for the main menu
to be displayed.
Control Buttons 7
WEARING YOUR PAGER
CNIRIDBook Page 7 Friday, September 4, 1998 9:31
WEARING YOUR PAGER
CNIRIDBook Page 8 Friday, September 4, 1998 9:31
Main Menu
The main menu provides access to many features
via a series of icons and prompts. When the pager
is on, press [ to display the main menu. When
the main menu is first displayed, the ? (personal
messages) icon is blinking.
Use Xor Y to move within the main menu for access
to the various features on your pager.
News and
Information
PhoneBook
Time, Alert
Setting
Personal
Messages
8 Main Menu
Folder
CNIRIDBook Page 9 Friday, September 4, 1998 9:31
Your pager can have more than one unread
message. The flashing ? on the main menu
displays a number inside the envelope to tell you
how many unread messages are in your pager.
Note: The 9501’s One-Button feature allows you
to read the entire message by repeatedly
pressing Z.
[
1. Press
to display
the main menu.
2. Press Z. Your pager
displays the message
preview screen.
?FEIH
4
9:00 23/09/98
Main Menu
\
03:Customer Needs
02:Looking forward
01:Hi there
3D9>8
)
Message Preview
3. Press W or Vto
move to the message
that you want to read.
4. Press Zto display the
highlighted message.
Note: A check mark is displayed to the left of
messages that have been read.
03: Hello my friend
Looking forward
to your arrival!
Made dinner plans.
)
Read Message
5. Press W or V to
move within the
message or press Z
to page through the
message.
A time and date
stamp is displayed at
the end of the
message.
Reading Messages 9
MAIN MENU
Reading Messages
GETTING STARTED
CNIRIDBook Page 10 Friday, September 4, 1998 9:31
6. When finished viewing
the message, you may
use Xor Y to move to
one of the message
(delete),
options:
(add to folder),
(add to phonebook), or
(next message).
7. Press Z to accept the
selected option or
to return to
press
the main menu.
Looking forward
to your arrival!
Made dinner plans.
4
3 9 > 8 *
)
9:00 23/09/98
9
>
*
Continued Message
8
[
If your pager has been programmed with reminder
alerts, your pager alerts you at predetermined
intervals and displays a flashing in the lower left
corner of the Standby screen when there is at least
one unread message in your pager.
1
News and Information Messages
When a message is received from an Information
Services provider, your pager automatically stores it
in the Information Services folder. When a message
is placed in the Information Services folder, your
pager displays a flashing
on the Standby screen
and J on the main menu to alert you there is a
message in your folder.
Note: This feature may not be activated on your
pager. Please check with your Iridium
Service Provider to determine if Information
Services are available in your area.
1
10 News and Information Messages
CNIRIDBook Page 11 Friday, September 4, 1998 9:31
?JEIH
4
9:00 23/09/98
Main Menu
3. Press Z. Your pager
displays the
information message
preview screen
4. Follow instructions
starting at Step 3.,
“Reading Messages”
on page 9.
02:Financial News
01:World News
3 D 9 >
[
1. Press
to display
the main menu.
2. Press Xor Yto move
to F (news and
information). The Icon
blinks when it is
selected. If you have
an unread message,
the news and
information icon (J)
has a burst around the
top.
)
Message Preview
Deleting Messages
You can delete a selected message or you can
choose to delete all of your messages at one time
via the message preview screen.
\
03:Customer Needs
02:Looking forward
01:Hi there
3D9>8
Message Preview
)
1. Press W or Vto
move to the message
you want to delete.
2. Press Xor Y to move
(delete
to
message).
3. Press Z . The pager
displays the delete
message option
screen.
9
Deleting Messages 11
GETTING STARTED
Reading Information Messages
CNIRIDBook Page 12 Friday, September 4, 1998 9:31
READING MESSAGES
Delete Message
Yes
No
All
Delete Options
4. Press Xor Y to move
to one of the options
(Yes, No, All).
5. Press Z to accept the
selected option or
to return to
press
the main menu.
[
Note: If you selected Yes to delete a message,
your pager displays an animation of your
message being deleted.
Setting the Time and Date
Your pager offers two real-time clocks, one for
“home” time and one for “travel” time. The clock that
you select is displayed and used for all time-related
functions of your pager, including message time and
date stamping and alarms.
Select either home time to refer to the time where
you live, or use travel time to indicate the time in the
location you are currently visiting. The time
displayed is based on the mode (home or travel) last
selected.
?FEIH
4
9:00 23/09/98
Main Menu
[
1. Press
to display
the main menu.
2. Press Xor Y to move
to H (settings). The
icon blinks when it is
selected.
3. Press Z. Your pager
displays the settings
menu.
4. Press Xor Yto move to
(home) or
either
(travel).
5
12 Setting the Time and Date
4
Set Home Time
32&45.,1
4
9:00 23/09/98
Settings Menu
4
Set Home Time
<
16:38
Ω
23/09/98
Set Time and Date
5. A word prompt at the
top of the screen
identifies each option
(e.g., Set Home Time).
6. Press Zto select an
option. Your pager
displays the Set
(Home, Travel) Time
screen with the hour
blinking.
7. Press W or V to set
the hour.
8. Press Xor Yto move to
other displayed fields
(minute, am/pm/24hr,
day, month, year) that
you want to modify.
9. Press W or V to set
each field.
10. Press Zto save the
time and date changes
or, to exit without
saving the changes,
.
press
[
Setting the Alert Mode
The alert can be set as either audible, vibrate or
silent. Different alerts can be set for Personal and
Information messages.
?FEIH
4
9:00 23/09/98
Main Menu
[
1. Press
to display
the main menu.
2. Press Xor Y to move
to H (settings). The
icon blinks when it is
selected.
3. Press Z. Your pager
displays the settings
menu.
Setting the Alert Mode 13
READING MESSAGES
CNIRIDBook Page 13 Friday, September 4, 1998 9:31
READING MESSAGES
CNIRIDBook Page 14 Friday, September 4, 1998 9:31
Set Audible Alerts
32&45.,
1
Settings Menu
4. Press Xor Y to move
to either (set to
vibrate) or (set
audible alerts). From
audible, you can set
(silent).
5. Press Zto select
(set to vibrate) or
(set audible alerts).
2
&
%
2
&
Set Audible Alerts
G
F
Message Type
%
Audible
1 2 3 4 5 6 7
Alert Selection
14 Setting the Alert Mode
6. Press Xor Y to move
to G (personal
message or F
(information message).
You can set a different
alert for personal and
information messages.
7. Press Z. Your pager
displays the alert
selection screen.
8. Press Xor Y to move
to an alert option. The
pager produces a
sample alert as you
move to each option.
9. Press Z to select an
alert. Your pager
displays the settings
menu.
10. Press Zto return to the
main menu.
Setting Alarms
Your pager alarm can be set for a specific time and
date, or can be used as a daily alarm. The alarm is
based on the currently selected time displayed on
your pager, (home) or 5 (travel).
4
At the designated alarm time, your pager emits an
alert (audible or vibrate) even if the pager is in
“silent” mode. If the alarm expires without being
acknowledged, the . flashes until any button is
pressed. When an alarm is set, . is displayed in the
right corner of the standby and pager off screens,
and main menu.
?FEIH
4
9:00 23/09/98
S
Main Menu
Return
32&45.,1
6C
O
Settings Menu
[
1. Press
to display
the main menu.
2. Press Xor Y to move
to H(settings). The
icon blinks when it is
selected.
3. Press Zand use Xor
Y to move to (set
alarm).
4. Press Zto enter
“settings” mode.
5. Press W or V to
choose either Enabled
Daily, Enabled OneTime, or Disabled.
.
Setting Alarms 15
NEWS AND INFORMATION
CNIRIDBook Page 15 Friday, September 4, 1998 9:31
NEWS AND INFORMATION
CNIRIDBook Page 16 Friday, September 4, 1998 9:31
Enabled One-Time
/
<
16:38
Ω
23/09/98
Set Alarm
6. Press Xor Yto move to
the hour digit and
press W or V to set
the hour that you want
for the alarm.
7. Press Xor Yto move to
each entry selection
(minute, AM/PM, day,
month, year) and press
W or V to set each
field.
8. Press Z to save your
changes. To exit
without saving
.
changes, press
[
Setting Quiet Time
Quiet Time mode allows you to select a time period
during which the pager receives messages and
performs all functions, but without any audible or
vibrate notification. If messages are received during
quiet time, the pager alerts when the quiet time
period has expired. This feature can be particularly
useful if you travel to different time zones and expect
to receive messages during sleep hours.
After quiet time is set and turned on, it remains set
on a daily basis (with a Rdisplayed in the lower left
corner of the standby screen and main menu) until
you turn the quiet time function off.
Note: If you have set and turned on an alarm and
have also set quiet time, your alarm
overrides quiet time and alerts you at the
designated time.
16 Setting Quiet Time
?FEIH
4
9:00 23/09/98
Main Menu
Return
32&45.,1
6C
O
Settings Menu
Enabled
,
<
23:30
Ω
<
06:00
Set Quiet Time
[
1. Press
from any
screen until the main
menu is displayed.
2. Press Xor Y to move
to H (settings). The
icon blinks when it is
selected.
3. Press Zand use Xor
Yto move to (quiet
time).
4. Press Zto enter
SETTINGS mode.
5. Press W or V to
choose either
Enabled or Disabled.
,
6. Press Xor Yto move
to the hour digit and
press W or V to set
the start and end time
(set hour, then minute)
that you want for quiet
time.
7. Press Z to save your
changes. To exit
without saving
.
changes, press
[
Setting Quiet Time 17
DELETING MESSAGES
CNIRIDBook Page 17 Friday, September 4, 1998 9:31
CNIRIDBook Page 18 Friday, September 4, 1998 9:31
DELETING MESSAGES
Turning Your Pager Off
?FEIH
4
9:00 23/09/98
Main Menu
Turn Pager Off
32&45.,1
6C
O
Settings Menu
[
1. Press
to display
the main menu.
2. Press Xor Yto move
the cursor to H
(settings). The Icon
blinks when it is
selected.
3. Press Z and use Xor
Y to move to (turn
pager off). Then press
Zto turn the pager
off. The pager shuts
off and displays a blank
screen.
Note: If you have set an alarm,
1
.
(alarm enabled)
is displayed in the right bottom corner of the
screen.
Your Folder
Your pager has one folder that you can use to store
personal and information service messages. You
can store up to 99 messages in your folder. Once
you place a message in your folder, you cannot
move it back to its origination point (personal or
information folder). It is “protected” and cannot be
automatically replaced with newly received
messages.
18 Turning Your Pager Off
CNIRIDBook Page 19 Friday, September 4, 1998 9:31
?FEIH
4
9:00 23/09/98
Main Menu
\
03:Customer Needs
02:Looking forward
01:Hi there
3D9>8
Message Preview
)
1. Press Z (positioned
at G for personal
messages or at F for
information
messages). Your
pager displays the
message preview
screen.
2. Press W or Vto
move to the message
you want to move to
your folder.
3. Use Xor Y to move to
(add to folder).
4. Press Z.
>
As your pager moves the message, it displays a
simulation of the message moving to your folder.
5. Press Z to return to
the main menu.
Reading Messages in Your Folder
From the main menu, use Xor Y to move to E ,
press Z, then refer to “Reading Messages” on
page 9. You can read messages in your folder in the
same manner you read messages in your personal
or information message folders.
Deleting Messages from Your Folder
From the main menu, use Xor Y to move to E ,
press Z, then refer to “Deleting Messages” on
page 11. You can delete messages from your folder
in the same manner you delete messages from your
personal or information message folders.
Your Folder 19
TIME AND DATE
Moving Messages to Your Folder
CNIRIDBook Page 20 Friday, September 4, 1998 9:31
TIME AND DATE
Your PhoneBook
Your pager provides a phonebook that can be used
to store up to 99 personal messages. Some models
may also support the download of an address book
from a PC via infrared port.
Your phonebook is a good place to store important
names and numbers, creating a handy contact list
for use when on the go.
Permanent PhoneBook Entries
Your 9501 pager comes with permanent entries in
the phonebook. Included is a listing of Country
Codes, a handy reference for business travelers and
especially useful for help in MDA registration.
Moving Messages to Your PhoneBook
?FEIH
4
\
9:00 23/09/98
Main Menu
03:Customer Needs
02:Looking forward
01:Hi there
3D9>8
Message Preview
)
1. Press Z (positioned
at ? for personal
messages or at F for
information
messages). Your
pager displays the
message preview
screen.
2. Press W or Vto
move to the message
you want to move to
your phonebook.
3. Use Xor Y to move to
(add to phonebook).
4. Press Z.
8
As your pager moves the message, it displays a
simulation of the message moving to your folder.
5. Press Z to return to
the main menu.
20 Your PhoneBook
CNIRIDBook Page 21 Friday, September 4, 1998 9:31
?FEIH
4
9:00 23/09/98
Main Menu
02:Fernandez,Jose pa
01:Chen, Li Mei pho
3 D 9 =
Message Preview
1. Press Xor Yto move
the cursor to I
(PhoneBook). The
icon blinks when it is
selected.
2. Press Z. Your pager
displays the
information message
preview screen.
3. Press W or V to
move to the message
that you want to view.
4. Press Z to display the
highlighted message.
5. Follow the instructions
starting at Step 3.,
“Reading Messages”
on page 9.
Deleting PhoneBook Messages
From the main menu, use Xor Y to move to 8 ,
press Z, then refer to “Deleting Messages” on
page 11. You can delete messages from your
PhoneBook in the same manner you delete
messages from your personal or information
message folders.
Your PhoneBook 21
ALERTS
Viewing Messages in your PhoneBook
CNIRIDBook Page 22 Friday, September 4, 1998 9:31
ALERTS
PhoneBook Lookup
When your pager receives a numeric message, it
searches the phonebook for a match. When a
match has been found in the phonebook, your pager
displays next to the message on the preview
screen and attaches the phonebook entry to the
message.
8
This feature helps you identify the person who is
trying to contact you. You may also create custom
“canned messages” that display detailed
information when a pre-determined set of numbers
are sent from a telephone.
Downloading an Address Book
Note: This feature is not available in all languages.
Please visit our web site, www.motorola.com, to
check on the current availability of software for this
feature.
If your 9501 pager supports this feature, you can
download phone records to your pager via an
infrared (IR) interface. Up to 99 messages can be
transferred to the phonebook. To cancel a data
exchange in progress, press any of the pager’s
buttons.
?FEIH
4
9:00 23/09/98
Main Menu
22 Your PhoneBook
1. Press Xor Yto move
the cursor to I
(PhoneBook). The
icon blinks when it is
selected.
2. Press Z. Your pager
displays the message
preview screen.
CNIRIDBook Page 23 Friday, September 4, 1998 9:31
01:Chen, Li Mei pho
3 D 9 =
Message Preview
Receive PhoneBook
Yes
No
Receive Option
3. Press Xor Yto move
the cursor to
(Receive PhoneBook).
The icon blinks when it
is selected.
4. Press Z. Your pager
displays the receive
option screen.
=
5. Press Xor Y to move
to one of the options
presented (Yes, No).
6. Press Z to accept the
selected option or
to return to
press
the main menu.
[
Note: Place the pager on the table or desk
(display side up) with the IR port facing the
IR serial adapter that is connected to the
PC. Leave a distance of about one foot
between the pager’s IR port and the IR
serial adapter.
If Yes is selected, the pager
displays an animation of
the transmission (top). If
the transmission fails, the
pager indicates a failed
transmission (center). If
the transmission is
successful, the pager
confirms (bottom).
If No is selected, your pager
returns to the message
preview screen.
Your PhoneBook 23
ALARMS
02:Fernandez,Jose pa
CNIRIDBook Page 24 Friday, September 4, 1998 9:31
More Features
Your Satellite Series 9501 pager may be equipped
with additional features.
ALARMS
Automatic Alert Reset
Pager alerts can last up to 12 seconds (depending
on the alert selected). The pager alert stops
automatically, even if you do not press any of the
pager’s buttons.
Automatic Message Deletion
Your pager displays MEMORY FULL on the message
preview screen when there is no more memory
available for message storage. When your
Personal and/or Information Services folder is full,
your pager automatically deletes the oldest
message to make room for a new message being
received. Your pager does not delete messages that
reside in your message folder, or messages that you
are currently viewing.
Errored Message Indicator
If you have an errored message, your pager alerts
you and displays the errored message that has been
constructed.
Your pager displays
errored characters in
03:Custumeu Needs
MISSED MESSAGE 2
reverse-video on the read 02:
01:Hi there
)
message screen and
displays empty boxes on
the message preview
Message Preview
screen.
3D9>8
Looking forward
to your atrival!
Made dinner plans.
4
3 9 > 8 *
16:48 23/09/98
Read Message
24 More Features
)
CNIRIDBook Page 25 Friday, September 4, 1998 9:31
If part of a message is
received, your pager
displays a missed
message segment
indicator at the point
where part of the
message is missing.
Looking <...>
to your arrival!
Made dinner plans.
4
3 9 > 8 *
)
16:48 23/09/98
Read Message
Missed Message Indicator
Each message transmitto your arrival!
ted by the Iridium system
Made dinner plans.)
is numbered sequentially.
[3]
4 16:48 23/09/98
If set by your service pro3 9 > 8 *
vider, your 9501 pager
displays the system sequence number at the end of
each received message.
\
If you receive a message
03:Customer Needs
that is out of sequential
MISSED MESSAGE 2
01:Hi there
)
order, your pager
indicates the missed
message(s) in the
Message Preview
message preview screen.
Missed messages can be retrieved from the Iridium
system by referencing the indicated sequence
number(s).
Note: Consult with your service provider for the
best way to retrieve missed messages.
3D9>8
Truncated Message Indicator
If the end of a message is
not received, ] appears
at the end of the text that
was received.
Looking forward
to your arrival!
Made
]
4
3 9 > 8 *
)
9:00 23/09/98
More Features 25
QUIET TIME
Missed Message Segment
CNIRIDBook Page 26 Friday, September 4, 1998 9:31
Satellite Features
Your 9501 pager includes features designed
specifically to enhance the pager’s operation on the
Iridium satellite communication system.
Note: The availability of the satellite features
described herein may vary, depending on
the region of the world that you are located
in and the type of service provided.
Checking Satellite Strength (Instant)
It is possible that you may have difficulty receiving
messages in the interior of large urban buildings.
When you arrive in an unfamiliar office, hotel room,
or meeting room, you may want to check the pager’s
ability to receive messages in that location. To
determine the likelihood of receiving messages in a
given environment, perform the following steps:
1. Position the pager correctly (refer to “Wearing
Your Pager” on page 5).
2. Press and hold [for 2 seconds. The LED
blinks yellow while the pager is looking for the
nearest satellite. To cancel the test, press any
button.
3. It can take up to 26 seconds to locate the
nearest satellite. Upon completion, your pager
alerts with a single chirp. The LED will be either
green (in range) or red (out of range). If you
press any button during the test, the test will be
canceled.
26 Satellite Features
CNIRIDBook Page 27 Friday, September 4, 1998 9:31
4. When complete, remove the pager from the
holster to view the display.
Note: If your signal strength indicator shows you
are out-of-range (antenna with no strength
bars), or weak (antenna with 1 or 2 strength
bars), move to an outer part of the building
or room with a window, where you may
obtain better reception results.
In Range Check
6C
32142
In Range
In Range Check
6
Out of Range
Satellite Strength Indicator (Average)
A satellite signal strength indicator is displayed on
the settings screen. This will give you an accurate
indication of received signal strength when you have
been in one location for more than 15 minutes with
the pager correctly oriented (in holster with display
side facing in). This measurement is an average
compiled over 15 minutes and is updated
approximately every three minutes.
Return
32&45.,1
6C
O
In Range
Return
32&45.,1
6
O
Out of Range
If your signal strength indicator shows you are
out-of-range (no strength bars), or weak (1 or 2
strength bars), move to an outer part of the building
or room with a window, where you may obtain better
reception results. Use the “instant” satellite strength
indicator feature to verify improved performance.
Satellite Features 27
CNIRIDBook Page 28 Friday, September 4, 1998 9:31
Registration Reminder
If you have traveled a considerable distance, you
may have to re-register your message delivery
areas in order to receive messages in your new
location. Your 9501 pager may remind you to check
your current registration while you are travelling by
alerting and displaying the message, Register
MDA.
Note: This message does not indicate you are
outside your registered coverage area, but
serves as a reminder to check your
registration when you are travelling.
Battery Information
Your Satellite Series 9501 pager operates with one
AA-size alkaline battery.
Battery Gauge
A battery gauge appears on the settings menu
screen to indicate the current energy level of your
pager’s battery. When the battery is empty, an empty
battery gauge is displayed on the main menu.
Battery gauge indicators are as follows:
O
N
M
L
28 Battery Information
Battery Full
Battery 2/3 Full
Battery 1/3 Full
Battery Empty
CNIRIDBook Page 29 Friday, September 4, 1998 9:31
Replacing the Battery
Your 9501 pager will retain all stored information for
up to 5 minutes with the battery removed.
1. Turn the pager off and place the pager with the
display side facing upward.
2. Slide the battery door latch to the left to unlock
it.
3. Slide the battery door down, then lift up.
4. Lift the battery out of the battery compartment,
noting the positive (+) and negative (-) markings
on both the battery and the pager housing.
5. Insert a new battery. Make sure you match the
positive and negative markings on the battery
with those on the pager housing.
Note: Installing the battery incorrectly could result
in resetting the alert mode and time to their
default settings, and all messages could be
deleted.
Battery Replacement
6. If you have removed the battery door, complete
steps 7 and 8. Otherwise, go to step 8.
Battery Information 29
CNIRIDBook Page 30 Friday, September 4, 1998 9:31
7. Insert the left pin of battery door into the battery
compartment insert, then maneuver the right
pin into the compartment insert.
Right Pin
Compartment
Insert
Battery Door Replacement
8. Drop the battery door down, align the grooves on
the door with the grooves on the pager housing,
slide the battery door up to the closed position and
slide the battery door latch to the right to lock it.
Upon replacement of the battery, your pager
starts the power-up process.
30 Battery Information
CNIRIDBook Page 31 Friday, September 4, 1998 9:31
Care and Maintenance
The 9501 pager is durable, reliable, and can provide
years of dependable service; however, it is a
precision electronic product. Water and moisture,
excessive heat, and extreme shock may damage
the pager components and impair the fine optical
quality of the display. Do not expose your pager to
these conditions.
If repair is required, the Motorola Service
Organization, staffed with specially trained
technicians, offers repair and maintenance facilities
throughout the world. Contact your service provider
or Iridium Global Customer Care for the location of
the nearest service facility.
Cleaning Your Pager
To clean smudges and grime from the exterior of
your pager, use a soft non-abrasive cloth moistened
in a mild soap and water solution. Use a second
cloth moistened in clean water to wipe the surface
clean. Do not immerse in water. Do not use alcohol
or other cleaning solutions.
Functionality and Use of Your Pager
For questions pertaining to the functions and use of
your Motorola pager, please visit our web site at
www.motorola.com. For questions pertaining to
your paging service, contact your Iridium Service
Provider.
Patent Information
This product is manufactured under one or more
Motorola U.S. patents. A partial listing of these
patents is provided on the inside surface of the
battery door. Other patents covering this product
are pending.
Care and Maintenance 31
CNIRIDBook Page 32 Friday, September 4, 1998 9:31
Warranty Information
MOTOROLA LIMITED WARRANTY FOR SATELLITE
PAGERS FOR THE IRIDIUM SYSTEM
I.WARRANTY STATEMENT
Motorola warrants the pager against defects in material
and workmanship under normal use and service for the
period of time specified below. This express warranty is
extended by Motorola, 1500 Gateway Blvd., Boynton
Beach, Florida USA 33426 to the original end user
purchaser only and is not assignable or transferable to any
other party.
II.GENERAL PROVISIONS
This warranty sets forth the full extent of Motorola’s
responsibilities regarding the Product. Repair,
replacement, or refund of the purchase price, at Motorola’s
option, is the exclusive remedy. THIS WARRANTY IS
GIVEN IN LIEU OF ALL OTHER WARRANTIES,
EXPRESS OR IMPLIED, INCLUDING WITHOUT
LIMITATION, IMPLIED WARRANTIES OF
MERCHANTABILITY AND FITNESS FOR A
PARTICULAR PURPOSE. IN NO EVENT SHALL
MOTOROLA BE LIABLE FOR DAMAGES IN EXCESS OF
THE PURCHASE PRICE OF THE MOTOROLA
PRODUCT, FOR ANY LOSS OF USE, LOSS OF TIME,
INCONVENIENCE, COMMERCIAL LOSS, LOST
PROFITS OR SAVINGS OR OTHER INCIDENTAL,
SPECIAL OR CONSEQUENTIAL DAMAGES ARISING
OUT OF THE USE OR INABILITY TO USE SUCH
PRODUCT, TO THE FULL EXTENT SUCH MAY BE
DISCLAIMED BY LAW.
III.ONE (1) YEAR STANDARD LIMITED WARRANTY
INFORMATION
Motorola pagers are shipped from the factory with a
standard limited warranty of one (1) year on parts and
labor from date of purchase by the original end user
purchaser, based on proof of purchase. In the event of a
defect, malfunction, or failure to conform to specifications
during the warranty period, Motorola, at its option, will
either repair, replace or refund the purchase price of the
pager.
32 Warranty Information
CNIRIDBook Page 33 Friday, September 4, 1998 9:31
MOTOROLA LIMITED WARRANTY FOR SATELLITE
PAGERS FOR THE IRIDIUM SYSTEM (continued)
Repair, at Motorola's option, may include the replacement
of parts or boards with functionally equivalent
reconditioned or new parts or boards. Replaced parts and
boards are warranted for the balance of the original
warranty period. All parts and boards removed in the
replacement process shall become the property of
Motorola. This warranty does not cover defects,
malfunctions, performance failures or damages to the unit
resulting from use in other than its normal and customary
manner, misuse, accident or neglect, the use of nonconforming parts, or improper alterations or repairs. This
warranty does not cover wear and tear on covers or
housings, nor the coverage or range over which the pager
will receive signals.
IV.HOW TO RECEIVE WARRANTY SERVICE
For information on how to receive service on Motorola
pagers, contact your service provider or the IRIDIUM
Global Customer Care Center. In U.S. call 1-800-5489954. RETAIN THE ORIGINAL DATED SALES RECEIPT.
Send a copy of your Proof of Purchase along with the
pager.
V.VOIDING OF WARRANTY
Pager warranty will be VOID if any of the following
conditions occur:
• Pagers that are incomplete such as ones in which the
boards or components are missing and/or incompatible.
• Pagers whose serial numbers do not match on the
boards, or pagers in which the board serial numbers don’t
match the housing serial number.
• Pagers that have been opened by or had work performed
by anyone other than a Motorola authorized pager service
center.
• Pagers received with non-conforming or non-Motorola
housings or parts.
Flat rate repair fees apply to pagers and accessories not
covered under warranty.
Warranty Information 33
CNIRIDBook Page 34 Friday, September 4, 1998 9:31
MOTOROLA LIMITED WARRANTY FOR SATELLITE
PAGERS FOR THE IRIDIUM SYSTEM (continued)
VI. STATE AND LOCAL LAW RIGHTS
SOME STATES AND OTHER LEGAL JURISDICTIONS
DO NOT ALLOW THE EXCLUSION OR LIMITATION OF
INCIDENTAL OR CONSEQUENTIAL DAMAGES, OR
LIMITATION ON HOW LONG AN IMPLIED WARRANTY
LASTS, THEREFORE THE ABOVE LIMITATIONS OR
EXCLUSIONS MAY N OT APPLY. This warranty gives you
specific legal rights and you may also have other rights
which may vary according to local law.
Motorola Inc., reserves the right to add, change, or delete
any or all of the features described herein.
t, Motorola, the SATELLITE SERIES logo,
and OPTIMAX are trademarks or
registered trademarks
of Motorola, Inc.
Iridium, the Iridium logo, and WorldPage
are trademarks or registered trademarks
and/or service marks of Iridium IP LLC.
© 1998 by Motorola, Inc.
All Rights Reserved.
Paging Products Group
1500 Gateway Blvd.,
Boynton Beach, FL 33426-8292
Printed in U.S.A. 8/98
34 Warranty Information
CNIRIDBook Page 35 Friday, September 4, 1998 9:31
Federal Communications Commission (FCC) Compliance
This device complies with part 15 of the FCC Rules. Operation
is subject to the following two conditions: (1) This device may
not cause harmful interference, and (2) this device must accept
any interference received, including interference that may
cause undesired operation.
Note: This equipment has been tested and found to comply
with the limits for a Class B digital device, pursuant to part 15 of
the FCC Rules. These limits are designed to provide reasonable
protection against harmful interference in a residential
installation. This equipment generates, uses and can radiate
radio frequency energy and, if not installed and used in
accordance with the instructions, may cause harmful
interference to radio communications. However, there is no
guarantee that interference will not occur in a particular
installation. If this equipment does cause harmful interference
to radio or television reception, which can be determined by
turning the equipment off and on, the user is encouraged to try
to correct the interference by one or more of the following
measures:
• Reorient or relocate the receiving antenna.
• Increase the separation between the equipment and
receiver.
• Connect the equipment into an outlet on a circuit different
from that to which the receiver is connected.
• Consult the dealer or an experienced radio/TV technician
for help.
CNIRIDBook Page 1 Friday, September 4, 1998 9:31
Reading Messages
When you receive a new message,
use the 9501’s One-Button feature to
read the entire message by
repeatedly pressing Z.
Setting the Pager Alarm
1.From the main menu, press X or Y
to move to H(settings).
2.Press Z and use X or Yto move to
(set alarm).
3.Press Zto enter “Settings” mode.
4.Press W or V to choose either
“Enabled Daily”, “Enabled Onetime”, or “Disabled”.
5.Press Xor Yto move to the hour
digit and press W or V to set
the hour you want for the alarm.
6.Press Xor Yto move to each entry
selection (minute, AM/PM, day,
month, year) and press W or V
to set each field.
7.Press Zto save your settings.
.
t, Motorola are registered trademarks of Motorola, Inc.
© 1998 by Motorola, Inc. All Rights Reserved
Satellite Series 9501 Pager
Quick Reference Card
Main Menu Icons
G
?
F
J
E
I
H
1
R
T
S
4
5
Message Envelope
Message Envelope (5 unread)
Information Folder
Information Folder (unread)
Personal Folder
PhoneBook
Time Alert Settings
Power On/Off
Quiet Time Enabled
Audible Alert Enabled
Alarm Enabled
Home Time
Travel Time
Control Buttons
XY
Z
WV
[
Move Left/Right
Select
Move Up/Down
Escape
CNIRIDBook Page 2 Friday, September 4, 1998 9:31
Pager Icons
/ Alarm Enabled
0 Alarm Disabled
, Quiet Time
- Quiet Time Disabled
D View Message
3 Return to Previous Screen
> Add to Folder
8 Add to PhoneBook
= Receive PhoneBook
O Battery Full Indicator
N Battery 2/3 Full Indicator
M Battery 1/3 Full Indicator
L Battery Low Indicator
6C Signal Strength Strong
6B Signal Strength Moderate
6A Signal Strength Low
6 No Signal, Out of Range
2 Set to Vibrate
& Set Audible Alerts
. Set Alarm
% Set Alert to Silent
* View Next Message
9 Delete Message
\ Message Read
() Scroll Up and Down
] Truncated Message
Wearing Your Pager
Your 9501 pager comes with a multifunctional holster that orients the
pager for the best possible
performance. It is recommended
that you place the pager in the
holster (display side facing in) and
wear it on your belt. The holster can
also be used effectively off the body
as a stand for your pager. To ensure
optimum reception, extend the belt
clip, stand it up on a desk or table,
and point it toward the nearest
window.
Note: Improper positioning of the
9501 pager will impair message
reception.
Checking Satellite Strength
Note: Availability of the satellite
feature described herein may vary,
depending on the region of the world
that you are in and the type of
service provided.
It is possible that you may have
difficulty receiving messages in the
interior of large urban buildings.
When you arrive in an unfamiliar
office, hotel room, or meeting room,
you may want to check the pager’s
ability to receive messages in that
location.To determine the likelihood
of receiving messages in a given
environment, perform the following
steps:
1.Position the pager correctly.
2.Press and hold [for 2 seconds.
The LED blinks yellow while the
pager is looking for the nearest
satellite.
3.It can take up to 26 seconds to
locate the nearest satellite. Upon
completion your pager alerts with a
single chirp. The LED will be either
green (in range), or red (out of
range). If you press any button
during the test, the test will be
cancelled.
4.When complete, remove the pager
from the holster to view the display.
5.If your signal strength indicator
shows you are out-of-range
(antenna with no strength bars), or
weak (antenna with 1 or 2 strength
bars), move to an outer part of the
building or room with a window,
where you may obtain better
reception results.