1
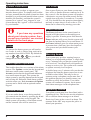
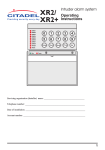
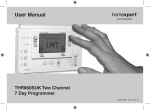
Intruder alarm system
Operating Instructions
ZONE
1
0
2
3
1
4
5
2
6
7
3
8
1 2 3 4 5 6 7 8
4
Power
PA
5
6
7
8
9
CHIME
OMIT
RESET
PROG
SET
ZONES
Attack
0
1
2
3
4
5
6
7
8
9
Chime
Omit
Reset
Prog
Set
PA
Tamper
Day
TA
PA
Day Power
Accenta G3 mini
Servicing organisation details
Servicing organisation (Installer) name: ____________________________________
Telephone number: _____________________________________________________
Date of installation: _____________________________________________________
r Ne
ke em w
yp ote
ad
Account number: _______________________________________________________
1
Operating instructions
System installation
Fire Zones
This booklet tells you how to operate your
intruder alarm system. To simplify this booklet
we have assumed that the alarm system has been
installed by a professional intruder alarm system
installer (the installer), and that the system is
operated in a “typical” way. Aspects of your
system that are not “typical” will be described
by your installer.
One or more Zones on your alarm system may
have a Fire or Smoke detector connected to it. In
the event of a fire the alarm system will produce
a distinctive two-tone fire alarm sound, and the
outside siren will pulse 2 seconds on, 2 seconds
off. You should leave the premises immediately,
and only re-enter when it is safe to do so. The
alarm can be silenced by entering your code.
"
If you have any questions
about your intruder system, then
consult your installer, see contact
details on the front page.
Codes
To operate the alarm system you will need to
use a code. A code is 4 digits long, and can be
any number from 0000 to 9999. By default the
1
2
3 but you should
code is 0
change this as soon as possible.
Alarm System Operation
This booklet describes two versions of the alarm
system. The Optima version has the keypad and
indicators on the main control panel. The
Accenta version has the keypad and indicators
on a small remote keypad. You operate the
alarm system by pressing buttons on the keypad
and viewing the indicators. Both alarm systems
work the same way. Both Accenta and Optima
systems can be fitted with an optional remote
keypad.
Personal Attack
If you are under threat, or are being attacked,
you can activate the alarm by pressing the 4 and
9 keys at the same time on any keypad. The
alarm system will produce a loud alarm sound,
and the external siren will be turned on.
2
Power Indicator
The Power indicator on the control panel or
keypad will light whenever the mains power
supply is present. If mains power fails then the
Power indicator will go out, but the system will
run from its backup battery for several hours. If
the Power indicator goes out when mains power
is present then a fault may have developed on
your system and you should contact your
installer.
Warning beeps
Your system may produce warning beeps to
inform you of a potential problem. A single beep
every 5 minutes tells you that the system needs
to be serviced. You should call your installer to
arrange a service visit. The system will continue
to operate correctly in all respects.
A double beep every 5 minutes tells you that the
telephone line that the alarm system uses is not
available or has failed. This may be due to
someone using a telephone on the same line. If
this problem persists you should contact your
installer to rectify the problem. Your alarm
system will continue to operate, but it cannot
send alarm messages via the telephone line.
Signalling Device
Your alarm system may have been fitted with a
signalling device. This device uses the telephone
line to send an alarm message to an Alarm
Receiving Centre in the event of an alarm. The
operator at the ARC may request the police to
attend your premises.
Accenta/Optima G3 intruder system
How to set the system
When you leave your premises you will need to set (or turn on) the intruder alarm system.
1.
Before setting the system you should ensure that
the premises have been completely vacated and
that all doors and windows are closed. Ensure
that pets do not have access to the protected areas
as they can cause a false alarm.
1 2 3 4 5 6 7 8
Power
ZONES
Attack
Tamper
Panel
Day
ZONE
1
2
3
4
5
Remote Keypad
6
7
8
TA
PA
Day Power
The green Day indicator should be lit.
2.
3.
1
2
3 and check
Enter your code 0
that the system is clear (none of the zone
indicators are lit).
The system will now produce an exit beep tone.
You should leave the premises by the exit route
recommended by your installer. The system will
set when the exit beep tone stops.
The Day indicator will go out. You should wait
until you hear that the exit beep has stopped
before assuming that the system has set.
Exit beeps
1 2 3 4 5 6 7 8
Power
ZONES
Attack
Tamper
Panel
Day
ZONE
1
2
3
4
Remote Keypad
5
6
7
8
TA
PA
Day Power
3
Operating instructions
How to Unset the system
When you enter your premises you will need to unset (or turn off) the system.
1.
Enter your premises by the route recommended
by your installer. The system will produce an
entry beep tone.
Entry beeps
1 2 3 4 5 6 7 8
Power
ZONES
Attack
Tamper
Panel
Day
ZONE
1
2
3
5
4
Remote Keypad
2.
6
7
8
TA
PA
Day Power
Acknowledgement
beep
1
2
3 , and the
Key in your code 0
entry tone will stop. The green Day indicator
will light.
1 2 3 4 5 6 7 8
ZONES
Power
Attack
Tamper
Panel
If any Zone, TA (Tamper) or PA (Attack)
indicator lights up then an alarm has occurred,
and an intrusion may have taken place. Seek
assistance before investigating further as
intruders may still be on the premises. Then
reset the system (refer to page 7).
Note that when you enter your premises you
will have a short period of time, usually
30 seconds, to key in your code. If you fail to do
this the system will go into alarm. Key in your
code to stop the alarm.
4
Day
ZONE
1
2
3
4
Remote Keypad
5
6
7
8
TA
PA
Day Power
Accenta/Optima G3 intruder system
How to part set the system
If your installer has programmed your system for part set operation you will be able to set some
zones of the system while others remain unset. Part set operation is often used at night time, and it
will permit you to freely walk around the bedrooms while the living area and outside doors are
protected. Your system may have 2 part-set programs called Program 2 and Program 3.
1.
Before part-setting the system you should ensure that
all doors and windows are closed. Ensure that pets do
not have access to the protected areas. Your installer
may have instructed you to use a different keypad to
the one normally used to set the system.
1 2 3 4 5 6 7 8
Power
ZONES
Attack
Tamper
Panel
Day
ZONE
1
2
3
4
5
Remote Keypad
6
7
8
TA
PA
Day Power
The green Day indicator should be lit.
2.
3.
Enter your code 0
will start.
1
2
Exit beeps
3 . The Exit beep
Exit beeps
Prog
Press the
key. The exit tone will stop and Zone
indicators 1 to 3 will light.
1 2 3 4 5 6 7 8
Power
ZONES
Attack
Tamper
Panel
Day
ZONE
1
2
3
4
5
Remote Keypad
4.
Or
3 to select part-set program 2 or 3.
Press 2
You must now leave the protected zones. The system
will set after a short time.
6
7
8
TA
PA
Day Power
Exit beeps
Note: There will be no exit beeps if
silent set exit mode was
programmed.
1 2 3 4 5 6 7 8
Power
ZONES
Attack
Tamper
Panel
Day
ZONE
1
2
3
4
Remote Keypad
5
6
7
8
TA
PA
Day Power
5
Operating instructions
How to silence an alarm
If your system goes into alarm then be aware that intruders may be in the premises. Seek assistance
before investigating the cause of the alarm.
1.
Enter your code 0
1
2
3 .
External siren
1 2 3 4 5 6 7 8
The alarm will stop, and the Zone, TA (Tamper)
or PA (Attack) indicators will light to show the
cause of the alarm. When 2 or more indicators
are lit, the flashing indicator shows the first
alarm, and the steady indicators show the second
and subsequent alarms.
3.
You may need to cancel Police response. Your
installer will provide details of how to do this.
You will now need to reset the system, as
described in the following section.
6
Power
ZONES
Attack
Tamper
Panel
Day
ZONE
1
2
3
4
Remote Keypad
5
6
7
8
TA
PA
Day Power
Accenta/Optima G3 intruder system
How To Reset After An Alarm
After any alarm you will need to reset your system so that it can be used normally. Your installer
may have programmed the system to be reset by you, the installer, or by Anti-code.
1.
Strobe Off
Reset
Press the
key.
If the Zone, TA (Tamper) or PA (Attack)
indicators all go out and the Day indicator
lights then the system has been reset.
1 2 3 4 5 6 7 8
Power
ZONES
Attack
Tamper
Panel
Day
ZONE
1
If any of the indicators continue to flash then
the system has been programmed to be reset by
the installer. In this case you must call the
installer to reset the system.
2
3
4
Remote Keypad
5
6
7
8
TA
PA
Day Power
If all indicators light steady (not flashing), and
the keypad stops working, then the system has
entered a fault-lockout. You must call the
installer rectify this fault.
Anti code reset
The installer may instruct you to reset the system by an Anti-code.
1.
Reset
Press
. The system will now display a
sequence of 4 numbers by using the Zone
indicators. Each number will be displayed for a
few seconds, the system will beep, and display
the next number. You can repeat this sequence
by pressing Reset again. Write down the
4 digit number and quote it to the installer
2.
The installer will tell you a 6 digit anti-code.
Call your installer for the anti-code.
3.
Key in the 6 digit code to reset the system.
7
Operating instructions
How to Omit zones
If you cannot set the alarm system because a detector is faulty and in constant alarm you may need
to omit its zone from the alarm system. A zone which has been omitted cannot cause an alarm.
1.
2.
Key in your code to start the exit procedure.
For more information see How to set the
system or How to set program 2 or 3.
Exit beeps
Exit beeps
Omit
Press
and the exit beep tone will stop, and
the indicators will display all zones being used.
3.
Press the zone numbers to be omitted n , these
indicators will now flash. If a flat reject tone is
produce then the zone cannot be omitted.
1 2 3 4 5 6 7 8
Power
ZONES
Attack
Tamper
Panel
Day
ZONE
1
2
3
4
5
Remote Keypad
4.
When you have finished press
system.
Set
6
7
8
TA
PA
Day Power
Exit beeps
to set the
10 seconds
insistent beeps
How to Quick Set the system
When you set the system you will usually have about 30 seconds to exit the premises. This also
means that you need to wait 30 seconds for the system to set. You can reduce this time to just
5 seconds by carrying out a second 'set' a Quick Set.
1.
2.
Key in your code to start the exit procedure.
The exit beep tone will start.
For more information see How to set the
system, or How to set program 2 or 3.
Set
Press
to Quick set the system and the exit
beep tone will change to a faster, insistent, tone.
The system will set in 5 seconds, and the exit
tone will stop.
8
Exit beeps
5 seconds
insistent beeps
Accenta/Optima G3 intruder system
How to set up Chime Zone
Chime is a low security facility for use when the system is unset. It is particularly useful in a shop
to warn of customers presence, or in a house to warn when a back door has been opened. When a
Chime zone detects movement the system will produce a brief two–tone sound, and the Zone
indicator will light.
To set any Zone to Chime:
1.
The green Day indicator should be lit.
1 2 3 4 5 6 7 8
Power
ZONES
Attack
Chime
2.
Press the
button, and the system will
produce a brief chime tone, the Day indicator
will flash, and the Zone indicators will light to
show those Zones that are already set-up for
Chime (possibly none).
Momentarily press the number of the zone to
toggle it in and out of chime.
Tamper
Panel
Day
ZONE
1
2
3
4
5
Remote Keypad
6
7
8
TA
PA
Day Power
1 2 3 4 5 6 7 8
Power
ZONES
Attack
Tamper
Panel
For this example we have Zone 1 in chime and
we want to de-select Zone 1 chime and select
Zones 2 and 3 to chime.
Press 1 2 3 .
3.
When you have finished using the Chime mode
press
Reset
Day
ZONE
1
2
3
4
5
Remote Keypad
6
7
8
TA
PA
Day Power
1 2 3 4 5 6 7 8
Power
ZONES
.
Attack
Tamper
Panel
Day
ZONE
1
2
3
4
Remote Keypad
5
6
7
8
TA
PA
Day Power
9
Operating instructions
How to change your User code
You should change your main code regularly to prevent potential intruders from knowing your
1
2
3 but this may
code. All codes are 4 digits long. The factory set main code is 0
have been changed.
1.
Prog
Press
0
1
1 2 3 4 5 6 7 8
and now enter your code
2
3 . The TA (Tamper) indicator
will light and the Day indicator will go out to
indicate that you are in Programming mode.
ZONES
Attack
Tamper
Day
Panel
ZONE
1
3
2
4
5
Remote Keypad
2.
Power
Press 8 to select user code reprogram. The
Attack and Zone indicators 1 to 4 will be lit to
prompt you to enter a new code.
6
7
8
TA
PA
Day Power
1 2 3 4 5 6 7 8
Power
ZONES
Attack
Tamper
Day
Panel
ZONE
1
2
3
4
5
Remote Keypad
3.
4.
Key in your new code n n n n .
If the code is accepted the system will produce a
series of rapid beeps.
6
7
8
TA
PA
Day Power
Rising beeps
If the code is rejected, for example if it is already
in use, the system will produce a flat reject tone.
You must go back to step 2.
5.
1 2 3 4 5 6 7 8
Reset
Press
to exit programming mode. The TA
(Tamper) indicator will go out and the Day
indicator will light.
Power
ZONES
Attack
Tamper
Panel
Day
ZONE
1
2
3
4
Remote Keypad
5
6
7
8
TA
PA
Day Power
Example
If your code is 0123 and you wish to change it to 5678 then:
Press
10
Prog
0
1
2
3
8
5
6
7
8
Reset
.
Accenta/Optima G3 intruder system
How to change your second code
Your alarm system can have a second user code. You may find it useful to set-up this second code
for use by a neighbour for use when you are on holiday. The second user code operates like your
user code, but it cannot be used to change or delete your code.
1.
Prog
Press
0
1
1 2 3 4 5 6 7 8
and enter your code
2
3 . The TA (Tamper) indicator
will light and the Day indicator will go out to
indicate that you are in Programming mode.
ZONES
Attack
Tamper
Day
Panel
ZONE
1
3
2
4
5
Remote Keypad
2.
Power
Press 7 to select second code reprogram. The
Attack and Zone indicators 1 to 4 will be lit to
prompt you to enter a new 4 digit user code.
6
7
8
TA
PA
Day Power
1 2 3 4 5 6 7 8
Power
ZONES
Attack
Tamper
Day
Panel
ZONE
1
2
3
4
5
Remote Keypad
3.
4.
Key in the new second code n n n n .
If the code is accepted the system will produce a
series of rapid beeps.
6
7
8
TA
PA
Day Power
Rising beeps
If the code is rejected, for example if it is already
in use, the system will produce a flat reject tone.
You must go back to step 2.
5.
1 2 3 4 5 6 7 8
Reset
Press
to exit program mode. The TA
(Tamper) indicator will go out and the Day
indicator will light.
Power
ZONES
Attack
Tamper
Panel
Day
ZONE
1
2
3
4
Remote Keypad
5
6
7
8
TA
PA
Day Power
Example
If your second code is 1234 and you wish to change the code to 7890, then:
Press
Prog
1
2
3
4
7
7
8
9
0
Reset
.
How to delete your second code
You can delete the second code to prevent it from being used.
1. Follow steps 1 and 2 of How to change your second code and press
2. Follow steps 5 of How to change your second code.
Omit
.
11
Operating instructions
How to change the Duress code
Your alarm system can have a duress code. The Duress code is used in a hold-up situation where
there is pressure to set or unset the system. The Duress code operates like your normal code but in
addition it will silently send a signal to the Alarm Receiving Centre who will inform the Police. The
duress code can only be changed by the main user. Note the Duress code facility is not applicable to
Optima compact G3 system.
1.
Prog
Press
0
1
1 2 3 4 5 6 7 8
and enter your code
2
3 . The TA (Tamper)
Attack
Tamper
Day
Panel
indicator will light and the Day indicator will go
out to indicate that you are in Programming
mode.
2.
Power
ZONES
ZONE
1
3
2
5
4
Remote Keypad
Press 9 to select Duress code programming.
The Zone indicators 1 to 4 will light to prompt
you for a new code.
6
7
8
TA
PA
Day Power
1 2 3 4 5 6 7 8
Power
ZONES
Attack
Tamper
Day
Panel
ZONE
1
3
2
5
4
Remote Keypad
3.
Now enter your new duress code
n n n n .
4.
If the code is accepted the system will produce a
series of rapid beeps.
6
7
8
TA
PA
Day Power
Rising beeps
If the code is rejected, for example if it is already
in use, the system will produce a flat reject tone.
You must go back to step 2.
5.
1 2 3 4 5 6 7 8
Reset
Press
to exit programming mode. The TA
(Tamper) indicator will go out and the Day
indicator will light.
Power
ZONES
Attack
Tamper
Panel
Day
ZONE
1
3
2
5
4
Remote Keypad
6
7
8
TA
PA
Day Power
Example
If you need to change the duress code to 6543, then:
Press
12
Prog
0
1
2
3
9
6
5
4
3
Reset
.
Accenta/Optima G3 intruder system
How to view the event log
The event log keeps a memory of the last 8 alarm events.
1.
Prog
1
2
3 .
Press
and enter your code 0
The TA (Tamper) indicator will light and the Day
indicator will go out to indicate that you are in
Programming mode.
1 2 3 4 5 6 7 8
ZONES
Attack
Tamper
Day
Panel
ZONE
1
2
3
4
5
Remote Keypad
2.
7
8
TA
PA
Day Power
Power
ZONES
Attack
Tamper
Panel
Day
ZONE
1
2
3
4
5
Remote Keypad
4.
6
1 2 3 4 5 6 7 8
Chime
Chime
Press
. The system will display 8 alarm events
in sequence, with the last (most recent) alarm first.
When 2 or more indicators are lit, the flashing
indicator shows the first alarm, and the steady
indicators show the second and subsequent alarms.
3.
Power
6
7
8
TA
PA
Day Power
The example here shows an event where Zone 3 was
the first zone in alarm followed by Zones 1 and 2.
All 8 alarm events will be displayed in sequence,
with a 5 seconds delay between each event. You can
cause the display to pause by pressing Chime. You
can also display a specific event by pressing its event
number, 1 to 8 .
Reset
Reset
Press
to exit the event log and press
again
to exit program mode. The TA (Tamper) indicator
will go out and the Day indicator will light.
1 2 3 4 5 6 7 8
Power
ZONES
Attack
Tamper
Panel
Day
ZONE
1
2
3
4
Remote Keypad
5
6
7
8
TA
PA
Day Power
13
Operating instructions
How to test your alarm system
You should check that your alarm system still works correctly by periodically carrying out the
alarm system tests described here.
How to test the Strobe, External Siren and Internal Sounders
1.
Prog
Press
0
1
1 2 3 4 5 6 7 8
and enter your 4 digit user code
2
3 . The TA (Tamper)
indicator will light and the Day indicator will
go out to indicate that you are in Programming
mode.
2.
Press 0 to select alarm test mode. The
Attack indicator lights to indicate that you are
in alarm test mode.
Power
ZONES
Attack
Tamper
Day
Panel
ZONE
1
2
3
4
5
Remote Keypad
6
7
8
TA
PA
Day Power
1 2 3 4 5 6 7 8
Power
ZONES
Attack
Tamper
Panel
Day
ZONE
1
2
3
4
Remote Keypad
3.
5
6
7
8
TA
PA
Day Power
Strobe test
Press 2 to test the strobe light. This is
normally mounted on the external siren. It
should produce a bright flash at a rate of 1
flash every few seconds. Press 0 to stop
Strobe On
Day
this test.
Siren (Bell) Test
Press 3
External siren
Day
to test the external siren, this should
produce a loud alarm sound. Press 0 to stop
this test.
Sounder Low Volume Test
Internal low volume
sound
Day
Press 4 to test the Low volume sounder.
This should produce a low volume alarm
sound. Press 0 to stop this test.
Sounder High Volume Test
Press 5 to test the High volume sounder.
This should produce a high volume alarm
sound. Press 0 to stop this test.
14
Internal high volume
sound
Day
Accenta/Optima G3 intruder system
Walktest
Press 6 to carry out a walktest. Walk around
your property, and in turn cause each of the
detectors to go into alarm. Also, open and
close all door and windows that are protected
by the system. For each detector (including
door or window sensor) that is activated the
system will produce a series of beeps, and the
associated zone indicator will light.
Press 0 to stop this test.
"
IMPORTANT: Do not test any
“Personal Attack” buttons during the
walktest, since these are still active and
will cause a full alarm.
If any of the alarm tests fail, or you are unsure
of the correct procedure, contact your installer.
4.
Reset
Reset
Press
to exit Alarm test and press
again to exit program mode. The TA
(Tamper) indicator will go out and the Day
indicator will light.
1 2 3 4 5 6 7 8
Power
ZONES
Attack
Tamper
Panel
Day
ZONE
1
2
3
4
Remote Keypad
5
6
7
8
TA
PA
Day Power
15
Operating instructions
External siren Time:_____________________________
Siren delay______________________________
Area
protected
Zone name
Program
1
Program
2
Program
3
Zone 1
Zone 2
Zone 3
Zone 4
Zone 5
Zone 6
Zone 7
Zone 8
T = Timed (Entry/Exit - Zone)
TI = Time Inhibited (Access zone to keypad)
I = Immediate (All zones armed to give full alarm)
For Technical Support
: 0906 302 0999
%
This is a premium rate line, calls are
charged at 50 pence per minute
The panels conform to the
requirements of the European
EMC and Low Voltage
directives, and carries the CE
mark.
16
Novar ED&S
The Arnold Centre
Paycocke Road
Basildon
SS14 3EA
4188-727 issue 4_11/03