1
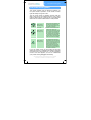
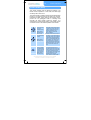
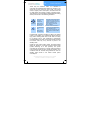
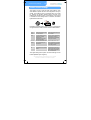
Geotagging Device
With three intelligent
modes of operation including
low-power and freeze mode
Suitable for:
Nikon D200/D2HS/D2X/D2XS
Fuji S5 Pro
1
Contents
Contents
Introducing the GeoPic II ………………………………… 2
Quick start guide ……………………………….………… 3
GeoPic II overview ……………………………….………. 4
GeoPic II basic operation ………………………….…….. 5
Continuous mode (red) ………………………….………. 7
Low power mode (green) ………………………….…….. 8
Freeze mode (blue) ………………………….…...…….. 10
Remote shutter release …………………….…...……. 14
GeoPic II user settings ……………………….…...……. 15
Technical information ……………………….…...……... 18
WARNINGS:
Keep out of reach of children
The product is not suitable for use by children under 14 years of age.
Only connect suitable attachments
The remote shutter release socket on the product is only suitable for remote shutter
releases which are described on page 14 of this booklet. If a non compatible remote
shutter release is used it may damage the product and camera.
Avoid contact with water
The product is not waterproof so avoid getting it wet. If it does get wet then disconnect
the unit from the camera and leave to dry in a warm place for 24 hours.
Do not disassemble
In the event of a faulty device contact Custom Idea Ltd. Touching the internals of the
device could result in injury. If the product breaks open due to an accident then
disconnect it immediately from the camera and contact Custom Idea Ltd.
Unplug immediately in the event of a malfunction
Should you notice the product not functioning correctly, then unplug it immediately and
contact Custom Idea Ltd.
Nikon D200, D2HS, D2X and D2XS and Fuji S5 Pro are registered
trademarks or a trademark of their respective companies.
2
Introducing the GeoPic II
Introducing the GeoPic II
Congratulations on your purchase of the GeoPic II, one
of the world’s most advanced geotagging solutions for
digital SLR cameras!
Geotagging is an exciting new area of photography that
involves attaching geographical location ‘tags’ to your
digital photos. An increasing amount of software is
becoming available to take advantage of these tags, for
example by placing your photos on a geographical map.
Some DSLR cameras, in particular the Nikon D200,
D2HS, D2X, D2XS and Fuji S5 Pro, have the potential
for geotagging built in as standard, and just require a
suitable GPS device to be attached to their 10-pin
accessory socket. However, a problem with many of
these GPS devices is that they reduce your DSLR
battery life, not only due to the GPS device itself taking
power, but also because the DSLR is forced to stay
continuously in its high-power metering state.
Thanks to patent pending low power technology in the
GeoPic II, attaching a GPS device no longer means flat
batteries after just a few hours. Furthermore, the GeoPic
II has a mode of operation that allows photos to be
geotagged whilst out of contact with the satellites. With
a high performance SiRF III chipset and configurable
options and settings, the GeoPic II really does represent
the cutting edge of the DSLR geotagging market.
Not only does all this technology come in a tiny
enclosure but it is also incredibly easy to use. This
handy booklet contains everything you need to know
about your GeoPic II, but if you want to jump right in,
then a quick start guide has been included on page 2.
Nikon D200, D2HS, D2X and D2XS and Fuji S5 Pro are registered
trademarks or a trademark of their respective companies.
Quick start guide
3
Quick start guide
The GeoPic II is powered up or down by pressing and
holding the function button and it starts up in the mode
you last used.
The three modes of operation are called continuous, low
power and freeze mode, and can be changed by half
pressing the shutter release button then pressing the
function button:
OF
F
Each mode has its own colour and operates as follows:
Mode:
Description
Continuous GPS location is continuously sent to the camera if locked to
the satellites. The status light will slowly flash red when
there is no lock and be continuously red if there is.
Low Power
GPS location is sent to the camera if locked to the satellites
AND shutter release button is half pressed. When unlocked
the status light will slowly flash green. When locked the
status light will only occasionally blink green to let you know
it is ready. GPS location will be sent to the camera the
moment the shutter release button is half pressed. Wait
until the beep and the green light is lit to take the picture.
Freeze
GPS location is frozen on demand in an internal buffer.
Press the function button to start a new search and freeze a
new location. Cancel a search by pressing the function
button again. When searching for a new location, the status
light will slowly flash blue. When a location is frozen the
status light will occasionally blink blue to let you know it is
ready. GPS data will be sent to the camera the moment the
shutter release button is half pressed, in the same manner
as the low power mode. Wait until the beep sounds, and
the blue light is lit to take the picture
Nikon D200, D2HS, D2X and D2XS and Fuji S5 Pro are registered
trademarks or a trademark of their respective companies.
4
GeoPic II overview
GeoPic II overview
The GeoPic II is designed to be extremely compact and
very simple to use, so you can spend time on your
photography instead of being confused by a new gadget.
A function button is used
along with your camera
shutter release button to
access all of the GeoPic II
features. A multicoloured
light indicates the current
state of the system. The
GeoPic II simply slots into
the flash mount on your
camera and connection is
achieved through a high
quality 10-pin lead.
The GeoPic II has three modes of operation, which are
explained in detail in later sections:
Mode:
Power: Colour:
Continuous Short
battery
life
Description
Red
GeoPic II continuously sends GPS
location to the camera if locked to the
satellites. Camera never leaves
metering state.
Low Power
Long
battery
life
Green
GeoPic II only sends GPS location to
the camera if locked to the satellites
AND shutter release button is half
pressed. Camera can leave metering
state.
Freeze
Super
long
battery
life†
Blue
GeoPic II freezes the GPS location, on
demand, in an internal buffer and uses
this data to send to the camera. Can
select to send GPS location to camera
when shutter release button is half
pressed, or continuously as required.
†
Super low power if set to send GPS data when shutter release button is half pressed
Nikon D200, D2HS, D2X and D2XS and Fuji S5 Pro are registered
trademarks or a trademark of their respective companies.
GeoPic II basic operation
5
GeoPic II basic operation
Slide the GeoPic II into the hotshoe flash mount on your
camera, and with the camera off, connect the 10-pin
connector to the matching socket on the camera body.
The locking ring can be used to secure the connection.
Press and hold the function button for a second or two
and you will see the GeoPic II spring to life.
There are a number of different ways that the GeoPic II
can be powered up and powered down. When the
GeoPic II powers up, the status light will slowly turn on in
the colour corresponding to the last used mode. When
the GeoPic II powers down, the status light will slowly
turn off in the colour of the currently used mode. The
following table explains the different power up and
power down methods:
Power up method:
Details
Press and hold function
button
Pressing and holding the function button on
top of the unit for approximately 2 seconds will
turn on the GeoPic II. You can disable this
power up method from the settings menu if
required.
Camera entering
metering state
The GeoPic II will turn on if the camera enters
its metering state. This will happen if you turn
on the camera, or if you press the shutter
release button to wake the camera up. You
can disable this power up method from the
settings menu if required.
Power down method:
Details
Press and hold function
button
Pressing and holding the function button for
approximately 2 seconds will turn off the
GeoPic II.
Auto off after inactivity
The GeoPic II will turn off after a certain period
of inactivity from the camera, the default is 5
minutes. If required, you can disable this
power down method from the settings menu,
or change the period of inactivity to between 1
and 10 minutes.
Nikon D200, D2HS, D2X and D2XS and Fuji S5 Pro are registered
trademarks or a trademark of their respective companies.
6
GeoPic II basic operation
You can change between the continuous, low power and
freeze modes of operation by holding the camera’s
shutter release button at the half pressed point then
pressing the GeoPic II function button. Each time you do
this the GeoPic II will change modes, from continuous to
low power to freeze and back to continuous.
OF
F
To make it clear which mode is currently selected, the
status light will always be a red colour in continuous
mode, a green colour in low power mode and a blue
colour in freeze mode. To save you time, the GeoPic II
remembers the mode you last used and when you
power it up will automatically enter that mode.
Nikon D200, D2HS, D2X and D2XS and Fuji S5 Pro are registered
trademarks or a trademark of their respective companies.
Continuous mode (red)
7
Continuous mode (red)
This section explains how the GeoPic II behaves in its
continuous mode of operation. In this mode, the status
light will always be a red colour.
The continuous mode is the most basic mode of
operation. If GPS data is available, the GeoPic II will
continuously update the camera with the current location.
Data is sent regardless of the state of the camera:
Status light:
Function button:
Description
No function
The GeoPic II does not have a
sufficient lock on the satellites, and
is not sending any GPS data to the
camera. The camera’s GPS icon will
not be visible in its display.
(Mode change
with half press)
slow flashing
No function
always on
(Mode change
with half press)
The GeoPic II has locked to three or
more satellites and is continuously
updating the camera with the GPS
location. The camera’s GPS icon
will be visible in its display.
The time that the GeoPic II takes to achieve a good lock
on the satellites will depend on a number of factors.
Typical lock times are given in the technical details at
the end of this manual.
Once the GeoPic II is locked, any pictures taken with
your camera will be geotagged with the current GPS
location.
You will notice that when the GeoPic II is in the
continuous mode and locked, the camera will not leave
its metering state (i.e. where metering information is
shown on the camera LCD). Since the camera uses far
more power in metering state than standby state, the
battery life in continuous mode will be significantly
reduced. This is not the case in the low power mode
which is discussed in the next section.
Nikon D200, D2HS, D2X and D2XS and Fuji S5 Pro are registered
trademarks or a trademark of their respective companies.
8
Low power mode (green)
Low power mode (green)
This section explains how the GeoPic II behaves in its
low power mode of operation. In this mode, the status
light will always be a green colour.
The low power mode of operation ensures that GPS
data is only sent to the camera when the user is getting
ready to take a picture. It does this by only sending GPS
data when the shutter release button is half pressed:
Status light:
Function button:
Description:
No function
The GeoPic II does not have a
sufficient lock on the satellites, and is
not sending any GPS data to the
camera. The camera’s GPS icon will
not be visible in its display.
(Mode change
with half press)
slow flashing
No function
(Mode change
with half press)
occasional
blink
No function
(Mode change
with half press)
always on
The GeoPic II has locked to three or
more satellites and is ready to send
GPS data to the camera. An
occasional green blink shows that the
GeoPic II is ready to send GPS data
when necessary. The moment the
shutter release button is pressed half
way, the GeoPic II will send GPS
data to the camera. The camera GPS
icon will not be visible in its display.
If the GeoPic II is locked and the
shutter release button has been
pressed half way then the status light
will be lit the moment the camera has
been sent enough GPS data to begin
geotagging photos. When this
happens the GeoPic II will emit a
short beep (this can be disabled if
desired) and the camera’s GPS icon
will be visible in its display.
In the low power mode, the short beep and the green
status light turning on indicates that sufficient GPS data
has been sent to the camera for it to start geotagging
photos. Once this happens you can be confident that
your photos will be geotagged successfully.
Nikon D200, D2HS, D2X and D2XS and Fuji S5 Pro are registered
trademarks or a trademark of their respective companies.
Low power mode (green)
9
There will be a fraction of a second delay from the
moment you press the shutter release button half way
until the camera is ready to geotag the photo. Therefore
you must wait until the green light is lit before taking your
photo. A beep coincides with the green light, meaning
that there is no need to take your eye from the camera
viewfinder to know that the camera is ready.
You will notice that in the low power mode, your camera
will happily leave its high power metering state when it
has seen no activity for a period of time. This is the
reason for the significantly increased battery life whilst in
the low power mode, because the camera uses only a
tiny amount of power in its standby state.
Note that the GPS module within the GeoPic II is
constantly on during the low power mode, so the power
consumed by the GeoPic II does not change. Power is
reduced by allowing the camera to enter standby state.
The following figures represent typical photo counts you
can expect in low power mode. Bear in mind that these
numbers will depend on your shooting style and camera
setup:
Mode:
Current consumption:
GeoPic II: ~55mA
Continuous Camera: ~300mA
Total: ~355mA regardless of state.
Low power
No GPS
attached
†
Photos:
315 †
†
GeoPic II: ~55mA
Camera (standby/metering): ~0.1mA/300mA
Total: (standby/metering): ~55.1mA/355mA
970
Camera (standby/metering): ~0.1mA/300mA
1750
†
3 large res, basic quality JPEGs taken every 2 minutes (more details at end of manual)
Nikon D200, D2HS, D2X and D2XS and Fuji S5 Pro are registered
trademarks or a trademark of their respective companies.
10
Freeze mode (blue)
Freeze mode (blue)
This section explains how the GeoPic II behaves in its
freeze mode of operation. In this mode, the status light
will always be a blue colour.
The freeze mode of operation keeps the last locked GPS
location in a buffer and uses this to send to the camera,
instead of live data. This is useful for two reasons, firstly,
photos can be geotagged whilst in buildings and
secondly the GPS module inside the GeoPic II is
switched off in freeze mode making it the lowest power
of all three modes. The default operation is as follows:
Status light:
slow flashing
Function button:
Description:
Cancels the
search and uses
previously
buffered location
The GeoPic II has switched on its
internal GPS module and is waiting
for a good lock so that it can store
this data in a buffer and use it for
subsequent geotagging. The
camera’s GPS icon will not be
visible in its display.
(Mode change
with half press)
Starts a new
search, to update
the buffered GPS
location
occasional
blink
always on
(Mode change
with half press)
Starts a new
search to update
the buffered GPS
location (can take
a few seconds to
see the request)
(Mode change
with half press)
The GeoPic II has locked to three or
more satellites and has buffered the
GPS location. It has switched off the
internal GPS module. An occasional
blue blink shows that the GeoPic II
is ready to send buffered GPS data
when necessary. The moment the
shutter release button is pressed
half way, the GeoPic II will send the
buffered GPS location. The camera
GPS icon will not be visible in its
display.
When the shutter release button has
been pressed half way then the
status light will light the moment the
camera has been sent enough GPS
data to begin geotagging photos.
When this happens the GeoPic II will
emit a short beep (this can be
disabled if desired) and the
camera’s GPS icon will be visible.
Nikon D200, D2HS, D2X and D2XS and Fuji S5 Pro are registered
trademarks or a trademark of their respective companies.
Freeze mode (blue)
11
To start a search for a new position, press the function
button on the GeoPic II. This will cause the GPS module
inside the GeoPic II to be powered up, until a new lock is
achieved. The new GPS location will be buffered and the
internal GPS module will switch off once more. The
search for a new position can be cancelled by pressing
the function button whilst the search is taking place, at
which point the last buffered location will be reloaded
into the buffer. If a search is cancelled when there is no
previous data available (e.g. when you first receive the
unit) then the GeoPic II will ignore the cancel request
and continue to search.
By default the GeoPic II will begin a new search when
powered up in freeze mode. If you want to retain the last
location you can cancel this search with the function
button as just described. However, if required, the
GeoPic II can be configured to not search by default on
power up in freeze mode (see the settings section).
In freeze mode, the short beep and lighting of the blue
light indicates that sufficient buffered GPS data has
been sent to the camera for it to start geotagging photos.
There will be a fraction of a second delay from the
moment you press the shutter release button half way
until the camera is ready to geotag the photo. Therefore
you must wait until the blue status light is lit before
taking your photo. A beep coincides with the blue light
meaning that you do not need to take your eye from the
camera viewfinder to know that the camera is ready.
This is identical operation to the low power (green) mode,
except the GeoPic II uses buffered, not live GPS data.
Nikon D200, D2HS, D2X and D2XS and Fuji S5 Pro are registered
trademarks or a trademark of their respective companies.
12
Freeze mode (blue)
There may be occasions when it is desirable to
continually send buffered GPS data to the camera in the
same way as the continuous (red) mode. This would
result in higher power consumption, but there would be
no delay before the camera is ready to geotag photos.
This behaviour can be enabled if desired (see the setting
section) and results in the following behaviour:
Status light:
slow flashing
Function button:
Description:
Cancels the
search and uses
previously
buffered data
The GeoPic II has switched on its
internal GPS module and is waiting
for a good lock so that it can store
this location in a buffer and use it for
subsequent geotagging. The
camera’s GPS icon will not be
visible in its display.
(Mode change
with half press)
Starts a new
search, to update
the buffered GPS
data
always on
(Mode change
with half press)
The GeoPic II has good buffered
data and is continuously updating
the camera with the buffered GPS
location. GPS data is sent
regardless of the camera state. The
camera’s GPS icon will be visible in
its display.
Provided that continuous sending of data in the freeze
mode is not enabled, your camera will happily leave its
high power metering state when it has seen no activity
for a period of time. This contributes to significantly
increased battery life whilst in the freeze mode, because
the camera uses only a tiny amount of power in its
standby state.
Unlike the low power (green) mode, the GPS module
within the GeoPic II is turned off during freeze mode
(unless searching for a new position). The power
consumed by the GeoPic II in freeze mode is therefore
much lower than both the other modes of operation. This
combined with the camera being allowed to enter its
standby state results in the lowest overall power
consumption.
Nikon D200, D2HS, D2X and D2XS and Fuji S5 Pro are registered
trademarks or a trademark of their respective companies.
Freeze mode (blue)
13
The following figures represent typical photo counts you
can expect in freeze mode. Bear in mind that these
numbers will depend on your shooting style and camera
setup:
Mode:
Current consumption:
GeoPic II: ~55mA
Continuous Camera: ~300mA
Total: ~355mA regardless of state.
Photos:
315
†
†
GeoPic II: ~55mA
Camera (standby/metering): ~0.1mA/300mA
Total: (standby/metering): ~55.1mA/355mA
970
Low power
GeoPic II: ~2mA
Camera (standby/metering): ~0.1mA/300mA
Total: (standby/metering): ~2.1mA/302mA
1690 †
Freeze
Camera (standby/metering): ~0.1mA/300mA
1750
No GPS
attached
†
†
3 large res, basic quality JPEGs taken every 2 minutes (more details at end of manual)
It is useful to have a means of recording whether a
photo was taken in freeze mode, to make it clear that the
geotag may not be accurate. For this reason a user
setting is available that replaces the altitude field of the
geotag with the value of ‘99999m’. If you would like to
enable this option then please see the settings section.
It is important to note that buffered GPS data in freeze
mode is never replaced in either the continuous (red) or
low power (green) modes. Consider the scenario when
the GeoPic II is in low power (green) mode and locked,
then you subsequently change to freeze mode. The
GPS data from low power mode will not be used in
freeze mode. Instead you can either wait for freeze
mode to obtain a lock and replace its buffered location or
cancel the search and use the data from the last time
you obtained a lock in freeze mode.
Nikon D200, D2HS, D2X and D2XS and Fuji S5 Pro are registered
trademarks or a trademark of their respective companies.
14
Remote shutter release
Remote shutter release
Every GeoPic II is provided with a fully functional remote
shutter release socket. The socket is a 2.5mm jack
socket which is compatible with standard remote shutter
release cords available in shops and online. Custom
Idea sells a suitable remote shutter release cord on our
website at a very reasonable price.
If you purchase a remote release cord from another
supplier then make sure the signals follow the standard
below:
Nikon D200, D2HS, D2X and D2XS and Fuji S5 Pro are registered
trademarks or a trademark of their respective companies.
GeoPic II user settings
15
GeoPic II user settings
The GeoPic II has a total of eight user settings, each
with different options that can be configured to suit your
needs. The settings menu is accessed from any mode
by holding the shutter release button half way and
pressing the function button on the GeoPic II for around
5 seconds. As the settings menu is entered, the status
light flashes white twice.
Navigating the setting and option menus is achieved by
using the function button and the shutter release button:
When in settings menu:
When in options menu:
Half press
shutter
release
Changes to the next setting
(wraps around from the last
to the first setting)
Changes to the next option
(wraps around from the last to
the first option)
Function
button
Enters the option menu for
the current setting. This is
confirmed by a single
red/green flash
corresponding to the first
option for this setting.
Saves the current option to
memory. This is confirmed by
a beep and a number of
green flashes corresponding
to the option number.
Full press
shutter
release
Exits the settings menu and
returns to normal operation.
This is confirmed by two
white flashes.
Exits the option menu and
returns to the settings menu.
This is confirmed by a number
of blue flashes corresponding
to the setting number.
Status
light
A number of blue flashes
corresponding to the setting
number.
A number of flashes
corresponding to the option
number. Flash colour will be
green if option is currently in
use or red otherwise.
The eight settings and options for these settings are as
follows (default option is green):
Nikon D200, D2HS, D2X and D2XS and Fuji S5 Pro are registered
trademarks or a trademark of their respective companies.
16
GeoPic II user settings
Setting:
Option:
Description:
1
1
Enables the beep in low power
and freeze modes.
Beep
2
2
Auto off
1
2
3
4
5
3
Button†
1
2
4
†
Meter
1
2
5
Blink
1
2
6
Continuous
1
2
7
Alt. Field
1
2
8
Search
1
2
Enabled
Disabled
1 min
2 mins
Enables the auto power down
after the period of inactivity
chosen.
5 mins
10 mins
Disabled
Enabled
Disabled
Enabled
Disabled
Enabled
Disabled
Enabled
Disabled
Enabled
Disabled
Enabled
Disabled
If enabled, the function button
will power up the GeoPic II.
If enabled, the GeoPic II powers
up when camera wakes up.
Enables the green/blue blink in
low power and freeze modes.
Enables continuous sending of
GPS data in freeze mode.
If enabled, in freeze mode the
altitude field is set to 99999m.
Enables searching on power up
in freeze mode.
†
If setting 3 is disabled then setting 4 will be automatically enabled and vice
versa - this is to avoid a situation where it is not possible to turn on the unit.
Changing the settings is easy once you get used to it –
try going through the following example, which shows
how to change the Auto off setting (setting 2) to 10
minutes (option 4):
1) Press and hold the shutter release button half way
then press the function button for around 5 seconds to
enter program mode. Two white flashes confirm that
program mode has been entered and the following
single blue flash shows you that setting 1 is selected.
Nikon D200, D2HS, D2X and D2XS and Fuji S5 Pro are registered
trademarks or a trademark of their respective companies.
17
GeoPic II user settings
2) Half press the shutter release button once to move
from the current setting (setting 1) to setting 2. Two blue
flashes confirm setting 2 is selected. Press the function
button to enter the option menu for setting 2. A single
red flash confirms you are at the first option for setting 2.
OF
F
3) Half press the shutter release button three times to
move from the current option (option 1) to option 4. With
each half press, the next option is selected and
confirmed with a number of flashes. Option 3 flashes in
green because it is the currently configured option.
OF
F
OF
F
OF
F
4) Save option 4 by pressing the function button. This is
confirmed by a beep and 4 flashes corresponding to the
option number. The flashes will be green because this is
now the currently configured option.
5) Fully press the shutter release button to return to the
settings menu. This is confirmed by two blue flashes,
showing we are still at setting 2. Fully press the shutter
release button again to exit from the settings menu and
return to normal operation. This is confirmed by two
white flashes, and normal operation is resumed.
Nikon D200, D2HS, D2X and D2XS and Fuji S5 Pro are registered
trademarks or a trademark of their respective companies.
18
Technical information
Technical information
Physical:
Dimensions
35mm x 58mm x16mm
Lead length
22cm
Connector
10-pin with locking ring
Remote socket
2.5mm jack
Power consumption
Current (on)
~55mA GPS on, ~2mA GPS off
Current (off)
<10µA
GPS module:
Module type
SiRF III
Channels
20 channel all in view tracking
Sensitivity
-159dBm
Accuracy
10m, 5m WAAS available
WAAS
Enabled by default
GPS time
UTC (GMT) time
Cold start
42 sec average
Warm start
38 sec average
Hot start
1 sec average
Re-acquisition
0.1 sec average
Output message
NMEA: GGA, RMC
Photo count test setup:
Camera model
Nikon D200
Battery
Fully charged fresh Nikon EN-EL3e
Photo interval
3 photos, 5 seconds apart, every 2 minutes
Picture quality
Large resolution, basic compression JPEG
LCD settings
LCD preview turned off
Lens
50mm f/1.8 Nikon
Error warnings:
Slow RGB flash
Settings are corrupt so GeoPic II has automatically
reloaded the default options. To continue, reset the
unit by disconnecting from the camera and
reconnecting after a few minutes.
Nikon D200, D2HS, D2X and D2XS and Fuji S5 Pro are registered
trademarks or a trademark of their respective companies.
Introducing the GeoPic II
Custom Idea’s newly released geotagging device, the
GeoPic II is one of the most sophisticated geotagging
solutions for digital SLR cameras in the world.
A problem with many DSLR GPS devices is reduced
battery life, not only due to the GPS device itself, but
also because the DSLR is prevented from entering its
low power sleep state. However, thanks to patent
pending low power technology in the GeoPic II, this
problem has now been solved.
In total the GeoPic II has three modes of operation,
including a low power and freeze mode. Freeze mode
keeps the GPS position in an internal buffer, allowing
you to geotag photos even when out of sight of the
satellites, for example when indoors. Not only does all
this technology come in a tiny enclosure but it is also
incredibly easy to use. With an integrated high
performance SiRF III chipset, a remote release socket
and many configurable options and settings, the
GeoPic II truly represents the cutting edge of the
DSLR geotagging market.
Mode:
Description
Photos
Continuous
GeoPic II continuously sends GPS data to
the camera if locked to the satellites. Camera
never leaves metering state – this is
equivalent to other units on the market.
315
Low Power
GeoPic II only sends GPS data to the camera
if locked to the satellites AND shutter release
button is half pressed. Camera can leave
metering state resulting in large power
savings over other units on the market.
970
Freeze
GeoPic II freezes the GPS position on
demand in an internal buffer and uses this
data to send to the camera. This saves even
more power and allows you to geotag photos
whilst out of sight of satellites (e.g. indoors).
1690
www.customidea.com