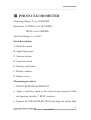
1
Manual de Usuario
ADInstruments
Tacómetro Digital AD6236P
AD Instruments
_______________________________________________________________________________
Copyright © Abacanto Digital SA, Reservados todos los derechos.
l La información de esta publicación reemplaza a toda la anterior que corresponda
con el mismo material.
l
Abacanto Digital SA, se reserva el derecho de modificar o cambiar parte o todas
las especificaciones y políticas de precios sin previo aviso.
©Copyright Abacanto Digital SA.
Manual de usuario AD6236P
2
AD Instruments
_______________________________________________________________________________
Contenido
Precauciones de seguridad……………………………………………………………………..…….4
Características generales………………………………………………………………………………5
Especificaciones generales…….……………..………….………………………..………………..6
Operación del tacómetro óptico……………………………………………………………………8
Operación del tacómetro de contacto………………………………………….……………….9
Mantenimiento……………………………………………………….…………………………………...11
Garantía……………………………………………………………………………………………………….12
©Copyright Abacanto Digital SA.
Manual de usuario AD6236P
3
AD Instruments
_______________________________________________________________________________
Precauciones de Seguridad
Revise cuidadosamente las siguientes precauciones de seguridad antes de utilizar el
instrumento para evitar daños personales, dañar el instrumento o los equipos
conectados a él. Este instrumento ha sido diseñado y probado cumpliendo con los
requisitos de seguridad para equipos eléctricos de medida, control y uso en
laboratorio.
PRECAUCIÓN:
Para evitar riesgos potenciales, utilice el instrumento únicamente de la forma descrita
en esta guía de usuario.
El instrumento deberá ser reparado y / o calibrado sólo por personal cualificado.
Para evitar fuego o daños personales:
Utilizar las baterías adecuadas. Use sólo baterías del mismo tipo y valor
especificado para este producto, antes de sustituir las baterías, apague el equipo.
No utilizar si sospecha mal funcionamiento. Si sospecha que el equipo puede
estar dañado, haga que el personal especializado del servicio técnico revise el
instrumento antes de continuar utilizándolo.
Cuando aparezca en la pantalla el símbolo de baterías agotadas, sustituya las
baterías cuanto antes para mantener la precisión de las medidas.
No modifique el circuito electrónico interno para evitar dañar el equipo o los
usuarios.
No utilizar o almacenar en: Condiciones de humedad elevada, una
atmósfera que pueda resultar explosiva, con temperaturas elevadas, en
zonas con campos magnéticos muy elevados.
Mantener las superficies del producto limpias y secas.
©Copyright Abacanto Digital SA.
Manual de usuario AD6236P
4
AD Instruments
_______________________________________________________________________________
Características generales
El AD6236P es un tacómetro digital controlado mediante un micro-computador y que
junto con la tecnología láser, combina un tacómetro óptico para medir revoluciones por
minuto y un tacómetro de contacto que permite medir tanto las revoluciones por
minuto como los metros por minuto.
Estas características unidas a su pantalla digital que permite una lectura clara y una
visualización simple hacen que resulte muy fácil de utilizar.
Sus principales características se resumen a continuación:
· Controlado mediante micro-procesador.
· Diodo láser para la medida óptica.
· Amplio rango de medida y alta resolución.
· Retro-iluminación de color amarillo-verde que garantiza una buena lectura en
cualquier condición de trabajo.
· Muestra y almacena el valor máximo y mínimo y el último valor.
· Indicador de batería baja.
· Se puede conmutar en cualquier momento entre la medida óptica y de contacto.
· Dispone de un nuevo sensor de contacto para la medida de la velocidad y la
longitud.
· Carcasa fabricada en plástico ABS para mayor robustez y de forma ergonómica
para mayor confort de uso.
©Copyright Abacanto Digital SA.
Manual de usuario AD6236P
5
AD Instruments
_______________________________________________________________________________
Especificaciones generales
Las especificaciones del tacómetro modelo AD623 se describen a continuación en
este apartado:
1. Pantalla
·
·
·
·
·
·
·
·
·
LCD, 5 Dígitos de 18 mm con retro-iluminación amarillo-verde.
Precisión de ±(0.05%+1dígito).
Tiempo de muestreo: 0,8 segundos (sobre 60 rpm).
Selección de rango: automático
Base de tiempos: Cristal de cuarzo.
Distancia de detección en modo óptico: de 50 a 500 mm.
Dimensiones: 210 x 74 x 37 mm.
Alimentación: 4 x 1,5 V Baterías alcalinas tipo AA.
Consumo: Aproximadamente 65 mA.
2. Operación de la tecla de recuperación de la memoria
Los valores máximo, valor mínimo y último valor se guardan en la
memoria de forma automática justo antes de apagarse el equipo.
Esto quiere decir que basta con pulsar la tecla de memoria una vez para
ver el valor máximo indicado por el símbolo “UP” , la siguiente pulsación
muestra el valor mínimo indicado por el símbolo “DN”, la siguiente
pulsación nos muestra el último valor indicado por el símbolo “LA”.
3. Indicador de batería baja
Aparecerá en la pantalla una indicación cuando la tensión de alimentación
sea menor de 4,5 V.
Deberá abrir la tapa posterior del equipo tan pronto como sea posible y
sustituir las baterías por otras del mismo tipo y valor.
Por favor quite las baterías del equipo si no piensa utilizarlo durante un
período largo de tiempo.
©Copyright Abacanto Digital SA.
Manual de usuario AD6236P
6
AD Instruments
_______________________________________________________________________________
4. Marcas reflectantes
Corte y despegue la protección de la cinta reflectante proporcionada en
cuadrados de aproximadamente 12 mm y aplique uno de estos cuadrados
en cada eje de rotación que vaya a comprobar.
El área no reflectante debe de ser siempre mayor que la reflectante.
Si el eje ya es de por sí reflectante, deberá cubrirse con un pedazo de
cinta negra o pintura negra excepto una pequeña zona de 12 mm, o bien
cubrirlo todo y poner un poco de cinta reflectante.
La superficie del eje deberá estar completamente limpia de y suave antes
de aplicar la cinta reflectante.
5. Medida de revoluciones muy bajas
Si se necesita medir valores muy bajos de revoluciones, se recomienda
añadir más cuadrados de cinta adhesiva reflectante espaciados
proporcionalmente. Bastará luego con dividir la lectura mostrada entre el
número de marcas que se han colocado para obtener las RPM reales.
6. Accesorios
·
·
·
·
·
·
Maleta de transporte
Manual de usuario
Cinta reflectante adhesiva 3 x 200 mm
Baterías 1,5 V x 4 tipo AA
Accesorios de goma para RPM contacto x 3
Accesorio de goma para m/min x 1
©Copyright Abacanto Digital SA.
Manual de usuario AD6236P
7
AD Instruments
_______________________________________________________________________________
Operación del tacómetro óptico
Las características del tacómetro óptico son las siguientes:
· Rango de medida: de 0,5 a 99.999 RPM
· Resolución: 0,1 RPM entre 2,5 y 999,9 RPM
1 RPM por encima de 1.000 RPM
· Rango total de prueba: hasta 99.999
Procedimiento de medida
1. Aplique una marca reflectora al eje del objeto que desee medir. Ponga el
conmutador de selección en “RPM photo”.
2. Pulse el botón de medir y alinee el haz láser de color rojo con el objetivo.
Compruebe que en la pantalla aparece el símbolo indicador de que se
está realizando la medida.
3. Suelte el botón de medir cuando haya finalizado.
4. Pulsaciones sucesivas de la tecla de memoria “MEM” le mostrarán el
valor máximo, mínimo y último de la medida.
©Copyright Abacanto Digital SA.
Manual de usuario AD6236P
8
AD Instruments
_______________________________________________________________________________
Operación del tacómetro de contacto
Las características del tacómetro de contacto son las siguientes:
· Rango de medida:
Tacómetro contacto: 0,5 a 19.999 RPM
Velocidad de superficie (m/min): 0,05 a 1.999,9 m/min.
·
Resolución:
Tacómetro contacto: 0,1 RPM (Entre 0,5 y 999,9 RPM)
1 RPM (por encima de 1.000 RPM)
Velocidad de superficie: 0,01 m/min. (Entre 0,05 y 99,9 m/min.)
0,1 m/min. (por encima de 100 m/min.)
Descripción del panel frontal:
A.
B.
C.
D.
E.
F.
Rueda de medida para superficies.
Adaptador de RPM.
Eje.
Tecla de medida.
Tecla selectora de modo de funcionamiento.
Tecla de recuperación de los datos en
memoria.
G. Pantalla.
H. Tapa de las baterías.
©Copyright Abacanto Digital SA.
Manual de usuario AD6236P
9
AD Instruments
_______________________________________________________________________________
Procedimiento de medida de RPM
1. Ponga el conmutador de selección en “RPM contact”.
2. Instale el accesorio de goma para la medida de revoluciones más
adecuado en el eje del equipo.
3. Pulse la tecla de medida y coloque el accesorio de goma haciendo una
ligera presión contra el centro del eje que está girando. Asegúrese de
que ambos ejes, el del equipo y el que se desea medir, están alienados.
4. Suelte la tecla de medida cuando el valor que se observa en la pantalla
se estabilice.
Procedimiento de medida de superficie
1. Ponga el conmutador de selección en “M/MIN contact”.
2. Instale la rueda de goma para contacto en el eje del equipo.
3. Pulse la tecla de medida y ponga la rueda en contacto con el dispositivo
a medir.
4. Suelte la tecla de medida cuando el valor que observa en la pantalla se
estabilice.
Nota: Debido a la diferencia de circunferencia entre la parte externa de la rueda y la
interna del sensor de velocidad, en el caso de medidas de velocidad lineal o medidas
de longitud, el resultado mostrado es correcto cuando se hacen medidas de velocidad
lineal, pero si se miden longitudes (como por ejemplo de una cuerda o de cable), el
resultado real se obtiene multiplicando el valor mostrado por 0,9.
©Copyright Abacanto Digital SA.
Manual de usuario AD6236P
10
AD Instruments
_______________________________________________________________________________
Mantenimiento
El exterior del instrumento deberá limpiarse regularmente usando un plumero o un
paño.
La suciedad que resulte difícil de quitar en la carcasa, podrá limpiarse con un paño
humedecido con una solución compuesta por el 99% de agua y 1% de detergente
suave. En el caso de que haya suciedad de tipo grasiento, podrá quitarse con alcohol u
otro producto de limpieza similar normalmente utilizado para quitar la grasa.
La pantalla deberá limpiarse con un paño humedecido con agua, no utilice disolventes
u alcohol, a continuación deberá secarse inmediatamente con un paño seco que suelte
pelusas.
Bajo ninguna circunstancia deberá entrar ningún líquido dentro del equipo. Tenga
presente que el uso de disolventes o productos abrasivos pueden atacar el plástico y
las superficies pintadas.
Cuando vea en la pantalla el símbolo de batería baja, sustituya las baterías tan pronto
como le sea posible. Para ello siga los pasos siguientes:
· Afloje el tornillo de la tapa de las baterías y quite la tapa.
· Quite las baterías y sustitúyalas por otras de igual tipo, o sea 1.5 V alcalinas tipo
AAA.
· Vuelva a colocar la tapa y fíjela con el tornillo
NOTAS:
· No utilice el equipo antes de haber puesto y fijado la tapa de las baterías.
Almacenamiento
Debe mantener la unidad en un lugar seco y ventilado después de su uso. Quite las
baterías si no va a usar la unidad durante un período largo de tiempo.
©Copyright Abacanto Digital SA.
Manual de usuario AD6236P
11
AD Instruments
_______________________________________________________________________________
Garantía
Abacanto Digital SA garantiza a sus clientes que los productos que vende están libres
de defectos en materiales y fabricación durante un año. Esta garantía no tendrá
validez cuando se produzca cualquier defecto, fallo o daño causados por un uso
impropio o un mantenimiento inadecuado.
Abacanto Digital SA no estará obligado a proporcionar mantenimiento durante este
período de garantía para reparar daños causados a los equipos por otro personal
distinto del autorizado por Abacanto Digital SA para instalar, reparar o modificar estos
productos.
Los clientes deberán contactar y notificar al distribuidor que ha vendido el producto
para obtener servicio durante el período de garantía
Cada instrumento es sometido a una prueba de calidad durante 10 horas consecutivas
de funcionamiento antes de dejar el área de producción. Prácticamente todos los fallos
iniciales son detectados por este método. En el caso de retorno del equipo mediante
transportista, se recomienda utilizar el embalaje original ya que los daños por
transporte y daños producidos por flagrante negligencia no están cubiertos por la
garantía.
En caso de cualquier reclamación, deberá adjuntarse una nota con el instrumento
describiendo brevemente los fallos encontrados, junto con la persona de contacto,
teléfono, correo electrónico y demás datos que faciliten el contacto para posibles
consultas en orden de agilizar al máximo el proceso de resolución del problema.
©Copyright Abacanto Digital SA.
Manual de usuario AD6236P
12
AD Instruments
_______________________________________________________________________________
DIGITAL
TACHOMETER
OPERATION MANUAL
MODEL AD6236P
ĉ FEATURES
1.
It is used the microcomputer (CPU) technique and junction
laser technique for one instrument combine PHOTO TACH.
(RPM) &CONTACT TACH (RPM, m/min).
2.
Wide measuring range and high resolution.
3.
Yellow green backlight makes sure that tachometer can work
normally in any light circumstance.
4.
The last displayed value/max. Value/min. Value maybe
automatically stored in memory and 96s of measured value
continuously. So this makes customers collected and recorded
data. (The tachometer starts to store the data measured after
which is renovation for three times).
5.
The tachometer can be connected 6V direct current stable
voltage power in favor of using for long time.
©Copyright Abacanto Digital SA.
Manual de usuario AD6236P
13
AD Instruments
_______________________________________________________________________________
6.
Low battery voltage indication.
7.
Contact part and photo part can be switched value at any time.
8.
New surface speed sensor with flute vials to measure speed
and length of wire, cable and rope conveniently.
9.
The instrument is delicate and rugged. It uses the durable,
long-lasting components and a strong, light weight ABC
plastic housing. The comfortably in either hand.
ĊSPECIFICATION
1. Display: 5digital, 18mm (0.7” yellow green backlight LCD)
Accuracy: f(0.05%+1digital)
Sampling Time: 0.8second (over 60RPM)
Range Select: Auto-range
Time Base: Quartz crystal
Detecting Distance: 50mm-500mm (photo)
Dimension: 210h74h37mm
Power: 4h1.5V AA size battery or 6V direct current stable
voltage power.
Power consumption: approx. 65mA
2. Memory call button operation A readout (the max value, min
©Copyright Abacanto Digital SA.
Manual de usuario AD6236P
14
AD Instruments
_______________________________________________________________________________
value, last value) obtained immediately before turning off the
MEATURING BUTTON is automatically memorized. For
example, please ret. following figure 1. That memorized value
can be displayed on the indicator by turn once depressing the
memory button. The symbol “UP” represents the MAX. Value
and “DN” the MIN. Value, “LA” the Last Value.
3. Data stored button operation
Display last value and for the fourth time press memory button,
the tachometer will indicate whether to switch to another display
mode. During display value changing from 20 to 1, it is switched if
you release memory button that have not change to max value/min
value/last value will be displayed in turn by pressing memory button
anytime.
If the value changes form 20 to 1 (please ret. Following figure 2)
and displaying “An **” (An is ab. of anamnesis). The display is
switched successfully. So the memory button is pressed, stored data
will be displayed in turn. Display format is as follow: the first is
serial number of stored data and then display the concrete value.
After all stored data is displayed(96s), the tachometer will
©Copyright Abacanto Digital SA.
Manual de usuario AD6236P
15
AD Instruments
_______________________________________________________________________________
automatically switch to display max value/ min, value / last value.
(more difference of data value, less data stored)
Eg.: the displaying is “An 64” when 64s of measuring data is stored
in one measuring(see fig.3). The tachometer will display the
stored data in turn by pressing the memory button. The first
value is 350.3RPM and the second 317.1RPM, analogically the
64th value is 337.0RPM (see fig.4).
Reminds: The contact line button do not stores max value /min
value and measuring data but last value. All data will be
canceled and the tachometer will start to measure and store
data again if measuring button is pressed when looking over
measured data.
4. Battery replacement
When it is necessary to replace the battery(battery voltage less tan
approx.4.5V), will appear on the display.
Slide the battery cover away from the instrument and remove the
battery.
Install the batteries into the case permanent damage to the circuit
may result form incorrect installation.
©Copyright Abacanto Digital SA.
Manual de usuario AD6236P
16
AD Instruments
_______________________________________________________________________________
5 Reminds
5.1 Reflective mark: cut and peel adhesive tape provided into
approx. 12mm (0.5”) squares and apply one square to each
rotation shaft. The non-reflective area must always be
greater than the reflective area. If the shaft is normally
reflective, it must be covered with black tape or black
paint before attaching reflective tape. Shaft surface must
be clean and smooth before applying reflective tape.
5.2
Very low RPM measurement: as if is easy to get high
resolution. If measuring the very low RPM values, suggest
user to attach more “reflective marks” averagely. Then
divide the reading shown by the number of “reflective
marks” to get the real RPM.
5.3 Contact tachometer parts include large taper, small taper
and pillar, large taper and pillar rubberpart is suitable to
low speed and but the small high speed.
5.4 If the instrument is not to be used for any extended period,
remove batteries.
©Copyright Abacanto Digital SA.
Manual de usuario AD6236P
17
AD Instruments
_______________________________________________________________________________
ċ PHOTO TACHOMETER
Measuring Range: 2.5 to 99999RMP
Resolution: 0.1RPM (2.5 to 999.9RMP)
1RPM (over 1000RPM)
Total Test Range: 1 to 99999
Panel description:
A: Reflective mark
B: Signal light beam
C: Measure button
D: Function switch
E: Memory call button
F: Display window
G: Battery cover
Measuring procedure
1. PHOTO RPM MEASUREMENT
a. Apply a reflective mark to the object being measured. Slide
the function switch to “ RPM” position.
b. Depress the MEASURE BUTTON and align the visible light
©Copyright Abacanto Digital SA.
Manual de usuario AD6236P
18
AD Instruments
_______________________________________________________________________________
beam with the applied target. Verify that the MONITOR
INDICATION lights when the target aligns with the beam.
2. TOTAL MEASUREMENT
a. Apply a reflective mark to the object being measured. Slide
the function switch to “TOT” position.
b. Install the batteries and press measuring button, then you see
light beam line with the target, start measuring. The value
will add 1 as the object rotate a circle or passed one reflective
mark, herein, the total value will stored in the meter until
loosen the button.
c. It will display total value as you press “MEM” button.
Accessories:
Carrying case
1pc
Reflecting tape marks
length
600mm
Operation manual
1pc
Damproof accessories
1pc
Bolt bag
1pc
©Copyright Abacanto Digital SA.
Manual de usuario AD6236P
19
AD Instruments
_______________________________________________________________________________
Č CONTACT TACHOMETER
Measuring Range: CONTACT THCH 0.5 to 19999RPM
Surface
Speed
(m/min):
0.05
to
1999.9m/min
Surface long (m): 0.05 to 99999m
Resolution:
CONTACT
THCH:
0.1RPM
(0.5
to
999.9RPM)
1RPM
(over
1000RPM˅
Surface
Speed:
0.01m/min
(0.05
to
99.99m/min)
0.1m/min (over 100m/min)
Surface long: 0.02m (0.05 to 99999m)
Panel description:
A: surface speed wheel
B: RPM adapter
C: shaft
D: measure button
E: function switch
F: memory call button
©Copyright Abacanto Digital SA.
Manual de usuario AD6236P
20
AD Instruments
_______________________________________________________________________________
G: display window
H: battery cover
Measuring procedure
1. CONTACT TACH MEASUREMENT
a. Slide the FUNCTION SWITCH to “rpm” position. Install
the proper RPM ADAPTER on the SHAFT.
b. Depress the MEASUING BUTTON and lightly pressing
the RPM ADAPTER against the center hole of rotating
shaft. Be certain to keep alignment straight. Release the
MEASURING BUTTON when the display reading
stabilizes.
2. SURFACE SPEED MEASURENENT
©Copyright Abacanto Digital SA.
Manual de usuario AD6236P
21
AD Instruments
_______________________________________________________________________________
a. Slide the FUNCTION SWITCH to “m/min”, in stall the
SURFACE SPEED WHEEL on the SHAFT instead of the
RPM ADAPTER.
b. Depress the MEASURING BUTTON and simply
attaching the SURFACE SPEED WHEEL to the detector.
Release the MEASURING BUTTON when the display
reading stabilizes.
3. SURFACE LONG MEASUREMENT
a. Slide the FUNCTION SWITCH to “m” and use the
corresponding part. The other same as (2).
Note: Because of the difference between the girth of outer
surface and inner flute of line speed sensor. For contact line
speed or length measurement. The displaying result is correct
when outer surface of the sensor contacts with the measured
object contact and but when inner flute of the sensor and the
measured object, that the reading multiply 0.9is the real
result (eg.: measure wire, cable and rope etc.)
Accessories:
Carrying case
©Copyright Abacanto Digital SA.
Manual de usuario AD6236P
1pc
22
AD Instruments
_______________________________________________________________________________
Operation manual
1pc
Damproof accessories
1pc
Bolt bag
1pc
Contact speed measurement fitting
1pc
Contact rotational speed measurement fitting
3pc
č PHOTO TACH/CONTACT TACH
Measuring Range: PHOTO TACH
to 99999RPM
CONTACT TACH
0.5 to 19999RPM
SURFACE SPEED (m/min)
0.05 to 1999.9m/min
Resolution:
PHOTO TACH:
0.1RPM (2.5 to 999.9RPM)
1RPM (over 1000RPM)
CONTACT TCAH
0.1RPM (0.5to 999.9RPM)
1RPM ( over 1000RPM)
©Copyright Abacanto Digital SA.
Manual de usuario AD6236P
23
AD Instruments
_______________________________________________________________________________
WURFACE SPEED
0.01m/min (0.05 to 99.99m/min)
0.1m/min
(over 100m/min)
Panel description:
A: Surface speed wheel
B: Contact test
device
C: Contact measuring device
E: Function switch
D: Measure button
F: Memory call
button
G: Display window
©Copyright Abacanto Digital SA.
Manual de usuario AD6236P
H: Battery cover
24
AD Instruments
_______________________________________________________________________________
Measuring procedure
1. PHOTO MEASURMNENT
a. Apply a reflective mark to the object being measured. Slide
the function switch to “rpm photo” position.
b. Depress the MEASURE BUTTON and align the visible light
beam with the applied target. Verify that the MONITOR
INDICATOR lights when the target aligns with the beam.
2. CONTACT TACH MEASUREMENT
a. Slide the FUNCTION SWITCH to “rpm contact” position.
Install the proper RPM ADAPTER on the SHAFT.
b. Depress the MEASURING BUTTON and lightly pressing the
RPM ADAPTER against the center hole of rotating shaft. Be
certain to keep alignment straight. Release the MEASURING
BUTTON when the display reading stabilizes.
3. SURFACE SPEED MEASUREMENT
a. Slide the FUNCTION SWITCH to “m/min contact” position.
Install the SURFACE SPEED WHEEL on the SHAFT instead
of the RPM ADAPTER.
b. Depress the MEASURING BUTTON and simply attaching
©Copyright Abacanto Digital SA.
Manual de usuario AD6236P
25
AD Instruments
_______________________________________________________________________________
the SURFACE SPEED WHEEL to the detector. Release the
MEASURING
BUTTON
when
the
display
reading
stabilizes.
Note: Because of the difference between the girth of outer
surface and inner flute of line speed sensor. For contact line
speed or length measurement, the displaying result is correct
when outer surface of the sensor contacts with the measured
object contact and but when inner flute of the sensor and the
measured object, that the reading multiply 0.9 is the real result
(eg.: measure wire, cable and rope etc.)
Accessories:
Carrying case
1pc
Reflecting tape marks
length
600mm
Operation manual
1pc
Damproof accessories
1pc
Bolt bag
1pc
Contact speed measurement fitting
1pc
Contact rotational speed measurement fitting
©Copyright Abacanto Digital SA.
Manual de usuario AD6236P
26