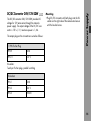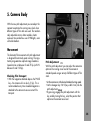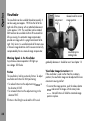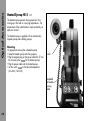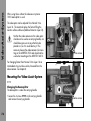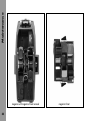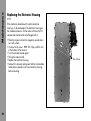
1
ARRIFLEX 16SR 3
Instruction Manual
As of: December 1992
ALL
THEY MUST NOT
BE COPIED FOR REPRODUCTION (E.G. ON
ARTWORK, PICTURES AND TEXTS ARE COVERED BY OUR COPY-RIGHT.
CD-ROM DISKS OR INTERNET-SITES) OR USED IN THEIR ENTIRE FORM OR IN EXCERPTS WITHOUT OUR PREVIOUS
IF YOU ARE DOWNLOADING PDF-FILES FROM OUR INTERNET HOME-PAGE FOR YOUR PERSONAL USE, MAKE SURE TO CHECK FOR UPDATED VERSIONS.
WE CANNOT TAKE ANY LIABILITY WHATSOEVER
FOR DOWNLOADED FILES, AS TECHNICAL DATA ARE SUBJECT TO CHANGE WITHOUT NOTICE.
WRITTEN AGREEMENT.
eyecup iris lever
magazine safety latch
ARRIGLOW
friction adjustment
mne release latch
film speed
selector
release knob for correct
image position
mechanical film counter
400ft magazine
on-board battery
viewfinder prism
rotating knob
PL-mount
inching knob
receptable for
heated eyecup cable
electronic inching/
phase button
run LED
on-board battery
adapter
display
on/off push button
push button SET
push button SEL
running light
push button MODE
slide switch
carring handle
PL mount lock ring
PL mount/bayonet
adapter lens release pin
mounting rosette
on/off switch
main power
remote switch
receptacles 24V DC out
pitch adjustment
accessory shoe
ACC-receptable CCU-receptable power input
receptable
• Warning Notes:
Operational error or camera error
possible!
• In order to ensure optimal performance, it is essential
that you acquaint yourself with this instruction manual
and that you follow the operating instructions described herein.
• Assembly and initial operation should only be carried
out by qualified personnel already familiar with the
equipment and the assembly procedures!
• Use only original ARRI accessories and replacement
parts!
• Do not use HS magazines (High Speed) on the
standard camera, nor standard magazines on the HS
camera!
• Never blow air into the lens opening! If the fiber optic
screen is removed the indicator on the light meter can
be damaged.
Contents
Safety Specifications
• Do not unscrew any screws which are painted over!
• When using polarizing filters, use only circular
polarizing filters as the light meter otherwise will give
incorrect readings.
Product Specifications
In the case of enquiries or when ordering parts
please advise type designation and camera number.
• Clean optic surfaces only with an optic brush or a
clean optic cloth! In cases of solid dirt moisten an
optic cloth with pure alcohol.
• Do not use solvents in cleaning the film track!
• When adjusting the mirror shutter remove the onboard battery or the supply cable!
1
Contents
Contents
Safety Specifications ....................................... 1
Product Specifications ..................................... 1
1. The ARRIFLEX 16SR 3 System-Camera ....................................... 5
2. Installation ................................................... 7
Packing and transport ..................................... 7
Tripod heads ................................................. 7
Bridge plate BP-6 ........................................... 7
Bridge plate BP-7 with 15 mm support rods ....... 9
Shoulder set S-3 ........................................... 11
Camera handgrip ......................................... 11
3. Power Supply ........................................... 13
On-board battery NC 24/1,2 .......................
Battery NC 24/7 R ......................................
Charger NCL 24 R .......................................
Double charger NCL 24/1,2 .........................
Mains unit NG 12/24 R ...............................
DC/DC converter 24V/12V-22W ..................
14
14
14
14
14
15
4. Magazines .................................................. 16
Loop protector .............................................. 16
Magazine door ............................................ 17
Film core, core holder and clamp core ............ 18
2
Cleaning the Magazines ............................... 18
Loading the Magazine .................................. 19
Unloading the magazine ............................... 24
5. Camera Body ............................................ 25
Movement ...................................................
Mirror shutter ...............................................
Fibre optic viewing screens ............................
Attaching the magazine onto the camera ........
Removing the magazine ................................
25
26
29
30
31
6. Optics ............................................................ 32
Lenses .........................................................
54mm PL-mount ............................................
41mm ARRI bayonet .....................................
Lens support ................................................
Viewfinder ...................................................
Eyepiece .....................................................
Eyecup ........................................................
32
34
35
36
38
39
39
7. Optical Accessories ................................ 41
Light-weight support LWS-2 ............................
Universal follow focus device FF-3 ..................
Light-weight dollow focus device ....................
Lens-Control-System LCS ................................
4"x4" production matte box MB-16 ................
4"x4" matte box MB-17 ................................
Light-weight matte boxes LMB-2 and LMB-3 ......
41
43
44
44
45
45
45
8. Conversion from Normal 16
to Super 16 .............................................. 49
Bridge plates BP-6 and BP-7 ........................... 53
Lightweight support ....................................... 54
Video optic .................................................. 54
12. Time Code ................................................ 80
TC-Indication on the display ...........................
TC-Input ......................................................
TC-Output ....................................................
Time code and ESU-1 ...................................
Using time code ...........................................
Indicating time code or user bits .....................
TC buffer .....................................................
Testing the TC recording ...............................
80
82
82
83
83
84
86
86
Contents
Finder extension FE-2 .................................... 46
Levelling rod for finder extension EL-3 ............. 47
Heated eyecup HE-3 ..................................... 48
9. Display and Operating Elements ... 55 13. Maintenance ........................................... 87
Camera display ...........................................
Setting the speed ..........................................
Film counter .................................................
Summary of modes .......................................
Exposure control and ARRIGLOW ..................
Checking the mirror shutter setting ..................
Synchronizing on the video monitor ................
55
56
58
58
66
68
68
10. Accessories .............................................. 69
Camera Control Unit CCU-1 .......................... 69
External Synchronization Unit ESU-1 ............... 74
Remote ON/OFF switches RS-3 and RS-4 ........ 74
Replacing the magazine drive gear ................
Cleaning the magazine throat assembly ..........
Flange focal distance ....................................
Setting friction on the viewfinder ....................
Changing the electronic housing ....................
87
87
89
92
94
Appendix
Camera-Checks ............................................ 96
Technical Data ............................................. 98
Order Numbers ......................................... 100
Index ................................................................. 102
11. Video-Assist-System ........................... 75
Mounting the Video-Assist-System ................... 76
Adjusting the Video Optic ............................. 78
3
4
Introduction
The ARRIFLEX 16SR 3 is a 16mm/Super 16 camera
designed to handle all modern production demands. It
utilizes the full range of ARRIFLEX 535 mechanical,
optical and electronic accessories.
• The format change from Normal 16 to Super 16 can
be carried out with very few adjustments. An additional film gate is not necessary.
• Due to the 54mm PL lens mount, all commonly available lenses can be used. Lenses with a 41mm ARRIbayonet-mount can be used with the single pushbutton release PL-mount-to-bayonet-mount adapter.
• The 16SR 3 time code capability offers access to all
modern electronic post-production processes. The TCgenerator has been integrated into the camera
electronics and the time code recording unit is located
in each magazine.
• The video-assist-system with the bright 1/2" color
camera CCD 2-FR and the anti flicker processor AFP-2
for PAL or NTSC supplies a high quality, nearly
flickerfree video images.
• As with the ARRIFLEX 535, the new bright viewfinder
can be swung three-dimensionally. An automatic
image compensator ensures that the frame remains
upright and correct left-to-right regardless of the
positon in which the viewfinder is used. The horizontal finder image can be corrected when using the
camera in difficult locations that do not allow the
image to be viewed in the standard viewfinder
positions.
• With ARRIGLOW, the ARRIFLEX 16SR 3’s new
illuminated frame viewfinder with continuously adjustable brightness, all format markings are clearly visible
even in low light situations.
• The mechanically adjustable mirror shutter allows
short exposure times and enables the use of HMI
lights, even with older inductive ballasts.
• Coaxial magazines with and without TC-recording
unit (time code) are available.16 SR II-magazines can
still be used (without TC-recording) on the ARRIFLEX
16SR 3.
• The HS version (high speed) of the camera is designed for speeds of up to 150 fps.
• The camera electronics incorporate a large, backlit,
programmable LCD-Display advising the user of the
Introduction
1. The ARRIFLEX 16SR 3 - System-Camera
5
Introduction
status and functions of the camera. The ARRIFLEX
16SR 3 provides for on-board speed selection and
speed changes while the camera is running up to
1/1000 of a frame accuracy,. without additional
electronic accessoriesw. Instant on-the-fly-changes
between preselected standard on-board and programmed variable speeds are possible, as well as onboard phase shifting for filming of monitors.
• Accessory-interfaces enable the use of well-known
ARRIFLEX system components such as
- the camera control unit CCU-1
- the external synchronization unit ESU-1
- the lens control system LCS
Symbols in the Handbook
designates new methods of operation compared
to the 16 SR II.
refers to objects which are shown in photos.
6
Packing and Transport
Bridge Plate BP-6
The camera should be stored in the sturdy ARRI
transport case with the magazine attached, without
the lens, the viewfinder extension, or the on-board
battery. The video camera and the anti flicker
processor should be removed for transport or shipping
purposes. The AC/DC converter can stay on the
camera. There are compartments for two on-board
batteries and the viewfinder extension. An adjustable
compartment enables storage of further equipment
such as the bridge plate or an additional magazine.
A compartment in the case lid is designed to hold
the bridge plate support rods 440mm (19").
The bridge plate allows quick mounting and balancing
of the fully-equipped ARRIFLEX 16SR 3 system on the
tripod.
Tripod Heads
The ARRIHEAD 2 with its compact construction is
ideally suited to the ARRIFLEX 16SR 3. The hydroheads ARRI 150 H, ARRI 150 M and ARRI 100 L
can be used as well.
Installation
2. Installation
The bridge plate consists of the base plate
,
and support rods
.
sliding upper plate
The standard length of the support rods is 440 mm
(19"). Support rods of 240 mm (9") length are
available. A quickly atachable wedge plate allows
mounting of the system without the base plate on the
tripod or the ARRIHEAD 2.
For changing from Normal 16 to Super 16 the reversible, center-mounting plate on the upper sliding plate
must be reversed to the appropriate position. See
chapter 8.
For mounting see next page.
7
Installation
base plate
springloaded stop pin
adjustable
top plate
lock lever
lock levers
support rods
8
• Press in the spring-loaded stop pin
and pull the
upper sliding backplate off the base plate
.
• Attach upper sliding plate with the central tie-down
screw (3/8" thread) to the camera base, ensuring that
the locating pins align with the holes in the camera
base.
• Screw the wedge plate of the tripod used onto the
base plate
.
• Lock the base plate onto the tripod head (springloaded stop pin rear).
• Slide the camera with the upper sliding plate into the
dovetail guide of the base plate until the spring-loaded stop
pin clicks audibly into position, preventing the camera
from sliding to the back of the bridge plate.
• Slide the camera into the desired position and lock
with the lock lever
.
• Pull the support rods out to the desired length and set
with the clamp screws
.
Bridge Plate BP-7 with
15 mm Support Rods
The bridge plate BP-7 with 15mm support rods can be
transferred from Normal 16 to Super 16 optical positions.
Old bridge plates with 15mm support rods for the 16
SR can subsequently be retrofitted with the new upper
sliding plate. A conversion kit with instructions is available.
Installation
Mounting
For mounting and operation see bridge plate BP-6.
For changing the upper sliding plate from Normal 16 to
Super 16 optical center positons, the reversible center
plate on the upper sliding plate must be reversed to the
appropriate position. See chapter 8.
Balancing
• Fully equip the camera. Attach all camera and lens
components you plan to use.
• Loosen the clamp lever on the upper sliding plate
, balance the camera on the base and lock the
clamp lever once the correctly balanced position is
found.
9
Installation
remote
switch
receptables
24V DC out
handgrip
adjustment
positions
10
Camera Handgrip
The shoulder set S-3 has adjustable grips and an
integrated shoulder pad which allows comfortable
hand-held camera operation.
The anatomically-shaped camera handgrip with the
RUN push button is intended for shoulder operation.
The shoulder pad can be used for more comfortable use
of the camera on the shoulder.
Mounting
• Attach the shoulder set with the central clamp screw
into the tripod thread (3/8") on the camera base
ensuring that the index pin on the shoulder set aligns
correctly with the locating hole in the camera base.
• Adjust and position the handgrips on the shoulder set
.
• Connect the cable to one of the RS-sockets
on
the right side of the camera
Mounting
Installation
Shoulder Set S-3
• By turning the intermediate ratchet mounting ring, the
angular outward position of the handgrip can be
changed to the operator’s personal fit.
• Attach the handgrip to the right rosette mount on the
camera in the desired angle of inclination.
• Connect the cable to one of the RS-sockets
on
the right side of the camera.
11
12
Power Supply
camera front
accessory fuse
The camera is intended for use with 24 V DC. The
acceptable voltage ranges are from 20 to 32 V DC. If the
voltage trops below 18 V or rises above 34 V, a
protective device prevents the camera from being
turned on.
Changing the Fuses
Main fuse:
10 A Picofuse
Accessory fuse: 2,5 A Picofuse
Power Supply
3. Power Supply
main fuse
• Remove the on-board battery or the power supply cable.
• Remove the magazine.
• Unscrew the cover FUSE on the electronic housing
with a coin.
• Take a new fuse from the cover FUSE.
• Exchange the defective fuse using tweezers or a
Hirschmann clamp. The accessory fuse is in the front,
the main fuse at the rear.
• Rescrew the cover FUSE with a coin.
NOTE: In order to avoid future problems you should
obtain replacement fuses as soon as possible. Fuses
from other suppliers should be cut to size and bent as
shown in the drawing on the right.
13
Power Supply
On-Board Battery NC 24/1,2
Charger NCL 24 R
Capacity 1,2 Ah. For mobile operation.
For all 24 V batteries.
• Plug the on-board adapter into the BAT-socket and
secure it with the knurled screw.
• Slide the on-board battery onto the on-board adapter
and clip onto the magazine - the magnet holder keeps
it securely in place.
To charge the on-board batteries NC 24/1,2 the
charger-adapter cable KC 38 is required.
Battery NC 24/7 R
To enable two on-board batteries to be charged simultaneously.
For use see product description NCL 24/1,2.
Capacity 7 Ah.
For use see product description NCL 24 R.
Double Charger NCL 24/1,2
For use see product description NC 24/7 R.
• Connect the battery cable KC 20 or the coiled battery
cable KC 29 into the BAT-socket on the camera.
• Make sure that the plug is locked in securely.
- Do not open the batteries!
- Charge batteries only with the ARRI charger!
- Do not bypass the fuse or temperature
switch! (Danger!)
- Do not heat NC-batteries!
- Do not short-circuit NC-batteries!
14
Mains Unit NG 12/24 R
The mains unit is suitable for use in the studio. Its use is
recommended when using electronic accessories with a
higher power consumption (e.g. eyecup-heating, VideoAssist-System, Lens-Control-System). The mains unit has
a safety switch-off device overheating and a power
limiter.
For use see product description NG 12/24 R.
The DC/DC converter 24V/12V-22W provides DC
voltage for 12V accessories through the camera’s
power supply. The output voltage of the DC/DC converter is 12V +/- 1V, maximum power is 1,8 A.
The output plugs on the converter are wired as follows:
11-PIN Fischer Plug
PIN 9
GND
PIN 11
+12 V
Mounting
• Plug DC/DC converter with both plugs into the RSsockets on the right side of the camera and secure
with the knurled screw.
Power Supply
DC/DC Converter 24V/12V-22W
RS-sockets:
Two 3-pin Fischer plugs, parallel switching
RS-Sockets
PIN 1
GND
PIN 2
+24 V
PIN 3
/ERUN
15
Magazines
4. Magazines
Coaxial magazines with or without TC recording unit
(time code)
are available. They are designed as
quick-change magazines and use the same mechanical
drive interface as previous 16SR systems.
For the HS camera (high speed) special HS magazines
are available with or without the TC-recording unit.
Do not use HS magazines on the normal
camera or standard magazines on the HS
camera!
16 SR II-magazines can still be used (without TCrecording).
Loop Protector
The loop protector protects the film loop and the pressure plate when the magazine is not attached to the
camera. the loop protector should always be kept on
the empty or loaded magazine until the magazine is
attached to the camera. If the magazine is removed
from the camera the loop protector should immediately
be attached to it.
16
guide pin
Magazines
Removing the Loop Protector
• Using slight pressure push the loop protector upwards.
• Swing out the lower side and remove the loop protector.
Attaching the Loop Protector
• Engage the upper side of the loop protector from
below into the pilot pin
on the magazine.
• Swing the loop protector into the magazine, and with
slight pressure push in to lock.
Magazine Door
safety push button
magazine cover lock
The magazine door can only be opened or closed if the
magazine has been removed from the camera.
Opening the Magazine Door
.
• Open the locking latch
• Hold down the red safety knob
depressed and
turn the locking latch to „A/O“.
• Pull on the locking latch to open the magazine door.
Never close the door when the locking latch is
in position „closed“ as otherwise the latch
could be damaged. Never hold the magazine
by the door as otherwise the hinge could be
damaged.
Closing the Magazine Door
• Make sure that the locking latch is in position „A/O“.
• Push the magazine door firmly and turn the locking
latch clockwise to the locked position - the safety knob
locks audibly into place.
17
Magazines
Film Core, Core Holder and Clamp Core
A film core adapter
and a collapsible core
are supplied with the camera; these are placed
on the supply and take-up film spindles.
retaining levers
standard
core
adapter
The film is normally delivered on a core. The film core is
attaches to the core adapter on the feed side. The core
adapter is secured on the shaft with two clamp levers
which automatically unlock when it is pulled off
the shaft. On the take-up side the collapsible core is
used. It usually remains on the shaft. The collapsible
core can be pulled off easily once the lock
has
been opened. When the collapsible core is placed on
the shaft it locks automatically in place.
film spindle
supply-side
Andruckrolle
collapsable
core adapter
Cleaning the Magazines
Keep the inner side of the magazine extremely clean! Clean the magazine every time
you load or unload it. Use only an optic brush!
• Swing away the guide roller arm back
until it
clicks - do not pull the guide roller arm upwards.
• Clean the glass window for the film end sensor on the
under side of the magazine with an optic cloth and
cotton buds. If very dirty moisten the optic cloth with
pure alcohol.
18
film spindle
take-up-side
release latch
idler roller
time code
recording unit
Magazines
Cleaning the TC-Magazine
• Open out the lens on the recording unit
.
• Clean the upper side of the lens with an optic cloth.
If very dirty, moisten the optic cloth with pure alcohol.
• Clean the under side of the lens with cotton swabs.
• Clip the lens holder.
If an empty film core is installed on the feed side pull it
straight off the core adapter. If the film core is too tight
on the core adapter, remove both from the film spindle.
Open the retaining latches and pull the core adapter with the
film core off the spindle, and separate the two outside of the
magazine. Before loading the magazine with film,
install the core adapter and lock the retaining latches.
Loading the Magazine
The film must be loaded with the emulsion side inwards.
With single perforated film only B winding can be used.
If the user is not familiar with the magazine it is recommended before placing it in the changing bag that they
become familiar with the following:
Film Head
Regardless of how the film head is cut, the film can
always be loaded. Optimal for loading is a straight cut
through the perforation holes. When cutting the film
ensure that no remains of the film fall into the magazine
as they could cause scratches on the film, damage to
the equipment or a film jam.
- the position of the opening for loading the film,
- the feed direction of the film in the magazine and
- the position and turning direction of the gear clockwise.
19
Magazines
Preparations
• Remove the tape seal from the film container.
• Place the closed film container and the magazine
without the loop protector in the changing bag.
• Place the magazine with the feed side up.
• Open the feed side of the magazine.
• Close the changing bag and place your hands in the
sleeves.
Changing Bag
• Open the film container in the closed changing bag.
• Remove the black film wrapper.
• Remove the tape from the film end.
Ensure that the tape is completely
removed.
• Stick the tape to the outside of the film container in
order to check later that no remains of tape are stuck
to the film.
• Close the empty film container and lay the film roll on
top of the container to facilitate threading the film.
Then place the film roll and the feed slot on the same
height, ensuring that the film roll feeds in as marked
on the magazine.
• Slide back the guide roller arm until it clicks in the
open position - do not pull the guide roller arm upwards.
20
Loading the Film, Feed Side
• Feel for the opening for threading.
• Guide the film head into the opening and carefully push
it further into the opening. Simultaneously feel on the
gear when the film engages with the internal sprocket.
• Be sure thast dual perforations is correctly loaded
(emulsion side inward, B winding).
• Carefully turn the gear further in the direction of the arrow
(clockwise) until the film emerges from the magazine throat.
• Pull some of the film out of the magazine throat.
If the film cannot be loaded at the first attempt, cut off a piece of film and try again.
Never use force!
Attaching the Film Roll
• Hold the film roll over the center of the shaft.
• Place the film on the shaft and push the core as far as
it will go onto the core adapter, without pressing on
the film. The film will otherwise become conical and
cause noise during operation.
• The spring on the core adapter can be locked into the
groove in the film core by turning the film core on the
core adapter.
• Ensure that the film core is locked in place.
• Carefully place the guide roller arm on the film roll.
• Ensure that the guide roller is centered and guides the
film roll on both sides.
• Pull the film roll tight with the magazine drive gear.
• Ensure that the cover locking latch is completely open.
• Carefully close the magazine door, ensuring that none of
the film is hanging out or gets caught or crimped.
After closing the magazine door feel with one finger
around the door to make sure that no piece of film or
any part of the changing bag is stuck in it.
• Lock the magazine cover with the locking latch.
• Ensure that the magazine cover is closed and locked.
• Open the changing bag and take out the magazine.
pressure plate.
• Hold the gear to keep the loop length stable. Push the
film head
gently into the smooth take-up
channel
(picture next page) until it engages
with the take-up sprocket.
• As soon as the film engages noticeably with the takeup sprocket, turn the magazine drive gear approximately 5 further revolutions in the direction of the
arrow.
• If the film loop is too large or too small repeat the process.
Magazines
This is the most common error! Therefore
check again whether the guide roller arm is
sitting correctly. The mechanical film counter
will not work if the guide roller arm is not
pushed onto the film roll.
Do not use force! In the case of difficulties
repeat the process carefully.
Forming the Film Loop and Threading the
Film, Take-Up Side
• Remove the magazine from the changing bag or dark
room, and place it with the magazine cover hingeside down (rear of magazine).
•
Pull some film out of the magazine throat and place
along the under side of the magazine, pulling it until
the first perforation hole reaches the white index line.
The film should be slightly tight. The film is guided at
a slight diagonal rather than straight against the
21
Magazines
Attaching the Film to the Core Adapter or the
Collapsible Core
take-up-side
film channel
22
• When in daylight place the magazine with the takeup side facing up.
• Open the take-up side of the magazine cover.
• Swing back the guide roller arm until it clicks in the
open position. Do not pull the guide roller arm
upwards.
• Pull out some film.
• Attach the core adapter or the clollapsible core onto
the take-up shaft.
Core holder:
• Place the core adapter on the film core, paying
attention to the direction of the slot (picture left).
• Place the film head in the slot.
• With a fingernail, smooth out the film where it
emerges to avoid uneven movement of the guide
roller arm.
• Feed with the gear approximately 5 revolutions
clockwise until the film is sitting securely.
The film can be secured on the core holder or the clamp
core before placing this on the shaft.
• Carefully tighten the film between the clamp core and
the gear: hold the gear firmly and turn the core holder
further.
• Clamp core: turn the gear by hand a few revolutions
further. Loosen the clamp on the clamp core. Carefully
push on the film reel to ensure that the film reel is
sitting at the correct height. Retighten the clamp.
• Turn the gear a few revolutions further by hand,
checking the even movement of the guide roller arm.
• If using TC-magazines set the sensitivity: turn the
desired value upwards. See the table, chapter 12.
• Close and lock the magazine cover.
• Ensure that the magazine cover is closed and locked.
• Check the counter on the magazine. The white
indicator must be visible, otherwise the guide roller
arm is not locked. The counter now shows the amount
of unexposed film on the feed side.
• Hang the film loop between the 4 guide pins
(2 shaped as claws).
• Center the film loop in the direction it will run.
• Attach the loop protector.
Magazines
Collapsible core:
• Slide the film head into the opening of the collapsible
core. The film head should be pushed a little past the
metal tongue of the clamp lever. If the film head is
pushed to far into the collapsible core, unwanted
noise may be heard.
• Lock the clamp lever. Ensure that the film is clamped
straight and at the right height. If the film is clamped
at a slant or too high in the collapsible core, unwanted noise may be heard.
Final Tasks
• Carefully place the guide roller arm on the film roll.
• Ensure that the guide roller is centered, and guides
the film on both sides.
23
Magazines
Unloading the Magazine
• Remove the loop protector.
• Check the counter on the magazine. It must show 0,
otherwise the film has not been fully exposed.
• Open the feed side in daylight.
• Swing away the guide roller arm until it clicks - do not
pull the guide roller arm upwards.
• Pull off the core of the exposed roll.
• If further shooting is to be carried out, the unexposed
film can now be loaded on the feed side.
Core adapter and film core:
• Unlock the film core.
• Brace your thumbs on the film spindle and carefully
pull off the film with the core adapter and film core.
• Carefully press the core adapter out of the film core,
ensuring that the inner loops of film are not pressed
out with it, and place the core adapter back onto the
film spindle.
• Place the film in the black wrapper and place this in
the film container.
• Lock the film container and seal it down with the tape.
• Open the changing bag.
Tasks in the Changing Bag
Final Tasks
• Place the magazine with the take-up side facing
upwards, the empty film container and the black film
wrapper in the changing bag.
• Close the changing bag and place your hands in the
sleeves.
• Open the magazine cover on the take-up side.
• Swing away the guide roller arm until it clicks. Do not
pull the guide roller arm upwards.
• Clean the pressure gate in the magazine throat with
an optic brush and an optic cloth. If very dirty,
moisten the optic cloth with pure alcohol.
• Clean the magazine (see above).
Preparations
Collapsible core:
• Loosen the clamp on the collapsible core.
• Holding the shaft down with your thumbs, brace your
thumbs on the film spindle and pull off the film carefully.
24
Never remove film deposit with metal tools;
use only the ARRI plastic film track cleaning rod.
Camera Body
5. Camera Body
With the new pitch adjustment you can adjust the
camera to optimize the running noise level when
different types of film stock are used. The mechanically adjustable mirror shutter enables shorter
exposure times and allows use of HMI-lights, even
with older ballasts.
Movement
The kinematic film-movement with pitch adjustment
is designed for extremely quiet running. The registration pin guarantees optimal image steadiness.
Speed can be set between 5 and 75 fps (with HS
between 5 and 150 fps).
Checking Film Transport
• With the magazine attached depress the PHASE
key – the camera will run slowly (1 fps). This is
recommended every time a loaded magazine is
attached to the camera to assure correct film
transport.
Pitch Adjustment
With the pitch adjustment you can adjust the camera to
optimize the running noise level of the camera at
standard speed using a variety of different types of film
stock.
• Let the camera run at the desired standard running speed.
• Set the hexagon key SW 2 (key width 2 mm) into the
pitch adjustment
.
• By pressing, engage the pitch adjustment with the
key, and by turning the key, select the position that
optimizes the camera noise level.
25
Camera Body
Mirror Shutter
The open sector of the mirror shutter can be
mechanically adjusted while the camera is disconnected. The opening angles are 45°, 90°, 135°, 144°,
172.8° and 180° and are marked on the moveable
shutterblade. The selected shutter opening locks into
its position. The selected shutter opening angle is also
shown on the camera display when depressing the
PHASE key in Standby (for longer than 1 sec.). An
automatic stop position guarantees an undisturbed view
through the viewfinder, once the camera is stopped.
If the film gate needs to be checked through the lens
port, release PHASE pushbotton quickly after activating it in Standby. The mirror shutter will then remain
in the open position for the gate check. Once the
check is completed, press the Phase pushbutton briefly,
and the shutter will return to its viewing position.
Manual Inching Knob
• To turn the mirror shutter and movement manually,
press the manual inching knob and turn this in the
direction of the arrow on the side of the camera.
Adjusting the Mirror Shutter Opening
Necessary tool: special key (2mm hxagonal driver)
26
located in the hidden compartment above the heated
eyecup connector.
• Switch off the camera and remove the on-board
battery or the supply cable.
If the camera is accidentally switched on
while the special key is attached, the mirror
shutter could be damaged. Therefore switch
off the camera and remove the on-board
battery or the supply cable!
• Remove the lens or the lens opening cover.
• If appropriate, remove the PL/bayonet-mount adapter.
The mirror shutter can be damaged if the
special key with the protective rubber covering is not used!
• In Standby, depress the PHASE pushbutton until the
wide angle symbol appears in the display. After
approx. 1 sec. the selected opening-angle will be
shown in the upper line of the display.
Camera Body
• Using the manual inching mechanism adjust the mirror
shutter so that the ladjustment screw for the shutter
adjustment
is visible at the bottom of the lens
mount, below the mirror shutter.
• Insert the special key into the adjustment screw.
• By pressing, engage the adjustment screw with the
special key and hold the mirror shutter with the
manual inching mechanism in its position. While
enlarging the opening angle it is possible to support
the mirror shutter on the special key, in which case it
does not need to be held in position by the manual
inching mechanism.
• Set the desired opening-angle of the mirror shutter
with the adjustment screw (to reduce the angle turn
counter-clockwise, to enlarge the angle turn clockwise). While adjusting the shutter angle, the shutter
can also be held with your finger in the black center,
preventing it from turning while adjusting the angle.
Be sure not to touch the mirror area of the shutter.
Checking the Mirror Shutter Setting
The setting of the mirror shutter can also be checked
with a lens in place.
27
Camera Body
1.37 – TV 1.33
TV 1.33
TV
1.37
1.37
TV
1.33
1.66 (S16)
HDTV 1.78 – TV 1.33
T.V. 1.33
28
1.33
TV
1.37
1.66 (S16) – TV 1.33
1.66 (S16)
1.85 (S16) – TV 1.33/1.78
1.85 (S16)
1.33
TV
1.66 (S16)
1.78
HDTV
1.78
HDTV
1.85 (S16)
The overview shows the available fibre optic viewing
screens. Without ARRIGLOW, the fibre optic viewing
screens for the ARRIFLEX 16 SR II can be used. (The
16SR 3 screens can also be used in the 16SR II as well).
Changing the Fibre Optic Viewing Screens
• Switch off the camera and remove the on-board
battery or the supply cable.
• Remove the lens or lens port cap.
• If appropriate remove the lens port adapter.
• Turn the mirror shutter downwards using the manual
inching mechanism.
• Grip the fibre optic viewing screen using the Hirschmannclamp (included in the camera package) and pull out
of the holder.
• To clean the fibre optic viewing screen use a particlefree optical cloth moistened with pure alcohol.
fiberscreen
Camera Body
Fibre Optic Viewing Screens
Before resinserting the fibre optic viewing
screen ensure the fibre optic viewing screen
frame is completely clean.
• Push the fibre optic viewing screen with the Hirschmannclamp to the stop position in the holder. A spring lock
fixes the fibre optic viewing screen in the exact position.
• Check the lock: press a finger carefully onto the front
rim of the fibre optic viewing screen frame.
29
Camera Body
Attaching the Magazine onto the
Camera
Do not use HS magazines on a standard
camera or standard magazines on a HS
camera.
• If appropriate press the button
on the video
carrying handle and swing the handle to the left side
of the camera.
• If appropriate swing back the on-board battery.
• Remove the loop protector and the aperture cover plate.
• Center the film loop in reference to the pressure plate,
and make sure the film is held in place by the four
guide pins.
• Flip the safety latch to the back
.
• Grasp the upper part of the magazine and hold it on
approx. 30° slant (two o'clock) position.
• Push the pilot pin
on the magazine forwards
into the camera housing.
• Carefully press the back part of the magazine downwards until it locks in place.
The red markings on the casing should
no longer be visible!
• Flip safety lever
30
to the front.
• Check that magazine is locked securely by lifting the
back part of the magazine.
• If appropriate swing back the on-board battery and
the video carrying handle.
• Set the film sensitivity on the camera´s exposure meter
and reset the film counter.
• Check the TC sensitivity setting on the magazine.
•
Press the button
on the video carrying
handle and swing the handle to the left side of the
camera.
• If appropriate swing back the on-board battery.
• Flip the safety lever
to the back.
• Grasp the upper part of the magazine.
• Press down the release lever with the index finger.
• Swing the magazine 30° upwards (two o'clock) and
pull it backwards until it is removed.
• Clean the aperture plate with an optical brush and an
optical cloth. Do not use solvents!
• Attach the loop protector to the magazine and the
aperture cover plate to the camera.
safety latch
magazine release
latch
Camera Body
Removing the Magazine
Never remove emulsion buildup with metal
tools; only use ARRI plastic rod.
31
Optics
6. Optics
Lenses
High speed 35mm lenses (with 54mm PL-mount)
The ARRIFLEX 16SR 3 has a 54mm PL-mounting
flange (positive locking). Lenses with a 41mm ARRIbayonet can be used with a lens port adapter. All
commonly used 16mm and 35mm lenses with an ARRI
mount can be used.
-
The following lenses can be used with the Super 16 format:
16mm lenses (with 41mm ARRI bayonet mount)
-
11-66mm Angenieux T2,6
11,5-138mm Angenieux T2,3
15-150mm Angenieux T2,3
16-44mm Angenieux T1,3
10,4-52mm Cooke Varokinetal T2,8
10-30mm Cooke Varokinetal T1,5
16mm lenses (with 54mm PL-mount)
- 11-110mm VARIO SONNAR T2,2 (also available with
41mm ARRI bayonet-mount)
- 12mm Zeiss Distagon T1,3
- 16mm Zeiss Distagon T1,3
- 25mm Zeiss Distagon T1,3
- 50mm Zeiss Planar T1,3
32
18mm
25mm
35mm
50mm
65mm
85mm
Zeiss
Zeiss
Zeiss
Zeiss
Zeiss
Zeiss
Distagon T1,3
Distagon T1,3
Distagon T1,3
Planar T1,3
Planar T1,3
Planar T1,3
35mm prime lenses (with 54mm PL-mount)
-
10mm Zeiss Distagon T2,1
12mm Zeiss Distagon T2,1
14mm Zeiss Distagon T2,0
16mm Zeiss Distagon T2,1
20mm Zeiss Distagon T2,1
24mm Zeiss Distagon T2,1
28mm Zeiss Distagon T2,1
32mm Zeiss Planar T2,1
40mm Zeiss Planar T2,1
50mm Zeiss Planar T2,1
60mm Zeiss Macro T3,0
85mm Zeiss Planar T2,1
100mm Zeiss Planar T2,1
135mm
180mm
300mm
600mm
Zeiss Planar T2,1
Zeiss Sonnar T3,0
Zeiss Tele-Apotessar T3,0
converter for Tele-Apotessar T6,0
35mm macro lenses (with 54mm PL-mount)
-
16mm
24mm
32mm
40mm
ARRI
ARRI
ARRI
ARRI
MACRO
MACRO
MACRO
MACRO
T2,1
T2,1
T2,1
T2,1
The following lenses can only be used if the viewfinder
arm is set vertically:
- 50mm ARRI MACRO T3,0
- 100mm ARRI MACRO T3,3
- 200mm ARRI MACRO T4,3
All 35mm lenses with a 41mm ARRI bayonet-mount can
also be used for Super 16.
Lenses with an automatic spring-loaded diaphragm can
be used. Shutter control will NOT work.
16mm and 25mm Schneider lenses of the old
construction-type (41mm aluminium-mount)
should under no circumstances be used as this
could destroy the mirror shutter!
Optics
-
Heavy lenses, such as some zoom and
telephoto lenses should only be used with a
support.
When using lenses or the PL/bayonet
adapter, lens mount surfaces must be kept
clean. After removing the lenses, immediately
replace with the protective cover or another
lens to prevent dust or dirt from entering the
camera.
The following lenses cannot be used for Super 16
format:
- 10-100mm VARIO SONNAR T2,0 (use instead the 11110mm VARIO SONNAR T2,2)
- 8mm DISTAGON T2,1
- 9,5mm DISTAGON T1,3
33
Optics
54mm PL-Mount
The bayonet lock on the PL-mount guarantees secure
fastening of all lenses, including heavy lenses. An
accurate index pin
in the lens mount assures
precise mounting of the lens. Four precise index slots in
the lens mount on the lens to be attached at a 90°
direction.
Attaching the Lens
.
• Open the bayonet lock
• Push the lens straight line into the lens mount receptacle and hold firmly in place.
• Check the mounting position of the lens.
• Ensure that the index pin on the camera side
is
positioned into one of the four slots on the lens mount.
• Lock the bayonet ring firmly clockwise. Don't
overtighten.
Removing the Lens
• Hold the lens and open the bayonet lock
ring
counterclockwise.
• Pull the lens straight out of the camera.
• Immediately replace the protective cover or another lens.
34
lens
locating pin
locking
lever
Optics
41mm ARRI Bayonet
Lenses with a 41mm ARRI bayonet mount can be used
with a PL/bayonet adapter. When changing bayonet
mount 41mm lenses, the adapter remains on the camera.
Release the bayonet lock of the adapter by pushing the
little back release pushbutton on the side of the camera.
Attaching the PL/Bayonet Adapter
• Open the bayonet lock
.
• Push the adapter
in a straight line onto the lens
mounting receptacle.
• Ensure that the index pin on the camera side
is
positioned into the index slot on the adapter.
• Lock the bayonet ring.
Attaching the Lens
Only lenses with a 41mm bayonet mount can be used.
bayonet/
PL mount
adapter
lens locating pin
locking
lever
• Push the lens straight into the adapter.
• Lock the lens into the adapter by turning clockwise.
35
Optics
Removing the Lens
The adapter remains on the camera.
• Press in the release button completely.
• Unlock the lens by turning counter-clockwise.
• Pull the lens straight out of the adapter.
• Immediately replace the protective cover for the
compensation adapter or another lens.
Removing the Lens Port Adapter
• Open the bayonet lock.
• Pull the adapter straight out of the camera.
• Immediately replace the protective cover or another lens.
Lens Support
When heavy lenses are used install the lens support. To
support heavy lenses, the lens support bridge LS-7
and a support ring
which is compatible
with the lens has to be installed.
Attaching the Lens
• Mount the support ring
on the lens. This is
usually done only once. The support ring then remains
on the lens.
• Place the lens support
from above on the
support rods and with slight pressure let it click in.
• Attach the lens to the camera and hold it firmly in
place.
• Push the lens support under the support ring.
• Tighten down the knurled knob
and pull tight
the clamp lever on the lens support
.
The clamp lever
positions:
can be locked in different
• Unlock the clamp lever by pulling it outwards and turn
to the desired position.
36
Optics
lens support ring
lens support bridge
tie down screw
clamp lever
37
Optics
Viewfinder
The viewfinder can be swivelled three-dimensionally. It
can be swang over approx. 190° from the left to the
right side of the camera, with an attached video-assistsystem approx. 120°. The viewfinder can be rotated
360° and can be swivelled a further 25° outwards for
left eye viewing. An automatic image compensator
provides an image which is upright and correct left-toright. Only when it is swivelled outside of the main axes
is there an image distortion which however can be fully
compensated by the new manual image compensator.
release knob for correct
image position
viewfinder prism
rotating knob
Warning Signals in the Viewfinder
Asynchronous camera operation: LED lights up
Low voltage: LED flashes
gradually decreases it should be reset. See chapter 13.
Friction
The viewfinder is held in position by friction. To adjust
viewfinder arm friction for 360° positioning:
Viewfinder Image Correction
If the viewfinder is used in other than the customary
position, the viewfinder image can be adjusted for more
convenient viewing comfort:
• To reduce friction turn the adjustment ring
in
the direction LOOSE.
• To increase friction turn the adjustment ring in the
direction FRICT.
If friction in the left-right swivel and the 25° swivel
38
friction
adjustment
ring
• To correct the image position, push the release button
and correct the image with the rotary knob
. Internal friciton will hold the corrected image
position in place.
Eyepiece
The diopter compensation on the eyepiece is fitted with
a scale of 1 to 12. At position 6 middle focus is set.
eye cup iris lever
knurled
retaining
ring
Optics
The above option allows unrestricetd correction of the
finder image.
Unscrewing the Eyepiece
• Loosen the knurled ring
.
• Pull off the eyepiece.
Screwing on the Eyepiece
• Attach the eyepiece to the finder.
• Ensure that the pin locks into a groove.
• Pull the knurled knob
tight.
Eyecup
In order to avoid light falling in through the viewfinder
the eyecup has a shutter.
• Always slide the shutter closed
for viewing.
when not using
The eyecup can be removed and replaced by the
heated eyecup. See chapter 7.
39
Optical Accessories
accessory shoe
40
tie down screw
Light-weight Support LWS-2
The light-weight support is necessary if using the lightweight follow-focus device and for the 4"x4" matte box
MB-17. The light-weight follow focus device and the
4"x4" matte box MB-17 are pushed onto the rods on
the light-weight support and then clamped.
The light-weight support can also be used as a support
for VARIO-SONNAR lenses - particularly when using the
Zeiss Mutar tele-converter, the light-weight follow focus
device or the LCS.
If using the 8mm Distagon, the extensions on
the light-weight support should be removed.
These would otherwise be visible in the frame.
For format change from Normal 16 to Super 16 the
flange on the light-weight support should be turned
180°. See chapter 8.
Mounting
• Loosen completely the locking screw
.
• Place the flange from above into the camera shoe
(side downwards).
• Press the light-weight support against the camera so
that the guide pins connect with the appropriate holes
in the light-weight support.
• Retighten the locking screw.
• If appropriate, screw the extensions on or off.
Dismounting
• Loosen completely the locking screw
so that the
guide pins on the camera pull out of the holes on the
light-weight support.
• Pull the light-weight support upwards and off.
Optical Accessories
7. Optical Accessories
Using VARIO-SONNAR Lenses
• Mount the light-weight support.
• Remove the rubber ring from the lens.
• Mount the support ring on the lens.
• Push the lens support LS-6 onto the light-weight
support.
• Attach the lens to the camera.
• Push the lens support under the support ring.
• Screw tight the knurled screw on the lens support.
41
Optical Accessories
adjustable drive
arm
tie down screw
knurled screw
tie down screw
marking disk
knurled screw
release knob
right focus knob
42
lens drive gear
tie down lever
focus knob
With the Universal follow focus device the operator can
focus the lenses from his working position. He uses the
follow focus knob or a flexible shaft to focus. This can
be attached on the left or the right side. The switchable
step-down gear allows the lens to be optimally adapted
to the scene. The Universal follow focus device can be
used on prime and zoom lenses. Mounting is also
possible if the matte box or other accessories are
attached. Markings can be made on and removed from
the marking disks. The groove and pin ensure that the
markings can be reproduced.
Mounting
Depending on the lens used, the adjustable arm can be
swung onto the lens geared ring from above or below,
and the gear shaft can be attached from in front or behind.
• Snap the Universal follow focus device onto the
support rods.
• If appropriate mount the lens support.
• Attach the lens and turn the follow focus ring to infinity.
• Attach the gear
to the swing arm
from in
front or behind and fasten with the knurled knob
.
• Slide the follow focus device onto the support rods
and swing the swing arm onto it so that the gear shaft
locks into the toothed drive ring on the lens allowing
no free play.
• Set the swing arm in place with the locking screw
.
• Clamp the follow focus device onto the support rods
with the locking lever
.
• Check for play by turning the follow focus device
in both directions.
• If appropriate reset: loosen the clamps from the follow
focus device and loosen the swing arm, reset the play
and retighten the clamps.
• For use from the right side: attach the right-hand focus
.
knob and fasten with the locking knob
• When using some short focal range lenses, the
extension included with the device should be mounted
on the right side of the follow focus device. The focus
knob is then attached to the extension.
• The follow focus lever which is included with the
device can be attached left or right on the focus knob.
• If using a flexible shaft: slot in the shaft right or left on
the focus knob. Set up the focus knob at the other end
of the shaft.
• Turn the marking disk
into the desired position
and fasten with the knurled knob
.
The locking lever
positions:
Optical Accessories
Universal Follow Focus Device FF-3
can be fastened in various
• Pull the locking lever outwards and turn in the desired
direction.
43
Optical Accessories
Changing the Step-Down Gear
When the focus knob is pushed in the step-down ratio is
1:1, when the focus knob is pulled out the ratio is
1:0,6.
• Depress the button
and simultaneously pull the
focus knob out to the stop position, or push it in - the
gear will be engaged or disengaged.
See also the information sheet „TECHN. INFORMATION
Universal Follow Focus Device“.
Light-Weight Follow Focus Device
The light-weight follow focus device is attached to the
light-weight support and fulfils the same function as the
Universal follow focus device. The light-weight follow
focus device can only be used from the left side.
Lens-Control-System LCS
The LCS is a versatile control unit for all commonly used
lenses. As a compact, modular system it can be expanded from the basic zoom control to a complete
remote control system for zoom, focus and iris. An
optional memory module stores set values and replays
operation functions. This data can be stored through the
RS232 interface on a computer and reloaded into the
memory module.
See the instruction manual Lens-Control-System.
44
4"x4" Matte Box MB-17
The 4"x4" production matte box is equipped with two
rotatable filter stages for two 4"x4" push-through filters.
The filter stage has a receptacle at the rear for 4 1/2"
diameters filters and a reflex protection ring. It is
interchangeable with other filter stages. Optional
4"x5,650" or 4"x6" filter frames with gearing for
graduated filters can be used by means of a rotary
knob or the flexible drive. French flags can be firmly
secured with the enclosed holder. Lenses down to a
focal range of 8 mm can be used.
The 4"x4" matte box is equipped with a rotatable filter
stage for two push-through 4"x4" filters. The filter stage
has at the rear a receptacle for 4 1/2" diameter filters
and a reflex protection ring. French flags can be firmly
secured with the enclosed holder.
The 4"x4" production matte box is fastened to the
support rods on the bridge plate and can be swung
forwards to facilitate lens changes.
See the information sheet „TECHN. INFORMATION
4“x4" Production Matte Box MB-16".
See the information sheet „TECHN. INFORMATION
4“x4" Matte Box MB-17".
Light-Weight Matte Boxes LMB-2
and LMB-3
Optical Accessories
4"x4" Production Matte Box MB-16
The light-weight matte boxes are fastened directly to the
front diameter of the lens. For the LMB-2 two 3"x3"
filters, and for the LMB-3 two 4"x4" filters can be
pushed into the filter stage. On prime lenses a „Series
9“ filter in an 80mm adapter ring can be used additionally.
See the information sheets „TECHN. INFORMATION
Light-weight Matte Box LMB-2“ and „TECHN. INFORMATION Light-Weight Matte Box LMB-3“.
45
Optical Accessories
Finder Extension FE-2
The finder extension used in combination with the
levelling rod allows comfortable work with the tripod the viewing height remains stable.
Mounting
on the viewfinder.
• Loosen the knurled ring
• Remove the eyepiece.
• Attach the finder extension to the viewfinder, magnification adjustment
on the user side.
• Ensure that the pin locks into the groove on the
viewfinder.
• Pull the knurled ring tight.
• Attach the eyepiece to the finder extension.
• Ensure that the pin locks into the groove on the finder
extension.
• Pull the knurled ring tight.
• Readjust the image by turning 180° with the image
compensator. See chapter 6.
The finder extension is equipped with an magnification
adjustment 10x to 17x. This is activated by turning the
lever.
46
knurled
retaining
ring
2x magnification
selector lever
Two finder extensions can be used together. In this case
the finder extension on the eye side must be set to 10x.
When filming from the tripod the levelling rod holds the
finder extension constantly at eye level. The levelling
rod for the finder extension can be used for the
ARRIFLEX 535 and 535B as well as for the 16SR 3.
Mounting
onto the tripod.
• Screw the lock bushing
• Push the short mounting rod
into the lock
bushing and clamp - after mounting the levelling rod
should stand vertical if possible.
• Fasten the levelling rod
with the under clamp
screw
at the end of the mounting rod.
• Push the plug rail
on the levelling rod into the
holder on the finder extension.
• Fix the desired viewing height with the knurled
screws
.
mounting rail
knurled
tie down
screw
adjustable
rod
Optical Accessories
Levelling Rod for Finder Extension
EL-3
finder support
clamp bracket
tie down screw
47
Optical Accessories
Heated Eyecup HE-3
The heated eyecup prevents the eyepiece lens from
misting up in the cold or in varying temperatures. The
temperature of the in-built heater is kept constant by an
electronic control.
The heated eyecup is supplied with an anatomically
shaped eyecup and a folding eyecup.
Mounting
• If appropriate remove the unheated eyecup.
• Snap the heated eyecup onto the eyepiece.
• Plug the angular plug on the power cable KC 27 into
the camera socket
for the heated eyecup.
• Plug the power cable into the heated eyecup.
• Set the switch
to the desired temperature
(LO=40°C, HI=55°C).
switch
receptable
for heated
eye cup
cable
48
The centre of the image format is 1 mm different for the
Super 16 (12.4 x 7.5 mm) than for Normal 16 (10.3 x
7.5 mm). In changing the image format, the lens mount
and the viewfinder on the camera must be adjusted 1
mm to centre it. The opening of the Universal film gate
is altered merely by addition or removal of a rail. For
both formats different fibre optic viewing screens must
be used.
• Remove the 6 cylinder head screws
.
• Turn the lens mount 180°. The desired format (N16 or
S16) must be top right.
Ensure that the adjustment shims are not bent,
dirtied or twisted during insertion.
Also on the bridge plate, the leightweight support and
the video optic the adjustments for Normal 16 or Super
16 must be carried out.
Adjusting on the Camera
Special Tool Kit
Included with camera
Altering the Lens Alignment
• Check Flange focal distance. See Chapter 13
Standard:
52.000 – 0.010 mm
HS:
51.970 – 0.010 mm
lock ring stop
lens locating
pin
cylinder head
screws
Adjustment Normal 16/Super 16
8. Adjustment Normal 16 /Super 16
lens lock-ring
handle
49
Adjustment Normal 16/Super 16
• Mount the alignment screw
SW 1,5 (wrench
width 1,5 mm) top right.
• Remove stop plate segment
and locking knob
after removing the fastening intermediate rings
and refasten on the opposite side.
• Replace the 6 cylinder head screws and screw tight.
• Check viewing screen for focus.
• Check flange focal distance.
Changing the Fibre Optic Viewing Screen
• For changing the fibre optic viewing screen see
chapter 5.
Adjusting the Opening in the Universal Film
Gate
For Normal 16 part of the film gate is covered by a rail
which is removed when changing to Super 16.
• Unscrew the 6 screws
on the cover plate
.
• Remove the cover plate
.
• Unscrew the 8 cylinder head screws
on the film
gate.
• Remove the film gate.
Ensure that the adjustment shims are not bent,
dirtied or twisted during insertion.
50
Phillips
head
screws
rail
(std. 16)
rail (std. 16)
cylinder
head
screws
aperture plate
• When changing to Super 16 remove the rail from the
film gate and place it in its case
.
• When changing to Normal 16 remove the rail from its
case and place it in position in the film gate
.
• Remount the film gate in the reversed order.
• Check the tracking.
Adjustment Normal 16/Super 16
hiden rail
compartment
51
Adjustment Normal 16/Super 16
52
Adjusting the Viewfinder Alignment
• Loosen the threaded bushing
with special
wrench A 16 SR-3 by approx. 2 full turns.
• Loosen the worm screw
SW 2 by approx. 10
full turns.
• Remove the threaded bushing
.
• Hold the knurled ring
firmly and completely
unscrew the worm screw
.
• Untwist the knurled ring
and remove the
viewfinder.
• Unscrew the 4 cylinder head screws
.
• Turn the friction flange 180°. The desired format (N
or S) must be legible.
• Replace the 4 cylinder head screws and screw tight.
• Clean the visible lens surfaces
carefully with a
moist optic cloth. If dirt clings, moisten the optic cloth
with pure alcohol.
• Remount the viewfinder in the reversed order. Adjust
the friction. See chapter 6.
When replacing the viewfinder never forget
the friction plate as otherwise the function of
the optic will be impaired.
swingover friction
adjustment
helical retaining ring
hex screws
• Unscrew the 3 screws
in the rail
in the
upper part of the bridge plate.
• Turn the rail 180° and refasten. The marker must
point to “Standard“ for Normal 16 and to “SUPER
16“ for Super 16.
index marks
Old bridge plates with 15mm support rods for 16SR
must be equipped with Normal 16/Super16 capability
prior to use. A conversion kit with instructions for
modification is available.
screws
Adjustment Normal 16/Super 16
Bridge Plates BP-6 and BP-7
reversable mounting plate
53
Adjustment Normal 16/Super 16
54
Lightweight Support
• Unscrew the guide screw
.
• Turn the flange 180°. The red dot must be on
“STANDARD“ for Normal 16 and on “S16“ for Super
16.
• Screw in the guide screw.
Video Optic
• Unscrew the video camera from the C-mount.
• When changing from Normal 16 to Super 16 screw
the red intermediate ring marked “S16“(delivered
with the package) onto the C-mount thread on the
video set firmly up to the collar.
• Rescrew the video camera.
• When changing back to Normal 16 remove the
intermediate ring.
• Check the video optic adjustment and reset.
lock screw
The camera electronics open up a variety of new
possibilities: a comprehensive large LCD display advises quickly the chosen settings. The electronics control
speed to exactly 1/1000 fps (to 100 fps). Even
without an external synchronization unit synchronization
is possible on a video monitor.
Camera Display
The display advises which values have been set. The
values in six various modes can be checked or changed.
The modes have the following meaning:
1
2
3
4
5
6
Standard (total exposed film or take counter/speed)
Programmable speed
Take or total exposed film counter/power supply
Time code time
Time code user bits
Time code sensitivity
Choosing a Mode
After turning on the camera the display is in mode 1.
• Depress the MODE key until the desired mode appears. After mode 6 mode 1 appears again.
slide lock
The display lights up. The light switches off approx.
30 sec after the last time the key has been depressed in
order to reduce power use.
Display and Operating Elements
9. Display and Operating
Elements
slide switch
55
Display and Operating Elements
Indicators independent of the mode:
Setting the Speed
TC
TC-recording is turned on (see chapter 12).
TC flashes
Standby: since the last synchronization
more than 8 hours have passed or the TCgenerator has malfunctioned.
At the setting NORM on the sliding switch the standard
speeds 24,00/25,00/29,97 and 30,00 fps are
available. At the setting PS/CCU, any desired speed
within the acceptable range of 5 to 75 fps at 1/1000
fps can be exactly set. On the HS camera (high speed)
speeds from 5 to 99,999 fps at 1/1000 fps and speeds
from 100 to 150 fps at 1/10 fps can be exactly set. Switching between standard and programmable speed is also
possible while the camera is running.
Run: as yet no recording has taken or is
taking place (see chapter 12).
bat
Battery voltage < 20 V. The camera
cannot be started.
asy
The camera is running asynchronously.
end
Indicator of the film end.
Locking the SEL and SET Keys
The keys SEL and SET can be mechanically locked in
order to avoid unintentional changing of the set values.
• Set the sliding switch
to LOCK - SEL and SET
can no longer be activated.
The values can still be changed through the CCU-1.
56
Camera Running
Camera run is started and stopped with the RUN key.
The RUN function can also be activated by:
-
the camera handgrip
the shoulder set S-3
remote control units RS-3 and RS-4
the camera control unit CCU-1
the external synchronization unit ESU-1
the lens-control-system LCS
The LED for camera run shows if the camera is running
synchronously (green) or asynchronously (red).
Choosing Programmable Speed in Advance
• Set the sliding switch to PS.
• Switch the MODE key to mode 2 (programmable speed).
• Enter the positions to be changed with the SEL key.
Switch each chosen position with the SET key until the
desired value is displayed. Enter the next position to
be changed using the SEL key, or after the third
position after the comma finish the setting. The third
position after the comma (1/1000 fps) is in the upper
line in the right-hand corner. On the HS camera the
display switches to the speed indicator of 100 to 150
fps if the first digit of the speed indicator is switched
above value 9. Speed can then only be set to 1/10
fps (neither 1/100 nor 1/1000 fps).
The last position (1/1000 fps) can also be changed
while the camera is running in order to manually finetune camera frame speed (see synchronization on a
video monitor).
Changing the Programmable Speed while the
Camera is Running
While the camera is runing only the last position (1/1000 fps) of
the programmable speed can be changed.
• Set the sliding switch to PS.
• The camera runs in RUN.
• Switch the MODE key to mode 2 (programmable speed).
• Decrease speed with the SEL key, increase speed with
the SET key.
Setting Speed from the Accessories
See chapter 10.
Display and Operating Elements
Choosing Standard Speed
• Set the sliding switch to NORM.
• Switch the MODE key to mode 1 (standard).
• Switch through on the SEL key to the desired speed the speed flashes approx. 3 sec. After 3 sec the
previously set speed will reappear.
• While the light is blinking depress the SET key to set
the speed.
57
Display and Operating Elements
Film Counter
Switching the Total Exposed Film/Take
Counter
The film counter can only be switched from total
exposed film to take counter while in Standby. The
take counter is reset every time the camera is
restarted. The total counter is reset by hand. To
switch:
• Switch the MODE key to mode 3 (take or total
exposed film counter/power supply).
• Depress the SEL key twice - the first position on the
counter flashes.
• With the SET key it is possible to switch between
„t“ take counter and total exposed film counter.
If the take counter is set the total counter will be
shown in mode 1 (standard), and vice versa.
Resetting the Total Exposed Film Counter
The total exposed film counter can only be reset
while in Standby:
• Switch the MODE key to the mode in which the
total exposed film counter is displayed (mode 1 or 3).
• Depress the SET key for approx. 3 sec - the counter
resets.
58
Switching from Meters to Feet
The film counter can only be switched between meters
and feet while in Standby. To do this:
• Switch the MODE key to mode 3 (take or total
exposed film counter/power supply). Press the SEL
key once - „m“ or „ft“ flashes.
• Enter the desired unit of measurement with the SET key.
Summary of Modes
On the following pages the modes are displayed in a
table and examples for each mode are given.
0007
Total exposed film (number) or take counter (t) in meters (m) or feet (ft).
See the table on the next page →
Only symbols independent of the mode.
In mode 1 the total exposed film is shown. The set unit of measurement is
meters. Since last resetting the total exposed film counter, 7m have been
filmed. The sliding switch is at NORM. The set standard speed is 25 fps.
There is no external synchronization unit, speed unit or remote unit
plugged in.
Display and Operating Elements
example
symbols
lower line
upper line
Mode 1: Standard (Total Exposed Film or Take Counter/Speed)
59
NORM
PS/CCU
•
60
← Position of the sliding switch
25.00
Standby
• PS
Set standard speed (24,00/25,00/29,97 or 30,00 fps). There is no external
synchronization unit, speed unit or remote unit plugged in.
Programmable speed. There is no external synchronization unit, speed unit or remote unit
plugged in.
• • SU
External synchronization unit is plugged in. If no valid frame speed of 5 to 75 fps (5 to
150 fps on the HS camera) can be recognised, the fps symbol flashes.
Speed unit or remote unit is plugged in and switched on.
•
Set standard speed (24,00/25,00/29,97 or 30,00 fps).
• • ESU
Run
Display and Operating Elements
Mode 1: Standard (Total Exposed Film or Take Counter/Speed) - lower line
25.00
• 23.45
Programmable speed or speed set by external synchronization unit, speed unit or remote
unit. At speeds of < 100 fps the positions before the comma and two positions after the
comma are displayed. At speeds of > 100 fps (possible on the HS camera) the positions
before the comma and one position after the comma are displayed.
PS 5
Programmable speed. There is no external synchronization unit, speed unit or remote unit
plugged in and switched on. At speeds of < 100 fps the last position (1/1000 fps) is displayed.
ESU
External synchronization unit is plugged in. The camera recognises whether a valid frame speed
of 5 to 75 fps (5 to 150 fps on the HS camera) is set. If no valid frame speed can be recognised,
the fps symbol flashes.
Speed unit or remote unit is plugged in and switched on.
SU
example
lower line
23.45
Programmable speed or speed set by the external synchronization unit, speed unit or remote unit.
At speeds of < 100 fps the positions before the comma and two positions after the comma are
displayed. At speeds of > 100 fps (possible on the HS camera) the positions before the comma
and one position after the comma are displayed.
The sliding switch is at PS/CCU. The programmed speed is 23,455 fps.
The third position after the comma for the speed setting (1/1000 fps) is
displayed in the upper display line.
There is no external synchronization unit, speed unit or remote unit
plugged in.
Display and Operating Elements
upper line
Mode 2: Programmable Speed
61
upper line
Take (t) or total exposed film counter (count) in meters (m) or feet (ft).
lower line
U 25
Power supply in [V].
symbols
e03.2
example
Display and Operating Elements
62
Mode 3: Take or Total Exposed Film Counter/Power Supply
Only symbols independent of the mode.
In mode 3 the take counter is displayed. The set unit of measurement is
meters. Since the start of the take 3,2m have been filmed.
The power supply is 25V.
31:25
sec:fps – seconds and positions before the comma of the TC-generator frame rate.
See chapter 12.
TC
Standby:
TC-recording is switched on.
TC
Run:
Time Code is being recorded. See chapter 12.
example
Actual time code time is 17:20:31 [hh:mm:ss]. The TC-generator frame
rate is 25,000 fps.
Display and Operating Elements
upper line
h:min – hours and minutes.
symbols
17:20
lower line
Mode 4: Time Code Time
TC-recording is switched on. In Run time code will be recorded. See
chapter 12.
63
upper line
Userbits 1–4.
lower line
35:F4
Userbits 5–8.
TC UB
UB
Standby:
TC-recording is switched on.
TC-recording is switched off.
TC UB
UB
Run:
Time code is being recorded.
Time code is not being recorded. See chapter 12.
symbols
8A:65
example
Display and Operating Elements
64
Mode 5: Time Code User Bits
The user bits are 8A6535F4. User bits can contain the figures 0-9 and the
letters A-F.
TC-recording is switched on. In Run time code will be recorded. See
chapter 12.
S 7
Timecode-sensitivity, TC-magazine is attached.
example
S
-
No TC-magazine is attached.
Only symbols independent of the mode.
The SET key is not depressed. The temperature in the electronic housing
will not be displayed.
Display and Operating Elements
upper line
Temperature in the electronic housing (depress the SET key). To check the acceptable temperature
range of –20°C - 50°C.
symbols
269
lower line
Mode 6: Time Code Sensitivity
A TC-capable magazine is attached to the camera. On the magazine
the value 7 is set for the intensity of the TC-recording. See the table in
chapter 12.
65
Display and Operating Elements
Exposure Control and ARRIGLOW
When using ARRIGLOW no exposure measurement is
possible. To switch between exposure control and
ARRIGLOW:
ARRIGLOW
intensity
adjustment
• Turn the adjustment knob
according to its
markings to the stop position until it locks noticeably
into place.
Exposure Control
The exposure meter has an area of measurement of 13
to 31 DIN (16 to 1000 ASA) at speeds of 5 to 75 fps
(5 to 150 fps on the HS camera). Speed is automatically taken into account by the exposure meter, regardless of whether the speed has been set internally
(through the camera display) or externally (e.g. through
the CCU-1 or the ESU-1), or whether the camera is in
Standby or running.
In order to receive a correct reading it is necessary to
set the correct film speed. To do this:
• Set film speed on the exposure meter with the rosette
wheel
.
If using polarizing filters use only circular
ones, as the exposure meter will otherwise
supply incorrect values.
66
apec/ARRIGLOW
on/off selector
film sensitivity
adjustment / selector
The exposure meter is set to an open sector of the mirror
shutter of 180°. For lesser aperture stops exposure
control must be corrected by resetting film speed. The
correction for the aperture stop setting should be taken
from the table on the next page. Intermediate values can
be estimated (half a stop = -3 DIN = ASA/2).
DIN
ASA-Factor
180°
0
1
172,8°
0
1
144°
–1
0,8
135°
–1
0,8
90°
–3
0,5
45°
–6
0,25
The iris diaphragm is manually adjusted until the
exposure field indicator needle is visible in the viewfinder, to the left, in the middle measurement field. The
middle measurement field stands for correct exposure in
a „normally bright“ scene, the outer points + and - show
over- and underexposure of approximately two aperture
stops.
ARRIGLOW
The illuminated frame viewfinder with variable brightness control - ARRIGLOW - facilitates filming in which
due to the prevailing lighting conditions it would otherwise be difficult or impossible to see the format markings. It can be minutely adjusted to suit every lighting
situation.
• Set the desired brightness with the adjustment wheel
.
If using effects filters such as strips of gauze on the back
of the lens, or if the back of the lens is dirty, the entire
viewfinder will be brighter.
ARRIGLOW and the exposure meter can only be used
as alternatives to each other. Therefore it is recommended when using ARRIGLOW to proceed in the
following manner:
• Switch to exposure meter.
• Set the aperture stop.
• Switch to ARRIGLOW.
Display and Operating Elements
Aperture Stop
67
Display and Operating Elements
68
Checking the Mirror Shutter Setting
The mirror shutter setting can also be checked with the
lens attached.
• In Standby depress the PHASE key and keep depressed - the angle symbol appears on the display.
After approx. 2 seconds the set shutter angle will be
displayed in the upper line.
Synchronizing on the Video Monitor
Fine-Tuning the Frame Speed
Frame speed can be finely tuned when the magazine is
removed.
• In Standby, set the programmable speed to half the
rated frequency on the monitor.
• Set the sliding switch to PS/CCU.
• Start the camera.
• Switch the MODE key on the display to mode 2
(programmable speed).
• If the camera is running change the speed with the
SEL key (to decrease speed) and the SET key (to
increase speed) until the bar on the monitor in the
picture area no longer wanders.
With the new synchronization function the camera can
by synchronized by hand on a monitor or a television.
To film from a quartz-stabilized monitor, the frame
speed and the phase of the camera must be aligned to
the camera.
Shifting Phase
Shifting phase is effective only for the current take and
should therefore be done again every time the camera
is started.
Through the external synchronization unit ESU-1 the
camera can also automatically be synchronized on a
video monitor (see the technical information sheet ESU-1).
• Start the camera.
• Hold the PHASE key depressed until the bar on the
monitor has disappeared from the picture area.
Camera Control Unit CCU-1
The camera control unit CCU-1 for the ARRIFLEX 535
and 535B can also be used on the 16SR 3. It enables
manually controlled remote control of the following
functions:
-
Switching the camera on or off.
Choosing the speed.
Checking the set values.
Displays and use of the film counter.
Displays and setting TC-time (time code) and TC-user bits.
Display of the set TC-sensitivity through the REMOTEmenu.
fed by batteries, and the camera control unit switches
off after approx. 5 min.
Replacing the Batteries
• Open the battery compartment
with a coin.
• Pull out the battery pack.
• Use batteries as designated on the battery pack.
Accessories
10. Accessories
Setting TC-time and TC-user bits can only be carried out
through the camera control unit or through external
synchronization.
The camera control unit is supplied with power by the
camera. If the camera is not plugged in the camera
control unit will be fed by the internal batteries. As the
battery unit limits the life of the camera control unit to
approx. 5 hours, the display illumination switches off
approx. 10 sec after last being touched when it is being
69
Accessories
• Insert the battery pack into the camera control unit
and close the battery compartment.
Pay attention to the correct polarity of the
battery pack!
Plugging in the Camera Control Unit
• Plug the cable KC 24 (2,4m) or KC 30 (20m) into the
on the side of the camera control unit,
socket
pressing the slide on the plug in the direction of the
plug.
• Plug the cable to the CCU-socket on the camera.
• Switch on the camera.
• Switch on the camera control unit with the red key
on the side.
Key Functions in all Menus
RUN
switches the camera on or off.
SEND
sends the chosen values to the camera.
HELP
shows the help text for the activated menu.
Cannot be used in the input mode. The help
text can be left by pressing the ENTER key.
EXIT
ends input or leaves the activated menu.
LIGHT
switches display illumination on or off.
70
push
button
on/off
bushing
Error Readings
In the case of functional errors on the camera the
display on the camera control unit will show an error
reading in the upper right-hand corner. The error
reading remains visible until the error has been corrected. If the error is caused by the user, an error
reading appears and disappears the next time a key is
depressed. Simultaneously an acoustic signal is audible;
this can however be turned off.
• Choose the desired menu with the keys 1, 3, 5, 6 or
8. The displayed menus SHUTTER (2), FORMAT (4)
and PROGRAM (7) are for the ARRIFLEX 535 and
have no function on the ARRIFLEX 16SR 3.
The SPEED Menu
With the SPEED menu any desirable speed within the
acceptable range of 5 to 75 fps at 1/1000 fps can be
exactly set. On the HS camera speeds from 5 to
99,999 fps at 1/1000 ps and from 100 to 150 fps at
1/10 fps can be exactly set. Speed can be changed in
Standby as well as when running. In both upper lines of
the CCU the speeds currently set on the camera control
unit and on the camera are displayed.
• Switch the sliding switch on the camera to PS/CCU.
• With keys 1 to 5, enter one of the listed standard
speeds from the SPEED menu - the chosen speed is
displayed in the uppermost line. The displayed speeds
6: -24 (backwards) and 7: -25 (backwards) are
intended for the ARRIFLEX 535 and have no function
on the ARRIFLEX 16SR 3.
• With the SEND key transfer the chosen value to the
camera.
Accessories
The Main Menu
When the camera control unit is switched on the main
menu appears on the display. This allows access to the
sub-menus and shows the speed currently set on the
camera. It also shows if the camera is switched off
(OFFLINE), in Standby (STANDBY) or is running (RUN).
Alternatively any desirable speed within the acceptable
range can be chosen:
• Switch the sliding switch on the camera to PS/CCU.
• Depress key 8 in the SPEED menu.
• Enter the desired speed, comma position with „.“.
• If not all positions after the comma were entered,
finish the input with the ENTER key - the chosen speed
is displayed in the uppermost line on the CCU.
• Transfer the chosen value to the camera with the
SEND key.
71
Accessories
All chosen speeds within the acceptable range of 5 to
75 fps (5 to 99,999 fps on the HS camera) can be
increased or decreased in steps of 1/1000 fps in order
to carry out a fine-tuning of the speed. For fine-tuning on
the camera see chapter 9. To fine-tune on the camera
control unit:
• Switch the sliding switch on the camera to PS/CCU.
• Pre-select the speed.
• In the SPEED menu depress key 9.
• Switch the camera to mode 2.
• Carry out fine-tuning: increase speed with key F1,
decrease speed with key F2.
• Leave fine-tuning with the EXIT key.
The REMOTE Menu
In the REMOTE menu the camera control unit displays
the same information as the camera display. The keys
F1 to F3 take on the meaning of the operating elements
on the camera:
F1 PHASE key
F2 MODE key
F3 SET key (RESET on the CCU)
72
In the lower line on the display the key functions are
shown. For the ARRIFLEX 16SR 3 only the displays for
keys F1, F2 and F3 are valid.
Operation of the camera in the REMOTE menu is
carried out parallel to operation with the corresponding
keys on the camera. See chapter 9.
The TIMECODE Menu
In the TIMECODE menu the current values and the most
recently set values on the camera control unit for time
code and all user bits are displayed and can be reset.
To change TC-time:
• Depress key 1 - „TIMECODE“ is displayed against a
dark background.
• Depress the ENTER key - ready for input of the new
TC-time.
• Enter all 6 positions of TC-time within the acceptable
range of 00:00:00 to 23:59:59 - the new TC-time is
displayed. If input is finished with the ENTER key, the
unfilled positions will be filled with zeros.
• Depress the SEND key - the new TC-time is transmitted
to the camera.
• Depress key 2 - „USERBITS“ is displayed against a
dark background.
• Depress the ENTER key - ready for input of the new
user bits.
• Enter all 8 user bits with figures 0-9 or letters A-F - the
new user bits are displayed. If input is finished with
the ENTER key, the unfilled positions will be filled with
zeros.
• Depress the SEND key - the new user bits are transmitted to the camera.
The OPTIONS Menu
The OPTIONS menu allows access to the LENGTH UNIT
and the COUNTER DISPLAY MODE.
The displayed points ASYNC-MODE and END WARNING are intended for the ARRIFLEX 535 and have no
function on the ARRIFLEX 16SR 3.
• Choose the desired point with key 2 or 4.
LENGTH-UNIT
Enables switching the film counter from meters to feet.
• Choose meters with key 1 or feet with key 2 - the
desired unit of measurement is displayed against a
dark background.
• Depress the SEND key - the desired unit of measurement is transmitted to the camera.
Accessories
To change the TC-user bits:
COUNTER DISPLAY MODE
Enables switching the film counter between the total
exposed film and the take counter. To switch on the
camera, see chapter 9. To switch on the camera control
unit:
• Choose the total exposed film counter with key 1 or
take counter with key 2 - the chosen counter is displayed against a dark background. Menu point 3
(remaining film display) has no function on the
ARRIFLEX 16SR 3.
• Depress the SEND key - the desired counter is transmitted to the camera and displayed in mode 1. If the
take counter has been chosen, the total exposed film
is displayed in mode 3, and vice versa.
73
Accessories
INFO Menu
Enables access to the menu points STATUS and COUNTER, and switching on and off the acoustic signal on the
camera control unit.
• Choose the desired menu point with key 1 or 2.
Switch on or off the acoustic signal with key 4.
STATUS
Displays the values currently activated on the camera.
COUNTER
Displays the total exposed film count and the take
count, and camera power supply.
SOUND CCU ON/OFF
• With key 4 switch on or off the acoustic signal. When
switching on, a control signal can be heard.
External Synchronization Unit ESU-1
The external synchronization unit ESU-1 can be used for
the ARRIFLEX 16SR 3 as well as for the ARRIFLEX 535
and 535B. It allows the camera to be synchronized with
external equipment. Through use of a BNC-socket it is
possible to synchronize on an external standard video
74
signal (50/60 Hz) or through an inductive pickup on a
computer or video monitor. Other sources can be
synchronized through the AC-input. Speed is displayed
on the camera display in mode 2. The external synchronization unit has a phase shifter and a pilotone generator. Synchronization is also stored when the camera is
switched off.
See TECHN. INFORMATION „External Synchronization
Unit ESU-1“.
Remote ON/OFF Switches RS-3 and
RS-4
The remote on/off switch can be clamped to the pan
handle on the tripod and allows the camera operator to
switch the camera on and off comfortably from his
working position.
The remote on/off switch RS-4 has an additional
LED for camera run. Like the LED on the camera, it
shows whether the camera is running synchronously
(green) or asynchronously (red).
• Clamp the remote on/off switch to the pan handle
and plug the cable into one of the RS-sockets on the
right side of the camera.
The video-assist-system delivers a high-quality,
nearly flickerfree monitor image for PAL or NTSC. The
video-assist-system consists of the video set, the 1/2"
color video camera CCD 2-FR and the anti-flicker processor AFP-2. The video set consists of the video
carrying handle and the video optic together. These
transmit the image from the beamsplitter to the video
camera. The video set is supplied already mounted.
With the corresponding video optic the video-assistsystem can also be used on the ARRIFLEX 535B and
the 35 III.
The brightness of the video image is automatically
adapted to the lighting conditions. This balancing can
also be carried out manually. The white balance is
designed for standard values for interior and outside
filming.
The technology for image-storing used in
this system enables reproduction of a stored image or
the alternation between the real and the stored image e.g. to align the camera to an earlier scene or for stop
trick filming.
Video-Assist-System
11. Video-Assist-System
When using several video cameras the video-assistsystem can also be synchronized by an external video
signal.
The change-over from the color to the black/white CCDcamera is simple and requires no subsequent adjustment. The following beamsplitters are available:
antiflickerprocessor
- 20% BW-video 80% viewfinder
- 50% color video 50% viewfinder
75
Video-Assist-System
When using these without the video-assist-system a
100% beamsplitter is used.
The video optic can be adjusted from Normal 16 to
Super 16. The monitor displays the format filling the
monitor surface width-wise (letterbox format on Super 16).
Neither the video camera nor the video optic
should ever be used as a carrying handle, nor
should heavy pressure in any other form be
placed on it, as this could destroy it! The
accessory shoe on the video camera is for mounting on the ARRIFLEX 35 III and should not be
used when mounting on the ARRIFLEX 16SR 3.
hex screws
For changing format from Normal 16 to Super 16 an
intermediate ring must be used on/removed from the
video camera. See chapter 8.
Mounting the Video-Assist-System
Changing the Beamsplitter
The beamsplitter is under the carrying handle.
• Loosen the 4 screws
on the carrying handle
and remove the carrying handle.
76
hex screws
Mounting the Video Optic
• Attach the video handle without the video optic.
• Screw on with 4 screws, ensuring that the adjustment
sockets for the beamsplitter and the carrying handle
engage together.
• Attach the video optic to the video carrying handle.
• Screw tight with the knurled knob
.
• Pull tight the clamp ring
.
• Screw the video camera onto the C-mount thread on
the video optic.
• Loosen the clamp ring
approx. 15° (as seen in
the direction of shooting, counter-clockwise).
• Turn the CCD-camera into the correct angle position
(the marking on the back of the camera must stand
upright).
• Pull tight the clamp ring.
on the clamp ring into the
• Screw the handles
desired position SW 1,5.
locking lever
lock ring
focus ring
Video-Assist-System
• Unscrew the 4 screws
SW 1,5 (key width 1,5
mm) on the beamsplitter.
• Remove the beamsplitter at the bevelled edges (under
the markings).
• Insert the desired beamsplitter and screw on with the
4 screws
.
iris ring
77
Video-Assist-System
Note: If the video carrying handle remains on the
camera when dismounting, the opening on the carrying
handle should be closed over with the supplied protective cover.
Wiring the Video-Assist-System
• Plug the anti flicker processor AFP-2 through the
socket MOVIE CAMERA with cable KC 37 into one of
the RS-sockets on the camera.
• Plug cable KC 34 into the socket VIDEO CAMERA on
the anti flicker processor AFP-2 and into the video
camera.
The video signal for the monitor is possible on two
sockets on the anti flicker processor AFP-2:
Minimonitor:
socket MINI MONITOR
Standard video monitor: BNC-socket VIDEO OUT
The BNC-socket „VD“ on the video camera
CCD 2-FR is used for synchronization with an
external video signal. Do not use as a video
output!
• Set the code switch on the underside of the anti flicker
processor to „A“.
• Adjust focussing and image position on the video
camera. See below.
78
Adjusting the Video Optic
Adjusting the Image Position
• Loosen the clamp ring
approx. 15° (as seen in
the direction of shooting, counter-clockwise).
• Adjust the angle position by turning the CCD-camera,
at the same time checking the image on the monitor.
• Set the width position with the adjustment screw
SW 1,3, taking care that on loosening the
adjustment screw the image follows, otherwise press
the CCD- camera at the screw-on position slightly
upwards.
• Retighten the clamp ring.
Adjusting Focus
• Loosen the aperture clamp with the aperture adjust; this also unlocks the focussing
ment knob
adjustment ring
.
• Completely open the aperture.
• Set focus through the monitor with the focussing
adjustment ring.
• Set the aperture to the monitor.
• Pull tight the aperture clamp.
adjustment
screws for
side position
(east/west)
and width of
image
Note:
The focussing area of the video optic can be shifted by
the gear
on the video camera.
Positions on delivery (looking at the left side of the
camera):
Normal 16: Focus is almost at the stop position turning
clockwise.
Super 16: Focus is almost at the stop position turning
counter-clockwise.
Video-Assist-System
adjustment screw for
north/south position
and height of image
79
Time Code
12. Time Code
In modern electronic post-production time code is often
used today. Quartz-synchronized film, sound and
video recordings have been made possible through the
use of equipment with TC-capability.
The ARRIFLEX 16SR 3 is equipped with a TC generator
which produces 80bit time code corresponding to
SMPTE RP136, Format Type C. The TC generator can
be set using the CCU or a master clock. The precision
of the TC generator ensures that for 8 hours after the
synchronization (at 0°C - 50°C) the difference remains
less than one frame. Every frame is therefore clearly
identifiable for synchronization or editing lists. After 8
hours a further synchronization process should be
carried out.
With the TC-Output the ARRIFLEX 16SR 3 can also take
on the master clock function in a TC system.
80
TC recording is still active when the camera is
synchroinized using the external synchronization unit
ESU on a video monitor. The maximum difference
between the frame rate of the external synchronization
and the TC frame rate is 1%.
Time code is recorded in the magazine corresponding
to SMPTE RP114 at standard speeds 24,00/25,00/
29,97/30,00 fps and at 23,976 fps.
The TC information also includes speed of recording
which is described in connection with time code as
frame rate. For the ARRIFLEX 16SR 3 the valid frame
rate is always the most recently set standard speed.
TC-Indication on the Display
The TC symbol has the following meaning:
TC-Symbol blinks
TC-Symbol on
TC-recording is turned off.
Since the last setting of time code
or since the last synchronisation
more than 8 hours have passed.
TC-recording is turned on, no
VSU is plugged in, time code is
set or externally synchronized,
the camera is set to a TCcompatible speed and the TC
generator is ready.
TC-recording is turned off, the
magazine is not TC-capable or
TC-sensitivity 0 is set.
There will be no TC-recording.
Possible causes:
Time code will be recorded.
Run
Standby
TC-Symbol off
Time Code
The TC-Symbol has the following meaning:
– the camera is running
asynchronous
– magazine is not TC capable
– the recording module is
defective
– communication with the
magazine could not be
established.
81
Time Code
TC-Input
TC-Output
The TC generator integrated in the ARRIFLEX 16SR 3
can be synchronized onto other equipment with TC
generator. An LTC signal (Longitudinal Time Code) from
any TC generator is plugged into the ACC socket. The
signal level must be higher than 500 mVpp. The camera
automatically takes on TC time and TC user bits. If the
LTC signal is correctly transferred the TC recording will
be automatically switched on.
TC information is constantly available as 80bit LTC on
the CCU socket and in Standby also on the ACC
socket. Both outputs 5 V asymmetrical.
• Using the MODE key switch to Mode 4 (time code
time)
• Plug the cable with the TC signal into the ACC socket.
The last two entries on the indicator show a blinking
„ec“ (external code). If the LTC signal is correctly
transferred the indication „cc“ (correct code) appears
for approx. 10 second before the indicator on the
generator frame rate switches back.
82
Through the TC-output TC-compatible equipment can be
synchronized on the set once (for 8 hours) on the
camera’s time code or constantly supplied with time
code by the camera. The camera then takes on the
master clock function.
Using Time Code
Also when using the external synchronization unit ESU-1
for synchronizing the camera to other equipment, time
code can be recorded. Before attaching the external
synchronization unit the TC generator the frame rate
must be set to the expected frame rate. The maximum
difference between the external synchronization and the
TC frame rate is 1%. If this difference increases the TC
recording switches off and the TC signal goes off. On
reaching a valid speed range the TC recording switches
on again and the TC signal appears again on the
display.
Turning on and off the TC Recording
• Using the MODE key switch to Mode 4 (time code
time).
• Depress the SET key for approx. 3 sec. until the TC
symbol appears or disappears on the display.
Time Code
Time Code and ESU-1
Time code starts when first turned on at time
00:00:00:00 and with the user bits 00000000. TC
time and user bits can be set on the CCU-1 independently of each other. See chapter 10.
If a speed is set on the camera which does not correspond to TC, the TC generator retains the most recently
set frame rate. While time code is in use and the speed
is changed from one to another valid time code speed, the
TC symbol on the display goes off for approx. 1 sec. and
reappears once the TC generator is ready.
While the TC recording is switched on, turning off
camera function is delayed by approx. 21 frames.
83
Time Code
Indicating Time Code or User Bits
• Using the MODE key switch to Mode 4 (time code
time) or Mode 5 (time code user bits).
The time code time indicator will indicate hours:minutes
in the upper line and seconds:frame rate in the lower
line. In the case of frame rate, only positions before the
comma will be shown:
24
25
29
30
23
24,000
25,000
29,970
30,000
23,976
fps
fps
fps
fps
fps
At speeds 29,970 fps and 23,976 fps the frame rate in
the „Nondrop-Frame“ mode counts in accordance with
SMPTE RP136-1990, 5.2.1, to correspond to NTSC
video with 59,940 Hz. The „Nondrop-Frame“ mode
results in a time difference to real time of exactly 0,1%.
84
Setting TC Sensitivity
The intensity of the TC recording must be adjusted to the
sensitivity of the film material. The knob for setting the
TCS level (time code sensitivity) is on the take-up side on
the magazine. The knob can be turned by hand if the
magazine cover is open or with a small screwdriver if
the magazine cover is closed.
„0“ means no recording, „1“-“9" stand for the various
intensity levels. The higher the TCS level, the higher the
intensity of the recording. The difference in intensity of
the successive TCS levels corresponds to one aperture
stop. The set level can also be seen in Mode 6 on the
display.
The TCS levels of the most frequently used film types:
Type
TCS
Kodak Eastman
Description
Type
TCS
Agfa Gevaert
7222
BW-negative
8
PAN 250
BW-negative
9
7231
BW-negative
9
XT 100
Colour negative
5
7239
Colour reversal
5
XT 125
Colour negative
6
7240
Colour reversal
6
XT 320
Colour negative
5
7245
Colour negative
6
XTS 400
Colour negative
4
7248
Colour negative
6
Fuji
7250
Colour negative
5
8427
Colour reversal
6
7251
Colour negative
4
8428
Colour reversal
6
7292
Colour negative
5
8610
Colour negative
7
7293
Colour negative
5
8620
Colour negative
6
7296
Colour negative
5
8630
Colour negative
6
7297
Colour negative
6
8650
Colour negative
5
8670
Colour negative
5
Time Code
Description
85
Time Code
TC Buffer
Testing the TC Recording
The ARRIFLEX 16SR 3 ensures not only high accuracy of
the time code but also allows the TC clock to continue
running while the camera is switched off as long as the
camera is connected to a power supply. The TC generator needs a power supply of 10mA if the camera is
switched off.
It is not possible to test the TC recording with an attached on-board battery. Therefore the camera must be
powered through a cable.
For changing the battery a short-term buffer of one
minute is provided. In order for this buffer to function
however it is necessary that the camera be connected to
a power supply for at least 10 min. prior to this. If the
buffer is exceeded, the TC time is lost and the TC
symbol no longer appears when the camera is turned
on again. Therefore a loaded battery should be kept
ready before the battery change.
To enable the camera to be used while mobile without
losing TC time, the use of an on-board battery is recommended. An on-board battery can receive the TC buffer
for more than 100 hours. To reduce power consumption
while working with the battery, the battery should be
removed during lengthy breaks in filming (longer than a
day). Before recommencing filming TC synchronization
must be carried out again.
86
• Set a TC-compatible speed on the camera.
• Turn on the TC recording (see above).
• Set the magazine without film with the cover on the
take-up side on the camera completely open.
• Set to TCS level 9 and check in Mode 6 (see above).
• Start the camera function - the TC symbol blinks. After
approx. 1 sec. the TC symbol must remain constant.
• Hold a narrow white strip of paper a few mm in the
film exit - at the outer end of the film guide a small red
dot must be visible.
Maintenance
13. Maintenance
Replacing the Magazine Drive Gear
Damaged magazine drive gears must be replaced as
they cause noise.
• Open the magazine on the take-up side.
• Unscrew the 3 screws on the magazine gear.
• Replace the gear.
• Ensure that the gear has been replaced with the
arrows visible.
• Screw in firmly the gear.
screws
Cleaning the Magazine Throat
Assembly
The magazine throat assembly should be dismounted
and cleaned if
- it has become very dirty through bad film material, or
- the film runs through the magazine throat with difficulty.
Dismounting
• Loosen the 2 screws
screws
. The screws are very tight!
87
Maintenance
magazine with magazine throat removed
88
magazine throat
Under no circumstances blow substances
away!
Remove deposits from the film with The ARRI plastic
film track cleaning rod or with a paper towel and
some spirits.
Under no circumstances remove deposit from
the film with metal tools!
Mounting
• Replace the magazine throat assembly. Only one
mounting orientation is possible: pay attention to the
form. Push the assembly to lock in.
• Replace the screws. Tighten the first screw completely
before screwing in the second screw.
The torque of the screws has no influence on the image
sharpness or adjustment of the film channel.
Replacing the Lens in the TC-Magazine Recording Unit
Strong scratches on the lens of the recording unit cause
the light to scatter. The lens on the recording unit should
be replaced by the ARRI Camera Service department.
Replacing the Glass Window
Large scratches on the gate for the film end sensor on
16SR 3 magazines could prevent the film end sensor
from functioning. The glass window should be replaced.
Maintenance
• Remove the magazine throat assembly
. The
gear drum and film channel will become visible.
• Possibly emulsion or film scraps are in the interior.
Clean carefully.
• Replace the frame with the glass window.
• Check function.
Flange Focal Distance
The flange focal distance should be checked after every
change from Normal 16 to Super 16, or when optimal
sharpness could not be attained during the sharpness
test. When using the compensation adapter for the 41
mm bayonet, the depth gauge A 16 SR-18 for the
ARRIFLEX 16 SR II can be used. The measure-ment for
the PL-mount is however more accurate.
89
Maintenance
Necessary Special Tools
Depth gauge for PL-mount
or
Depth gauge
A 16
Depth gauge cylinder A 16
Depth gauge base
A 16
Depth gauge plate
A 16
SR-18
SR-19
SR-20
SR-21
Checking the Flange Focal Distance
• Adjust the depth gauge with the gauge cylinder on
the gauge base to „0“.
• Turn the mirror shutter downwards with the inching
knob.
• Lay the gauge plate on the film gate and check the
flange focal distance
with the gauge.
• Standard camera:
52,000 mm -0,010 mm
HS camera:
51,970 mm -0,010 mm
Adjusting the Flange Focal Distance
The flange focal distance can be set with the adjustment
shims which sit between the camera housing and the PLmount.
• Check the flange focal distance (see above).
• If appropriate remove the compensation adapter.
• Unscrew the 6 cylinder head screws.
• Remove the PL-mount.
90
• Exchange the adjustment shims, ensuring that they do
not get bent, dirtied or twisted in the process.
• Replace the PL-mount, ensuring that the marking for
the chosen format is in the upper right-hand corner.
• Screw in the 6 cylinder head screws.
Pull the 6 cylinder head screws tight before
checking the flange focal distance as otherwise a false reading will be attained.
• Check the flange focal distance (see above).
91
Maintenance
Maintenance
Setting Friction on the Viewfinder
When friction decreases it is necessary to readjust it.
Neessary
Special key
Allen key
Allen key
Special Tools
A 16 SR-3
A 16 SR-16
A 16 SR-17
Friction Left-Right-Swing (190°)
with the special
• Loosen the threaded socket
key A 16 SR-3 approx. 2 revolutions.
• Tighten the endless screw
with the Allen key A
16 SR-16 until the desired friction is reached.
• Retighten the threaded socket.
92
thread bushing and
worm gear shaft
Friction on Viewfinder Arm (25°)
• Loosen or tighten the 3 inner hexagon screws
evenly one after the other with the Allen key A 16 SR17 until the desired friction is reached.
Maintenance
hexagon screws
93
Maintenance
94
Replacing the Electronic Housing
If the electronics break down the entire electronic
housing is to be exchanged. The electronic housing on
the standard camera is not the same as that on the HS
camera and should not be interchanged with it.
• Place the camera without the magazine upside down
on a soft surface.
SW 2 (key width 2 mm)
• Unscrew the 6 screws
in the bottom of the camera.
• Turn the camera around again.
• Pull up the camera shaft.
• Replace the electronic housing.
• Remount the camera, taking care that the intermediate
metal plate is placed on the new electronic housing
before mounting.
hex screws
95
Maintenance
Appendix
96
Camera-Checks
Checking Camera Readiness
Wiring
Check complete wiring and the position of the plug.
Electronics
Switch through all modes and check the set values.
Time Code
Set TC and check TC-sensitivity on all magazines.
Batteries
Check power supply to all batteries in display mode 3 (take counter/power
supply): U > 20 V.
Exposure Meter
Check set film speed.
Fiber Optic Screen
Check if the desired fiber optic screen is in place.
Check the cleanliness of the fiber optic screen with the ARRIGLOW.
Fluff Check
Remove the lens and magazine. Turn the mirror shutter forwards with the inching
knob and check the film gate for fluff on both sides.
Film Track
Carefully examine the film track and film gate for deposit or scratches.
Optics
Check the cleanliness of the optic surfaces of the lens and viewfinder.
Film Running
Let the camera run very slowly for a few seconds with the PHASE key. Check if the
set shutter angle appears in the display. Let the camera run a little further. Check if
the RUN-LED illuminates green.
Let the camera run very slowly with the PHASE key. Watch the right shutter edge
through the lens opening: the shutter must be completely closed before the
ARRIGLOW light illuminates. Watch the left shutter edge: the light must have gone
off before the shutter opens.
Magazine
The red markings on the casing must no longer be visible once the magazine has
been attached to the camera.
Appendix
ARRIGLOW
End of the Day Check
Batteries
Charge empty batteries and discharge and recharge partially empty batteries.
Film Track
Clean the film track with an optic brush and an optic cloth. Use no solvents.
Under no circumstances remove film deposit with metal tools; use only the
ARRI plastic film track cleaning rod.
Film End Sensor
Check the lens on the camera body and the glass window of the film end sensor on
the mgazine for dirt
Finder Friction
Check finder friction, and if necessary readjust. See chapter 13.
Magazine Gear
Examine the magazine drive gear fo damage. Smooth out slight deformations with
the back of a knife. In the case of strong deformations replace the magazine gear.
See chapter 13.
Cleaning Magazines
Clean the feed and take-up sides of empty magazines. Check if the film core and
clamp core are in place. On TC-magazines clean the film end sensor window.
Attach the loop protector to the magazines.
97
Appendix
Technical Data
Image Format
Normal 16: 10,3 x 7,5 mm
Super 16: 12,4 x 7,5 mm
Magazine
Coaxial quick-change magazine for 120m film in the
following varieties:
- standard magazine
- standard magazine with TC-recording unit
- HS magazine
- HS magazine with TC-recording unit
Lens Mounting Flange
54mm PL-mount
Lenses with 41 mm ARRI bayonet mount with a
compensation adapter
Flange Focal Distance
Standard: 52,000 - 0,010 mm
HS:
51,970 - 0,010 mm
Mirror Shutter
Mechnically adjustable
Fixed settings for shutter angles of
45°, 90°, 135°, 144°, 172,8°, 180°
98
Film Movement
Jointed pull-down film transport claw with registration pin
Variable Speed
Standard: 5 ... 75 fps
HS camera: 5 ... 150 fps
Noise Level
Standard: 20 dB(A) + 2 dB(A)
HS camera: 27 dB(A) +/- 2 dB(A)
Exposure Control
Manual exposure control
13 ... 31 DIN
16 ... 1000 ASA
ARRIGLOW
Illuminated frame viewfinder with continuously
adjustable brightness
Viewfinder
Adjustable three-dimensionally with automatic image
steadiness compensation and additional manual image
steadiness compensation, total magnification 10 x.
Fiber Optic Screens
Interchangeable for various shooting formats
Power Supply
24 V DC
Acceptable voltage range: 20 ... 32 V DC
Beamsplitter
Color:
50% video 50% viewfinder
SW:
20% video 80% viewfinder
without video: 100% viewfinder
Operation and Display
Standard speeds 24; 25; 29,97; 30 fps
Other speeds programmable
Standard: 5 ... 75 fps at 1/1000 fps exactly
HS camera: 5 ... 99,999 fps at 1/1000 fps exactly
100 ... 150 fps at 1/10 fps exactly
Total exposed film or take counter in meters or feet
Time Code
Intergrated TC-generator produces 80 bit time code
corresponding to SMPTE RP136, format, type C
Recording in the TC-magazine corresponding to SMPTE
RP114
Can be set through the camera control unit CCU or
through external synchronization
TC-output: LTC, 5 V asymmetrical
TC-input:
LTC, 500 m Vpp ... 20 Vpp
Function Monitoring
Power supply
Synchronous running
TC-recording
Display of time code information
Dimensions
Viewfinder horizontal: L x B x H: 267 (336) x 171 x 236
Viewfinder vertical:
L x B x H: 267 (336) x 107 x 294
Length in [mm] (with on-board battery) measured from
lens flange
Video-Assist-System
for PAL or NTSC consisting of:
- video carrying handle
- video optic
- 1/2" color video camera CCD-2
- anti flicker processor AFP-2
Weight
approx. 7 kg
with magazine, 120m film and on-board battery
Appendix
Temperature Range
-20° to +50°
99
Appendix
Order Numbers
ARRIFLEX 16SR 3 ................................... K1.45999.0
ARRIFLEX 16SR 3 HS .............................. K1.45998.0
Installation
ARRIHEAD 2 ......................................... K2.43670.0
Hydro-head ARRI 150 H ......................... K2.50491.0
Hydro-head ARRI 150 M ........................ K2.50463.0
Hydro-head ARRI 100 L .......................... K2.50462.0
Bridge plate BP-6 ...................................
Support rods 240 mm for BP-6 ................
Bridge plate BP-7 ...................................
Conversion set S16 for BP-7 ....................
K2.42572.0
K2.43046.0
K2.41010.0
K2.46947.0
Shoulder set S-3 ..................................... K2.41460.0
Camera handgrip .................................. K2.45886.0
Shoulder pad ........................................ K2.21860.0
Power Supply
Main fuse 10 A Picofuse ......................... K2.45423.0
Accessory fuse 2,5 A Picofuse ................. K5.45422.0
On board battery NC 24/1,2 ................. K2.46550.0
Attachable adapter ................................ K4.45285.0
Charger adapter cable KC 38
for NC 24/1,2 ..................................... K2.43196.0
100
Battery NC 24/7 R ................................ K2.41950.0
Connector cable KC 20 .......................... K2.41966.0
Connector cable KC 29 (spiral) ............... K2.44693.0
Charger NCL 24 R ................................ K2.42010.0
Couble charger NCL 24/1,2 .................. K2.47014.0
Mains unit NG 12/24 R ......................... K2.44481.0
DC/DC converter 24V/12V-22W ........... K2.46884.0
Magazines
Magazine without TC .............................
Magazine with TC .................................
HS-magazine without TC ........................
HS-magazine with TC .............................
K2.45161.0
K2.45162.0
K2.45164.0
K2.45165.0
Film core .............................................. K4.15005.0
Clamp core ........................................... K4.15912.0
Optics
Compensation adapter 41mm bayonet ........ K2.45955.0
Optical Accessories
Viewfinder extension FE-2 ....................... K2.45296.0
Viewfinder levelling rod EL-3 ................... K2.42533.0
Heated eyecup HE-3 .............................. K2.42202.0
Light-weight support LWS-2 ..................... K2.43539.0
Universal follow focus device FF-3 ............ K0.59979.0
Leight-weight follow focus device ............. K2.21541.0
4"x4"
4"x4"
3"x3"
4"x4"
production matte box MB-16 .........
matte box MB-17 .........................
light-weight matte box LMB-2 .........
light-weight matte box LMB-3 .........
K2.44472.0
K2.42100.0
K0.59954.0
K2.44471.0
Accessories
Camera control unit CCU-1 ..................... K2.42320.0
Power cable KC 24 (2,4 m) .................... K4.44003.0
Power cable KC 30 (20 m) ..................... K2.43183.0
External synchronization unit ESU-1 ......... K2.46006.0
Remote ON/OFF switch RS-3 .................. K2.44478.0
Remote ON/OFF switch RS-4 .................. K2.46942.0
Video
˚“ video-camera CCD 2-FR PAL ................
˚“ video-camera CCD 2-FR NTSC ............
Anti flicker processor AFP-2 PAL ..............
Anti flicker processor AFP-2 NTSC ...........
Cable KC 34 (replacement) ....................
Cable KC 37 (replacement) ....................
K2.45865.0
K2.45866.0
K2.43194.0
K2.43195.0
K4.45827.0
K4.42752.0
Maintenance
Magazine drive gear ............................. K5.15090.0
Depth gauge
A 16 SR-18 ......
Depth gauge for 54mm PL-mount .............
Gauge cylinder
A 16 SR-19 ......
Gauge base
A 16 SR-20 ......
Gauge plate
A 16 SR-21 ......
Special key
A 16 SR-3 ........
Allen key
A 16 SR-16 ......
Allen key
A 16 SR-17 ......
K4.26370.0
K4.26637.0
K5.26270.0
K5.26277.0
K4.26290.0
K5.26129.0
K5.26152.0
05.02824.0
Appendix
Cable KC 27 ........................................ K4.44549.0
Electronic housing .................................. K4.42630.0
Electronic housing for HS-camera ............. K4.43334.0
Adjustment Screws
Overview .............................................. K4.37092.0
width [mm]
color/material
0,0127
0,0254
0,0380
0,0640
0,1000
0,1500
silver ..............................
violet ..............................
red ................................
withe ..............................
copper ...........................
copper ...........................
K5.37098.0
K5.37099.0
K5.37100.0
K5.37101.0
K5.37102.0
K5.37103.0
101
Index
Index
1/2" color video camera CCD 2-FR ...................
15mm support rods ...........................................
41 mm ARRI bayonet .......................................
4"x4" matte box MB-17 ...................................
4"x4" production matte box MB-16 ....................
54mm PL-mount ..............................................
75
9
35
45
45
34
Asynchronous running ......................................
Attaching
compensation adapter .................................
lens, 41 mm bayonet mount ..........................
lens, 54mm PL-mount ..................................
magazine to the camera ..............................
Automatic image steadiness ..............................
Automatic stop ................................................
74
82
41
74
14
B
A
AC-input, external synchronization unit ...............
ACC-socket, time code .....................................
Accessories, optical .........................................
Acoustic signal, camera control unit ...................
Adapter, attachable .........................................
Adjusting
lens alignment ............................................
viewfinder alignment ...................................
Angenieux lenses ............................................
Anti flicker processor AFP-2 ..............................
ARRI bayonet for 41 mm mounting flange ...........
ARRI MACRO lenses ........................................
ARRIGLOW ....................................................
checking ....................................................
ARRIHEAD 2 ....................................................
102
49
52
32
75
35
33
67
97
7
56
35
35
34
30
38
26
Balancing with the bridge plate ............................ 9
Batteries, camera control unit ............................ 69
Battery NC 24/7 R .......................................... 14
Battery cable KC 20 ......................................... 14
Bayonet
41 mm mount ............................................. 35
54 mm PL-mount ......................................... 34
Beamsplitter, video optic ................................... 75
Bridge plate BP-6 .............................................. 7
conversion Normal 16/Super 16 .................. 53
Bridge plate BP-7 with 15mm support rods ............ 9
conversion Normal 16/Super 16 .................. 53
Camera body ................................................. 25
Camera control unit CCU-1 ............................... 69
attaching
starting camera run
Camera display .............................................. 55
Camera handgrip ............................................ 11
Camera run
changing ................................................... 57
starting and stopping ................................... 56
CCU-socket
camera control unit ..................................... 70
time code .................................................. 82
Charger NCL 24 R ........................................... 14
Charger adapter cable KC 38 ........................... 14
Checks
ARRIGLOW ............................................... 97
camera readiness ....................................... 96
end of day ................................................. 97
fiber optic screen ........................................ 96
film running ............................................... 96
fluff........................................................... 96
magazines ................................................. 97
mirror shutter setting .................................... 68
film transport claw engaging with film perforation..... 25
time code recording .................................... 86
Circular polarizingfilter .................................... 66
Clamp core ....................................................
Cleaning
fiber optic screen ........................................
film end sensor ...........................................
film track ...................................................
magazine ..................................................
magazine throat assembly ............................
pressure plate and stone ..............................
time code magazine ....................................
Collapsible core holder .....................................
Color video camera CCD 2-FR ...........................
Compensation adapter .....................................
installing ...................................................
removing ...................................................
Connector cable KC 27 for heated eyecup ...........
Conversion Normal 16/Super 16 ......................
bridge plates ..............................................
changing the Universal film gate sector ...........
lens alignment ............................................
light-weight support .....................................
video optic .................................................
viewfinder alignment ...................................
Cooke lenses ..................................................
Core holder ....................................................
Cover plate in the Universal film gate ..................
18
29
18
31
18
87
24
18
18
75
32
35
36
48
49
53
50
49
54
54
52
32
18
50
Index
C
103
Index
D
DC/DC converter 24V/12V-22W ......................
Depth gauge ...................................................
Depth gauge cylinder .......................................
Depth gauge plate ...........................................
Dimensions .....................................................
Diopter compensation ......................................
Display ..........................................................
camera, choosing the mode ..........................
illumination, camera ....................................
illumination, camera control unit ....................
Double charger NCL 24/1,2 ........................
F
15
90
90
90
99
39
55
55
55
69
14
E
Effects filters when using ARRIGLOW .................. 67
Electronic housing, replacing ............................. 94
End of the Day Check ....................................... 97
Error readings, Display on the camera control unit .... 70
Exposure control ............................................. 66
External synchronization unit ESU-1 ................... 74
using with time code .................................... 83
Eyecup .......................................................... 39
folding ...................................................... 48
heated ...................................................... 48
Eyepiece ........................................................ 39
104
Feet/meters, switching between
on the camera ............................................
on the camera control unit ............................
Fiber optic screens
changing ...................................................
checking ....................................................
overview ...................................................
Film
attaching to the clamp core ..........................
attaching to the core holder ..........................
threading, feed side ....................................
threading, take-up side ................................
Film core ........................................................
Film counter ....................................................
Film end sensor ...............................................
cleaning ....................................................
Film head .......................................................
Film loop, creating ...........................................
Film roll, attaching ...........................................
Film run, checking ...........................................
Film speed ......................................................
Film track
checking ....................................................
cleaning ....................................................
Film transport claw ..........................................
58
73
29
96
29
22
22
20
21
18
58
18
18
19
21
20
96
66
97
31
25
Friction on the viewfinder, setting
maintenance ..............................................
variable ....................................................
Fuses, changing ..............................................
92
38
13
Index
engaging with film perforation, checking ........ 25
Filming from a video monitor ............................. 68
Filters ............................................................ 45
polaroid .................................................... 66
Finder ............................................................ 38
extension FE-2 ............................................ 46
Finder side ..................................................... 38
setting friction ............................................. 92
Fine-tuning speed
on the camera ............................................ 57
on the camera control unit ............................ 72
Flange focal distance ....................................... 98
adjusting ................................................... 90
checking .................................................... 90
Fluff check ................................................. 26,96
Focus adjustment, video optic ............................ 78
Focus adjustment ring, video optic ...................... 78
Focus range, setting on the video optic ................ 79
Focussing knob ............................................... 43
Folding eyecup ............................................... 48
Follow focus device
light-weight ................................................ 44
Universal ................................................... 43
Frame finder, illuminated .................................. 67
Frame rate ..................................................... 80
Frame speed, fine-tuning when synchr. on video ..... 68
French flags .................................................... 45
G
Gears, replacing ............................................. 87
Glass window in the magazine, replacing ........... 89
Graduated filter .............................................. 45
H
Handgrip ....................................................... 11
Heated eyecup HE-3 ........................................ 48
HS camera
flange focal distance ................................... 98
magazines ...................................... 16, 30, 98
setting speed .............................................. 57
speed range ............................................... 56
Hydro heads, recommended ............................... 7
I
Illuminated frame viewfinder ............................. 67
Illumination
camera control unit ..................................... 69
105
Index
camera display ...........................................
Image adjustment on video monitor ....................
Image format ..................................................
Image steadiness compensation .........................
Image storing, video-assist-system ......................
Inching knob ...................................................
Installation ........................................................
Intensity of time code recording .........................
55
78
98
38
75
26
7
84
J
Jointed pull-down film transport claw .................. 25
K
Key functions on the camera control unit ............. 70
Keys RUN, SEL, SET ......................................... 56
L
LED, camera run ..............................................
on the remote ON/OFF switch RS-4 ..............
Left-eye viewing ..............................................
Lens alignment, adjusting ..................................
Lens-Control-System LCS ...................................
Lens possibilities ..............................................
with automatic diaphragm ............................
106
56
74
38
49
44
32
33
Lens support LS-7 ............................................
Lenses ,attaching
41 mm bayonet mount .................................
54mm PL-mount ..........................................
Lenses, removing
41 mm bayonet mount .................................
54mm PL-mount ..........................................
Levelling rod for viewfinder EL-3 ........................
Light-weight follow focus device .........................
Light-weight matte boxes LMB-2, LMB-3 ..............
Light-weight support LWS-2 ..............................
conversion Normal 16/Super 16 ..................
Loading the magazine ......................................
Lock for eyecup ...............................................
Locking
magazine to camera ...................................
SEL key .....................................................
SET key .....................................................
Locking handle on magazine cover ....................
Loop protector .................................................
LTC signal ......................................................
36
35
34
36
34
47
44
45
41
54
19
39
30
56
56
17
16
82
Magazine
attaching ................................................... 30
available varieties ....................................... 16
cleaning .................................................... 18
oading ...................................................... 19
removing ................................................... 31
unloading .................................................. 24
Magazine cover .............................................. 17
Magazine drive gears, replacing ....................... 87
Magazine throat assembly, cleaning ................... 87
Mains unit NG 12/24 R ................................... 14
Maintenance ................................................... 87
Manual brightness tuing, video .......................... 75
Manual image steadiness adjustment .................. 38
Matte box
matte box MB-17 ........................................ 45
light-weight- LMB-2/LMB-3 .......................... 45
production- MB-16 ...................................... 45
Measurement area, exposure meter .................... 66
Meters/feet, switching
on the camera ............................................ 58
on the camera ............................................ 58
Mirror shutter .................................................. 26
checking setting ..................................... 27,68
setting ....................................................... 26
Mode for display, selecting ...............................
Mounting
bridge plat ...................................................
camera handgrip ........................................
heated eyecup ............................................
levelling rod for finder .................................
light-weight support .....................................
shoulder set ...............................................
Universal follow focus device ........................
video-assist-system ......................................
video optic .................................................
viewfinder extension ....................................
55
9
11
48
47
41
11
43
76
77
46
Index
M
N
Noise ............................................................ 98
Normal 16/Super 16 conversion ....................... 49
NTSC-video-assist-system .................................. 75
O
On-board battery NC 24/1,2 ........................... 14
Operating elements ......................................... 55
Operating errors, Display on camera control unit ..... 70
Operating time code ........................................ 83
Optical accessories .......................................... 41
107
Index
Optics ........................................................... 32
Order numbers ............................................. 100
P
PAL-video-assist-system .................................... 75
Phase shifting when synchr. on a video monitor ...... 68
Pitch adjustment .............................................. 25
PL-mount ........................................................ 34
Polarizing filters .............................................. 66
Position, adjustment on video image ................... 78
Power supply
on the camera ............................................ 13
on the camera control unit ............................ 69
Product descriptions ........................................... 1
Production matte box MB-16 ............................. 45
Programmable speeds ...................................... 56
changing during camera run ............................. 57
Protective cover for lens opening ........................ 33
Protective cover for video optic .......................... 78
Q
Quietness, optimization through pitch adjustment .... 25
108
R
Reflex protection ring .......................................
Remote control through the camera control unit ....
Remote ON/OFF switches RS-3/RS-4 .................
Removing
compensation adapter .................................
lens, 41 mm bayonet mount ..........................
lens, 54mm PL-mount ..................................
magazine from camera ................................
Replacing
beamsplitter ...............................................
electronic housing .......................................
fiber optic screens .......................................
fuses .........................................................
glass window in magazine ...........................
lens on TC-recording unit .............................
magazine drive gear ...................................
Resetting total counter ......................................
RUN key ........................................................
45
69
74
36
36
34
31
76
94
29
13
89
89
87
58
56
S
Safety instructions .............................................. 1
SEL key, locking .............................................. 56
SET key, locking .............................................. 56
Synchronous running .......................................
66
78
78
26
84
11
11
78
56
14
56
71
56
14
44
26
7
49
36
7
6
68
75
74
56
T
Take/total exposed film counter, switching
on the camera ............................................
on the camera control unit ............................
TC symbol ......................................................
TCS value (time code sensitivity) .........................
Technical data ................................................
Temperature range ..........................................
Threading
film-, feed-side ...........................................
film-, take-up side .......................................
Time code ......................................................
buffer ........................................................
changing the lens on the recording unit ..........
checking the recording unit ...........................
display on camera control unit ......................
generator ..................................................
input .........................................................
output .......................................................
recording unit ............................................
setting sensitivity .........................................
status display .............................................
switching on/off the recording ......................
Index
Setting
film speed ..................................................
focus, video image ......................................
image, video image ....................................
mirror shutter opening .................................
time code sensitivity .....................................
Shoulder pad ..................................................
Shoulder set S-3 ..............................................
Shutter adjustment knob, video optic ...................
Sliding switch, setting speed ..............................
Socket, BAT ....................................................
Speed, setting
on the camera ............................................
on the camera control unit ............................
Speed, standard ..............................................
Spiral battery cable KC 29 ................................
Step-down gear, Universal follow focus device .....
Stop, automatic ...............................................
Storage ............................................................
Super 16/Normal 16 conversion .......................
Support ring ...................................................
Support rods .....................................................
Symbols in the handbook ....................................
Synchronization
on a video monitor ......................................
on several video cameras .............................
through the external synchronization unit ............
58
73
81
84
98
99
20
21
80
86
89
86
72
80
82
82
16
84
80
83
109
Index
time and user bits display ............................. 84
when using the external synchronization unit ... 83
Transport ......................................................... 7
Transport case .................................................. 7
Tripod heads, recommended ............................... 7
U
Universal film gate, changing the sector ..............
Universal follow focus FF-3 ................................
Unloading the magazine ..................................
User bits, display .............................................
User bits on the camera control unit, setting .........
50
43
24
84
73
V
VARIO-SONNAR ............................................
support ring ...............................................
Video-Assist-System .........................................
aligning the optic ........................................
conversion Normal 16/Super 16 ..................
mounting ...................................................
mounting the optic ......................................
wiring .......................................................
Video camera, color CCD 2-FR ..........................
Video carrying handle ......................................
Video monitor, synchronizing ............................
110
Video set ........................................................
Viewfinder .....................................................
changing alignment ....................................
extension FE-2 ............................................
setting friction .............................................
Viewing height, setting with levelling rods ............
75
38
52
46
92
47
W
Warning instructions .......................................... 1
Warning signs in the viewfinder ......................... 38
Weight .......................................................... 99
White balance, video ....................................... 75
Z
33
41
75
78
54
76
77
78
75
75
68
Zeiss lenses ....................................................
32
Technical data are subject to change without notice.
ARRI Service
Germany ............................... Arnold & Richter Cine Technik
Türkenstraße 89
D-80799 München
phone: (089) 3809-0
fax: (089) 3809-1244
fax service: (089) 3809-1793
E-mail service:
[email protected]
USA ........................................ ARRI USA
617, Route 303
Blauvelt, New York 10913
phone: (914) 353 14 00
fax: (914) 425 12 50
E-mail: [email protected]
ARRI USA
600 North Victory Blvd.
Burbank, California 91502
phone: (818) 841 70 70
fax: (818) 848 40 28
E-mail: [email protected]
GB ........................................... ARRI (GB) Ltd.
The Movie House
1-3 Airlinks, Spitfire Way
phone: (0208) 848 88 81
fax: (0208) 561 13 12
E-mail: [email protected]
Italy ........................................ ARRI ITALIA S.R.L.
Viale Edison 318
20099 Sesto S. Giovanni (Milano)
phone: (02) 26 22 71 75
fax: (02) 242 16 92
E-mail: [email protected]
ARRI ITALIA S.R.L.
Via Placanica, 97
00040 Morena (Roma)
phone: (06) 79 89 02 02
fax: (06) 79 89 02 39
Canada .................................. ARRI Canada Ltd.
415 Horner Avenue, Unit 11
Etobicoke, Ontario
Canada M8W 4W3
phone: (416) 255 33 35
fax: (416) 255 33 99
E-mail: [email protected]