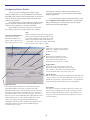
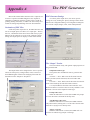
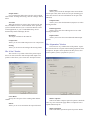
1
User’s Guide
© 2003 iProof Systems, Inc. All Rights Reserved.
Information contained in this document is subject to change without notice and does not represent a commitment on the part of iProof Systems, Inc. The software
described in this document is furnished under the dealer agreement or nondisclosure agreement. The software may be used or copied only in accordance with the terms
of the agreement. It is against the law to copy the software on any medium except as specifically allowed in the license or nondisclosure agreement. No part of this
manual may be reproduced or transmitted in any form or by any means, electronic or mechanical, including photocopying and recording for any purpose without the
express written permission of iProof Systems, Inc.
PowerRIP ImageSet is a registered trademark of iProof Systems, Inc.
Windows, Windows 95, Windows 98, Windows NT and Windows XP are registered trademarks of Microsoft Corporation.
EPSON and EPSON Stylus are registered trade,arks of Seiko Epson Corporation.
All other trademarks are the property of their respective companies.
1
Contents
Validating PowerRIP ImageSet
.................................................................................... 4
Chapter 1 Introduction
Features............................................................................ 6
Where to get help............................................................. 6
Chapter 2 Printing from applications
to PowerRIP Imageset
Selecting the destination printer ...................................... 7
Print Settings.................................................................... 7
Invalid Settings ................................................................ 7
Print Settings Explained .................................................. 8
Paper Size ................................................................... 8
Print Quality ............................................................... 8
ICM Method/ICM Intent ............................................ 8
Scaling ........................................................................ 8
Color Mode................................................................. 8
Output Profile ............................................................. 8
Rendering Intent ......................................................... 8
RGB Source Profile .................................................... 8
CMYK Source Profile ................................................ 8
Make Composite From Separation ............................. 8
Make Separations ....................................................... 8
Mirror Image............................................................... 8
Negative Image........................................................... 8
Paper Type .................................................................. 8
Generate Pure Blacks.................................................. 8
True Spot Colors......................................................... 9
Screening .................................................................... 9
Nesting ........................................................................ 9
Nesting output media size........................................... 9
Job Priority ................................................................. 9
When using PageMaker................................................... 9
Chapter 3 Printing to PowerRIP ImageSet From
Remote Workstations
Sharing the PowerRIP ImageSet Printers........................ 10
Connecting from Windows workstations ........................ 10
Gaining access to the server ....................................... 10
Connecting to the printer ............................................ 10
Printing from remote Windows workstations .................. 11
Connecting from Mac OS 9.x.......................................... 12
Printing from Mac OS 9.x ............................................... 13
Connecting from Mac OS X............................................ 13
Printing from Mac OS X ................................................. 14
Chapter 4 Operational Overview
Understanding the PowerRIP printing
architecture ................................................................. 15
Hardware RIP job flow.................................................... 15
PowerRIP ImageSet job flow .......................................... 15
Windows PostScript driver.............................................. 16
Hot Folders ...................................................................... 16
Output Queues................................................................. 16
Multiple Inputs/Multiple Outputs.................................... 16
Job Control ...................................................................... 16
Chapter 5 The PowerRIP Application
The main control dialog................................................... 17
Information ................................................................. 17
Configuration .............................................................. 17
Control ........................................................................ 17
Queue Control ................................................................. 17
Incoming Jobs Queue ................................................. 17
Pausing the Incoming Jobs Queue ......................... 18
Holding/Releasing jobs .......................................... 18
Deleting queued jobs .............................................. 18
Changing job priority ............................................. 18
Changing a queued job’s print settings .................. 18
Intended output device ...................................... 18
Output To: (output queue) ................................. 19
Job Priority ........................................................ 19
Use settings specified at print-time ................... 19
Specify settings button....................................... 19
Default settings button ....................................... 19
Apply Custom Calibration ................................. 19
Adjust Custom Calibration ................................ 19
Processed Jobs Queue ................................................. 20
Deleting processed jobs ......................................... 20
Reprinting processed jobs ...................................... 20
Job Info .............................................................. 20
View Job Settings .............................................. 20
Page Preview Window....................................... 20
Pages Section ..................................................... 20
Color (plate) section .......................................... 20
Re-Process entire job ......................................... 20
Re-print individual pages .................................. 20
Pages Being Printed Queue ........................................ 21
Viewing page info .................................................. 21
Changing page print priority .................................. 21
Cancelling a page ................................................... 21
Re-starting a printing page ..................................... 21
Pausing/resuming a printing page .......................... 21
Manually inserting a PostScript
or PDF file into the PowerRIP job queue ................... 22
Output Configuration dialog in detail .................... 22
The Print Quality Tab ............................................. 22
The Color Tab......................................................... 22
Color Mode ........................................................ 22
Spot Colors ........................................................ 22
Edit/Define Spot Colors..................................... 22
Output profile (ICM/ICC) ................................. 22
Rendering Intent ................................................ 22
Input Profiles ..................................................... 24
The Paper Tab......................................................... 24
Media Selection ................................................. 24
Nesting ............................................................... 24
Activate nesting .............................................. 24
2
Contents (cont.)
Override job’s nesting settings....................... 24
Configure nesting ........................................... 24
The Separations Tab ............................................... 24
Make Composite ................................................ 24
Make Separation ................................................ 24
Configuring PowerRIP ImageSet program settings ........ 25
Chapter 6 Density Calibration
The “all the same” checkbox........................................... 26
The Channel dropdown item ........................................... 26
The Reset button.............................................................. 26
The Load button .............................................................. 26
The “Save As” button ...................................................... 26
Calibrating ....................................................................... 26
Chapter 7 Managing Inputs
Configuring Hot Folders ................................................. 28
Configuring Printer Entities ............................................ 29
Adding a Printer Entity and Hot Folder Tutorial............. 30
Create the hot folder ................................................... 30
Create the printer entity .............................................. 32
Chapter 8 Managing Outputs
Working with Output Queues .......................................... 34
Controlling an output queue and its jobs .................... 34
Pausing and resuming Output Queues........................ 35
Managing an output queue’s jobs ............................... 35
Changing an output queue’s destination port ............. 35
Advanced settings....................................................... 36
Deleting an output queue ............................................ 36
Adding an output queue.............................................. 36
Appendix A The PDF Generator
Destination of PDF files .................................................. 37
PDF Generator settings.................................................... 37
The “Output” Tab ....................................................... 37
Output File Name Type .......................................... 37
File ovewrite policies (if file already exists) .......... 37
Output Folder ......................................................... 38
View File ................................................................ 38
Resolution .............................................................. 38
ASCII Format......................................................... 38
Auto-Rotate ............................................................ 38
Compression........................................................... 38
Thumbnails............................................................. 38
The “Images” Tab ....................................................... 38
Use device dependent color ................................... 38
Convert CMYK images to RGB ............................ 38
Transfer function .................................................... 38
Undercolor removal ............................................... 38
Image Sub-sampling .............................................. 38
Image compression................................................. 38
Preserve OPI Comments ........................................ 38
Preserver Overprint settings................................... 38
The “Color” Tab ......................................................... 38
Output profile ......................................................... 38
Rendering intent ..................................................... 38
Input profiles .......................................................... 38
Mirror ................................................................... 38
The “Fonts” Tab .......................................................... 39
Subset fonts ............................................................ 39
Embed all fonts ...................................................... 39
Never embed these fonts ........................................ 39
Always embed these fonts...................................... 39
The “Separations” Tab ................................................ 39
Make Composite .................................................... 39
Make Separation .................................................... 39
Appendix B The TIFF Generator
Destination of TIFF files ................................................. 40
TIFF Generator Settings .................................................. 40
The “Output” Tab ....................................................... 40
Output File Name Type .......................................... 40
File ovewrite policies (if file already exists) .......... 40
View File ................................................................ 41
Resolution .............................................................. 41
Compression........................................................... 41
Nesting ................................................................... 41
The “Color” Tab ......................................................... 41
Color Mode ............................................................ 41
Effects..................................................................... 41
Spot Colors............................................................. 41
Output Profile......................................................... 41
Rendering Intent..................................................... 41
Input Profiles .......................................................... 41
The “Separations” Tab ................................................ 41
Make composite ..................................................... 41
Make separation ..................................................... 41
Appendix C
Adding ICM/ICCs to PowerRIP ImageSet
Introduction, description of utility................................... 43
Adding a profile choice entry to the PPDs ...................... 43
Deleting a profile choice entry from PPDs..................... 44
Distribution of altered PPDs............................................ 44
3
Validating PowerRIP ImagSet
PowerRIP ImageSet can be downloaded and “test-driven”
without having to purchase it. In this evaluation mode, a watermark will appear on all printed pages. Once the software is
purchased, the user is supplied with a “product code” which will
enable the validation of the product, removing the watermark.
This will open the PowerRIP Server validation dialog
PowerRIP ImageSet’s copy protection is a security-key
based system which is validated by the user by obtaining an
“unlock code” or “activation code” from the iProof web server
using the supplied “product code”. The validation is installed on
the server externally of the PoweRIP ImageSet software. This
means that, once validated, you can un-install and re-install
PowerRIP ImageSet as many times as you want on the same
server without having to re-validate. If you wish to move
PowerRIP ImageSet to a different server system, you can remove
the validation, log on to the iProof validation server to preform
the validation removal procedure, then re-install PowerRIP
ImageSet on a different server and validate again.
Validating the software.
To validate PowerRIP ImageSet and get rid of the pesky
“PowerRIP” watermark, you must purchase the software. Once
you have purchased it you will receive a “product code” which
you will use to obtain a validation code from our server.
Write down the user code (you’ll need it for the next step)
and leave this window open.
Next, log on to www.iproofsystems.com/validation using
your favorite web browser
Open “Validate PowerRIP” from the “Configure” menu
option.
Select “Validate PowerRIP ImageSet”.
4
The validation page will appear:
Enter the validation code (activation code) into
PowerRIP’s validation dialog:
Click OK. A dialog will appear informing you that
PowerRIP is now validated.
Enter your product code (the 16-character code either on
the CD or the CD case) in the box marked “Please enter your
product code”
Close PowerRIP. The validation will not take effect until
PowerRIP is re-launched.
Enter the User Code (obtained in last step) in the box
marked “Please enter your User Code:”
Click Submit.
If the numbers were entered correctly, the next page will
supply you with a validation code.
5
Introduction
Chapter 1
PowerRIP ImageSet turns your printer into a PostScript®
Level 3 compatible print server. PowerRIP ImageSet , a software
raster image processor (RIP), reads and interprets PostScript
Level 3 and allows your printer to print virtually any PostScript
job. Simply select the PowerRIP printer entity from the local
server or any remote Mac or PC running Windows, select your
printing options and click print; PowerRIP takes care of the rest.
PostScript is the standard for high quality graphic output. All
elements of a document, including text, graphics, and images are
described by the PostScript code. When you print from an
application, such as PageMaker®, PowerRIP processes the
PostScript code and sends the processed image to the printer in
it’s native language, already rasterized.
Features
l
l
l
l
l
l
l
l
l
l
l
l
l
l
l
l
l
l
l
l
l
PostScript Level 3 compatible - the professionalworld
printing standard
Advanced job queue management on a per-job or per-page
basis
Stochastic screening support.
Halftone screening support.
User-defined halftone angles & frequencies.
Pre-defined halftone angles/frequency combinations.
Specify halftone angles/frequency on a per-color basis.
Accepts User Defined ICC Profiles. Also includes all necessary ICCs for the supported printers.
Density calibration on per-color basis
Make composite prints from PostScript separations
DCS1and DCS2 support
Prints Acrobat PDF files directly. Without the need to
print them from Reader.
Override printing options embedded in PostScript files. This
allows printing of PostScript files created for other PostScript
devices.
Network ready, Server/Client and cross-platform configurable
SWOP, and Euro color simulation for more accurate offset
press proof color matching
Print to PDF file
Print to TIFF file
Print to multiple printers
Nesting (page imposition)
Page Previewing
Reprint selected pages from a multiple-page document
without re-processing.
Where to get help
When calling for technical assistance, be ready to identify
your system and its configuration, the serial number of
PowerRIP ImageSet, and a description of the problems you are
encountering.
iProof Systems Technical Support
iProof Systems Technical Support is available through
phone, fax, mail, e-mail and the Internet. Hours of operation are
9:00 am to 6:00 pm EST (Monday through Friday). Free
telephone support is limited to 30 days after your first support
call. After 30 days from your first call, a charge of $25.00 (U.S.
Dollars) applies per incident (billed to your credit card). Visa,
MasterCard and American Express are accepted. We suggest
using iProof’s free e-mail support to get a prompt answer to any
questions you may have.
iProof Systems
1790 Highway A1A, Suite 204
Satellite Beach, FL 32937 USA
Telephone Support: (321) 777-3982
Fax Support: (321) 777-6025
Electronic Support Services
l
World Wide Web
iProof Systems’ World Wide Web site is
http://www.iproofsystems.com. iProof Systems’ home page
includes FAQs (Frequently Asked Questions), new product
announcements, Error Messages, Read Me files, and other
helpful information.
l
iProof Systems E-Mail Support
You can also send e-mail to iProof Systems at
[email protected]. Please include your name,
PowerRIP 2000 Product Code, platform, and printer model(s)
so that iProof Systems technical support representatives can email a response to your question.
6
Chapter 2
Printing from Applications to PowerRIP ImageSet
Selecting the destination printer
Upon installation of PowerRIP ImageSet, a printer will be
added to to the Windows operating system for each printer
selected during PowerRIP ImageSet installation. The printer
names are preceded by “PowerRIP” for example, if you’ve
installed PowerRIP ImageSet and chose to support the Epson
Stylus Pro 9600, a Windows printer will be added called
“PowerRIP Stylus Pro 9600”. This would be the printer you
select when using PowerRIP ImageSet to print to the Epson
Stylus Pro 9600. If you’ve installed a different printer, you’ll see
the appropriate “ Windows PowerRIP” printer for this device.
The installer also creates “output queues” which
PowerRIP uses to communicate with the printer(s). These queues
are typically named “PowerRIP Output Queue”. DO NOT print
directly to these queues from your application. The output
queues are only present on the system which is running the
PowerRIP ImageSet sever software. These queues will not be
visible by remote users printing to the server.
PowerRIP ImageSet uses the standard Windows PostScript
driver version 5 to create the PostScript jobs, therefore the print
dialog will be pretty much the same as you would see when
printing to any PostScript device from Windows:
Invalid settings
Whenever a combination of settings is not valid, a warning
icon will appear. For example, when printing to the Epson 1290,
a resolution setting of 2880 is not valid. Note the warning icon
next to the 2880 resolution selection. If the “Paper” selection
were changed to a media which supports the 2880 resolution,
this warning icon will not display. If you select the option with
the warning icon, a dialog will appear telling you which options
are conflicting with each other (in this case it would be “Paper
Type: Plain Paper” and “Resolution: 2880 dpi”. DO NOT allow
a job to print with conflicting settings; it will not print properly.
Print Settings
The supported resolution and output media choices you
see at print-time will depend on the printer being used. There
are, however, settings which are common to all devices supported by PowerRIP ImageSet. To set these options, click the
“Advanced” button. The printer-specific as well as the common
settings will be displayed in a dialog:
7
PowerRIP ImageSet Print Settings
The following are the settings which are common to all
outpt devices supported by PowerRIP ImageSet. Although some
of the choices available for these settings may vary from device
to device, their function is the same.
Paper Size
This settings will tell PowerRIP ImageSet what size the
destination media is. Please note that this setting is not necessarily the size of the document. Although your document might
have been created as tabloid size, for example, if you want to
print it on a tabloid sheet of paper, you must choose tabloid
(11x17) paper size. Also, you might want to print a letter size
document on a bigger sheet to allow for crop marks or registration marks. When using the nesting feature (described later), the
size you pick here will be the size of the pages nested onto the
output media.
Print Quality
This is where you would pick your output resolution.
Invalid choices will have a warning icon next to the selection,
valid choices will not.
ICM Method/ICM Intent
PowerRIP ImageSet has its own color management and
ICM support built in. Leave the default settings in these two
options as they will not have any effect. They are visible only
because they are part of the Windows PostScript driver. The
settings for color management are decribed below under “RGB
Source Profile”, “CMYK Source Profile”, “Output Profile” and
“Rendering Intent” which allow much more control and flexibility for color management.
Scaling
Rendering Intent
This option allows you to choose the rendering intent for
your output. Your choices are: Perceptual, Absolute Saturation,
Relative Saturation, Relative Colorimetric & Absolute Colorimetric
RGB Source Profile
This option will allow you to select the input profile to use
for your 3-color images. Although PowerRIP installs quite a few
RGB source profiles which you can select, you can add additional input profiles to the PPD. Please see the “Adding additional ICCs to PowerRIP ImageSet” section for more information on how to do this.
CMYK Source Profile
The same as the RGB Source Profile option but for CMYK
images.
Make composite from separations
Selecting “Yes” will cause a separated job to be printed as
a composite.This option is widely used to proof separations
before they go to press, check trapping, etc. When using this
feature, you MUST print a separated job from an application
which supports separations (Quark XPress, PageMaker, etc.). If
you select Yes and print a composite job, the results will be
unpredictable.
Make Separations
This option is the opposite of the “Make composite from
separatiosn” option. When set to “Yes” PowerRIP ImageSet will
print four plates (C,M,Y & K) in black from any composite job.
This feature is widely used to print separations when the
original document is either not available or created on an
application which does not support the printing of separations
(Microsoft Word, etc)
Enlargement/reduction percante desired for your output.
Pretty self-exaplanatory... a settings of 50% would result in a
printout of the document that’s half the original size.
Mirror Image
Color Mode
Negative Image.
This option will define the color mode of the output, color
or monochrome (this option not available for the PDF or TIFF
generator output devices)
Output Profile
This option lets you choose the ICM or ICC to use for
output. PowerRIP ImageSet comes with all the necessary ICMs
to generate color-correct output to all the supported devices. It
picks the correct ICM automatically according to the paper type
and resolution selected. You can, however, define your own
ICM/ICC to use as your output profile. Please refer to the
“Adding additional ICCs to PowerRIP ImageSet” section for
instructions on adding ICCs (ICMs) to PowerRIP ImageSet. If
there are no custom ICMs added to the PPD, this option will not
display.
Flips the page about its X axis (left is right, right is left)
Prints a negative of the page (white is black, black is
white). This feature is handy when printing a document which
was creted in “negative” mode and a positive printout is desired
as well as for printing offset negatives on devices which support
plate material. Care should be used when using this feature as it
tends to use A LOT of black ink on inkjet printers.
Paper Type
Allows selection of the output media type (Plain paper,
photo paper, etc.). This option is not available for the PDF or
TIFF generator output devices.
Generate Pure Blacks
When enabled, this option will convert black pixels made
up of 100% C,M,Y & K (or 100% C, M & Y) and convert them
to 100% K only. This feature not available on all devices.
8
True Spot Colors
When enabled, this option will tell PowerRIP ImageSet to
enable the “True Spot” feature. This feature will recognize spot
colors within a composite or separated job and, using a proprietary mechanism, render the color as accurately as possible on
the output device.
Screening
This option lets you select the type of halftone screening to
use. For “contone-looking” proofs, use Stochastic. For halftonescreening, use one of the pre-defined screen rulings or select
“Document Defined Halftone” to set the frequencies/angles/spot
functions in your application. Available “pre-defined” halftone
screen choices range from 30-line to 150 line in both “Standard”
angles and “Special” angles. The special angles are less likely to
produce moire. You can use this option whether you are printing
composites, separations, composite from separations or separations from composites. This feature not available for the PDF or
TIFF file generator output devices.
When Using Adobe PageMaker in Windows
When using Adobe PageMaker 6.5 in Windows: You must
copy the PPDs for the PowerRIP printers you are using into
PageMaker’s PPD folder. This folder is usually named
“\PM65\RSRC\USENGLSH\PPD4”. At print-time, you must
select the PPD to use in the “PPD” window of the print dialog.
Additionally, you should always click on “Features” and select a
setting for each option available for that printer as PageMaker
does not automatically use the defaults listed in the PPD as do
most other applications.
Nesting
This allows you to activate the nesting feature and set the
reduction size of the nested pages. The nesting feature allows the
printing of multiple pages on one sheet of output media. For
example, if we had a multi-page, Letter-size job and were to set
“Nesting” to “Pages at 100%” and “Nesting Output Media Size”
to “Tabloid”, the job would print 2-up on 11x17 paper. The
nesting mechanism will automatically rotate the nested pages to
accomodate as many as possible on the output sheet.
Nesting Output Media Size
This settings allows you to specify the output media size
when using the nesting feature (see above for explanation).
When “Nesting” is set to “No Nesting”, this option has no
effect..
Job Priority
This option allows you to choose the priority of the job.
Jobs with higher priority will be printed before jobs with lower
priority by the PowerRIP ImageSet server. Priorities can be reassigned after the job has been queued in PowerRIP ImageSet.
See the “Queue Control” section for more details.
9
Printing to PowerRIP ImageSet
From Remote Workstations
Chapter 3
Sharing the PowerRIP Imageset Printers
Before anyone can connect and print to PowerRIP
ImageSet, you must “share” the proper printer entities. If you
require Macintosh systems to connect and print to PowerRIP
ImageSet, you must install Windows 2000 Server ’s or Windows
XP Professional’s “Services for Macintosh” network add-on.
This will enable the Macs to see the shared printers. For instructions on how to do this, see your Windows documentation.
Please note that you must use the “Server” versions of the
Windows operating systems as they are the only versions that
support services for Macintosh. It might be possible to use thirdparty utilities to connect Macs to Windows 2000 or XP “nonserver”. Any software package that allows the Macs to see the
shared printer entities on the PC running PowerRIP ImageSet
“should” work. We recommend using the “Services For
Macintosh” from Microsoft.
To share the PowerRIP ImageSet supported printers,
follow these simple steps. For this example, we will assume that
we’ve installed PowerRIP ImageSet Server with support for the
Epson Stylus Photo 1290, the Epson Stylus Pro 9600, TIFF
output and PDF output. Will will further assume that we wish to
share all the supported printers:
1)
2)
3)
4)
5)
6)
7)
Open the “Printers” dialog under Windows
Win 2000: Start/Settings/Printers
Win XP: Start/Printers and Faxes
Open the first printer entity (PowerRIP Stylus Photo 1290 in
this test scenario)
Select Printer/Sharing
Select the “Sharing” tab if not already selected
Select the “Shared As” radio button, the text box next to it
will become enabled
Enter a descriptive name in the Text box, click “OK”. The
name you enter in the text box is the name that will appear
as the shared printer when you connect to PowerRIP
ImageSet from remote workstations.
Depending on the name you chose, you might get a dialog
stating that the name you chose might not be accessible
from MS-DOS workstations. If you’re not using any MSDOS workstations (most people are not, now-adays) click
“Yes”.
Your printer is now shared. Repeate steps 1 thru 6 for the
remaining printer entities which, for this example, would be:
PowerRIP Stylus Pro 9600, PowerRIP PDF and PowerRIP
TIFF.
Installing the printer driver on remote
workstations
PowerRIP ImageSet comes with a utility which lets you
easily connect your remote Windows workstations (any 32-bit
version of Windows) as well as the appropriate PPDs to let your
Macintosh connect just as easily.
Connecting from Windows workstations
Gaining access to the server
Due to Windows’ security, it is necessary that the remote
client system (the PC which will be the client) be logged in to
the server (the PC running PowerRIP ImageSet). If you are
unsure as how to do this, consult your Windows documentation
or your system administrator.
To connect to the PowerRIP ImageSet printers from a Windows
workstation (any version of 32-bit Windows):
1)
2)
3)
4)
5)
10
Ensure that the workstation is logged in to the server
running PowerRIP ImageSet
Insert the PowerRIP ImageSet CD into the workstation you
wish to connect from. The PowerRIP ImageSet splash
screen will appear within a few seconds.
If the PowerRIP ImageSet splash screen does not appear,
Open “My Computer”, select and open the CD drive and
open “Setup.exe”
Click on “Connect Workstation to PowerRIP ImageSet
Server”
The “Connect To PowerRIP Server” application will launch
(it might take a few seconds, be patient)
6)
In the box labled “Print Servers” you will see a list of all
Windows servers that were found on the network.
Select the server where PowerRIP ImageSet is installed.
This will cause the box labled “Shared Printers” to display
all printers shared by that system.
Printing From Remote Windows Client
Printing to PowerRIP ImageSet from a remote Windows
client is as straight-forward as printing to any networked printer.
Simply select the newly created printer entity, set the desired
options and print. The jobs will be quickly spooled freeing the
remote client PC to continue working without much delay.
For more information on print settings, see the beginning
of Chapter 2.
7)
As you click on the different shared printers, the printer type
will appear in the text box labled “Printer Type”. Select the
printer entity you wish to connect to and click the “Connect”
button. After a few seconds, if all was succesfull, a message
box will display informing you that the connection was
completed. If the operation fails, an error message will be
displayed. The most common reason for this operation to
fail is that the logged in client has insufficient rights to
create a printer.
8)
Repeat steps 6 and 7 for any additional printers you wish to
connect to.
Your Windows PC is now ready to print jobs to PowerRIP
ImageSet.
11
Connecting from Mac OS 9.x
connect to. In this example we’ll be connecting to the Epson
1290. Please note that the Macintosh sees the printer entity’s
“real” name rather than the “Share Name” that was assigned
at share time.
As mentioned before, it is necessary to load “Services For
Macintosh” on the server system (the PC running PowerRIP
ImageSet) to make the shared printer entities available to
Macintoshes on the network (consult the Windows Server
documentation for instructions on how to do this). Once this is
complete, enabling the Mac to print to PowerRIP ImageSet is
very straight-forward, simply copy the proper PPD to the proper
folder on the Mac and use the chooser to select the proper printer
and PPD.
1)
2)
3)
4)
Insert the PowerRIP ImageSet CD into the client Mac’s CD
drive and open it.
Find the folder named PPD and open it
In this folder you will see all the PPDs for the printers and
other output devices supported by PowerRIP ImageSet.
Select the proper PPD(s) and drag it (them) to the Mac’s
Printer Descriptions folder which is inside the Extensions
folder which is in the System Folder (system
folder::extensions::printer descriptions).
For reference, here are the PPD names and their corresponding printer names:
IPEP1270.PPD = PowerRIP Stylus Photo 1270
IPEP1280.PPD = PowerRIP Stylus Photo 1280
IPEP1290.PPD = PowerRIP Stylus Photo 1290
IPEP1520.PPD = PowerRIP Stylus COLOR 1520
IPEP2200.PPD = PowerRIP Stylus Photo 2200
IPEP3000.PPD = PowerRIP Stylus Photo 3000
IPEP7600.PPD = PowerRIP Stylus Pro 7600
IPEP9600.PPD = PowerRIP Stylus Pro 9600
IPEPC80_.PPD = PowerRIP Stylus C80
IPPRPDF_.PPD = PowerRIP PDF
IPPRTIFF.PPD = PowerRIP TIFF
5)
Double-click the selected printer and the Printer Description
Dialog will appear. Click “Select PPD...”
6)
Select the appropriate PPD (see file-name list above)
7)
Repeat Steps 1 thru 6 to add connections for any additional
printers.
Open the chooser and select “LaserWriter” or AdobePS
(Adobe PS used in this example). In the “Select PostScript
Printer” dialog, choose the printer entity you wish to
Your System 9.x Mac is now ready to print to PowerRIP
ImageSet.
12
Printing from Mac OS 9.x
Connecting from Mac OSX
As mentioned before, it is necessary to load “Services For
Macintosh” on the server system (the PC running PowerRIP).
1)
1)
Open the Chooser and select LaserWriter or AdobePS.
Select the desired PowerRIP ImageSet printer (the 1290 in
this example)
2)
In your application’s print dialog, select “Printer Specific
Options” to set the PowerRIP ImageSet options
Create a Printer Description folder on your OS X Macintosh
and copy the appropriate PPDs (see Connecting from Mac
OS 9 for filename/model descriptions). The folder can be
anywhere on the OS X hard disk. There is no special
requirement for its location. IMPORTANT: Mac OS X does
not regognize the option-restrictions defined in the PPD. It
is therefore imperative that you impose the printing restrictions yourself (resolution/paper-type combinations) as the
operating system will not flag conflicts.
2) Open Print Center on the OS X Mac. Hold down the Option
key and click Add. Select AppleTalk. Select Local
AppleTalk Zone. The name of the printer should display.
Select Other in Print Model. Note: DO NOT select “Auto
Select”
3) A dialog will display asking you to choose. Navigate to the
PPD folder you created and copied the proper PPD files
into. Select the PPD for the selected printer entity. The Print
Center dialog will redisplay. Click Add
4)
3)
Select the desired print settings. For more information on
the different options, see the beginning of Chapter 2
13
Repeat the above steps for any additional printer entities.
Your OS X Mac is now ready to send jobs to PowerRIP
ImageSet.
Printing from Mac OSX
IMPORTANT: Mac OS X does not regognize the optionrestrictions defined in the PPD. It is therefore imperative
that you impose the printing restrictions yourself (resolution/paper-type combinations) as the operating system will
not flag conflicts.
1)
Go to “File/Print”. Select the printer entity in the Printer
pull-down. In the Copies & Pages pull-downs go to Paper
Feed and select the paper tray only if you’re printing to a
printer which supports paper tray selections.
2)
Go to the Printer Features and select the desired print
settings. IMPORTANT: Mac OS X does not regognize the
option-restrictions defined in the PPD. It is therefore
imperative that you impose the printing restrictions yourself
(resolution/paper-type combinations) as the operating
system will not flag conflicts.
3)
14
Note: There is no action necessary in Layout, Output
Option, Error Handling or Summary selections in the Copies
and Pages pull downs.
Operational Overview
Chapter 4
Understanding the PowerRIP printing
architecture.
There are 4 main components in a PostScript printing
environment. 1) The application that creates the page, 2) The
PostScript driver which generates the PostScript code when an
application prints the page, 3) The PostScript Raster Image
Processor (RIP) which interprets the PostScript code and renders
a rasterized representation of the page, 4) The physical connection (port) and 5) The actual printer. In some printers, the
PostScript RIP is “built in” to the printer but it is, nevertheless, a
separate computer. We refer to these as “hardware RIPs”. There
are some disadvantages to hardware rips as they are not easily
upgradeable and are virtually impossible to troubleshoot and
maintain by the end-user. These units are also much more
expensive than software-based RIPs and they can only drive the
printer to which they are attached.
PowerRIP ImageSet is a “Software RIP” meaning that the
PostScript RIP is external to the printer and runs on the host
computer (print server) this allows the RIP to take full advantage
of the power available in today’s very powerful and relatively
inexpensive PCs. Software upgrades are painless, troubleshooting is possible by the end-user and he/she has complete
control over the system configuration. This approach also
enables the RIP to offer features that a hardware RIP could never
offer.
In the hardware RIP architecture, the application prints its
page, the Windows PostScript driver generates the PostScript
code and sends it to the physical port (USB, LPT, etc). The RIP
(which is part of the printer) receives the PostScript, rasterizes it
and drives the printer to which it is attached.
PowerRIP ImageSet Job Flow
Because it is external and much more versatile, the
PowerRIP job flow is a little more complex. This also allows
more crontrol and a much wider variety of configurations and
expansion. Here is a simplified flowchart of the job path when
printing to PowerRIP ImageSet.
Front-End Application
(Quark XPress, etc.)
Windows PostScript
Driver
PowerRIP
Hot Folder
Hardware RIP Job Flow
Front-End Application
(Quark XPress, etc.)
PowerRIP
Application (RIP)
Windows PostScript
Driver
PowerRIP
Output Queue
Physical Port
(USB, LPT, etc.)
Physical Port
(USB, LPT, etc.)
Hardware RIP/
Printer
Printer
15
Windows PostScript Driver
In the case of PowerRIP ImageSet the first part of the
cycle is the same as a hardware RIP architecture. The application
prints its page and the Windows PostScript driver generates the
PostScript code. The PostScript driver loaded by the PowerRIP
Installer is version 5 which is the latest available from Microsoft/
Adobe. The proper PPDs are also loaded in the system. From
here on thigs are different. Instead of sending the PostScript out
through a physical port to the RIP/Printer hardware, the
PostScript code is stored in a file. The file is placed in a “Hot
Folder”.
Hot Folders
A hot folder is a folder that isscanned by PowerRIP every
few seconds looking for PostScript or PDF files to print. If it
finds a completed file in the hot folder it opens it and processes
it. The jobs will be processed (rasterized) according to the print
options the user chose when the file was printed (these can be
overriden at the RIP, more on that later).
Job Control
PowerRIP ImageSet allows control over jobs and individual pages within a job wich are not available in any hardware
based RIP (nor in most software based RIPs).
The software features a job queue which is broken up into
3 sections.
The first section contains jobs which have been received
(found in a hot folder) and are either in the process of being
rasterized, waiting to be rasterized or on “hold”.
The second section contatins jobs which have been
rasterized and some or all of its pages are being printed or
waiting to print. It also contains jobs who’s pages all printed, but
the job has not “expired” (expiration time can be set by the user).
The third section contains the actual pages that are being
printed or are waiting to be printed.
See the Queue Control section for more details on how to
change priority/settings/delete/reprint queued jobs.
Output Queues
The PostScript job is interpreted and one by one the pages
of the job are rasterized and wrapped in commands that the
destination printer can understand. What is sent to the printer is
actually a “picture of a page”. The printer itself does not have to
use any resources such as fonts, etc.
As the pages are rasterized they are placed in an output
queue which is nothing more than a Windows Printer entity
which happens to be pointed at the hardware port that the
destination printer is plugged into. There can be multiple output
queues connected to multiple ports which are in turn connected
to multiple printers.
Multiple Inputs / Multiple Outputs
PowerRIP ImageSet can support any number of “Hot
Folders”. Each hot folder can have it’s own destination output
queue and, therefore, its own destination printer. When you
install PowerRIP ImageSet, a hot folder and an output queue is
created for every output device you selected. This allows for
separate, independent job paths and thus multiple-printer
support. For example, if you install support for the Epson 1290
and the Epson 9600 the installer will create Windows printers
called “PowerRIP Stylus Photo 1290” and “PowerRIP Stylus Pro
9600”. When a user prints to the “PowerRIP Stylus Photo 1290”
printer entity, the resulting PostScript file is automatically
written to the EPSON1290 hot folder. Because of the configuration information saved during the install (it asked you what port
the printer was connected to) it will know to send the rasterized
pages to the proper output queue (the one pointed at that output
port). This is all set up for you at install time and you don’t have
to mess with it if you don’t want to. It does, however open up all
kinds of creative configuration possibilities.
16
The PowerRIP Application
Chapter 5
Configuration.
The Main Control Dialog
The PowerRIP ImageSet (aka PowerRIP Server) application is launched automatically when a job is printed to one of the
Windows PowerRIP printer entities. It can also be launched by
opening Start/Programs/PowerRIP ImageSet/PowerRIP
ImageSet.
The dialog consists of 3 sections: Information, Control and
Configuration.
The “Inputs” and “Outputs” buttons launch the PowerRIP
configuration dialogs for inputs (Hot Folders, Printer Entities,
etc.) and outputs (Output Queues) respectively. These options
are also present under the “Configure” menu option. These are
described in more detail later in this chapter.
Control.
The Tabs over the main dialog’s large window control the
function of this window. This is where the queues can be
manipulated when one of the queue-tabs is activated.
To Delete a currently processing job, click the “Cancel
Button”
Queue Control
PowerRIP ImageSet’s job queue is divided into 3 sections.
Incoming Jobs, Processed Jobs and Pages Being Printed. To
view/manipulate the different queue sections, use the tabs above
the main dialogs large window.
Information
Configuration
Control
Information.
The top of the screen contains mostly information about the
current job and the status of the RIP.
Current job processing, page #,
resolution, etc.
Progress
Bars
The Incoming Jobs Queue.
To view/manipulate the incoming queue, click the Incoming Jobs tab. The incoming jobs queue is where jobs arrive
initially. Jobs that have been found in the Hot Folders or have
been manually inserted into PowerRIP appear here. As the jobs
are received they are listed in the queue window. The information displayed in this queue view is Job Name, Status, Owner,
Time Submitted and Size (of the PostScript file, in bytes).
Status messages
Current activity (processing, rendering, etc.)
When the Status Messages tab is selected, no queue viewing/
manipulation is possible. In this mode, the window is used for
viewing messages from the RIP engine. Status information
messages appear in the window. These messages are usually for
information only. If there is a problem printing a job (missing
font, etc.), this window is invaluable for trouble-shooting the
problem. To clear the contents of the window, click the “Clear”
button on the lower left of the dialog. This will delete all status
messages currently in the window.
Accross the bottom of the window, you’ll see three
control buttons: Settings, Delete and Pause Queue. These are
used to change the job settings of a queued job, delete selected
jobs and pause the input queue respectively.
17
Pausing the Incoming Jobs Queue
Clicking the Pause Queue button will pause the incoming
jobs queue. Jobs will still arrive in the queue as they are found in
the hot folders but they will not be processed. They will remain
in the queue with a status of “waiting” until the queue is resumed. When the queue is paused, the third button changes to
“Resume Queue”. Click this button to resume the queue. Once
the queue is resumed, the queued jobs will begin processing in
order of priority.
Placing jobs on hold/releasing held jobs
When a job is in the incoming jobs queue with a status of
“waiting” it is possible to place individual jobs on hold and
release held jobs. To do this select the jobs you wish to hold
highlighting them then right-click to bring up the options popup
menu. Select Hold/Release to toggle the state of the selected
jobs.
Job with higher priority will move up the queue list while
jobs with lower priority will move down.
Changing a queued job’s print settings
When a job is in the incoming jobs queue with a status of
“waiting” or “held” it is possible to change it’s destination
printer as well as the printing attributes (resolution, paper type,
etc.). To do this, double-click on the job you wish to modify or
select the job and click the “Settings” button. The Configure
Output dialog will appear.
Configuring a job’s output settings
Held jobs will remain in the Incoming Jobs queue
indefinetely.
The Configure Output dialog is common to all sections of
PowerRIP which require configuration of the target device and
settings of print jobs. This dialog is used when configuring hot
folders, changing the settings of a queued job or reprocessing a
job already processed.
Deleteting queued jobs
It is possible to delete queueds job that are “waiting” or
“held” by selecting the job(s) then clicking the Delete button or
right-clicking and selecting the Delete Menu Option.
Changing Job Priority
If there is more than one job in the incoming jobs queue, it
is possible to change their print-order by changing their priority.
This can be achieved by dragging the jobs to their new location
Or you can double-click the job and change the priority
using the slider control.
Intended Output
This is the output device the the job(s) will be printed to.
All printers and other output devices selected at install-time will
be displayed here. Be sure to select the proper output queue in
the “Output To:” drop-down list to insure the data is sent to the
right output port.
18
Output To:
In this drop-down, you can select the proper output queue.
Output queues are created at install-time (or manually by the
user). The output queue is simply a printer entity which is used
for PowerRIP to send data to the printer. The output queue you
select should be outputting to the port that the selected printer is
connected to. To view/configure the output queues, click the
“Outputs” button on the main PowerRIP dialog window.
Job Priority
The priority slide-control allows you to set the priority of
the job(s). The range is 1 thru 99 (just like Windows) where 1 is
lowest and 99 is highest priority. You can slide the handle on the
slide control to change the priority or enter the priority number
desired in the text box to the right.
Use Settings Specified at Print Time checkbox
When this control is checked, the job settings will be
controlled by the options the user selected when the job was
printed from the application. If the box is un-checked, it allows
the user to select the printing options and override the settings
used at print time. When this control is checked, the “Output
Configuration” and “Default Settings” buttons are disabled.
Specify Settings
This button is only active if “Use Settings Specified at
Print Time” is NOT checked. Clicking this button will display
the device-specific configuration options. These options will
vary between output devices. See the “Specifying Job Settings”
section later in this chapter
Default Settings
This button is only active if “Use Settings Specified at
Print Time” is NOT checked. Clicking this button will load the
pre-defined defaults for the selected printer (usually plain paper
at low-resolution)
Apply Custom Calibration
When this button is checked, custom cablibration will be
used. To define the density calibration curves to use, click the
“Adjust Custom Calibration” button. This will launch the “QCurve” application which enables you to define the density
curves. See chapter 6
Adjust Custom Calibration
Clicking this button will launch the “Q-Curve” application
which enables you to define the density curves. Each color
channel can be adjusted individually. See Chapter 6
19
The Processed Jobs Queue.
To view/manipulate the processed jobs queue, click the
Processed Jobs tab.
Job Info:
This section displays the job
name, creator and destination
device.
View Job Settings
Clicking this button will let you
view (but not change) the
settings that were used to
process the job.
Preview
Window:
This window
displays the
selected page or
color plate
This view will allow the user to view and manipulate jobs
which have been processed and have not yet expired (expiration
time is set in the “Configure PowerRIP Settings” option under
the “Configuration” menu item).
Deleting Processed Jobs
To delete a job or range of jobs, simply select the desired
jobs by clicking on their job names and click the Delete button
or right-click ont he job-name and select Delete from the popup
menu options.
Reprinting a processed job
To reprint a job that’s already been processed, or to reprint selected pages from a processed job, you can double-click
on the job name or select the job name and click the Reprint
button. This will cause the Rasterized Job dialog to appear.
This dialog enables you to view individual pages, re-print
idividual pages, re-process the entire job with different settings
or even reprocess the job for another output device. You could,
for instance, print a job to PowerRIP ImageSet’s PDF generator
for proofing then re-process the job for the destination printer
without having to re-print the job from the application that
created it.
Example of the Rasterized Job
dialog showing a one-page job
with many spot colors as well as
CMYK printed as a separation
with “Make Composite From
Separations” enabled.. You can
see the individual colors listed as
well as composite.
Pages Section:
This section displays the
pages in the job clicking on
the individual page number
will cause a sub-sampled
preview of the page to be
displayed in the preview
window
Re-Process Entire Job:
Clicking this button will
enable you to re-process the
entire job with different
settings or to a different
output device if desired. If
there are pages currently
printing, they will be deleted.
Color Section:
If the job was printed as a
separation and contains
multiple plates and “Make
Composite From Separation”
was enabled, all the colors will
be displayed in this box along
with the Composite
representation. If the job was
printed as a composite, only
“Composite” will appear in this
window. If the job was printed
as a separation, only
“Composite” will appear in this
window, to view the individual
plates, select the proper “page”
in the pages list.
Reprint Section:
This section allows the re-printing of individual pages without
re-processing. Any page range from a document can be reprinted.
Range: Ranges can be specified as well as multiple ranges
separated by a semicolon. For example “1-5;7-11” will reprint
pages 1 thru 5 and 7 thru 11. Conversely, “5-1;12-10” will
reprint pages 1 thru 5 in reverse order and 10 thru 12 in
reverse order. You can also specify all even or odd pages in the
selected range.
Copies. The range(s) will be repeated according to the number
entered in the “Copies” text box and according to the selection
of “stacked” or “collated”. Collated will print all pages in a
range then start over (1,2,3,4, 1,2,3,4, etc) while Stack will
print multiple copies of each page in the range before printing
the next page (1,1,1,2,2,2,3,3,3, etc.)
20
The Pages Being Printed Queue
(aka Page Queue).
To view/manipulate the page queue, click the “Pages
Being Printed” tab.
Cancelling a page
To cancel a page that’s currently printing or to delete a
page before it prints, select the page(s) and click the Delete
button. Alternately, you can select the pages, right-click and
select Delete from the popup menu. You can also delete the page
by opening the Page Information dialog (double-click on the
page) and click the Delete button.
Re-starting a page
To restart a page or range of pages, select the pages by
highlighting them and click the Restart button. This will cause
pages to begin printing from the beginning. This is handy for
paper-jams, out of ink and other such events that may keep a
page from printing successfully. As with the delete option, you
may also use the “right-click” method or the Page Information
dialog method to do this.
In this view you may see multiple entries per job, as each
job may contain more than one page. This queue allows you to
control the job output on a per-page basis. The job information
displayed in this queue is Job Name, Page #, Status (ready,
printing, printed, error, spooling), Destination (printer/output
queue), Owner, Size (of raw printer data in bytes) and time
submitted. You may have to use the bottom scroll bar to see the
last few columns. The buttons at the bottom of the window are
now “Pause/Resume”, “Cancel” and “Restart”
Pausing/Resuming page printing
To pause or restart a page or range of pages, select the
pages by highlighting them and click the Pause/Resume button.
This will the pause status of the selected pages to toggle. If they
were paused they will resume and vice-versa. As with the delete
option, you may also use the “right-click” method or the Page
Information dialog method to do this.
Viewing page info & changing page priority
To view information about a page, double click on the
desired item (in the Job column). The Page Information dialog
will display.
This window shows a thumbnail preview of the page as
well as other useful information. To change the priority of the
page, use the slide control or enter the priority in the text box
provided (1 is low, 99 is high priority). Pages of higher priority
will print first; skipping lower priority pages regardless of their
visual order in the queue window.
21
Manually inserting a PostScript or
PDF file into the PowerRIP job
queue.
One of the nice features of PowerRIP ImageSet is the
ability to rasterize PostScript and PDF files that were not printed
specifically for our supported devices. Although PostScript is
inherently a “device-independent” language, in the real world,
this is not always the case. If you have a PostScript file that was
intended for an imagesetter (Agfa, Lino, etc.) then more than
likely it was crated using the options in the PPD appropriate for
that device. If you were to send this file verbatim to most other
PostScript interpreters, you may not get the desired results.
PowerRIP ImageSet allows you to insert a PostScript or PDF file
directly into the job queue, specify the print settings and process
the job.
To insert a PostScript or PDF file into the PowerRIP
queue, simply drag the file over the queue window. The Output
Configuration dialog (decribed in next section) will appear. You
can then select your output device, print settings, etc. and the job
will print. Alternately, you can use the “Print PostScript File”
option from the File menu.
Output Configuration
(The “Specify Settings” button)
There are several sections in PowerRIP ImageSet that
enable you to specify job settings by clicking the “Specify
Settings” button. This action invokes a printer-specific dialog
which allows you to set resolution, media, color mode etc.
Although some sections are device-dependent, a lot are common
to all devices as they are features that belong to PowerRIP, not
the printer. In this section we will go through a typical configuration and explain the different functions. Most of these are the
same as the settings available at print-time because they are in
the PPDs. We will use the Epson Stylus Photo 1290 for this
example.
Wether you are configuring a hot-folder, re-processing a
job or manually inserting a Job in the queue, this procedure will
be the same
If the job was not printed using one of PowerRIP
ImageSet’s PPDs (as would be the case with a file created for an
imagesetter) it is HIGHLY recommended that you do NOT select
“Use Settings Specified at Print time” and set the print options
manually.
Print Quality
The options in this section usually pertain to resolution and
other print-quality related settings. In the case of the Epson
1290, the choice of halftone secreening or stochastic can be
made here. The resolutions that appear in the resolution dropdown will vary from paper type to paper type.
22
The Spot Color Configuration dialog allows the addition/
deletion and modification of user-defined spot colors in CMYK,
RGB or Lab color spaces. Simply select the color space you
wish to work in by clicking one of the radio buttons on the upper
right. This will display all user-defined spot colors (if any) that
were defined in that particular mode. As you select the spot color
name in the name window, the values will appear in the appropriate boxes on the right. These can then be edited. To delete a
spot color, select it and click the delete button. To add a spot
color, click the “Add Spot Color” button and follow the instructions.
Color
This section of the dialog does not change much between
different models of printers as it contains mostly PowerRIPspecific color features.
Color Mode:
This section lets you specify color or monochrom output.
Spot Colors:
This section lets you specify the use of the “True Spot”
feature. This feature recognizes named spot color in a job and
applies a proprietary function to make the spot color appear as
close as possible to it’s true color.
Edit/Define Spot Colors:
This button displays the spot color configuration dialog
which will let the user define spot color definitions. This is
sometimes necessary as PostScript separation files don’t always
contain the definition of a spot color. This can also be used to
override a spot color with a certain name.
Output Profile (ICC/ICM)
This lets you select the profile to use when printing.
PowerRIP ImageSet ships with all necessary ICMs for all
supported printers and resolution/paper type combinations.
These are used automatically by setting this option to “Auto
Select”. This drop-down contains all the CMYK (in this case)
ICMs that were found in the system. If you have created a
custom profile you would like to use, you can select it here. To
be able to select it at print-time from your applications, it must
be added to the PPD. To do this, use the “Add ICM to PPD”
utility which is located in the PowerRIP ImageSet program
group. This utility is documented elsewhere in this manual. The
best thing to remember when using this feature is: When in
doubt, use Auto Select.
Rendering Intent
This drop-down lets you select which rendering intent to
use when printing. The default is Perceptual. Following is a brief
description of each rendering intent:
Perceptual: Maintains contrast. Creates natural-looking
images (this is the default)
Absolute Saturation: Maintains saturation. Good for
business charts and other situations where un-dithered colors are
required.
Relative Colorimetric: Maintains colorimetric match. Used
for graphic designs and named colors.
Absolute Colorimetric: Maintains the white-point, matches
the colors to their nearest color in the destination gamut.
23
Input Profiles
This lets you select the input profiles for CMYK and RGB.
These drop-downs will list and let you choose any CMYK or
RGB profile (ICM/ICC) found in the system. To add profiles to
the PowerRIP PPDs, use the “Add ICM to PPD” utility in the
PowerRIP ImageSet program group.
Paper
This section of the dialog allows you to change the media
type and set any output-tray options. It also lets you to mirror or
reverse the output. This section also contains the controls for the
use of the nesting feature.
Destination Media Size
This drop-down lets you define the size of the actual media
that well be printed on. In our example, we have a letter-size job
that will be nested onto 11x17 sheets so the destination media
size is Tabloid (11x17). This drop-down list also contains the
ability to create a custom destination media size. To do this,
select “Custom” as the destination media size. The two boxes
that contain the x and y dimensions will be set to 0.0. Set the x
and y dimensions of the sheet in “PostScript Points”. There are
72 PostScript points to an inch so 8.5 inches would be 612 and
11 would be 792, etc.
Nesting
Nesting is the ability to print multiple pages on one sheet
of media. For example, if you had a multi-page, Letter size job
you could print 2-up on 11x17 media by using the nesting
feature. PLEASE NOTE: You can only nest pages from the
same job. Cross-job nesting is not supported at this time.
Activate Nesting
Checking this checkbox will activate the nesting feature. If
this box is not checked, nesting will not be turned on even if the
job you are printing has nesting turned on.
Output Reduction
If the pages of the job are too big to nest onto the desired
destination media, the individual pages can be reduced so that
they will fit. This dropdown lets you select the percentage of full
size.
Separations
This sections lets you set the separation-specific settings.
Override job’s nesting settings.
When using nesting, this should always be checked unless
you are re-printing a job which was printed with the nesting
feature activated and want to use those settings. If you do not
check this box and the job was not printed with the nesting
feature enabled, it will not take effect.
Configure Nesting
Clicking this button will display the Configure Nesting
dialog. This dialog will also appear if there are no nesting
settings for the job and “Override job’s nesting settings” is
clicked.
24
Make Composite
Selecting this checkbox turns on the “Make Composite
From Separation” feature. Use this ONLY on separated
PostScript files. If the file is not separated, the results will be
unpredictable
This feature will take the plates from a separated job with
up to 256 plates and merge them together into a composite. This
is a powerful feature widely used for proofing separations to
view trapping, etc.
Remove Validation (disabled if software is not yet validated) is used for removing the validation to move the software
to another system.
Configure PowerRIP settings allows you to set applicationspecific settings.
Make Separation
Selecting this checkbox turns on the “Make Separation
From Composite” feature. Use this ONLY on jobs that were
printed as composite color. If the jobs are separated or monochrome, the results will be unpredictable.
This feature will take a composite job and separate it out
into C, M, Y and K plates. This feature is handy when a separation is required but the original file is not available or was
created with an application that does not support printing
separations
.
Configuring PowerRIP ImageSet
program settings
The PowerRIP ImageSet “Configuration” menu option
contains five options:
Job Expiration:
This lets you set how long printed jobs will remain in the
queue before being deleted. You can set the time in minutes
hours, and days. Keep in mind that expired jobs will NOT be
deleted until all pages have left the output queue (Pages Being
Printed) either by being printed and automatically deleted or by
being deleted by hand by the user. Jobs with pages still waiting
to be printed will remain in the job queue indefinetely.
Configure Inputs. Selecting this option has the same effect
as clicking the “Inputs” button on the main dialog.
Configure Outputs. Selecting this option has the same
effect as clicking the “Outputs” button on the main dialog
Validate PowerRIP (disabled once software is validated) is
used for validating the product (makes the “PowerrRIP” watermark dissappear)
25
Chapter 6
Density Calibration (Q-Curve)
PowerRIP ImageSet includes a calibration tool known as
Q-Curve which is used to create the calibration files used to
change the output density on a per-color basis. This application
is launched automatically whenever the “Adjust Custom Calibration” button is clicked (see the Configure Output Section) or,
when the “Apply Custom Calibration” checkbox is checked and
there is no calibration curves defined for that job or queue setup.
When you click on the Adjust Custom Calibration button,
the Q-Curve main dialog will appear.
The “Load” button
This will envoke the normal Windows navigation dialog
and allow you to load a previously defined curve from a named
file.
The “Save As..” button
This will envoke the normal Windows navigation dialog
and allow you to save the current settings to a named file. This
will allow you to have an archive of different curves to load as
needed.
The “Cancel” button
Ignores all changes and exists
The “OK” button
Saves all changes and exists
Calibrating
NOTE: It is highly recommended that a densitometer be
used when doing any calibration. Although you can calibrate
without one, you would be relying on the human eye, light
source, etc which can have many variables.
The last values for this job or queue (depending on what
dialog it was selected from) will be loaded automatically. It is
not necessary to “name” the different calibrations. It is possible,
however, to save settings to and load from named files by using
the “Load” and “Save As” buttons.
The “All the same” checkbox
Checking this box will tie all the channels together. All
other color channels will become like the currently displayed
channel when the box is checked. Also, any subsequent changes
to a channel will affect all channels in the same manner.
If this checkbox is not checked, all channels can be edited
independently and will retain their individual values.
The “Channel” dropdown
This dropdown list allows you to switch color channels. If
“All the same” is checked, all channels will be the same.
The “Reset” button
The Q-Curve calibration user interface enables you to alter
the density curves by dragging the graphical line (on the left) or
typing the number into the proper box (on the right).
To edit using the graphical line, select a place on the curve
where you want to make the change and click. A handle will
appear which you can then drag up and down. Create as many
handles as necessary to achive the proper curve. To delete a
handle, simply drag it outside the bounds of the grid and it will
dissapear.
The calibration grid is designed “linearly” and thus 0%
(the highlights) is at the bottom left and 100% (the shadows) is
on the upper right.
To change the appearence of your printout, drag the curve
in the direction you want the density to move. For example if
your 50% range is printing too dark, decrease the value at that
range by moving the curve down or entering a lower number in
the 50% box.
Clicking this button will reset the curve to the values that
were set when the “Adjust Custom Calibration” button was
clicked.
26
27
Managing Inputs
Chapter 7
PowerRIP ImageSet is designed to accept input from
multiple sources. Hot folders being the primary way in which
jobs are received. The printing mechanism, including hot
folder, printer entities, etc. is automatically set up at install
time. The user does not have to configure any of this to print
normally. It is possible, however, to customize the inputs for
particular needs.
When PowerRIP ImageSet server is installed a hot folder
and a Windows printer is created for each output device that is
intalled. For example, if you install PowerRIP ImageSet server
and select the Epson 1290, Epson 9600, TIFF Generator and
PDF Generator, four different Windows printers will be created,
one for each output device. These are refered to as “Printer
Entities” by PowerRIP ImageSet. These four Windows printers
(printer entities) will in turn deposit PostScript files in four
different hot folders when they are printed to. These four hot
folders are scanned periodically by the PowerRIP server software.
dialog. The bottom portion of this dialog is exacly the same as
the “Configure Output” dialog documented in Chapter 5.
Hot Folders List:
This window displays all currently active hot folders. They are
identified by the full path to their location. You will notice that
the hot folders are all located in the “PowerRIPHotFolders”
folder. This is for organizational purposes only, any folder can
be used as a hot folder. Keep in mind that files in the hot folders
are volatile. They will be deleted once the job expires
Extensions to detect:
This window displays all file
extensions that will be treated as
jobs. The default extensions are
PDF, PS and PRN. Any file in the
hot folder which has one of these
extensions will be treated as a job
and thus renamed, opened,
processed and deleted.
In this section we will discuss how to manage hot folders
and printer entities. At the end of this chapter, we will combine
all the information by adding an input (hot folder and printer
entity) for the Epson 9600 which is hard-wired
to print on Photo Paper at 720 dpi (ignoring
print-time settings).
Add/Remove buttons
(hot folders):
Add and delete hot
folders.
Input management is controlled by the
Configure Inputs dialog. This dialog contains
two sections, one for configuring Hot Folders
and one for configuring Printer Entities. To
access the Configure Inputs dialog, click the
“Inputs” button on the PowerRIP application
main dialog.
Configuring the Hot Folders
A hot folder is simply a folder into which users can drop
PostScript or PDF files to be printed.
The Configure Hot Folders section of the Configure
Inputs dialog allows you to add/delete/configure hot folders. The
information in the screen-shot below shows the hot folders as
they were created by the installer when we installed with support
for the Epson 1290, Epson 9600, TIFF Generator and PDF
Generator. Lets take a look at the different sections of this
Add/Remove
buttons
(extensions):
These buttons
pertain to the
extensions for
the selected hot
folder.
Configure Output
Section
All settings in this
section are
documented in the
section titled
“Configuring a Job’s
Output Settings” in
Chapter 5.
Advanced
This button will invoke the “Advanced
Hot Folder Scanner Settings” dialog:
Advanced Hot Folder scanner settings.
The top box contains the number (in
seconds) of the scan invervals.
The bottom box contains the number of
times to find the file unchagned and closed
before it is considered “complete” and is
placed in the job queue.
28
Configuring Printer Entities
It is not necessary to change these settings to print
normally. Furthermore, it is recommended that the settings for
the default printer entities not be modified unless you are sure of
what you are doing. Wrong settings in this section will cause
problems when printing.
As mentioned before, upon installation, a Windows printer
(appears in the list of printers unders start/settings/printers) is
created for each output device selected at install-time.
These Windows printers are refered to as “Printer Entities”. When you print to one of these printers, the resulting
Current PowerRIP Printers:
These are the currently
defined PowerRIP printer
entities. These can be seen in
Start/settings/printers as well.
PostScript file is placed in a Hot Folder (described in the
previous section) which is in turn scanned by the PowerRIP
ImageSet application.
To access the Printer Entities configuration dialog, select
the “Configure Printer Entities” tab of the Configure Inputs
dialog. If this dialog is not already open, click the “Inputs”
button on the main PowerRIP dialog.
Edit:
When this button is clicked, the setting options
below will switch from read-only mode to readwrite mode, enabling you to change the settings.
When in edit mode, this button will change to
“Cancel Edit”. To save any changes made during
the edit session, click “OK” or “Apply”
Add:
Enables the creation of a new Printer
Entity. See “adding an input tutorial”
in the next section.
Delete:
Deletes the selected printer entity.
When deleting a printer entity, don’t
forget to delete the hot folder entry
associated with it (if one was created)
Output Folder:
This is where the selected printer entity will
deposit its PostScript jobs when you print a job.
There must be a hot folder entry telling PowerRIP
to scan this folder. Since this printer entity was
App To Launch:
This is the executable that will be automatically launched when
a job is printed to one of the PowerRIP printer entities. It will
launch this app from the “Application Path”. See explanation
of the Application Path parameter for more information.
Application Path:
Part of the printing mechanism is to automatically launch
PowerRIP ImageSet when a job is printed to one of the
PowerRIP printer entities. This parameter tells the system the
location of the application’s executable file. The reason this is
selectable is because it is theoretically possible to have more
than one version of PowerRIP ImageSet loaded and this would
enable different printer entities to launch different versions.
This is a very advanced setup though and should not be
attempted by the faint of heart. Normally, this should be left at
the default, which is the path to the PowerRIP ImageSet
executable (powerrip.exe)
Driver/PPD:
The driver selected here is the driver that will be used by the
printer entity. You MUST use one of the “PowerRIP” drivers
and it must match the destination printer. The PPD box will
always be read-only and automatically updated as the driver
selection changes.
29
Adding a Printer Entity and
Hot Folder tutorial
The previous 2 sections describes the operation of the Hot
Folder Configuration and the Printer Entity Configuration
dialogs. This section will walk you through the creation of a
printer entity/hot folder to help you understand how they work
together.
In our example, PowerRIP ImageSet was installed with
support for the Epson Stylus Photo 1290, the Epson Stylus Pro
9600, the TIFF Generator and the PDF Generator.
You will notice that the dialog comes up by default to the
“PowerRIPHotFolders” folder. Lets give the folder the name
“EPSON1290HRHT”. Type that in the Folder Name box:
Lets say we want to add a printer entity that, when printed
to, outputs to the Epson Stylus Photo 1290, ignoring the job
settings at print-time and processing every job for “Professional
Media Photo Paper” at 1440x720 dpi using 85-line halftone
screening. We’ll call this printer entity “Epson1290Halftones”.
The object in this scenario is to have a printer entity that will
always print the same way regardless of the print settings the
user specified when he/she printed the job. This will also leave
us with a hot folder where you can deposit virtually any
PostScript or PDF file and have it print on the 1290 using the
settings we “hard-wired”.
Click OK
Create the hot folder
The first step is to create the hot folder. We like to keep all
the hot folders in the “PowerRIPHotFolders” folder. This is just
to keep things organized... a hot folder can be anywhere on the
server system (the machine running PowerRIP ImageSet Server)
or even on the network.
A dialog will apear asking you if you wish to create this
folder (assuming the folder doesn’t already exist). Click Yes.
The folder is created and added to the hot folders list.
Open the “configure inputs” dialog by clicking the
“Inputs” button on the main dialog.
Click Add, the “Choose Hot Folder” dialog will appear:
With the new folder selected, lets set the output options.
First, set the target output device, in this case, the Epson 1290. In
the “Intended Output” section select the EPSON Stylus Pro 1290
as the printer and the appropriate output queue. In this case,
PowerRIP Output Queue 1 (which is pointed at the port the 1290
is connected to). If you want to assign a higher priority to the
jobs that arrive in this hot folder, you may change that now by
using the “Job Priority” settings.
30
Since we want all jobs that are processed from this hot
folder to have the same settings (Professional Media Photo
Paper” at 1440x720 dpi using 85-line halftone), we’re going to
un-check the “Use settings specified at print-time” and define
our own settings. When you un-check this box, the “Specify
Settings” button becomes enabled. Click the Secify Settings
button.
The EPSON Stylus Photo 1290 Setup dialog will appear.
Set the paper type first, this will enable the proper range of
resolutions. Click on the “Media” drop-down list and select
“Professional Media Photo Paper” Your dialog should now look
like this:
Now we’ll verify that there are no un-wanted settings
elsewhere in the configuration. Click on the “Color” tab and
make sure that “Color Mode” is set to color. For the purposes of
this example, we’re going to leave all the other color management settings at their default setting. Your Color dialog should
look like this:
Make sure the “Make Composite” and “Make Separations”
settings are not turned on. Click the “Separations” tab. Your
Separations dialog should look like this:
Now that we’ve chosen our paper type, lets choose the
resolution and screening mode. Click on the “Print Quality” tab,
select 1440x720 resolution, halftone screening, 85-line by using
the “Resolution” dropdown list, the “Halftone” radio button and
the “Screen Ruling” dropdown list. The Screen Ruling
dropdown will not appear until you select halftone screening.
Your dialog should now look like this:
Click OK. This will bring you back to the hot folder setup
dialog. Your Hot folder is now created. Any job that lands in the
EPSON1290HRHT folder will be ripped for the Epson Stylus
Photo 1290 with the settings we specified, ignoring the settings
specified at print-time and will be sent to PowerRIP Output
Queue 1 wich will send the ripped pages to the Epson 1290
printer. Click OK In the “Configure Inputs” dialog to save your
changes.
31
Create the printer entity
Go to the “Output Folder” section and click on the “...”
button to navigate to our hot folder.
Now that we have the hot folder configured, lets create a
print manager entity wich, when printed to, will deposit
PostScript files into this newly created folder.
If not already opened, open the “Configure Inputs” dialog
by clicking the “Inputs” button on the main dialog. Click the
“Configure PowerRIP Printer Entities” tab. The dialog will
appear
Navigate to the hot folder we created during the hot-folder
setup phase and click OK. This instructs the new printer entity to
deposit its PostScript files into this folder. Your dialog should
now look like this:
Click Add. A dialog will appear asking you for the name of
the new printer entity. Type “Epson1290Halftones” without the
quotes and click OK.
The new entity name will be added to the list and you will
be returned to the Configure PowerRIP Printer Entities in edit
mode. You will notice that the button formerly named “Add”
now reads “Cancel Add” you can click this button at any time to
cancel the add operation.
Next we’re going to select the printer driver to use. Since
we’re going to be ripping jobs to the Epson 1290, we need to use
that driver. Note: The driver is really the same for all of
PowerRIP’s devices (Windows PostScript driver version 5) what
differentiates the different drivers on the list is the PPD that is
used... and it is very important to use the right PPD.
Click the “Driver” drop-list and select “PowerRIP Stylus
Photo 1290”. It is imperative that the driver you use has the
“PowerRIP” prefix. You CANNOT use any other drivers.
32
Once you select the proper driver, you will see the PPD
name appear in the box next to the driver name in this example
the PPD is “IPEP1290.PPD”.
Almost done. The last two settings are always the same
(unless you have a VERY creative configuration). The last step is
to enter the Application Path and App to launch settings. This
tells the printer entity what application to launch when a job is
received.
Click the navigation button (“...”) next to the “Application
Path” box and navigate to the folder where you installed
PowerRIP ImageSet. The default folder is usually
C:\PowerRIPImageSet. Once you’ve navigated to the folder,
select “PowerRIP.exe” and click “Open”. Your dialog should
now look like this:
Click “Apply”
Click “OK”
The printer entity is now created. Any jobs printed from
any application to the Windows printer called
“Epson1290Halftones” will be printed with the settings we hardwired regardless of the settings selected at print-time. You can
also share this new printer entity and print to it from remote
workstations just like the ones that were created at install-time.
33
Managing Outputs
Chapter 8
PowerRIP ImageSet is designed to support printing to
multiple printers connected to multiple ports. It employs “output
queues” which are actually Windows print queues that are used
to send rasterized page data to the printer(s).
output queue allowing all the waiting pages to print.
Upon installation, one output queue is created for each
printer selected. The default name for the output queues are
“PowerRIP Output Queue 1”, “PowerRIP Output Queue 2”, etc.
Assuming you selected the correct ports when prompted during
the installation, you shouldn’t “need” to touch the output queue
configuration.
Working with Output Queues
These examples might give you ideas as to how to customize your PowerRIP ImageSet configuration.
To launch the Configure Output Queues dialog click the
“Outputs” button on the PowerRIP main dialog.
It is possible, however, to add additional output queues for
special purposes. Below are two examples of how additional
output queues might be used
In the previous chapter, there is a tutorial that creates an
input (Print Manager entity/hot folder setup) for printing to an
Epson 1290 with hard-wired print settings.
Example 1:
Lets say that a user, currently running with our example
setup (an Epson 1290 and an Epson 9600) aquired a second
Epson 1290 for printing only high-resolution screened color
proofs on Professional Photo Paper. Lets say that the original
Epson 1290 is connected to USB port 1 and the Epson 9600 is
connected to USB port 2 and he plugs the additional Epson 1290
printer to USB port 3. This printer is always loaded with
Professional Photo Paper so we want all the jobs printed to the
Windows printer “Epson1290Halftones” (see end of previous
chapter) to print to this printer instead of the first Epson 1290.
All the user would have to do is create a new output queue
which prints to USB port 3 and change the hot-folder settings for
the the “EPSON1290HRHT” hot folder entry to output to this
new output queue instead of its currently selected output queue.
Example 2:
Another example using the new printer entity we created
in the exercise at the end of the last chapter:
Lets say that the user of this ficticious system did NOT
aquire an additional Epson 1290 but he/she doesn’t want these
high-res jobs from the Epson1290Halftones printer entity which
are supposed to print on Photo paper sneaking in while there’s
plain paper loaded in the printer.
The user could create an additional output queue which
prints to THE SAME port as PowerRIP Output Queue 1, modify
the EPSON1290HRHT hot folder configuration to output to this
new output queue, and keep this new output queue paused while
the printer is loaded with different media. This way, all jobs
printed to Epson1290Halftone will process and the pages will
wait in this new ouput queue until it is released. When the printer
is loaded with the high quality media, he/she can then release the
This dialog allows you to manage the jobs in the different
queues as well as modify the queues themselves. You can, of
course, add and delete queues.
The current output queues are listed in the section labled
“Current PowerRIP Output Queues”. The name, status, port and
jumber of jobs currently in the queue are plainly displayed
Below the list of queues are the control buttons which let
you control and edit the different output queues.
Controlling the output queue and its jobs.
From this dialog you can pause and resume an output
queue. You can also open the queue and list the jobs that are in a
queue and pause/resume/restart/delete individual pages. You can
do this from the “Pages Being Printed” tab in the main
PowerRIP dialog but this dialog is more “direct” as you can list
the pages in a particular output queue, as the “Pages Being
Printed” displays all pages being printed in all queues. For
example if you wanted to purge all pages from only from
“PowserRIP Output Queue 1” it is much easier to do it from
here.
34
Pausing & Resuming output queues
To pause or resume an output queue, select the queue by
clicking its name in the list then click the “Pause” or “Resume”
buttons. If the queue is paused, the only the “Resume” button
will be enabled. If the queue is not paused, only the “Pause”
button will be enabled. Keep in mind that when you pause a
queue, it will not send any “additional” pages but if there’s a
page already printing it will continue to print until its completion. To pause the printing page, you must pause the page itself
.
Changing an output queue’s destination port.
To change the physical port that an output queue sends its
jobs to, select the queue by clicking on its name then click the
Edit button. The dialog will enter “edit mode” and you can them
make changes to it’s configuration. select the new port in the
“ports ” list and click “Apply”.
Advanced Settings
Managing a queue’s jobs (pages)
To view a queue’s jobs double-click the queue name or
select the queue by clicking on it’s name and click the “Jobs”
button.
The advanced settings dialog allows you to set some of the
same attributes that you can set in Windows without having to
open start\printers\ etc. To change the advanced settings, select
the queue and click the Edit button. The dialog will enter “edit
mode”. Click the “Advanced” button.
The jobs dialog will appear. While in this dialog, you can
manipulate all pages currently in the selected output queue. You
can delete, pause, resume, restart any number of pages or you
can purge the entire queue by clicking “delete all”. Simply select
the pages you wish to act upon and click the proper button.
Priority:
This will assign a default priority to the output queue. This
will be overriden, however, by the priority setting of the individual pages.
35
Deleting an Output Queue.
Care must be used when deleting an output queue. If there
are hot folder configurations using an output queue and this
queue is deleted without first changing the hot folder configuration, the hot folder mechanism will pick the first available output
queue at print-time instead. The pages might end up going to the
wrong port. Before deleting an output queue, be sure no hot
folders are using it.
To delete an output queue, just select it’s name and click
the Delete button.
Driver:
The driver used makes little difference on an output queue.
The jobs (pages) arrive here already rasterized and ready to send
directly to the printer. The driver does nothing but pass the data
through to the output port. In some rare cases, it is advantageous
to use the printer’s native driver as the driver for the output
queue. Most of the time, however, this setting is irrelevant.
Spool print documents to disk:
This enables page spooling. If this is not selected, the data
is sent directly to the output port and the “start printing after
page is spooled” and “start printing immediately” features are
disabled. It is preferable to have this selected.
Start printing after page is spooled:
When selected, Windows will not start sending the page
data to the printer until the entire page has been spooled.
Start printing immediately:
When selected, Windows will start sending page data to
the printer as soon as the page starts to spool.
Print directly to the printer:
When selected, Windows will not spool page data to disk.
It will send the data directly to the output port. This is discouraged.
Keep printed pages, do not delete after printing:
After the page is printed, it remains in the output queue
with a status of “Printed”. This is handy for re-pritning pages by
just issuing a “restart” from the output queue dialog or the
“Pages Being Printed” queue. NOTE: Keep in mind that as long
as there are pages from a job in the Page Queue (output queue)
the job will not expire, r unning like that all the time might cause
you to run out of disk space.
Adding an output queue
To add a
new output
queue, click the
“Create New”
button. The
dialog will go
into “edit mode”.
Select the name,
port and any
advanced
options you wish
and click Apply .
NOTE: When setting
advanced options it is
necessary to click Apply
when exiting the Advanced
menu and then again to
save the new output queue.
36
The PDF Generator
Appendix A
Most of this manual makes mention of the “output device”
in terms of a printer. PowerRIP ImageSet is also capable of
outputting to a PDF file instead of a printer. This is useful for
proofing, sharing documents, etc. PDF is the most widely used
format for sharing and publishing electronic documentation.
PDF-Generator Settings.
As with any other output device, the device-specific
settings are set by clicking the “Specify Settings” button which
launches the configuration dialog. The configuration dialog has
five sections: Output, Images, Color, Fonts and Separations.
Destination of PDF Files.
Unlike the printer output devices, the PDF Generator does
not use an output queue since there’s no “output port”. There is,
however, a destination folder. You’ll notice that when you pick
PDF File as the output device in one of the Configure Output
dialogs, the output queue box displays a folder name instead.
The “Output” Section.
This section deals mostly with general output properties of
the generated PDF.
The output folder can be changed in the “device specific”
settins (click the specify settings button). Future versions of
PowerRIP ImageSet will allow the changing of the PDF file
destination via the “Output To” drop-down.
Output File Name Type:
This specifies how the PDF file name is generated. The
options are:
Job Name+”.PDF” Will create the file name from the
actual job name (not the file name) and it will add a .PDF
extension
File Name+”.PDF” Will create the file name from the file
name of the PostScrip file and add a .PDF extension
User Defined Will use the name entered into the “UserDefine File Name” box below. This box is only enabled if “User
Defined” is chosen as the Ouput File Name Type.
Prompt if file exists:
When this radio button is selected, PowerRIP will prompt
for a new file name is the PDF file already exists.
Auto Rename if file exists:
When this radio button is selected, PowerRIP automatically add a number, starting with “0” to the end of the file name
if the file it’s trying to write already exists.
Always overwrite:
When this radio button is selected, PowerRIP will overwrite the file without any prompts or warnings.
37
Output Folder:
Lets you define the folder where PDF files will be placed
when created. To change this setting, click the Change button
below.
View File:
When this checkbox is selected, after creation of the PDF
file, PowerRIP will issue a “shell command” to the operating
system to launch the PDF. If you’ve associated PDF files with a
certain application (ie, you’ve loaded Acrobat Reader). It will
automatically launch and display the file.
Resolution:
Specifies the resolution of the PDF.
ASCII Format:
Do not use binary data in the file, just ASCII
Auto-Rotate:
Automatically rotates the page for proper viewing
Compressed:
When selected, generates compressed PDFs.
Thumbnails:
Create Color, Monochrome or No thumbnails
The “Images” Section.
This section deals mostly with the reproduction of images.
Things like compression, sub-sampling, transfer functions, etc.
Use Device Dependent Color:
If device-dependent color information exists in the
PostScript file, retain this information in the PDF file.
Convert CMYK images to RGB:
Converts any images (images only) that are in CMYK
color space to RGB.
Transfer Function:
Allows you to specify remove/apply/preserve the transfer
function (used for density calibration) if one is present in the
PostScript file.
Undercolor Removal:
Lets you remove or preserve undercolor removal information if present in the PostScript file.
Image Sub-Sampling:
If enabled (subsample or average) the images in the job
will be sub-sampled (only a sub-set of the pixels will be rendered). This results in smaller PDFs but lower quality pictures. If
subsample or average are selected, the Resolution box becomes
active. This allows you to set the resolution the images will be
subsampled to.
Image Compression:
Allows you to set various levels and methods for compressing the images in the job.
Preserve OPI comments:
Preserves any OPI comments in case the PDF will be used
with an OPI server (and the original PostScript file contained
OPI comments)
Preserve Overprint Settings:
Preserves any overprint settings that the original PostScript
file contained.
The “Color” Section.
This section is very simlar to that of the printer output
devices. It deals with input and output color profiles.
Output profile:
Allows selection of
output profile.
Rendering Intent:
Allows selection of
rendering intent.
Input profiles:
Allows selection of
RGB and CMYK input
profiles
Preserve halftone information:
If the PostScript file contained halftone information,
preserve this information in the PDF file.
Mirror:
Produces mirrored PDF output.
38
The “Fonts” Section.
This section deals with the way fonts are handled when
creating the PDF
Subset fonts:
When selected, uses the “font subsets” specified in the
“Never embed” and “Always embed” windows.
Embed All Fonts:
Embeds all document fonts in the PDF. This will ensure
proper viewing on any system regardless of the fonts loaded on
the viewing system. This is recommended when sharing the PDF
with others.
Never embed these fonts:
Allows you to create a list of fonts to never embed in the
PDF. This list will be used if “Subset fonts” is selected.
Always embed these fonts :
Allows you to create a list of fonts to embed embed in the
PDF. This list will be used if “Subset fonts” is selected.
The “Separation” Section.
This section is very similar to that of the printers’ separation section with one exception: When making separations from
a composite, the plates can be produced in their process color
(Yellow plate in yellow, cyan plate in cyan, etc.)
Make Composite
Same as the make composite option for printers. Works the
same way, same restrictions apply. Makes a composite from a
separated PostScript file.
Make Separations
Same as the make separations option for printers. Works
the same way, same restrictions apply. Makes a separation PDF
from a composite PostScripfile. There is one additional feature.
If you select “All Plates In Black” it will reproduce all plates (C,
M, Y & K) in black. If you do not select “All Plates In Black”
the plates will be rendered in their plate color (Yellow plate in
yellow, cyan plate in cyan, etc.)
39
The TIFF Generator
Appendix B
Most of this manual makes mention of the “output device”
in terms of a printer. PowerRIP ImageSet is also capable of
outputting to a TIFF file instead of a printer. This is useful for
rasterizing a page and then including it as part of another
document. Also, some pre-press systems accept tiff files for final
output.
TIFF-Generator Settings.
As with any other output device, the device-specific
settings are set by clicking the “Specify Settings” button which
launches the configuration dialog. The configuration dialog has
three sections: Output, Color, and Separations.
Destination of TIFF Files.
Unlike the printer output devices, the TIFF Generator does
not use an output queue since there’s no “output port”. There is,
however, “a destination folder”. You’ll notice that when you pick
“TIFF File” as the output device in one of the Configure Output
dialogs, the output queue box displays a folder name instead.
The “Output” Section.
This section deals mostly with general output properties of
the generated TIFF.
The output folder can be changed in the “device specific”
settins (click the specify settings button). Future versions of
PowerRIP ImageSet will allow the changing of the TIFF file
destination via the “Output To” drop-down.
Output File Name Type:
This specifies how the TIFF file name is generated. The
options are:
Job Name+”.TIF” Will create the file name from the
actual job name (not the file name) and it will add a .TIF
extension
File Name+”.TIF” Will create the file name from the file
name of the PostScrip file and add a .TIF extension
User Defined Will use the name entered into the “UserDefine File Name” box below. This box is only emabled if “User
Defined” is chosen as the Ouput File Name Type.
Prompt if file exists:
When this radio button is selected, PowerRIP will prompt
for a new file name is the created TIF file already exists.
Auto Rename if file exists:
When this radio button is selected, PowerRIP automatically add a number, starting with “0” to the end of the file name
if the file it’s trying to write already exists.
Always overwrite:
When this radio button is selected, PowerRIP will overwrite the file without any prompts or warnings.
40
Output Folder:
Lets you define the folder where TIF files will be placed
when created. To change this setting, click the “Change” button
below.
View File:
When this checkbox is selected, after creation of the TIF
file, PowerRIP will issue a “shell command” to the operating
system to launch the TIF. If you’ve associated TIF files with a
certain application (ie, you’ve loaded Photoshop). It will
automatically launch and display the file.
Resolution:
The output resolution for the TIFF file
Compression:
Allows you to select LZW compression or no compression
Nesting:
Allows you to activate and configure the nesting feature.
The “Color” Section.
This section is very simlar to that of the printer output
devices. It deals with color mode and input and output color
profiles. It also allows you to activat the “TrueSpot” feature.
Color Mode:
Specify the color space of the resulting TIFF. RGB or
CMYK.
Effects:
Allows you to reverse and mirror the output if desired.
Spot Colors:
Allows you to activat the TrueSpot feature and to define
custom spot colors (these will be used if a job containing spot
colors does not have the color information for the spot colors
embeded)
Output Profile:
Allows you to select the destination (output) to use when
creating the TIFF.
Rendering Intent:
Allows you to select the rendering intent to use when
creating the TIFF file
Input Profiles:
Allows you to select the source RGB and CMYK input
profiles.
The “Separations” Section.
This section is very similar to that of the printers’ separation section with one exception: When making separations from
a composite, the plates can be produced in their process color
(Yellow plate in yellow, cyan plate in cyan, etc.)
Make Composite
Same as the make composite option for printers. Works the
same way, same restrictions apply. Makes a composite from a
separated PostScript file.
Make Separations
Same as the make separations option for printers. Works
41
the same way, same restrictions apply. Makes a separation TIFF
(one plate per file) from a composite PostScripfile. There is one
additional feature. If you select “All Plates In Black” it will
reproduce all plates (C, M, Y & K) in black. If you do not select
“All Plates In Black” the plates will be rendered in their plate
color (Yellow plate in yellow, cyan plate in cyan, etc.)
42
Appendix C
Adding ICM/ICCs to PowerRIP ImageSet
At install-time, PowerRIP ImageSet installs all necessary
ICMs for proper color output on any supported device. These
ICMs have been created and calibrated for each printer at each
resolution/media combination. For thsi reason, PowerRIP
ImageSet gives you accurate color “out of the box”. The ability
exists, however, to add support for other ICC/ICMs.
Upon start-up, PowerRIP reads and identifies all ICMs that
are loaded on your system (usually in
\windows\system32\spool\drivers\color). For this reason, when
manually inserting a job into PowerRIP’s job queue, the ICC/
ICMs can simply be picked from a dropdown list (see the “Color
Tab” in Chapter 5)
When printing from an application, however, we are at the
mercy of the Windows PostScript driver. This driver will only
display settings which are contained in the PPD associated with
a printer entity. If we are to add ICM profile choices that can be
seen and selected at print-time from an application, the PPD
must be edited.
PowerRIP ImageSet includes a utility to edit the PPDs,
saving you the heartache of doing so “by hand”. This utility is
called “Add Output Profiles To PPDs” and it can be found in the
same program group as PowerRIP ImageSet (Start/Programs/
PowerRIP ImageSet by default).
In reality, this utility doesn’t just add “output” profiles, you
can add input profiles as well.
On the right panel, you’ll see a listof all the printers loaded
in your system. This is where you would pick the PPD to edit
(by picking the correct printer).
Between the left and right panels, you will see the “Add
To:” section. This lets you choose what section of the PPD you
want to add the selected ICM name to (Output Profiles, CMYK
Source profiles or RGB source profiles). According to which of
these sections you select, that’s where the new entry will appear
in the print dialog when you print your pages.
When ICMs of type CMYK are displayed, only the
“Output Profile” and “CMYK Source” selections are enabled as
you wouldn’t want a CMYK ICM to be used as an RGB input
profile. Conversely, when ICMs of type RGB are displayed, only
the “RGB Source” selection is enabled.
Adding a profile selection to the PPD
.
As with any other output device, the device-specific se
To add an ICM to the selected section of a PPD:
1) Select the color space of the ICM you want to add (with
the CMYK/RGB buttons)
2) Select the ICM
3) Select the destination printer (this will tell the utility
which PPD to edit)
The screen shot below depicts the utility set up to add the
“USSheetfedCoated.icc” profile to the Output Profiles section of
the PowerRIP Epson Stylus Photo 1290’s PPD
Launch the utility, open Start/Program/PowerRIP
ImageSet/Add Output Profiles to PPDs.
To make the change, click the Add button.
On the left panel, you will see the ICMs currently loaded
in your system. The “type” of ICMs displayed (RGB or CMYK)
can be controlled by clicking the “CMYK” and “RGB” buttons
in the “Show ICM files of type:” section.
43
When finished adding profiles, click Exit. If the new
options do not appear in the print dialog, restart your system.
Once the ICM options have been added to the PPD, they
will be available to choose at print-time from your applications.
list. The screen shot above shows the Output Profile entries
section and in the window below you can see the entry we just
added.
Select the entries you wish to remove. When done, click
Save.
Distributing the edited PPDs to connected remote
clients
.
The changes made by this utility affect only the “local”
PPDs which are on the server (the system running PowerRIP
ImageSet). It is therefore necessary to distribute the newly
modified PPD to any users which are printing from remote
workstations. The edited PPD can be found in the folder:
windows\system32\spool\drivers\w32x86\3\
or
winnt\system32\spool\drivers\w32x86\3\
depending on which version of Windows you have
When using PageMaker
PageMaker 6.5 users, don’t forget to copy the edited PPD
to the “PPD4” folder PageMaker’s RSRC folder. If you don’t the
new choices will not be available when you print from
PageMaker.
Deleting a profile selection from the PPD
.
If you make a mistake and add it to the wrong section, or
for some other reason wish to remove a selection from the PPD,
select the printer entity who’s PPD you wish to alter and click
Remove ICM/ICC entries from PPD
Mac remote users:
For mac clients printing remotely, simply copy the
modified PPD over the old one.
Win 95/98/Me remote users:
For Windows 95/98/Me remote users, copy the modified
PPD to windows\system\. NOTE: The file extension on these
operating systems is SPD instead of PPD. Copy the PPD to the
folder, then copy it again with an extension of “SPD”, overwriting the old one.
Windows NT 4.0 Remote users:
For Windows NT remote users, copy the modified PPD to
winnt\system32\spool\drivers\w32x86\3\. NOTE: Windows NT
creates a “binary” version of the PPD which must be deleted for
the new options to be visible. Delete the file with the same name
as the PPD but with a “BPD” extension.
Windows 2000 Remote users:
For Windows NT remote users, copy the modified PPD to
winnt\system32\spool\drivers\w32x86\3\. NOTE: Windows
2000 creates a “binary” version of the PPD which must be
deleted for the new options to be visible. Delete the file with the
same name as the PPD but with a “BPD” extension.
Windows XP Remote users:
For Windows NT remote users, copy the modified PPD to
windows\system32\spool\drivers\w32x86\3\. NOTE: Windows
XP creates a “binary” version of the PPD which must be deleted
for the new options to be visible. Delete the file with the same
name as the PPD but with a “BPD” extension.
The section labled “Select type of profile entry” will let
you select which section of the PPD options you would like to
44
Copyright(c) 2003 Digital Graphics Imaging Inc. All rights reserved.
PowerRIP and PowerRIP ImageSet are registered trademarks of iProof Systems Inc.
45