1
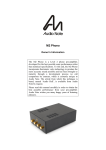
M2 Phono Balanced
Level 2 pre-amplifier
Owner's Information
Music's Finest Conductor
Introduction to the M2 Phono Balanced pre-amplifier
Congratulations on your purchase of the Audio Note M2 Phono Balanced level 2 pre-amplifier.
Audio Note Level System
First, a word about how we classify our products at Audio Note. The world renowned Audio Note Ongaku,
Kegon and Gaku-on amplifiers incorporate six technological design features which give them
unmatched sonic performance and clarity, placing them amongst the best amplifiers in the world. All
Audio Note products are, where applicable, judged by this standard. These features are:
• Single ended output stage
• Zero negative feedback
• Directly heated triode output stage
• Pure Class A operation
• Materials and component technology
• Valve rectification
Qualification for level 2 requires the inclusion of at least two of these features.
The M2 Phono Balanced
The M2 Phono Balanced is based on the M2 Phono, but this incarnation features an optional balanced
output.
The M2 Phono Balanced incorporates vacuum tube technology to produce the most accurate sound
possible. We have developed the M2 Phono Balanced using a "comparison by contrast"* technique of
aural evaluation - a system that is currently unique to Audio Note.
Please read this manual carefully in order to obtain the best possible performance and longevity from
your pre-amplifier.
*An essay dubbed "Audio Hell" which describes this system is available from Audio Note on request.
-2-
Unpacking and installation
Please ensure care is taken when unpacking the pre-amplifier. We recommend that you store the
packing materials in case the unit requires shipping at a later date. Also, check that no transit damage
has occurred before installing the pre-amplifier.
Select a suitable location for the unit, ensuring that adequate ventilation is provided as the pre-amplifier
generates considerable heat during normal operation. Avoid sitting the M2 Phono Balanced close to any
other equipment, such as a power amplifier, that may be generating a strong magnetic field, or in close
proximity to active mobile telephones.
The M2 Phono Balanced is capable of driving long interconnects to power amplifiers and so, if you are
using mono block amplifiers, it may be worthwhile to locate them close to the speakers. This will reduce
the speaker cable lengths and provide sonic improvements.
-3-
Connections
Phono input
The phono input is suitable for connection to a turntable with a moving magnet (MM) cartridge installed.
Audio Note is able to provide a range of step-up transformers for use with moving coil (MC) cartridges.
These transformers are able to provide the best possible match for the M2 Phono Balanced. The phono
input consists of a pair of RCA connectors.
NOTE:
Some turntables are equipped with a separate ground wire for connection to the ground
terminal next to the phono input sockets. We recommend that this terminal is used, however, in
some systems this may cause a ground loop. This will be identifiable by excessive background
hum. It is therefore worthwhile to experiment a little to find the connection method that yields the
lowest background noise levels.
Line input
Eachline input is suitable for connecting to any line level music source. Line level sources include CD
players, radio tuners, televisions etc.Each line input consists of a pair of RCA connectors.The M2 Phono
Balanced has 3 line inputs available.
Tape loop
The tape loop is available for connecting to a cassette desk. The 'tape in' connections should be
connected to the cassette deck's 'line out' and the 'tape out' connections should be connected to the
cassette desk's 'line in'. The tape in can be used as an additional line input if required. The RCA
connectors are marked red for the right channel and white for the left channel.
Feedback switches
Two feedback switches are located next to the ground terminal on the rear panal. These are used for
matching the pre-amplifierto the rest of your system. Set the switches to the 'on' position if any of the
following apply, when in doubt, choose the setting that provides the best sonic performance:
• If the volume control is too sensitive.
• If the interconnects between the pre-amplifierand the power amplifier are longer than 3 metres.
• If your amplifier has an input impedance of less than 50 kOhms
NOTE:
Always turn the power off before adjusting the feedback switches. Ensure that both feedback
switches are in the same position.
Balanced output
The balanced outputs are provided to be used with power amplifiers equipped with a balanced input
option. Using the balanced option can sometimes result in a better sound quality, depending on the
exact deign of the power amplifier.
Unbalanced output
There are 2 sets of unbalanced outputs are provided for Bi-amplified systems. Both sets are identical and
may be used for single amplifier operation. The connectors are marked red for the right channel and
-4-
white for left channel.
NOTE:
The balanced/unbalanced selection switch must be set to the appropriate position. It is not
recommended to use both the balanced and unbalanced outputs simultaneously.
Mains power connection
Use the supplied cable to connect the IEC inlet socket on the pre-amplifier to the mains supply. Ensure
the power is switched off when you do this.
NOTE:
It is important that all connections are firm, secure and airtight. any oxidisation of the
interconnects will result in loss of performance. Always use high quality interconnects - Audio
Note interconnects are recommended, as they are manufactured to the same exacting
standards as all of our products.
Operation
Once all the connections are completed and checked, make sure all power amplifiers are off and flip
the mains rocker switch located on the back panel of the pre-amplifier to the 'on' position.
The M2 Phono Balanced is a vacuum tube design and therefore requires about 45 seconds warm-up
time. After this the remaining system components may now be turned on.
Bedding-in time
The pre-amplifier requires around 200 hours of initial use (called 'bedding-in time') before the circuitry
becomes stable and optimum performance is realised. As the pre-amplifier beds in, the sound will
become more lucid, detailed and expansive.
After the initial bedding-in, a short warm-up period is required each time the unit is turned on before
optimum sonic performance is reached.
The M2 Phono Balanced is designed for continuous operation and may remain switched on, even when
not in use. You may, however, prefer to turn the unit off between uses by using the power switch located
on the back panel, next to the mains inlet socket.
NOTE:
Always turn the pre-amplifier(s) on before turning on the power amplifier and always turn the
power amplifier off before turning off the pre-amplifier. This will prevent any buzzing or popping
sounds from occurring.
-5-
After-care
Cleaning
Cleaning the M2 Phono Balanced is best done with a soft brush - some photographic stores are able to
provide suitable brushes. Alternatively, a soft cotton cloth may be used with a mild propriety cleaner for
removing dirt build-up. Strong or alcohol based solvents may damage the finish of this amplifier. Ensure
the pre-amplifieris switched off and cold when cleaning. Do not wet the unit.
Replacing the vacuum tubes
The vacuum tubes in the M2 Phono Balanced are carefully selected from Audio Note's vast stock to
provide optimum performance and reliability. Should these tubes require replacement, please contact
your Audio Note dealer, who will be able to supply the correct parts.
Warranty and servicing
Audio Note warrants that this product will be free from defects in materials and workmanship for one year
from the original date of purchase from an appointed Audio Note dealer. The vacuum tubes are
warranted for three months.
In the event that your Audio Note product requires servicing, please contact your Audio Note dealer. If
the component needs to be shipped, please use the original packaging materials and include a copy
of the sales purchase with a note, explaining, in as much detail as possible, the problems that your are
experiencing with the unit.
Any modification not authorised by Audio Note will invalidate any warranty.
If you require technical support or have any questions, please direct them to your local Audio Note
dealer or alternatively contact us directly at:
Customer Support
Audio Note (UK) Limited
25 Montefiore Road
HOVE
East Sussex
BN3 1RD
United Kingdom
TEL: +44 (0)1273 220511
FAX: +44 (0)1273 731498
EMAIL: [email protected]
-6-
Technical overview
The M2 Phono Balanced utilises simple but sonically effective circuitry using vacuum tube technology
rather than complex techniques using impure semi-conductor type devices, so common in the audio
industry.
This kind of circuit architecture is incredibly transparent and revealing. As a natural consequence, part
material plays an important role in the final sonic performance, so we use only the best possible
components and materials. Where components that meet our standards are not available - we make our
own.
The M2 Phono Balanced's circuit arrangement is briefly described below.
The phono stage uses ECC83/12AX7A and ECC88/6DJ8 vacuum tubes. Two zero feedback common
cathode stages with a passive RIAA network between them are used for each channel. Paper in oil and
Black Gate capacitors with Audio Note pure silver interconnect provide very pure signal transfer.
The line level stage is driven via high quality Noble volume and balance controls. The amplification stage
uses a 6SN7 anode follower. Again, AN paper in oil and Black Gate capacitors and 1% premium resistors
are used throughout. Adjustable gain and output impedance is performed by the selectable application
of negative feedback around this stage.
The high voltage power supply uses a 6X5GT vacuum tube rectifier with choke input filtering and vacuum
tube regulation. The vacuum tube regulator employs a dissimilar pentode/triode, the pentode as the
power device and the triode section as an error amplifier. The filament voltages are also regulated to
reduce hum and noise.
-7-
Specifications
Weight (kg)
8
Dimensions
Height (mm)
Width (mm)
Depth (mm)
140
395
450
Max Power Consumption (W)
55
Fuse Ratings
HBC T (110/120 Vac supply) (A)
HBC T (220/240 Vac supply) (A)
1
0.5
Input Impedance
Line input (k Ohms)
Phono input (k Ohms)
100
47
Gain @ 1kHz
Line, feedback off (dB)
Line, feedback on (dB)
Phono, feedback off (dB)
Phono, feedback on (dB)
23
17
60
54
Input Sensitivity (for 1V output)
Line, feedback off (mV)
Line, feedback on (mV)
70
150
Output Noise
Line, unweighted, feedback off (mVrms)
Phono, unweighted, feedback off (mVrms)
< 0.4
12
Output Impedance
Feedback off (kOhms)
Feedback on (kOhms)
5
2.5
Tube Compliment
6SN7
6X5
ECL82
ECC83
ECC88
x1
x1
x1
x1
x1
NOTE:
Due to Audio Note's ongoing research and development programme, specifications are subject
to change without notice.
-8-
Safety Information
HEAT: By the nature of vacuum tubes, this product generates high levels of heat.
Adequate ventilation must be provided. Do not restrict the airflow through any of
the ventilation slots or place the amplifier on any surface that may restrict airflow.
CAUTION: The vacuum tubes and other nearby parts operate at extremely high temperatures KEEP OUT OF REACH OF CHILDREN.
HUMIDITY: Do not store or operate this unit in areas of high humidity or in close
proximity to water. Do not expose the unit to liquid.
EARTHING: The product must be earthed - ensure that the mains supply cable is
earthed.
SHOCK: Internal operating voltages are lethal. Do not remove the top cover. Do
not replace fuse without first disconnecting the unit from the mains supply.
SAFETY COMPONENTS: Internal fuses and other safety components are located
inside this unit in accordance with BS 60065 requirements. In the event of
component failure, replacements must be of the same part type. Such
replacements must be carried out by a qualified service technician.
This product conforms to CE standards
-9-