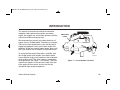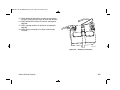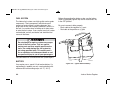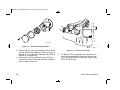
1
OME0502-11 CoverC_OM0502-05 Cover.qxd 4/20/10 3:34 PM Page 1
The first production inboard equipped with catalytic converters.
5400 Old Millington Road Millington, TN 38053
w w w. i n d m a r. c o m
Part No. OME0502-11
Ken Cook Co.
Operator ’s Manual
Printed in U.S.A.
OME0502-11 CoverC_OM0502-05 Cover.qxd 4/20/10 3:34 PM Page 2
Date of Purchase: ______________________ Owner Name: _____________________________________________
Address: __________________________________________________ City: ________________________________
State/Province: ___________________________ Zip/Postal Code:____________ Country: ____________________
Engine Serial Number: _____________________________ Transmission Serial Number: _______________________
PROPOSITION 65
WARNING
The engine exhaust from this product
contains chemicals known to the
State of California to cause cancer, birth
defects or other reproductive harm.
10-20 Hour Service
Date:___________ Hours:____________
By:_______________________________
Every 100 Hour Service
Date:___________ Hours:____________
By:_______________________________
Every 300 Hour/Annual Service
Date:___________ Hours:____________
By:_______________________________
Every 50 (25) Hour Service
Date:___________ Hours:____________
By:_______________________________
Date:___________ Hours:____________
By:_______________________________
Date:___________ Hours:____________
By:_______________________________
Date:___________ Hours:____________
By:_______________________________
Date:___________ Hours:____________
By:_______________________________
Date:___________ Hours:____________
By:_______________________________
Date:___________ Hours:____________
By:_______________________________
Date:___________ Hours:____________
By:_______________________________
Date:___________ Hours:____________
By:_______________________________
Date:___________ Hours:____________
By:_______________________________
Date:___________ Hours:____________
By:_______________________________
Date:___________ Hours:____________
By:_______________________________
Every 2 Year Service
Date:___________ Hours:____________
By:_______________________________
Date:___________ Hours:____________
By:_______________________________
Date:___________ Hours:____________
By:_______________________________
Date:___________ Hours:____________
By:_______________________________
Date:___________ Hours:____________
By:_______________________________
Date:___________ Hours:____________
By:_______________________________
Date:___________ Hours:____________
By:_______________________________
Date:___________ Hours:____________
By:_______________________________
Date:___________ Hours:____________
By:_______________________________
Date:___________ Hours:____________
By:_______________________________
Date:___________ Hours:____________
By:_______________________________
Date:___________ Hours:____________
By:_______________________________
OME0502-11 Body_OM0502-05 Body.qxd 6/3/10 10:45 AM Page 1
OME0502-11 Body_OM0502-05 Body.qxd 6/3/10 10:45 AM Page 2
OME0502-11 Body_OM0502-05 Body.qxd 6/3/10 10:45 AM Page i
IMPORTANT SAFETY INFORMATION
Throughout this manual, specific precautions and symbols identify safety related information.
!
The Safety Alert Symbol means ATTENTION!
BECOME ALERT! YOUR SAFETY IS INVOLVED!
!
!
Indicates the presence of a hazard which
WILL cause SEVERE injury, death or substantial property damage.
Indicates the presence of a hazard which
CAN cause SEVERE injury, death or substantial property damage.
Indmar Marine Engines
Indicates the presence of a hazard which
WILL or CAN cause MINOR or MODERATE
personal injury or property damage.
NOTICE
Indicates installation, operation or maintenance information which is important but not hazard-related.
The precautions listed in this manual and on the engine
or boat are not all-inclusive. If a procedure, method, tool
or part is not specifically recommended, you must satisfy
yourself that it is safe for you and others, and that the
engine or boat will not be damaged or made unsafe as a
result of your decision.
i
OME0502-11 Body_OM0502-05 Body.qxd 6/3/10 10:45 AM Page ii
ENGINES COVERED
The information in this manual applies to the following engine models:
5.7L Carbureted
Indmar 5.7L Vortec
350 Carb Jet
5.7L Electronic Fuel Injected
Axis AR335**
Indmar 5.7L MPFI
Indmar Assault 325
Malibu 5.7L LCR
MasterCraft 5.7L RTP-1
Indmar 5.7L HO*
Indmar Assault 350*
Malibu Monsoon*
MasterCraft MCX*
6.0L Multi Port Fuel Injected
Indmar LS2*
Indmar L96*
MasterCraft LY6* / L96*
Malibu L96*
6.2L Multi Port Fuel Injected
Axis Raptor 400**
383 Indmar MPI*
Indmar LSA
Malibu LS3
Malibu LSA
MasterCraft LSA
7.0L Engines
Malibu LS7
7.4 Liter Engines
Indmar 454 Carbureted
8.1L Engines
Indmar 8.1L Vortec MPFI
Malibu 8.1L Vortec MPFI
MasterCraft 8.1L Vortec MPFI
8.2L Engines
Indmar 502 Carbureted
* Engines equipped with ETX-Cat catalytic converters.
** Available with ETX-Cat catalytic converters.
ii
Indmar Marine Engines
OME0502-11 Body_OM0502-05 Body.qxd 6/3/10 10:45 AM Page iii
WELCOME
Dear Indmar Marine Engine Owner,
Thank you for selecting a boat powered by an Indmar Marine Engine. Indmar is proud to provide the power
to the best boat companies in the business and we hope that pride shows in the quality of our products. In
the unlikely event that you have a defect related problem with your boat’s engine / drive train, you can
rest assured knowing that it is backed by our industry leading 3-year factory backed warranty coverage.
This is another exciting year for Indmar and for the marine industry. Indmar has expanded its line of
marine inboard engines equipped with catalytic converters. Indmar’s ETX/CAT system reduces exhaust emissions, including carbon monoxide (CO), to provide a cleaner and safer boating experience for you and your
family. ETX/CAT is standard on all 2011 model 5.7L, 6.0L and 6.2L Electronic Fuel Injected (EFI) engines
built after January 1, 2011.
If you have any questions concerning your engine that are not covered in this manual, please feel welcome
to contact Indmar Customer Service at (901) 353-9930 or visit our website, www.indmar.com, and submit
your question.
Thanks again for choosing an Indmar powered boat. We wish you safe, trouble-free boating.
Sincerely,
Team Indmar
Indmar Marine Engines
iii
OME0502-11 Body_OM0502-05 Body.qxd 6/3/10 10:45 AM Page iv
INDMAR MARINE ENGINES COMPANY MISSION
To produce the world’s finest, most advanced and most dependable
gasoline inboard marine engines at the best possible price,
while respecting the needs of our employees, customers, vendors
and the precious environment we share.
iv
Indmar Marine Engines
OME0502-11 Body_OM0502-05 Body.qxd 6/3/10 10:45 AM Page v
TABLE OF CONTENTS
Introduction . . . . . . . . . . . . . . . . . . . . . . . . . . . . . . . . . . . . . . . . . . . . vii
Chapter 1: First Time Operation and Break-In . . . . . . . . . . . . . . . 1-1
First Time Operation . . . . . . . . . . . . . . . . . . . . . . . . . . . . . . . . . .1-1
Chapter 2: General Operations and Warnings . . . . . . . . . . . . . . . 2-1
Chapter 3: Engine Starting Procedures . . . . . . . . . . . . . . . . . . . . . 3-1
How to Start Your Engine . . . . . . . . . . . . . . . . . . . . . . . . . . . . . .3-1
If Engine Does Not Start . . . . . . . . . . . . . . . . . . . . . . . . . . . . . .3-3
How to Clear the Engine . . . . . . . . . . . . . . . . . . . . . . . . . . . . . .3-3
Engine Restart . . . . . . . . . . . . . . . . . . . . . . . . . . . . . . . . . . . . . .3-4
Chapter 4: Normal Operation . . . . . . . . . . . . . . . . . . . . . . . . . . . . . 4-1
Daily Routine . . . . . . . . . . . . . . . . . . . . . . . . . . . . . . . . . . . . . . . .4-1
Operating the Controls . . . . . . . . . . . . . . . . . . . . . . . . . . . . . . . .4-2
Unusual Vibration . . . . . . . . . . . . . . . . . . . . . . . . . . . . . . . . . . . .4-3
Fuel System . . . . . . . . . . . . . . . . . . . . . . . . . . . . . . . . . . . . . . . .4-4
Battery . . . . . . . . . . . . . . . . . . . . . . . . . . . . . . . . . . . . . . . . . . . . .4-4
“Service Required” or “Check Engine” Indicator
(EFI Engines Only) . . . . . . . . . . . . . . . . . . . . . . . . . . . . . . . . .4-5
Check Transmission Light . . . . . . . . . . . . . . . . . . . . . . . . . . . . .4-6
Engine Cooling . . . . . . . . . . . . . . . . . . . . . . . . . . . . . . . . . . . . . .4-6
Exhaust Hoses . . . . . . . . . . . . . . . . . . . . . . . . . . . . . . . . . . . . . .4-7
Selecting a Propeller . . . . . . . . . . . . . . . . . . . . . . . . . . . . . . . . .4-8
Indmar Marine Engines
v
OME0502-11 Body_OM0502-05 Body.qxd 6/3/10 10:45 AM Page vi
Chapter 5: Fuel . . . . . . . . . . . . . . . . . . . . . . . . . . . . . . . . . . . . . . . . 5-1
What Type of Gasoline to Use . . . . . . . . . . . . . . . . . . . . . . . . . .5-1
Using Oxygenated Fuels or Fuels with Alcohol . . . . . . . . . . . .5-2
Fuels in Other Countries . . . . . . . . . . . . . . . . . . . . . . . . . . . . . .5-3
Chapter 6: Maintenance . . . . . . . . . . . . . . . . . . . . . . . . . . . . . . . . . 6-1
General Service Notes . . . . . . . . . . . . . . . . . . . . . . . . . . . . . . . .6-1
Engine Oil . . . . . . . . . . . . . . . . . . . . . . . . . . . . . . . . . . . . . . . . . .6-4
Engine Flame Arrestor . . . . . . . . . . . . . . . . . . . . . . . . . . . . . . . .6-9
Engine Cooling . . . . . . . . . . . . . . . . . . . . . . . . . . . . . . . . . . . . . .6-9
Internal (Cooling System) Care . . . . . . . . . . . . . . . . . . . . . . . .6-12
Ignition Timing . . . . . . . . . . . . . . . . . . . . . . . . . . . . . . . . . . . . . .6-15
Fuel System . . . . . . . . . . . . . . . . . . . . . . . . . . . . . . . . . . . . . . .6-15
Carburetor Adjustments . . . . . . . . . . . . . . . . . . . . . . . . . . . . . .6-16
Transmission . . . . . . . . . . . . . . . . . . . . . . . . . . . . . . . . . . . . . . .6-16
Electrical System . . . . . . . . . . . . . . . . . . . . . . . . . . . . . . . . . . .6-19
Wiring . . . . . . . . . . . . . . . . . . . . . . . . . . . . . . . . . . . . . . . . . . . .6-20
Chapter 7: Storage and Winter Lay-up . . . . . . . . . . . . . . . . . . . . . 7-1
General Preparation . . . . . . . . . . . . . . . . . . . . . . . . . . . . . . . . . .7-2
Reactivating Engine After Extended Storage . . . . . . . . . . . . . .7-8
Chapter 8: Troubleshooting . . . . . . . . . . . . . . . . . . . . . . . . . . . . . . 8-1
Appendix A – Maintenance Components and Fluids . . . . . . . . . .A-1
Appendix B – Engine Specifications . . . . . . . . . . . . . . . . . . . . . . . B-1
Appendix C – Limited Warranty . . . . . . . . . . . . . . . . . . . . . . . . . . C-1
vi
Indmar Marine Engines
OME0502-11 Body_OM0502-05 Body.qxd 6/3/10 10:45 AM Page vii
INTRODUCTION
This manual will acquaint you with basic information
needed to safely operate and maintain your Indmar
engine. We suggest you and all other operators read the
entire manual before using your boat.
EMISSIONS
LABEL
We recommend you contact your Indmar dealer for all
engine service. Certified Indmar Technicians are trained.
They have current specifications, parts and the special
equipment needed to service your Indmar engine and
drive line. To find your nearest Indmar dealer, please call
(901) 353-9930 or visit our website at www.indmar.com.
To ensure that the proper information is available, note
the six digit engine serial number. Your dealer should
have written the engine serial number on the inside back
cover of this manual. The serial number is stamped on
the engine block; see Figure 1.1 for locations. The serial
number also appears on the emissions label at the rear
of the engine and on several stick-on tags that are
attached to major engine components.
Indmar Marine Engines
INDM-A001
Figure 1.1 – Serial Number Locations
vii
OME0502-11 Body_OM0502-05 Body.qxd 6/3/10 10:45 AM Page viii
Complete your warranty registration today!
The Federal Boat Safety Act of 1971 requires registrations of marine products sold in the United States be
maintained by the manufacturer and dealers of those
products. Your dealer should have completed your
warranty registration to comply with federal regulations.
This registration enables us to contact you, if it should
become necessary, to change or improve your product.
The engine serial number is stamped into the block
and should also be written on the inside of the back
cover of this manual. Always retain a copy of the serial
number for your personal records.
Warranty registration must be received within 10 days
after date of purchase by the first owner. If your engine is
not registered, all warranties may be void.
viii
Indmar Marine Engines
OME0502-11 Body_OM0502-05 Body.qxd 6/3/10 10:45 AM Page ix
Warranty Registration Transfer
The remainder of the engine warranty is transferable to a
second or subsequent owner. Warranty transfers must
be completed within 10 days of the transfer of ownership.
If the trade-in and resale is handled by an authorized
Indmar dealer, the dealer must fill out the warranty registration transfer form and send it and other paperwork
specified along with the warranty transfer fee (currently
$200.00) and the transfer will be processed on approval
by Indmar.
If the sale of the boat is from a private owner to another
individual, the engine package must be inspected, at the
seller or purchaser’s expense, and the Inspection Form,
Warranty Transfer Form, specified paperwork and transfer fee (currently $200.00) and the transfer will be
processed on approval by Indmar.
To obtain enjoyment from your boat, follow recommendations described in this manual. The knowledge you gain
through careful review will help you experience lasting
satisfaction.
Further information regarding the care, operation,
required equipment or specifications for your boat can be
obtained from your local US Coast Guard Auxiliary, US
Power Squadron, state boating authorities, or the
American Red Cross. Know the law and your responsibilities as a boat owner.
Any alteration, change, improper maintenance or abnormal use by you which renders the engine or any of its
components unreasonably dangerous will void all warranties and Indmar will not be liable for the resulting
damages or injuries.
The new boat owner will be notified within 10 days of
Indmar’s receipt of the transfer paperwork whether the
transfer has been accepted or not. If the transfer has
been accepted, the warranty expiration date will also be
provided for the new owner.
Indmar Marine Engines
ix
OME0502-11 Body_OM0502-05 Body.qxd 6/3/10 10:45 AM Page x
EMISSION CONTROL WARRANTY INFORMATION
The inboard engine in your
boat includes the Indmar
Emission Control System
identified as MFI or TBI or
EM. Refer to the identification sticker on your engine
to determine which emission control system pertains to your engine. The
fuel and ignition systems
on your engine meet the
stringent requirements set
forth by the California Air
Resources Board (CARB).
Indmar also uses Sierra
brand anti-freeze in the
closed cooling system of
your engine to reduce the
environmental impact in
the event that anti-freeze is
expelled from the engine.
INDM-A041
Operating Fuels and Lubricants
In order to keep your engine operating efficiently and to
maintain the Emission Control System the following
requirements must be observed.
Fuel – Your engine was designed and certified to
operate on the unleaded fuels listed below. Fuel ratings must be based on the (R+M)/2 method and meet
the specifications ASTM D4814 in the US. These
fuels need no additives for proper operation.
INDM-A042
Your Indmar manufactured engine has a special environmental label required by the California Air Resources
Board (CARB). The label has 1, 2, 3 or 4 stars. A hangtag, provided with your inboard engine, describes the
meaning of the star system.
x
•
•
Malibu LS3, L96, LS7,
MasterCraft LY6, L96 and
Indmar LS2 engines
All other Indmar, Malibu or
MasterCraft Engines
91 Octane
89 Octane
Indmar Marine Engines
OME0502-11 Body_OM0502-05 Body.qxd 6/3/10 10:45 AM Page xi
Lubricant – Indmar uses and recommends
Pennzoil 15W40 Marine Oil for use in all of its
engines except for the 8.1 liter models which use
Pennzoil 40W oil and the LS series engines which
use Mobil 1 5W30 oil. If Pennzoil Marine oil is not
available, any appropriate viscosity motor oil
meeting the API ratings of SL/SJ, CI-4, CH-4,
CG-4 is acceptable. See Chapter 6, Maintenance,
for information regarding the use of synthetic oil.
Additives – The only additive that is recommended by
Indmar for use in your engine is Sta-Bil brand fuel stabilizer. This additive helps preserve the fuel in your
tank and in the engine’s fuel system. We recommend
the use of Marine Formula Sta-Bil during off-season
storage and for the boater that consumes less than a
full tank of fuel every two weeks. See Chapter 5, Fuel,
for more information.
Emissions Components Warranty
The following components are considered as part of the
emissions control system and are covered under the
Emissions Control Warranty.
1. Fuel Metering System
A. Fuel injectors
B. Fuel pressure regulator
C. Manifold Absolute Pressure Sensor
D. Throttle Position Sensor
E. Idle Air Control Valve
F. Throttle Body – Port Fuel Injection Models
Indmar Marine Engines
G.
2.
3.
4.
5.
6.
7.
Throttle Body Assembly – Throttle Body Fuel
Injection Models
H. Carburetor
I.
Coolant Temperature Sensor
J. Intake Valves
K. Oxygen Sensors
Air Induction System
A. Intake Manifold
B. Air Filter (Flame Arrestor)
Ignition System
A. Spark Plugs
B. Electronic Ignition System
C. Ignition coil and/or control module
D. Ignition Wires
Lubrication System
A. Oil pump and internal parts
Positive Crankcase Ventilation (PCV) System
A. PCV valve
B. Oil Filler Cap
Exhaust System
A. Exhaust manifold(s)
B. Exhaust riser(s)
C. Exhaust valves
D. Catalytic Converters
Miscellaneous Items Used on Above Systems
A. Hoses, clamps, fittings, tubing, sealing gaskets or
devices and mounting hardware
B. Electronic Controls
C. Electronic Control Module
D. Pulleys, belts and idlers
xi
OME0502-11 Body_OM0502-05 Body.qxd 6/3/10 10:45 AM Page xii
NOTICE
The repair or replacement of any warranted part otherwise eligible for warranty coverage under the
Emission Control Warranty may be excluded from
such warranty coverage if Indmar demonstrates that
the engine has been abused, neglected, or improperly
maintained and that such abuse neglect or improper
maintenance was the direct cause of the need for
repair or replacement of the part.
The emission warranty covers damage to other engine
components that is caused by the failure of a warranted
part.
This manual contains written instructions for the proper
maintenance and use of your inboard engine. All emission warranty parts are warranted by Indmar for the
entire warranty period of the engine, unless the part is
scheduled for replacement as required maintenance in
the Operator’s Manual.
Emission warranty parts that are scheduled for replacement, as required maintenance, are warranted by Indmar
for the period of time before the first scheduled replacement date for that part. Emission warranted parts that
are scheduled for regular inspection, but not regular
replacement, are warranted by Indmar for the entire
warranty period of the inboard engine.
xii
Any emission warranty part repaired or replaced under
the terms of this warranty statement is warranted by
Indmar for the remainder of the warranty period of the
original part. All parts replaced under this limited warranty
become the property of Indmar.
If the ownership of a product is transferred during
Emission Components Warranty period, this warranty
shall also be transferred and be valid for the remaining
coverage period provided that Indmar is notified in the
following way:
a. The former owner contacts Indmar and provides us
with the required information listed below; or
b. Indmar receives a proof that the former owner agreed
to the transfer of ownership and we are provided with
the information listed below.
-
Current owner’s name, address, telephone,
engine serial number and date of purchase
-
New owner’s name, address, telephone, engine
serial number and date of transfer
Send the above information to:
Indmar Products
5400 Old Millington Rd
Millington, TN 38053
Attn: Emission Warranty Transfer
Indmar Marine Engines
OME0502-11 Body_OM0502-05 Body.qxd 6/3/10 10:45 AM Page xiii
NOTICE
NOTICE
The above procedure is valid for the transfer of the
Emission Components warranty only. Refer to the
Limited Warranty in Section C of this manual for information regarding warranty transfer of the remaining engine
components.
Ignition timing, engine idle speed and air-fuel mixture
are not adjustable on this engine. NO OTHER
ADJUSTMENTS NEEDED.
Emission Maintenance Requirements
Engine Oil and Filter: See Chapter 6, Maintenance
Spark Plugs: See Chapter 6, Maintenance
PCV Valve: See Chapter 6, Maintenance
Flame Arrestor: See Chapter 6, Maintenance
Spark Plug Wires: See Chapter 6, Maintenance
Breather Hose: See Chapter 6, Maintenance
Ignition Timing: See Chapter 6, Maintenance
Carburetor Adjustment: See Chapter 6, Maintenance
The following component maintenance is required to
maintain the Emission Control System of your engine.
See Chapter 6, Maintenance, for procedures.
• Engine oil and filter: Change oil and filter after the first
10 hours then every 50 hours or annually, whichever
occurs first.
• Flame Arrestor: Clean every 100 hours. Replace as
necessary.
• Spark Plugs: Replace every 300 hours or annually,
whichever occurs first.
• PCV Valve: Replace every 300 hours or annually,
whichever occurs first.
• Spark Plug Wires: Inspect annually. Replace as necessary.
Indmar Marine Engines
Emission Maintenance Procedures
xiii
OME0502-11 Body_OM0502-05 Body.qxd 6/3/10 10:45 AM Page xiv
Emission Component Part Numbers
Following are the Indmar Part numbers for the Emission Maintenance Components:
Engine Model
Indmar 5.7L Vortec*
Indmar Assault 310*
Indmar 5.7L MPFI*
Indmar Assault 325*
Malibu 5.7L LCR*
MasterCraft 5.7L RTP-1*
AXIS AR335*
AXIS Raptor 400*
AXIS AR335 With Catalyst
AXIS Raptor 400 With Catalyst
Indmar 5.7L HO
Indmar 5.7L Assault 340
Malibu Monsoon 350
Malibu 383 Hammerhead
MasterCraft MCX
MasterCraft 6.0L LY6/L96
Indmar 6.0L LY6/L96
Malibu 6.0L LS2
Malibu 6.2L LS3
Malibu LS7
Indmar 454 Carbureted*
Indmar 8.1L Vortec*
Malibu 8.1L Vortec*
MasterCraft 8.1L Vortec*
Indmar 502 Carbureted*
Engine Oil
Oil Filter
Spark
Plugs
PCV Valve
556262
505001
Oxygen
Sensor
Flame
Arrestor
525006
506002
Plug Wires Dist Cap Dist Rotor
756002
556083
556084
556345
556345
756004
N/A
521119
751104
756004
505001
871001
15W40
Pennzoil
525028
556199
501001
506002
751105
756004
525022
505001
751104
556162
525011
756004
525021
751202
N/A
N/A
525006
756001
556083
556084
556188
556134
871003
5W30
Mobil 1
985139
40W
Pennzoil
556234
501000
501001
501015
501015
501000
556090
505001
N/A
556198
N/A
525011
756003
N/A
N/A
556090
505001
525006
756001
556083
556084
*Not for sale in California
xiv
Indmar Marine Engines
OME0502-11 Body_OM0502-05 Body.qxd 6/3/10 10:45 AM Page xv
CALIFORNIA EMISSION CONTROL
WARRANTY STATEMENT
YOUR WARRANTY RIGHTS AND OBLIGATIONS
The California Air Resources Board and Indmar Products
are pleased to explain the emission control system warranty on your 2011 inboard engine. In California, new
inboard engines must be designed, built and equipped to
meet the State’s stringent anti-smog standards. Indmar
Products must warrant the emission
control system in your inboard engine for the time listed
below provided there has been no abuse, neglect or
improper maintenance of your inboard engine.
Manufacturer’s Warranty Coverage
Select emission control parts from model year 20032009 inboard engines are warranted for 2 years.
Select emission control parts from model year 2009 and
later are warranted for 3 years.
Your emission control system may include parts such as
the carburetor or fuel injection system, the ignition
system, and catalytic converter. Also included may be
hoses, belts, connectors and other emission-related
assemblies.
Where a warrantable condition exists, Indmar Products
will repair your inboard engine at no cost to you, including diagnosis, parts and labor.
Indmar Marine Engines
xv
OME0502-11 Body_OM0502-05 Body.qxd 6/3/10 10:45 AM Page xvi
Owner’s Warranty Responsibilities
As the inboard engine owner, you are responsible for the
performance of the required maintenance listed in your
owner’s manual. Indmar Products recommends that you
retain all receipts covering maintenance on your inboard
engine, but Indmar Products cannot deny warranty solely
for the lack of receipts or your failure to ensure the performance of all scheduled maintenance.
You are responsible for presenting your inboard engine
to an Indmar Products distribution center as soon as
a problem exists. The warranty repairs should be
completed in a reasonable amount of time, generally
within 30 days.
If you have any questions regarding your warranty rights
and responsibilities, you should contact the Indmar
Director of Customer Service at 1-901-353-9930.
As the inboard engine owner, you should be aware that
Indmar Products may deny you warranty coverage if
your inboard engine or part has failed due to abuse, neglect, improper maintenance or unapproved modifications.
The most common failures we see are due to lack of
proper lubrication. Failures due to lack of lubrication are
not warrantable.
If your engine is operated in salt or brackish water, special precautions, such as flushing the engine internally
and externally, are important. See the “Salt Water
Operation” information in Chapter 6. Failures due to
corrosion are not covered by the Indmar Limited
Warranty.
xvi
Indmar Marine Engines
OME0502-11 Body_OM0502-05 Body.qxd 6/3/10 10:45 AM Page 1-1
Chapter 1
FIRST TIME OPERATION AND BREAK-IN
FIRST TIME OPERATION
A new engine may use a more than normal
amount of engine oil before it is broken in.
Check your oil level hourly during the breakin period. Once the engine is broken in,
check the oil level before each day’s use and
more often during sustained periods of high
RPM operation. Marine usage is different
from automobile usage and oil consumption
is expected. Do not be alarmed if you have to
add oil between oil changes.
The following checks assumes your dealer has performed the pre-delivery service and inspection. Complete
the following pre-start check list before starting your
engine for the first time. If you have questions about any
of these procedures, see your Indmar dealer for assistance.
Indmar Marine Engines
1. Check the boat hull and/or garboard drain plug. Make
sure they are installed and secure. Check the boat
owner’s manual for additional pre-operation checks.
2. Make sure all engine drain plugs are installed. Refer
to Chapter 7, Storage and Winter Layup. There are
several drain locations:
Block – There are block drain points on both sides of
the engine. Some engines have brass drain plugs on
each side and some engines have knock sensors
installed in the block drain holes (Figure 1.2).
NOTICE
On the 6.0, 6.2 and 8.1 Liter engines, removing the
knock sensor does NOT drain the block. Remove the
plugs from the brass fittings on both sides of the
engine to drain water from the block.
Exhaust – The drain hose must be connected.
Transmission – The transmission oil cooler has one
drain plug. In addition, the Walters V-Drive and ZF
Ski-Vee (if equipped) have two drain plugs. See
Chapter 7 for instructions.
1-1
OME0502-11 Body_OM0502-05 Body.qxd 6/3/10 10:45 AM Page 1-2
Fresh Water Cooling System – If equipped, the heat
exchanger has four drain plugs; two for raw water and
two for coolant. Refer to Chapter 7, Storage and
Winter Lay-up.
RANGE
OPERATING
RS MANUA
SEE OWNE
INDM-A003
ADD
Figure 1.3 – Engine Dipstick Level
5. Check transmission oil level for correct level. Refer to
Chapter 6, Maintenance.
6. If your engine is equipped with fresh water cooling,
check the expansion tank for the correct level. Refer
to Chapter 6, Maintenance.
1
Do not mix antifreeze types.
7. Inspect engine mounts to make sure they aligned and
tight. Make sure that the propeller shaft coupler bolts
are tight.
IND-A005A
Figure 1.2 – Anti Knock Sensor
3. Make sure your battery is fully charged and the cables
are clean and tight.
4. Check engine oil for correct level. Refer to Chapter 6,
Maintenance.
1-2
Make sure the engine water intake is not
blocked by the trailer bunk. Blocked or
restricted water flow may damage the engine.
Indmar Marine Engines
OME0502-11 Body_OM0502-05 Body.qxd 6/3/10 10:45 AM Page 1-3
8. Back trailer into the water. Make sure the engine
water intake is submerged.
!
!
Before starting engine operate bilge blower
at least 4 minutes and raise engine cover to
ventilate fumes. Inspect engine and compartment for any fluid or fuel leaks. Failure to do
so can possibly result in fire and/or explosion resulting in death or serious injury to
you and your passengers.
ON
NOTICE
Priming the EFI Fuel
System is required
before starting your
EFI engine for the first time.
This allows the electric fuel
pump to fill the fuel injection
lines with gasoline. Each
time you advance the ignition
switch to the “ON” position,
the fuel pump cycles for 2
seconds.
OFF
START
ACC
NOTICE
Priming fuel system
is not necessary with
carbureted engines.
INDM-A006
Figure 1.5 – Engine
“On” Switch
9. EFI Engines Only. Prime the fuel system by cycling
the fuel pump eight to ten times before the engine is
started for the first time. To prime:
• Turn the ignition key ON for 5 seconds.
• Turn the ignition key OFF for 5 seconds.
• Repeat above eight to ten times
Figure 1.4 – Raised Engine Cover
Indmar Marine Engines
1-3
OME0502-11 Body_OM0502-05 Body.qxd 6/3/10 10:45 AM Page 1-4
NOTICE
The above procedure is only necessary for
the first time the engine is started or in the
event the fuel tank is run dry.
10. Start the engine (Refer to Chapter 2, General
Operation and Warnings) and allow it to reach normal operating temperature; keep a close eye on the
gauges. If any of the gauges indicate an engine
problem, stop the engine immediately and bring the
boat to your Indmar dealer for assistance.
Do not operate starter motor for more than
15 seconds without a 2 (two) minute cooldown period. Excessively long cranking
times will permanently damage the starter
motor and drain the battery.
1-4
Break-In
Taking care now to break-in your new Indmar engine is
VERY important. When properly broken in, your engine
will last longer, run better and require fewer repairs over
its lifetime. Your new Indmar engine does not require an
elaborate break-in procedure, just a little care and common sense for the first 10 hours.
Break-in Tips
• Always let engine warm up to normal operating temperature before accelerating.
• Avoid fast accelerations and don’t carry (or pull) a
heavy load during this period.
• If your boat is equipped with ballast tanks, do not use
them during the first 10 hours.
• Check engine and transmission fluid levels frequently.
During the first 50 to 100 hours, an engine can use
more oil than usual. Maintain oil at proper levels at all
times but do not overfill.
• Vary your boat speed during break-in. Do not run at
the same speed very long.
• Observe gauge readings and check for loose mountings, fittings, nuts, bolts and clamps.
• Report abnormal operation, noises or vibrations to
your dealer.
Indmar Marine Engines
OME0502-11 Body_OM0502-05 Body.qxd 6/3/10 10:45 AM Page 1-5
Break-in Steps
1. For the first hour, do not exceed 2000 RPM; vary
RPM continuously.
2. For the second hour, do not exceed 3000 RPM; vary
the RPM regularly.
3. For the next five hours, do not exceed 4000 RPM;
vary the RPM regularly.
After the first ten hours but before 20 hours of operation,
take your boat to the dealer for its first engine and transmission oil and filter change and engine checkup. Your
Indmar dealer is best equipped to check the engine
immediately after break-in.
After the break-in procedure is over, your boat may be
operated at any speed. Be sure to check the wide open
throttle operating range; refer to Chapter 4, Selecting A
Propeller.
Do not exceed maximum RPM recommended
for your engine. Exceeding the maximum
RPM may result in damage to the engine.
Indmar Marine Engines
1-5
OME0502-11 Body_OM0502-05 Body.qxd 6/3/10 10:45 AM Page 1-6
1-6
Indmar Marine Engines
OME0502-11 Body_OM0502-05 Body.qxd 6/3/10 10:45 AM Page 2-1
Chapter 2
GENERAL OPERATION AND WARNINGS
!
The engine exhaust from this product contains chemicals known to the State of
California to cause cancer, birth defects or
other reproductive harm.
Operating a boat is a safe and enjoyable experience.
Indmar marine engines use gasoline for fuel. The area
under the engine and around the gasoline tank and supply lines is not open to outside air. Ventilation around
these areas must be provided by your bilge blower system and air vents located around the boat. We recommend taking time out to carefully inspect your boat at
least once a day for gasoline fumes, oil leaks, and areas
where wiring may be worn or damaged.
Indmar Marine Engines
!
Explosive gasoline and battery fumes may
accumulate in your engine compartment.
Failure to properly ventilate fumes with the
bilge blower may result in explosive atmosphere resulting in death or serious injury to
you and your passengers.
Before starting engine operate bilge blower
at least 4 minutes and raise engine cover to
ventilate fumes. Inspect engine and compartment for any fluid or fuel leaks.Failure to do
so can possibly result in fire and/or explosion resulting in death or serious injury to
you and your passengers.
2-1
OME0502-11 Body_OM0502-05 Body.qxd 6/3/10 10:45 AM Page 2-2
When refueling, make sure to open the motor box and
run the blower during and after the re-fueling operation.
Failure to do so may result in fire or explosion and may
cause death or serious injury.
!
!
Carbon monoxide gas (CO) is colorless,
odorless and extremely dangerous. All
engines and fuel burning appliances produce
CO as exhaust. Direct and prolonged exposure to CO will cause BRAIN DAMAGE or
DEATH. Signs of exposure to CO include
nausea, dizziness and drowsiness. Ensure
adequate ventilation to prevent accumulation
of CO in the boat.
Each year, boaters are injured or killed by carbon
monoxide. Virtually all of these injuries and deaths are
preventable. Carbon monoxide is a potentially deadly
gas produced anytime a carbon-based fuel, such as
gasoline, burns. Carbon monoxide sources on your boat
include gasoline engines and generators, cooking
ranges, space heaters and water heaters.
Some Indmar engines are equipped with catalytic converters which significantly reduce harmful CO emissions,
but it is important that all of the DO’s and DON’Ts still be
followed.
2-2
Please follow these DOs and DON’Ts to ensure a safe
boating experience every time.
DON’T swim or sit near the swim platform when any
engine is running.
DON’T hold on to the swim platform while the boat is
underway (no “Teak Surfing”).
DON’T moor next to another boat whose engine is
running.
DON’T confuse carbon monoxide poisoning with seasickness or intoxication.
DO immediately move the person to fresh air, investigate
the cause and take corrective action if someone on
board complains of irritated eyes, headache, nausea,
weakness or dizziness. Seek medical attention if necessary.
DO make sure generators are properly ventilated and
keep engine and generator exhausts clear.
DO always shut off engine and generator when moored,
anchored or standing still.
DO be aware that the station wagon effect, or backdrafting, can cause carbon monoxide to accumulate inside
the cabin, cockpit and bilge when the boat is underway,
moving at slow speed or idling.
DO keep your boat’s engine well-maintained and regularly
check to make sure carbon monoxide detectors in the
cabin are working properly.
DO always wear a properly fitted life jacket while in or
around water.
Indmar Marine Engines
OME0502-11 Body_OM0502-05 Body.qxd 6/3/10 10:45 AM Page 2-3
For more information on carbon monoxide and boats,
contact the US Coast Guard Office of Boating Safety at
1-800-368-5647 or www.uscgboating.org or your state
boating law administrator at 1-800-225-9487 or
www.nasbla.org.
Daily Pre-Start Checks
Refer to Chapter 6, Maintenance for checks and services.
15
14
16
1
Never remove or modify any components of
the engine’s fuel system. Tampering with fuel
components may cause a hazardous condition that could result in severe personal
injury or death. This work must be performed
by your Indmar dealer’s technicians.
1
2 3 4 5 6 7 8 9 10 11 12 13
INDM-A007
Your Indmar Marine Engine is cooled by
pumping water from the body of water that
the engine is being operated in through the
engine or through the heat exchanger on
closed cooled engines. Freezing temperatures will severely damage the engine block,
cooling system components and exhaust
system components. Contact your dealer or
see Chapter 7 for draining instructions.
Indmar Marine Engines
Figure 2.1 – Pre-Start Check Points
1. Verify boat hull and/or garboard drain plug are in
place.
2. Carefully inspect engine compartment for signs of
fluid leakage and proper ventilation. Unlike autos,
marine engine compartments require positive ventilation and air re-circulation to ensure that flammable
and explosive vapors are safely dispersed in an environmentally sound manner.
2-3
OME0502-11 Body_OM0502-05 Body.qxd 6/3/10 10:45 AM Page 2-4
3. Verify engine drain plugs are in place.
4. Check engine oil level with the dipstick.
INDM-B001
Figure 2.2 – Engine Oil Dipstick
5. Verify fuel lines are tight and there is no leakage
present.
6. Inspect oil lines and oil filter. Ensure they are tight
and no leakage is present.
2-4
INDM-A009
Figure 2.3 – Engine Oil Filter
7. Check transmission fluid level. Check V-Drive fluid
level if equipped.
8. If your engine is equipped with a fresh water cooling
system, check coolant level in the expansion tank.
9. Check alternator belt for wear and proper tension.
10. Verify that exhaust hoses are in good condition and
clamped tight.
11. Ensure that the propeller shaft coupler bolts are tight.
12. Verify engine mounts are tight.
Indmar Marine Engines
OME0502-11 Body_OM0502-05 Body.qxd 6/3/10 10:45 AM Page 2-5
13. Check electrical connections and ensure connectors
are tight. Check wiring for signs of wear and abrasion.
14. Verify throttle/shift control is functional and properly
adjusted.
15. Verify steering controls are functional and properly
adjusted.
16. Verify battery connections are clean and securely
fastened.
INDM-A010
Figure 2.4 – Battery Connections
Indmar Marine Engines
2-5
OME0502-11 Body_OM0502-05 Body.qxd 6/3/10 10:45 AM Page 2-6
2-6
Indmar Marine Engines
OME0502-11 Body_OM0502-05 Body.qxd 6/3/10 10:45 AM Page 3-1
Chapter 3
ENGINE STARTING PROCEDURES
!
!
Explosive gasoline and battery fumes may
accumulate in your engine compartment.
Failure to properly ventilate fumes with the
bilge blower may result in explosive atmosphere resulting in death or serious injury to
you and your passengers.
Before starting engine operate bilge blower
at least 4 minutes and raise engine cover to
ventilate fumes. Inspect engine and compartment for any fluid or fuel leaks.Failure to do
so can possibly result in fire and/or explosion resulting in death or serious injury to
you and your passengers.
Indmar Marine Engines
When refueling, make sure to open the motor box and
run the blower during and after the re-fueling operation.
Failure to do so may result in fire or explosion and may
cause death or serious injury.
Never remove or modify any components of
the engine’s fuel system. Tampering with fuel
components may cause a hazardous condition that could result in severe personal
injury or death. This work must be performed
by your Indmar dealer’s technicians.
HOW TO START YOUR ENGINE
1. Run the blower for 4 minutes to remove explosive
gasoline and battery fumes from the engine compartment.
3-1
OME0502-11 Body_OM0502-05 Body.qxd 6/3/10 10:45 AM Page 3-2
2. Perform the Daily PreStart checks. Refer to
Chapter 2, General
Operation and Warnings.
3. Move the shift control
lever to the NEUTRAL
position. Pull out the
neutral safety lever (if
equipped). Without
advancing the throttle
lever, turn the starter key
to START position.
NOTICE
R
WE
O
BL
ON
F
OF
INDM-A011
Figure 3.1 – Typical
Blower Switch
NOTICE
Prime cold engine by moving throttle forward
and back two or three times. Then return to
idle position before starting. A hot engine
does not require priming.
NOTICE
On carbureted engines it will be necessary to
feather the throttle until the engine warms up.
3-2
Because of the
electronic engine
controls, there is no
need to advance the throttle
to set an automatic choke.
The throttle should be in the
neutral position with the
neutral detent button on the
shift control box pulled out.
ON
OFF
START
ACC
4. After the engine starts,
release the key. The
engine will gradually slow
from a fast idle to normal
INDM-A012
idle. If engine is cold, it
Figure 3.2 – Start
will operate at a slightly
Position
higher idle speed until
warm-up is complete.
Make sure that when you
do shift into gear that you are at idle speed (less than
1100 RPM). Let engine warm up to normal operating
temperature before accelerating.
Indmar Marine Engines
OME0502-11 Body_OM0502-05 Body.qxd 6/3/10 10:45 AM Page 3-3
IF ENGINE DOES NOT START
INDM-A013
Figure 3.3 – Typical Tachometer
Once the engine has started, immediately
check the oil pressure. Monitor the oil pressure and engine temperature closely for the
first 10 minutes of operation.
Do not operate starter motor for more than
15 seconds without a 2 (two) minute cooldown period. Excessively long cranking
times will permanently damage the starter
motor and drain the battery. Damage from
overheating the starter motor is not covered
by the warranty.
Hold key in START position for 3-5 seconds. If engine
still does not start, advance throttle lever about 1/4 of its
total travel. Turn key and hold it there for 12 more seconds or until engine starts.
If your engine does not start after several attempts, it
may have too much fuel and needs to be cleared.
HOW TO CLEAR THE ENGINE
1. Check throttle lever (2, Figure 3-4) to make sure it is
pulled out (or shift interlock button, 1, activated) so
that boat is still in NEUTRAL.
2. Wait for 2 minutes to allow starter motor to cool.
Indmar Marine Engines
3-3
OME0502-11 Body_OM0502-05 Body.qxd 6/3/10 10:45 AM Page 3-4
ENGINE RESTART
2
1. If your engine is already warm and will not re-start,
turn key to ON position and wait for about 20 seconds (not necessary with carbureted engine).
2. Make sure that your throttle lever is in NEUTRAL.
3. Turn key OFF. Try to start engine again. If it does
not start disengage the shift interlock and advance
throttle to about 1/4 while holding key in the START
position. (Remember, you should only hold key in
start position for 12 seconds at a time.) When engine
starts, release the key and immediately return throttle
to IDLE position.
1
NOTICE
INDM-A016
Figure 3.4 – Typical Shift/Throttle Lever
3. Disengage the shift interlock. Advance throttle lever
to full throttle position and hold. Hold key in START
position for no more than 10 seconds to clear extra
gasoline from the engine. When engine starts, immediately return throttle handle to IDLE position.
Your engine is designed to work with the
standard electronics installed in your boat. If
you add electrical components or accessories, you could change fuel injection controls for
your engine or could exceed the amperage capacity
of the wiring and protection system. Before adding
electrical equipment, consult your Indmar dealer.
4. If it does not start, wait two minutes and try the
sequence again.
3-4
Indmar Marine Engines
OME0502-11 Body_OM0502-05 Body.qxd 6/3/10 10:45 AM Page 4-1
Chapter 4
NORMAL OPERATION
DAILY ROUTINE
1. Open the engine cover and check the bilge for
water; pump bilge dry. Excessive amounts of
water can indicate leakage problems from shaft/
rudder logs, thru-hull fittings, loose or damaged
hoses or hull damage. Excess water in the bilge will
damage engine components (starters, alternators,
transmissions, etc.).
Don’t forget to run your engine blower for at
least 4 minutes before cranking engine.
Failure to do so may result in fire and/or
explosion resulting in death or serious personal injury.
3. Once the engine is started, allow it to reach operating temperatures of at least 120°-140° F (49˚-60˚ C)
before accelerating to speeds above 3000 RPM.
Do not allow excessive amounts of water to
remain in the bilge. Component damage due
to water is not covered by the warranty.
2. Follow the starting procedures outlined in Chapter 3,
Engine Starting Procedures.
INDM-A015
Figure 4.1 – Typical Temperature Gauge
Indmar Marine Engines
4-1
OME0502-11 Body_OM0502-05 Body.qxd 6/3/10 10:45 AM Page 4-2
4. Monitor your gauges and warning lights frequently to
ensure that engine temperatures and pressures are
within the proper ranges.
INDM-A014
OPERATING THE CONTROLS
Be sure to refer to the boat owner’s manual for additional
information. Should there be any difference between the
information presented in this manual and the boat
owner’s manual, the boat owner’s manual should take
precedence.
The shift / throttle control is important to daily operation.
Have your dealer check it regularly for proper adjustment
and lubrication.
Figure 4.2 – Typical Oil Pressure Gauge
NOTICE
Avoid using the throttle lever during the starting sequence. Your electronic engine controls
should not need any throttle movement while
starting.
Your engine has a safety feature that allows the engine
to crank only in the neutral position. If during the starting
process your engine will not turn over, make sure that
the shift / throttle control is in the NEUTRAL position and
try again.
4-2
Indmar Marine Engines
OME0502-11 Body_OM0502-05 Body.qxd 6/3/10 10:45 AM Page 4-3
Most boats have an engine safety switch (1, Figure 4-3) that can
be activated if the driver moves
from the helm position. If you
experience a “no start” condition,
verify that this switch has not
been disabled. If the tether cord
is pulled from the switch, it disables the ignition system so the
boat cannot start.
HYDROSTATIC LOCK: If water collects in the
engine cylinder for any reason, it can cause
hydrostatic lock, not allowing the pistons in
the engine to move properly. Hydrostatic
lock can severely damage your engine which
is not covered by your warranty.
1
UNUSUAL VIBRATION
Use caution while operating
shift lever. Shift only while the
engine is at idle.
INDM-A017
Figure 4.3 – Typical Tether Cord and Safety Switch
Avoid using the throttle when in reverse.
This can force water backwards into the
exhaust system and into the engine cylinders
with major damage.
Indmar Marine Engines
If your engine is used in a direct coupled application
(inboard) you need to know that damage to the drive line
(propeller, shaft, strut and coupling) can cause vibration.
You may feel vibration if damage is severe. Vibration in
the drive line will cause excessive wear on transmission
and engine components.
If you believe you hit something with the propeller, or if
you notice excessive vibration, see your dealer. Damage
to your engine, drive line, or transmission caused by
vibration is not covered by your warranty.
4-3
OME0502-11 Body_OM0502-05 Body.qxd 6/3/10 10:45 AM Page 4-4
FUEL SYSTEM
The Indmar fuel system uses high quality marine grade
components. These components will tolerate small
amounts of water without sustaining damage. Your
engine will misfire and run poorly, however, if water is in
the fuel. Use caution when re-fueling not to allow water
to enter the fuel system. If you suspect your fuel is water
contaminated, consult your dealer and avoid that fuel
source in the future.
Before disconnecting the battery, make sure the battery
switch (if equipped), ignition key and all accessories are
in the OFF position.
Be sure to connect cables properly:
• Black cable to the negative or (-) post
• Red cable to the positive or (+) post
Do not attempt to repair or replace any components of the fuel system. They are special
marine parts and may require special service
tools. You could damage the fuel system by
not using specified tools. This could cause a
fire or explosion and subsequent death or serious personal injury to you or your passengers.
See your dealer for assistance with fuel system repairs.
BATTERY
Your engine uses a special 12-volt marine battery. If a
replacement is needed, use only a marine battery with
minimum 650 cold cranking amps at 0° F (-18° C).
4-4
INDM-A010
Figure 4.4 – Typical Marine Battery
Indmar Marine Engines
OME0502-11 Body_OM0502-05 Body.qxd 6/3/10 10:45 AM Page 4-5
Use caution when connecting the battery
cables. Improperly connecting the battery
cables or using the wrong battery type can
damage electrical components. These damages are not covered by your warranty.
“SERVICE REQUIRED” OR “CHECK ENGINE”
INDICATOR (EFI ENGINES ONLY)
Some boats are equipped with a digital dash which displays the words “SERVICE REQUIRED” and/or
“CHECK ENGINE,” and some boats are equipped with
a Check Engine light. This alerts you when the ECM
(Engine Control Module) detects a possible engine problem. If the indicator goes on, return to dealer for service.
CHECK
ENGINE
INDM-A018
Figure 4.5 – Typical Check Engine Light
Indmar Marine Engines
If any of the following conditions is noted:
• Low Oil Pressure
• High Coolant Temperature
• High Transmission Oil Temperature
EFI engines may enter a Power Reduction mode. Power
reduction limits the engine speed to a “safe maneuvering” speed of about 2000 RPM. This mode is intended to
allow the driver to get out of harm’s way and to reach
safe harbor for engine service.
If the check engine indicator should go on, or if the
engine enters the Power Reduction mode, you should
have your dealer check the engine as soon as possible.
Schedule engine service at once when this
light is illuminated. Failure to have your
engine serviced when a check engine light
signal is given, may cause damage to your
engine or your emissions system.
The ECM also provides for a tapered engine RPM reduction if engine coolant temperature approaches the high
operating limit. If the coolant temperature exceeds 176° F
(80° C), the engine RPM is gradually reduced until a safe
temperature is reached. If the engine RPM should
decrease due to high coolant temperature, stop the
engine and inspect the raw water intake, sea cock and
sea strainer (if equipped) and hoses for blockage or problems.
4-5
OME0502-11 Body_OM0502-05 Body.qxd 6/3/10 10:45 AM Page 4-6
Follow the boat manufacturer’s instructions if the sea
strainer is blocked.
CHECK TRANSMISSION LIGHT
If the engine is equipped with the Walters V-Drive transmission, there may also be a Check Transmission light. If
low oil pressure is sensed in the V-Drive, the light will go
on indicating the problem. Under normal operation, the
light will stay lit at idle and slow speed operation until
enough pressure is produced (1200 RPM ± 400 RPM).
Extended cruising or trolling at low RPM is not harmful,
even if the light is lit, provided that the V-Drive oil level is
sufficient. If the oil level is normal and the light stays lit
above 2000 RPM, take the boat to your Indmar dealer
for service.
INDM-A019
Figure 4.6 – Raw Water Pump
ENGINE COOLING
Raw water cooled engines have two water pumps. One
circulates water throughout the engine. The other pump
uses water from the sea, lake or river to feed raw water
to the engine. This raw water pump is designed to use
the water it pumps to lubricate its impeller. Do not run the
engine unless the boat is in water. If you run the engine
with the boat out of the water, the water pump may be
damaged, causing your engine to overheat or start a fire.
4-6
Running engine without adequate cooling
can cause engine to overheat and may result
in fire, explosion, death and/or personal serious injury.
Indmar Marine Engines
OME0502-11 Body_OM0502-05 Body.qxd 6/3/10 10:45 AM Page 4-7
The rubber water pump impeller in the water
pump can be damaged from running dry or
by picking up sand or silt through the water
intake. Inspect your water pump impeller
annually or more often if you operate your
boat in shallow water or run it aground.
Impeller failure will result in an overheated
engine.
Running your engine with your boat out of
water will damage or ruin your engine.
Damage to your engine caused by overheating is not covered by your warranty.
Running the engine during the RPM reduction phase may cause severe damage to your
engine.
Indmar Marine Engines
• Monitor the temperature and oil gauges continuously.
• If the temperature rises past 200° F (93° C), or your
oil pressure drops below 4 psi (41 kPa), STOP THE
ENGINE IMMEDIATELY.
Damage due to running the engine with excessive temperature or low oil pressure is not covered by your warranty.
EXHAUST HOSES
Exhaust hoses on most boats carry exhaust gases from
the engine outside of the boat. These hoses carry water
that has been used to cool the engine. This water keeps
the hoses cool and prevents them from melting.
The engine exhaust from this product contains chemicals known to the State of
California to cause cancer, birth defects or
other reproductive harm.
4-7
OME0502-11 Body_OM0502-05 Body.qxd 6/3/10 10:45 AM Page 4-8
!
!
Carbon monoxide gas (CO) is colorless,
odorless and extremely dangerous. All
engines and fuel burning appliances produce
CO as exhaust. Direct and prolonged exposure to CO will cause BRAIN DAMAGE or
DEATH. Signs of exposure to CO include
nausea, dizziness and drowsiness. Ensure
adequate ventilation to prevent accumulation
of CO in the boat.
Monitor the engine temperature gauge frequently. If your
engine overheats, carefully inspect the exhaust hoses for
damage. Damaged hoses can allow carbon monoxide
gas to enter your boat.
SELECTING A PROPELLER
For best engine performance and longevity, the wideopen-throttle (WOT) engine operation must be near the
top of, but within, the specified WOT operating range. To
adjust the WOT operating range, you must select a propeller (propping) with the proper diameter and pitch. The
propeller which was supplied with your boat was chosen
by the boat builder for best all-around performance
under average conditions.
4-8
Load, weather, altitude and boat condition all affect
WOT engine operation. If you use your boat for several
different applications such as wakeboarding, barefooting
and cruising, it may be necessary to have 2 or more propellers which will allow the engine to operate in the WOT
range for each application.
Propping the boat should be done after engine break-in
and the initial 10 hour dealer check. The boat should be
loaded the way it would normally be for each application.
For instance, if you are propping for wakeboarding, fill
the ballast tanks if equipped and add all the people and
gear you would normally expect to carry in the boat.
Take the boat out and after warm-up, run it at wide-openthrottle and note the maximum RPM. EFI Engines are
equipped with RPM limiters to prevent over-revving. Take
note if the RPM limiter is activated.
If the WOT RPM is higher than the maximum RPM in
your engine’s WOT operating range, the boat is underpropped. Install a higher pitched propeller to reduce
WOT RPMs. An engine that is over-revving may quickly
experience catastrophic damage.
If the WOT RPM is lower than the minimum RPM in your
engine’s WOT operating range, the boat is over-propped.
Install a lower pitched propeller to increase WOT RPMs.
Indmar Marine Engines
OME0502-11 Body_OM0502-05 Body.qxd 6/3/10 10:45 AM Page 4-9
An engine that is under-revving is lugging. Lugging
places tremendous loads on the pistons, crankshaft and
bearings and can cause detonation, piston seizure and
other engine damage.
Elevation and weather also have a very noticeable effect
on the wide-open-throttle power of an engine. Since air
(containing oxygen) gets thinner as elevation increases,
the engine begins to starve for air. Humidity, barometric
pressure and temperature have a noticeable effect on
the density of air since heat and humidity thin the air.
This phenomenon can become particularly apparent
when an engine is propped out on a cool dry day in
Indmar Marine Engines
spring and later, on a hot, humid day in summer, does
not have the same performance. Although some performance can be regained by dropping to a lower pitch
propeller, the basic condition still exists. The propeller is
too large in diameter for the reduced power output. An
experienced marine dealer can determine how much
diameter to remove from a lower-pitch propeller for specific high-elevation locations.
Indmar suggests that if you do require a different propeller, consult the dealer you bought the boat from. The
dealer is best equipped to help with the selection of the
correct propeller for your application(s).
4-9
OME0502-11 Body_OM0502-05 Body.qxd 6/3/10 10:45 AM Page 4-10
4-10
Indmar Marine Engines
OME0502-11 Body_OM0502-05 Body.qxd 6/3/10 10:45 AM Page 5-1
Chapter 5
FUEL
WHAT TYPE OF GASOLINE TO USE
All carbureted and standard EFI engines run on unleaded
fuel of 89 octane or higher. The LY6, L96, LSA, LS2, LS3
and LS7 require 91 octane or higher. Indmar recommends purchasing fuel from a supplier that advertises
that the fuel meets “TOP TIER” specifications. This fuel
has additives and detergents that will reduce the build-up
of deposits in the engine.
Gasoline vapors are highly flammable and
explosive.
The intention of the TOP TIER Detergent Gasoline standards is to create a winning situation for gasoline retailers, engine manufacturers and boat operators. Currently,
many gasoline retailers provide fuels with lower-quality
additive packages that can build up deposits on fuel injectors and on intake valves. Others can build up deposits in
combustion chambers and may lead to intake valve sticking. These lower levels of additives can have negative
impacts on engine performance and vehicle responsiveness. For a current list of gasoline retailers supplying TOP
TIER gasoline, go to www.toptiergas.com and click on
RETAILERS.
• Stop engine before fueling.
Indmar Marine Engines
• Never smoke while refueling. Keep sparks
and flames away from fuel.
• Only refuel in well ventilated area.
• Never overfill fuel tank.
• Swallowing or inhaling gasoline or fumes
is dangerous. Seek medical attention.
• Gasoline spills on your skin should be
washed immediately with soap and water.
If gasoline spills on clothing, change
clothing immediately.
* Avoid spilling gasoline. Clean spills with
dry cloth and dispose properly.
5-1
OME0502-11 Body_OM0502-05 Body.qxd 6/3/10 10:45 AM Page 5-2
Frequently inspect fuel lines and connections for leaks or deterioration.
Indmar recommends the regular use of Marine Formula
Sta-Bil fuel stabilizer for boat users that consume less
than a tank of fuel every two weeks. Today’s fuels are
more susceptible to degradation and the use of a quality
stabilizer will help ensure fewer problems for the occasional boater.
If your boat has not been used for more than 30 days
with fuel in the tank (even stabilized fuel), the engine
may run poorly until the “old” fuel is used up. Indmar will
not pay for repairs to carburetors or fuel injection components that are inoperable or damaged from old and/or
poor quality fuel.
USING OXYGENATED FUELS OR FUELS WITH
ALCOHOL
MBTE (methyl butyl tertiary ether) is an oxygenate and
octane enhancer. This compound may be blended with
fuel. Fuel that is no more than 15% MBTE is acceptable
for use in your Indmar engine.
5-2
Ethyl alcohol, ethanol or grain alcohol is acceptable as
long as it is a blend and the blended fuel contains no
more than 10% ethanol.
Fuels that are blended to contain methanol
or wood alcohol should not be used in
Indmar engines. These fuels can corrode
metal parts in your fuel system and engine.
Fuels that contain methanol will damage
your engine. Damage caused by the use of
fuels that contain methanol is not covered by
your warranty.
FUELS IN OTHER COUNTRIES
If you operate your Indmar engine outside the USA or
Canada, unleaded fuels may be difficult to obtain.
Leaded fuels must not be used in engines with catalytic
converters or serious damage will occur.
Indmar Marine Engines
OME0502-11 Body_OM0502-05 Body.qxd 6/3/10 10:45 AM Page 6-1
Chapter 6
MAINTENANCE
GENERAL SERVICE NOTES
Your Indmar dealer is your best source for engine repair
and maintenance. Indmar certified technicians attend
ongoing service training programs and have the proper
diagnostic tools plus the latest specifications for your
engine.
!
!
Electrical, ignition and fuel system components on Indmar engines comply with U.S.
Coast Guard rules and regulations to minimize risks of fire or explosion. Use of
replacement electrical, ignition or fuel system components, which do not comply to
these rules and regulations, could result in a
fire or explosion hazard and should not be
used.
Indmar Marine Engines
Your safety depends on your use of marine parts. When
servicing the electrical, ignition and fuel systems, it is
extremely important that all components are properly
installed and tightened. If not, any electrical or ignition
component could permit sparks to ignite fuel vapors from
fuel system leaks, if they existed.
Since marine engines are expected to operate at near
full-throttle for most of their life, and to operate in fresh
and salt water environments, many special parts and
fasteners are used which are quite different from standard automotive parts. Many parts are made from special corrosion resistant materials while other moving
parts are heavy-duty for continuous, high RPM duty. If
you perform minor service procedures, make sure to use
genuine Indmar parts for marine use.
6-1
OME0502-11 Body_OM0502-05 Body.qxd 6/3/10 10:45 AM Page 6-2
• You can be injured if you try to work on your
marine engine without knowing enough
about your engine.
• Be sure you have the knowledge, experience
and the correct replacement parts BEFORE
you attempt any repairs.
• Be sure all fasteners you use are approved
and rated for marine use. Use of improper
parts can cause component or engine failure
which may result in death or serious personal injury.
Special maintenance procedures are required
for engines that are operated in brackish or
salt water. See the Salt Water Operation portion of this chapter for details.
Never operate engine without adequate water
supply to the raw water pump. Failure to
properly cool engine will cause severe
engine damage and void your warranty.
Special Note for Boats Operating on Small Ski Lakes
If the temperature falls below the freezing
point (32°F, 0°C) the raw water portion of
your engine’s cooling system must be
drained. See Chapter 7 - Storage and Winter
Lay-up. Failure to drain the cooling system
will result in severe damage to your engine
and other cooling system components.
6-2
Some operators choose to use their boats exclusively on
small ski lakes where they never get an opportunity to
run their engines for extended amounts of time (15 minutes or more) in the upper RPM range (above 4000
RPM). Many of these engines are also exposed to
extended periods of idling RPM below 1000.
Boats used in these conditions often have engines that
may suffer from fuel dilution of the motor oil. This condition is commonly referred to as “making oil” because the
oil level on the dipstick appears to rise over time. Boats
that are operated in these severe conditions will be
required to have more frequent oil and filter changes
(every 25 hours instead of every 50 hours).
Indmar Marine Engines
OME0502-11 Body_OM0502-05 Body.qxd 6/3/10 10:45 AM Page 6-3
Scheduled Maintenance Chart
ITEM
Engine Oil & Filter
ZF Transmission Fluid
Walters V-Drive Oil
Engine Coolant
Spark Plugs*
Engine Timing*
Engine*
Flame Arrestor
Belts
Shaft Alignment
Spark Plug Wires*
Raw Water Pump Impeller
Breather Hose*
PCV Valve*
Starter Bendix*
Heat Exchanger
Zinc Anodes
SERVICE
Change
Change
Change
Change
Replace
Check
Tune Up
Clean/Change
Inspect
Check
Inspect
Inspect
Clean
Replace
Grease
Inspect/Clean
Inspect
FIRST
10-20
HOURS
X
X
X
EVERY
25
HOURS1
X
EVERY
50
HOURS
X
EVERY
100
HOURS
EVERY 300
HOURS or
ANNUALLY
EVERY
2
YEARS
X
X
X
X
X
X
X
X
X
X
X
X
X
X
X
X
X
X
X
X
X
Replace
X
* Services best accomplished by your Indmar dealer.
1
Severe use applications (see special note on previous page)
Indmar Marine Engines
6-3
OME0502-11 Body_OM0502-05 Body.qxd 6/3/10 10:45 AM Page 6-4
ENGINE OIL
1.
2.
3.
4.
5.
6.
Checking Oil
Pull dipstick from engine.
Wipe oil off stick with clean towel/cloth.
Insert dipstick completely into the dipstick tube.
Remove dipstick and read oil level.
After reading is complete, return dipstick to tube.
Add oil if necessary.
Adding Oil
If oil level on the dipstick reads below the ADD mark,
add only enough oil to return level to FULL mark.
INDM-B001
Figure 6.1 – Engine Oil Dipstick Location
Check the oil level with the dipstick every time you get
fuel. To get an accurate reading, your engine should be
warm and the boat should be level. For best results wait
about 2 minutes after you turn off the engine to allow the
oil to drain into the oil pan, giving you a more accurate
reading.
INDM-A025
OPERATING
RANGE
RS MANUA
SEE OWNE
INDM-A003
ADD
Figure 6.3 – Engine Oil Fill
Figure 6.2 – Dipstick
6-4
Indmar Marine Engines
OME0502-11 Body_OM0502-05 Body.qxd 6/3/10 10:45 AM Page 6-5
Special Oil Instructions for Malibu LS7 Engine
Do not overfill. If your oil level is above the
full mark on the dipstick, the engine may be
damaged.
Indmar uses and recommends Pennzoil Marine 15W40
in all 5.7L, 6.0L and 6.2L (383) engines and Pennzoil
Heavy Duty 40W in all 7.4L (454), 8.1L (496) and 8.2L
(502) engines. This oil meets the API Service CI-4, CH-4,
CG-4, CF-4, and CF/SL. If engine is to be used in conditions below 20 F (-7 C), use Pennzoil 10W30 meeting the
above API specifications. Note the special instructions for
the LS7 engine.
The use of engine oil other than the recommended viscosity with an API SJ/CG4 designation can cause engine damage. Damage to
your engine caused by the use of improper
oils is not covered by your warranty.
Indmar Marine Engines
Oil Requirement
The Malibu LS7 by Indmar oil requirement is different
than the requirement for any of our other engines. The
LS7 comes from Indmar filled with 5W30 Mobil 1 fully
synthetic oil. Indmar strongly recommends the continued
use of this oil for subsequent oil changes on this very
special engine.
Checking the Oil Level
The Malibu LS7 by Indmar is a unique high performance
engine with a dry-sump lubrication system. Since the
engine does not have a conventional oil pan like most
engines, the procedure for checking the engine oil is a little different.
Do not check the engine oil cold. The engine must be
warmed up. Cold oil will not give a correct oil level reading. After the engine is warmed up to at least 160°F
(72°C), shut off the engine. Checking the oil with the
engine running will result in an incorrect reading. Wait for
5 minutes (but not more than 20 minutes), to allow the oil
to drain and settle. Make sure boat is sitting level as possible. For convenience, Indmar suggests you check the
oil at the end of each session rather than the beginning
of each day as you would with a conventional engine.
6-5
OME0502-11 Body_OM0502-05 Body.qxd 6/3/10 10:45 AM Page 6-6
Pull the dipstick with the yellow handle from the reservoir, and clean it with a lint-free cloth. Then push it back
in all the way until it stops. Remove it again, keeping the
tip down, and note the oil level on the crosshatched
area. An oil level within the crosshatched area is normal.
If the level is below the crosshatched area, add 1 quart
(0.96 L) of 5W30 Mobil 1 synthetic oil through the black
oil reservoir fill cap and take another reading.
Do not overfill the reservoir, as this may
result in excessive oil consumption. Oil levels above the crosshatched area may
degrade lubrication system performance. In
the event of an over filling, some oil will be
discharged through the dry sump tank vent
and wet the flame arrestor and front of the
motor.
Oil Change Procedure
NOTICE
Indmar strongly recommends that you take your boat
to your authorized dealer to perform this critical service.
The oil change interval for the LS7 is the same as any
other Indmar engine. The first oil and filter change should
be done after approximately 10 hours of operation.
Subsequent oil changes should be done every 50 hours
or annually, whichever comes first.
To remove the oil from the engine requires accessing
two oil drain locations. If you have an early model that
only has one oil drain hose, remove the cap from the oil
drain hose and either drain or pump the oil from the oil
pan through the hose. The hose is connected to the oil
pan where approximately 1 quart of oil will be retained.
Once the residual oil has been removed from the oil pan,
reinstall the drain cap and secure the hose.
Next, remove the fill cap from the oil tank. You will need
to use a pump or oil suction device to remove the oil
from the tank. Just run the pump or suction line all the
way to the bottom of the tank and remove all of the oil.
If the engine you are changing the oil on has two oil
drain hoses, you must drain or pump the oil from the oil
pan (as above) from one of the hoses. The other hose is
connected to a different fitting on the front of the oil pan
that will drain oil tank.
Materials Required:
8 quarts 5W30 Mobil 1 Synthetic Oil
Pennzoil PZ52 Oil Filter
Oil Change Pump/Oil Suction Device
6-6
Indmar Marine Engines
OME0502-11 Body_OM0502-05 Body.qxd 6/3/10 10:45 AM Page 6-7
Once the oil has been removed from the engine and
reservoir, fill a new PZ52 oil filter with 5W30 Mobil 1 synthetic oil and install it on the remote filter head. Tighten
per instructions on the filter. Pour the remainder of the 8
Quarts of 5W30 Mobil 1 through the oil fill cap in the top
of the dry sump reservoir. The total service fill, with a filter,
is 8 quarts (7.57 L) of 5W30 Mobil 1 synthetic engine oil.
Replace the oil fill cap and start the engine. Let it run at
idle for at least 15 seconds to circulate the fresh engine
oil through the lubrication system. (This is similar to running an engine after a radiator fill, to purge air from the
system.)
Check the oil level according to the instructions above.
The oil change is now complete.
Synthetic Oil
For the engines that come from Indmar with conventional
oil, synthetic oil that meets our viscosity requirements and
API SL/SJ/CI-4, CH-4, CG-4 is acceptable to use after
100 hours of operation with the recommended oil. The use
of synthetic oil does not change the requirement of 50
hour (25 hour in severe conditions) oil change intervals.
INDM-A009
Figure 6.4 – Oil Filter
Indmar recommends all engine maintenance procedures
be performed by your dealer, including oil changes. If
you must perform the oil change yourself, operate the
engine to full operating temperature.
Changing Oil
Change your engine oil after the first 10-20 hours of
operation. Then change oil every 50 hours (25 in
severe conditions) or annually, whichever comes first.
To maximize engine life, change the oil filter at every
oil change.
Indmar Marine Engines
6-7
OME0502-11 Body_OM0502-05 Body.qxd 6/3/10 10:45 AM Page 6-8
Oil Additives
Engine oil is hot. Be careful not to burn yourself.
1. With the boat level on trailer, remove the hull or garboard drain plug and insert QuickDrain through the
hull opening (outside of hull).
2. Remove QuickDrain hose cap and let oil flow into
used oil container. When all oil has drained, replace
cap and return QuickDrain to storage position.
3. Replace the hull or garboard drain plug. Position a
suitable container under the oil filter.
4. Unscrew and remove the oil filter; ensure that filter
seal is removed with oil filter. Wipe up any spilled oil in
the bilge and dispose of properly.
5. Fill a new Pennzoil Marine oil filter about 1/2 full with
clean engine oil. Lightly lubricate the oil filter gasket
and “spin on” the filter until the gasket makes contact.
Hand-tighten filter 1/4 to 1/2 turn after contact.
6. Add the new oil through the cap located on the engine
valve cover. Fill only to the FULL mark of dipstick.
7. After initial start up, always carefully inspect oil drain
plug and oil filter gasket area for leaks.
8. Stop the engine and re-check oil level. Add if necessary.
Do not use oil additives. Indmar engines do not need oil
additives. Use of recommended oil, along with regular oil
and oil filter changes, will protect your engine adequately.
Disposing
Used engine oil contains dangerous chemicals and is
considered a hazardous waste. Do not allow used oil to
remain on your skin for any length of time. Make certain
to drain all free flowing oil from the filter prior to disposal.
Recycle used oil by taking it to a collection center. If you
have a problem disposing of used oil, ask your Indmar
dealer or service station for the name of a local oil recycling center for proper disposal.
• Prolonged and repeated contact with used
engine oil may cause skin cancer.
• Avoid direct skin contact with used oil. If skin
contact is made, wash thoroughly with soap
or hand cleaner as soon as possible.
• Keep used engine oil out of reach of children.
• Used engine oil is a hazardous material.
Dispose of properly.
6-8
Indmar Marine Engines
OME0502-11 Body_OM0502-05 Body.qxd 6/3/10 10:45 AM Page 6-9
ENGINE FLAME ARRESTOR
dry completely before it is returned to the engine.
Your engine is equipped with a U.S. Coast Guard
approved flame arrestor. Its purpose is to contain any
backfire that may occur during the operation of your
engine. Because an inboard engine is completely
enclosed, an uncontained backfire can be extremely
dangerous.
K&N Element Type Flame Arrestor
If your engine is eqipped with a K&N high performance
element type flame arrestor, special procedures are
required. Special servicing instructions for this flame
arrestor can be found on the K&N website, www.knfilters.com/cleaning.htm.
When cleaning or replacing the flame arrestor, clean the
breather hose and replace the PCV valve at the same
time.
INDM-A027
Do not remove the flame arrester at any time
when the engine is being started or run as it
may result in fire, explosion and death or
serious personal injury.
Figure 6.5 – Flame Arrestor
Periodically inspect flame arrestor to prevent clogging by
dirt or corrosion. There are two types of flame arrestors
used in Indmar engines, metal and paper.
Metal Type
The metal flame arrestor is cleaned using a mild part
washing solvent. Using solvent, clean the flame arrestor
thoroughly and blow dry. The metal flame arrestor must
Indmar Marine Engines
ENGINE COOLING
Running engine without adequate cooling
can cause engine to overheat and may result
in fire, explosion, death and/or personal
serious injury.
6-9
OME0502-11 Body_OM0502-05 Body.qxd 6/3/10 10:45 AM Page 6-10
Fresh water cooled engines are shipped from
the Indmar factory filled with a 50/50 mix of
Sierra brand antifreeze and water. This mixture provides freeze protection down to –26° F
(-32° C). If the temperature in your area is
expected to go below this level of protection,
see your Indmar dealer to have the antifreeze
mixture adjusted for your needs.
Running your engine with your boat out of
water will damage or ruin your engine.
Damage to your engine caused by overheating is not covered by your warranty.
Most engines are cooled by the raw water outside of the
boat (Open Cooling System). For this reason, do not
start the engine when the boat is out of the water without
an engine flushing device available from your Indmar
dealer.
With Open Cooling Systems, if your engine is used in
salt, brackish, dirty or polluted water, the cooling system
must be flushed with clean water immediately to prevent
corrosion and blockage in the cooling system.
6-10
Open Cooling Systems usually consist of a raw water
intake on the bottom of the boat, a raw water pump, a
belt driven marine water pump, a thermostat to regulate
engine temperature, and various connecting hoses. The
raw water pump pulls outside water through the intake,
circulates the water through the engine and then
discharges it overboard through a hose or with the
engine exhaust.
Fresh Water (Closed) Cooling Systems
Some engines have
a closed fresh water
cooling system. In the
fresh water system
HOT
the cooling water
contains anti-freeze
and re-circulates
throughout the
1
engine. If your engine
is equipped with a
COLD
heat exchanger tank,
it has a fresh water
cooling system. Raw
INDM-B002
water is pulled
Figure 6.6 – Overflow Tank
through the intake
and flows through
chambers in the heat exchanger and then discharged
overboard with the engine exhaust.
Indmar Marine Engines
OME0502-11 Body_OM0502-05 Body.qxd 6/3/10 10:45 AM Page 6-11
Check coolant level daily. The level in the coolant
recovery tank should be maintained at the “Full Cold”
mark (1, Figure 6.6) when the engine is cold.
To avoid possible skin burns, the engine must
be turned “OFF” and cool enough so no heat
is registered on the temperature gauge. Only
after the engine is completely cooled is it safe
for you to remove the coolant reservoir cap to
check the level. Failure to follow procedure
may result in death or serious personal injury.
• The coolant system should be flushed and
coolant replaced every two years. This
should be performed by a qualified Indmar
service technician.
When adding coolant, add only Sierra brand propylene
glycol in an appropriate mixture with distilled water in
accordance with the directions on the container. Do not
overfill the tank. Do not mix anti-freeze types.
If the cooling system is completely empty, see your
Indmar dealer for assistance immediately to purge system. Purging the system is a difficult procedure that is
not recommended for the boat owner.
Salt Water Operation
• Failure to maintain the coolant at the proper
level can cause engine damage. Your warranty will not cover engine damage due to
overheating or any other cause associated
with improper coolant levels.
• Use only propylene glycol coolant. Use of
any other coolant or mixing coolant types
can cause engine damage. Damage to your
engine from use of any other type of coolant
is not covered by warranty.
Indmar Marine Engines
All Indmar Marine engines are capable of operating in
brackish or salt water environments as long as certain
precautions and maintenance procedures are followed.
Damage to the engine, both internal and external, that is
a result of inadequate maintenance on an engine used in
salt water will not be covered under the Indmar Limited
Warranty.
6-11
OME0502-11 Body_OM0502-05 Body.qxd 6/3/10 10:45 AM Page 6-12
The following engines must not be operated in brackish
or salt water environments unless equipped with a
closed cooling system which allows the use of antifreeze coolant in the engine instead of raw water.
• Malibu Hammerhead 383, LS3 and L96
• MasterCraft LY6 and L96
• Indmar LS2
These engines use aluminum cylinder heads and/or
block assemblies which will be severely damaged from
salt water corrosion if operated in brackish or salt water.
See your Indmar dealer to install a closed cooling system if you have one of these engines and will operate it
in salt water.
The following engine is equipped with a standard closed
cooling system from Indmar:
• Malibu LS7
This engine can be operated in fresh water or salt water
without causing damage to the internal cooling passages
in the engine. The cooling passages in the exhaust manifolds are not part of the closed cooling system and
although they are corrosion resistant, need to be
checked periodically for damage from salt water.
6-12
The remaining Indmar engines will tolerate occasional
use in salt water but it is recommended that if the engine
will be used in salt water more that 25% of the time that
the engine be equipped with a closed cooling system.
External Care
Your engine has been carefully primed and painted to
protect it against rust and corrosion. To keep your engine
looking like new, Indmar recommends applying an anticorrosion compound, such as Pennzoil Marine Z-M
Corrosion Protectant and Lubricant. Regular application
(every 3 months) of this Protectant, particularly on
exposed metal surfaces, motor mounts and electrical
connections, will displace water and seal the surfaces
against penetration by corrosive agents. Rinsing the
engine with fresh water between applications of the
Protectant will further protect the exposed surfaces.
INTERNAL (COOLING SYSTEM) CARE
Raw Water Cooling Systems
If your engine is raw water cooled, water from whatever
body of water you are operating in is pumped through
the cooling passages of the engine, exhaust manifolds
and exhaust risers. It is critical that the salt water be
flushed from these cooling passages after use by running fresh water through the cooling system. For more
convenient flushing, ask your dealer about permanently
installing a flushing device that allows easy connection of
a water hose.
Indmar Marine Engines
OME0502-11 Body_OM0502-05 Body.qxd 6/3/10 10:45 AM Page 6-13
Even with diligent flushing, certain exhaust system components called exhaust risers or exhaust elbows will be
significantly affected by salt water. These risers must be
inspected by your dealer annually and replaced as
required. It is not unusual to have to replace these risers
every two years on boats used exclusively in salt water.
Some half system installations use the one piece aluminum Tri-Y or ETX manifolds and do not have separate
risers or riser gaskets. These manifolds have shown to
be extremely resistant to salt water damage and should
provide extended service over the two piece cast iron
systems, but still need to be flushed regularly with fresh
water to maintain their integrity.
Fresh Water Cooling – Half Systems
A fresh water cooling system that uses anti-freeze in the
engine but raw water in the exhaust manifolds is referred
to as a half-system. This is the most common type of
system installed on water-ski boats. Although the engine
is protected, it is still important to flush the engine with
fresh water to remove as much salt water as possible
from the raw water side of the cooling system as well as
from the exhaust manifolds and risers. For more convenient flushing, ask your dealer about permanently
installing a flushing device that allows easy connection of
a water hose.
Even with diligent flushing, certain cast iron exhaust system components called exhaust risers or exhaust elbows
will be significantly affected by salt water. These risers
must be inspected annually and replaced as required. It
is not unusual to have to replace these risers every two
or three years on boats used exclusively in salt water.
Indmar Marine Engines
Fresh Water Cooling – Full System – Salt Water
Series Engines
Some fresh water cooling systems are referred to as full
systems. A full fresh water system includes the exhaust
manifolds as part of the system that is cooled with antifreeze. Most commonly, a block-off plate is installed
between the exhaust manifolds and exhaust risers and
the risers are cooled with raw water.
Because the risers are exposed to salt water they are
subject to corrosion. These risers must be inspected by
your dealer annually and replaced as required. It is not
unusual to have to replace these risers every two years
on boats used exclusively in salt water.
Some Full Fresh Water Cooled engines equipped with
ETX or Tri-Y one piece exhaust manifolds do not have
separate exhaust risers. Full FWC systems utilizing those
manifolds use anti-freeze in the complete manifold/riser
assembly and will not have the riser corrosion issues
associated with the two piece manifold/riser assemblies.
6-13
OME0502-11 Body_OM0502-05 Body.qxd 6/3/10 10:45 AM Page 6-14
Fresh Water Cooling – All Systems
All fresh water cooling systems, whether they are half or
full systems, must be inspected and maintained annually,
usually during winterization.
Heat Exchanger – Remove the end caps to drain and
inspect the heat exchanger. Clean out any debris. Make
sure you inspect the end caps for contour and cracks
and replace the neoprene gaskets before putting the
boat back in service. If you find rubber bits in the
exchanger, check the raw
SACRIFICIAL ANODE
water pump impeller. Note
REPLACE IF ANODE IS
that if you use a clean-out
3/4" (19 mm) OR
rod, it should be softer than
LESS IN LENGTH
the copper tubes, and
should not be used to dislodge materials which are
firmly stuck to the tube surface, as this could damage
the tubes. The rod will assist
INDM-B007
in cleaning out bits of grass,
zinc, shells, and
Figure 6.7 – Sacrificial
similar materials which are
Anode
just lodged in the tubes.
Zinc Anodes – The sacrificial zinc anodes frequently
spall, and there will probably be zinc bits in the exchanger which should be cleaned out. Inspect the zinc anode
often during use and replace when it is 3/4" (19 mm)
or less.
6-14
Raw Water Pump – Replace the impeller if it is worn or
over two years old. Since you must remove the impeller
to inspect it, it is good practice to replace the impeller
every year as a routine. Be sure there are no impeller
parts lodged in the hoses or elsewhere in the system as
they will eventually move to an inconvenient place and
restrict water flow. The raw water pump impeller should
be replaced every two years or whenever it is found
to be worn or have damaged blades. Be sure to
re-assemble with the proper gaskets.
INDM-A036
Figure 6.8 – Raw Water Pump Impeller
Indmar Marine Engines
OME0502-11 Body_OM0502-05 Body.qxd 6/3/10 10:45 AM Page 6-15
IGNITION TIMING
All current production Indmar engines, except for
carbureted models, have non-adjustable ignition timing. On carbureted models, the ignition timing is carefully adjusted at the Indmar factory. Unless the distributor hold down clamp is loosened and the distributor
is turned, the engine is essentially “timed for life.” In
the event that the distributor has been moved, the timing procedure for a carbureted engine is as follows:
4. Adjust the idle to 750-850
RPM.
5. Set timing to 10 degrees
BTDC. (Figure 6.10)
6. Disconnect timing shunt
from 12 volts and remove
plug from distributor.
7. Reset idle to 750 RPM for
inboard engines and 1000
RPM for jet engines.
INDM-B006
Carbureted Engines
1. Install P/N
801012 timing
shunt (plug with
looped white wire
and black wire
TIMING
SHUNT
shipped with
each engine) into
the plug on the
distributor.
TO 12 VOLTS +
(Figure 6.9)
2. Start engine.
INDM-B005
3. Connect the
Figure 6.9 – Timing Shunt
loose end of the
black wire to 12 volts positive.
Indmar Marine Engines
TIMING
NOTCH
Figure 6.10 – Timing Notch
Altered or improperly set ignition timing can cause
severe engine damage, which is not covered under the
terms of your warranty.
FUEL SYSTEM
The fuel system consists of fuel lines, fuel pump, and an
unused fuel recovery system. Fuel in the system is
under pressure and must be relieved before servicing.
Because of the inherent danger of fuel leakage into the
bilge, do not attempt servicing or maintaining components of the fuel system.
Your Indmar dealer has factory trained technicians and
U.S. Coast Guard approved marine grade parts required
for fuel systems.
6-15
OME0502-11 Body_OM0502-05 Body.qxd 6/3/10 10:45 AM Page 6-16
CARBURETOR ADJUSTMENTS
The carburetor on your engine has been carefully adjusted at the factory and has had sealing caps applied to the
idle mixture screws to prevent further adjustment.
Altering the original factory settings will change the emissions characteristics of your engine and may put your
engine "out of compliance" with the emission standards
in California. If you are experiencing drivability problems
that may be related to the operation of your carburetor,
Indmar suggests that you contact your dealer for assistance. Unauthorized removal of the carburetor sealing
caps may void the warranty on your engine if damage
occurs as a result.
If you have a carbureted engine and live and will always
operate your boat in an area with an altitude greater than
2500 feet above sea level, it may be necessary to have
your carburetor re-jetted to operate properly. It may also
be necessary to reduce your propeller size to allow the
engine to operate at the appropriate RPM. Your boat
dealer is best equipped to help you make these adjustments.
6-16
TRANSMISSION
It is important to keep the water level in the
bilge below the output shaft of the transmission. If the water level in the bilge is too
high, the coupler can splash water inside the
engine compartment and cause corrosion
problems. High water levels can also allow
water intrusion into the transmission causing
severe damage.
Indmar engines are
equipped with one of
four types of marine
transmissions:
• Midships Mount:
ZF Hurth Marine
In-Line
• Stern Mount:
ZF Hurth Marine
V-Drive
• Stern Mount:
Walters V-Drive and
ZF Hurth In-Line
• Stern Mount:
ZF Hurth Ski-Vee or
Indmar-Vee
INDM-A030
Figure 6.11 – ZF Hurth
Transmission Dipstick
(2 on Ski-Vee Models)
Indmar Marine Engines
OME0502-11 Body_OM0502-05 Body.qxd 6/3/10 10:45 AM Page 6-17
A separate owner’s manual covering basic maintenance is provided
with each transmission. The transmission fluid must be changed and
the filter cleaned after the first 1020 hours of operation and once
each year thereafter. Refer to the
transmission owner's manual for
information.
The transmission is water cooled
by a heat exchanger connected to
the engine cooling system. The
transmission fluid level should be
checked daily. Fluid level is to be
maintained at a level between the
“Full” and “Add” marks on the
transmission dipstick.
sensor and a dashboard mounted light. If low oil pressure is sensed, this lamp will light indicating the problem.
Shut down the engine and check the transmission fluid
level. Refer to Chapter 6, Check Transmission Light for
more information.
If transmission service is required, note the Serial
Number of the transmission stamped onto the ID plate
on the top of the transmission housing. It is good practice to note the serial number and keep it with other
owner related information.
Checking/Adding Transmission Fluid
HIGH
LOW
INDM-A039
Overfilling the transmission with
Figure 6.12 – Walters
fluid will cause the seals to leak,
V-Drive Dipstick
and eventually lead to overheating,
while if there is too little fluid, overheating will result.
If the engine uses the Walters V-Drive, it is equipped with
a ZF Hurth in-line transmission for shifting. Be aware that
the Walters V-Drive uses motor oil for lubrication, while
the ZF Hurth transmission uses Automatic Transmission
Fluid. The Walters V-Drive also has a low oil pressure
Indmar Marine Engines
Check fluid only with engine OFF and boat floating level,
or level on trailer. The transmission dipstick is located on
the top of the transmission. Dipsticks may be marked
“ADD” and “FULL” or “H” and “L” (high and low); maintain fluid level between the two marks.
Check level immediately after turning engine
off. Transmission fluid may be hot. Be careful not to burn yourself.
6-17
OME0502-11 Body_OM0502-05 Body.qxd 6/3/10 10:45 AM Page 6-18
1. Remove the dipstick and wipe with a clean towel.
2. Insert the dipstick completely (do not screw in
threaded dipstick to check fluid). Remove the dipstick
and read fluid level.
3. Return dipstick after level check. Make sure it is
secured in place.
4. If level is below “ADD” mark, add the proper fluid
until it reaches the full mark. Add fluid through same
tube as you removed the transmission dipstick.
INDM-A031
Figure 6.13 – Walters V-Drive Dipstick Location
6-18
Indmar Marine Engines
OME0502-11 Body_OM0502-05 Body.qxd 6/3/10 10:45 AM Page 6-19
USED BY
TRANSMISSION
MODEL
CAPACITY
FLUID TYPE
MB, MC, SC
MC
MC
MC
ZF
ZF
ZF
ZF
ZF
ZF
ZF
ZF
MB
ZF Hurth V-Drive
ZF 45IV
SC
Walters V-Drive
RV-26D-71V
MB
Indmar V
–
1.7 qt (1.6L)
2.12 qt (2L)
4.2 qt (4L)
4.2 qt (4L)
2.12 qt (2L) Main Gearbox
1.0 qt (1.06L) V-Drive Unit
0.5 qt (0.5L)
2.3 qt (2.18L) Main Gearbox
1.25 qt (1.18L) V-Drive Unit
Dexron III ATF
15W40 Motor Oil
15W40 Motor Oil
15W40 Motor Oil
Dexron III ATF
Dexron III ATF
SAE 30 Motor Oil
Dexron III ATF
Mobil Delvac Synthetic 50
MC - MasterCraft
SC - Supra, Moomba
MB - Malibu, Axis
Hurth
Hurth
Hurth
Hurth
In-Line
In-Line
In-Line
V-Drive
45C
45A
63A
63IV
COMPLIES TO MARINE SAE J1171
POWER
RELAY
40A
20A
F8-HELM
F9-EMPTY
F7-MAIN BREAKER
Do not overfill the transmission. Overfilling
can damage the transmission. Damage to
your transmission due to too much or too
little fluid is not covered by your warranty.
FUEL PUMP
RELAY
SPARE FUSES UNDER COVER
SPARE
SPARE
SPARE
SPARE
2
20A
F2-ECM
20A
20A
F4-PTR
F6-STARTER
STARTER
RELAY
5A
F1-VSW
20A
20A
F3-FUEL PUMP
F5-FUEL PUMP
MODEL #E-6123
P/N: E2321993
ELECTRICAL SYSTEM
All Indmar engines are equipped with a 40 A circuit breaker (1, Figure 6-14) to protect the engine electrical system
and components from overload. If the engine will not
crank with the battery switch in the ON position, locate the
breaker reset button at the back of the engine. It is located under the fuse block cover. Firmly push the button until
the breaker resets (an audible click will be heard). Start
the engine.
Indmar Marine Engines
1
INDM-0001
Figure 6.14 – Breaker Reset Button
6-19
OME0502-11 Body_OM0502-05 Body.qxd 6/3/10 10:45 AM Page 6-20
If the breaker trips again, there is a problem with the
electrical system. Take your boat immediately to your
Indmar dealer for repair.
NOTICE
20A
F7-MAIN BREAKER
40A
STARTER
RELAY
MODEL #E-6123
P/N: E2321993
SPARE
SPARE
SPARE
F8-HELM
SPARE FUSES UNDER COVER
F9-EMPTY
SPARE
FUEL PUMP
RELAY
POWER
RELAY
COMPLIES TO MARINE SAE J1171
In addition to the 40 A Circuit Breaker, EFI
Engines are equipped with additional component overload protection.
F1-VSW
F2-ECM
F3-FUEL PUMP
F4-PTR
F5-FUEL PUMP 2
F6-STARTER
5A
20A
20A
If during maintenance or inspection, it becomes necessary to move or reposition any of the engine’s wiring or
wire harnesses, verify that wiring is returned to its original position, and that all harnesses are routed correctly. If
a wiring clip or retainer breaks, replace it immediately.
Wiring is specifically routed to eliminate problems related
to engine heat and spray or immersion in liquids.
Electrical problems can result if wiring is moved from its
original position and is not properly repositioned.
General Lubrication
STARTER
20A
20A
20A
INDM-0002
Figure 6.15 – Fuse Block
EFI fuses are located in the holder (Figure 6-15)
attached by the ECM. To remove or inspect a fuse,
remove molded plastic cap from fuse holder. Inspect
fuse and replace if it is defective. Make sure to replace
the fuse block cover when finished.
6-20
WIRING
Apply a dab of Pennzoil Premium Plus multipurpose
grease onto the starter bendix every month or 50 hours
of operation. Your starter has been sprayed with lubrication internally to extend its longevity.
SHIFT AND THROTTLE CABLES
Spray exposed throttle cable and transmission cable
ends with Pennzoil Marine Z-M Corrosion Protectant and
Lubricant or Pennzoil Premium Plus multipurpose
grease. Work the cable back and forth, then spray to
completely lubricate. In highly corrosive locations, a complete cable lubrication system may be purchased
through your Indmar dealer.
Indmar Marine Engines
OME0502-11 Body_OM0502-05 Body.qxd 6/3/10 10:45 AM Page 7-1
Chapter 7
STORAGE AND WINTER LAY-UP
Storage or winter lay-up requires preparation to prevent
damage to the power package. While preparing the
power package for winter lay-up, annual maintenance
tasks should also be performed.
Without proper preparation, storage over a long period of
time may cause internal engine and transmission parts
to rust due to lack of lubrication. Also, if the boat is stored
where the temperature falls below freezing, any water
not drained from the engine may freeze, resulting in
severe damage. Damage that is the result of improper
storage is not covered under terms of Indmar’s limited
warranty.
Indmar Marine Engines
Because of the complexity of preparing your
engine for winter storage, and the danger of
catastrophic engine damage from freezing
water in the engine, it is recommended that
you have your dealer perform winterization
procedures. Damage due to by improper winterization/storage is not covered by product
warranty!
To properly winterize your engine, you MUST be able to
bring the engine up to operating temperature. To accomplish this, your boat must be in the water, or be attached
to a water supply using a hose and suitable adapter that
will allow an uninterrupted supply of water to the engine.
7-1
OME0502-11 Body_OM0502-05 Body.qxd 6/3/10 10:45 AM Page 7-2
NOTICE
This procedure covers only the power package portion of your boat. Consult your boat owner’s manual
or boat manufacturer for specific boat winterizing
instructions.
GENERAL PREPARATION
Before beginning you will need the following supplies:
• Sta-Bil Gasoline Stabilizer
• 6 quarts of Appropriate Engine Oil
(10 quarts for 8.1 Liter)
• Pennzoil PZ52 Oil Filter for 5.7 and 6.0 Liter
Carbureted and EFI Engines
• AC-PF454 Oil Filter for 8.1 Liter Engines
• Low Tack Tape
• 4-6 ounces of Pennzoil Marine Fogging Oil
• 1 can Pennzoil Marine Z-M Corrosion Protectant and
Lubricant
• Transmission Oil (As Required)
• Pennzoil Premium Plus Multipurpose Grease
• Short Piece of Stiff Wire (Coat hanger wire)
• Pipe Thread Sealant
• Anti-Freeze Tester suitable for Propylene Glycol
(Fresh Water Cooled Engines Only)
• Sierra Brand Anti Freeze (As required for Fresh
Water Cooled Engines Only)
7-2
Fuel System Treatment
1. If the boat is to be placed in storage with fuel in the
tank(s) that does not contain alcohol, fill the fuel
tank(s) with fresh fuel and a sufficient amount of
Marine Formula Sta-Bil gasoline stabilizer to treat the
entire tank. Follow instructions on the container.
2. Start the engine and operate at Idle RPM until the
engine reaches normal operating temperature. (If
using a hose and adapter, adjust the faucet to avoid
over-cooling the engine at low RPM.) Run the engine
for at least 15 minutes to ensure that the fuel stabilizer enters the engine’s fuel system.
Running the engine with the flame arrestor
removed increases the possibility of fire or
explosion if engine backfire occurs and
gasoline fumes are present. If the engine is
operated without the flame arrestor secured,
extreme care must be taken to ensure that
the engine compartment is well ventilated
and that no fuel leaks are present.
Indmar Marine Engines
OME0502-11 Body_OM0502-05 Body.qxd 6/3/10 10:45 AM Page 7-3
In catalytic converter-equipped engines,
Indmar does not recommend applying fogging oil while the engine is running. The fogging oil could damage the catalytic converter. The cylinders can be protected by removing the spark plugs and applying the fogging
oil directly into the cylinders.
All Engines:
1. Drain water from exhaust manifolds except on salt
water series engines. Uncouple the hose quick
disconnect and drain the manifolds. Indmar
recommends that you leave the drain plugs out,
or the hose uncoupled, until spring.
2. Remove both hoses from the seawater pump on the
front of the engine. Drain any remaining water from
the hoses.
3. Carefully loosen the flame arrestor and lift it far
enough to insert the tube of the fogging oil can.
Spray 4-6 ounces (118-177 cc) of fogging oil into the
throat of the carburetor or throttle body. Shut off the
engine. Reattach the flame arrestor and seal with
low tack tape.
4. Perform annual maintenance, refer to Chapter 6,
Scheduled Maintenance Chart.
5. Loosen all accessory drive belts and check condition.
Replace belt(s) if cracked or damaged.
6. Drain seawater section of the cooling system.
NOTICE
Placing all drain plugs, impeller, etc. in a plastic bag
and attaching the bag to the steering wheel of the
boat is a good reminder to reinsert the plugs when
you recommission the boat in the spring.
Indmar Marine Engines
INDM-A038
Figure 7.1 – Quick Disconnect
7-3
OME0502-11 Body_OM0502-05 Body.qxd 6/3/10 10:45 AM Page 7-4
INDM-A036
Figure 7.2 – Raw Water Pump Impeller
INDM-A009
3. Remove the raw water pump impeller from the pump
housing. Replace the impeller if it shows any signs of
damage or wear. Lubricate the impeller with Vaseline
and seal in an airtight bag.
4. Remove the hose from the lower (rear) end of the
transmission cooler. Inspect the cooler for any debris
such as weeds, plastic, etc.
7-4
Figure 7.3 – Transmission Cooler
5. On Walters V-Drive equipped units, remove the two
small square headed drain plugs from the front and
rear of the upper housing. Look for the words “Water
Drain” on the housing.
Indmar Marine Engines
OME0502-11 Body_OM0502-05 Body.qxd 6/3/10 10:45 AM Page 7-5
6. On Ski-Vee equipped units, the hoses that are connected to the integral V-Drive cooler (1, Figure 7.4)
must be removed to drain the hoses and cooler. The
anodes (2, Figure 7.4) at the back of the cooler must
be removed and inspected. Replace if they are 50%
eroded.
WATER LINE
WATER DRAIN
WATER
DRAIN
1
1
INDM-A040
2
2
INDM-A041
Figure 7.4 – Ski-Vee
Indmar Marine Engines
Figure 7.5 – Walter V-Drive Drain Plugs
NOTICE
Placing all drain plugs, impeller, etc. in a plastic bag
and attaching the bag to the steering wheel of the
boat is a good reminder to reinsert the plugs when
you recommission the boat in the spring.
7-5
OME0502-11 Body_OM0502-05 Body.qxd 6/3/10 10:45 AM Page 7-6
Raw Water Cooled Engines
NOTICE
NOTICE
Placing the drain plugs in a plastic bag and attaching
it to the steering wheel of the boat will act as a
reminder to reinstall the drain plugs during recommissioning in spring.
Some 5.7 Liter engines have a knock sensor
located in the drain locations on both sides of
the engine. The knock sensor and knock sensor stud must be carefully removed to drain that side
of the block.
NOTICE
1. Remove the drain plug or sensor from each side of
the engine.
On the 6.0 and 8.1 Liter engines, removing the knock
sensor does NOT drain the block. Remove the plugs
from the brass fittings on both sides of the engine to
drain water from the block.
2. Use a short piece of stiff wire and poke around in the
drain hole to ensure that any rust or scale is broken
apart, and the engine drains completely.
3. Disconnect the large diameter hose that runs from
the water-circulating pump to the thermostat housing.
Make sure all of the water drains from the hose.
1
IND-A005A
Figure 7.6 – Anti Knock Sensor
7-6
Indmar Marine Engines
OME0502-11 Body_OM0502-05 Body.qxd 6/3/10 10:45 AM Page 7-7
Fresh Water Cooled Engines
1. Check the level of
the coolant in the
coolant recovery
tank. The coolant
level with a cold
HOT
engine should be
approximately 1/3
of the coolant tank
capacity. (Figure
1
7.7) Use an antifreeze tester suitCOLD
able for measuring
the strength of
propylene glycol
INDM-B002
anti freeze to test
Figure 7.7 – Overflow Tank
the strength of the
mixture.
2. If the coolant level is low, use a mixture of Sierra
Brand Anti Freeze and distilled water to bring the level
in the recovery tank to the appropriate level. If the
strength of the mixture needs to be increased, we recommend that you drain and refill the system with the
appropriate strength mixture of Sierra Brand
Antifreeze and distilled water.
3. Remove the drain plugs from the ends of the heat
exchanger and drain the raw water from the exchanger. One of the drain plugs in the heat exchanger is a
Indmar Marine Engines
sacrificial anode. The
SACRIFICIAL ANODE
active material on a new
REPLACE IF ANODE IS
anode is approximately 1
3/4" (19 mm) IN LENGTH
1/2 inches long. If the
anode is 3/4" (19 mm) or
less, it must be replaced
with a new P/N S865055
anode. (Figure 7.8)
4. Remove the hoses from
INDM-B007a
the raw water pump one
Figure 7.8 – Sacrificial
at a time and push them
Anode
low into the bilge to
make sure that any
water drains from the hoses or any coolers that are
connected to them. Make sure the hoses go back to
the fittings from which they were disconnected.
5. Coat the threads of the heat exchanger drain plug
and anode with pipe sealant and install.
6. Disconnect the hose that runs between the two
exhaust manifolds. Lower the hose into the bilge
using care not to kink it. Allow both exhaust manifolds
to drain.
NOTICE
Never use pipe thread tape or sealant on sacrificial
anodes as they must maintain electrical contact with
the housing.
7-7
OME0502-11 Body_OM0502-05 Body.qxd 6/3/10 10:45 AM Page 7-8
Drive Train Preparation
1. Change the transmission fluid and clean the filter
screen following the instructions in the Transmission
Owner’s Manual.
2. Remove the attaching hardware from the propeller
shaft coupling. Separate the flanges and coat the
surfaces with Pennzoil Premium Plus Multipurpose
grease.
General Power Package Preparation
1. Clean dirt, grime and grease from painted surfaces of
the engine and drive train.
2. Touch-up painted areas of the engine and transmission.
3. Lubricate throttle and shift linkages and cables with
Pennzoil Premium Plus Multipurpose Grease.
REACTIVATING ENGINE AFTER EXTENDED
STORAGE
Use caution when connecting the battery
cables. Improperly connecting the battery
cables or using the wrong battery type can
damage electrical components. These damages are not covered by your warranty.
7-8
1. Charge and reinstall the battery in the boat. Make
sure terminals are clean and tight.
2. Coat the threads of the manifold drain plugs with
pipe sealant and Install the manifold drain plugs in
the back of the exhaust manifold and/or reconnect
exhaust manifold drain hoses.
3. Coat the threads of the block drains with pipe sealant
and install in the engine block. EFI engines may
have knock sensors located in the drain holes. If
your engine has knock sensors, they must be reinstalled using thread sealant. Do not over tighten the
knock sensor. Torque specification for the knock sensor stud is 14-16 lb. ft. (19 to 21.5 N•m).
4. On Walter V-Drive units, coat the threads on the
drain plugs with pipe sealant and reinstall on the
front and rear of the transmission housing.
5. Reinstall the raw water pump impeller, be sure to use
a new gasket for the housing cover. Re-attach the
inlet and outlet hoses to the raw water pump.
6. Reattach the large diameter hose to the water-circulating pump.
7. Reattach the water hose to the transmission cooler.
8. On fresh water cooled models, reattach the raw
water inlet and outlet hoses.
9. Install a new set of spark plugs in the engine.
10. Inspect accessory drive belts and tighten to the
proper tension if necessary.
11. Check condition of the distributor cap and rotor on
5.7L engines, and replace if worn, damaged or corroded.
Indmar Marine Engines
OME0502-11 Body_OM0502-05 Body.qxd 6/3/10 10:45 AM Page 7-9
12. If the fuel tank was drained, fill tank with fresh fuel
that does not contain alcohol.
13. Check all fluid, oil and coolant levels on engine and
drive train.
14. Check engine compartment and bilge for nesting animals. Clean as necessary. Check for any damage or
evidence of fluid leaks.
15. Remove tape from flame arrestor. Check alignment
between the output flange on the transmission and
the prop shaft flange. If the maximum feeler gauge
that can slip between the flange faces at any point is
0.003" (0.08 mm), the unit is properly aligned. If a
thicker gauge can be inserted at any point, the engine
must be readjusted until proper alignment is obtained.
.00
NOTICE
With the boat in the water or a hose and
adapter installed, cycle the key switch ON,
then OFF, for five second intervals 8-10 times
before cranking the engine to allow the fuel pump to
prime the fuel lines.
16. Review boat manufacturers starting procedure.
17. Start the engine. If you experience a no-start condition, do not crank the engine for more than 15 seconds without allowing a two minute cool-down period. When the engine starts, keep a close watch on
the gauge readings. Check all of the hoses and drain
plugs for leaks. Listen for abnormal noises. Run the
engine long enough to reach normal operating temperature and re-inspect for leaks. If no leaks are
found, the boat is ready for operation.
3"
INDM-A037
Figure 7.9 – Prop Shaft Flange Alignment
Indmar Marine Engines
7-9
OME0502-11 Body_OM0502-05 Body.qxd 6/3/10 10:45 AM Page 7-10
7-10
Indmar Marine Engines
OME0502-11 Body_OM0502-05 Body.qxd 6/3/10 10:45 AM Page 8-1
Chapter 8
TROUBLESHOOTING
Your Indmar engine is manufactured under strict quality
control standards. It is tested along with a full spectrum
gas analysis. It is operating at optimum levels before it is
shipped. Indmar engines have the exclusive Indmar
3-year limited warranty.
Difficulties can occur. Use the following problem
diagnosis charts to help pinpoint problems. In most
cases, you will need the assistance of your Indmar dealer to correct the cause of the problem.
Poor Gas Mileage
1.
2.
3.
4.
Fouled spark plugs
Plugged flame arrestor
Poor driving habits
Closed or partially closed choke (carbureted
engines only)
5. Plugged positive crankcase ventilation system
6. Black smoke at exhaust outlet shows rich gas mixture
7. Excessive boat loads (weight)
8. Damaged or dirty hull
9. High altitude adjustment required
10. Adjustment for temperature extremes required
Indmar Marine Engines
Hard Cold Start
1. Weak or discharged battery
2. Choke held open (carbureted engines only)
3. Loose coil or ignition wires
4. Engine Flooded
5. Fouled spark plugs
6. Lack of fuel at carburetor (carbureted engines only)
7. Battery cables loose or corroded
8. Loose electrical grounds at engine
9. Ignition switch problems
10. Dirt or water in fuel system
11. Engine needs tune-up
Poor High Speed Performance
1. Fouled spark plugs, incorrect spark plug gap or heat
range
2. Closed or partially closed choke (carbureted
engines only)
3. Dirt or water in fuel
4. Lack of fuel in carburetor (carbureted engines only)
5. Restricted exhaust system
6. Plugged flame arrestor
8-1
OME0502-11 Body_OM0502-05 Body.qxd 6/3/10 10:45 AM Page 8-2
7. Insufficient air supply to engine
8. Engine needs tune-up
9. Damaged or incorrect propeller
10. Engine needs to be adjusted for high altitude
operations
11. Engine needs to be adjusted for temperature
extremes
Engine Cranks / Won’t Start
1.
2.
3.
4.
5.
6.
Weak or shorted coil; no spark at plugs
Loose engine grounds
Lack of fuel at carburetor (carbureted engines only)
Weak or discharged battery
Boat Engine Safety switch not attached
Vapor lock
Idle — Misses or Runs Rough
1.
2.
3.
4.
5.
Spark plugs fouled or cracked
Spark plug or distributor wires loose or shorted
Plugged positive crankcase ventilation system
Engine in need of tune-up
Engine needs to be adjusted for high altitude
operations
6. Engine needs to be adjusted for temperature
extremes
7. Carburetor out of adjustment (carbureted engines
only)
8-2
Hard Start Hot
1.
2.
3.
4.
5.
6.
7.
8.
9.
Flooding condition
Loose electrical ground at engine
Closed choke (carbureted engines only)
Plugged flame arrestor
Fouled spark plugs
Loose coil or ignition wires
Battery cables loose or corroded
Weak or discharged battery
Vapor lock
Engine Won’t Crank
1. Weak or discharged battery; loose or corroded
battery cables
2. Defective neutral safety switch or adjustment needed
3. Defective starter motor
4. Ignition switch problems
5. Hydrostatic lockup — remove spark plugs to look for
water or gasoline in cylinders
6. Seized engine — turn crank pulley with socket and
ratchet
Indmar Marine Engines
OME0502-11 Body_OM0502-05 Body.qxd 6/3/10 10:45 AM Page A-1
Appendix – A
MAINTENANCE COMPONENTS AND FLUIDS
Engine Oil
All 5.7, 6.0, 383 – 15W-40 Pennzoil Marine, API Service SL/SJ/CI-4, CH-4, CG-4
All 7.4L, 8.1L, 8.2L – 40W Pennzoil Marine Service SL/SJ/CI-4, CH-4, CG-4
All LSA, LS2, LS3 and LS7 – 5W30 Mobil 1
Engine Oil Filter
All 5.7 and 6.0 Liter – Pennzoil PZ52
8.1 Liter – AC-PF454 w/o Remote Oil
8.1L w/ Remote Oil – Pennzoil PZ52
Engine Coolant (for fresh water cooled systems)
Sierra brand propylene glycol
ZF Hurth Transmission (1:1 Transmission) (Ski-Vee Transmission)
ZF V-Drive and Reduction Gears
Walters V-Drive
Engine Fuel (for storage)
Engine Cables (for corrosion protection)
Starter Bendix
Indmar Marine Engines
Pennzoil Type A Dexron II, III or Dexron/Mercon
15W-40 Pennzoil Marine, API Service SL/SJ/CI-4, CH-4, CG-4
SAE 30 Pennzoil Motor Oil
Marine Formula STA-BIL fuel stabilizer
Pennzoil Marine Z-M Corrosion Protectant and Lubricant
Pennzoil Premium Plus Multipurpose Grease
A-1
OME0502-11 Body_OM0502-05 Body.qxd 6/3/10 10:45 AM Page A-2
Alternator Belt
Thermostat
Spark Plugs
Surface Corrosion Protection
Engine Fogging Oil
A-2
All Indmar 5.7 Liter – Indmar 725018
All Malibu MasterCraft 5.7L and 6.2L – Indmar 725034
LS7/6.0 serpentine – Indmar 725028
8.1 Liter – Indmar 725030
All Raw water cooled – Indmar 985009
All Closed cooled except LS7/6.0L – Indmar 986034
LS7/6.0L – Indmar 986110
All 5.7L and 383 – AC Delco 41-101 Platinum
LY6, L96, LS2 and LS3 – AC Delco 41-110
8.1 Liter – AC Delco 41-983
LS7 – AC Delco 41-104
Pennzoil Marine Z-M Corrosion Protectant and Lubricant
Pennzoil Marine Fogging Oil
Indmar Marine Engines
OME0502-11 Body_OM0502-05 Body.qxd 6/3/10 10:45 AM Page B-1
Appendix – B
ENGINE SPECIFICATIONS
See page ii for engine models
Number of Cylinders
Displacement
Bore/Stroke
Compression Ratio
Compression Pressure
Idle RPM in Neutral
Operating Range at WOT
Oil Pressure at Idle
Oil Pressure at 2000 RPM
5.7L Carbureted 5.7L MPI
LS7
LS2/LS3/LY6/L96
V-8
350 CID (5.7L)
383 CID (6.3L)
427 CID (7.0L) 364 CID (6.0L)
4.0012 x 3.480 in.
4.0012 x 3.8 in
4.125 x 4.00 4.000 x 3.622 in.
(101.63 x 88.39 mm)
(101.63 x 96.52 mm) (104.8 x 101.6) (101.6 x 92 mm)
9.4:1
9.7:1
11.0:1
10.1:1
Minimum 100 PSI (690 kPa)
650 ± 50 RPM
4400-4800 RPM
4600-5200 RPM
5200-5600 RPM
4 PSI (41 kPa) Minimum Hot
18 PSI (124 kPa) Minimum Hot
Oil Filter
Fuel Pump Pressure
Pennzoil PZ52, AC-PF25
8 PSI Max
(55.2 kPa)
Electrical System
Minimum Battery Requirements
Firing Order
Spark Plug Type
Spark Plug Gap
Base Timing at 1000 RPM
Thermostat
Indmar Marine Engines
383
8.1L MPI
496 CID (8.1L)
4.25 x 4.37 in.
(108 x 111 mm)
9.1:1
5000-5400 RPM
5 PSI (34 kPa) Min
10 PSI (69 kPa) Min
AC-PF454 (on engine)
Pennzoil PZ52 (remote)
60 PSI Min at Keyup (414 kPa)
12 Volt DC Negative (-) Ground
650 cca/700 mca/120Ah
1-8-4-3-6-5-7-2
AC 41-101
0.030 in.
(0.76 mm)
10° BTDC
1-8-7-2-6-5-4-3
AC 41-110
AC 41-983
0.040 in. (1.02 mm)
Non Adjustable
160°F (71°C)
B-1
OME0502-11 Body_OM0502-05 Body.qxd 6/3/10 10:45 AM Page B-2
Fluid Capacities
Crankcase (With Filter)
Closed Cooling System
In-Line 1:1 Transmission
In-Line Reduction Gear
ZF Ski Vee Transmission
ZF V-Drive Transmission
Walter V-Drive
B-2
5.7L Carbureted 5.7L MPI
383
LS7
LS2/LS3/LY6/L96
8.1L MPI
5.5 Quarts (5.25 L)
6.0 Quarts (5.7 L)
10 Quarts (9.5 L)
12-14 Quarts (11.4-13.3 L)
14-16 Quarts (13.2-15.1 L)
1.7 Quarts (1.6 L) Dexron 3 ATF
4.2 Quarts (4 L) 15W40
2.12 Quarts (2 L) Pennzoil 15W40
4.2 Quarts (4 L) 15W40
2.12 Quarts (2 L) Main Gearbox, 1.0 Quart (1.06 L) V-drive - Dexron 3
4.2 Quarts (4 L) Pennzoil 15W40
0.5 Quart (0.5 L) Pennzoil SAE 30 Motor Oil
Indmar Marine Engines
OME0502-11 Body_OM0502-05 Body.qxd 6/3/10 10:45 AM Page B-3
454 Carb
Number of Cylinders
Displacement
Bore/Stroke
Compression Ratio
Compression Pressure (Note 1)
Idle RPM in Neutral (Note 2)
Operating Range at WOT
Oil Pressure at Idle
Oil Pressure at 2000 RPM
Oil Filter
Fuel Pump Pressure
Electrical System
Minimum Battery Requirements
Firing Order
Spark Plug Type
Spark Plug Gap
Base Timing at 1000 RPM (Note 3)
Thermostat
Indmar Marine Engines
502 Carb
V-8
454 CID (7.4L)
502 CID (8.2L)
4.25 x 4 in.
4.46 x 4 in.
(107.95 x 101.6 mm)
(113.28 x 101.6 mm)
8.6:1
8.75:1
Minimum 100 PSI (690 kPa)
650 ± 50 RPM
4400-4800 RPM
5 PSI (34 kPa) Minimum
10 PSI (69 kPa) Minimum
AC-PF454/Pennzoil PZ-45
8 PSI Max (55.2 kPa)
12 Volt DC Negative (-) Ground
550 cca/700 mca/120Ah
1-8-4-3-6-5-7-2
MR43T
0.045 in. (1.1 mm)
10˚ Before Top Dead Center
160° F (71° C) - No Thermostat in Jets
B-3
OME0502-11 Body_OM0502-05 Body.qxd 6/3/10 10:45 AM Page B-4
Fluid Capacities
Crankcase (With Filter)(Note 4)
Closed Cooling System (Note 5)
In-Line Transmission (Note 4)
Walters V-Drive Transmission (Note 4)
Hurth V-Drive Transmission (Note 4)
454 Carb
502 Carb
7 Quarts (6.62 L) With Filter (10 Quarts with Jet Pan)
14-16 Quarts (13.25-15.14 L)
2.12 Quarts (2.0 L) Dexron 3 ATF
2 Pints (0.95 L) 30W Motor Oil
4.4 Quarts (4.16 L) 15W40 Motor Oil
Notes:
1) Minimum recorded compression in any one cylinder should not be less than 70% of the highest recorded cylinder.
2) Measured using an accurate shop tachometer at normal operating temperature. Idle RPM on EFI models is not
adjustable.
3) Timing must be set using special procedures indicated in the appropriate service manual. Timing cannot be set
using conventional methods. Special tool(s) required.
4) Always use dipstick to determine exact quantity of oil required. Do not fill above “FULL” mark.
5) Do not over fill. Correct level is at the “Full Cold” mark on the coolant recovery bottle when coolant is cold.
B-4
Indmar Marine Engines
OME0502-11 Body_OM0502-05 Body.qxd 6/3/10 10:45 AM Page C-1
Appendix – C
INDMAR LIMITED PRODUCT WARRANTY
1. Warranty. Indmar Products Co., Inc., 5400 Old Millington Road, Millington, Tennessee 38053 (“Indmar”), warrants that its marine
propulsion engine and the parts related thereto (collectively, “Product”) are free from material defects in material and workmanship
under normal use and service during the applicable warranty period as set forth herein.
2. Coverage. Indmar shall replace or repair any defect in material or workmanship relating to the Product under the terms and conditions of this Limited Product Warranty. Components or parts of the Product that Indmar determines in its sole discretion to be “wornout” from use are specifically excluded from this Limited Product Warranty. If a Product or defective part thereof is, upon examination by Indmar, determined by Indmar to be defective, Indmar shall repair, or at its sole option, provide either a new or rebuilt replacement of equivalent quality. Indmar shall have the sole discretion to determine whether the replacement, if provided, shall be a new
or rebuilt replacement. Indmar’s sole obligation under this Limited Product Warranty is limited only to the foregoing obligations as
stated herein.
3. Customer. This Limited Product Warranty is extended only to the original retail purchaser of a boat or the original lessor, in the
case of a leased boat, in which a Product has been installed pursuant to Indmar’s approval or authority (“Customer”). If the boat is
sold or traded prior to the end of the applicable warranty period set forth herein, the remainder of the applicable warranty period is
transferable to the new owner or new lessor (also referred herein as “Customer”) provided that all of the requirements for a valid transfer as set forth in this Limited Product Warranty are satisfied. No transfer of any rights by any Customer shall be deemed valid or
effective unless and until approved in writing by Indmar. Warranties of any nature to any person other than those described herein
are specifically excluded.
4. Excluded Items. In addition to, and without in any way limiting, any exclusion set forth elsewhere in this Limited Product
Warranty, this Limited Product Warranty shall not apply to the following items:
(a) Shop supplies used in performing work pursuant to this Limited Product Warranty, including, but not limited to, rags, sealants
and lubricants.
Indmar Marine Engines
C-1
OME0502-11 Body_OM0502-05 Body.qxd 6/3/10 10:45 AM Page C-2
(b) Incidental and consequential damages, including, but not limited to, storage charges, telephone or rental charges of any type,
inconvenience or loss of time or income.
(c) Minor adjustments and tune-ups, including, but not limited to, checking, cleaning or adjusting spark plugs, carburetor setting,
filters, belts, controls and checking lubrication.
(d) Water pump impellers, water hoses, cooling system anodes, or any component determined solely by Indmar to be damaged
from the failure of any of such items.
(e) Product failure as determined solely by Indmar to be caused by neglect, lack of maintenance, accident, abnormal operation,
improper installation, improper preparation, improper winterization, improper dealer set-up, improper service or normal wear
and tear.
(f) Haul-out, launch, and towing charges.
(g) Cost and expense incurred that relate to the removal and/or replacement of boat partitions or material due to boat design for
necessary access to the Product.
(h) Transportation charges and travel time incurred by dealer to fulfill any of its obligations pursuant to this Limited Product
Warranty.
(i) Service or work to the Product as requested by the Customer that is as determined solely by Indmar to be beyond the scope
of this Limited Product Warranty.
(j) Use of parts other than Indmar parts (or parts authorized by Indmar) and the use of labor other than Indmar labor (or labor
authorized by Indmar) when making repairs or providing a replacement under this Limited Product Warranty.
(k) Oil, lubricants or fluids used for the normal maintenance of the Product.
(l) Defects to the Product as determined solely by Indmar to be caused by or due to participation in or preparing for racing or
other competitive activity.
(m) Defects to the starter motor, armatures or field coil assembly of the Product as determined solely by Indmar to be caused by
excessive cranking, condensation or submersion.
(n) Defects to the Product as determined solely by Indmar to be caused by water entering the Product via the intake or exhaust
system or submersion.
C-2
Indmar Marine Engines
OME0502-11 Body_OM0502-05 Body.qxd 6/3/10 10:45 AM Page C-3
(o) Defects to the Product as determined solely by Indmar to be caused by the use of fuels and lubricants that are not suitable
for use with or on the Product or its fuel system components that was damaged or rendered inoperable from stale gasoline.
(p) Defects to the Product as determined solely by Indmar to be caused by the lack of cooling water resulting from the motor
being started out of water or foreign materials blocking intake passages.
(q) Defects to the Product as determined solely by Indmar to be caused by servicing errors made by the Customer or by any
servicing dealer/mechanic not approved or authorized by Indmar.
(r) Product warranty claims that Indmar in its sole opinion determines are not due or traceable to material defects in material or
workmanship of the Product.
5. Inspection and Testing of Product. Certain parts of the Product may be tested upon receipt by Indmar. Such parts found to
be free of defects will be returned to the dealer and no credit will be issued. Indmar reserves the right to retrieve run time/run condition data from a Product’s Electric Control Module prior to granting any warranty coverage on the Product under this Limited Product
Warranty.
6. Warranty Period. Warranty coverage shall be provided only for the periods of time hereinafter set forth:
(a) For Product installed in boats manufactured by a manufacturer approved by Indmar (OEM):
(i) A period of thirty-six (36) months commencing from the date of purchase or the date of commencement of the Product
use, whichever sooner occurs, in the case of non-commercial use;
(ii) A period of thirty-six (36) months commencing from the lease date if the lease is for private use and is for a time period
of not less than two (2) years; or
(iii) A period of three (3) months commencing from the date of purchase or lease inception or the date of commencement of
the Product use, whichever sooner occurs, in the case of commercial use.
(b) For repowers (defined as engines purchased for replacement) or the installation of the Product in boats by a manufacturer
not approved or authorized by Indmar:
(i) A period of twelve (12) months commencing from the date of purchase or the date of commencement of the Product use,
whichever sooner occurs, in the case of non-commercial use; or
(ii) A period of three (3) months commencing from the date of purchase or the date of commencement of the Product use,
whichever sooner occurs, in the case of commercial use.
Indmar Marine Engines
C-3
OME0502-11 Body_OM0502-05 Body.qxd 6/3/10 10:45 AM Page C-4
In the event that more than one warranty time period may be applicable to a particular Product pursuant to this Section 6, the shortest period of time shall apply and shall be the only warranty time period allowed for that Product.
The repair or replacement of parts or the performance of service under this Limited Product Warranty does not extend the applicable
period of this warranty beyond its original expiration date as set forth herein.
7. Procedure. Within 10 days from the date of purchase by the original retail purchaser of the Product or the beginning date of
lease period, the Customer shall either (i) complete and mail the Indmar Warranty Registration Card to Indmar; or (ii) register the
Product online by visiting www.indmar.us. In addition to other requirements set forth herein, no warranty claim will be honored without Indmar’s prior receipt of the Indmar Warranty Registration Card or the successful online registration of the Product. In the case
of a leased boat, a copy of the lease contract showing the length of the lease must be delivered to Indmar. In the case of a warranty transfer to a subsequent owner or lessor, the new owner/lessor’s information along with a check for $200.00 made payable to
“Indmar Warranty Transfer” must be sent to Indmar within 10 days of the transfer. No transfer shall be effective or valid unless and
until approved by Indmar in its sole discretion. In the case of a warranty transfer relating to a leased boat, a copy of the lease contract
showing the length of the lease must also be submitted to Indmar along with the $200.00 check. For warranty claims to be asserted
hereunder, the Product or defective part thereof, together with a written notice of itemized defects must be returned to the retailer from
whom the Product was purchased or to any other convenient Indmar authorized dealer. To obtain the location of an authorized Indmar
dealer or service center in your area, write to Indmar requesting such information or visit www.indmar.com. In the event that the
local authorized Indmar dealer is unable to remedy a warranted defect in the Product, the Product or defective part thereof, together
with a written notice of itemized defects, must be delivered to Indmar at 5400 Old Millington Road, Millington, Tennessee 38053 with
any and all freight and insurance charges prepaid. All insurance and freight charges and return charges incurred by Indmar for delivery of the Product (or its new or rebuilt replacement) to the retail purchaser or lessor shall be paid by such purchaser or lessor. The
Customer shall be solely responsible for any and all labor expenses related to the repair or replacement of a Product pursuant to this
Limited Product Warranty that exceed the specified services rates of Indmar in effect at the date of purchase or lease. A schedule of
service rates of Indmar may be obtained from any authorized Indmar dealer.
8. Trade Accessories.
manufactured by Indmar.
Indmar makes no warranty of any character with respect to any and all trade accessories not
9. Voiding the Warranty. In addition to any requirement set forth in this Limited Product Warranty not being met or satisfied, this
Limited Product Warranty shall become void and shall not apply under the following conditions or circumstances:
(a) When the Product or any part thereof is subject to accident, alternation, modifications, abuse, misuse, neglect or improper
maintenance and Indmar in its sole discretion determines the same;
C-4
Indmar Marine Engines
OME0502-11 Body_OM0502-05 Body.qxd 6/3/10 10:45 AM Page C-5
(b) When the Product is serviced by any individual or entity not authorized or approved by Indmar; or
(c) When damage to the Product results from cases not arising from defects in material and/or workmanship and Indmar in its
sole discretion determines the same.
10. Notices. Any notice to Indmar set forth pursuant to this Limited Product Warranty shall be delivered to the following address:
Indmar Products Co., Inc.
5400 Old Millington Road
Millington, Tennessee 38053
THE WARRANTY STATED ABOVE IS A LIMITED WARRANTY AND IT IS THE ONLY WARRANTY MADE BY INDMAR. INDMAR DOES NOT MAKE ANY OTHER WARRANTIES EXPRESS OR IMPLIED. THERE ARE EXPRESSLY EXCLUDED ALL
WARRANTIES OF MERCHANTABILITY AND FITNESS FOR A PARTICULAR PURPOSE. INDMAR SHALL HAVE NO
LIABILITY WITH RESPECT TO ITS OBLIGATIONS UNDER THIS LIMITED WARRANTY OR OTHERWISE FOR CONSEQUENTIAL, EXEMPLARY, INCIDENTAL OR PUNITIVE DAMAGES EVEN IF IT HAS BEEN ADVISED OF THE POSSIBILITY
OF SUCH DAMAGES. THE STATED EXPRESS LIMITED WARRANTY IS IN LIEU OF ALL LIABILITIES OR OBLIGATIONS OF
INDMAR FOR DAMAGES ARISING OUT OF OR IN CONNECTION WITH THE DEVELOPMENT, DELIVERY, USE OR PERFORMANCE OF THE PRODUCT. IN ANY EVENT, THE LIABILITY OF INDMAR FOR ANY REASON AND UPON ANY CAUSE
OF ACTION WHATSOEVER SHALL BE LIMITED TO THE AMOUNT THEN PREVIOUSLY PAID FOR THE PRODUCT BY THE
CUSTOMER.
INDMAR DOES NOT AUTHORIZE ANY PERSON, EMPLOYEE, AGENT, REPRESENTATIVE OR ENTITY TO ALTER ANY
OF THE TERMS AND CONDITIONS OF THIS LIMITED PRODUCT WARRANTY OR CREATE ANY OTHER OBLIGATION
RELATING TO THE PRODUCT. THIS WARRANTY GIVES YOU SPECIFIC LEGAL RIGHTS, AND YOU MAY ALSO HAVE
OTHER RIGHTS WHICH MAY VARY FROM STATE TO STATE.
NOTICE TO CALIFORNIA CUSTOMERS: CALIFORNIA CUSTOMERS MUST DIRECTLY NOTIFY INDMAR IN WRITING IF THE
PRODUCT DOES NOT CONFORM TO APPLICABLE WARRANTIES AND (A) THE NON-CONFORMITY IS LIKELY TO CAUSE
DEATH OR SERIOUS BODILY INJURY AND HAS BEEN SUBJECT TO REPAIR TWO (2) OR MORE TIMES, AND/OR (B)
THE NON-CONFORMITY HAS BEEN SUBJECT TO REPAIR FOUR (4) OR MORE TIMES. CALIFORNIA CUSTOMERS ARE
HEREBY NOTIFIED TO THE FOLLOWING PROVISIONS OF CALIFORNIA LAW: CAL. CIVIL CODE § 1793.22 AND CAL. CIVIL
CODE § 1793.2(d). COMPLETE COPIES OF THESE CODE SECTIONS ARE AVAILABLE UPON REQUEST.
Indmar Marine Engines
C-5
OME0502-11 Body_OM0502-05 Body.qxd 6/3/10 10:45 AM Page C-6
C-6
Indmar Marine Engines
OME0502-11 CoverC_OM0502-05 Cover.qxd 4/20/10 3:34 PM Page 2
Date of Purchase: ______________________ Owner Name: _____________________________________________
Address: __________________________________________________ City: ________________________________
State/Province: ___________________________ Zip/Postal Code:____________ Country: ____________________
Engine Serial Number: _____________________________ Transmission Serial Number: _______________________
PROPOSITION 65
WARNING
The engine exhaust from this product
contains chemicals known to the
State of California to cause cancer, birth
defects or other reproductive harm.
10-20 Hour Service
Date:___________ Hours:____________
By:_______________________________
Every 100 Hour Service
Date:___________ Hours:____________
By:_______________________________
Every 300 Hour/Annual Service
Date:___________ Hours:____________
By:_______________________________
Every 50 (25) Hour Service
Date:___________ Hours:____________
By:_______________________________
Date:___________ Hours:____________
By:_______________________________
Date:___________ Hours:____________
By:_______________________________
Date:___________ Hours:____________
By:_______________________________
Date:___________ Hours:____________
By:_______________________________
Date:___________ Hours:____________
By:_______________________________
Date:___________ Hours:____________
By:_______________________________
Date:___________ Hours:____________
By:_______________________________
Date:___________ Hours:____________
By:_______________________________
Date:___________ Hours:____________
By:_______________________________
Date:___________ Hours:____________
By:_______________________________
Date:___________ Hours:____________
By:_______________________________
Every 2 Year Service
Date:___________ Hours:____________
By:_______________________________
Date:___________ Hours:____________
By:_______________________________
Date:___________ Hours:____________
By:_______________________________
Date:___________ Hours:____________
By:_______________________________
Date:___________ Hours:____________
By:_______________________________
Date:___________ Hours:____________
By:_______________________________
Date:___________ Hours:____________
By:_______________________________
Date:___________ Hours:____________
By:_______________________________
Date:___________ Hours:____________
By:_______________________________
Date:___________ Hours:____________
By:_______________________________
Date:___________ Hours:____________
By:_______________________________
Date:___________ Hours:____________
By:_______________________________
OME0502-11 Cover_OM0502-05 Cover.qxd 6/3/10 2:52 PM Page 1
The first production inboard equipped with catalytic converters.
5400 Old Millington Road Millington, TN 38053
w w w. i n d m a r. c o m
Part No. OME0502-11A
Ken Cook Co.
Operator ’s Manual
Printed in U.S.A.