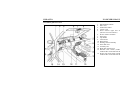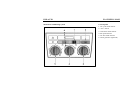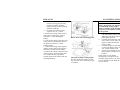
1
BYDAUTO F3 OWNER’S MANUAL Owner’s Manual to BYD F3/F3-R BYD Auto Co., Ltd. 1 BYDAUTO Foreword F3 OWNER’S MANUAL Thanks for choosing BYD F3/F3-R. To help you operate and maintain BYD F3/F3-R, please read this Owner's Manual thoroughly. BYD F3 uses electric injection engine, and the wiring harness is very complex, so please do not install the following additional electric equipment by yourself: burglar alarm, central control lock, power window, audio devices and so on. Any damages or malfunctions caused by the above modifications are not covered by warranty. Throughout this manual, you will see safety and vehicle damage warnings. You must follow these warnings carefully to avoid possible injury or damage. The types of warning, what they look like, and how they are used in this manual are explained as follows: Important Information CAUTION This is a warning against anything which may cause injury to people or damages to your vehicle. NOTICE Be convenient to overhaul, please abide the following. All pictures in this manual are schematic and only for references. BYD reserves the right to modify the technical features and specifications in this manual without notice. Thanks for choosing BYD F3/F3-R. All suggestions are welcome. When you see the safety symbol shown above, it means: “Do not …”; “Do not do this”; or “Do not let this happen”. 2 BYDAUTO F3 OWNER’S MANUAL CONTENTS Section 1 Operation of Instruments and Controls...............................................................................................................10 1. Overview of instrument panel ...................................................................................................................................10 2. Keys and doors............................................................................................................................................................16 3. Seats, seat belts, steering wheel and mirrors............................................................................................................37 4. Light, wipers, defogger, and HUD (Head-up Display) ............................................................................................55 5. Instruments and service reminder indicators ..........................................................................................................66 6. Ignition switch, manual transmission, and parking brake .....................................................................................76 7. Car audio system ........................................................................................................................................................79 8. Air conditioning system .............................................................................................................................................92 9. Other equipment.......................................................................................................................................................106 Section 2 Driving Information for BYD F3........................................................................................................................114 Section 3 Starting and Driving ............................................................................................................................................122 Section 4 In Case of an Emergency.....................................................................................................................................130 Section 5 Corrosion Precaution and Appearance Care ....................................................................................................144 Section 7 Do-It-Yourself Maintenance ...............................................................................................................................159 1. Introduction ..............................................................................................................................................................160 2. Engine and chassis....................................................................................................................................................166 3 BYDAUTO F3 OWNER’S MANUAL 3. Electrical components ..............................................................................................................................................175 Section 8 Specifications ........................................................................................................................................................190 4 BYDAUTO F3 OWNER’S MANUAL Technical Specifications and Vehicle Identification Technical specifications of BYD F3 Type Overall length (mm) Dimensions Overall width (mm) Vehicle height (mm) Wheel base (mm) Front (mm) Wheel track Rear (mm) Curb weight (kg) Total weight (㎏) Tire Approach angle (°) Departure angle (°) Front overhang (mm) Rear overhang (mm) Passengers Max. speed (km/h) Engine QCJ7150A/A1 DA4G15S QCJ7160A QCJ7160A1 4533 1705 1490 2600 1480 1460 1200 1575 195/60 R15 17.7 18.9 933 1000 5 180 DA4G18 QCJ7160A2 5 BYDAUTO F3 OWNER’S MANUAL Type In line four cylinder; 16 valves; water cooling; OHC Displacement (ml) 1.5 1.6 1488/1584 Max. power (kW) 78 73.5 Max. gradeability (%) Constant-speed fuel consumption per 100km (90km/h) ≥35 4.7 Emission standard EURO III / II 4.9 EURO III EURO II EURO III * The actual fuel consumption depends on many factors, like vehicle condition, road condition, and driving habit. Technical specifications of BYD F3-R QCJ7151A/A1 QCJ7361A Type Dimensions Overall length (mm) 4235 Overall width (mm) 1705 Vehicle height (mm) 1490 Wheel base (mm) Wheel track 2600 Front (mm) 1480 Rear (mm) 1460 6 BYDAUTO F3 OWNER’S MANUAL Curb weight (kg) 1170 Total weight (㎏) Tire Approach angle (°) Departure angle (°) Front overhang(mm) Rear overhang (mm) Passengers Max. speed (km/h) engine Type 1545 195/60 R15 17.7 28.8 933 792 5 180 4G15S In line four cylinder; 16 valves; water cooling; OHC Displacement (ml) Max. power (kW) Max. gradeability (%) Constant-speed fuel consumption L/100km (90km/h) 1.5 78 ≥35 4.7 * The actual fuel consumption depends on many factors, like vehicle condition, road condition, and driving habit. 7 BYDAUTO BYD F3 vehicle identification VIN: F3 OWNER’S MANUAL The VINs are set in the engine cabin separately and on the upper left of the panel, as shown in Figure 1. This is the VIN of BYD-F3 for the car owner to register. The Plate-2 shows the VIN as well. 1. 2. 3. Cooling water indicating board A/C system alarm board Cooling fan alarm board The above picture indicates the fuel specification which is set in the inner part of the cap. 8 BYDAUTO The picture above refers to childrenprotection system indication which is downward to the children-protection lock on the inner side of the rear door. F3 OWNER’S MANUAL The picture above shows the tire pressure indication which is set below the lock ring of left front door No. of engine As showed in the picture above, the number of Engine is indicated on the cylinder. 9 BYDAUTO F3 OWNER’S MANUAL Section 1 Operation of Instruments and Controls SECTION 1-1 OPERATION OF INSTRUMENTS AND CONTROLS 1. Overview of instrument panel Instrument panel overview…………………………………………………………………………………………………… Combined instrument overview……………………………………………………………………………………………… Indicator symbols on the combined instrument……………………………………………………………………………… 10 BYDAUTO F3 OWNER’S MANUAL Instrument panel overview 1. 2. 3. 4. 5. 6. 7. 8. 9. 10. 11. 12. 13. 14. 15. 16. Side defroster outlets Side vents Instrument cluster Center vents Front interior light and switch (electric sun roof switches) Power window switches Glove box Cup holder Console box Rear ashtray Parking control assembly Gear shift lever Auxiliary box Hook lock release lever Window lock switch (inside the window lifter of the left front door) Power door lock switch (inside the window lifter of the left front door) 11 BYDAUTO F3 OWNER’S MANUAL With manual air conditioning controls 1. Leftward combination switches (Light) 2. Rightward combination switches (Wiper and washer) 3. Emergency flasher switch 4. Car audio 5. Electronic clock 6. A/C switch 7. Glove box 8. Front ashtray 9. Cigarette lighter assembly 10. Rear window defogger switch 11. Ignition switch unit 12. Tilt steering lock release lever 13. Burglar alarm indicator 14. Power rear view mirror control switches 15. Rear fog lamp switch 16. Vice-driver seat trump switch (When equipped) 17. Backing radar switch (When equipped) 12 BYDAUTO F3 OWNER’S MANUAL With automatic air conditioning controls 1. Leftward combination switches (Light) 2. Rightward combination switches (Wiper and washer) 3. Backing indicator (Backing radar switch) 4. Car audio 5. Electronic clock 6. Emergency flasher switch 7. A/C controls 8. Auxiliary box 9. Front ashtray 10. Cigarette lighter assembly 11. Rear window defogger switch 12. Ignition switch 13. Tilt steering lock release lever 14. Burglar alarm indicator 15. External power rearview mirrors 16. Rear fog light switch 13 BYDAUTO F3 OWNER’S MANUAL Combined Instrument overview 1. Tachometer 2. Speedometer 3. Water temperature indicator 4. Fuel gauge 5. Odometer 14 BYDAUTO F3 OWNER’S MANUAL Indicator symbols on the combined instrument Brake system warning indicator * door opening warning indicator * Driver’s seat belt reminder * SRS warning indicator * Discharge warning indicator * Tail light indicator Low engine oil pressure warning indicator* Headlight high beam indicator Malfunction indicator * Turn signal indicator Low fuel level warning indicator * Front fog light indicator ABS warning indicator * Rear fog light indicator The indicators marked with * are service reminder indicators. For details, please see “Instrument and service reminder indicators” in Section 1-5. 15 BYDAUTO F3 OWNER’S MANUAL SECTION 1-2 OPERATION OF INSTRUMENTS AND CONTROLS 2. Keys and doors Keys…………………………………………………………………………………………………………………………... Side doors…………………………………………………………………………………………………………………….. Wireless remote control………………………………………………………………………………………………………. Power windows……………………………………………………………………………………………………………….. Luggage compartment lid…………………………………………………………………………………………………….. Back door……………………………………………………………………………………………………………………... Engine hood…………………………………………………………………………………………………………………... Anti-theft system……………………………………………………………………………………………………………... Fuel tank cap…………………………………………………………………………………………………………………. Electric sun roof……………………………………………………………………………………………………………… 16 BYDAUTO F3 OWNER’S MANUAL Keys Your vehicle is supplied with two kinds of keys 1. Master keys: these keys work in every lock. (2) 2. Sub key: this key will not work in the luggage compartment. (1) Note: Your F3-R is equipped with 2 remote keys with no spare key. As the key is not needed when locking the door, please take a master key with yourself for spare use when your keys are locked in the car accidentally Side doors Key number plate Your key number is shown on the plate. Keep the plate in a safe place such as your bag, not in the vehicle. If you put the key in the vehicle, lock the all of the doors, and there is not spare key, too, you should smash the smallest window and open the door. In this way, the cost will be very cheap. Pay attention to the cullet, avoiding being injured. Unlocking and locking with key Insert the key into the keyhole and turn it. To unlock: turn the key clockwise. To lock: turn the key anticlockwise. Vehicles with the central door lock system. All doors lock and unlock simultaneously with the driver’s door. 17 BYDAUTO F3 OWNER’S MANUAL The driver’s side door can not be locked when the door is open and the key is in the ignition. The driver’s door can be opened from the inside even if the inside lock knob is in the lock position. Unlocking and locking with inside lock knob Move the lock knob. To unlock: pull the knob backward To lock: push the knob forward If you want to lock the door from the outside, set the knob in the lock position before closing the door. The outside door handle must be held up while front doors are being closed. Do not lock your keys inside the car. To lock: push the rear of the switch All the doors lock or unlock simultaneously. Unlocking and locking the door automatically When the speeds reach to 20km/h, all doors will be locked automatically. When you turn the ignition key from “ON” to “ACC” or “LOCK”, all doors will be opened. You can cancel these functions. For details, see the section “Settings of optional functions”. Unlocking and locking with central door lock switch Push the switch To unlock: push the front of the switch. 18 BYDAUTO F3 OWNER’S MANUAL Rear door child protector Wireless remote control CAUTION Move the lock lever to the “LOCK” position as shown in the figure. When the child-protector is locked, you can not open the rear door via the inside door handle. We recommend using this feature when ever small child are in the vehicle. Before driving, be sure that the doors are closed and locked, especially when small children are in the vehicle. Along with proper use of seat belts, locking the doors helps prevent the driver and passengers from being thrown out from the vehicle in an accident. It also helps prevent the doors from being opened unintentionally. 1. “LOCK” switch 2. Indicator 3. “UNLOCK” switch 4. “PANIC” switch The wireless remote control system is designed to lock or unlock all the side doors and back door in the distance of 1 m or so. To operate any switch, push it slowly and securely. At this time, the 19 BYDAUTO indicator flashes once. Observe the following instructions to avoid damages: ● Do not leave the key in places where the temperature becomes high such as on the dashboard. ● Do not disassemble it. ● Avoid knocking it hard against other objects or dropping it. ● Do not place it into water. One vehicle is equipped with two wireless remote control keys. Contact BYD after-sale service station for more information. If the wireless remote control key does not actuate the doors, or operate from a normal distance, or the indicator on the key is dimmed or does not illuminate, please do the following actions: ● Check for closeness to a radio transmitter such as a radio station or an airport which can interfere with normal operation of the key. ● The battery may have been F3 OWNER’S MANUAL consumed. Check the battery inside the transmitter. Replace the battery. For details, see “Replacing the battery in the remote control”. If you lose your wireless remote control key, contact your BYD AUTO service station as soon as possible “LOCK” switch If the switch is kept being pressed, the operation is not repeated. Release the switch and then push again for another operation. To lock: push the “LOCK” switch, all the side doors and back door are locked simultaneously. At this time, the turn signal lights flash once. If the key is in the ignition switch, locking and unlocking can not performed by the remote control. If the key is not in the ignition switch and no doors are locked, press the “LOCK” button on the remote control, and the forth (fifth for F3-R) door will be locked. At the same time, the horn will buzz one time to make a warning without entering the anti-theft mode. When the forth (fifth for F3-R) door is closed but do not in the state of anti-theft, press the “LOCK” switch to lock the door. Finding the vehicle: when the vehicle enters the state of anti-theft, press the “LOCK” switch and you will hear a buzz and watch the turn signal light flashes 15 seconds. (When you do not ensure the position of your vehicle, you can use this feature to find your vehicle.) Under the state of finding the vehicle, press the “LOCK” switch again to enter this state again. Cancel warning: while the vehicle is under the state of anti-theft, the warning system is activated. Press the “LOCK” switch, and all of the doors will be locked one time. At the same time, the warning will be cancelled. In this way, the vehicle is also under the anti-theft state. 20 BYDAUTO “UNLOCK” SWITCH If the switch is kept being pressed, the operation is not repeated. Release the switch and then push again for another operation. To unlock: press the “UNLOCK” switch, and all doors will be unlocked while the turn signal light will flash twice. If you press this switch when the vehicle is under the state of anti-theft, the vehicle will be unlocked and the turn signal light will flash three times. You can not unlock the vehicle by pressing the “UNLOCK” switch if the key is in the ignition switch. If under the state of anti-theft and the key is in the ignition switch, pressing the “UNLOCK” switch can exit from the state of anti-theft and open all of the doors simultaneously. While using the wireless remote control to open the key, the rear inner light and ignition switch reminder light will be on for 30 seconds, and then off. (This function is optional. F3 OWNER’S MANUAL For details, see “Settings of optional functions”.) You have 30 seconds to open a door after using the wireless remote control unlock feature. If a door is not opened by then, all the doors will be automatically locked again. Quit the anti-theft state: when the car is in the anti-theft state (including that the anti-theft warning is on), press “UNLOCK” switch and all the doors will be open once with the turning light flash for three times. At the same time, the car will quit the anti-theft state. “PANIC” switch Press the “PANIC” switch for 1.5 seconds or longer at any time to start intermittent warning and enable the turn signal light to flash. The warning lasts about 30 seconds. If you want to stop this warning within the 30 seconds, you can press “UNLOCK” once or “PANIC” again (Please do not press this switch during driving). Replacing the battery in the remote control For replacement, use two CR2016 lithium batteries or the equivalent. It is recommended to go to BYD AUTO service station to replace it. CAUTION Special care should be taken to prevent small children from swallowing the removed battery or components. NOTICE Dispose of used batteries according to the local laws. 21 BYDAUTO F3 OWNER’S MANUAL Replace the battery by following procedures: 1. Open the wireless remote with a screwdriver or other tool as equivalent. 2. Remove the module from the key frame. 3. Put in a new battery with the positive side up. Tighten the cover with screws. 22 BYDAUTO NOTICE Make sure the positive side and negative side of the battery are faced correctly. ● Do not replace the batteries with wet hands. Water may cause unexpected rust. ● Do not touch or move any components inside the transmitter, or it may interfere with proper operation. ● Be careful not to bend the electrode when inserting the battery and that dust or oils do not adhere to the case. ● Close the cover securely. After replacing the battery, check whether the key operates properly. If the key still does not operate properly, contact your BYD AUTO service station. ● F3 OWNER’S MANUAL Specification of the remote control Frequency range: 314.9-315.1 MHz Emission power: ≤5500 μV/m Spurious emission threshold: ≤610μ V/m Bandwidth: ≤300 kHz ● ● ● NOTICE Don’t change emission frequency, increase the emission power (including installing frequency amplifier), or install other antenna by yourself. Don’t bring baleful disturbance to legal wireless communications. Upon disturbance, stop using it and contact with BYD AUTO service station to eliminate disturbance. Don’t use it on airplane or around the airport. 23 BYDAUTO F3 OWNER’S MANUAL Power windows Operating the switch The ignition key must be in the “ON” position. Operating the driver’s window Using the switch on the driver’s door can control all of the doors. Normal operation: Press the switch to enable the window to rise or descend. To open: lightly push down the switch. To close: lightly pull up the switch. Automatic operation Push the switch completely down and then release it. The window will fully be opened or closed. To stop the window partway, lightly move the switch in the opposite direction and then release it. 24 BYDAUTO F3 OWNER’S MANUAL F3 F3-R Operating the passengers’ windows Use the switch on each passenger’s door or the switches on the driver’s door that control each passenger’s window. The window moves as long as you press and hold the switch. To open: lightly push down the switch. To close: lightly pull up the switch. If you push down the window lock switch on the driver’s door, the passengers’ windows can not be operated. 25 BYDAUTO F3 OWNER’S MANUAL Luggage compartment lid (F3) ● ● ● CAUTION Power windows do not have the jam protection function, so please pay attention to you operation. Recommend to use the window lock switch when there are children in the vehicle. Make sure that the ignition key is taken out when you leave the vehicle. To open the luggage compartment lid from the outside, insert the master key and turn it clockwise. See “Luggage storage precautions” in Section 2 for precautions when loading luggage. To close the luggage compartment lid, lower it and press it. Then, try to pull upward to make sure it is really closed. CAUTION Keep the luggage compartment lid closed while driving. This not only keeps the luggage from being thrown out but also prevents exhaust gases from entering the vehicle. Luggage component inner control lever (F3) Pull the lever up, and the luggage component lock will be opened. 26 BYDAUTO Cancel the function of luggage component inner control lever (F3) After closing the luggage component, insert the main key and turn it clockwise to cancel the function of the inner control lever. In this situation, you can not open the luggage component with the sub key. F3 OWNER’S MANUAL Back door (F3-R) Open the back door 1. Insert the main key and turn it clockwise, or press the “UNLOCK” button on the wireless remote control (All other doors are opened at the same time). 2. Lift the outer handle to open the door. See “Luggage storage precautions” in Section 2 for precautions when loading luggage To close the back door, lower it and press it. Then, try to pull upward to make sure it is really closed. CAUTION Keep the catch-back door closed while driving. This not only keeps the luggage from being thrown out but also prevents exhaust gases from entering the vehicle. 27 BYDAUTO F3 OWNER’S MANUAL Engine hood To open the engine hood: 1. Pull the hood lock release lever and the hood will spring up slightly. CAUTION Before driving, be sure that the hood is closed and securely locked. Otherwise, the hood may open unexpectedly while driving and an accident may occur. 2. In front of the vehicle, pull up the auxiliary catch lever and lift the hood. 3. hold the hood open by inserting the supporting rod into the slot Before closing the hood, check whether you left any tools or rags inside. Return the supporting rod to its clip. Then, lower the hood and make sure that it locks into place. If necessary, press down gently on the front edge to lock it. CAUTION After inserting the supporting rod into the slot, make sure the rod supports the hood securely, preventing from falling down on to your head or body. 28 BYDAUTO Anti-theft system It is used to prevent the vehicle from stealing. When the vehicle enters the anti-theft state, there will be a warning in the following situations: ● Any side doors are opened. ● The ignition switch is turned to “ON” position. ● Disconnect or re-connect battery or control components of F3 OWNER’S MANUAL anti-theft system. ● The vehicle is knocked. If someone wants to damage or enter the vehicle, the system will enable the turn signal light to flash and send an alarm. Manual setting of the function Use the wireless remote control to manually set the anti-theft system. Press the “UNLOCK” switch to activate the anti-theft state and. Then, the turning light flashes once while all the doors are locked. Press the “LOCK” switch and the manual anti-theft setting will be exited in 1 second. The indicator will flash slowly. In the following situations, the anti-theft state can not be enabled: ● Any one door is opened. The buzzer will buzz for about 1 second. Close the door and try again. 29 BYDAUTO Automatic setting of the function This is an optional function. To use this function, change the function mode first. For details, see “Settings of optional functions”. If you take the key out, close the side doors, and do not operate the wireless remote control in 30 seconds, the vehicle will enter the anti-theft state automatically. At this time, inserting the key into the ignition switch will cause an alarm. When the key is at the “ON” position, the anti-theft state will be quitted automatically. You can also press the “UNLOCK” switch to quit the state. Cancel the state of anti-theft Press the “UNLOCK” switch, and all of the doors will be opened while the vehicle quit the anti-theft mode. The relations between the system state and the actions: ● If the anti-theft system is F3 OWNER’S MANUAL deactivated, the turn signal lights will flash twice. ● If the anti-theft system is activated, the turn signal lights will flash three times, and the anti-theft indicator light will flash quickly. When the ignition key is turned to the “ON” position, the indicator light will be off. After you quit the anti-theft state, the rear interior light and ignition key reminder light will be on for about 30 seconds go off even when the doors are closed. The delay time can be modified. For details, see the “Settings of optional functions”. If you can not quit the anti-theft mode by using wireless remote control, you can use the key to cancel it: within the 15 seconds when the doors are opened, turn the ignition key from “ACC” to “ON” ten times, and the state will be disabled. After the anti-theft state is disabled, all of the doors will be locked again, and the vehicle will enter the anti-theft state again if any one door is not opened. Starting the anti-theft warning When the anti-theft system detects an abnormal condition, the signal light will flash and the warning will be on for 30 seconds. ● Any door is opened. ● The key is in “ignition” position. ● Reconnect the battery or anti-theft module. ● The vehicle is knocked. Dual-testing function This feature is realized through the dual testing below. ● A beep will be sent as an alarm upon a light knock in anti-theft mode. If your vehicle detects a light knock 30 BYDAUTO in 10 seconds in anti-theft mode, it will warn by buzzing with the turning lights flashing for 30 seconds. ● A beep will be sent as an alarm and the turning lights will flash for 30 seconds upon a heavy knock in anti-theft mode. The alarm sensitivity against knocks can be regulated. For details, see the corresponding part in “Steps for changing optional functions”. Restarting the warning The warning will restart on the following conditions after warning stops Any door being open. Key being turned to “Start” position. Your vehicle will alarm by buzzing with the turning lights flashing for 30 seconds and pausing for 15 seconds. This action circulates for three times. The cycle can be changed. Refer to F3 OWNER’S MANUAL “Settings of optional functions” for details. Resetting of anti-theft system If the anti-theft system does not stay in the states said above, the alarm stops after the cycle. Then, the system will be reset automatically when the auto set function is selected. Stopping the warn While warning, press “LOCK” to stop it with the anti-theft system still working. While warning, press “UNLOCK” to stop it with the anti-theft system not working. Settings of optional anti-theft functions Optional anti-theft functions: ● Automatic setting function For details, see the “Automatic setting function”. ● Automatic locking and unlocking For details, see the “Automatic locking and unlocking”. ● On-board illuminating system For details, see the “Rear interior light” and the “Ignition switch reminder light”. ● Starting 6 warning cycles When the vehicle enters the anti-theft state, an alarm will be sent and the turn signal lights will flash 30 seconds. A cycle will be performed every 15 seconds. Three cycles are defaulted. You can choose 6 cycles. If so, 3 and 9 warning cycles are cancelled automatically. If 6 and 9 warning cycles are disabled, 3 warning cycles will be enabled again. ● Starting 9 warning cycles Select this item to enable 9 warning cycles. Then, 3 and 6 warning cycles 31 BYDAUTO are cancelled automatically. If 6 and 9 warning cycles are disabled, 3 warning cycles will be enabled again. ● Delay time of entering the vehicle (15s) After using the wireless remote control to open all doors, the rear interior light and ignition key reminder light will be on for about 15 seconds (original time: 30 seconds). If selected, the default time, 30 seconds, will be disabled. ● Delay time of entering the vehicle (30) After using the wireless remote control to open all doors, the rear interior light and ignition key reminder light will be on for about 30 seconds. To use this function, deselect the 15s option first. If both options are selected, the system will set the time to be 15 seconds automatically. Steps for changing optional F3 OWNER’S MANUAL functions 1. Check whether the anti-theft system is released. 2. Close all of the doors. 3. Insert the key into the ignition switch. 4. Open and close the driver’s door twice within 10 seconds. (close→ open→close→open→close) 5. Turn the key from “ACC” to “ON” three times. (ACC→ON→ ACC→ON→ACC→ON→ACC) Now the anti-theft indicator light illuminates. 6. Press the “LOCK” switch on the wireless remote control according to the following tables, and make sure that the indicator flashes. Make sure the function state by pressing the “LOCK” switch on the wireless remote control. While the function is chosen, the turn signal light will flash once and you can hear the warning sound once. To deselect this function, open any a door and close it. If you find the turn signal light flash twice hear the warning sound twice, it indicates that the function is disabled. If failed, re-open the door and close it again to exit from disabled state to enabled state. Press LOCK once Optional function Automatic setting functions twice Automatic locked and unlocked 3 times On-board light system 4 times Starting 6 cycles warning 5 times Starting 9 cycles warning 6 times The delay time of entering the vehicle:15s 7 times The delay time of entering the vehicle:30s 8 times Knocking sensitive standard The sensitivity can be set in 4 grades: 1st grade, 2nd grade, 3rd grade, and 32 BYDAUTO 4th grade. The 1st grade is most sensitive while the other grades feature a much less sensitivity in turn. While the vibration sensitivity standard is selected, the turn signal light corresponding to the grade will flash and the warning sound corresponding to the grade will be given. Changing sensitivity standards: After entering the vibration sensitivity standard, you can open and then close any door to step to the next grade. 7. Store the settings by doing any of the following: ● Turn the ignition switch to the “ON” position. ● Close the driver’s door for 30 seconds. ● Press the “LOCK” switch on wireless remote control again. For details, please contact your BYD AUTO service station. F3 OWNER’S MANUAL Fuel tank cap 1. To open the fuel filler door, pull the lever up. When refueling, turn off the engine. This indicates that the fuel filler cap is on the left side of your vehicle. CAUTION ● ● While refueling, do not smoke, avoiding the sparks or the flame that could lead to fire. When opening the cap, do not remove the cap quickly. Upon hot weather, fuel under pressure could cause injury by 33 BYDAUTO F3 OWNER’S MANUAL spraying out of the filler neck if the cap is suddenly removed. 34 BYDAUTO F3 OWNER’S MANUAL CAUTION ● ● Make sure the cap is tightened securely to prevent fuel spillage in the event of an accident. Use only a genuine BYD AUTO fuel tank cap for replacement. It is designed to regulate fuel tank pressure. 1. To remove the fuel tank cap, turn the cap slowly anticlockwise, and then pause slightly before removing it. After removing the cap, hang it on the cap hanger. It is normal to hear a slight swoosh when the cap is opened. While installing, turn the cap clockwise till you hear a click. 35 BYDAUTO Electric sun roof (optional) Sliding operation Tilting operation F3 OWNER’S MANUAL To operate the sun roof, use the switches beside the front interior light. The sun roof works when the ignition key is in the “ON” position. The sun shade can be opened or closed by hand. Sliding operation: To open: push the switch on the “SLIDE” side. The sun shade will be opened together with the roof. To close: push the switch on the opposite side of the “SLIDE” side. As a precaution when closing, the roof stops at the half closed position before fully closing. Therefore, release the switch and then push it again to close it completely. Tilting operation: To tilt up: push the switch on the “UP” side. To lower: push the switch on the opposite side of the “UP” side. You may stop the sun roof at any desired position. The roof will move while the switch is being pushed and stop when released. CAUTION ● While the vehicle is moving, always keep the heads, hands and other parts of the bodies of all occupants away from the roof opening. Otherwise, they could be seriously injured if the vehicle stops suddenly or if the vehicle is involved in an accident. ● Before you close the sun roof, always make sure nobody places his or her head, hands, and other parts of the body in the roof opening. Otherwise, someone will be serious injured. ● Do not let any passenger (esp. children) stay in the car when the ignition key is inserted in case he/she will touch sunroof switch and get stuck. Passengers that nobody is taking care, especially children, may be involved in an accident. 36 BYDAUTO F3 OWNER’S MANUAL SECTION 1-3 OPERATION OF INSTRUMENTS AND CONTROLS 3. Seats, seat belts, steering wheel and mirrors Seats…………………………………………………………………………………………………………………………... Front seats…………………………………………………………………………………………………………………….. Folding rear seats …………………………………………………………………………………………………………….. Rear armrest…………………………………………………………………………………………………………………... Seat belts……………………………………………………………………………………………………………………… SRS driver airbag and front passenger airbag………………………………………………………………………………... Steering wheel………………………………………………………………………………………………………………... Power outside rear view mirror………………………………………………………………………………………………. Interior rear view mirror……………………………………………………………………………………………………… 37 BYDAUTO Seats During driving, all occupants should have the seatback upright, sit well back in the seat, and properly wear the seat belts provided. CAUTION ● Do not drive the vehicle unless the occupants are properly seated. It is not allowed to sit on the top of a folded-down seatback, or in the luggage compartment or cargo area. Persons not properly seated and/or properly restrained by seat belts can be severely injured in the event of emergency braking or a collision. ● During driving, passengers are not allowed to stand up or move around between seats. Severe injuries can occur in the event of emergency braking or a collision. F3 OWNER’S MANUAL Front seats Seat adjustment precautions Adjust the driver’s seat so that the foot petals, steering wheel and instrument panel controls are within easy reach of the driver. CAUTION ● Adjustments should not be made while the vehicle is moving, as the seat may unexpectedly move and cause the driver to lose control of the vehicle. ● When adjusting the seat, be careful not to hit the seat against a passenger or luggage. ● After adjusting the seat position, try sliding it forward and backward to make sure if it is locked in position. ● After adjusting the seat position, try moving seat back backward to make sure it is locked in position ● Do not put objects under the seats. The objects may interfere with the seat-lock mechanism or unexpectedly push up the seat position adjusting lever; the seat may suddenly move, causing the driver to loss control of the vehicle. ● While adjusting the seat, do not put your hands under the seat or near the moving parts. Your hands or fingers may be caught and injured. Adjusting front seats 38 BYDAUTO 1. Forward and backward adjusting lever Hold the center of the lever and pull it up. Then slide the seat forward or backward to the desired position with slight body pressure and release the lever. 2. Angle adjusting lever for the seat back Lean forward and pull the lever up. Then lean back to the desired angle and release the lever. CAUTION Avoid reclining the seatback any more than needed to prevent from sliding downward the safety belt upon a collision. The seat belts provide maximum protection in a frontal or rear collision when the driver and the front passenger are sitting up straight and well back in the seats. If you are reclined, the lap belt may slide past your hips F3 OWNER’S MANUAL and apply restraint forces directly to the abdomen or your neck may contact the shoulder belt. In the event of a frontal collision, the more the seat is reclined, the greater the risk of death or personal injury. Folding rear seat (optional) Pull upward the back seat handle to unlock the seat, and fold down it. In this way, the luggage compartment can be widened till the back of the front seats. For precaution when loading luggage, see “Luggage storage precautions” in Section 2. If necessary, each seat back can be folded separately. Folding rear seat (only in F3-R) Pull upward the back seat belts to unlock the seat, and fold down it. In this way, the luggage compartment can be widened till the back of the front seats. For precaution when loading luggage, see “Luggage storage precautions” in section 2. 39 BYDAUTO CAUTION When the back seat is unfolded, to prevent occupants from injuring in the event of an accident or emergency brake, please obey measures as following: ● Pull the back seat forward and backward to make sure it has been firmly locked, and the red mark on the button can not be seen. Otherwise, normal operation of the safety belts may be affected. ● Make sure the safety belt has not been twisted or block in the back seat. Then, put them in the right position for use. F3 OWNER’S MANUAL Integral back seat can not been folded. Integral back seat (only in F3 nonnoblest type G-i, and F3 flagship type GL-i) 40 BYDAUTO Armrest (optional) To use the armrest, pull it out as shown above. F3 OWNER’S MANUAL Seat belts Seat belt precautions: BYD AUTO strongly urges that the driver and passengers in the vehicle be properly restrained at all times with the seat belts provided. Failure to do so could increase the chance of injury and/or the severity of injury in accidents. The seat belts provided for your vehicle are designed for people of adult size, large enough to properly wear them. Children must be sit in the rear seat and use the seat belts. According to accident statistics, the child is safer when properly restrained in the rear seat than in the front seat. If a child must sit in the front seat, the seat belt should be worn properly. If an accident occurs and the seat belts are not worn properly, the force of the rapid inflation of the airbag may cause death or serious injury to the child. Do not allow the child to stand up or kneel on either rear or front seats. An unrestrained child could suffer serious injury or death during emergency braking or a collision. Also, do not let the child sit on your lap. It does not provide sufficient restraint. CAUTION During driving, passengers must sit at seats, and fasten seat belts well. Otherwise, injures or deaths may be easily caused when there is emergency braking and collision. When using the seat belts, observe the following: ● Use the belt for only one person at a time. Do not use a single belt for two or more people, even children. ● Avoid reclining the seatback any 41 BYDAUTO more than needed. The seat belts provide maximum protection in a frontal or rear collision when the driver and the front passenger are sitting up straight and well back in the seats. You can refer to the descriptions about seat adjustment. ● Be careful not to damage the belt webbing or hardware. Take care that they do not get caught or pinched in the seat or doors. ● Inspect the belt system periodically. Check for cuts, fraying, and loose parts. Damaged parts should be replaced. Do not disassemble or modify the system. ● Keep the belts clean and dry. If they need cleaning, use a mild soap solution or lukewarm water. Never use bleach, dye, or abrasive cleaners which may severely weaken the belts. (See “Cleaning the interior” in Section 5.) ● Replace the belt assembly F3 OWNER’S MANUAL (including bolts) if it has been used in a severe impact. The entire assembly should be replaced even if the damage is not obvious. 3-point seat belts CAUTION The safety belts are designed only for adults, not suitable for children. Children must be seated in the rear seat. Adjust the seat as needed and sit up straight and well back in the seat. To fasten your belt, pull it out of the retractor and insert the tab into the buckle. You will hear a click when the tab locks into the buckle. The seat belt length automatically adjusts to your size and the seat 42 BYDAUTO position. The retractor will lock the belt during a sudden stop or on impact. It also may lock if you lean forward too quickly. A slow, easy motion will allow the belt to extend, and you can move around freely. CAUTION ● After inserting the tab, make sure both the tab and the buckle are locked and the belt is not twisted. ● Do not insert coins, clips, etc. in the buckle as this may prevent you from properly latching the tab and buckle. ● If the seat belt does not function normally, immediately contact your BYD AUTO service station. F3 OWNER’S MANUAL Do not use the seat until the seat belt is fixed. It can not protect an adult occupant or your child from injury. If the seat belt can not be pulled out of the retractor, firmly pull the belt and release it. You will then be able to smoothly pull the belt out of the retractor. When a rear shoulder belt is completely extended and is then retracted even slightly, the belt is locked in that position and can not be extended. Release the seat belt again, and it retracts adequately. Then pull it out again. Seat belts with an adjustable shoulder anchor Adjust the shoulder anchor position to your size. To rise: slide the anchor up. To lower: push in the lock release button and slide the anchor down. After adjustment, make sure the anchor is locked in position. 43 BYDAUTO Adjust the position of the loin and shoulder belts. Position the lap belt as low as possible in your hips, not on your wais. Then, adjust it to a snug fit by pulling the shoulder portion upward through the latch plate. F3 OWNER’S MANUAL CAUTION ● Both high-positioned loin belts and loose-fitting belts could cause serious injuries due to sliding under the lap belt during a collision and other unintended result. Keep the lap belt positioned as low on hips as possible. ● For your safety, do not place the shoulder belt under your arm. To release the belt, press the buckle-release button and allow the belt to retract. If the belt does not retract smoothly, pull it out and check for kinks or twists. Then make sure it remains untwisted as it retracts. CAUTION Ensure that the belt goes through the center of shoulder. The belt should be farther enough from your neck and should not fall off from your shoulder. Otherwise, the protection from the belt will be weakened, and injuries during collision may be caused. 44 BYDAUTO F3 OWNER’S MANUAL 2-point seat belts Sit on a seat straightly and well back in the seat. To fasten your belt, insert the tab into the buckle. You will hear a click when the tab locks into the buckle. If the belt is not long enough for you, hold the tab at a right angle to the belt and pull on the tab. Keep as low on hips as possible CAUTION Both high-positioned and loose-fitting lap belts could cause serious injuries due to sliding under the lap belt during a collision or other unintended result. Keep the lap belt positioned as low on hips as possible. Remove excess length of the belt and adjust the belt position. To shorten the belt, pull the free end of the belt. Position the loin belt as low as possible on your hips, not on your loin. Then, adjust it to a snug fit. CAUTION ● After inserting the tab, make sure the tab and buckle are locked and that the belt is not twisted. ● Do not insert coins, clips, etc. in the buckle as this may prevent you from properly latching the tab and buckle. ● If the seat belt does not function normally, immediately contact BYD AUTO service station. Do not use the seat until the seat belt is fixed. It can not protect an adult occupant or your child from injury. 45 BYDAUTO F3 OWNER’S MANUAL Airbag is Supplemental Restraint System (i.e. SRS). It reinforces the seat belts, which are designed to be activated in response to a severe frontal impact. This system provides an extra protection to the occupant’s head and chest to reduce injury and death. To release the belt, press the buckle-release button. Dual SRS airbags (optional) Seat belts cannot be substituted by an airbag for it is part of the automobile protection system. Please pay attention to that the airbag could exert to the most only with the fastened seat belt. For you and your family’s safety, please pay particular attention to the CAUTION in this part. CAUTION ● Use available seat belts while driving! ● Sit at correct pose. In this way, seat belts and SRS airbag will protect all occupants best! ● Child must sit at rear seats! ● Do not disassemble SRS airbag system by yourself! System assembly The SRS airbag mainly contains the parts as below: 46 BYDAUTO 1. 2. SRS warning light Front passenger airbag subassembly (airbag and charging installation) 3. Airbag ECU (electronic control unit) 4. Driver airbag assembly 5. Crash sensor The airbag ECU includes a safety sensor and an airbag sensor. Airbag warning indicator This airbag is monitored by an F3 OWNER’S MANUAL electronic control unit. With a self-diagnosis function, it indicates the system state through the warning light in the instrumental panel. z Every time when the ignition key is turned to the “ON” position, the indicator lights on for about 5 seconds and goes off and continues for 5 seconds above. This means that the system functions well. z If the airbag has been closed by BYD service station, the indicator still work as above but the airbag does not have the protection function. This warning light system monitors the airbag ECU, crash sensor, inflators, warning light, interconnecting wiring, and power sources. For details, see “Maintaining the remainder indicator and warning buzzers” in Section 1-5. NOTICE The following situations indicates that the airbag system works abnormally: ● The indicator does not light on when the ignition key is turned on. ● The indicator does not goes off after 5 seconds the ignition key is turned on or comes on again after it goes off. ● The indicator comes on again when the ignition key is turned off. ● The indicator goes on or flashes when driving. CAUTION If the airbag doesn’t work well, please contact BYD AUTO service station to examine it, or it will affect the normal function of airbag. 47 BYDAUTO Conditions of activating SRS airbag system The SRS airbag system is designed to activate in response to a severe frontal impact or other special impact. The SRS airbag is not designed to inflate if the vehicle is involved in a low-speed frontal collision, side or rear collision, or if it is involved in a rollover. But seat belts will protect occupants. When impact occurs, the SRS ECU will analyze the acceleration to ensure whether it reaches the reference value to activate the airbag. If it doesn’t reach the value, the airbag will not be activated, even though the vehicle is distorted heavily in the accident. The BYD F3 airbag ECU is designed basing on most road conditions and wrong usage of the vehicle. However, please observe this manual to drive your vehicle to ensure your safety F3 OWNER’S MANUAL because man reasons may lead to accidents. The protected process of the airbag While the airbag system is activated, the gas is emitted in the airbag, and the airbag inflates quickly. The driver and passenger are protected by the airbag from being hurt upon the head, neck and the chest when he/she gets into the airbag while the moving inertia is buffered. When the airbag hustles the body, it can absorb the energy, and make the gas exhaust from the bag at some speed ratio. This way can reduce the injury to the person farther. After the accident, the gas in the bag will be exhausted completely. Therefore, it will not block the front visual field. The airbag deploys at some ms, thus carrying out extra protection towards drivers and passengers. While the airbag is deploying, there is a large sound. Generally, it does not cause the injury. Maybe it can cause the tinnitus and cause you to lose hearing temporarily. However, these are the unabiding and you will recover quickly. The gas from the airbag may give some smell and affect your appetite, but it does not cause the driver or passengers toxic. While the airbag is inflating, it may emit some smoke. It is normal. 48 BYDAUTO F3 OWNER’S MANUAL Conditions when the SRS airbag does not deploy The SRS airbag is not designed to inflate if the above conditions occur. For examples, refer to the above illustrations. 49 BYDAUTO F3 OWNER’S MANUAL Conditions when the SRS airbag deploys z z The SRS front airbags may deploy if the above conditions occur. The SRS front airbags may deploy if a serious impact occurs to the underside of your vehicle. For examples, refer to the above illustrations. 50 BYDAUTO NOTICE ● The SRS airbag system is designed only for this module. Changes of suspension system, tires, bumpers, chassis, and other parts will bring harmful impact. In addition, do not replace any part of SRS airbag system to other vehicles. Otherwise, the SRS airbag system will be invalid. ● While driving, please wear the seat belt and sit at correct pose. If you do not tie the seat belt, lean forwards or keep in correct pose, the possibility that you get hurt will be increased in case of accidents that would activate the SRS airbag. ● Please keep 25 cm between driver’s chest and steering wheel. In this way the SRS airbag system will protect driver best. It also means that front seats and head-rest should be adjusted in accord with each passenger’s figure. Besides, the driver should keep elbow bended slightly even close to straight. ● Do not affix anything onto the cover of steering wheel or the surface of front passenger airbag position. Those two places must be cleaned with dry dishcloth. Do not knock those places seriously. F3 OWNER’S MANUAL ● Children are not allowed to sit at the front seat without child restraint. Since the front airbag inflates with considerable speed and force, the child may be seriously injured or killed. ● There shouldn’t be any person, animal or object between the SRS airbag and the driver or the passengers at the front seat. Do not hold a child on your lap or in your arms. It would be extremely dangerous for children. ● Do not put any objects or your pets on or in front of the dashboard or steering wheel pad that houses the front airbag system, or the possibility that you get hurt will be increased in case of accidents that would activate the SRS airbag. ● Do not change any part of SRS airbag system, including marks. ● Any operation to the SRS airbag system or repair relating to this system must be operated by BYD AUTO service station. ● Change the SRS airbag system in 15 years since the manufacture date marked on the auto certificate and maintenance manual. This must be operated by BYD AUTO service station. For replacing some parts of the SRS airbag system, please make a record. ● The SRS airbag system only provides one time protection. After deployed or damaged, it must be replaced for a new one. ● While you transfer your vehicle to other person, give the on-vehicle files to the new owner. If the SRS airbag system is closed, give this file to the new owner, too. ● To dispose the parts of the SRS airbag system, observe the safety order and disposal process. BYD service station is familiar with these regulations and detailed disposal descriptions are available on the maintenance manual. ● The SRS airbag system has excellent anti-magnetic ability. However, to avoid the suddenness, do not drive the vehicle in some area where the magnetic intensity is beyond the state rule. ● The SRS airbag system is fitting for many road conditions and wrong operation to the vehicle. But to avoid the suddenness, please do not make serious crash to the chassis, or do not drive the vehicle gruffly in rough road conditions. 51 BYDAUTO Closing SRS airbag system At some situations, SRS airbag system can be closed. For examples: z Even if the seat is adjusted correctly, but the distance of 25 cm between the driver’s chest and steering wheel can not be kept. z Special equipment at area of steering wheel for handicapped is needed to be installed. z The front passenger seat is adjusted due to some reason. However, the position set upon delivery can not be guaranteed. Please contact your BYD AUTO service station to close the SRS airbag system. When closing an F3 OWNER’S MANUAL airbag, please mark at a right position and record on the service manual. CAUTION In some situations, the SRS airbag system can be closed. To do so, contact your BYD AUTO service station. Otherwise, it may cause serious injury or death. To resume the protection function of the SRS airbag system, please re-start your closed SRS airbag system as soon as possible. Other situations ● Please read this manual carefully. If you want to sell or dispose the vehicle, please tell the new owner or the disposal factory that this vehicle has the SRS airbag system and suggest them to read this manual thoroughly. ● While the airbag is deploying, avoid contacting the airbag module. Otherwise, it may cause the scald or discomfort. Contact your BYD AUTO service station to replace with a new SRS airbag as soon as possible if it has been activated before. ● The SRS airbag system will be activated only upon some situations. Therefore, if the SRS airbag system fails to work, it may not be the problem of the system itself. Abnormal repair or untimely repair towards the damaged parts of the vehicle may affect the SRS airbag system. 52 BYDAUTO F3 OWNER’S MANUAL Steering wheel Contact BYD AUTO service station upon the following conditions: ● The SRS airbags have inflated. ● The front of the vehicle (shaded in the illustration) was involved in an accident that was not severe enough to cause the SRS airbags to inflate. ● The pad section of the steering wheel (shaded in the illustration) is scratched, cracked, or damaged. ● After adjusting the steering wheel, try to move it upward and downward to make sure that it is locked in position. Audio-control switch of Steering wheel (optional) Under the radio mode, press the “ ” key and “ ” key on the main switch of steering wheel to search programs. Press “MUTE” to mute the device. Power outside rear view mirror To change the steering wheel angle, hold the steering wheel, push down the lock release lever, tilt the steering wheel to the desired angle and return the lever to its original position. ● CAUTION Do not adjust the steering wheel while the vehicle is moving. This may cause the driver to mishandle the vehicle and an accident may occur. Adjust the mirror so that you can just see the side of your vehicle in 53 BYDAUTO the mirror. CAUTION Do not adjust the mirror while the vehicle is moving. Doing so may cause the driver to mishandle the vehicle and thus an accident may occur. Power rear view mirror control F3 OWNER’S MANUAL feature.) 1. Choice switch-To select the mirror to be adjusted, push the switch to “L” or “R”. 2. Control switch - To move the mirror, push the switch in the desired direction. Mirrors can be adjusted when the key is in the “ACC” or “ON” position. NOTICE If the mirror is blocked by the ice, do not operate the control or scrape the mirror face. Use a spray deicer to free the mirror. Interior rear view mirror Adjust the mirror so that you can just see the rear of your vehicle in the mirror. Pull the lever toward you (position 2 in the illustration) to reduce glare from the headlight of the vehicle behind you during night driving. Daylight driving at position 1: The reflection in the mirror has greater clarity at this position. Night driving at position 2: Remember that by reducing glare you also lose some rear view clarity. The mirror has a direction display function (Optional): Start condition: The ignition switch is turned to the ACC/ON position. To adjust a mirror, use the switches. (Taxi model and training model are not designed with this 54 BYDAUTO F3 OWNER’S MANUAL SECTION 1-4 OPERATION OF INSTRUMENTS AND CONTROLS 4. Light, wipers, defogger, and HUD (Head-up Display) Headlights and turn signal light………………………………………………………………………………………………. High mounted braking light…………………………………………………………………………………………………... Emergency flashers…………………………………………………………………………………………………………… Front fog lights……………………………………………………………………………………………………………….. Rear fog lights………………………………………………………………………………………………………………… Rear interior light …………………………………………………………………………………………………………….. Ignition switch light…………………………………………………………………………………………………………... Front interior light …………………………………………………………………………………………………………… Front reading lamp……………………………………………………………………………………………………………. Windshield wipers and washer……………………………………………………………………………………………….. Rear window defogger………………………………………………………………………………………………………... Speed HUD (heads up display) ……………………………………………………………………………………………… 55 BYDAUTO Headlights and turn signal light (without automatic light control system) HEADLIGHTS To turn on the following lights, turn the headlight/turn signal light switch Position 1: position lights, license plate lights and instrument panel lights. The indicator light (green lights) for position lights on the instrument panel indicate that the position lights are on. F3 OWNER’S MANUAL Position 2: headlights and all lights said above. Light reminder buzzer A buzzer will remind you to turn the lights off when the driver’s door is opened if you remove the key with the headlight switched on. NOTICE To prevent the battery from being discharged, do not leave the lights on for a long period when the engine is not running. High-low beams: turn the left multi –function switch to the headlight switch. For low beams, push the lever to position 2. Pull the lever to position 3 for high beams. The headlight high beam indicator light (blue light) on the instrument panel will tell you that the high beams are on. Flashing the high beam of headlights (position 1) Pull the lever all the way back. The flashing high beam of headlights will turn off when you release the lever. The headlight high beam indicator light (blue light) on the instrument panel will tell you that the high beams are flashing. You can flash the high beam headlights with the knob turned to “off”. 56 BYDAUTO F3 OWNER’S MANUAL If the turn signal indicator lights (green lights) on the instrument panel flash faster than normal, it means that a front or rear turn signal bulb is burned out. Headlights and turn signal lights (with automatic light control system---optional) Turn signal lights To signal a turn, push the left multi-function switch up or down to position 1. The key must be in the “ON” position. The lever automatically returns after you make a turn. But you may have to return it by hand after you change a lane. To signal a lane change, move the lever up or down to the pressure point (position 2) and hold it. position lights on the instrument panel will tell you that the tail light are on. Position 2: headlights and all lights said above. Position 3 (“AUTO”): headlights and all of the light in position 2. They automatically turn on or off depending on the darkness of the surroundings. When you drive the vehicle into a tunnel, garage or other dark surrounding where needs light immediately, turn the switch to position 2 manually. Headlights To turn on the following lights, turn the light adjusting switch: Position 1: position lights, license plate and instrument panel lights. The indicator light (green light) for 57 BYDAUTO The automatic light control sensor is on the top of the instrument panel at driver’s side. Do not place anything on the instrument panel, and do not affix anything on windshield to block this sensor. When you turn the ignition key from “ON” to the “ACC” or “LCOK”, or pull the key out with headlights switch on, the headlights will go off. If you want to turn on the headlights again, turn the ignition key to “ACC” or “ON”. If your vehicle will be parked for no less than one week, make sure the headlight switch is off. NOTICE To prevent the battery from being discharged, do not leave the lights on for a long period when the engine is not running. F3 OWNER’S MANUAL You can flash the high beam headlights with the knob turned to “off”. Turn signal lights High-low beams: For high beams, push the lever to position 1. For low beams, push the lever to position 2. Pull the lever to position 3 for high beams. The indicator light (blue light) for on the instrument panel the headlight high beam will tell you that the high beams are on. Flashing the high beam of headlights (position 3) Pull the lever all the way back. The flashing high beam of headlights will turn off when you release the lever. To signal a turn, push the left multi-function switch up or down to position 1. The key must be in the “ON” position. The lever automatically returns after you make a turn, but you may have to return it by hand after you change a lane. To signal a lane change, move the lever up or down to the pressure point 58 BYDAUTO (position 2) and hold it. If the turn signal indicator lights (green lights) on the instrument panel flash faster than normal, it means that a front or rear turn signal bulb is burned out. High mounted braking light (optional) While pedaling, this light will be on together with rear brake light to warn that the vehicle is in the braking condition so that contingency can be prevented. Emergency flashers F3 OWNER’S MANUAL To turn on the emergency flashers, press the switch. All the turn signal lights will flash. To turn them off, press the switch once again. Turn on the emergency flashers to warn other drivers if your vehicle must be stopped where it might be a traffic hazard. Always pull as far off the road as possible. The turn signal light switch will not work when the emergency flashers are operating. NOTICE To prevent the battery from being discharged, do not leave the switch on longer than necessary when the engine is not running. Front fog lights (optional) To turn on the front fog lights, turn the left multi-function switch lever. They will illuminate when the position lights are turned on. The indicator light on the instrument panel for the front fog lights will tell you that the front fog light is on. 59 BYDAUTO Rear fog lights To turn on rear fog lights, press this switch. Rear fog lights will be on upon following conditions: While the position lights switch, the front fog lights, as well as the switch of the rear fog lights are turned on, the rear fog lights will be on. While the headlights switch and rear fog lights switch are turned on, the rear fog lights will be on. F3 OWNER’S MANUAL While the rear fog lights switch is turned on, the rear fog lights indicator light on the instrument panel will be on. While the headlights switch or the position lights switch and front fog lights switch is turned off, the rear fog lights will be not on even you re-open the rear fog lights switch, While all of the other lights are off, the rear fog lights will be off automatically. To turn on the rear fog lights, press the rear fog lights switch again. Rear interior light To turn on the interior light, slide the switch. The rear interior light switch has the following positions: “ON”: to keep the light on all the time. “OFF”: to turn the light off. “DOOR”: to turn the light on when any one side door or back door is opened. The light goes off when all the side doors and back door are closed. 60 BYDAUTO Illuminated entry system When the switch is at the “DOOR” position, the light will illuminate upon opening any one door. After all the side doors and back door are closed, the light remains on for about 30 seconds before fading out. However, the light goes out immediately in the following cases. ● All the side doors and back door are closed when the ignition key is in the “ON” position. ● All the side doors and back door are closed and locked by the wireless remote control. When all the side doors and back door are unlocked using the wireless remote control, the light will illuminate and remain on for about 30 seconds before fading out. This function can be activated or deactivated. For details, see “Settings of optional functions” in Section 1-2. F3 OWNER’S MANUAL Ignition switch light For easy access to the ignition switch, the ignition switch light comes on when any of the side doors or the back door is opened. ● While all the side doors and back door are closed, the light will illuminate and remain on for about 30 seconds before fading out. ● When all the side doors and back door are locked using wireless remote control, or after all the side doors and back door are closed, turn the ignition switch to the “ON” position, and the light fades. ● When the all side doors and back doors are opened with wireless remote control, the light will be on and remain on for about 30 seconds even if the doors are not opened. This function can be activated or deactivated. For details, see “Settings of optional functions” in Section 1-2. Front interior light (with electric sun roof) To turn on the front interior light, press the switch. To turn it off, 61 BYDAUTO F3 OWNER’S MANUAL press the switch again. 62 BYDAUTO Front reading lamp (optional for the vehicle model without power sunroof) The operation for front reading lamp is showed above. F3 OWNER’S MANUAL Windshield wipers and washer To turn on the windshield wipers, move the lever to the desired set position. The ignition switch must be at the “ON” position. Lever position Operation Position 1 Intermittent Position 2 Slow Position 3 Fast the lever up and release it. To squirt washer fluid, lift the lever up. After the washer squirts, release the lever. The wiper will operate a couple of times. For instructions on adding washer fluid, see “Adding washer fluid´in section 7-3. In freezing weather, warm the windshield with the defroster before using the washer. This will help prevent the washer fluid from freezing on your windshield, which can block your vision. NOTICE Do not operate the wipers if the windshield is dry. It may scratch the glass, and damage the wiper. To make a wipe only one time, lift 63 BYDAUTO Rear window defogger With manual air conditioning controls F3 OWNER’S MANUAL To defog or defrost the rear window, push the switch. The key must be in the “ON” position. The thin heating wires on the inner side of the rear window will quickly clear the window surface. An indicator light will illuminate to indicate the defogger is operating. Push the switch once again to turn the defogger off. melting snow. ● ● NOTICE With manual air conditioning controls: to prevent the battery from being discharged, turn the switch off when the engine is not running. When cleaning the inside of the rear window, be careful not to scratch or damage the heating wires or connectors. With automatic air conditioning controls, the defogger goes off automatically after 15 min. With automatic air conditioning controls After the rear window is cleaned, make sure the defogger is off. The battery will be discharged if the defogger operate for long time, especially when the car stays in stop-and-go traffic. The defogger is not designed for drying raindrop or 64 BYDAUTO F3 OWNER’S MANUAL Main technical specifications Speed HUD (Head Up Display) (optional for F3) If the speed HUD is started, the vehicle speed will be projected on the windshield. Thus, the driver can read the information of speed while paying attention to the situation of road. In this way, the driving safety can be improved. Starting conditions: z The ignition switch is at “ON” position. z The power switch is pressed down. z The vehicle is moving. Item Parameter Unit Working Voltage DC: +9~+15 V Working Temperature -30~70 °C Storage Temperature -40~80 °C Measuring Range 0~199 km/h Measuring Error +5% Dimension 80*54*46 mm 65 BYD AUTO F3 OWNER’S MANUAL SECTION 1-5 OPERATION OF INSTRUMENTS AND CONTROLS 5. Instruments and service reminder indicators Fuel gauge…………………………………………………………………………………………………………………….. Engine coolant temperature gauge …………………………………………………………………………………………... Tachometer…………………………………………………………………………………………………………………… Odometer and two trip meters………………………………………………………………………………………………... Service reminder indicators and warning buzzers …………………………………………………………………………… 66 BYD AUTO Fuel gauge F3 OWNER’S MANUAL When you are driving on the slope or turning, the fuel in the tank will be caused to swash. Needle of fuel gauge would sway or warning light of fuel quantity would usually be on earlier. When the ignition key is at “ON” position, there is no malfunction even if needle of fuel gauge is at “E”. Engine coolant temperature gauge When the ignition switch is at “ON” position, the gauge indicates the approximate quantity of the fuel remaining in the tank. Nearly full: needle at “F” Nearly empty: needle at “E” It’s necessary to keep 1/4 tank of fuel. The needle moves when braking, accelerating or making turns. This is caused by the fuel moving in the tank. Reminding of filling the fuel: if it becomes yellow when needle at “E”, please fill the fuel. The gauge indicates the engine coolant temperature when the ignition switch stays at “ON” position. Working temperature of the engine varies with weather and load of the engine. If the needle moves into the red zone, your engine is too hot. If you vehicle overheats, park your vehicle and allow the engine to cool. Your vehicle may overheat during severe operating condition, such as: ● Driving up a long hill on a hot day. ● Idling for a long period with the air conditioning on in stop-and-go traffic. ● Daggling other vehicles. When the ignition switch is in “START” position, there is no malfunction even if the engine coolant temperature gauge needle returns to “C”. 67 BYD AUTO F3 OWNER’S MANUAL Tachometer ● ● NOTICE Do not remove the thermostat on the engine cooling system as this may cause the engine to overheat. The thermostat is designed to control the flow of coolant to keep the temperature of the engine within the specified operating range. Do not continue driving with an overheated engine. See “If your vehicle overheats” in section 4. “START” position, there is no malfunction even if the engine coolant temperature gauge needle returns to “0”. NOTICE Do not let the indicator needle get into the red zone. This may cause severe engine damage. The tachometer indicates the engine speed in thousands of rpm (revolutions per minute). Use it while driving to select correct shift points and to prevent engine lugging and over-running. Driving when the engine is running too fast may cause excessive engine loss and poor fuel economy. Remember. In most cases, the slower the engine speed is, the fewer the fuel is consumed. When the ignition switch is in 68 BYD AUTO Odometer and two trip meters F3 OWNER’S MANUAL This meter displays the following information: 1. Odometer — shows the total distance the vehicle has been driven. 2. Two trip meters — shows two different distances independently driven since the last time each trip meter was set to zero. You can use one trip meter (TRIP A) to calculate the fuel consumption and the other (TRIP B) to measure the distance on each trip. 3. Trip meter reset knob — resets the two trip meters to zero, and also change the meter display. To change the meter display, quickly push and release the knob. The meter displays changes in the order from the odometer to trip meter (TRIP A), then to trip meter (TRIP B), then back to the odometer upon every pressing. To reset the trip meter A to zero, display the meter (TRIP A/ TRIP B) reading; then, push and hold the knob until the meter is set to zero. 69 BYD AUTO F3 OWNER’S MANUAL Service reminder indicators and warning buzzers If the indicator lights on or the buzzer beeps… Do this… (a) If you are not using the parking brake, park immediately and contact your BYD AUTO service station (b) Fasten driver’s seat belt (indicator and buzzer) (c) Park and check (d) Park and check (e) Take your vehicle to BYD AUTO service station (f) Fill the fuel on time 70 BYD AUTO F3 OWNER’S MANUAL (g) Take your vehicle to BYD AUTO service station If the brake system warning light is still on, park immediately and contact your BYD AUTO service station (h) Turn off all the side door and back door (i) Take your vehicle to BYD AUTO service station (j) Key reminder buzzer Remove the key (k) Light reminder buzzer Turn off lights 71 BYD AUTO F3 OWNER’S MANUAL problem. (a) Brake system warning light This light comes on in the following cases when the ignition key is at the “ON” position. ● The brake fluid level is low. CAUTION It is dangerous to continue driving normally when the brake fluid level is low. Have your vehicle checked at your BYD AUTO service station in the following cases: ● The light does not illuminate even if the parking brake is applied when the ignition key is in the “ON” position. ● The light does not illuminate even if the ignition key is turned on with the parking brake released. A warning light turning on briefly during operation does not indicate a CAUTION If either of the following conditions occurs, immediately park your vehicle at a safe place and contact your BYD AUTO service station. ● The light does not turn off even when the parking brake is released while the engine is running. In this case, the brakes may not work properly and your stopping distance will become longer. Depress the brake pedal firmly and bring the vehicle to an immediate stop. ● The brake system warning light remains on together with the “ABS” warning light. In this case, not only the ABS will fail but also the vehicle will become extremely unstable during braking. (b) Seat belt reminder light This light reminds the driver to buckle up the seat belt. Once the ignition key is turned to “ON” or “START”, the reminder light flashes if the driver’s seat belt is not fastened. Unless the driver fastens the belt, the light keeps flashing. (c) Discharge warning light This light warns that the battery is being discharged. If it comes on while you are driving, there is a problem somewhere in the charging system. The engine ignition will continue to operate until the battery is discharged, however. Turn off the air conditioning, blower, radio, etc., and drive directly to the nearest BYD AUTO service station. 72 BYD AUTO (d) Low engine oil pressure warning light This light warns that the engine oil pressure is too low. If it flickers or stays on while you are driving, pull over to a safe place and stop the engine immediately. Call a BYD AUTO service station for assistance. The light may occasionally flicker when the engine is idling or it may illuminate briefly after a hard stop. There is no cause for concern if it then goes out when the engine is accelerated slightly. The warning light will be on if the level of oil is low as well. This light isn’t designed to indicate the low oil level. The oil level must be inspected by oil dip rod. F3 OWNER’S MANUAL NOTICE Do not drive the vehicle with the warning light on — even for one block. It may ruin the engine. (e) Malfunction indicator light This light comes on when the electronic injection system of the engine fails to work. If it comes on, contact your BYD AUTO service station as soon as possible. (f) Low fuel level warning light When the fuel is nearly empty, the light will be on. Please fill the fuel at once. When driving on the slope or taking a turning, the light would usually be on earlier because the fuel in tank will swash. (g) “ABS” warning light The light comes on when the ignition switch is turned to the “ON” position. If there is no malfunction about the ABS, the light will be off in few seconds. Then, the light would be on again caused by any malfunction of the system. When the “ABS” warning light is on (and the brake system warning light is off), the anti-lock brake system does not operate, but the brake system still operates conventionally. When the “ABS” warning light is on (and the brake system warning light is off), the wheels could lock up during a sudden brake or brake on slippery road surfaces because the anti-lock brake system does not operate. If either of the following conditions occurs, this indicates that a malfunction somewhere in the components is monitored by the warning light system. Contact your BYD AUTO service station as soon as possible to check the vehicle. 73 BYD AUTO ● The light does not illuminate or become solid on when the ignition key is turned to the “ON” position. ● The light comes on while you are driving. A warning light turning on briefly during operation does not indicate a problem. CAUTION If the “ABS” warning light remains on together with the brake system warning light, immediately park your vehicle at a safe place and contact your BYD AUTO service station. In this case, not only the ABS will fail but also the vehicle will become extremely unstable during braking. (h) Open door warning light This light remains on until all the side F3 OWNER’S MANUAL door and back door are completely closed. (i) SRS warning light This light will illuminate when the ignition key is turned to the “ON” position. After about 5 seconds, the light will go off. This means that the system of the airbag is operating properly. The warning light system monitors the SRS airbag system ECU, front seat belt pretensioner assemblies, inflators, warning light, interconnecting wiring, and power sources. The occurrence of either of the following condition indicates that a malfunction somewhere in the parts is monitored by the warning light system. Contact your BYD AUTO service station as soon as possible to check the vehicle. ● The light does not illuminate or remains on for long time when ● the ignition key is turned to the “ON” position. The light comes on or flashes while driving. (j) Key reminder buzzer This buzzer reminds you to remove the key when you open the driver’s door with the ignition key in the “ACC” or “LOCK” position. (k) Light reminder buzzer This buzzer will sound if the position lights in still on and the driver’s door is opened with the key removed from the ignition switch. 74 BYD AUTO Checking service reminder indicators 1. Apply the parking brake. 2. Open one of the side door or back door. The open door warning light will illuminate. 3. Close the door. The open door warning light will go off. 4. Turn the ignition key to “ON”, but do not start the engine. All the service reminder indicators except the open door warning light should illuminate. The “ABS” warning light goes off in few seconds. The SRS waning light goes off after 6 seconds. If any service reminder indicator or warning buzzer does not function as described above, have it checked by your BYD AUTO service station as soon as possible. F3 OWNER’S MANUAL NOTICE If warning light (such as discharging, brake, oil, water temperature, etc.) is on while driving, park the car as soon as possible and check it according to the instructions in this manual. Contact BYD AUTO service station if necessary. 75 BYD AUTO F3 OWNER’S MANUAL SECTION 1-6 OPERATION OF INSTRUMENTS AND CONTROLS 6. Ignition switch, manual transmission, and parking brake Ignition switch with steering lock…………………………………………………………………………………………….82 Parking brake………………………………………………………………………………………………………………….83 76 BYD AUTO Ignition switch with steering lock “START” — to start the engine The key returns to the “ON” position when released. For starting methods, see Section 3. When the ignition switch is turned to the “START” position, the tachometer, fuel gauge, and engine coolant temperature gauge needles will return to bottom. This does not indicate malfunctions. “ON” — to switch on the engine and all accessories F3 OWNER’S MANUAL This is the normal driving position. When the ignition switch is turned to “ON”, the speedometer needle may have a move, this does not indicates malfunctions. “ACC” — to enable accessories such as the radio to work while stop the engine If you leave the key in the “ACC” or “LOCK”, a buzzer will remind you to remove the key when opening the driver’s door. slightly while turning the key gently. NOTICE Do not leave the key in the “ON” position if the engine is not running. The battery will discharge and the ignition device could be damaged. “LOCK” — to switch off the engine and lock the steering wheel The key can be removed only at this position. You must press in the key to turn it from “ACC” to the “LOCK” position. When starting the engine, the key may seem stuck at the “LOCK” position. To free it, first make sure that the key is pressed all the way in, and then rock the steering wheel 77 BYD AUTO Parking brake When parking, firmly apply the parking brake to avoid inadvertent creeping. F3 OWNER’S MANUAL To set: pull up the lever. For better holding power, first depress the brake pedal and hold it while setting the parking brake. To release: (1) Pull up the lever slightly. (2) Press the lock release button. (3) Loosen the lever. To remind you that the parking brake is set, the parking brake reminder light in the instrument panel remains on until you release the parking brake. CAUTION Before driving, be sure the parking brake is fully released and the parking brake reminder light is off. 78 BYD AUTO F3 OWNER’S MANUAL SECTION 1-7 OPERATION OF INSTRUMENTS AND CONTROLS 7. Car audio system Instruction of on-board CD …………………………………………………………………………………………………... Multi-media player …………………………………………………………………………………………………………. Summarization of on-board GPS……………………………………………………………………………………………... 79 BYD AUTO F3 OWNER’S MANUAL Instruction of on-board CD Function and feature 1. CD supported 2. Built in AM/FM radio 3. Anti-vibration structure 4. MAX. power output: 25 W*4 5. Audio input supported Specifications: Item Working voltage Max. power output Max. working current FM frequency range AM frequency range Parameter DC: 11~16 25 W*4 10 87.5~108.0 522~1620 Unit V W A MHZ KHZ 80 BYD AUTO F3 OWNER’S MANUAL Instruction of the on-board CD function panel 81 BYD AUTO F3 OWNER’S MANUAL Connect one end of the audio line to the external audio device, such as the MP3 output and the other end to the AUX input. Switch on your CD player and press this button, thus you can play the tracks stored in your external audio device via the on-board CD player if the device is turned on. In other play modes, you can press the AUX button to enable the external audio device to play. If no external audio device is available, you will return to the previous play mode. After your CD player is turned on, the external audio device play mode will be accessed directly if it is inserted. “∧” and “∨”: 82 BYD AUTO F3 OWNER’S MANUAL Radio mode: Press the button for 0.5 second to select a channel backward or forward and for 2 seconds above to search the previous or next available channel automatically. CD mode: Press the button to select a track backward or forward. Press and hold it to perform fast forward or fast rewind. To resume normal play, release it. 83 BYD AUTO F3 OWNER’S MANUAL NOTICE CD: CD disk is playing. Radio: The radio is in signal receiving state. 84 BYD AUTO F3 OWNER’S MANUAL Instruction of eliminating on-board CD malfunction Failure Reason 1. 1 No power or sound 2. The ignition switch is not turned on. The wire is not connected properly. Solution 1. 2. 1. 2. The disk is put in reversely. The disk is dirty or scratched seriously. 3 Unstable sound caused by vibration 1. 2. Installation is infirm. The disk is dirty or scratched seriously. 4 Can not store channels and the preset broadcast The battery line is connected improperly. Connect the cable to correct pole. 5 The noise sent by FM stereophony and single channel broadcast give are too loud The broadcasting station is far away or the signal is excessively weak. Choose other broadcasting station with stronger signal. 2 No sound with disk put in 1. 2. Turn the vehicle key to “ACC” or “ON”. Check the wire connection. 1. 2. Put in the disk correctly. Wipe the disk or change a new one Fix the machine with installation parts. Clean up the disk or change a new one. 85 BYD AUTO F3 OWNER’S MANUAL Technique specifications Usage of multi-media player Features 1. 6.5 inches and 16:9 TFT liquid crystal display 2. VCD/CD play supported 3. Built-in AM/FM radio 4. Anti-vibration structure 5. High power output: 25W×4 6. Manual flexible structure allows you to adjust the view angle manually. 7. External GPS navigation system supported Item Working voltage Max. output power Video system FM frequency range AM frequency range Parameter DC: 11~16 Unit 25 W*4 W V NTSC 87.5~108. 0 MH Z 522~1620 KH Z 86 BYD AUTO F3 OWNER’S MANUAL Instruction of the multi-media player function panel 87 BYD AUTO Instruction of multi-media player function panel keys Power-Volume adjusting knob: To adjust the volume/audio mode. To adjust the volume, turn the knob. To switch the audio mode among VOL, BAS, TRE, BAL, and FRD in turn, press the knob. To change a mode, turn the knob leftward or rightward. Switch/manual frequency modulation knob: To switch on the device or search a channel manually. In the radio mode, press it to operate single-step channel-choosing. “SRC” key: To choose play mode or radio mode. To switch the mode, press the key. To resume, press it again. “GPS” key: Press it to switch the current mode to “GPS” display mode. To resume, press the key again. “MUTE” key: Press the key to mute your device. To resume, press it again. F3 OWNER’S MANUAL “AM/FM” key: To choose radio wave band at the sequence of “FM1”, “FM2”, “FM3”, “AM1”, and “AM2”. “RPT” key: Press it to activate the repeated play mode. To quit, press it again. “SCM”key: Preset the equalizer. “BEAT”indicates strong sound effect applying to rock & roll and disco waltz; “SOFT” indicates soft sound effect applying to quiet music; “POP” indicates popular effect, applying to popular music. “MBP” key: To choose a suitable position for listening. Basing on your position, choose the perfect timbre, “self centered”, to locate the sound at three positions: left front, right front, and midpoint. “ ” / “ ”: In radio mode, press the key for 0.5 second to perform single-step channel-choosing. Press it for 2 seconds or above to search the next channel automatically. In CD play mode, press the key to operate single-direction music-choosing. Press it for a while to perform FF or REW. To return to normal state, release the key. “TILT” key: Press it to adjust the vision angle of liquid crystal display. The display can be moved by 10º, 20º, and 30º. “ ” key: Press it to play a CD or pause. Press it once to pause and again to continue playing. “POWER” key: Screen power switch. Press it to power off the display and again to power on. “OPEN” key: Key of LCD sliding screen. Press it to slide the screen without showing images. Press it again to return to normal state. “SHF” key: Press it to play randomly. Press it again to cancel it. 88 BYD AUTO F3 OWNER’S MANUAL Troubleshootings for multimedia player (optional) Failure Reason 1. 1 No power or sound 2. 3. 1. The ignition switch is not turned on. The wire is not connected properly. The fuse breaks. The disk is put in reversely. The disk is dirty or scratched seriously. 1. 2. 3. Solution Turn the vehicle key to “ACC” or “ON”. Check the wire connection. Change a fuse with specified specification. 1. 2. Put in the disk correctly. Wipe the disk or change a new one 1. Fix the machine with installation parts. Clean up the disk or change a new one. 2 No sound with disk put in 3 Unstable sound caused by vibration 1. 2. Can not store channels and the preset broadcast The noise sent by FM stereophony and single channel broadcast give are too loud The battery line is connected improperly. Connect the cable to correct pole. The broadcasting station is far away or the signal is excessively weak. Choose other broadcasting station with stronger signal. 4 5 2. Installation is infirm. The disk is dirty or scratched seriously. 2. 89 BYD AUTO z NOTICE When the screen is sliding, do not put your hand inside the screen. z When the disk is being taken out, do not press “OPEN” key, preventing the disk from being scratched with the screen sliding back. Press it after the disk is out. z When putting in a disk, keep the side with words upward. z Do not press the screen with great force, or the screen would break. Because liquid crystal is deleterious, take care when screen breaks. F3 OWNER’S MANUAL CAUTION If malfunction is detected, please turn off the power at once. If there are smoke or peculiar smell, remember not to keep using it and contact your BYD AUTO service station. Do not repair it by yourself. 90 BYD AUTO Loudhailer The loudhailer 4SP consists of 2 treble loudhailers and 2 woofers. The loudhailer 6SP (optional) consists of 2 treble loudhailers and 4 woofers. Instruction of on-board GPS function (optional) On-board GPS mainly has such functions as listed below: 1. Route: Layout and navigation z GPS location: longitude/latitude, height above sea level, target position display, moving speed, and distance to the destination. z Multiple destinations can be set. The system is able to select the best route for user; z Adopt effective and powerful algorithm to mark the route, solving the complicated route layout problems such as crossroads, one-way street, restrained street, and trestle. F3 OWNER’S MANUAL z Guide users to reach the destination by words or screen. z Navigation statistic information is detailed, including the total mileage per hour, estimated reaching time, time /distance needed to drive or driven. 2. Course Deviation Indicator When users drive the wrong route or sheer from the marked-out route with traffic jam or restraint, the system will reprogram the route so that users can arrive as soon as possible. 3. Integrative information inquiry z Inquire the position by unit name. z Inquire the companies or institutions near to one certain position. 4. Zoom in/zoom out of the map and roaming z Abundant electronic map information, including particular maps of 34 capital-level cities all over the country and national map. The national map lists all towns, traffic artery, and rivers. The particular maps even show constructions and small alleys in range of 50 meters z The touch screen facilitates zooming in/out and roaming operation. z Display the vehicle position at any time. z The map is designed with SD memory card, which eases the renewal of map data. 5. Satellite navigation together with automatic navigation The system can provide satellite navigation of highly precision. When the vehicle drives into an area without satellite data (e.g. tunnel, roads between high buildings), a gyroscope, and a speed sensor can be applied to calculate the current position for automatic navigation. NOTICE Do not use CDs with viscous labels which may scroll. This may cause the CD to get stuck in the player. 91 BYD AUTO F3 OWNER’S MANUAL SECTION 1-8 OPERATION OF INSTRUMENTS AND CONTROLS 8. Air conditioning system Manual air conditioning system……………………………………………………………………………………………... Control panel……………………………………………………………………………………………………………... Air flow selector settings…………………………………………………………………………………………………. Operating tips……………………………………………………………………………………………………………... Automatic air conditioning system………………………………………………………………………………………….. Control panel……………………………………………………………………………………………………………... Air flow selector settings…………………………………………………………………………………………………. Operating tips……………………………………………………………………………………………………………... Side vents……………………………………………………………………………………………………………………. Checking and replacing air condition filter…………………………………………………………………………………….. 92 BYD AUTO F3 OWNER’S MANUAL Manual air conditioning system 6 Control panel 1. Air cycle mode selector 2. “A/C” switch 3. Cool/warm wind selector 4. Fan speed selector 5. Air flow mode selector 6. Anion generator (Optional) 93 BYD AUTO Fan speed selector Turn the knob to adjust the fan speed: To increase, turn the knob clockwise. To decrease, turn the knob anticlockwise. At the same time, there will be leaf-like icons showed on the controls (if an anion generator is equipped) Cool/warm wind selector Turn the knob to adjust the temperature: To select warm wind, turn the knob clockwise. To select cool wind, turn the knob anticlockwise. To turn off the air conditioning, turn the knob to “OFF”. F3 OWNER’S MANUAL used for air flow. 1 PANAL: The air flows mainly from the instrument panel vents and side vents. 2 BI-LEVEL: The air flows from the floor vents, the instrument panel vents and side vents. 3 FLOOR: The air flows mainly from the floor vents. 4 FLOOR/WINDSHIELD: The air flows mainly from the floor vents and windshield vents. Use when the air cycle mode knob stays in FRESH. 5 WINDSHIELD: The air flows mainly from the windshield vents. Use when the air cycle mode knob stays in FRESH. For instructions on settings of air flow knob, see the following part. Air cycle mode selector Move the lever to select the air source. 1. RECIRCULATE: To re-circulate the air inside the vehicle. 2. FRESH: To draw the external air into the system. “A/C” BUTTON To turn the air condition on, first turn the fan speed knob, and then press the “A/C” button. The “A/C” button indicator will illuminate. To turn the air conditioning off, press the button again or set the fan speed knob to “0”. Air flow mode selector Turn the knob to select the vent 94 BYD AUTO F3 OWNER’S MANUAL Air flow knob settings Op era ting tips z T o c o ol of f y o ur B Y D F 3 af te r it h as b e e n p ar z z z z z ked in the hot sun, drive with the windows open for a few minutes. Make sure the air intake grilles in front of the windshield are not blocked (by leaves or snow, for example). On humid days, do not blow cold air on the windshield. The windshield could fog up because of the difference in air temperature on the inside and outside of the windshield. Keep the underside of front seats vacant so that air in vehicle can be cycled completely. On cold days, set the fan speed to high speed for one minute to help clear the intake ducts of snow or moisture. This can reduce the amount of fogging in the windows. When driving on dusty roads, close all windows. If dust thrown up by the vehicle is still drawn into the vehicle after closing the windows, it is recommended that the air intake selector be set to FRESH and the fan speed selector to any position expect “0”. 95 BYD AUTO Heating For best results, set controls to: Fan speed: any value except “0” Temperature: towards WARM (red zone) Air intake: FRESH (outside air) Air flow: FLOOR Air conditioning: OFF z For quick heating, select re-circulated air for a few minutes. To keep the windows from fogging, select FRESH after the interior of the vehicle has been warmed. z Press the “A/C” button on for dehumidified heating. z Choose floor/windshield air flow to heat the vehicle interior while defrosting or defogging the windshield. F3 OWNER’S MANUAL Air conditioning For best results, set controls to: Fan speed: any value except for “0” Temperature: towards COLD (blue zone) Air intake: FRESH (outside air) Air flow: PANEL Air conditioning: ON For quick cooling, turn the air cycle mode selector to re-circulated air for a few minutes. Ventilation For best results, set controls to: Fan speed: any value except for “0” Temperature: towards COLD (blue zone) Air intake: FRESH (outside air) Air flow: PANEL Air conditioning: OFF Defogging The inside of the windshield For best results, set controls to: Fan speed: any value except for “0” Temperature: towards WARM (red zone) Air intake: FRESH (outside air) Air flow: WINDSHIELD Air conditioning: ON z On humid days, do not blow cold air on the windshield, as the difference between the outside and inside temperatures could make the fogging worse. Defrosting The outside of the windshield For best results, set controls to: Fan speed: any value expect “0” Temperature: towards WARM (red zone) Air intake: FRESH (outside air) Air flow: WINDSHIELD Air conditioning: OFF z To heat the vehicle interior while defrosting the windshield, choose FLOOR/WINDSHIELD air flow. 96 BYD AUTO F3 OWNER’S MANUAL Automatic air conditioning system Control panel 1. Fan speed selector 2. “OUTSIDE TEMP” button 3. “TEMP” button 4. “AUTO” button 5. “OFF” button 6. Air intake selector 7. Air flow selector 8. Front defroster button 9. “A/C” button 97 BYD AUTO “AUTO” button For automatic operation of the air conditioner, press the “AUTO” button. An indicator light will illuminate to show that the automatic operation mode has been selected. In the automatic operation mode, the air conditioner selects the most suitable fan speed and air flow according to the temperature. You may use manual controls if you want to select your own settings. To turn off the automatic operation, press “OFF” button, the air flow selector, or fan speed selector. Fan speed selector Push the “∧” (increase) or “∨” (decrease) button to adjust the fan speed. In automatic operation, you do not have to adjust the fan speed unless you want to use another fan speed mode. F3 OWNER’S MANUAL “TEMP” button To increase the temperature, press the “∧” side. To decrease it, press the “∨” side. “MAX. COLD” appears when you adjust to maximum cooling temperature, and “MAX. HOT” appears when you adjust to maximum warming temperature. The anion generator will work while fan working. “OURSIDE TEMP” button Press the “OURSIDE TEMP” button to change the temperature display between the air conditioning temperature and outside temperature. For details, see “Outside temperature display” in section 1-9. “OFF” button Press the button to turn off the air conditioning system. Air flow selector Turn the knob to select the vent used for air flow. In the automatic operation mode, there is not necessary to adjust the air flow unless need other way of air flow. 1 PANAL: The air flows mainly from the instrument panel vents and side vents. 2 BI-LEVEL: The air flows from the floor vents, the instrument panel vents and side vents. 3 FLOOR: The air flows mainly 98 BYD AUTO from the floor vents. 4 FLOOR/WINDSHIELD: The air flows mainly from the floor vents and windshield vents. Use with the air intake selector positioned in FRESH. Front defroster button When this button is pressed, the air flows mainly from the windshield vents with reminder flashing. Press the button once again to exit from the air flow mode to the previous one used and the reminder off. Press the front defroster button while there is the fog, and the A/C will be turned on automatically while the “A/C” button indicator illuminates. The fresh air will come in to clean the windshield. While there is frost, the A/C will start heating function, and the hot air will come in to clean the windshield. F3 OWNER’S MANUAL For details about air flow selector settings, see “Air flow selector settings” described below. Air cycle mode selector “A/C” BUTTON To turn the air condition on, press the “A/C” button. The “A/C” button indicator will illuminate. To turn the air conditioning off, press the button again. If the fan is not turned on and there is air flowing out, the A/C system cannot be started by pressing the “A/C” button. Press the button to select the air source. 1. RECIRCULATE: To re-circulate the air inside the vehicle. 2. FRESH: To draw the external air into the system. 99 BYD AUTO F3 OWNER’S MANUAL Operating tips z To cool off your BYD F3 after it has been parked in the hot sun, drive with the windows open for a few minutes. This vents the hot air, allowing the aid conditioning to cool the interior more quickly. z Make sure the air intake grilles in front of the windshield are not blocked (by leaves or snow, for example). z On humid days, do not blow cold air on the windshield. The windshield could fog up because of the difference in air temperature on the inside and outside of the windshield. z Keep the area under the front seats clear to allow air to circulate throughout the vehicle. z On cold days, set the fan speed to high speed for one minute to help clear the intake ducts of snow or moisture. This can reduce the amount of fogging on the windows. z When driving on dusty roads, close all windows. If dust thrown up by the vehicle is still drawn into the vehicle after closing the windows, it is recommended that the air intake selector be set to FRESH and the fan speed selector to any value. 100 BYD AUTO Heating For best results, set controls to: For automatic operation Press in the “AUTO” button Temperature: to the desired temperature Air intake: FRESH (outside air) Air conditioning: OFF For manual operation Fan speed: to the desired fan speed Temperature: towards high temperature Air intake: FRESH (outside air) Air flow: FLOOR Air conditioning: OFF z For quick heating, select re-circulated air for a few minutes. To keep the windows from fogging, select FRESH after the vehicle interior has been warmed. z Choose FLOOR/WINDSHIELD air flow to heat the vehicle F3 OWNER’S MANUAL interior while defrosting or defogging the windshield. Air conditioning For best results, set controls to: For automatic operation Press in the “AUTO” button Temperature: to the desired temperature Air intake: FRESH (outside air) Ventilation For best results, set controls to: Fan speed: to the desired fan speed Temperature: towards low temperature Air intake: FRESH (outside air) Air flow: PANEL Air conditioning: OFF For manual operation Fan speed: to the desired fan speed Temperature: towards low temperature Air intake: FRESH (outside air) Air flow: PANEL Air conditioning: ON z For quick cooling, move the air intake selector to RECIRCULATE for a few minutes. 101 BYD AUTO Side vents If the air flow control is not satisfactory, check the side vents. The side vents may be opened or closed as shown. F3 OWNER’S MANUAL Checking and replacing air conditioning filter The instruction plate of air conditioning filter is pasted inside the glove box. This indicates the filter has been fixed. The air conditioning filter can block the dust to enter the vehicle though the air intake vent. The air conditioning filter is placed behind the glove box. The air condition will be blocked though a long time. If you feel that the air flow decreases, replace the air conditioning filter. To guarantee the A/C working effect, follow the maintain plan to check and replace the air filter. For details, see Section 6. 102 BYD AUTO 1. Open the right glove box and use a cross-head screwdriver to release the specified screw on the damper. F3 OWNER’S MANUAL 2. Press both sides of the glove box to unfasten the pothook and remove the glove box. 3. Follow the picture to remove the air conditioning filter. 103 BYD AUTO F3 OWNER’S MANUAL CAUTION The air conditioning filter must be installed in its correct position. Using an air conditioning system without a filter will weaken the dust-proof function and the air conditioning capability. 4. Pull the filter core out from the filter box. 5. Check the surface of the filter core. If it is dusty, replace it. While installing the air conditioning filter, keep the arrowhead up. Install the glove box 1. Insert the pin into the damper hole as illustrated above. 104 BYD AUTO 2. Connect the glove box, draw out the damper, and insert the screw into damper. Use the cross-head screwdriver to tighten the screw. F3 OWNER’S MANUAL 3. Press both sides of glove box and close it. 105 BYD AUTO F3 OWNER’S MANUAL SECTION1-9 OPERATION OF INSTRUMENTS AND CONTROLS 9. Other equipment Electronic clock……………………………………………………………………………………………………………...115 Outside temperature display…………………………………………………………………………………………………115 Cigarette lighter and ashtrays………………………………………………………………………………………………..115 Glove box……………………………………………………………………………………………………………………116 Auxiliary boxes……………………………………………………………………………………………………………....117 Console box………………………………………………………………………………………………………………….117 Backing radar system………………………………………………………………………………………………………..118 Rear sun visor………………………………………………………………………………………………………………..121 106 BYD AUTO Electronic clock The ignition switch must be at “ACC” or “ON” position. To reset the hour, press the “H” button. To reset the minutes, press the “M” button. Press the “:00” button to change the time fast. For example, if the present time ranges from 1:01 to 1:29, you can press the “:00” button to change the time to l:00. If present time is between 1:30 and l:59, you can press it to change the time to 2:00. F3 OWNER’S MANUAL If the electrical power source has been disconnected from the clock, the time display will automatically be set to AM 1:00. Outside temperature display (with automatic electric air-conditioning system) TEMP” button once to show the outside temperature. Pushing the “OUTSIDE TEMP” or “TEMP” button will change the display back to the air conditioning temperature. Cigarette lighter and ashtray Cigarette lighter and front ashtray The outside temperature display indicates the outside air temperature on Celsius when you press the “OUTSIDE TEMP” button. The key must be in the “ON” position. Pushing the button once again will turn off the display. When the air conditioning system is enabled, pushing the “OUTSIDE Cigarette lighter and rear ashtray 107 BYD AUTO Cigarette lighter To use the cigarette lighter, press it in. After finishing heating up, it automatically pops out ready for use. If the engine is not running, the key must be in the “ACC” position. Do not keep the cigarette lighter being pressed in. Ashtray To use the ashtray, pull it out. When finishing with your cigarette, thoroughly extinguish it in the ashtray to prevent other cigarette butts from catching fire. After using the ashtray, close the lid completely. Front: to remove the ashtray, press down on the lock spring plate and pull it out. Rear: to remove the ashtray, hold the ashtray on both sides and pull it out. F3 OWNER’S MANUAL Left glove box (Auxiliary box) CAUTION To reduce the chance of injury in case of an accident or sudden stop while driving, always completely close the ashtray after use. Right glove box To open the glove box door, pull the lever. To use the box, pull on the handle. 108 BYD AUTO F3 OWNER’S MANUAL Console box Cup holder To access the console box, pull up the lock release lever while raising the console box lid. The cup holder is designed for holding cups or drink-cans securely. CAUTION To reduce the chance of injury in case of an accident or a sudden stop, always keep the console box closed while driving. 109 BYD AUTO F3 OWNER’S MANUAL Backing radar system (optional) Backing radar system While backing, the backing radar system prompts the driver the distance between vehicle and stumbling block through indicator light and buzzer. The system uses the sensor to detect stumbling blocks. When the ignition key stays at “ON” and the selector lever is in reverse gear, this system is under working. Open: press the switch and the indicator illuminates and the buzzer beeps. Close: press the switch again to turn off the system. This system prompts driver distance between vehicle and stumbling block though indicator light and buzzer. A refers to Indicat buzzer distance or (mm) Flash Intermittently About l,000-750 beeps About Flash Quickly and 750-500 intermittently beeps About 500 ON Continuously or less than beeps 500 110 BYD AUTO Backup radar system (only for F3-R fashionable mode) F3 OWNER’S MANUAL lever is in reverse gear, the system is under working. This system prompts driver distance between vehicle and stumbling block through indicator light and buzzer. Backing radar system While backing, the backing radar prompts driver the distance between vehicle and stumbling block through the indicator light and buzzer. The system uses sensor to detect stumbling blocks. Open: press the switch and the indicator illuminates and the buzzer beeps. Close: press the switch again to turn off the system. A refers to Indicat Buzzer distance (mm) or About Intermitten Flash tly beeps l,000-750 Quickly and About 750-500 Flash intermitten tly beeps About 500 or Continuou On less than 500 sly beeps When the ignition key stays at “ON” position and the selector 111 BYD AUTO Sensing area The sensing area (i.e. the maximal distance from “A”) of the sensor reaches to about 1100mm. Apperceive is limited, so you have to check the surroundings before starting driving and get vehicle started slowly. CAUTION Do not affix something onto sensor. Otherwise, this may cause the system not to work normally and even an accident. F3 OWNER’S MANUAL The system may not work normally at following conditions: ● There is something on the sensor, for example, ice, snow, slurry and so on. ● The vehicle has been parked at higher temperature and lower temperature surrounding for long time. ● The vehicle is driven at muddy, rude, or other special road. ● The vehicle is near the objects which can eradiate ultrasonic, such as vehicle horn, motor of motorcycle and so on. ● Drive the vehicle when it rains heavy or water spatters on vehicle. ● Install the dual-pass wireless antenna or buffer. ● The center of gravity is acclivitous. ● The sensor is shielded by hand. ● The vehicle is too near to objects. ● The sensor is knocked seriously. If the following things come near the sensor, the system may fails to work: ● Metal lead wire, cord, or thin objects ● Cotton, snowflakes or objects with absorbency ● Small objects ● Objects with sharp ends ● High and protuberant objects Please contact your BYD AUTO service station at following situations: ● The bumpers are destroyed or sunken. ● The indicator is solid on but the buzzer does not beep. 112 BYD AUTO F3 OWNER’S MANUAL Rear sun visor (optional) To raise the rear sun visor, pull the hook of the rear sun visor and hang it to the bracket. To descend it, pull the hook and put it down. NOTICE Follow the rules below. Otherwise, damages or losses may be caused. ● Do not put any objects that may block the curtain from moving under the rear sun visor. ● Do not place objects on the visor. 113 BYD AUTO F3 OWNER’S MANUAL Section 2 Driving Information for BYD F3 Running-in period…………………………………………………………………………………………………………… Fuel………………………………………………………………………………………………………………………….. Fuel cut-off system………………………………………………………………………………………………………….. Three-way catalytic converter………………………………………………………………………………………………. Engine exhaust cautions…………………………………………………………………………………………………….. Facts about engine oil consumption………………………………………………………………………………………… Brake system………………………………………………………………………………………………………………… Warning of brake pad ……………………………………………………………………………………………………… Luggage storage precautions………………………………………………………………………………………………... Suspension and chassis……………………………………………………………………………………………………… 114 BYD AUTO Running-in period Drive gently and avoid high speed. Your vehicle does not need an elaborate running in, but you can follow a few simple tips below for the first 2000 km to save fuel and prolong the service life of your vehicle: ● Avoid full throttle acceleration when starting and driving. ● Avoid running the engine in over speed mode. ● Avoid sudden brakes for the first 300km. ● Do not drive for a long time at any single speed, either fast or slow. ● Do not tow a trailer during the first 2000km. F3 OWNER’S MANUAL Fuel Selecting the proper fuel is essential for satisfactory engine performance. It’s also important to pay attention to the emission control and the maintenance of relevant apparatus. Engine damage caused by use of improper fuels is not covered under BYD F3 warranty. Fuel type Only the GB17930-93# unleaded gasoline can be applied. In order to avoid the mistakes made by gas station, there is a smaller opening in the fuel box. The special muzzle of unleaded gasoline pump is well-matched with it, while the bigger standard muzzle is unusable. NOTICE Do not use leaded gasoline on vehicle. This may cause the three-way catalytic converter to lose its effectiveness and the emission control system to function improperly. In addition, this can increase the maintenance cost. NOTICE The vehicle emission system must apply the GB17930-93# or above unleaded gasoline. If your engine has ignition knock If you detect heavy ignition knock even when using the recommended fuel, or if you hear steady ignition knocks while holding a steady speed on level roads, consult your BYD AUTO service station. 115 BYD AUTO However, it is normal to hear brief and slight knock when accelerating and grabbling. Do not worry. F3 OWNER’S MANUAL Three-way catalytic converter Fuel tank capacity: 50 L Fuel cut-off system When the engine stops running in an accident, the engine control system will stop providing engine with fuel in order to minimize the possibility of fuel leak. If the fuel pump stops working, please turn the switch to “ACC” or “LOCK” before restarting. CAUTION Before restarting the engine, check the ground below your vehicle. If fuel leaks to the ground, then the fuel system would be damaged and need repair. In this case, do not restart the engine. The three-way catalytic converter is an emission control device installed in the exhaust system. It aims to reduce pollutants in the exhaust gas. NOTICE ● Keep people and combustible materials away from the exhaust pipe while the engine is running. The exhaust gas is very hot. ● Do not drive, idle, and park the vehicle on easy-burning ground such as lawn, leaves, sheets, and rags, especially in summer. NOTICE A large amount of unburned gases flowing in to the three-way catalytic converter may cause or to overheat and create a fire. To prevent this and other damages, observe the followings precautions: ● Use only the prescribed or above unleaded gasoline. ● Do not drive with an extremely low fuel level. Running out of fuel could cause the engine to misfire, creating an excessive load on the three-way catalytic converter. ● Do not allow the engine to run at high and low idle speed for a long time. ● Avoid running the engine in over speed mode. ● Do not push-start or pull-start your vehicle. ● Do not turn off the ignition switch 116 BYD AUTO ● ● ● while the vehicle is moving. Keep your engine in good running condition. Malfunctions in the engine electrical system, electronic ignition system/distributor ignition system, or fuel system could cause an extremely high three-way catalytic converter temperature. If the engine becomes difficult to start or stalls frequently, take your vehicle in for a check-up as soon as possible. To ensure that the three-way catalytic converter and the entire emission control system operate properly, your vehicle must receive the periodic inspections required by your BYD AUTO service station. For details, see Section 6. F3 OWNER’S MANUAL Engine exhaust cautions CAUTION ● Avoid inhaling the engine exhaust. ● Make sure the exhaust system has no holes or loose connections. The system should be checked from time to time. If you hit something, or notice a change in the sound of the exhaust, have the system checked immediately. ● Do not run the engine in a garage or enclosed area except for the time needed to drive the vehicle in or out. The exhaust gases can not escape, making this a particularly dangerous situation. ● Do not remain for a long time in a parked vehicle with the engine running. If it is unavoidable, however, do so only in an unconfined area and ● ● ● adjust the heating or cooling system to force outside air into the vehicle. Keep the luggage component lid or back door closed while driving. An open or unsealed trunk lid or back door may cause exhaust gases to be drawn into the vehicle. To allow proper operation of your vehicle’s ventilation system, keep the inlet grilles in front of the windshield clear of snow, leaves, or other obstructions. If you smell exhaust fumes in the vehicle, drive with the windows open and the luggage component lid or back door closed. Have the cause immediately located and corrected. 117 BYD AUTO Facts about engine oil consumption Functions of engine oil Engine oil has the primary functions of lubricating and cooling the inside of the engine, and plays a major role in maintaining the engine in proper working order. Engine oil consumption It is normal that an engine should consume some engine oil during normal engine operation. The causes of oil consumption in a normal engine are as follows. ● Oil is used to lubricate pistons, piston rings, and cylinders. A thin film of oil is left on the cylinder wall when a piston moves downwards in the cylinder. High negative pressure generated sucks some of this oil into the combustion chamber when the vehicle is decelerating. This oil as some part of the oil film left on the cylinder wall is burned by the high temperature combustion F3 OWNER’S MANUAL gases during the combustion process. ● Oil is also used to lubricate the stems of the intake valves. Some of this oil is sucked into the combustion chamber together with the intake air and is burned along with the fuel. High temperature exhaust gases also burn the oil used to lubricate the exhaust valve stems. The amount of engine oil consumed depends on the viscosity of the oil, the quality of the oil and the conditions the vehicle is driven under. More oil is consumed by high-speed driving and frequent acceleration and deceleration. A new engine consumes more oil, since its pistons, piston rings and cylinder walls have not become conditioned. Oil consumption: Max. 1.0 L/1,000 km When judging oil consumption, pay attention to that it would be difficult to judge the real oil level because oil rarefies. For example, if vehicle repeatedly drives for a short distance, oil would be consumed. In this case, even if the vehicle drives for 1,000 km or above, oil level displayed on oil dip rod would not decrease since oil has been rarefied by fuel and smoke. If vehicle drives at high speed (e.g. on freeway), rarefied oil would ablate, so oil will be over-consumed after high speed driving. 118 BYD AUTO Importance of engine oil level check One of the most important points in proper vehicle maintenance is to keep the engine oil at the optimum level so that oil function will not be impaired. Therefore, it is essential that the oil level be checked regularly. BYD AUTO recommends that the oil level be checked every time you refuel the vehicle. NOTICE Failure to check the oil level regularly could lead to serious engine trouble due to insufficient oil. For detailed information on oil level check, see “Checking the engine oil level” in Section7-2. F3 OWNER’S MANUAL Brake system The tandem master cylinder brake system has two separate sub-systems. If either sub system should fail, the other will still work. However, the pedal will be harder to press, and your stopping distance will be increasing. CAUTION Do not drive your vehicle with only a single brake system. Have your brakes fixed immediately. Brake booster The brake booster uses engine vacuum to power the brakes. If the engine should quit while you are driving, you can bring the vehicle to a stop with more pedal pressure. CAUTION Do not push the brake pedal if the engine stalls. Each push on the pedal uses up your reserved vacuum. ● Even if the power assist is completely lost, the brakes will still work. But you will have to push the pedal hard, much harder than normal. And your braking distance will increase. Anti-lock brake system (with “ABS” warning light) The anti-lock brake system is designed to help prevent lock-up of the wheels during a sudden brake or brake on slippery road surfaces. This assists in providing directional stability and steering performance of the vehicle under these circumstances. ● 119 BYD AUTO Effective ways to press the ABS brake pedal: when the anti-lock brake system function is working, you may feel the brake pedal pulsating and hear a noise. In this condition, to enable the anti-lock brake system to work, just hold the brake pedal down more firmly. Do not pump the brake in a panic stop. This will result in reduced braking performance. The anti-lock brake system becomes operative after the vehicle has accelerated to a speed in excess of approximately 5 km/h. It stops operating when the vehicle decelerates to a speed below approximately 5km/h. In rainy days, it is easy to activate anti-lock brake system when stepping on brake pedal on slippery surface, such as the cap of well, armor plate or the joint of bridges. You may hear a click or motor sound in the engine compartment for a few seconds when the engine is started or just after the vehicle begins to move. F3 OWNER’S MANUAL This means that the anti-lock brake system is in the self-check mode, and does not indicate a malfunction. When the anti-lock brake system is activated, the following conditions may occur. They do not indicate a malfunction of the system: ● You may hear the anti-lock brake system operating and feel the brake pedal pulsating and the vibrations of the vehicle body and steering wheel. You may also hear the motor sound in the engine compartment even after the vehicle is stopped. ● At the end of the anti-lock brake system activation, the brake pedal may move a little forward. CAUTION Do not overestimate the anti-lock brake system: although the anti-lock brake system assists in providing vehicle control, it is still important to drive with all due care and maintain a moderate speed and safe distance from the vehicle in front of you, because there are limits to the vehicle stability and effectiveness of steering wheel operation even with the anti-lock brake system on. If tire grip performance exceeds its capability, or if hydroplaning occurs during high speed driving in the rain, the anti-lock brake system does not provide vehicle control. Anti-lock brake system is not designed to shorten the stopping distance: Compared with vehicles without an anti-lock brake system, your vehicle may require a longer stopping distance in the following cases: ● Driving on rough, gravel, or snow-covered roads. ● Driving with wheel chains installed. ● Driving over the steps such as the joints on the road. ● Driving on bumpy or uneven 120 BYD AUTO roads. Install all 4 tires of specified size at appropriate pressure: the anti-lock brake system detects vehicle speeds using the speed sensors for respective wheels’ turning speeds. The use of tires rather than specified may fail to detect the accurate turning speed resulting in a longer stopping distance. Disk/drum integrated parking brake Vehicle is equipped with drum parking brake. This type of parking brake needs to change brake shoe or brake drum periodically and have them wear in by your BYD AUTO service station. F3 OWNER’S MANUAL Warning of brake pad There is warning of brake pad. When the brake pad is over-worn, there will be a warning sound. If you hear a scream or friction noise, please contact with BYD AUTO service station to replace the brake friction disc as soon as possible. Do not drive your vehicle for long time when there is a warning sound. Luggage storage precautions When stowing cargo and luggage in the vehicle, observe the following rules: ● Put cargo and luggage in the trunk or luggage compartment when possible. Be sure all items are secured in place. ● Be careful to keep the vehicle balanced. Locating the weight as forward as possible helps maintain balance. ● For better fuel economy, do not carry unneeded weight. Suspension and chassis CAUTION Do not modify the suspension/chassis with lift kits, spacers, springs, etc. This can cause dangerous handling characteristics, resulting in loss of control. 121 BYD AUTO F3 OWNER’S MANUAL Section 3 Starting and Driving Before starting the engine…………………………………………………………………………………………………… Starting the engine…………………………………………………………………………………………………………... Safety check…………………………………………………………………………………………………………………. Tips for driving in various conditions………………………………………………………………………………………. Driving tips in winter………………………………………………………………………………………………………... Daggling other vehicles……………………………………………………………………………………………………... How to save fuel and make your vehicle last longer………………………………………………………………………. 122 BYD AUTO Before starting the engine 1. Check the area around the vehicle before entering it. 2. Adjust the seat position, seat height, seatback angle, head restraint, and steering wheel angle. 3. Adjust the inside and outside rear view mirrors. 4. Lock all doors. 5. Fasten seat belts To use wireless remote control to lock the vehicle, press “UNLOCK” to unlock the vehicle. Otherwise, you can not start the engine. F3 OWNER’S MANUAL Starting the engine (a) before starting 1. Apply the parking brake firmly. 2. Close all lights and other devices which are not needed. 3. Shift the transmission into neutral. 4. Trample death on the clutch pedal till your vehicle starts. 5. Turn off the anti-theft system. (b) Start the engine Before starting the engine, be sure to follow the instructions in “(a) before starting”. Normal starting procedures The multi-point fuel injection system in engine will automatically control a proper mixture of the air and fuel for start. Follow the procedures listed below for warm or cool start of the engine. Start the engine by turning the key to “START”. Release it after the engine starts. Engine gets heating up by running but idling. Run the engine steadily to warm up the vehicle till the temperature of engine coolant rises to normal range. 123 BYD AUTO If the engine starts Follow the correct procedure given in normal start to restart it. If the engine will not start See “If your vehicle will not start” in Section 4. z z z NOTICE Starting operation of engine can not excess 30 seconds, or it will lead to over-heat of engine and circuit system. Do not run the engine in over-speed mode. If engine is hard to be started or stall frequently, check the engine at once. F3 OWNER’S MANUAL Safety check It is a good idea to do a safety check before starting out on a trip. A few minutes of checking can help ensure safe and pleasant driving. Just a basic familiarity with your vehicle is required and a careful eye! Otherwise, if necessary, BYD AUTO service station will do the check at a low cost. CAUTION If you make this check in an enclosed garage, make sure there is adequate ventilation. The engine exhaust is poisonous. Before starting the engine Outside the vehicle Tire: check the pressure with a gauge and look carefully for cuts, damage, or excessive wear. Wheel nuts: make sure no nuts are missing or lost. Fluid leaks: after the vehicle has been parked for a while, check the underneath for leaking fuel, oil water, or fluid. (Water dripping from the air conditioning after use is normal.) Lights: Make sure the headlights, stop lights, tail lights, turn signals and other lights are all working. Check the headlight strength. Inside the vehicle Spare tire, jack, and wheel nut wrench: Check the tire pressure and make sure you have your jack and wheel nut wrench. Seat belts: check that the buckles lock securely. Make sure the belts are not worn or frayed. 124 BYD AUTO Instruments and controls: special attention should be taken to make sure that the service reminder indicators, instrument lights, and defrosters are working. Brake: make sure the pedal has enough clearance and the brake works properly. In the engine compartment Spare fuses: make sure you have spare fuses. They should cover all the amperage ratings designated on the fuse box lid. Coolant level: make sure the coolant level is correct. See Section 7-2 for instructions. Battery and cables: all the battery cells should be filled to the proper level with distilled water. Look for corroded or loose terminals and a cracked case. Check the cables for good condition and connections. Wiring: look for damaged, loose, or F3 OWNER’S MANUAL disconnected wires. Fuel lines: check the lines for leaks or loose connections. CAUTION Do not stack children’s toys inside the vehicle. Although easy for play, this may cause potential safety hazards, especially for emergency brakes or crashes. These toys not only affect the driving safety, but also can become dangerous for children. After starting the engine Exhaust system: listen for any leakage. Have any leaks fixed immediately. See “engine exhaust cautions” in Section 2. Engine oil level: stop the engine and park on a level spot. See section 7-2 for instructions. While driving Instrument: make sure the speedometer and gauges are working. Brake: in a safe place, check that the brakes do not pull the one side when applied. Other unusual phenomena: check whether there is loose part, leaks, or abnormal noise. If there’s no malfunction, you can get released and enjoy your driving. Note whether there is some noise at the beginning. Tips for driving in various conditions ● Always slow down in gusty crosswinds. This allows you to control much better. ● Drive slowly onto curbs and, if possible, at a right angle. Avoid driving onto high, sharp-edged objects and other road hazards. Failure to do so can lead to severe tire damage such as a tire burst. 125 BYD AUTO ● ● ● ● Drive slowly on the rough road. Otherwise, the wheels or the tires may be damaged. Washing your vehicle or driving through deep water may get the brakes wet. To see whether they are wet, check that there is no traffic near you first, and then press the pedal lightly. If you do not feel a normal braking force, the brakes are probably wet. To dry them, drive the vehicle cautiously while lightly pressing the brake pedal with the parking brake applied. If they still do not work safely, pull to the side of the road and call your BYD AUTO service station for assistance. CAUTION Before driving, make sure the parking brake is fully released and the parking brake reminder light is off. After starting the engine, do not go out of the vehicle. F3 OWNER’S MANUAL ● Do not keep your foot on brake pedal. Otherwise, it will cause over-heat, abrasion, and poor fuel economy. ● To drive down a long or step hill, reduce your speed and downshift. Remember, if you ride the brakes excessively, they may overheat and not work properly. ● Be careful when accelerating, up-shifting, downshifting, or braking on a slippery surface. Sudden acceleration or engine braking could cause the vehicle to skid or spin. ● Do not poke your head or arms out of any window during driving. Take special care when children stay inside. Do not continue normal driving when the brakes are wet. If they are wet, your vehicle will require a longer braking distance, and it may pull to one side when the brakes are applied. Also, the parking brake will not hold the vehicle securely. Notice When running on the wet surface, please avoid plashes. If much water enters the engine compartment, the engine or electric components will be damaged. Driving tips in winter Make sure your coolant is properly protected against freezing. Use the coolant which is appointed by BYD AUTO only. NOTICE Do not use too much plain water, since it would be likely to damages the cooling system of engine in winter. 126 BYD AUTO Check the condition of the battery and cables. Cold temperature reduces the capacity of any battery, so it must be in top shape to provide enough power for winter starting. Section7-3 tells you how to visually inspect the battery. Your BYD AUTO service station will be pleased to check the level of charge. Make sure the engine oil viscosity is suitable for the cold weather. See Section 7-2 for recommended viscosity. Leaving much summer oil in your vehicle during winter months may cause harder starting. If you are not sure about which oil to use, call your BYD AUTO service station. We will be pleased to help. Keep door locks from freezing. Squirt the lock deicer or glycerine into the locks to keep them from freezing. F3 OWNER’S MANUAL Use cleaner containing anti-freezing agent. This product is available at your BYD AUTO service station and most parts stores. Follow the manufacturer’s directions to mix the water with agent. NOTICE Do not use engine antifreeze or any other substitutes because it may damage your vehicle’s paint. Do not use your parking brake when there is a possibility it could freeze. When parking, put the transmission into some gear and block the rear wheels. Do not use the parking brake, or snow or water accumulated in and around the parking brake mechanism may freeze, making it hard to release. Keep ice and snow from accumulating under the fenders. Ice and snow built up under your fenders can make steering difficult. During bad winter driving, stop and check under the fenders occasionally. Depending on where you are driving, we recommend you to carry some emergency equipment. Some of the objects you might put in the vehicle are tire chains, window scraper, bag of sand or salt, flares, small shovel, jumper cables, etc. Daggling other vehicles BYD F3 is designed for carrying passengers. Daggling other vehicles will affect its operation, performance, brake, durability and fuel economy. The driving safety and comfort completely depend on correct using and driving habits. Do not overload and daggle for your and others safety. BYD AUTO does not offer guarantee for the damage or malfunction due to daggling with commercial purposes. 127 BYD AUTO Weight limitation Before daggling other vehicles, makes sure the daggling capability. You can contact BYD AUTO service station to confirm whether the daggling capability is within the weight limitation. This capability is measured on horizontal road. Remember that the engine power and daggling capability will decrease when driving on mountain area. CAUTION The weight of vehicle being daggled should not exceed the maximal rated weight. Otherwise, an accident would be caused. Because the braking distance may be increased, you should enlarge the distance between vehicles when daggling at a speed of 10 km/h. The least distance to front one should be the sum of length of the two vehicles. Thus, it would be avoided to lose control upon slippage. F3 OWNER’S MANUAL Tire ● Make sure that the tire has appropriate air pressure. See Section 7-2 for recommendation. ● Please keep vehicle’s tire pressure under the standard which is set by the producer, according to the total weight of the vehicle. Wear-in procedure BYD AUTO company suggest you not to daggle other vehicles in the initial 2,000 km if it is a new one or has new driving system spare parts (engine, transmission, differential, wheel bearing, drive shaft) Maintenance ● If daggling is needed, vehicle has to be maintained much frequently because of the added load. How to save fuel and make your vehicle last longer Improving fuel economy is easy, so just take it easy. It will help make your vehicle last longer, too. Here are some specific tips on how to save money on both fuel and repairs: ● Keep your tires inflated at the correct pressure. Under inflation causes tire wear and wastes fuel. See Section 7-2 for instructions. ● Do not carry unneeded weight in your vehicle. Excess weight puts a heavier load on the engine, causing greater fuel consumption. ● Avoid lengthy warm-up idling. Once the engine is running smoothly, begin driving but gently. Remember, however, that on cold winter days this may take a little longer. ● Accelerate slowly and smoothly. Avoid jackrabbit starts. Get into high gear as quickly as possible. 128 BYD AUTO ● ● ● ● ● ● Avoid long engine idling. If you have a long wait and you are not in traffic, it is better to turn off the engine and start it again later. Avoid engine lugging or over-running. Use a gear position suitable for the road on which you are traveling. Avoid continuous speeding up and slowing down. Stop-and-go driving wastes fuel. Avoid unnecessary stopping and braking. Maintain a steady pace. Try to time the traffic signals so you only need to stop as possible or take advantage of through streets to avoid traffic lights. Keep a proper distance from other vehicles to avoid sudden brakes. This will also reduce wear on you brakes. Avoid heavy traffic or traffic jams whenever possible. Do not rest your foot on the clutch or brake pedal. This F3 OWNER’S MANUAL ● ● ● ● causes premature wear, overheating and poor fuel economy. Maintain a moderate speed on highways. The faster you drive, the greater the fuel consumption. By reducing your speed, you will cut down on fuel consumption. Keep the front wheels in proper alignment. Avoid hitting the curb. Slow down on rough roads. Improper alignment not only causes faster tire wear but also puts an extra load on the engine, which, in turn, wastes fuel. Keep the bottom of your vehicle free from mud, etc. This not only lessens weight but also helps prevent corrosion. Adjust your vehicle and have it work in best operating state. A dirty air cleaner, carburetor out of adjustment, improper valve clearance, dirty plugs, dirty oil, and grease, brakes not adjusted, and other conditions will lower the engine performance and lead to poor fuel economy. For longer life of all parts and lower operating costs, keep all maintenance work on schedule. If you often drive under severe conditions, have your vehicle receive more frequent maintenance. See Section 6. CAUTION Never turn off the engine to coast down hills. Your power steering and brake booster will not function without the engine running. Also, the emission control system operates properly only when the engine is running. 129 BYD AUTO F3 OWNER’S MANUAL Section 4 In Case of an Emergency If your vehicle fails to start…………………………………………………………………………………………………. If your engine stalls while driving…………………………………………………………………………………………... If your vehicle overheats……………………………………………………………………………………………………. If you have a flat tire………………………………………………………………………………………………………… If your vehicle becomes stuck………………………………………………………………………………………………. If your vehicle needs to be towed…………………………………………………………………………………………… 130 BYD AUTO If your vehicle fails to start (a) Simple checks Before making these checks, make sure you have followed the correct starting procedure given in “How to start engine” in Section 3 and that you have sufficient fuel. Please check whether other keys can start engine. If the engine can be started, then the key may be damaged. Contact your BYD AUTO service station to inspect the key. If all the keys can not work, then there are malfunction to keys or ignition switch. Please contact BYD AUTO service station. See “Keys” in Section 1-2 for reference. If the engine is not turning over or is turning over too slowly― 1. Check whether the battery terminals are tight and clean. 2. If the battery terminals are OK, switch on the interior light. If the light goes out, dims, or the F3 OWNER’S MANUAL battery is discharged when the starter is cranked. You may try jump starting. See “(c) Jump starting” for further instructions. If the light is OK, but the engine still will not start, it needs adjustment or repair. Call your BYD AUTO service station. NOTICE Do not pull-start or push-start the vehicle. It may damage the vehicle or cause a collision when the engine starts. The three-way catalytic converter may overheat and become a fire hazard. If the engine turns over at its normal speed but will not start― 1. Turn the ignition key to “ACC” or “LOCK” and try starting the engine again. 2. If the engine will not start, the engine may be flooded because of repeated cranking. See “(b) Starting a flooded engine” for further instructions. 3. If the engine still fails to start, adjustment or repair is needed. Call your BYD AUTO service station. (b) Starting a flooded engine If the engine will not start, your engine may be flooded because of repeated cranking. If this happens, turn the key to “START” with the accelerator pedal fully depressed. Keep the key and accelerator pedal in these positions for 15 seconds and release them. Then try starting the engine with your foot off the accelerator pedal. If the engine does not start after 15 seconds of cranking, release the key, wait a few minutes and try again. If the engine still fails to start, it needs adjustment or repair. Call your BYD AUTO service station for assistance. 131 BYD AUTO NOTICE Do not crank for more than 30 seconds at a time. This may overheat the starter and wiring systems. (c) Jump starting To avoid serious personal injury and damages to your vehicle which might result from battery explosion, acid burns, electrical burns, or damaged electronic components, these instructions must be followed precisely. If you are unsure about how to follow this procedure, we strongly recommend that you seek the help of a competent mechanic or towing service. F3 OWNER’S MANUAL ● ● CAUTION Batteries contain sulfuric acid which is poisonous and corrosive. Wear protective safety glasses when jump starting, and avoid spilling acid on your skin, clothing, or vehicle. If you should accidentally get acid on yourself or in your eyes, remove the contaminated clothing and flush the affected area with water immediately. Then get immediate medical attention. If possible, continue to apply water with a sponge or cloth while on route to the medical office. The gas normally produced by a battery will explode if a flame or spark is brought near. Use only standardized jumper cables and do not smoke or light a match upon jump starting. NOTICE The battery used for boosting must be 12 V. Do not jump start unless you are sure that the booster battery is correct. Jump starting procedure 1. If the booster battery is installed in another vehicle, make sure the vehicles are not touching. Turn off all unnecessary lights and accessories. 2. If necessary, remove all the plugs of the battery for charging and discharged battery, and cover a cloth on the openings of the battery. This can help reduce explosion possibility and injury to people. 3. If the engine in the vehicle with the booster battery is not running, 132 BYD AUTO start it and let it run for a few minutes. During jump starting, run the accelerator pedal by lightly pressing it at the running speed of 2,000 rpm. 4. Connect wires basing on the sequence of a, b, c, and d. a. Connect the clamp of the positive (red) jumper cable to the positive terminal (+) on the discharged battery. b. Connect the clamp at the other end of the positive (red) jumper cable to the positive terminal (+) on the booster battery. c. Connect the clamp of the negative (black) jumper cable to the negative terminal (-) on the booster battery. d. Connect the clamp at the other end of the negative (block) jumper cable to a solid, stationary, unpainted, metallic point of the vehicle with the discharged battery. F3 OWNER’S MANUAL Below shows the connecting point: The joint of jump starting engine Do not connect the cable to or near any part that moves when the engine is cranked. CAUTION For connections, to avoid serious injury, do not lean over the battery or accidentally let the jumper cables or clamps touch anything except the correct battery terminals or the ground. 5. Run the engine in the vehicle with the booster battery at about 2000 rpm with the accelerator pedal lightly pressed. 6. Carefully disconnect the cables in the exact reverse order: the negative cable and then the positive cable. 7. Carefully dispose of the cloths covering the battery: they may now contain sulfuric acid. 8. If removal is needed, put all plugs of battery back to its initial position. If the reason of your battery discharging is not apparent (for example, lights left on), you should have it checked at your BYD AUTO service station. 133 BYD AUTO If your engine stalls while driving 1. Decelerate your vehicle gradually, and keep moving in a straight line. Move cautiously off the road to a safe place. 2. Turn on your emergency flashers. 3. Turn the ignition key to “ACC” or “LOCK”, and try starting the engine again. If the engine fails start, see “If your vehicle fails to start” in this section. CAUTION If the engine is not running, the power assist for the brakes and steering will not work so steering and braking will be much harder than usual. F3 OWNER’S MANUAL If your vehicle overheats If your engine coolant temperature gauge indicates overheating, if you experience a loss of power, or if you hear a loud knocking or pinging noise, the engine has probably over heated. Then, perform the following procedures 1. Pull safely over the road, park your vehicle, and turn on your emergency flashers. Put the transmission on neutral and apply the parking brake. Turn off the air conditioning if it is being used. 2. If coolant or steam is boiling out of the radiator or reservoir, stop the engine. Wait until the steam subsides and open the engine hood. If there is no coolant or steam boiling over, leave the engine running and make sure the electric cooling fan is operating. If it is not, turn the ignition switch off. CAUTION To help avoid personal injury, keep the hood closed until there is no steam. Escaping steam or coolant is a sign of very high pressure. 3. Look for obvious coolant leaks from the radiator, hoses and under the vehicle. However, water draining from the air conditioning is normal if it has been used. CAUTION When the engine is running, keep hands and clothing away from the moving fan and engine drive belts. 4. If the engine drive belt is broken or the coolant is leaking, stop the engine immediately. Call a BYD AUTO service station for assistance. 134 BYD AUTO 5. If there are no obvious leaks, check the coolant reservoir. If it is dry, add coolant to the reservoir while the engine is running. Fill it between the two lines. CAUTION Do not attempt to remove the radiator cap when the engine and radiator are hot. Serious injury could be resulted from hot fluid and steam blown out under pressure. 6. After the engine coolant temperature has cooled to normal, check the coolant level in the reservoir again. If necessary, bring it up to half full again. Serious coolant loss indicates a leak in the system. You should have it checked as soon as possible at your BYD AUTO service station. F3 OWNER’S MANUAL If you have a flat tire 1. Decelerate your vehicle gradually and keep moving in a straight line. Move cautiously off the road to a safe place well away from the traffic. Avoid stopping on the center divider of a highway. Park in a level spot with firm ground. 2. Stop the engine and turn on your emergency flashers. 3. Firmly set the parking brake and put the transmission in neutral. 4. Have everyone get out of the vehicle on the side away from traffic. 5. Read the following instructions thoroughly. CAUTION Upon jacking, be sure to observe the following to reduce the possibility of personal injury: ● Follow jacking instructions. ● Do not put any part of your ● ● ● ● body under the vehicle supported by the jack. Otherwise, personal injury may occur. Do not start or run the engine while your vehicle is supported by the jack. Stop the vehicle on a level firm ground, firmly set the parking brake, and put the transmission in neutral. Block the wheel diagonally opposite to the one being changed if necessary. Make sure to set the jack properly in the jack point. Raising the vehicle with a jack improperly positioned will damage the vehicle or may allow the vehicle to fall off the jack and cause personal injury. Never get under the vehicle when the vehicle is supported by the jack alone. 135 BYD AUTO ● ● ● ● Use the jack only for lifting your vehicle during wheel changing. Do not raise the vehicle with someone in the vehicle. When raising the vehicle, do not place any objects on top of or underneath the jack. Raise the vehicle only high enough to remove and change the tire. NOTICE Do not continue driving with a deflated tire. Driving even a short distance can damage a tire and wheel beyond repair. F3 OWNER’S MANUAL Required tools and spare tire Get the required tools and spare tire. 1. Tool bag 2. Jack 3. Spare tire To prepare yourself for an emergency, you should familiarize yourself with the use of the jack, each of the tools and their storage locations. Turn the jack joint by hand To remove: turn the joint in direction 1 until the jack is free. To store: turn the joint in direction 2 until the jack is firmly secured to prevent it flying forward during a collision or suddenly braking. 136 BYD AUTO To remove the spare tire: loosen the bolt and remove it. When storing the spare tire, put it in place with the outer side of the wheel facing up. Then, secure the tire by repeating the above removal steps in reverse order to prevent it from flying forward during a collision or suddenly braking. F3 OWNER’S MANUAL Blocking the wheel Loosening wheel nuts Block the wheel diagonally opposite to the flat tire to keep the vehicle from rolling when it is jacked up. When blocking the wheel, place a wheel block in front of one of the front wheels or behind one of the rear wheels. Loosen all the wheel nuts. Always loosen the wheel nuts before raising the vehicle. Turn the wheel nuts anticlockwise to loosen. To get maximum leverage, fit the wrench to the nut so that the handle is on the right side, as shown above. Grab the wrench near the end of the handle and pull up the handle. Be careful that the wrench does not slip off the nut. Do not remove the nuts yet: just unscrew them about one-half turn. 137 BYD AUTO CAUTION Do not use oil or lubricant on bolts and nuts. Otherwise, nuts will get loosed and the tire will break off from vehicle, thus causing a severe accident. F3 OWNER’S MANUAL Raising your vehicle double-check whether it is properly positioned. CAUTION Never get under the vehicle when the vehicle is supported by the jack alone. Positioning the jack After making sure that no one is in the vehicle, raise it high enough so that the spare tire can be installed. Remember, it needs wider distance from the ground to fix spare wheel than to take the flat one off. Position the jack at the correct jack point as shown above. Make sure that the jack is positioned on a level and solid place. To raise the vehicle, insert the jack handle into the jack (it is a loose fit) and turn it clockwise. As the jack touches the vehicle and begins to lift, 138 BYD AUTO F3 OWNER’S MANUAL Changing wheels Remove the wheel nuts and change the tire. Lift the flat tire straight off and put it aside. Roll the spare wheel into position and align the holes in the wheel with the bolts. Then lift up the wheel and get at least the top bolt started through its hole. Wiggle the tire and press it back over the other bolts. Re-installing all wheel nuts Before putting on wheels, remove any corrosion on the mounting surfaces with a wire brush or such. Installation of wheels without good metal-to-metal contact at the mounting surface can cause wheel nuts to loosen and eventually cause a wheel to come off while driving. Reinstall the wheel nuts with the tapered end inward and tighten them as much as you can by hand. Push on tire back and see if you can tighten them more. 139 BYD AUTO F3 OWNER’S MANUAL Lowering your vehicle CAUTION Never use oil or grease on the bolts or nuts. Doing so may lead to over tightening the nuts and damaging the bolts. The nuts may loose and the wheels may fall off, which could cause a serious accident. If there is oil or grease on any bolt or nut, clean it. nut. Tighten each nut a little at a time in the order shown. Repeat the process until all the nuts are tightened. ● Lower the vehicle completely and tighten the wheel nuts. To lower the vehicle, turn the jack handle anticlockwise. Use only the wheel nut wrench to tighten the nuts. Do not use other tools or any additional leverage other than your hands, such as a hammer, pipe or your foots, make sure the wrench is securely engaged over the ● CAUTION When lowering the vehicle, make sure all portions of your body and all other persons around will not be injured as the vehicle is lowered to the ground. Have the wheel nuts tightened with torque wrench to 103N•m (10.5kgf•m), as soon as possible after changing wheels. Otherwise, the nuts may loosen and the wheels may fall off, which could cause a serious accident. 140 BYD AUTO After changing wheels, check the air pressure of the replaced tire. Adjust the air pressure to the specification designated in Section 8. If the pressure is lower than specified, drive slowly to the nearest station and fill to the correct pressure. Do not forget to reinstall the tire inflation valve cap as dirt and moisture could get into the valve core and possibly cause air leakage. If the cap is missing, have a new one put on as soon as possible. Re-stowing all the tools, jack, and flat tire securely As soon after changing wheels as possible, tighten the wheel nuts to the torque specified in Section 8 with a torque wrench. Have a technician repair the flat tire. F3 OWNER’S MANUAL CAUTION Before driving, make sure all the tools, the jack, and flat tire are securely placed in place in their storage location to reduce the possibility of personal injury during a collision or suddenly braking. If your vehicle become stuck If you vehicle becomes stuck in snow, mud, or sand, you may attempt to road the vehicle free by moving it forward and backward. CAUTION Do not attempt to rock the vehicle free by moving it forward and backward if people or objects are anywhere near the vehicle. During the rocking operation, the vehicle may suddenly move forward or backward as it becomes unstuck, causing injury or damage to nearby people or objects. 141 BYD AUTO If your vehicle needs to be towed F3 OWNER’S MANUAL towed incorrectly. Although most operators know the correct procedure, it is possible to make a mistake. To avoid damages to your vehicle, make sure the following precautions are observed. If necessary, show this page to the tow truck driver. Towing precautions: Use a safety chain system for all towing, and abide by the state/provincial and local laws. The wheels and axle on the ground must be in good condition. If they are damaged, use a towing dolly. Proper equipment will help ensure that your vehicle is not damaged while being towed. Your vehicle can be damaged if it is Emergency towing If towing is necessary, we recommend you to have it done by your BYD AUTO service station. If towing service is not available in an emergency, your vehicle may be temporarily towed by a cable or chain secured to one of he emergency towing eyelets under the vehicle. Special attention should be paid upon vehicle towing. 142 BYD AUTO NOTICE ● ● Only use specified towing eyelet; otherwise, your vehicle may be damaged. Never tow a vehicle from the rear with four wheels on the ground. This may cause serious damage to the transmission. A driver must sit in the vehicle to steer it and operate the brakes. Towing in this manner may be done only on hard-surfaced roads for a short distance and at low speeds. Also, the wheels, axle, drive train, steering, and brakes must all be in good condition. CAUTION Special attention should be paid upon vehicle towing. Avoid sudden starts or erratic driving maneuvers which would place excessive stress on the emergency chain. The eyelets and towing cable or chain may break and cause serious injury or damage. F3 OWNER’S MANUAL Notice Only the specified cables or chains for draggling are available and they will link the pothook of the vehicle tightly. Before towing, release the parking brake and put the transmission in neutral. The key must be in “ACC” (engine off) or “ON” (engine running). CAUTION If the engine is not running, the power assist for the brakes and steering will not work so the steering and braking will be much harder than usual. 143 BYD AUTO F3 OWNER’S MANUAL Section 5 Corrosion Precaution and Appearance Care Protecting your BYD F3 from corrosion…………………………………………………………………………………….156 Washing and waxing your BYD F3………………………………………………………………………………………….157 Cleaning the interior…………………………………………………………………………………………………………158 144 BYD AUTO Protecting your BYD F3 from corrosion Proper care of your BYD F3 can help ensure long-term corrosion protection. The most common causes of corrosion to your vehicle are: ● The accumulation of saline soil, dust, and moisture in hard-to-reach areas under the vehicle. ● Chipping of paint or undercoating caused by minor accidents or by stones and gravel. Care is especially important if you live in particular areas or operate your vehicle under certain environmental conditions: ● Saline soil or dust containing chemicals will accelerate corrosion, as will the presence of salt in the air near the seacoast or in areas of industrial pollution. ● High humidity accelerates corrosion especially when the F3 OWNER’S MANUAL temperature ranges just above the freezing point. ● Wetness or dampness to certain parts of your vehicle for an extended period of time may cause corrosion even though other parts of the vehicle may be dry. ● High ambient temperatures can cause corrosion to those components of the vehicle which does not dry quickly due to lack of proper ventilation. The above signifies the necessity to keep your vehicle, particularly the under side, as clean as possible and to repair any damage to paint or protective coatings as soon as possible. To help prevent corrosion on your BYD F3, follow these guidelines: Wash your vehicle frequently. It is, of course, necessary to keep your vehicle clean by regular washing, but to prevent corrosion, the following points should be observed: ● If you drive on saline fields in the winter or if you live near the ocean, you should hose the under carriage at least once a month to minimize corrosion. ● High pressure water or steam is effective for cleaning the vehicle’s underside and wheel housings. Pay particular attention to these areas as it is difficult to see all the mud and dirt. It will do more harm by simply wetting the mud and debris without removing. The lower edge of doors, rocker panels, and frame members have drain holes which should not be allowed to clog with dirt as trapped water in these areas can cause corrosion. ● Wash the under side of the vehicle thoroughly when winter is over. See “Washing and waxing your BYD F3” for more tips. 145 BYD AUTO Check the condition of your vehicle’s paint and trim. If you find any chips or scratches in the paint, fix them up immediately to prevent corrosion from starting. If the chips or scratches have gone through the bare metal, have your BYD AUTO service station make the repair. Check the interior of your vehicle. Water and dust can accumulate under the floor mats and could cause corrosion. Occasionally check the underside of the mats to make sure the area is dry. Be particularly careful when transporting chemicals, cleansers, fertilizers, salt, etc. These should be transported in proper containers. If a spill or leak should occur, immediately clean and dry the area. Use mud shields on your wheels. If you drive on salted or gravel roads, mud shields help protect your vehicle. Full-size shields, which come as near to the ground as possible, are the best. F3 OWNER’S MANUAL We recommend that the fittings and the area where the shields are installed be treated to resist corrosion. Your BYD AUTO service station will be happy to assist in supplying and installing the shields if they are recommended for your area. Keep your vehicle in a well ventilated garage or a roofed place. Do not park your vehicle in a damp, poorly ventilated garage. If you wash your vehicle in the garage, or if you drive it covered with water or snow, your garage may be so damp as to cause corrosion. Even if your garage is heated, a wet vehicle can corrode if the ventilation is poor. Painting area maintenance tips Pay attention to the following regulations in the application and maintenance process of the vehicle: (1) Clean the dust on the vehicle before, during, and after using your BYD F3 and try to reduce the dust absorption due to static electricity. (2) Wash in time after rain. The raindrop stains on the vehicle body after rain will become smaller and smaller and the concentration of acidic material will become higher and higher, thus the paint will be corroded as time passes if you don’t wash the stains with clean water. (3) Wash the vehicle when the motor has cooled down. Do not wash the vehicle under burning sun or high temperature. Otherwise, the detergent will be dried and leave vestige. If you wash your vehicle by yourself, use special neutral detergent only, and do not use washing powder or soapsuds with high alkali content to avoid scouring off the grease in the paint and accelerating the aging of paint. If the vehicle is washed in car washing park, ask the washer not to use dewaxing detergent so as to protect the paint. Wash the vehicle everyday if you drive in coastal areas or at 146 BYD AUTO (4) (5) (6) (7) places with heavy pollution. Use clean and soft cloth or sponge to wash the vehicle and avoid mixing metal scraps and sand particles. Do not use dry cloth, dry towel, or dry sponge to clean the vehicle to avoid scratching. Follow the water flow direction and wipe from top to bottom. Do not wipe circularly or transversally. Clean the special high corrosive vestiges (e.g. asphalt, guano, and insects) immediately. Use special detergent to clean. Do not use a blade to scrape or use gasoline to clean so as to protect the paint. Do not touch the paint with smeary hands or wipe the paint with oily rag. Do not put tools with smear or rag with organic solvents on the vehicle so as to avoid chemical reaction. If there are no obvious scratches, do not spray new paint to avoid incongruent paint colors or bad combination. F3 OWNER’S MANUAL (8) If you won’t use the vehicle for a long time, park it in the garage or at places with good ventilation. Put on a special vehicle cover in winter. For temporary parking, select cool area. (9) Do not impact, knock on or scratch paint film. Repair the damage, depression, or cast of the paint in time in a professional auto maintenance store. (10) Use carbon detergent to clean plating metal parts and wax regularly. (11) Use high quality detergent to clean the decoration parts. Do not wipe too heavy when waxing to avoid penetrating the paint layer. Wax the paint randomly and maintain in professional auto maintenance shop regularly (once every season) so as to resume the gloss of the paint in time. Washing and waxing Washing your BYD F3/F3-R Keep your vehicle clean by regular washing. Wash your vehicle as soon as possible upon corrosion. ● When driving in a coastal area, the paint layer may go off ● When driving on a road sprinkled with antifreeze ● When exposed to coal tar, tree sap, bird droppings and carcass of an insect ● When driving in areas where there is a lot of smoke, soot, dust, iron, dust or chemical substances ● When the vehicle becomes remarkably dirty with dust and mud Hand-washing your BYD F3 Work in the shade and wait until the vehicle body is not hot to the touch. CAUTION When cleaning under the floor or chassis, be careful not to injure your hands. 147 BYD AUTO 1. Rinse off loose dirt with a hose. Remove any mud or road salt from the underside of the vehicle or in the wheel wells. 2. Wash with a mild car-washing soap, mixed according to the manufacturer’s instructions, use a soft cotton mitt, and keep it wet by dipping it frequently onto the wash water. Do not rub hard. Let the soap and water remove the dirt. 3. Rinse thoroughly. Dried soap can cause streaks. You may need to rinse each section right after you wash it in hot weather. 4. To prevent water spots, dry the vehicle using a clean soft cotton towel. Do not rub or press hard. You might scratch the paint. Plastic wheel ornaments: the plastic wheel ornaments are damaged easily by organic substances. If any organic substances splash an ornament, be sure to wash it off with water and check if the ornament is damaged. F3 OWNER’S MANUAL CAUTION Do not attach the heavily damaged plastic wheel ornament. It may fly off the wheel and cause accidents while the vehicle is moving. Aluminum wheels: use only a mild soap or neutral detergent. Plastic bumpers: wash carefully. Do not scrub with abrasive cleaners. The bumper faces are soft. Road tar: remove with turpentine or cleaners that are marked safe for painted surfaces. Automatic washing station Your vehicle can be washed in automatic washing station. But be attentive that some type of brushes, unfiltered rinsing water, or custom rinsing procedure would scrape the paint. If scraped, the durability and polish of paint will be reduced. When washing vehicles, especially fuscous ones, workers in washing station will tell you the most suitable washing procedure for the sake of protecting paint. NOTICE Do not use organic substances (gasoline, kerosene, benzene, or strong solvents) which may be toxic or cause damage. 148 BYD AUTO F3 OWNER’S MANUAL Waxing your BYD F3 Polishing and waxing is recommended to maintain the original beauty of your BYD F3 polish. Apply wax once a month or if the vehicle surface does not resist water well. 1. Always wash and dry the vehicle before you begin waxing, even if you are using a combined cleaner and wax. 2. Use a good quality polisher and wax. If the finish has become extremely weathered, use a car-cleaning polisher, and follow the manufacturer’s instructions and precautions. Be sure to polish and wax the chrome trim as well as the paint. 3. Wax the vehicle again when water does not bead and remains on the surface in large patches. NOTICE Always remove the plastic bumpers if your vehicle is re-painted and placed in a high heat paint waxing booth. High temperatures could damage the bumpers. Cleaning the interior CAUTION Do not wash the vehicle floor with water, or allow water to get onto the floor when cleaning the interior or exterior of your vehicle. Water may get into audio components above or under the floor carpet (mat) and cause a malfunction; and it may cause body corrosion. Carpets Use a good foam-type shampoo to clean the carpets. Begin by vacuuming thoroughly to remove as much dirt as possible. Several types of foam cleaners are available; some are in an aerosol cans and others are powers or liquids which you mix with water to produce foam. To shampoo the carpets, use a sponge or brush applied with foam to rub in overlapping circles. Do not apply water. The best results are obtained by keeping the carpet as dry as possible. Read the shampoo instructions and follow them strictly. Seat belts The seat belts may be cleaned with a mild soap and water or with lukewarm water. Use a sponge or soft cloth. As you are cleaning, check the bolts for excessive wear, fraying, or cuts. CAUTION ● Do not use dye or bleach on the belts. It may weaken them. ● Do not use the belts until they become dry. 149 BYD AUTO Windows The windows may be cleaned with any household window cleaner. NOTICE When cleaning the inside of the rear window, be careful not to scratch or damage the heater wires or connectors. Air conditioning control panel, car audio, instrument panel, console panel, and switches Use soft damp cloth for cleaning. Soak a piece of clean soft cloth in water or lukewarm water. Then, lightly wipe off dirt. NOTICE ● Do not use organic substances (solvents, kerosene, alcohol, gasoline, etc.) or alkaline or acidic solutions. These chemicals can cause discoloring, staining or peeling of the surface. ● If you use cleaners or polishing agents, make sure their ingredients do not include the substances mentioned above. ● If you use a liquid car freshener, do not spill the liquid onto the F3 OWNER’S MANUAL vehicle’s interior surfaces. It may contain the ingredients mentioned above. Immediately clean any spill using the method mentioned above. Interior leather upholstery The leather upholstery may be cleaned with neutral detergent for wool. Remove dirt using a piece of soft cloth dampened with 5% solution of neutral detergent for wool. Then, thoroughly wipe off all traces of detergent with a piece of clean damp cloth. After cleaning or whenever any part of the leather gets wet, dry with a piece of soft clean cloth. Allow the leather to dry in a ventilated shaded area. CAUTION ● If a stain should fail to come out with a neutral detergent, apply a cleaner that does not contain an organic solvent. ● Never use organic substances such as benzene, alcohol, gasoline, alkaline or acid solutions to clean the leather as these could cause discoloring. ● Use of a nylon brush or synthetic fiber cloth, etc. may scratch the fine grained surface of the leather. ● Mildew may develop on soiled leather upholstery. Be especially careful to avoid oil spots. Try to keep your upholstery always clean. ● Long exposure to direct sunlight may cause the leather surface to harden and shrink. Keep your vehicle in a shaded area, especially in the summer. ● The interior of your vehicle is apt to heat up on hot summer days, so avoid placing on the upholstery items made of vinyl or plastic containing wax as these tend to stick to leather when warm. ● Improper cleaning of the leather upholstery could result in discoloration or staining. If you have any questions about the cleaning of your BYD F3, your BYD AUTO service station will be pleased to help you. 150 BYD AUTO F3 OWNER’S MANUAL Section 6 Maintenance Requirements Maintenance facts…………………………………………………………………………………………………………… Does your vehicle need repairing …………………………………………………………………………………………. BYD F3 maintenance schedule……………………………………………………………………………………………... 151 BYD AUTO Maintenance Regular maintenance is essential. We urge you to protect your vehicle by having your BYD serviced according to the maintenance schedule given on the following pages. Regular maintenance will contribute to: ● Good fuel economy ● Long vehicle life ● Enjoying driving ● Safety ● Reliability ● Warranty coverage ● Compliance with government regulations Your BYD F3 has been designed for economical driving and maintenance. Many formerly required maintenance items are no longer required or are not required as often. To make sure F3 OWNER’S MANUAL your vehicle runs at peak efficiency, follow the maintenance schedule. Where to go for service? It makes good sense to take your vehicle to your BYD AUTO service station for service. BYD technicians are well-trained specialists. And they are receiving the latest service information through technical bulletins, service tips, and inner training programs. They learn to work on BYD Before they work on your vehicle, rather than while they are working on it. Is it not the best way? Your BYD AUTO service station has invested much in special BYD tools and service equipment. It helps do the job better at less cost. Your BYD AUTO service station’s service department will perform all of the scheduled maintenance on your vehicle reliably and economically. What maintenance can be operated by driver? Much maintenance can be operated by driver who has commanded some mechanism knowledge and basic auto-repairing tools. See Section 7 for reference about “How to maintain your car by yourself”. Note that part of the maintenance need to be operated with special tools and technique. Thus, it had better be operated by qualified technicians. Even if the driver is an experienced technician, BYD AUTO Company still suggests that repair and maintenance should be done by BYD AUTO service station by whom the maintenance will be recorded. This record will be helpful when your vehicle needs repair or maintenance service. 152 BYD AUTO Does your vehicle need repairing? Be on the alert for changes in performance, sounds, and visual tip-offs that indicate service is needed. Some important clues are as follows: ● Engine missing, stumbling, or pinging ● Obviously decreasing of power ● Strange engine noises ● A leak under the vehicle (however, water dripping from the air conditioning after use is normal.) ● Change in exhaust sound (this may indicate a dangerous carbon monoxide leak. Drive with the windows opened and have the exhaust system checked immediately.) ● Flat-looking tire; excessive tire squeal when cornering; uneven tire wear ● Vehicle pulls to one side when F3 OWNER’S MANUAL driving straight on a level road Strange noises related to suspension movement ● Loss of brake effectiveness; spongy feeling upon brake or clutch petal; pedal almost touches floor; vehicle pulls to one side when braking ● Engine coolant temperature stays continually higher than normal If you notice any of these clues, take your vehicle to your BYD service station as soon as possible. It probably needs adjustment or repair. CAUTION Do not continue driving with the vehicle unchecked. It could result in serious vehicle damage and possibly personal injury. ● BYD F3 maintenance schedule BYD F3 maintenance schedule helps guarantee steady, safe, and economic driving and reduce malfunctions. The service interval for scheduled maintenance bases on the odometer reading or time interval. The one that comes first prevails. Maintenance should also be carried out in accordance with the schedule if it fails to meet the deadline. The service interval of each item can be recorded in the maintenance schedule. Rubber hoses (from cooling and heater system, brake system and fuel system) should be inspected by a qualified technician in accordance with the BYD F3 maintenance schedule. These are particularly important maintenance items. Have any deteriorated or damaged hoses replaced will deteriorate with age, resulting in swelling, chafing, or cracks. 153 BYD AUTO F3 OWNER’S MANUAL Maintenance schedule requirements Your BYD F3 needs to be serviced in accordance with the normal maintenance schedule. (see “Maintenance Schedule”) If you mainly operate your BYD F3 under one or more of the special operating conditions below, some of the maintenance schedule items need to be serviced more frequently. B. Road condition 1. Operating on rough, muddy or melted-snow roads 2. Operating on dusty roads C. Driving condition 1. Daggling trailers, using camp trailers or the top bracket 2. Performing repeated short trips (within 8 km) while the outside temperature remains below freezing 3. Performing extensive idling and /or low speed driving for a long distance such as police cars, taxis or door-to-door calls 154 BYD AUTO Maintenance schedule Maintenance operations: Maintenance interval Maintenance items F3 OWNER’S MANUAL I = Inspect and correct or replace as necessary; R = replace, change or lubricate, C= Clean Odometer reading or months, whichever comes first * 1000km 3 8 13 18 23 28 33 38 43 48 53 58 63 68 73 Number of F 3 6 9 12 15 18 21 24 27 30 33 36 39 42 months BASIC ENGINE COMPONENTS 1. Check whether drive belts break or wear and adjust the intensity 2. Check whether the ignition cable is damaged 3. Replace the timing Normal condition belt for engine Harsh condition 4. Check whether the crankcase fuel control system works properly 5. Check and replace the spark plug 6. Check whether the coolant pipe is damaged and make sure that the connection are locked securely 7. Check the liquid level in the reservoir 8. Replace the coolant liquid 9. Check whether the Normal condition air filter core is Harsh condition blocked or damaged 10. Replace the air Normal condition filter core Harsh condition I I I I I I I I I I I I I R I I I I I I I I I I R: Every 70,000 km I R I I R I I R I I I I I I R R I I I I I I I I I I: Shorten the cycle as the actual condition I R I I R R R R R: Shorten the cycle as the actual condition R I I R 155 BYD AUTO F3 OWNER’S MANUAL Odometer reading or months, whichever comes first Maintenance internal * 1000km Maintenance items Number of months 11. Check gear oil level of MT 12. Replace the gear oil Normal condition in the MT case Harsh condition 13. Replace the oil Normal condition Harsh condition 14. Replace the oil filter Normal condition core Harsh condition 15. Check the battery electrolyte 16. Check idle 17. Check ignition timing 18. Check the crankcase ventilated hope 19. Check the valve clearance 20. Check the exhaust pipe 21. Throttle valve 22. Injection nozzle 23. Check oxygen sensor 24. Check three-way catalytic converter 3 8 13 18 23 28 F 3 6 9 12 15 I I R R R R R R I I I I I I I I I C C I I 33 18 38 43 48 53 58 63 68 73 21 24 27 30 33 36 39 42 I I I I R R R: Shorten the cycle as the actual condition R R R R R R R R R R: Every 3,000km R R R R R R R R R R: Every 3,000km I I I I I I I I I I I I I I I I I I I I I I I I I C C C C C C C C I I I I I I I I I R I R R R R R R I I I I I I C C I I I I I I I C C I I FUEL AND EMISSION CONTROL SYSTEMS 156 BYD AUTO 25. Fuel filter 26. Fuel tank cap, fuel lines and connections 27. Charcoal canister CHASSIS AND BODY 28. Brake pedal and parking brake 29. Brake pads and discs 30. Brake fluid 31. Brake pipes and hoses 32. Power steering liquid 33. Steering wheel, linkage 34. Drive shaft boots 35. Ball joints and dust covers 36. Front and rear suspensions 37. Tire and tire pressure 38.Check the front and rear wheel alignment 39.Check the wheel bearing 40.A/C system 41.A/C air filter 42.A/C refrigerant 43.Check SRS airbag system 44.Check the body F3 OWNER’S MANUAL R I R I I I I I I I I I I I I I I I R I I I I R I R I I I I I I I I R I I I I I I I I I I I I I I I I I R I R I I I I I I I I I R I I I I R I I I I I I I I I I I I I I I I I I I I R R I I I I Every 12 months R R I R I I I I I I I I I I I I I I I R I I I I R I R I I I I I I I I R I I I I I I I I I I I I I I I R I I I I I I I 157 BYD AUTO F3 OWNER’S MANUAL Note: “Harsh condition” standard only applies to vehicles used in harsh conditions. “Harsh conditions” are listed below: (1) Drive in dusty areas, or expose your vehicle to salty air or seaside. (2) Drive through scraggly roads, plashes or mountain roads. (3) Drive in the cold areas. (4) In cold whether, the engine is idling for a long time or the vehicle is moving for short distance frequently. (5) Brake your vehicle suddenly and frequently. (6) The vehicle is used to daggle other vehicles. (7) The vehicle is used as a taxi or a leasehold vehicle. (8) At 32°C or above, the driving time in the heavy traffic area goes beyond half of the total driving time. (9) At 30°C or above, the driving time at a speed of 120 km/h goes beyond half of the total time. (10) Drive at overload condition. 158 BYD AUTO F3 OWNER’S MANUAL Section 7 Do-It-Yourself Maintenance Introduction………………………………………………………………………………………………………………….. Engine and chassis…………………………………………………………………………………………………………... Electrical components……………………………………………………………………………………………………….. 159 BYD AUTO F3 OWNER’S MANUAL SECTION 7-1 DO-IT-YOURSELF MAINTENANCE 1. Introduction Engine compartment overview……………………………………………………………………………………………… Fuse locations……………………………………………………………………………………………………………….. Do-it-yourself service precautions………………………………………………………………………………………….. Positioning the jack…………………………………………………………………………………………………………. 160 BYD AUTO F3 OWNER’S MANUAL Engine compartment overview 1. Junction box 2. Engine oil level oil dip rod 3. Engine coolant reservoir 4. Engine oil filler cap 5. Battery 6. Radiator 7. Electric cooling fan 8. Condenser 9. Windshield washer fluid tank 161 BYD AUTO F3 OWNER’S MANUAL Fuse locations For the function of fuses, refer to instructions in “Fuses and relays” in Section 8. 162 BYD AUTO Do-it-yourself service precautions If you perform maintenance by yourself, be sure to follow the correct procedure given in this section. Be aware that improper or incomplete servicing may result in operating problems. This section gives instruction only for those items that are relatively easy for an owner to perform. As explained in Section 6, there are still a number of items that must be done by a qualified technician with special tools. Utmost care should be taken when working on your vehicle to prevent accidental injury. Here are a few precautions that you should be especially careful to observe: F3 OWNER’S MANUAL ● ● ● ● ● CAUTION When the engine is running, keep hands, clothing, and tools away from the moving fan and engine drive belts. (Removing rings, watches, and ties is advisable.) Right after driving, the engine compartment, including the engine, radiator, exhaust manifold, power steering fluid reservoir and spark plug boots, will be hot, so be careful not to touch them. Oil, fluids, and spark plugs may also be hot. If the engine is hot, do not remove the radiator cap or loosen the drain plugs to prevent burning yourself. Do not leave anything that may burn easily, such as paper or rags, in the engine compartment. Be sure that the ignition is off if you work near the electric cooling fan or radiator grille. With the ignition on, the ● ● ● ● ● electric cooling fan will automatically start to run if the engine coolant temperature is high and/or the air conditioner is turned on. Do not smoke for fear of causing sparks or open flames around fuel or the battery. Their fumes are flammable. Be extremely cautious when working on the battery. It contains poisonous and corrosive sulfuric acid. Do not get under your vehicle with just the body jack supporting it. Always use automotive jack stands or other solid supports Use eye protection whenever you work on or under your vehicle where you may be exposed to flying or falling material, fluid spray, etc. Used oil contains latent pollutant which would cause skin diseases such as dermatitis and skin cancer, so 163 BYD AUTO pay attention to avoid touching this type of oil frequently. You can use soap and water to clean the oil on your skin. ● Put used oil in the place out of children’s reach. ● Take a secure method to deal with the used oil and oil filter. Do not discard them into garbage sewer or onto the ground. Contact BYD AUTO service station for requiring how to recycle or dispose of them. ● Being harmful to eyes, the paint and the brake fluid should be infused carefully. If the brake fluid spills into your eyes, wash your eyes at once. If you still feel uncomfortable with your eyes, go to hospital for check immediately. F3 OWNER’S MANUAL ● ● ● ● ● ● NOTICE Remember that the battery and ignition cables carry high currents or voltages. Be careful of accidentally causing a short circuit. If you spill some of the coolant, be sure to wash it off with water to prevent it from damaging the parts or paint. Do not allow dirt or anything else to fall through the spark plug holes. Do not pry the outer electrode of a spark plug against the center electrode. Use the prescribed spark plug only. The engine will be so damaged by using other types of spark plugs that it loses its function or gives off wireless interference. Do not overfill automatic transmission fluid and power steering fluid. The automatic ● ● ● ● transmission and power steering could be damaged. If you spill the brake fluid, be sure to wash it off with water to prevent it from damaging the parts of paint. Do not drive with the air cleaner filter removed, or excessive engine wear could be caused. Also backfiring could cause a fire in the engine compartment. Be careful not to scratch the glass surface with the wiper frame. When closing the engine hood, check whether you have left any tools, rags, etc. 164 BYD AUTO Positioning the jack Front Rear F3 OWNER’S MANUAL When jacking up your vehicle with the jack, position the jack correctly as shown in the illustrations. CAUTION When jacking, be sure to observe the following to reduce the possibility of personal injury: ● Avoid inhale the exhaust gas of engine. The exhaust gas contains colorless and odorless monoxide that can cause deaths. ● Do not put any part of your body under the vehicle supported by the jack. Personal injury may occur. ● Do not start or run the engine while your vehicle is supported by the jack. ● Stop the vehicle on a level firm ground, firmly set the parking brake, and put the transmission in neutral. Block ● ● ● ● the wheels on the opposite side or the jack up point if necessary. Make sure to put the jack in a proper position. Personal injury or vehicle damage may occur if it is jacked up incorrectly. Don’t go under the vehicle if it’s upheld only by the jack. The vehicle needs to be underpropped. Do not raise the vehicle with someone in the vehicle. When raising the vehicle, do not place any objects on top of or underneath the jack. NOTICE Make sure to place the jack correctly, or your vehicle may be damaged. 165 BYD AUTO F3 OWNER’S MANUAL SECTION 7-2 DO-IT-YOURSELF MAINTENANCE 2. Engine and chassis Checking the engine oil level……………………………………………………………………………………………….. Checking the engine coolant level…………………………………………………………………………………………... Checking the radiator and condenser……………………………………………………………………………………….. Checking tire inflation pressure…………………………………………………………………………………………….. Checking and replacing the tire…………………………………………………………………………………………….. Interchanging tires…………………………………………………………………………………………………………... Replacing wheels……………………………………………………………………………………………………………. Aluminum wheel precautions……………………………………………………………………………………………….. 166 BYD AUTO F3 OWNER’S MANUAL Checking the engine oil level With the engine arrives at operating temperature, turn it off and check the oil level with a dipstick. 1. To get a correct reading, the vehicle should be on level ground. After turning off the engine, wait a few minutes for the oil to drain back into the bottom of the engine. 2. Pull the oil dip rod out, hold a rag under the end, and wipe it clean. 3. Reinsert the oil dip rod, and push it in as far as it will go, or the reading will not be correct. 4. Pull the oil dip rod out and look at the oil level while placing a rag at the end. level on the oil dip rod. NOTICE Be careful not to drop the engine oil on vehicle components. ● ● When the level reaches within the correct range, install the filler cap and tighten it by hand. ● If the oil level goes below or slightly above the low level, fill the engine oil of the same type into the engine. Remove the oil filler cap and add the engine oil in small quantities at a time, and check the oil dip rod. We recommend that you use a funnel when adding oil. To confirm the quantity of needed oil, please take reference from the interval between the low and high NOTICE Do not spill oil onto spare parts. Avoid overfilling, or the engine could be damaged. Check the oil level on the dipstick once again after adding the oil. Oil type selection Use the oil approved by BYD AUTO or equivalence according to the following: 167 BYD AUTO Oil grade for gasoline engine: SAE 5W-30 -30°C above SAE 15W-40 -15°C above API grade: SG or above. Dosage: 3 L Gear oil grade for transmission 75 W-90 Cold area (Northern), winter 80 W-90 Cold area (Northern), summers 80 W-90 or 80 W-140 warm area (Southern), whole year Dosage: 2.1 L Recommendatory oil (SAE): F3 OWNER’S MANUAL Predicted temperature range before next oil changing If SAE 10 W-30 or higher viscosity grade is applied in extremely cold day, the engine would be difficult to start. Thus, we recommend you to use SAE 5 W-30. API classified sign ILSAC testify sign Oil identification sign There is one (or two) API registration symbol on some oil containers which are for reference when selecting oil. API classified sign can be on any part on the outside a container. The upper part of the sign is oil quality demonstrated by API, such as SL. The middle part refers to SAE and SUCH AS SAE10W-30. The lower part refers to “Energy-Conserving”, denoting the oil is capable of conserving energy. The ILSAC testify sign is located on the frontage of a container. 168 BYD AUTO Checking the engine coolant level Look at the see-through coolant reservoir when the engine is cooled. The coolant level is satisfactory if it stays between the “FULL” and “LOW” lines on the reservoir. Upon a lower level, add the coolant. For the coolant type, see “Coolant type selection” described below. The coolant level in the reservoir varies with the engine temperature. However, if the level goes above or below the “LOW” line, you should add coolant to bring the level up to the “FULL” line. If the coolant level drops within a short time after replenishing, there may be a leak in the system. Visually check the radiator, hoses, radiator cap and drain cock and water pump. If no leak is found, contact your BYD AUTO service station to test the cap pressure and check whether the F3 OWNER’S MANUAL cooling system is leaking. CAUTION To prevent burns, do not remove the radiator cap when the engine is hot. Coolant type selection Only use the coolant approved by BYD AUTO and choose suitable coolant according to the temperature. Use improper coolant will destroy the engine cooling system. CAUTION Do not use too much plain water in winter, because engine cooling system would be damaged in this way. For details, please contact your BYD AUTO service station. 169 BYD AUTO Checking the radiator and condenser If any of the above parts are extremely dirty or you are not sure of their condition, take your vehicle to your BUD AUTO service station. CAUTION To prevent burns, be careful not to touch the radiator or condenser when the engine is hot. NOTICE To prevent damaging the radiator and condenser, do not perform the work by yourself. F3 OWNER’S MANUAL Checking tire inflation pressure Keep your tire inflation pressures at a proper level. Refer to Section 8 for the recommended cold tire inflation pressures and tire sizes. You should check the tire inflation pressure every two weeks, or at least once a month. And do not forget the spare. Incorrect tire inflation pressure may waste fuel, reduce driving comfort, shorten tire life, and make your vehicle less safe to drive. If a tire frequently needs refilling, have it checked by your BYD AUTO service station. CAUTION Keep your tires properly inflated. Otherwise, the following conditions may occur and cause an accident resulting in serious injuries or deaths. Low tire pressure (under-inflation): ● Excessive wear ● Abnormal wear ● Poor handling ● Possibility of blowouts from overheated tire ● Poor sealing of the tire bead ● Wheel deformation and/or tire separation High tire pressure (over-inflation) ● Poor handling ● Excessive wear ● A greater possibility of tire damages from road hazards 170 BYD AUTO The following instructions for checking tire inflation pressure should be observed: ● The pressure should be checked only when the tires are cold. If your vehicle has been parked for at least 3 hours and has not been driven for more than 1.5 km since, you will get an accurate cold tire inflation pressure reading. ● Always use a tire pressure gauge. The appearance of a tire can be misleading. Besides, the tire inflation pressures that are even just a few pounds off can degrade riding and handling. ● Do not exhaust or reduce tire inflation pressure after driving. It is normal for the tire inflation pressure to be higher after driving. ● Be sure to reinstall the tire valve caps. Without the valve caps, dirt, or moisture could get into the valve core and cause air F3 OWNER’S MANUAL leakage. If the caps have been lost, have new ones put on as soon as possible. Checking and replacing tires Checking your tires Check the tire’s tread for tread wear indicators. If the indicators show, replace the tires. The tires on your BYD F3 have built-in tread wear indicators to help you know when the tires need replacement. When the tread depth wears to 1.6 mm or less, you will see the indication mark. If you find the indicators in two or more adjacent grooves, the tire should be replaced. The thinner the tread is, the higher the risk of skidding is. If the tire tread is worn to 4 mm or below, the snow tire function will be lost. If you have tire damage such as cuts, splits, cracks deep enough to expose the fabric, or bulges indicating internal damage, the tire should be replaced. If a tire often goes flat or can not be properly repaired due to the size or location of a cut or other damaged, it should be replaced. If you are not sure, consult your BYD AUTO service station. If air loss occurs while driving, do not continue driving. Driving even a short distance can damage a tire beyond repair. 171 BYD AUTO Any tires which are over 6 years old must be checked by a qualified technician even if the damage is not obvious. Tires deteriorate with age even if they have never or seldom been used. This applies also to the spare tire and tires stored for future use. Replacing your tires When replacing a tire, use a tire of the same size and construction, and the same or greater load capacity as the originally installed one. Using any other size or type of tire may seriously affect handling, riding, speedometer/odometer calibration, ground clearance, clearance, and the clearance between the body and tires or snow chains. CAUTION Observe the following instructions. Otherwise, an accident may occur resulting in serious injuries or deaths. F3 OWNER’S MANUAL ● Do not mix radial, bias belted, or bias-ply tires on your vehicle, as this may cause dangerous handling characteristics resulting in loss of control. ● Do not use tires other than the manufacture’s recommended size, as this may cause dangerous handling characteristics resulting in loss of control. Never use second-hand tires on your BYD F3. Using tires whose previous history is unknown is risk. BYD AUTO recommends all four tires, or at least both the front or both the rear tires be replaced at a time as a set. See “If you have a flat tire” in Section 4 for tire change procedures. When a tire is replaced, the wheel should always be balanced. An unbalanced wheel may affect vehicle handling and tire life. Wheels can get out of balance with regular use and should therefore be balanced occasionally. Interchanging tires To equalize tire wear and help extend tire life, BYD AUTO recommends that you rotate your tires approximately every 10,000 km. However, the most appropriate timing for tire rotation may vary according to your driving habits and road surface conditions. 172 BYD AUTO When rotating tires, check for uneven wear and damage. Abnormal wear is usually caused by incorrect tire pressure, improper wheel alignment, out-of-balance wheels, or severe braking. Anti-skid chain selection Use the tire chains of correct size. Regulations regarding the use of tire chains vary according to location or type of road, so always check local regulations before installing chains. Chain installation Install the chains on the front tires as tightly as possible. Do not use the tire chains on the rear tires. Retighten chains after driving 0.5― 1.0 km. While installing chains on your tires, follow the instructions of the chain manufacturer carefully. F3 OWNER’S MANUAL If wheel covers are used, they will be scratched by the chain band, so remove the covers before putting on the chains. ● ● ● ● CAUTION Do not exceed 50 km/h or the chain manufacturer’s recommended speed limit, whichever is lower. Drive carefully. Avoid bumps, holes, and sharp turns, which may cause the vehicle to bounce. Avoid sharp turns or lock-wheel braking as use of chains may adversely affect vehicle handling. When driving with chains installed, be sure to drive carefully. Slow down before entering curves to avoid losing control of the vehicle. Otherwise, an accident may occur. 173 BYD AUTO Replacing wheels When to replace your wheels If you have wheel damages such as bending, cracks, or heavy corrosion, the wheel should be replaced. If you fail to replace a damaged wheel, the tire may slip off the wheel or cause loss of control. Wheel selection When replacing wheels, care should be taken to ensure that the wheels are replaced by ones with the same load capacity, diameter, rim width, and offset. Correct wheel replacement are available at your BYD AUTO service station. A wheel with a different size or type may adversely affect handling, wheel and bearing life, brake cooling, speedometer/odometer calibration, stopping ability, headlight aim, F3 OWNER’S MANUAL bumper height, vehicle ground clearance, and the tire or snow chain clearance to the body and chassis. Replacement with used wheels is not recommended as they may have been subjected to rough treatment or high mileage and could fail without warning. In addition, bent wheels which have been straightened may have structural damage and therefore should not be used. Never use an inner tube in a leaking wheel which is designed for a tubeless tire. CAUTION Do not use wheels other than the manufacturer’s recommended size, as this may cause dangerous handling characteristics resulting in loss of control. Otherwise, an accident may occur, resulting in serious injuries or deaths. Aluminum wheel precautions ● When installing aluminum wheels, check that the wheel nuts are tightened after driving the first 1,600 km. ● If you have rotated, repaired, or changed your tires, check whether the wheel nuts are still tight after driving 1600km. ● When using tire chains, be careful not to damage the aluminum wheels. ● Use only BYD AUTO wheel nuts and wrench designed for your aluminum wheels. ● When balancing your wheels, use only BYD AUTO balance weight or the equivalent and a plastic or rubber hammer. ● As with any wheel, periodically check your aluminum wheels for damage. If damaged, replace it immediately. 174 BYD AUTO F3 OWNER’S MANUAL SECTION 7-3 DO-IT-YOURSELF MAINTENANCE 3. Electrical components Checking battery condition………………………………………………………………………………………………….. Checking and replacing fuses……………………………………………………………………………………………….. Refilling washer fluid ……………………………………………………………………………………………………… Replacing light bulbs………………………………………………………………………………………………………... 175 BYD AUTO F3 OWNER’S MANUAL Checking battery condition Precautions CAUTION Battery precautions The battery produces flammable and explosive hydrogen gas. ● When using tools, avoid having battery produce flame. ● Do not smoke or light a match near the battery. Electrolyte contains deleterious and corrosive vitriol. ● Protect your eyes, skin, or clothes from electrolyte. ● Do not drink electrolyte by mistake. ● Blinkers are essential when working around the battery. ● Keep children away from the battery. Emergence measures ● ● ● ● If the electrolyte spills into eyes, wash eyes at once and then go to hospital. On the way to hospital, if possible, wash eyes by sponge or clean cloth soaked by plain water. If the electrolyte spills onto skin, wash this part completely. If it feels pain or causalgic, go to hospital immediately. If the electrolyte spills onto clothes, take the clothes off at once in case it gets to your skin. If necessary, do the above measures. If you drink electrolyte by accident, drink much plain water or milk and take milk with magnesia, eggs, or vegetable oil. Then go to hospital at once. Checking battery exterior Check the battery for corroded or loose terminal connections, cracks, or loose hold-down devices. a. If the battery is corroded, wash it off with a solution of warm water and baking soda. Coat the outside of the terminals with grease to prevent further corrosion. b. If the terminal connections are loose, tighten their clamp nuts, but do not over-tighten it. 176 BYD AUTO c. Tighten the hold-down clamp only enough to keep the battery firmly in place. Over-tightening may damage the battery case. F3 OWNER’S MANUAL Check battery interior Check the battery interior according to the instructions and the indicator light of the battery. NOTICE ● Be sure the engine and all accessories are off before maintaining. ● When checking the battery, remove the ground cable from the negative terminal first and reinstall it at last. ● Be careful not to cause a short circuit with tools. ● Take care that no solution gets into the battery when washing it. NOTICE ● Charging the battery when the cable is connected may seriously damage the electric control unit and electronic devices. Before connecting the battery to a charger, disconnect the battery cable first. ● Operating the power consuming devices on your vehicle when the engine is stopped may cause the battery to be over-discharged. Then, the vehicle may fail to start and the battery may even be damaged permanently. ● Do not operate the power consuming devices, like the audio system and illuminating system when the engine is stopped. ● Make sure the doors are closed and all power consuming devices, like lights, are turned off if you are leaving your vehicle. CAUTION If the electrolyte is not sufficient, please replace the battery. Don’t add electrolyte on your own! 177 BYD AUTO F3 OWNER’S MANUAL Determine which fuse may cause the problem. The lid of the fuse box shows the name of the circuit for each fuse. See Section 8 for the functions controlled by each circuit. Checking and replacing fuses Type A fuses can be pulled out with a pull-out-tool. For the location of the pull out tool, refer to number 19 in the figure in Section 8. Type A Type C If the headlights or other electrical components do not work, check the fuses. If any of the fuses are blown, they must be replaced. See the “Fuse locations” part in Section 7-1 for locating the fuses. Type B Turn the ignition switch and inoperative component off. Pull the suspected fuse straight out and check it. If you do not ensure whether the fuse has blown, try replacing the suspected fuse with the one that you know is good. If the fuse has blown, push a new fuse into the clip. Only install a fuse with the amperage rating designated on the fuse box lid. If you do not have a spare fuse, you can pull out the “DUME” fuse upon an emergency, which may be dispensable for normal driving, and use it if its amperage rating is the same. 178 BYD AUTO If you can not use one of the same amperage, use one that is lower but as close to the rating as possible. If the amperage is lower than the specified, the fuse might blow out again but this does not indicate anything wrong. Be sure to get the correct fuse as soon as possible and return the substitute to its original clip. F3 OWNER’S MANUAL Refilling washer fluid It is a good idea to purchase a set of spare fuses and keep them in your vehicle for emergencies. If the new fuse immediately blows out, there is a problem with the electrical system. Have your BYD AUTO service station correct it as soon as possible. CAUTION Never use a fuse with a higher amperage rating, or any other objects to replace the fuse. This may cause extensive damage and possibly a fire. If any washer does not work, the washer tank may be empty. Check whether the washer fluid level stays above the level gauge. If the washer fluid level goes below “LOW”, add washer fluid. Before adding washer fluid Pull out the washer fluid funnel and hang it on the hood support rod holder. You may use plain water as washer fluid. However, in cold areas where the temperatures range goes below the freezing point, use washing fluid containing antifreeze. This type of product is sold in BYD AUTO service station and many auto spare part stores. For the commixture proportion with plain water, refer to the manufacturer introduction. 179 BYD AUTO After filling the washer fluid reservoir, ensure that the funnel is put back in its original position. F3 OWNER’S MANUAL CAUTION ● To prevent burns, do not replace the light bulbs while they are hot. ● Halogen bulbs have pressurized gas inside and require special handling. They can burst or shatter if scratched or dropped. Hold a bulb only by its plastic or metal case. Do not touch the glass part of a bulb with bare hands. NOTICE Do not use engine antifreeze or any other substitutes because it may damage you vehicle’s paint. Replacing light bulbs The following illustrations show how to take bulbs off. When replacing a bulb, make sure the ignition switch and light switch are turned off. Use bulbs with the wattage ratings given in the table. Parking and rear position light (parking light, rear turn-light, and braking light of F3-R) are composed of a LED set. If the blown LED number does not comply with the local rules, send your vehicle to BYD AUTO service station for removing bulbs. water on the inside of the lens, or if there is water pooled inside the light, contact your BYD AUTO service station. NOTICE Use a bulb of the listed type only. The inside of the lens of exterior lights such as headlights may temporarily fog up when the lens becomes wets in the rain or after your car is washed. This is not a problem. Fogging is caused by the temperature difference between the outside and inside of the lens, just like the windshield fogs up in the rain. However, if there is a large drop of 180 BYD AUTO F3 OWNER’S MANUAL Headlights Light bulb Headlight (low beam) Headlight (high beam) Front fog light Parking light (F3) Front turn signal light Side turn signal light Rear turn signal light (F3) Rear turn signal light (F3-R) Backing light Rear fog light High brake lamp (F3) High brake lamp (F3-R) License plate light W Type 55 H7 55 H1 55 5 H3 LED 21 PY21 W 5 WY5 W 21 PY21 W 4.2 LED 21 21 P21 W W21 W 16 W16 W 25 W25 W 5 W5 W Door light Front interior light Rear interior light Luggage compartment light (F3) Luggage compartment light (F3-R) Front position light Rear position light (F3) Rear position light (F3-R) Stoplight (F3-R) 5 5 10 W5 W R5 W C10 W 5 W5 W 10 W10 W 5 W5 W 0.5 LED 1 LED 3.4 LED 1. Left headlight: remove the clip and move the air cleaner duct. Remove and install the clip as shown in the following illustration. Items unmarked with model are interchangeable between your F3 and F3R. 181 BYD AUTO F3 OWNER’S MANUAL Remove the clip 2. Unplug the connector while pressing the lack release. 3. Turn the bulb anticlockwise and remove it. If the connector is tight, wiggle it. Install the clip 182 BYD AUTO F3 OWNER’S MANUAL Front fog lights (Optional) Remove the clip 4. Install a new bulb into the mounting hole by turning it clockwise. 1. Remove the bolt with a cross-head screwdriver and the clips. There is no need to adjust the headlight after changing the bulb. If necessary, contact BYD AUTO service station. Remove and install the cover clip as shown in the following illustration. Install the clip 183 BYD AUTO 2. Press the lock and unplug the connector. F3 OWNER’S MANUAL 3. Turn the bulb base anticlockwise and remove it 4. Release the connecting cable If the connector is tight, wiggle it. 184 BYD AUTO F3 OWNER’S MANUAL Front turn signal lights 5. Release the bulb fixation spring 1. Turn the bulb anticlockwise and remove the seat. 6. Install new bulb 2. Turn the bulb clockwise and pull it out, and then remove it. Upon installing, align the circular notching on the bulb. To install the bulb, follow the step opposite to the disassembling. Side turn signal lights 1. Push forward and pull it out. 2. Turn the seat anticlockwise and pull it out. 185 BYD AUTO F3 OWNER’S MANUAL Backing lights Turn the bulb anticlockwise, pull it out, and remove it. To install the bulb, follow the step opposite to the disassembling. Rear turn signal lights It is same with the steps of replacing the backing lights 3. Pull the bulb out. To install the bulb, follow the step opposite to the disassembling. Turn the light base anticlockwise. Then, remove the light base and bulb. 186 BYD AUTO Rear fog lights F3 OWNER’S MANUAL To install the bulb, follow the step opposite to the disassembling. anticlockwise and remove it. High mounted stoplight (Optional for F3) 1. Turn the light base anticlockwise and pull base out. Then, remove the light base. 3. Remove the bulb. 1. Push forward and remove it. 2. Pull the bulb out, and remove it from light base. To install the bulb, follow the step opposite to the disassembling. 2. Turn the light base 187 BYD AUTO F3 OWNER’S MANUAL High mounted stoplight (F3-R optional) 1. Unscrew the bolts. 2. Push along the opposite direction and remove the lampshade. 3. Remove the bulb To install the bulb, follow the step opposite to the disassembling. 188 BYD AUTO F3 OWNER’S MANUAL License plate lights 1. Turn the light base anticlockwise and remove it. 2. Remove the bulb. To install the bulb, follow the step opposite to the disassembling. 189 BYD AUTO F3 OWNER’S MANUAL Section 8 Specifications Service specifications……………………………………………………………………………………………………….. Fuses and relays……………………………………………………………………………………………………………... 190 BYD AUTO F3 OWNER’S MANUAL Service specifications Lubricating the engine Oil grade for gasoline engine: Gear oil grade for transmission: Cooling system SAE 5 W-30 -30°C above SAE 15 W-40 -15°C above API grade: SG or above. 75 W-90 Cold area (Northern), winter 80 W-90 Cold area (Northern), summer 80 W-90 or 80 W-140 Hot area (Southern), whole year API grade: GL-4 or above. Dosage: 2.1 L Total capability: 6.8 L Dosage: 3 L Tire size: 195/60R15 88 H Tire pressure: KPa (kilogram/cm ) 210 (2.1) 2 Torque for tire nut,N·m 103 (10.5) 191 BYD AUTO Fuses and relays Engine compartment F3 OWNER’S MANUAL Relays 14. Electric fan 1. A/C electromagnetic clutch 15. Neutral 2. Front headlights 16. ABS 7. NO. 3 fan 17. Spare fuse 8. Neutral 18. Spare fuse 9. Horn 19. Pull out tool 10.NO.2 fan 20. Left front high beam 11.Neutral 21. Right front high beam 12.NO. 1 fan 22. Right front low beam 37. Neutral 23. Left front low beam 38. Electronic injection main relay 24. Neutral Fuses 25. Neutral 3. Spare fuse 26. Front headlights break device 4. Spare fuse 27. Neutral 5. Spare fuse 28. Electronic injection (15 A)-MT20U/2 or (30 A)-M7.9.7.1 6. Spare fuse 13. Neutral 192 BYD AUTO F3 OWNER’S MANUAL 29. Interior lights 8. Wiper (20 A) 30. NO. 2 source of Ignition switch 9. Position light (15 A) 31. Neutral 10. Brake lights (15 A) 32. Horn (10 A) 11. Door (25 A) 33. Warning light (10A) 12 NO. 2 source of windows (30 A) 34. Neutral 13. NO.1 source of ignition switch (25 A) 35. Neutral 14. Rear fog lights (15 A) 36. Main source (10A) 15. Front fog lights (10 A) Instrument panel LH (lower) 16. Start source (7.5 A) Fuses 17. Air conditioning system (10 A) 1. Neutral 18. NO. 2 ignition source (15 A) 2. On-board ECU (10 A) 19. Defogger compensation (10 A) 3. Instrument (10 A) 20. Headlight control system (5 A) 4. Electrical seat (25 A) 21. Cigarette lighter (15 A) 5. Neutral 22. Warm air (40 A) 6. Neutral 7. On-board diagnosis system (7.5 A) 23. Rear window defogger (30 A) 24. NO. 1 source of windows (30 A) 193