1
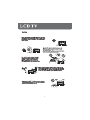
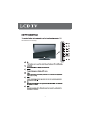
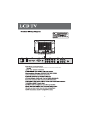
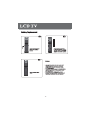
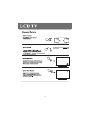
LTV32HD
32 ” LCD TV with HD Tuner
www.vivotvs.com
1
Warning...........................................................................................1
Table of Contents..............................................................................2
Product Introduction..........................................................................2
Safety Precaution..............................................................................3
Safety...............................................................................................4
TV Stand Installation..........................................................................6
Control Panel....................................................................................7
Terminal Wiring Diagram....................................................................8
Remote Control.................................................................................9
Battery Replacement.......................................................................10
Antenna Connections.......................................................................11
Channel Selection............................................................................12
Channel Return................................................................................13
TV and DTV Searching......................................................................14
Video...............................................................................................15
Audio..............................................................................................18
TV...................................................................................................20
Setup..............................................................................................24
Parental..........................................................................................26
Multimedia.......................................................................................28
Troubleshooting...............................................................................29
Product Specification........................................................................30
Product Introduction
Thank you for your purchasing the latest generation high definition LCD TV. Endowed with high
display quality and light weight, it is power-saving and radiationless with high sensitivity
television reception. This LCD TV will bring you safe & comfortable brand-new visual experience.
Applying color active matrix TFT with brand-new technologies, the product can provide high
quality display image, flicker free television, VCD & DVD programs. In addition, it can be used
as definition digital television or computer display. We believe the product will surely make you
satisfied.
2
Safety Precaution
♦Do not place the TV on unstable places, from which it may be fell off.
♦Do not expose the TV to extreme temperature and humid environment.
♦Avoid subjecting the TV to direct sunlight and other heat sources.
♦Do not put the TV into any liquid.
♦Do not put anything inside the TV, or place water container on top of the TV.
♦In thunder rainy days (especially with lightening), please plug out the power plug and antenna plug.
♦Do not step on the power cable, or tangle them together.
♦Avoid overload of the exterior electric outlet to prevent fire hazard of electric shock.
♦Clean the TV with dry and soft cloth (without evaporative matter).
♦If your TV is broken, do not repair it by yourself, but contact the maintenance personnel.
♦If the remote control is left unused for a long time, please take the batteries out and store them in dry places.
♦Avoid dropping the remote control.
♦If the LCD TV is installed for exhibition purpose, please do not place the overheated part on the ground or
carpet to prevent accident.
♦Please install the TV at proper position, such as wall or ceiling. Please install it under the guidance of
Professional staff. (When used or exhibit, please do not place the TV horizontally or vertically on the ground.)
♦This device complies with Part 15 of the FCC Rules. Operation is subject to the following two
conditions: (1) this device may not cause harmful interference, and (2) this device must accept
any interference received, including interference that may cause undesired operation.
♦This equipment should avoid from waterdrops “and” things that fill with liquid, such as vases,
cannot be placed on this equipment.
♦This equipment is predeterminated to work constantly (unless adding switch on this equipment).
♦Please disconnect the power cord before long time unused.
Basic Operations
Power on/off
1. Use AC 100-240V power outlet for the TV power supply.
2. If the screen of TV is not on, please press the power button on the remote control or on the TV.
3. If you want to shut the TV temporary, please press the power button on the remote control or on the TV.
4. If your want to shut off the TV completely, please plug out the power plug.
Auto screen shut off function
The TV will enter idle state if there is no signal input within 5 minutes.
Pre-shut off memory
The setting and tuning of picture and sound will be saved when the TV is shut off, which will be working
in the pre-shut off state when the TV is turn on again.
Precaution of signal source application
1. If PC signal source is used, please first set the resolution of the PC display card as the following modes:
(1360X768 60Hz, 1280X768 60Hz, 1024X768 60 Hz, 800X600 60 Hz)
2. If there is line-by-line output of the signal used by the user, signal source with line-by-line output is recommended.
3
4
5
Your television is packaged with the TV stand separated from the cabinet. To setup the
TV table stand, please carry out the installation according to the instructions below.
Step one
Place the TV faced down on a soft cloth or cushion to prevent the LCD panel from being
damaged.
Note:
1. The LCD panel is easy to scratch, so please choose an absolutely flat surface to place
the TV, and use soft cloth or cushion to protect the TV panel.
2. Unplug the AC cord first when installing or removing the TV stand.
Step two
Take the stand. Please align the screw holes of the stand and TV.
Step three
Insert the four M4 stand screws and tighten them.
Please refer to the picture given below.
Screws sort and position
Quantity
Upper machine screws
M4 x10mm
2 pcs
Lower tapping screws
M4 x12mm
2 pcs
Upper machine screws
M4 x10mm
Lower tapping screws
M4 x 12mm
6
Introduction for each key
7
LCD
: This button can be used to switch the set between ON and OFF.
8
Descriptions of Television Remote Control
Selects the different picture mode directly.
9
10
Connecting to Satellite Receiver or Decoder
In order to receive TV programs, signal should be received
from one of the following signal sources:
♦ Outdoor antenna.
♦ Cable TV network.
♦ Satellite broadcast network.
1. In these three cases, the input cable of antenna or TV network
should be plugged in the 75 Ohm coaxial cable jack at the rear
side of LCD TV.
2. If you are using indoor antenna and the effect of TV program is
not satisfactory, you can adjust the position of the antenna until
the picture is clear.
When installing LCD TV, please use special 75 Ohm coaxial Cable.
If other coaxial cable is used, there may be noise and image
disturbances.
Connecting to Satellite Receiver or Decoder
In order to receive TV programs emitted by satellite, a satellite
receiver should be connected to the rear of the LCD TV. Mean
while, in order to receive encoded emit signal, a decoder should
be connected to the rear of LCD TV.
Using the coaxial cable
Connect the coaxial cable connectors to
♦ The decoder output terminal.
♦ The antenna input terminal.
If you want to connect the TV to satellite receiver (or decoder) and
video recorder at the same time, the following operation should be
followed:
♦ Connect receiver (or decoder) to video recorder.
♦ Connect video recorder to LCD TV, or connect receiver (or decoder)
directly to LCD TV.
11
2. If you want to select program number
from 10-99: Input the channel number
you desired, then press OK to confirm,
e.g. select channel 12.
2. If you want to select program number
after 99: Input the channel number
you desired, then press OK to confirm,
e.g. select channel 100.
1. Use the buttons on the television penel to conduct channel selection,
press “CH+/-” buttons on front panel to select channel.
2. “CH+/-” buttons of the remote control may also be applied to conduct
channel selection.
12
Volume
13
English
Español
Français
Deutsch
Italiano
Exit
Exit
Cancel
14
Picture Mode
User
Press the “
” button to select the “Picture Mode”
item, and then use “
” button to adjust the preset
picture mode.
Note: Only in User mode you can adjust brightness,
contrast, saturation, etc.
Picture Mode
User
OK
Picture Mode
User
OK
Picture Mode
User
OK
Picture Mode
User
OK
15
Picture Mode
User
OK
Picture Mode
User
.
OK
Picture Mode
User
OK
Advanced Video
16
Picture Mode
User
OK
VGA
VGA
OK
OK
17
Sound Mode
Off
Press the “
” button to select the “sound Mode”
item, and then use “
” button to adjust the preset
sound mode.
Sound Mode
Off
Sound Mode
Off
Sound Mode
Off
18
Sound Mode
Off
Sound Mode
Off
19
Country
Country Region
VIC
Channels
Country
Country Region
VIC
Channels
Country
Country Region
Channels
VIC
Channels
Channel Scan
Channel Scan
Digital Channel Range Scan
Analog Manual Scan
Update Scan
Channel Skip
Channel Sort
e
OK
Note: Channel Scan function will clear the current
channel list and perform a new one. If you want to
keep the existing channels, please choose Update
Scan for a scanning for new channels.
2
Cancel
20
Channel Scan
Digital Channel Range Scan
Digital Channel Range Scan
Analog Manual Scan
Update Scan
Channel Skip
Press the “ / ” button to select the “Digital Channel
Range Scan” item, and then use “ ” or “OK” buttons
to enter digital channel range scan sub-menu.
Channel Sort
e
OK
Scan with a range of channels
You can select the start channel and ending channel
number by selecting “From channel” and “To Channel”.
From Channel
To Channel
9
69
OK
Scan
Back
Channel Scan
Analog Manual Scan
Digital Channel Range Scan
Analog Manual Scan
Update Scan
Channel Skip
Press the “ / ” button to select the “Digital Channel
Range Scan” item, and then use “ ” or “OK” buttons
to enter digital channel range scan sub-menu.
Channel Sort
e
OK
Searching for analog channels
You can select the start frequency of scanning and
choose scanning upward by “Scan Up” or scanning
downward by “Scan Down” with OK button.
Start Frequency (Mhz)
Scan Up
Scan Down
45.00
Back
21
Channel Scan
Digital Channel Range Scan
Analog Manual Scan
Update Scan
Channel Skip
Channel Sort
e
OK
/ /
your
Channel Scan
Digital Channel Range Scan
Analog Manual Scan
Update Scan
Channel Skip
Channel Sort
e
OK
Press the “ / ” button to select the first channel,
press OK button; then select another channel and
press OK again, these two channel will change
position in channel list.
22
Channel Scan
Digital Channel Range Scan
Analog Manual Scan
Update Scan
Channel Skip
Channel Sort
e
OK
Press the “ / ”button to select the “Channel
Number” or ‘‘Frequency’’item, and then use the
numeric key “0-9” on the remote control to input
the channel number or frequency.
OK
Network Name:
Color System
Auto
OK
Channel Scan
Digital Channel Range Scan
Analog Manual Scan
Update Scan
Channel Skip
Channel Sort
Press the “ / ” button to select the “Analog Channel
Fine Tune” item, and then use “ ” or “OK” buttons
to enter analog channel fine tune sub-menu.
e
OK
112.25MHz
125.25MHz
128.25MHz
160.25MHz
166.25MHz
176.25MHz
Press the “ / ”button to select the channel you
want to adjust and press OK button, then you can
adjust the channel frequency manually.
184.25MHz
192.25MHz
200.25MHz
208.25MHz
23
.
Press the “ / ” button to select the “Day Light”
item, and then use “ / ” buttons to select day light
on/off.
Note: If you turn on the Day Light function, the TV time
will become daylight saving time, which pulls ahead for
an hour than the standard time.
OK
This item is disabled.
OK
24
Off
On
Off
On
OK
25
OK
OK
DTV mode.
OK
Restriction of Access
No Block
Press the “
/
” button to select the block level:
R, AV, MA, M, PG, G.
26
OK
9
Multimedia
OK
Note: if you want to unlock the input source, press
the ‘ ‘ MTS’’ button on the remote control to display
password menu, then input the password (the
initial password is 0000), the input source will
unlock.
OK
at
OK
27
1. Enter into Multimedia mode
TV
AV
Please insert the mobile storage device to the USB input
jack on the back panel of TV first (see page 8). After
connecting the device, press the “SOURCE” button on
remote control or TV front panel to display the source list,
use the “ / ” to select Multimedia item then press “OK”
to enter into Multimedia mode.
S-Video
YPBPR 1
YPBPR 2
VGA
HDMI 1
HDMI 2
Multimedia
Picture
01/01
2. User Interface
There are three functions in multimedia interface: Picture,
Music and Video. Press the “ / ” to select one of them
and then press “OK” to enter the function. If you want to
exit the current function, press “EXIT” until you go back to
the initial interface and choose the function you desire
again.
3. Use the remote control to operate.
1) Picutre
PLAY/PAUSE: Press to play/pause the picture slide display.
PREVIOUS: Press to go to previous picture.
NEXT: Press to go to next picture.
B (green): Press to set the picture slide time.
C (yellow): Press to select the picture slide mode.
D (blue): Press to show the picture information.
A
B
C
D
2) Music
PLAY/PAUSE: Press to play/pause the music.
STOP: Press to stop the playing.
PREVIOUS: Press to go to previous music file.
NEXT: Press to go to next music file.
FR/FF: Fast review/fast forward.
A (red): Press to select the repeating mode.
B (green): Press to select the shuffle mode.
D (blue): Press to show the music information.
3) Video
PLAY/PAUSE: Press to play/pause the video.
STOP: Press to stop the playing.
PREVIOUS: Press to go to previous video file.
NEXT: Press to go to next video file.
FR/FF: Fast review/fast forward.
REPEAT: Press to select repeating mode.
A (red): Press to select the preset picture mode.
D (blue): Press to show the video information.
The TV supports media files formats below:
Video: MPEG1, MPEG2 coding files.
Picture: JPEG (resolution maxium 4000x4000).
Audio: Mp3.
28
The remote control doesn’t work
29
Power: Less than 110W
30