1
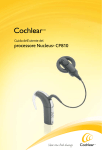
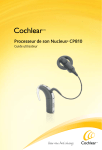
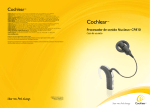
The
Nottingham
Cochlear Implant
Programme
Your
Nucleus 5 - CP810
Processor
BTE VERSION with Remote Assistant
www.nuh.nhs.uk/ncip
Contents:
Page number
Your Speech processor
2
Your Remote Assistant
4
The LED lights
7
Daily Checks
8
Batteries
9
Do’s and Don’ts
10
Accessories available from your Implant Centre
11
Document produced July 2010
Revision date December 2011
1
Your CP810 Behind The Ear (BTE) Processor:
1
5
3
2
9
4
7
6
8
1) Upper button: This can be used to change between the microphone and accessory
setting (e.g. telecoil and other assistive listening devices that can be plugged in).
2) Lower button: On/Off and Select Button – Please remember to switch your speech
processor OFF when it is not in use. (please see: “controls” section for more information)
a. To switch the speech processor ON, press and hold the select button until the
green light flashes.
b. To switch the speech processor OFF, press and hold the select button until the
steady orange light disappears.
c. A short press on the select button allows you to switch between the maps given
by the audiologist. The CP810 device can store up to four maps (P1-P4).
The number of green flashes you see corresponds to the number of the
selected program.
3) Microphones: The processor has 2 microphones for detecting sound, placed within a
short distance from each other, enabling directionality of the incoming signal. A
microphone cover helps prevent dirt and dust from getting into the microphones.
The cover can be removed and replaced when it is dirty. This is not easy
to do and you will need a small screwdriver to get it out. Please discuss
with your audiologist as you DO NOT WANT TO DAMAGE the
microphones.
4) Accessory Socket: The socket is situated underneath the silver latch. It can be used to
connect accessories to your speech processor such as:
Monitor earphones, FM systems, TV/Hi-FI or Personal Audio cable
5) The Coil and Magnet: The magnet keeps the coil in place on the head as it attracts to the
magnet in the internal device. It transmits the information coming from the speech
processor to the internal device.
Document produced July 2010
Revision date December 2011
2
6) The Coil Cable: this connects the coil to the processor and can be replaced separately.
Please be careful when connecting and disconnecting the cable.
7) Speech Processing Unit: This processes the sounds picked up by the microphone. The
signal is then sent to the internal device via the cable and the coil.
8) Battery: (your audiologist will advise you on the most appropriate batteries for your map)
The standard disposable battery unit uses 2 x Power One Implant plus batteries.
These will last on average 50-60 hours, depending on the energy the map
requires.
The standard rechargeable battery unit can be used too and will last up to 22
hours, depending on the energy the map requires.
The compact rechargeable battery unit can be used too and will last up to 12
hours, depending on the energy the map requires.
9) Ear hook: The ear hook allows the speech processor to sit behind the ear comfortably.
The ear hook can be changed by pulling it down. Younger children can use a “Snugfit”
which is a different kind of hook that helps to keep the processor in place more securely
than using the ear hook alone. The ear hook is see-through and you can see the LED alert
system underneath it.
To lock the processor settings with the processor buttons:
Quickly press the upper and lower button together and the green light will flash. This prevents
your child from changing the program or settings.
To lock the processor to the battery unit: (i.e. to lock the bayonet connection)
To prevent children from removing the battery unit from the processor: lift the accessory socket
cover (4), to reveal the lock. Using a pair of tweezers or a screwdriver push the latch to the left to
lock the battery unit to the processor. To unlock push right. (see picture 1)
To lock the battery unit: (when using disposable batteries)
To prevent children form taking the batteries out: using a screwdriver, gently rotate the lock, on
the bottom of the battery unit, in a clockwise direction until it is positioned horizontally. To unlock
rotate in an anti-clockwise direction until positioned vertically. (see picture 2)
1
2
Document produced July 2010
Revision date December 2011
3
Your CR110 Remote Assistant (RA)
7
2
4
3
6
5
3
1
2
4
1
8
The buttons on the Remote Assistant (RA):
1)
Cochlear button: Turns the remote assistant on and off, switches between the 3 main
screens as shown on the next page.
2)
Program select button (1, 2, 3, 4): Selects the program (4 buttons: clockwise from bottom
right) and depending on the screen selected, you can select different functions.
3)
Volume button: Increases the volume or scrolls up – the opposite one is to decrease the
volume or scroll down
4)
Sensitivity button: decreases the sensitivity or switches between control modes – the
opposite one is to increase the sensitivity and again switch between control modes
5)
Toggle button: turns telecoil and auto-telecoil on and off and it turns the audio accessory
on and off.
6)
Key Pad lock: locks and unlocks remote assistant (slider button).
7)
Remote Assistant Indicator Light: gives indication of functioning – see LED section
8)
USB cable socket: connects remote assistance to the USB cable to charge the device
Document produced July 2010
Revision date December 2011
4
The LCD Panel on the Remote Assistant (RA):
There are 3 main screens, as shown below (use the Cochlear button (1) to scroll through):
(1) Home Screen (programs)
(2) Processor status screen
Processor
functions
P3
Remote
Functions
P4
P2
P1
(3) Troubleshooting screen
1) Home screen: this will come up when you switch the RA on. It allows you to change between
the 4 different programmes.
2) Processor status screen: this controls the processor and RA functions. You can select either
by clicking on the (2.3) or (2.4) buttons.
Processor Functions (9 functions):
RA Status/functions (8 function)
1. Lock
1. Contrast
2. T-coil ratio
2. Brightness
3. Accessories ratio
3. Volume
4. Flashing green light in response to sound
4. Volume – muting
5. Flashing light to indicate a problem.
5. Pairing
6. Private tones
6. Language
7. Beam
7. Reset
8. Reset
8. Serial number info
9. Serial number information.
3) Troubleshooting screen: this will come up automatically when there is a problem with the
processor, or you can get to it by pressing the Cochlear button (1). It will give you a few
options to check and to help you resolve any problems you may have with your speech
processor. Whilst trying to resolve the issue it will take you back to the processor functions
screen.
Document produced July 2010
Revision date December 2011
5
To lock the Remote Assistant (RA):
Slide the key pad lock button (6) down to lock and back up to unlock.
To reset the Remote Assistant (RA):
The RA can reset in 2 different ways:
1. Go to the processor status screen and press remote functions (2.4) and scroll down to the
reset screen (function 7) and press (2.1) to reset.
2. Or use the screwdriver to press in to the “Hard reset button” on the back of the RA
To pair the processor and RA together:
In order for the RA to only work with your (child’s) processor(s) and not with someone else’s
processor(s):
For the first processor / unilateral users: switch both processor and RA off, switch the RA
on and it should automatically come up with the pairing screen. Select “pair” using button
(2.1), then switch the processor on. On successful pairing the RA will beep.
For the second processor: select the pair second button (2.1), switch the second
processor on. On successful pairing the RA will beep again.
To un-pair the RA and the processor: from the home screen press the Cochlear button (1) to see
the processor status screen, then press (2.4), then select “unpair” with (2.2), then select the green
tick with (2.1).
To lock the processor using the Remote Assistant (RA):
You can lock the 2 buttons on the processor to prevent children from changing the settings. In the
processor status screen, select the processor buttons lock and unlock screen, by scrolling up or
down (3) on the RA. Press 2.1 to lock or unlock the processor buttons.
To reset the processor settings using the Remote Assistant (RA):
In processor +status screen press 2.4 and scroll down (3) and it will bring you up the reset page:
click “reset” with 2.1 and it will come up with “done” on the screen.
Document produced July 2010
Revision date December 2011
6
The LED indicator lights on the Processor and Remote Assistant (RA)
Processor functions
General processor faults
Document produced July 2010
Revision date December 2011
7
Remote Assistant functions
Daily checks:
It is essential that you check the processor and Remote Assistant every morning to ensure that it
is functioning effectively - it may be some time before your child is able to let you know if there is a
problem with the device.
Before putting the speech processor on:
1)
Ensure that the batteries for both the processor and RA are fully charged
2)
Check that all the connections (coil - cable, battery – processor) are making good contact
and are not loose.
3)
Check the cables and coil are not damaged. You can place the coil on the back of the RA to
check the signal is working, you will see a green signal flash if its working okay.
4)
Listen to the microphone via the listening earphones. (If the sound is distorted, please check
the microphone ports for any blockages i.e dirt/dust build up.)
5)
Check the LED lights on the processor and the troubleshooting screen on the RA for any
faults.
6)
The RA will let you know when there is a fault and will take you through step by step what
you need to do to resolve the problem.
Document produced July 2010
Revision date December 2011
8
Batteries:
The standard battery unit:
This uses 2 x Power One Implant Plus batteries and lasts on average 50-60 hours, depending on
mapping in the processor. Please check with your audiologist.
The standard rechargeable battery unit:
This is a rechargeable battery which lasts up to 22 hours, depending on mapping in the
processor. Please check with your audiologist.
The compact rechargeable battery unit
This is a rechargeable battery which lasts up to 12 hours, depending on mapping in the
processor. Please check with your audiologist.
The rechargeable battery charger unit
Your audiologist will explain how to connect and disconnect the battery units to the charger.
Document produced July 2010
Revision date December 2011
9
Do’s and Don’ts!
Don’t wear another person’s speech processor, all processors are programmed on an
individual basis, yours is only programmed with your personal parameters.
If you have two processors:
Don’t switch the processors. Use the left one for your left ear and the right one for your right
ear.
Don’t bathe or shower whilst wearing your processor, or headset. The processor is only splash
proof and not waterproof.
Don’t shave the scalp as some hair helps the coil to grip.
Don’t touch battery contacts when changing batteries.
Don’t go through metal detectors at airports. You can be scanned with a hand held scanner
from the neck down.
Don’t use electric head lice combs.
Do ensure the best coupling between the transmitting coil and the implant, this may mean
trimming the hair directly over the implant, leaving about 2mm hair growth.
Do contact the airline direct before travelling as they all have their own rules.
Do turn the processor off during LANDING and TAKE OFF if travelling by aeroplane.
Do remove all external parts when involved in body contact sports.
Do remove all external parts when playing on plastic slides, bouncy castles etc.
Do show your medical card to the medical specialist if attending hospital for any treatment.
Accessories available from your Implant Programme.
Document produced July 2010
Revision date December 2011
10
FM Leads:
These are to be used with radio aid systems (usually used within the school setting). The Implant
Programme can provide the first lead but any spares or replacements must be provided by the
local service. Leads can be obtained from:
Cochlear Europe LTD,
9 Weybridge Business Park,
Addlestone Road,
Addlestone,
Surrey,
KT15 2UF
Telephone: 01932-871500
TV/Hi-Fi Cable:
This cable is to be used with televisions, computers and AC powered audio equipment. Your child
will need to set the volume control appropriately and adjust the microphone sensitivity on their
speech processor to alter the balance between environmental sound and the sound coming in
from the audio equipment. It is electrically isolated to protect your child from an electric shock.
When used with the television, plugging in the cable may stop the sound from the television’s
main speaker, depending on your television. A qualified electrician will be able to alter your set so
that both speaker and cable work together. Please ask your Implant Centre for details.
Personal Audio Cable:
This cable is for use with personal stereos. Connect the cable between the external input socket
on the speech processor and the headphone socket on the personal stereo. This cable must only
be used with battery operated equipment and not mains powered equipment as it has not been
electrically isolated.
Lapel Microphone:
This microphone can be used instead of the headset microphone during group discussions, where
the microphone can be handed around to individual speakers. The cable is plugged into the
external input socket on the speech processor. It can also be used when the headset microphone
is thought to be faulty.
Monitor Earphones:
These are to be used by parent/carer to listen to the headset microphone to check for faults.
Dry store and brics:
The Dry store is used to remove excessive moisture from the speech processor, for example, in
humid environments or from perspiration. Place the speech processor and headset in the dry
store, along with a dry bric and leave overnight. For further information, read the instruction leaflet
with the Dry store.
Document produced July 2010
Revision date December 2011
11


![[ITA] RX40 Manuale v1-5](http://vs1.manualzilla.com/store/data/006119954_1-2ba2af64dd7b8b55c335fa8e9797796a-150x150.png)