1
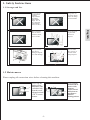
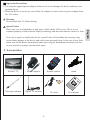
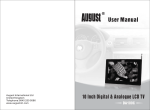
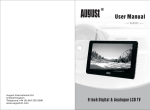
DA100C
10 INCH DIGITAL/ANALOGUE TV & MEDIA PLAYER
TV NUMERIQUE/ANALOGIQUE 10 POUCES & LECTEUR MEDIA
10 ZOLL DIGITAL/ANALOG TV & MEDIA PLAYER
TV DIGITALE/ANALOGICA & MEDIA PLAYER 10 POLLICI
TV DIGITAL/ANALGICA 10 PULGADAS & LECTOR MEDIA
User Manual
Safety
To ensure your safety and the safety of others, please ensure you read the Safety Instructions
before you use this product.
Disposal
Please ensure the product and its accessories are disposed in compliance with WEEE (Waste
Electrical and Electronic Equipment) Directive and other regulations. Please check with your
local authority for disposal regulations.
Customer Service
If you need help, please contact our Customer Service:
Telephone:
+44 (0) 845 250 0586
Email:
[email protected]
English
Thank you for buying our August TV. You may already be familiar with using a similar product
but please take time to read these instructions carefully. It is designed to familiarise you with
the product’s many features and to ensure that you get the very best from your purchase.
Quick Start Guide
DA100C
1. When scanning for channels for the first time, it is suggested to use a rooftop aerial. If
any channels are saved, the information will be saved to your TV and you can then
switch to the portable antenna and change your location to find the best place to receive
a signal.
2. Connect the device to the mains power then press power on the remote or press and hold
the POWER button on the device for 1.5 seconds to switch the device on.
3. Switching the device on for the first time, the “Initial Install Screen” is displayed.
Follow the on screen instructions to select your language and area then press enter. It
will then ask whether you wish to install, select yes to begin the auto channel search.
Once the search has completed, use CH+, CH- or EPG to select channels. Pressing the
TV/R button switches between Freeview TV and radio modes.
4. If you have already completed the initial installation and need to rescan for additional
Freeview channels or have moved to a different location and need to scan again, press
MODE to select the Digital TV mode, then enter the menu using the MENU button.
Choose “Digital TV” by pressing ENTER then select “Installation” then “Auto Search”.
Pressing ENTER will start the search and save any channels found automatically.
5. To search for Analogue TV, press MODE repeatedly until it shows ATV, press LEFT or
RIGHT to switch to the Analogue TV mode. Press MENU, it shows the ATV SETUP
menu, set the TV FORMAT to “PAL I” for UK, then move to AUTO SEARCH, press
ENTER to start the search.
6. To play video, music of photos from an SD card or USB stick, press MODE to select the
Digital TV and Media Player mode, insert an SD card or USB stick into the card slot or
USB port, then press MENU and select “Movie”, “Music” or “Photo”. Press ENTER or
PLAY to begin playback, press MENU to stop playback and return to the main menu.
In Photo mode, UP applies a mirror effect, DOWN inverts the image, RIGHT rotates the
image 90° clockwise, LEFT rotates the image 90° anticlockwise and ENTER begins a
slideshow off all photos in the selected folder.
English
Pressing the MODE button on either the device or the remote switches between the
following modes and settings: DTV (Digital Freeview TV & Media Player), ATV
(Analogue TV), AV IN, BRIGHTNESS, CONTRAST, COLOR, SCALE (Aspect Ratio)
and INVERT.
7. Please note that the signal strength in some areas may not be sufficient to support TV
reception using a portable aerial. The distance from the closest transmitter and other
factors such as surrounding buildings, the walls of your house, weather and electromagnetic interference caused by power and telecommunication infrastructure may affect
signal strength. Changing location may improve signal reception but a rooftop aerial
designed for digital TV should be used to achieve the best possible reception.
8. For any further queries, please telephone August International Ltd helpline
+44 (0) 845 250 0586 or email [email protected]
English
Contents
1
2. Accessories
2
3. Part Names and Functions
3
4. Connection
6
5. Basic Operation
8
6. Digital Freeview TV (DVB-T)
9
7. Digital TV Recording
15
8. Card Reader & USB Functions
16
9. Games
18
10. Analogue TV (ATV)
18
11. Battery Compartment
19
12. Specifications
21
13. Troubleshooting
22
14. Warranty
23
English
1. Safety Instructions
1. Safety Instructions
1.1 Storage and Use
Keep this TV
set away from
water or damp
environments.
Never expose
this TV set to
moisture, dust,
oil or smoke.
Never drop or
expose this
device to
impact.
Always secure
this device
during transport
to avoid damage.
Never strike
this TV set or
scratch with
sharp objects.
1.2 Maintenance
Please unplug all connection wires before cleaning this machine.
Please wipe the
display screen
and buttons with
a softcloth. Only
clean the screen
with professional
LCD TV screen
cleanser.
-1-
Alcohol
Never wipe this
machine with an
abrasive cloth,
detergent
powder, alcohol
and benzene etc.
propellants or
chemical
cleaning products.
English
Do not expose
this device to
extreme
temperatures.
Operating
temperature
range: 0°C to
50°C Storage
temperature:
-10°C to 60°C.
Operation Precautions
1. Use only the supplied power adaptor, failure to do so can damage the device and may cause
personal injury.
2. When the device is not in use, turn off the AC adaptor or remove the car power adaptor from
the 12V socket.
Warning
Do not watch this TV whilst driving.
Never try to repair or modify this device yourself, this will invalidate the warranty, may
cause further damage to the device and could cause personal injury. In the case of any fault,
please turn off the device immediately and contact August International customer services
or your retailer to arrange a professional repair.
2.Accessories
DA100C TV
Remote control
AC/DC adaptor
Stand
DA
TV
Telescopic antenna
Digital TV antenna
AV cable
-2-
10
0C
TV
NU 10
M E IN C
H
R
T V 1 0 IQ U D IG
D IG Z O E /A IT
N A A L /A
D IG IT L L
D
IT A L E IG L O N A
AL
/A ITA G IQ L O
N
/A
N A A L L /A U E G U E
10
LG OG NA
T
PO V &
IC IC A L O
G
A
10 & M TV UC ME
P U E D & E S D IA
L G IA M E & L P L
A D P L D IA E C AY
A S AY
P TE ER
& E R L AY U R
LE
1
ME
E
CT 0 P R
D IA
OR OL
M E L IC
D IA I
User manual
English
Special Notice
There may be a few highlights or dark spots visible on the LCD screen. This is a very
common property of active matrix display technology and does not indicate a defect or fault.
3. Part Names and Functions
3.1 Front
2
English
1
1. IR receiver window
2. LCD display
3.2 Back
1
1
2
3
4
9
5
6
7
8
10
1. Speakers
2. Antenna input
3. USB port
4. SD/MMC card slot
5. Headphone socket
6. AV in/out
7. Standby power indicator
8. 12V DC IN
9. Battery compartment
10. Stand slot
*Note:
The standby power indicator lights red when the device is in standby mode and connected to an
external power source. When the device is switched on, the light turns off.
-3-
3.3 Top
1
3
4
5
6
7
8
9
10
Power / Play / Pause / Resume
Main Menu
Left / Reverse
Right / Forward
Enter/ Confirm
Channel Down/ Down/ Previous Track or Chapter
Channel Up/ Up / Next Track or Chapter
Volume Down
Volume Up
Press repeatedly for mode switch. More details can be found on page 8
MENU
VOLVOL+
MODE
3.4 Remote Control
3.4.1 Remote Button Functions
2
3
1
4
5
6
7
10
11
12
13
16
17
20
21
8
9
14
15
18
19
22
23
24
25
1.
2.
3.
4.
5.
6. REC
7.
8.
9.
10.
11.
12. MOVE
13.
26
14.
27
28
15.
16.
-4-
Power on / off
Select mode
Select Digital TV or radio
Select audio channel or audio language
Numbers
Start or stop recording
Main Menu
Volume Up
Volume Down
Mute and unmute the sound
Play / Pause / Resume
Move channels when using Channel
Organizer
Set parental lock when using Channel
Organizer
Set favourite channels when using
Channel Organizer Access favourite
channels list whilst in TV or Radio mode
Zoom in to a picture
Up / Channel Up
English
1.
2.
3.
4.
5.
6.
7.
8.
9.
10.
2
17.
18.
19.
20.
21.
22.
23.
24.
25.
26.
English
27.
28.
Next track or chapter
Previous track or chapter
Left / confirm or change settings in ATV mode
Confirm settings
Right / confirm or change settings in ATV mode
Down / Channel Down
Rewind in media player mode
Forward in media player mode
Switch subtitles on or off
7 day electronic program guide
Use RIGHT, UP and DOWN to navigate today's program information.
Use
to view next day’s program information, use
to come back.
Freeview channel information
Freeview interactive teletext
3.4.2 Use of the Remote Control
Please remove the PVC packaging before using the remote control for the first time.
1. Do not expose the remote control to direct sunlight or very strong/bright light.
2. Do not drop or step on the remote control or subject it to shocks.
3. Keep the remote control away from extreme heat and humid environments.
4. Keep the remote control away from water.
Operating range
1. The IR range of the remote control is 5 meters.
2. The IR sensor on the remote control should be aimed
directly at the sensor on the front of the device.
It may not be possible to operate the device if
there are obstacles between it and the remote control.
3. The receiving angle is ±30°.
30° 30°
<5m
Replacing the battery
If the remote control does not function or if the operating range becomes reduced, replace the
old battery with a new one.
Lithium battery(CR2025)
+
Pull out the battery holder
and remove the old battery.
Insert the new battery into the battery
holder with the + side facing upwards.
-5-
Replace the battery holder.
*Note:
1. Please ensure proper disposal of used batteries.
2. To prevent leakage of fluid from the lithium battery, remove the battery when not using the
remote control for a long period of time. If the battery leaks fluid, carefully wipe it out of the
battery case, then insert a new lithium battery.
4. Connection
1
2
4.2 Connecting headphones
Connect your headphones to the headphone socket on the device.
Earphones
*Note:
When headphones are connected to the device, no sound will be played through the devices
speakers.
Headphone and Earphone Safety
1. Listening through headphones or earphones at high volume for prolonged periods can cause
damage to your hearing.
2. Please be considerate to others and use closed back headphones or listen at low volume
whilst in public.
3. If you are experiencing tinnitus, stop using headphones or listen only at a very low volume.
4. Even at a low volume, prolonged periods of headphones or earphones use can cause damage
to your hearing.
-6-
English
4.1 Connecting the power supply
1. Connect the DC output of the AC/DC power adaptor to the DC IN 12V socket.
2. Plug the power adaptor in to an AC power socket.
4.3 Connecting to a TV set via AV Output
Turn off all devices before connecting or disconnecting any cables.
Audio/Video output
Black AV cable
(Included)
TV
Signal flow
*Note:
The AV output function is only available in Freeview (DVB-T) and Media player mode.
4.4 Connecting to an Audio/Video device via AV Input
Turn off all devices before connecting or disconnecting any cables.
Audio/Video input
Black AV cable
(Included)
Signal flow
Yellow Red White
Connect to the
Video Output of
the AV device
Connect to the Audio
Output of the AV device
*Note:
To use the AV IN function of this device, please set it to AV IN mode first.
-7-
English
Yellow Red White
To video input jack
(Yellow)
To audio input jack
(White)
To audio input jack
(Red)
5. Basic Operation
5.1 Switching the device off or on
5.1.1 Switching on
Connect the device to mains power, then either press and hold the power button on the device for
1.5 seconds, or press the power button on the remote control to switch the device on.
5.2 Mode settings
Press MODE repeatedly to select between the following modes:
DTV: Freeview TV & Media Player, press RIGHT to change
ATV: Analogue TV, press RIGHT to change
AV IN: AV input, press RIGHT to change
BRIGHTNESS: Press LEFT or RIGHT to change
CONTRAST: Press LEFT or RIGHT to change
COLOR: Press LEFT or RIGHT to change
SCALE: Press LEFT or RIGHT to change aspect ratio to 16:9 or 4:3
INVERT: Press LEFT or RIGHT to change the display to upside down or normal
-8-
English
5.1.2 Switch Power Off
Either press and hold the power button on the device for 1.5 seconds, or press the power button on
the remote control to switch the device off.
6. Digital Freeview TV (DVB-T)
2. If there are no channels saved on the TV,
Channel Organizer cannot be accessed, and
"Channel not available" will be displayed.
If the device is not set to the Digital TV mode,
press MODE repeatedly until DTV appears on
the screen, then press LEFT or RIGHT to
confirm.
6.1 Channel Manager
Channel Manager allows the user to sort,
edit, delete, and classify the channels.
4. To change a channel name, use UP/DOWN to
highlight the channel, press LEFT/RIGHT to
select, then use RED/GREEN/YELLOW/
BLUE to edit the channel name.
In the Digital TV menu, select channel manager
then press ENTER to access the submenus.
5. Press MENU to exit Channel Organizer.
6.1.2 Channel Sorting
Channel sorting allows the user to sort channels
by area, alphabetically or by channel number.
6.1.1 Channel Organizer
1. Channel Sorting can be accessed by
selecting MENU-> Digital TV->Channel
Manager->Channel Sorting.
Channel organizer is used to set favourite
channels, change channel positions, lock and
delete channels and edit a channel’s name.
1. Channel Organizer can be accessed by
selecting MENU -> Digital TV ->
Channel Manager -> Channel Organizer.
-9-
English
3. Use UP/DOWN to select the channel
you want to edit.
- Press RED to delete or undelete a channel,
it will ask you to enter the password, the
system default password is 0000.
- Press GREEN to add or remove a channel
from favourites.
- Press YELLOW to reposition a channel, use
UP/DOWN to select the new position and
press Enter to confirm.
- Press BLUE to lock or unlock a channel,
it will ask you to enter the password, the
system default password is 0000.
2. If there are no channels saved on the TV,
Channel Sorting cannot be accessed and
"Channel not available" will be displayed.
3. Use UP/DOWN to select the channel, and
then select the category by pressing the
numbers (1-8).
3. Press UP/DOWN to select:
4. Press MENU to save. "Successfully updated"
will display to confirm.
① First Option: Sorting by area, press RIGHT
to enter the area list, use UP/DOWN to select,
6.1.4 Edit Channels
press ENTER to confirm.
Edit Channels allows the user to add and edit
channels.
1. Edit Channels can be accessed by selecting
MENU-> Digital TV->Channel Manager->
Edit Channels.
4. Sorting rules can be selected by pressing
RIGHT/UP/DOWN/LEFT.
5. After sorting rules have been selected, press
ENTER to confirm, it will ask “Are you
sure?”, select “Yes” to begin channel sorting
or “No” to cancel.
2. If there are no channels saved the Edit
Channels window will open but be blank.
3. To add a new channel, press RED, and then
press UP/DOWN to select between the 6
parameters as shown:
6. Press MENU to exit Channel Sorting.
6.1.3 Channel Grouping
Channel grouping allows the user to group
channels into 8 categories: News, Science,
Sports, Movie, Kids, Music, Fashion and None.
1. Channel Grouping can be accessed by
selecting MENU-> Digital TV->
Channel Manager->Channel Grouping.
2. If there are no channels saved on the TV,
Channel Grouping cannot be accessed and
"Channel not available" will be displayed.
①Area Name: press RIGHT to enter the area
list, use UP/DOWN to select, press ENTER
to confirm.
②Carrier: press RIGHT to enter the carrier list,
use UP/DOWN to select, press ENTER to
confirm.
③Channel Name: press RIGHT to enter
the edit page, use RED/GREEN/YELLOW/
BLUE to edit, press ENTER to confirm.
④Audio PID: can be changed by pressing the
numbers.
⑤Video PID: can be changed by pressing the
numbers.
-10-
English
② Second Option: Sorting alphabetically or by
channel number, press RIGHT to enter the
option list, use UP/DOWN to select, press
ENTER to confirm.
⑥PCR PID: can be changed by pressing the
numbers.
⑦Once all settings have been made, press
ENTER to confirm. “Successfully Updated”
will show before you are returned to Edit
Channels.
⑧During setup, press MENU at any time to
cancel and exit to Edit Channels.
1. Use UP/DOWN to select TV channels and
press ENTER. It will ask “ Delete all TV
channels?”, select “Yes” to confirm and
delete all channels, select “No” to cancel.
2. Use UP/DOWN to select Radio channels
and press ENTER. It will ask “ Delete all
Radio channels?”, select “Yes” to confirm
and delete all channelsand proceed the delete,
select “No” to cancel.
4. To edit a channel, press YELLOW, and then
press UP/DOWN to select between the 4
options as shown:
English
①Channel Name: press RIGHT to enter the
edit page, use RED/GREEN/YELLOW/
BLUE to edit, press ENTER to confirm.
②Audio PID: can be changed by pressing the
numbers.
③Video PID: can be changed by pressing the
numbers.
④PCR PID: can be changed by pressing the
numbers.
⑤all settings have been made, press ENTER
to confirm. “Successfully Updated” will
show before you are returned to Edit
Channels.
⑥During setup, press MENU at any time to
cancel and exit to Edit Channels.
6.2 Installation
Installation allows you to search for additional
channels and rescan for channels once you
change location. To access installation select:
MENU-> Digital TV-> Installation.
The installation menu has two options, Auto
Search and Manual Search.
6.1.5 Delete All
To delete all the TV and Radio channels,
select MENU-> Digital TV->Channel
Manager-> Delete All.
6.2.1 Auto Search
Select auto search, then press ENTER to
begin searching.
Once the search is completed, the system
automatically saves all channel information
and returns to the Installation menu.
-11-
6.2.2 Manual Search
If you know a channel's broadcasting frequency
and bandwidth, using manual search to find the
channel can be quicker.
Select Manual Search, press ENTER, it will ask
you to provide two parameters:
After setting, press ENTER to start the search.
After searching, the system will automatically
exit the searching page, save program
information and return to Installation menu,
press MENU to exit.
1. OSD: supports 5 menu patterns, press
LEFT/RIGHT to select between Theme1-5.
2. OSD Timeout: Sets the amount of time which
an information window remains on screen.
Press LEFT/RIGHT to select between 1-6
seconds. The system default is 3 seconds.
3. OSD Trans: Set the transparency of the OSD,
press LEFT/RIGHT to adjust from 0%-60%.
4. OSD Language: Change the OSD language,
press RIGHT to enter the language list, use
UP/DOWN to select, press ENTER to
confirm.
5. 1st Audio Language: press RIGHT to enter
Audio Language list, use UP/DOWN to select,
press ENTER to confirm.
6. 2nd Audio Language: press RIGHT to enter
Audio Language list, use UP/DOWN to select,
press ENTER to confirm.
7. After setting, press ENTER to confirm, press
MENU to exit the setup, it will show
“Successfully updated”.
6.3 Configuration
Configuration menu has the following options:
On Screen Display, TV, System Setup, Time,
Wakeup Timer and Parental Lock. It can be
accessed by selecting MENU->Digital TV->
Configuration.
6.3.2 TV
Use UP/DOWN to select the setting you wish
to change.
6.3.1 OSD (On Screen Display)
Through OSD, you can customise the on screen
display.
Left of the menu lists all the options. Press UP/
DOWN to select an option.
1. Display Mode: press LEFT/RIGHT to select
between AUTO, PAL & NTSC, press
ENTER to confirm and exit the setting. Or
press UP/DOWN to select another option.
-12-
English
①Freq (KHz): scanning frequency, the default
is 474000 KHz, use numbers or LEFT/
RIGHT to change.
②Band Width: use LEFT/RIGHT to select.
Use UP/DOWN to select the setting you wish to
change.
2. Aspect Ratio: press LEFT/RIGHT to select
between 16:9, 4:3 Pan Scan, 4:3 Letter Box,
press ENTER to confirm and exit the setting.
Or press UP/DOWN to select another option.
7. After setting, press ENTER to confirm,
press MENU to exit the setup, it will show
“Successfully updated”.
3. Brightness: press RIGHT to enter the list,
use UP/DOWN to select, press ENTER to
confirm, press ENTER again to exit the
setting, or press UP/DOWN to select another
option.
6.3.3 System Setup
The device can output 5V power from the
coaxial aerial socket. Select Antenna Power
ON if your external aerial takes 5V input via
its coaxial plug.
Press UP/DOWN to select an option, use
LEFT/RIGHT to change the settings. After
setting, press ENTER to confirm, press MENU
to exit the setup, it will show “Successfully
updated”.
5. HUE: press RIGHT to enter the list, use
UP/DOWN to select, press ENTER to
confirm, press ENTER again to exit the
setting, or press UP/DOWN to select
another option.
6.3.4 Time
You can set Timer Mode, Date, Time, GMT
Offset, and Summer Time under Time menu.
There are two Timer modes, one is Auto,
and one is Manual.
6. Saturation: press RIGHT to enter the list,
use UP/DOWN to select, press ENTER to
The system default is Auto timer mode, press
confirm, press ENTER again to exit the
setting, or press UP/DOWN to select another UP/DOWN to select Timer Mode or GMT
Offset, use RIGHT/LIFT to change.
option.
-13-
English
4. Contrast: press RIGHT to enter the list, use
UP/DOWN to select, press ENTER to
confirm, press ENTER again to exit the
setting, or press UP/DOWN to select another
option.
You can set EQ Setup, Surround, Antenna
Power, LCN (Logical Channel Number) and
Area in System Setup.
In Manual timer mode, press UP/DOWN to
select an option, use RIGHT/LEFT or numbers
to change the Date or Time. (GMT Offset and
Summer Time options are greyed out and not
available in Manual timer mode).
①Wakeup Message: use LEFT/RIGHT to
select between Birthday, Anniversary or
General.
②Wakeup Channel: use LEFT/RIGHT to
select a channel from the channel list.
4. Wakeup Date: press RIGHT to enter the
Calendar, use UP/DOWN/LEFT/RIGHT
to select a date.
6.3.5 Wakeup Timer
This option allows you to switch the device
on and off automatically, set a scheduled
recording and set reminders for programs.
5. On Time: use numbers to set the starting
time.
6. Duration: use numbers to set how long you
want to watch or record the program.
7. Default Partition: this is for scheduled
recording only, press RIGHT, it will show
“Device List”, if the TV connects to an
USB stick, it only shows one device on the
list, if the TV connects to an external hard
drive which has number of partitions, it
will show the partition list, select the
appropriate, press ENTER, it will ask to
confirm whether to change, if you want to
change, select “Yes” then press ENTER,
otherwise select “No”. It will show “Set
successfully”.
You can set Timer Mode, Wakeup Mode,
Wakeup Message, Wakeup Channel, Wakeup
Date, Time, Duration and Default Partition.
1. Timer No.: the number of this Wakeup
Timer setting, use LEFT/RIGHT to change.
2. Timer Mode: use LEFT/RIGHT to select
between Once, Daily, Weekly, Yearly or Off.
After setting, press ENTER to confirm, press
MENU to exit the setup, it will show
“Successfully updated”.
6.3.6 Parental Lock
User can change system password under
this option.
3. Wakeup Mode: use LEFT/RIGHT to choose
to show a message, switch to a channel you
want to watch, switch off/on the device or
set a scheduled TV recording.
Please note, the wake up timer will only work
on this device to turn it on automatically after
it has been turned off using a timer.
-14-
English
After setting, press ENTER to confirm, press
MENU to exit the setup, it will show
“Successfully updated”.
Enter the old password, if it is correct, the
cursor will move to Enter New Password
option, enter and confirm the new password.
The system will show “Password changed”.
7. Digital TV Recording
The device supports recording Freeview TV
to a USB memory stick or external hard
drive (FAT32, USB2.0) via the USB port.
Before starting the recording, connect a USB
stick or external hard drive, which has
sufficient space left, to the device first.
7.1 Real Time TV Recording
The system default password is 0000.
6.4. Software Upgrade
This function is for manufacturer use only.
6.5 Factory Default
To restore the system configuration to factory
default, press MENU, select Digital TV->
Factory Default, press ENTER.
Press YELLOW during the recording, it allows
you to set the duration of the recording, press
RIGHT to choose: 15 min, 30 min, 45 min,
60 min, 75 min, 90 min, 105 min, 120 min or
disable, press ENTER to confirm and exit.
Press INFO during a recording to display how
long the device has been recording for, the
channel name and the remaining space left on
the USB storage device. Press INFO again to
cancel.
It will ask whether you want to perform the
factory default, select [No] to cancel or select
[Yes] to confirm.
The recorded program is saved in a new folder
“PVR” in your USB stick or external hard
drive and is in MPG video format. It can be
viewed by pressing MENU then selecting
Movie.
Press MENU, then select Disk Manger, it
shows all the recorded programs stored in the
USB stick or external hard drive, press GREEN
repeatedly to select Play/Delete One/Delete All/
Rename a recorded program, press ENTER to
confirm, press MENU to exit at any time
6.6 Version
This provides the hardware, software and
system information.
7.2 Scheduled TV Recording
To set up a recording schedule, please make
sure the device is on digital Freeview TV mode
first. Then press MENU, select Digital TV by
pressing ENTER, select Configuration, and
then select Wakeup Timer. It shows the
following options:
-15-
English
Press REC on the remote to start the recording,
it will show “REC” on the screen, press REC
again to stop the recording, it will ask “Do
you want to stop recording”, choose “Yes” to
stop or “No” to carry on recording.
8. Card Reader & USB Functions
This player has built-in SD/MMC card reader
and USB port. It supports the playback of MP3,
JPEG and MPEG4 (AVI) files.
Insert a SD/MMC card or an USB memory stick
to the card slot or USB port on the player.
8.1 Movie
Press MENU, select Movie, press ENTER, the
Movie menu will show:
Use UP/DOWN to select a subtrack.
Please note the scheduled recording can only be
activated when the device is ON and is in the
Freeview TV mode.
When the recording starts, it will show “REC”
on the screen, when it has finished, the “REC”
will disappear. Press INFO during the recording,
it will show the progress of the recording, the
name of the channel, and how many space has
left on your USB stick or external hard drive,
press INFO again to exit.
Press ENTER to view the video files in the
subtrack.
Use UP/DOWN to select a movie you want
to watch, press ENTER to confirm.
The recorded program is saved in a new folder
“PVR” in the USB stick or external hard drive
and is in MPG video format. It can be viewed
by pressing MENU then selecting Movie.
Press MENU, then select Disk Manger, it shows
all the recorded programs stored in the USB
stick or external hard drive, press GREEN
repeatedly to select Play/Delete One/ Delete
All/ Rename a recorded program, press ENTER
to confirm, press MENU to exit at any time.
-16-
Press
to search forward at 2, 4, 8 and 20
times of the normal speed.
Press
to reverse at 2, 4, 8 and 20 times of
the normal speed.
English
1. Timer No.: the number of this Wakeup Timer
setting, use LEFT/RIGHT to change.
2. Timer Mode: use LEFT/RIGHT to select
between Once, Daily, Weekly, Yearly or Off.
3. Wakeup Mode: select “Recorder” for
scheduled recording, for the use of other
available functions in this setting, please
refer to page 18 in the user manual.
4. Wakeup Channel: use LEFT/RIGHT to select
the channel you want to record.
5. Wakeup Date: press RIGHT to enter the
Calendar, use UP/DOWN/LEFT/ RIGHT to
select a date you want to record the program.
6. On Time: use numbers to set the starting time
of the recording.
7. Duration: use numbers to set the duration of
the recording.
8. Default Partition: press RIGHT, it will show
“Device List”, if the TV connects to an USB
stick, it only shows one device on the list, if
the TV connects to an external hard drive
which has number of partitions, it will show
the partition list, select the appropriate, press
ENTER, it will ask to confirm whether to
change, if you want to change, select “Yes”
then press ENTER, otherwise select “No”. It
will show “Set successfully”.
9. Press MENU to exit the setting, it will show
“Successfully updated”.
Press
press
to play the previous movie,
for the next one.
Press
to play the previous music file,
press
for the next one.
Press MENU to stop at any time, press again
to exit the playback.
Press ZOOM to zoom in or zoom out.
Press LEFT or RIGHT to move the picture.
Press MENU to stop at any time, press again to
exit the playback.
8.3 Photo
Press MENU, select Photo, press ENTER,
the Photo menu will show:
Use UP/DOWN to select a subtrack.
Use UP/DOWN to select a subtrack.
Press ENTER to view the photo files in the
subtrack.
Press ENTER to view the music files in the
subtrack.
Use UP/DOWN to select a file you want to play,
press ENTER to confirm.
Use UP/DOWN to select a file you want to play,
press ENTER to confirm.
Press
Press
to play the previous photo.
for the next one.
Press ZOOM to zoom in or zoom out.
Press LEFT or RIGHT to rotate the picture.
Press ENTER for photo slideshow, photos in
the selected folder will show repeatedly.
Press
to search forward at 2, 4, 8 or 20
times of the normal speed.
Press
to reverse at 2, 4, 8 or 20 times of
the normal speed.
Press MENU to stop at any time, press again
to exit the playback.
-17-
English
8.2 Music
Press MENU, select Music, press ENTER, the
Music menu will show:
9. Games
10. Analogue TV (ATV)
Games can be accessed by selecting Menu->
Game-> Native Games.
To search for Analogue TV, press MODE
repeatedly until it shows ATV, press LEFT or
RIGHT to switch to the Analogue TV mode.
Press MENU, the ATV SETUP menu will show
as follows:
English
Press UP/DOWN to select the game you want
to play, press ENTER to confirm. The games
are played using UP/DOWN/LEFT/RIGHT
buttons. To exit the game, press ENTER to
pause, and then select Exit Game.
Use UP/DOWN to select the TV FORMAT,
AUTO SEARCH, SKIP SWITCH, FINE
TUNE, press ENTER to confirm, press MENU
to exit at any time during the setting.
10.1 TV FORMAT
Use UP/DOWN to select the correct TV format
for where you are, press ENTER to confirm.
*Note:
Set the TV FORMAT to “PAL I” for UK.
10.2 AUTO SEARCH
The device will search for programs
automatically if selecting AUTO SEARCH.
It will show as follows:
or
or
-18-
10.3 SKIP SWITCH
The SKIP SWITCH allows you to hide any channels, and they will be skipped when selecting
channels using CH+ or CH-.
Move to the channel you want to skip, press MENU, then select SKIP SETUP, the following
menu will show:
10.4 FINE TUNE
The device will tune the program finely if selecting FINE TUNE.
Use LEFT/RIGHT to tune, and the following will show:
*Note:
If the signal is too weak, the image will remain poor whatever you do, and may output loud
noise, shaking images and inferior sound etc., which is not the TV's fault. If the image remains
poor when using the telescopic antenna, please try to use a roof top aerial or an amplified
external antenna.
11. Battery Compartment
This device has got a built-in battery compartment which takes 6 pieces of AA 1.2V rechargeable
batteries.
Fully charged batteries with 2700mAh capacity can support the TV watching and video playback
for up to 2.5 hours. Higher duty batteries work longer.
The device will automatically charge batteries when connected to an external power source until
fully charged.
Batteries may be charged by an external and separate charger (not supplied) before installed to
the device and the charging time depends on the capacity of the charger used.
-19-
English
Use UP/DOWN to select SKIP ON, press ENTER to confirm, then press MENU to exit.
To turn the SKIP OFF for a channel, press the channel's number, press MENU, use UP/DOWN
to select SKIP OFF, press ENTER to confirm, then press MENU to exit.
Caution:
1) Open the battery compartment
Make sure the device is switched off and disconnected with the power lead. Slide to remove
the battery compartment cover as shown below.
Press and slide out
2) Place the batteries with “+” and “-“ poles in right direction as shown on the device.
3) Replace the battery cover, slide and push it back.
-20-
English
Use AA 1.2V rechargeable batteries only. Use normal AA 1.5V batteries may cause
permanent damage to the device and will invalidate the warranty.
Have the batteries fully charged before the first time using them.
The playback time may become shorter after the batteries are charged and discharged for a
large number of times.
Remove the batteries from the compartment if the device will not be used for an extended
period of time.
Dispose used batteries in compliance with WEEE and other government regulations.
Do not throw batteries into fire. This can cause explosions.
12. Specifications
Decode Standard
DVB-T MPEG2
DVB-T Band Width
6, 7, 8 MHz
DVB-T Frequency
VHF: 177.5~226.5 MHz
UHF: 474~858 MHz
PAL-I , DK, BG
SECAM-L, DK
Analogue TV Format
Analogue TV Frequency
VHF: 48.25 ~ 160.25 MHz
168.25 ~ 456.25 MHz
UHF: 464.25~863.25 MHz
AV In
System: PAL, NTSC, SECAM
CVBS Input: 1.0Vp-p/75ohm
Audio Input: 1Vrms~2Vrms
AV Out
CVBS Output: 1.0Vp-p/75ohm
System: PAL, NTSC
Antenna Input
Impedance: 75ohm
Card Reader
Support SD/MMC card up to 8GB
USB Port
USB 2.0 host (5v, 800Am)
Built-in Speaker
2 x1W, 8 ohm
Power Adaptor
AC 100~240V 50~60 Hz
DC 12V/1.5A
Watch TV for up to 1.5 hours with 6 x AA
1.2V 2700mAh rechargeable batteries
Battery Compartment
Power consumption
< 10 W
Dimensions
263x172x31mm
Net Weight
681g
Media Formats
Video player
File Type
AVI(Audio-Video.lnterleaved),MPG,ASF,VOB
Video Type
MPEG1, MPEG2, MPEG4
Audio Type
MPEG1/2, Layer 1/2/3, PCM, LPCM
Audio bit Ratio
32Kbps ~ 320Kbps
Resolution
Max. 720 x 480
Frame Rate
Max. 30fps/25fps(PAL)
-21-
English
LCD Display
Screen size: 10.1 Inch
Resolution: 1024 x 600 pixels
Aspect Ratio: 16:9
Brightness: 170 cd/m2
Contrast: 400:1
Music player
Photo viewer
Caption
DIVX(4.0, 5.0), XVID
File Type
MP3,WMA
Bit Ratio
32Kbps~320Kbps
File Type
JPG,JPEG(not include non--interlace)
Resolution
Up to 4000 x 3000 pixels
13. Troubleshooting
Problems
Possible Causes and Solutions
No picture and no sound
Check the connection with the AC adaptor or car adaptor.
Use of an unauthorized power supply.
Press POWER on the remote to turn on the device, or press
and hold POWER on the device for 1.5 seconds to turn it on.
No image
No sound
Check the channel selection. Scan for channels again.
Always rescan for channels in new locations.
Check the sound volume. If you are using earphones, test
them on another item. Check the earphone cable is plugged
into the earphone socket on the device. Incorrect TV Format
setting in Analogue TV mode. Set the device to factory
default, then try again.
Picture freezing, and/or
sound distorting
Signal too weak, please check the aerial. Try to use a
proper roof top aerial or an amplified aerial.
No signal
Signal too weak, please check the aerial. Try to use a
proper roof top aerial or an amplified aerial.
Dark Picture
Please adjust Brightness and/or Contrast settings.
Snowstorm
Motors/Trains/High Voltage Lines and Neon Lights may
affect the signal.
Achromatic/Flashing/No Colour
Please adjust the Colour Setting.
Incorrect TV Format setting in Analogue TV mode.
Warning
This user manual and instructions are intended for reference purposes only. No further
notice will be given regarding modification of any information contained therein. Due
to continuing improvements, the features and design are subject to change without notice.
-22-
English
Problems listed below do not necessarily signify a fault with the unit.
Please check this list before requesting repairs.
Warning
No user serviceable components are fitted inside this TV. Do not attempt any repairs, as
this will invalidate the warranty. Any repairs must be carried out by either the
manufacturer or their nominated service centre. Parts inside this set are subject to high
voltage.
14. Warranty
This warranty is subject to the following conditions:
The warranty is only valid within the country where the product is purchased
The product must be correctly installed and operated in accordance with the instructions
given in the user's manual.
The product must be used solely for domestic purposes.
The warranty only covers the main unit, and does not cover the accessories.
The warranty does not cover the damage caused by misuse, negligence, accident and
natural disaster.
The warranty will be rendered invalid if the product is resold or has been damaged by
inexpert repairs. The manufacturer disclaims any liability for incidental or consequential
damages.
Please consult our customer service before returning any product; we are not responsible
for any unexpected product returns.
Any faulty products must be kept and returned in the original packaging with all the
accessories and the original copy of the purchase receipt.
The warranty is in addition to, and does not diminish, your statutory or legal rights.
Please note:
1. A LCD display panel comprises a very large number of pixels and each pixel contains three
sub-pixels - red, green and blue. Due to the complex manufacturing process, occasional pixel
anomalies may occur. Pixel anomalies cannot be fixed or repaired and can happen at any stage
in the LCD's life. August products should not be deemed as faulty if there are no more than
three bright and dark pixels respectively.
2. Portable TV antennas included in the box are for people to watch Freeview TV in areas where
the signal is very strong and there may be difficulties in receiving signal with the included
portable antennas in some regions at present. This is due to the fact that Freeview is yet to
operate in full power in the UK. August TVs should not be deemed as faulty if it can receive
Freeview by connecting to a proper digital rooftop aerial.
Customer Service:
Telephone:
+44 (0) 845 250 0586
Email:
[email protected]
-23-
English
This product is guaranteed for twelve months from the date of the original purchase. In the
unlikely event of any defect arising due to faulty materials or workmanship, the unit will be
either replaced or repaired free of charge (where possible) during this period. An alternative
product will be offered in case the product is no longer available or repairable.
August International Ltd
United Kingdom
Telephone:+44 (0) 845 250 0586
www.augustint.com