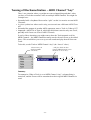
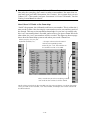
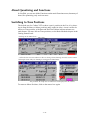
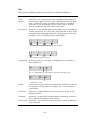
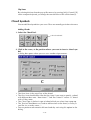
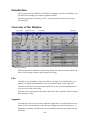
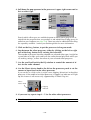
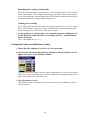
1
E
S
A
B
CU
VST
for Windows
Getting into the Details
-1-
Operation Manual by Ernst Nathorst-Böös, Ludvig Carlson
Documentation Quality Control: Dave Nicholson, Anja Kramer, Andrea Menke
The information in this document is subject to change without notice and does not represent
a commitment on the part of Steinberg Soft- und Hardware GmbH. The software described
by this document is subject to a License Agreement and may not be copied to other media
except as specifically allowed in the License Agreement. No part of this publication may be
copied, reproduced or otherwise transmitted or recorded, for any purpose, without prior written permission by Steinberg Soft- und Hardware GmbH.
All product and company names are ™ or ® trademarks of their respective owners. Windows
and Windows 95 are trademarks of Microsoft Corporation.
© Steinberg Soft- und Hardware GmbH, 1998.
All rights reserved.
-2-
Table of Contents
1
-3-
10
11
11
13
14
16
16
17
18
18
19
20
21
24
26
32
How Cubase VST handles audio
and MIDI
Why you should read this Chapter
Audio Channels vs Tracks
Audio Files
Audio Segments and Events - NonDestructive Editing
MIDI Inputs
MIDI Outputs
How Cubase VST records MIDI
Channel data
Rechannelizing – The MIDI
Channel setting for the Track
Rechannelizing also works on Thruput!
Turning off Rechannelization –
MIDI Channel “Any”
Stereo, Multi Channel and Multi
Track Recording
Stereo audio recording
Multi Channel Recording - Channel
“Any”
Multi Track Recording
The Arrangement - More on what
you can do with Parts and Tracks
33
34
35
36
37
38
44
45
46
47
47
48
48
49
50
52
Creating Parts
Overlapping MIDI Parts
Part Info
Merging Parts
About Cut, Copy & Paste
Part Operations using the Toolbox
Renaming Parts
Ghost Parts
Using the “Repeat” function
Cut Events
Global Cut
Global Insert
Global Split
Copy Range
Remix Track
Mix Down
54
Instruments
55
About Instruments
57
Inspector Real Time Parameters
58
59
What can I do with the Inspector?
The Parameters
62
Program Changes and MIDI
Volume
63
63
70
71
Why you should read this Chapter
Program Change
MIDI Volume
About Chase
72
Programming and Recording Mutes
and Solo
73
73
75
Pre-programming Mutes
Recording Mutes and Solo
About editing recorded Mutes
76
Groups
77
78
78
81
About Groups
How to use Groups - the basic steps
Building Groups
Using Groups
87
The MIDI Editors - General
Information
88
88
About this Chapter
Similarities and differences between
Editors
Opening an Editor
Closing an Editor
Editing music during playback
How Events are displayed in the
Editors
Moving around and the Goto popup menu
Monitoring Events in the Editors
Selecting and the To pop-up menu
The Do pop-up menu
The Info Line
Quantize and Snap Values
Creating Note Events
Editing Notes
Deleting Events
Creating and Editing Continuous
Data
89
91
92
94
97
98
98
100
103
104
105
107
109
110
113 Step Recording
114 Introduction
-4-
119 Key Edit
163 Logical Edit
120 About this “Chapter”
164
164
165
167
167
167
167
168
169
173
174
178
179
121 Drum Edit and Drum Tracks
122
123
125
126
128
128
129
About Drum Tracks and Drum Parts
About Drum Maps
About Output and MIDI Channel
Setting up a Drum Map
Loading a Drum Map
Saving your Drum Map
Editing Drum Parts in the Drum
Editor
133 Editing MIDI Parts in Drum Edit
134 Converting between MIDI and
Drum Parts
135 List Edit
136
140
141
142
143
144
145
147
147
The Columns in the List
Creating Events
Editing in the List
Editing in the Event Display
Editing in the “Value 2” Display
Hiding Events
Using Mask
About Quantizing and Functions
Switching to Time Positions
Why Should I Use Logical Edit?
Opening Logical Edit
Working with Presets
Undo
Selecting Easy or Expert Mode
Initializing the Settings
How Logical Edit Operates
About Setting Values
Setting up Filters
Applying a Filter
Setting Up for Processing
Processing Functions
Expert Mode
182 Filtering and Mapping MIDI Data
183
183
185
186
187
Introduction
Recording Filters
Thru Filters
Mapping Controller Messages
The Input Transformer
190 GM/GS/XG Edit
191 About this chapter
191 The Controls
193 When are the settings in the GM/
GS/XG Editor applied?
148 Score Edit
149 About this Chapter
150 Overview
151 Getting the Score displayed
correctly
155 Editing several Tracks
157 Manipulating Notes
159 Chord Symbols
160 Adding Text
161 Moving and Duplicating Chords
And Text
161 Deleting Text and Chord Symbols
161 Title, Comment and Copyright
162 Printing
194 The Input/Output Bus System
195 Introduction
195 What you can do with the Bus
system
196 Activating Inputs
198 Recording from an Input
200 Activating and routing Buses
201 Assigning the Audio Channels to
Buses
202 Sends and Effects
205 An example setup
-5-
207 The Audio Pool
228 The Audio Editor
208
208
209
210
211
212
229
229
229
233
234
236
240
240
213
216
217
218
220
222
223
225
227
Introduction
Overview of the Window
Displaying Segments
The Headings and Columns
Customizing the View
Finding Out how a Segment is used
in the Song
File Operations
Handling “Missing Files”
Creating Wave Images and Keeping
them up to date
Segment Operations
Deleting Unused Portions of Audio
Files (Erase Unused)
Importing Audio Files into the Pool
Dragging Segments into Other
Windows
Preparing File Archives and
“Masters”
Saving and Loading the Pool
242
243
244
247
249
252
253
255
256
261
262
264
265
266
270
272
274
277
277
Introduction
Opening the Audio editor
About Events, Lanes and Segments
About Q-points
About Zero Crossings
Customizing the View
Recording in the Audio editor
Importing and Dragging Audio into
the Editor
Auditioning and Scrubbing
Editing on the Info Line
Changing Start and End Insets
Working with Q-Points
Adding and Editing Match Points
Moving Audio Events
Duplicating and Repeating Events
Using Cut, Copy and Paste
Quantizing Audio Events
Deleting Events
Working with Grouped Events
Muting Events
Splitting Events
Creating Crossfades, Fade Ins and
Fade Outs
Using Cycled Recording for
assembling a “perfect” take
Fitting Audio Events to the Loop
Changing the Volume and Panning
of an Event
Making an Event Play another
Segment
Exporting Events into Files
278 Processing Audio Files
279 Introduction
279 Applying the Processing
280 The Functions
-6-
283 The Wave editor
342 Working with ReCycle files
284 What is the Wave Editor?
284 Precautions
284 About the Wave Editor Preference
setting
285 Opening Wave Editor Windows
286 Adjusting the View
289 Playing Back
290 Selecting
291 Working with segments
292 Turning the Selection into a File
293 Cutting and Pasting Audio
293 Applying Processing Functions
343 About ReCycle
344 Using ReCycle files in VST
346 About tempo changes and the last
Segment(s)
346 Importing into “Any” Tracks Polyphonic playback
348 Editing Tips and Tricks
294 Using an External Wave Editor
295
295
296
297
Why use an external Wave Editor?
Precautions
Setting which Wave Editor to use
Editing in the selected Wave Editor
299 Mixing and using Effects
300
301
302
303
306
317
321
322
Introduction
Volume
Panning
EQ
Effects
The Group Mixer
ReWire
Volume and Pan Automation –
Dynamic Events or Monitor Mixer
324 Automating the Monitor mixer
349 Making the Most of the Event/
Segment Relationship
350 What is an Event really?
350 What is a Segment really?
351 Copying Audio Events
354 Optimizing Audio Performance
355 Introduction
356 About Audio Cards
359 Computer Performance and Audio
Channels
362 Audio System Settings
369 The ASIO Multimedia Setup dialog
379 Using the ASIO DirectX Driver
382 Methods of Optimizing
Performance
383 Maintaining the Hard Disk
331 Installing and using external effect
plug-ins
332 About this chapter
332 VST-native Plug-ins
334 DirectX Plug-ins
336 Importing and Exporting Audio
337 Importing audio files into the
Arrangement
338 Mixing down to an audio file
341 Including your MIDI music in the
mixdown
-7-
384 The Master Track
431 Matching Audio and Tempo
385
386
387
388
388
389
390
432 Introduction
432 Opening the Audio/Tempo Match
Editor
433 Adding and Editing Match Points in
the Editor
436 Making the Playback Tempo follow
the Audio
441 Making the Audio Follow the
Tempo
446 Creating a Groove template
447 Using Snip at M-points
391
392
392
393
394
396
398
399
400
401
401
401
401
402
402
403
403
404
406
409
What is the Master Track?
Opening the Graphic Editor
The Window Sections
About the Tempo Display
About Time Signature Events
About Rulers and Positions
Switching between Meter and Time
based Display
Moving around and setting Song
Position
About Hitpoints
About the Toolbox
Activate Master!
Recording Tempo Changes
Selecting
Editing on the Info Line
Redrawing the Tempo Curve
Drawing new Events
Moving Events Using the Mouse
Duplicating Events
Cut, Copy and Paste
Deleting Events
Repeating Events
Creating Accelerandi and
Ritardandi
Reducing the number of Tempo
Events
Smoothing Tempo Event values
Numerical processing of Tempo
Events
The Master Track List Editor
Moving Master Track data between
Arrangements
410 Hitpoints
411
411
412
413
415
417
418
420
424
428
What can I do with Hitpoints?
What are Hitpoints?
About this Chapter
Setting Out Hitpoints
Editing Hitpoints
Playing back Hitpoints via MIDI
Linking Hitpoints
Working with Tempo Matching
Working with Straighten Up
Tempo Mapping "freely recorded"
Music using Time Locked Tracks
449 Time Locked Tracks
450
450
450
451
451
451
451
What are Time Locked Tracks?
Time Locking a Track
Changing the Tempo
Turning Time Lock On and Off
Editing Time Locked Tracks
Creating Multiple Tempi
Things To Note
452 Synchronization
453
453
454
455
458
459
460
461
462
463
465
466
467
467
468
469
470
-8-
Introduction
The two types of Sync Signals
Cubase VST – Master Or Slave?
Synchronization and audio
playback
The Synchronization Dialog Box
Internal Sync - No External
Synchronization used
Synchronizing Cubase VST to MIDI
Time Code (MTC)
Synchronizing Cubase VST to MIDI
Machine Control (MMC)
About Frame Rates
Synchronizing Cubase VST to
another MIDI Device via MIDI
Clock
Synchronizing other Equipment to
Cubase VST
Transmitting Synchronization
Signals while Cubase VST is
synchronized to an External Source
Song Start
Time Display Offset
Bar Display
MROS Resolution and System
Preroll
Sync Options
471 Customizing Cubase VST
472
473
475
475
Why Customize?
Examples of things to customize
Saving the Startup Song
Starting from other Song documents
–Templates
476 Keyboard Commands
477 What This Chapter Contains
477 Numeric Keypad
478 Typewriter Keyboard
485 Index
-9-
1
How Cubase VST handles audio and
MIDI
2
- 10 -
Why you should read this Chapter
This chapter contains some details and background theory about how Cubase VST
handles audio and MIDI, as well as some terminology used throughout this manual
and in the program. Please take the time to read this, as it will aid you in using the
program in the most effective way (when working with audio, you should also read
the chapter “Optimizing Audio Performance” for best results).
Audio Channels vs Tracks
Many audio recording systems do not make a difference between audio channels
and Tracks, which is the way a regular tape recorder works: one channel - one
Track. Cubase VST however, has a much more flexible approach to handling audio,
as we shall see. This is important to note, especially if you have previously been
working with a system where Tracks and Channels are one and the same thing.
Tracks
An Arrangement can contain a practically unlimited number of Tracks. Each Track
has a Channel (Chn) setting that determines which audio channel the Track records
and plays back on, just like you select MIDI Channel for a MIDI Track. The possibilities are:
• A single (mono) channel, for example “7”.
• A stereo pair, for example “3+4”
• “Any”.
All these alternatives are described below.
Audio Channels
An audio channel plays back one mono audio recording at a time.
In Cubase VST, the number of audio channels you have access to is limited by your
computer’s processing power, the amount of free RAM and the speed of the hard
disk (see page 356).
The number of audio channels puts a limit to how many audio recordings can be
played back at the same time. For example, in a four channel system, you could
play back:
•
•
•
•
One lead vocal recording (one channel), plus
One backing vocal recording (one channel), plus
One mono bass recording (one channel), plus
One mono guitar recording (one channel)...
...all at the same time.
Four channels of audio
- 11 -
Mono/Stereo
A stereo recording occupies two consecutive channels. If you for example make a
stereo recording on channels “3+4”, this single recording uses up both channels 3
and 4. It’s your decision when to record in mono and when to record in stereo.
Since the number of channels is limited, some care should be taken so that the
stereo facility is only used when actually needed.
More about stereo recording on page 21.
Channel “Any”
A Track can also be set to Channel “Any”. This allows you to access all available
audio channels from one Track. This feature is mainly useful for the more advanced
systems where is it possible to record a large number of audio inputs (and hence
channels) simultaneously.
Imagine a situation where you make a multi channel recording, for example a recording of a drum kit via a large number of microphones. Using the “Any” feature
then allows you to handle the whole recording as one entity (one Track) although it
actually consists of recordings on many separate audio channels.
Setting Two Tracks to the same Audio Channel
You can set things up so that two Tracks use the same audio channel. This is not a
problem as long as there is no audio happening at the same time, on the two Tracks.
For example like this:
Here, the Guitar Track plays through the verses and the saxophone Track plays in
the chorus. Since the Parts don’t overlap, both Tracks can have access to the same
audio channel during playback.
However, if there is any overlap between the two – if, for example, the saxophone
starts playing in the middle of the guitar, the two Tracks will compete for the single
audio channel, and only one of them can use it at the same moment. In this case, the
“latest” recording will always “steal” the audio channel, as described in the illustration below.
The guitar will play until the sax Part starts. Then the sax will be heard instead.
These sections will not be heard!
- 12 -
This situation extends to stereo recordings. If one Track records in stereo, on for example channels 3+4, both these channels are occupied when this Track plays back.
You can’t overlap either mono or stereo recordings that use either of these channels.
Audio Files
When you record, your audio card digitizes the audio signal coming from the microphone (or other sources) and stores the digital data as files on your hard disk.
One File per Channel
One file is always created for each single recording you make.
File Format
The audio files created by Cubase VST are Wave files (WAV), the most common
audio file format for the PC. It is also possible to import and export audio files in
AIFF format, which is a very common Macintosh format.
Since practically all Windows audio processing programs read and write Wave or
AIFF files, this allows you to process your Cubase VST files in other programs, and
import files that have been created elsewhere, into Cubase VST. See page 337 for
information about importing and exporting files.
Audio Files are big
Audio files are comparatively large, compared to Cubase VST Song files, MIDI
files, or for example, word processor files. For each minute of recording at 44.1
kHz mono, you will use up 5 MBytes of hard disk storage per mono audio channel.
This means that to record continuously on four channels for three minutes, you will
need 60 Mbyte of free hard disk space (5MByte * 4 channels * 3 minutes =
60MByte).
Take good care of your Audio Files!
This can not be repeated too many times: Back up your files! Hard disk crashes are
a well known fact in the computer industry, and the only way to insure yourself
against any disasters is to maintain a meticulous back-up scheme. If you work professionally, we suggest you invest in an removable disk based, DAT based or other
back-up system and that you keep multiple copies of all files.
- 13 -
Audio Segments and Events - Non-Destructive Editing
Cubase VST is a random access based, non-destructive audio recording system –
and even if that sounds like gibberish, you should be happy about it, as you will
soon find out.
Non-destructive editing
Let’s say you have recorded a couple of minutes of guitar. During the first verse,
there happens to be a brilliant section that you would like to use again in all the
other verses. As you may know, this is possible using the “Copy and Paste” techniques employed in most computer programs.
However, reusing material over and over again, normally wastes computer memory
and/or hard disk space. With Cubase VST it doesn’t!
If you “cut out” a section of audio, and paste it in, over and over again in the song,
you are simply instructing the program to use the same portion of the audio file in
many places, without actually copying the file. This is made possible via Cubase
VST’s use of segments.
Segments
A segment is a specification for a section of an audio file. The segment contains information about where in the audio file to start playing and where to stop. It might
be that the segment plays the entire file, or it could also be that it just plays a couple
of seconds somewhere in the middle of the file.
You can create as many segments as you like, from the same file, as the example below shows.
Audio file
Segments
- 14 -
Audio Events
To actually play back a segment in your Song, you need to place an Audio Event in
the Song. Each Audio Event plays a certain segment.
Audio Events and segments are of course automatically created as you record, but
you can also manually create events and segments when you are editing or assembling recorded material.
In many cases, you will not “feel” any difference between handling Audio Events
and segments, but there is one. For example, an Audio Event specifies where to
start playing some audio, but the segment specifies the duration of playback. Also,
you might delete Audio Events and still have access to the segment it played, so
that some other Audio Event can play back the same segment in another part of the
song. When there is an important difference between these two, this manual will
tell you.
A Part contains Audio Events...
...which play segments (portions of an audio file).
- 15 -
MIDI Inputs
Cubase VST records from all active MIDI Inputs at the same time. In essence, this
means you don’t have to care about selecting or activating MIDI Inputs. However,
if you have multiple interfaces and want to deactivate an input for some reason, you
can do this in the MIDI Setup dialog.
MIDI Outputs
Each MIDI Track has a MIDI Output setting. This routes the data on the Track to a
physical MIDI Output on one of your MIDI Interfaces.
Standard Interfaces
Standard interfaces are identified in Cubase VST by the names provided by their respective drivers.
Select one of the ports on the Output pop-up
menu to make the Track transmit data to that
interface.
Multi-port Interfaces
If you have a multi-port interface, each of its MIDI Out connectors appears as a
MIDI Output in the Output list. Setting a Track to a certain Output routes all the
MIDI Data on that Track to that specific MIDI Out connector on the interface.
In this case, the Track will transmit all its data to MIDI
Output number 1 on a Voyetra multi-port interface.
- 16 -
How Cubase VST records MIDI Channel data
Each MIDI Event that Cubase VST records has a MIDI Channel number.
If for example you set your MIDI keyboard to transmit on MIDI Channel 5, all the
notes, Pitch Bend data, program change or whatever you transmit from it, will have
the MIDI Channel number 5.
5
5
5
5
5
This keyboard transmits on MIDI Channel 5.
Some MIDI devices can transmit on more than one MIDI Channel. In this case the
MIDI input data coming in to Cubase VST will contain mixed channel numbers.
2
6
2
6
6
This keyboard transmits on two MIDI Channels, – 2 and 6. It may for example transmit each
channel from one side of a split point.
Cubase VST stores the MIDI Channel with the Event. If for example you look in
List Edit (which you will learn about later in this manual), you can see the MIDI
Channel for each Event that has been recorded.
In List Edit you can see
the MIDI Channel
stored with each Event.
- 17 -
Rechannelizing – The MIDI Channel setting for the Track
When you play back a recording, you want it to be routed to a certain sound in one
of your synthesizers. Let’s say you have a synthesizer that plays a bass sound on
MIDI Channel 3. To route a Track to that sound you set it to MIDI Channel 3.
This Track is set to play back
on MIDI Channel 3.
What now happens is that when you hit play Cubase VST plays back all the data on
the Track, but when doing so it replaces the MIDI Channel number stored in the
Events with that of the Track – in this example, MIDI Channel 3!
These Events, on different
MIDI Channels...
...get their MIDI Channel changed to
that of the Track, during playback
3
3
3
3
3
This replacement is done as part of the playback procedure, that is it does not affect
the recording permanently. If you check the data on the Track in List edit (as mentioned above) all the Events still have their MIDI channel intact.
This is what we refer to as rechannelizing – changing the MIDI Channel of the
Events on playback.
Rechannelizing is very convenient because it lets you forget what MIDI Channel
number your keyboard is set to transmit on. Instead, to route a Track to a certain
sound, you simply set the MIDI Channel number in the Track list in Cubase VST.
And, if you decide you want to route the Track to another synthesizer, later, the
only thing you have to do is to change the MIDI Channel setting for the Track.
Rechannelizing also works on Thru-put!
The text above only described what happens on playback. But in fact, Rechannelizing happens on the data that passes Thru Cubase VST.
If you click on a Track to activate it, its MIDI Channel setting is used for rechannelizing the data that passes through the program. This automatically routes your
playing to the correct MIDI Channel when you are recording, or rehearsing for a recording you are about to make.
2
6
2
6
3
6
If you make a
Track active...
- 18 -
3
3
3
3
...its MIDI Channel value is used
for rechannelizing the data that
passes through Cubase VST.
Turning off Rechannelization – MIDI Channel “Any”
There’s one situation where you might not want rechannelizing and that’s when
you have a Track that contains Events on multiple MIDI Channels. You might for
example have:
• Recorded with a keyboard that can be “split” so that it transmits on two MIDI
Channels.
• A guitar synthesizer where each string can transmit on a different MIDI Channel.
• Recorded the output of another MIDI sequencer onto a Track in Cubase VST.
• Imported a MIDI File of Type 0, which by definition contains only one Track,
possibly with Events on several MIDI Channels.
In each of these situations you might want to have the Track transmit on all its
MIDI Channels – the MIDI Channels actually stored with each Event, as described
above. This would allow you to set up several sounds and play them all from one
Track.
To do this, set the Track to MIDI Channel “Any” (the “lowest” value ).
...will play back on their
original MIDI Channels since
the Track is set to “Any”.
These Events, on
different MIDI
Channels...
2
6
2
6
6
Summary
To summarize: When a Track is set to MIDI Channel “Any”, rechannelizing is
turned off, and the Events will be transmitted on their original MIDI Channels instead.
- 19 -
2
Stereo, Multi Channel and Multi Track
Recording
3
- 20 -
Stereo audio recording
Stereo recording only applies to audio Tracks and has no relevance for MIDI data.
Setting a Track to stereo
This is done in the Inspector, by clicking the Mono/Stereo button until it shows
stereo.
The mono/stereo button in the Inspector.
Which Tracks can be set to stereo?
The mono/stereo button indicates if a track can be set to stereo or not (it is bright
when this is possible and dark when it is not). A Track must meet the following criteria for the stereo option to be available:
• It must be set to an odd channel number.
A stereo recording always uses as an odd channel for the left channel and an
even for the right.
• It must not already contain any mono recordings.
If there are already mono Parts on the Track you can not switch it to stereo
and vice versa.
• No other audio Track that is already in use can be set to “the other”
channel.
If channel 4, for example, is already used by some Track for a mono recording, a Track set to channel 3 cannot be switched to stereo.
What happens when I switch a Track to stereo?
• The Chn column in the Inspector indicates the two channels used for
stereo.
This example indicates that
theTrack uses channels 1+2.
- 21 -
• The Channel pop-up (reached from the Inspector and the Chn column in
the Track list) lists the two channels as a stereo pair.
From this point on they can only be used together, as a pair.
In this example, all Tracks
(in a 16 channel system) are
set to stereo.
• The Chn column in the Track List also indicates the use of two channels
by adding a star [*] after the channel number.
For example, “1*” means that channels 1 and 2 are used.
• Any Tracks set to the “other” audio channel in the resulting stereo pair,
will automatically be set to channel “Any”.
Let’s say you have a Track set to channel 3, and switch it to stereo. Then, any
Tracks playing back on channel 4 will automatically be set to channel “Any”.
• In the Mixer window, the two channels are tied together by a “stereo
banner” at the top.
A stereo channel pair in the Mixer.
• Stereo recordings that you make take up two audio channel lanes in the
audio editor, see page 231.
Recording in stereo
Making a stereo recording is actually no different from making a mono recording.
Just make sure that the two audio outputs you want to record (probably the left and
right sides of a stereo source) are connected to the correct inputs (see the Getting
Started book and page 196 for details about inputs).
- 22 -
The Mixer and Stereo Channel Pairs
As described above, a stereo channel pair is indicated in the Monitor Mixer window
by a “banner” at the top.
In addition to this, many controls for the channels are “ganged”, which means that
when you change one of them, they are both affected.
For example, if you adjust the level of one channel in a stereo pair, the other channel is also adjusted, automatically. This makes it easy to set up the two channels in
a stereo pair so that they sound identical.
The controls affected by this are:
•
•
•
•
•
Level.
All EQ settings.
Effect Send Amount and Pre/Post settings.
Mute and Solo.
Monitoring on/off
More about mixing in the chapter “Mixing and using Effects”.
Overriding “ganging”
If you want to make Monitor Mixer adjustments indvidually for a channel in a
stereo pair, simply hold down [Alt] when adjusting the control.
- 23 -
Multi Channel Recording - Channel “Any”
● Multi channel recording can be used on any system but is most useful to
those with cards with more than two inputs.
Why record on an Any Track?
A single “Any” Track can contain recordings on multiple channels. In fact one
Track can contain mono recordings on as many channels as the system supports.
Let’s say that you are recording a drum kit on four channels: a stereo mix of the entire kit, plus two separate channels for bass drum and snare (provided your card can
record four simultaneous inputs). If you use an “Any” Track for this recording you
will be able to record all four channels onto one Track and subsequently handle all
four as one entity. This simplifies editing in the Arrange window and in the Audio
editor.
Performing a Multi Channel Recording
1. Connect and set up the audio sources as desired.
2. Create an Audio Track to record on.
3. Open the Inspector for the Track and set it to channel “Any”.
A number of Record Enable buttons appear. Exactly how many depends on
the number of audio channels in your audio recording system.
A Track set to “Any” in a 16 channel system.
• There is also a group of Monitor buttons in the Inspector, as many as
there are audio channels.
These work just like the Monitor button for a single channel Track, allowing
you to manually turn monitoring on and off for each audio channel.
● If stereo inputs are used, a maximum of two audio channels - one odd, one
even - can be monitored at once. If you for example are monitoring a channel
with odd number, and click on another odd-numbered channel button, monitoring will be deactivated for the first channel.
- 24 -
4. For the two channels you plan to record on, click the corresponding
Record Enable button in the Inspector.
The Record Enable buttons will change color to indicate their status, as described below.
5. Activate recording in any way you like, as described in the previous
chapter.
All audio channels will now be recorded on the single Track.
When you later open the Audio Editor you might want to Group the recordings together. More on this on page 262.
About changing the Channel setting
As you noted above, it is the “Any” channel setting that is the clue to the Track being able to play back on more than one channel. If you later set the Track to a specific Channel number you will only hear one of the recorded files.
Record Info color coding
For Tracks with channel “Any”, a color scheme is used in the Inspector to make
channel assignment more intuitive:
• An audio channel box is red if the channel is record enabled.
• An audio channel box has a green border if the selected Track uses the
channel and is ready for playback.
• An audio channel box has a blue border if another Track uses the channel.
This helps you determine if this channel is available for recording.
● Please note that it may be perfectly OK to record on a channel that already is
in use (displays a green or blue border). This depends on where in the Song
the channel is in use.
- 25 -
Multi Track Recording
What can I do with Multi Track Recording?
• Multi Track Recording allows you to record several players at the same time
and have their performances appear on one Track each.
• If audio channels you are about to record are not directly related, but you still
want to record them at the same time, you might prefer to record them on one
Track each.
• If you have a keyboard or other MIDI Controller that can transmit on several
MIDI Channels, Multi Track recording allows you to record different MIDI
Channels onto different Tracks.
• Multi Track recording also allows you to “layer” several MIDI sounds, and
record them on one Track each.
• When using Tape Tracks, Multi Track recording should be activated, so that
you can set more than one Track on the tape recorder to record ready. This is
described in the separate Tape Tracks document.
Activating Multi Recording
1. Pull down the Options menu and select “Multirecord”.
2. From the menu that appears, select “Active” so that it is ticked.
Multi Track Recording is now turned on, and a new Track column appears, labelled “R”. This is used in different ways for different Recording Modes, as
described below.
3. Pull down the menu again and select one of the “modes” on the lower
half, Merge, Channel Split, Input Split or Layer.
Which of these “modes” you should select depends on what type of recording
you want to make. They are all described on the following pages.
This item is used to
activate/deactivate
Multi Recording.
This part of the menu is used
to select one of the modes.
When Multi Recording is active,
a new Track column appears.
- 26 -
Recording Audio
1. If you are only recording Audio, select Multi Record Merge mode.
2. Create as many Audio Tracks as desired and set them all to different
channels.
The number of Tracks you can record on is limited by the number of inputs
you have access to. If you only have two audio inputs, you can only record
two different audio sources.
3. Click in the “R” column for each Track, to set them up for recording.
4. Enable recording for each Track by clicking the Record Enable button in
the Inspector.
5. Activate recording in any way you like, as described in the previous
chapter.
The audio channels will now be recorded on one Track each.
Recording MIDI
About Merge Mode
Using Merge mode is like recording with Multirecord turned off.There is no reason
to use this mode for MIDI recording only. It is primarily used to record audio onto
several Audio Tracks and with Tape Tracks (for setting multiple Tracks on the tape
recorder to Record Ready Mode).
Here is how MIDI recording works in Merge mode:
• Recording only happens on one MIDI or Drum Track at a time, just as when
Multi Track Recording is turned off.
• Recording happens on the Track where you last activated recording in the “R”
column (see illustration on previous page).
Recording different MIDI Channels on different Tracks (Channel Split Mode)
This is the preferred mode if you either have several MIDI Instruments all connected to the same input, or if you have a MIDI Controller that can transmit on
more than one MIDI Channel.
1. Set up your MIDI instrument(s) so that they transmit on different MIDI
channels, preferably on consecutive MIDI Channels, starting at 1 (1, 2, 3,
etc.).
2. Activate Multi Recording in Channel Split mode (see above).
3. Set up the Tracks you plan to record on so that they transmit on the desired MIDI Channels and Outputs.
This does not have to be the same MIDI Channels as your instruments are set
to transmit on. You can for example make a Track record information coming
in via MIDI Channel 2, while it plays back on MIDI Channel 11.
- 27 -
4. Click in the “R” column for the first Track you want to record on. A popup appears from which you can select one of five alternatives
The Multi Rec pop-up when
“Channel Split Mode” is selected.
In the “R” column, the first Channel of the four
that the Track records, is displayed.
The Multi Recording pop-up when “Channel Split Mode” is selected.
• The first option (Off) deactivates recording for this Track.
• Selecting the second option makes this Track record all information coming in
on MIDI Channel 1, 5, 9 and 13.
• Selecting the third option makes this Track record information coming in on
MIDI Channel 2, 6, 10 and 14
• The fourth and fifth options work just as the previous, but with the remaining
MIDI Channels.
• So, to for example separate four different players by MIDI Channel they
should transmit on for example MIDI Channel 1, 2, 3 and 4, respectively.
5. Set up the other Tracks you wish to Record on.
6. Activate Recording as usual.
Recording different players onto different Tracks (Input Split Mode)
This is the mode to use if you have several MIDI Instruments connected to one
MIDI input each.
1. Connect the instruments (up to four), each one to a MIDI input of its own.
2. Activate Multi Recording in Input Split mode (see the beginning of this
chapter for details).
3. Set up the Tracks you plan to record on, so that they transmit on the desired MIDI Channel and Output.
- 28 -
4. Click in the “R” column for the first Track you want to record on. A popup appears from which you can select one of five alternatives (please refer to the table on the next page):
The Multi Rec pop-up when
“Input Split Mode” is selected.
Menu Option
MIDI Input used
Off
None (No recording on this Track)
In 1
The first MIDI Input in your system.
In 2
The second MIDI Input in your system.
In 3
The third MIDI Input in your system.
In 4
The fourth MIDI Input in your system.
Exactly which is the first and second etc MIDI Inputs in your system is decided by
Windows. If you only have one MIDI interface the numbering will most likely be
the same as on the interface. If you have several interfaces only experimentation
can tell which is which.
After selecting an Input, the “In” number
is displayed in the “R” column
5. Select a MIDI Input for the second Track.
Continue in the same way with the third and fourth Track.
6. Activate Recording as usual.
- 29 -
Using Multi Track Recording to layer sounds
In Layer Mode you record the same information onto several Tracks (up to four). If
each of the Tracks you record on is set to transmit on a different MIDI Channel and
Output in you are able to play and record with up to four different sounds at the
same time.
1. Set up the Tracks you plan to record on so that they transmit on the desired MIDI Channels and Outputs.
2. Activate Multi Recording in Layer mode (see the beginning of this chapter for details on how to do this).
3. Click in the “R” column for each of the Tracks you want to record on.
You can record on a maximum of four Tracks.
4. Activate Recording as usual.
The same information now gets recorded onto four different Tracks. While
you record you will hear the sounds of all four of the instruments set to play
back from those Tracks.
When four Tracks are
activated in Layer mode...
...the same information gets
recorded on all four Tracks...
Recording MIDI and Audio at the Same Time
When Multi Record is activated you can record on MIDI and Audio Tracks at the
same time. There’s only one special thing to note:
• You can only activate Multi Recording on up to three MIDI Tracks simultaneously.
Activating recording in Multi Record Mode
Recording in Multi Record mode is no different from Recording in regular
mode.You can use punch in and out, Cycled Recording etc. There’s only one thing
to note:
Cycle Modes and Multi Recording
As described in the Getting Started book, you can record in various Cycle Modes.
You can also apply recording functions like Key Erase, Delete last version etc.
• During Multi Recording, these Modes and Functions only apply to the
Active (selected) Track, not to all Tracks that you record on!
- 30 -
Options related to Multi Track Recording
Using the Mixdown feature on the Structure menu you can merge a Multi Track recording into one Track set to channel “Any”. This can also be a handy way to assemble several separate recordings (e.g. the different voices in a backing vocal
arrangement) into one easily handled unit in the Arrange window. See page 52 for
more information.
- 31 -
3
The Arrangement - More on what you
can do with Parts and Tracks
4
- 32 -
Creating Parts
Parts are normally created in one of three ways:
• by recording (applies to Audio Parts, MIDI Parts and Drum Parts only, see the
Getting Started book).
• by direct creation of an empty Part.
• or by duplication of existing Parts (see Getting Started).
How Parts appear when you record
When you record on one Track the following rules apply:
• Recording from one point to another creates a Part that spans between
these two points.
• Recording again between the same points or within the Start and End
points of the existing Part creates no new Part.
The music is either added to (Overdub mode) or replaces (Replace mode) the
existing.
• If “Prerecord” in the Metronome dialog box is active, recording during
the Precount will extend the Part to the left.
For obvious reasons Parts are not extended beyond the Left Locator position
when you record in Cycle mode, or before Song Position 1.1.0.
• In other cases (like starting recording in an empty section of the Track,
recording over Parts and recording out of existing Parts into empty areas
of the Track), new Parts are only created where there wasn't any before.
As described above, the Overdub/Replace setting determines whether music
is being added to the existing, or replaces it.
An example might clarify this:
You have an existing Part starting at 3.1.0 and ending at 4.1.0.
You start the new recording
in Overdub mode at 2.1.0
and end at 9.1.0.
This creates a new Part starting at
2.1.0 and ending at 3.1.0...
...the old one between 3.1.0 and 4.1.0
is kept, but music gets added to it...
...and finally there is a new part created
between 4.1.0 and 9.1.0.
- 33 -
Direct Creation of Parts
There are four ways to create an empty Part:
• By double clicking in any empty (white) area between the Left and Right
Locator, in the Arrange window.
The new Part winds up between the Locators, on the Track you clicked on.
• By selecting Create Part from the Structure menu.
• By pressing [Control]-[P] on the computer keyboard.
In these two cases, the new (empty) Part winds up on the active Track beginning at the Left Locator and ending at the Right Locator.
• By drawing it with the Pencil tool.
In this case, the Track, position and length of the new (empty) Part depends on
your drawing, just like when you draw notes in an editor.
● A directly created Part never replaces an existing Part, but might overlap one.
● Group Parts are created differently, see page 83.
Overlapping MIDI Parts
Parts on the same MIDI Track might overlap or be completely on top of one another. You can make good use of this feature in many ways:
• Parts which start with an upbeat can overlap the end of the Part before.
• Small drum ornaments (such as cymbal crashes) can be created as separate Parts and just be put on top of the basic beat Part.
• Duplicate Parts (or Ghost Parts, see page 45) which are used to create
delay effects, double sounds and so on, can be put on top of the original
Parts.
You will probably find other creative uses for this feature.
- 34 -
Selecting overlapping Parts
To display overlapped Parts in an Arrangement, use the Select Overlap item in the
Edit menu. This will select all Parts that are partially obscured by other Parts.
The Select Overlap item...
...selects all overlapped Parts.
Part Info
• To Get information about a Part, select it and select Get Info from the
Edit menu or press [Control]-[I] on the computer keyboard.
If several Parts are selected, the window will show the first one.
Change this field to move
the start point of the Part.
Change this field to
resize the Part.
How to rename Parts is described on page 44 in this chapter.
- 35 -
Merging Parts
Merging one Part with another adds all Events in the first Part to the second. It is
done like this:
1. Hold down [Alt]+[Control] on the computer keyboard.
2. Drag the first Part and release it on top of the other Part.
The result of this depends on the Snap Setting and the Record Mode:
• Overdub Mode gives a regular merge, that is the contents of the second
Part are kept, together with the inserted Events from the first Part.
• Replace Mode will make the inserted Events replace the old Events in the
destination Part.
Regardless of Record Mode, the destination Part will keep all its Parameters
(Output, MIDI Channel and so on).
● The dragged Part is not erased or even moved. A copy of its contents is made,
and it is this copy that is merged into the other Part.
Appearance and size of the merged Part
The start and end points of the two Parts don't have to match at all:
If the two Parts don’t exactly overlap...
...new Parts are created, following
the same rules as when creating Parts
in other ways.
● You can only merge two Parts which belong to the same Track class. Group
Parts can not be merged.
- 36 -
About Cut, Copy & Paste
You can use Cut, Copy and Paste ([Control]-[X], [Control]-[C] and [Control]-[V])
to rearrange your Parts within the Arrangement, or to move Parts between different
Arrange windows. Cut, Copy and Paste works according to standard Windows principles. There are however a few things to note:
• The Parts are always Pasted in beginning at the current Song Position.
Before Pasting, move the Song Position to where you want the beginning
of the first Part.
The Song Position is automatically moved when a Cut or Copy is executed.
When you Copy, the Song Position is moved to the end of the last of all selected Parts, making this position a suggestion for Pasting. When you Cut, the
Song Position is moved to where the first of the Cut Parts started.
• If you Paste into the same Arrange window as the Parts came from, they
are put in on the same Tracks as they originally were on.
• If you Paste into another Arrange window, Cubase VST tries to use existing Tracks if possible.
This means that Parts are Pasted in on existing Tracks with the same MIDI
channel and Output settings, if there are any. If not, new Tracks are created for
the Pasted Parts.
• If you hold down [Alt] and select Paste from the Edit menu, all the consecutive Parts in the Arrangement will be moved forward to “make
room” for the Parts you Paste.
Note that the inserted Parts will end up on the same Tracks they have been
Copied from.
- 37 -
Part Operations using the Toolbox
Resizing Parts
You can change the length of a Part using the Pencil tool. There are two ways of doing this:
• Position the pointer close to the end point, and drag to the left (shorten)
or to the right (lengthen).
This changes the length of the Part (without changing its start position).
• Position the pointer close to the beginning, and drag to the left.
This adds to the beginning of the Part, This does not move the Events in it, it
just sizes it as if recording had been activated earlier.
● An outline of the Part shows the size while you are dragging. The Mouse box
aids you in positioning the pointer so that you can set the length exactly as
you want it. The Snap function helps you to restrict your changes to some
even note value (see the Getting Started book).
Shortening a Part with the Pencil.
● If you make a Part shorter, the Events outside the new length are lost.
Repeating Parts
If you hold down [Alt] while lengthening a Part with the Pencil tool, new Parts will
be created, all lined up end-to-start after the Previous Part. The new Parts will be
copies of the original, including all Events and playback parameters.
The outline shown when you drag the Pencil can be thought of as a “frame”, that becomes
filled with as many copies of the original Part as possible.
If you instead hold down the [Control] key, the repeated Parts will be Ghost Parts
(see page 45).
• You can also Repeat using a dialog box, see page 46. This allows you to
repeat several Parts at the same time.
- 38 -
Deleting Parts
This is done with the Eraser tool. Select the Eraser and click on the Parts you want
to delete. If you hold down [Alt] while doing this, the Part you click on and all consecutive Parts on the Track will be erased.
There are of course several other ways of deleting Parts. These are described in
Getting Started.
About Deleting Audio Parts
If you delete a Part with the Eraser or via the keyboard, the Part is removed from
the Arrange window, but its segments remain in the Pool, and the file is of course
left on disk.
If you wish to also delete all segments and the files referenced by the Part, proceed
as follows:
1. Select the Part.
2. Hold down [Control] and press [Backspace].
3. Click OK in the dialog that appears.
Splitting a Part in two
A Part can be split or cut up using the Scissors tool in the Toolbox. This creates two
completely independent Parts:
Click with the Scissors on the
Part you want to Split.
The exact position of the Split is
determined by the set Snap value.
- 39 -
Splitting into several Parts
1. Hold down [Alt].
2. Split the Part as described above.
The Part will be split up into many Parts, all with the length of the cut you indicated.
If you for example have a six bar
Part and cut it after the two first
bars while pressing [Alt]...
...it will be cut into
three two bar Parts.
About Splitting Audio Parts
• When you Split a Part in two you also split the Events at that position and
therefore create new segments.
• If Snap to Zero is turned on, on the Audio menu, the splitting of the audio will
occur at the closest zero crossing. See page 234.
Joining Parts together
Joining Parts means turning two shorter Parts (on the same Track) into one long
Part:
• Click on a Part with the Join tool (glue tube).
This Part will now be joined to the Part coming after it on the Track.
Gluing two Parts together, regardless of if they are spread apart...
...gives you one long Part with the name of the first.
● If the Parts overlap, they are merged in the overlapping area. No Events are
lost.
- 40 -
Joining several Parts
If you hold down [Alt] and click on a Part with the Join tool...
...all consecutive Parts on that Track will be glued to
the Part you clicked on.
Monitoring Parts
You can listen to the contents of a Part with the Magnifying glass tool.
1. Select the magnifying glass from the Toolbox.
2. Hold down the mouse button.
3. Click on the Part or drag the mouse over the Part you want to hear.
What you get depends a bit on what type of Part your are using this on:
• For audio Parts, the event at that position is played back. You can not drag,
only click.
• For MIDI Parts, you need to drag back and forth to hear the MIDI data at those
positions (scrub).
• For MIDI Parts you can start playback, hold down [Alt] and click on a Part.
The Part will then be played back, beginning at the next bar.
• The Magnifying glass can not be used on Group Parts.
Muting Parts
To mute a Part, click on it with the Mute tool (the cross). To "unmute" a Part, just
click on it again. Muted Parts are displayed in grey.
The Mute tool.
A muted Part.
- 41 -
Match Quantizing
Why Match Quantize?
Match Quantizing allows you to match the feel of one Part with the feel of another.
If you for instance have made up a great "live" bass drum Part and wish to pass the
timing of it on to a hi-hat you should use Match Quantize.
This type of Quantizing takes the positions of the notes in one Part as a reference. It
uses them to move some or all notes in another Part to similar positions. By setting
a Quantize value you control how far the notes can be moved forward or backwards
in time. If you for instance select the Quantize value 8, notes will maximally be
moved backwards or forward to the nearest 8th note position in the reference Part,
but not beyond.
Say for instance that you have a bass drum playing on every beat (quarter) in a bar.
The feel of this is to be passed on to a hi-hat playing eighths.
But, you don't want all notes in the hi-hat Part to be moved to the quarters of the
bass drum, since this would not give you an eighth note hi-hat Pattern but a strange
quarter note one. You only want the notes on the quarter beats to be affected.
To achieve this, you use the Quantize value to put a grid on the Match Quantize effect. In our example, you set Quantize to 8. This will only move the notes in the hihat Part that are positioned near one of the four quarter notes in the bass drum Part.
The notes between them will "slip through", and not get Quantized.
Bass Drum
hi-hat
Before Match Quantizing.
Bass Drum
hi-hat
After Match Quantizing.
The Quantize value is used to put a filter, or grid, on the Quantizing so that notes in
the "affected Part" that are close to notes in the "feel Part" are moved, while notes
that are closer to one of the Quantizing values between the dots are unaffected. If
this all sounds technical, experiment a bit and you will soon get the hang of it.
How to use Match Quantize
1. Set a suitable Quantize value.
See the explanation above.
- 42 -
2. Select the Match Quantize (Q) tool.
3. Drag the Part with the desired feel, to the Part you want to Quantize.
4. Release the mouse button.
A dialog box pops up, asking you if you want to “Include Accents?”
5. Select one of the options in the dialog (See below).
Option
Description
No
No velocities are copied from the Source Part to the Destination Part.
Merge
The velocity values in the Source Part are copied to the Destination Part,
but if there are already very strong accents in the Destination Part, these
are preserved. Using Match quantize repeatedly on the same two Parts
with this option, may give unpredictable results with regards to the velocity value in the Destination Part.
Copy
The velocity values in the Source Part are copied to the Destination Part.
The feel of the first Part will now be passed on to the second Part.
If the Source Part is shorter than the Destination Part, the Source Part's contents are repeated
so that the whole Destination Part is Match Quantized.
- 43 -
Using Match Quantize with Audio Parts
This is described in the chapter “The Audio Editor”.
Using Match Quantize with Chord Parts
The Match Quantize tool can also be used to “Scale-Map” MIDI Parts, using the
chords and the Scale Events in a Chord Part to determine transposition:
1. Select the Match Quantize tool.
2. Drag a Part from a Chord Track onto a Part on a MIDI Track.
For the Scale-Map to work, the “Compute Scale”-function must have been
performed for the Chord Track.
3. Release the Mouse button.
A dialog will appear, asking you if you want to “Use Chords?”.
• If you click “No”:
The program looks at each note in the MIDI Part, and transposes it so that it
fits the scale determined by the Chord Part.
• If you click “Yes”:
The program will transpose notes so that they fit into the chord type, and then
transpose them according to the chord root-note.
● The “Use Chords” option is only useful if the MIDI Part is completely played
in C.
Renaming Parts
If you hold down [Alt] and double click on a Part, a small dialog box appears where
you can change the name of the Part. If you hold down [Control] when hitting [Return], the new name is copied to all the Parts on the Track.
Parts can also be renamed in the Inspector.
- 44 -
Ghost Parts
A Ghost Part is a linked copy of an existing Part. This means that even though the
original and the copy share contents (notes and other MIDI data) they may play back
on different MIDI Channels and Outputs and with different settings of the Part parameters (see the chapter “The Track Columns and the Inspector” in Getting Started).
Creating a Ghost Part
1. Hold down the [Control] key.
2. Drag the Part you want to copy to a new position.
3. Release the mouse button.
The Ghost Part appears, shown with a the Part name in italics.
Creating several Ghost Parts
1. Hold down the [Control] key.
2. Lengthen the Part with the Pencil tool.
A number of Ghost Parts will be created, all lined up end-to-start after the
original Part (the number of Ghost Parts is determined by the length of the
“frame” you draw with the Pencil, see page 38).
About Ghost Parts
• Ghost Parts can also be created using the Repeat Parts function on the Structure menu.
• A Ghost Part can be moved as any other Part.
• It can also overlap existing Parts, just as any other Part.
• If you edit the original or the Ghost Part in any of the Edit windows, the
changes show up in both the original and the Ghost Part. But, the changes
don’t take effect for the other Parts until you close the Edit window.
• If you alter the contents of a Ghost Part by recording over it, merging it with
another Part or by splitting or joining, it is automatically converted to a regular copy.
• You can "Ghost" any type of Part, but for Group Parts, "real" and Ghost Parts
are the same thing.
• For details about Ghost Audio Parts, see the chapter “Making the Most of the
Event/Segment Relationship”.
● Do not edit (in an Edit window) several Ghost Parts at the same time that are
made up from the same Real Part. It won’t make the program crash or anything, it will just lead to confusing results when you close the editor.
- 45 -
Using the “Repeat” function
This function lets you repeat one or several Parts, on the same or different Tracks:
1. Select the Part(s) you want to repeat.
2. Select the “Repeat...“ item on the Structure menu...
...or press [Control]-[K] on the computer keyboard.
3. Enter the desired number of copies in the dialog box that appears.
Here you can also decide if the copies are to be Real Parts or Ghost Parts.
4. Click “Do It”.
The selected Part(s) are repeated, and the copies are lined up "end-to-start" after the original(s). The Parts selected are treated as one block, so the relative
spacing between the created Parts is determined by the beginning of the first
selected Part and the end of the last.
You can also repeat one Part using the Pencil tool and the [Alt] key, see page 38.
- 46 -
Cut Events
This command makes sure that all Events in a Part end where the Part ends and no
later. It only applies to Events which have a length. With MIDI, this means notes
only.
About Cut Events
Cubase VST works differently from MIDI when it comes to handling notes. Where
MIDI regards Note Ons and Note Offs as separate entities, Cubase VST stores
notes, their position and length. This means that even if you change the length of a
Part by using the Pencil or Scissors tool you may get notes that play past the end of
the Part. This is a valuable feature, but you may not always want this to be the case.
If you don't, you should use Cut Events on the Part(s).
Performing Cut Events
1. Select the Part(s) that are to have their notes Cut.
2. Select Cut Events from the Structure menu.
Global Cut
This command removes the area between the Locators (on all Tracks):
1. Set the Locators around the area you want to delete.
2. Select Global Cut from the Structure menu.
The area between the Locators is removed, and the Parts to the right of the
Right Locator are moved to the left, to fill up the gap.
Any Parts that lie
inside the Locator
Positions....
...are shortened (cut).
● Muted Tracks are excluded from the operation, i.e. they are not Cut, but the
Master Track is affected like any other Track.
- 47 -
Global Insert
Global Insert is the opposite of Global Cut; an empty area is inserted between the
Locator Positions (on all Tracks):
1. Set the Left Locator to where you want the inserted area to start.
2. Set the Right Locator to where you want the inserted area to end.
3. Select Global Insert from the Structure menu.
All Parts to the right of the Left Locator are moved to the Right Locator.
Parts that have their
start point before the
Left Locator and
their end point after
it, are lengthened
the selected amount
of bars, but of course
contain no Events in
their lengthened
sections.
All Parts that started after the Left
Locator Position are moved the
selected amount of bars.
● As with Global Cut, muted Tracks are excluded from the operation, but the
Master Track is affected like any other Track.
Global Split
Global Split is a function that works like a giant version of the scissors tool. Using
it you can split all Parts on all non-muted Tracks. Actually it’s two cuts you make in
one go, one at the Left and one at the right Locator position.
Where Global Cut actually removes part of your music from the Arrangement, Global Split does not. It just splits several Parts at the same positions.
• If you only want the Parts to be split in one place, set the Left and Right
Locator to the same position.
● Muted Tracks are excluded from the operation.
- 48 -
Copy Range
This command is used to copy a section of the music, on several Tracks, to some
other position in the Arrangement:
1. Set the Left and Right Locator to the beginning and end of the section
you want to copy.
2. Mute Tracks containing Parts in the range that you don’t want to copy.
Just as with Global Cut, Insert and Split, muted Tracks are excluded from the
operation.
3. Set the Song Position to the point where you want the copied section to
be placed.
4. Select Copy Range from the Structure menu.
Cubase VST makes up one new Part for each Track, containing all the music
between the Locators, and then puts (Pastes in) these new Parts at the Song
Position.
- 49 -
Remix Track
This command works differently for different Track Classes:
With MIDI Tracks
If you have one or several MIDI Parts containing Events on several MIDI Channels, these Parts can be split up into new Parts, one for each MIDI Channel.
You may get a MIDI Part with Events on several different MIDI Channels if you for
example record music from another sequencer into Cubase VST, or record using a
split keyboard that sends on two MIDI Channels. This is just fine, if all you want to
do is listen to the recorded music – just set the Channel setting for the Track to
“Any”, and each Event will be played back on its own, associated MIDI Channel
(and therefore the right sound). But if you want to edit or rearrange the music you
probably wish to work with the different “instruments” separately.
Remix Track therefore allows you to split up a Track into new Parts on new Tracks
so that Events get separated according to the MIDI Channel stored with the Event.
If you look at a Part in List Edit, you can see the MIDI Channel value for each Event.
When you perform a Remix, the Events with different MIDI Channel values are placed
in new Parts, on new Tracks, each with the Channel setting of their respective Events.
Performing the Remix
1. Select a MIDI Track to be Remixed.
2. Set up the Left and Right Locators as boundaries for the Remix.
All music between the Locators will be Remixed.
3. Select Remix from the Structure menu.
• If possible, the Parts are put in on existing Tracks set to the same MIDI Channel and Output. Otherwise, as many new Tracks as necessary are created.
New Parts with Events on one MIDI Channel each are created on those
Tracks, between the Left and Right Locators.
• For MIDI Tracks, each Track is set to the MIDI Channel the Events in them are
stored on.
- 50 -
Using Remix with Drum Tracks
Remix Track splits up the Drum Track into several new Tracks, one per used Sound
in the Drum Track. The new Tracks that are created are MIDI Tracks, with notes on
only one Sound per Track. If you want some of the Sounds back into composite
Parts, you can always Merge or Mix Down the Parts (see page 36 and below).
The Drum Part is
split into new Parts
on one Track per
Sound.
With Audio Tracks
You may want to split up a Track set to “Any” and which contain Events on several
channels, into one Track for each channel. This is done using Remix on the Structure
menu.
1. Select an Audio Track to be Remixed.
2. Set up the Left and Right Locators as boundaries for the operation.
All audio between the Locators will be Remixed.
3. Select Remix Track from the Structure menu.
New Tracks are created, as many as needed. New Parts with Events on one
channel each are created on those Tracks, between the Left and Right Locators. Each Track is set to the Channel the Events in it are stored on.
- 51 -
Mix Down
Mix down allows you to merge all Parts on some (or all) MIDI, Audio or Drum
Tracks into one composite Part.
With MIDI and Drum Tracks
When you Mix down, the MIDI Channels that the Parts or Tracks are set to will be
stored as a permanent part of their MIDI data. That is, the MIDI Channel set for
each Part replaces the MIDI Channel originally recorded. So, when you play back
the Mixdown Part with the MIDI Channel set to "Any", you will actually get the
same thing back as when you played back all the Tracks that are now merged into
the Mix down Part.
Furthermore, the Playback parameters are used when creating the Mix down Part.
For example, a temporary transposition in one of the Parts will be a permanent one
in the Mix down Part. The Output setting, on the other hand, is lost in the Mix
down, since one Part can output on one Output only.
Performing the Mixdown
1. Set the Left and Right Locator (the Locators determine the start
and end points of the Mixdown Part).
2. You can exclude
Tracks and their
contents from the
Mixdown, by
simply muting
them.
3. Select a Track for
the Mixdown Part.
- 52 -
4. Select Mix
Down from the
Structure Menu.
A new Part, named Mixdown, is created on the selected Track.
5. Set the new Track to “Any” and Mute the Parts you have Mixed down, to get the correct
sounds and avoid double notes.
• Drum Tracks are mixed down after the O-Note setting in the Drum Map
(see page 123).
• Tracks that are included in the mixdown can be set to MIDI Channel
"Any" themselves, so that their original MIDI Channels values will be preserved in the Mixdown Part.
With Audio Tracks
The Mixdown function also mixes down Audio Events. This means that it moves
Audio Events from several Tracks into one Track. It should not be confused with
the Export Audio command on the File menu, which works directly on audio (as
described on page 338).
When do I need Mixdown?
If you record a number of Tracks from the Arrange window, you wind up with one
recording per Track. Using Mixdown on the Structure menu allows you to pack all
the Events on these Tracks into a Part on one Track. Then, setting this track to channel "Any" will make it play back as before the mixdown.
The benefit of this operation is that when you edit the mixdown Track, all the audio
channels are put above each other on one lane each.
Performing the Mixdown
The Mixdown is mainly done as with MIDI Tracks. The big difference is that you
select an Audio Track as a destination, and thereby tell the program that it is audio
you want Mixed down, not MIDI.
1. Mute all the Audio Tracks that you want excluded from the Mixdown.
2. Select an (empty) Audio Track where you want the mixdown to appear.
3. Set the Left and Right Locators to encompass the section of the Arrangement you want to mix down.
4. Select Mixdown from the Structure menu.
5. Check the Part you get, by setting it to channel “Any”, so that all Events
in it play back on their original channels.
When you play back the Mixdown Part, also make sure all the original Tracks
are muted so that they don't compete for audio channels.
- 53 -
4
Instruments
5
- 54 -
About Instruments
In Cubase VST, you can define a combination of a certain MIDI Output and a certain MIDI Channel as an “Instrument”. Instruments can be defined for MIDI Tracks
and Drum Tracks. Defining a “palette” containing the Instruments you use, can be
very practical since you won’t have to think of the exact Output and Channel settings. Instead, you can hide the Output and Channel columns in the Track list by
moving them to the right and dragging the Divider to the left.
Defining an Instrument
Let’s say that you have a Korg X-5. You set it to play a Piano sound on MIDI Channel 3. X-5 is connected to a standard SoundBlaster interface.
6. Select a Track. Set the MIDI Channel to 2 and the Output to “SB16MIDI...”.
7. Double click in the Instrument column for that Track or press
[Alt]+[Control]-[J] on the computer keyboard.
A small box opens up.
8. Enter a name and press [Return].
In our example, maybe "PnoX5" would be appropriate.
You have now defined an Instrument called "PnoX5". If you now set a Track (or
Part) to use that Instrument it will send its data to the Output “SB-16MIDI...” and it
will send on MIDI Channel 2. Likewise, if you change the Output and Channel settings of another Track (or Part) to “SB-16MIDI...” and Channel 2, the Instrument
field of the Track/Part will show “PnoX5”.
- 55 -
Selecting an Instrument already defined
There are two ways to select an Instrument for a Track:
• Press the mouse button with the pointer in the Instrument Track column.
The instrument pop-up in the Track list.
• Pull down the Instrument pop-up in the Inspector.
This way you can also select Instruments for Parts.
Deleting an Instrument
1. Double click on its name.
The name dialog box opens up.
2. Press [Backspace] to clear the line.
3. Press [Return].
The Instrument is deleted.
● You will probably want the program to start with the same Instruments every
time. This is done by saving a Startup Song, as described on page 475.
- 56 -
5
Inspector Real Time Parameters
- 57 -
6
What can I do with the Inspector?
● This chapter applies to MIDI Tracks and Parts only. For Audio Tracks, the Inspector is mainly used for enabling recording, monitoring, etc (see the Getting
Started book).
Using the parameters in the Inspector you can:
• Change one or several aspects in the playback of your recorded music
(like volume, velocity, pitch, selected sound, etc).
These changes are easily reversible as they are made to what is played back,
not to what has actually been recorded.
• Change your music in real-time - i.e. while you play - for instance have it
transposed.
This is done in connection with the Thru-function in Cubase VST and we call
it Realtime Thruing.
The Inspector and how to use it is described in the chapter “The Track Columns and
the Inspector” in Getting Started; this chapter mainly explains the parameters. Just
remember the following:
• The settings you make in the Inspector will affect the material during playback. You do not change anything recorded.
• Since the Inspector settings don’t actually change anything recorded, they
will not be reflected in the MIDI Editors. To convert the Inspector settings to
“real” MIDI Events, you need to use the Freeze Play Parameter function on
the Functions menu (see the Getting Started book).
• When you change the value of a parameter in the Inspector, the new value is
immediately sent out to the MIDI Output.
• The values sent out will not only affect the sound source assigned to the selected Track, but all MIDI devices on the same Output and MIDI Channel.
- 58 -
The Parameters
Volume
MIDI contains a number of different "Controllers", that is messages for continuously changing aspects of a sound or an instrument. One of the most important
Controllers is MIDI Volume. In the Volume field in the Inspector, you can specify a
volume value (0 – 127) for a MIDI or Drum Track or for the selected Part(s). This
value will be sent out at the start point of the Track/Part and then changes the overall volume for the sound.
● MIDI Volume (MIDI Controller 7) is a function totally separate from MIDI
note messages and their velocity values. Not all MIDI Instruments can receive
MIDI Volume, check the instruments operation manual or MIDI Implementation Chart.
Transpose
Changing this value will transpose the notes from a MIDI or Group Track. Remember that it is only the output that is transposed, not the actual recorded material.
Transposing a Group Part means transposing all notes from all the Parts within the
Group.
You can specify a transpose value between –127 and +127 semitones, but remember that the total range of MIDI note numbers is 0–127. Furthermore, not all instruments can play back notes over the whole range. Therefore, extreme transpositions
can give rather strange and unwanted results.
Drum Parts (or Drum Tracks) have no Transpose parameter.
• You may enter a transpose value directly from the computer keyboard,
by typing [Shift]-[O] and entering a value.
- 59 -
Velocity
This value is used to change the dynamics of a MIDI or Drum Part. The value in
this field is added to the velocity of each note message that is sent out from the Part.
A positive value means that the resulting volume is raised and a negative that it is
lowered. The range is –127 to +127 and 0 is of course no change.
• You may enter a Velocity value directly from the computer keyboard, by
typing [Shift]-[V] and entering a value.
● Not all instruments handle the velocity range identically. A certain value
might lead to more drastic changes on one instrument than on another.
Delay
This is used to delay a MIDI or Drum Part relative to other Parts. The values represent 1 tick (fraction of a beat; there are 384 ticks per beat). The range is –127 to
+127. The negative values put the Part ahead of the other Parts. Use this feature to
adjust the feel of a Part or Track or to compensate for "slow reactions" in a MIDI
instrument.
● Notes that wind up either before the beginning (1. 1. 0) or outside a set Cycle,
due to delay settings, are not played.
• You may enter a Delay value directly from the computer keyboard, by
typing [Shift]-[D] and entering a value.
Length
This value adjusts the lengths of all notes in a Drum or MIDI Part. The range is Off
and 25% to 200%. 200% means that all notes get double the length of the recorded.
25% means they get a quarter of their actual length.
- 60 -
Compression
This parameter acts on MIDI and Drum Parts and can be made to compress or expand the dynamic range of MIDI notes. It does this by adjusting velocity values
(make sure that your sounds are velocity sensitive!) It can be set to Off and 25% to
200% (where 25% means that all velocity values are divided by four, and 200% that
they are doubled). The point is, that this will also affect the difference in velocity
between the notes. By combining this with the Velocity parameter, you can compress or expand the velocity range of the notes in a Part. An example:
Let’s say you have three notes with the velocity values 60, 90 and 120, and wish to
“even out” the velocity differences somewhat. If you set the Compression value to
50%, the notes will play back with the velocity values 30, 45 and 60. By adding 60
in the Velocity field, you will have the notes playing back with the velocity values
90, 105 and 120, meaning you have in effect compressed the velocity range.
In a similar way, you can use Compression values greater than 100% together with
negative values in the Velocity field, to expand the velocity range.
● Remember that the maximum velocity is always 127 no matter how much
you try to expand.
Pan
This parameter allows you to send Pan messages (MIDI Controller 10) to your
MIDI instrument, placing different sounds in different stereo positions. The possible values are Off, L1–L64 (left), 0 (center) and R1–R63 (right).
● Check the MIDI specification of your instrument to make sure it responds to
Pan messages.
- 61 -
6
Program Changes and MIDI Volume 7
- 62 -
Why you should read this Chapter
When you arrange in Cubase VST you will find yourself spending some time selecting Programs and setting Volumes for each instrument. This will be significantly easier if you understand exactly how and where Program and Volume
Changes can be inserted and the advantage that the different methods have.
Program Change
Program Change messages are used to switch between sounds in your instruments.
By inserting Program Change messages for all MIDI Channels, at the beginning of
the Song, the instruments will automatically play with the correct sounds when you
open and play the Song (if you haven’t “re-programmed” your instruments since
you played the Song last).
By inserting Program Change messages somewhere in “the middle” of a Song, you
can use one MIDI Channel for playing several different sounds throughout the
Song. This allows you to use “limited MIDI resources” as effectively as possible.
Entering Program Change in the Inspector
As described in the Getting Started book, you can enter Program Change messages
in the Inspector, either for the whole Track or for one Part at a time. If you’re not
sure how this is done, refer to the chapter “The Track Columns and the Inspector”
in the Getting Started book.
• If you enter a Program Change for the Track, this Program Change will be
sent out at the beginning of every Part on that Track.
This might not always be desirable, since some devices shut off their sound
momentarily when they receive a Program Change message, see below.
• If you enter a Program Change message for one certain Part, this is sent
out where that specific Part starts (and for no other Part).
For instance you can enter one Program for the first Part on the Track and then
another for a Part later in the Song, where you want the device to switch to
another Program.
This Part sends out Program
Change number 4 when you start
the Song from the beginning.
- 63 -
Later in the Song, this Part sends out
Program Change 52 to make the
device switch to another Program.
● As described in the “Track columns and the Inspector” chapter in the Getting
Started book, the Prg field in the Inspector will show a GM Program name instead of a number, if GM, GS or XG Mode are activated in the GM/GS/XG Editor.
Resetting Program Change
If you for example Copy and Paste or duplicate Parts a lot, Program Change messages setup in the Inspector might get copied or moved too, ending up in positions
where you don’t want them. The quickest way to get around this might be to start
over from scratch:
1. Make sure no Part is selected.
2. Select the Track for which you want to “reset” Program Change.
3. Use the Inspector to set the Program Change to “Off”.
Even if the box already says “Off”, adjust the value up and then down again to
make sure all Parts are set to “Off”.
Make sure that the Inspector says
“Trackinfo” at the top. Then, if you set
Program Change to Off, this setting is
“copied” to all Parts on the Track
4. Now select each Part for which you want a Program Change message,
and enter it in the Inspector.
- 64 -
Program Change and Delay
Many devices shut off their sound momentarily when they switch to a new Program. Other devices don’t, but still might need some time from the moment the
Program Change messages is received until the Program is “loaded and ready”.
This will be apparent since the device will “choke” on the first notes after the Program Change message, or not play them at all.
For this situation, Cubase VST has a special setting in the MIDI Setup dialog which
allows you to have Inspector MIDI messages sent out in advance.
1. Open the MIDI Setup dialog from the Options menu.
2. Adjust the “Play Parameter Delay” value.
Play Parameter Delay
• If the Value is negative, the messages are sent out in advance (before the Part
starts).
• If this number is too close to zero, your instrument will “choke” just when the
Part with the Program Change message begins.
• If you set it to too large a negative number the instrument will switch to a new
Program before the previous Part has ended.
- 65 -
Selecting Programs in the GM/GS/XG Editor
As stated in the Getting Started book, you can also use the GM/GS/XG Editor to
send Program Change messages to your instruments. However, there are a couple
of things to note:
• Program Change settings in the GM/GS/XG Editor are sent out when you
open the Song and when you make the actual settings.
They are not updated, “chased” or sent out automatically during playback.
• Program Change settings in the GM/GS/XG Editor have no connection
with the settings in the Inspector.
Combining Program Change settings in Editor and Inspector may cause some
confusion.¨
• The Program settings in the GM/GS/XG Editor are always named according to the General MIDI standard.
If your instrument is not GM compatible, you will not get the sound you select.
Therefore, we recommend that you use the GM/GS/XG Editor:
• When you are working with General MIDI instruments only.
• When your music doesn’t require any Program Changes during playback.
• When you are sure you don’t need to record any Program Change settings, or
make any in the Inspector.
Recording or Entering Program Change in the Editors
You can record Program Change messages if you have equipment that can transmit
them. This is done as with any other MIDI recording in Cubase VST, simply enter
Record mode and transmit the message (probably be selecting a new Program on
the front panel of your instrument). Please also refer to the chapter “Filtering and
Mapping MIDI Data”.
You can also enter Program Change messages “by hand” in List Edit and in Key
Edit’s and Drum Edit’s Controller Display. List edit is probably the best choice in
most situations, since it shows you more precisely where the message has been entered.
Entering Program Change messages in List Edit allows you to put them anywhere
you want them, even in the middle of a Part. It also allows you to perform editing
functions on them.
- 66 -
Finding Program Change messages in Parts
If you are unsure of if a Part contains Program Change messages there are two easy
ways to find out:
Method 1
1. Pull down the Options menu.
2. Switch Part Appearance to “Show Events”.
3. Use the lower half of the Part Appearance menu to deactivate all options
except “Program Change”.
The Arrange window now shows Program Change messages as vertical lines
in the Parts.
If you select
Show Events...
...and the
only Event
type
activated is
Program
Change...
then only Program Changes are
shown in the Parts.
Method 2
1. Open the Track, in List Edit.
2. Click on the “F” (Display Filter) button.
3. Make sure that Program Change is the only un-checked item.
- 67 -
Now only Program Change messages are shown in the List.
The F-button reveals the filters
Program Change unchecked
Which should I choose?
Well it’s of course up to you. The only advice we’d like to give is not to mix the two
methods unless you are absolutely sure of what you’re doing. For more help in your
decision, please check the table below:
Method
Advantages
Disadvantages
Inspector
• Can be viewed and changed in
real time from the Arrangement,
while the music is playing.
• Always positioned at beginning of a Part.
GM/GS/XG
Editor
•Graphical overview of the Program settings for all 16 MIDI
Channels at the same time.
•Program Change messages
sent out at the beginning of the
Song only.
•Program names apply to GM
instruments only.
Recording or
entering into
an editor
• Can be entered anywhere in a
Part.
• Cannot be changed from the
Arrange window.
• Can be edited using all the available edit tools.
• Finding the right Program number might be easier by recording a
button on the synth front panel
than by typing in a number.
Program Change Numbering
Program Change numbers range from 1 to 128 in MIDI. Some instruments use
other types of numbering; some count from 0 to 127 and others have the numbers
divided into Banks (A 1 to 32, B 1 to 32 etc). To find the right number to enter in for
example the Inspector, consult the device’s operation manual or simply experiment
until you get it right!
- 68 -
About Bank Select
With Program Change messages, you are able to select between 128 different programs in your MIDI device. However, many MIDI instruments contain a larger
number of program locations. To make these available from within Cubase VST,
you need to use Bank Select messages, a system in which the programs in a MIDI
instrument are divided into Banks, each Bank containing 128 programs. If your instruments supports MIDI Bank Select, you can use the Bank field in the Inspector
to select a Bank, and then the Prg field to select a program in this Bank.
● Technically, a Bank Select message is actually a combination of two MIDI
Controller messages (Controller 0 and 32). However, not all manufacturers
follow the MIDI Standard in this aspect; some instruments use Controller 0
messages as a replacement for standard Bank Select messages. If this is the
case with your instruments, you need to multiply the value in the Bank field
with 128 to select program Banks. Refer to the documentation for your MIDI
equipment for more information.
Selecting SoundFont Banks and Patches
If you are using a soundcard that supports SoundFonts, such as the Creative Labs
AWE series, Cubase VST offers a special feature to make it easier to select sounds
for the card’s built-in synthesizer:
1. Make sure the card’s built-in wavetable synthesizer is selected on the
Output pop-up menu.
2. Pull down the Bank pop-up menu and select a SoundFont Bank.
The Banks are displayed with names instead of numbers.
3. Instead of using the Program Change (Prg) pop-up menu, pull down the
Patch pop-up menu.
A list is displayed, containing all the SoundFont names for the sounds in the
selected Bank.
4. Select a Patch from the pop-up menu.
● Cubase VST automatically detects an installed SoundFonts compatible soundcard and makes the SoundFonts Patch pop-up menu available, provided that
the proper software is installed. This is usually done automatically when installing the card. If in doubt consult the documentation for the card.
- 69 -
MIDI Volume
MIDI Volume is a MIDI Controller message, Controller 7 to be exact. When a device receives MIDI Volume messages it is supposed to adjust its volume for that
MIDI Channel, just as if you had changed the it directly from the front panel.
● Some older synthesizers might not be able to respond to MIDI Volume!
Entering Volume in the Inspector
Just as with Program Change messages you can enter MIDI Volume messages in
the Inspector for individual Parts, for example to get a basic mix at the beginning
and to introduce volume changes at different positions in the Song.
When Cubase VST plays
back this Part, the instrument
will receive a MIDI Volume
message to set its Volume to
a value of 115.
Entering Volume in an Editor
You can enter single MIDI Volume messages in the List editor, but it is probably
more convenient to use the Controller Display in Key and Drum Edit. This allows
you to “paint” volume curves, to easily create fade ins and fade outs etc.
A Fade in, drawn in Key Edit.
Finding Volume messages in Parts
The same method described above for finding Program Changes can be used to find
Volume. The only difference is that you specify Controllers in the Part Appearance
pop-up or in the List Edit Filter section. Please note that this displays all Controllers, though, not only Volume.
- 70 -
Which should I choose?
Again – it’s your choice, but the table might give some advice:
Method
Advantages
Disadvantages
Inspector
• Visible directly from the Arrange window.
• Can only be used for “direct
changes” not for fades.
• Can be changed in real time
• Always appear at the beginfrom the Arrangement, while the ning of the Part.
music is playing.
Recording or
entering into
an editor
• Can be entered anywhere in a • Not visible from the Arrange
Part.
window.
• You can draw in smooth
curves in Key and Drum Edit.
• Can’t be changed from the
Arrange window.
• Can be recorded from external equipment such as a foot
pedal or slider.
• Can be edited using all the
available edit tools.
About Chase
Chase is a function that makes sure your devices always are set to the right Program
and Volume among other things. Chase works both on Inspector settings and on
“real data” in the Parts. See the Online Help for more information.
- 71 -
7
Programming and Recording Mutes
and Solo
8
- 72 -
Pre-programming Mutes
You can define and store up to ten Track Mute settings. These can be used for instant recall of any combination of muted Tracks.
1. Mute the Tracks you want Muted.
You can use either the Mute function or the Solo function, as described earlier.
2. Hold down [Shift]+[Alt]+[Control] and press one of the function keys
[F2] to [F11].
The Mute setting is now stored under that key.
3. To recall a setting: Hold down [Alt]+[Control] and press the corresponding function key ([F2] to [F11]) .
Recording Mutes and Solo
It is possible to record Mutes and Solo, just like any regular MIDI data. Recording
Mutes can be very handy, since it allows you to have automated Mutes happening
at certain positions on playback, as an alternative to permanently deleting some
music or other information on a Track. You can record Mutes in several ways:
• Record a single Mute-click in the Track list.
Instead of clicking on the Mute button, you can press [Alt]+[Control]-[M] to
mute the selected MIDI Track.
• Record pre-programmed Mutes on several Tracks.
See the previous page.
• Record the fact that you activated the Solo function.
Solo is just a special case of Mute, where all but one Track are muted.
Performing the Recording
1. Select the “Record Tempo/Mutes” item on the Options menu.
When this is ticked, recording of Mutes is possible. (The flag is also used for
recording tempo changes, see page 394).
- 73 -
2. Select a MIDI Track to record the Mutes on.
You should not select a MIDI Track onto which you have recorded music. We
strongly recommend you to use a separate Track for recording Mutes, to avoid
confusion (see later in this chapter). You can then record all the different mute
settings for any and all other Tracks on this single Track.
3. Activate recording at some point.
If you want to mute a Track from the beginning, put your Mute Events one or
two ticks before the first notes, so that you are sure the first note also gets
muted.
4. When you reach the point where you want the mute to happen, perform
it by clicking in the Mute column, by pressing [Alt]+[Control] and [F2] to
[F11] or by activating the Solo function.
5. Keep on muting and un-muting Tracks for as long as you wish.
The Record switch (Overdub/Replace) applies, so that you can overwrite or
add Mute and Un-mute Events as you wish.
6. Terminate recording as usual.
About recording Mutes
There aren’t really any restrictions to what you can do. Things can get quite involved if you indulge in complex mute setups. Observe the following:
• Muting silences all output from a Track, notes, Continuous Controllers,
MIDI Mixer data, System Exclusive, everything - including the mute
Events themselves!
This means, that you should avoid recording mute Events for the very Track
you are recording on.
An example might clarify this: Let’s say you are recording mutes on Track 1,
and happen to record a mute Event followed by an un-mute Event, both for
Track 1. When you play back the Track and the song position reaches the first
Event, the Track will mute itself. The un-mute will never happen since the
Track is muted for all output. This is why you should always record mutes on
a separate mute-Track, and never record any mutes for that Track.
• A mute Track may of course be muted by another Track, which leads to
the same confusion as above.
• Notes that have started before the mute are not cut off by the mute itself.
They always play to their end.
• Mutes are chased (see page 71 and the Online Help) if the Chase Events
function on the Options menu is activated, but only within one Part.
Make sure to end your Mute recording with the Track in the right status
(muted or un-muted).
• You can only use Tracks 1 to 128 for Mute recording.
- 74 -
About editing recorded Mutes
If you need to edit or delete your recorded Mute Events, this is done in List Edit.
The Mute Events are shown just like any other Events, and are handled in the same
way.
Value 1 indicates the
number of the muted Track.
Value 2 indicates if the Event is a
Mute (1) or an Un-Mute Event (0).
The mute Events that get recorded are of two types: Mute Events and Un-mute
Events. When one of these Events is played back, the Track changes to the status of
that Event. This means that if the Track is already muted when a mute Event is
played back, nothing happens. This may sound obvious, but when you rewind or
fast forward to some point, and start playback from there, this might confuse you. A
Track that is "manually" muted is also un-muted by an Un-mute Event.
- 75 -
8
Groups
9
- 76 -
About Groups
● Audio Parts cannot be Grouped.
Groups
Group Parts on a Group Track
Parts that belong to Groups
The Group List
Defining a Group is a way to make Cubase VST look at several Parts as one entity.
This allows you to handle a set of Parts as one section, making it easier for you to
experiment with the structure of your song. To play back Groups, you need to place
them as Group Parts on a special Track called a Group Track. Groups can be used in
many ways:
• Group all the brass parts in a chorus (trumpet, sax, trombone...) so that
they can be handled as a section of the orchestra and easily be repeated
in every chorus.
• Turn every section of a song (intro, verse, chorus, etc), into a Group so
that the song can be remodelled fast, on a separate Group Track.
• Build up each Part of the song (intro, verse, chorus...) in one Arrange
window each, and assemble the song on a Group Track in yet another Arrange window.
As you understand from the examples above, the Groups are global for the whole
Song. A Group created in one Arrange window can easily be played back in another. All in all you can have 64 groups, which are saved with the Song.
● A Part isn't muted or deleted when it is used in a Group. Parts can both be
used as members of one or several Groups and as regular Parts at the same
time. Therefore, you might have to Mute the Tracks with the Parts that make
up the Group. If you don’t and both the Group and the regular Parts are positioned at the same positions, you will get double notes that might give you an
increase in volume, reduced polyphony or unwanted flanger effects.
● Parts that have been used as components in a Group, can be moved around
without affecting what the Group plays. However, if you change the contents
of the Parts, this will be reflected in the Groups.
- 77 -
How to use Groups - the basic steps
Using Groups can be broken down into the following steps:
1. Use the “Build Group” command to assemble Parts into one or several
Groups.
This determines which Parts should be in each Group. The created Group is
placed in the Group List (see page 81).
2. Create a Group Track.
This is necessary to be able to play back the Groups (see page 82).
3. Select Groups from the Group list, and place them on the Group Track as
Group Parts.
This is how Groups are played back - see page 83.
Building Groups
Creating a new Group
1. Select the Parts you want to include in the Group.
A Group can contain any type of Part, except other Group Parts.
2. Select “Build Group” from the Structure menu, or press [Control]-[U].
A dialog appears:
3. Enter the name you want for the Group.
4. Click “New” or press [Return] on the computer keyboard.
The Group is created and added to the Group List . If the list is hidden, it is
automatically displayed when you create a new Group.
● The Parts keep their Playback Parameter settings within the Group. They also
keep their relative starting points.
The above means that all the Parts that are selected when you created the new
Group are considered as one block of music. This block is made up of several Parts
which all have a relation to each other, positionwise, and which all send out on their
respective MIDI Channel, and Output, and which all can have different Playback
Parameter settings.
- 78 -
Adding Parts to a Group
If you already have created a Group, but want to add one or more Parts to it, proceed as follows:
1. If the Group List is hidden, display it by selecting the “Show Groups”
item on the Structure menu (or by pressing [Control]-[J].
Displaying the Group List.
2. From the Group List, select the Group you want to add to.
How to scroll, show/hide and generally handle the Group List is described on
page 81.
3. Select the Parts you want to add.
4. Select “Build Group” from the Structure menu or press [Control]-[U].
The Build Group dialog appears.
5. Click on “Add to”.
The selected Parts are added to the selected Group.
● The Added Parts keep their relative position in relation to the existing Parts in
the Group, and they also keep their internal relative starting points.
The above basically means that they wind up where you want them. Let's say that
you have a Part that starts one bar later than the first Part in a Group. When you add
that Part to the Group, it is put in so that it starts one bar later than the first Part in
the Group. The only exception is if the Part starts before the Group. In this case it
will be put in at the beginning of the Group.
- 79 -
Replacing all Parts in a Group with new Parts
This function is used when you already have created a Group with a certain name,
and want to keep it but completely change its contents:
1. From the Group List, select the Group you want to replace.
The Group List is described on page 81.
2. Select all the Parts you want the Group to include.
3. Select “Build Group” from the Structure menu or press [Control]-[U].
The Build Group dialog appears.
4. Click on “Replace”.
The new Group takes the place of the selected one in the list. If you have
Group Parts from this very Group placed on a Group Track, the contents of
these will change too.
- 80 -
Using Groups
The Group List
On the right side of the Arrange window a special column can be made to appear,
containing all the Groups. This list, called the Group List, is used as a “palette”
when placing the Groups on Group Tracks (see page 83).
Showing and Hiding the Group List
The list is first displayed when you create the first Group. To hide the list, select
“Hide Groups” from the Structure menu, or press [Control]-[J] on the computer
keyboard. To show the hidden list, select “Show Groups” from the Structure menu
(this menu item toggles between “Show Groups” and “Hide Groups” depending on
whether the Group List is visible or not), or press [Control]-[J] again.
Scrolling the Group List
Since you can have up to 64 Groups in a Song, you may have to scroll the list to be
able to see all Groups. This is done by clicking on the UP and DOWN buttons on
the top and bottom of the Group List.
The Groups in the list are always sorted so that those Groups that were created in
the selected Arrange window appear at the top of the list.
Displaying the contents of a Group
When you click on a Group in the List, all the Parts in the active Arrange window
that are members of the Group get selected. This can also be used as a quick way of
selecting a number of Parts, for example for editing.
Renaming a Group in the Group List
1. Double click on the name of the Group in the Group List.
2. Type in the new name.
The change is reflected in the Group Parts on the Tracks (see below).
- 81 -
Deleting a Group from the Group List
• Drag the Group past the top or bottom of the Group List.
This deletes the whole Group. The individual Parts that have made up the
Group are of course not affected.
Deleting a Part that is in a Group
If you delete a Part from the Arrange window it is also deleted from the Group.
How Groups are saved
The Group List and all the Groups in it are part of the Song. When you Save or
Open a Song, all the Groups are saved/opened with it. On the other hand, when you
save an Arrangement, only the Groups created in that Arrange window are saved.
Creating a Group Track
You use Groups by placing Group Parts on a Group Track. To create a Group Track,
press [Control]-[T] and change the Track Class in the “C” column of the Track List
to Group.
You can create several Group Tracks if necessary.
● Group Tracks can't be set to a certain MIDI Channel, Instrument or Output,
since this is independent for each Part in the Group.
Group Tracks only have one Playback
Parameter in the Inspector, Transpose,
which transposes all notes in MIDI
Parts in the Group.
- 82 -
Placing Groups on Group Tracks
As explained earlier, you need at least one Group Track to place the Groups on. You
also need to have the Group List displayed to do this.
1. Drag a Group from the Group List.
An outline is shown to help you position the Group.
2. Place the outline at the desired position on a Group Track and release the
mouse button.
A Group Part is created. This has the name of the Group, and is as long as the
Parts the Group is made up of. The Group Part will start where you place the
outline.
● If you hold down [Alt] while dragging, the Group Part will be inserted on the
Track instead. This means that all the Group Parts after it will be moved down
the line to make room for the new Group Part.
3. Continue placing Groups on the Group Track.
The same Group can be used as many times as you like, on one or many
Group Tracks, in the same or different Arrange windows.
- 83 -
About Parts and Group Parts
• A Part can be used as it is, even though you have put it into a Group.
Therefore, you might have to Mute a Track if the Parts on it are used in a
Group and the Group is played back at the same time as the Parts in it.
Otherwise you will get double notes that might give you an increase in volume, reduced polyphony or strange flanger effects.
• You can decide if Parts on muted Tracks should be muted when played
back from the Group or not.
This is done using the "Groups take Part Mute" checkbox in the MIDI Setup
dialog (see the online Help).
• A Group Part has "living" links to all the Parts in it.
If you delete a Part, it disappears in the Group, and if you change its Playback
parameters, this is also reflected in the Group. If you move it, however, this is
not reflected in the Group.
• If you add Parts to a Group, so that this lengthens the Group, this is not
shown in the Group Parts on the Group Tracks.
That is, the already placed Group Parts keep the original length. Use the Pencil
tool to lengthen the Group Part and "reveal" the added music. When you place
Group Parts from the Group List after having added Parts to the Group, these
new Group Parts automatically get the right length.
Once they're on the Group Track, Group Parts are treated just as regular Parts. They
can be:
•
•
•
•
•
•
Moved.
Selected in any way that regular Parts can.
Duplicated (Hold down [Alt]).
Muted.
Deleted in any way that Parts can.
Sized using the pencil tool.
● You can also use any function, like Quantizing, directly on a Group Part.
However, this will not affect the Group Part itself, but rather all Parts that
make up the Group.
Group Parts can not be:
•
•
•
•
Recorded into.
Merged with other Parts.
Grouped.
Edited in any way (split, joined, or edited in the Edit windows. You can edit
the contents by editing the Parts that make up the Group).
- 84 -
Placing Groups on a Group Track during playback
It is possible to actually build the Group Track in real-time, while the music is playing:
1. Start playback.
2. Hold down [Control].
3. Click on a Group in the Group List.
The Group is inserted on the active Group Track, at the beginning of the next
bar.
● If you have already made up the basics of your Arrangement and wish to experiment with adding Group Parts this way, create a separate Group Track for
the Group Parts you are adding in real-time. This will give you a better overview of what is going on.
Unpacking Group Parts
About Unpacking
You can take a Group Part apart into its original components by using the “Unpack
Group” command on the Structure menu.
An example: you have repeated a verse several times during a piece of music by
making a group out of all the Parts that make up that verse. This Group has then
been used several times on a Group Track. Now you find that you want to leave out
one of the instruments in the first verse only. A convenient way to do this is to Unpack the Group Part on the Group Track that plays that first verse, and then simply
Mute the desired Part.
● It is the Group Parts on the Group Track that can be Unpacked, not the
Groups in the Group List.
- 85 -
Performing the Unpacking
1. Select the Group Part (on the Group Track) that is to be Unpacked.
2. Select Unpack Group from the Structure menu.
One of two things happens:
• If the Group was created in the same Arrange window as it is used, Ghost
Parts are created on the original Tracks at the same Positions as the
Group Part.
• If the Group was created in another Arrange window, real Parts are created at the same Position as the Group Part.
If possible, the Parts are put in on existing Tracks set to the same MIDI Channel and Output. Otherwise, new Tracks are created as needed.
In both cases, the Group Part is of course removed from the Group Track.
● Unpacking can be undone using the Undo command.
The Group feature can be used to an extreme by packing all different sections of a
song (intro, verse, chorus...) into Groups to get an overall feeling of the structure of
the song. Then you can Unpack all Groups and start making detailed changes.
● If you want to use the Unpack feature for detailed editing this way, make sure
that the Group Parts you Unpack are in another Arrange window than the
Parts that make up the Groups. If not, Unpacking will create Ghost Parts, and
if you make changes to a Ghost Part, they will affect all Group Parts containing the original Part.
- 86 -
9
The MIDI Editors - General
Information
- 87 -
10
About this Chapter
This chapter is similar to the chapter “An Introduction to the MIDI Editors” in the
Getting Started book, but contains more detailed information. Please read the “An
Introduction...” chapter first to get used to the basic concepts and procedures. It is
also a good idea to have the Getting Started book at hand, since this Chapter refers
to the “An Introduction...” chapter now and then.
Similarities and differences between Editors
Even though the Edit windows all look fairly different, they have similar behaviours. In this chapter you will find all things common to several editors, while the
features that are unique to the different editors are described in the following chapters.
You will no doubt find a special way to work with the editors that fits you personally, but the following suggestions may be of help if you’re new to the program:
Use Key Edit when...
• You want to get a quick overview of the Events.
• You want to edit several Parts at the same time.
• You’re editing Continuous Data and velocity values (see page 110).
Use List Edit when...
• You need to perform detailed editing of single Events.
• You’re editing Mute or Stop Events (see page 139).
• You’re editing MIDI Mixer Events (see page 138).
Use Drum Edit when...
• You are editing Drum Parts.
Use Score Edit when...
• When you are used to reading and writing scores.
• You are using a score printing version of Cubase VST, and are preparing your
music for printing.
● Key, Drum and Score Edit can be used to edit any combination of Parts from
different Tracks. List Edit can only be used for Parts on one Track at a time.
- 88 -
Opening an Editor
If you double click on a Part, if appropriate, a default editor is opened. Exactly
which editor opens, is determined by the Track Class of the Part’s Track and by the
settings in the Preferences dialog in the File menu, according to this table:
Track Class
Default editor opened
MIDI Track
Key Edit, Score Edit or List Edit, depending on the “Double Click
Opens” setting in the Preferences dialog (found on the File menu).
Audio Track
Audio Edit.
Drum Track
Drum Edit.
Mixer Track
Mixer window.
Group Track
None.
Tape Track
None.
Chord Track
Score Edit.
• If you want to edit several Parts of the same type, select them and select
Edit as described above.
If the Tracks are of different types, only one editor will be opened.
● In List Edit, only Parts on the same Track can be edited simultaneously.
• If you use the Edit command with no Parts selected, all Parts on the Active Track will be edited.
Opening a non-default Editor from the Edit Menu
If you want to open another editor than the default, select the Part(s) you want to
edit (or a whole Track), and use the Edit menu to select a specific editor. The following options are available (note that not all combinations of Track class and editor are possible):
Editor
Keyboard
Equiv.
Can be opened for
Key Edit
[Control]-[E]
(“Edit” on the
Edit menu)
MIDI Tracks. For other Track classes, pressing [Control]-[E] opens the default editor as described on the
previous page.
List Edit
[Control]-[G]
All Track classes except Tape and Group Tracks.
Drum Edit
[Control]-[D]
MIDI and Drum Tracks.
Score Edit
[Control]-[R]
MIDI, Drum and Chord Tracks.
- 89 -
Opening several editors at once
Normally you will want to use one editor at a time for a Part or a selection of Parts.
If you for example have Key Edit up on the screen and open List Edit from the Edit
menu, Key Edit will disappear and be replaced by List Edit. However, two (or
more) editors can be open at the same time:
1. Open an editor as usual.
2. Press [Control] and [Shift] on the computer keyboard.
3. While holding down [Control] and [Shift], open a second (or third, or
fourth) editor.
The other(s) are not closed, but remain on the screen and can be selected and
resized as usual.
• To be able to see all open editors, use the Tile item on the Windows
menu.
You can also switch back to the Arrange window and select other Part(s) and open
the same type of editor (or another type) for these by using the [Control] and [Shift]
keys. The possible number of editors might be restricted by the available RAM in
your computer.
Communication between Open Editors
The editors communicate in "real-time", sharing the following information:
• Changes made to the Events.
• What Events are currently selected.
• The Loop settings.
Other settings remain independent for each editor.
This makes it easy to switch between editors, taking full advantage of their different styles of presentation. You will probably establish working practices whereby
you utilise specific editors to perform particular functions.
● Remember: the changes you make while editing will not be permanent until
all open editors (editing the same Parts) are closed! If you Cancel changes (by
pressing [Esc]) in the last open editor, changes made in any of the editors will
be cancelled.
- 90 -
Closing an Editor
As described in the Getting Started book, when closing an editor, you can choose
between keeping the changes you made, and cancelling (undoing) all changes.
To close the editor and keep the changes:
• Press [Return].
or
• Close the edit window by clicking on its close box.
or
• Press [Control]-[W] on the computer keyboard.
If you are editing a Ghost Part (described on page 45), and close the editor as above
(keeping the changes), a dialog box will ask if you want to convert the Ghost Part to
a real Part. If you answer Yes, the changes will only appear in this new Part. If you
answer No, the Ghost Part will remain a Ghost Part, and the changes will appear in
the real Part the Ghost Part was made from as well as in all other Ghost Parts made
from the same real Part.
To close the editor and cancel the changes:
• Press [Esc] on the computer keyboard.
All changes you have made since you opened the editor, will be undone.
● If “Fewer Alerts” in the Preference dialog (on the File menu) is unchecked, a
dialog box appears, asking you if you really want to discard your changes.
● If you have entered Events outside the range of the edited Part(s), a dialog
with the text “Keep Appended Events?” will appear when you close the Editor.
Clicking “Yes” will extend the Part to make room for the new Events while
clicking “No” will discard any Events outside the Part.
● If you enter the Edit window while recording, stop the recording while in the
editor and then Cancel, the whole recording is deleted.
- 91 -
Editing music during playback
To make changes to the music while you are actually listening to it, is probably the
most practical way to work. There are some features included just for these occasions:
Edit Solo
Using this function you can mute playback for all Parts that make up your Arrangment except for those currently edited in the open editor. To activate/de-activate
Edit Solo click on its button in the upper left corner of the Status Bar in any of the
editors, or press [A] on the computer keyboard.
Follow Song
Normally, the Follow Song option will be turned on, making the Arrange and Edit
windows “follow” the music at playback, so that the Parts or Events currently
played always are visible. However, when you are editing Events in an editor, you
may want to turn Follow Song off, either on the Options menu or by pressing [F] on
the computer keyboard. This way the Events you’re working with will stay visible.
The Loop Function
In all of the MIDI editors you can set up a local Loop, which is a sort of "mini-cycle" for the Parts being edited. The Loop facility operates in addition to the Cycle,
meaning you can Loop the Parts you are editing while Cycling Parts that are not being edited!
There are three ways to set the Loop:
• Drag the mouse on the Position Bar to draw the Loop area.
This does not work in Score Edit, since it has no Position Bar.
• Use the mouse and/or computer keyboard to set the values in the Loop
boundary boxes on the Status Bar.
The Loop On/Off button.
The upper box is the start of the Loop, the lower is the end.
• Use [Alt]+[Control]-[L] and [Alt]+[Control]-[R] to open the Loop boundary boxes and enter the values.
Either way, the current Loop is shown in black on the Position Bar when it is on,
and in grey when it is off.
- 92 -
Turning the Loop on or off
• Turn the Loop on/off by clicking on its button or by pressing [Alt]+[Control]-[O].
For this to work, you have to define the Loop first, as explained above.
When the Loop is active, the Parts within the Loop in the Edit window loop almost
independently of the rest of the music. We say "almost", because the Loop is still
dependant on the Cycle. Every time the Cycle starts over again, so does the Loop.
The Loop is also used to direct editing to the Events inside the Loop. See page 99 in
this chapter.
- 93 -
How Events are displayed in the Editors
This is where the various editors differ most. The different representations of
Events are described in the chapter “An Introduction to MIDI Editing” in the Getting Started book, but there are some common properties worth pointing out:
Active and Inactive Parts
In Key, Drum and Score Edit, several Parts on different Tracks can be displayed at
the same time. However, only one at a time is active. The active and inactive Parts
are separated graphically. In Key and Drum Edit, notes belonging to an active Part
are bright-colored (black when they are selected), while notes belonging to an inactive Part are dimmed. Furthermore, in Key Edit, notes belonging to inactive Parts
are thinner than the notes of the active Parts.
An active and an inactive Part in Key Edit.
• To activate a Part, click on any Event that belongs to that Part.
You can also use the Next/Previous Part commands on the Goto menu, which
is convenient if the Part is empty.
● When you record, use Step Input or make any other changes via MIDI, it is always the active Part that is affected.
Notes and Continuous Events
Even though every MIDI message consists of single Events, the editors make a distinction between regular notes and what is called continuous Events. The Continuous Events, Pitch Bend, Modulation, Aftertouch and many others, have special
displays in all editors except Score Edit. They are described separately in the Getting Started book and on page 110 in this chapter.
Playback Parameters
The Playback settings you may have done in the Inspector are not visible when you
edit the Part. This means that if a Part is transposed using the Inspector, it will be
shown at its original recorded pitch in the editor, even though you will hear it playing back transposed.
• If this is a problem, use the “Freeze Play Parameters” function on the
Functions menu.
This function, explained in the chapter “The Track Columns and the Inspector” in the Getting Started book, transforms the settings in the Inspector (e.g. a
transposition) to “real” MIDI data (in the case of transposition, changed
pitches for each note), visible and editable in the editors.
- 94 -
Coloring notes in the editors
In Key, List and Drum Edit, you can use the Color menu on the Status Bar to add
color to the notes.
● If you run Cubase on a black and white monitor, the color symbols are not
shown.
1. Pull down the color pop-up menu.
2. Select one of the five options on the pop-up menu.
The options are described below.
● Score Edit has a different color palette, which lets you choose colors individually for each note, much like you color Parts in the Arrange window.
Color options
White
No color is used for the notes.
Channel colors The notes get different colors depending on their individual MIDI
Channel values. Which color is associated with which MIDI
Channel, can be set with the Edit option (see below).
Pitch colors
The notes get different colors depending on their pitch. Which
color is associated with which pitch, can be set with the Edit option (see below).
Velocity colors
The notes get different colors depending on their velocity values.
Which color is associated with which velocity, can be set with
the Edit option (see below).
Colorize by
Parts
The notes get the same color as their respective Part in the Arrange Window. Use this option when you are working with two
or more Tracks in an editor, to better see which notes belong to
which Track.
- 95 -
Editing Color
If you have selected Channel, Pitch or Velocity colors, an extra item appears at the
bottom of the pop-up menu. This is used to set which colors should be used:
1. Select the option at the bottom of the color pop-up menu (named “Channel colors...”, “Pitch colors...” or “Velocity colors...” depending on what
is selected).
A color dialog is opened. Channel, Pitch and Velocity have separate color dialogs, allowing you to set different color schemes for each color option.
The Pitch color dialog. There are twelve different pitch color steps (one for each semitone).
2. Choose colors for the velocity levels/pitches/channels, using standard
Windows color selection.
See the Windows documentation for detailed information.
3. When you have edited the colors, click on the “OK” button.
- 96 -
Moving around and the Goto pop-up menu
You can move directly to certain useful positions in an editor by selecting from the
Goto menu on the Function Bar. These options will scroll your view to show the
Events at the chosen position.
● The Goto commands don't affect selection in any way. They only change the
view as if the scroll bars were used.
Song Position
Takes you to the Song Position.
First Event
Takes you to the first Event in the active Part.
Last Event
Takes you to the last Event in the active Part.
First Selected
Takes you to the earliest of all the selected Events.
Next Selected
Takes you to the next selected Events.
Last Selected
Takes you to the last of the selected Events.
Prev Selected
Takes you to the selected Event before the one currently in
view.
Next Part
Takes you to the beginning of the next Part. This might just
lead to a vertical scroll if there are several Parts beginning at
the same Position.
Prev Part
Takes you to the beginning of the previous Part. This might
just lead to a vertical scroll (see above).
- 97 -
Monitoring Events in the Editors
As already mentioned, you can have playback running while you are editing. And,
you can also use the cue function (see the Getting Started chapter “Playback,
Tempo and the Transport Bar”) in the Edit windows. But there are two more ways
to listen to your music in the editors:
The Magnifying Glass
The Magnifying Glass tool is common to all MIDI editors. When you click on an
Event using this tool, the Event is played back. You can also hold the mouse button
and drag the Magnifying Glass around over the Events.
The Speaker
When you click on the speaker symbol on the Status Bar, Events will be output automatically when you click on them, when you create them using the pencil or paint
brush, and when you make changes on the info line.
Selecting and the To pop-up menu
The concept of selecting Events is much the same as selecting Parts, described in
the Getting Started book. You can:
• Click on an Event to select it (and deselect all others).
• Hold [Shift] and click on an Event to select it, keeping any previously selected Events.
• Select several Events by enclosing them in a rectangle using the Arrow
tool.
• Press [Control]-[A] to select all Events in the editor.
This is the same as using the Select All item on the Edit menu.
• Use the [←] and [→] keys to select the previous/next Event in the Active
Part.
If you hold down [Shift] and use the arrow keys, the next/previous Event will
be selected, without deselecting already selected Events.
• Use the “Select” submenu on the Edit menu.
The contents of this submenu varies depending on which editor you’re in. See
the Online Help.
- 98 -
Selecting Events from different Parts
You can select Events from both an active and an inactive Part:
1. Select the Events you want in the active Part, using any method described above.
2. Hold down [Shift].
3. Select one Event from an inactive Part by clicking on it.
This Part now becomes active.
4. While keeping [Shift] pressed, use any method to select more Events
from the now active Part.
As long as you keep [Shift] pressed, you can switch active Parts and select
from as many as you like, using this method.
● Any type of editing you do (like moving, copying and so on) will affect all selected Events, whether they are in active or inactive Parts.
The To Pop-up
All the editors have a pop-up menu called “To”. This is used together with the Loop
and Cycle functions to collectively choose a group of Events to be affected by your
editing.
All Events, active or inactive, will be affected.
All Events inside the Loop
will be affected, whether the
Loop is On or Off, and
regardless of if the Events
come from active or
inactive Parts.
All selected Events,
inactive or active, will
be affected.
Those Events that are
inside the Loop and
selected will be
affected.
Those Events that are inside the
Cycle and selected will be affected.
All Events inside the Cycle will be
affected, whether the Cycle is On or
Off, and regardless of if the Events
come from active or inactive Parts.
- 99 -
The Do pop-up menu
This pop-up menu is found on the Status Bar, next to the Goto pop-up. It contains
some special functions to make editing and creating Events easier. The items common to all editors are described below (the Do Pop-up in Score Edit Window in
score printing versions of Cubase VST have even more options, described in the
“Score Layout and Printing” documentation).
● Use the commands in the To menu to first define a selection of notes you
want to edit. Then use the commands in the Do menu to perform one of the
available actions.
Fixed Note
This gives all the affected notes the same pitch as the last selected note. The positions, velocity and MIDI Channel values for the notes are left intact.
● Make sure you only have one note selected when you use this function.
Delete Note
Deletes all affected notes with the same pitch as the selected note, but leaves all
other notes. This means that if you select a C3 then all C3's (in the range defined by
the To menu) will be deleted.
● Make sure you only have one note selected.
Keep Note
This function is sort of the reverse of Delete Note. All notes (in the range defined by
the To menu) that have the same pitch as the selected one are kept. All others are deleted.
● Make sure you only have one note selected.
- 100 -
Repeat
This function is used to repeat a section of the Part until the end of the Part. You define the "repeat cycle" by setting the Loop or the Cycle. From there on there are two
options:
• The To menu is set to "Looped Selected Events" or "Cycled Selected
Events":
The selected Events (notes and other) inside the Loop/Cycle are repeated until
the Part is filled. The created Events are added to the existing.
• The To menu is set to just "Looped Events" or "Cycled Events":
All the Events inside the Loop/Cycle are repeated and the created Events replace the existing. The repeating goes on until the Part is filled.
Fill
This function only works when the To menu is set to "All Events", "Looped
Events" or "Cycled Events". It then fills the whole Part/the Loop/the Cycle with
notes that have the same pitch. The notes are spaced according to the Snap value
and are all given a length corresponding to the Quantize value.
Reverse
This reverses the order of all Events (notes and other) in the range defined by the To
menu.
Delete
This deletes all Events in the range defined by the To menu (notes, Controllers, the
lot).
- 101 -
An Example
This example shows one way to use the To and Do pop-ups in conjunction. Let’s
say you want one and a half bars of short, staccato-like 16th notes. Instead of drawing or playing them from your instrument, you can proceed like this:
1. Set up the Loop to the range you want filled with notes.
The Loop does not have to be active.
2. Set Snap to 16.
3. Set Quantize to 64.
This should give the notes the desired, short length.
4. Pull down the To menu and select “Looped Events”.
5. Pull down the Do menu and select “Fill”.
The area within the Loop is filled with 16th notes, each with the length of a
64th note.
- 102 -
The Info Line
The Info Line is the area directly above the main display in the Key, Drum and
Score editors.You use the Info Line for precise, numerical editing.
Editing on the Info Line
1. To show/hide the Info Line, click on the i-button on the Status Bar or
press [Alt]+[Control]-[I] on the computer keyboard.
2. Select a single Event.
Its values are shown on the Info Line.
If no Event or several Events are selected, the Info Line shows "– – – " for all values.
3. Change the desired values using regular value editing.
As always, you can use the mouse or type in values from the computer keyboard.
Info Line Parameters
The following parameters can be changed on the Info Line:
Parameter
Remark
Start
Changing this value is the same as moving the note.
Length
In ticks.
Pitch
Changing this value transposes the note.
Velo On
The Note On velocity; the speed with which you press a key on a
MIDI keyboard.
Velo Off
The Note Off velocity; the speed with which you release a key on a
MIDI keyboard.
Chn
The “original” MIDI Channel associated with the note (see page
17).
● Not all MIDI Instruments send and/or read velocity (especially true with Note
Off velocity). Check your instrument’s operation manual if you are unsure.
- 103 -
Quantize and Snap Values
The Quantize and Snap values work exactly like in the Arrange Window (see the
Getting Started book). However, there are a couple of things worth pointing out:
• Each editor has separate settings for Quantize and Snap values.
This means that the settings you make in the Key Edit window will not automatically be transferred to Score Edit. This is practical, due to the different
work methods you will employ in the different editors.
• The Quantize value also works as a length determinator when inputting
notes.
If you for example have the Quantize value set to 8, the notes you create will
automatically become 1/8-notes.
• The Snap value also defines the spacing between input notes.
This applies when you use the paint brush or the Fill command from the Do
pop-up. With a Snap value of 4 and a Quantize value of 16, you will get sixteenth notes, positioned on the beats (quarter-note positions).
• The Snap pop-ups in the editors contain more options than the one in the
Arrange Window.
The reason for this is of course that you do not need small or uneven Snap
values when moving Parts. In the editors, however, you do. The following
Snap values are available:
The values ranging
from 64 to 1 are
regular note values.
Triplets (T) and dotted
(.) note values can be
selected.
The values 2 - 7 pp
are values in ticks,
allowing high
precision editing
and moving.
● In Drum Edit, each Sound has separate Quantize and Length values.
- 104 -
Creating Note Events
You can paint new notes into the active Part using different Toolbox tools. Which
tools are available depends on what editor you are using:
Using the Pencil tool
You can use the Pencil (or Drumstick, in Drum Edit) to draw new notes one at a
time. This is described in detail in the Getting Started book, but here are a few
rules-of-thumb (the Quantize and Snap values apply as described on the previous
pages):
• Click once with the Pencil to create a single note.
The new notes will get the length of the Quantize value.
• Click and drag with the Pencil to create a note with a length of your
choice.
• In Score Edit, you use the note and rest tools in a manner similar to the
Pencil, see the chapter “Score Edit”.
Using the Paint Brush tool
Use the Paint Brush to ‘paint’ in several new notes at a time. The following rules
apply:
• The notes are created at a spacing defined by the Snap value.
• The new notes will get the length of the Quantize value.
• Movement is restricted to horizontally only when you are dragging.
That is, in Key edit for example, all notes will have the same pitch, and in
Drum Edit they will belong to the same "Sound". If you want to paint “freehand”, with no restrictions in pitch, hold down [Alt] when you are using the
Paint Brush.
- 105 -
Velocity and MIDI Channel values for Created Notes
When you draw or paint notes, you can give them one of four fixed velocity values
by holding down keys on the computer keyboard while you are painting.
Key
Velocity value
None
127
[Shift]
96
[Control]
64
[Shift]+[Control]
32
• Drum Edit has a special function for assigning velocity values to created
notes, see page 131.
• The Note-Off velocity for notes will always be set to 64.
• Created notes will get the MIDI Channel value of their respective Parts.
In Drum Edit, created notes get the MIDI Channel value set for their Drum
Sounds, respectively.
The Insert Button
The Insert button
If the Insert button is activated on the Status Bar when you use the Pen or Brush,
then all Events in the Part will be moved one Quantize value forward when you input new Events, just as with Step Input.
● You can also create new Events using the pop-up Do menu, see page 100 in
this chapter.
- 106 -
Editing Notes
To edit the values of a note in detail, select it and edit on the Info Line (as described
on page 103 in this chapter) or make the changes in List Edit. However, there are
quicker and more intuitive ways to edit notes in the Graphical editors:
Using the Tools
Moving Notes with the Arrow tool
You can move notes by dragging them around using the Arrow tool (also see the
chapter “An Introduction to the MIDI Editors” in the Getting Started book). The
smallest distance you can move a note, is equal to the Snap value set with the Snap
pop-up menu.
Moving Notes with the Kickers
For fine adjustment of a note’s position, use the two Kickers.
1. Set the Snap value to the distance you want to move the note.
2. Click on the note with the left or the right Kicker, to move it left or right
respectively.
If you for example set the Snap value to “8” and click on the note with the right Kicker, the
note will be moved an eighth note to the right.
Resizing Notes with the Pencil tool
In Key and List Edit, you may change the size of notes that you have drawn or recorded, using the Pencil tool:
1. Set the Snap value.
What you do when you resize a note, is moving the position where the note
ends. You can only move notes in multiples of the set Snap value. That
means, if Snap is set to 8, you can move the end-position of a note to 1/8, 1/
4, 3/8, etc.
2. Press the mouse button with the Pencil tool selected, and the pointer inside the note you want to resize.
- 107 -
● It might be hard to determine whether you have the pointer inside a note or
not. To avoid painting in new Events, hold down [Alt] on the computer keyboard. This disables creation of new Events.
3. Position the pointer at the length you want the note to have, and release
the mouse button.
The note gets resized, taking the set snap value into account.
Editing Notes via MIDI
You can change the properties of notes via MIDI. This can be a handy and fast way
to get for example the right velocity value, since you will hear the result even as
you edit:
1. Select the note you want to edit.
2. Click on the MIDI Connector symbol on the Status Bar.
The symbol should be “lit”. This enables editing via MIDI.
3. Use the Note buttons on the Status Bar to decide what properties will be
changed by the MIDI input.
You can enable editing of Pitch, Note On- and/or Note Off-velocity.
With this setting, the edited notes will get the Pitch and Velo-off values of the notes inputted
via MIDI, but the Velo-on values will be kept as they are.
4. Play a note on your MIDI instrument.
The note selected in the editor will take on the properties of the played note,
according to the setting made in step 3.
The next note in the active Part automatically gets selected. A series of notes
can therefore quickly be edited.
• If you want another try, select the note again (easiest by pressing the [←]
key on the computer keyboard) and again play a note on your MIDI Instrument.
Cutting, Copying and Pasting
You can use standard Cut, Copy and Paste commands to move Events between editors or to duplicate a series of Events.
• Cut or Copied Events are Pasted in starting at the Song Position. The
Events will keep their relative positions, pitch and other properties.
- 108 -
Deleting Events
Events can be deleted in several ways:
• Select them and select Delete Events from the Edit menu.
or
• Use the Delete command on the Do pop-up menu (see page 101).
or
• Select them and press [Backspace] on the computer keyboard.
or
• Click on them with the Eraser tool.
- 109 -
Creating and Editing Continuous Data
In Key and Drum Edit, there are special displays for graphical editing of Events
other than notes. These include Modulation, Main Volume and Pitch Bend Events,
but also Poly Pressure and Velocity values (which are not really Events of their own
but rather properties of notes).
Continuous Data can also be edited in List Edit, using the List, the Event display
and/or the special “Value 2 display”, which lets you edit the data in a bar graph
form (see page 143).
How to create and edit Continuous Data is described in the chapter “An Introduction to MIDI Editing” in the Getting Started book. Here is a brief rundown of the
features:
• Open and close the display by clicking on the icon in the lower left corner of the Edit window.
• Change the size of the display by dragging the Divider up or down.
• To select data type to be displayed, press the mouse button with the
pointer on the data type icon (to the left in the display).
This pulls down the data type pop-up menu.
Click here to pull down the data
type pop-up menu.
• If you move the pointer up and down in the Controller Display, the value
corresponding to the pointer position is shown in the box below the data
type icon to the left.
This helps you position the Pencil/Line tool when creating or editing Events.
● All values range between 0 and 127, except Pitch Bend, which has a value
range from –8192 to +8191. For Pitch Bend, value 0 is equivalent to no Pitch
Bend (the Pitch Bend wheel/lever in centre position).
- 110 -
Selecting Non-standard Controller Types
The data type pop-up menu lists only the most common Continuous Controllers. If
you want to view and edit other Controllers, you can use the two custom data types
at the bottom of the pop-up menu. Proceed as follows:
1. Double click on the data type icon.
This opens a small dialog box with the Controller number settings for the two
custom data types.
2. Select Controller numbers for the two custom data types, using regular
value editing, and press Exit.
3. Select one of the two custom Controllers (the two last items on the popup menu).
Velocity
The velocity values of notes are shown as thin vertical bars, with higher bars representing higher velocity values. Since a velocity value always belongs to a note, you
can not create new velocity “bars” in the Controller Display, only edit existing.
• Selecting a note also selects the velocity bar in the Controller Display.
And in the same way, selecting a number of velocity bars, by enclosing them
with a selection rectangle, will select the notes in the note display.
Non-Note Events
These Events include all Controllers, Pitch Bend, Sustain-pedal etc. There is one
very important thing to observe about non-note Events. If you for example put in
one single MIDI Modulation wheel Event with a value of 63, this will be displayed
like this:
The figure above might look like an "infinite" series of modulation Events all with
the value 63, but it is not, it is only one. It is a graph of instantly moving the modulation wheel to position 63 and leaving it there.
It is important to remember that if drawing Controllers or inputting them in any
other way, makes them stay at the last set value for an infinite amount of time (or
until you change it the next time). Sustain pedal (damper) for instance, will vary between 0 and 127 every time you press or release the pedal, but stay at the last value
as long as you don't move your foot on or off it. Draw in one "foot down" Event,
and the notes will sustain until a "foot up" Event appears.
- 111 -
Selecting Non-Note Events
Click with the Arrow tool to select Events in the Controller Display. To select several Events, you may hold down the [Shift] key on the computer keyboard and
click, or enclose the Events in a frame, just like when selecting notes.
Creating and Editing Non-note Events
The Pencil and Line tools can be used to create and edit non-note Events in the
Controller Display.
• You edit existing Events by drawing with the pen or making a ramp with
the Line tool.
• You create new Events by holding down [Alt] on the computer keyboard,
and drawing/making a ramp.
Deleting Non-note Events
Just like with note Events, this can be done in several ways:
• Select the Events and select Delete Events from the Edit menu.
or
• Use the Delete command on the Do pop-up menu to delete all Events
within a certain range (set by the Loop or Cycle).
or
• Select the Events and press [Backspace] on the computer keyboard.
or
• Click on the Events with the Eraser tool.
● Please observe that deleting an Event makes the last Event before this valid up
until the next Event. It does not "zero" any Controller changes.
Poly Pressure
Polyphonic pressure data has two values that go with it. First the key that was
pressed, and then the amount of pressure.
In the Controller Display in Key and Drum Edit, only the Poly Pressure data for the
note displayed on the Note Info Line (select one note only!) is shown. When you
draw or paint in Poly Pressure data it also gets this note number (pitch) value.
- 112 -
10
Step Recording
11
- 113 -
Introduction
Step Input is when you enter notes one at a time (or one chord at a time). This is
useful when you know the part you want to record but are not able to play it exactly
as you want it.
Preparations
1. Create an empty Part, as a container for the notes you are about to Step
Record.
You can of course also use an exisiting Part.
2. Open the Part in a MIDI editor of your choice.
In the pictures below we will use Key Edit, but it doesn’t matter which you select.
3. Click on the Step button.
This automatically activates the MIDI In icon and the Step Position box
Click the Step button...
...the MIDI connector is
automatically activated...
...and the Step Position
box appears.
Determining Note Lengths and Positions
• To set the length of the notes you are about to input, adjust the editor’s
Quantize value.
If you e.g. set this to “16” all notes you input will be sixteenth notes.
• To set the “spacing” between the notes and chords, adjust the editor’s
Snap value.
If you e.g. set this to “8” all notes will appear on eighth note positions.
Note “spacing”.
Note length.
- 114 -
Setting the Position for the first note
To set the position where you want the first note to appear, adjust the regular Song
Position (for example on the Transport Bar) and the Step Position is automatically
set to the same value.
Selecting a Track for input
If you are editing several Tracks at the same time, you must decide which Track to
enter notes into by making a Part/Track active (see page 94).
Entering notes and chords
1. Play one key or a chord.
If you just played one key it appears as soon as you release it. If you play a
chord it appears when you release the last key. In either case, the velocity you
played is recorded with the note.
No matter how long you hold down the key, the note will get the length set in
the Quantize box.
2. The Step Position has now advanced one Snap value.
3. Enter the notes for the next position.
1. Start by setting the Step
Position
2. Press and release the first
key.The note appears and the Step
Position box advances one step.
3. Press and release a chord.
It appears and the Step
Position advances again.
- 115 -
Adding Rests
To move one step without entering any notes, press the [Tab] key on the computer
keyboard.
Changing note values and positions as you go along
• If you want to enter notes of another length, simply change the Quantize
value at any point.
• If you want to input notes with a different “spacing” simply adjust the
Snap value.
• If you want to move to a completely new position, change the Song Position or use Fast Forward or Rewind.
If you change the
Song Position...
...the Step Position is
set to the same value.
• To move one step back or forward in time, use the [←] and [→] keys. The
Song Position Pointer shows you the current position.
- 116 -
If you make a mistake
If for example you entered a note with the wrong pitch or made a mistake when
playing a chord, press [Backspace]. This deletes the last note/chord you entered,
and moves the Step Position one step backwards. You can press this key repeatedly
to “delete backwards”.
If you have this, and
press [Backspace]...
... the last entered note gets
deleted and the Step Position
moves back one step.
You can also use the tools and menu for editing (deleting, moving etc).
- 117 -
Using the Insert button
The Insert button.
If the Insert button on the Status Bar is activated, the notes are inserted rather than
added. That is, any existing notes are moved to a later position to make room for the
new notes.
With Insert on, and the
Step Position here...
...the new note is
inserted, and the
following notes are
“pushed forward”.
Playing back
You can activate playback at any time and from any position, to hear what you have
done. Please note, though, that moving the Song Position also moves the Step Position.
When you are finished
When you have entered all the notes you want, don’t forget to deactivate step mode
by clicking on the MIDI In button.
Click on the “MIDI
connector”, and the
Step button is
automatically
deactivated.
- 118 -
11
Key Edit
12
- 119 -
About this “Chapter”
You do not find any additional information here because Key Edit is a very straightforward editor. We have therefore used it as an example in the chapters “An Introduction to the MIDI Editors” (in the Getting Started book) and “The MIDI Editors
- General Information” (in this document). If you have read these two chapters, you
do know everything there is to know about Key Edit.
- 120 -
12
Drum Edit and Drum Tracks
- 121 -
13
About Drum Tracks and Drum Parts
In MIDI instruments, drum sounds most often are separated by being placed on different keys, i.e. assigned to different MIDI note numbers. This means that when
you use a keyboard to record a drum part in a sequencer, you usually use one key
for bass drum, one for snare and so on. On many instruments used to play back
drum sounds (drum machines, samplers and some synths) you can re-arrange the
order in which the sounds of the single instruments are assigned to the keys. (Instead of assigning the bass drum to the key C1 you could for instance assign it to
D1, or any other key available on your keyboard).
Unfortunately, most MIDI instrument manufacturers place their drum sounds on
different keys and in different orders. This can be troublesome if you have made a
drum pattern using one instrument, and then want to try it on another. When you
switch instrument, it is very likely that your snare drum becomes a ride cymbal, or
your hi-hat becomes a tom, etc, just because the drum sounds are distributed differently in the two instruments.
To solve this problem, and simplify several aspects of MIDI drum kits (like using
drum sounds from different instruments, in the same “drum kit”), Cubase VST features a Track class called Drum Tracks. Parts on Drum Tracks are called Drum Parts.
The thing that separates Drum Tracks from MIDI Tracks is that everything played
back from (or routed Thru) a Drum Track, is “filtered” through a Drum Map.
Among other things, this Drum Map (described in detail on the next page) determines exactly which MIDI Note Number is sent out for each sound in your drum
pattern (and thereby which drum sound is played in the receiving instrument). A solution to the problem above, would therefore be to make up Drum Maps for all your
instruments. When you want to try your drum pattern on another instrument, you
simply switch to the corresponding Drum Map as well, and your snare drum sound
will remain a snare drum sound.
- 122 -
About Drum Maps
A Drum Map consists of settings for 64 drum sounds, from now on called Sounds.
For each Sound you may define the following values:
Parameter
Description
Sound
The name of the Sound.
I-note
When this MIDI note is sent into Cubase VST, (i.e. played by
you), the particular Sound is “triggered” (played).
O-note
When the Sound is triggered (either by you playing it, or by
the program playing back a Drum Part), this is the MIDI note
number that is sent out.
Chn
The MIDI-channel that the Sound will be output on.
Output
The MIDI Output used by the Sound.
Instrument
A way to name the combination of MIDI Channel and Output (just as in the Track Columns).
Quant
A Quantize value used when editing (see page 129 and page
132 in this chapter).
Len
A Length value used when inputting notes (see page 130 in
this chapter)
Lev1 – Lev4
These are four different velocity values, used when you cre(“Diamond values”) ate notes in Drum Edit (see page 131).
Though this may seem a lot of parameters, only two are really important for understanding Drum Maps: The I-note and O-note values.
I-note
This is a certain key (MIDI note number) used for playing the Sound. Setting the Inote value will let you choose a key on your MIDI instrument (or drum pad or
whatever) to play the Sound.
● Two Sounds cannot share the same I-note.
O-note
This is the MIDI note number that the Sound actually outputs when played by you
or played back by the program.
Say that you have a rack synth with some drum sounds in it. They are spread over
the keyboard range in a way that is inconvenient for your playing style. First set the
O-notes in the Drum Map so that they match the actual notes that play back the
sounds on your instrument. If the instrument plays back the bass drum on the C2
key, then set the O-Note for the bass drum sound to just that, C2, so that the Sound
plays the bass drum. Now you can rearrange the whole "drum kit" so that the fingering suits you, just by setting the right I-notes.
- 123 -
● Since you use the Drum Map in Cubase VST to redirect certain note numbers
(the ones that you play, the I-notes) to other note numbers (the ones that are
sent back into your MIDI Instrument, the O-notes), this assumes that you use
Cubase VST’s Thru-mode (and your instrument is in Local Off-mode). See the
Getting Started book for details.
How Cubase VST looks at the Drum Map
“Inside” the program, the 64 Sounds each have a note number. This is neither the Inote nor the O-note value, but simply a note number used to sort and keep track of
the Sounds. This may seem superfluous knowledge for you, but it is actually only
this “real” note number that is recorded, and as soon as you open a Drum Part in another editor, the “real” note numbers will be revealed. The figure on the next page
shows how the Drum Map system works when you record a Drum Part:
When you play a key on your
keyboard controller, etc...
...the input is directed to the Sound
with the corresponding I-Note.
Internally, the “real” note number for
the Sound (here: E0) is recorded.
Then, in order for you to hear anything, Cubase
VST sends out the O-Note set for the Sound.
Finally, when you play back the recorded note, the program doesn’t care about the I-Note
value, just looks at the recorded, “real” note number, and outputs the O-Note stored with
that Drum Sound.
- 124 -
About Output and MIDI Channel
You can set separate Outputs and MIDI Channel for each Sound in the Drum Map.
This allows you to use sounds from several different MIDI instruments or sound
modules in the same Drum Map. There are a few things to note:
Selecting a MIDI Output for the Drum Sound
This is done in the Output column in the Drum Map (see page 123 in this chapter).
The Output setting for the Sound always overrides the setting for the Track in the
Track list. In other words, the Output setting in the Track list does not apply for
Drum Tracks.
Selecting a MIDI Channel for the Drum Sound
This is done in the Chn column in the Drum Map.
● For the MIDI Channel settings in the Drum Map to apply, you have to set the
MIDI Channel of the Track (in the Track list) to “Any”.
- 125 -
Setting up a Drum Map
Opening the Drum Editor
Drum Maps are created and edited in the Drum Edit window. Open the editor like this:
1. Select a Drum Part.
You may have to create a Drum Track and a Drum Part if you haven’t got any
already. This is done just as with a MIDI Track, except you set the Track Class
to Drum Track (see the Getting Started book for info on Track Classes).
2. Double click on the Part, select Edit from the Edit menu, or press [Control]-[E] on the computer keyboard.
The Drum editor is opened.
Making the Parameter Settings
1. Click on the Speaker button on the Status Bar.
When this is activated, a note will be sent out every time you change a value
in the editor. This is essential when setting up and selecting drum Sounds.
2. Drag the Divider all the way to the right, so that all columns are visible.
If you are editing a MIDI Part in the Drum editor (see page 133) the columns
look a little different.
- 126 -
3. Choose an unused Sound and change its O-Note value until you find a
sound you want to include in your Drum Map.
Each time you change the O-Note value, the new note is output.
4. Double-click in the Drum Name column and type in a suitable name for
the Sound.
5. Repeat steps 3 and 4 until you have all the sounds you want in your
Drum Map.
• If you want to incorporate sounds from several different instruments (or
several drum kits from a multitimbral instrument) in the same Drum
Map, set the Output and Channel values for each Sound so that the right
instrument is addressed.
To avoid redoing this over and over again, you can define Instruments just
like you do in the Track Columns in the Arrange Window.
● If you use different MIDI Channel settings for different Sounds, you have to set
the MIDI Channel for the Track (in the Track list) to “Any”.
6. When you have all the sounds you want, set the I-Note values for each
Sound.
Setting the I-Notes allows you to place your Sounds on convenient keys on
the keyboard.
● You might get a warning saying “Double defined I-NOTE in your drum set”.
This means that more than one Sound is set to the same I-Note value. To
avoid problems, be sure to change one of the Sounds to an unused I-Note
value.
• You may move and re-sort the Sounds in the editor if you for example
want to have your snare drum sounds gathered on consecutive rows.
This is done by dragging the rows in the list, just like re-arranging Tracks in
the Track list. Changing the order of the Sounds in the list does not affect the
I-Note, O-Note or “real” note values - it is just a display feature, to make editing easier.
You now have a basic Drum Map. You may want to set the Q and Len parameters
and the four pre-defined velocity values when editing or inputting notes in Drum
Edit. This can be done for some or all of the Sounds, as described on page 131 in
this chapter.
- 127 -
Making parameter settings via MIDI
The I-Note, O-Note and Lev.1–4 parameters can be set using your MIDI controller,
which often is a lot easier:
1. Click on the MIDI connector symbol on the Status Bar to activate it.
2. Select the Sound you want to edit by clicking on its name in the Sound
list.
3. Select the parameter you want to change by clicking on its name, at the
top of its column.
The name gets highlighted to show that the parameter is selected.
4. Play a note on your MIDI controller.
The note number (I-Note, O-Note) or velocity value (Lev. 1–4) changes accordingly. If you do not get it right, try again.
5. When you are satisfied, deactivate the MIDI connector symbol.
Loading a Drum Map
A number of predefined Drum Maps are included with Cubase VST. You can load
anyone of them (or a Drum Map created and saved by you) into your Song:
1. Select “Open” from the File menu.
2. Use the File List to open the directory named “drumsets” (or another directory where you have saved Drum Maps).
3. In the dialog box that appears, use the File Type pop-up to select “Drumsets (*.DRM)”.
This causes Cubase VST to display the Drum Maps available in the current directory.
4. Select and open the preferred Drum Map.
The new Drum Map will replace the one currently in the Song. If you save the
Song, the new Map will be saved with it, and will automatically be loaded
next time you open the Song.
Saving your Drum Map
Created Drum Maps can be saved for later use:
1. Select “Save As...” from the File menu.
2. In the dialog box that appears, use the File Type pop-up to select “Drumsets (*.DRM)”.
3. Choose a directory and name for the Drum Map and save it as usual.
- 128 -
Editing Drum Parts in the Drum Editor
Inputting Notes with the Drum Stick
The Drum Stick tool is Drum Edit’s equivalent of the Pencil tool in Key and List
Edit. There is however one difference:
If you click in the Event display
using the Drum Stick...
...a new note is created.
If you click on the created
note again...
...the note is erased!
This makes it easy to try out rhythmic variations; adding and removing notes without having to switch tools.
• If you delete a note this way, you can continue dragging, deleting other
notes as long as you don’t release the mouse button.
The Quant Value
Exactly where a created note is placed, is determined by the Quant value set for its
Sound. This works just like Snap value in the other editors, except you can have different settings for each Sound.
Pressing the mouse button with the
pointer in the Quant column...
...opens the Quant
pop-up menu.
- 129 -
● Note that the Quant value only applies when you create notes. When you
Quantize notes, the regular Quantize value on the Status Bar applies (usually
- see page 132), and when you move a note, the Snap value (on the Status
Bar) determines its exact position.
The Len Value
You don’t change the length of created notes with the Drumstick (as you can with
the Pencil tool in Key Edit). Instead, you can predefine a length value for each
Sound, that created notes automatically get.
The Len value is specified as a regular note value, while the Note Info
Line shows lengths in ticks.
● The length of a drum note may or may not be important, since many drum
sounds play to their end regardless of how long notes you play.
- 130 -
Velocity Values
You can give the notes one of four “levels” (velocity values), by holding down keys
on the computer keyboard while you are drawing. The created notes are shown in
the display as diamonds. If “White” is selected as the color option, a different pattern is used for different levels:
Modifier key
Level
[Shift]+[Control]
Lev. 1
[Control]
Lev. 2
[Shift]
Lev. 3
None
Lev. 4
Diamond symbol
The actual velocity value associated with each of the four levels, is set individually
for each Sound in the Drum Map:
Making Settings for All Sounds at Once
You can set a parameter to the same value for all Sounds:
1. Hold down [Control] on the computer keyboard.
2. Change the parameter for anyone of the Sounds to the desired value.
3. Release [Control].
All Sounds in the Drum Map will now get the same value for the selected parameter.
Inputting Notes with the Paint Brush
The Paint Brush tool works just like in the other editors (see page 105). Just remember that each Sound has individual Quant and Len values.
• When inputting notes with the brush, you can use the modifier keys to
control the note velocity in the same way as when you input notes with
the drum stick tool. See above.
- 131 -
Quantizing
Quantizing Events in the Drum editor works just like quantizing in any other editor,
with one exception:
• If the To menu is set to Selected Events, Looped Selected Events or Cycled Selected Events, and no Events are actually selected, then the selected Sound will be Quantized after its individual Quant value.
In all other cases, quantizing works “as usual”, that is: All Events set to be affected
will be Quantized after the Quantize value on the Status Bar.
Muting Drum Sounds
You may mute individual Sounds in the Drum editor. This is done just like muting
Tracks in the Arrange Window, by clicking in the Mute column.
Muting a Sound.
There is also a Solo button, just below the Ed Solo button in the upper left corner of
the window. This will Mute all Sounds but the selected one.
- 132 -
Editing MIDI Parts in Drum Edit
You may also edit regular MIDI Parts in Drum Edit, by selecting the Part(s) and selecting Drum Edit from the Edit menu or by pressing [Control]-[D] on the computer keyboard. When you do this, a simplified Drum Map is used where there is no
O-note or Instrument settings:
If you open a MIDI Part in Drum Edit, each note will be displayed on the “line”
(Sound) whose I-note setting is the same as the note’s actual note number. If you
for example have a MIDI Part containing a note with the note number D2, this note
will be displayed on the line of the Sound with the I-note value of D2 – if there is
such a Sound in the Drum Map! Notes will be “invisible” in Drum Edit if there are
no Sounds with the right I-note values.
When you use Drum Edit to edit MIDI Tracks, some of the columns work differently than with Drum Tracks:
I-Note
The I-Note is the note (the key, the MIDI Note number) used to input, display and play back the Sound.
Chn
This will be the Channel number for the notes you draw in or in any
other way input directly in the editor. For this to have any effect you must
set the Part (or Track) to MIDI Channel "Any" in the Arrange Window.
Changing the Drum Map
If you change the I-Note for a Sound while editing, the notes previously displayed
on that line will of course disappear since the I-Note values doesn't correspond to
the notes anymore. Conversely, all notes that are already in the Part and have the
same note number as the new I-Note value will appear.
- 133 -
Converting between MIDI and Drum Parts
You may at any time change a MIDI Track to a Drum Track and vice versa. When
you change the Track class, a dialog box appears, asking you if you wish to transform the Parts on the Track. These options are slightly different depending on
“which way” you are converting.
From MIDI to Drum Track
• “No” cancels the conversion of the Track.
• “Yes” will convert all Parts on the MIDI Track to Drum Parts. The notes
will appear on the Sounds with the corresponding I-note values. If you
for example have a note with the pitch C3, it will end up on the Sound
with the I-note C3.
From Drum to MIDI Track
• “Cancel” will cancel the conversion of the Track.
• “In Notes” will set the note numbers of the converted notes to the I-Note
values they had in the Drum Map.
• “Out Notes” will set the note numbers of the converted notes to the ONote values they had in the Drum Map.
● When you convert a Drum Part to a MIDI Part, the Output settings in the
Drum Map will be lost.
- 134 -
13
List Edit
14
- 135 -
The Columns in the List
In List Edit, you can view and edit most of the various Event Types in all of Cubase
VST’s different Track Classes. The columns in the List represent different values
depending on the Track Class and Event Types:
Audio Tracks
If you open an Audio Part or Track in List Edit you get a list of the Audio Events.
This is useful when you want to find and keep track of Events, since no Events ever
obscure and hide each other as they can do in Audio Edit. When it comes to editing,
List Edit is limited to moving the Audio Events around. The columns have the following labels and functions for Audio Tracks:
Startpos
Endpos
Chn
Comment
The meter (or time)
position of the Start
Inset. Changing this
is the same as moving the Audio
Event.
The End Inset position. Cannot be edited, but changes
automatically
when you edit the
Startpos value.
The Audio Channel
that each Event plays
back on. Cannot be
edited here.
This column displays the name of
the segment and
audio file played
back by the Event.
Cannot be edited.
You can also perform basic editing of Audio Events in the Part Display, to the right
in the List Edit window. In brief, you can do the following:
• Move Events by dragging them or by using the Kicker tools.
• Delete Events using the Eraser tool.
• Create new Events by clicking with the Pencil tool.
As in Audio Edit, this opens a file dialog where you can select an audio file to
import.
● The rest of this chapter does not apply to Audio Tracks.
- 136 -
MIDI and Drum Tracks
Common to the various Event types, are the Start Position, Length and Chn parameters. As you expected, these show where an Event starts (as a meter or time position value, see page 147 in this chapter), its length in ticks and its MIDI Channel
value, respectively. The table below shows the List columns and the parameters for
the different Event types (the rows):
Val 1
Val 2
Val 3
Comment
Notes
Pitch
Note On
velocity
Note Off
velocity
Sound Name
(Drum Tracks)
Poly Pressure
Note
Number
Pressure
Amount
Not used
Not used
Control Change
Controller
Type
Change
Amount
Not used
Not used
Program Change
Program
Number
Not used
Not used
Not used
Aftertouch
Pressure
Amount
Not used
Not used
Not used
Pitch Bend
Bendvalue
(fine)
Bend value
(coarse)
Not used
Not used
System Exclusive
Not used
Not used
Not used
The Sys Ex message –
see page 138
There is also a column named Status. For all Event types except Control Change
(see below), this is just an explanatory value that can’t be changed, e.g. “Note” for
Note Events etc.
Transforming Controller Events
If you change Value 1 for a Control Change Event, you actually change the Controller from one type to another. To simplify this, the name of the Controller type is
shown in the “Status” column in the List. You can change the value either in the
“Val 1” column or the “Status” column.
Changing the value in the
“Val 1” column...
...will simultaneously affect the “Status”
column, and vice versa.
• If you want to transform all Controller Events of a certain type to another
type, use this feature in conjunction with the Mask function (described
on page 145 in this chapter) and the [Alt] key on the computer keyboard
(which makes changes affect all Events in the List, see page 141 in this
chapter).
- 137 -
Editing System Exclusive Messages
A complete package of System Exclusive data is shown as one Event in the List.
The first part of the message is shown in the Comment column, and the Event Type
Status column will show the manufacturers ID code, if known.
To view and edit the complete message:
1. Click in the Comment column.
A long name box is opened, showing the complete Sys Ex message in hexadecimal code.
● If the message is very long, you will not be able to see all of it.
2. Enter and edit Sys Ex text.
System Exlusive data is written as a string of hexadecimal bytes, each separated by a comma. If you’re not absolutely sure of what you are doing, you
should probably avoid hexademical editing of System Exclusive messages.
3. Press [Return] to keep your changes or [Esc] if you want to cancel editing.
● For more extensive System Exclusive editing, we recommend that you use the
SysEx Editor module, as described in the separate document “Handling SysEx
and the SysEx Editor”.
Mixer Tracks
Event Type
Val 1
Val 2
Val 3
Comment
MIDI Mixer
Events
Object
Number
Value
Not used
Object Name and Instrument
setting
- 138 -
Special Events
These, like Mixer Events, are not really MIDI Events, but rather Events used internally in Cubase VST. Therefore they have no MIDI Channel value.
Event Type Val 1
Val 2
Val 3
Comment
Track
Mute
1: Mute,
0: UnMute
Not used
Track Name
Track Number
Stop Event No values are used. Stop Events just make Cubase VST stop, just as if
you had clicked the Stop button yourself.
Text Event
Text Events let you enter comments in the list. Click in the Comments
column to enter and edit text.These texts do not affect MIDI in any
way, they are just meant to serve as remarks for System Exclusive and
other Events.
Score
Event
These reflect Symbols in Score Edit. Score Events can not be created in
List Edit, but they can be deleted.
Scale
Event
Type of Scale
(Major, minor,
etc.
Scale Root Key
(0–11 = C–B)
StyleTrax
Event
Style
Variation
- 139 -
Value 1 (the type of
Scale), displayed in
words.
Creating Events
1. Use the Insert pop-up menu to decide what type of Event to Insert.
2. Set the Snap value to the smallest position you want to enter a note at.
3. If you are entering notes, set their length with the Quantize value.
From here there are three ways to go:
• Select the Pencil or the Paint Brush and draw the Event in the Event display.
The Event appears both in the display and in the List to the left.
• Activate Step Input by clicking on the foot symbol on the Status Bar.
Step programming is described in “Step Recording”.
• Create notes using the Do menu, see page 100.
If you are inputting notes, they will have...
•
•
•
•
the pitch C3.
a Note On velocity of 127.
a Note-Off velocity of 64.
the MIDI Channel value of the Part.
- 140 -
Editing in the List
The positions and values of Events can be edited in the List, using the regular procedures. There are some things to note:
• If you hold down the [Alt] key on the computer keyboard while you’re
changing a value, all Events of the same Event type will be edited.
The setting on the To pop-up menu is also taken into account, allowing you to
for example edit all Control Change Events within the Cycle, etc (see page
99). If you wish to edit only a certain type of Control Change Events, e.g.
Modulation Events, use the Mask function (see page 145 in this chapter).
• If you change an Event’s Start Position, the List will be re-sorted.
The Events are always shown in the order they are played back, with the earliest Event at the top and the latest at the bottom.
- 141 -
Editing in the Event Display
Moving Events
You can use the Arrow tool to move Events in the Event Display, much like in Key
or Drum Edit.However, there is one big difference. This is how you should look at
the horizontal and vertical positions:
• The horizontal position of an Event in the Event Display is directly related to the Events Start Position in the Song (just like in Key or Drum
Edit).
• The vertical position of an Event is just related to the order of the Events,
like in the List. It has no direct relation to time.
The figure below shows an example of this.
Let’s say we have three Events, positioned at 2.1.0, 2.2.0 and 2.4.0.
If you move the Event in the middle a bit to the right...
...it will still keep the exact same vertical position, since its
position is still after the first Event but before the third.
But if you move the Event further to the right, past the third Event...
...the Event suddenly appears on another vertical position,
since the order of the Events has been changed.
- 142 -
Changing the Lengths of Notes
You can click inside a Note Event and drag it to the desired length, using the Pencil
tool. The new length is shown in the Length column in the List.
Editing in the “Value 2” Display
The graphical display to the right shows Value 2 for the Events in the List (where
applicable) as horizontal bars. You may use this to change values, create ramps etc.
For note Events, the bars are black,
for SysEx Events, they are white, and
for other Event types they are grey.
This is to make it easier to
distinguish different values.
As you can see in the tables on page 137 and page 138 in this chapter, the Event
types that use Value 2 are Notes, Poly Pressure, Control Change, Pitch Bend, Scale,
Styletrax and MIDI Mixer Events. Perhaps the most common use for the display is
to edit Value 2 for Note Events, that is, the Note On velocity value.
• You do not have to select the Pencil tool to change the bars in the “Value
2” display; the pointer automatically changes to the Pencil when you
move it into the display.
- 143 -
Hiding Events
You might not want to see all types of Events in the list. If you for example are only
interested in editing Program Change, then all other Events are just in the way. Use
the Display Filters to determine which Event types should be shown:
1. Click on the “F”-button on the Status Bar.
This opens a line with checkboxes for the different Event Types.
2. Check the checkboxes for the Event Types you want to Hide.
These types disappear from the List.
● The Display Filters do not remove, mute or in any other way change the
Events. Editing may affect both visible Events and Events hidden with the Display Filters.
● Special Events can not be hidden.
- 144 -
Using Mask
You can Mask Out certain Events in List Edit. This goes beyond the Display Filters
in two ways:
• Masking really hides Events from any type of editing like Quantizing, Deleting, etc.
• Masking makes it possible to hide Events not only of a certain Type, but also
with certain values.
Masking out all Events of a certain type
To make List Edit only show Events of a certain Type (notes, Controllers, Aftertouch etc), proceed as follows
1. Select an Event in the List.
Let’s say that you select a note.
2. Pull down the Mask menu and select “Mask Event Type”.
All Events that are not of the same type
(here: all non-note Events) are hidden.
Any editing you do now, including functions in the Do pop-up and on the Functions
menu, will only affect the displayed Event Type.
Masking out all Events of a certain type and with the same values
This makes List Edit show only those Events that are of a certain Type and have the
exact same Value 1 (for notes, this means the same Pitch, for Control Change
Events it means the same type of Controller, etc).
1. Select an Event in the List.
Let’s say that you select a note with the pitch C3.
- 145 -
2. Pull down the Mask menu and select “Mask It”.
In our case, only notes with the pitch C3 will be shown and affected by editing.
Unmasking Events
• To make all Events visible and possible to change, pull down the Mask
menu and select “No Mask”.
An Example:
Let us say that you have been using a MIDI Instrument with a Breath Controller,
and therefore have a lot of Breath Controller Events (Continuous Controller 2).
Now you want to transform these Events to Modulation Events (Continuous Controller 1). Proceed like this:
1. Select a Breath Controller Event.
2. Pull down the Mask menu and select “Mask It”.
Now, only Control Change Events with Value 1 set to 2 (that is, Breath Controller Events) will be shown and affected by editing.
3. Press [Alt] on the computer keyboard.
This will let you edit all Events in the List at once.
4. Holding down [Alt], change Value 1 of the selected Event to 1.
You may also change the value in the Status column; it is the same value,
only expressed in words.
5. Release the [Alt] key.
Now all Events in the List will have Value 1 set to 1 - they have been transformed to Modulation Events.
6. Pull down the Mask menu and select “No Mask”.
● The only function not affected by the Mask command is Playback. All Events
are always played back.
- 146 -
About Quantizing and Functions
In List Edit, you can use all the Functions on the main Functions menu, but many of
them, like quantizing, only work on notes.
Switching to Time Positions
The default way for Cubase VST to show a note’s position in the List, is by showing its Start Position (as Meter position) and Length (in ticks). A note can also be
shown as Time position, with Start and End Time shown in hours:minutes:seconds:frames. For more info on Time positions, see the Basic Methods chapter in the
Getting Started book.
Clicking on the Mouse box...
...will make the first two columns in the List change from showing an Event’s Start Position
and Length (notes only) to showing its Start Time and End Time.
The positions for Loop Start and End are also displayed in this format.
To return to Meter Position, click on the mouse box again.
- 147 -
14
Score Edit
15
- 148 -
About this Chapter
This is a brief description of some of the editing features specific to Score Edit. We
will not deal with score printing or the finer aspects of working with scores here. If
you want to use the extensive Score layout features of Cubase VST, you should
read the “Score Layout and Printing” document, included with the Score and Audio
versions of the program.
Cubase vs Cubase Score/Audio
Cubase Score VST and Cubase Audio VST have much more advanced score printing features than the “regular” version of Cubase. If you have Cubase Score VST or
Cubase Audio VST and plan to use the Score Editor for printing, we recommend
you turn to the “Score Layout and Printing” document rather than reading this
chapter.
● Whenever a description in this chapter applies to one version only, this is
made explicit in the text.
About the Score menu and the Do pop-up menu
One of the big differences between the Score Editors in the “regular” Cubase VST
and the Score/Audio versions, is that the latter have a dedicated Score menu, which
is only accessible from within Score Edit. The regular Cubase VST does not have a
Score menu. Instead, the necessary Score commands and functions have been
placed on the Do pop-up menu.
Page Mode and Edit Mode (Cubase Score VST and Audio VST only)
In the Score and Audio versions of Cubase VST, the Score editor has two principal
modes, Page and Edit Mode. The difference and implications of these modes are
described in the “Score Layout and Printing” book. In this chapter, we assume that
you are in Edit Mode.
Switching to Edit Mode (If there is no Edit Mode option on your Score menu, then you
already are in Edit Mode).
If you don’t use Cubase Score or Cubase Audio, you don’t need to worry about any
“modes” in the Score Editor.
- 149 -
Overview
Score Edit displays your music as regular notation. Below you will find a description of some of Score Edit’s main features:
The mouse position is shown both in the mouse box and as a
note name in the box below. When you move a note, the lower
box shows the amount of transposition in semitones.
If you are editing Parts on several Tracks at the same
time, the striped double bar line at the beginning of
the score indicates the Active Track.
The “inverted” notes
are selected.
The Song Position Pointer.
• If you are editing one Track, as much of it as possible is shown on several
staves - one above the other - just as with a score on paper.
• If you edit Parts on several Tracks, they are put on a grand staff (multiple
staves, tied together by bar lines).
• The number of measures across the screen of course depends on how
many notes there are in each measure.
• The last measure in the Part is indicated by a double bar line.
- 150 -
Getting the Score displayed correctly
Time Signature
Score Edit always uses the Time Signatures specified in the Master Track.
Staff Settings
When you open Score Edit for a Part played in real-time, the score may not look as
legible as you would first expect. The Score editor can ignore the minor time variances in performance and make a neater score almost instantly. To achieve this,
there are a number of settings in a Staff Settings dialog box that determine how the
program displays the music. In this chapter we will describe the options in “regular” Cubase. Cubase Score and Audio have additional options.
There are two ways to open the Staff Settings dialog:
• Double click in the white area to the left of the staff.
• Activate a staff by clicking on the first bar line on any of the staves in the
window. Then select “Staff Settings” from the Do pop-up menu (or, if you
are using Cubase Score VST or Cubase Audio VST, from the Score menu).
• Activate the Staff and press [Control]-[I] on the computer keyboard.
The Staff Settings dialog appears:
● The settings you do in this dialog box are independent for each Staff (Track),
but common for a piano staff which you have created by choosing the “Split”
option in the Staff Mode pop-up menu (see below).
- 151 -
Key and Clef
The correct Key and Clef are set using the two scroll bars in the Key & Clef section.
If you check the “Auto Clef” checkbox, the program attempts to
guess the correct clef, judging from the pitch of the music.
Staff Mode
This pop-up determines how the staff should be shown:
• When set to “Single”, all notes in the Part are shown in the same staff.
• When set to “Split”, the Part is split on the screen into a bass and treble
clef, as in a piano score.
You use the Splitpoint value field to set the note where you want the split to
occur. Notes above and including the split note will appear on the upper staff,
and notes below the split note will appear on the lower staff.
Before and after setting a split at C3.
• To set the clef and key for the lower staff, activate the “Lower Staff”
checkbox in the Key/Clef section.
- 152 -
Display Quantize
Notes are not an absolute language, and you must give the program a few hints on
how the score should be displayed. This is done using the Display Quantize section
of the Staff Settings dialog.
● These are only display values used for the graphics in the Score Editor. They
do not affect the actual recording in any way.
Here is a description of the functions:
Parameter
Description
Notes
The smallest note value to be displayed. Set this to the smallest significant note value used in your music. If for example you set this to
eighth notes, no note values smaller than eighth notes will be displayed. If you set it to a triplet value, the program expects all notes on
this staff to be triplets.
This setting is partly overridden by Auto Quantize (see below).
Rests
The smallest rest value to be displayed, as with the “Notes” setting
described above.
Auto
Quantize
Generally, if your music contains mixed triplets and straight notes, try
selecting “Position” or “Distance” from this pop-up menu. Otherwise
set it to “None”.
Auto Quantize uses involved methods to make your score look as
legible as possible. Auto Quantize allows you to mix straight notes
with tuplets (triplets) in a Part. But, Auto Quantize also uses the (display) Quantize value. If it can't find an appropriate note value for a
certain note or group of notes, it will use the set Quantize value to
display it.
If the part is imprecisely played and/or complex, Auto Quantize may
have a problem “figuring out” exactly what you “mean”.
If you are using Cubase Score or Audio, there is more information in
the chapter “Transcribing MIDI Recordings” in the Score Layout and
Printing document.
- 153 -
Flags
These provide additional options for how the score should be displayed:
Parameter
Description
Clean
Lengths
When this is activated, notes that are considered to be chords will
be shown with identical lengths. This is done by showing the longer
notes as shorter than they are. When Clean Lengths is turned on,
notes with very short overlaps are also cut off; a bit as with No
Overlap (see below), but with a more subtle effect.
No Overlap
When this is activated one note will never be shown as overlapping
another, lengthwise. This allows long and short notes starting at the
same point to be displayed without ties; the long notes are cut off in
the display. This will make the music more legible.
An example measure with No Overlap deactivated...
. and with No Overlap activated.
Syncopation When this function is activated, syncopated notes are shown in a
more legible way.
This is a dotted quarter at the end of a bar when Syncope is Off...
... and when it is On.
Shuffle
Activate this function when you have played a shuffle beat and want
it displayed as straight notes (not triplets). This is very common in
jazz notation.
Flat Beams
When this is ticked, the beams over the notes will be flat (as opposed to slanted).
No Beams
When this is ticked, there will be no beams whatsoever in the Part.
This is good for example for vocal scoring.
Track Name
When this is activated, the name of the Track is shown at the beginning of the Staff.
- 154 -
Closing the Dialog
• When you are done with the settings, close the dialog, by clicking the OK
button.
This applies the settings to the active Staff/Track. If you are editing several
Tracks at once (see next page), you can apply the Staff Settings to all these
Tracks at once, by holding down the [Alt] key when you click OK.
● Remember that the Staff settings are done independently for each Track.
Editing several Tracks
You may edit several Tracks simultaneously in Score Edit. The Tracks are shown as
multiple staves, tied together by bar lines and placed in the order they appear in the
Track List.
The Song Position Pointer.
Selected notes.
• If you need to rearrange the staves: close the editor, go back into the Arrange window, drag the Tracks to the order you want them, and open
Score Edit again.
- 155 -
The Active Staff
Just as in the other editors, all MIDI input (as when recording from your instrument) is directed to one of the Tracks, here called the Active Staff. The Active Staff
is indicated by a black rectangle in the left part of the first visible bar.
The Active Staff rectangle.
To change Active Staff:
• Click anywhere in the Staff you want to activate.
or
• Step to the Staff you want to activate, using the [↑] and [↓] keys on the
computer keyboard.
- 156 -
Manipulating Notes
There are a few special features for manipulating notes:
Moving Notes
• Use the two mouse boxes to determine where to place notes.
The upper box shows the position of the
moved note (as bars, beats and ticks).
The lower box shows the pitch when
inputting notes, and the transposition
value when moving notes.
When you move several notes, the upper mouse box shows the position of
the note you clicked on when starting to drag.
• If you hold down [Control] and transpose a note, it will only be transposed within the set key.
If, for example, the key is C major (set in the Staff Settings dialog), you will
only transpose to notes belonging to the C major scale.
Creating Notes and Rests
When you input music “by hand” in Score Edit, you can use the Note and Rest
tools. The length of the note or rest to be input, is determined by the Quantize
value. However, the easiest way to input notes and rests, is to use the note symbols
in the Toolbar:
• To input a note, first click on the desired note value in the Toolbar (the
Note tool is automatically selected), then click in the staff where you
want the note.
If you want to insert a triplet or dotted note, click on the “T” or “·” button
when you select the note value.
• To input a rest, first select the Rest tool, then proceed as when inputting
notes.
There is one big difference between inputting notes and rests:
● Rests are always inserted (as if Insert was activated) into the music.
- 157 -
When you change Quantize value, or click on a note button on the Toolbar, the shapes of the
Note and Rest tools are changed.
Joining Notes
The Glue Tube allows you to join two or more notes of the same pitch.
• Click on a note with the Glue Tube tool.
The note is joined to the next note with the same pitch.
Splitting Notes (Cubase Score VST and Cubase Audio VST only)
The Scissors tool does the opposite of the Glue Tube; it splits two tied notes into
separate notes:
• Click on the second of two tied notes.
The notes are split into two.
Enharmonic Shift
The buttons to the right on the toolbar are used to shift the display of selected notes
so that for example an F# (F sharp) is instead shown as a Gb (G flat) and vice versa:
1. Use the arrow tool to select the note(s) you want to affect.
2. Click on one of the buttons to display the selected notes(s) a certain way.
The middle button resets the notes to original display. The other four options are double flats,
flats, sharps and double sharps.
- 158 -
Flip Stems
By selecting this item from the pop-up Do menu or by pressing [Alt]+[Control]-[X]
on the computer keyboard, you change the stem direction of the selected note(s).
Chord Symbols
You can add Chord symbols to your score. These are normally put in above the notes.
Adding Chords
1. Select the Chord Tool.
The Chord Tool.
2. Click in the score, at the position where you want to insert a chord symbol.
A dialog box opens where you can set a number of parameters:
• The Root Note is the actual key of the chord.
• The Bass Note should differ from the Key Note if you want to specify a chord
with different bass note. “Root Note C” and “Bass Note D” means a C chord
with a D bass note.
• The Chord Type is the basic type of chord which you select from a pop-up.
• The Tensions checkboxes are used to add tensions to the chord, as many as
you like (or as makes sense...)
• You can perform enharmonic shift on chords by activating this option in the
dialog.
- 159 -
3. When you have set up the chord, click OK.
A chord symbol appears at the position where you clicked.
Editing chords
Once a chord is in place, you can edit it by double clicking it.The same dialog box
appears as when you created the chord. Change the settings and click OK.
Adding Text
● This procedure applies to the “regular” Cubase VST only. If you have Cubase
Score VST or Cubase Audio VST, please refer to the chapter “Working with
Text” in the “Score Layout and Printing” document.
Adding Text
1. Select the “Text” Tool.
The Text Tool.
2. Click anywhere in the score.
A text input line dialog box appears.
3. Enter the text and press [Return] when you are ready.
Changing the Font and Size
If you wish to change the font and size for some text you already put in, proceed as
follows:
1. Select the text.
2. Select “Text settings” from the Do pop-up menu.
3. Use the Font pop-up, the size setting and the style options in the dialog
box that appears.
The fonts you find on the menu depend on what fonts you have installed in
Windows. The quality of their printout also depends on what type of font they
are and what kind of printer you use. Generally, TrueType fonts (preceded by
a “TT” symbol on the pop-up) and PostScript fonts (if you have a PostScript
printer) will print fine in any size.
4. Click OK to apply your settings to the selected text object(s).
The font and size settings you just made will also apply to all the text you input onwards (until you change them, of course).
- 160 -
● On your font menu you will also find the Cubase font. This is not intended for
text, but for the non-text symbols used in the score.
Cutting and Pasting Text
Using the keyboard short-cuts (not the menus) you can Cut and Paste text.Select
some text, press [Control]-[X] or [Control]-[C] to Cut or Copy. Click for a new insertion point, and press [Control]-[V] to Paste.
Editing text
To edit text, just double click on it with the Arrow tool and enter new information
on the input line, just as when you put in the text the first time.
To change the size or type face of a block of text, select it and then select “Text Settings” from the Score menu, as described above.
Moving and Duplicating Chords And Text
Text and Chord Symbols can be moved freely within the “page”, one at a time or
together, just drag it/them to the new location.
If you hold down [Alt] when you drag you are making copies instead of just moving.
Deleting Text and Chord Symbols
As with all other objects in Cubase there are two ways to erase Text and Chord
Symbols. Either select them and press [Delete] or [Backspace] on the keyboard, or
select the Eraser from the Toolbox and click on them.
Title, Comment and Copyright
These are three standard text elements on the first page of your score. To make settings for these, select “Score Title” from the Do pop-up menu (if you are using the
regular Cubase VST version) or double-click on the title in Page Mode (if you are
using Cubase Score VST or Cubase Audio VST). This opens a dialog box, in which
you can input texts and make settings for font, size and attributes for each of the
three elements. Cubase VST will automatically position the elements as follows:
• The Title is always centered, at the top of the page.
• The Comment is always positioned just below the Title.
• The Copyright notice is always positioned at the right side of the page, just
above the first system.
In the “regular” Cubase VST, none of these elements are visible on-screen but will
be printed out properly.
- 161 -
Printing
● If you have Cubase Score VST or Cubase Audio VST, you should also refer to
the chapter “Printing and Exporting Pages” in the “Score Layout and Printing”
document.
To print your score, proceed as follows:
1. Make settings for the Text, Title, Comment and Copyright elements, as
described on the previous pages.
2. Pull down the File menu and select Print & Page Setup.
A dialog with printer settings opens.
3. Select the preferred printer, paper size, orientation, etc.
4. If you need to, change the margins by setting the Left, Right, Top and
Bottom settings.
Please note that each printer has a minimum margin. To automatically set the
values to this, click the Default Values button.
5. Click OK to close the dialog.
The “Print” item should now be available on the File menu. If it is greyed out,
you have not made the correct printer settings in the Print & Page Setup dialog - repeat step 6 to 8 above.
6. Select Print from the File menu or press [Command]-[P].
A dialog box appears. The options in the dialog depend on the type of printer
you use (explained in your Windows documentation). Normally you should
be able to specify a number of copies to be printed, print all pages or just a
specified range, etc.
7. Click OK.
A dialog will inform you of the progress of the printout. You can cancel printing at any time by clicking the Cancel button.
● Note that printing is only available from Score Edit!
- 162 -
15
Logical Edit
16
- 163 -
Why Should I Use Logical Edit?
Most of the time you will probably perform your MIDI editing graphically, from
one of the main graphic editors. But there are times when you want more of a
“search and replace” function on MIDI data, and that’s where Logical Edit comes
in. It allows you to find certain MIDI Events, based on criteria that you set up.
Once those Events are found, you might want to delete them, change them in one
way or another, or to move them to another Track for example.
To master Logical Edit you need a fair amount of knowledge about how MIDI messages are built up.
Opening Logical Edit
1. If needed, select Parts or Events you want to operate on.
See below for details.
2. Select Logical from the Edit menu or press [Control]-[L].
Which part of the Arrangement will be affected?
As always, this depends on the window you “come from” and the selection:
Window/Selection
Logical Edit operates on:
Arrange Window – No Parts Selected
All Parts on the active Track.
Arrange Window – One or more Parts
selected
The selected Parts.
Any MIDI editor
The Events that the “To” menu is set for.
What is currently edited is displayed in the title bar of the Logical Edit window.
● Before you enter Logical Edit from an editor, check that the “To” menu is set
as desired.
About using Logical Edit with different Track Classes
The natural choice is of course to use Logical Edit on MIDI Tracks. But Logical
Edit can also be used on Drum Tracks to edit MIDI data and on Mix Tracks to edit
Mix data.
- 164 -
Working with Presets
In the lower left corner is the Preset section of Logical Edit. A Preset includes all
the settings in Logical Edit. For example, one Preset might find all your Modulation
wheel Events and convert them into Breath Controller Events. Another Preset
might find all very short notes and delete them.
Logical Presets in the Song appear both on the Main Functions menu (see below),
and in the Logical editor (see next page).
When you install the program the first time, ten Presets will be included. These are
described in the online Help texts.
The Logical Presets on the Functions menu.
- 165 -
Applying Ready-made Presets
To apply a Preset from Logical Edit, proceed as follows:
1. Select a Preset from the pop-up menu.
The Logical Presets in the Logical Edit dialog box.
2. Click “Do it”.
Presets can also be accessed from the Functions menu directly, without displaying
the Logical Edit window. See the online Help.
Making up your own Presets
If you make settings of your own and wish to save them as a Preset, proceed as follows:
1. Set up all the fields and values as desired.
2. Hold down [Alt] and select any Preset that you wish to overwrite.
This selects that Preset without changing the settings in the window. If the correct Preset is already selected in the list is already selected, this step is of
course unnecessary.
3. Click the Store button.
Changing the Name of a Preset
If you want to change the name for a Preset, double click on the Preset name (the
pop-up), enter a new name and hit [Return].
How the Presets are Stored
You always have ten Presets, and they are stored in the Song. In other words, if you
quit the program without saving, you lose your Logical Presets!
- 166 -
Undo
This undoes the last Function you “applied”.
Selecting Easy or Expert Mode
Logical Edit can be switched between two modes, Easy and Expert. The Expert
mode has more possibilities than Easy (see page 179), but is also harder to grasp.
Most of the “normal” logical editing like deleting certain types of Events etc, can
be performed in Easy mode.
Click to switch to the mode
labelled on the button.
Initializing the Settings
The “Init” button returns all settings to “normal” default values.
How Logical Edit Operates
Filters
The principle for Logical Edit is this: First you set up Filters. These are used to decide which MIDI messages will be affected and which will not. An example of a
specified Filter could be “all notes that have a pitch of F#3 and a velocity value that
is larger than 37". Filters can be set up for all aspects of almost all types of MIDI
messages.
This is similar to using “Find” or “Search” in a word Processor, where you specify
which text to find, by typing it, in a dialog box.
After setting up Filters, the simplest thing you can do is to perform a function like
Quantizing or Deleting on the Events that are “found” by the Filters, see below.
Processing
A more advanced option is to apply some Processing. An example of this would be
to “add 7 to all the notes' note number”, which would be the same as transposing
them all a perfect fifth.
Processing can be thought of as “replace” in a word processor, where the found text
is replaced by some other text.
- 167 -
Functions, Quantize and Do It
In the bottom section of the dialog is a pop-up menu where you select what type of
functions to actually perform.
The Functions pop-up.
Most of the functions, like Quantize and Delete, only need the Filters to perform
their trick. But Transform and Insert also use the Processing settings.
The Quantize setting is for deciding what note value to Quantize to, in Quantizing
operations.
The “Do it” button, finally, is used to actually perform the Function.
About Setting Values
In some cases you will define a a range of values by setting two values (for example
to define “all pitches between C2 and F3”).
Initially both values are set to 0. To set the values, start raising the “high” value (in
the lower field), and then set the “low” value. Not all operations use both values,
and some use none of them.
Start by changing
the “High” value...
...then adjust the
“Low” value.
- 168 -
Setting up Filters
In Easy mode, there are four columns in the Filter area of the dialog box.
Event Type
Condition pop-up
Event Type pop-up
The first column is called Event Type. This is for setting what type of Event the Filters should operate on.
• The upper field is used to set up a condition for the Event type selected in the
pop-up above, as described in table on the next page.
• The lower field lists all types of MIDI Events.
● This can not be adjusted if the upper field is set to “Ignore”, see table below.
Condition
Explanation
Ignore
This means that all Event types will be affected by the operation. The
Event type pop-up setting is then of no relevance.
Equal
Only Events of the type indicated on the Event type pop-up will be affected.
Unequal
Only Events that are not of the selected type will be affected.
- 169 -
About the Following three columns (Easy Mode)
For each of the next three columns in the Filter section there is one condition popup and two value fields. Here is an explanation of each column:
Value 1
Condition pop-up
Value fields
The second column in the Filter section is used for the same part of the MIDI messages as the “Val1” column in the List editor displays.
Condition
This pop-up is used to set how the values you set in the field(s) below should be
used to pick Events for processing:
Condition Explanation
Ignore
This means that all Events are affected regardless of the set values.
Therefore, both the values below are dimmed.
Equal
Events that have a value equal to the set value are affected. This means
that only one value is used, the lower field is therefore dimmed.
Unequal
Events that have a value that is not equal to the set value are affected.
This also means that only one value is used, and the lower field is
dimmed.
Higher
Events that have a value that is higher (not “equal to or higher”) than
the set value are affected. Only uses top field.
Lower
Events that have a value that is lower (not “equal to or lower”) than the
set value are affected. Only uses top field.
Inside
Events that have a value that falls inside the range formed by the two
values are affected. You therefore need to set both fields.
Outside
Events that have a value that falls outside the range formed by the two
values are affected. Uses both fields.
- 170 -
Value Fields
You use these to specify value(s) for the condition. The exact meaning of the values
is different for each Event type:
Event Type
Meaning of Value 1
Notes
The Note Number/Pitch. The pitch is shown to the right of the number (like F#3, C2 and so on).
Poly Pressure The key that was pressed, also easily found by looking at the letters
showing the pitch.
Control
Change
The type of Controller, displayed as a number.
Program
Change
The Program Change number (Please note that many MIDI units do
not display the real Program Change number on the front panel.)
Aftertouch
Simply the amount of pressure.
Pitch Bend
The “fine tune” of the bend. Rarely used.
Value 2
This corresponds to Val2 in the List editor.
Condition
This exactly the same as for Value 1, see above.
Value Fields
Here is a list of the meaning of the values for each type of Event:
Event Type
Meaning of Value 1
Notes
The velocity of the note.
Poly Pressure
The amount of pressure for the note.
Control Change
The amount of Control Change.
Program Change Program Change messages don't have a Value 2.
Aftertouch
Aftertouch messages don't have a Value 2.
Pitch Bend
The coarse amount of bend.
- 171 -
Channel
This is the MIDI Channel stored with the Event, not the one set for the Part. See
page 17 for a detailed explanation.
Condition
This is exactly the same as for Value 1, see above.
Value Fields
This is simply the MIDI Channel number (1 to 16).
Example
The filter below allows you to find notes with the pitch C3 and a velocity range between 23 and 85.
These settings
limit the “search”
to notes only.
This pinpoints the
filter to one pitch
(C3).
- 172 -
This limits the
“search” to a certain
velocity range.
Applying a Filter
Just setting up the filters is enough for some very complex Logical Editing. Proceed
as follows:
1. Open Logical Edit from the Arrange window or from the editors, depending on what you want to process.
See page 164 in this chapter for details.
2. Set up the Filters to “find” the desired Events.
3. Select one of the Functions from the pop-up menu.
The Function pop-up. See the table below for details.
4. If you have selected “Quantize”, set the Quantize value as desired.
5. Click “Do it”.
The function is performed.
• You can make as many edits as you wish without leaving Logical Edit.
• Note that Events that do not pass through the filters remain intact, they are not
affected in any way by the operation.
Functions
Function
Description
Quantize
The Events that pass through the filters are Over-Quantized to the
Quantize value set with the Quantize Pop-up menu.
Quantizing non-note data, allows you to “thin out” for example Controllers or Pitch Bend.
Select
This Function is only active if you selected Logical Edit from one of
the other Edit windows: Key, Drum, List or Score. It simply selects the
Events that pass through the filters for future processing directly in the
editor, after you have exited Logical Edit.
Delete
The notes that pass through the filters simply get deleted.
Extract
This Function is only active if you selected Logical Edit from the Arrange window. It Cuts the Events that pass through the filters out of
the Part, and then creates new Part(s) with the extracted Events only.
These new Part(s) are put on a new Track and have the same start and
end points as the original(s).
Copy
This Function is only active if you selected Logical Edit from the Arrange window. It works just as Extract, only it doesn't Cut the Events
from the Part(s), it Copies them.
- 173 -
Setting Up for Processing
If you decide to Process Events (Transform existing or Insert new Events) you must
decide how the Events that pass through the Filters should be processed. This is
done using an Operator and one or two Values for each column.
The Operators are found on pop-up menus in the Processing section of the dialog
box.
The Values are displayed below each operator.
Operator pop-up
Value fields
Event Type
For the Event type column you have two Operators to choose from:
Menu option Description
Keep
The Events will stay the same type as they are.
Fix
The Events will be transformed into some other Event type, as set on
the lower pop-up. The options are all the different MIDI types of
Events.
● If you Edit Mix Tracks, you can not change the Event type.
- 174 -
Value 1
For the Value 1 Column you have a number of different Operators:
Operator Description
Keep
The value is not affected in any way. You don't set any number in the
value fields.
Plus
A number is added to the existing. You use the upper value field to set
how much should be added.
Minus
A number is subtracted from the existing. You use the upper value field
to set how much should be subtracted.
Multiply
The existing value is multiplied by a number. You use the upper value
field to set how much it should be multiplied with. The Operator contains an integer and two decimals, but the result is always rounded to
an integer.
Divide
The existing value is divided by a number. You use the upper value field
to set how much it should be divided by. Uses integers and decimals,
just as Multiply.
Fix
The existing values are simply replaced by a fixed value that you set in
the upper value field.
Value 2
When you select this, the existing Value 2 value in each Event is copied
to its Value 1. If you for example use this on notes, this would mean
copying its velocity value to the note number. If you used it on Controllers it means replacing the Controller number with the Controller value.
Dyn
This function is used to create a “ramp” from one value to an other, like
for example a crescendo or a diminuendo. This function involves four
things, the Start and End Value and the Start and End Point.
If you open Logical Edit from the Arrange window, the Start and End
points will be the start and end of the Part(s).
If you open Logical Edit it from one of the editors, Start and End points
will be one of three things: The start and end of the Part, the Left and
Right Locator values, or the Loop boundaries, all depending on how
the To menu was set in the editor.
The two value fields are used to set the initial value – at the beginning
of the range, and the final value – at the end.
Random
This replaces the values with random numbers within a range specified
by the two values.
Value 2
Value 2’s Operators are practically identical to Value 1. There’s only one difference:
Value 1
This is the reverse of its “Value 1“column counter part, that is, the existing Value 1 value in each Event is copied to its Value 2. If you for example use this on notes, this would mean copying its the note number
(pitch) to velocity.
- 175 -
Channel
You can also process the MIDI Channel of the Event. The Channel Operator menu
only has five options, identical to the same items on the Value 1 and Value 2 menus:
Operator
Description
Keep
The Channel is not affected in any way.
Plus
A number is added to the existing Channel.
Minus
A number is subtracted from the existing Channel number.
Fix
The existing Channel number is simple replaced by the number you
specify.
Random
This replaces whatever Channels the Event originally was on,with a
random number. The two values fields are used to set the lower/upper
limit of the random numbers.
● For this to have any effect when you play back the Part, the Track/Part must be
set to MIDI Channel “Any”.
Examples
The Example below, applied to notes, would transpose them a fifth and set their velocity to a fixed level of 100.
The Event type is
“kept”, that is it is
not affected.
The number 7 is
added to the
Pitch.
- 176 -
The existing velocity
values are replaced by a
fixed number (100).
The next example converts Aftertouch into Modulation wheel Events.
Only Aftertouch
Events will be
affected.
The Event type is
changed to
Control Change.
This setting “moves”
the Aftertouch amount
(stored in Val 1) to the
Controller amount
(stored in Val 2).
Transform is chosen
since Events are to
be converted.
Modulation wheel is Controller 1, therefore a fixed value of 1 is entered here.
The last example allows you to make up a bass drum part that exactly follows for
example a bass part on the selected Track. Work on a copy of the bass Track. The
value in the Value 1 Processing field is the key you have the bass drum on.
Only notes will be
affected.
Regardless of their
original pitch, the
new Events will have
a fixed pitch of C3.
Regardless of their
original velocity, the
new Events will have
a fixed velocity of
100.
Transform is chosen
since Events are to
be converted.
For further examples, please examine the Presets in the Def.All Song that comes
with the program. Their functionality is described in online Help.
- 177 -
Processing Functions
To use the Processing functions, proceed as follows:
1. Open Logical Edit from the Arrange window or from the editors, depending on what you want to process.
See page 164 for details.
2. Set up the Filters to “find” the Events that you want processed.
3. Set up the Processing.
4. Select Transform or Insert from the pop-up menu.
The Function pop-up. See the table below for details.
5. Click “Do it”.
The processing is performed.
• You can make as many edits as you wish without leaving Logical Edit.
• Note that Events that do not pass through the filters remain intact, they are not
affected in any way by the operation.
Functions
Function
Description
Transform
The notes that pass through the filters have their values Transformed
(i.e. changed) according to the values set in Processing. This doesn't
add any new Events, it just changes the existing ones.
Insert
The Events that pass through the filters get copied, transformed (see
above) and then inserted among the existing Events. This adds new
Events to the Part(s).
- 178 -
Expert Mode
When you switch Logical Edit to Expert Mode (by clicking the “Expert” button)
you get two more columns in the Filter and Processing sections, plus a graphic Bar
Range setting in the Filter section. The pop-ups in the Processing section are also
extended with additional functions.
Additional Filter Columns
Column
Description
Length
This allows you to select notes depending on their length. This value is
displayed in ticks.
Bar
Range
This allows you to only include Events at a certain position within each
Bar in the editing. You can type the beat and tick value. Or, you can
drag a range in the Bar Range graphic at the lower part of the whole dialog box. This is done in the same way as when you drag to set the
Loop range in Key, Drum or List Edit.
- 179 -
Bar Range Example
Check out the settings above. If you have a snare drum playing on the key C#1, this
setting will allow you to pin-point all snare drum beats that lie around the fourth
quarter in each bar and transpose them up two octaves to C#3. This is useful if you
want to double up the second snare drum in each bar in a basic rock beat, with some
other Sound. Since this example uses Copy, it assumes that you entered Logical
Edit from an Arrange window. Click on “Do it” to make up a Part with the copied
beats only. Then use transposition and MIDI Channel settings to assign the new
Track to another Sound.
- 180 -
Additional Processing Columns
The Processing section also gets two new columns in Expert mode.
Column
Description
Length
By using processing on this value, you can manipulate notes' lengths.
The Operations for it are Keep, Plus, Minus, Multiply, Divide, Fix.
Position
Processing position will affect the Events' position values so that you
are able to move Events and create Events at new positions. The Operations for it are Keep, Plus, Minus, Multiply and Divide.
The integer (the number to the left of the decimal point) represents ticks.
If you for example add to the Position value and use Insert, this will result in some sort of echo effect. If you multiply or divide the Positions,
this will be the same as changing the tempo of the music in the Part.
There are examples of this in the Logical Presets in the Def.All Song that
comes with the program.
Additional Operators
In Expert Mode, the Value 1 and Value 2 pop-ups menus in the Processing section
contain additional Operators:
Processing
Description
Invert
This inverts the values, so that the bigger it originally was the lower
it comes out. If you for instance select Controller values in Key or
Drum Edit and Invert them, you will find that it looks as if the graph
has been turned upside down. An upwards scale becomes a downwards scale etc. This Operation needs no values.
ScaleMap
Appears for Value 1 only. This works like Scale Correction in the
Transpose/Velocity dialog box. The upper value field is the Scale
type, which is selected from a pop-up, and the second value is the
Key Signature.
Flip
Appears for Value 1 only. This flips the Events around a set axis. For
notes this will invert the scale, with any key as a “center point”. For
velocity it will make high velocities low and low velocities high,
with any value as a flip axis. It will have similar effect on Controller
values etc.
- 181 -
16
Filtering and Mapping MIDI Data 17
- 182 -
Introduction
Cubase VST has a number of real time features for filtering out MIDI data and for
converting one type of MIDI data into another. These are called “real time” functions because they work “in the background” while the program is recording or
playing back. It is these features that are described in this chapter.
In addition, Cubase VST has a number of filtering and mapping (transformation)
editing features, in List Edit, Logical Edit and on the Functions menu. These permanently change the recorded data. They are described in their respective chapters.
Recording Filters
By Event Type
You might want to prevent some type of MIDI data from being recorded. If for example you have a master keyboard transmitting Poly Pressure, but no sound module set to react to it, recording the Poly Pressure data wastes precious memory
space and might even clog up the MIDI data stream.
1. Open the MIDI Filter dialog from the Options menu.
2. In the “Record” section, activate the check boxes for the MIDI data types
you don’t want to record.
In this example Poly Pressure and System Exclusive data will not be recorded.
3. Close the dialog box.
- 183 -
By MIDI Channel
You might also want to filter out all Events that are coming in on a certain MIDI
Channel. If you for example are transmitting data from another sequencer, this will
allow you to record only a selection of the MIDI Channels it is transmitting.
1. Open the MIDI Filter dialog from the Options menu.
2. In the “Channel” section, activate buttons for the MIDI Channels you
don’t want to record.
In this example, data coming in on MIDI Channels 9 and 16 will not get recorded.
3. Close the dialog box.
Controllers
As explained above, you can filter out all Controller data. But Cubase VST offers
more detailed filtering than just filtering a whole class of Events! If you need to you
can filter out up to four user-specified Controllers.
1. Open the MIDI Filter dialog from the Options menu.
2. Make sure Controller messages are not filtered out altogether (see above).
3. Locate the Controller Filters.
As you can see, there are four of them.
4. To filter out one certain Control Change message set one of the four
fields to that Controller number or name.
To turn off one of the four Filters, set it to “NoCtrl” (the lowest value).
In this example, Expression pedal and Local Control On/Off messages will be filtered out
5. Close the dialog box.
- 184 -
Thru Filters
There might be situations where you want to have MIDI Thru active (see the Getting Started book), but still don’t want one certain type of MIDI message to be sent
“Thru” Cubase VST.
For example, System Exclusive that you send out from a MIDI Instrument to record
into Cubase VST, should most probably not be immediately sent back to the instrument, since this might lead to serious confusion.
1. Open the MIDI Filter dialog from the Options menu.
2. In the “Thru” section, activate the check boxes for the MIDI data types
you don’t want to record.
In this example System Exclusive and Program Change will not be Thru-put
3. Close the dialog box.
- 185 -
Mapping Controller Messages
There might be situations where you want one Control Change message to “masquerade” for another. For example, you might have a unit that reacts to Breath Controller messages, but nothing to generate them with. You might then set up Cubase
VST to convert for example Modulation Wheel Events to Breath Controllers, before recording them. Proceed as follows:
1. Open the MIDI Setup dialog from the Options menu.
2. Locate the Controller Map section.
3. If you want to make sure no mapping takes place, click the Reset button.
This turns off mapping for all Controllers.
4. Scroll the upper field to select the Controller you want to map.
In our example, this would be Modulation Wheel.
5. Use the lower field to set which type of Controller to map to.
In our example this would be Breath Controller.
This Controller
is converted into
this Controller
6. Continue setting up mapping for as many Controller as you wish, in the
same way.
Any Controller can be mapped into any other, and all at the same time if you
wish.
7. Close the dialog box.
- 186 -
The Input Transformer
This function (reached from the Options menu) is used to selectively filter out and
change data that is coming in to Cubase VST, before it is recorded. To use the Input
Transformer you should be reasonably acquainted with Logical Edit, since the two
are very similar.
Here are some of the things the Input Transformer allows you to do:
• Use four different filters/transforms at the same time.
• Make up split keyboard combinations for recording left and right hands separately.
• Turn a Controller like a foot pedal into MIDI notes (for playing bass drum the
right way)
• Filter out one specific type of MIDI data on one MIDI channel only.
• Turn Aftertouch into any Controller (and vice versa)
• Inverse velocity or pitch.
• etc...
And again: four of these things can be done at the same time.
Filter and Processing
The Filter and Processing sections work exactly as in Logical Edit in Easy mode
(see page 167). The big difference is that the Input transformer acts in real time on
the incoming MIDI signals.
- 187 -
Selecting and Activating
The buttons labelled 1-4 at the bottom of the window are used to decide which of
the four transformers should be displayed.
The check boxes just below these are for turning each of these four transformers on
and off.
Input Transformer 1
selected for editing.
Input Transformer 1
and 2 activated.
Initializing
If you want to reset any of the transformers to its initial setting (everything turned
off), select it and click the Init button.
Functions
When you have set up the Filtering and Processing sections, you have to select one
of two functions from the pop-up menu in the lower half of the dialog box, Filter
(remove, delete) or Transform (change using Processing settings). If you select the
Filter option, only the Filter settings are of any interest. If you select Transform,
both the Filter and Processing settings apply, just as in Logical Edit.
Events are put through module 1 first, then 2 etc. But, if a module “selects” Events
for filtering or processing, they will not reach the other modules at all.
● It is very well possible to create transformations that lead to “hanging” notes!
(Note Ons without Note Offs).
About the Default settings
The following four Input Transformations come with the program. They are stored
in the DEF.ALL Song. They are all turned off initially, so you will have to open Input Transform and turn on the ones you plan to use.
“Preset”
Description:
1. Split Keyboard
This Transformation takes all notes from C3 and up, and adds 1 to
their MIDI Channel. For this to have any effect you must set the
Track to MIDI Channel “Any”. If you do this and for example set a
regular MIDI keyboard to send on MIDI Channel 3 you will get an
output where all notes below C3 come out on MIDI Channel 3
and all notes above come out on MIDI Channel 4. Use this to play
one sound with the left hand and another with the right hand.
- 188 -
“Preset”
Description:
2. Fix Velocity This Transformation makes all notes have velocity 100, regardless
of how you play. It is easy to change the output velocity value in
the dialog box, if you need to.
3. Modulation
Transformed
into Aftertouch
This Transformation takes incoming Modulation wheel Events and
turns them into Aftertouch. Many rack synthesizers can receive Aftertouch, but not all keyboards send it. This allows you to use your
“mod wheel” to send Aftertouch to a synth and there use it to control volume, filter or anything else the synth module is capable of
doing via Aftertouch.
4. Invert keyboard
This Transformation turns your keyboard “upside down”, “Joe
Zawinul Arp 2600” style. Enjoy!
- 189 -
17
GM/GS/XG Edit
- 190 -
18
About this chapter
The GM/GS/XG Editor is thoroughly described in the Getting Started book. Therefore, this chapter contains only brief reference descriptions of the editor controls.
The Controls
The Mixer section
Mute buttons
(GS/XG only)
Volume faders
Pan controls
Reverb level
Chorus level
Program name
popups
This is the main section of the window, where you perform the actual mixing. The
following table lists the controls available for each channel:
Control:
Description:
Volume fader
Drag the fader to change the volume of the corresponding MIDI
channel.
Pan
Defines the panning (position in the stereo image) for the corresponding MIDI channel. The Drum channel (channel 10) has no
panning control.
Reverb level
Although this is not a part of the GM specifications, many GM instruments (and all GS/XG instruments) have a built-in reverb that
can be controlled via the standard MIDI controller number for reverb (#91). If this is so, use this value field to set the amount of reverb for the channel.
Chorus level
Like the Channel Reverb controls, this parameter is not a part of
the GM specification. However, some GM instruments (and all
GS/XG units) have a built-in chorus (sometimes flanger or delay)
that can be controlled via the standard MIDI controller number
for chorus depth (#93). If this is so, use this value field to set the
amount of chorus for the channel.
- 191 -
Control:
Description:
Program name This item opens a hierarchical pop-up menu with the 128 GM
sounds divided into instrument type groups on sub-menus.
To select a sound, pull down the pop-up, move the pointer to one
of the instrument groups and select the sound from the sub-menu
that appears.
Mute switch
(GS/XG only)
In GS/XG Mode (see below), the channel number fields above the
faders can be used as Channel Mute buttons. You can mute/unmute each channel individually by clicking on the respective button.
The Device section
Control:
Description:
Mode
You can use the editor in GM or Roland GS or Yamaha XG mode.
To switch between modes, click on the Mode pop-up and select
the desired mode.
Output
Use this pop-up menu to select the Output to which your GM/GS/
XG instrument is connected (otherwise the editor wouldn’t know
where to send the changes you make).
On/Off/Reset
button
This button has different names and functionalities, depending on
which Mode is selected:
In GM mode, this button is used to switch your instrument in and
out of General MIDI mode. Click on the button to send the command that is currently shown to your instrument.
In GS/XG mode, this button is labelled “GS/XG Reset”. Clicking it
resets all controls in the window, as well as any connected GS/XG
instrument, to their default values.
- 192 -
The Effects section (GS/XG only)
The third section is not shown at all in GM mode. It contains the following global
settings for the reverb and chorus effects that are included in all GS/XG instruments:
Control:
Description:
Reverb pop-up
Lets you select one of eight reverb types. The available reverb
types are different in GS and XG instruments. In XG mode, selecting “No Effect” allows you to easily turn off the reverb completely.
Reverb time
Lets you change the overall reverb time.
Chorus pop-up
Lets you select one of eight chorus- and related effect types. The
available effect types are different in GS and XG instruments. In
XG mode, selecting “No Effect” allows you to easily turn off the
effect completely.
When are the settings in the GM/GS/XG Editor applied?
Unlike settings in the Inspector, which are sent out at the beginning of each Part,
the settings in the GM/GS/XG Editor are sent as MIDI messages to your instruments on two occasions:
• When a Song is opened.
If GM, GS or XG is activated in a Song, all the settings in the Editor are sent
out when you open the Song.
• When you make the actual settings.
This makes it possible to use the GM/GS/XG Editor as a regular “hands-on”
mixer.
● Please note that the settings in the GM/GS/XG Editor are in no way connected
to the settings in the Inspector. Making volume settings in both Editor and Inspector, for example, may lead to some confusion. You are probably better off
using one or the other.
- 193 -
18
The Input/Output Bus System
- 194 -
19
Introduction
The bus system in Cubase VST allows you to take full advantage of audio cards
with multiple inputs and outputs, by providing a complete routing system, very
similar to that on a fully-fledged mixing console with a busing system. For this to
be useful, you need an audio card with several inputs and/or outputs. The audio
card also needs to be supported by VST, i.e. it must either be compatible with the
ASIO Multimedia or DirectX drivers included with VST, or come with an ASIO
Driver specifically written for the card.
What you can do with the Bus system
Here’s what you can achieve with the busing system (all of this will be described in
detail in this chapter):
• Map physical audio inputs on your card to inputs in VST, and name each
inputs.
This is convenient when you integrate your VST system with other recording
equipment.
• Record from any input on any audio channel.
This is done by selecting a VST Input for a channel, prior to recording.
• Route output audio channels or Groups to one of the stereo Buses, in any
combination.
The number of stereo Buses depends on the number of physical output pairs
on your audio card. Any channel in the Monitor window (and any individual
Group channel) can be routed to any Bus.
• Map the Buses to physical Outputs on your audio card, and name the
Buses.
This allows you to use VST as a true bus mixer, for example when using the
program in conjunction with a digital tape deck such as a and ADAT, Tascam
DA-88 or similar.
• Route effect sends to any of the buses, so that they now can be used for
external effects as well as the internal VST effects.
In fact, theoretically, all sends on all channels can be routed to different destinations, which means VST provides 128 individual effect sends, all switchable between pre- and post operation.
• Do all of this at the same time, so that you for example use a Send to add
an external effect and record the result back on any audio channel.
An example of this is described on page 205.
- 195 -
If you do not have an audio card with several ins and outs
Even if you are using Cubase VST with a standard Windows audio card, the new
bus system affects you in a couple of areas:
• Input Assign.
You can freely select an input for any audio channel, in the Monitor window
or in the Inspector (see page 198). It is also possible to deactivate the audio
inputs completely, thereby saving some processor power, for example when
you’re doing the final mixdown (see page 196).
• Channel FX Sends.
Each effect send for each audio channel can be independently assigned to an
effect or to one of the outputs (Master L/R). See page 202.
Activating Inputs
To be able to record and monitor any audio sources you need to activate the Inputs
they are connected to:
1. Pull down the Audio menu and select Inputs.
The Input window appears:
The left column contains the available “physical” Input ports. The fields in the right column
show the names that will be used for each Input throughout the program. The indicators in
the middle column show which Inputs are active (in this figure inputs Main L/R, Ret 1 L/R and
S2 1/2 are active).
2. To rename an Input, click on its name field in the Labels column, and
type in a new name.
The name can contain up to seven characters, and will be displayed when
you select Inputs for the audio channels in the Monitor window and the Inspector.
- 196 -
The active Inputs will
appear on the Input
popup, for example in
the Inspector.
3. Activate the Inputs you need, by clicking on their buttons in the middle
column.
The buttons lights up, indicating that the Inputs are active. Note that all Inputs
are activated in stereo pairs.
● Make sure not to activate more Inputs than necessary, to conserve processor
power. In situations when you don’t need any Inputs at all, such as audio mixdown, you should consider deactivating all Inputs, to make more processor
power available for effects, EQs, etc.
4. Press [Return] on the computer keyboard to close the Inputs window.
The Input settings are saved with the Song. However, if you would select another ASIO Device and then open the Song, the Input settings saved in the
Song will be ignored.
- 197 -
Recording from an Input
When you record audio in Cubase VST, you need to decide from which input you
want to record. This can be done in the Inspector, in the following way:
1. Select an Audio Track to record on.
2. Open the Inspector for the Track.
The Input button in the Inspector.
● This example assumes the Audio Track is set to a single audio channel. If
channel “Any” is selected for the Track, you have to select Inputs for the audio channels in the Monitor window instead.
3. Hold down the [Control] key on the computer keyboard and click on the
Input button.
A pop-up menu appears, containing all active Inputs.
If no Inputs are activated in the Inputs window, the button will be labelled
“NO INP”, and no pop-up menu will appear.
4. Select an Input from the pop-up.
The Input button now displays the name of the selected Input.
5. Click on the Input button to activate monitoring for the channel.
The button lights up and an “M” appears in the Mute column, to indicate that
monitoring is activated. Now the sound from the selected Input is routed to
the audio channel.
- 198 -
6. Open the Monitor mixer window.
Note that the Input button/popup in the Inspector is duplicated for each audio
channel in the Monitor window. Changing the setting or turning monitoring
on/off in the Inspector will automatically affect the setting in the Monitor window, and vice versa.
The Input selection for
an audio channel will
always be the same in
the Inspector and the
Monitor window.
7. Click the “In” button at the top of the level meter for the selected recording channel.
This activates the Input meter function:
When the “In” button is activated, the level meter shows
the level of the input signal at the selected Input.
8. Check the Input level and adjust the output level of your audio source (or
use the Input Gain control in the ASIO Device Control Panel, if available
- see page 364).
The mixer faders control the output level only, no matter whether the “In”
button is activated or not.
9. Continue recording as usual.
- 199 -
Activating and routing Buses
As with Inputs, you need to activate the Buses you want to use, and assign each Bus
to an output pair on your audio card. This is done in the Master window:
1. Pull down the Audio Menu and select Master.
Aside from the regular Master panel, the window will contain a number of
additional “subgroups”, one for each Bus:
● The total number of Buses (including the Master Bus) is equal to the number
of stereo output pairs on the audio card. The picture above shows a system
with sixteen outputs (eight stereo pairs) and eight Buses, where Master is considered to be the first Bus.
2. Activate the Buses you need, by clicking on their Active buttons.
The indicator in the button lights up to show that the Bus is active.
To conserve processor power, you should avoid activating Buses that you
don’t need to use. The Master Bus, however, is always activated.
● The Bus settings are saved with the Song. However, if you would select another ASIO Device and then open the Song, the Bus settings saved in the Song
will be ignored.
- 200 -
3. Use the popup menus at the bottom of the window to route each active
Bus to an output pair on your audio card.
● Two Buses cannot be connected to the same output pair.
4. To rename a Bus, click on its label (above the Active button) and type in
a new name.
5. Set the output levels for each active Bus, in the same way as with the
MasterBus.
Dragging one of the faders for a Bus will automatically move the other fader
as well. To move the left or right fader for a Bus independently, hold down
[Alt] and drag.
Assigning the Audio Channels to Buses
To route the audio of a channel to one of the active Buses, proceed as follows:
1. Open the Monitor window.
At the bottom of each channel you find a button labelled with the name of the
Bus that is selected for the channel.
2. Click the Bus button to pull down a popup menu, containing all active Buses.
The Master Bus will always be available.
3. Select one of the Buses.
- 201 -
Sends and Effects
The four effect sends for each audio channel can now either be routed to any of the
built-in VST effects, or directly to one of the Buses, for use with external effects,
etc. Proceed as follows:
1. Open the Monitor window.
2. Click the FX button for a channel to open its EQ and FX Send window.
3. Activate an effect send by clicking its On button.
Remember to check that the DRY button is not activated.
- 202 -
4. Click on the button below the Send Level knob to pull down the Send
Routing popup menu.
This popup menu contains the eight VST effects, all activated Buses and each
side (left/right) of the eight Groups.
5. Select one of the effects, Groups or Buses on the popup menus to route
the send there.
Since the sends are in mono, you can select each side of an output Bus independently.
6. Repeat steps 3 to 5 for the other sends as desired.
Clicking the Pre button will allow you to send the signal of an audio channel
to an effect or a bus, independently of the channel’s fader and mute settings.
Use this for insert type effects, etc.
● It is important to note that the Routing is independent for all Sends on all audio channels!
If for example you route Send 1 for channel 1 to the first effect processor in
the Mixer Effect window (running “Choirus” in the example above), you are
free to route Send 1 for the next channel to whatever effect processor or Bus
you wish!
- 203 -
Routing the Effect Outputs to Buses
The stereo outputs of the Mixer Effects can now be routed independently to any of
the output Buses:
1. Open the Effects window.
2. Select an Effect for one of the units, and activate it.
3. Click on the button next to the File button in the effect unit to pull down
a Bus popup menu.
This popup menu is similar to the ones in the Monitor window, containing all
the active Buses. The Master Bus will always be available.
4. Select one of the Buses to route the output of the effect there.
- 204 -
An example setup
In this example, we will set up an Audio Track for playback, route one of the effect
sends to an individual output, connected to an external (mono) effect, and record
the output of this effect on another Audio Track. During recording, this Track will
be monitored, and some built-in VST reverb will be added to the monitored sound:
Audio:
Played back
audio channel
Monitor Mixer:
Output Buses:
Pre-fader send
Bus 2
External FX.
Recording audio
channel
Channel routing
Master Bus
Monitoring
Equipment
Post-fader send
VST Reverb
Setting up the audio channel for playback
1. Make the physical connections between your audio hardware and the external effect device.
Connect an auxiliary output on your audio card to the input on the external
effect. Then connect the output of the effect to an input on your audio card.
2. Open the Master window and activate Bus 2, by clicking its Active button.
This is the Bus you will use to route audio to the external effect.
3. Pull down the Output popup menu for Bus 2 and route it to the desired
output on your audio card.
This should be the output pair containing the output you connected in Step 1.
4. Set up the Audio Track for playback in the Arrange window.
This may involve muting other Tracks, setting the Cycle, etc.
5. Open the Monitor window and click on the FX button for the played
back audio channel.
The EQ and FX Send window opens.
6. Click on the On and Pre buttons for the first effect send, so that the indicators in the buttons light up.
Make sure the DRY button isn’t activate.
7. Pull down the Send Routing popup and select Bus 2 (Left or Right, depending on which output on your audio card is connected to the external
effect device).
8. Use the Send Level knob to set an appropriate signal level for the external effect.
You may want to play back the audio at this point, to check the connection
and the input signal level on your effect device.
- 205 -
9. Go back to the Monitor window and click on the Mute button for the
played back audio channel.
Since “Pre” is activated for the effect send, this will not affect the signal to the
external effect.
Setting up the audio channel for recording
1. Pull down the Audio menu and select Inputs.
The Input window appears.
2. Activate the Input to which you connected the external effect device.
Leave the other Inputs deactivated.
3. Close the Input window and return to the Arrange window.
4. Prepare a Track for recording.
This Track should be set to another audio channel than the playback Track.
5. Open the Monitor window, locate the audio channel selected for recording and click on its FX button.
The EQ and FX Send window for the channel appears.
6. Activate one of the Effect sends by clicking its On button.
The Pre button should not be activated. Also make sure that the other Effect
sends are deactivated, to avoid any accidental feedback loops.
7. Pull down the Send Routing popup and select the first VST Effect slot.
8. Open the Effects window, select an effect for the first slot and activate it.
In this case, select “WunderVerb3”.
9. Pull down the Bus popup menu for the Effect and select Master.
10.Set the Send level (in the EQ and FX Send window) and the Effect Master
level (in the Effects window) to appropriate values.
11.Return to the Monitor window, hold down [Control] and click on the Input button for the recording channel.
Make sure the correct Input is selected (if this is the only active Input, it will
be selected automatically).
12.Click on the Input button so that the indicator in the button lights up.
Now, the sound from the external effect will be routed to the recording audio
channel.
13.Try playing back the audio, and set levels for sends, monitoring, etc.
14.When ready, perform the recording.
The audio from the playback Track will be routed through the external effect
and recorded on the recording Track, and you will monitor the result with
some reverb added.
- 206 -
19
The Audio Pool
20
- 207 -
Introduction
Just as you can use the Windows 95 Explorer to manage your files and folders, you
use the Pool to manage your audio segments and files.
The Pool is opened by selecting “Pool...” from the Audio menu or by pressing
[Control]-[F].
Overview of the Window
File name
Segment name
Headings
Segment
Audition button
The Pool lists all the audio files in the Song. Please note that this means it shows the
files for all Arrange windows that belong to the Song.
Files
Each file is represented by a line, preceded by a triangle. For each file there are a
number of settings and information, plus a waveform image on the right side.
The files in the Pool each represent an audio file on one of your hard disks that is
(or have been) used in the Song.
Files are never used directly in the Song. Instead it is the “segments” that are played
back from the Tracks.
Segments
For each file you have one or more segments. Segments are specifications for a section of a file. An introduction to the concept of segments can be found on page 14.
Segments are mainly created when you record audio and when you edit in the Audio editor.
- 208 -
Displaying Segments
For one File
To display/hide the segments belonging to one file, click on the triangle preceding
the file.
For all Files
• To Show all segments for all files, select Expand from the pop-up View
menu.
• To Hide all segments for all files, select Collapse from the same menu.
• To toggle between showing and hiding all segments for all files, hold
down [Alt] and click on one of the triangles preceding the files.
- 209 -
The Headings and Columns
For each file/segment you have a number of information and setting fields. The
names for these are displayed in two rows of headings at the top of the window. On
the following pages you find brief descriptions of each entry in the headers. Many
of these are used in various operations described later in this chapter.
File Headings
File Heading
Explanation
File Name
The name of the file, on disk.
Disk
The Disk the file resides on. If the file can’t be found, three question
marks are shown instead (see page 216). Clicking on the letter in this column lets you replace an audio file, as described on page 215.
S/M
If the audio file is stereo, two intersecting circles are shown under this
heading.
Img
This shows you the status of the waveform image for the file, see below.
Length
This shows the size of the file in kilobytes.
Date and Time
This shows the date and time the file was created.
Segment Headings
Segment Heading
Explanation
Hear
To play the segment, click in this column (on the speaker symbol) and
hold down the mouse button.
Segment (name)
The name of the segment.
Start
The segment’s Start Inset in the file. Displayed in samples, as a meter
position, or as time code, depending on the selected format (as described on page 211). This can be changed, see below.
End
The segment’s End Inset in the file. Can be changed.
Length
The length of the segment. Cannot be changed.
SRate
The Sample Rate of the file.
Range
An overview of the segment in the file.
- 210 -
Customizing the View
Hiding Headings
If you don’t need the Headings at the top of the window you can hide them using
the “Hide/Show” item on the pop-up View menu.
Turning on and off Information
If you don’t need all the information fields for the files and segments, you can deactivate these by selecting Show/Hide Info from the View pop-up. Among other
things this allows you to get a more detailed overview of the waveforms.
Turning on and off Waveforms
If you don’t need to see the waveforms for the segments, you can hide them by
clicking on the waveform icon at the top of the window.
Zooming and setting Sizes of the Waveforms
If you change the width of the window, the waveforms are scaled accordingly. That is,
the bigger you make the window the more detailed view of the waveform you will have.
By using the fader below the scroll bar you can set the vertical size of each line, to
get a better overview of the waveforms.
Selecting Time Formats
You can set whether the Start, End and Length values should be displayed in samples, as meter positions, or as time code values, by using the View pop-up menu.
• If you select samples, the values are shown as numbers of samples.
How many samples there are to a second, depends on the sample rate (48000
samples per second at 48kHz for example).
• If you select time code format, the values are shown in the format “minutes:seconds:frames:subframes”.
How many frames there are to a second depends on the Time code Frame
rate setting in the Synchronization dialog (typically 30 or 25).
• If you select meter position format, the start and end inset values indicate the start and end position of the first instance of the segment in the
Song, as bars, beats and ticks.
If the segment is not used, the start inset will show 1.1.0 and the end inset will
show the end position as it would be if the segment had really started on
1.1.0.
The length value shows the length of the segment in bars, beats and ticks,
starting with 0.0.0 - in other words the difference between the end inset value
and the start inset value.
- 211 -
● Please remember that if you have meter position format selected, the End Inset and Length values are tempo dependent. That is, if you change the tempo,
these values will change as well.
Setting File and Segment Order
File Order
On the View menu, you can determine in which order the files should be displayed:
Option
Description
By Name
Files are shown alphabetically.
By Date
Files are shown chronologically according to the time they were created, with the newest file on top.
By Size
Files are shown in size order, with the largest one on top.
Segment Order
By selecting “Order Segments” from the pop-up View menu, you re-arrange the
segments so that they are shown in the order they appear in the file.
Finding Out how a Segment is used in the Song
One segment can be used in more than one place in a Song. There are a number of
situations where you will want to find out where a segment is used, for example:
• So that you can tell that a segment isn’t used anywhere and possibly delete it.
• If you want to know if a segment is used in more than one place, so that you
can decide how editing the segment affects the Song.
Number of Times the Segment is used
Next to the speaker icon for each segment, you will see a number telling how many
times in the Song this segment is used. A segment without numbers is not used
anywhere.
Finding Out Where the Segment is used
1. Select one or more segment(s).
2. Select Find Parts from the Do pop-up menu.
Now the Parts that play the selected segment(s) get selected in the Arrange
window.
3. If desired, select Edit from the Edit menu, and the selected Parts are
opened in the audio editor for further examination.
- 212 -
File Operations
Renaming a File
To rename a file, proceed as follows:
1. Double click on the existing name, or select the file and press [Alt]-[Ctrl]-[N].
2. Enter a new name or edit the existing one.
3. Click outside the box or press [Return].
● Renaming a file this way is much preferred to renaming it in the Explorer. This
way, Cubase “knows” about the change and will not lose track of the file the
next time you open the Song. See page 216 for details about lost files.
Locating a File on the Hard Disk
To find out where on the hard disk a certain file is located, hold down [Alt] and
click on the file. A pop-up showing you the file location appears.
Duplicating Files
To make a duplicate of an audio file, proceed as follows:
1. Select the file.
2. Pull down the File pop-up menu and select “Duplicate File”.
A file dialog opens where you can enter a name and location for the duplicate. To minimize the risk of Cubase VST “losing track” of your audio files,
use this function instead of duplicating files in the Explorer.
- 213 -
Deleting Files
Removing from Pool
If you want to remove one or more files from the Pool without actually deleting
them from the hard disk, proceed as follows:
1. Select the file(s).
Selecting more than one is done just as with any other object in Cubase, by
clicking in combination with the [Shift] key.
2. Select “Delete” from the Edit menu or press [Backspace].
• If you try to delete a file that is used by one or more Parts, the program
will ask you if you also want to delete those Parts.
Cancelling this operation means that neither the file nor the Parts are deleted.
Removing from the Pool and deleting from Hard Disk
If you want to remove the file from the Pool and also delete the file permanently
from the hard disk, proceed as follows:
1. Select the files.
2. Hold down [Control] and press [Backspace].
A dialog box asks you if you are sure you want to follow through. Remember
that this operation can not be undone!
Deleting all Unused Files
This function finds all files in the Pool that are not used in the Song, and removes
them from the hard disk.
1. Pull down the File pop-up and select Delete Unused Files.
If there are unused files in the Pool, a dialog reminds you that the operation
cannot be undone, and asks you if you want to go on.
2. If you change your mind, click Cancel. Otherwise, click OK.
Please note that you cannot undo this operation.
Creating a Segment
You can create a “default” segment for the file, that is one that plays the entire file.
1. Select the file.
2. Select Duplicate Segment from the Do pop-up menu.
The new segment can be edited to play any part of the file (see page 218).
- 214 -
Replacing a File in the Pool
There are situations when you may want to replace an audio file in the Pool with
another, but keep all segments that are in use. As an example, consider the following situation:
You have used an external Wave Editor (see the chapter “Using an External Wave
Editor”) to perform some dynamic or spectral editing on an audio file. To be on the
safe side, you save the edited audio file under another name than the original. When
you return to Cubase VST, you will want to be able to replace the original file, so
that all segments reference to the new, edited audio file instead, and preferably be
able to switch back if you change your mind. Proceed as follows:
1. Click on the letter in the Disk column for the file.
A dialog appears, asking if you want to “Re-find” the file. Click “Yes”.
2. In the file dialog that appears, select the audio file that should replace
the existing file in the Pool.
In our example above, this would be the edited version of the audio file.
3. Another dialog will ask you if you are sure. Click “Sure”.
The audio file in the Pool is now replaced with the one you selected in the file
dialog. The segments keep their names and, if possible, their start and end inset positions. If you later want to switch back to the original file, just repeat
the operation.
● Please note that the replacing audio file must be of the same length as the
original file, for the segment start and end insets to be relevant! If you perform
any editing that involves changing the length of the file (such as time stretch,
truncating, etc), this method does not work, since you will have to create new
segments.
- 215 -
Handling “Missing Files”
When you open a Song, you may get a warning that one or more files are “missing”. If you click Ignore, the Song will open anyway, without the missing files. In
the Pool you can check which files are considered missing. This is indicated by
three question marks in the Disk column.
File is missing
File is found
A file is considered missing under one of the following conditions:
• The file has been moved to another folder or renamed in the Explorer since
the last time you changed the Song, and you ignored the Missing files dialog
when you opened the Song.
• You have used the Explorer to move, rename or change properties such as
date for the file since you started the program this time.
Locating a missing file
1. Click on the question marks.
2. In the dialog that appears, decide if you want the program to try the find
the file for you (Auto) or if you want to do it yourself (Manual).
Auto
If you choose Auto, the program scans all your hard disks for a file with the proper
name and creation date.
If Auto doesn’t work
Please note that Cubase is quite strict about identifying the files you use. Cubase retains information on the Name, Size and Creation Date of every file saved in a
Song. If these values are changed by you, or a program you may be using, you will
not be able to rely on Cubase's “auto-find” function. In this case you will have to
use the “Manual” option and “over-ride” the subsequent warnings.
Manual
If you choose Manual, the program will display a file dialog allowing you to locate
the file manually.
When you have found the file, click OK to replace the missing file in the Pool. If the
name or date is not identical to the missing one, the program will warn you but let
you proceed. The next time during this session that the program attempts to search
for a missing file, it will first look at the position of the last found file.
- 216 -
Creating Wave Images and Keeping them up to date
With each audio file goes an image, a picture of the waveform for display in various
places in Cubase. The wave images are very useful, especially in the Audio editor
when you are editing your files. A wave image is stored in a separate file with the
same name as the audio file, but with the extension “OVW”.
Wave images are created after you have completed recording, in a process that may
take a few seconds. If you don’t want to wait for this to happen when you stop recording, this function can be turned off, by deactivating the “Use Waveforms” item
on the Audio menu.
In addition, a wave image can get “out of sync” with the file it belongs too. The
three states of the wave image are indicated like this:
Icon:
Description:
The image is OK.
The image might need updating (“out of sync”).
The file has no image.
Updating the Wave Image
To update the wave image for one file, click on its icon.
- 217 -
Segment Operations
The Pool allows you to create new segments, slightly or drastically different from
those you already have in your Song, and drag and drop these in the Audio editor,
the Wave editor or the Arrange window.
Auditioning a Segment
From the Beginning
To audition a segment from its beginning, press and hold the mouse button with the
pointer over the speaker icon to the left of the segment name.
From any Position
To start playback from any position in the segment, click with the mouse pointer in
the waveform to the right. Playback will start from the position you click on.
Renaming a Segment
To rename a segment, proceed as follows:
1. Double click on the existing name or select the segment and press [Alt][Ctrl]-[N].
2. Enter a new name or edit the existing one.
3. Click outside the box or press [Return].
Duplicating Segments
To create a copy of a segment, proceed as follows:
1. Select the segment by clicking on it.
2. Select Duplicate Segment from Do pop-up menu.
The new segment appears in the Pool.
Changing Start and End Insets
You can change the Start and End points of the segment. This allows you to change
what part of the audio file the segment plays (this can also be done in the Audio editor, see page 244).
● Please note that this change will affect all places in the song where this segment is used.
You can adjust the Start and End Inset values by regular value editing. See page 211
for a description of the different time formats.
- 218 -
Deleting segments
Deleting one or several segments from the Pool
1. Select the segment(s).
Selecting more than one segment is done just as with any other object in Cubase VST, by clicking in combination with the [Shift] key.
2. Select Delete from the Edit menu or press [Delete] or [Backspace].
• If you try to delete a segment that is used by one or more Parts, the program will ask you if you also want to delete those Parts.
Cancelling this operation means that neither the segments nor the Parts are
deleted.
You can tell how many times a segment is used in a Song by checking the number
next to the speaker icon.
Deleting all Segments not used in the Song (Purge)
To automatically delete all segments that are currently not used in the Song, select
Purge Segments from the Do pop-up menu.
- 219 -
Deleting Unused Portions of Audio Files (Erase Unused)
“Erase Unused” allows you to “trim” down your Audio files so that they only contain the sections actually referenced by that file’s segment. This helps you maintain
as much free space on the hard disk(s) as possible.
The idea behind this is that hard disk space is most often precious, and recorded silence (for example) takes up as much hard disk space as recorded “noise”. When
you adjust Start and End Points in segments to “hide” the sections of audio you
don’t want to hear, you are still using up valuable disk space for those unheard bits.
To “fix” this, use Erase Unused.
Which Parts of the Files are considered Unused?
Unused portions of a file are the sections not played back by any segment in the
“Pool”.
This means that even if the segment isn’t used anywhere in the Song (which you
can tell by looking at the speaker icon beside the segment – unused segments have
no number) the section of the file that the segment plays is considered to be in
use.To avoid keeping a lot of unnecessary audio sections, the program therefore automatically performs a “Purge Segments” (see page 219) before the actual “Erase
Unused” operation.
These segments
are each used in
one place in the
Song.
These segments are
not used in the
Song, and will
automatically be
purged (deleted).
Applying Erase Unused
● Erase Unused changes the contents of one selected audio file. If you use the
file in another Song, or if you want to be able to go back to the original recording, make sure you have a copy of the file before you begin!
1. Select either the file or one of it's segments.
This command works on “one sound file at a time”. For this function to work,
two criteria have to be fulfilled:
• The audio file must be used by at least one Event somewhere in the Song.
• There must be some section of the audio file that isn’t used by any Segment
(otherwise there’s nothing to erase, right?).
- 220 -
2. Select the “Erase Unused” command from the pop-up menu.
A dialog box will display how much of the original audio file will be kept,
and ask you if you want to go on.
3. Click Compact.
First the unused Segments are deleted. Then the unused sections of the file are
deleted and the remaining parts “joined together” with only a short section of
silence in between. The segments are adjusted accordingly.
Erasing all Unused Audio in a Song
To permanently erase all unused Audio in a Song, simply select all files in the Pool
and select Erase Unused.
- 221 -
Importing Audio Files into the Pool
From the Pool you can import files created by other programs, or files you have created in another Cubase VST Song.
File Formats
Files in the following formats can be imported:
• Uncompressed 16 bit Wave (WAV) or Audio IFF (AIFF).
• Mono or Stereo.
• The Sample Rate currently used in your Song.
● If you import files with another sample rate than the one used in the Song,
they may most probably play back at the wrong speed and pitch, depending
on your audio hardware.
Proceed as follows:
1. Pull down the File pop-up menu and select Import Audio File.
A file dialog appears.
2. Select a file format (WAV, AIF or both) from the File Type pop-up.
Files of the selected type(s) are listed in the file dialog box.
3. Use the file dialog box to locate the file and select it.
• You can audition the audio file with the Play button.
When you click the Play button, its label changes to “Stop” and the selected
audio file is played back. Playback continues until you click on Stop, or select
another file.
4. You can select several files by using the [Shift] or [Control] keys, in
standard Windows fashion.
5. Click “Open”.
Now, the File(s) will appear at the bottom of the Pool window, each complete
with a segment which can be dragged into the Arrangement, as described
above.
- 222 -
Dragging Segments into Other Windows
Introduction
To move segments into other windows, Cubase uses drag and drop techniques. You
can do the following:
• Drag a segment into the Arrange window for use on any audio Track.
• Drag a segment into the Audio editor for detailed positioning on a Track.
• Drag a segment into the Wave Editor for further processing.
General Procedure
1. Arrange the windows so that as much as possible of the window you
want to drag the segment into (Arrangement, Wave Editor or Audio editor) is visible, when you have the Pool window active.
2. Position the mouse button over the name of the segment and press the
mouse button.
A dotted rectangle appears around the name of the segment.
3. Drag the segment out of the Pool window and release it somewhere on
top of the other window.
In this example the segment is dragged to the Arrange window. A new Part is then
created, containing an Event which plays the segment you dragged.
- 223 -
Dragging into the Arrange Window
When you drag into the Arrange window, you must release the segment on an Audio Track. When you do this, you get the following:
• A new Part, beginning at the position you pointed at when you released the
mouse button. The Snap value applies as with all editing in the Arrange window.
• Inside this Part is one Audio Event which plays the segment.
For more information on Audio Events and their relation to segments, see
page 14.
Dragging into the Audio editor
When you drag into the Audio editor there are a few things you should be aware of:
• The mouse position in the Audio editor shows you where you are about to
“drop” the segment. The Snap value applies as always.
• If the Track is set to channel “Any”, or if you are editing several Parts, it matters very much which “lane” you put the segment on, since each lane uses its
own audio channel, as described on page 231.
• When you “drop” the segment in the Audio editor, an Audio Event that plays
the segment is created and appears in the window.
For more information on lanes, audio events and other Audio editor concepts,
see page 230.
Dragging into the Wave Editor
Dragging a segment into the Wave editor will show it as a waveform, see page 285
for more info.
- 224 -
Preparing File Archives and “Masters”
Prepare Archive
This function on the Pool File pop-up menu takes all the audio files used in the
Song (or, if you wish, all the audio files in the Pool, regardless of whether they are
used or not) and puts them in a new folder that you specify. This folder can then
easily be backed up to another disk or other media, using the Finder's copy commands or any backup utility program.
1. Select Prepare Archive from the Pool’s File pop-up menu.
A file dialog appears where you can navigate to the folder where you want to
store the files.
2. In the new dialog that appears, specify if you want to include All the files
in the Pool, or only those that are Referenced (actually used in the Song).
All the sound files are now moved to the selected folder. If the files are on another disk, copies are automatically created and put into the same folder.
● We recommend you to also save your Song document into this folder or in
close vicinity to it. If you make this a habit you can rest assured that you always have all the files for one Song collected in one place. This makes backing up and restoring much simpler.
Prepare Master
This option takes all the audio files used in the Song, extracts only the used bits of
each audio file and stores this into new files. The result is a new set of files that play
back the Song just as before, but now only contains the portions of audio which actually appears in the song. The Song is also updated to play the new “trimmed”
files.
The Prepare Master operation is entirely non-destructive, in that no audio files will
be erased from your hard disk, new files are created for all the material. Please note
the following:
• This procedure can not be Undone.
• Since new files are created, it requires that you have sufficient space on
your destination hard disk.
You will be warned should there be insufficient free space to complete the
operation.
In a sense, the function is a composite of other Cubase VST operations, those being
“Purge Segments”, “Erase Unused”, and “Prepare Archive”.
- 225 -
Using Prepare Master
Proceed as follows:
1. Make sure your Song is saved.
After the operation, the Song is altered, so this is an important step if you also
want to save the Song as it is now.
2. Select “Prepare Master” from the Pool’s pop-up File menu.
A dialog box appears, telling you that this operation is not undoable.
3. A new dialog box appears informing you that you need to create a new
folder.
Use the file selector that appears after this, to do so.
4. Open the folder you have just created and click Select.
The software now examines your use of the audio material in the Pool, discards
anything which is not used, and then proceeds to create new audio files which corresponds to the sections of the existing material. All the new files which are created
are named automatically. The software also creates new segments which play these
new files, and swaps these in automatically.
5. Save the Song in its new state into the same folder as the new files or in
close vicinity to it.
This is necessary, since the Song you have after the operation uses completely
new files and segments than before.
- 226 -
Saving and Loading the Pool
The Pool is automatically saved with the Song. However, by using the Load and
Save Pool commands on the pop-up File menu, you can freely save Pools and load
them into Songs.
Saving
1. Select Save Pool from the File Pop-up menu.
2. In the dialog box that appears, specify if you want to save all files and
segments, or just the selected ones.
3. In the standard dialog box that appears, specify a name and a location
for the file.
● The audio files themselves are not saved in the Pool file, only a reference to
them. You should probably not move any audio file(s) until next time you
want to use the Pool. You should definitely not delete them!
Loading
A Pool file is opened (loaded) with the Load Pool command on the File pop-up
menu. When you load a Pool file, the files in it are “added” to the current Pool.
- 227 -
20
The Audio Editor
- 228 -
21
Introduction
The Audio editor is your main environment for editing, trimming and assembling
audio recordings into finished Tracks.
Many of the techniques described below are common to the Arrange window and
the MIDI editors (mainly Key Edit). Examples of such operations are moving, duplicating, using Tools etc. Therefore this chapter assumes that you are reasonably
familiar with such basic operations and does not always describe all the details involved.
Opening the Audio editor
The Audio editor is opened just like any other MIDI editor. You can edit Parts from
several Tracks at the same time, if desired.
You can only have one Audio editor window open at a time.
About Events, Lanes and Segments
● Please take the time to read this section and familiarize yourself with the terminology and concepts of the Audio editor. This will help you work as
quickly and effectively as possible. Bear with us, we’ll try to be as brief as
possible in this theoretical section:
Audio Events and Segments
Audio Events appear as boxes, with waveforms in them. You can have a virtually
unlimited number of Events in the Audio editor at one time; they do not consume
more memory than MIDI Events.
Audio Events can be arranged in any way, with gaps between them, overlapping
each other, etc.
An Event plays a Segment (for an introduction to Segments, see page 14). The Audio Event specifies where the Segment should start. The Segment in turn specifies
what part of the audio file should be played, and therefore effectively governs the
length of the Audio Event.
• If you want two Events to play the same segment, you can use ghost copies.
A ghost copied Event will play the same segment as the original Event. See the
chapter “Making the Most of the Event/Segment Relationship”.
- 229 -
Lanes
When you first open the Audio editor you will note that it is divided horizontally
into something we call “Lanes”.
Lanes bear some resemblance to Tracks in the Arrange window. On each Lane you
can have as many Audio Events as you like. You might think of your Audio Events
as “hangers” for the recordings you have made. In this analogy, the Lanes would be
the “rails” on which the hangers are positioned.
When Editing A Single Channel Track
If the Track is set to play back on one specific audio channel, in the Arrange window (as opposed to being set to channel “Any”), the Lanes all have equal value.
You can move the Events between the Lanes as you like, and add new Events on
any Lane. Playback is not affected by which lane an Event is on. The only reason
for you to use more than one Lane when editing a single channel Track is if you
find that it gives you a better overview of what is going on.
Remember that in a single channel Track, all Events “compete” for one single
(monophonic) audio channel.That is, if they overlap timewise, they will cut each
other off during playback, even if they are on different Lanes.
When the lower Event starts, the sound of the upper Event will be cut off.
- 230 -
When Editing a Stereo Track
• Stereo recordings occupy two lanes. These two lanes use one audio channel each. Otherwise editing stereo Tracks is not much different from editing mono Tracks.
• Volume and Pan is common to both audio channels. That is, any change
you make will affect both channels equally.
The left and
right sides in a
Stereo event.
Changing one of the Event Volume curves will automatically affect the other.
When Editing a Multi Channel Track
If you are editing a Track set to channel “Any”, each Lane will represent one of the
available audio channels. Which audio channel each Lane “uses” is indicated by a
number on the left side of the window.
Events on this lane play
back on channel 1.
Events on this lane play
back on channel 2.
If you set your view so that you see many Lanes (see Customizing the view, below),
you will note that the channel numbers start repeating as you move down the window. For example, in a four channel system, the first four Lanes are numbered 1 to
4, then next four Lanes are again numbered 1 to 4 and so on.
As with a single channel Track, all Lanes that use the same channel have “equal
value”. It does not matter which of them you put your Audio Events on.
By moving an Event between Lanes with different channel numbers, you change
which audio channel the Event is played back on.
- 231 -
When Editing Several Tracks
If you open several Parts on different Tracks at the same time in the Audio editor
you will also get Lanes with multiple audio channels. How many different channels
and exactly which ones, depends on what audio channels the Tracks are set to.
Editing Parts on three Tracks with different audio channels.
As you will learn later on in this chapter, the Audio editor Lanes can be used as a
means of moving Events between audio channels and even between Tracks!
Which Audio Events will I Hear?
If any two Events in your Arrangement try to play back on the same audio channel
at the same time, only one of them will be heard. This is shown in the pictures below:
The ”1st Part” Event is cut off by the ”2nd Part” Event.
The ”MainBeat” Event is cut off by the ”Fill-in” Event. After the end of this shorter Event, the
”MainBeat” Event will be heard again.
- 232 -
Finding Out How Events compete for Audio Channels
In case there is one recording that doesn’t play back as intended, you may want to
check whether several Events “compete” for an audio channel. Proceed as follows:
1. Select all the Parts you think might compete for audio channels.
This may very well mean selecting Parts on several Tracks.
2. Open the Audio editor, displaying the selected Parts.
3. Select “By Output” from the View pop-up menu in the Audio editor.
Now, all Events that play back on the same audio channel are put on the same Lane,
regardless if they are on different Tracks or on the same Track.
4. Check for overlapping Events along the Lanes.
If there are any, some audio will be cut off at those points.
● Often it is desired to have overlapping Events, for example when you have
performed a punch in on a Track, for example to correct a mistake in a vocal
part or similar (the punch in recording overlaps and therefore hides the original, faulty recording). But then again you might accidentally get overlapping
Parts, and this feature helps you find those points.
About Q-points
All Audio Events have a Q-point which aids you in positioning them in a sensible
way and which makes it possible to use Quantizing on the positions of Audio
Events.
For example, if you record with the Prerecord option activated in the Metronome
dialog, you will note that your Audio Events actually begin before the point where
you activated recording. For example the Q-point might be exactly on a downbeat
but the Event extends a little bit to its left.
Q-points are very valuable to audio editing. On page 247 in this chapter you will
learn all about how they facilitate your work in the Audio editor.
- 233 -
About Zero Crossings
If you are familiar with audio editing from other digital systems you will know that
splicing two audio files together might create a “click” just at the split point. This is
because the two signals happen to have a different amplitude (level) at this point
which creates a transient (a sudden and dramatic change in signal level).
One way to avoid this is to always make all edits at “zero crossings”.
Zero crossings
An analog waveform is a voltage rising and falling around a center axis. This center
axis is considered “zero” voltage. As indicated in the picture, a zero crossing is
when the signal passes through this center axis.
•
•
•
•
To automatically make all edits happen at the closest zero crossing, activate Snap
To Zero on the Audio menu. When Snap To Zero is activated, the following operations always occur at the closest zero crossing:
Changing Start and End Insets.
Splitting Event in the Audio editor.
Splitting Parts in the Arrangement (the Events in the Parts are split at zero
crossings).
Using Snip Loop (in the Audio editor).
● It may happen that it will take a while to find the closest zero crossing. If this
is the case the program will ask you if you want to continue the search or cancel it.
- 234 -
Zero Crossing Example
Here, an Event has been split in two places, with Snap to Zero off. When the two sections
are moved together...
...the result will be a transient, probably causing a “click” or other undesired sound.
Here, an Event has been split in two places, with Snap to Zero activated. When the two
sections are moved together...
...a fairly seamless splice is created.
- 235 -
Customizing the View
There are a number of features you can use to tailor the Audio editor view to your
liking:
The View Menu
The View pop-up menu allows you to select what will be displayed in the Events
and on the Lanes:
Waveforms
This turns the display of waveforms on and off in the editor. Deactivating this
speeds up screen redraws.
Names
This turns the display of Segment names in the Events on and off.
Handles
This allows you to decide if you want to see the Start, End and Q-point handles in
the Events. See below.
By Output
By selecting this item you sort your Events so that all Events that play back on the
same audio channel are put on the same Lane. See page 230 for details.
Lane Info
This shows/hides the display to the left of each Lane that tells what audio channel
the Events on the Lane play back on.
- 236 -
Dynamic Events
If this item is activated, the lower half of each Event displays one of these three alternatives:
• The Volume curve for the Event.
• The Pan curve for the Event (see page 274 for descriptions on how to edit Volume and Pan).
• The M-Points (Match Points) for the Event (see page 249).
A Volume curve.
A Pan curve.
Match Points.
You determine which of these three Event types that is shown, by using the pop-up
to the right of the Edit Solo button.
Magnification
The sliders on the scroll bar can be used to set the amount of detail, both horizontally and vertically.
• Zooming in all the way horizontally allows you to see the waveform in ultrahigh resolution: one sample per pixel (screen “dot”).
• Zooming in vertically makes the Lanes “higher”. This is convenient for example for detailed editing of Volume.
- 237 -
Time/Meter Scale and Ruler and Position Formats
Time/Meter Scale
By clicking the Meter Scale button you can decide if the display and the ruler
should show time or meter linearly:
• In a time linear display, each “second” on the screen occupies equal amount
of space, horizontally. This is convenient if you are working with time related
material, such as for example narration or sound effects to be matched to
video.
• In a meter linear display, each bar on the screen occupies equal amount of
space, horizontally. This the mode to use if you are working with musically
related material.
Ruler and Position Formats
By clicking on the mouse box you can determine whether the rulers and the mouse
position box should be displayed in time code (SMPTE) format or as bars and
beats, as in the Arrange window and some of the MIDI editors (see the Basic Methods chapter in the Getting Started book).
• Normally, you would match the Time Meter Scale and Ruler formats so
that they are both set to Time or Meter positions.
• If you set the display to Time Scale and the Ruler to Meter positions, the
ruler will not be linear.
That is, if you have tempo changes, there will not be equal spacing between
the measures. This is natural, since if the measures are played at different
tempo, they occupy different amounts of “real time” (minutes, seconds etc.)
• If you set the display to Meter Scale and the ruler to Time positions, the
same phenomenon occurs, that is if you have tempo changes, the ruler
will not be “linear”.
- 238 -
Using Color in the Audio Editor
The Events in the Audio editor can be displayed in color to help you distinguish between audio channels, etc. This is done by using the color palette pop-up menu.
There are three options on this menu:
No Color
Select this option if you don’t want any color for the Events.
Colorize by Channels
If you select Colorize by Channels, Events on different audio channels will get different colors. This is useful if for example you are editing a Track with channel
“Any”, and viewing several Events by Output.
• When Colorize by Channels is selected, the Color pop-up menu is automatically expanded to include an item called “Channel Colors...”.
Select this to edit which color goes with which audio channel.
Colorize by Parts
If you select Colorize by Part, the Events in the editor will get the color that you
have selected for their respective Parts in the Arrange Window. This allows you to
distinguish Events from different Parts on the same audio channel, even if View by
Output is selected on the View pop-up menu.
- 239 -
Recording in the Audio editor
Recording from within the Audio editor is no different from recording in the Arrange window. If you are editing several Tracks at the same time, you will be recording into the “active Track”.
• The active Track is indicated by the inverted number in the Lane Info field.
To activate another Track, click in the Lane Info field for that Track.
The active Track.
Importing and Dragging Audio into the Editor
Dragging Audio From the Pool
As described on page 223 you can drag Segments from the Pool window into the
Audio editor. This creates an Audio Event in the Part that plays back the dragged
Segment. Here are some points to keep in mind:
• The mouse position in the Audio editor shows you where you are about to
“drop” the Segment. The Snap value applies as always, using the Q-Point in
the Event as position reference.
• If the Track is set to channel “Any”, it matters very much which “Lane” you
put the Segment on, since it determines which audio channel the Event will
play back on.
• If the Segment is already used (as indicated by the number beside the speaker
symbol in the Pool), the created Audio Event will be a Ghost Event (see the
chapter Making the Most out of the Event/Segment/File Relation).
- 240 -
Importing Audio Files
You can import files created by other programs. You can also import files you have
created in another Cubase VST Song.
File Formats
Files in the following formats can be imported:
• Uncompressed 16 bit Wave (WAV) or Audio IFF (AIFF).
• The Sample Rate currently used in your Song (if you import files with another
sample rate, they will play back at the wrong speed and pitch).
• Mono or Stereo.
Importing the File
1. Set the Snap value as desired.
As always, the Snap value restricts what positions you can put the file on.
2. Select the Pencil from the Toolbox.
3. If you are editing a multi channel Track, select the lane on which you
want to put the Event, by clicking on its Lane Info field to the left.
This determines which channel the Event will play back on.
4. Find the position where you want the start of the Event.
5. Click at this position.
You can click somewhere on an existing Event, which means the two Events will
overlap.
The only place where you should avoid to click is in another Event’s Volume, Pan
or M-Points display (see page 274), since this will change the values rather than
import an Event.
6. In the file dialog that appears, select a file format (WAV, AIF or both)
from the File Type pop-up.
Files of the selected type(s) are listed in the file dialog box.
7. Use the file dialog box to locate the file and select it.
• You can audition the audio file with the Play button.
When you click the Play button, its label changes to “Stop” and the selected
audio file is played back. Playback continues until you click on Stop, or select
another file.
8. Click “Open”.
A new Event is inserted in the Audio Part. If you check the Pool, you will find
that the imported audio file has been added, together with a segment that
plays the full file.
- 241 -
Auditioning and Scrubbing
There are a number of techniques for monitoring Events, to aid you in finding positions for editing operations:
Auditioning
This allows you to play back an Event from any position, at its “normal speed”:
1. Deactivate the Scrub icon on the Status Bar.
Auditioning mode.
2. Select the Magnifying Glass from the Toolbox.
3. Click on an Event.
The Event is played back from that point as long as you hold the mouse button down.
Scrubbing
This allows you to play the Event back at practically any speed, forwards or backwards. This is convenient when trying to find a certain point to perform some editing at, such as splitting, changing Insets etc. The Scrubbed audio is not affected by
Dynamic Events or any Monitor settings, only by the Master volume faders.
1. Activate the Scrub icon on the Status Bar.
Scrub mode.
2. Select the Magnifying Glass from the Toolbox.
3. Press the mouse over an Event and drag sideways.
The faster you move the pointer, the higher the playback speed. If you drag to
the left, audio will be played backwards.
Monitoring Settings
If the Speaker icon is activated, certain operations will give you audible feedback,
namely:
• Changing Start and End Insets.
• Setting Q-points.
If you perform one of the above actions with the Speaker icon activated, a short section of the segment will be played back, allowing you to monitor your edits. If you
move the Start Inset, you will hear a short section from the Start Inset and onwards.
If you move the End Inset you will hear a short section up until the End Inset.
- 242 -
To set the desired length of the played section, proceed like this:
1. Hold down [Control] on the computer keyboard.
2. Click on the Speaker icon.
A small pop-up menu appears.
3. Select one of the options on the menu.
Editing on the Info Line
Like other editors, Audio Edit has an Info Line.
1. Make sure the “I” button on the Status Bar is activated.
2. Select one, and only one, Event.
3. Adjust the values as described in the table below:
Heading:
Description:
Start
Start Position. Adjusting this moves the Event.
End
End Inset. Adjusting this shortens or lengthens the Event.
QPoint
Q-point. Adjusting this moves the Q-point. See page 247.
Segment
Segment name. If you change this, this is reflected in all Events
that play the Event, and in the Pool.
File
File name. This can be changed on the Info Line.
- 243 -
Changing Start and End Insets
Each Event has a Start and End Inset which represent the Segment start point in the
audio file, and its length. Handles for adjusting these are visible in the upper and the
lower corners (respectively) of the Events if Handles is ticked on the pop-up View
menu.
Checking if the File Plays from the beginning
The shape of the handle indicates what the Event actually plays:
Symbol:
Description:
If this symbol appears at the beginning of the Event, it means that the
Event plays the audio file from the beginning.
If this symbol appears at the beginning of the Event, it means that the
Event plays the file from some point later than the absolute beginning
of the file. The Start Inset has already been adjusted.
If this symbol appears at the end of the Event, it means that the Event
plays the audio file to its end.
If this symbol appears at the end of the Event, it means that the Event
does not play the file to its absolute end. The End Inset has already
been adjusted.
● The handles do not actually have to be shown for you to move the Insets. It is
sufficient to click and drag in the upper left and lower right corner, respectively.
If the Event doesn’t fit in the Window
Even if the Event doesn’t begin or end inside the window, the Start and End Inset
symbols will be visible at the edges of the window. If you have long Events, this allows you to see the “status” of the Insets (as described above) without scrolling the
view.
The Start and End Inset symbols are shown even if the Event extends
across the window boundaries.
- 244 -
About the Inset settings
• The Inset value is in ticks. There are 384 ticks for each beat (quarter note)
which means that when you change the Insets this is the resolution you are
using for the position value. However, if you need sample accurate editing
of Segment Insets, you can perform this in the Pool, see page 218.
• The Insets do not “snap” to the closest snap value.
Changing the Start Inset
The Start Inset is adjusted by dragging in the “upper left corner” of the waveform
part of the Segment. Usually, you will point at the handle, click and drag, but the
handle does not actually have to be shown (hide/show it with the View pop-up
menu, if you like).
Position the pointer in the upper left corner of the waveform...
...and drag the Inset left or right.
The Start Inset can also be changed numerically from the Info Line.
What happens when you Change the Start Inset?
Changing the Start Inset adjusts from which point in the file the Segment plays; it
“hides” more or less of the beginning of the file. It does not move the audio in the
Song. Note the difference between changing the Start Inset and moving the Event:
Before moving the Event.
Before moving the Start Inset.
After moving the Start Inset.
- 245 -
Changing the End Inset
This is done just as changing the Start Inset, only you click or drag in the “lower
right corner” of the waveform. Changing the End Inset adjusts the Length of the
Event; that is, it hides more or less of the end of the file.
The End Inset can also be set numerically on the Info Line.
Changing the Insets with a single click
If you click somewhere along the very top edge of the segment (though not on the
segment name) the Start Inset will immediately be set to that position. Likewise,
clicking at the bottom edge of the segment moves the End Inset.
About Snap to Zero
If the option “Snap To Zero” in the Audio menu is enabled, all offset adjustment
will be followed by an automatic “search for a zero crossing”. This option will always make the resulting Segment very slightly smaller than it was when you released the mouse button. If there is absolute silence, and therefore no zero crossings
in the sample for some time, Cubase will ask whether it should continue the search.
For more info on Zero Crossings, see page 234.
● Group Events do not Snap to Zero.
The length of the section played back can be set using the Speaker pop-up as described on page 242.
- 246 -
Working with Q-Points
Introduction
Why Q-points?
Each Event has a Q-point that is used for snapping the Event to musical positions.
The concept behind this is that with audio, as opposed to MIDI, the beginning of
the Event might not occur at a musical position at all, there might for example be a
significant amount of silence at the beginning of the recording.
This means that snapping the beginning of the Event to a musical position normally
doesn’t make much sense. Hence Q-points. These allow you to specify a position in
the Segment which is to be taken as its first “musically significant position”, the
first down-beat for instance.
When are Q-Points used?
The program uses Q-Points in the following operations:
• When moving Audio Events (the Q-Point snaps to the closest Snap value).
• When Quantizing (see page 256).
• When you drag a Segment from the Pool, into the Audio editor or the Arrangement (the Q-Point is used to snap the position of the Event to the closest
snap value).
Displaying and Hiding Q-Points
The “Q” handle in an Event is only visible if “Handles” are ticked on the pop-up
View menu.
Adjusting Q-points
Manually
• Snapping does normally not apply to “Q” handles, they can be put at arbitrary positions within the Segment (however it must be within the first 65000
samples).
• If you specifically want the Q-Point position to snap to the closest Snap value,
hold down [Alt] while dragging it.
• You can edit the Q-Point position on the Info line. The value is in ticks counting from the Start Inset.
If you turn on the Speaker icon, a short section of the Segment, from the Q-point
and onwards will play whenever you move the Q-point. This auditioning takes
place at full volume. You can set the length of the section to be played back, as described on page 242.
- 247 -
Automatically
For newly created Events the Q-point is set automatically as follows:
When you do this:
The Q-point is set at:
Record with Prerecord turned on
(see the Basic MIDI Recording
chapter in the Getting Started
book).
Exactly the point you specified for the recording to start at. However, the actual recording
starts slightly early to preserve the attack (in
case the performer started slightly early). See
the Online Help for details about Prerecord.
Record with Prerecord off.
The nearest sensible bar or beat position.
Punch in manually.
The closest beat.
Drag Audio into the Editor.
The nearest sensible bar or beat position.
Split an Event with the Scissors
The Segment that contains the existing Q-point
after the split is not affected. The other Segment gets a Q-point at the nearest sensible bar
or beat position.
Drag Start and End Insets beyond
the existing Q-point
The nearest sensible bar or beat position.
- 248 -
Adding and Editing Match Points
What are Match Points?
Match points, or M-Points, are “markers” within an Audio Event, used to indicate
significant positions in your Audio file. Furthermore, they contain information
about the “velocity” of the audio at the positions they indicate. Match Points are
used for comparing and combining the timing of recorded audio with the timing of
recorded MIDI material in various ways. Therefore, the goal is most often to get MPoints on all “beats” in the recorded audio. The picture below shows a drum pattern, with M-Points displayed. Note that the horizontal positions of the Match
Points coincide with the peaks in the audio - the “beats”.
The velocity values of the Match Points (indicated by the vertical position of the black
squares) correspond to the level of each audio peak.
Match points have the following uses:
• Matching tempo to audio.
• Matching audio to tempo.
• Making groove templates by extracting timing and velocity from recorded audio.
• Match quantizing MIDI Parts to Audio Parts, Audio Parts to MIDI Parts or
even Audio Parts to other Audio Parts (after using “Snip at M-points”).
● For more information on the usage of M-Points, see the chapter Matching Audio and Tempo in this Audio addendum to the manual.
Displaying the M-Points
1. Pull down the View pop-up menu.
2. If the Dynamic Events item is not ticked, select it.
This will make the lower halves of the Events show dynamic data (M-Points,
Volume or Pan).
3. Pull down the pop-up menu to the right of the Ed Solo button menu and
select M-Points.
- 249 -
Adding M-Points Automatically
Cubase VST can automatically analyse the Audio Event for you, find the “important” positions and create M-Points:
1. Select the Event.
2. Pull down the Do pop-up menu and select Get M-Points.
A dialog box appears, where you can make various settings for how the
Match Points should be calculated (described on page 433).
For now, click on the Default button. This will make the program use default
settings, which quite often work well.
3. Click Process.
Match Points are calculated and added to the Audio Event.
Adding M-Points manually
You may also add M-Points manually, if for example you find that the automatic
M-Point detection doesn’t find all the “important” beats in the audio.
In this case, you may want to add M-Points for some of the beats in the audio.
1. Set Snap to a value of your liking.
This affects on which positions you can place M-Points, just like when adding
Events in a MIDI editor. On many occasions it may be best to turn Snap off, to
be able to freely move created M-Points.
2. Select the Pencil tool.
3. Hold down [Alt] on the computer keyboard and click where you want the
M-Point(s).
- 250 -
Editing M-Points
Sometimes you may want to move Match Points to make them better coincide with
the beats in the audio. It may for example happen that the automatic Match Point
detection positions an M-Point too early, due to “double” drum hits, diffuse sounds
etc. If that is the case, you can easily move the Match Points:
• If you want to move an existing Match Point or change the vertical position of the black square (i.e. the velocity value), click on it with the Pencil and drag it up/down or sideways.
The Snap value applies for which positions you can move the value to. Since
the audio material is probably not perfectly correlated to the playback tempo,
it is often best to turn Snap off when moving M-Points.
• If you want to make sure the Match Point isn’t moved left/right, hold
down [Shift].
This also makes the value change in smaller steps.
Deleting M-Points
If you find that the Match Point detection finds too many M-Points in the audio,
you may want to delete some of them:
1. Select the Eraser tool.
2. Click on the black square of the Match Point you want to delete.
- 251 -
Moving Audio Events
By Dragging
Audio Events are moved just like other objects in Cubase:
1. Select the Arrow Tool.
2. Select all Events you want to move.
3. Press and hold the mouse with the arrow pointer over one of the selected
Events (not in the handles) and move the mouse.
The mouse box shows you where the Q-point of the first selected and
dragged Event will wind up when you release the button.
4. If you want to restrict movement to horizontal or vertical only, hold
down [Shift] while dragging.
5. Release the mouse button, and the selected Events are moved to the new
position.
The Snap function applies, positioning the Event so that its Q-point gets aligned
with the closest Snap value.
Between Lanes
• If you are editing a single-channel or stereo Track, moving the Event to
another Lane has no effect on playback. Still, you might want to organize
your view of the Events, by moving Events between Lanes.
• If you are editing one Track set to channel “Any” you can use this feature
to set which channel an Event plays back on.
Check the channel indicator on the left side of the window to find out which
channel each Lane plays back on.
• If you are editing a number of single channel or stereo Tracks simultaneously, moving Events between Lanes means you are moving the Events
between Tracks.
You can identify the Tracks by which channel they each are set to, as described in the previous paragraph.
• If you hold down [Shift] while dragging, moving is restricted to vertically
or horizontally only (depending on in which direction you dragged first).
This allows you to move the sound to another Lane without affecting Start position. See above for an introduction to this.
- 252 -
Moving By “Kicking”
You can “Kick” an Event one Snap value at a time, forward or backwards in time.
1. Select the hand from the Toolbox.
2. Set the Snap value to the distance you want to move the Event, with each
“kick”.
3. Position the pointer over the Event you want to move.
4. To move the Event forward, click on its first half. To move the Event
backwards, click on the second half.
Duplicating and Repeating Events
Duplicating
There are two slightly different ways of creating new Events:
• Creating a “real copy” also creates a new Segment, which means the two
Events are totally independent. That is, if you for example change the Start Inset of one of them (in the Editor or in the Pool), the other is not affected.
• A “ghost copy” uses the same Segment as the Event it was created from. More
details follow below and in separate chapters:
Creating Real Copies (New Segments)
1. Select the Event(s) you want to duplicate.
2. Hold down [Alt] and drag to the new position.
Everything else is as when moving, see above.
3. Preferably rename the new Segment, to avoid confusion in the Pool (see
page 243).
- 253 -
Creating Ghost Copies (No new Segments)
1. Select the Event(s) you want to duplicate.
2. Hold down [Control] and drag to the new position.
Everything else is as when moving, see above.
The fact that the new Event is a “ghost” copy, is indicated by a dotted outline.
Please note that the original Event also gets a dotted outline, once a ghost copy is
made.
The original Event
Ghost copy
“normal” copy
About Editing Ghost Events
• All ghost copies that are playing the same Segment have dotted outlines.
The program doesn't differentiate between the “original” and the ghost, they
are all considered ghost copies of each other.
• If you make any changes to the Segment in the Pool, this will equally affect all Ghost Events that play this Segment.
• However, if you make changes to the Start and End Insets of one of the
ghost Events in the editor, this Event will be turned into a real Event, and
a new Segment will be created for it.
• If you specifically want to make Start and End Inset Changes that will affect all the Ghosts that play the same Segment, hold down the [Control]
key while editing any of those Events.
● Read more about working with Ghost copies in the chapter “Making the Most
of the Event/Segment Relationship”.
Repeating Events
To repeat Audio Events, use the Repeat command on the pop-up Do menu. This
works just as the Repeat command in any of the MIDI Editors, see the chapter “The
MIDI Editors - General Information” in the main Cubase manual.
- 254 -
Repeating Any Section of Audio
By combining a few commands in the Audio editor, you can repeat any section of
audio:
1. Set up the Loop so that it plays the section to be repeated.
2. Use Snip Loop (on the pop-up Do menu) so that the Events that fall inside
the Loop are split at the Loop Start and End points.
3. Select the Events to be repeated (those inside the Loop).
4. If you want to delete the snippets of audio outside the loop, select Keep
from the pop-up Do menu.
Only the selected Events are kept.
5. Select Repeat from the Do pop-up menu to repeat the selected Events.
You may repeat Events to fill the Cycle, to the end of the Part etc., depending
on what the situation requires.
Using Cut, Copy and Paste
Cut, Copy and Paste can be used to move and duplicate Events just as in any MIDI
Editor. However, since Pasting in a Cubase Editor always adds Events to the active
Part, there is one additional thing to keep in mind if you are editing several Parts at
the same time:
• To determine which Part to Paste into, click in the Lane Info field for the
Part.
Clicking here...
...activates the Part.
The currently Active Part is indicated in the Editor's window title and by a black
rectangle in the Lane Info fields.
- 255 -
Quantizing Audio Events
Quantizing Audio Parts allows you to adjust the positions of your events, just like
you adjust the positions of MIDI notes.
Event Position Quantizing vs “True” Audio Quantize
There are two type of audio quantize.
• The first type moves the events to desired positions, without affecting the actual audio file. This is described below.
• The second type processes and changes the audio recording permanently. .
Even Position quantizing
There is one big difference between quantizing Audio Event positions, compare to
MIDI events: It is not the “start point” of each Event that is used to decide what the
new position should be, but the “Q-point”. Note that quantizing moves the whole
event; it does not affect the timing of the recording within the file (for ways of
quantizing the actual material in a recording file, see page 259 and the chapter
“Matching Audio and Tempo”). Quantizing the start of a long Audio Event might
therefore be pretty pointless. To make quantization affect positions within the recording, split it into several shorter Events before you perform the quantization.
There are two principal ways to do this:
• Use the Scissors tool to manually split the Audio Event in suitable places.
This may work fine if the Audio Event contains several phrases or sounds, and
you only want to quantize the beginning of these individual phrases/sounds.
• Create Match Points (see page 249) and select Snip at M-Points from the
Do pop-up menu.
This will split the Event at each Match Point. Use this method if you have audio material with short, well separated sounds, like a clean drum loop. You
may for example want to tighten up an inexactly played hi-hat pattern by
quantizing the beats to 16th notes.
● If you try the above methods with a less than satisfying result, check out page
259 and the chapter “Matching Audio and Tempo”) for information about
permanent quantization of the actual audio file.
There are three quantization methods that can be applied to audio:
- 256 -
Over Quantize (without processing)
This moves the Events in the selected Parts, so that their Q-points line up with the
selected Quantize value. See page 233.
Over Quantizing an Audio Part
with a Quantize value of 8.
Groove Quantize
This moves the Events so that the Q-points line up with the “timing map” in the selected Groove. For basic information about Groove Quantize, see the Getting
Started book.
Match Quantize
This allows you to:
• Apply the timing of a MIDI Part to an audio Part.
• Apply the timing of an audio Part to a MIDI Part.
• Apply the timing of an audio Part to another audio Part.
For basic information on Match Quantize of MIDI Parts, see the Getting Started
book. Working with Audio Parts is different in that it is all based on Match Points.
Proceed as follows:
Using an Audio Part to Quantize a MIDI Part
1. Create Match Points for the Events in the Audio Part, as described on
page 249.
Match Points in the Audio Editor.
- 257 -
2. In the Arrange Window, select the Match Quantize tool.
3. Drag the Audio Part and release it on top of the MIDI Part.
A dialog appears, asking if you want to include the accents (Match Points velocity values). The options are the same as when you Match Quantize with
MIDI Parts (see the main Cubase manual).
4. Select one of the options in the dialog box.
The Events in the MIDI Part are quantized to the positions of the Match Points
in the Audio Events.
Using a MIDI Part to Quantize an Audio Part
1. Create Match Points for the Events in the Audio Part, as described on
page 249.
2. For each Event in the Part, pull down the Do pop-up menu and select
Snip at M-Points.
The Audio Events are split at the positions of the M-Points. This is important,
since the Quantize function cannot change the actual audio, only move the
start points of individual Audio Events!
3. In the Arrange Window, select the Match Quantize tool.
4. Drag the MIDI Part and release it on top of the Audio Part.
A dialog box appears with the text “Dynamic Time Compression?”. If you
click “Yes” the Audio file will be quantized permanently as described on
page 442, using the MIDI Part as rhythmical reference.
5. If you do not want to permently process the file, click “No”.
The start points of the Events in the Audio Part will be quantized to the positions of the Events in the MIDI Part. Please note that if the gaps between the
Events are too big, the process may not give the desired musical result.
- 258 -
Using an Audio Part to Quantize another Audio Part
This is a combination of the two above procedures:
1. Create Match Points for the Events in both Audio Parts, as described on
page 249.
2. For each Event in the Part you want to Quantize, pull down the Do popup menu and select Snip at M-Points.
The Audio Events are split at the positions of the M-Points.
3. In the Arrange Window, select the Match Quantize tool.
4. Drag the “source” Audio Part and release it on top of the “destination”
Audio Part.
As in the previous example, a dialog box appears, asking if you want to quantize permanently. If you click “Yes” the Audio file will be quantized permanently as described on page 442.
5. If you do not want to permanently process the file, click “No”.
The start points of the Events in the “destination” Audio Part will be quantized
to the positions of the M-Points in the Audio Events in the other Part.
Undo Quantize
The Undo Quantize item on the Functions menu does not apply to Audio. However,
you can Undo the last Quantize operation, as with any other operation, by using
Undo on the Edit menu.
“True” Quantizing (by Time Stretching)
As described in the chapter “Matching Audio and Tempo” there are very advanced
ways of processing an audio file, to make it fit with other material. However, you
may also permantly quantize an audio file without leaving the Audio editor.
● Since this process permanently alters your audio files, you may want to make
a copy of the file before proceeding! See the Audio Pool chapter for instructions on how to duplicate files.
1. Select the Event to be quantized, and insert Match Points using the Get
M-Points function on the Do pop-up menu.
This creates Match Points on the musically “important” positions in the Audio
Event, as described on page 492 in this chapter. You may also add Match
Points manually using the Pencil tool.
2. Set the Quantize value as usual.
● If there are great differences between the spacing of the M-Points and the
Quantize value, this gives rise to very large Time Stretch factors. Since this
may cause undesired results, try to use a Quantize value that matches the
spacing of the M-Points fairly well.
- 259 -
3. With the Event selected, pull down the Do pop-up menu and select
“Quantize at M-Points”.
This instructs the program to move each M-Point in the Audio Event to the
closest Quantize position, and timestretch the material in between.
The program works through the audio file, and each section of the file is time processed to fit between the corresponding Match Points. Depending on the length of
the audio file, the processing may take a while, during which a progress box is
shown.
4. When this is done, your Audio Event will play a new segment, quantized
according to the set value.
More advanced Quantizing methods
For even more advanced Quantizing options, see the chapter Matching Audio and
Tempo.
- 260 -
Deleting Events
Audio Events are deleted just as Parts in the Arrange window or Events in a MIDI
Editor.
● Deleting an Event does not delete its Segment from the Audio Pool.
Using the Eraser to Delete Events
Clicking on an Event with the Eraser tool will delete it.
Using Keep to Delete Events
To delete all Events but the ones selected, proceed as follows:
1. Select the Events you want to keep.
As in the MIDI editors, the To pop-up menu determines which Events will be
affected. If you want to be sure only those Events will be kept, that you have
selected, the To pop-up menu should show “All”.
2. Select “Keep” from the pop-up Do menu.
All Events are deleted, except those indicated by the To pop-up menu and
your selection.
Using the Menu or Keyboard to Delete Events
1. Select the Events.
2. Press [Delete] or [Backspace] or select Delete Events on the Edit menu.
Permanently deleting an Audio File
To delete an Event and its audio file from disk, hold down [Control] and press
[Backspace].
● This operation will permanently delete the referenced audio file from your
hard disk, and can not be undone.
- 261 -
Working with Grouped Events
If two Events are grouped, a number of operations that you carry out on one of
them are applied equally to all. Examples of such operations are moving, duplicating, adjusting Insets etc.
Grouping Events
1. Select the Events that should make up the Group.
2. Select “Group” from the Audio editor’s Do pop-up menu.
Ungrouping
1. Select the grouped Event.
2. Select “Ungroup” from the Audio editor Do pop-up menu.
● To ensure the timing relationship is kept unaffected by editing, try to keep recordings that were made together grouped. If you have to Ungroup, make absolutely sure you don’t edit one of the channels separately or you’ll disturb
the timing/phase relationship.
Operations on Grouped Events
Some operations are done a little bit differently on Grouped Events than on regular
ones. Below follows a list.
About Snap to Zero
Snap to Zero (see page 234) is not applied to Groups.
Selecting, Moving, Cutting and Pasting, etc.
• When you click on one Grouped Event, all Events in the Group get selected.
• To select one of the Events in a Group, use the cursor keys instead of the
mouse.
The only reason to do this is to be able to edit on the Info Line, see below.
•
•
•
•
•
•
•
The following operations affect the entire group, as if it was one Event:
Moving (using the arrow pointer or the kicker)
Duplicating
Quantizing
Cut, Copy and Paste
Deleting
Muting with the Mute Tool.
- 262 -
• If you move, duplicate or Quantize, the Q-point of the top (or first) Event
is used for determining where the Event should wind up.
Changing Q-Points and Start and End Insets
• If the grouped Events start at the same position, the Start Inset and QPoints will be set identically for all Events in the Group, when you adjust
it for one of them.
• Likewise, if the Events end at the same position, the End Inset is adjusted
simultaneously for all.
• If the Events don’t start at the same position, Start Inset, End Inset and Qpoint are set individually for each Event in the Group.
Splitting
If you split a Group with the Scissors tool or the Snip Loop item on the Do pop-up
menu, the Group will be split into new Groups.
Editing on the Info Line
• To use the Info Line, only one Event must be selected.
This means you have to select the Event with the cursor keys, since clicking
selects the entire Group.
Using Export Segments
• Export Segments only work on one Event at a time.
To use this function on multi-channel material, first ungroup, then apply the
Function and finally Group again.
Groups and Channel Settings
To make Grouped Events in a multi channel recording play back on separate channels, you must have the Track set to channel “Any”. If not, only one of the Events
will play. See page 12.
- 263 -
Muting Events
The Mute Tool
Using the Mute Tool
Using the Mute tool in the Toolbox you can mute an Event. This silences it until
you unmute it again.
A Muted Event
Erase Muted
This function, found on the Do pop-up menu permanently deletes all the Events
that are currently muted. This is a quick way of “cleaning up” a Part after editing.
● Deleting Muted Events does not delete Segments. Neither does it erase any
files from your hard disk.
- 264 -
Splitting Events
Using the Scissors Tool
To split one Event up into more, proceed as follows:
1. Decide if you want the split to happen on a zero crossing or not by
checking or unchecking “Snap to Zero” on the Audio menu.
See page 234 for details.
2. Set the Snap value as desired.
As always, this determines the “smallest” note value where you can apply the
split.
3. Select the Scissors from the Toolbox.
4. Click on the Event.
The Event is split into two.
Deleting while splitting
To automatically delete the left or right resulting Event, hold down [Alt] or [Control] respectively when you split the original Segment.
Using Snip Loop
This command, on the Do pop-up menu, splits all Events at the positions of the Left
and Right Loop position. If you want to split several Events in one place only, set
the Loop End point to the same position as the Loop Start.
The Loop positions indicate where the Event(s) will be split.
The Event(s) will be split into three (or two if the Left and Right
Loop positions are the same).
- 265 -
Creating Crossfades, Fade Ins and Fade Outs
The Crossfade function allows you to create a smooth fade between two sections of
audio. It also allows you to add a fade-in or out to only one Event. It does so by creating one or more new files which contain a new portion of audio – the actual
(cross)fade.
Events which play these crossfade files are then inserted into the Audio editor at the
correct position. The Segment settings of the Events are changed, but the original
files are not affected by the operation.
Which Events can be faded?
The fades are created by “unveiling” sections in the audio file which are currently
not played. This means that:
• It is not possible to create a fade from the end of one file, because there
is no audio to fade after the end of the file.
The file ends here. You cannot fade out after this point.
• It is not possible to create a fade to the beginning of a file, because there
is no audio before the beginning of the file.
The file starts here. You cannot fade in before this point.
To check if there is any audio to fade to/from at the beginning/end of a file, check
the Inset handles, as described in the main documentation.
- 266 -
Creating a Crossfade
The two Events you crossfade between must play on the same audio channel(s).
They should probably either be positioned edge to edge or overlap.
● It is possible to crossfade between Events with a gap between them, but it
might not create the desired result. If the program can’t make anything sensible out of the selection of Events you have made, it will tell you so.
1. Select the Crossfade tool from the toolbox.
2. Position the pointer in the Event you want to fade from, at approximately
the position where you want the crossfade to start.
3. Click and keep the mouse button pressed while you drag to the right.
A dotted outline appears, indicating the crossfade area.
4. Release the mouse button in the Event you want to fade to, at approximately the position where you want the crossfade to end.
The following dialog box appears.
The Crossfade dialog. The display shows how the two Events will be “mixed”. The two pairs
of arrows above the display indicate the start and end points for the fade “zones” in the two
Events.
5. Drag the lower set of arrows to set the start and end points for the fade
of the first Event.
If you want the fade to start earlier than you indicated when dragging with the
Crossfade tool, you can numerically change the value in the XFade Start Pos
value box. You cannot go past the start/end points of the entire Event.
- 267 -
6. Drag the upper set of arrows to set the start and end points for the fade
of the second file.
If you want the fade to end later than you indicated when dragging with the
Crossfade tool, you can numerically change the value in the XFade End Pos
value box. You will not be able to go past the start/end points of the entire
Event.
7. Use the mouse to draw the shape of the fade in and fade out curves.
Drawing in the overlapping area only affects the start segment (the fade out).
If you want to change the overlapping part of the fade curve for the end segment (the fade in), start dragging to the right of the overlap and keep dragging
to the left.
8. As an alternative to drawing, you can use the buttons on each side of the
curve display to select “preset” linear or logarithmic curve types for the
fade in/fade out curves.
The logarithmic curves will create the most natural fade.
9. Click Calculate.
A preview of the crossfade gets created, which you can see in the box below
the curve display.
● Is is quite possible to introduce clipping (levels higher than the system can
handle) with inappropriate fade curves. If this happens, the program will tell
you the number of Clips detected. Adjust the curves and Calculate again!
10.Check the fade using the Play button.
11.When you have a fade you are happy with, click the OK button.
A new Event appears on top of the two you were fading between. This Event
plays a new file which contains the actual crossfade.
The created crossfade file(s) are placed in a folder on your recording hard disk,
named “Songname_Xfades” (where “Songname” is the name of the current Song).
12.To ensure the three Events retain their timing relationship even after editing, they are automatically Grouped.
- 268 -
Creating Fade Ins and Outs
A method very similar to the one above can be used to create a fade-in or out from
only one file:
1. Select the Crossfade tool.
2. Position the pointer in the Event you want to fade, at approximately the
position where you want the fade-in/out to start.
You cannot start or end a fade outside of the start/end-points of the actual
Event.
3. Click and keep the mouse button pressed while you drag to the right.
A dotted line appears, indicating the fade area.
4. Release the mouse button at approximately the position where you want
the fade-in/out to end.
5. Set the length and shape of the fade-in/out in the Crossfade dialog box
that appears.
See the Creating Crossfade description on the previous pages.
6. Click the OK button.
A new Event appears on top of (and grouped with) the one you had. This
Event plays a new file which contains the actual fade.
Crossfading by Overlapping Segments
● This operation can be performed on multiple, Grouped Segments, such as
split stereo files, provided they share the same start/end points.
It is also possible to automatically create a crossfade by overlapping two segments.
Proceed as follows:
1. Select the Crossfade tool.
2. Press [Control] and drag one of the Segments so that they overlap.
3. Release the mouse button.
The Crossfade dialog appears, with the Crossfade range determined by the
amount of overlap between the segments.
- 269 -
Using Cycled Recording for assembling a “perfect” take
When you record several laps in a Cycle, only one Audio file is created. However,
this is split up into a number of Segments (one for each lap) which are “stacked” in
the Audio Editor. Since the Segments are all on the same Track, this normally
means that only one of them will play back (the top one). However, you can use this
feature to assemble a “perfect” take from all the different Segments.
Let’s say you have a chorus and you want to record a few different takes of vocals
for it, to later assemble snippets from each take into one “perfect” recording.
Proceed as follows:
1. Set up the Left and Right Locator to encompass the section you want to
record.
2. Activate Cycle on the Transport Bar.
3. Activate Recording from “Stop Mode”.
4. Record for as many laps as you desire.
5. Stop recording.
6. Open the Track in the Audio Editor.
3 takes (cycle laps).
You will now have all the takes stacked above each other. Since the Track plays
back on one channel only you will only hear one of them at a time. But, you can
consecutively mute each one to find which pieces you want to keep from each.
- 270 -
7. Use the Masking, Splitting, Muting and Delete functions to assemble one
single take out of all the ones you originally had.
The same recording, after having split the Audio Events at appropriate places and deleted the
unused sections.
• To view the reassembled recording as it is played back, pull down the
View pop-up menu and select By Output.
This will show all Events on the same lane.
- 271 -
Fitting Audio Events to the Loop
You may have an audio file with an inherent tempo that doesn’t fit the current Arrangement. Cubase VST then allows you to adapt either the audio file to the Arrangement (by applying time correction) or the Arrangement to the audio file (by
adjusting the tempo). Proceed as follows:
1. Import the file into the Arrangement.
2. Open the Audio Editor and adjust the Start and End Insets of the Event so
that it exactly fits some specified “musical” length, for example an even
number of bars.
One good way of doing this is to use the Loop playback feature in the Wave
editor. What you are trying to achieve here is that the audio file, when played
in isolation, is of exactly the correct length. However, it will not fit in with the
metronome or other events in the Arrangement.
3. Move the event so that it starts at some sensible musical position, for example the downbeat of a bar.
4. Set up a loop of the same “musical” length as the event.
Since the two are currently not playing in the same tempo, the “graphical”
length of the loop will not be the same as that of the event.
Here, the loop is set to a
length of one bar.
This drum loop is also
one bar long, but doesn’t
fit the current tempo.
The event and Loop set up correctly.
5. Select the audio event, and only that event.
6. Select “Fit Event To Loop Range” from the Do pop-up menu.
You are presented with a dialog that allows to choose between two options:
• Tempo: This will adjust the tempo of the Arrangement so that it fits the event.
If you have the Master Track activated, a tempo change is added at the Loop
start.
• Audio: This will time correct the part of the audio file that the event plays, so
that it fits the current tempo. For more info on time correction, see page 281.
- 272 -
7. Click either, depending on your preference.
The event now fits the Arrangement.
The same event, after applying time correction.
- 273 -
Changing the Volume and Panning of an Event
About this Section - What Volume/Pan am I changing?
In this section we deal with the “mechanics” of adding the Volume/Pan changes.
You will learn how to change the volume and panning of individual Events and how
to create dynamic changes of the same parameters.The relation between the volume
you put in for an Event, the volume control in the Mixer window and the volume
control in the Monitor window is described in detail on page 322.
Displaying the Volume/Pan Curve
For the Events to display any Dynamic data, the Dynamic Events item on the View
pop-up menu must be ticked. To select whether volume or pan should be shown in
the Events, pull down the pop-up menu immediately right of the Edit Solo button
and select the corresponding option.
The third option, M-Points, is described on page 249.
Event/Segment relation for Volume/Pan Curves
Even though we are talking about volume and pan for Events here, in fact the dynamic data affects the segment that the Event plays. This means that if you have
Ghost Events (that play the same segment), any changes you do to the volume/pan
curve for one of the Events, will be reflected in the others.
Changing the overall Volume/Pan for an Event
Please note that the Volume and Pan curves differ a bit when it comes to default values:
• If you haven’t yet edited the Volume curve for an Event, it consists of one
single straight line.
That is, the volume is constant for the entire length of the Event. The default
value is 0.0 dB.
• For Pan, there is no default value!
This means, that if you haven’t yet edited the Pan curve for an Event, there is
no curve shown at all. Instead the Panning set for the channel in the Monitor
window is used. As soon as you insert a Pan value in the Dynamic Events display, a Pan curve is created.
- 274 -
To change the volume/panning, proceed as follows:
1. Select the Pencil from the Toolbox.
2. If you want to make fine adjustments, press and hold [Shift].
3. Click on a Volume/Pan handle (the small breakpoint squares) and drag
up/down.
A value label appears, indicating the Volume (in dB) or Pan position (again, if
you haven’t yet edited the Pan curve for the Event, you have to create a new
Pan curve first - see below).
● The volume curve ranges from 0.0 dB down to –infinity. If you need to go
above unity gain (amplify the sound), use the Monitor mixer faders (which
can be automated using the Write function; see page 324).
Creating Volume/Pan Curves
Adding new points to the curve
Adding points (“breakpoints”) to the curve is done in a way similar to editing controller data in the editor:
1. Set the Snap value as desired.
2. Select the Pencil.
3. Hold down [Alt] (and [Shift] if desired, see previous page).
4. Click somewhere in the “curve area” or press the mouse button and drag
up down to find the right point.
Editing points
• If you want to move or change the vertical position of an existing “breakpoint”, click on it with the Pencil and drag it up/down or sideways.
The Snap value applies for which positions you can move the value to.
• If you want to make sure the breakpoint isn’t moved left/right, hold
down [Shift]. As described above, this also makes the value change in
smaller steps.
- 275 -
Applying the same Curve to all Grouped Events
If you have a number of Grouped events, you might want to give them all the same
curve:
1. Select the Pencil from the Toolbox.
2. Hold down [Control].
You might also want to hold down [Alt] (to create new breakpoints) and/or
[Shift] (to restrict movement to vertical), as described above.
3. Edit a breakpoint or input a new to one of the Events.
The entire curve is now copied to all the Events in the Group.
Deleting Volume Pan/Points
• To delete a “breakpoint”, click on it with the Eraser tool.
- 276 -
Making an Event Play another Segment
You can set which Segment an Event plays. Use this to make an already positioned
Event play back another sound.
Please note that you are restricted to selecting segments from within the same file
as the Event now plays.
With any type of Event
To make any one Event play another segment, proceed as follows:
1. Hold down [Control] and [Alt] and click on an Event.
A pop-up menu shows a list of all the available Segments in the audio file,
with the one now used by the Event highlighted.
2. Select any Segment from the list.
If the Segment you select is already played by an Event, the Event you are
working with will become a Ghost Event (shown with a dotted outline).
With Ghost Events
To make all Ghost Events that play the same segment play another segment instead,
proceed as follows:
1. Hold down [Control], [Shift] and [Alt] and click on an Event.
2. Select any Segment from the list.
Exporting Events into Files
Export Segment, on the Do pop-up menu, allows you to save the Segment that an
Event plays, as a separate audio file.
1. Select the Event.
2. Select Export Segment.
3. In the file dialog that appears, specify a name and position for the file.
- 277 -
21
Processing Audio Files
- 278 -
22
Introduction
A number of processing functions specifically for audio are included in the program. These can be applied in a number of ways:
• On one or more selected Parts in the Arrange window.
This will process all files in the Part(s) by equal amounts.
• On one or more selected Events in the Audio Editor
This will process those segments of the audio files that the Events play back.
• On one or more files or segments in the Pool
• A selection, segment or file in the Wave editor.
● Note that the audio processing makes permanent alterations to the audio
file(s)! If required, make copies of the files before applying a processing function! If you process a segment or Event, be aware that all segments playing
this section of the file will be affected by the processing.
You should also remember that a segment or an Event is most often only a
smaller section of a complete audio file. If you perform audio processing to
this section, you may not be able to use the audio file in other Songs, etc.
Again, be sure to make copies of your audio files before processing them.
Applying the Processing
1. Select the audio you want to process.
2. Select the relevant Function from the Audio menu.
- 279 -
The Functions
Reverse
This turns a recording backwards, just as when you turn a tape on a reel-to-reel recorder backwards.
Silence
This replaces the audio with absolute silence.
Fade In
This creates a linear fade in.
Fade Out
This creates a linear fade out.
Quieten
This lowers the amplitude of the recording to about half the level.
Invert (Phase)
This can be used with for example a stereo recording where one channel has accidentally been recorded out of phase with the other. You could say it turns the waveform “upside down”.
Normalize
This lets you increase the level of a recording that was made at too low a level:
1. When you select this, the program first scans the file to find the maximum amplitude.
2. Then a dialog appears, allowing you to set the resulting level.
The program will compare the current maximum amplitude with the level
you have set, and raise the level of the entire recording until the maximum
amplitude matches your set level. The highest level you can set is 0 dB.
● Note that the settings you make are used for all audio you have selected for
processing!
- 280 -
In this example, the loudest signal in the resulting file will have a level 3 dB below maximum.
3. When you click OK, the file gets processed.
● Please note that the level of any background noise is raised just as much as
the rest of the signal. If you have the option to re-record the file with correct
level settings, this is in many cases a better option than using Normalize.
Pitch Shift/Time Correction
This menu item opens a dialog that lets you change the pitch of a recording without
affecting the length, or change the length without affecting the pitch. You can even
do both at the same time!
1. Select Pitchshift/Timecorrection.
The Pitch Shift/Time Correction dialog.
2. If you want Pitch Shift, specify the amount by adjusting the semi tones:
cents (hundreds of a semitone) values.
The maximum change is +/– one octave (12 semitones).
3. If you don’t want Pitch Shift, make sure this value is set to “+0:00”.
- 281 -
4. If you are pitch shifting vocal material, or other recordings with prominent resonant character, activate Formant Mode.
5. If you want Time Correction, you can either specify a new audio file
length (in SMPTE format; hours:minutes:seconds:frames) or define a new
tempo:
• The program displays the current file length in the “Source File” SMPTE field,
as a guideline. If you know what you want the new length of the file to be, enter this value in the “Destination File” SMPTE Field.
• If you know the “current” tempo of the music in the file and want the program
to adapt the file to a “new” tempo, enter these two values in the Source File
BPM and Destination File BPM fields, respectively.
To get “exactly” the new tempo you desire, you must know the exact tempo
of the original file.
● Note that the settings you make are used for all audio you have selected for
processing!
6. Click OK.
About Audio Quality
In order to get the best possible audio quality when you pitch shift or time correct
an audio file, please follow these rules:
• The smaller the change, the better the resulting sound quality.
• The amount of change that can be applied varies drastically with the complexity of the audio material.
For example, pitch shifting a complete stereo mix one octave up or making it
twice as long will most certainly make it sound unnatural.
• If you have the possibility to process individual files rather than a mix, this is
preferred.
- 282 -
22
The Wave editor
- 283 -
23
What is the Wave Editor?
The Wave editor allows you to perform edits on your audio files. This includes Cutting and Pasting real audio data and applying DSP (Digital Signal Processing)
functions. In other words, it provides more direct control over the audio files than
the Audio editor does.
The Wave editor also provides additional tools for creating and modifying segments.
Precautions
In contrast to the Audio editor, the Wave editor makes permanent changes to your
audio files, (sometimes called “destructive editing”). When you for example Paste
in the Wave editor, this alters the file on disk directly, rather than just adding new
segments or Events.
You can of course Undo the last action in the Wave editor. However, you might
want to experiment with different editing operations in the Wave editor, and later
decide to go back to the original file. If you do, use the Duplicate File item on the
File pop-up menu in the Pool to duplicate your audio files before editing them in
the Wave editor.
About the Wave Editor Preference setting
In Cubase VST you have the choice of working with the internal Wave Editor (as
described in this chapter) or any external audio editing software (as described in the
chapter “Using an External Wave Editor”). This choice is made in the Preferences
dialog on the Audio menu:
1. Pull down the Audio menu and select “Preferences...”.
The Audio Preferences dialog opens.
2. Make sure the checkbox “Use internal Wave Editor” is activated.
This lets you open the internal Wave Editor in the ways described below.
“Use internal Wave
Editor” activated.
3. Click Exit to close the dialog.
- 284 -
Opening Wave Editor Windows
From the Audio editor
To open the Wave editor, displaying the segment and file played by an Event in the
Audio editor, proceed as follows:
• Double click on the Event in the Audio editor.
The Wave editor opens, displaying the file, with the relevant segment indicated in black and the rest of the waveform in grey.
From the Pool
To open the Wave editor displaying a certain segment and its file, do one of the following:
• Double click on a segment in the Pool.
• Drag the segment from the Pool into an open Wave editor window.
This is described in detail on page 224.
From the Arrange Window
It is also possible to open the Wave Editor directly from the Arrange window:
1. Select the Audio Part containing the Audio Event you want to edit.
2. Pull down the Audio menu and select “Edit Audio”.
The Wave Editor opens, displaying the first segment in the selected Part.
Working with Multiple Editors
Using the techniques described above you can open as many Wave editor windows
as memory permits.
By switching between the different windows you can work on a number of different
files at the same time.
- 285 -
Making a Window Display another File
It is possible to make any of the open Wave editor windows display any of the files
in the Pool:
1. Pull down the pop-up File menu.
The Wave editor’s File menu holds a list of the files in the Pool.
2. Select the desired file.
Adjusting the View
Ruler
The rulers in the Wave editor are always in Real Time format (Hours:Minutes:Seconds:Milliseconds).
Thumbnail View
The thumbnail is a miniature view of the file. The big difference between the
thumbnail and the main waveform area is that the thumbnail always displays the
entire file. Use the thumbnail view to quickly navigate around in the file.
The frame in the thumbnail shows what portion of the whole file is shown in the
waveform display above.
The part of the file inside this rectangle is shown in the display above.
The inverted
section of the file
is selected for
editing.
The active segment is shown in black, while the rest of the file is greyed out.
- 286 -
Segment Display
In the waveform area, the currently selected segment is indicated in black with Inset arrows (see the Audio editor). We call this the active segment. All audio data
outside the active segment is displayed in grey.
You can make any of the segments in the file active, see page 291.
The active segment is displayed in black, while the rest of the file is grey.
Scrolling
Using the Scroll Bars
As in all editors, you can use the scroll bars to move through the displayed data.
Scrolling to the segment Start and End
• To move to the beginning/end of the selected segment, click the Go To
Segment Start/End buttons on the Status Bar.
The Song position is then also moved to this position.
The Go To Segment Start/End buttons.
- 287 -
Using the Thumbnail
• By dragging the black rectangle in the Thumbnail, you can scroll to any
position.
Dragging in the Thumbnail.
Setting Magnification
There are two ways to set the Magnification:
• Use the slider at the end of the scroll bar.
• Hold down the [Control] key and drag inside the Thumbnail view.
When you release the mouse button, the selected part of the waveform will
be shown in the waveform display.
[Control]]-dragging in the Thumbnail view
will select a part of the file for display.
- 288 -
Playing Back
The Play and Loop buttons.
From any Position
1. Firstly, make sure no audio is selected, by clicking somewhere in the
waveform display.
If some audio is selected, only this will play, see below.
2. If necessary, click in the ruler to set a new Song Position to play back
from.
3. Press the Play button.
Playback continues as long as you hold the mouse button down, or until the
end of the file.
Playing a certain section
1. Select the audio you want to play, for example by dragging over it.
For more on selecting, see page 290.
2. Press the Play button.
Playback continues as long as you hold the mouse button down, or until the
end of the selection.
Looping
If the Loop button is activated, audio will loop continuously as long as you press
the Play button.
• If no audio is selected, and you start playback from outside the segment,
the entire file will loop.
• If no audio is selected, and you start playback from within the segment,
only the segment will loop.
• If some audio is selected, this will loop.
Scrubbing and Auditioning
• The Wave editor has Auditioning and Scrubbing tools that work just as in
the Audio editor, see page 242.
The Wave editor’s Audition and Scrub Tools.
- 289 -
Selecting
A number of operations can be performed on the selected portion of the audio file.
Making a selection in the Wave editor is very similar to selecting in other windows.
The selected part of the waveform is displayed in inverse video.
Using the Mouse
To select from one point to another, proceed as follows:
• Click, hold down [Shift] and click again, or...
• Drag to create a selection rectangle.
The area between the two points will be selected.
Selecting all Audio in the Active segment
• If you use Select All on the Edit menu ([Control]-[A]), all audio in the active segment will be selected.
Selecting all audio in the File
• If the active segment is already selected, using Select All will select the
entire file. In other words, to select the entire file, press [[Control]-[A]
twice.
Adjusting the Selection’s Start and End Points numerically
In the upper right part of the Wave Editor window there are value boxes for the start
and end positions of the selection (in samples). These can be adjusted using regular
value editing.
- 290 -
Working with segments
Making a segment Active
As described on page 287, one of the segments in the file is indicated in a special
way. This is called the active segment. You can display any of the file’s segments in
this way:
1. Pull down the Segment pop-up menu.
The Wave editor’s segment menu holds a list of the File’s segments.
2. Select the desired segment.
Adjusting the Active segment’s Start and End points
Sample-accurate Editing
Adjusting segment start and end points in the Wave editor has advantages:
• When you adjust segment points in the Audio editor, the points always snap
to ticks (1/384 of a quarter note).
• In the Pool, you can adjust segments down to an accuracy of one single sample, but you have no graphical feedback.
• In the Wave editor you can adjust segments graphically and with single sample resolution.
Adjusting the Start and End Points by Dragging
By dragging the Inset handles, you can adjust the start and end points for the segment, just as in the Audio editor (see page 244), but with single sample resolution.
If you need to, you may zoom in closely on the waveform for more precision.
Converting the Selection into a new segment
1. Create and adjust the selection as described on page 290.
2. Verify that the selection is as intended, by playing back.
Playing back in a loop is a great way of finding points that make musical
sense.
3. Pull down the segment pop-up menu and select “Selection To Segment”.
The new segment will get the name of its audio file, but with an index number
at the end of the name. If the file is named “Guitar” and there already are segments named “Guitar1”, “Guitar2” and “Guitar3”, the new segment will be
named “Guitar4”.
- 291 -
Moving the segment within the file
You can also adjust the segment’s start and end points simultaneously, that is, essentially “move” the segment within the file.
1. Select the Hand tool from the Toolbox.
2. Position the pointer somewhere within the segment, press the mouse
button and drag left/right.
Moving the segment with the Hand tool.
Turning the Selection into a File
If you want to make the selection into a totally separate file, proceed as follows:
1. Make and adjust the selection as described for segments above.
2. Select “Selection To File” from the Wave editor’s pop-up File menu.
3. In the file dialog that appears, name and position the new file.
- 292 -
Cutting and Pasting Audio
Caution!
● Cut and Paste in the Wave editor performs permanent changes to your audio
files. If you need to make sure you don’t inadvertently change your recordings, use the Duplicate File function in the Pool to make a copy of the file
first.
Performing the Cut/Copy and Paste
For basic information on how to Copy and Paste, see the Getting Started book. The
description below outlines the details specific to the Wave editor.
1. Select the Audio you want to Cut or Copy.
2. Select Cut or Copy from the Edit menu.
3. Set the Song Position where you want the Pasted block of audio to be inserted.
● The material you Paste always replaces existing material. This means it overwrites whatever audio was there before the Paste.
4. Select Paste.
Applying Processing Functions
On the Do pop-up menu you will find a number of processing functions that can be
applied to the selection in the Wave editor. These are described in detail in the chapter “Processing Audio Files”.
- 293 -
23
Using an External Wave Editor
- 294 -
24
Why use an external Wave Editor?
Cubase VST has a built in Wave Editor. However, you might have a more advanced
editor (such as Steinberg WaveLab) that you would prefer to use instead. This chapter describes how you can make Cubase VST launch another program instead of the
built in Wave Editor when you edit a wave file or segment.
Precautions
• Many Wave Editors allow you to Undo your last action. However, it may
be safest to use the Duplicate File item on the File pop-up menu in the
Pool to make a backup of your audio file before editing it in an external
Wave editor.
• The program you use must be able to launch and open a “.WAV”-file for
editing, by receiving a DOS command line with the path and name of the
file as argument.
If you are uncertain whether your programs meet this criterium or not, follow
the instructions below and try it.
• If your external Wave Editor uses the same audio hardware as Cubase
VST to play back audio, you need to deactivate “Play Audio in Background” in the Preference dialog (on the File menu) before launching the
external Wave Editor.
Otherwise, the Wave Editor will not be able to play back the edited audio.
- 295 -
Setting which Wave Editor to use
To select which program to use for Wave editor, proceed like this:
1. Pull down the Audio menu and select “Preferences...”.
A dialog opens.
2. Make sure “Use internal Wave Editor” is unchecked.
3. Click on the Browse button.
A regular file dialog opens. Find and select the Wave editor file you want to
use, and click OK.
The path and name of the selected Wave editor file is displayed in the dialog, together with its program icon.
4. If you are using WaveLab Lite or WaveLab, and want to make use of the
segment start and end insets when editing the audio file, activate “Segment Range Selection”.
See below.
5. Click Exit.
- 296 -
Editing in the selected Wave Editor
Once you have selected a Wave editor using the procedure described on the previous pages, you can access it from inside the Pool or the Audio Editor.
● Remember that any processing you perform on this audio file will be reflected
in all its segments throughout the Song. If you don’t want this, use the Duplicate File command in the Pool to create a copy of the audio file to edit instead.
Opening the Wave Editor from the Audio Editor
1. Open the Audio Editor.
2. In the Audio Editor, double click on the Audio Event whose file you want
to edit, or select “Edit Audio” from the Audio menu.
This automatically opens the file in the set Wave editor.
● If you are using WaveLab Lite or WaveLab, and you have activated the option
“Segment Range Selection” in the Audio Preferences dialog, the segment
range in the audio file will be selected when you open it in the editor. Furthermore, if you are using WaveLab (the full-featured version), Markers will be inserted in the audio file, at the start and end inset positions.
3. Perform whatever processing you want.
This may include shortening or lengthening the file, applying DSP effects, etc.
See the documentation for the Wave editor in question for more details.
4. Save the audio file (you may want to save it under another name, see below) and close it.
Nothing stops you from keeping the Wave editor running, just remember to
close the audio file.
5. Return to Cubase VST.
If you have applied any processing to the audio file, an alert box will appear,
telling you that the file contents have been changed, and the Pool and Arrange windows will be updated to reflect the changes.
• If you have shortened the audio file in the Wave editor, the length of its
segments in Cubase VST will automatically be adjusted if needed (since a
segment cannot be longer than its audio file).
• If you have lengthened the audio file, the length and start point of its segments will not be affected.
- 297 -
Opening the Wave Editor from the Pool
1. Select the segment or audio file you want to edit.
2. Pull down the Audio menu and select “Edit Audio”.
The set Wave Editor opens.
3. Perform the editing and return to Cubase VST as described above.
● If you use the “Save As...” command in the external Wave Editor to save the
edited audio file under another name, you can switch between the original
and the edited file without having to adjust or make new segments, by using
the “Re-find” function in the Pool (see page 215). Note that this only works if
you performed editing to the audio file that didn’t change its length (e.g. dynamic or spectral editing).
Opening the “secondary” Wave Editor
Even if you have selected an external audio editing software as your primary Wave
Editor (by deactivating the “Use internal Wave Editor” checkbox in the Audio Preferences dialog), you can open the internal Wave Editor at any time, by holding
down [Control] and double clicking on an audio segment in the Audio Editor. Likewise, if you have activated “Use internal Wave Editor”, [Control] + double clicking
a segment will open the external Wave Editor. In other words:
● To open the “secondary” Wave Editor (the one that is not selected in the Audio Preferences dialog), press [Control] and double click on a segment in the
Audio Editor.
- 298 -
24
Mixing and using Effects
- 299 -
25
Introduction
This chapter describes the general procedures of handling levels, pan, EQ and effects to create a final, fully automated (if you like), stereo mix.
What this chapter doesn’t contain, is detailed descriptions of how to handle each
part of Cubase VST that is involved in the Mixing process. For details, see the
chapters describing the respective windows.
Also, the signal routing system and buses are described separately in the chapter
“The Input/Output Bus System”.
- 300 -
Volume
On mixdown as well as during recording, the output level of each audio channel is
controlled in two ways: with the faders in the Monitor Mixer and with the Dynamic
Volume Events in the Audio Editor.
Monitor Mixer
In the Monitor Mixer, each audio channel has a fader for volume control. You can
also use the Mute and Solo buttons to silence one or several audio channels. The
faders in the Master window determine the final output level of the stereo mix.
• The fader settings are displayed numerically below the faders.
The Monitor Mixer allows you to boost weak signals by +6 dB, if you like. Just
be sure to avoid signal levels above 0 dB (clipping).
• If you hold down [Control] and click on a Monitor fader, it will automatically be set to position 0.0 dB.
• Faders for stereo pairs (both for regular audio channels and buses) normally move together (move one and the other follows), but if you hold
down [Alt] you can change either independently.
For mono faders, the inverse is true. Hold down [Alt] while moving a fader, to
simultaneously control the next fader in an odd-even pair.
• To hear only the audio playback, click on the MIDI Mute button to the
left in the Monitor Mixer.
This mutes all MIDI playback, letting you concentrate on mixing the audio.
You can use the Monitor and Master faders to set up a volume balance between the
audio channels and perform a manual mix, by moving the faders and other controls
while playing back. By using the Write function (described on page 322), you can
automate the fader movements and other Monitor Mixer actions.
Dynamic Events
As described in the Audio Editor chapter, you can create a Volume curve for each
Audio Event, and thereby get automatic volume changes. The Volume values created by this curve are added to the volume fader values in the Monitor Mixer, so
you can combine the two ways of automating and controlling volume. The properties and differences of the two methods are discussed on page 322.
- 301 -
Panning
Just as with Volume, the pan (stereo position) of each audio channel can be controlled in two ways: with the Pan controls in the Monitor Mixer and with the Dynamic
Pan Events in the Audio Editor.
Monitor Mixer
The Pan controls in the Monitor mixer pans the sound between the left and right
side of the assigned stereo output bus (see page 201). If your mix contains stereo recordings, you will probably want to pan each stereo pair hard left/right.
• When you are changing Pan for a channel, the setting is shown numerically (L63–R63) in the level display below the fader.
To make the display show the fader setting again, click the fader handle.
• To select center Pan position, hold down [Control] and click on the Pan
control.
The Master and bus faders determine the levels of each “side” in the stereo output.
There are no Pan controls in the Master window. Just as with Volumes you can automate the Monitor panning using the Write function or the Dynamic Events (see
page 322).
Dynamic Events
You can use the Dynamic Events feature in the Audio Editor to create Pan curves
for single Audio Events.The Pan value set with the Dynamic Events overrides any
Pan setting for the channel in the Monitor mixer.
- 302 -
EQ
Cubase VST is equipped with a powerful equalizer. Depending on your computer,
you can have up to 4 bands of full parametric EQ per audio channel!
About the Hi Quality mode
For each audio channel you can select whether you want to use Hi Quality EQ or
not. When Hi Quality mode is selected, the EQ bands have a greater gain range
(±24 dB as opposed to ±12 dB), and generally improved audio quality. However, Hi
Quality mode will also consume more CPU power. To conserve processor power,
you could activate Hi Quality mode for some channels and deactivate it for others.
● Generally, we recommend that you use Hi Quality mode, except if you want
to play back Songs mixed in a previous version of Cubase VST (where the Hi
Quality mode wasn’t available).
About EQing stereo channels
To add EQ to a stereo channel pair or Group (see page 317), make the equalizer settings for the left side channel. Just as with the volume fader and other controls, the
settings are automatically duplicated for the right side channel and vice versa.
● To make independent EQ settings for one channel in a stereo pair, hold down [Alt].
Opening the EQ and making settings
At the top of each channel strip in the Monitor mixer there are two buttons, labelled
“FX” and “EQ”. The “EQ” button is used to activate equalizing for the channel, but
to be able to do that, you must first open the equalizer and make some settings:
1. Click the “FX” button for the channel you want to apply EQ to.
The EQ window opens. This contains a duplicate of the Monitor mixer channel strip, a section with effect sends (see page 307) and 1–4 EQ modules.
Here, two EQ modules
are visible and active.
- 303 -
2. Use the arrow buttons in the top right corner to set the number of visible
EQ modules.
This helps you avoid “screen cluttering” by hiding unused modules.
3. Click on the “Hi Quality” button to activate or deactivate Hi Quality
mode.
This setting affects all EQ modules for the channel.
4. Activate as many EQ modules as you need (up to four) by clicking on
their “Enable” buttons.
As soon as any of the EQs are activated, the “EQ” button indicator in the
channel strip is lit.
5. Set the parameters for the activated EQ module.
It is perhaps easiest to set up a playback cycle and experiment with the settings until you get the desired sound.
Each EQ module contains a fully parametric one band equalizer, with the following parameters:
Hi Limit
Determines the upper limit of the Frequency parameter. The highest
value for this is 16000 Hz.
Lo Limit
Determines the lower limit of the Frequency parameter (down to 20
Hz). Nothing stops you from setting Hi Limit to its highest value and
Lo Limit to its lowest, and thereby get a very wide range for the Frequency parameter. However, the narrower range you select, the finer
resolution for the Frequency parameter.
Presets
These are four preset pairs of values for the Hi and Lo Limit parameters, allowing you to quickly select a range for the Frequency parameter (Lo, Lo Mid, Hi Mid or Hi).
Gain
Governs the amount of boost or attenuation around the set frequency.
The value range is ± 12 dB.
Frequency
The center frequency for the equalization. Around this frequency, the
sound will be boosted or attenuated according to the Gain setting.
The range of the Frequency parameter is determined by the Hi and Lo
Limits.
Q
Determines the width of the frequency band around the center frequency to be affected. The narrower frequency band, the more drastic effect of the boost or attenuation.
Q Presets
These are four presets for the Q value, ranging from a wide frequency
band to a very narrow band.
● Please note that high Gain values may give rise to distortion. Compensate
with the channel volume faders.
- 304 -
● The maximum total number of EQ modules (for all channels together) is governed by your computer. If you activate more EQ modules than your system
can handle, you will note that the “Over” indicator in the Audio Performance
window lights red, and the audio playback stutters. Keep an eye on the Performance bar graphs and deactivate a number of EQ modules or Effects, until
the computer load seems normal.
6. Close the EQ window by clicking on its close box in the upper right corner.
In the Monitor window, the “EQ” button indicator for the audio channel will
now be lit, which means EQ is applied to that channel.
Activating Equalization from the Monitor Mixer or Inspector
When you have enabled the desired EQ modules and made settings, you can turn
equalizing on and off for the channel by pressing [Control] and clicking its “EQ”
button in the Monitor window or the Inspector.
- 305 -
Effects
About the difference between the three Effect types
In addition to the EQ, Cubase VST provide effects in three flavours:
• Send effects
Up to four send effects can be used. When you use send effects, audio is
routed through the effect processors via independent Effect Sends for each
channel in the Monitor, just like on a “real” physical mixer. The output from
each effect processor is then routed to one of the buses or the master faders,
where it can be mixed with the “dry” signal, if desired. These effects are thus
mono in-stereo out.
• Insert effects
An insert effect is inserted into the signal chain of an audio channel, which
means that the whole channel signal passes through the effect. This make inserts suitable for effects for which you don’t need to mix dry (direct) and wet
(processed) sound, e.g. distortion, filters or other effects that change the tonal
or dynamic characteristics of the sound.
You can have up to four different insert effects per channel.
• Master effects
Up to four stereo in-stereo out effect processors can be added to the signal on
the master bus, the final stereo mix. Please note that there is no mixing of the
dry/fx signals as there is with the send effects. Typical uses for master effects
would be compressor/limiter effects, noise suppression units, etc.
● Only effects with stereo inputs can be used as master effects, regardless
whether or not Mono is activated in the Master window.
The effect processors are entirely “virtual”, that is, they are all in software. A
number of effects are provided with the program and additional effects can be purchased from Steinberg and third party vendors.
- 306 -
Routing an Audio Channel through the Send Effects
1. Open the Monitor window.
2. Click on the EQ button for the audio channel you want to add effect to.
The EQ window opens, as described on the previous pages. The section between the channel fader and the EQ modules contains the effect sends.
Dry Button (affects all four sends)
Pre-fader Send switch
Send On/Off
Send level
Effect routing popup
3. To route an effect send to one of the eight effects, click below its send
knob and select an effect from the pop-up menu that appears.
Exactly what is available depends on how the Effects window has been set
up, as described later in this chapter. However, the first eight items correspond to the eight internal effects while the following items route the effect
sends to buses and Groups (see page 202 and page 317).
4. Make sure the “DRY” button is not pressed.
When this button is pressed, all eight effect sends are deactivated for the
channel. Click on it to turn the function on/off.
5. Click on the “On” button for the effect sends you want to activate and
turn the corresponding Send level knob to a moderate value.
Remember that the Effects rely heavily on the CPU power in your computer.
The more activated sends and effect units, the more computer power will be
used for effects.
6. If you want the signal to be sent to the effects before the faders, click on
the Pre button for the send.
With Pre-fader effect sends, the amount of effect for the channel is not affected by the volume fader. With Post-fader effect sends (PRE button not
pressed), the amount of effect is proportional to the channel volume, and will
change with the volume fader movements.
The next step is to select programs and set the parameters for the effect processors.
Since you will probably need to adjust the send levels while doing this, leave the
EQ window open.
- 307 -
Selecting Effects and making settings
You select effect types and programs in the Effects window:
1. Pull down the Audio menu and select Effects.
The Send Effects window opens. This window resembles an effect rack, with
eight separate “processors” arranged on top of each other.
There are three different effect processor “fronts”: Standard (slots nr 1, 3 and 4 from the top in
the picture above), Rack Xpander (slots 2 and 5 from the top ) and “No Effect” (the three slots
at the bottom). For details, see page 314.
2. Activate an effect processor by clicking on its “Power” button.
3. Use the Output pop-up menu to route the effect output to the desired
Output bus.
The location of this pop-up menu depends on the effect panel type; on standard VST effect panels the pop-up is located in the lower right corner; on Rack
Xpander panels, the pop-up is located just to the right of the effect value display. The “normal” setting for the Output pop-up menu is “Master” (see page
204).
- 308 -
4. Pull down the pop-up menu in the processor’s upper right corner and select an effect type.
Exactly which effect types are available depends on which Effect plug-ins are included with the program when you purchase it, and which DirectX plug-ins are installed on your computer (see page 334). There may also be additional Effect PlugIns separately available - contact your Steinberg dealer for more information.
5. Click on the Prog. button, to put the processor in Program mode.
6. Step between the effect programs, either by clicking on the left or right
part of the Prog. button or by rotating the value dial.
The number of program locations depends on selected effect type. It might be
a good idea to set up a cycle and have the audio channel play back while you
are making settings, to hear the effect of your selected effect programs.
7. Use the send level knob in the EQ window to control the amount of effect for the audio channel.
8. Use the Effects Master knob to the left on the processor panel to set the
amount of input level to the effect processor.
If you set this to a high value, it might cause clipping (distortion) in the effect
processor. If the output of an effect processor is clipped, an indicator will light
up (this feature is not necessarily supported by all Effect Plug-Ins).
Effects
Master knob
Clipping
indicator
9. If you want to, repeat steps 2 – 7 for the other effect processors.
● The effect settings can be automated, as described on page 324.
- 309 -
The three effect categories
On the Effect pop-up menus, the effects are organized in three categories:
Effect type
Description:
No Effect
If you select this, an “empty” panel will be displayed and no effect
will be used. Select No Effect for the effect processors you don’t
need! This will prevent them from using up memory and processor
power.
VST-Native
These are effect plug-ins in VST:s “own” format, and can only be
used with Steinberg programs such as Cubase VST and WaveLab.
VST-native effects can use the “Standard” effect panel front or the
Rack XPander panel (see the picture on page 308).
DirectX
DirectX is a Microsoft standard for handling multimedia under
Windows95 and Windows NT.
DirectX plug-ins (previously called ActiveMovie plug-ins) can be
used with many different programs and applications, including Cubase VST. They are installed under Windows95 rather than separately for Cubase VST, but you can select which plug-ins should be
available for selection in Cubase VST (see page 334). DirectX Plugins are listed at the bottom of the effect pop-up menus and use the
Rack XPander panel front.
- 310 -
About Cubase VST’s Implementation of Insert Effects
Inserts are serial
You can apply up to four effects per channel. The signal passes through the effects
in series from the top downwards.
Each Channel has its own Insert Effect Rack
Each channel has its own rack of four effects which are totally independent of the
other channels. This means that (in a system where additional effect plug-ins have
been added) Channel 1 can be routed through distortion, gating and compression,
whereas Channel 2 can be routed through tremolo, compression and a spectral enhancer, etc.
Insert effects require the same processing power as any other effect type. This
means that applying insert effects on many channels uses up far more processing
power than the send effects (four in total for the whole program). Remember that
you can use the Performance window to keep an eye on the CPU load.
Which Effect Plug-ins can I use for Insert Effects?
Most effect plug-ins will work fine as Insert Effects. In general, the only restrictions are with the number of Inputs and Outputs in the Effects:
• For a Plug-In to be usable as an Insert Effect, it has to have 1 or 2 inputs
and 1 or 2 outputs.
This may seem obvious, but it is also possible to have effect plug-ins either
with more than two inputs or outputs, or even no inputs or outputs at all.
These cannot be used as Insert effects.
The number of inputs and outputs can also determine whether you use the Insert effects on a single (mono) audio channel or on a stereo channel pair:
• For stereo audio channels, you need to use an effect with stereo inputs
(e.g. one of the master effects).
It is possible to use a mono-input effect with a stereo channel pair, but then
only the left channel in the pair will be processed, which is probably not what
you want.
• For mono audio channels, you can use mono- or stereo-input effects.
However, since the audio channel is in mono, the output of the effect will
also be in mono. For stereo output effects, the left channel will be used.
- 311 -
Routing an Audio Channel through Insert Effects
1. Open the Monitor window.
2. Locate the audio channel you want to add insert effects to, and click on
its Insert button.
● For stereo Tracks, there will only be one Insert button, for the left channel in
the audio channel pair. However, both channels in the pair are routed
through the Insert effect (provided it’s a stereo-input effect - see above).
The Insert Effects window opens. This looks much like the Send Effects window,
but has no Effects Master knobs or output bus pop-up menus.
3. Select and activate an Effect, and make settings for it just as with regular
Send Effects.
4. If required, use the parameters in the effect’s control panel to adjust input level and balance between dry and effect signal.
Since the entire signal passes through the effect, you will only hear the “wet”
signal on the output, unless you adjust the settings of the effect to make the
output include some of the “dry” sound as well.
● Not all Effect Plug-ins have dry/wet balance controls.
5. If you want to, repeat steps 2-3 for the other effect processors.
Avoid activating effect processors that you don’t use, since this draws some
extra processor power. To minimize the processor load, pull down the Effect
type pop-up for the unused processors, and select “No Effect”.
• To turn off an Insert Effect, click on its Power button.
- 312 -
Selecting and activating Master Effects
1. Pull down the Audio menu and select “Master Effects”.
The Master Effect rack appears. You could also click the Master FX button in
the Master window to open the Master Effects window.
2. Pull down the Effect type pop-up and select the plug-in.
● There may be two versions of the plug-in on the menu. If this is the case, you
should select the stereo version (the mono version is used as a Send Effect).
3. Activate “Power”.
The master mix signal is now routed through the plug-in.
4. Make settings for the effect.
If the effect uses the standard VST interface, you can use the Parameter buttons and the Value dial (see next page).
If the effect does not use the standard VST interface, you need to click the Edit
button to bring up a window with parameters for the effect.
5. Repeat steps 3 and 4 for all effects you want to insert.
6. If you open the Master window, you will find the name of the selected effect(s) in the Master Effect slots.
● To turn off a Master Effect, open the Master Effect window and select “No Effect” for the corresponding slot. Simply deactivating the Power switch will
still cause the effect to use up some memory.
- 313 -
Editing Effects
If any of the preprogrammed effects suits you as it is, that is great. But you can also
edit the effect parameters in each program. This is done differently for effects with
the Standard VST interface and effects with the Rack XPander interface:
Editing Standard Effects:
1. Click on the Para. button, to put the processor in Parameter mode.
In the display, up to three parameters are shown at a time. The parameter currently selected for editing has a border around it.
In this picture, the parameter Width is selected for editing.
2. If the parameter you want to edit is not visible in the display, click on the
left or right part of the Page button to go to another parameter page.
While you are in Page mode (the indicator in the Page button is lit), you can
also scroll between pages using the value dial. To return to Parameter mode,
click on the Para. button again.
3. To step between parameters, click on the left or right part of the Para.
button.
If you click on the right part of the button while the rightmost parameter in the
display is selected for editing, the display will switch to show the next parameter page (if there is one). The same goes for the left part of the button if the
leftmost parameter in the display is selected.
The Parameters and their values are explained in the tables on the following
pages.
4. Set a value for the selected parameter by using the value dial.
If you want to make small adjustments; click on the dial, hold down the
mouse button and move the pointer away from the dial before turning it. The
further away from the dial the pointer is, the finer possible value adjustments.
● The Effect settings are saved with your Song. If you want to use your edited effects in other Songs, you can save and load them separately, as described on
page 315.
- 314 -
Editing Rack XPander Effects
Effects shown with the Rack XPander panel front have custom windows for making settings. You open these parameter windows by clicking on the Edit button in
the Rack XPander panel.
After having set up the effect as desired, you can close the parameter window and
name and save the effect if you like (see below).
Naming Effects
You can freely edit the effect parameters as described on the previous pages, and
even name your edited effects:
1. Click on the Program name in the top center of the effect processor “display”.
A name box opens.
2. Type in a new name.
3. Press [Return].
Saving Effects
You can save your edited effects for further use by using the File pop-up menu to
the right, under the Effect Type pop-up:
1. Pull down the File pop-up menu.
• If you want to save the current Program only, select “Save Effect”.
• If you want to save all Programs for the Effect Type, select “Save Bank”.
- 315 -
2. In the file dialog that appears, select a name and location for the file.
It might be a good idea to prepare a special folder for your effects.
3. Click Save.
Loading Effects
You can load effects from disk for use in the selected effect processor:
1. Pull down the File pop-up menu.
• If you want to load a single Program only, select “Load Effect”.
• If you want to load a complete Program Bank, select “Load Bank”.
2. In the file dialog that appears, find and select the file you want to load.
3. Click Open.
If you loaded a Bank, it will replace the current set of effect programs. If you
loaded a single effect, it will replace the currently selected effect Program.
- 316 -
The Group Mixer
The Group Mixer is a separate mixer, with eight Groups (stereo channel pairs). You
can route several audio channels to the same Group, to mix them with a single set
of controls and add the same EQ or effects to all of them. This section describes the
Group Mixer and how to use it.
Routing an Audio Channel to a Group
1. Open the Monitor Mixer.
2. Locate the audio channel you want to route, and pull down the pop-up
menu at the bottom of its channel strip.
On the pop-up menu, the Groups are listed after the available Output Buses.
In this case, only one Output Bus is available (Master).
3. Select one of the eight Groups.
The output of the audio channel is now redirected to the selected Group.
● The Groups are in stereo, which means that the pan setting for the audio
channel is taken into account when you route the channel to a Group. If you
want to route a stereo channel pair to a Group, you should pan the channels
hard left/right and assign them to the same Group.
- 317 -
Routing an Effect Send to a Group
1. Open the EQ/FX Send window for an audio channel, by clicking on its
EQ button in the Monitor Mixer or the Inspector.
2. Activate a Send.
3. Pull down the Send Routing pop-up below the Send level knob and select
one of the Groups on the list.
Note that the Send is routed to one side of a Group.
4. Adjust the volume with the Send level knob.
- 318 -
Opening the Group Mixer
There are two ways to display the Group Mixer:
• Pull down the Audio menu and select “Group Mixer”,
or
• Open the Monitor Mixer and scroll it to the right.
The Groups are displayed to the right of the regular audio channel strips. The
Group channel strips are displayed in blue, to distinguish them from the regular channel strips.
The Group Mixer as a separate window...
...and as a part of the Monitor Mixer window.
- 319 -
Settings in the Group Mixer
The channel strips in the Group mixer are identical to the strips in the Monitor
Mixer. The descriptions of the Monitor Mixer features apply to the Group Mixer as
well. Some things to note:
• The Groups are always in stereo.
As with stereo channel pairs in the Monitor Mixer, all controls are “ganged” dragging one fader will automatically move the other as well. If you want to
make independent settings for a channel “side”, hold down [Alt].
• You can route the output of a Group to an Output Bus or to another
Group with a higher number.
You cannot route a Group to itself or to Groups to the left of it in the Group
Mixer. Routing is done with the pop-up menu at the bottom of each channel
strip, independently for each “side” of a Group.
• The “In” buttons are disabled in the Group Mixer.
Likewise, there are no Input (Monitoring) buttons. This is because Inputs are
never connected directly to a Group.
An Example
In this example, we assume you have four Audio Tracks you want to “treat as one”.
For example, this could be four recordings of background vocals, which you want
to mix as one entity:
Audio:
Monitor Mixer:
Group Mixer:
Audio Channel 1
Pan L30, Output to Group 1
Group 1:
Audio Channel 2
Pan L15, Output to Group 1
• EQ active
Audio Channel 3
Pan R15, Output to Group 1
• Output to Master
Audio Channel 4
Pan R30, Output to Group 1
• Post-fader send
VST Reverb
Physical Audio Outputs
Master Bus
Since you are applying EQ to a stereo submix (two channels) rather than to each individual Audio Channel (four channels), you will save processor power. Also, any
EQ and Effect settings you make will affect all four channels - you don’t have to
copy settings. To set up the routing like this, proceed as follows:
1. Play back the four audio channels together and set up volume balance
and panning.
In the diagram above, each channel has been panned differently, to spread
the background vocals in the stereo image.
- 320 -
2. For each of the four audio channels, pull down the pop-up menu at the
bottom of the channel strip, and select “Grp 1”.
This routes the output of the audio channels to the Group Mixer instead of to
an Output Bus.
3. Pull down the Audio menu and select “Group Mixer”, or scroll the Monitor Mixer to the right until you see the Group channel strips.
4. Locate Group 1 and make sure that its channel strips are panned fully left
and right.
5. Pull down the Output Routing pop-up menu at the bottom of the channel
strip and select “Master”.
This routes the output of the Group to the Master Bus.
6. Click on the big FX button to the left in the Group/Channel Mixer window.
The Send Effects window opens.
7. Select and activate the Wunderverb 3 reverb effect.
8. In the Group/Channel Mixer window, click the EQ button for Group 1.
The EQ/FX send window for Group 1 opens.
9. Activate and set up equalization for the Group.
10.Activate an effect send, and route it to the Wunderverb 3 effect.
11.Activate playback, and use the Group 1 faders to set the level of the
combined background vocal recordings.
The level faders in the Group Mixer are automatically “ganged” so that they
move together when you drag one of them.
ReWire
If you are the owner of Propellerhead Software ReBirth RB-338 version 2.0 or
later, you can fully integrate this with Cubase VST, having the output of ReBirth
(the synths, the drum machines or even individual drum sounds) appear on separate
audio channels in Cubase VST, while running the two programs in perfect synchronization. All this is done using the ReWire facility, found on the Audio menu in Cubase VST. For more information about this, see the ReBirth documentation.
- 321 -
Volume and Pan Automation – Dynamic Events or
Monitor Mixer
Cubase VST offers two ways of automating volume and pan: the Dynamic Events
set in the Audio Editor and the Write function in the Monitor Mixer. The two methods have their specific properties and uses, as described below:
Dynamic Events
The Dynamic events allow you to control the volume and panning individually for
each segment. This allows you to create fade-ins, fade-outs and auto-pan effects,
which are then integral parts of each segment. This is all done in the Audio Editor,
see page 274.
What this means is that if you for example create a volume curve for one segment,
and later copy this segment for use in other places in the song, all copies will “inherit” the volume curve of the original segment. You can later adjust the curve for
each individual segment, if needed.
A more advanced possibility is to use Ghost events. These are audio events which
all share a segment, and thereby share a volume or pan curve. This means that if
one is adjusted, they are all affected. See page 351.
● If you use the Dynamic Events to control volume, you cannot boost the s ignal
above unity gain (0.0 dB).
Monitor Mixer Automation
Using the Write function in the Monitor mixer you can automate Volume and Panning (actually all mixer settings and changes) for each audio channel. All Tracks in
the Arrange window that are set to play back via this audio channel will be affected
likewise by these controls. This method is described on the following pages.
Let’s say, as an example, that one channel is first used for a guitar and later in the
song for vocals. If you then use the Monitor window to lower the volume in the guitar intro, you will get the same lower volume for the vocal, since they are on the
same channel.
When you are using the Monitor mixer to control volume, you can go above unity
gain (actually amplify the sound). Furthermore, you can automate Mutes and Solos.
Conclusion
So, when to use Dynamic Events and when to use the Monitor Mixer depends on
what is needed at the moment; if you need to make minute adjustment of shorter
segments and repeat those in the Song, you should choose Dynamic Events. If you
make longer non-repeating recordings and prefer to adjust volumes via (on-screen)
faders, you use the Monitor window.
- 322 -
Do not hesitate to combine the two methods of automation, simultaneously or during different parts of the Song. The settings you make in the Monitor window are
relative to the volume value delivered by the Dynamic Events automation. For example, if the Dynamic Event volume has a value of -2.0 dB, and you set the Monitor window fader to -0.4 dB, the resulting volume will be -2.4 dB.
● Please note that the Monitor Mixer automation is not restricted to Volume and
Pan - Mutes, Solo, EQ and Effect settings can also be automated.
- 323 -
Automating the Monitor mixer
Your actions in the Monitor mixer window can be automated in a very straightforward way: by “writing” them into a special Audiomix Part. When played back, this
Part will repeat your fader movements and button presses just like you performed
them. You will even see the faders and buttons move on the screen, like on a physical mixer with motorized controls.
What can be automated?
Mixdown in Cubase VST can be completely automated! The following parameter
settings are recorded with the Write function:
For each channel and Group:
•
•
•
•
•
•
•
•
•
•
•
•
Volume
Pan
Mute
Solo
EQ On switch
Settings for 4 EQ modules
8 x Effect Send Active switches
8 x Effect Send levels
8 x Effect Send PRE switches
Effect DRY switch
4 x Insert Effect Program selection (audio channel 1 to 32 only)
4 x Insert Effect parameters (the 15 first parameters for each effect - audio
channel 1 to 32 only)
Global for all channels:
•
•
•
•
•
•
Master volume Left and Right
8 x Send Effect “Master” level
8 x Send Effect Program selection
8 x Send Effect parameters (the 16 first parameters for each effect)
4 x Master Effect Program selection
4 x Master Effect parameters (the 8 first parameters for each effect)
- 324 -
Recording your actions
1. Open the Monitor window.
If you want to record Group mixer actions, you can do this in the Monitor
window or in the separate Group mixer window (which contains duplicates
of the Read and Write buttons in the Monitor window).
2. Click on the Write button in the upper left corner to activate recording.
While this button is “lit” (activated), every volume, pan, mute or solo movement you make will be recorded.
3. Start playback.
4. Move the faders and pan controls, mute and solo as you would during a
manual mixdown.
Since you can repeat this recording several times, it is probably easiest to mix
one or a couple of channels at a time, and stop and deactivate the Write function in between. That way, you can also Undo your last run if you’re not satisfied, using the Undo command on the Edit menu.
5. Stop playback.
If you check the Arrange window, you will note that a special Mixer Track
called “Audiomix” has been created. This Track contains one long Part
named “Audiomix”, in which all your Monitor mixer actions are stored. Don’t
worry about the length of this Part; it will automatically be lengthened if you
record past its end.
Please note that there is only one Audiomix Part/Track, created the first time
you use the Write function in your Arrangement. No new Parts are created the
next time you use the Write function; information is added to the existing Part
instead.
6. Deactivate the Write function by clicking on the button.
● Exiting the Monitor window will automatically deactivate the Write function.
- 325 -
Recording Mixer settings in Stop mode
The Write function works in Stop mode as well as during playback. If you activate
Write when Cubase VST is stopped, all changes you make to your mixer parameters are recorded at the current Song Position. This feature can be used creatively if
you need initial mixer settings, abrupt changes, etc.
Undoing your recording
If you select Undo from the Edit menu, all actions recorded since you last activated
Write will be undone. Therefore, make it a habit to always deactivate Write after
each recording “pass” and listen to what you recorded.
• If you find this too cumbersome, you can make separate Audiomix Parts
for the different audio channels or recording “passes”, and edit/delete
these afterwards.
This is described on page 327.
Playing back your recorded Mixer actions
1. Check that the Audiomix Track or Part are not muted.
2. Activate the Automated playback by clicking on the Read button in the
upper left corner of the Monitor window.
You may have Write and Read activated simultaneously, if you want to watch
and listen to your recorded mixer actions while you’re recording fader movements for another mixer channel, etc.
3. Start playback as usual.
The monitor faders and controls will move automatically, following your recorded actions.
- 326 -
Moving and Muting the Audiomix Part
The Audiomix Part can be handled as any Mixer Part:
• If you want to turn off Monitor mixer automation from the Arrange window, you can mute the Audiomix Part or Track.
• You can copy recorded mixer actions to several places in your Arrangement by cutting out the relevant section of the Audiomix Part with the
Scissors tool and duplicating it, placing the copies wherever you want
them.
Working with one Audiomix Part for each Audio Channel
Although Cubase VST only creates one dedicated Audiomix Track, there is a way
to structure your Mixer Automation into different Parts for different channels,
which makes it easier to edit and redo mixer recordings you’re not satisfied with:
1. Record your fader movements and other mixer actions for the first audio
channel, as described on the previous page.
2. Deactivate the Write function and go to the Arrange window.
3. Make a new Mixer Track.
It might be a good idea to name it after the audio channel you just mixed, to
avoid confusion later on.
4. Move the entire Audiomix Part to the new Track.
5. Open the Monitor again, activate the Write function and record your
mixer actions for the next audio channel.
Now Cubase VST creates a new Audiomix Part on the original, empty Audiomix Track. If you activate the Read function, your previously recorded Part
will be played back from its new Track, so you can watch your recorded fader
movements while you continue with new audio channels.
6. Repeat steps 2 to 5 for as many channels you like.
You will end up with a number of Mixer Tracks, all playing back simultaneously, affecting different audio channels in the Monitor mixer. If you want to,
you can keep it that way. If you like to clean up your Arrange window, you
can Merge the Parts into one, as described in the chapter “The Arrangement More on what you can do with Parts and Tracks”.
- 327 -
Editing the Audiomix Part
The Audiomix Part contains Mixer Events, which can be edited in List Edit:
1. Select the Audiomix Part in the Arrange Window.
2. Open List Edit.
3. Pull the divider to the right so that you can see the Comment column.
This column shows which Mixer parameter (volume, pan etc) and audio
channel each Event controls.
● Switch parameters (parameters with on/off values) are handled in a special
way. All information about a switch Event (switch name, on/off) will be displayed in the Comments column, but do not try to edit a Switch value if you
are not sure about how the Value 2 encoding works (see page 329).
4. Select an Event that corresponds to the fader (or other Mixer control)
you want to edit.
5. Pull down the Mask pop-up menu and select “Mask It!”.
This will hide all Events except those of the same type as the selected (that is,
only Events of the same type and the same audio channel as the selected one
will be shown).
6. Look at the “Value 2 display” to the right in the editor.
As described in the List Edit chapter, this display shows Value 2 for each Event
as a horizontal bargraph. If you have recorded a fader movement, this will be
displayed as a ramp, as shown below:
- 328 -
7. Use the Pencil tool to redraw the curve, or the Eraser tool to delete
Events.
You can of course edit the values in the Value 2 column in the actual list. Use
this feature if for example you want to set a fader to a specific value at a certain position.
● The value 101 for a fader corresponds to 0 dB (unity gain).
8. When you’re done, pull down the Mask pop-up menu, select “No Mask”
and press [Return] to leave List Edit.
How List values work for Switches
The text in the Comments column corresponds to the numerical value in the Value
1 column. Each continuous parameter (such as volume, pan, etc) on each audio
channel, has a unique Event number (value 1), while the Value 2 column shows the
parameter values. However, switches (on/off-parameters) are handled in a special
way:
All switches on the same audio channel share the same Event number!
All other information (which switch is it and what is its state) is encoded into Value
2. If you want to edit the values of switch Events, you have to consult the tables below to find the appropriate values. This is the Value 2 functionality for switches on
each audio channel:
Switch Name
“On” value
“Off” value
Mute
64
0
Solo
65
1
EQ On/Off
66
2
Effect send DRY
67
3
Effect send 1 On/Off
68
4
Effect send 2 On/Off
69
5
Effect send 3 On/Off
70
6
Effect send 4 On/Off
71
7
Effect send 5 On/Off
80
16
Effect send 6 On/Off
81
17
Effect send 7 On/Off
82
18
Effect send 8 On/Off
83
19
Effect send 1 PRE switch
72
8
Effect send 2 PRE switch
73
9
Effect send 3 PRE switch
74
10
Effect send 4 PRE switch
75
11
Effect send 5 PRE switch
84
20
- 329 -
Switch Name
“On” value
“Off” value
Effect send 6 PRE switch
85
21
Effect send 7 PRE switch
86
22
Effect send 8 PRE switch
87
23
EQ module 1 Enable switch
76
12
EQ module 2 Enable switch
77
13
EQ module 3 Enable switch
78
14
EQ module 4 Enable switch
79
15
Combining manual Mixing and/or two kinds of Automation
Even if you automate the volume or pan for an audio channel, you can still make a
manual adjustment by dragging the fader/pan control in the Monitor window. Just
remember to leave the Write function off, or your movements will be recorded “on
top of” the already recorded automation.
Likewise, if you have automated volume or pan using Dynamic Events, you can
still manually or automatically adjust the volume/pan in the Monitor mixer.
- 330 -
25
Installing and using external effect
plug-ins
26
- 331 -
About this chapter
This chapter describes how to install new effect plug-ins, for use as mixer effects or
master effects. There are two basic kinds of plug-ins:
• VST-native Plug-ins.
These are effect plug-ins in VST:s “own” format, and can only be used with
Steinberg programs such as Cubase VST and WaveLab.
• DirectX Plug-ins.
Microsoft DirectX is a set of standards and routines for handling various kinds
of multimedia under Windows95 and Windows NT. DirectX plug-ins (previously called ActiveMovie plug-ins) can be used with many different programs
and applications, including Cubase VST.
The two plug-in types are handled slightly differently:
VST-native Plug-ins
Installation
VST-native plug-ins are installed simply by dragging the files with extension “.dll”
from the plug-in disk to the “Vstplugins” folder (for details, see the installation
document that comes with the plug-in). When you launch Cubase VST and open
one of the Effects windows, you will find the installed plug-in on the Effect type
pop-up.
About “.fxp”- and “.fxb”-files
When you purchase or download VST-native plug-ins, you may find files with the
extensions “.fxp” or “.fxb” included in the package. These are effect Program and
Effect Bank files respectively, containing saved parameter settings for the specific
effect plug-in. You can place these files anywhere on your hard disk, but we recommend that you make a separate folder for each plug-in that you have Program or
Bank files for, and place this inside your “Vstplugins” folder.
• Read more about how to load and save effect Programs and Banks on
page 315.
- 332 -
Using and Editing the Effects
As described on page 308, plug-in effects are selected from the Effect pop-up menu
in one of the three Effect windows (Send, Insert or Master Effect). VST-native
plug-ins are always shown in the middle section of the Effect pop-up menu.
● If you cannot find your installed plug-in on the Effect pop-up menu, it may be
that you are in the wrong Effect window. Effect plug-ins with mono inputs are
only available in the Send or Insert Effects windows, and plug-ins with stereo
inputs are only available in the Insert or Master Effects windows.
After selecting the effect from the pop-up, two things can happen, depending on the
plug-in. If the plug-in uses VST’s standard Effect user interface, the settings for the
plug-in simply appear in the selected effect, as with any on-board VST effect.
The standard VST effect interface.
However, many plug-ins use special user interfaces, with windows of their own. If
this is the case, the selected effect gets the label “Rack XPander”. This is a generic
front-end for all plug-in effects with non-standard user interfaces. To display the
parameters and settings, click the Edit button. The Prog button and File pop-up
menu work as with standard VST effects.
The Rack XPander interface.
• See page 306 for more info on how to use and edit external Effects.
- 333 -
DirectX Plug-ins
Installation
To be able to use DirectX plug-ins, you must first have DirectX installed on your
computer. Therefore, DirectX 5 is included with Cubase VST and installed automatically when you install the program. Refer to the Microsoft web site for information about updates, etc.
DirectX plug-ins should not be placed in the VST folder! Rather, you should follow
the installation instructions included with each plug-in.
Managing and selecting DirectX plug-ins
On the Audio menu you will find an item called “DirectX Plug-ins...”. Selecting this
opens a dialog listing all the available DirectX compatible plug-ins in your system.
• To activate a plug-in (make it available for selection), click in the left column.
Only the currently activated plug-ins (shown with a check sign in the left column) will appear in the FX lists in the Send, Insert and Master Effects windows.
The idea here is that there could be a variety of DirectX plug-ins in your system,
many of which are not intended for musical audio processing. Disabling these helps
you keep the FX pop-up menus in Cubase VST more manageable.
• The second column indicates how many instances of the plug-in are currently used in Cubase VST.
Clicking in this column (or right-clicking anywhere in the row) for a plug-in
which is already in use produces a pop-up showing exactly where each use
occurs.
- 334 -
● Please note that a plug-in may be in use even if it isn’t “activated” in the left
column! You might for example have opened a Song containing effects that
currently are “deactivated” on the menu. The left column purely determines
whether or not the plug-in will be visible in the FX pop-up menus.
Using and Editing the Effects
Once enabled, DirectX plug-in effects can be selected from the Effect pop-up menu
in one of the three Effect windows (Send, Insert or Master Effect). DirectX plug-ins
are always shown in the lower half of the Effect pop-up menu.
● As with VST-native effects, plug-ins with mono inputs are only available in
the Send or Insert Effects windows, and plug-ins with stereo inputs are only
available in the Insert or Master Effects windows.
After selecting the effect from the pop-up menu, a Rack XPander interface will appear (see page 333). To display the window with parameters and settings for the
plug-in effect, click the Edit button (for detailed information, see the documentation for the DirectX plug-in). The Prog button and File pop-up menu work as with
standard VST effects.
- 335 -
26
Importing and Exporting Audio
- 336 -
27
Importing audio files into the Arrangement
By using the Import Audio function on the File menu, you can quickly import audio
into your Arrangement without having to open the Pool:
1. Select the Audio Track to which you want to import an audio file.
Note that you can only import stereo files to stereo Tracks and vice versa.
2. Move the Left Locator to where you want the audio file to start.
3. Pull down the File menu and select “Import Audio...”.
A file dialog opens.
4. Select a file format (WAV, AIF or both) from the File Type pop-up.
Files of the selected type(s) are listed in the file dialog box.
5. Use the file dialog box to locate the file and select it.
• You can audition the audio file with the Play button.
When you click the Play button, its label changes to “Stop” and the selected
audio file is played back. Playback continues until you click on Stop, or select
another file.
6. Click “Open”.
The file is imported into the Pool, just as when using the Import Audio File
command on the File menu in the Pool. A segment that plays the whole file is
created and placed in an Audio Part, which in turn is placed on the selected
Audio Track, at the position of the Left Locator.
- 337 -
Mixing down to an audio file
The Export Audio feature in Cubase VST allows you to mix down any number of
audio tracks, complete with effects and mixer automation, to a new audio file, in
one of several file formats, mono or stereo.
● Please note that MIDI Tracks are not included in this type of mixdown. To
make a complete mixdown containing both MIDI and audio, follow the instructions on page 341.
1. Set up the left and right locator to encompass the area that you want to
mix down.
2. Set up your Tracks, so that they play back the way you want.
You can use the automation in the Monitor Mixer window, as well as Effects
and Master Effects. If you are planning not to include any of these features in
the exported audio file, you should turn them off while preparing the Tracks
as well, to hear what you get.
● If you plan to export a stereo file and import it back into VST, it might be a
good idea to leave audio channels 1 and 2 unused when you set up your
Tracks for mixdown. See the section about imported files and Audio Tracks on
page 341.
3. If you want to include the automation, make sure that the Read button is
activated in the Monitor window.
4. Pull down the File menu and select “Export Audio”.
The Export Audio dialog opens.
- 338 -
5. Decide whether you want to include automation and/or effects, by using
the “Include” checkboxes.
You can independently include the automation from the Monitor window, the
Mixer Effects and the Master Effects.
6. If you want to automatically import the resulting audio file back into Cubase VST, activate the “Import to” checkboxes.
If you activate the “Pool” checkbox, the file will appear in the Pool. Activating the “Audio Track” checkbox as well, will place the file in a new Part on an
Audio Track, starting at the Left Locator. For more info about the created Audio Track, see page 341.
7. If you want an audible verification during the mixdown process, activate
the “Audition Audio” checkbox.
This will cause the unmuted audio Tracks to rapidly play back while the mixdown file is created.
● The Audition Audio option is not available if you select “Stereo Interleaved”
or a Resolution other than 16 bit (see below).
- 339 -
8. Select mono or stereo with the “Channels” radio buttons.
You have three choices here:
• You can make a mono file, in which case the left and right channels are
mixed (as when using the mono switch in the Master window).
• You can select the Stereo Split option, in which case two mono files (one for
each stereo side) will be created. If you have activated the “Import to Audio
Track” options in step 6 above, the two files are grouped and placed on an
“Any” channel audio Track, using channel 1 and 2.
• Finally, you can select Stereo Interleaved, in which case a true stereo file is
created.
9. Select a file type.
You can choose between AIFF and WAVE. Which type to choose depends on
which other programs you plan to use the file in. Please note that WAVE files
(audio files with the extension “.WAV”, used for PC) cannot be imported into
Cubase VST for Macintosh.
10.Select Resolution.
The choices are 8, 16 and 24 bit. 8 bit audio files are of limited fidelity, but
can be useful for multimedia applications, or situations when you want to
keep the file size down. 24 bit files can be imported into some high-end audio editors, such as Steinberg WaveLab. If you plan to use the file in VST, you
have to select the 16 bit option.
11.Select a sample rate.
You can choose between 22.05, 44.1 and 48 kHz.
● It is possible to import and/or audition the file no matter which sample rate is
selected. Please note however, that if the selected sample rate is another than
the one used by Cubase VST, the pitch and length of the audio will be incorrect when you audition it or play it back.
For example, if you have selected 48kHz and VST plays back at 44.1 kHz, the
re-imported audio file will play back too slow, and with a lower pitch.
12.Select a folder and a name for the audio file to be created.
If you have selected the “Stereo Split” option in step 8 above, the two files
will have the same name, but with the letter “L” appended for the left channel
file and “R” for the right channel file.
13.Press the Create File button.
The audio file is created. If you have activated the “Audition” option, the resulting audio will be cued (played back rapidly) during the process.
If you have activated the “Import to” options, the file will be imported into the
Pool and, if you like, onto an audio Track. You can play it back to check the
results immediately. Just remember to mute the original Tracks, and turn off
any eq and/or effects for the audio channel(s) used by the imported Track, so
that you really hear the true result (see below).
- 340 -
About imported files and Audio Tracks
If you choose to automatically import the audio file into the Arrangement, using the
“Import to Audio Track” checkbox, the segment(s) and Track will have the following properties:
• If an Audio Track is selected when you select Export Audio, the imported
audio is placed in a Part on the selected Track.
The selected Audio Track must be a mono Track if the audio file is in mono, a
stereo track if “Stereo Interleaved” is selected and an “Any” channel Track if
the “Stereo Split” option is used. Otherwise, a new Track is created, as described below.
• If no Audio Track is selected, a new Track, named MixDown, is created.
Including your MIDI music in the mixdown
If you want to prepare a complete master audio file, you probably want to include
some MIDI material in your Arrangement. Proceed as follows:
1. Set up all your MIDI Tracks, instruments and external sound equipment,
so that your Arrangement plays back as intended.
2. Connect the output of your mixer, synthesizer or whatever sound source
you use, to the VST audio inputs.
To avoid feedback, make sure not to include the VST audio output in the mix.
3. Select one or two Tracks for recording, and check the recording levels
with the Input Meter function in the Master window, by playing back
loud sections of the MIDI music.
4. Rewind to where the MIDI Parts start, and activate recording.
When you are done, stop recording as usual. You will now have audio Tracks
that play back the sound of your MIDI equipment. You can now mute the corresponding MIDI Tracks.
5. If you need to overdub more MIDI material, repeat steps 3 and 4 (using
new audio Tracks).
6. Finally, use the Export Audio function as described in this chapter, to create an audio file containing a complete mixdown of your Arrangement.
- 341 -
27
Working with ReCycle files
- 342 -
28
About ReCycle
Steinberg ReCycle is a program specifically designed for working with sampled
loops. Using ReCycle you can "slice" a loop and make separate samples of each
beat. Among other things, this makes it possible to change the tempo of loops without affecting the pitch, and edit the loop as if it was built from individual sounds.
● At the time of writing, the currently available version of ReCycle for Windows
does not allow export of "REX" files for use in Cubase VST. Please contact
your dealer to find out when this update will be available.
However, if you have access to ReCycle version 1.6 (or later) for Macintosh, you
can export ReCycled files in a format which can be read by both Windows and
Macintosh versions of Cubase VST.
● When moving ReCycle “REX” files from the Macintosh to the Windows platform, make sure their names have the extension “.REX”.
- 343 -
Using ReCycle files in VST
To ReCycle a file for use in Cubase VST, proceed as follows:
1. Locate the file on disk and open it in ReCycle.
This can either be a file recorded in Cubase, or a file of any other origin.
2. Set up the slices, bar length, time signature and sampler options as desired.
A typical application would be “slicing for tempo changes”, see the application examples in the ReCycle manual for details.
3. Select “Export to ReCycle! REX file”, from the ReCycle File menu.
4. Specify a location and name for the file and save it.
5. In Cubase VST, select a mono Audio Track on to which the file can be imported, and set the Left Locator to the position at which you'd like the
file to appear.
There are special rules for importing into “Any” Tracks, see page 346.
6. Select “Import ReCycle file...”, from the File menu.
7. Locate the ReCycle export file you just saved, and open it.
The following will now occur:
• The file is added to the Pool.
• A number of Segments are created for the file, each corresponding to a slice
in Recycle.
• A Part for playing back these Segments is automatically created on the active
Track, starting at the Left Locator position.
Now you can play back the ReCycled file in any tempo, as if using a sampler. You
can also edit it in detail, quantize, etc, for example from the Audio editor.
- 344 -
• If you need to re-import the file into the Arrangement, drag the file item
from the Pool to the Arrangement, as with any other file.
A new Part is then created.
● Please note that the new file will sound very strange if played back in its entirety. It should only be triggered from the Part which has been created in the
Arrangement.
Also note that if you ReCycle a file already used in the Arrangement, you will
have two copies of it, one regular and one ReCycled. You might want to delete – or at least mute – the original, to avoid confusion.
- 345 -
About tempo changes and the last Segment(s)
Sometimes you may import a ReCycle file into an Arrangement with a faster tempo
than that of the original loop. In this case the slices (Segments) will overlap, and
the last segment will continue past the end of the Part.
An audio event in Cubase should never play past the end of the Part otherwise you
will hear audio in the Arrangement that you can't actually "see". To get around this
problem, Cubase VST automatically shortens segments that would otherwise play
past the end of the Part, so that they end exactly where the Part ends. This is done
automatically when you import the ReCycle file.
In fact, if you have used a very high stretch factor in ReCycle, or if the Cubase
tempo is drastically different from the original loop tempo, several of the last segments could be affected by this problem and will be shortened. If you later raise the
tempo, the shortened segments will then become too short, since they no longer
play to the end of the Part. There are two ways to fix this:
• Manually adjust the length of the offending segments, in the Audio Editor.
• Delete the existing Part and re-import the ReCycle file, by dragging the
file symbol from the Pool to the Arrange window.
In the new Part that appears the length of the last segment(s) will be adjusted
to fit the current tempo.
Importing into “Any” Tracks - Polyphonic playback
While a sampler or sampling synthesizer is polyphonic, each track in Cubase VST is
monophonic, that is, it can only play back one sound at a time. This is not ideal when
playing many short overlapping sounds, which is what happens with ReCycled files.
Drum loops should not normally be affected, however with other types of material,
bass loops etc, the monophonic character of a Cubase VST channel might lead to
clicks in the transition between segments. To avoid this, Cubase can “simulate” the
polyphonic behaviour of a sampler by splitting up a ReCycle file, so that the
“slices” play back on more than one channel.
Proceed as follows:
1. Examine your Arrangement and locate two or more consecutive channels
that you can reserve for a ReCycle file.
The number of tracks you need for Polyphonic operation depends on the nature of the loop. The trick is to avoid overlapping segments, since it is in the
overlap that clicks might occur. If you have no idea how many to choose,
don’t worry, the program will suggest a number for you, see below.
● Please note that you can minimize the number of Tracks needed by using as
small a stretch factor as possible in ReCycle, and avoiding very short segments.
2. Create or select a Track and set it to Channel “Any”.
3. Set the Left Locator to the position at which you want the Part to appear.
- 346 -
4. Import the ReCycle file from disk.
5. In the dialog that appears, the program suggests an appropriate number
of channels to ensure that no overlap occurs.
This can be changed if necessary.
6. Using the same dialog you can specify which channel to use first.
For example if you want the file to use channels 1, 2 and 3, specify “1” as the
start channel and “3” as the number of channels to use.
7. Click OK.
8. Open the Part that appears, and examine it in the Audio Editor.
As you see, the slices now alternate between the specified channels.
The drawback of this procedure is that more than one audio channel is “used up” by
a single file. However, if you run out of audio channels you can use the “Export Audio” feature to turn your “multi-channel” ReCycle Track into one file, that only requires one audio channel, see below.
- 347 -
Editing Tips and Tricks
• You can completely re-assemble your drum patterns by editing slices in the
audio editor for example creating variations and fills by duplicating and moving events.
• To replace the sounds in the loop, while maintaining the timing integrity of
the playing, you can use the “segment pop-up” feature to make the events
play other segments than they originally did. Hold down [Control] and [Alt],
click on an event and select the desired segment from the menu that appears.
• Once you have finished editing a ReCycle file (or several), you can mix it
(them) down to one audio file, using the “Export Audio” feature described
elsewhere in this book. This minimizes the audio channels required for the
loops. If also simplifies some editing procedures, since there are fewer events
to handle when “cutting and pasting”. Doing this does not mean you can’t
continue to perform detailed editing on the loop. You can always keep the
original ReCycle Track muted, and re-do the “Audio Export” whenever it is
needed.
• Exporting a “Polyphonic” ReCycle Track into a mono Track means it will only
use up one audio channel. No clicks will appear in this file, since the mixdown incorporates any overlapping audio as it is originally played on multiple channels.
- 348 -
28
Making the Most of the Event/
Segment Relationship
- 349 -
29
What is an Event really?
An Audio Event is an item in Cubase VST that contains three pieces of information:
• A reference to a segment.
• A start point, relative to the Part the Event resides in.
• A Q-Point (see page 233).
Everything else that you see when you edit an Event in the Audio Editor, is really in
the segment!
What is a Segment really?
A segment is an item that contains the following information:
• A reference to an audio file on your hard disk. By reference we mean that the
segment doesn’t contain any audio in itself; it only “points” to a file on disk.
• A start and end inset, to determine which section of the file that the segment
plays.
• A name.
• A volume curve (if you have created one).
• A pan curve (if you have created one).
• A set of Match Points (if you have created Match Points, either manually or
using the Get M-Points function).
- 350 -
Copying Audio Events
There are two principal ways of copying Audio Events in Cubase VST: “normal”
copying and Ghost copying. These two methods are fundamentally different, which
is important to understand.
Making “Normal” Copies of Audio Events
When you copy Events in any “normal” way, new segments are automatically created. This means that if you edit the segment in a copied Event, the original segment is unaffected.
When should I use “normal” copies?
There are a number of situations where this is exactly what you want. You may
want to add a volume curve to one of the copied Events, but not to the others, or
shorten one of the copied Events, to “make room” for another Event on the same
audio channel, etc.
Making Ghost Copies of Audio Events
A Ghost Event is any Audio Event that plays the same segment as another Event.
This means that there are no “original” Events; all Events that play the same segment are considered Ghosts.
Ghost Events are shown with dotted outlines in the audio editor.
These are Ghost Events. They
play the same segment.
This is a “normal” copy (uses a
segment “of its own”)
- 351 -
When are Ghost Events created?
Ghost Events are created when you perform the following operations:
• When you ghost copy an Event in the Audio editor.
This is done by holding down [Control] and dragging the Event to a new position in the Part.
• When you drag a segment from the Pool into the Audio editor or the Arrange window, and that segment is already played by another Event.
As soon as two or more Events play the same segment, the Events are Ghost
Events.
• When you make a Ghost Copy of an Audio Part.
• In the Audio editor, when you hold down [Alt] and [Control] and select a
new segment for an Event, and the segment you select is already in use.
When should I use Ghost Events?
If you edit a segment, the changes you make are reflected in all Events that play the
segment. Therefore, you may use Ghost Events if you want any editing you do to
apply “every time that segment” is used. This includes:
• The start and end insets (when you edit them “in the Pool” - see below).
Allows you to for example fine-tune the length of a drum loop and use it repeatedly in your Arrangement.
• The volume and pan curves.
Lets you for example smooth out the volume in an “uneven” segment, or create auto-pan effects.
• The Match Points.
• The name of the segment.
The following editing is not copied to Ghost Events:
• Changing the position of the Q-Points.
These are part of the Events, not the segments.
• Changing the start and end insets “in the Audio editor”.
This will instead automatically create a new segment. However, if you hold
down [Control] while you are changing the insets, all Ghost Events will be affected and no new segment will be created.
- 352 -
Converting a Ghost Event to a “normal” Event
If you find that you want to edit one Event without affecting its Ghost Copies, you
have to convert it to a “normal” Event first:
1. Open the Pool and select the segment that the Event plays.
2. Pull down the Do pop-up menu and select Duplicate Segment.
A new segment with the same name is created. If you want to, you may
change the name of the new segment to avoid confusion.
3. Return to the Audio Editor and select the Event in question.
4. Hold down [Alt] and [Control] and click on the Event.
A pop-up menu opens, containing all segments “belonging to” the same audio file.
5. Select the segment you created in the Pool.
Now, the Event is no longer a Ghost Event, and you can edit it without affecting any other Events.
About Audio Ghost Parts
You can create Ghost-copies of Audio Parts, by using the Pencil tool, the Repeat
command or by [Control]-dragging. The audio Ghost Parts behave just like MIDI
Ghost Parts.
- 353 -
29
Optimizing Audio Performance
- 354 -
30
Introduction
This chapter contains several different sections:
• Information about the components in your computer system and how
they affect audio performance.
This is mainly intended as background information and as a help for when
you plan to update your system.
• Information about the System dialog and Driver settings.
This is important information for all Cubase VST users.
• Some tips for optimizing audio performance.
• Hard disk maintenance tips.
You do back up regularly, don’t you?
- 355 -
About Audio Cards
Which cards will work?
Cubase VST works with any audio card that meets the following requirements:
•
•
•
•
16 bit audio recording and playback capability.
Windows Multimedia compatible, or...
DirectX compatible (playback only, see page 379), or...
Comes with an ASIO driver.
Sample rates
Cubase VST can record and play back at the sample rates your card supports. The
choice of sample rate is made in the System dialog as described on page 362.
Most audio cards support 11, 22 and 44.1kHz. Many cards do not support 48kHz
and some don’t support 32kHz.
Audio Quality
The audio quality you get from your recordings (the amount of distortion, the
amount of background noise etc.) is solely dependant on your audio card and your
other audio equipment, not on Cubase VST.
Number of Audio Channels
The number of audio channels you can get in Cubase VST does not depend on the
audio card at all but is related to a number of computer performance factors. More
on this later in this chapter.
Stereo/Mono
All 16-bit audio cards can record and play back in stereo or mono. In Cubase VST
you can decide before each recording which it should be, stereo or mono, from the
Inspector.
- 356 -
Outputs – Stereo and Multi Output Cards
Stereo Only cards
Standard PC Audio cards, accessed via the ASIO Multimedia or DirectX driver,
normally only allow for one stereo output. With such a card you may be able to play
a large number of channels in Cubase VST, but the output is still only a mixed
stereo signal.
Multi Output Cards
There are three ways Cubase VST can access a card with more than one set of
stereo outputs:
• Via a Windows Multimedia (or DirectX) driver that caters for multi channel
operation.
Some cards come with both a stereo and a multi channel driver. You have to
select either for use in Cubase VST. We recommend that you select the multichannel driver.
• Via special Windows Multimedia drivers that make the card appear as several
standard PC cards, to Windows.
• Via a dedicated ASIO driver.
Some cards come with ASIO drivers specifically written for the card. This is
then the best option to choose, since it allows you to bypass the Windows
Multimedia system.
If your card fits to any of the descriptions above, you will be able to take full advantage of Cubase VST’s “bus system”, see page 194.
Drivers
Cubase always uses ASIO for audio playback. With Cubase VST comes some
ASIO drivers, most notably the ASIO Multimedia driver, which serves as a “glue”
between Cubase VST and Windows Multimedia system and thus allows you to use
standard Windows compatible audio cards, see page 369. For these cards, you do
not need anything else than the latest Windows driver for the card, installed as the
manufacturer recommends. Everything else is installed with Cubase VST.
Other ASIO drivers might be added to the system, for cards that require it. Each
driver should come with its own installation program and instructions.
The technically minded might want to know that ASIO drivers come in the form of
“DLLs”. They can be located anywhere on the hard disk. The installation procedure
adds the driver to the Windows Registry. To replace or remove a driver, use the installation program that came with the driver. You should definitely avoid renaming
or moving ASIO drivers “manually”.
- 357 -
Using the DirectX driver
Cubase VST supports DirectX, or to be more precise, DirectX, which is a part of
the Microsoft DirectX Foundation package. This means that if your audio card
comes with a native DirectX driver, you can use this instead of the Windows Multimedia system to play back audio. This has some benefits (mainly lower latency
times and the ability to play back audio from several applications simultaneously)
but also some restrictions (mainly audio output only - no input). For details, see
page 379.
Simultaneous Recording and Playback - “Full Duplex”
On a regular multi track recorder you often perform something called overdubbing.
This is when you listen to one Track and at the same time record on another.
You can of course overdub in Cubase VST, but there are a few things you have to be
aware of.
For a PC audio card to allow simultaneous recording and playback, the card must
support something called “Full Duplex”. Some PC audio cards do not have this
ability. This means that as soon as you enter record mode, you will not hear your
previously recorded audio Tracks. This is not a limitation of Cubase VST, but of the
cards themselves.
If your card does have the ability to record and play back at the same time you
should activate this function in ASIO Multimedia Setup, see page 369.
It is of course a great benefit to have this functionality, since it allows you to match
your current performance to the previous audio recordings, for example when adding vocal harmonies, one by one.
Some cards, like the Roland RAP-10, have the ability to use one channel for playback and the other for recording, which means that you can record and play back
audio at the same time, but only if playback is limited to mono. Some cards can
play back and record audio at the same time, but with reduced audio quality of the
playback signal (usually 8 bit resolution instead of 16 bit). If this is the case with
your audio card (see its documentation), make sure to deactivate all audio inputs
when you want to listen to your recordings with full audio quality.
Multiple Cards
If you have multiple cards you can theoretically select one for input and another for
output. However, this is not recommended unless the cards are tied together with a
word clock sync signal. The sample rate clocks in any two cards will always drift
slightly against each other, which can cause glitches and dropouts in the audio.
- 358 -
Computer Performance and Audio Channels
The number of audio channels you get from your system depends on a number of
factors. These factors are all related to the amount of data that has to be transferred
within the system. When you record, data is collected by the audio card and transferred via the computer’s processor to the hard disk. When you play back, this process is reversed. On the way there are a number of bottlenecks to pass, which we will
try to outline on the following pages. Please also refer to the Read Me files in your
Cubase VST directory which may contain late information on how to optimize your
system.
How do I know how many channels I can get?
There is no easy answer to that question. To find out, record and play back channel
by channel, until Cubase VST informs you that there is not enough capacity to play
back all the Tracks at the same time.
Computer architecture and processor speed
In all audio operations, the computer’s processor is involved, which means that the
processor speed will limit the amount of audio that can be handled at any given moment.
Processor Type
Cubase VST requires a Pentium processor. However, there are several manufacturers of Pentium “equivalents”. We strongly recommend that you use an Intel processor. Intel Pentium processors have significantly better processing power when it
comes to handling floating point numbers, than many of the “equivalents”. Cubase
VST (and many other audio applications) relies very heavily on floating point calculations. This means that this difference in design between processors is much
more apparent in VST than when comparing processors when they run for example
a word processor or database program.
Processor Cache
A 2nd level processor cache is strongly recommended, the larger the better. This is
included in many computer models. If in doubt, consult your computer dealer.
Memory (RAM)
Audio work requires a lot of RAM! In fact, the amount of available RAM is in direct relation to the number of audio channels. You have a large amount of control
over how Cubase VST handles the available memory, as described on the following
pages.
- 359 -
Disk Controller Card
The controller card for the hard disk is the next possible bottleneck:
● We recommend that you use a controller card connected to your computer's
PCI bus rather than to the ISA bus. A PCI card can transfer data considerably
faster than an ISA card.
Hard Disk Performance
The performance of the hard disk is probably the biggest limiting factor.
One unit of measure for a hard disk’s speed is the Average Access Time. This
should be as low as possible, and the more Tracks you plan to record on the drive,
the lower it has be. For eight stereo Tracks, you need an Average Access Time of 20
ms or less.
Many manufacturers do not specify the Average Access Time. You will then have to
check out a number of other parameters:
• Average Seek Time. This should be as low as possible.
For eight stereo Tracks at 44.1 kHz, you need an Average Seek Time of 9ms or
less.
• Rotation Speed. Sometimes indicated as Rotation Latency. The Rotation
Speed should be as high as possible, which in turn makes the Rotation Latency as small as possible.
For eight stereo Tracks you need a Rotation Speed of 5400rps or above, which
equals a Rotation Latency of 5.6 ms or less.
• Sustained Data Transfer Rate. This should be as high as possible.
For eight stereo Tracks you need at least 5Megabytes/second.
SCSI or E-IDE?
• In general, SCSI disks are better suited for hard disk recording than IDE drives,
for various technical reasons. However, a fast E-IDE drive is better than a slow
SCSI one.
• If you decide not to use SCSI, try to get an “Enhanced IDE” (E-IDE) drive rather
than a regular IDE one.
• If you use a SCSI or E-IDE drive, make sure it has a built in cache of at least
128 kByte, preferably 256 kByte or more.
- 360 -
Other hard disk considerations
• Make sure the hard disk does not have automatic “thermal recalibration”. Or,
at least use a hard disk that only performs thermal recalibration when the
hard disk is not in operation. Some manufacturers sell special “A/V” (Audio/
Video) drives, claimed to be specifically suitable for hard disk recording. This
usually means (among other things) that the drive doesn't have automatic
thermal recalibration.
• Try to get as large a disk as you can. We recommend 1GByte and up. You will
get 1 minute of mono audio for each 5 MByte on the hard disk, per Track, at
44.1kHz sample rate. This means that if you for example record two stereo
Tracks, you will use up 20 MByte per minute.
• We recommend that you save your audio files together with your Song documents on a separate drive, leaving the main drive of your computer to hold
Windows, program files and the like.
- 361 -
Audio System Settings
Cubase allows you to set the number of audio channels you want to use to in the
program. The maximum number of audio channels is 64 (96 if you are using the
Cubase VST/24 version), but most systems will be restricted to a smaller number,
due to limited processor power, RAM, etc. The settings are made in the System
Setup dialog (reached from the Audio menu) and involves several parameters:
Audio Performance section
• Number of Channels.
Sets the number of audio channels you would like to have access to (4 - 64, or
4 - 96 in VST/24).
• Memory per Channel.
Sets the amount of internal memory assigned to each audio channel. This
value multiplied by the Number of Channels has a direct relation to the
amount of RAM available to the program. The higher the value the lesser the
risk of playback problems. On the other hand, raising this will probably lower
the number of channels you can use at the same time, since the total amount
of RAM in the computer is always limited.
• Disk Block Buffer Size.
Governs the buffer size used in Cubase VST when reading and writing data
from/to the hard disk. The larger value, the smoother and faster performance.
However, each Buffer Size value has a corresponding minimum Memory per
Channel setting. For example, if the Disk Block Buffer Size is 64 kB, the Memory per Channel cannot be lower than 192 kB.
- 362 -
As you can see, there is a quite involved relation between these three parameters.
To ensure the best HD/audio performance, you would raise the Disk Block Buffer
Size, but this automatically increases the Memory per Channel which in turn limits
the possible Number of Channels. This means you will have to experiment with different settings to find the performance/memory/channel balance best suited for
your system.
The Apply button
Clicking the Apply button applies the settings you have made. If you get a warning
reading “Not enough memory for the Audio Engine”, you either have to decrease
the number of audio channels or decrease the Memory per Channel figure.
Try these settings first!
• Generally, start with Disk Block Buffer Size set to 64 kB and Memory per
Channel set to 256 kB.
• If you find that the audio and hard disk performance is poor (playback
stutters, system momentarily slows down), try raising the Disk Block
Buffer Size to 96 kB.
The Memory per Channel setting is automatically increased to 288 kB.
• If you need more channels, try lowering Disk Block Buffer Size to 48 kB.
● All of the above assumes your hard disk is fast enough to handle the number
of channels specified.
Audio I/O
ASIO Device
Here you select the ASIO driver you want to use. The options depend on which
drivers are available for your audio card:
• ASIO Multimedia driver.
This is the “standard” choice, for using the Windows Multimedia System to
play back and record audio.
• ASIO DirectX driver.
This option is available if your audio card has a native DirectX driver. It is also
required that you have DirectX 5 or better installed, but this is done automatically when you install Cubase VST. See page 379 for details.
• Dedicated ASIO drivers.
If your audio card has a dedicated ASIO driver (that is, an ASIO driver specifically written for that audio card), you should always use that driver and not
the Multimedia or DirectX drivers.
- 363 -
ASIO Control Panel
If the driver supports it, this button brings up a window with settings specific to the
audio card.
• For the ASIO Multimedia driver, see page 369 for more info.
• For the ASIO DirectX driver, see page 379 for more info.
• For other ASIO drivers, see the documentation that came with the card/driver.
Latency indication
Depending on the audio hardware and drivers, there will be different latencies (delays) involved when recording and playing back audio. This is especially troublesome when you are monitoring what you record in VST, since the monitored sound
will be delayed a substantial amount. However, the recorded audio will not be affected, since VST takes the latency into account, and adjusts the timing of the recorded audio accordingly.
Users of Windows Multimedia compatible audio cards may want to note that you
can reduce the latency by adjusting buffers in the ASIO Multimedia Setup window.
However, we do not recommend you to do this unless you are absolutely sure of
what you are doing.
● Using DirectX instead of the Windows Multimedia system will also result in
lower latency times. This can be useful if you find that the latency makes it
hard to perform an accurate manual mix (since fader and knob movements
are slightly delayed). However, since DirectX is restricted to audio playback
only, this method will not remedy the audio monitoring delay. See page 379.
Sample Rate
This setting determines the audio quality of your recordings. The higher the value,
the better the quality, but when you raise the value, each recording also uses up
more disk space and computer processing power.
You should not change the Sample Rate setting if you already have files in the Pool
(which you will have if you have made any audio recordings at all in this Song).
Audio Clock Source
If the card and its driver supports it, this pop-up allows you to select an external
source to which the audio playback can synchronize its sample rate. See the documentation that came with the card for details.
● If you use the ASIO Multimedia or DirectX driver, only the “Internal” option is
available.
- 364 -
File Cache Scheme
Virtual Tape Recorder/Audio Sequencer
This pop-up allows you to select one of three methods for audio playback file caching.
Here’s the background: When the computer reads data from the hard disk, this data
is first transferred to an intermediate RAM storage area, called a cache. If things are
set up cleverly, using a file cache can improve computer performance. This mainly
depends on whether the same data is requested repeatedly or not:
• If you use Cubase VST more or less like a tape recorder, that is, mainly
with long recordings that are generally used just once in the Song,
choose the Virtual Tape Recorder option.
In this mode, Cubase VST does not rely heavily on file caching.
• If you use Cubase VST more as an “assembly” tool, repeating the same
material over and over, choose the Audio Sequencer option.
In this mode, Cubase VST relies heavily on file caching. For this to have a
positive effect on performance, the same file(s) would be repeated over and
over without large gaps between, like you would with a drum loop.
• If you do little bit of both, select the combined option.
Recorded Buffers go direct to disk
This option is related to audio recording. Normally you would leave this option on.
• When this is activated, as soon as an audio buffer has been “captured” by
Cubase VST, it will be saved to disk.
• When this is deactivated, “captured” audio buffers may be passed on to
the Windows system cache before they are saved to disk.
You should only deactivate this option if you have problems recording, related to your disk and driver. The problem with using the system cache is that
if you have a lot of memory in your computer, and you have raised the system
cache settings, a considerable amount of data might be stacked up before being saved to disk. This might create playback and recording problems, since
saving large amounts of data to disk might block the system too long for the
other processes to get all the time they need.
- 365 -
MIDI Sync Reference
This determines what clock source MIDI playback will use.
• If Time Code is selected, the MIDI playback will always be in time with any
external time code coming in. However, there is a risk that MIDI playback
will not be in perfect sync with the audio. This happens because the audio
card is not aware of fluctuations in the incoming time code and therefore can
not adjust to them.
• Audio Clock is the preferred option when you are not using any external synchronization. If Audio Clock is selected, MIDI and audio playback will always be in perfect sync. However, there’s a risk they will both drift in relation
to incoming time code.
MIDI to Audio Delay
If you experience that MIDI playback lags behind the audio, this could be because
the MIDI response in your MIDI instrument is slightly slow. If this is the case, use
this parameter to compensate.
Priority
When you run Cubase VST there are several processes fighting for access to processor time in your computer. This parameter allows you to determine which processes should have priority. Select an option depending on the character of your
recordings:
Setting:
Description:
Low
In this mode, MIDI timing gets top priority. If you don’t use much audio
(especially audio processing such as effects and EQ) you should try selecting this option.
Normal
In this mode, MIDI timing and audio playback get roughly equal priorities. Try this mode if you find that audio playback stutters in “Low”
mode.
High
In this mode, audio precedes MIDI in priority. Normally, this should not
affect the MIDI timing badly, but if you have very “busy” MIDI recordings, the timing may suffer somewhat.
Highest
This mode gives maximum priority to audio, which means that the MIDI
timing may suffer and the user interface may seem more sluggish. Select
this mode if you use a lot of audio Effects and EQ, and not much MIDI
material.
- 366 -
Enable Audio only during Play
Normally, after Cubase VST has established connection to the audio hardware, it
starts sending a continuous stream of audio blocks to the audio hardware - even if
audio playback isn’t activated. However, some audio drivers cannot handle hours
and hours of continuous audio streams. The results are occasional audio glitches,
“hiccups”, etc.
To remedy this problem, there is a checkbox called “Enable Audio only during
Play”, in the System dialog on the Audio menu. When this is activated, Cubase
VST stops transmitting audio blocks to the audio hardware as soon as playback is
stopped. When playback starts again, communication with the audio hardware is
re-opened (actually, this is the same as activating and deactivating “Disable Audio”,
only it is done automatically).
By default, this checkbox is turned off, but if you are having problems with audio
playback you should try activating it.
● The “Enable Audio only during Play” switch has one drawback: since all audio transfers are stopped when the playback is stopped, any trailing reverb or
delay ‘tails’ will be cut off.
24 Bit Recording (VST/24 only)
If you are using Cubase VST/24, you will find an additional checkbox in the Audio
System dialog, labelled “24 Bit Recording”. When this checkbox is activated, all
audio files you record will be 24 bit files.
• This is only useful if you are using audio hardware that supports 24 bit
audio.
You may also need to deactivate the “Use 16-Bit only” option in the ASIO
Control Panel, as described on page 375.
• Remember that 24 bit files will be 1.5 times the size of 16 bit files.
• You can freely mix 24 bit and 16 bit files in the same Song.
• You can also turn 24 bit recording on and off by clicking on the red
“24Bit” button in the Arrange window.
This has the same function as the checkbox in the Audio System dialog.
- 367 -
Save your System settings!
Some of the settings in the System Setup dialog are saved automatically in the Cubase VST preferences, while others are saved with the Song, according to the table
below. To make sure that you always start out with the audio settings you know
work well on your system, tailor your System settings once and for all, and save
your Song as the def.all Song.
Setting
Saved in
Audio Performance Settings
Song
Monitoring Switch
Song
MIDI Sync Reference
Song
Audio I/O Settings
Preferences
MIDI To Audio Delay
Preferences
Priority Setting
Preferences
- 368 -
The ASIO Multimedia Setup dialog
When the ASIO Multimedia driver is selected (see page 363), you can use the ASIO
Multimedia Setup dialog to make settings for the audio cards in your system, to optimize the performance and take full advantage of the card’s features.
Actually, there are two dialogs, once basic setup dialog (described below) and one
with advanced options (described on page 370).
The Basic ASIO Multimedia Setup dialog
Opening the dialog
This dialog can be opened in two ways:
• By clicking the ASIO Control Panel button in the System dialog, or...
• By selecting ASIO Multimedia Setup on the Start menu in Windows95.
Selecting a Preset
At the top of the dialog you will find a pop-up menu labelled “Presets”. This contains pre-programmed setups for a number of audio cards. In fact, this is the only
setting which can be changed in this dialog, but in most cases it will be sufficient.
- 369 -
• If you are using a single audio card, and the pop-up list contains a Preset
for it, you should select this.
There may be several Presets for a single audio card type. For example, you
may be able to select a “half duplex” or a “full duplex” setup. “Full duplex”
means that the card has the ability to record and play back at the same time,
which is a great benefit. If your audio card supports this feature (see the audio
card documentation), make sure to select the “full duplex” Preset.
The Output/Input Port lists
These show all the Output and Input Ports currently available in your system. You
will also find information about which Ports are active and which Output Port is
used as Sync Reference (see page 372). You cannot change anything directly in
these lists, although the “Status” and “Sync Ref” settings may change when you select another Preset.
Advanced Options...
Clicking this button opens the Advanced Multimedia Setup dialog, as described below. You may have to use this for one of following reasons:
• There is no Preset available for your audio card.
• You have more than one audio card.
• You experience problems with audio playback or recording, such as audio
glitches, dropouts or poor synchronization between audio and MIDI.
The Advanced Options dialog
This dialog is opened by clicking the “Advanced Options...” button in the basic
ASIO Multimedia Setup dialog. It contains a number of settings and some functions to help you calibrate your audio system properly.
- 370 -
Below, you will find a general working procedure followed by descriptions of all
parameters and controls in the dialog.
Changing the settings in the Advanced Options dialog
When you open the dialog, you will either have a Preset or the Custom option selected, depending on what was selected in the basic ASIO Multimedia Setup dialog.
• As soon as you change any value, the Custom option is selected and set
to the current values in the window.
For example, if you have selected a Preset for a Soundblaster card, and edit
the number of Audio Buffers, the Custom option is selected and is automatically set to the values of the Soundblaster Preset, but with the new Audio
Buffer setting.
• When you have set up your audio card(s) as desired, you can either store
your settings as a Preset (see page 376) or click OK.
If you click OK, you will return to the basic ASIO Multimedia Setup dialog,
with the Custom option selected. The Custom option will contain your new
settings.
• If you click Cancel, you will return to the ASIO Multimedia Setup dialog,
and your changes will be discarded.
Sample Rate pop-up
When you set the Buffer Size (see below), you have to make separate settings for
all available sample rates. Each setting will then be used by the audio system when
you select the corresponding sample rate in the System dialog.
The Sample Rate pop-up in the Advanced Options dialog determines which sample
rate you are currently making Buffer Size settings for.
If you change sample rate, different Buffer Sizes will be displayed.
Note that you only need to make Buffer Size settings for the sample rates that you
actually use for playback and recording (many users will probably only need to
make settings for 44100 Hz).
● Selecting a sample rate on this pop-up will not affect the sample rate setting in
the System dialog (the sample rate used to play back and record audio).
- 371 -
Output and Input Port lists
Here, all available Input and Output Ports are listed, together with a number of settings. To change a setting, double click on it and enter a new value with the computer keyboard. The columns in the lists are described in the table below:
Column:
Description:
Checkbox
Click here to activate or deactivate a Port. Only active Ports
(shown with a checked box) will be available for audio input
and output.
Device Name
The name of the Port. You can change the name of a Port if you
like. The names shown here will appear in the Master window
(Output Ports) and the Input window (Input Ports) in VST.
Audio Buffers
This value determines how many audio buffers are used when
playing back or recording audio on the selected Port. See the
section about buffers, below this table.
Buffer Size
This value determines the size of the audio buffers for a Port, in
samples. See the section about buffers, below this table.
Note that there are different Buffer Size values for different Sample Rates (see page 371).
Offset
This is an offset time for a Port, in samples. With some audio
cards (usually stereo multimedia cards), there may be a slight
delay on the Input or Output port, causing recorded audio to be
a little “off the beat”. You can use the Offset value to compensate for this.
To find out if you need to change the Offset value for your audio
card, try recording the audio metronome click, by feeding the
audio output of the card back into an audio input (remember to
disable Monitoring in the System dialog first, to avoid feedback!). Then zoom in on the recorded audio metronome click in
the Wave Editor and check whether it’s off the beat.
Audio Channels
Indicates the number of audio channels associated with each
Port. You cannot change this value.
Sync Reference
This column indicates which Port is used as Sync Reference, i.e.
to which audio Port the MIDI playback is synchronized.
You cannot change this value directly in the column, rather Sync
Reference is always set to the first activated Port on the list. To
select another Port as Sync Reference, you have to make sure it’s
activated, select it and then move it to the top of the list using
the “Move Up” button (see below).
To select whether Sync Reference should be set to an Input or an
Output port, use the Sync Reference pop-up menu in the lower
right corner of the dialog. This is also where you select the preferred method of Sync Reference (see page 374).
- 372 -
About Audio Buffers and Buffer Size
When Cubase VST receives or sends out data to an audio card, it passes via a
buffer, a temporary storage area. Furthermore, to be able to send data continuously,
just having one buffer isn’t enough; you need several buffers that the system can
switch between.
Having many and large buffers ensures that playback will occur without glitches.
However, the time between the moment Cubase VST sends out the data and when it
actually arrives on the output (the “latency” - see page 364) will be longer. This
means that it will take longer for changes that you make – for example in the Monitor window – to take effect. Also, the larger the latency, the longer the monitoring
(sound input to output) delay.
You can adjust the number of buffers and buffer sizes, if required. The following
guidelines apply:
• You can set the number of buffers directly in the Port lists, but we recommend that you do this in the “Check Buffers and Sync” dialog.
This allows you to try out different settings before applying them, as described
on page 377.
• If you are using the “DMA Block” Sync Reference method, you should set
the Buffer Sizes with the “Detect Buffer Size” function (see page 374).
• If you are using the “Sample Position” Sync Reference method, you are
free to change the Buffer Size value directly in the list if necessary, but
again, we recommend that you do this in the “Check Buffers and Sync”
dialog instead (see page 377).
• There are different Buffer Size settings for different sample rates.
Use the Sample Rate pop-up at the top of the dialog to select a sample rate to
make settings for (see page 371).
Port Order buttons
These buttons are used to move the selected Port up or down in the Port list. The order of the Ports in the list is very important, since the first activated Port from the
top of the list will be used as Sync Reference as described above.
- 373 -
Sync Reference pop-up
This setting is used to select a method of “synchronizing” the MIDI playback to the
audio. There are two different methods:
• Sample Position
This is the preferred setting if your card supports it. In this mode the number
of samples played are reported from the card to Cubase VST and this number
is used for synchronizing the MIDI playback. This is equivalent to synchronizing to a sample accurate external clock.
Unfortunately, not all audio cards support this method. If the documentation
for your audio card is unclear on this point, try selecting Sample Position as
sync reference method, and use the Check Buffers and Sync method to determine whether it works properly (see page 377).
• DMA Blocks
This should only be used as a last resort. In this mode, the reference between
audio and MIDI is determined by the rate at which the data blocks are being
transferred by Direct Memory Access (DMA) to the audio card during recording and playback (yes, this is a heavy technical explanation, but this is a very
technical issue!).
For this mode to work properly, the Audio Buffers setting must be in accordance with the real blocksize used in the system. Use the Detect Buffer Size
function to achieve this (see page 376).
On the pop-up menu, you will find four options:
Sample Position
Output
Selects the uppermost Port that is activated on the Output Port
list for Sync Reference, using the Sample Position method.
DMA Block
Output
Selects the uppermost Port that is activated on the Output Port
list for Sync Reference, using the DMA Block method.
Sample Position
Input
Selects the uppermost Port that is activated on the Input Port
list for Sync Reference, using the Sample Position method.
DMA Block
Input
Selects the uppermost Port that is activated on the Input Port
list for Sync Reference, using the DMA Block method.
- 374 -
Card Options
This pop-up menu contains four additional settings:
Full duplex
When this switch is activated, Cubase VST will play back audio
Tracks while recording new ones. It is of course a great benefit
to have this ability, since it allows you to hear previously recorded audio Tracks whilst recording overdubs.
However, not all audio cards support this feature. Activate this
switch if:
• You know you have a card that supports this feature.
• You use two separate cards for recording and playback. (Not
recommended, unless the cards are tied together with a word
clock sync signal. Otherwise, the sample rate clocks in the
two cards will always drift slightly against each other, which
can cause glitches and dropouts in the audio.)
Start Input First
If your card does not seem to work correctly with Full Duplex
activated, you should try this option which starts the Input on
the card before the Output.
Open All Devices This is only for multi-channel cards. It determines how the card
Before Start
is initialized. If the card works with this option activated, this is
preferred, because all ports will then be in absolute sync. Only
if you have problems with the card should you deactivate this
option.
Use 16-Bit only
This is described below.
About the “Use 16-Bit only” option
This option determines the sample bit resolution used when VST is communicating
with the audio hardware. If the option is activated, all audio devices are opened
with a sample width of 16 bits. If the option is deactivated, all audio devices are
opened with their respective highest supported sample width. This makes it possible to use a 16-Bit device together with a 24-Bit device, for example.
Generally, we recommend that you keep this option deactivated, except:
• If you specifically want to make sure that only 16-Bit resolution is used.
• If you experience loss of performance with the switch deactivated (this may
be the case if your audio hardware is on an ISA-bus).
- 375 -
Presets
As in the basic ASIO Multimedia Setup dialog, you can select a Preset from this
pop-up menu. However, in the Advanced dialog, you can also store your own Presets, or delete Presets you don’t need (factory Presets excluded).
To create and store a Preset, proceed as follows:
1. Make the desired settings.
This may include using the functions “Check Buffers and Sync” and “Detect
Buffer Size” (see below).
● Note that there are different Buffer Size values for each sample rate! Use the
Sample Rate pop-up at the top of the dialog to select the sample rates that you
need to use, and set Buffer Sizes for each of them before storing.
2. Click Store.
A dialog with a name box appears.
3. Enter a new name for the Preset, or enter a name of an existing Preset.
Note that you cannot overwrite any of the factory-made Presets.
4. Click OK to save the Preset or Cancel to abort.
You can also delete any Presets you have made yourself:
1. Select the Preset you want to delete.
If you select a factory-made Preset, the Delete button will be greyed-out.
2. Click Delete.
The Preset is removed from the list.
Detect Buffer Size
This button automatically detects the correct buffer size for cards where DMA
Block has to be used as sync method. Also, you may need to use it when the Buffers
and Sync test indicates problems (see below).
- 376 -
The Check Buffers and Sync dialog
This dialog is opened by clicking the “Check Buffers and Sync” button in the Advanced Options dialog. In a situation when you have to manually change your
Buffer and/or Sync Reference settings, it helps you check if your settings are OK.
This is how to use it:
1. In the Port list, select the Port you want to test.
The function will perform a test that determines both whether MIDI to Audio
synchronization will work, and whether audio playback/recording will work
without dropouts. If you are specifically interested in testing synchronization,
you should probably select the Port currently used as Sync Reference (see
page 374).
2. Click the “Check Buffers and Sync” button.
The dialog opens. At the top of the dialog, the name of the selected Port is displayed.
3. Select a method for Sync Reference.
As described above, Sample Position is the preferred choice if your audio
card supports it.
4. Make settings for Audio Buffers and Buffer Size.
These settings are used for the test only. You can apply them as “real” settings
by clicking the button “Apply Buffer Settings”. This makes it easy to try out
different settings, and apply them after the test has indicated that they should
work.
5. Set a test period with the slider.
You can set a test period ranging from 1 second to 5 minutes. The longer the
test period, the more certain you can be that your settings will work.
- 377 -
6. Click “Start”.
The test begins. The duration of the test is indicated by the progress bar below
the Test Period slider.
• If the “Sync lost” value (in the upper left corner) builds up, this indicates
that MIDI to Audio synchronization is unstable.
• If the “Buffer lost” value (below the “Sync lost” value) builds up, this indicates audio dropouts.
7. Wait until the test is completed or, if the Sync/Buffer lost values are
building up, click the “Stop” button to stop the test.
If the test was successful (no Sync or Buffer lost), an alert will tell you so. If Sync
or Buffers were lost, a message will appear, suggesting what you can do to remedy
the problem. Make the necessary changes and perform the test again.
8. When the test is successful, click “Apply Buffer Settings” and then OK.
You are returned to the Advanced Settings dialog, with the new Buffer settings
applied to the selected Port.
● A successful test doesn’t automatically ensure that audio playback and recording will be troublefree! When doing “real” audio work in Cubase VST,
the computer may have additional tasks which could decrease the performance. The Buffers and Sync test should be viewed as a guide, not an absolute
rule.
Automatic Sync Testing
You will find that the program sometimes automatically asks whether you want a
sync and buffer test to be performed. This will happen after installation of Cubase
VST and after you make any changes to the audio configuration (activating/deactivating ports, changing the buffer sizes, etc.).
• If you choose to test the new configuration, the program will open all selected audio devices over a short time and try to simulate a Cubase VST
operation, using the current ASIO Multimedia settings. It will also check
the sync stability of the selected Sync Reference port.
If the test fails, you will have to change the settings manually, as described in
the Troubleshooting document.
• If you choose to skip the test, the program will remind you later on that
the new settings weren’t tested, and ask whether you want to perform
the test.
- 380 -
Using the ASIO DirectX Driver
Microsoft DirectX is a set of standards and routines for handling various kinds of
multimedia under Windows95 and Windows NT, including audio playback. DirectX version 5 is automatically installed when you install Cubase VST. If you have
an audio card with a DirectX driver, you can use DirectX instead of the ASIO Multimedia driver when playing back audio in Cubase VST. Using the DirectX driver
has the following benefits:
• Lower latency (see page 364).
For example, this makes it easier to perform a manual mix, since the “response time” of faders and other mixer controls will be shorter. A typical approach would be to record audio using the ASIO Multimedia driver and then
switch to the ASIO DirectX driver for mixdown (since DirectX does not support audio input, see below).
• Several applications can play back audio simultaneously.
This means that you can run Cubase VST together with a DirectX compatible
software synth, for example. Note that the application “in focus” (the one currently “at the front”) determines the audio playback format. You cannot simultaneously play back audio at different resolutions or sample rates.
Also, be aware that playing back audio from several applications simultaneously may cause clipping (digital distortion), simply because the level of the
added audio signals may exceed 0dB. If this happens, lower the outputs of the
respective applications.
• The “Sample Position” method is automatically used for synchronizing
MIDI playback to audio (see page 374).
You will not have to use the “DMA Blocks” sync method or set the size of the
audio buffers, which is an advantage.
However, there are also some restrictions:
• You can only use the DirectX driver for audio playback, not for recording!
This is because Microsoft DirectX currently doesn’t support audio input, only
output.
• The ASIO DirectX driver only works for cards with a "native" DirectX
driver.
DirectX emulation for an audio card is not supported.
● If your audio card has a dedicated ASIO driver (that is, an ASIO driver specifically written for that audio card), you should always use that driver and not
the DirectX driver. A dedicated ASIO driver will provide low latency times
and enable audio input.
- 379 -
Installing a DirectX driver for your audio card
At this point, there are three possibilities:
• A driver for you audio card may be included in the Microsoft DirectX
package.
In this case, you don’t have to do anything; the DirectX driver for the card was
installed automatically with DirectX. If you are not sure, see Microsofts website (www.microsoft.com) for a list of supported audio cards.
• A DirectX driver was included with your audio card when you purchased
and installed it the first time.
Again, this means that the DirectX driver is already installed.
• There is a DirectX driver for your audio card, but you haven’t installed it.
For example, you may have purchased or downloaded a DirectX driver after
having installed your audio card. In this case, follow the installation instructions included with the driver.
Selecting the ASIO DirectX driver in Cubase VST
1. Pull down the Audio menu and select System.
The Audio System dialog appears.
2. Select the ASIO DirectX driver from the ASIO Device pop-up menu.
3. Click the ASIO Control Panel button.
The Control Panel for the DirectX driver appears:
4. Check that your audio card appears and that it’s activated.
5. Click OK to close the Control Panel and the Audio System dialog.
- 380 -
Conclusion: When should I use the DirectX driver?
Since both the DirectX and Multimedia drivers have limitations, you may want to
combine these during the same session, for example recording with the Multimedia
driver and switching to DirectX for mixdown. Use the following guidelines to determine when to select which driver:
Select the ASIO DirectX driver if:
• You only need to play back audio, not record.
• You do not have or need several audio outputs.
• You want to be able to play back audio from two or more applications simultaneously (and they all support DirectX).
Select the ASIO Multimedia driver if:
• You need to record audio.
• If you don’t find the higher latency a problem during playback.
● Again, if you have a dedicated ASIO driver for your audio card, you should
always use this, rather than the DirectX or Multimedia drivers.
- 381 -
Methods of Optimizing Performance
Using Stereo/Mono and Sample Rate settings to gain more channels
If your computer system limits the number of channels, you should try recording
with a lower sample rate and/or mono recording.
This will considerably reduce the amount of data that needs to be transferred from
the hard disk to the audio card. A 44100Hz stereo recording creates four times as
much data as 22050Hz mono!
• Of course, you will not actually get more audio channels when recording
in mono, but since a stereo recording uses two channels and a mono recording only one, you will get one precious channel left, which you can
use for other recordings.
The Performance window, EQ and Effects
Even though you have been able to activate a number of audio channels in the System dialog without getting any warning, you may possibly run into performance
problems when adding EQ or effects. This is due to the fact that the Apply function
doesn’t “know” how much processing is activated. The EQ and effects modules put
a certain demand on the processor, which may cause the audio playback to drop out
or stutter. Therefore:
1. Pull down the Audio menu and select Performance...
The Audio Performance window appears.
2. Move the Performance window to a place on the screen, where you can
see it all the time.
• The upper bar graph shows the CPU (processor) load.
If the red OVER indicator lights, you need to decrease the number of EQ modules, active Effects and/or audio channels playing back simultaneously.
• The lower bar graph shows the Hard Disk transfer load.
If the red OVER indicator lights, the hard disk is not supplying data fast
enough to the computer. You might then try going into the System dialog,
lower the number of channels and raise the Disk Block Buffer Size. If this
doesn’t help, you need a faster hard disk.
● Please note that the OVER indicator for the Disk meter may light up briefly
during positioning or when stopping playback. This is not an indication of
any problem.
- 382 -
Maintaining the Hard Disk
Defragment!
Always make sure your hard disk is defragmented. Fragmentation affects the performance of any hard disk severely. A defragmentation utility is included with later
versions of DOS and Windows 95. See your computer manuals for details.
Delete Unused Files!
Cubase VST requires a lot of disk space and fast disks. If you don’t delete unused
files, your hard disk will soon fill up.
When you use Purge Segments in the Pool, it will be evident which files are no
longer used in a Song (the files not used will have no Segments at all). This gives
you a way of finding out which files can be deleted. But please remember that an
audio file can be used in more than one Song.
Back Up!
It can’t be said too often. Disk crashes are a well known phenomenon. Without a
regular backup scheme you take the risk to lose valuable recordings!
- 383 -
30
The Master Track
- 384 -
31
What is the Master Track?
Cubase VST has a Master Track, a special "hidden" Track that contains all the
tempo and time signature changes. There is one Master Track for each Arrangement. The Master Track does not have Parts, you always edit the entire length of the
Song.
● For the tempo changes to have any affect on the Arrangement whatsoever,
you must have the Master button on the Transport Bar activated! The Time
Signatures in the Master Track, however, are always used.
The Master button
on the Transport Bar.
There are three ways to change the Master Track:
• by editing in the Master Track Graphic editor (see page 399 in this chapter).
• by editing in the Master Track List editor (see page 406 in this chapter).
• by recording tempo changes (see page 394 in this chapter).
- 385 -
Opening the Graphic Editor
You can open the graphic Master Track editor in two ways:
• By selecting Mastertrack Graphic from the Edit menu.
• By pressing [Control]-[M] on the computer keyboard.
- 386 -
The Window Sections
The central display in the Graphic editor is divided into six sections. Some of these
can be hidden using the group of buttons on the Function bar.
Here are the graphic editor’s areas, from top to bottom:
Info Line (turned on/off using the
Info button).
Meter Ruler (always visible).
Time Signature Strip
(turned on/off using the
Time Sig button).
Meter Hitpoint Strip
(turned on/off using the
Hitpoint button).
Tempo display (always visible).
Time Hitpoint Strip (turned
on/off using the Hitpoint
button).
Time Ruler (turned on/off using
the Time button).
- 387 -
About the Tempo Display
The Tempo Display behaves very much like the Continuous Data Display in for example Key Edit. For a basic introduction to Cubase VST's way of handling continuous data (tempo belongs to this type of data), see the chapters about the MIDI
Editors.
The First Tempo/Time Signature Event
When you first open the Master Track editor, for a new song, it will only contain
one tempo, displayed as a grey or colored box continuing for ever to the right.
● You can't move or delete the first Tempo or Time signature Event.
The Tempo Display and Scrolling
Since the Tempo Display can be scrolled and the window resized, you might not always see the entire tempo graph:
• If the display is "white", this is because the tempo graph is below the window
(scroll down).
• If the entire display is grey, this is because the top of the graph is above the
window (scroll up).
About Time Signature Events
Time Signature Events are displayed as small "hangers" above the tempo graph,
visible if the Time Sig button is activated on the Function bar (see illustration
above). The Events themselves can be selected, moved, copied, etc and the values
for them are edited on the Info Line, as described on page 398.
- 388 -
About Rulers and Positions
The Master Track editor has two rulers, one above and one below the Tempo Display. The upper ruler shows meter (bars, beats etc.). The lower ruler – which can be
turned on/off using the Time button, see page 387 in this chapter – shows time in
one of a number of formats. To select a time format for this ruler, use the pop-up
Options menu.
The formats are made up as follows:
SMPTE/EBU
hours:minutes:seconds:frames:subframes
1/1000 sec
hours:minutes:seconds:thousands of seconds
Frames
frames
16mm Film
feet’frames
35mm Film
feet’frames:sprockets (4 sprockets per frame)
For SMPTE/EBU and Frames, the number of frames per second is set in the Synchronization dialog box, reached from the main Options menu. There are always 80
subframes to a frame, regardless of the frame rate.
The amount of detail shown on the ruler depends on how far you have zoomed in.
- 389 -
Switching between Meter and Time based Display
Normally, the meter ruler will be linear, that is, there will be equal distance between
all bars on the screen. If there are tempo changes, the time ruler will be non-linear
to match. If you watch the accelerando below you will see that the meter ruler is
linear but the tick marks on the timing ruler get more and spread apart as the tempo
increases.
There will be cases where you want the Meter ruler to be linear and the Time ruler
to adapt to this, and there will be cases where you want the opposite (for example
when working with film or video). For this purpose, the display can be switched,
using one of the buttons on the Status Bar.
Meter Linear Time Linear
After switching, you may have to change the horizontal magnification of the window to make the window show the range you are interested in.
- 390 -
Moving around and setting Song Position
Since the Master Track is basically an editor like any other, moving around and setting Song position is basically identical to using any editor. Here are two minor differences:
• To Position the Song Pointer, simply click on either Position Ruler.
• The Goto menu has slightly fewer options than the other editors.
Position Boxes
Time Position
Meter Position
Tempo
The Mouse Pointer position is always shown on the Status bar, at the top as a time
position and below as a meter position. These two position boxes are also used
when moving and duplicating objects, as in all Cubase VST editors and in the Arrange window.
● Please note that these two boxes always show the position at the closest Snap
value. Since the Snap value is used when positioning Events, these boxes will
always indicate the position that an Event will actually appear on when you
move it or draw it in. This also means that when you have zoomed in very far,
you will probably want to set Snap to Off to be able to position accurately.
- 391 -
About Hitpoints
The Master Track editor also adds “Hitpoints” to Cubase VST. These are used to
match time positions to meter positions, for example to make a certain musical cue
fit a scene in a film or video.
Hitpoints come in two flavors, meter and time based. "Meter Hits" are shown on the
upper Hitpoint strip and "Time Hits" are shown on the lower. You can hide all Hitpoints by using the Hitpoint button on the Status Bar, see page 387 in this chapter.
Utilizing Hitpoints, tempo changes can be created which make the music fit any
type of cue. More on working with Hitpoints in the next chapter.
About the Toolbox
The Master Track editor has a Toolbox, just like all Cubase VST's main windows:
- 392 -
Activate Master!
● For the Tempo and Time Signature changes to have any effect on playback,
you must turn on the Master button on the Transport Bar.
- 393 -
Recording Tempo Changes
Recording Tempo Changes in the Graphic Editor
To record tempo changes using the mouse, proceed as follows:
1. Select a Snap value (using the Snap pop-up on the Function bar) to decide for a spacing between the Events.
Do not use a higher value than needed, since this will make it harder to perform detailed editing on the recording afterwards. Often quarter notes will
suffice, but experiment to find a value that suits you.
2. Activate playback from any position in the Song.
3. Position the mouse pointer over the tempo scale to the left of the tempo
graph.
Watch the Tempo box on the Status bar, it will show the Tempo represented
by the mouse position, see page 391 in this chapter.
4. Click the mouse button to insert one tempo Event, or drag up and down
to create accelerandi or ritardandi.
5. When the mouse button is down you record tempo changes, when it is
up you don't. Use this is as a way of punching in/out.
The display does not get updated while the mouse button is down.
6. When you are ready, stop playback.
- 394 -
● The recording you make overwrites any earlier recordings at the same positions (The Master Track editor always records in “Replace Mode”).
Recording Tempo Changes from the Arrange Window
It is possible to record changes in tempo without entering the Master Track editor(s). There are two major uses for this:
• You get a better view over the actual position in the Song, since you can
watch the Part display while you are changing the tempo.
• You can use this for setting out "markers" for tempo changes and then edit in
the actual tempo values in the Master Track afterwards.
When the "Record Tempo/Mutes" item is on (checked) on the Options menu, and
Cubase VST is put into Record mode, it records any tempo changes and puts them
in on the Master Track.
● Make sure you don't overwrite (Replace) any regular recording when Cubase
VST is put into Record mode. To make certain, select an empty Track.
Tempo Recording works just as regular recording, using the Locators, with punch
in and out at any time and so on, but...
• The Master Track is always in Replace mode, that is, the recording always replaces the existing tempo Events.
Once in Record mode, change the tempo value on the Transport bar. Each time you
change it, the new setting is recorded. Recorded tempo changes appear in the Master Track, where they can be edited as usual.
● For the recorded tempi to have any effect on playback or future recordings
you must of course switch Cubase VST to Master (press [M] on the computer
keyboard).
Remember that it is only tempo changes that are recorded, you may have to set an
initial tempo directly in the Master Track. Also remember that this type of recording does not use the Snap value, and is therefore harder to edit than a recording
made directly in the Graphic editor.
- 395 -
Selecting
Tempo Events
Selecting in the tempo graph is done as everywhere else in Cubase VST:
• Clicking on one Event selects it.
• If you hold down [Shift], you can select more Events.
• If you press the mouse button somewhere in a free (white) area and drag, a
rectangle appears. This rectangle should stretch over the beginning of all the
Events you wish to select.
With a rectangle like this...
... you select these two Events, since they both begin within the range.
• You can click on one Event and then use the [←] and [→] keys to step through
them. Hold down [Shift] to select as well.
• You can use Select All ([Control]-[A]) to select all Events, not just the tempo
ones.
• To deselect, simply click on some free (white) area in the display.
- 396 -
Time Signature Events and Hitpoints
Selecting Time Signature Events (and "Hitpoints", see the next chapter) is done in
exactly the same way as with Tempo Events, see above.
Selecting Events of Different Types at the Same Time
The Master Track editor displays data of several different types: Tempo Events,
Time Signature Events and Hitpoint Events. To select more than one type, first
make your selection in one area (for example in the Tempo Display) using any of
the methods above then hold down [Shift] and continue selecting in the next area
(for example among the Time Signatures), again using any method.
To select for example some Tempi and a Time Signature, first select the Tempi, then hold
down [Shift]...
...and click on the Time Signature Event.
The only exception to this is Select All, which (as stated above) selects all Events,
regardless of type.
- 397 -
Editing on the Info Line
When you select one and only one Event its settings appear on the Info Line.
• All types of Events have a Time and a Meter position. You can edit either to
move the Event.
• The Time Position is always edited in time code (SMPTE) format; as
hours:minutes:seconds:frames:subframes.
• Tempo Events can also be edited on the Info Line. If you have the display
switched to the Time based mode (see page 390), the curve will get "compacted" or "expanded" as you change the tempo.
• Time Signature Events have a numerator and a denominator which can be
changed individually on the Info Line to produce any time signature from 1/2
to 16/16.
• Hitpoints' names (as shown in the value column) are described on page 415.
● Moving Time Signatures using the Info Line can be a bit confusing at first.
Here's why: If you move a Time Signature so that it winds up on the same position as an existing Time Signature, that Event will be deleted. If this is not
what you want, either double click on the position value on the Info Line and
type in the desired position or move the Event using the mouse, see page 401.
● You can not move the first Time Signature Event.
- 398 -
Redrawing the Tempo Curve
If you select the Pencil from the Toolbox and drag over an existing tempo curve,
you will change the values of the tempo Events you pass over. A box on the status
bar, just to the left of the Quant value, will show you exactly which tempo the current mouse position represents, see page 391 in this chapter.
To change the value of one Event for example, you can position the Pencil anywhere "over it", move up and down until you see the right tempo, and then simply
click to set the Event to that tempo.
Clicking in the graph changes the tempo of the Event to the position of the pointer.
To change the tempo of several Events at the same time, you simply drag over them
with the mouse button down. If you drag faster than the program can redraw the
screen, don't worry, your movement is tracked anyway.
Please note that this only changes the values of existing Events, it does not input
new ones. To do this, you must hold down [Alt], see below.
If you have the display switched to the Time based mode (see page 390), the curve
will get "compacted" or "expanded" as you change the tempi.
- 399 -
Drawing new Events
Tempo Events
Drawing one Event
1. Set the Snap value.
You can only input Events at the closest Snap position.
2. Select the Pencil
3. Hold down [Alt], position the pointer (watch the tempo indicator on the
Status Bar), and click once.
Drawing a Curve
1. Set the Snap value.
Don’t draw Tempo Events with a tight spacing than you need, it’ll “eat up”
memory and make the screen redraw slowly.
2. Select the Pencil
3. Hold down [Alt], position the pointer (watch the tempo indicator on the
Status Bar), and drag.
If you drag faster than the program can redraw the screen, don't worry, your
movement is tracked anyway and the values are smoothed at the end of the
draw.
If you have the display switched to the Time based mode (see page 390), the curve
will get "compacted" or "expanded" as you input new tempi.
Time Signature Events
To draw in Time Signature Events, simply select the Pencil and click once in the
Time Signature strip. You can also drag to input several Time Signature Events at
the same time. To input a Time Signature change at every bar for example, set Snap
to "1" and drag across the time Signature Strip. Then select each one and set its
value using the Info Line.
- 400 -
Moving Events Using the Mouse
If you have one or more Events selected (even of different types) you can move
them using the mouse, just as with any object in Cubase VST (select the arrow
pointer from the Toolbox). Only horizontal movement matters.
If you are only moving one tempo Event, its position is indicated by a vertical line.
If the selection contains several tempo Events, a rectangle encompassing the area
from the start of the first selected Event to the start of the last selected Event guides
you. The movement snaps to the closest Snap value.
● A block of tempo data that you move, always replaces any existing tempo
data on the position you move it to. You can not move the first Tempo and
Time Signature Events.
Duplicating Events
If you hold down [Alt] and move Events, you are duplicating them. Everything else
is as when moving.
● Time Signature events can only be positioned at the beginning of a bar.
Cut, Copy and Paste
The Master Track editor supports full Cut, Copy and Paste of all types of Event.
Cut and Paste works just like in any other part of Cubase VST.
● If, as a result of the Paste, one Tempo or Time Signature Event will wind up on
the same position as the other, the previous Event will get replaced. A block of
tempo data that is Pasted in, always replaces any tempo data at those positions.
Deleting Events
• To delete Events using the mouse, select the Eraser and click or drag over
the Events.
• To delete using the computer keyboard, first select the Events you want
to delete, then press [Backspace].
• You can also use the "Delete" item on the Edit menu to clear the selected
Events.
- 401 -
● When you delete a Tempo or Time Signature Event, you actually remove a
change in Tempo/Time Signature. Since you remove the change, the previous
Tempo or Time Signature will remain, until the next Event.
You can not delete the first Tempo or Time Signature Event.
Repeating Events
The Repeat function on the pop-up Do menu can be used to block-duplicate a
number of Events one or more times. It operates on all Events, Tempo changes,
Time Signature changes and Hitpoints at the same time.
1. Set up the Left and Right Locator (on the Transport bar) to encompass the
section you want to repeat.
2. Set the Song Position to where you want the first block of Events to appear (you can click on the Time or Meter Rulers to do this).
3. Select Repeat from the pop-up Do menu.
4. In the dialog box that appears, set the number of times you want the
block repeated.
5. Click OK.
The copies will now appear. They are lined up "edge to edge", starting at the
Song Position.
Creating Accelerandi and Ritardandi
The Line tool in the Toolbox (see page 392) can be used to create continuous tempo
changes, accelerandi and ritardandi (deaccelerandi). The Line tool is described in
detail in the chapters describing the MIDI editors.
• To fit existing Events under the line (to create a ramp), position the
mouse, press the mouse button and drag to create a line. Release the
mouse.
• To create new Events, hold down [Alt] before pressing the mouse button.
New Events that fit "under the line" are created, spaced according to the
Snap value.
Please note that if you have the display switched to Time Base (see page 390) the
ramp will appear "curved" since the meter scale is compacted/expanded. If this is
confusing, switch over to meter base.
- 402 -
Reducing the number of Tempo Events
As a result of a tempo recording you may have an overly dense tempo curve, which
might make the screen redraw sluggishly and the tempo curve hard to edit.
Reduce, found on the pop-up Do menu thins the data at its densest points, making
the spacing more even. Applying it repeatedly will make the data consecutively
"thinner".
Reduce only works on the selected Events. Select a section of the tempo Curve and
use the Reduce function.
Smoothing Tempo Event values
This function evens out a tempo curve with "transients" (jumps), without inserting
or deleting Events. Instead, existing Tempo Events are averaged to make the curve
smoother.
Before Smoothing......and after.
- 403 -
Numerical processing of Tempo Events
The Tempo Processor dialog, located on the pop-up Do menu, is the equivalent of a
fit time calculator. It is used to numerically change a set of tempi by a specific
amount or to fit a certain cue. Since this function uses numbers, it might feel complicated when you first try it. We will try to guide you through it. Here's the main
procedure:
• The Tempo Processor dialog adjusts existing tempi so that a region of bars (for
example eight bars) will fit a certain time span (for example "6 seconds and
ten frames").
• Since the function does not create any tempi of its own, you have to put them
in before you start. If you want a smooth tempo change, create a ritardando or
accelerando. If you want more direct changes, only input one or a few Events.
Also note that the adjustment is made overall for all the tempi in the range,
which means they keep their relative tempo differences. In other words, a
steep ritardando will still be a steep ritardando after the processing.
• The adjustments themselves are made in a dialog where you can change only
two things: either you simply set an overall scale factor (for example 70% of
the original tempo) or you set an end time for the range, so the number of bars
that you selected will now end at precisely that position.
- 404 -
Here are the details:
1. To use this function, select one or more tempi that make up a range of
bars, but do not include the last tempo in the Song!
(if the last tempo is selected, Process Tempo will be greyed out on the menu).
All the tempi within the selected range will get processed, whether they are
all selected or not.
This selection will Process all Tempi between bar 11 and 14.
2. Select Process Tempo from the pop-up Do menu.
A dialog box appears.
3. The Start and End Meter values in the "Selection Range" section are only
display values. They show you the range of the selection you made.
4. The Start Time and Length fields in the same section are also just display
values. Start Time shows you the Time position of the beginning of the selection. Length shows you the current length of the selection. This last
value will change when you...
5. ...set the amount of change either by adjusting Length or Tempo Scaling
in the "Settings" section of the dialog. In either case the other value and
the Length value will get updated to show you how the change will affect
the bars the selection encompasses.
6. When you are done with all the settings, click Do.
The changes take effect immediately. You can also click Undo to revert to
what you had before.
7. When you are ready, click Exit.
A more intuitive way of fitting tempi to time based cues is using Hitpoints, see page
420.
- 405 -
The Master Track List Editor
Cubase VST also features a list editor for Tempi, Time Signatures and Hitpoints.
You can use this instead of the Graphic editor, or as a complement.
The List window is very straightforward to use. If you are familiar with the Graphic
editor and Cubase VST’s List Edit for MIDI data, using this editor will be easy.
Opening the List Editor
You open the list editor by selecting Mastertrack List from the Edit menu or by
pressing [Shift]+[Control]-[M].
You can have the List and the Graphic editors open at the same time, and they will
always be "in sync", just as when you have two MIDI editors open at the same time.
- 406 -
Selecting a Time Format and Hiding Event Types
Using the upper part of the pop-up Options menu at the top of the window, you can
select a format for the Time Positions of the Events (as described on page 389 in
this chapter).
Using the lower part of the same menu, you can hide/show any of the four possible
Event types.
Creating Events
If you want to create a new Event, proceed as follows:
1. Select an Event type from the pop-up menu above the Option pop-up.
2. Set the Song Position on the Transport Bar to where you want your new
Event.
3. Click the Insert button.
● If an Event of the same type already exists on that position, it will get overwritten.
Moving Events
This is done by adjusting the position values in the list, as on the Info Line in the
Graphic editor (see page 398). You can move an Event by either giving it a new Meter Position or a new Time Position (in Time Code format (SMPTE/EBU) only).
- 407 -
● You can not move the first Tempo and Time Signature Event.
Deleting Events
1. Select the Event(s) you want to delete.
You can use [Shift] to select several Events at the same time.
2. Press [Backspace].
● You can not delete the first Tempo/Time Signature Event.
Cut, Copy and Paste
Events that you have selected can be Cut, Copied or Pasted. When you Paste they
will get inserted as a block, starting at the Song Position.
- 408 -
Moving Master Track data between Arrangements
As you know, you can have several Arrangements open at the same time. Each Arrangement has its own Master Track, for which the Master Track editor is an editor.
To move Tempo Events, Time Signatures and Hitpoints between Arrangements,
you can use two techniques: Cut, Copy and Paste or Import/Export.
Using Cut, Copy and Paste
To Cut, Copy and Paste between Arrangements, proceed as follows.
1. Select the Events you want to move, in the Graphic editor or in the List
(it doesn't matter which). For details on selecting, see page 396.
2. Select Cut or Copy.
3. Select another Arrangement
This can be either an open one, one that you create using New on the File
menu or one that you open from disk (as an Arrangement file).
4. In the new Arrangement, open the Master Track editor.
5. Set the Song Position to where you want to insert the block of data, and
select Paste from the Edit menu.
● If, as a result of the Paste, one Event will wind up on the same position as an
existing, the existing Event will get replaced. A block of tempo data that is
Pasted in always replaces any tempo data at those positions.
Using Import and Export
If you want to move an entire Master Track between Arrangements, you use Import
and Export on the pop-up Do menu in the Master Track editor.
• Export presents you with an ordinary file selector where you can define a
name and location for your Master Track file.
• Import loads a Master Track from disk which simply replaces the current Master Track.
- 409 -
31
Hitpoints
32
- 410 -
What can I do with Hitpoints?
Hitpoints are basically used for matching time positions to meter positions, by inserting – and changing the values of – tempo changes. This can be used in a number
of situations:
•
•
•
•
When scoring for film and video, matching music to visual cues.
For syncing Cubase VST to live music on tape.
For restoring lost sync tracks.
When working with material that contains both music (tempo based Events)
and for example sound effects (time based Events).
• Creating tempo maps for music recorded without a metronome, and fit the
music to the "barlines" in Cubase VST.
What are Hitpoints?
Hitpoints are actually only positional references, markers of important positions
that appear in the Graphic Master Track editor. They are used to define the relationship between time and meter in order to "match tempo" (see below) or to create
tempo maps that fit certain cues.
There are two types of Hitpoints, Meter Hits and Time Hits. Meter Hits are found
on a strip above the Tempo Display and Time Hits are found on a strip below (see
page 392). If these Strips are not visible, there is a Hitpoint button on the Status bar
that reveals them.
Hitpoint Strips hidden.
Hitpoint Strips shown.
The Hitpoint button.
Meter Hitpoint
Meter Hitpoint Strip (turned on/
off using the Hitpoint button).
Time Hitpoint Strip
(turned on/off using the
Hitpoint button).
Time Hitpoint
- 411 -
Meter Hits always appear on meter positions (bars, beats etc) and Time Hits are always on time positions (for example displayed as time code).
The idea is that you set out Time Hits to mark out important visual keys in film, or
for example quarter notes in freely recorded music. You then use various tools to
find a relation between the Time Hit’s positions (defined in time) and important musical positions (defined in bars and beats). This relation is created in one of two
ways: by linking Time and Meter Hits, or by using the Tempo Match/Tempo Scan
function.
About this Chapter
This section describes how Hitpoints are used and how they can be applied to different situations, such as Fit Tempo operations and sync to existing music on tape.
It assumes you are already familiar with the basic use of the graphic Master Track
editor.
The following text will first describe how Hitpoints are handled, and then applies
this to real life situations.
- 412 -
Setting Out Hitpoints
Using the Mouse
The obvious way of setting out Hitpoints is using the Pencil in the Toolbox. This
works just as with Time Signature changes (see page 400), just select the Pencil
from the Toolbox and click or drag in a Hitpoint Strip (see previous chapter). The
Snap values restricts your input as usual.
● Please note that when settings out Meter Hits, you may want to turn off Snap
completely.
If you hold down [Alt] while dragging, you get two linked Hitpoints, but more
about that on page 419.
Via MIDI
You can use MIDI to input Time Hits, whether Cubase VST is playing or not.
1. Activate the MIDI In button on the Status Bar.
The MIDI In button.
2. If so desired (see below) activate playback.
3. "Send" in some MIDI Notes, for example by tapping a MIDI keyboard.
When the MIDI In button is activated, MIDI notes coming in while the Master
Track editor is open will be converted to Time Hits.
4. When you are done, turn off the MIDI In button.
● For this function to work, you don’t have to be in play or record mode. This
means you can add hitpoints even when syncing to time code running very
slow or even at still frame (using VITC time code converted to MIDI Time
Code, for example). This will allow you to input Hits "manually" with very
high precision.
Using Fill
To create evenly spaced Meter Hits, there is a special item on the pop-up Do menu,
called "Fill meter hitpoints". This will fill the Meter Hit strip with Hitpoints, between the Left and Right Locator, spaced according to the Snap value.
- 413 -
Mirror
This function will mirror the selected Hitpoints onto the "other side". A Time Hit
will get a Meter Hit at the corresponding position, and vice versa.
Selecting two Hitpoints and then Mirror...
...creates two new Hitpoints.
- 414 -
Editing Hitpoints
Moving and Naming using the Info Line
Just as with Tempo Events and Time Signatures, Hitpoints can be edited one by one
on the Info Line (see page 415). Apart from moving them this way you can also
give each Hitpoint a name. Just double click on the default name at the far right end
of the Info line and type in a new one.
The right end of the Info line shows the type of Hitpoint and its name.
Moving, Duplicating, Deleting etc.
Just as with Time Signatures and Tempo Events (and many other objects in Cubase
VST) you can use the tools in the Toolbox and the computer keyboard to select
move, duplicate, Cut, Copy, Paste and delete Hitpoints. This is all described in detail in the previous section.
Also, the Repeat function described on page 402 of course applies to Hitpoints too.
Kicking
The Kickers in the Toolbox can be used to move one Hitpoint one Snap value in either direction (depending on which tool you selected).
If – as a result of a kick – a Hitpoint winds up on the same position as another one,
you will only see one of them. You can always use the Master Track List editor to
check for "double" Hitpoints.
Converting MIDI Notes to Hitpoints
If you have Copied or Cut notes or Control Change messages (for example sustain
pedal) from a MIDI editor, and Paste them in the Master Track, they will appear as
Time Hitpoints, starting at the Song Position.
Keep Linked and Keep Selected
These two functions on the pop-up Do menu can be used to conditionally delete
Hitpoints.
• “Keep Linked” deletes all Hitpoints that are not linked (see below).
• “Keep Selected” deletes all Hitpoints that are not selected.
- 415 -
Quantizing
Meter Hits can be Quantized. This is probably most useful together with the Mirror
& Link function as described on page 419. Combining these two functions allows
you to for example easily insert small tempo changes to make some Hits perfect after using Match to find an adequate tempo.
1. Set a Quantize value using the Quant pop-up menu.
2. Select the Meter Hits you want to Quantize.
If you want to Quantize them all you use Select All, since no other Events
than Meter Hits are affected by this operation).
3. Select Quantize Meter Hits from the pop-up Do menu.
- 416 -
Playing back Hitpoints via MIDI
You can get audible feedback on the position of a Hitpoint. While this is probably
most useful for Time Hits, it can be used on Meter Hits too.
To set up MIDI playback of Hitpoints, select "Edit Hitp Note" from the pop-up Do
menu. If you are familiar with the Metronome dialog, this one will be self explanatory.
The Meter and Time Hitpoints can be set to play one key each with a certain velocity. Both share a MIDI Channel and Output setting, (which can be defined as an Instrument).
- 417 -
Linking Hitpoints
Linking Hitpoints is a way of telling the Master Track editor which Meter and Time
Hits belong together. The program can then use this information to change tempo
(and insert tempo changes if needed) to make certain meter and time positions line
up. The practical uses of this are described on page 424 and page 426.
Linked Hitpoints
Show Hitpoint Links
To make the links between Hitpoints visible, you must make sure that Show Hitpoint Links on the pop-up Options menu is ticked. If it isn't, select it.
Manual Linking
To manually Link two Hitpoints, proceed as follows:
1. Select the Arrow pointer.
2. Position the mouse inside a Hitpoint.
3. Press the mouse button and drag down or up depending on where you
started (from Meter to Time or vice versa).
A line will follow the pointer.
4. Drag until the mouse pointer is positioned inside a Hitpoint on the "other
side".
The Hitpoint "lights up" to show you when you have the pointer inside it.
5. Release the mouse.
- 418 -
When Drawing
If you hold down [Alt] while drawing a Hitpoint you automatically get a linked Hitpoint right above/below it.
Breaking Links
If you want to break a Link between two Hitpoints, select the scissors from the
Toolbox and use it to click on or drag over the lines. Do not click on the Hitpoints
themselves.
Also, if you delete a Hitpoint, its link to any other Hitpoint will vanish.
Link One by One
This item on the pop-up Do menu, automatically links the first Meter Hit with the
first Time Hit, the second Meter Hit with the second Time Hit, etc.
This is most useful when you have tapped in the Time Hits and used "Fill Meter
Hits" to create Meter Hits. This will be the situation, for example when syncing to
existing music on tape or when restoring a lost sync track (see page 426).
Mirror & Link
This function takes all the selected Hitpoints and copies them "to the other side"
(Hits to Meter and vice versa) and also links each pair.
This function is very useful when you have certain visual cues indicated as Hitpoints and wish to find corresponding meter positions to fit them to. By using Mirror and Link, moving or quantizing the resultant Meter Hits and then using
Straighten up, the tempo is adapted in a few simple operations. For more details,
see page 424.
- 419 -
Working with Tempo Matching
The Tempo Matching feature of the Master Track editor is best suited for finding
suitable tempi for shorter spots or a smaller section of a larger piece.
Show Hitpoint Match
When this option is turned on on the pop-up Options menu, lines will extend from
the Time Hits up over the Tempo Graph and onto the Meter Hit strip. When these
lines are dotted, the Time Hits currently do not match any certain meter positions,
when they are solid, they do.
In this figure, the Time Hit in the middle doesn’t match, but the other two do.
About Matching
So how do you tell the program what "matching" means, in your particular case?
There are two settings for this, the Snap value and the Tolerance pop-up (in %) beside it.
If you for example set Snap to 4 and Tolerance to 12%, this means that all Time
Hits that are positioned within 12% from a quarter note are considered matching
and will be shown in solid black.
Finding Matches
Let's say you have a short video spot for which you want to find one tempo that fits
as many visual cues as possible. You have a video tape recorder with time code that
you can feed to Cubase VST to achieve synchronization. Proceed as follows:
1. Activate the Master Track by clicking on the Master button on the Transport bar.
2. Use the Synchronization dialog to set things up so that Cubase VST starts
exactly where the music should start in the spot.
3. Set up a few Time Hits to match the important visual cues.
- 420 -
4. Use the Hitpoint MIDI playback function (see page 417) to verify that
the Hits actually happen when they should.
5. Decide for a Snap setting and a Tolerance.
Raising the Tolerance will give you a larger number of Matches, but they will
be of lower precision. However, you might gain from increasing the Tolerance initially to find as many matches as possible. You can later link the Time
Hits to absolute Meter positions and then use Straighten Up to automatically
create a perfect fit. See page 423.
6. The method works best if you don't have any tempo changes at all during
the section which you try to fit, so preferably delete any tempo changes
in the section.
7. Set the tempo to the lowest you could possibly be satisfied with.
8. Raise the tempo gradually, by using the Pencil directly in the graph.
Zoom in vertically if you need higher precision. You can also use the Info
Line.
9. Watch the Tempo Match lines as you change the tempo.
Whenever one of them turns solid, you have found a match. Change the
tempo up and down until as many of the Hits match as possible. Also note
where they match. For example, if you have Snap set to "4", a match on the
second quarter in a bar may not be as "useful" to you as a match on the downor up-beat.
10.Experiment with different Snap and Tolerance settings.
11.Play back the Song and monitor the MIDI playback of the Hits and how
they relate to the metronome to get a feel for how the music should be
written to fit.
- 421 -
Using Auto Tempo Scan
If adjusting the tempo as in the Process above feels like too much work, the Master
Track editor can do it for you.
1. Set things up just as described above and set the tempo to the lowest you
could possibly be satisfied with.
The Master Track editor always raises the tempo when trying to find matches.
2. Select the Tempo Event you want to vary to find the match
Auto-scan can only vary one Tempo Event at a time.
3. Also select (hold down [Shift]) the Time Hits that you want to find a
Match for.
The function will only check the selected Time Hits for a match, no other
Hits.
To use Tempo Scan, exactly one Tempo Event and at least one Time Hit must be selected.
4. Select Auto Tempo Scan from the pop-up Do menu.
The program now raises the tempo gradually and looks for matches. If it finds a
match for all selected Hitpoints, it stops. You will have to select Auto Tempo Scan
repeatedly to step through all the possibilities.
If no match can be found for all selected Hits, the program will show you the last of
the best matches, that could be found. If you for example have three Hitpoints selected and the program can only find a match for two of them, it will show this.
● The more Hitpoints you have, the longer the scan will take. Please be patient...
- 422 -
Proceeding from here
If you have found a tempo that you would like to use, but not all Hits match, or you
think you have raised the Tolerance too far, you can automatically insert tempo
changes to create a perfect match:
1. Use Tempo Match (with or without Auto Tempo Scan) to find a tempo
that gives an adequate match, as described above.
2. Select Show Hitpoint Links from the pop-up Options menu. The Tempo
Match lines disappear.
3. Select all the Time Hits involved.
4. Select Mirror & Link from the pop-up Do menu.
5. Set Quant to the appropriate value. If your match is for example to
downbeats, set it to "1".
6. Use Quantize Meter Hits to move the Meter Hits exactly to the downbeats.
7. Select Straighten Up from the pop-up Do menu.
A dialog box will ask you if you are prepared to insert Tempo changes. Click
OK. You will now find that the tempo varies (probably just slightly) between
the Hits.
- 423 -
Working with Straighten Up
Straighten Up is a function, and as all others in the Master Track editor it is located
on the pop-up Do menu. Straighten up adjusts and inserts tempi to make Linked
Time and Meter Hits match, so that musical positions (Meter Hits) happen at specific time cues (Time Hits).
Switching to “Straighten Up Mode” (Show Hitpoint Links)
To display the Links between Hitpoints (instead of the Tempo Match lines) activate
Show Hitpoint Links on the pop-up Options menu.
How Straighten Up works
When you have input and adjusted your Hitpoints and select Straighten Up, all Hitpoints are examined, one pair at a time, starting from the beginning of the song.
To make the two Hitpoints match in time and meter, Tempo Events just before the
pair are adjusted. Visually, this turns any diagonal link-line into a solid vertical one.
If there isn't enough tempo changes for Straighten Up to make a pair match, it will
ask for permission to insert additional tempo Events.
In some cases a perfect match can not be found (for "mathematical" reasons). In
this case, the line remains dotted, but it may be straight on screen anyway. This
slight mismatch (which is always in the millisecond range) probably won't be
noted.
If you have cross-linked Hitpoints, the program will be unable to straighten up and
will inform you via a dialog box.
Working with visual cues
If you are working with music for film or video, for example with Cubase VST
synced to time code from a video, Straighten Up is an invaluable tool for making
cues match the picture. Here's a general outline of how to work with Hitpoints and
Straighten Up:
1. Set up synchronisation to the video.
See the Synchronization chapter.
2. Activate the Master Track (press Master on the Transport Bar) and open
the Master Track editor. Set an approximate initial tempo for the music
you have in mind.
3. In the Synchronisation dialog box, find a starting point, for example approximately two bars before the music should actually start.
4. In the same dialog, to make the Time Ruler in Cubase VST display the actual time code on the tape, set the Time Display to the same value as the
Song Start. Also set Bar Display to for example -2, so that position 1.1.0
in the Song is where the music should actually start.
- 424 -
5. Draw in, or use MIDI to insert a Time Hit where the music will start.
6. Draw a Meter Hit on Bar 1, and link it to the Time Hit.
7. Now select Straighten Up, and the tempo will get adjusted so that these
two points line up.
If the tempo was changed too much, you might have to repeat the procedure,
set a new Song Start and Time Display in the Sync dialog, and move the Time
Hit accordingly, then Straighten Up again.
8. When the beginning of the Song is adjusted to taste, you can begin inserting Time Hits for important visual cues.
We suggest you name them for future reference.
9. The next step is to create corresponding Meter Hits. This can be done
manually (draw and link) or using Mirror and Link.
10.Move the Meter Hits around to fit the music and use Straighten Up to
examine what kind of tempo changes were needed.
Please note that Straighten up only inserts one tempo change for each linked
pair. If you want a gradual tempo change between two pairs, draw in an accelerando/ritardando, and Straighten Up will scale the entire section to fit.
11.Keep adjusting the Hitpoints, insert new tempo changes (accelerandi or
ritardandi for example) where needed, and use Straighten Up to restore
the Time/Meter relations.
Don't worry about making last minute changes. If you for example receive a new
copy of the video where a few frames have been cut out, just move your Time Hits
accordingly and straighten up again. Changes you make in the beginning of the
Song won't affect tempi at later positions, since each matched pair of links creates a
new fixed "reference" between time and meter.
During the course of this procedure, you can of course switch back to the Arrange
window and record and edit music to fit the cues.
- 425 -
Synchronizing to existing music and recovering lost Sync Tracks
It is not uncommon to have to synchronise MIDI sequencing to existing music. To
do this, you need the Master Track editor and a tape with the music on one track
and time code on another.
Anyone who has been in the unfortunate situation of losing a time code track, for
example by accidentally erasing it, knows how time consuming it can be to restore
it.
The procedure below lets you do both these things very easily:
1. Start by striping the tape with fresh time code, if necessary. This code
should start a few bars before the music and extend well after it.
2. Activate the Master Track by clicking on the Master button on the Transport bar.
3. Set up synchronisation to this time code, and verify it works as expected.
See the Synchronization chapter for details.
4. Try to set an approximate initial tempo.
You can for example turn off sync, and guess at a tempo. Start the sequencer
in time with the metronome turned on, and adjust roughly.
5. In the Synchronization dialog, set a Songstart position approximately (for
example) two bars before the music starts. Turn on sync again.
6. In the same dialog, to make the Time Ruler in Cubase VST display the actual time code on the tape, set the Time Display to the same value as the
Songstart. Also set Bar Display to for example -2 (if the music starts two
bars after the Songstart), so that position 1.1.0 in the Song is where the
music will actually start.
7. Use MIDI to insert a Time Hit where the music starts. Verify its position
by making it play back for example a drum sound via MIDI.
8. Draw a Meter Hit on Bar 1, and link it to the corresponding Time Hit.
- 426 -
9. Now select Straighten Up, and the tempo will get adjusted so that these
two points line up.
If the tempo was changed too much, you might have to repeat the procedure.
Note down the position of your Time Hit. Select a new Songstart and Time
Display in the Sync dialog, and move the Time Hit accordingly. Then
Straighten Up again.
10.When the beginning of the Song is adjusted to taste, you can begin inserting Time Hits.
We suggest you use MIDI to input them, and start out with one or two Hits per
Bar. Of course, the tighter you place the Hits, the tighter your sync will become, but editing will also be more difficult and each Straighten Up will take
more time to perform.
11.Use Fill to input Meter Hits at the same spacing as the Time Hits (set
Snap to for example whole notes or half notes). Make sure the first Time
Hit and the first Meter Hit indicate the same position in the song; for example, the first Time Hit should be where the downbeat of bar 1 is on the
tape and the first Meter Hit should be on position 1.1.0 in Cubase VST.
12.Select Link One By One from pop-up Do menu.
13.Select Straighten Up from the pop-up Do menu .
Straightening Up might take some time.
14.Play back the Song in sync with the tape.
15.If you don't like what you got, move the Time Hits around and try
Straightening Up again.
Remember, Straighten Up only scales the tempo changes between two Hitpoints. If
you need a gradual tempo change between two Hits, use the Line tool to create an
accelerando or ritardando that can be scaled to fit.
- 427 -
Tempo Mapping "freely recorded" Music using Time
Locked Tracks
The Master Track editor interacts with Cubase VST’s Time Locked Tracks in a special and very useful way. If you change the tempo in the Master Track editor, notes
on Time Locked Track will get moved, bar-wise, so as to make them still appear on
the same time positions. You can use this to your advantage:
• To "reposition" Events in music recorded without a metronome, so that
they fit the meter positions in Cubase VST.
• To match music to for example sound effects or other audio Events that
occur on fixed time positions, rather than meter positions.
Observe this when working with Time Locked Tracks
Time Locked Tracks are described in general in their own chapter in this book.
Please just observe the following points:
• The time it will take to recalculate Time Locked Tracks depends on the
number of tempo changes in your Arrange window. When you work with the
Master Track editor it is common to have very large amounts of Tempo Events.
This will lead to noticeable recalculation times (sometimes very long) in two
cases: when you adjust the Tempo curve and when you use Straighten Up.
• Try to avoid to edit a Part on a Time Locked Track in a MIDI editor, at the same
time as you are changing the tempo in the Master Track editor. The reason is
that if a tempo change happens to move an Event so that it winds up on a position before the beginning of its Part, this Event will be lost!
Working with Time based Events
If you already have Events on Time Locked Tracks which indicate important positions (Hits) in the music, you can use these as a basis for your tempo changes:
1. Time Lock the Tracks that have Events which happen on "fixed" Time Positions.
2. Open a MIDI editor and select the Events you want to use as Hitpoints in
the Master Track editor. Note down the position of the first of the selected Events.
3. Open the Master Track editor and set the Song Position to the position of
the first Event you copied.
4. Select Paste. The Events are now Pasted in as Time Hits and can be used
as a basis for Tempo Matching or Straighten Up, as described in the previous section.
- 428 -
Repositioning "freely recorded" Music
Many musicians find it constraining to record in time with a metronome. With the
Master Track editor you can record in "free time" and later adapt the recording to
Cubase VST’s meter positions:
1. Turn off the Metronome and perform a recording.
If you plan to preserve the feeling in the recording, make sure you get a take
that contains all the tempi just as you want them.
2. For safety, make a copy of the Track and Mute it.
3. Open the recording for editing, for example in Key Edit. Select all Events
and drag them so that the first Event winds up on position 1.1.0.
This assumes the Part begins on 1.1.0. If it doesn’t you can either move the
Part or use the Pencil in the Arrange window to adjust the beginning of it.
4. Select a number of Events on easily defined meter positions.
For example if the piece contains a relatively simple bass line (mainly happening on quarter notes and eighth notes), select the notes in this bass line. If
it is a more complex piece you might have to work a bit on the selection, or
maybe only do a bit at a time. Try to not select notes that are more tightly
spaced than quarter notes. (It probably isn’t necessary and linking them will
take more time.)
5. If selecting notes in the actual recording doesn’t work for you, you might
try recording a special Track with a drum sound, where you simply tap
the beat while listening to the recording. Then you can use this Track for
reference instead of the notes in the actual recording.
6. When you have the selection right, copy the Events (using Copy on the
Edit menu). Close the editor.
7. Open the Master Track editor. Position the Song Position on 1.1.0.
Pasting always happens at the Song Position!
8. Paste.
All the notes will now appear as Time Hits.
9. Use the Pencil to draw in Meter Hits on the musical positions that the
Time Hits refer to.
● Since the tempo is completely wrong at this point, the Meter ruler and the
Time ruler will not match up at all. This might lead to some confusion at first.
What you are supposed to do is to tell the program what meter positions the
Pasted Time Hits refer to. If the bass for example played on straight quarter
notes only, draw in one Meter Hit on each quarter note.
10.When you are done and have one Meter Hit for each Time Hit, use Link
One By One on the Pop-up Do menu to link all the Hitpoints together.
- 429 -
11.Select Straighten Up, and when the dialog box appears, verify that it is
OK to insert new Tempo Events.
12.Play back the Track and examine it in Key or Score Edit to check that
everything actually has wound up as you intended.
When examining the recording in one of the editors, you will note that the Events
have been moved to the correct musical (meter) positions. This allows you to use
Cubase VST’s different tools (such as quantizing) in a predictable way and to format the recording for printout in Score Edit. But, since a number of tempo changes
have been created, the piece still plays back as it originally did.
If you are happy with the piece as it is now, you should possibly turn off Time Lock
for the Track before you proceed with further editing (maybe you should make a
copy first?).
If you want to hear how the piece plays back at a fixed tempo, simply turn off the
Master Track. And if you like, you can continue to use the Master Track editor to
edit the tempo further.
- 430 -
32
Matching Audio and Tempo
- 431 -
33
Introduction
This chapter describes Cubase VST’s features for matching the tempo of the audio
to the MIDI playback tempo and vice versa. These features are based on the Match
Points described on page 249 in the Audio Editor chapter.
Having a reasonably good knowledge of the Mastertrack Graphic Editor will simplify working with Audio/Tempo matching. If you want to check up on details, see
the Mastertrack and Hitpoints chapters.
Opening the Audio/Tempo Match Editor
This part is the same, whether you want to match the audio tempo to MIDI or vice
versa:
1. Select the Audio Event in the Audio Editor.
At this point, you may have created Match Points already (see the Audio Editor chapter), or you may do it in the Match Audio/Tempo editor as described
on the following pages.
2. Select the Event, pull down the Do pop-up menu and select Match Audio
with Tempo...
The editor window opens.
This window is very much like the Mastertrack Graphic Editor, but with four extra
features:
•
•
•
•
A waveform display directly below the graphic tempo display.
Match Points are shown in the Time Hitpoint area.
An additional fader in the lower left corner.
An additional Audio pop-up menu.
- 432 -
Adding and Editing Match Points in the Editor
Match points, or M-Points, are “markers” within an Audio Event, used to indicate
significant positions in your Audio file - often all “beats” in the recording. In this
editor, the Match Points are shown in the area below the waveform, where Time
Hitpoints usually are shown.
Match Points
Creating Match Points
There is no actual “add M-Points” function in the Match Audio/Tempo editor. To
create Match Points, you have the following options:
• Use the Get M-Points function.
• Duplicate other M-Points and move the duplicates to desired positions.
• Convert Time Hitpoints to M-Points.
The Get M-Points function
1. Select the Get M-Points command on the Audio pop-up menu.
A dialog box opens. The parameters are explained in the table below.
- 433 -
Sensitivity
The higher the value, the more “sensitive” the detection algorithm,
and the more Match Points will be created.
Attack
Try experimenting with this parameter when you are working with
“non-percussive” recordings.
Max. NumThe maximum allowed number of Match Points per second of auber of Events dio.
per Sec.
• If you don’t want to experiment with different settings, click the Default
Settings button.
2. When you have made the desired settings, click on Process.
The program scans the audio and inserts Match Points.
Manual Adding and Editing of M-Points
As already mentioned, there is no actual “add M-Points” function in the Match Audio/Tempo editor, and you cannot draw in M-Points like you can in the Audio editor. Instead you can do the following:
Duplicate an existing Match Point
1. Click on a Match Point to select it.
2. Set Snap to a suitable value.
Since you will most likely want to be able to place the Match Point anywhere
in the waveform, “Off” might be a good choice for Snap.
3. Hold down [Alt] on the computer keyboard and press the mouse button.
A dotted outline is shown around the Match Point.
4. Drag the outline to where you want the new Match Point and release the
mouse button.
A duplicate of the Match Point is created and placed where you indicated.
You may move it later.
Add a Time Hitpoint and convert it
1. Set Snap to a suitable value.
Since you will most likely want to be able to place the Match Point anywhere
in the waveform, “Off” might be a good choice for Snap.
2. Select the Pencil tool and click in the Time Hitpoint area.
A new Time Hitpoint is created (see the Hitpoints chapter in the main Cubase
manual).
3. Select the Hitpoint with the Arrow tool.
- 434 -
4. Pull down the Audio pop-up menu and select Hitpoint to M-Point.
The selected Time Hitpoint is converted to a Match Point, which you later
can move to another position if you like.
Moving Match Points
Match Points can be moved by clicking on them and dragging to the left or right.
Remember that the Snap value affects to which positions you can move the Match
Point (in most cases it will be best to turn Snap off when you move Match Points).
If you want to move a Match Point to a certain position in the audio, you can use
the following method for better accuracy:
1. Press the mouse button with the pointer positioned on the Match Point.
2. Move the pointer to the position in the waveform where you want the
Match Point to appear.
Since you can “aim” directly in the waveform display, it is easier to find the
correct position than when you drag the Match Point in the strip below the
waveform display.
3. Release the mouse button.
The Match Point is moved to the selected position. This function can also be
used with Hitpoints.
Deleting Match Points
There are two principal ways to delete Match Points in the Audio Match Editor:
• Click on the Match Point with the Eraser tool.
or
• Select the Match Point(s) and press [Backspace] on the computer keyboard.
Existing Match Points are automatically deleted when you create a new set with the
Get M-Points function.
Cut, Copy and Paste
You can use these features on Match Points, as you can on other items in Cubase
VST. When you Paste, Match Points are Pasted in beginning at the Song Position.
- 435 -
Making the Playback Tempo follow the Audio
There are two ways to do this:
• Use Hitpoint Match mode to find the closest tempo match, and insert
one tempo change at the beginning of the Event.
This may be sufficient if you’re working with rather short Events and audio
with a fairly steady tempo. The method is described below, under the heading
Fixed Tempo Match.
• Use Hitpoint Link mode and Straighten Up to make a tempo map.
This means that tempo changes are inserted at several places in your Event.
This method works with long Events and audio with fluctuating tempo. It is
described on the following pages under the heading Creating a Tempo Map.
Fixed Tempo Match
For this to work, the audio should have a fairly steady beat, and the Match Points
should be evenly distributed, for example on the quarter notes. However, it is sufficient if Match Points are inserted in the first two or three bars of the Event (i.e. they
can be seen in the editor window at the same time).
1. Activate Master on the Transport Bar.
2. At the beginning of the Audio Event, insert a tempo change with a value
roughly the same as the tempo of the recording.
3. Set Snap to the note value that separates the Match Points.
In our example, this would be 4 (quarter note).
4. Pull down the Options pop-up menu and select Show Hitpoints Match.
- 436 -
This will display vertical lines rising from the Match Points. If the position of
the Match Points coincide with the Snap value, the lines will be fully drawn;
if the Match Points are “off” the Snap value, the lines will be dotted (see the
Hitpoints chapter in the main Cubase manual).
5. Set the Tolerance pop-up to a fairly high percentage.
The higher the Tolerance percentage, the more “off” the Match Points are allowed to be and still be considered Matching.
Now, the object is to find a tempo where as many as possible of the M-Points are
matching (shown with fully drawn vertical lines). This is done either by changing
the tempo in the graphic tempo display (as described in the “Hitpoints” chapter in
the main Cubase manual), or by using the slider to the left to visually stretch the
waveform in the window, and then letting the program automatically calculate the
tempo. The steps below describe the latter alternative:
6. Select a Stretch percentage range from the pop-up below the slider.
This determines the maximum stretch range with the slider. If you for example
select 4.2%, you may visually stretch the waveform ± 4.2%, with zero stretch
in the slider’s middle position.
- 437 -
7. Move the slider and try to find the position where as many as possible of
the vertical lines are fully drawn (matching).
To reset the slider to middle position (zero stretch), hold down [Control] and
click anywhere on the slider.
● As you move the slider, you will note that the waveform image is stretched
(slider above middle position) or contracted (slider below middle position).
This is only a visual help for you, to make it easier to find a match, and does
not affect the actual Audio Event!
8. When you have found the best possible match, pull down the Audio popup menu and select Slider to Tempo.
The program will calculate a tempo based on the slider setting.
• If there already is a Tempo Event at the beginning of the Audio Event, this
Tempo Event simply gets the calculated Tempo value.
• If there is no Tempo Event at the beginning of the Audio Event, one is created,
and gets the calculated Tempo value.
• If there are several Tempo Events within the duration of the Audio Event, (e.g.
a ritardando), these are all affected relatively - the tempo is “scaled” according to the calculated value.
9. When you’re done, press [Return] to close the editor.
When you play back the Song, the tempo will match the tempo of the audio.
- 438 -
Creating a Tempo Map
For this to work, Match Points should be inserted throughout the whole Event, and
preferably evenly distributed, for example on every quarter note. It is possible to
create a tempo map for an Audio Event with a lot of “syncopated” Match Points,
but this will require you to insert and move Meter Hitpoints by hand (see step 6 below).
1. Activate Master on the Transport Bar.
2. At the beginning of the Audio Event, insert a tempo change with a value
roughly the same as the tempo of the recording.
This will make it easier for you to see if the links are correct (see step 8 below).
3. Set Snap to the note value that separates the Match Points.
In our example, this would be 4 (quarter note).
4. Set the Left and Right Locators so that they encompass the Event.
5. Select Fill Meter Hitpoints from the Do pop-up menu.
Meter Hitpoints are inserted in the area above the tempo curve.
6. If your Audio Event contains Match points that are not positioned on
quarter notes (or whatever Snap value you have chosen), you need to insert Meter Hitpoints on the corresponding places as well.
Also, it for some quarter notes in your Audio Event, there are no Match
Points (for example in long breaks, pauses, etc), you have to delete the
Meter Hitpoints on the corresponding positions.
This is because you will later perform a “link one by one”, where each Match
Point is linked to exactly one Meter Hitpoint. If there is a Hitpoint or a Match
Point “missing”, the wrong Match Points will be linked to the wrong Hitpoints.
● It is perfectly possible not to use the “Link One by One” function, and instead
link the Hitpoints to the Matchpoints “by hand” as described in the Hitpoints
chapter in the main Cubase manual. If you choose to do this, the number of
Hitpoints does not have to be the same as the number of Match Points.
7. Pull down the Option pop-up menu and select Show Hitpoint Links.
8. Pull down the Do pop-up menu and select Link One by One.
Now, the program attempts to link each of the Meter Hitpoints to a Match
Point, starting from the first one.
- 439 -
If everything is OK, you should get a number of roughly vertical lines (if you made
a good estimation of the audio tempo in step 2 above). If the angle of the lines
changes abruptly from one line to the next, this indicates that there are dramatic
tempo changes in the audio. If you know that there are no such tempo changes in
the audio, the links are not correct and you need to insert or delete Meter Hitpoints.
Repeat steps 6 to 8 until the links seem OK.
9. Pull down the Do pop-up menu and select Straighten Up.
The program creates a tempo map, i.e. inserts tempo changes into the Master
Track, to make the playback tempo continuously change to fit the audio
tempo.
- 440 -
Making the Audio Follow the Tempo
This means changing the length of the audio file, to make it fit the playback tempo.
One reason to do this (instead of matching the tempo to the audio) might be that
your Song contains other audio files that already match the tempo, or that you simply are perfectly satisfied with the playback tempo you have.
There are two ways to match the audio to the tempo:
• Use Hitpoint Match mode to find the closest time stretch match, and tell
the program to time stretch the whole Event by one fixed stretch factor.
This may be sufficient if you are working with rather short Events and audio
with a fairly steady tempo. The method is described below, under the heading
Fixed Time Stretch.
• Use Hitpoint Link mode and tell the program to quantize the audio
Event.
This means that the Match Points in the audio are quantized (moved to coincide with the Meter Hitpoints) and the audio material between the Match
Points are stretched/contracted accordingly. This method works with long
Events and audio with fluctuating tempo. It is described on the following
pages under the heading Quantizing Audio.
Fixed Time Stretch
For this to work, the audio should have a fairly steady beat, and the Match Points
should be evenly distributed, for example on the quarter notes. However, it is sufficient if Match Points are inserted in the first two or three bars of the Event (i.e. they
can be seen in the editor window at the same time).
1. Activate Master on the Transport Bar.
2. Set Snap to the note value that separates the Match Points.
In our example, this would be 4 (quarter note).
3. Pull down the Options pop-up menu and select Show Hitpoints Match.
This will display vertical lines rising from the Match Points. If the position of
the Match Points coincide with the Snap value, the lines will be fully drawn;
if the Match Points are “off” the Snap value, the lines will be dotted (see the
Hitpoints chapter in the main Cubase manual).
4. Set the Tolerance pop-up to a fairly high percentage.
The higher the Tolerance percentage, the more “off” the Match Points are allowed to be and still be considered Matching.
Now, the object is to find a stretch factor for the audio where as many as possible of
the M-Points are matching (shown with fully drawn vertical lines). This is done by
visually stretching the waveform in the window, using the slider to the left.
- 441 -
5. Select a Stretch percentage range from the pop-up below the slider.
This determines the maximum stretch range with the slider. If you for example
select 4.2%, you may visually stretch the waveform ± 4.2%, with zero stretch
in the slider’s middle position.
6. Move the slider and try to find the position where as many as possible of
the vertical lines are fully drawn (matching).
To reset the slider to middle position (zero stretch), hold down [Command]
and click anywhere on the slider.
● As you move the slider, you will note that the waveform image is stretched
(slider above middle position) or contracted (slider below middle position).
This is only a visual help for you, to make it easier to find a match, and does
not affect the actual Audio Event at this stage.
7. When you have found the best possible match, pull down the Audio popup menu and select Slider to Time Stretch.
This instructs the program to process the Audio Event using the Stretch factor
set with the slider.
8. When this is done, your Audio Event will play a new segment, time
stretched to fit the playback tempo.
Quantizing Audio
● This text describes advanced audio quantizing of any type, Groove, Iterative
etc. If all you want is quantizing to a certain note value, see page 259.
For this to work, Match Points should be inserted through the whole Event, and
preferably evenly distributed, for example on every quarter note. It is possible to
create a tempo map for an Audio Event with a lot of “syncopated” Match Points,
but this will require you to insert and move Meter Hitpoints by hand (see step 5 below).
● Do not put Match Points too close! This might give rise to large stretchfactors
when quantizing, which in turn may produce a result that is not musically desirable.
1. Activate Master on the Transport Bar.
2. Set Snap to the note value that separates the Match Points.
In our example, this would be 4 (quarter note).
3. Set the Left and Right Locators so that they encompass the Event.
- 442 -
4. Select Fill Meter Hitpoints from the Do pop-up menu.
Meter Hitpoints are inserted in the area above the tempo curve, spaced according to the Snap setting.
5. If your Audio Event contains Match points that are not positioned on
quarter notes (or whatever Snap value you have chosen), you need to insert Meter Hitpoints on the corresponding places as well.
Also, it for some quarter notes in your Audio Event, there are no Match
Points (for example in long breaks, pauses, etc), you have to delete the
Meter Hitpoints on the corresponding positions.
This is because you will later perform a “link one by one”, where each Match
Point is linked to exactly one Meter Hitpoint. If there is a Hitpoint or a Match
Point “missing”, the wrong Match Points will be linked to the wrong Hitpoints.
● It is perfectly possible not to use the “Link One by One” function, and instead
link the Hitpoints to the Matchpoints “by hand” as described in the Hitpoints
chapter in the main Cubase manual. If you choose to do this, the number of
Hitpoints does not have to be the same as the number of Match Points.
6. Pull down the Option pop-up menu and select Show Hitpoint Links.
7. Pull down the Do pop-up menu and select Link One by One.
Now, the program attempts to link each of the Meter Hitpoints to a Match
Point, starting from the first one. If everything is OK, you should get a number
of roughly vertical lines (if you made a good estimation of the audio tempo in
step 2 above). If the angle of the lines changes abruptly from one line to the
next, this indicates that there are dramatic tempo changes in the audio. If
there are no such changes in the audio, the links are not correct and you need
to insert or delete Meter Hitpoints. Repeat steps 5 to 7 until the links seem
OK.
8. Pull down the Audio pop-up menu and select Quantize Audio.
This instructs the program to move each M-Point in the Audio Event to the position of the corresponding Meter Hitpoint, and timestretch the material in between.
9. When this is done, your Audio Event will play a new segment, processed
to fit the playback tempo.
- 443 -
If your Audio Event is partly right in Timing
If some parts of the Audio are in timing but some are not, a special situation arises.
For example, let’s look at a drum loop where one beat is “off” but the rest is correct.
When you now use Quantize Audio to put the faulty section right again, you must
be careful to not also accidentally move parts of the correctly timed audio:
Here, the beat in the middle is played too early (note that the link line is
dotted). If you perform a Quantize Audio with these three links, the faulty
beat will be moved to a correct position.
But, Cubase VST will also stretch the
audio to the left of the faulty beat (to fill
up the gap when the beat is moved to
the right). In our example, this will
mean that this correctly timed beat is
moved to the right, and will be out of
timing!
In this example, the correct beat closest to the
left of the faulty one is linked instead.
When you Quantize Audio, this section
will be stretched. But since there are no
actual beats within the section, this will
not affect the rhythmic “feel” of the
audio.
- 444 -
The essence of this is:
● Always put one Match Point before and one after the sections you want to
quantize, at the nearest beats (or other musical “events”) that are in timing,
and “straight-line” link both these Match Points to meter hitpoints!
It may seem that an easy way to avoid the problem above would be to simply draw
two Match Points immediately before and after the faulty beat, and very close to it,
so that no important, correctly timed audio was affected. This is not a good idea!
Putting Match Points too close might give rise to very large stretch factors when
quantizing, which in turn may produce a result that is not audibly desirable.
- 445 -
Creating a Groove template
With this feature, an audio file is used as a source for a new groove template. The
template is added to the Groove Quantize submenu, and can be used with any MIDI
material.
1. Pull down the Do pop-up menu and select Get M-Points.
The Get Match Points dialog appears (see page 433).
2. Experiment with the settings in the Get Match Points dialog until you get
a sufficient amount of Match Points in your Audio Event.
If possible, try to get Match Points on the sixteenth notes.
● The Get M-Points function removes all existing Match Points in the Event, before it creates new ones.
3. If you want to adjust the velocity values of the individual Match Points,
you have to exit to the Audio editor.
You change velocity values by holding down [Shift] and dragging the black
squares on the Match Points up or down. When you drag, the current velocity
value is displayed numerically beside the Match Point.
4. In the Match Audio/Tempo editor, pull down the Audio pop-up menu and
select M-Points to Groove.
Cubase VST creates a Groove Template with the name of the audio file, and
puts it in the Groove Quantize submenu. For information on how to use the
Groove Templates, see the main Cubase manual.
- 446 -
Using Snip at M-points
This function (found on the Do pop-up menu in the Audio editor) allows you to
take a rhythmic piece of audio (for example a drum loop) and make it play back
faster, without raising the pitch or performing any actual time correction. The trick
is to split the Audio Event at each single “beat”. The new Events that are created by
the operation, will each start playback at a specific meter position in the Song, so if
you raise the playback tempo, the tempo of the audio will seem to follow! Proceed
like this:
1. Select the Event in the Audio editor.
2. Create Match Points and see to it that they are positioned on each single
rhythmic “building block” (e.g. drum beats) in the Audio Event.
You may use the Get M-Points function, and/or add M-Points manually.
3. Pull down the Do pop-up menu and select Snip at M-Points.
The Event is split at each Match Point.
4. Select all the Events, pull down the Do pop-up menu and select Group.
We recommend you to do this, since if you don’t, you will find it hard to
move or copy the entire piece of audio without losing the timing.
5. Try activating playback and raising the tempo.
Even though this will make each Event start playing before the previous has
ended, it will not cause the two sounds to mix. This is simply because only
one Event at a time can play on the same audio channel!
Raising the tempo. Note how the Events are moved together to overlap each other.
- 447 -
Why not lower the Tempo as well?
Of course you can lower the tempo with this function. The individual Events will
start at the correct positions, giving the impression of a lower tempo in the audio.
But since the length of the Events doesn’t change when you lower the Tempo, there
will be “empty space” between the Events, which in most cases will sound strange
(see the figure below). Therefore, we cannot recommend lowering the tempo other
than as a special effect.
The effect of dramatically lowering the tempo.
- 448 -
33
Time Locked Tracks
- 449 -
34
What are Time Locked Tracks?
Events on Time Locked Tracks are fixed in time. This means that even if you
change the tempo, the Events will stay at the same position, time-wise. For example, an Event that played back ten seconds in from the beginning of the Song will
still play back ten seconds in from the beginning, even if the tempo is doubled.
Time locked Tracks can be used for example when you work with audio locked to
film or video and mix sound effects with music in one Arrange window. Time
Locked Tracks can also be used to create music with multiple tempi.
Time Locking a Track
1. As a first step, we recommend you to duplicate the entire Track.
This allows you to go back to the original meter based positions later.
2. Click in the “T” column of the Track.
A lock symbol appears, indicating that the Track is Time Locked.
3. Click on the Master Button on the Transport Bar, to make the settings in
the Master Track govern the tempo.
● The Master Track must be activated for the Time Locking to have any effect on
your recordings. For information about the Master Track, see the chapter “The
Master Track”.
Changing the Tempo
• If you change the tempo by editing the Master Track, the positions of Events
on time locked Tracks are recalculated, so that they stay on the same time position. When you examine these Tracks in for example Key Edit, the Events
will appear to have moved, meter-wise.
• When you change the tempo, the Parts are also lengthened and shortened
bar-wise, as needed to accommodate the Events. The Events' positions are
also recalculated when you move the Part.
• If you have a lot of Tempo changes and a lot of Events in the Time locked
Tracks, moving parts, inserting new tempi or changing existing ones may lead
to noticeable recalculation times.
- 450 -
Turning Time Lock On and Off
A Track can at any time be switched in and out of Time lock mode. But when you
switch a Track out of time locked mode the Events will of course stay at their current time position. This means that if you have made any tempo changes since you
Time Locked the Tracks, the Events on those Tracks will not be at “sensible” meter
positions when you turn off Time Lock.
Editing Time Locked Tracks
When editing Time Locked Tracks, please observe the following:
• When moving Parts on Time Locked Tracks, set the Snap value to Off.
This is since Time Locked Tracks are not related to Meter Position the way
usual Tracks and the Snap value are.
• Remember that you can click the Mouse box to make the Mouse position
and the Bar Display switch to show time code values instead of bars and
beats.
The same applies in the MIDI editors.
• The Song Position can be always used as a converter between bar and
time positions at the current tempo.
If you for example know the time and need the bar position, input the bar
beat and tick in the Song Position box and read back the time value in the
Time Position box (and vice versa).
Creating Multiple Tempi
When scoring for film and video it is not unusual to need a piece fading over into
the next which is played in another tempo. Here are the necessary steps, in brief.
1. Finish the first piece, the one that the Song begins with.
2. Time lock the existing Tracks.
3. Insert a tempo change where the new piece begins, even if this is before
the end of the last.
The previous piece will then not be affected by the new tempo.
4. Create new Tracks for the second piece and record it.
Things To Note
• When you time lock a Track with Ghost Parts, they are automatically
converted into real Parts.
• Group Tracks and Tape Tracks can not be Time Locked.
- 451 -
34
Synchronization
- 452 -
35
Introduction
Synchronizing is when you make two pieces of equipment agree on time or tempo.
You can establish synchronization between Cubase VST and a number of other
types of devices, including tape recorders and video decks, but also other MIDI devices that “play back”, such as other sequencers, drum machines, “workstation sequencers” etc.
The two types of Sync Signals
Basically there are two types of synchronization signals:
Sync To Time Code (SMPTE, EBU, MTC, VITC)
Time Code appears in a number of guises. No matter which “format” it has, it always supplies a “clock on the wall” type of synchronization, that is it a synchronization related to hours, minutes, seconds and two smaller units called “frames” and
“sub-frames”.
Sync To MIDI Clock
MIDI Clock is a tempo based type of synchronization signal, that is it is related to
the number of “beats per minute”.
Cubase VST has full support for both Time Code and MIDI Clock.
- 453 -
Cubase VST – Master Or Slave?
When you set up a synchronization system you must decide which unit is the master. All other devices are then slaved to this unit, which means they will adjust their
playback speed to the master’s.
Cubase VST as a Slave
When a synchronization signal is coming in to Cubase VST, from another device
(such as a tape recorder, a disk based recording system, a drum machine, another
sequencer etc), this device is the master and Cubase VST is the slave. Cubase VST
will adjust its playback to the other device.
Cubase VST as a Master
When you set up Cubase VST to transmit synchronization signals to other devices,
Cubase VST is the master and the other devices are the slaves; they will adjust their
playback to Cubase VST.
Cubase VST – Both Master and Slave
Cubase VST is a very capable synchronizing device. It can operate as both a master
and a slave at the same time. For example, Cubase VST might be slaved to a tape
recorder transmitting time code, while at the same time transmitting MIDI Clock to
a drum machine, acting as a master for that.
- 454 -
Synchronization and audio playback
Synchronizing digital audio material with the “real world” raises many issues
which are not immediately apparent when using MIDI only systems. This is a big
subject, and we will only be able to touch upon it here.
● Please note that Cubase VST makes use of special Synchronization functionality in the respective ASIO drivers. Exactly what is possible depends on
which audio card you are using.
Avoid MIDI Clock!
With Cubase VST, you should sync the program to time code (SMPTE or MIDI
Time Code), not MIDI Clock. MIDI Clock is a tempo dependent synchronization
with low resolution, not really suitable for professional audio applications.
If you can – Use Cubase VST as a Master
To avoid drift between audio and MIDI we recommend you to not synchronize Cubase VST externally at all when using audio, if possible. However, you might very
well use Cubase VST as a “master” for other systems. Using MIDI Time Code or
MIDI Clock generated by Cubase VST (for transmission to other devices) will ensure sync with the audio.
Audio and External Synchronization
How Timing is handled in a non-synced system
Let’s first look at the situation where Cubase VST is not synchronized to any external source.
Any digital playback system has an internal clock that ultimately affects the playback speed and stability, and PC audio hardware is no exception. This clock is extremely stable.
Normally, you will have the MIDI Sync Reference setting in the Audio System dialog set to “Audio Clock”. This means that when Cubase VST plays back, the MIDI
part of the program is internally synchronized to the digital audio to ensure synchronization between digital audio and MIDI.
Synchronizing Cubase VST’s playback
Let’s assume now that we use external synchronization, with Cubase VST, for example, we might synchronize playback to a tape recorder, using time code.
Time code coming from an analog tape recorder will always vary slightly in speed.
Different time code generators and different tape recorders will also supply time
code with slight differences in speed. In addition, the shuttling of tape mechanisms
due to overdubs and re-recordings can cause the physical tape to wear and stretch,
which affects the speed of the time code.
- 455 -
If you now set the MIDI Sync Reference setting in the Audio System dialog to
Time Code, and Cubase VST receives time code, it will vary its overall playback
speed (the “song position speed”) to compensate for such fluctuations in the speed
of the time code, that’s the whole purpose of synchronization.
What happens with the Digital Audio?
The fact that Cubase VST’s playback is synchronized to the time code does not affect the playback of the digital audio. It still relies on the perfectly stable, built-in
clock in the audio hardware.
As you may understand by now, problems will appear when the perfectly stable
digital audio gets related to the slightly varying speed of a system synchronized to
time code.
The playback timing of each segment will not be in total accordance with the tape
or the MIDI playback, since the playback speed of the audio is determined by the
digital audio hardware’s built-in clock.
So, what can I do about it?
There are generally two methods that solve the problem, and a few others that minimize the problem to an acceptable level without actually solving it.
Resolving
The first – and best – solution is to use one external clock for all components in the
system. One master clock is used to derive whatever type of clock signal each component in the system needs. For example, something called a house clock can be
used to generate sample rate clocks for the digital audio hardware and time code for
Cubase VST. This ensures all components in the system use the same reference
source for their timing.
Synchronizing digital audio to external clocks running at sample rate is often called
“resolving” or “synchronizing to word clock”.
However this option is not available on standard PC audio cards. It might be possible to do on more advanced audio hardware, but even then it requires additional,
fairly expensive synchronizing hardware.
Continuous Resynchronization
Some systems use digital signal processing techniques to simulate variations in
playback speed. In a typical such situation you feed the digital audio hardware time
code (or MIDI Time Code) and it uses this to calculate in what way it should adjust
the playback speed to stay in sync with the time code (and hence with Cubase
VST). This method is often called “continuous resync”.
Cubase VST Solutions
The third solution is offered by Cubase VST, and comprises a set of tools and strategies to minimise the problems without the need of additional hardware, and without compromising audio quality. These solutions are described in the following
paragraphs:
- 456 -
Chose your Audio Timing Reference
In the System dialog there are two settings the are related to sync (see page 364):
• The MIDI Sync Reference allows you to decide whether Cubase VST’s playback (and hence the MIDI) should slave to the external time code or to the audio hardware.
• The Audio Clock Source setting is for those with advanced audio hardware
that supports resolving via external word clock signals. It allows you to clock
the audio card from an external source.
Always use the Same Sync Source!
Throughout a project, use the same synchronization source for all audio recording
and editing. If you plan to sync Cubase VST to for example a tape recorder, make
sure you are synchronized to that tape recorder at all times!
Use Generate SMPTE
The Generate SMPTE command on the Audio menu allows Cubase VST to create a
synthesised audio file containing ”perfect” SMPTE code.
Once you have created the audio files that simulates a time code recording, you can
stripe the tape you intend to synchronize your work to, with this code. The idea is
that since this time code is generated at exactly the same speed as your digital audio
hardware uses, it will make the MIDI playback play back in “perfect” sync with the
digital audio.
We highly recommend using this feature to generate the time code before commencing any synchronized work with Cubase VST.
The code is generated ”off-line” and is created very quickly. When finished, you
can simply throw the file away or perhaps store it on a stable medium – such as
DAT tape – for later use.
- 457 -
The Synchronization Dialog Box
This dialog box is used for setting up everything that has to do with Cubase VST’s
synchronization to other units. You reach it from the Options menu.
Once you have the settings in the dialog box right, you activate sync as such by
clicking on the Sync button on the Transport bar or by pressing [X] on the computer
keyboard. When the Sync button is activated, Cubase VST will automatically start
when it receives a proper synchronization signal.
- 458 -
Internal Sync - No External Synchronization used
When no external synchronization source is used at all, it actually doesn’t matter
what settings you have made in the Synchronization dialog box, as long as the Sync
button on the Transport Bar is deactivated.
Sync deactivated on the Transport Bar.
However, there are situations where you might want to make sure that Cubase VST
is definitely not synchronized to any source, even if you (accidentally) activate
Sync on the Transport Bar. Proceed as follows:
1. In the Synchronization dialog box (reached from the Options menu), set
Timecode Base to Intern.
2. Set Tempo Base to Intern.
Sync to time code deactivated
Sync to MIDI Clock
deactivated
3. Close the Synchronization dialog.
- 459 -
Synchronizing Cubase VST to MIDI Time Code (MTC)
You might have a device which transmits time code in a MIDI cable – MIDI Time
Code (MTC).There are several types of devices that does just this:
• MIDI interfaces with built synchronization capabilities.
• Time Code (SMPTE) to MIDI Time Code converters.
• VITC (Vertical Interval Time Code, used in video editing systems) to MTC converters.
• MIDI devices (like other sequencers or disk based recording systems) which
generate MIDI Time Code.
In this type of setup, synchronization happens as follows:
• Cubase VST is synchronized to the time code. In other words, the device
transmitting the time code (for example the video deck or hard disk recording
system) is the master and Cubase VST is the slave).
• The time code synchronization signals do not control Cubase VST’s tempo directly. Instead, the time code replaces Cubase VST’s internal “clock on the
wall” type of clock, as displayed in the Time Position box on the Transport
Bar. Cubase VST still follows the tempo set either on the Transport Bar or in
the Master Track. However, if the time code coming in slows down or speeds
up, this will affect Cubase VST’s internal clock and thereby the tempo (since
the “minutes” in the “beats per minute” setting now varies).
Setting Up for Synchronization
1. In the Synchronization dialog box (reached from the Options menu), set
Timecode base to MIDI Timecode.
2. From the menu just below Timecode base, select the input to which the
MTC is coming in.
Cubase VST is now expecting a time code synchronization signal from the
specified port.
3. Set Tempo base to Intern.
This tells Cubase VST to not expect MIDI Clock signals.
4. Use the pop-up in the dialog box to tell Cubase VST what Frame Rate to
expect from the incoming code (see page 462 in this chapter).
Sync to time code activated
The MIDI Input for
the time code
The frame rate
Sync to MIDI Clock
deactivated
- 460 -
5. Use the Song Start value to set which frame on the tape that should correspond to the beginning of the Song (position 1.1.0 in Cubase VST).
Set this to the time code position
where you want the Song to start
from the beginning.
6. Close the Synchronization dialog.
This is actually not necessary, but probably preferable.
7. On the Transport Bar, activate Sync by clicking on the button with the
same name, or by pressing [X].
Cubase VST is now expecting MIDI Time Code to come in via the specified
port.
Sync activated on the Transport Bar.
8. If you want the tempo to follow the Master Track, activate Master on the
Transport Bar.
9. Start the tape (or video, or...) that contains the time code. Cubase VST
starts playing when it receives MIDI Time Code with a position “higher”
than, or equal to, the Song Start frame.
You can wind the device that sends the MTC to any position and start from there.
● When the device with the time code is stopped, you can use the Cubase VST
transport controls as you normally do, when it is not synchronized.
If you synchronize Cubase VST to Time Code you should also look into the Time
Display Offset described on page 467 and Sync Options described on page 470.
Synchronizing Cubase VST to MIDI Machine Control
(MMC)
This is described in the chapter “Tape Tracks – Controlling Tape Recorders”.
- 461 -
About Frame Rates
The Frame Rate is the number of frames per second in a film or on a video tape.
Just as there is always sixty seconds to a minute, there is always a certain number of
frames to each second. However, the frame rate used varies with the type of media
(film or video), which country the video tape has been produced in, and other circumstances.
When synchronizing Cubase VST to time code, you must make sure that the Frame
Rate setting in Cubase VST matches the actual frame rate of the time code.
In Cubase VST there are six frame rates to choose from:
24 fps
The traditional frame rate of 35mm film.
25 fps
The frame rate used for all video and audio in Europe (EBU).
30 fps
Straight 30 frames per second. This is often used in the United States
for audio only work.
30 dfps
Very rarely used.
29.97 fps
Straight 29.97 frames per second.
29.97 dfps
“Drop frame” code running at 29.97 frames per second, most often
used in the United States for work with color video.
- 462 -
Synchronizing Cubase VST to another MIDI Device via
MIDI Clock
● This method should only be used for MIDI-only material.
If you want Cubase VST to follow the tempo of another MIDI device (such as another sequencer, a drum machine or similar), you need to use MIDI Clock signals.
In this situation, synchronization happens as follows:
• Cubase VST’s tempo is synchronized to the other device’s. In other words, the
other device is the master and Cubase VST is the slave).
• Cubase VST’s Master Track and the tempo setting on the Transport Bar have
no effect on playback. Instead, Cubase VST plays in the same tempo as the
other device.
Proceed as follows:
1. In the Synchronization dialog box (reached from the Options menu), set
Timecode Base to Intern.
This tells the program that you are not synchronizing to time code.
2. Set Tempo Base to MIDI Clock.
This prepares the program for synchronizing to MIDI Clock.
3. From the menu just below Tempo Base, select the MIDI input to which
you have connected the device transmitting the MIDI clock signal.
Sync to time code deactivated
Sync to MIDI Clock activated
The MIDI Input for
the MIDI Clock
4. Close the Synchronization dialog.
This is actually not necessary, but probably preferable.
5. On the Transport Bar, activate Sync by clicking on the button with the
same name, or by pressing [X].
Sync activated on the Transport Bar.
- 463 -
6. Set up the other device to transmit MIDI clocks, and Start it.
Cubase VST will automatically start and play in the same tempo as the other
device.
This type of synchronization is tempo based, that is the external device controls
Cubase VST’s tempo. This means that the Master Track and the tempo setting on
the Transport Bar have no effect on playback.
● You do not need to activate play in Cubase VST, it will automatically begin
playback when it senses the incoming MIDI Clock. However, when the other
device is stopped, you can use the Cubase VST transport controls as you normally do, when it is not synchronized to any device.
If the other device sends messages called Song Position Pointers, Cubase VST will
follow when you wind and rewind, and will always start from the same position as
the other device. If it doesn’t send Song Position Pointers, you must manually locate Cubase VST and the other device to exactly the same position (for example the
beginning of the Song!) before you Start.
- 464 -
Synchronizing other Equipment to Cubase VST
You may have other MIDI devices which you may want to synchronize Cubase
VST to. There are two types of synchronization that Cubase VST can transmit:
MIDI Clock and MIDI Time Code.
Transmitting MIDI Clock
• If you transmit MIDI Clock to a device supporting this type of synchronization
signal, the other device will follow Cubase VST’s tempo. That is, Cubase VST
is the master and the other device is the slave.
• The tempo setting in the other devices is of no relevance. Instead it plays at
the same tempo as Cubase VST.
• If the device also reacts to Song Position Pointers (which Cubase VST transmits) it will follow when you wind, rewind and locate using the Cubase VST
Transport Bar.
Transmitting MIDI Time Code
• If you transmit MIDI Time Code to a device supporting this type of synchronization signal, the device will synchronize time-wise to Cubase VST, that is,
the time displays on Cubase VST’s Transport Bar and on the other device will
agree.
• In this situation, Cubase VST is the master and the other device is the slave.
• When you wind and locate Cubase VST and then activate playback, the other
device will follow from the same position (if it has this capability and is set up
for it!).
Setting Up
1. Connect a MIDI Out from Cubase VST to the device that you plan to synchronize.
2. Open the Synchronization dialog box.
3. Use the Sync Out menus to decide what type of synchronization to send
and to which MIDI Output. You can actually output both, but it is unlikely that you want to. Instead set one of the menus to Off, and the other
to the Output to which you connected the external device.
MIDI TIme Code transmitted
to this Output
MIDI Clock transmitted
to this Output
4. Set the other device in “external synchronization” mode (or some other
mode with a similar name) and activate Play on it if necessary.
5. Activate Play in Cubase VST, and the other device will follow.
- 465 -
Transmitting Synchronization Signals while Cubase VST
is synchronized to an External Source
• Cubase VST can be synchronized to an external source at the same time as it
transmits synchronization signals to another device.This means that Cubase
VST is acting as a slave to one device at the same time as being the master for
another. A common application for this would be to for example synchronize
Cubase VST to tape while transmitting MIDI clock to for example a drum machine.
• You could possibly also synchronize Cubase VST to time code and at the
same time transmit the same code in MIDI Time Code format to another device unable to read time code directly off tape.
There’s one very important fact to note:
● If several devices in your MIDI system should run at the same tempo, they
should all be synchronized using MIDI clock. Only one of them should be
synchronized to time code (if necessary), and this will be the master in the
system. All other devices should be synchronized via MIDI clock to this master.
- 466 -
Song Start
The Song Start time
code position.
This is the position on the time code tape that will make Cubase VST start the song
from the beginning. If you for example set this to 0:5:0:0:0 (five minutes) Cubase
VST will start from the beginning of the Song when it receives a time code message
with this value.
In other words, if Cubase VST receives a time code message of “seven minutes”
with the Song Start value suggested above, it will jump to a position two minutes in
from the beginning of the Song.
This way sequenced material can be matched to film or video, and you can adjust
the relative starting points between e.g. material recorded on an audio tape and Cubase VST.
The Song Start value is in the following format:
hours:minutes:seconds:frames:subframes (80 bits).
Time Display Offset
The Time Position display on the Transport bar usually starts at “zero”, even if the
incoming time code is something else. But if you want Song Position 1.1.0 to correspond to some certain Time position on the Transport bar, set this value with
Time Display.
This value will be used
for the time position of
the beginning of the
song.
If you for instance want the Transport bar to show the actual incoming time code
values during external synchronization, the “Song Start” and “Time Display”
should be set to the same value.
- 467 -
Bar Display
By the same token as with Time Display Offset you can here set the number of the
first Bar in the Song. This allows you to record before position 1.1.0, which is otherwise impossible.
Setting the Bar Display to
for example “-1” makes the
Song start at “0.1.0” instead
of the normal “1.1.0”.
- 468 -
MROS Resolution and System Preroll
MROS Resolution
This allows you to set the playback resolution of the program.
Cubase VST normally gives MIDI playback first priority. This means that whatever
the workload of the computer, MIDI data is sent out when — and as — it should.
However, when a lot of MIDI data is handled and an unusual amount of real-time
processing is going on, the program might not feel as smooth to use as it normally
does.
If you for example feel the graphics aren't updated as quickly as you like, you could
try lowering the resolution to 96 ticks per quarter note.
On the other hand, if you need extremely high playback resolution, you should use
the highest possible playback setting, 384 ticks per quarter note (often called pulses
per quarter note and hence abbreviated PPQN).
No matter what this setting is, data is always recorded at 384 PPQN and all editing
conforms to this value.
System Preroll
This parameter should only be adjusted if you experience problems with MIDI timing. Here’s the background: Modern operating systems with features such as multitasking and background processes make it hard to write timing stable MIDI
applications. Although Steinberg have made a great and successful effort to provide
very tight MIDI playback in Cubase VST, there might be systems where timing
isn’t as stable as you’d like it to be.
In this case, raising the System Preroll value might help.
What the parameter does is that it allows the system a longer “start up time” when
you hit playback. This will be noticeable at very large System Preroll values, when
you can see the Song pointer “jump back” a little when playback starts.
As a positive side effect, on systems with large audio latencies, raising this parameter to a value above the latency value (as indicated in the System dialog) will let
you hear the very first section of audio (which might otherwise be lost), when you
start playback.
- 469 -
Sync Options
Lock Time
Using this field you can set how many frames of “correct” time code Cubase VST
should receive before attempting “lock” (synchronize) to incoming time code. If
you have a tape recorder with a very short start-up time, you could try lowering this
number to make lock-up even faster than it already is. If you have Chase Events
turned on, and many Events to chase, you could try raising this number.
Dropout Time
On a tape with time code (SMPTE) dropouts may occur. If a drop-out is very long,
Cubase VST may (temporarily) stop. In the Dropout Time field you can set how
long a drop-out (in frames) should be tolerated until Cubase VST decides that the
tape isn't good enough to synchronize to. If you have a very stable time code
source, you may lower this number to make Cubase VST stop more swiftly after
the tape recorder has been stopped.
Detect Frame Change
If this option is ticked, Cubase VST will automatically detect frame rate changes in
incoming time code and reset the Frame rate setting to the new value.
The “normal” setting for this parameter is “Off”.
- 470 -
35
Customizing Cubase VST
- 471 -
36
Why Customize?
When you use Cubase VST the first time, all settings in the program have “factory
values”. Depending on your working style, what we have chosen might suit you
perfectly or not at all. By customizing Cubase VST, you are able to make it “your
program” and you will streamline your work considerably.
Customizing actually only involves two steps:
1. Setting up the program exactly as you want it to be each time you start
up.
2. Saving those settings in a default Song file (“Def.All”; hereafter referred
to as the “startup song”).
Before customizing...
... and after.
- 472 -
Examples of things to customize
Below follows a brief list of candidates for customizing. At this point you might not
understand what all the functions below are for and what they do. Either look them
up in the rest of this manual or leave them out for now.
Window Settings
You can change the size of the windows, move dividers and set the magnification,
to tailor the windows to your needs. Saving this in the startup song will make the
program appear as you want it.
Tracks
You can create and name Tracks, set them to different Track classes, etc. For example if you know you always want a Drum Track that plays on MIDI Channel 10,
simply create it!
You can also rearrange Track columns as you like.
Instruments
As described on page 54, Instruments are “macro” settings for MIDI Output and
Channel. By creating your own Instruments you can refer to all the devices in your
MIDI rig by name.
Parts
You can even have Parts in your startup Song. These could for example contain libraries of often used drum patterns or riffs. Or, they could contain system Exclusive
dumps of settings that load your instruments with certain sounds. Put the Parts on
muted Tracks and drag them onto other Tracks when you need them.
Transport Bar settings
You might for example prefer to record in Replace Mode, or you might always
want Automatic Quantizing of your recordings. If you do, simply set this up on the
Transport Bar.
Editor settings and Drum Map
If you prefer certain settings in the editors, for loops, quantizing etc, set them up
and save them with the startup song.
A perfect candidate for customizing is the Drum Map. This includes which Drum
Map to use and how it should be set up.
Mixer Maps
You can have up to eight Mixers loaded in a song. You might for example have one
basic “volume mixer” and seven “editors” for various MIDI instruments in your
rig.
- 473 -
Audio Settings
In the Monitor and other VST windows you can name buses, set up effects, EQ,
panning and a lot of other things to create your own “mixing environment”. The
Pool window also allows you to determine how you want the files and segments to
be listed.
Preferences
On the File menu you have a Preferences dialog box. This is used to set up a few
general things, like for example which editor opens when you double click on a
Part.
Grooves and other Quantize settings
If you have created a few favourite Grooves or made settings for Iterative Quantize,
make these part of your startup Song.
Chase and Part Appearance
The Chase setting determines how Cubase VST handles MIDI Volume and Program Change (among other things) during playback. The settings for Chase are
found on the Options menu.
Part Appearance is used to decide how the Parts should look, if the Part “boxes”
should display names or Events, for example.
Metronome, MIDI Setup and MIDI Filter
Do you want a click at all? Do you want it via the computer speaker or via MIDI?
How long do you want the count-in to be? All this is set in the “Metronome” dialog
box, reached from the Options menu.
The “MIDI Setup” dialog contains information about your MIDI Interface (among
many other things). Since you don’t want to have to set this every time you launch
Cubase VST you should save this setting in the startup Song.
If you have equipment that generates MIDI data that you don’t want to record, use
the “MIDI Filter” dialog box.
Sync
Most often you will synchronize to the same external equipment – for example the
tape recorder in your studio. By setting up the Synchronization dialog as you want
it, activate Sync on the Transport Bar and save this with the startup Song, Cubase
VST will automatically synchronize as soon as you hit play on the tape recorder.
Remote
Many functions in Cubase VST, like Play and Record, can be activated via MIDI.
Exactly how, is set up in the Remote dialog on the Options menu. Saving the Remote settings in the startup Song allows you to have a fixed personal setup for Remote Control.
- 474 -
Saving the Startup Song
Once you have set up the Song, perform the following steps.
1. Pull down the File menu and select “Save As...”.
2. From the File Format pop-up, select “Songs (*.ALL)”.
3. Make sure you save in the same directory as where you have your Cubase VST program.
4. In the File Name field, type in the name “Def.All”.
5. Click OK.
Now the next time you launch the program, the Song you just saved will automatically be loaded.
Starting from other Song documents –Templates
There are only two things special about the Def.All Song, compared to other
Songs:
• It loads automatically on startup if found in the same directory as the program.
• It loads automatically if you select the “New Song” item on the File menu.
You can in fact use any Song document for customizing on startup. This is convenient if you do different types of work and want different “templates” for each.
1. Set up the Song as you want it.
2. Save it under any name in any directory on your hard disk.
3. When you want to use a “template” song, simply double click on the
document icon in the Explorer.
Cubase VST launches and the Song is loaded automatically.
- 475 -
36
Keyboard Commands
- 476 -
37
What This Chapter Contains
The following is a list of the keyboard short-cuts for many of Cubase VST's functions.
Numeric Keypad
Key Command:
Function:
[*]
Activate recording
[Enter]
Start/Continue
[0] or [spacebar]
1st time – Stop
2nd time – Go to Left Locator/ 1. 1. 0
3rd time – Go to 1. 1. 0
[+]
Increase Tempo
[–]
Decrease Tempo
[1]
Go to Left Locator
[2]
Go to Right Locator
[9]
Go to last Stop Position
[Shift] + [1]
Store Song Position as Left Locator
[Shift] + [2]
Store Song Position as Right Locator
[3] to [8]
Go to Cue Point 3 to 8
[Shift] + [3] to [8]
Store Song Position as Cue Point 3 to 8
[/]
Cycle On/Off
- 477 -
Typewriter Keyboard
The various key commands are grouped after their contexts, to make it easier to
find what you’re looking for:
File Handling and General Procedures
Key Command:
Function:
[Control]-[O]
Open
[Shift]+[Control]-[N]
New Song
[Control]-[S]
Save Song
[Shift]+[Control]-[S]
Save Arrangement
[Control]-[Z]
Undo
[Control]-[X]
Cut
[Control]-[C]
Copy
[Control]-[V]
Paste
[Control]-[Q]
Quit
- 478 -
Window Handling
Key Command:
Function:
[Control]-[N]
New Arrange window
[Control]-[W]
Close active window
[Return]
Close editor or "click button with bold label" in Dialog
Box
[Esc]
Close and Cancel in Dialog Boxes
[G]
Decrease horizontal magnification
[H]
Increase horizontal magnification
[Shift]-[G]
Decrease vertical magnification
|Shift]-[H]
Increase vertical magnification
[F12]
Hide/Show Transport Bar
[Shift]-[F12]
Hide/Show VST Windows
[Control]-[F12]
Bring VST Windows to front
[Control]-[E]
Open Key Edit or default Editor (depending on Track Class)
[Control]-[G]
Open List Edit window
[Control]-[R]
Open Score Edit window
[Control]-[L]
Open Logical Edit window
[Control]-[Y]
Open GM/GS/XG Editor
[Control]-[F]
Open Audio Pool window
[Control]-[*] (keypad)
Open Audio Monitor Mixer
[Control]-[+] (keypad)
Open Audio Master window
[Control]-[M]
Open Graphic Master Track window
[Shift]+[Control]-[M]
Open Master Track List
[Control]-[H]
Open Transpose/Velocity dialog
[Control]-[B]
Open Notepad window
[F1]
Open Online Help
- 479 -
Transport Bar functions
Key Command:
Function:
Page Up
Forward
Page Down
Rewind
[P]
Set Meter Position
[Shift]-[P]
Set Time Position
[Shift]-[T]
Set Tempo
[Shift]-[S]
Set Time Signature
[L]
Set Left Locator
[R]
Set Right Locator
[Alt]+[Control]-[P]
Set Left and Right Locator to Part’s Start and End
[Shift]+[F2] to [F11]
Store Locator settings
[F2] to [F11]
Recall Locator settings
[C]
Click On/Off
[D]
Toggle Record Mode (Overdub/Replace)
[F]
Follow Song On/Off
[I]
Punch In On/Off
[O]
Punch Out On/Off
[M]
Master Track On/Off
[S]
Solo On/Off
[X]
Sync On/Off
[Y]
Remote On/Off
[V]
Delete last version (MIDI Cycle Recording)
[B]
Delete Subtrack (MIDI Cycle Recording)
[N]
Quantize last version (MIDI Cycle Recording)
[K]
Key Erase (MIDI Cycle Recording)
- 480 -
General Selection and Editing
Key Command:
Function:
[Control]-[A]
Select All Parts/Events
[Backspace]
Delete Selection
[Control]-[Backspace] Permanently delete audio from the hard disk.
[Control]-[I]
Get Information about selected Parts/elements
[Q]
Over Quantize
[U]
Undo Quantize
[W]
Note On Quantize
[E]
Iterative Quantize
[J]
Groove Quantize
[Z]
Auto QuantizeOn/Off
[1]-[7]
Set Quantize value
[T]
Set Quantize value to triplets
[.]
Set Quantize value to dotted
- 481 -
Arrange Window Selection and Editing
Key Command:
Function:
[→]
Select Next Part
[←]
Select Previous Part
[↑]
Go one Track up
[↓]
Go one Track down
[Control]-[T]
Create Track
[Alt]+[Control]-[T]
Select Track (enter a Track number, counted from the top
of the Track list)
[Alt]+[Control]-[N]
Rename Track
[Alt]+[Control]-[C]
Set MIDI/Audio Channel for selected Track
[Alt]+[Control]-[O]
Set MIDI Output for selected Track
[Alt]+[Control]-[J]
Create/Rename Instrument for selected Track
[Shift]+[Control]-[T]
Set Track Class for selected Track (enter a number 1-7, corresponding to the order on the Track Class pop-up menu)
[Alt]+[Control]-[M]
Monitoring on/off (Audio Track) / Mute on/off (others)
[Shift]+[Alt]+
Store Mute settings
[Control]-[F2] to [F11]
[Alt]+[Control][F2] to [F11]
Recall Mute settings
[Control]-[P]
Create Part
[Control]-[K]
Repeat Part(s)
[Alt]+[Control]-[A]
Toggle Part Appearance between “Show Names” and
“Show Events”
[Alt]+[Control]-[I]
Open/Close Inspector
[Shift]-[O]
Edit Transpose (in Inspector)
[Shift]-[V]
Edit Velocity (in Inspector)
[Shift]-[D]
Edit Delay (in Inspector)
[Alt]+[Control]-[F]
Freeze Play Parameters
[Control]-[J]
Show/Hide Groups
[Control]-[U]
Build Group
- 482 -
All MIDI Editor windows
Key Command:
Function:
[Return]
Keep (Close editor, keeping changes)
[Esc]
Cancel (Close editor, discarding changes)
[Insert]
Insert Event
[Tab]
Move one Snap in Step Edit
[A]
Edit Solo on/off
[Alt]+[Control]-[O]
Loop On/Off
[Alt]+[Control]-[L]
Input Left Loop boundary
[Alt]+[Control]-[R]
Input Right Loop boundary
[Alt]+[Control]-[I]
Info On/Off
[Alt]+[Control]-[C]
Show/Hide Controller display
• In all MIDI Editors, the arrow keys can be used in combination with the
[Shift] key to select several notes.
Key Edit only
Key Command:
Function:
[Alternate]
Restrict Pen to length changes only
[→]
Next Note
[←]
Previous Note
Drum Edit only
Key Command:
Function:
[→]
Next Note
[←]
Previous Note
[↑]
Previous Sound
[↓]
Next Sound
[Alt]+[Control]-[S]
Solo On/Off (for selected Sound)
[Alt]+[Control]-[N]
Rename Sound
- 483 -
Score Edit only
Key Command:
Function:
[→]
Next Note
[←]
Previous Note
[↓]
Next Staff
[↑]
Previous Staff
[Control]+[Arrow key]
Move selected item up/down/left/right
[+] (typewriter kbd)
Move Tablature note one string up
[–] (typewriter kbd)
Move Tablature note one string down
[Alt]+[Control]-[X]
Flip Stems
[Alt]+[Control]-[G]
Group selected items
[Alt]+[Control]-[B]
Hide selected items
[Alt]+[Control]-[H]
Grace Note
[Alt]+[Control]-[1] to [8] To Voice 1 - To Voice 8
[Control]-[P]
Print Score
List Edit only
Key Command:
Function:
[↑]
Previous Event
[↓]
Next Event
Pool functions
Key Command:
Function:
[Alt]+[Control]-[N]
Rename Segment
MIDI Mixer Window only
Key Command:
Function:
[↓]
Decrease Object Value
[↑]
Increase Object Value
[Control]-[I]
Open Object Dialog Box
- 484 -
Index
38
- 485 -
A
Accelerandi 402
Active Part 94
Aftertouch
Deleting 112
Editing 110
Filtering 183
In List Edit 137
In Logical Edit 171
Selecting Events In Editors 112
Any
Audio Channel 12, 24
MIDI Channel 19
Arrow Tool
Editors 98, 107
List Edit 142
Master Track 401
ASIO Control Panel 364
DirectX driver 379
Multimedia driver 369
ASIO Device 363
ASIO Multimedia driver 363
ASIO Multimedia Setup Window 369
Audio Buffers 373
Audio Card Requirements 356
Audio Channel
About 11
Any 12, 24
Assigning to Bus 201
Maximum nr of 362
vs Track 11
Audio Clock Source 364
Audio Editor
Color Palette 239
Display Formats 238
Dragging Audio into 240
Info Line 243
Multi Channel Track 231
Opening 229
Recording In 240
Single Channel Track 230
Stereo Track 231
Time/Meter Scale 238
Audio Events
About 15, 229, 350
Copying 351
Crossfading 267
Deleting 261
Duplicating 253
Exporting into Files 277
Ghost Copying 351
Grouped 262
Moving 252
Muting 264
Overlapping 232
Selecting Segment for 277
Splitting 265
Audio Files
About 13
Converting Formats 340
Creating in Wave Editor 292
Deleting 214
Deleting Unused 214
Deleting Unused Portions of 220
Duplicating 213
Importing 222, 241, 337
Locating Missing 216
Locating on Hard Disk 213
Mixing Down 338
Naming 213
Pool 208
Replacing 215
Audio Performance Window 382
Audio Preferences 284
Audio Tracks
In List Edit 136
Setting Channel for 11
Audio/Tempo Match Editor 432
Audiomix Part 327
Auditioning
Arrangement 41
Audio Editor 242
Pool 218
Wave Editor 289
Auto Quantize (Score) 153
Auto Tempo Scan 422
B
Bank Select 69
Bar Display Offset 468
Bar Range 179
Buffer Size (audio) 373
Buffers and Sync Test 377
Buses
About 195
Activating 200
Naming 201
Routing Effect Sends to 203
Routing to Outputs 201
C
Channel, see MIDI/Audio Channel
Chase 71
Check Buffers and Sync 377
Chn
Drum Map 133
Drum Tracks 125
Chord Symbols 159
Chorus
Level 191
Type 193
Clean Lengths 154
Clef 152
- 486 -
Color
Editing 96
In Audio Editor 239
In MIDI Editors 95
Comment (Score Edit) 161
Compression 61
Conditions 170
Controller Display
Drum Edit 110, 112
Key Edit 110, 112
List Edit 143
Controllers
Deleting 112
Editing 110
Filtering 183, 184
In List Edit 137
In Logical Edit 171
Mapping 186
Selecting Events In Editors 112
Transforming 137
Converting
Drum Tracks To MIDI Tracks 134
Hitpoints to Matchpoints 434
MIDI Notes to Hitpoints 415
MIDI Tracks To Drum Tracks 134
Copy
Audio Events 255
Logical Edit 173
Master Track 401, 408
Master Track Data Between Arrangements 409
MIDI Events 108
Parts 37
Copy Range 49
Copyright (Score Edit) 161
Create
Accelerandi/Ritardandi 402
Events 140
Hitpoints 413
Master Track Events 407
Parts 34
Tempo Events 400
Time Signature Events 400
Crossfading Audio Events 266
Customizing
About 472
Saving 475
Settings 473
Using Templates 475
Cut
Audio Events 255
Master Track 401, 408
MIDI Events 108
Parts 37
Cut Events 47
Cycle
Recording Audio in 270
Restricting Editing to 99
D
Default Song 472, 475
Defragmenting Hard Disk 383
Delay
MIDI Inspector 60
Play Parameters 65
Delete
All Events 101
Audio Events 261
Hitpoints 401
Logical Edit 173
Master Track Events 408
Note 100
Parts 39
Segments 219
Tempo Events 401
Time Signature Events 401
Delete Unused Files 214
Detect Buffer Size 376
Detect Frame Change 470
DirectX Driver 379
DirectX Effects 310
Disk Block Buffer Size 362
Display Filters 144
Display Quantize 153
Do Pop-up Menu
Master Track 402
MIDI Editors 100
Score Edit 149
Drawing
Hitpoints 413
Tempo Events 400
Dropout Time 470
Drum Map
About 123
Changing 133
Editing via MIDI 128
I-note 123
Len Value 130
MIDI Channel 125
O-note 123
Opening 128
Output 125
Q Value 129
Saving 128
Setting Up 126
Velocity Values 131
Drum Parts
About 122
Editing 129
Drum Stick Tool 129
Drum Tracks
About 122
Converting to MIDI Tracks 134
In List Edit 137
- 487 -
Duplicate
Audio Events 253
Master Track Events 401
MIDI Events 101
Parts 38
Segments 218
Dynamic Events
About 274
Displaying 237, 274
Editing 274
E
Easy (Logical Edit) 167
Edit Audio 297
Edit Solo 92
Editing
Audio Editor 243
External Wave Editor 297
In List Edit 141
MIDI Parts In Drum Edit 133
Wave Editor 291
Editing via MIDI 108
Editors
Closing, Cancelling Changes 91
Closing, Keeping Changes 91
Differences 88
Opening 89
Opening Several 90
Playback Parameters 94
Effect Plug-Ins
Installing 332
User Interface 333
Effects
About 306
DirectX 310
Editing 314
Insert 311
Loading 316
Naming 315
Routing Outputs to Buses 204
Routing Sends to Buses 203
Saving 315
Selecting 308
Sends 307
Enable Audio only during Play 367
Enharmonic Shift 158
EQ Button 305
Equalizer
About 303
Activating from Mixer/Inspector 305
Parameters 304
Erase Muted 264
Erase Unused 220
Eraser Tool
Arrange Window 39
Audio Editor 261
Editors 109, 112
Event Display 142
Event Type (Logical Edit) 169
Events
Audio 15
Creating 140
Deleting 109
Hiding 144
Monitoring In Editors 98
Moving 142
Score 139
Selecting 98
Special 139
Stop 139
Text 139
Expert (Logical Edit) 167, 179
Export Audio 338
Exporting Master Tracks 409
Exporting Segments 277
Extract (Logical Edit) 173
F
Fade In 269, 280
Fade Out 269, 280
Fading In/Out Audio Events 266
F-button 144
File Cache Scheme 365
Fill 101
Fill Meter Hits 413
Film 389
Filtering
By Event Type 183
by MIDI Channel 184
Logical Edit 167, 169, 173
Thruput 185
Filtering Controllers 184
Filters
About 183
In List Edit 144
In Logical Edit 167
Fit Event To Loop Range 272
Fixed Note 100
Flat Beams 154
Flip Stems 159
Follow Song 92
Fragmentation 383
Frame Rate 462
Frames 389
Freeze Play Parameters 94
Full Duplex 358, 375
Functions (Logical Edit) 168
FX Button 303
- 488 -
G
Generate SMPTE 457
Get Info 35
Get M-Points 433
Ghost Audio Events
About 351
Converting 353
Creating 254, 352
Selecting Segment for 277
vs "Normal" Audio Events 352
Ghost Parts
About 45
Audio 353
Creating 45
Creating Using Repeat 46
Global Cut 47
Global Insert 48
Global Split 48
Glue Tube Tool
Arrangement 40
Score Edit 158
GM, Activating 192
GM/GS/XG Editor Controls 191
Goto Pop-up Menu 97
Groove Quantize 257
Grooves
Creating from Audio 446
Group Mixer 317
Group Parts
About 84
Arranging 83
Arranging During Playback 85
Unpacking 85
Grouped Audio Events 262
Groups
About 77
Adding Parts To 79
Creating 78
Creating Group Tracks 82
Replacing All Parts In 80
The Group List 81
Using (basic steps) 78
GS
Additional Parameters 193
Resetting 192
H
Hand Tool
Audio Editor 253
Wave Editor 292
Hard disk
Maintaining 383
Requirements 360
Hi Quality EQ 303
Hiding Events (List Edit) 144
Hitpoints
About 392, 411
Audio/Tempo Matching 436
Breaking Links 419
Converting MIDI Notes to 415
Converting to Match Points 434
Creating 413
Deleting 401, 415
Duplicating 415
Editing 415
Linking 418
Meter 411
MIDI Input 413
MIDI Output 417
Moving 415
Naming 415
Quantizing 416
Showing Links 424
Time 411
I
Import Audio 222, 337
Importing Master Tracks 409
In Button 199
Inactive Part 94
Info Line
Editing On 103
In Audio Editor 243
In Master Track Editor 387, 398
In MIDI Editors 103
Parameters 103
Init (Logical Edit) 167
Input Meter 199
Input Transformer 187
Inputs (Audio)
Activating 196
Naming 196
Selecting for Recording 198
Insert
Logical Edit 178
MIDI Editors 106
Insert Button 106, 118
Insert Effects 311
Inspector
About 58
Group Tracks 82
Parameters In 59
Program Change 63
Instruments
About 55
Defining 55
Deleting 56
Selecting 56
Invert (Phase) 280
- 489 -
J
M
Joining Parts 40
Magnification
Pool 211
Wave Editor 288
Magnifying Glass Tool
Arrangement 41
Audio Editor 242
Editors 98
Wave Editor 289
Mapping MIDI data 187
Mask
About 145
Event Type 145
Event Type and Value 145
Removing 146
Master Button 385, 393
Master Effects
About 306
Selecting 313
Master Track
About 385
Copying Data Between Arrangements
409
Graphic Editor 386
Importing and Exporting 409
List Editor 406
Matching Audio and Tempo 432
Match Pitch to Scale 44
Match Points, see M-Points
Match Quantize
Audio Part with Audio Part 259
Audio Part with MIDI Part 258
MIDI Part with Audio Part 257
MIDI Part with Chord Part 44
MIDI Part with MIDI Part 42
Matching
Audio to Playback Tempo 441
Playback to Audio Tempo 436, 439
Memory per Channel 362
Memory Requirements 359
Merge Parts 36
Meter Based Display 390
Meter Hit Strip 387, 411
Meter Hits 392
Meter Ruler 387, 389
MIDI Channel
Any 19
Drum Tracks 125, 127
Filtering 184
In Events 17
Info Line 103
Instruments 55
Logical Edit 172, 176
Multi Record Split 27
Setting for Tracks 18
K
Keep Linked 415
Keep Note 100
Keep Selected 415
Key Signature 152
Keyboard Commands 476
Kickers
Editors 107
Master Track 415
L
Lanes
About 230
Displaying 236
Multi Channel Tracks 231
Single Channel Tracks 230
Stereo Track 231
Length
Drum Notes 130
Logical Edit 179
MIDI Inspector 60
Line Tool
Editors 112
Master Track 402
Link
About 418
Breaking 419
One By One 419
Showing 418
Load Pool 227
Lock Symbol 450
Lock Time 470
Logical Edit
About 164
Conditions 170
Easy/Expert mode 167, 179
Filtering 167, 169, 173
Functions 168
Init 167
Opening 164
Presets 165
Processing 167, 174, 178
Loop
MIDI Editors 92
Restricting Editing to 99
Wave Editor 289
- 490 -
MIDI Clock
Sync to 463
Transmitting 465
MIDI Connector Button 108
MIDI In Button 114, 413
MIDI Input 108
MIDI Mute Button 301
MIDI Output
About 16
Multi-port Interfaces 16
Standard Interfaces 16
MIDI Sync Reference 366
MIDI Thru Filters 185
MIDI Time Code 460
MIDI to Audio Delay 366
MIDI Tracks
Converting to Drum Tracks 134
Mixing Down 52
MIDI Volume 59, 70
Mirror 414
Mirror & Link 419
Mix Down
With Audio Tracks 53
With MIDI and Drum Tracks 52
Mixer Tracks
In List Edit 138
in Logical Edit 164
Mixing Audio
Automated 322
Editing Automated 328
EQ 303
Pan 302
Volume 301
Mixing Down to File 338
Monitor Mixer
Automation 322
Recording 325
Mono 12
Moving
Audio Events 252
Hitpoints 415
Master Track Data 409
Notes 107
Tempi 401
Time Signatures 401
M-Points
About 249
Creating Automatically 250, 433
Creating Manually 250, 434
Deleting 251
Displaying 249
Editing 251
In Match Audio/Tempo Editor 432
Moving 435
M-Points to Groove 446
MROS Resolution 469
MTC 460
Multi Channel Recording 24
Multi Track Recording
About 26
Activating 26
Channel Split Mode 27
Input Split Mode 28
Layering Sounds With 30
Merge Mode 27
Mute
Audio Events 264
Drum Sounds 132
Editing Recorded 75, 139
Parts 41
Pre-programming 73
Recording 73
Mute Buttons
Audio Monitor Mixer 301
GM/GS/XG Editor 192
Mute Tool
Arrangement 41
Audio Editor 264
Muted Tracks
With Global Cut 47
With Global Insert 48
With Groups 84
N
Naming
Hitpoints 415
Parts 44
No Beams 154
No Overlap 154
Normalize 280
Note Info Line
Editing On 103
Parameters 103
Note Tool 157
Notes
Creating 105
Creating in Drum Edit 129
Deleting 100
Filtering 183
In List Edit 137
In Logical Edit 171
Length 47
MIDI Channel 106
Moving 107
Resizing 107
Velocity Modifiers 106
Number of Channels 362
Numeric Key Pad 477
- 491 -
O
Offset (Audio Input/Output Port) 372
Output (MIDI)
About 16
Drum Tracks 125
Outputs (Audio)
About 195
Routing Buses to 201
P
Paint Brush Tool 105, 131
Pan
Audio Editor 274
Audio Monitor Mixer 302
GM/GS/XG Editor 191
MIDI Inspector 61
Parts
Active and Inactive 94
Auditioning 41
Creating 34
Cutting, Copying and Pasting 37
Deleting 39
Getting Information About 35
Joining 40
Match Quantizing 42
Merging 36
MIDI Volume 59
Muting 41
Naming 44
Notes Lengths 60
Overlapping 34
Recording 33
Repeating 38, 46
Resizing 38
Scrubbing 41
Selecting Overlapped 35
Splitting 39
Transpose 59
Triggering 41
Velocity 60
Paste
Audio Events 255
Master Track 401, 408
MIDI Events 108
Parts 37
Patch pop-up menu 69
Pencil Tool
Arrangement 38, 45
Audio Editor 241, 250, 275
Editors 105, 107, 112
Groups 84
List Edit 143
Master Track 399, 400, 413
Performance Window 382
Pitch Bend
Deleting 112
Editing 110
Filtering 183
In List Edit 137
In Logical Edit 171
Selecting Events In Editors 112
Pitch Shift 281
Play Audio in Background 295
Play Parameters
About 58
Delaying 65
Freezing 58
Playback during Recording 358
Poly Pressure
Editing 112
Filtering 183
In List Edit 137
In Logical Edit 171
Pool
Contents 210
Loading 227
Opening 208
Saving 227
Time Formats in 211
Position Box 391
Prepare Archive 225
Prepare Master 225
Presets (ASIO Multimedia Setup) 369
Presets (Logical Edit) 165
Printing 162
Priority 366
Process Tempo 404
Processing
Audio 279
Logical Edit 167, 174, 178
Program Change
About 63
Detecting 67
Entering In Editors 66
Entering In Inspector 63
Filtering 183
In GM/GS/XG Editor 192
In List Edit 137
In Logical Edit 171
Numbering 68
Recording 66
Resetting for Parts 64
Timing 65
Purge Segments 219
- 492 -
Q
S
Q Tool, see Match Quantize
Q-Points
About 233, 247
Displaying 247
Grouped Events 263
Setting Automatically 248
Setting Manually 247
Quantize
Audio (by Time Stretching) 259, 442
Audio Events 256
Drum Edit 132
Drum Tracks 129
Editors 104
Hitpoints 416
Logical Edit 168, 173
Match 42
Quieten 280
Sample Rate 356, 364
Sample Rate (ASIO Multimedia Setup) 371
Save Pool 227
Scissors Tool
Arrangement 39
Audio Editor 265
Master Track 419
Score Edit 158
Score
Displaying 151
Printing 162
Score Edit
Editing Several Tracks 155
Joining Notes 158
Modes 149
Moving Notes 157
Splitting Notes 158
Transposing Notes 157
Score menu 149
Scrub
Audio Events 242
Parts 41
Wave Editor 289
Segments
About 14, 350
Auditioning 218
Changing Start and End Insets 218, 245
Creating in Pool 214
Creating in Wave Editor 291
Deleting 219
Deleting Unused 219
Dragging into Other Windows 223
Duplicating 218
Editing in Wave Editor 291
In the Pool 209, 212
Renaming 218
Start and End Insets 244
Selecting
Audio File in Pool 214
Events 98
Events in Master Track Edit 397
Logical Edit 173
Overlap 35
Segment in Pool 218
Wave Editor 290
Selection To Segment 291
Send Effects 306
Show Hitpoint Links 418
Show Hitpoint Match 420
Shuffle 154
Silence 280
Slider to Tempo 438
Slider to Time Stretch 442
Smooth 403
SMPTE see Time Code
SMPTE/EBU 389
R
R Column, see Multi Track Recording
Read Button 326
Rechannelizing 18
Record Info (Audio Inspector) 25
Record Tempo/Mutes 395
Recording
24-Bit Audio (VST/24 only) 367
In Audio Editor 240
In Free Time 429
MIDI and Audio at the Same Time 30
Multi Track 26
Reduce Tempo Events 403
Remix Track
With Audio Tracks 51
With Drum Tracks 51
With MIDI Tracks 50
Repeat
Audio Events 254
Editors 101
Master Track Events 402
Parts 38, 46
Resolving 456
Rest Tool 157
Reverb
Level 191
Time 193
Type 193
Reverse 101, 280
ReWire 321
Ritardandi 402
Ruler 387, 389
- 493 -
Snap 104
Snap to Zero 234, 246
Snip at M-points 447
Snip Loop 265
Solo
Audio Monitor Mixer 301
Drum Edit 132
Edit Solo 92
Recording 73
Song Start Offset 467
SoundFonts 69
Speaker
Audio Editor 243, 247
MIDI Editors 98
Split
Audio Events 265
Parts 39
Split (Piano) Staff 152
Staff
Active 156
Multiple 155
Staff Mode 152
Staff Settings 151
Start and End Insets
About 244
Changing in Audio Editor 245
Changing in Pool 218
Startup Song 472, 475
Step Button 114
Step Input
About 114
Entering Notes 115
Entering Rests 116
Insert 118
Note Length and Spacing 114
Stereo
About (Audio) 12
Inspector 21
Monitor Mixer 23
Stop Events 139
Straighten Up 424, 440
Sync
MIDI Clock 463
MIDI Time Code 460
Recovering Lost Sync Tracks 426
Testing Audio 377
To Existing Music 426
With Audio 455
Sync Button 458
Sync Options 470
Sync Reference 372, 374
Syncopation 154
System Exclusive
Editing 138
Filtering 183
In List Edit 137
System Preroll 469
T
Templates 475
Tempo
And the Info Line 398
Auto Scan 422
Creating Accelerandi and Ritardandi 402
Creating Events 407
Deleting Events 401, 408
Display 388
Drawing 399, 400
Events 396
Finding Matches 420
Mapping to Audio 439
Mapping using Time Locked Tracks 428
Matching 420
Matching Fixed to Audio 436
Moving Events 401, 407
Multiple in one Arrangement 451
Processing 404
Recording In Real Time 394
Reducing Events 403
Selecting 396
Smoothing 403
Straighten Up 424
Time Locked Tracks 450
Using Master Track 393
Tempo Display 387
Text (Score Edit) 160
Text Events 139
Time Based Display 390
Time Based Events 428
Time Code
Formats 389
Frame Rate 462
Generating 457
Time Correction 281
Time Display Offset 467
Time Format 407
Time Hit Strip 387, 411
Time Hits 392
Time Locked Tracks 428, 449
Time Position, Switching to 147
Time Ruler 387, 389
Time Signature
About 388
Creating Events 407
Deleting Events 401, 408
Drawing 400
Editing 398
Moving Events 401, 407
Score 151
Selecting 396
Time Signature Strip 387
Time Stretch 441
Title (Score Edit) 161
To Pop-up Menu 99
- 494 -
Track Class
Converting Between MIDI And Drum
Tracks 134
Tracks
Active 240
Audio 11
Drum Tracks 122
Group 82
Name in Score 154
Tranforming MIDI data 187
Transpose
Editing Transposed Notes 94
Group Tracks 82
MIDI Inspector 59
Triggering Parts 41
U
Undo
Audio Quantize 259
Editing 91
Logical Edit 167
Ungroup Audio Events 262
Unmask 146
Use 16-Bit only 375
Use Waveforms 217
W
Wave Editor
About 284
Cut, Copy and Paste 293
Loop button 289
Opening 285
Opening "Secondary" 298
Opening External 297
Playing Back 289
Selecting External 296
Selecting In 290
Selecting Internal 284
Setting Magnification 288
Wave Images 217
WaveLab
Opening from Cubase 297
Selecting in Cubase 296
Write Button 325
X
XG
Additional Parameters 193
Resetting 192
Z
V
Zero Crossings 234
Velocity
Editing 111
Editing via MIDI 108
For Created Notes 106
MIDI Inspector 60
Modifiers (Drum Tracks) 131
View Pop-up Menu (Audio Editor) 236
VITC 460
Volume
Audio Editor 274
Audio Monitor Mixer 301
Entering in MIDI Editors 70
GM/GS/XG Editor 191
MIDI Inspector 59, 70
VST/24 367
- 495 -