1
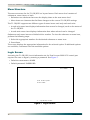
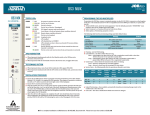
DSX
DS1
TST
T1-OR/NIU 1181310L2
PWR
ALM
T R
.6V X X
LBK
TX
DSX
EQ
RX
TX
DSX
MON
RX
®
Total Access 3000/3010 T1-OR/NIU
Installation and Maintenance Practice
Document Number: 61181310L2-5D
CLEI: M3CUTYLB_ _
November 2008
Total Access 3000/3010 T1-OR/NIU Installation and Maintenance Practice
Trademarks
Front Matter
Any brand names and product names included in this document are trademarks, registered
trademarks, or trade names of their respective holders.
To the Holder of the Document
The contents of this document are current as of the date of publication. ADTRAN® reserves the
right to change the contents without prior notice.
In no event will ADTRAN be liable for any special, incidental, or consequential damages or
for commercial losses even if ADTRAN has been advised thereof as a result of issue of this
document.
®
901 Explorer Boulevard
P.O. Box 140000
Huntsville, AL 35814-4000
(256) 963-8000
©2008 ADTRAN, Inc.
All Rights Reserved.
ii
61181310L2-5D
Revision History
Revision
Date
Description
A
April 2002
B
August 2004
Revised to expand information on the Network Service options.
C
August 2008
Revised to add a Connections section, expand descriptions of Provisioning options, and change the CLEI code.
D
November 2008
Revised to add the input voltage to the Specifications section and to
correct illustrations.
Initial release
Conventions
The following typographical conventions are used in this document:
This font indicates a cross-reference link.
This font indicates screen menus, fields, and parameters.
THIS FONT indicates keyboard keys (ENTER, ESC, ALT). Keys that are to be pressed simultaneously
are shown with a plus sign (ALT+X indicates that the ALT key and X key should be pressed at the
same time).
This font indicates references to other documentation and is also used for emphasis.
This font indicates on-screen messages and prompts.
This font indicates text to be typed exactly as shown.
This font indicates silk-screen labels or other system label items.
This font is used for strong emphasis.
NOTE
Notes inform the user of additional, but essential, information or
features.
CAUTION
Cautions inform the user of potential damage, malfunction, or
disruption to equipment, software, or environment.
WARNING
Warnings inform the user of potential bodily pain, injury, or death.
61181310L2-5D
iii
Total Access 3000/3010 T1-OR/NIU Installation and Maintenance Practice
Training
ADTRAN offers training courses on our products. These courses include overviews on product
features and functions while covering applications of the ADTRAN product lines.
ADTRAN provides a variety of training options, including customized training and courses
taught at our facilities or at customer sites.
For inquiries concerning training, contact ADTRAN:
Training Phone:
800-615-1176, ext. 6303
Training Fax:
256-963-6217
Training Email:
[email protected]
iv
61181310L2-5D
Contents
Introduction . . . . . . . . . . . . . . . . . . . . . . . . . . . . . . . . . . . . . . . . . . . . . . . . . . . . . . . . . . . . . . . . . . . . . . . . . . . . . .
Description . . . . . . . . . . . . . . . . . . . . . . . . . . . . . . . . . . . . . . . . . . . . . . . . . . . . . . . . . . . . . . . . . . . . . . . . . . . .
Features . . . . . . . . . . . . . . . . . . . . . . . . . . . . . . . . . . . . . . . . . . . . . . . . . . . . . . . . . . . . . . . . . . . . . . . . . . . . . .
Compliance . . . . . . . . . . . . . . . . . . . . . . . . . . . . . . . . . . . . . . . . . . . . . . . . . . . . . . . . . . . . . . . . . . . . . . . . . . . .
1
2
2
2
Installation . . . . . . . . . . . . . . . . . . . . . . . . . . . . . . . . . . . . . . . . . . . . . . . . . . . . . . . . . . . . . . . . . . . . . . . . . . . . . . .
Shipping Contents . . . . . . . . . . . . . . . . . . . . . . . . . . . . . . . . . . . . . . . . . . . . . . . . . . . . . . . . . . . . . . . . . . . . . .
Instructions for Installing the Module . . . . . . . . . . . . . . . . . . . . . . . . . . . . . . . . . . . . . . . . . . . . . . . . . . . . . . . .
Front Panel LEDs . . . . . . . . . . . . . . . . . . . . . . . . . . . . . . . . . . . . . . . . . . . . . . . . . . . . . . . . . . . . . . . . . . . .
3
3
4
5
Front Panel Operation . . . . . . . . . . . . . . . . . . . . . . . . . . . . . . . . . . . . . . . . . . . . . . . . . . . . . . . . . . . . . . . . . . . . . .
LBK Pushbutton . . . . . . . . . . . . . . . . . . . . . . . . . . . . . . . . . . . . . . . . . . . . . . . . . . . . . . . . . . . . . . . . . . . . . . . .
LBK Operation . . . . . . . . . . . . . . . . . . . . . . . . . . . . . . . . . . . . . . . . . . . . . . . . . . . . . . . . . . . . . . . . . . . . . .
XMT and RCV Span Power Test Points . . . . . . . . . . . . . . . . . . . . . . . . . . . . . . . . . . . . . . . . . . . . . . . . . . . . . .
Test Point Operation . . . . . . . . . . . . . . . . . . . . . . . . . . . . . . . . . . . . . . . . . . . . . . . . . . . . . . . . . . . . . . . . .
Front Panel Bantam Jacks . . . . . . . . . . . . . . . . . . . . . . . . . . . . . . . . . . . . . . . . . . . . . . . . . . . . . . . . . . . . . . . .
6
6
6
6
6
7
Connections . . . . . . . . . . . . . . . . . . . . . . . . . . . . . . . . . . . . . . . . . . . . . . . . . . . . . . . . . . . . . . . . . . . . . . . . . . . . . . 8
Office Repeater Mode . . . . . . . . . . . . . . . . . . . . . . . . . . . . . . . . . . . . . . . . . . . . . . . . . . . . . . . . . . . . . . . . . . . 8
Network Interface Unit Mode . . . . . . . . . . . . . . . . . . . . . . . . . . . . . . . . . . . . . . . . . . . . . . . . . . . . . . . . . . . . . . 9
Total Access 3000 Chassis Amphenol Connectors . . . . . . . . . . . . . . . . . . . . . . . . . . . . . . . . . . . . . . . . . . . . 10
SCU Control Port Operation . . . . . . . . . . . . . . . . . . . . . . . . . . . . . . . . . . . . . . . . . . . . . . . . . . . . . . . . . . . . . . . .
Menu Structure . . . . . . . . . . . . . . . . . . . . . . . . . . . . . . . . . . . . . . . . . . . . . . . . . . . . . . . . . . . . . . . . . . . . . . . .
Login Screen . . . . . . . . . . . . . . . . . . . . . . . . . . . . . . . . . . . . . . . . . . . . . . . . . . . . . . . . . . . . . . . . . . . . . . . . .
Total Access Main Menu . . . . . . . . . . . . . . . . . . . . . . . . . . . . . . . . . . . . . . . . . . . . . . . . . . . . . . . . . . . . . . . .
Access Module Menus . . . . . . . . . . . . . . . . . . . . . . . . . . . . . . . . . . . . . . . . . . . . . . . . . . . . . . . . . . . . . . .
T1 Main Menu . . . . . . . . . . . . . . . . . . . . . . . . . . . . . . . . . . . . . . . . . . . . . . . . . . . . . . . . . . . . . . . . . . . . .
Configuration . . . . . . . . . . . . . . . . . . . . . . . . . . . . . . . . . . . . . . . . . . . . . . . . . . . . . . . . . . . . . . . . . . .
Provisioning . . . . . . . . . . . . . . . . . . . . . . . . . . . . . . . . . . . . . . . . . . . . . . . . . . . . . . . . . . . . . . . . . . . .
Office Repeater Mode . . . . . . . . . . . . . . . . . . . . . . . . . . . . . . . . . . . . . . . . . . . . . . . . . . . . . . . . .
Network Interface Unit Mode . . . . . . . . . . . . . . . . . . . . . . . . . . . . . . . . . . . . . . . . . . . . . . . . . . . .
Status . . . . . . . . . . . . . . . . . . . . . . . . . . . . . . . . . . . . . . . . . . . . . . . . . . . . . . . . . . . . . . . . . . . . . . . .
Loopback and Test . . . . . . . . . . . . . . . . . . . . . . . . . . . . . . . . . . . . . . . . . . . . . . . . . . . . . . . . . . . . . .
Performance Monitoring . . . . . . . . . . . . . . . . . . . . . . . . . . . . . . . . . . . . . . . . . . . . . . . . . . . . . . . . . .
Performance Monitoring Functions . . . . . . . . . . . . . . . . . . . . . . . . . . . . . . . . . . . . . . . . . . . . . . .
Stored Performance Characteristics . . . . . . . . . . . . . . . . . . . . . . . . . . . . . . . . . . . . . . . . . . .
Performance Defect Definitions . . . . . . . . . . . . . . . . . . . . . . . . . . . . . . . . . . . . . . . . . . . . . . .
Circuit ID . . . . . . . . . . . . . . . . . . . . . . . . . . . . . . . . . . . . . . . . . . . . . . . . . . . . . . . . . . . . . . . . . . . . . .
61181310L2-5D
11
12
12
13
14
15
16
17
17
18
20
21
23
23
23
24
25
v
Total Access 3000/3010 T1-OR/NIU Installation and Maintenance Practice
Alarm History . . . . . . . . . . . . . . . . . . . . . . . . . . . . . . . . . . . . . . . . . . . . . . . . . . . . . . . . . . . . . . . . . . . 26
Event History . . . . . . . . . . . . . . . . . . . . . . . . . . . . . . . . . . . . . . . . . . . . . . . . . . . . . . . . . . . . . . . . . . . 26
In-band Loopbacks . . . . . . . . . . . . . . . . . . . . . . . . . . . . . . . . . . . . . . . . . . . . . . . . . . . . . . . . . . . . . . . . . . . . . . . 27
Activating Loopbacks . . . . . . . . . . . . . . . . . . . . . . . . . . . . . . . . . . . . . . . . . . . . . . . . . . . . . . . . . . . . . . . . . . . 27
Code Detection . . . . . . . . . . . . . . . . . . . . . . . . . . . . . . . . . . . . . . . . . . . . . . . . . . . . . . . . . . . . . . . . . . . . 27
Maintenance . . . . . . . . . . . . . . . . . . . . . . . . . . . . . . . . . . . . . . . . . . . . . . . . . . . . . . . . . . . . . . . . . . . . . . . . . . . . . 27
Specifications. . . . . . . . . . . . . . . . . . . . . . . . . . . . . . . . . . . . . . . . . . . . . . . . . . . . . . . . . . . . . . . . . . . . . . . . . . . . 28
Appendix A
Front Panel DSX and MUX Mode Test Access . . . . . . . . . . . . . . . . . . . . . . . . . . . . . . . . . . . . . . . . A-1
General . . . . . . . . . . . . . . . . . . . . . . . . . . . . . . . . . . . . . . . . . . . . . . . . . . . . . . . . . . . . . . . . . . . . . . . . . . . . . A-1
DSX Mode Test Access. . . . . . . . . . . . . . . . . . . . . . . . . . . . . . . . . . . . . . . . . . . . . . . . . . . . . . . . . . . . . . . .
DSX MON, Tx to Customer . . . . . . . . . . . . . . . . . . . . . . . . . . . . . . . . . . . . . . . . . . . . . . . . . . . . . . . . . .
DSX MON, Rx from Customer . . . . . . . . . . . . . . . . . . . . . . . . . . . . . . . . . . . . . . . . . . . . . . . . . . . . . . . .
DSX EQ, Tx to Customer, Rx from Customer . . . . . . . . . . . . . . . . . . . . . . . . . . . . . . . . . . . . . . . . . . . .
A-1
A-2
A-3
A-3
MUX Mode Test Access . . . . . . . . . . . . . . . . . . . . . . . . . . . . . . . . . . . . . . . . . . . . . . . . . . . . . . . . . . . . . . .
MUX MON, Tx to Customer . . . . . . . . . . . . . . . . . . . . . . . . . . . . . . . . . . . . . . . . . . . . . . . . . . . . . . . . . .
MUX MON, Rx from Customer . . . . . . . . . . . . . . . . . . . . . . . . . . . . . . . . . . . . . . . . . . . . . . . . . . . . . . . .
MUX EQ, Tx to Network, Rx from the Network . . . . . . . . . . . . . . . . . . . . . . . . . . . . . . . . . . . . . . . . . . .
MUX EQ, Tx to Customer, Rx from Customer . . . . . . . . . . . . . . . . . . . . . . . . . . . . . . . . . . . . . . . . . . . .
A-4
A-4
A-4
A-5
A-6
Appendix B
Warranty . . . . . . . . . . . . . . . . . . . . . . . . . . . . . . . . . . . . . . . . . . . . . . . . . . . . . . . . . . . . . . . . . . . . . . . B-1
Warranty and Customer Service . . . . . . . . . . . . . . . . . . . . . . . . . . . . . . . . . . . . . . . . . . . . . . . . . . . . . . . .
ADTRAN Sales . . . . . . . . . . . . . . . . . . . . . . . . . . . . . . . . . . . . . . . . . . . . . . . . . . . . . . . . . . . . . . . . . . .
ADTRAN Technical Support . . . . . . . . . . . . . . . . . . . . . . . . . . . . . . . . . . . . . . . . . . . . . . . . . . . . . . . . .
ADTRAN Repair/CAPS . . . . . . . . . . . . . . . . . . . . . . . . . . . . . . . . . . . . . . . . . . . . . . . . . . . . . . . . . . . . .
Repair and Return Address . . . . . . . . . . . . . . . . . . . . . . . . . . . . . . . . . . . . . . . . . . . . . . . . . . . . . . . . . .
vi
B-1
B-1
B-1
B-1
B-1
61181310L2-5D
Contents
Figures
Figure 1.
Figure 2.
Figure 3.
Figure 4.
Figure 5.
Figure 6.
Figure 7.
Figure 8.
Figure 9.
Figure 10.
Figure 11.
Figure 12.
Figure 13.
Figure 14.
Figure 15.
Figure 16.
Figure 17.
Figure 18.
Figure 19.
Figure 20.
Figure 21.
Figure A-1.
Figure A-2.
Figure A-3.
Figure A-4.
Figure A-5.
Figure A-6.
Figure A-7.
Total Access 3000/3010 T1-OR/NIU . . . . . . . . . . . . . . . . . . . . . . . . . . . . . . . . . . . . . . . . . . . . . . . . 1
Office Repeater Mode Orientation . . . . . . . . . . . . . . . . . . . . . . . . . . . . . . . . . . . . . . . . . . . . . . . . . . 8
Office Repeater Mode Backplane Cabling . . . . . . . . . . . . . . . . . . . . . . . . . . . . . . . . . . . . . . . . . . . . 8
Network Interface Unit Orientation . . . . . . . . . . . . . . . . . . . . . . . . . . . . . . . . . . . . . . . . . . . . . . . . . . 9
Network Interface Unit Mode Backplane Cabling . . . . . . . . . . . . . . . . . . . . . . . . . . . . . . . . . . . . . . . 9
RS-232 (DB-9) Pin Assignments . . . . . . . . . . . . . . . . . . . . . . . . . . . . . . . . . . . . . . . . . . . . . . . . . . 11
Logon Screen . . . . . . . . . . . . . . . . . . . . . . . . . . . . . . . . . . . . . . . . . . . . . . . . . . . . . . . . . . . . . . . . . 12
Total Access Main Menu . . . . . . . . . . . . . . . . . . . . . . . . . . . . . . . . . . . . . . . . . . . . . . . . . . . . . . . . 13
Access Module Menus Screen . . . . . . . . . . . . . . . . . . . . . . . . . . . . . . . . . . . . . . . . . . . . . . . . . . . . 14
T1 Main Menu . . . . . . . . . . . . . . . . . . . . . . . . . . . . . . . . . . . . . . . . . . . . . . . . . . . . . . . . . . . . . . . . 15
Configuration Screen . . . . . . . . . . . . . . . . . . . . . . . . . . . . . . . . . . . . . . . . . . . . . . . . . . . . . . . . . . . 16
Provisioning Menu-OR Mode . . . . . . . . . . . . . . . . . . . . . . . . . . . . . . . . . . . . . . . . . . . . . . . . . . . . . 17
Provisioning Menu-NIU Mode . . . . . . . . . . . . . . . . . . . . . . . . . . . . . . . . . . . . . . . . . . . . . . . . . . . . 18
Status Screen-OR . . . . . . . . . . . . . . . . . . . . . . . . . . . . . . . . . . . . . . . . . . . . . . . . . . . . . . . . . . . . . 20
Status Screen-NIU . . . . . . . . . . . . . . . . . . . . . . . . . . . . . . . . . . . . . . . . . . . . . . . . . . . . . . . . . . . . . 20
Loopback and Test Commands Menu-OR . . . . . . . . . . . . . . . . . . . . . . . . . . . . . . . . . . . . . . . . . . . 21
Loopback and Test Commands Menu-NIU Mode . . . . . . . . . . . . . . . . . . . . . . . . . . . . . . . . . . . . . 22
Performance Monitoring Menu . . . . . . . . . . . . . . . . . . . . . . . . . . . . . . . . . . . . . . . . . . . . . . . . . . . . 23
Circuit ID Screen . . . . . . . . . . . . . . . . . . . . . . . . . . . . . . . . . . . . . . . . . . . . . . . . . . . . . . . . . . . . . . 25
Alarm History Screen . . . . . . . . . . . . . . . . . . . . . . . . . . . . . . . . . . . . . . . . . . . . . . . . . . . . . . . . . . . 26
Event History Screen . . . . . . . . . . . . . . . . . . . . . . . . . . . . . . . . . . . . . . . . . . . . . . . . . . . . . . . . . . . 26
DSX MON, Tx to Customer . . . . . . . . . . . . . . . . . . . . . . . . . . . . . . . . . . . . . . . . . . . . . . . . . . . . . .A-2
DSX MON, Rx from Customer . . . . . . . . . . . . . . . . . . . . . . . . . . . . . . . . . . . . . . . . . . . . . . . . . . . .A-3
DSX EQ, Tx to Customer, Rx from Customer . . . . . . . . . . . . . . . . . . . . . . . . . . . . . . . . . . . . . . . .A-3
MUX MON, Tx to Customer . . . . . . . . . . . . . . . . . . . . . . . . . . . . . . . . . . . . . . . . . . . . . . . . . . . . . .A-4
MUX MON, Rx from Customer . . . . . . . . . . . . . . . . . . . . . . . . . . . . . . . . . . . . . . . . . . . . . . . . . . . .A-4
MUX EQ, Tx to Network, Rx from Network . . . . . . . . . . . . . . . . . . . . . . . . . . . . . . . . . . . . . . . . . .A-5
MUX EQ, Tx to Customer, Rx from Customer . . . . . . . . . . . . . . . . . . . . . . . . . . . . . . . . . . . . . . . .A-6
61181310L2-5D
vii
Total Access 3000/3010 T1-OR/NIU Installation and Maintenance Practice
Tables
Table 1.
Table 2.
Table 3.
Table 4.
Table 5.
Table 6.
Table 7.
Table 8.
Table 9.
Table 10.
viii
Compliance Codes . . . . . . . . . . . . . . . . . . . . . . . . . . . . . . . . . . . . . . . . . . . . . . . . . . . . . . . . . . . . . . 2
Front Panel LEDs . . . . . . . . . . . . . . . . . . . . . . . . . . . . . . . . . . . . . . . . . . . . . . . . . . . . . . . . . . . . . . . 5
Span Current/Voltage Test Points . . . . . . . . . . . . . . . . . . . . . . . . . . . . . . . . . . . . . . . . . . . . . . . . . . 6
Bantam Jack Test Directions . . . . . . . . . . . . . . . . . . . . . . . . . . . . . . . . . . . . . . . . . . . . . . . . . . . . . . 7
Total Access 3000/3010 Backplane Connector Pinout . . . . . . . . . . . . . . . . . . . . . . . . . . . . . . . . . 10
Provisioning Menu Options . . . . . . . . . . . . . . . . . . . . . . . . . . . . . . . . . . . . . . . . . . . . . . . . . . . . . . 19
Stored Performance Statistics Descriptions . . . . . . . . . . . . . . . . . . . . . . . . . . . . . . . . . . . . . . . . . . 23
Performance Defect Definitions . . . . . . . . . . . . . . . . . . . . . . . . . . . . . . . . . . . . . . . . . . . . . . . . . . . 24
Loopback Codes . . . . . . . . . . . . . . . . . . . . . . . . . . . . . . . . . . . . . . . . . . . . . . . . . . . . . . . . . . . . . . 27
T1-OR/NIU Specifications . . . . . . . . . . . . . . . . . . . . . . . . . . . . . . . . . . . . . . . . . . . . . . . . . . . . . . . 28
61181310L2-5D
Total Access 3000/3010 T1-OR/NIU
INTRODUCTION
This is an installation and maintenance practice for the ADTRAN Total Access® 3000/3010
T1 Office Repeater/Network Interface Unit (T1-OR/NIU). Figure 1 illustrates the T1-OR/NIU
(P/N 1181310L2) front panel. This device provides office repeater functionality in a singleslot interface module.
DSX
DS1
TST
T1-OR/NIU 1181310L2
PWR
ALM
T R
.6V X X
LBK
TX
DSX
EQ
RX
TX
DSX
MON
RX
Figure 1. Total Access 3000/3010 T1-OR/NIU
61181310L2-5D
1
Total Access 3000/3010 T1-OR/NIU Installation and Maintenance Practice
Description
The T1-OR/NIU enhances existing T1 repeater spans. The T1-OR/NIU provides troubleshooting capabilities through either locally or remotely-programmed options and loopbacks.
The T1-OR/NIU receive-transmission-path provides a long-haul regenerator, followed by a
provisionable DSX pre-equalizer, and its transmit path provides a short-haul regenerator
followed by a provisionable transmit line build-out. The T1-OR/NIU is equipped with a DSXlevel interface to the equipment side and provides independent monitoring jacks at DSX and
T1 sides. In addition, the T1-OR/NIU provides both DSX and multiplexer (MUX) position
connections with appropriate switching logic.
Features
The basic features of the Total Access 3000/3010 T1-OR/NIU include the following:
• Screen provisioning and troubleshooting via menus through the System Controller Unit (SCU)
• ESF and SF compatibility
• Provisionable DS1 Line Build Out (0 to –22.5 dB)
• Provisionable DSX–1 Line Build Out (0 to 655 feet in 133 foot increments)
• AMI and B8ZS compatible
• Provisionable span power
• Addressable loopbacks
• DSX monitor jacks
• Front panel Bantam jacks and span power test points
• Seven day storage and real-time performance monitoring information
Compliance
Table 1 shows the compliance codes for the T1-OR/NIU. The T1-OR/NIU is NRTL listed to the
applicable UL standards. Install the T1-OR/NIU in a restricted access location and in a type
“B” or “E” enclosure only.
Table 1. Compliance Codes
Configuration Code
2
Input
Output
Power Code (PC)
F
X
Telecommunication Code (TC)
–
X
Installation Code (IC)
A
–
61181310L2-5D
Installation
This device complies with Part 15 of the FCC rules. Operation is subject to the following two
conditions:
1. This device may not cause harmful interference.
2. This device must accept any interference received, including interference that may cause
undesired operation.
Changes or modifications not expressly approved by ADTRAN could void the user’s authority
to operate this equipment.
INSTALLATION
After unpacking the T1-OR/NIU, inspect it for damage. If damage exists, file a claim with the
carrier, then contact ADTRAN Customer Service. Refer to “Appendix B, Warranty” for further
information. If possible, keep the original shipping container for returning the T1-OR/NIU for
repair or for verification of shipping damage.
Refer to “Connections” on page 8 prior to card insertion. The T1-OR/NIU plugs directly into
the Total Access 3000 chassis. No installation wiring is required. This unit can be either DSX
or MUX fed. If the unit is MUX fed, a BNC connector (P/N 1181004L1) is required for the MUX
module to interface with the network.
Shipping Contents
The contents include the following items:
• Total Access 3000/3010 T1-OR/NIU
• Total Access 3000/3010 T1-OR/NIU Job Aid (document number 61181310L2-22C)
CAUTION
C A U T I O N !
SUBJECT TO ELECTROSTATIC DAMAGE
OR DECREASE IN RELIABILITY.
HANDLING PRECAUTIONS REQUIRED.
Electrical Static Discharge (ESD) can damage Electronic modules.
When handling modules, wear an antistatic discharge wrist strap
to prevent damage to electronic components. Place modules in
antistatic packing material when transporting or storing. When
working on modules, always place them on an approved antistatic
mat that is electrically grounded.
61181310L2-5D
3
Total Access 3000/3010 T1-OR/NIU Installation and Maintenance Practice
Instructions for Installing the Module
To install the Total Access 3000/3010 T1-OR/NIU, perform the following steps:
1. Set the Span Power option to either T1-OR or NIU. Two board-mounted jumper straps (P4)
select this span power option.
a. Set Span Power option to T1-OR. Move P4 straps to posts 1-3 and 2-4 (default setting).
With the straps positioned in the 1-3 and 2-4 configuration (factory default setting),
span power is software controlled.
b. Set Span Power option to NIU. Move the straps to the 3-5 and 4-6 position.
In positions 3-5 and 4-6, span power is always disabled and software selection is
ignored regardless of screen indication.
CAUTION
If the card is provisioned as a T1-NIU, change jumper P4 to 4-6 and
3-5. Failure to change the strap prevents the span power from
looping back properly through the unit, and the line powered
devices do not receive power.
2. If present, remove the Access Module Blank (P/N 1191953L1) from the appropriate access
module slot of the Total Access 3000/3010 chassis.
3. Pull the ejector latch, located on the lower left-hand side of the T1-OR/NIU front panel,
from its closed position.
4. Hold the T1-OR/NIU by the front panel while supporting the bottom edge of the module
with the ejector latch opened to engage the chassis edge.
5. Align the module edges to fit in the lower and upper guide grooves for the access module
slot.
6. Slide the module into the access module slot. Apply simultaneous thumb pressure at the
top (above the PWR LED) and at the bottom (below the electrostatic caution symbol) of the
module. This ensures that the module is firmly seated against the backplane of the
chassis.
7. Secure the T1-OR/NIU in place by pushing in on the ejector latch.
Once properly installed, the T1-OR/NIU performs a series of self-tests. Once the self-tests are
complete, the front panel LEDs indicate the true status of the hardware.
4
61181310L2-5D
Installation
Front Panel LEDs
The T1-OR/NIU provides front panel LEDs to display status information. Table 2 shows the
LEDs and status descriptions.
Table 2. Front Panel LEDs
Label
Status
Description
PWR
{ Off
No power to module
z Green
Module in service
4 Green Flashing
Module in service and being accessed from SCU front panel craft
interface port
z Yellow
Module is out of service
4 Yellow Flashing
Module is out of service and being accessed from SCU front panel
craft interface port
{ Off
DSX interface loss of synchronization
z Green
Normal
{ Off
DS1 interface loss of synchronization
z Green
Normal
{ Off
Loopback not active
z Yellow
Loopback active
4 Yellow Flashing
Loopback arming
{ Off
No alarm condition detected
z Red
Local alarm condition detected
DSX
DS1
TST
ALM
61181310L2-5D
5
Total Access 3000/3010 T1-OR/NIU Installation and Maintenance Practice
FRONT PANEL OPERATION
The T1-OR/NIU provides the following front panel operational controls:
• LBK pushbutton
XMT and RCV span power test points
• DSX TX and RX monitor (MON) jacks
• DSX TX and RX equalizer (EQ) jacks
LBK Pushbutton
The LBK push button initiates a loopback to the network and sends an AIS signal (all ones)
toward the customer end.
LBK Operation
• To activate a loopback, depress the LBK pushbutton for two seconds. If successful, the TST
LED illuminates. Release the pushbutton.
• To release a loopback, depress the LBK pushbutton a second time.
XMT and RCV Span Power Test Points
The test points provide front-panel access for measuring the 60 mA-current provided to the
DS1 facility when the T1-OR module is in the T1-OR mode.
Test Point Operation
Table 3 provides the VOM connections for both span current and voltage measurements.
Table 3. Span Current/Voltage Test Points
6
When Measured
Between Points
Measurement Taken
+TX to –TX
Measures the transmit span current
A reading of 0.6 volts indicates a 60 mA span current in the transmit path
+RX to –RX
Measures the receive span current
A reading of 0.6 volts indicates a 60 mA span current in the receive path
–TX to +RX
Measures the actual span voltage being supplied to the facility.
This is the span voltage across the facility T/R pairs
61181310L2-5D
Front Panel Operation
Front Panel Bantam Jacks
Monitoring of DSX signal characteristics can be performed through two sets of front panel
bantam jacks. Table 4 describes the functions of the jacks and test points.
Bantam EQ and MON test jacks provide two monitoring functions depending on the mode of
the module:
• Office Repeater (OR)
• Network Interface Unit (NIU)
NOTE
EQ Jacks do not function in NIU mode if the customer equipment
is connected to the DSX interface.
CAUTION
EQ testing is intrusive. Do not use EQ bantam jacks if there is
equipment attached to the DSX connection on the Total Access
3000 backplane.
Table 4. Bantam Jack Test Directions
Function
MON
(non-intrusive)
Description
DSX MON Office Repeater Mode:
• TX to customer
• RX from customer
EQ
(intrusive)
DSX EQ T1-OR mode:
• TX to customer or network*
• RX from customer or network*
* Direction of the EQ Jacks depends upon the EQ Jack direction option on the Loopback and Test screen as well
as the network source provisioning option. Refer to “Loopback and Test” on page 21 for further information.
61181310L2-5D
7
Total Access 3000/3010 T1-OR/NIU Installation and Maintenance Practice
CONNECTIONS
The cabling for the T1-OR/NIU is significantly different for each mode of operation:
• “Office Repeater Mode” on page 8
• “Network Interface Unit Mode” on page 9
Office Repeater Mode
Figure 2 illustrates the Office Repeater mode.
Figure 3 illustrates the backplane cabling for the Office Repeater mode.
Central Office
DSX-1
DS3
STS-1
OC3
Total Access 3000/3010 System
DS1
Network
CSU/DSU
Backplane
Pairs 1 and 2
Figure 2. Office Repeater Mode Orientation
Pair 1
T1/R1
Pair 2
T/R
XMT to DS1
“MDF/Local Loop” side
RCV from DS1
“MDF/Local Loop” side
T1-OR Configuration
ADMIN
64
P5
PAIR 4
33
64
33
32
1
P12
PAIR 3
1
32
1
J29
1
J28
1
J27
1
J26
1
J25
1
J24
1
J23
1
P11
C B A
J22
1
C B A
J21
1
C B A
J20
1
PAIR 2
33
64
J19
C B A
1
1
J18
C B A
J17
1
C B A
J16
1
J15
1
J14
1
J13
1
1
J12
1
J11
J10
1
J9
33
32
1
P8
1
32
C B A
64
E D C B A
PAIR 1
C B A
1
J8
C B A
1
1
1
J7
J6
C B A
1
J5
P15
C B A
J4
1
C B A
J3
1
E D C B A
P14
1
10
10
10
10
10
10
10
10
10
10
10
10
10
10
10
10
10
10
10
10
C
F1
F2
J1
B
A
1
10
10
10
20
10
10
10
10
10
1
D
C B A
J2
10
10
J31
20
8
T
R
20
20
S
20
20
20
20
20
20
20
20
20
20
20
20
20
20
20
20
20
20
20
20
20
20
20
20
P23
20
R1
T
S
1
S
T1
–
32
C B A
32
C B A
C B A
32
C B A
32
C B A
32
32
C B A
PAIR 5
64
C B A
32
32
32
32
32
32
32
32
-48 VDC PRI
-48 VDC SEC
32
C B A
32
C B A
A
B
A
B
A
B
NO
NC
32
C B A
C
NC
NO
NC NO
C
NC NO
32
P1
F4
C
NC
NO
C
NC NO
C
NC NO
C
NC
+
–
S
+
–
S
RS485
P18
+
R21
J30
-48 VDC
RET
-48 VDC RET
ACO
RMT
AUX1
AUX2
AUX1
AUX2
CRI-A
MAJ-A
MIN-A
CRI-A
MAJ-A
MIN-A
A - OUT
+
––
B IN
S
A
B
IN
A
PC2A
94V-0
2298
J32
B
P2
B - OUT
32
F3
48
1181004L1
PAIR 8
P19
CUSTOM
TELECOM
E190349
1
NTWK MGMT
6
48
1
32
P20
S
32
33
EXTCLK
ALARM OUTPUTS
C
32
32
P10
1
NO
32
64
33
P21
C
32
C B A
32
P3
B
32
C B A
64
PAIR 6
A
32
C B A
PAIR 7
P22
J33
32
C B A
P9
1
P7
1
32
C B A
33
64
33
32
40
R1
S
32
1
R
EXTCLK
C-IN
40
+
R22
P24
LOOP
TEST
ACCESS
20
DSX1
TEST 30
ACCESS
30
T1
OUT
E - NET
NOTE:
When the T1-OR/NIU is provisioned for
T1-OR mode, the DSX-1 signal is active
via these connections.
Figure 3. Office Repeater Mode Backplane Cabling
8
61181310L2-5D
Connections
Network Interface Unit Mode
Figure 4 illustrates the Network Interface Unit mode.
Figure 5 illustrates the backplane cabling for the Network Interface Unit mode.
Customer
Total Access 3000/3010 System
DSX-1
Network
CSU/DSU
Backplane
Pairs 7 and 8
Figure 4. Network Interface Unit Orientation
NIU Configuration
ADMIN
64
P5
PAIR 4
33
64
33
32
1
P12
PAIR 3
1
32
1
J29
1
J28
1
1
J27
1
J26
J25
1
J24
1
J23
1
P11
C B A
J22
1
C B A
J21
1
C B A
J20
1
PAIR 2
33
64
J19
C B A
1
1
J18
C B A
J17
1
C B A
J16
1
J15
1
J14
1
J13
1
1
J12
1
J11
J10
1
J9
33
32
1
P8
1
32
C B A
64
E D C B A
PAIR 1
C B A
1
J8
C B A
1
1
J7
1
J6
C B A
1
J5
P15
C B A
J4
1
C B A
J3
1
E D C B A
P14
1
10
10
10
10
10
10
10
10
10
10
10
10
10
10
10
10
10
10
C
F1
F2
J1
B
A
1
10
10
10
20
10
10
10
10
10
10
10
1
D
C B A
J2
10
10
J31
20
8
T
R
20
20
S
20
20
20
20
20
20
20
20
20
20
20
20
20
20
20
20
20
20
20
20
20
20
20
20
P23
20
T
S
+
1
R
EXTCLK
C-IN
S
T1
–
32
C B A
32
C B A
C B A
32
32
C B A
C B A
32
32
C B A
PAIR 5
64
C B A
32
32
32
32
32
32
32
64
33
32
32
-48 VDC PRI
-48 VDC SEC
32
C B A
32
C B A
A
B
A
B
A
B
NO
NC
32
C B A
C
NC
NO
NC NO
C
NC NO
32
32
P1
F4
C
NC
NO
C
NC NO
C
NC NO
C
NC
+
–
S
+
–
S
RS485
P18
+
R21
J30
-48 VDC
RET
-48 VDC RET
NOTE:
When the T1-OR/NIU is provisioned for
NIU mode, the DSX-1 signal is active
via these connections.
ACO
RMT
AUX1
AUX2
AUX1
AUX2
CRI-A
MAJ-A
MIN-A
CRI-A
MAJ-A
MIN-A
A - OUT
+
––
B IN
S
A
B
IN
A
PC2A
94V-0
2298
J32
B
P2
B - OUT
32
F3
48
1181004L1
PAIR 8
P19
CUSTOM
TELECOM
E190349
1
NTWK MGMT
6
48
1
32
P20
S
32
33
EXTCLK
ALARM OUTPUTS
C
32
P10
1
NO
32
64
33
P21
C
32
C B A
32
P3
B
32
C B A
64
PAIR 6
A
32
C B A
PAIR 7
P22
J33
32
C B A
P9
1
P7
1
32
C B A
33
40
R1
S
32
1
40
LOOP
TEST
ACCESS
R22
P24
20
DSX1
TEST 30
ACCESS
30
T1
R1
OUT
E - NET
Pair 8
T/R
Pair 7
T1/R1
RCV Out of Equipment
toward the DSX-1 “Network” side
XMT into Equipment
from the DSX-1 “Network” side
Figure 5. Network Interface Unit Mode Backplane Cabling
61181310L2-5D
9
Total Access 3000/3010 T1-OR/NIU Installation and Maintenance Practice
Total Access 3000 Chassis Amphenol Connectors
The Total Access 3000 shelf delivers DSX-1 from the network to the T1-OR/NIU through
connectors on the backplane labeled Pair 7 and Pair 8. The DS1 signal is provided through the
backplane connectors labeled Pair 1 and Pair 2.
Pins 1 and 33 of the connectors Pair 7 and Pair 8 are the DSX connections for the T1-OR/NIU
in slot 1. Pins 2 and 34 of these connectors are associated with slot 2. Pins 3 and 35 are
associated with slot 3, and so forth, up to pins 28 and 60 for slot 28. Table 5 provides the pin
numbers of the Total Access 3000 backplane Amphenol connectors.
Table 5. Total Access 3000/3010 Backplane Connector Pinout
10
Slot
Total Access 3000/3010
Loop Pair 1 and Pair 2 (DS1 Side)
DSX-1 Pair 7 and Pair 8 (DSX-1 Side)
1
1/33
1/33
2
2/34
2/34
3
3/35
3/35
4
4/36
4/36
5
5/37
5/37
6
6/38
6/38
7
7/39
7/39
8
8/40
8/40
9
9/41
9/41
10
10/42
10/42
11
11/43
11/43
12
12/44
12/44
13
13/45
13/45
14
14/46
14/46
15
15/47
15/47
16
16/48
16/48
17
17/49
17/49
18
18/50
18/50
19
19/51
19/51
20
20/52
20/52
21
21/53
21/53
22
22/54
22/54
23
23/55
23/55
61181310L2-5D
SCU Control Port Operation
Table 5. Total Access 3000/3010 Backplane Connector Pinout (Continued)
Slot
Total Access 3000/3010
Loop Pair 1 and Pair 2 (DS1 Side)
DSX-1 Pair 7 and Pair 8 (DSX-1 Side)
24
24/56
24/56
25
25/57
25/57
26
26/58
26/58
27
27/59
27/59
28
28/60
28/60
SCU CONTROL PORT OPERATION
The Total Access 3000/3010 System Controller Unit provides a front panel-mounted DB-9
connector that supplies an RS-232 interface for connection to a controlling terminal. The
pinout of the DB-9 is illustrated in Figure 6.
1
6
7
8
9
2
TXD (Transmit Data)
3
RXD (Receive Data)
4
5
SGN (Signal Ground)
Figure 6. RS-232 (DB-9) Pin Assignments
The terminal interface operates at a default data rate of 9.6 kbps (from 9.6 to 115.2 kbps is
possible via Total Access 3000/3010 SCU provisioning options). The asynchronous data
format is fixed at 8 data bits, no parity, and 1 stop bit. Disable the line wrap feature of
emulation programs.
NOTE
If you are using a personal computer (PC) with terminal emulation
capability, disable any power saving programs. Otherwise, communication between the PC and the HDSL4 unit may be disrupted,
resulting in misplaced characters or screen time outs.
61181310L2-5D
11
Total Access 3000/3010 T1-OR/NIU Installation and Maintenance Practice
Menu Structure
The menu structure for the T1-OR/NIU is a layered menu. Each menu level consists of
submenus, menu items, or both.
• Submenus are elements that move the display down to the next menu level.
• Menu items are elements that facilitate changes to the current T1-OR/NIU settings.
The T1-OR/NIU supports two different types of menu items: read-only and read-write.
• A read-only menu item displays information that cannot be changed, such as the status of
the T1-OR/NIU.
• A read-write menu item displays information that when selected can be changed.
Submenus and menu items are labeled with a number. To view the submenu or menu item,
perform the following steps:
1. Select the appropriate number for the desired submenu or menu item.
2. Press ENTER.
The screen displays the appropriate information for the selected option. If additional options
are available, a submenu lists the available options.
Login Screen
Accessing the T1-OR/NIU circuit information via the Total Access 3000 SCU control port
requires the user to logon by entering a password. See Figure 7.
• Default account name: ADMIN
• Default password: PASSWORD
TID:
Total Access System
12/29/05 09:29
Unit Number:
1
Total Access System
Account Name :
'?' - System Help Screen
Figure 7. Logon Screen
12
61181310L2-5D
SCU Control Port Operation
Total Access Main Menu
After successful logon, the Total Access Main Menu (Figure 8) displays. Select the Access
Modules option from this menu.
Shelf: 1
Unacknowledged Alarms: None
Total Access System
12/29/05 09:29
Total Access
1.
2.
3.
4.
5.
6.
7.
System Controller
Common A - [.....]
Common B - [.....]
Access Modules
System Alarms
Network Management
Logoff
Selection:
'?' - System Help Screen
Figure 8. Total Access Main Menu
61181310L2-5D
13
Total Access 3000/3010 T1-OR/NIU Installation and Maintenance Practice
Access Module Menus
The Access Module Menus screen (Figure 9) displays the access modules that occupy the Total
Access 3000 shelf. Select the corresponding channel slot number for the desired
T1-OR/NIU to display its menu options. To the right of each access module listed, the current
alarm state is indicated.
Shelf: 1
Unacknowledged Alarms: None
Total Access System
12/29/05 09:29
Access Module Menus
1
2
3
4
5
6
7
8
9
10
11
12
13
14
-
T1-OR/NIU...
............
............
............
............
............
............
............
............
............
............
............
............
............
[None]
[None]
[None]
[None]
[None]
[None]
[None]
[None]
[None]
[None]
[None]
[None]
[None]
[None]
15
16
17
18
19
20
21
22
23
24
25
26
27
28
-
............
............
............
............
............
............
............
............
............
............
............
............
............
............
[None]
[None]
[None]
[None]
[None]
[None]
[None]
[None]
[None]
[None]
[None]
[None]
[None]
[None]
Enter Channel Slot Number :
Inverse = Busy Modules
Figure 9. Access Module Menus Screen
14
61181310L2-5D
SCU Control Port Operation
T1 Main Menu
Following selection of the desired module, the T1 Main Menu is displayed (Figure 10).
Shelf: 1 Slot: 12
Total Access System
Unacknowledged Alarms: None
CIRCUIT ID:
12/29/05 09:29
T1 Main Menu
1.
2.
3.
4.
5.
6.
7.
8.
Configuration
Provisioning
Status
Loopbacks and Test
Performance Monitoring
Circuit ID
Alarm History
Event History
‘?’ - System Help Screen
Selection:
Figure 10. T1 Main Menu
The T1 Main Menu consists of numbered category selections. The following list provides an
index to the descriptions of each menu item.
• “Configuration” on page 16
• “Provisioning” on page 17
• “Status” on page 20
• “Loopback and Test” on page 21
• “Performance Monitoring” on page 23
• “Circuit ID” on page 25
• “Alarm History” on page 26
• “Event History” on page 26
61181310L2-5D
15
Total Access 3000/3010 T1-OR/NIU Installation and Maintenance Practice
Configuration
The Configuration screen (Figure 11) is a read only display that lists relevant device
information.
Shelf: 1 Slot: 12
Total Access System
Unacknowledged Alarms: None
CIRCUIT ID:
12/29/05 09:29
ADTRAN
901 Explorer Boulevard
Huntsville, Alabama 35806-2807
--------------------- For Information or Technical Support --------------------Support Hours ( Normal 7am - 7pm CST, Emergency 7 days x 24 hours )
Phone: 800.726.8663 / 888.873.HDSL Fax: 256.963.6217 Internet: www.adtran.com
-------------------------------------------------------------------------------T1-OR/NIU
P/N: 1181310L2
S/N: 123456789
CLEI: M3CUTYOBAA
Manf: 08/29/05
Figure 11. Configuration Screen
16
61181310L2-5D
SCU Control Port Operation
Provisioning
Provisioning the module provides setup and configuration information that allows the module
to conform to local network standards of operation, including framing format, transmit level
line coding and network source. Network Administration maintains this information on each
circuit.
Office Repeater Mode
The Provisioning menu (Figure 12) for each mode lists option categories and the current
option selection for each. Enter the number for a category to advance the screen display to a
new screen providing the options for that category. Enter D to restore the factory default
options for the entire list.
On this menu, the Card Configuration option selects the appropriate mode for the intended
application (T1-OR or NIU).
Shelf: 1 Slot: 12
Total Access System
Unacknowledged Alarms: None
CIRCUIT ID:
Provisioning
1.
2.
3.
4.
5.
6.
7.
8.
9.
10.
11.
DSX-1 Line Buildout
DSX-1/DS1 Line Code
DSX-1/DS1 Framing
Loopback Timeout
DS1 TX Level
Network Source
Service State
Span Power
External Alarms
Card Configuration
AIS
12/29/05 09:29
=
=
=
=
=
=
=
=
=
=
=
0-133 Feet
B8ZS
ESF
120 Min
0 dB
DSX/DS1
OOS Unassigned
Disabled
Disabled
T1-OR
Disabled
D. Restore Factory Defaults
‘?’ - System Help Screen
Selection:
Figure 12. Provisioning Menu-OR Mode
Table 6 provides descriptions and defaults for the Provisioning menu options.
CAUTION
Do not make provisioning option changes when the Service State is
set to In Service. Make option changes in an Out-of-Service state
only.
61181310L2-5D
17
Total Access 3000/3010 T1-OR/NIU Installation and Maintenance Practice
Network Interface Unit Mode
The Provisioning menu for the NIU mode (Figure 13) is identical to the OR mode with the
exception of Span Power. There is no span power in the NIU configuration. See the note on the
screen.
Shelf: 1 Slot: 12
Total Access System
Unacknowledged Alarms: None
CIRCUIT ID:
Provisioning
12/29/05 09:29
1. DSX-1 Line Buildout
= 0-133 Feet
2. DSX-1/DS1 Line Code
= B8ZS
3. DSX-1/DS1 Framing
= ESF
4. Loopback Timeout
= 120 Min
5. DS1 TX Level
= 0 dB
6. Network Source
= DSX/DS1
7. Service State
= OOS Unassigned
8. Span Power
= Disabled
9. External Alarms
= Disabled
10. Card Configuration
= T1-NIU
11. AIS
= Disabled
Span Power option unavailable in T1-NIU configuration.
Switch to T1-OR configuration first.
D. Restore Factory Defaults
‘?’ - System Help Screen
Selection:
Figure 13. Provisioning Menu-NIU Mode
NOTE
If P4 option straps are in the “span power disabled” position, span
power is disabled regardless of software screen indication.
Table 6 provides descriptions and defaults for the Provisioning menu options.
CAUTION
Do not make provisioning option changes when the Service State is
set to In Service. Make option changes in an Out-of-Service state
only.
18
61181310L2-5D
SCU Control Port Operation
Table 6. Provisioning Menu Options
Menu Item
Description
Default
DSX-1 Line
Buildout
Conditions the output signal to provide a 0 dB
output level to the DSX. Options range from 0
to 655 feet in 133-foot increments.
0 to 133 feet
Line Coding
AMI or B8ZS
B8ZS
Line Framing
SF, ESF, or unframed
ESF
Loopback Timeout
20 minutes, 60 minutes,
120 minutes, or disabled
120 minutes
DS1 TX Level
Conditions output signal buildout at:
0 dB, –7.5 dB, –15 dB, or –22.5 dB
0 dB
Selects DSX or multiplexer input/output
interface:
DSX/DS1
MUX A
MUX B
Auto MUX
DSX/DS1
Selects one of three service states:
In Service
Out-of-Service, Unassigned
Out-of-Service, Maintenance
Out-of-Service, Unassigned
Span Power
Disabled, –130 volts, ±130 volts
–130 volts
External Alarms
Disabled, Enabled
Disabled
Card Configuration
T1–OR, T1–NIU. Changes to this option can be
seen on the Status screen.
T1-OR
AIS
Disabled, Enabled
Disabled
Network Source
Service State
1
2
1. For Network Source settings, the following options apply:
• DSX/DS1: The module will use the DSX-1 interface for the network source when the module is provisioned
for the T1-OR mode. If the module is provisioned for the T1-NIU mode, the network source will be the DS1
interface. The MUXes will not be used, even if present.
• MUX A: The module will use MUX A as its data source. The module will not switch to MUX B in the case of
a MUX A failure. The EQ jacks can be used as a temporary test point in conjunction with the EQ jack setting
on the loopback/test screen.
• MUX B: The module will use MUX B as its data source. The module will not switch to MUX A in the case of
a MUX B failure. The EQ jacks can be used as a temporary test point in conjunction with the EQ jack setting
on the loopback/test screen.
• Auto MUX: The module will default to MUX A as its data source. In the event of a MUX A failure, the module
will perform a protection switch to MUX B if it is present and in service. The EQ jacks can be used as a
temporary test point in conjunction with the EQ jack setting on the loopback/test screen.
2. The default service state is Out-of-Service Unassigned
• Out-of-Service Unassigned allows the loops to train up but does not connect to the DSX or MUX interface.
• The Out-of-Service Maintenance setting allows active connections to the DSX or MUX interface; however, no
alarms will be generated.
• The In Service setting allows full functioning connections to DSX or MUX interfaces.
61181310L2-5D
19
Total Access 3000/3010 T1-OR/NIU Installation and Maintenance Practice
Status
The Status screens change (as do the network/customer and DSX orientations) depending on
whether in the OR or NIU mode.
The OR Status screen is shown in Figure 14. The NIU Status screen is shown Figure 15.
These screens display a graphic showing the network status within and on either side of the
T1-OR/NIU (i.e., loopbacks or loop down indication). Also note the DSX and MUX labels on
the NET side of each graphic, which is derived from the Network Source option of the Provisioning menu.
Shelf: 1 Slot: 12
Total Access System
Unacknowledged Alarms: None
CIRCUIT ID:
Span Status Screen
12/29/05 09:29
______
NET |
| LOOP
|
|
<-----|
|<--LOS|
|
|
|
-LOS->|
|------>
|
|
DSX |______| DS1
T1-OR
Figure 14. Status Screen-OR
Shelf: 1 Slot: 1
Total Access System
Unacknowledged Alarms: None
CIRCUIT ID:
Span Status Screen
12/29/05 09:29
______
|
|
CUST
|
|
<-----|
|<-----|
|
|
|
----->|
|------>
|
|
MUX A |______|
DSX
T1-NIU
NET
'?' - System Help Screen
Press <ESC> to return to Main Menu.
Figure 15. Status Screen-NIU
20
61181310L2-5D
SCU Control Port Operation
Loopback and Test
The Loopback and Test menu for each mode is shown in Figure 16 and Figure 17. When
selected, the screen displays a graphic of the test or loopback path in effect. A real-time
display is also available on the Status screen.
CAUTION
Loopbacks can be initiated in any service state. However, loopbacks initiated in the OOS Maintenance state are preferred to prevent service interruption. Loopbacks can be initiated in any
framing mode.
Shelf: 1 Slot: 12
Total Access System
Unacknowledged Alarms: None
CIRCUIT ID:
Loopback and Test Commands
12/29/05 09:29
______
NET |
| LOOP
|
|
<-----|
|<----|
|
|
|
----->|
|----->
|
|
DSX |______| DS1
T1-OR
1.
2.
3.
4.
Run Self Tests
T1-OR Loopup To Network
T1-OR Loopup To Customer
Equipment Jack Direction:
To Customer
‘?’ - System Help Screen
Selection:
Figure 16. Loopback and Test Commands Menu-OR
61181310L2-5D
21
Total Access 3000/3010 T1-OR/NIU Installation and Maintenance Practice
Shelf: 1 Slot: 1
Total Access System
Unacknowledged Alarms: None
CIRCUIT ID:
Loopback and Test Commands
12/29/05 09:29
______
|
|
CUST
|
|
<-----|
|<-----|
|
|
|
----->|
|------>
|
|
MUX A |______|
DSX
T1-NIU
NET
1.
2.
3.
Run Self Tests
T1-NIU Loopup To Network
T1-NIU Loopup To Customer
'?' - System Help Screen
Selection:
Figure 17. Loopback and Test Commands Menu-NIU Mode
NOTE
The Equipment Jack direction is dependent upon the Network
Source option. Equipment Jack direction is only effective when the
module network source is provisioned for MUX mode. Equipment
Jack will not switch toward network if a DS1/DSX is the source.
22
61181310L2-5D
SCU Control Port Operation
Performance Monitoring
The Performance Monitoring screen (Figure 18) displays various error data plus a list of
additional screens that are accessed by entering the category number. On-screen instructions
explain the selections.
Shelf: 1 Slot: 12
Total Access System
Unacknowledged Alarms: None
CIRCUIT ID:
Menu
1.
2.
3.
4.
5.
6.
7.
8.
12/29/05 09:29
15 Minute T1-OR NETW Performance Data
Definitions
Reset Data
15 Min Data
24 Hr Data
Line Data
Path Data
T1-OR NETW
T1-OR CUST
10:15
10:00
09:45
09:30
09:15
09:00
08:45
08:30
_______
| T1-OR |
-7->|
|—>
B. Backward
|
|
<---|
|<-8
|_______|
Selection:
ES-L
102
900
900
900
900
900
900
900
900
SES-L
102
900
900
900
900
900
900
900
900
LOSS-L
102
900
900
900
900
900
900
900
900
CV-L
00000
00000
00000
00000
00000
00000
00000
00000
00000
‘?’ - System Help Screen
Figure 18. Performance Monitoring Menu
Performance Monitoring Functions
Performance monitoring data is collected and stored in local nonvolatile memory.
Stored Performance Characteristics
The modules collect and store the performance characteristics listed in Table 7. The data is
stored in 15-minute increments for the proceeding 24 hours, and in 24-hour increments for
the preceding 7 days.
Table 7. Stored Performance Statistics Descriptions
Statistic
Description
Line Statistics (-L)
Errored Seconds (ES-L)
Count of 1-second intervals containing 1 or more BPV, EXZ, or
LOS errors
Severely Errored Seconds (SES-L)
Count of 1-second intervals containing 1544 or more BPV and
EXZ errors, or 1 or more LOS errors
LOS Seconds (LOSS-L)
Count of 1-second intervals containing 1 or more LOS errors
Coding Violations (CV-L)
Count the total number of BPV and EXZ errors
61181310L2-5D
23
Total Access 3000/3010 T1-OR/NIU Installation and Maintenance Practice
Table 7. Stored Performance Statistics Descriptions (Continued)
Statistic
Description
Path Statistics (-P)
Errored Seconds (ES-P)
Severely Errored Seconds (SES-P)
SF Operation:
Count of 1-second intervals containing 1 or
more frame bit (FE), SEF, or AIS errors
ESF Operation:
Count of 1-second intervals containing 1 or
more CRC, SEF, or AIDS errors
SF Operation:
Count of 1-second intervals containing more
than 7 frame bit (FE) errors, or 1 or more SEF
or AIS errors
ESF Operation:
Count of 1-second intervals containing 319 or
more CRC errors, or 1 or more SEF or AIS
errors
Unavailable Seconds (UAS-P)
Count of ten sequential SES errors will trigger a UAS. UAS clears
after 10 sequential seconds without SES errors
Coding Violations (CV-P)
SF Operation:
Count of frame bit errors
ESF Operation:
Count of SCRC errors
NOTE
During a UAS condition, ES and SES statistics are inhibited.
Performance Defect Definitions
The defects described in Table 8 are used to calculate the Stored Performance Characteristics.
Table 8. Performance Defect Definitions
Defect
Descriptions
Bipolar Violation
(BPV)
A BPV is the occurrence of a pulse of the same polarity as the previous pulse.
If B8ZS is provisioned, BPVs associated with the B8ZS are excluded from the
count.
Loss of Signal
(LOS)
An LOS is defined by the detection of 175 consecutive “0’s.” When a 12.5 percent ones density is detected (4 ones/32 bits and no 15 consecutive “0’s”), the
LOS status is eliminated.
24
61181310L2-5D
SCU Control Port Operation
Circuit ID
The Circuit ID screen (Figure 19) enables assignment of the Circuit ID, a customer-issued
alphanumeric identifier that is assigned specifically to this device. The Circuit ID number
targets a device for rack-shelf-slot location, features and functions.
Shelf: 1 Slot: 12
Total Access System
Unacknowledged Alarms: None
CIRCUIT ID:
12/29/05 09:29
New Circuit ID =
Begin typing to change Circuit ID field
Press ESC to Exit.
Figure 19. Circuit ID Screen
61181310L2-5D
25
Total Access 3000/3010 T1-OR/NIU Installation and Maintenance Practice
Alarm History
The Alarm History screen (Figure 20) displays both Customer-side and Network-side T1 red,
yellow, and blue alarms. To clear the T1 alarms, type C and press ENTER.
Shelf: 1 Slot: 12
Total Access System
12/29/05 09:29
Unacknowledged Alarms: None
CIRCUIT ID:
T1 Alarm History
LOCATION
ALARM
FIRST
LAST
CURRENT
COUNT
-------------------------------------------------------------------------------T1-OR
RED(LOS/LOF) 03/04/02 16:49:00
03/04/02 16:49:00
Alarm
001
NETW
YELLOW(RAI)
OK
000
BLUE(AIS)
OK
000
T1-OR
CUST
RED(LOS/LOF) 03/04/02 16:49:00
YELLOW(RAI)
BLUE(AIS)
03/04/02 16:49:00
Alarm
OK
OK
001
000
000
-------------------------------------------------------------------------------C. Clear T1 Alarms
‘?’ - System Help Screen
Selection:
Figure 20. Alarm History Screen
Event History
The Event History screen (Figure 21) shows all the events that have occurred since the last
time the screen was reset. Events include the date and time for option changes, loop up
requests, loop down requests. To reset the screen, press R and then ENTER.
Shelf: 1 Slot: 12
Total Access System
12/29/05 09:29
Unacknowledged Alarms: None
CIRCUIT ID:
Num
Description of Event
Date Time
-----------------------------------------------------------------11.
T1-OR/NIU Network
Loop Down Request
03/12/02 10:00:00
12.
T1-OR/NIU Customer Loop Down Request
03/12/02 10:12:00
13.
T1-OR/NIU Network
Loop Up
Request
03/12/02 10:13:00
14.
T1-OR/NIU Network
Loop Down Request
03/12/02 10:13:00
15.
T1-OR/NIU Network
Loop Up
Request
03/12/02 10:14:00
16.
T1-OR/NIU Customer Loop Up
Request
03/12/02 10:14:00
Page Number: 2/ 2 Number of Events: 16
-----------------------------------------------------------------‘P’ - Previous Page
‘H’ - Home
‘R’ - Reset Events
‘N’ - Next Page
‘E’ - End
‘?’ - System Help Screen
Selection:
Figure 21. Event History Screen
26
61181310L2-5D
In-band Loopbacks
IN-BAND LOOPBACKS
Along with the LBK pushbutton on the front panel, loopbacks are activated or de-activated
with TL1 or in-band commands.
Activating Loopbacks
The repeater circuit can be activated from either the DSX or CPE side of the T1-OR/NIU.
When activated from the DSX side, all components, including line-side transformers, are
tested. When activated from the CPE side, only the active components of the repeater are
tested. Loopbacks can only be active on one interface at a time using in-band codes. Loopback
codes are shown in Table 9.
Code Detection
The T1-OR/NIU is capable of detecting loopback codes from either direction, network or
customer. Direction determination is accomplished with the application of an arming code. By
sensing the arming code for at least five seconds on one side of the T1-OR/NIU, the code
direction is determined and the loopback is activated.
NOTE
All in-band codes must be detected for more than five seconds.
Table 9. Loopback Codes
Code
Description
In-band Loopback
Arming/Disarming Codes
Arming: 11000
Loopback Activation Code:
1101 0011 1101 011
Acknowledgement is 250 bit errors
(bit errors are inserted after initial 6 seconds and in 20
second intervals thereafter)
Loop Down Code:
1001 0011 1001 0011
(Unit returns to the Armed State.)
Arming Timeout: 120 minutes
Disarming: 11100
Loopback Timeout:
Provisionable for 30 minutes (default), 120 minutes, or No
Note: To be acted on, these codes must be detected for more than five seconds.
MAINTENANCE
The T1-OR/NIU does not require routine maintenance for normal operation. Do not attempt
repairs in the field. Obtain repair services by returning the defective unit to ADTRAN. Refer to
“Appendix B, Warranty” for further information.
61181310L2-5D
27
Total Access 3000/3010 T1-OR/NIU Installation and Maintenance Practice
SPECIFICATIONS
Specifications for the Total Access 3000/3010 T1-OR/NIU are detailed in Table 10.
Table 10. T1-OR/NIU Specifications
Specification
Description
Temperature
Operating Temperature
–40°C to +65°C
Storage Temperature:
–40°C to +65°C
Relative Humidity:
95 percent maximum, noncondensing
Physical
Dimensions:
Weight:
Height: 5.20 inches
Width: 0.66 inch
Length: 9.25 inches
< 9.2 ounces
Transmission
Line Impedance:
100 ohm ±20%
DSX Sensitivity:
0 to –13.6 dB at 772 kHz
Transmit Line Build Out (LBO):
0 to –22.5 dB in –7.5 dB increments
Loopback
Maximum Detect Error Rate:
Arming Timeout:
Loopback Timeout:
10–3
120 minutes, fixed
No timeout 30, 60, or 120 minutes
Span Powering
Current Regulation:
Span Voltage Regulation:
Impedance to GND:
Longitudinal Immunity:
Constant 60 mA with 0 to 4.3 k ohm load
0 to 260 VDC (provisionable from the SCU for
On/Off, –130 VDC, or ±130 VDC)
Greater than 201 ohms per lead
200 mA VAC, 60 Hz
Power
Input Voltage:
–48 VDC, nominal
Input Voltage Range:
–40 VDC to –56.7 VDC
Span Powering Mode:
22 watts (maximum)
Power Dissipation:
6 watts (maximum)
Part Number
Total Access 3000/3010 T1-OR/NIU:
28
1181310L2
61181310L2-5D
Appendix A
Front Panel DSX and MUX Mode Test Access
GENERAL
Figure A-1 through Figure A-3 are DSX-1 fed modes of operation, and Figure A-4 through
Figure A-7 are MUX fed modes of operation.
From the Provisioning menu (“Provisioning” on page 17), the Network Source option is used to
choose either MUX fed or DSX fed operation. When performing intrusive MUX mode testing,
the equipment jack on the front panel can be configured to access the signal going to the
network or the customer. The Equipment Jack option, on the loopback and Test Commands
screen (“Loopback and Test” on page 21) is used to configure the equipment jack for the
network or customer. Every time the unit is power-cycled, it will default to the customer
direction.
DSX MODE TEST ACCESS
DSX Mode connects to the DSX (network) connector on the backplane of the chassis, where a
Multiplexer (MUX) is not used in the Total Access 3000 shelf.
61181310L2-5D
A-1
Total Access 3000/3010 T1-OR/NIU Installation and Maintenance Practice
DSX MON, Tx to Customer
The Rx of the BERT receives data from the TX MON jack (Figure A-1). This data has a monitor
jack impedance of 432 ohms and comes from the Backplane Network T1 DSX (the data that
would go toward the customer). The BERT TX jack is not used. This test is non-intrusive.
NOTE
Provision the T1-OR/NIU for the Out-of-Service Maintenance service state when performing intrusive bantam jack testing.
DSL
DSX/DS1
ALM
ESF/ SF
(YEL) (GRN)
B8ZS/ALM
(YEL) (GRN)
To MUX
From MUX
LBK
TX
X
RX
TX
To DSX
From DSX
E
Q
RX
TX
M
O
N
RX
432 Ω
432 Ω
To CUST
From CUST
T1 BERT
Figure A-1. DSX MON, Tx to Customer
A-2
61181310L2-5D
Appendix A, Front Panel DSX and MUX Mode Test Access - DSX Mode Test Access
DSX MON, Rx from Customer
The Rx of the BERT receives data from the RX MON jack (Figure A-2). This data has a monitor
jack impedance of 432 ohms and comes from the customer-originated data. The BERT TX jack
is not used. This test is non-intrusive.
DSL
DSX/DS1
ALM
ESF/ SF
(YEL) (GRN)
B8ZS/ALM
(YEL) (GRN)
To MUX
From MUX
LBK
TX
X
RX
TX
To DSX
From DSX
E
Q
RX
432 Ω
TX
M
O
N
To CUST
From CUST
RX
432 Ω
T1 BERT
Figure A-2. DSX MON, Rx from Customer
DSX EQ, Tx to Customer, Rx from Customer
The Tx of the BERT goes to the TX EQ jack, and the Rx of the BERT goes to the RX EQ jack
(Figure A-3). The TX EQ data from the BERT is sent to the customer. The RX EQ data to the
BERT is data from the customer. The MON jack TX and RX are 432 ohm replicas of the EQ TX
and RX direct connections. This test is intrusive, as it connects the EQ jacks directly to and
from the customer data.
DSL
DSX/DS1
ALM
ESF/ SF
(YEL) (GRN)
B8ZS/ALM
(YEL) (GRN)
To MUX
From MUX
LBK
TX
To DSX
From DSX
TX
E
Q
RX
RX
TX
432 Ω
M
O
N
To CUST
From CUST
RX
432 Ω
T1 BERT
Figure A-3. DSX EQ, Tx to Customer, Rx from Customer
61181310L2-5D
A-3
Total Access 3000/3010 T1-OR/NIU Installation and Maintenance Practice
MUX MODE TEST ACCESS
MUX Mode tests through a MUX on the Total Access 3000 shelf.
MUX MON, Tx to Customer
The Rx of the BERT receives data from the TX MON EQ jack (Figure A-4). This data is a copy of
the data that the T1-OR/NIU will transmit to the customer. The Tx of the BERT is not used.
This test is non-intrusive.
DSL
DSX/DS1
ALM
ESF/ SF
(YEL) (GRN)
To MUX
From MUX
B8ZS/ALM
(YEL) (GRN)
LBK
TX
X
To DSX
From DSX
TX
E
Q
RX
RX
432 Ω
TX
M
O
N
To CUST
From CUST
RX
432 Ω
T1 BERT
Figure A-4. MUX MON, Tx to Customer
MUX MON, Rx from Customer
The Rx of the BERT receives data from the RX MON jack (Figure A-5). This data is 432 ohm
copy of the data that the T1-OR/NIU will receive from the customer and route to the Total
Access shelf MUX (network). The Tx of the BERT is not used. This test is non-intrusive.
DSL
DSX/DS1
ALM
ESF/ SF
(YEL) (GRN)
To MUX
From MUX
B8ZS/ALM
(YEL) (GRN)
LBK
TX
X
RX
To DSX
From DSX
TX
E
Q
RX
TX
432 Ω
M
O
N
RX
432 Ω
To CUST
From CUST
T1 BERT
Figure A-5. MUX MON, Rx from Customer
A-4
61181310L2-5D
Appendix A, Front Panel DSX and MUX Mode Test Access - MUX Mode Test Access
MUX EQ, Tx to Network, Rx from the Network
The Tx of the BERT is connected to the EQ TX jack, and the Rx of the BERT is connected to the
RX EQ jack (Figure A-6). The Tx of the BERT is then substituted for the data that the T1-OR/
NIU sends to the Total Access Shelf MUX (network). The Rx of the BERT receives data directly
from the MUX (network). The MON TX and RX jacks are 432 ohm impedance copies of the EQ
jack TX and RX. This test is intrusive. From the Test screen, ensure that the equipment jack is
in the To Network mode. In the To Network mode, AIS (unframed all 1’s) is sent in the
customer direction.
DSL
DSX/DS1
ALM
To MUX
From MUX
ESF/ SF
(YEL) (GRN)
B8ZS/ALM
(YEL) (GRN)
LBK
TX
To DSX
From DSX
TX
E
Q
RX
RX
432 Ω
TX
M
O
N
To CUST
From CUST
RX
432 Ω
T1 BERT
Figure A-6. MUX EQ, Tx to Network, Rx from Network
61181310L2-5D
A-5
Total Access 3000/3010 T1-OR/NIU Installation and Maintenance Practice
MUX EQ, Tx to Customer, Rx from Customer
The Tx of the BERT is connected to the EQ TX jack, and the Rx of the BERT is connected to the
RX EQ jack (Figure A-7). The Tx of the BERT is then substituted for the data that the T1-OR/
NIU sends to the customer. The Rx of the BERT receives data directly from the customer. The
MON TX and RX jacks are 432 ohm impedance copies of the EQ jack TX and RX. This test is
intrusive. Via the Test screen, ensure that the equipment jack is in the To Customer mode. In
the To Customer mode, AIS (unframed all 1’s) is sent in the network direction.
DSL
DSX/DS1
ALM
ESF/ SF
(YEL) (GRN)
B8ZS/ALM
(YEL) (GRN)
To MUX
From MUX
LBK
TX
TX
To DSX
From DSX
E
Q
RX
RX
TX
M
O
N
RX
432 Ω
432 Ω
To CUST
From CUST
T1 BERT
Figure A-7. MUX EQ, Tx to Customer, Rx from Customer
A-6
61181310L2-5D
Appendix B
Warranty
WARRANTY AND CUSTOMER SERVICE
ADTRAN will replace or repair this product within the warranty period if it does not meet its
published specifications or fails while in service. Warranty information can be found at
www.adtran.com/warranty.
Refer to the following subsections for sales, support, Customer and Product Service (CAPS)
requests, or further information.
ADTRAN Sales
Pricing/Availability:
800-827-0807
ADTRAN Technical Support
Pre-Sales Applications/Post-Sales Technical Assistance:
800-726-8663
Standard hours: Monday - Friday, 7 a.m. - 7 p.m. CST
Emergency hours: 7 days/week, 24 hours/day
ADTRAN Repair/CAPS
Return for Repair/Upgrade:
(256) 963-8722
Repair and Return Address
Contact CAPS prior to returning equipment to ADTRAN.
ADTRAN, Inc.
CAPS Department
901 Explorer Boulevard
Huntsville, Alabama 35806-2807
61181310L2-5D
B-1
®
Carrier Networks Division
901 Explorer Blvd.
Huntsville, AL 35806