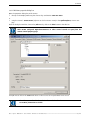
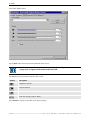
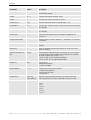
1
User’s manual
Apollo
Wall Management Software
Doc-3197-2
Doc-3197-2, current issue
Title:
User's Manual APOLLO Wall Management Software
ID-No.:
Doc-3197-2
date:
2006-11
Revision:
08
Software:
Apollo Rel. 1.9
Main issue
Chapter 1
Chapter 2
Chapter 3
Chapter 4
Chapter 5
Chapter 6
Chapter 7
Chapter 8
Chapter 9
Chapter 10
Chapter 11
Chapter 12
Chapter 13
Chapter 14
Chapter 15
Chapter 16
Update
new
new
new
new
new
new
new
new
new
new
new
new
new
new
new
new
new:
The corresponding chapters were newly generated or completely revised.
corr.:
Parts of the corresponding chapter were corrected; see edit mark.
add:
Missing parts of the corresponding chapter were added; see edit mark.
Document History
Changes resulting in a new version are marked with a bar in the margin of the text.
Do not discard this page!
Barco – Apollo – DOC-3197-2 – user's manual – Revision 08 – November 2006 ______________________________________________________ iii
© Copyright 2000-2006 Barco Control Rooms GmbH, Karlsruhe, Germany
All rights reserved. This material, information and instructions for use contained herein are the property of Barco
Control Rooms GmbH. The material, information and instructions are provided on an AS IS basis without warranty
of any kind. There are no warranties granted or extended by this document. Furthermore Barco Control Rooms
GmbH. does not warrant, guarantee or make any representations regarding the use, or the results of the use of
the software or the information contained herein. Barco Control Rooms GmbH shall not be liable for any direct,
indirect, consequential or incidental damages arising out of the use or inability to use the software or the information contained herein.
The information contained herein is subject to change without notice. Revisions may be issued from time to time
to advise of such changes and/or additions.
No part of this document may be reproduced, stored in a data base or retrieval system, or published, in any form
or in any way, electronically, mechanically, by print, photoprint, microfilm or any other means without prior
written permission from Barco Control Rooms GmbH.
This document supersedes all previous dated versions.
All other product names are trademarks or registered trademarks of their respective owners. Correspondence
regarding this publication should be forwarded to:
Barco Control Rooms GmbH
Karlsruhe, Germany
This issue refers to Apollo 1.9, Release date November 2006.
Main changes of Apollo 1.4 compared to Apollo 1.3
Apollo Explorer
FRG viewer
Visu viewer
Cottus viewer
WEB viewer
Mpeg viewer
VTplus Viewer
New features of Release 1.4 SR1
Property pages for the RGB sources (FRG viewer, Visu viewer)
Automatic adaptation of Visu configuration file
New features of Release 1.4SR3, May 2003:
Support of OverView D series
Support of shortnames for command line parameters
Support of additional parallel ports in the Eos/Argus
Support of Asian languages (cf. Apollo Internationalization)
New Apollo font settings (cf. Apollo font settings)
iv _______________________________________________________ Barco – Apollo – DOC-3197-2 – user's manual – Revision 08 – November 2006
New features of Release 1.4SR4, August 2003:
Backup/Restore of Apollo projects
New option in viewer decoration
Window property in Layout Editor
New features of Release 1.5, November 2003:
VNC compatible viewer
SOAP API Service
Automatic update of local projects
New features of Release 1.6, April 2004:
Support of streaming video card in FRG Viewer
ProServer
RemotePointer
XP Support
New features of Release 1.7, January 2005:
Support of SDI card in FRG Viewer
Gateway functionality for Cottus Viewer
Colored border for Viewer contents
Place IDCs outside of the insertion
Area for unexpected windows
Synchronize load/unload layouts
Autoload functionality
Scenario controller
New features of Release 1.8, October 2005:
Enhanced layout editor (incl. Display Wall, Default Area, Viewer sources
Preview in Remote Desktop
Support for SCN in FRG Viewer
Support of TransForm A12
New features of Release 1.9, November 2006:
Remote Desktop includes a source treeview
Resize non-sizeable windows (Remote Desktop)
Customized hotkeys for ProViewer
Context aware disconnect for ProViewer, RemotePointer
Support of source selection (OverView D with dual DVI interfaces, support implemented since Apollo 1.8SR1)
Barco – Apollo – DOC-3197-2 – user's manual – Revision 08 – November 2006 _______________________________________________________ v
Corrections
To
•
Barco Control Rooms GmbH
An der Rossweid 5 • D-76229 Karlsruhe • Germany
Phone (49) (721) 6201-0 • Fax (49) (721) 6201-298
E-mail [email protected], Web www.barcocontrolrooms.de
Sender
Date:
Please correct the following items in the documentation DOC-3197-2:
Page
Incorrect text
Correction
vi _______________________________________________________ Barco – Apollo – DOC-3197-2 – user's manual – Revision 08 – November 2006
Table of Contents
1 Preliminary remarks ........................................................................................................................... 15
1.1 Styles and symbols....................................................................................................................................... 16
2 Introduction......................................................................................................................................... 17
2.1 Summary....................................................................................................................................................... 18
2.2 Apollo components ...................................................................................................................................... 19
3 New functions ..................................................................................................................................... 23
3.1 New functions in Apollo 1.9......................................................................................................................... 24
3.2 New functions in Apollo 1.8......................................................................................................................... 24
3.3 New functions in Apollo 1.7......................................................................................................................... 24
3.4 New functions in Apollo 1.6......................................................................................................................... 24
3.5 New functions in Apollo 1.5......................................................................................................................... 24
3.6 New functions in Apollo 1.4......................................................................................................................... 24
4 Installation .......................................................................................................................................... 27
4.1 Best practice ................................................................................................................................................. 28
4.2 Requirements ............................................................................................................................................... 28
4.3 Used ports ..................................................................................................................................................... 29
4.4 Setup ............................................................................................................................................................. 30
4.5 Upgrade from Apollo 1.3 to Apollo 1.4 ....................................................................................................... 31
4.5.1 1. Converting the Apollo Database ..................................................................................................... 31
4.5.2 2. Generating current configuration files............................................................................................ 32
4.6 Upgrade from Apollo 1.4 to Apollo 1.4SR1 ................................................................................................. 33
4.7 Upgrading from Apollo 1.4 to Apollo 1.5 .................................................................................................... 33
4.8 Upgrading from Apollo 1.5 to Apollo 1.6 .................................................................................................... 34
4.9 Upgrading from Apollo 1.6 to Apollo 1.7 .................................................................................................... 34
4.10 Upgrading from Apollo 1.7 to Apollo 1.8 .................................................................................................. 34
4.11 Upgrading from Apollo 1.8 to Apollo 1.9 .................................................................................................. 34
4.12 Upgrading the Display Wall configuration................................................................................................. 35
5 Control Room Configurator ................................................................................................................. 37
5.1 Requirements ............................................................................................................................................... 38
5.2 Installing Control Room Configurator........................................................................................................... 38
5.3 Basic principles of creating a configuration ................................................................................................ 39
5.3.1 Recommended Visio settings.............................................................................................................. 39
5.3.2 Template and shapes .......................................................................................................................... 39
Barco – Apollo – DOC-3197-2 – user's manual – Revision 08 – November 2006 ______________________________________________________ vii
5.3.3 Generating configuration files............................................................................................................. 60
5.3.4 Copying Configuration Files ................................................................................................................. 60
5.3.5 Updating a configuration..................................................................................................................... 61
6 Viewer ................................................................................................................................................. 63
6.1 Concept ......................................................................................................................................................... 64
6.2 Apollo 1.9 Viewers ....................................................................................................................................... 65
6.3 Limitations .................................................................................................................................................... 66
6.4 Memory requirements (minimal RAM size)................................................................................................ 66
6.5 Communication memory.............................................................................................................................. 67
6.6 Requirements ............................................................................................................................................... 69
6.6.1 Steps required to configure the FRG Viewer ...................................................................................... 69
6.6.2 Steps required to configure the Visu Viewer...................................................................................... 71
6.6.3 Steps required to configure the Cottus Viewer .................................................................................. 72
6.6.4 Steps required to configure the VNC Viewer...................................................................................... 83
6.6.5 Steps required to configure the ProViewer ........................................................................................ 84
6.6.6 Steps required to configure the Web Viewer ..................................................................................... 85
6.6.7 Steps required to configure the MPEG Viewer ................................................................................... 85
6.6.8 Steps required to configure the VTplus Viewer .................................................................................. 85
6.7 Launching Viewer ......................................................................................................................................... 86
6.7.1 Creating shortcuts ................................................................................................................................ 86
6.8 Controlling Viewers ...................................................................................................................................... 87
6.8.1 FRG Viewer........................................................................................................................................... 87
6.8.2 Visu Viewer ........................................................................................................................................104
6.8.3 Cottus Viewer.....................................................................................................................................114
6.8.4 VNC Viewer ........................................................................................................................................123
6.8.5 ProViewer...........................................................................................................................................130
6.8.6 Web Viewer........................................................................................................................................140
6.8.7 MPEG Viewer......................................................................................................................................145
6.8.8 VTplus Viewer.....................................................................................................................................150
6.9 Placeholders for In Display Caption Texts..................................................................................................155
6.9.1 Specific FRG Viewer placeholders .....................................................................................................156
6.9.2 Specific Visu Viewer placeholders.....................................................................................................156
6.9.3 Specific Cottus Viewer placeholders .................................................................................................156
6.9.4 Specific VNC Viewer placeholders .....................................................................................................156
6.9.5 Specific Pro Viewer placeholders ......................................................................................................156
6.9.6 Specific Web Viewer placeholders ....................................................................................................156
6.9.7 Specific MPEG Viewer placeholders ..................................................................................................157
6.9.8 Specific VTplus Viewer placeholders................................................................................................157
6.10 The ServerData\Globals.ini File ...............................................................................................................158
6.11 The ServerData\viewersources.ini File....................................................................................................159
6.11.1 FRG Viewer source specification .....................................................................................................159
6.11.2 FRG Viewer streamingsource specification.....................................................................................159
6.11.3 Visu Viewer source specification.....................................................................................................160
6.11.4 Cottus Viewer source specification .................................................................................................160
6.11.5 VNC Viewer source specification.....................................................................................................161
viii ______________________________________________________ Barco – Apollo – DOC-3197-2 – user's manual – Revision 08 – November 2006
6.11.6 Web Viewer source specification ....................................................................................................161
6.11.7 MPEG Viewer source specification ..................................................................................................162
6.11.8 VTplus Viewer source specification .................................................................................................162
6.11.9 ProViewer source specification .......................................................................................................163
6.12 The ServerData\DigitalStreamSource.ini-file ..........................................................................................164
6.13 The ServerData\EncoderType.ini-file.......................................................................................................165
6.14 Global Viewer Parameters .......................................................................................................................166
6.14.1 FRG Viewer parameters...................................................................................................................168
6.14.2 Visu Viewer parameters ..................................................................................................................171
6.14.3 Cottus Viewer parameters...............................................................................................................172
6.14.4 VNC Viewer parameters ..................................................................................................................173
6.14.5 Pro Viewer parameters ...................................................................................................................174
6.14.6 Web Viewer parameters .................................................................................................................176
6.14.7 MPEG Viewer parameters................................................................................................................176
6.14.8 VTplus Viewer parameters ..............................................................................................................176
6.15 Remote Pointer ........................................................................................................................................177
6.15.1 Launching the Remote Pointer application ....................................................................................177
6.15.2 File menu .........................................................................................................................................178
6.15.3 View menu.......................................................................................................................................180
6.15.4 Tools menu.......................................................................................................................................181
6.15.5 Help menu .......................................................................................................................................184
6.15.6 Status bar .........................................................................................................................................184
6.15.7 Remote Pointer parameters............................................................................................................185
7 Explorer ............................................................................................................................................. 187
7.1 Starting the Explorer...................................................................................................................................188
7.2 Explorer User Interface ...............................................................................................................................188
7.2.1 Default settings..................................................................................................................................188
7.2.2 Split window ......................................................................................................................................188
7.2.3 Adjusted menu bar ............................................................................................................................189
7.2.4 Task bar ..............................................................................................................................................189
7.3 Object Tree..................................................................................................................................................190
7.3.1 Desktop Server...................................................................................................................................191
7.3.2 Device.................................................................................................................................................193
7.3.3 Overview: device ...............................................................................................................................194
7.3.4 Display Source ...................................................................................................................................194
7.3.5 Web Source ........................................................................................................................................195
7.3.6 TV Source............................................................................................................................................196
7.3.7 Overview: object tree sources...........................................................................................................196
7.3.8 Viewer ................................................................................................................................................197
7.4 Source Tree View ........................................................................................................................................198
7.5 Explorer workspace ....................................................................................................................................199
7.6 Explorer menu bar ......................................................................................................................................199
7.6.1 Explorer menu....................................................................................................................................199
7.6.2 View menu.........................................................................................................................................200
7.6.3 Tools menu.........................................................................................................................................201
Barco – Apollo – DOC-3197-2 – user's manual – Revision 08 – November 2006 ______________________________________________________ ix
7.6.4 Valid Command line options .............................................................................................................210
7.7 Help menu ..................................................................................................................................................211
7.8 Remote Desktop menu ..............................................................................................................................212
7.8.1 Connect ..............................................................................................................................................213
7.8.2 Virtual Desktop...................................................................................................................................214
7.8.3 Task bar ..............................................................................................................................................215
7.8.4 Window properties ............................................................................................................................216
7.8.5 Invisible windows ..............................................................................................................................217
7.8.6 Command line....................................................................................................................................217
7.8.7 Keyboard input ..................................................................................................................................217
7.8.8 Show FRG pictures .............................................................................................................................218
7.8.9 Show preview ....................................................................................................................................218
7.8.10 Refresh preview...............................................................................................................................218
7.8.11 Permissions ......................................................................................................................................219
7.8.12 Permission edit ................................................................................................................................220
7.8.13 Working with the Remote Desktop ................................................................................................221
7.9 Layout Selector menu ................................................................................................................................223
7.9.1 Layout Selector ..................................................................................................................................223
7.9.2 Connect ..............................................................................................................................................224
7.9.3 Unload all layouts ..............................................................................................................................224
7.9.4 Reload layouts ...................................................................................................................................224
7.9.5 Save layouts.......................................................................................................................................225
7.9.6 Groups ................................................................................................................................................227
7.9.7 Active layout only ..............................................................................................................................227
7.9.8 Permissions ........................................................................................................................................227
7.9.9 Context menus...................................................................................................................................229
7.10 Explorer tool bar .......................................................................................................................................230
7.11 Device Manager in the Explorer ..............................................................................................................231
7.11.1 OverView-mP50...............................................................................................................................233
7.11.2 LCD_DLP Projectors ..........................................................................................................................239
7.11.3 Hermes D2D .....................................................................................................................................246
7.11.4 Hermes V2A .....................................................................................................................................249
7.11.5 Matrix Switcher................................................................................................................................252
7.11.6 Visu...................................................................................................................................................255
7.11.7 Phoenix Projector DX .......................................................................................................................261
7.11.8 OverView D ......................................................................................................................................267
7.11.9 OverView cPU67-DL .........................................................................................................................273
7.12 Explorer Context Menu.............................................................................................................................279
7.12.1 Adding commands to the context menu........................................................................................280
7.13 Drag&Drop functionality...........................................................................................................................282
8 Layout Editor ..................................................................................................................................... 285
8.1 Layout database .........................................................................................................................................286
8.1.1 Regions...............................................................................................................................................286
8.1.2 Layouts ...............................................................................................................................................287
8.2 Launching the Layout Editor.......................................................................................................................287
x________________________________________________________ Barco – Apollo – DOC-3197-2 – user's manual – Revision 08 – November 2006
8.3 Layout Editor menus...................................................................................................................................290
8.3.1 File menu ...........................................................................................................................................290
8.3.2 Edit menu ...........................................................................................................................................291
8.3.3 Properties menu ................................................................................................................................293
8.3.4 Window menu ...................................................................................................................................304
8.3.5 Favorites menu ..................................................................................................................................304
8.3.6 Tools menu.........................................................................................................................................306
8.3.7 Settings menu....................................................................................................................................307
8.3.8 Help menu..........................................................................................................................................309
8.4 Working with the Layout Editor .................................................................................................................310
8.4.1 Loading layouts and shortcuts ..........................................................................................................310
8.4.2 Defining regions.................................................................................................................................312
8.4.3 Defining shortcuts in the database...................................................................................................312
8.4.4 Defining layouts.................................................................................................................................313
8.4.5 Preloading viewers ............................................................................................................................321
8.4.6 Valid command line options .............................................................................................................326
9 Desktop Server.................................................................................................................................. 327
9.1 Login............................................................................................................................................................328
9.2 Launching the Desktop Server ...................................................................................................................328
9.2.1 Starting the Desktop Server manually..............................................................................................328
9.3 Closing the Desktop Server ........................................................................................................................329
9.4 Saving layouts in the database..................................................................................................................329
10 Project Backup ................................................................................................................................ 331
10.1 General......................................................................................................................................................332
10.2 Creating the backup file ...........................................................................................................................333
10.3 Restoring an Apollo project .....................................................................................................................336
11 Command Interface ........................................................................................................................ 337
11.1 Device command Interface ......................................................................................................................338
11.2 Desktop command Interface....................................................................................................................341
11.3 Viewer command Interface .....................................................................................................................342
11.4 Apollo Explorer command interface ........................................................................................................342
11.5 Apollo Layout Editor command interface ................................................................................................342
11.6 Apollo Layout Selector command interface ............................................................................................343
11.7 Apollo Remote Desktop command interface ..........................................................................................343
11.8 Apollo Database Convertor command interface .....................................................................................344
11.9 Apollo Window Detector command interface.........................................................................................344
12 Control Room Bus services ............................................................................................................. 345
12.1 Control Room Bus .....................................................................................................................................346
Barco – Apollo – DOC-3197-2 – user's manual – Revision 08 – November 2006 ______________________________________________________ xi
12.2 Serial command interface ........................................................................................................................347
12.2.1 Customizing configuration files.......................................................................................................347
12.2.2 Mode of operation...........................................................................................................................348
12.3 TCPIP command interface ........................................................................................................................349
12.3.1 Mode of operation...........................................................................................................................349
12.4 Application management ........................................................................................................................351
12.5 License management...............................................................................................................................352
12.6 Time synchronization ...............................................................................................................................353
12.7 Log file ......................................................................................................................................................353
12.8 Security Provider ......................................................................................................................................353
12.8.1 Defining accessGroups.....................................................................................................................354
12.8.2 Configuration of restricted objects..................................................................................................356
12.8.3 Permissions ......................................................................................................................................357
13 Customized configuration and uninstallation of Apollo................................................................ 361
13.1 Settings .....................................................................................................................................................362
13.1.1 Project directory...............................................................................................................................362
13.1.2 Language..........................................................................................................................................362
13.2 Apollo Internationalization.......................................................................................................................362
13.2.1 Asian languages...............................................................................................................................362
13.3 Layout icons ..............................................................................................................................................363
13.4 Apollo font settings ..................................................................................................................................364
13.5 Apollo uninstall.........................................................................................................................................365
14 Soap API Service ............................................................................................................................. 367
14.1 Requirements ...........................................................................................................................................368
14.2 Installation of the Internet Information Service IIS ................................................................................368
14.3 Installation of the SOAP SDK ....................................................................................................................372
14.4 Creation and configuration of virtual directory in the Internet Information Service ............................373
14.5 Configuration of the DCOM ......................................................................................................................375
14.5.1 Windows 2000 .................................................................................................................................375
14.5.2 Windows XP .....................................................................................................................................378
14.5.3 How to check the Apollo API...........................................................................................................381
15 Appendix ......................................................................................................................................... 383
15.1 Commands via keyboard .........................................................................................................................384
15.2 Identifying windows ................................................................................................................................385
15.3 Redundant Apollo System........................................................................................................................386
15.3.1 Setup ................................................................................................................................................386
15.3.2 System checkup ...............................................................................................................................386
15.4 Placeholders for In Display Caption Texts ...............................................................................................387
xii _______________________________________________________ Barco – Apollo – DOC-3197-2 – user's manual – Revision 08 – November 2006
15.4.1 Specific FRG Viewer placeholders ...................................................................................................387
15.4.2 Specific Visu Viewer placeholders...................................................................................................387
15.4.3 Specific Cottus Viewer placeholders ...............................................................................................388
15.4.4 Specific VNC Viewer placeholders...................................................................................................388
15.4.5 Specific Pro Viewer placeholders ....................................................................................................388
15.4.6 Specific Web Viewer placeholders ..................................................................................................388
15.4.7 Specific MPEG Viewer placeholders ................................................................................................388
15.4.8 Specific VTplus Viewer placeholders..............................................................................................389
15.5 Overview: List of commandline parameters and their shortcuts...........................................................390
15.6 Escape sequences supported by the send command of the Serial Interface........................................400
16 Hotline............................................................................................................................................. 401
16.1 Addresses..................................................................................................................................................402
Barco – Apollo – DOC-3197-2 – user's manual – Revision 08 – November 2006 ______________________________________________________xiii
1. Preliminary remarks
1 Preliminary remarks
This brochure is directed towards administrators and users of Display Walls. It describes how to use the Wall
Management Software Apollo to efficiently manage and administrate information on a Display Wall from a local
workstation.
This document describes the installation and configuration of the Apollo Wall Management software as well as all
operating steps.
Barco – Apollo – DOC-3197-2 – user's manual – Revision 08 – November 2006 __________________________________________________ 15/402
1. Preliminary remarks
1.1 Styles and symbols
The typographic styles and the symbols used in this document have the following meaning:
Bold
Labels, menus and buttons are printed in Bold font.
Condensed
Links to both other chapters of this manual and to sites in the Internet are printed
condensed. In the on-line version of this manual all hyperlinks appear teal.
Courier
Names of files and parts from programs are printed in the Courier font.
Courier bold
Inputs you are supposed to do from the keyboard are printed in Courier bold font.
If you do not heed instructions indicated by this symbol there is a risk of damage to the
equipment!
If you do not heed instructions indicated by this symbol there is a risk of electrical shock
and danger to personal health!
If you do not heed instructions indicated by this symbol there is a risk of damage to parts,
which are sensitive towared electrostatic charge!
If you do not heed instructions indicated by this symbol there is a risk to get harmed by
sharp objects!
If you do not heed instructions indicated by this symbol there is a risk that parts may
explode!
If you do not heed instructions indicated by this symbol there is a risk that hot parts impact
persons or objects!
The sheet icon indicates additional notes.
Next to this icon you find further information.
This arrow marks tips.
Next to this icon you find important notes.
16/402 __________________________________________________ Barco – Apollo – DOC-3197-2 – user's manual – Revision 08 – November 2006
2. Introduction
2 Introduction
Barco – Apollo – DOC-3197-2 – user's manual – Revision 08 – November 2006 __________________________________________________ 17/402
2. Introduction
2.1 Summary
Modern Display Walls have begun arriving wherever current information is to be displayed for and made available to a larger number of people at the same time. The display wall is the central information medium in control stations and control rooms, although all employees have their own monitors to perform their respective
duties. Such a scenario requires that the Display Wall can be controlled from remote locations or workstations.
This means it should be possible to open a window on the Display Wall from a separate workstation and to resize
or reposition this window as well.
The Apollo Wall Management software for Windows 2000, Windows XP meets this requirement comfortably. This
software permits access to the Display Wall from any desired computer within the network. You are able to predefine entire window layouts to be activated when specified.
18/402 __________________________________________________ Barco – Apollo – DOC-3197-2 – user's manual – Revision 08 – November 2006
2. Introduction
2.2 Apollo components
Apollo comprises several client and server application which communicate via the Control Room Bus.
Server applications which manage resources such as projectors or the desktop of a Display Wall are installed and
used on central Server computers. These applications are started automatically during booting or log in.
The interactive client applications are graphical user interfaces to provide access to the services of the central
servers. If required they can started multiple times on each workstation of the Apollo network.
The Apollo Wall Management software consists of the following components:
Control Room Bus
The Apollo software runs distributed on different computers. The Control Room Bus supplies the communication
infrastructure for the computers integrated into the Apollo network. It also includes several system utilities and
an easy user interface. The Control Room Bus is based on the TCP/IP protocol and started automatically during
booting.
Desktop Server
This component runs on the control computer (TransForm A) of the Display Wall. It receives commands from the
interactive client applications of the workstations and converts them into activities to manipulate the windows of
the Display Wall.
Layout Editor
The Layout Editor is used to create and modify so-called layouts. Layouts usually consist of several windows
and/or shortcuts and define which windows are to be loaded in which position using what size. Every layout is
saved in a database using a unique name. Every Display Wall has its own database located on the associated
control computer or on any other network computer.
The Layout Editor is also used to define regions on the Display Wall. By means of regions, specific permissions
can be assigned to user groups.
Security Provider
The permissions of users to access and modify certain objects are controlled by Access Groups. An object can be
assigned to a number of Access Groups, each of which having individual permissions. Before a certain action is
performed, the permission of the user is checked. If the permission is given, the system will execute the action,
else not.
Checking is done by the Security Provider which is a separate party on the Control Room Bus.
SNMP Manager
The SNMP Manager is the interface between the Control Room Bus and the Simple Network Management Protocol (SNMP). The SNMP Manager provides the possibility to use a configuration file to integrate any SNMP-capable
device.
Explorer
The stand-alone applications Remote Desktop, Layout Selector and Device Manager are now integrated in one
application, the Apollo Explorer. Controlling a Display Wall now requires only launching the Apollo Explorer.
Remote Desktop
The Remote Desktop is integrated in the Explorer and enables to manipulate the windows of the Display Wall
from a separate and remote workstation.
If required, the user interface of the Explorer can be adapted to look like the user interface of the previous standalone application Remote Desktop.
Barco – Apollo – DOC-3197-2 – user's manual – Revision 08 – November 2006 __________________________________________________ 19/402
2. Introduction
Layout Selector
The Layout Selector is integrated into the Explorer. It allows easily loading and removing layouts from a remotely linked Display Wall. Layouts have to be defined in the Layout Editor and saved in a database first.
If required, the user interface of the Explorer can be adapted to look like the user interface of the previous standalone application Layout Selector.
Device Manager
The Device Manager is integrated into the Explorer and offers to control the parameters of the devices. The
following devices are supported: Barco Reality 6xxx, Barco Graphics 6xxx, analog poly-silicone projector units of
the rear projection systems S70, Atlas67CS4, Atlas84CS4, digital poly-silicone projector units of the rear projection
systems OverView-mP50 and Atlas67C4, Hermes D2D and Hermes V2A, digital Visu, digital Phoenix, and some
third party devices.
Project Backup
Apollo Project Backup uses the Windows Backup tool. The customized script ensures that all relevant files are
included into the backup (the files are stored on multiple locations). If e.g. the hard disk of the Desktop Servers
crashes, the Apollo project can easily be restored by means of the backup file.
Viewer
Viewers are applications running on the Display Wall and showing the contents of e.g. Internet pages, or digital
media streams, analog video etc. Like all other application, the viewer windows can be integrated in a layout.
Desktop Command, Device Command, Viewer Command
Console applications used for sending commands to a Desktop server, to devices, to viewers from the command
prompt.
Serial Command, TCPIPCommand
Console applications used for receiving commands via the serial COM interface or via the Ethernet interface. .
Remote Pointer
This is a client application which provides a GUI to move the cursor and to send keystrokes to a remote computer.
SOAP API Service
This component is a development interface to integrate Apollo in customer applications. It is based on the Soap
SDK 3.0 of Microsoft.
20/402 __________________________________________________ Barco – Apollo – DOC-3197-2 – user's manual – Revision 08 – November 2006
2. Introduction
Layout
DB
TransForm A Windows XP
TransForm A Windows 2000
Layout
DB
TransForm A Windows XP
TransForm A Windows 2000
LAN
Operator Workstation
Windows XP
Windows 2000
Operator Workstation
Windows XP
Windows 2000
Barco – Apollo – DOC-3197-2 – user's manual – Revision 08 – November 2006 __________________________________________________ 21/402
3. New functions
3 New functions
Barco – Apollo – DOC-3197-2 – user's manual – Revision 08 – November 2006 __________________________________________________ 23/402
3. New functions
3.1 New functions in Apollo 1.9
Apollo 1.9 comes with enhanced functionalities in the Remote Desktop which now includes a source treeview to
assign a source to an existing viewer at runtime. In addition non-sizeable windows (e.g. Viewer windows without borders) can now be re-sized..
The ProViewer allows to set customized hotkeys for connect, release control, disconnect and features a context
aware disconnect.
For the ProViewer and the Remote Pointer, a context aware disconnect has been introduced.
The FRG viewer supports the new RoHs compliant TransForm A input cards and the TransForm SCN.
Already since Apollo 1.8SR1, the device manager supports the dual DVI input of OverView and allows to set the
source selection mode as well as to select the active source.
3.2 New functions in Apollo 1.8
Apollo 1.8 comes with enhanced functionalities in the layout editor which now includes treeview nodes also for
the display wall, the default area and the viewer sources. In addition a second treeview can be displayed to
allow fast and intuitive copy&paste and drag&drop operations.
The Remote Desktop now shows a preview of the application and viewer windows when possible, and in case of
the FRG viewer (where no preview of the content can be shown) the status of the source is indicated by an icon.
The FRG viewer has enhanced property pages for the Streaming Video Card and supports also to the soon-tocome SCN.
3.3 New functions in Apollo 1.7
Apollo 1.7 comes with the scenario controller which allows defining a sequence of Apollo actions via a graphical
user interface. The actions are initiated by triggers which can be defined according the actual requirements.
Apollo 1.7 supports the projections system OverView cPU67-DL and the QuadSDI input card for Eos/Argus controllers. The Layout Editor allows to automatically load layouts and to specify the treatment of unexpected windows. The API interface has been enhanced to support the new applications and functionalities of Apollo 1.7
3.4 New functions in Apollo 1.6
Apollo 1.6 includes the new applications ProServer, ProViewer and RemotePointer. Furthermore the FRG viewer
now supports streaming video cards, and the VNC viewer supports TightVnc server. The API interface has been
enhanced to support the new applications and functionalities of Apollo 1.6.
3.5 New functions in Apollo 1.5
The number of viewers has been enhanced by a VNC compatible viewer (VNC Viewer) which depicts the screen
contents of host workstations on the Display Wall.
For OverView D series, the device support has been enhanced.
An upgrade utility for Apollo projects (starting with projects created with Apollo 1.4x) is provided which automatically converts the project and the database into a current Apollo project.
The SOAP API interface enables the integration of Apollo into customer applications.
For the Web viewer, the scroll bars can be hidden or shown.
3.6 New functions in Apollo 1.4
Support for additional device types as well as several viewers is among the many new functions of Apollo 1.4.
New supported devices are the Digital Visu, the Digital Phoenix projector, and the Matrix Switcher.
Viewers are applications running on display walls, showing different contents. Apollo 1.4 features the following
viewers:
FRG Viewer to depict and control analog video and RGB signals connected to a BigVideo Card, QuadVideo Card, or
RGB-Input Card in the Eos.
24/402 __________________________________________________ Barco – Apollo – DOC-3197-2 – user's manual – Revision 08 – November 2006
3. New functions
Visu Viewer to depict and control analog video and RGB signals connected to a Video Input Unit, or RGB Input
Unit of a digital Visu.
Cottus Viewer to depict screen contents of host workstations on the display wall.
Web Viewer to depict Internet pages.
Mpeg Viewer to depict digital video.
VTplus Viewer to depict video text pages.
All of these viewers are running in windows that are customizable concerning position, shifting, and scaling, and
can be opened in several instances. The viewers are remote controlled.
Previous Apollo applications such as the Layout Selector, Remote Desktop, Device Manager are now integrated into the Apollo Explorer and no longer need to be started separately. Just one single application offers
you now easy access to all functions running on the Control Room Bus.
The Apollo Layout Editor used to define layouts and regions continues to be a stand-alone application that can
be used on any computer within the network as long as the layout database can be accessed by this computer.
Barco – Apollo – DOC-3197-2 – user's manual – Revision 08 – November 2006 __________________________________________________ 25/402
4. Installation
4 Installation
Barco – Apollo – DOC-3197-2 – user's manual – Revision 08 – November 2006 __________________________________________________ 27/402
4. Installation
4.1 Best practice
It is recommended to first read the Readme file located on the CD-ROM in the folder
…\Apollo (CRS-3045)\Apollo 1.8
4.2 Requirements
•
Windows 2000 Service Pack 4 or later
•
Internet Explorer 6.0 SP1 or later
•
Windows Scripting Host 5 or later
•
Barco TASK-2k-09 (for TransForm A controller)
or
•
Windows XP Professional Service Pack 2 or later
•
Internet Explorer 6.0 SP1 or later
•
Windows Scripting Host 5 or later
•
Barco TASK-XP-09 (for TransForm A controller)
•
Barco Snmp RcAgent 1.6 (for device control)
•
Barco Windows driver suite 4.2 (for TransForm A controller)
•
Funk Software Inc. Proxy Host 5.1 (for Cottus viewer), Gateway 5.1
•
VNC 3.3.7 (for VNC viewer)
•
TightVnc 1.2.9 (for VNC viewer)
•
Microsoft Visio2000 or higher (for Apollo Configurator)
•
Microsoft VisualStudio 6.0 SP4 (for software development)
•
Barco OCM 1.2 for OverView D projection modules
When running the viewers, please keep in mind that each instance of a viewer requieres
about 20MB to 30MB RAM. Upgrade your TransForm A controller accordingly!
28/402 __________________________________________________ Barco – Apollo – DOC-3197-2 – user's manual – Revision 08 – November 2006
4. Installation
Please mind: The Control Room Configurator requires Microsoft Visio 2000 or higher!
These requirements are checked before Apollo is installed. A prompt is displayed to install any additionally required software, if necessary. The Apollo installation then has to be restarted.
In case Windows Scripting Host is missing at your Windows installation, this application is enclosed on the Apollo
installation CD (“Apollo (CRS-3045)\Apollo 1.8\public\WindowsScriptingHost” directory).
You need administrative privileges to install the Apollo software. If the computer reboots during installation,
users have to log in with administrative privileges after the reboot as well.
When installing, please stick to the following installation sequence: OS level first
(Windows2000 WindowsXP), then system level (Windows Driver Suite, Barco RC Agent),
finally application level (Apollo, RemotePointer, Screen Host)
4.3 Used ports
Apollo will use the following ports:
Application
ports
Control Room Bus
TCP/IP ports: 4570 and 4571
CottusViewer / Proxy Host
UDP port: 1505
CottusViewer /Gateway
UDP port: 2303
VncViewer / VncServer / TightVncServer
TCP/IP port: 5900
ProServer / ProViewer / RemotePointer
TCP/IP port: 4580
TCP/IP Command interface
TCP/IP port 4585
SnmpMngr
TCP/IP port 4701
RcAgent
TCP/IP port 4700
OCM
TCP/IP port 6063 and 4702
With Windows XP SP2, the firewall is automatically activated and all ports are closed! Make
sure to open the above mentioned ports! Without being able to communicate, Apollo will
not work!
Please check also if an external firewall is installed. No matter what type of firewall:
Apollo can only operate when the ports listed above are open.
Consult the user documentation about your firewall how to open the ports.
Barco – Apollo – DOC-3197-2 – user's manual – Revision 08 – November 2006 __________________________________________________ 29/402
4. Installation
4.4 Setup
You need administrative privileges to install the Apollo software.
Remove any older Apollo installation present on the system before installing a newer version;
see "Uninstall Apollo." The files in the Apollo project directory remain intact when you uninstall
Apollo!
Place the CD into the CD drive and run setup.exe. The Install Shield Wizard will guide you through the installation
process. Follow the displayed instructions.
Component
Description
API Service
Select this option to integrate Apollo into customer applications.and
to benefit from Apollo Scenario Management.
Control Room Configurator
This component requires Microsoft Visio. Install this component on the
computer before configuring the Apollo project.
Custom
Use this option to install one or several of the following components
Displaywall
This component runs on the control computer (TransForm A) of the
Display Wall
Operator Workstation
The client components have to be installed on any network computer
used to manipulate the Display Wall via the interactive applications.
Layout Editor
The Layout Editor can be installed anywhere in the network where
layouts are to be created or edited.
Control Room Configurator
This component requires Microsoft Visio. Install this component on the
computer before configuring the Apollo project.
Displaywall
This component runs on the control computer (TransForm A) of the
Display Wall
30/402 __________________________________________________ Barco – Apollo – DOC-3197-2 – user's manual – Revision 08 – November 2006
4. Installation
Operator Workstation
The client components have to be installed on any network computer
used to manipulate the Display Wall via the interactive applications.
ProServer
This component has to be installed on every workstation which
screen should be scraped or which has to be controlled by means of
the RemotePointer application.
Select the desired component. If Custom is selected, define the components to be installed in the Select Components dialog
The required files are installed to the C:\Program Files\Barco Apollo directory unless otherwise indicated.
The Control Room Bus is installed as a service as well and Apollo shortcuts are generated.
Installation is a completely automatic process.
The Settings dialog is displayed once installation has finished. Enter a directory for your Apollo project. Use OK to
end the Settings dialog.
The system can be reconfigured for any project at any time after the initial installation using the shortcut
Start|Programs|Barco Apollo|Settings, see also Settings. The project directory including the subdirectory for the
Apollo database is created during the installation. This subdirectory is directly accessed by the Layout Editor.
Share this sub directory if the Layout Editor is to be started on a different workstation.
In case of Apollo has been installed on an WinXP platform, make sure that the Apollo
project directory allows write access for a user. Change the permission of this directory
accordingly. Without write access, Apollo cannot be run.
4.5 Upgrade from Apollo 1.3 to Apollo 1.4
Upgrading from Apollo 1.3 to Apollo 1.4 takes two steps:
4.5.1 1. Converting the Apollo Database
Call the database converter program. Use Windows Explorer to find and click on the file C:\Program Files\Barco
Apollo\Program\Databaseconvertor.exe. The following dialog is displayed:
Click on the button with the three dots (Browse …) and select the Apollo database. Click on the Convert button
to start the conversion process for the required database.
Only a database generated with Apollo Release 1.1, 1.2 or 1.3 can be converted.
If the Apollo database includes regions, and you want to preserve them, the option Use Regions has to be
checked. If this option is not checked, the regions will be hidden. If later required, they can be shown again using
the Layout Editor (Properties | Display Wall | Use Regions)
Barco – Apollo – DOC-3197-2 – user's manual – Revision 08 – November 2006 __________________________________________________ 31/402
4. Installation
4.5.2 2. Generating current configuration files
Whenever a new Apollo Release or Service Release is installed, the Visio configuration file of the Apollo project
has to be upgraded, too, in order to generate the most current configuration files.
All configuration files (*.ini, *.cn) are generated by the Apollo 1.4.1 Control Room Configurator.
If the Control Room Configurator was selected when installing individual components and if the
standard directory was used for the installation, then the following folder was created: ...
Program Files\Barco Apollo\Control Room Configurator.
Copy this folder to the following directory:
… \Visio\Solutions
To update an existing Visio configuration proceed as follows:
•
In Microsoft Visio, open the template Control Room Configuration.vst.
•
Right click into the template to open the context menu.
•
From the context menu, select Import and Upgrade Drawing
The dialogs pops up to open a file. Browse for the Visio configuration file of the existing project.
•
The file will be imported. At the same time, the shapes are updated.
•
Save the file
•
Create the configuration files by means of the command Export Files of the context menu (right mouse
click)
•
Copy the configuration files into the folder of the Apollo Project.
Devices which are controlled via the Barco LCD-DLP SNMP Agent now are updated to be
controlled by the Barco RC Agent.
Starting with Apollo 1.4, only the Barco RC Agent is used.
Apollo features a security provider to assign specific permissions to different access user
groups. The security provider gets his information from the file AccessGroups.ini which
has to be located in a subfolder ServerData in the ApolloProject folder.
The subfolder ServerData and a sample AccessGroups.ini file is created by quitting the
Settings Dialog with OK. Then the AccessGroups.ini file can be edited and customized.
The modifications will be valid after an additional launching of the Apollo Settings. For
more information on the AccessGroups.ini-file, please see Defining accessGroups
32/402 __________________________________________________ Barco – Apollo – DOC-3197-2 – user's manual – Revision 08 – November 2006
4. Installation
4.6 Upgrade from Apollo 1.4 to Apollo 1.4SR1
Upgrading from Apollo 1.4 to Apollo 1.4.1 does not require converting the database. However, the update of the
configuration files (see above, generating current configuration files) is mandatory.
Starting with Apollo 1.4SR1 the file SerialCommandInterface.ini is split into a file
specifying the parameters of the serial interface (SerialCommandInterfaceBasic.ini) and
a file allocating the patterns (SerialCommandInterface.ini). When upgrading projects
made with former releases of Apollo, the then SerialCommandInterface.ini file remains
unchanged, and the entries referring to the COM Port and the baud rate have to be
deleted manually! In addition, the Visio drawing has to be updated: the shape "Serial
Command interface" has to be replaced by the shape "Command Source"!
4.7 Upgrading from Apollo 1.4 to Apollo 1.5
An Apollo project which has been created with Apollo 1.4x is automatically upgraded to Apollo 1.5. No intervention is required.
If the project is selected in the Apollo Settings dialog, the version of the project is validated. In case it is later
than 1.4x, the following message pops up:
Select Backup to make a copy of the old project.
Only projects created with Apollo 1.4x are updated automatically. All other projects have
to be upgraded as described in chapter Upgrade from Apollo 1.3 to Apollo 1.4.
Please note, that if the Apollo project includes the Phoenix projector, it also has to be upgraded manually.
Barco – Apollo – DOC-3197-2 – user's manual – Revision 08 – November 2006 __________________________________________________ 33/402
4. Installation
Projects with Phoenix projectors require a manual update as described in chapter Upgrade
from Apollo 1.3 to Apollo 1.4.
4.8 Upgrading from Apollo 1.5 to Apollo 1.6
An Apollo project which has been created with Apollo 1.5 is automatically upgraded to Apollo 1.6. No intervention is required.
4.9 Upgrading from Apollo 1.6 to Apollo 1.7
An Apollo project which has been created with Apollo 1.6 is automatically upgraded to Apollo 1.7. No intervention is required.
4.10 Upgrading from Apollo 1.7 to Apollo 1.8
An Apollo project which has been created with Apollo 1.7 is automatically upgraded to Apollo 1.8. No intervention is required.
4.11 Upgrading from Apollo 1.8 to Apollo 1.9
An Apollo project which has been created with Apollo 1.8 is automatically upgraded to Apollo 1.9. No intervention is required.
34/402 __________________________________________________ Barco – Apollo – DOC-3197-2 – user's manual – Revision 08 – November 2006
4. Installation
4.12 Upgrading the Display Wall configuration
Whenever new and/or additional devices are added to the configuration, this expansion of the Display Wall configuration has to be included into the Visio drawing!
All configuration files (*.ini, *.cn) are generated by the Apollo 1.8 Control Room Configurator.
If the Control Room Configurator was selected when installing individual components and if the
standard directory was used for the installation, then the following folder was created: ...
Program Files\Barco Apollo\Control Room Configurator.
Copy this folder to the following directory:
… \Visio\Solutions
To update an existing visio configuration proceed as follows:
•
In Microsoft Visio, open the template Control Room Configuraton.vst.
•
Right click into the template to open the context menu.
•
From the context menu, select Import and Upgrade Drawing
The dialogs pops up to open a file. Browse for the Visio configuration file of the existing project.
•
The file will be imported. At the same time, the shapes are updated.
•
Adjust the configuration (add/modify the devices)
•
Save the file
•
Create the configuration files by means of the command Export Files of the context menu (right mouse
click)
•
Copy the configuration files into the folder of the Apollo Project.
Starting with Apollo 1.4 SR3, an existing Apollo Explorer.ini file is automatically
upgraded in case devices which are supported for the first time are added to the
configuration.
This upgrade maintains the existing customizations of e.g. the context menus of the
devices.
Barco – Apollo – DOC-3197-2 – user's manual – Revision 08 – November 2006 __________________________________________________ 35/402
5. Control Room Configurator
5 Control Room Configurator
The Control Room Configurator is a VISIO application used to create all configuration files.
Barco – Apollo – DOC-3197-2 – user's manual – Revision 08 – November 2006 __________________________________________________ 37/402
5. Control Room Configurator
5.1 Requirements
Microsoft Visio2000 or higher
In case of Visio 2003, the follwing settings must be made:
Macro Security: medium (or low)
File path settings (Tools|Options)
Templates: C:\Program Files\Barco Apollo\Control Room Configurator
Stencils: C:\Program Files\Barco Apollo\Control Room Configurator
Add-ons: C:\Program Files\Barco Apollo
5.2 Installing Control Room Configurator
If the Control Room Configurator was selected when installing individual components and if the standard directory was used for the installation, then the following folder was created: ... Program Files\Barco
Apollo\Control Room Configurator.
Copy this folder to the following directory:
… \Visio\Solutions
This refers to Visio 2000 only. For higher versions of Visio, the above mentioned settings
must be done!
For Visio 2000, also the paths can be set as described above (Tools|Options). This will allow
you to work with directories other than …\Visio\Solutions.
Now all of the following files are located in the directory …\Visio\Solutions\Control Room Configurator:
Notes
Resources (Folder)
Apollo.lic
Clkserv.cn
Excluded Windows.ini
Pmxtext.inc
Startup.ini
Examples (Folder)
Examples.vsd
Configuration examples:
Control Room Configuration.vst
Template for creating a configuration
Connectors.vss
Templates (Connections)
Devices.vss
Templates (Barco Hardware)
Software.vss
Templates (Apollo Software)
Third Party.vss
Templates (Additional Products)
38/402 __________________________________________________ Barco – Apollo – DOC-3197-2 – user's manual – Revision 08 – November 2006
5. Control Room Configurator
5.3 Basic principles of creating a configuration
Basic Microsoft Visio and template knowledge is assumed.
5.3.1 Recommended Visio settings
Please select the following options in Tools|Snap&Glue|General:
When drawing the projection modules, it is recommended to click Alignment Box.
5.3.2 Template and shapes
Have a look at the file Examples.vsd located in the folder …\Visio\Solutions\Control Room Configurator\Samples. There you can learn how to use the Control Room Configurator to configure an Apollo project.
A functional document has to be based on the template Control Room Configuration!
This template is located in the folder …\Visio\Solutions\Control Room Configurator
To create a configuration, proceed the following way:
Select File|New|Control Room Configurator|Control Room Configuration
A new Visio document is opened based on the template Control Room Configuration. Attached to this document are the Barco stencils. Use the shapes provided by these stencils to create the Apollo project.
Use the shapes of devices to configure the Display Wall. Select the required projectors and their control unit. Do
the cabling by means of the connectors.
Barco – Apollo – DOC-3197-2 – user's manual – Revision 08 – November 2006 __________________________________________________ 39/402
5. Control Room Configurator
The template utilizes the three levels "control," "data," and "LAN." These levels are identified with the following
colors.
Level
Color
Control
red
Data
blue
Network
green
These levels can be individually hidden or displayed.
The Control Room Configurator makes it possible to depict hardware and software configurations of Barco Display Wall using the help of specific shapes.
Link lines (connectors) can be attached only at connection points located within the small red, blue, or green
squares.
Red Square:
Control Connection
Blue Square:
Data Connection
Green Square:
Network (LAN) Connection
Links are possible only within one level! Invalid connections/links don't click into the connection points.
Dotted connection lines lead to invalid configuration files! Links are possible only within one
level (color)! Connection lines can be attached only to connection points.
In early Apollo Release, there were two types of protocols to control devices, the Barco
LCD-DLP Agent protocol and the Barco RC Agent protocol. Now the Barco RC Agent can
address and control every device of a Display Wall, and the LCD-DLP Agent is no longer
necessary.
There are 4 template groups:
Template Collection
Content
Connectors.vss
Connections
Devices.vss
Barco Hardware
Software.vss
Apollo Software
Third Party.vss
Additional Products
Properties have been defined for most objects that can be used to specify parameter values required for the
creation of configuration files.
40/402 __________________________________________________ Barco – Apollo – DOC-3197-2 – user's manual – Revision 08 – November 2006
5. Control Room Configurator
Specified values may not contain any blank spaces!
The Properties window can be opened permanently (View|Custom Properties). This command is available via
the regular menu as well as the context menu (right mouse button). Double-clicking on the object also opens the
Properties window.
The following is a brief overview of the templates representing Barco hardware and Barco software.
5.3.2.1 Stencils Devices.vss
Starting with Apollo 1.4SR3, all modular projection cubes can be drawn with the same
shape (shape of OverView-mP, or shape of AtlasC4, or shape of AtlasCS4, or shape of
Phoenix). The actual device is indicated by the respective Type of Module in the Custom
Properites listbox of the shape.
5.3.2.2 Projection module OverView D
OverView-D
Custom Properties:
Data Connection Point
Type of Module
OverView D
Address
Input a value between 1 … 255
DVI_Digital_Input
(blue):
Control Connection Point
Serial_Input
Possible to connect with
•
DVI_Digital_Output of AGX graphic cad/
UGX graphic card/TransForm A OmniScaler
Possible to connect with Serial_Output of previous device or the control computer
(red):
Serial_Output
Possible to connect with Serial_Input of subsequent device
Barco – Apollo – DOC-3197-2 – user's manual – Revision 08 – November 2006 __________________________________________________ 41/402
5. Control Room Configurator
5.3.2.3 Projection module OverView PU
Custom Properties
Type of Module
Data Connection Point
VGA_Digital_Input
OverView-cPU67-DL (should not be changed)
Possible to connect with VGA_Digital_Output
•
of the digital graphic card
(blue):
Control Connection Point
Serial_Input
Possible to connect with Serial_Output of previous
device or the control computer
(red):
Serial_Output
Possible to connect with Serial_Input of subsequent
device
5.3.2.4 Projection module OverView-mP
Custom Properties
Type of Module
Data Connection Point
VGA_Digital_Input
(blue):
Control Connection Point
Serial_Input
OverView-mP (should not be changed)
Possible to connect with VGA_Digital_Output
•
of the digital graphic card
•
the digital output of Hermes D2D
•
the digital output of Hermes V2A
Possible to connect with Serial_Output of previous
device or the control computer
(red):
Serial_Output
Possible to connect with Serial_Input of subsequent
device
42/402 __________________________________________________ Barco – Apollo – DOC-3197-2 – user's manual – Revision 08 – November 2006
5. Control Room Configurator
5.3.2.5 Projection module Atlas C4
Custom Properties:
Type of Module
Data Connection Point
VGA_Digital_Input
(blue):
Control Connection Point
Serial_Input
Atlas C4 (should not be changed)
Possible to connect with VGA_Digital_Output
•
of digital graphic card
•
of Hermes D2D
•
of Hermes V2A
Possible to connect with Serial_Output of previous
device or the control computer
(red):
Serial_Output
Possible to connect with Serial_Input of subsequent
device
5.3.2.6 Projection module Atlas CS4
Custom Properties:
Data Connection Point
Type of Module
Atlas CS4 (should not be changed)
Address
Input a value between 1 … 255
VGA_Analog_Input
(blue):
Control Connection Point
Serial_Input
Possible to connect with
•
VGA_Analog_Output of analog graphic card
•
DVI_Analog_Digital_Output of AGX graphic card
•
analog video / RGB signal
Possible to connect with Serial_Output of previous
device or the control computer
(red):
Serial_Output
Possible to connect with Serial_Input of subsequent
device
Barco – Apollo – DOC-3197-2 – user's manual – Revision 08 – November 2006 __________________________________________________ 43/402
5. Control Room Configurator
5.3.2.7 Projection module S70
Custom Properties:
Data Connection Point
(blue):
Control Connection Point
(red):
Type of Module
S70 (should not be changed)
Address
Input a value between 1 … 255
VGA_Analog_Input
Serial_Input
Possible to connect with
•
VGA_Analog_Output of analog display adapter
•
DVI_Analog_Digital_Output of AGX graphic card
•
analog video / RGB signal
Possible to connect with Serial_Output of previous
device or the control computer
Serial_Output
Possible to connect with Serial_Input of subsequent
device
Type of Module
Phoenix (should not be changed)
Address
Input a value between 1 … 255
5.3.2.8 Phoenix DX Projector
Custom Properties:
Data Connection Point
(blue):
Control Connection Point
(red):
VGA_digital Input
Serial_Input
Serial_Output
Possible to connect with
•
VGA_Digital_Output of graphical card
•
DVI_Analog_Digital_Output of AGX graphic card
Possible to connect with Serial_Output of previous
device or the control computer
Possible to connect with Serial_Input of subsequent
device
44/402 __________________________________________________ Barco – Apollo – DOC-3197-2 – user's manual – Revision 08 – November 2006
5. Control Room Configurator
5.3.2.9 Hermes D2D (obsolete)
Data Connection Point
(blue):
Control Connection Point
(red):
VGA_Digital_Input
Possible to connect with VGA_Digital_Output of
digital display adapter
VGA_Digital_Input
Possible to connect with VGA_Digital_Output of
digital display adapter
VGA_Digital_Output
Possible to connect with VGA_Digital_Input of projection module
Serial_Input
Possible to connect with Serial_Output of previous
device or the control computer
Serial_Output
Possible to connect with Serial_Input of subsequent
device
5.3.2.10 Hermes V2A (obsolete)
Data Connection Point
(blue):
VGA_Digital_Input
VGA_Analog_Input
Control Connection Point
(red):
Possible to connect with VGA_Digital_Output of
digital display adapter
Possible to connect with analog video / RGB signal
VGA_Digital_Output
Possible to connect with VGA_Digital_Input of projection module
Serial_Input
Possible to connect with Serial_Output of previous
device or the control computer
Serial_Output
Possible to connect with Serial_Input of subsequent
device
Barco – Apollo – DOC-3197-2 – user's manual – Revision 08 – November 2006 __________________________________________________ 45/402
5. Control Room Configurator
5.3.2.11 Control Computer Eos (obsolete)
Custom Properties
Name
Reserved COM Ports
Number of Viewers
IP Address
Network Connection Point
(green):
LAN
Control Connection Point
Serial_Output Com1
(red):
Serial_Output Com2
Enter the name of the computer in the network. Do
not specify an IP address if the name has been defined.
Select from the list box the respective number of
reserved COM ports (WindowsNT: 4, Windows2000:
2). The COM ports of the serial I/O card then gets the
subsequent numbers (3 and 4, or 5 and 6 respectively)
Enter the number of viewers the Apollo project will
include. The required communication memory for
the Apollo Master/Slave/Client will be calculated
accordingly.
Enter the IP address if the computer does not have
an assigned name. The name property then remains
undefined!
Possible to connect to LAN
Possible to connect with Serial_Input of a device or
of the Source Command
Enter the corresponding baud rate.
Possible to connect with Serial_Input of a device or
of the Source Command
Enter the corresponding baud rate.
Parallel_Output LPT1
Parallel_Output LPT2
PCI Slots
For PCI boards (I/O serial/parallel cards, analog/digital graphic adapter, AGX card, BigVideo card,
QuadVideo card, RGB input card, PCIExt card [connect
with a PCI Extender 7 slot or a PCI Extender 13 slot])
Software Container
Apollo Base
Desktop Server
SNMP Manager
SNMP Agent RC
Device Command
OCM
Argus Scan Server
TCP Command
46/402 __________________________________________________ Barco – Apollo – DOC-3197-2 – user's manual – Revision 08 – November 2006
5. Control Room Configurator
5.3.2.12 Control Computer Argus / TransForm A
Custom Properties
Name
Reserved COM Ports
IP Address
Number of Viewers
Network Connection Point
(green):
LAN
Control Connection Point
Serial_Output Com1
(red):
Serial_Output Com2
Enter the name of the computer in the network. Do
not specify an IP address if the name has been defined.
Select from the list box the respective number of
reserved COM ports (WindowsNT: 4, Windows2000:
2). The COM ports of the serial I/O card then gets the
subsequent numbers (3 and 4, or 5 and 6 respectively)
Enter the IP address if the computer does not have
an assigned name. The name property then remains
undefined!
Enter the number of viewers the Apollo project will
include. The required communication memory for
the Apollo Master/Slave/Client will be calculated
accordingly.
Possible to connect to LAN
Possible to connect with Serial_Input of a device or
of the Source Command.
Enter the corresponding baud rate.
Possible to connect with Serial_Input of a device or
of the Source Command.
Enter the corresponding baud rate.
Parallel_Output LPT1
Parallel_Output LPT2
PCI Slots
For PCI ExtCard only, to connect with a TransForm A
OmniBus, or with I/O serial/parallel ports
Software Container
Apollo Base
Desktop Server
SNMP Manager
SNMP Agent RC
Device Command
OCM
Argus Scan Server
TCP Command
Barco – Apollo – DOC-3197-2 – user's manual – Revision 08 – November 2006 __________________________________________________ 47/402
5. Control Room Configurator
5.3.2.13 Extender 7(PCI Extenderbox 7 slot, obsolete)
This device is discontinued. Use the PCI Extenderbox 13 instead!
Data Connection Point
(blue):
PCI_Bus
Possible to connect with PCI_Bus of PCI ExtCard in a
PCI slot of TRANSFORM A
5.3.2.14 Extender (PCI Extender Box 6+7)
Data Connection Point (blue):
PCI_Bus
Possible to connect with PCI_Bus of PCI ExtCard in a
PCI slot of TRANSFORM A
5.3.2.15 OmniBus A18 (TransForm A OmniBus A18)
Data Connection Point (blue):
PCI_Bus
Possible to connect with PCI_Bus of Host IF card in a
PCI slot of TransForm A processor.
For PCI boards (analog/digital graphic adapter, UGX
card, OmniScaler, Dual RGB Input Card, Quad Analog
Video Card)
PCI slots
5.3.2.16 OmniBus A12 (TransForm A OmniBus A12)
Data Connection Point (blue):
PCI slots
PCI_Bus
Possible to connect with PCI_Bus of Host IF card in a
PCI slot of TransForm A processor
For PCI boards (analog/digital graphic adapter, UGX
card, OmniScaler, Dual RGB Input Card, Quad Analog
48/402 __________________________________________________ Barco – Apollo – DOC-3197-2 – user's manual – Revision 08 – November 2006
5. Control Room Configurator
Video Card)
5.3.2.17 Visu
Only digital Visu is supported by Apollo!
The custom properties of this shape include the parameter setting of the timing. The values can be entered
manually or – recommended!- automatically by the system. The automatic values are derived from the position
of the resolution switch and the color depth specified on the graphics card.
Manually entered values in the visu properties will overwrite the default values which
are related to the resolution switch and color depth.
Barco – Apollo – DOC-3197-2 – user's manual – Revision 08 – November 2006 __________________________________________________ 49/402
5. Control Room Configurator
Custom Properties
Linux Firmware Folder
/opt/barcorc/etc/
Windows
Folder
C:\Program Files\ Barco RC Agent\
Firmware
Hardware Handshake
On (special cable required) or Off
HWHorzPhase
HWVertPhase
HWColorKeyRed
HWColorKeyGreen
HWColorKeyBlue
HWBackgroundRed
HWBackgroundGreen
HWBackgroundBlue
HWHorzResolution
HWVertResolution
HWInternalTotalPixels
PerLine
HWInternalTotalLines
PerFrame
HWOutputTotalPixelsP
erLine
HWLinePeriod
HWHorzSyncWidth
Connection point
Serial_input
From TransForm A or control PC (RS232 in)
Connection point
Parallel_input
Parallel output from TransForm A (Reset in)
Connection point
Parallel_output
To parallel_input of the following VISUPLUS (Reset
out)
Connection point
Serial_output
To serial_input of the following VISUPLUS (RS232
out)
Input cards
Video Input Unit
Up to 4 input cards per VISUPLUS
Output cards
Digital Output Unit
Up to 4 output cards per VISUPLUS
For 15, 16, and 32 bit color depth:
Color values for color key and background color: (RGB) 8, 0, 0
For 8 bit color depth:
Color values for color key and background color: (RGB) 0, 0, 0 or 128, 0, 0
50/402 __________________________________________________ Barco – Apollo – DOC-3197-2 – user's manual – Revision 08 – November 2006
5. Control Room Configurator
5.3.2.18 Device Group
Custom Properties
Group Name
Enter a freely selectable name.
Warning: Name may not contain any empty spaces!
5.3.2.19 OVT analog (Analog graphical card, obsolete)
Data Connection
Point (blue):
VGA_Analog_Output
PCI board for Eos or PCI Extender Box
Possible to connect with VGA_Analog_Input of
projection module
5.3.2.20 OVT digital (Digital graphical card, obsolete)
Custom Properties
Data Connection
Point (blue):
Resolution Switch
Select the appropriate position of the rotary switch
from the list box, see table below
Color Depth
Select
the
appropriate
(8 bit per pixel or 16 bit per pixel)
VGA_Digital_Output
PCI board for Eos or PCI Extender Box
color
depth
Possible to connect with VGA_Digital_Input of projection module
switch
projection module
resolution
0
OVERVIEW-ML
VGA 640×480
1
OVERVIEW-ML
OVERVIEW-MD
SVGA
SVGA
2
OVERVIEW-ML
XGA 1024×768
3
(reserved for future use)
4
OVERVIEW-MP
ATLASC4 67" with poly-silicon engine
XGA 1024×768
5
OVERVIEW-MP
OVERVIEW-ME
SVGA
SVGA
F
analog
software defined
800×600
800×600
800×600
800×600
Barco – Apollo – DOC-3197-2 – user's manual – Revision 08 – November 2006 __________________________________________________ 51/402
5. Control Room Configurator
5.3.2.21 AGX Graphic Card (Digital graphical card, obsolete)
Custom Properties
Data Connection
Point (blue):
Resolution Switch
Select the appropriate position of the resolution
switch from the list box, see table below
Color Depth
Select the appropriate color depth (8 bit per pixel or
16 bit per pixel)
DVI_Analog_Digital_
outpt
PCI board for TransForm A OmniBus, Eos base unit,
Eos Extender Box
Possible to connect with VGA_Digital_Input or
VGA_Analog_Input of projection module
switch
projection module
resolution
DDC active
0
OVERVIEW-ML
VGA
640×480
no
1
OVERVIEW-ML, OVERVIEW-MD
OVERVIEW-ME
SVGA
800×600
no
2
OVERVIEW-ML
XGA
1024×768
no
4
OVERVIEW-MP, ATLAS67C4 (LCD Type D,
E)
XGA
1024×768
no
5
OVERVIEW-MP; ATLAS67C4
OVERVIEW-ME
SVGA
800×600
no
6
digital output, 60 Hz VESA timing
SXGA
1280×1024
no
7
OVERVIEW-MP, ATLAS67C4 (LCD Type F)
XGA
1024×768
no
8
OverView D series, SXGA
SXGA
1280×1024
no
9
Reserved for future use
F
digital output with DDC
connected display device provides
DDC information
VGA
SVGA
XGA
SXGA
UXGA
640×480
800×600
1024×768
1280×1024
1600×1200
yes
analog output (CRT)
software defined
no
52/402 __________________________________________________ Barco – Apollo – DOC-3197-2 – user's manual – Revision 08 – November 2006
5. Control Room Configurator
5.3.2.22 UGX Graphic Card (4channel graphical card)
Custom Properties
Data
Connection
Point (blue):
Resolution Switch
Select the appropriate position of the resolution
switch from the list box, see table below
Color Depth
Select the appropriate color depth (8 bit per pixel or
16 bit per pixel)
DVI_Analog_Digital_
outpt
PCI board for TransForm A
Possible to connect with VGA_Digital_Input or
VGA_Analog_Input of projection module
switch
projection module
resolution
DDC active
0
OVERVIEW-ML
VGA
640×480
no
1
OVERVIEW-ML, OVERVIEW-MD
OVERVIEW-ME
SVGA
800×600
no
2
OVERVIEW-ML
XGA
1024×768
no
4
OVERVIEW-MP, ATLAS67C4 (LCD Type D,
E)
XGA
1024×768
no
5
OVERVIEW-MP; ATLAS67C4
OVERVIEW-ME
SVGA
800×600
no
6
digital output, 60 Hz VESA timing
SXGA
1280×1024
no
7
OVERVIEW-MP, ATLAS67C4 (LCD Type F)
XGA
1024×768
no
8
OverView D series, SXGA
SXGA
1280×1024
no
9
Reserved for future use
F
digital output with DDC
connected display device provides
DDC information
VGA
SVGA
XGA
SXGA
UXGA
analog output (CRT)
software defined
640×480
800×600
1024×768
1280×1024
1600×1200
yes
no
5.3.2.23 OmniScaler (TransForm A OmniScaler)
Data Connection
Point (blue):
DVI_Analog_Digital_
outpt
PCI board for TransForm A
Possible to connect with VGA_Digital_Input of projection module;
Only in conjunction with UGX Graphic Card in TransForm A Processor or TransForm A OmniBus A18 /
TransForm A OmniBus A12
Barco – Apollo – DOC-3197-2 – user's manual – Revision 08 – November 2006 __________________________________________________ 53/402
5. Control Room Configurator
5.3.2.24 BigVideo ( obsolete)
Data Connection
Point
PCI board for Eos or PCI Extender Box or Argus Backplane
(blue):
Possible to connect with three analog video sources
5.3.2.25 QuadVideo (obsolete)
Data Connection
Point (blue):
PCI board for Eos or PCI Extender Box
Possible to connect with four analog video sources
5.3.2.26 RGB-Input Card (obsolete)
Data Connection
Point (blue):
PCI board for Eos or PCI Extender Box or Argus Backplane
Possible to connect with a RGB source to display on
projection module and control monitor
5.3.2.27 Quad Analog (Quad Analog Video Card)
Data Connection
Point (blue):
PCI board for TransForm A.
Possible to connect with 4 video sources.
This input card requires the OmniScaler!
5.3.2.28 Dual RGB Input (Dual RGB Input Card)
Data Connection
Point (blue):
PCI board for TransForm A.
Possible to connect with up to 2 RGB sources.
This input card requires the OmniScaler!
54/402 __________________________________________________ Barco – Apollo – DOC-3197-2 – user's manual – Revision 08 – November 2006
5. Control Room Configurator
5.3.2.29 Streaming Video Card
PCI board for TransForm A.
Data Connection
Point (blue):
Possible to connect up to 4 digital video stream
sources
This input card requires the OmniScaler!
Quad SDI Video
5.3.2.30 Quad SDI video card
PCI board for TransForm A.
Data Connection
Point (blue):
Possible to connect to 4 SDI videos
This input card requires the OmniScaler!
5.3.2.31 Video Input Unit (Visu)
Data Connection Point (blue):
Video Input/
Video Output (left)
SVHS Input/
SVHS Output (right)
Video Input Card for VisuPlus, Video input on BNC
connectors, S-Video input on 4-pin mini-Din connectors, loop through
5.3.2.32 RGB Input Unit (Visu)
IPU RGB
RGB Input Unit for VisuPlus, .
Data Connection Point (blue):
5.3.2.33 Digital Output Unit (Visu)
Data Connection Point (blue):
VGA_Digital_Input/
VGA_Digital_Output
Digital input from the Eos, digital output to the projection module
(PanelLink or DVI)
5.3.2.34 PCI Ext Card
Data Connection
Point (blue):
PCI_Bus
PCI board for TransForm A
Possible to connect with PCI_Bus of TransForm A
Extender Box or TransForm A OmniBus.
Barco – Apollo – DOC-3197-2 – user's manual – Revision 08 – November 2006 __________________________________________________ 55/402
5. Control Room Configurator
5.3.2.35 Host IF Card (Host interface card)
PCI_Bus
Data Connection
Point (blue):
PCI board for Transform A
Possible to connect with TransForm A OmniBus A18
and TransForm A OmniBus A12
5.3.2.36 IO card (serial I/O card)
Serial Interface
(rot):
Serial_Output COM3
PCI Card for Eos
Serial_Output COM4
Includes two additional serial interfaces, e.g. for
connecting a Visu
Baudrate can be set
to
1200/2400/9600/1
9200/38400
Number of COM ports depends on the reserved COM
ports on Eos or Argus
5.3.2.37 I/O card Parallel Port
Parallel_Output
Parallel Interface
(rot):
PCI Card for TransForm A
Includes an additional parallel interface.
5.3.2.38 Data field
This field can not be edited, but displays the information of the file and the file properties entered in the file
properties dialog.
Refer to the following table to learn about the relationship
Data field
File | Properties
Copyright
Company
Project
Category
Document Context
Topic
Title
Title
Starting with Control Room Configurator 1.4.4, the version of the Control Room
Configurator is indicated in the version field.
Please note: the version is only updated when the drawing is saved, exported or printed!
56/402 __________________________________________________ Barco – Apollo – DOC-3197-2 – user's manual – Revision 08 – November 2006
5. Control Room Configurator
5.3.2.39 Stencils Software.vss
5.3.2.40 Apollo Base
Custom Properties
Function
Set this property to master, slave, or client
Clock Server
Set this property to true if this controller is to be the
clock server for the Apollo system.
It is mandatory that in every Apollo project there is one master defined!
5.3.2.41 SNMP Manager
Custom Properties
Trap Port
Enter the number of the TC Port to receive traps of the
SNMP agents
Read Community
Enter public
Write Community
Enter Barco
Type of Agent
RC
Port
Enter the TCP/IP Port used to receive commands from
the SNMP manager
Path
Enter the entire path of the Apollo Database if the database is not local but on any other workstation of the
Apollo network
5.3.2.42 SNMP Agent RC
Custom Properties
5.3.2.43 Desktop Server
Custom Properties
5.3.2.44 Device Command
Custom Properties
none
5.3.2.45 Argus Scan
Custom Properties
Path
Argus Scan only used with the Apollo API
Port
4585
5.3.2.46 Tcp Command
Custom Properties
Barco – Apollo – DOC-3197-2 – user's manual – Revision 08 – November 2006 __________________________________________________ 57/402
5. Control Room Configurator
5.3.2.47 OCM
Custom Properties
Owner
Barco
Location
Kuurne
Password
barco
SNMP Port
6063
SNMP Port
4702
Read Comm
public
Write Comm
barco
58/402 __________________________________________________ Barco – Apollo – DOC-3197-2 – user's manual – Revision 08 – November 2006
5. Control Room Configurator
rd
5.3.2.48 Stencils Barco 3 Party Devices.vss
5.3.2.49 Matrix Switcher
Custom Properties
Name
Enter a freely selectable name of the matrix switcher
Input Switch
Number of Inputs
Output Switch
Number of Outputs
After entering the required inputs/outputs, the shape is adapted accordingly.
5.3.2.50 Command Source
This shape replaces the shape SerialCommandInterface of previous versions of the
Control Room Configurator.
Connection point
(red)
Serial input
To connect with COM1 or COM2 of the TransForm A.
This shape defines the entries of the SerialCommandInterfaceBasic.ini – file: baudrate
and port!
If the project includes the Command Source, but there is no file
SerialCommandInterface.ini in the project folder yet, then a sample file will be copied to
this folder when quitting the Apollo Settings dialog. This sample file then has to be
edited and adjusted according the specific requirements, cf. Customizing configuration files.
Barco – Apollo – DOC-3197-2 – user's manual – Revision 08 – November 2006 __________________________________________________ 59/402
5. Control Room Configurator
5.3.3 Generating configuration files
In order to generate the configuration files the entire Display Wall and its control system has to be created as a
Visio plan based on the Control Room Configuration template.
Correct configuration files can be created only if all utilized hardware and software components
are included in the configuration plan!
Make sure individual devices are properly connected!
Use the Device Group template to create a hierarchical device structure.
Use Device Group as well to assign a freely selectable name to the Display Wall (of the Apollo project).
The system automatically assigns the names of the devices and their logical addresses.
Click with the right mouse button on the Visio page and select Export from the context menu to create the configuration files.
5.3.4 Copying Configuration Files
When exporting, the sub directories containing the necessary configuration files are added to the folder where
the Visio plan is saved
Configuration files for the control computer of the Display Wall are located at
…\FileName_Name of Control Computer
Configuration files for the operator workstations are located at
…\FileName_Name of Operator Workstation
In case of a redundant Apollo System, the configuration files for the master are located at
…\FileName_Name of Master
The configuration files for the slave are located at
…\FileName_Name of Slave
Copy the respective files to the Apollo Project directory of the corresponding workstation.
Apollo features a security provider to assign specific permissions to different access user
groups. The security provider gets his information from the file AccessGroups.ini which
has to be located in a subfolder ServerData in the ApolloProject folder.
The subfolder ServerData and a sample AccessGroups.ini file is created by quitting the
Settings Dialog with OK. Then the AccessGroups.ini file can be edited and customized.
The modifications will be valid after an additional launching of the Apollo Settings. For
more information on the AccessGroups.ini file, please see Defining accessGroups
In case your system comes with an already configured Apollo project, when copying the
viso configuration folders, DO NOT copy the file apollo.lic: the license file located in the
folders created by Viso is a demo license file which then would overwrite your project
license file.
•
Copy remotecontrol.ini to the serverdata subfolder
•
Copy barcorc.ini to the rcagent installation folder
•
Copy OCM configuration xml files to the OCM installation folder
60/402 __________________________________________________ Barco – Apollo – DOC-3197-2 – user's manual – Revision 08 – November 2006
5. Control Room Configurator
5.3.5 Updating a configuration
Any expansion to an Apollo project (hardware or software component) has to be implemented with the original
Visio plan. Import the drawing of an existing Apollo Project in the most lately template of the Control Room
Configurator. Current configuration files are then recreated using the Export function , which are copied to the
respective project directory.
Configuration files may not be changed or modified manually!
Barco – Apollo – DOC-3197-2 – user's manual – Revision 08 – November 2006 __________________________________________________ 61/402
6. Viewer
6 Viewer
Barco – Apollo – DOC-3197-2 – user's manual – Revision 08 – November 2006 __________________________________________________ 63/402
6. Viewer
6.1 Concept
Viewers are applications running on the display wall with their windows showing different contents such as videos, video text, Internet pages, or applications on different screens or display walls.
A bitmap may cover the entire content of the viewer window (blanking) or information (text and/or logo) can
overlay the content at specific positions. Up to 4 so-called “In Display Captions” (IDC) can be defined for each
viewer.
While text can be entered freely and as desired, the available bitmaps for the blanking mode and the IDCs are
managed for all viewers in the ServerData\Globals.ini file. Text colors, background colors, and character size
are defined in this file as well.
Every viewer can be launched with individual parameters and in several instances. The mandatory Ident parameter is used to access and control the respective viewer. The viewer application cannot be launched at all
without a specified Ident parameter! The Ident parameter has to be unique!
Start parameters are either defined in the shortcut or passed via the command line when launching the command line interface.
The optional Source parameter defines the actual content of the respective viewer window and can be, e.g., a
Web address (Web Viewer), a video source (FRG Viewer), or the name of a client workstation (Cottus Viewer).
The viewer application is started with a gray window if the Source parameter has not been defined.
The parameters applicable to each viewer are listed with the respective viewer descriptions.
As mentioned above, the respective viewer is controlled with the Ident parameter. The properties of an already
launched viewer can be modified using the properties dialog box or the command line interface.
The following functions are supported from within all viewer applications:
•
Hide/show of viewer window title bar
•
Hide/show of viewer window status bar
•
Hide/show of actual viewer window content
•
Window content overlay with up to 4 informative contents (text and/or logo)
Additional parameters can be controlled depending on the type of viewer.
Settings selected for a viewer are saved in an *.ini file and are applied to the viewer when launched again. Since
these configuration settings are not only viewer-specific but also user-specific, these files are saved in the respective user folder (Windows NT: ….\WinNT\Profile\User Name or. Windows 2000:… \Documents and
Settings\User Name), using the subfolder … \Local Settings\Application Data\Apollo).
64/402 __________________________________________________ Barco – Apollo – DOC-3197-2 – user's manual – Revision 08 – November 2006
6. Viewer
6.2 Apollo 1.9 Viewers
Apollo 1.9 features the following viewers:
Name
Depicted Application
Object Type
FRG Viewer
Analog video / RGB sources connected to BigVideo,
QuadVideo, RGB input card, QuadAnalog Input card,
Dual RGB Input card, or digital video streams connected to Streaming Video Card, or SDI sources connected to Quad SDI Video Card.
Display source
Visu Viewer
Analog video / RGB sources connected to video input
units or RGB input units of the Visu
Display source
Cottus Viewer
Screen contents of linked client workstations
Display source
VNC Viewer
Screen contents of linked client workstations, compatible to VNC
Display source
ProViewer (new)
Screen contents of linked client workstations
Display source
Web Viewer
Internet Explorer 5.0
Web source
MPEG Viewer
Digital video
Web source
VTplus Viewer
Video text
TV source
There a three viewers to share the content of a linked client workstations over the LAN. All of them have unique
features. The following table gives an overview of the features for each of these viewers:
Cottus Viewer
Pro Viewer
VNC Viewer
Operating System
MS Windows
MS Windows
Multi OS
Bandwidth Usage
Low*
Medium
High
Response
Synchronous between server
and viewer
Asynchronous update
Asynchronous update
One to One
One to One
One to One
One to Many**
One to Many
One to Many
Full desktop
Full desktop
Full desktop
fast scaling
Connection
Dynamic region capture
Dynamic Region
Application Window
Max. Desktop size
8 x XGA 16 bpp
120 MB
Unlimited
Yes
Yes
6 x SXGA 16 bpp
4 x UXGA 16 bpp
Remote Control
Yes
Secure Connection
Yes
API Support
Full
Full
Full
Record & Playback
Yes**
-
-
*
For static applications this can be as low as 20kb/s, for dynamic MS PowerPoint presentations bandwidth
can peak to up to 2 Mb/s. Bandwidth usage for the Pro Viewer and VNC viewer will be several times
higher than for the Cottus viewer.
**
requires Proxy Gateway!
Barco – Apollo – DOC-3197-2 – user's manual – Revision 08 – November 2006 __________________________________________________ 65/402
6. Viewer
6.3 Limitations
The Control Room Bus does not support more than 255 applications on one computer.
The maximum number of viewers depends on the number of visible IDC’s and is about 90-130.
The ProServer is limited to 16 clients. The max. scraping size is 120 MB display memory, cf. 6.6.5 Steps required to
configure the ProViewer
Neither ProServer nor VNC Server transfer rubber boxes.
Apollo 1.9 Cottus Viewer is based on Funk Proxy Host 5.1. Recording and playing back sessions are based on the
functionality of the Funk Gateway Server 5.1. In case there are recorded sessions of a previous version of Apollo,
and you still want to make use of them, contact Barco: The recordings have to be converted to be compliant with
Funk Gateway Server 5.1.
6.4 Memory requirements (minimal RAM size)
As already mentioned in the system requirements, every viewer needs about 20-30 MB RAM. Together with the
need of the operating systems (200MB) and the base display wall system(100MB), the numbers of viewers define the required memory to be installed in the TransForm A processor.
For screen viewers the resolution of the grabbed desktop has to be taken into consideration as well.
The following table lists the memory requirements of the viewers:
Viewer
memory
FRG Viewer
7 MB
Web Viewer
20 MB
Cottus Viewer
10 MB + target screen resolution
Pro Viewer
10 MB + target screen resolution
VNC Viewer
10 MB + target screen resolution
The target screen resolution of the screen viewers (Cottus Viewer, Pro Viewer, VNC Viewer) result in the below
listed additional RAM (approx. values):
Screen resolution
memory
XGA
3 MB
SXGA
5 MB
SXGA+
6 MB
Double SXGA
10 MB
UXGA
8 MB
Please keep in mind that the operating system and the base wall display system
contribute with additional 300MB
66/402 __________________________________________________ Barco – Apollo – DOC-3197-2 – user's manual – Revision 08 – November 2006
6. Viewer
6.5 Communication memory
Since Apollo Rel. 1.8, the communication memory is automatically set via the viewers
specified in the Apollo Configurator, TransForm A shape, custom properties: number of
viewers.
As an empiric value, every viewer contributes with 210 kB to the basic requirement of 4096 kB of communication memory.
Depending on the actual Apollo configuration (Master only, Master and Slave) the required memory is calculated
and allocated to the Control Room Bus. This is done automatically when making exporting the visio configuration
file for the project, provided the correct number of viewers is entered in the shape of the TransForm A master /
TransForm A slave/Client workstation.
Let's define N as sum of all viewers of all computers in the project and M as number of viewers of the computer.
In a master only project, the following communication memory is required:
•
for the master computer: crbComSize=4096+N*210
•
for the client computer: crbComSize=4096+M*210
•
for the operator workstation: crbComSize=4096
In a master/slave project, the following communication memory is required:
•
for the Master and Slave computer: crbComSize=8192+N*420
•
for the client computers: crbComSize=4096+M*420
•
for the operator workstation: crbComSize=4096
(due to the master/slave configuration, the basic load and the contribution of a viewer is counted twice. Of
course the sum of viewers and the number of viewers is the same.)
The more viewers are running, the more communication memory of the Control Room Bus is needed. The size of
this memory is defined in the file startup.bat.
The file startup.bat as delivered with the Apollo installation sets the crbComSize to 10240. After the actual configuration of the project via the Apollo Configurator, the crbComSize is adjusted according the actual requirements.
Barco – Apollo – DOC-3197-2 – user's manual – Revision 08 – November 2006 __________________________________________________ 67/402
6. Viewer
68/402 __________________________________________________ Barco – Apollo – DOC-3197-2 – user's manual – Revision 08 – November 2006
6. Viewer
6.6 Requirements
Several configuration files have to be modified in addition to the required hardware requirements (e.g., Visu,
BigVideo Card, etc.).
The predefined sources for all viewers are specified in the ServerData\viewersources.ini file; see The
ServerData\viewersources.ini File. A name has to be defined for the video and RGB input cards using the switcher
definition file and the switcher language compiler. The sample file apollo.vsw is included and may be edited
and customized.
The user manual TransForm A Workstation for Windows NT / Windows 2000 lists detailed instructions for the
switcher language compiler.
The VisuBasicConfiguration.ini file has to be adapted for the connected Visu devices
If the screen content of a workstation is to be depicted on the Display Wall using the Cottus Viewer this workstation has to have the software Proxy Host of the company Funk Software Inc. installed as well as the host
license; see Steps required to configure the Cottus Viewer
The Internet browser Explorer 5.0 has to be installed on the control server of the Display Wall to view Web pages
using the Web Viewer.
Videotext pages require a video text input card for viewing. Cards of the type Hauppage WinTV PCI are supported.
6.6.1 Steps required to configure the FRG Viewer
The BigVideo Card, QuadVideo Card, and the RGB-Input Card digitalize analog video and RGB signals, which
are then displayed and controlled on the display wall using the FRG Viewer.
Names have to be assigned to the TransForm A input cards. This is done with the help of the switcher definition
file.
First, the video hardware configuration (input cards, cables, switcher, etc.) has to be specified in the switcher
definition file and written to the registry using the switcher language compiler.
A simple switcher definition file–- apollo.vsw–- is located in the directory Program Files|Barco
Apollo|Samples|SLC. Modify and rename this file for the specific configuration.
If the switcher language compiler is already installed, the required files are located at
C:\Programs\BARCO\SLC\ or, if the compiler is not installed in the default folder, in the folder indicated during
installation of the compiler. The user manual TransForm A Workstation for Windows NT / Windows 2000 lists
detailed instructions for the switcher language compiler installation.
The file slc.exe is the actual compiler reading the switcher definition file and writing the entries into the registry.
The other files in the folder contain fixed hardware information and may not be modified.
Line comments are marked with // at the beginning of a line; embedded comments start with /* and end with
*/.
Barco – Apollo – DOC-3197-2 – user's manual – Revision 08 – November 2006 __________________________________________________ 69/402
6. Viewer
The following hardware assignments apply:
vsw2974[x]
Video switcher (applies to models AutoPatch 1YDM, AutoPatch 1Y-16, AutoPatch 4YDM)
frg2739[x]
QUADVIDEO CARD
frg2684[x]
BIGVIDEO CARD
rgb2774[x]
RGB INPUT CARD, labeled RGB-2774-0
rgb2774v1[x]
RGB-INPUT CARD, labeled RGB-2774-1
frg3008[x]
Video channels of QUAD ANALOG VIDEO CARD, STREAMING VIDEO CARD, DUAL RGB INPUT CARD
mpg3012[x]
STREAMING VIDEO CARD (for configuration of the board (IP address etc.)
Numbering for every input card type starts with [0]. The cards are numbered consecutively according to their
order in the PCI slots.
After the switcher definition file has been adapted as needed, the file has to be compiled and data from the file
has to be entered into the registry.
Excerpt from a switcher definition file:
st
This example shows that the name "Quad1C1" is assigned to the first channel of the 1 QuadVideo Card. This
name is then displayed on the Source tab of the FRG Viewer property dialog box as the name of the source for
the FRG Viewer.
Additional properties are assigned to this name in the ServerData\viewersources.ini file.
70/402 __________________________________________________ Barco – Apollo – DOC-3197-2 – user's manual – Revision 08 – November 2006
6. Viewer
6.6.2 Steps required to configure the Visu Viewer
Visu is a device to display video and RGB sources and is addressed by the Barco RC Agent as such.
The tree view of the Apollo Explorer also lists this as a device and it has to be an entry in the RC Agent as well.
Follow these steps to adjust the Visu hardware for Apollo:
•
Copy the Visu firmware files (located on the Control Room Suite CD-ROM in the folder RCAgent\RCAgent
1.4.4) to the directory of the Barco RC Agent on the workstation (default path during the installation of the
Barco RC Agent is C:\Program Files\Barco RC Agent).
•
Configure the Visu in the Visio file of the ApolloProject and create the required configuration files using the
Export command. Configuration is done either by specifying the correct position of the resolution switch on
the graphic card (recommended) or manually by setting the respective Visu parameters of the Visu shape.
switch
projection module
resolution
DDC active
0
OVERVIEW-ML
VGA
640×480
no
1
OVERVIEW-ML, OVERVIEW-MD
OVERVIEW-ME
SVGA
800×600
no
2
OVERVIEW-ML
XGA
1024×768
no
4
OVERVIEW-MP, ATLAS67C4
XGA
1024×768
no
5
OVERVIEW-MP; ATLAS67C4
OVERVIEW-ME
SVGA
800×600
no
6
digital output, 60 Hz VESA timing
SXGA
1280×1024
no
F
digital output with DDC
connected display device provides
DDC information
VGA 640×480
SVGA
800×600
XGA 1024×768
SXGA
1280×1024
UXGA
1600×1200
yes
software defined
no
•
analog output (CRT)
Copy the files to the ApolloProject directory.
•
Launch the Apollo Explorer..
•
The Device branch has to list the Visu.
•
Click on the name in the main Explorer window (right mouse button). The Device Manager opens the dialog
box for setting the Visu parameters. Check the Status entry on the General tab. The device has to be ready
for operation.
•
If necessary, adjust the settings on the dialogs of the Device Manager. Write down the new values, since
the Visu Basic Configuration file has to be adjusted accordingly.
•
Open the Visio configuration file, select the Visu shape, and enter the new values of the parameters.
•
Export the configuration, and copy the files to the ApolloProject directory.
Do not modify any of the parameters in the VisuBasicConfiguration.ini!
Barco – Apollo – DOC-3197-2 – user's manual – Revision 08 – November 2006 __________________________________________________ 71/402
6. Viewer
6.6.3 Steps required to configure the Cottus Viewer
Using the Cottus Viewer, the content of a host workstation can be displayed in one viewer window (peer-to-peer
connection) or in multiple viewer windows (gateway based connection).
The peer-to-peer connection requires installing the Proxy Host 5.1 by Funk Software on every workstation with
a screen to be displayed on the Display Wall.
The gateway based connection also requires installing the Proxy Host 5.1 by Funk Software on every workstation with a screen to be displayed on the Display Wall. In addition, Proxy Gateway Server 5.1 of Funk Software
has to be installed on at least one workstation as well as the Proxy Gateway Administrator.
The gateway based connection also allows to record and play host sessions.
Sessions recorded with an earlier version than Apollo 1.9 have to be converted to be
played back with Apollo 1.9. Contact Barco to convert the sessions!
For every Apollo project, a dedicated license key has to be entered, both for the Proxy
Host and for the Gateway Server. The license key of the Gateway Server encodes and
respects the number of workstations.
The required installation file and the license key are located on the Apollo CD-ROM in the following directory:
Proxy Host 5.1 by Funk software.
Apollo (CRS-3045)\Screen Host 5.1
Proxy Gateway Server 5.1 by Funk software
Apollo (CRS-3045)\Gateway 5.1
Both Proxy Host and Proxy Gateway provide an online help which informs about the various options and selections. To make use of this context sensitive help, press the F1 key while having selected the respective control.
The manuals of these applications are also included in the above mentioned folders. It is recommended to carefully read them in order to learn about operation of the software. The functionalities and settings of Funk software are beyond the scope of the Apollo user's manual!
If you want to install Proxy Host and Proxy Gateway Server on one workstation, the Proxy
Gateway Server has to be installed first.
6.6.3.1 Installation of the Proxy Gateway Server and/or Proxy Gateway Administrator
The Funk Proxy Gateway has enhanced security features and uses network authentication.
The operating system security policy "Network access: Sharing and security model for local
accounts" must be set to "Classic" mode, not "Guest only" mode (WinXP). This policy can
be configured in Administrative Tools|Local Security Policy|Security Options.
If this is not set correctly, the installation aborts.
The installation procedure suggest the service to be personalized for the account
domain\RemoteControlServer.
Before starting the installation procedure, make sure that this "member" is added to the
domain (contact your local IT administrator), or define/select another one.
The Proxy Gateway Server acts as a central communication hub. It also stores and retrieves recordings of previous host sessions.
72/402 __________________________________________________ Barco – Apollo – DOC-3197-2 – user's manual – Revision 08 – November 2006
6. Viewer
When installing the Proxy Gateway Server, make sure that the respective workstation
provides enough disk space to store host sessions: a typical desktop takes between one
and 2 Megabytes per minute.
Therefore it might be recommended to install the Proxy Gateway Server on multiple
workstations.
However, in principle it is sufficient to install it once on any workstation of the Apollo
network or on TransForm A.
Sessions recorded with Apollo 1.8SR1 or earlier need to be converted. Contact Barco for
help!
The Proxy Gateway software runs as a service. The system resources required depend on the number of active
Cottus Viewer / host connections that the gateway must support simultaneously, as well as on the bandwidth
required by each connection.
The Proxy Gateway may be installed on the same PC as the Proxy Host.
Before starting installation, make sure that the operating system security policy "Network
access" is set to classic mode, and that there is a member domain\RemoteControlGateway
or similar.
To install the Proxy Gateway Server, proceed as follows:
•
On the respective computer, log in with administrative privileges.
•
Navigate to the respective folder on the Apollo CD-ROM and double click on setup.exe.
The installation process starts.
Follow the instructions on the screen.
On the next dialog, select the components to be installed, Proxy Gateway Server and/or Proxy Gateway Administrator.
Barco – Apollo – DOC-3197-2 – user's manual – Revision 08 – November 2006 __________________________________________________ 73/402
6. Viewer
When asked for the license key, enter the key provided for your project
Every Gateway Server requires its own license key!
74/402 __________________________________________________ Barco – Apollo – DOC-3197-2 – user's manual – Revision 08 – November 2006
6. Viewer
As mentioned above the Gateway Server runs on a domain user account. The following dialog requires to specify
user and password:
This domain user account is used by Proxy to identify the Gateway server when it connects to computers running
Proxy Host. You can use the same domain user account for all Gateway servers you install on your network.
When you name the domain user account RemoteControlGateway , you can facilitate the configuration of computers running Proxy Host for Gateway Server-managed connections. If you set up Proxy Gateway Server with
another user account, you must configure full access rights for this account for every copy of Proxy Host you intend to use with your Gateway server.
Then the program is going to be installed.
Barco – Apollo – DOC-3197-2 – user's manual – Revision 08 – November 2006 __________________________________________________ 75/402
6. Viewer
6.6.3.2 How to configure the Proxy Gateway
Configuration of the Proxy Gateway is done via the Proxy Gateway Administrator program.
Select Start|All Programs|Funk Software|Proxy|Proxy Gateway Administrator.
You can use this tool to configure all Proxy Servers in your network. Select View|Add Gateway to invoke the wizzard to search your network for Gateway Servers:
76/402 __________________________________________________ Barco – Apollo – DOC-3197-2 – user's manual – Revision 08 – November 2006
6. Viewer
Click next on the wizzard dialog to start polling the network for gateway servers.
The gateway server selected will be added as node to the tree view of Remote Control Gateway Servers:
Barco – Apollo – DOC-3197-2 – user's manual – Revision 08 – November 2006 __________________________________________________ 77/402
6. Viewer
In the tree view, select the gateway you want to administer.
For further information about the configuration settings, please see the manual about the Proxy Gateway Server
supplied on the Apollo CD-ROM.
At this place just some basic statements:
A host workstation detected by the gateway polling for hosts usually will be added to the list of hosts located in
the folder Unmanaged Hosts. Drag it into the folder Managed Hosts to control it via the gateway.
The number of managed hosts a gateway server can deal with is encrypted in the license!
78/402 __________________________________________________ Barco – Apollo – DOC-3197-2 – user's manual – Revision 08 – November 2006
6. Viewer
Adjust the Gateway Security for Data services, settings and operation. Allow the desired permission to an existing user group and/or define a new user group.
In case sessions are to be recoeded and played, handling of the files is easier if they have a user friendly name
indicating the content/use of the session. User friendly names require to check the options Record to File and
Connect to File!
Check the entries on the dialog Gateway Server Settings|General Settings. In case on a workstation both, the
Proxy Gateway and the Proxy Host are installed, the IPX protocol can only be assigned to one of them. For
Apollo, however, it is the IP protocol which is used!
Only the IP Protocol is used!
The gateway is also specified in the viewersources.ini file! Please refer to Cottus Viewer source
specification
6.6.3.3 Installation of the Proxy Host
If you want to install Proxy Host and Proxy Gateway Server on one workstation, the Proxy
Gateway Server has to be installed first.
Proxy Host has to be installed on every workstation which desktop has to be displayed via the Cottus Viewer.
Barco – Apollo – DOC-3197-2 – user's manual – Revision 08 – November 2006 __________________________________________________ 79/402
6. Viewer
Follow these steps to install Proxy Host:
•
Log into the host workstation with administrative privileges.
•
On the Apollo CD-ROM, click on the Link Screen Host
or
•
Open the Windows Explorer and navigate to the following directory on the Apollo CD-ROM
Apollo (CRS-3045)\Screen Host 5.1
•
Double-click on setup.exe.
The setup process starts.
Follow the onscreen instructions.
The license key is specific for every project. In case no valid key exists yet, check the option "30 Day TrialInstall".
A valid license key can be entered afterwards without the need of re-installation.
80/402 __________________________________________________ Barco – Apollo – DOC-3197-2 – user's manual – Revision 08 – November 2006
6. Viewer
Continue the setup process.
The host computer has to be rebooted once the setup process is finished.
Select Start|Programs|Proxy Networks|Proxy|Proxy Host Control Panel to configure the
host workstation.
If the workstation wants to make use of the gateway functionality, the gateway has to be
registered! Registration is done in the Proxy Host Control Panel
(Start|Programs|Proxy|Proxy Host Control Panel, Gateways tab)
Barco – Apollo – DOC-3197-2 – user's manual – Revision 08 – November 2006 __________________________________________________ 81/402
6. Viewer
On the Security tab you can choose between a simple password configuration and the Windows authentication
configuration. If the later is selected, the respective permissions have to be allowed. In case password configuration is selected, the password has to be entered when launching the Proxy Host Control Panel.
82/402 __________________________________________________ Barco – Apollo – DOC-3197-2 – user's manual – Revision 08 – November 2006
6. Viewer
6.6.4 Steps required to configure the VNC Viewer
The VNC Viewer supports the VNC 3.3.7 protocol or the TightVnc 1.2.9 protocol.
On the host workstations, VNC 3.3.7 or TightVnc 1.2.9, respectively, has to be installed. Since VNC supports Windows, Linux, and Apple Macintosh, no VNC software is provided on the Apollo CD-ROM. Please install and configure the VNC server on the host workstation according your operating systems and needs.
It is mandatory that the color depth of the host workstation matches the color depth of
the client workstation. In case the color depth differs, those colors which are only
present in the color model with the higher color depth are displayed black!
Barco – Apollo – DOC-3197-2 – user's manual – Revision 08 – November 2006 __________________________________________________ 83/402
6. Viewer
6.6.5 Steps required to configure the ProViewer
The ProServer has to be installed on every host workstation with a screen to be displayed on the Display Wall.
Select ProServer when installing Apollo, cf. Setup.
The best color depth for the ProServer wrt performance is 32Bit. However depending on the desktop resolution,
it might be mandatory to set the color depth to 16Bit: there is a limitation of max. 120 Mbyte display memory!
In case the max. display memory is exceeded, the error in the ProServer log file reads:
"Failed to create memory bit map: error = 8
To resolve this problem, reduce the color depth of the desktop!
•
Log into the host workstation with administrative privileges.
•
Place the CD into the CD drive and run setup.exe. The Install Shield Wizard will guide you through the installation process. Select Custom, and then ProServer. Follow the displayed instructions.
After the installation of the ProServer, it has to be configured. If it is unconfigured, the following warning pops
up:
After accepting, the configuration dialog is displayed:
It is highly recommended to enter a password and NOT to remove the check mark in the
Disable empty password box.
84/402 __________________________________________________ Barco – Apollo – DOC-3197-2 – user's manual – Revision 08 – November 2006
6. Viewer
Enter the desired password. This password can freely be assigned. It is not the Windows password!!
If the default port is already used by other applications, enter a different one. Please refer also to the system
requirements to see all default ports used by Apollo, cf. Used ports
If a different port is used, on every computer running ProViewer/Remote Pointer the
environment variable has to be defined with this port!
Environment variable ApolloProServerPort = <port>.
Enter the configuration of the display. This information will be used to show a representative mini display in the
Scraping Layout frame on the ProViewer|Aspect tab to interactively define a region to be scraped.
Select the desired behavior when the last client has been disconnected. Default setting is Simply disconnect.
Define Keyboard and Mouse handling, and specify the arbitration time: To a host computer, only one client can
connect, then the host is locked for all other clients. In case the client does not give any inputs on the host during
the arbitration time, an other client is allowed to connect to the host.
It is recommended to remove the wallpaper (remove wallpaper).
In case update problem occur when scraping the desktop of certain applications (e.g. Java applications), check
the option Transfer full screen. This will enhance updating the screen, however the CPU load will be much
higher.
To change the configuration, right click on the ProServer Icon on the system tray and
select properties.
6.6.6 Steps required to configure the Web Viewer
The Web Viewer requires no additional configuration steps except for the predefinition of Internet addresses.
6.6.7 Steps required to configure the MPEG Viewer
The Mpeg Viewer requires no additional configuration steps except for the predefinition of source addresses. The
viewer makes use of Windows Media Player and supports Media Player 9 (included on the Windows TransForm A
System Kit (TASK). Media Player 9 comes already installed on a TransForm A hard disk. All video formats and
codecs of Media Player 9 are supported.
6.6.8 Steps required to configure the VTplus Viewer
A videotext card has to be installed in order to use the VTplus Viewer. Apollo supports video text cards such as
Type WinTV PCI by Hauppage.
This video text card is not a component offered by the Barco Control Rooms product
range.
Barco – Apollo – DOC-3197-2 – user's manual – Revision 08 – November 2006 __________________________________________________ 85/402
6. Viewer
6.7 Launching Viewer
Viewer require the Ident parameter which has to be defined when creating a shortcut. By means of this shortcut, viewers can be launched in different ways.
•
The shortcut is defined in the Layout Database. In the Apollo Explorer, click on the Start button in the taskbar
and then double click on the shortcut.
•
The shortcut is part of a layout: The viewer launches as soon as the corresponding layout is activated
•
The shortcut is directly on the Display Wall. Double click on it to launch the viewer.
•
The shortcut is executed by means of the DesktopCmd.exe (e.g. "C:\Program Files\Barco
Apollo\Program\DesktopCmd.exe– -name:Server -Shortcut:"HTML Viewer 1")
To reduce the time for launching the FRG viewer, it is recommended to invisible preload
these viewers and then switch them to visible on demand.
6.7.1 Creating shortcuts
When creating a shortcut for a viewer application, make sure that the Ident parameter is defined as well. The
other parameters are optional.
Enter the environment variable %ApolloData% into the Start in field as input.
The following example shows the properties dialog box of a Web Viewer shortcut:
The Ident parameter is mandatory (here: Web1) used to control the viewer. Additional parameters may be
added.
The parameters are listed in Viewer command Interface
86/402 __________________________________________________ Barco – Apollo – DOC-3197-2 – user's manual – Revision 08 – November 2006
6. Viewer
6.8 Controlling Viewers
Viewers are controlled via the command interface (Viewer command Interface) or their Properties dialog box.
Open the properties dialog box of the viewer
•
directly on the Display Wall using the shortcut key combination CTRL+ALT+Enter
or
•
using the viewer’s context menu (right mouse click on viewer name) in the Apollo Explorer, viewer category
•
or double click on the mini window of the viewer in the Apollo Explorer
The properties dialog box of all viewers has several tabs. These are described together with the corresponding
viewers.
Starting with Apollo 1.8, the time interval for reconnection to a source can be set via
command line. Default value is 30sec. This parameter cannot be set via the GUI!
6.8.1 FRG Viewer
Use the FRG Viewer to view analog videos and RGB sources as well as digital video streams connected via one
of the input cards of TransForm A controller.
The viewer window does not contain any menu or tool bars. Viewers are controlled via the command interface
(cf. Viewer command Interface) or the Properties dialog box.
Barco – Apollo – DOC-3197-2 – user's manual – Revision 08 – November 2006 __________________________________________________ 87/402
6. Viewer
Follow these steps to see the mouse cursor on the video:
•
Select Start|Settings|Control Panel|Mouse
•
Activate the Pointers tab
•
Deactivate the Enable Pointer Shadow option
88/402 __________________________________________________ Barco – Apollo – DOC-3197-2 – user's manual – Revision 08 – November 2006
6. Viewer
6.8.1.1 FRG Viewer properties dialog box
Open the properties dialog box of the viewer
•
directly on the Display Wall using the shortcut key combination CTRL+ALT+Enter
or
•
using the viewer’s context menu (right mouse click on viewer name) in the Apollo Explorer, viewer category.
Close the dialog box with the shortcut key Alt+F4 or by click on the Close button in the title bar.
With 10.000 configured DigitalStreamSources it takes several seconds to open/close the
remote control property page.
A simple mouse click on the Source tab selects a video source from a predefined list of sources.
The video sources listed in the selection list are defined in the
ServerData\viewersources.ini file.
Barco – Apollo – DOC-3197-2 – user's manual – Revision 08 – November 2006 __________________________________________________ 89/402
6. Viewer
If a name has been assigned to this source, SourceConnected displays this name. SourceCaption shows the
description entered in the ServerDate\viewersources.ini file.
An assigned title is depicted next to Title. Status refers to the status of the link with the source.
Select from scaling options: original resolution (native size), optimized (best fit, preserve aspect ratio) while
maintaining aspect ratio (distortion-free), or fit into window (aspect ratio and resolution are not preserved).
The Channel field shows the name of the input card selected on the Source tab. The Port associated with this
source is listed as well.
If it is a non-predefined input card, the Port has to be selected. The 4 pole mini-DIN connectors of the BigVideo
Card or QuadVideo Card allow connecting 2 composite signals or 1 S-Video signal. By means of the Port, the
kind of signal is specified (Composite1, Composite2, S-Video).
Port 0 always indicates the Off state.
The analog input cards have the following ports:
BigVideo Card
3x 4pole mini-DIN
Signals
Number
of Ports
Port Allocation
1
(out of
three)
9
1: Connector 1, Composite1
2: Connector 2, Composite1
3: Connector 3, Composite1
4: Connector 1, Composite2
5: Connector 2, Composite2
6: Connector 3, Composite2
7: Connector 1, S-Video
8: Connector 2, S-Video
9: Connector 3, S-Video
QuadVideo Card
4x 1
3
4x 4pole mini-DIN
1: Composite1
2: Composite2
3: S-Video
RGB-Input Card
1
1
1: RGB
2x 1
1
1: RGB
4x 1
1
1: Composite
1xVGA
Dual RGB-Input Card
2xVGA
Quad
Card
Analog
Video
2: S-Video
1xLFH-160
Streaming Video Card
4x 1
1
1: Streaming Video
4x 1
1
1: SDI
2xRJ45
SDI Card
4xBNC
In case of a StreamingVideoCard, select the desired source from the StremSourceList.
90/402 __________________________________________________ Barco – Apollo – DOC-3197-2 – user's manual – Revision 08 – November 2006
6. Viewer
Some control elements are no longer visible if the dialog box size is reduced. Enlarge the
dialog box until all control elements are again visible (drag with mouse).
The depiction of the window content in blanking mode can be selected from the
Decoration tab.
All commands except the selection of a new video or RGB source (from list box) are sent immediately to the
associated viewer and applied.
General rule:
All entries into editable text fields (e.g., manual entries such as URLs) as well as the
automatic name import (when selecting from list box) have to be confirmed with the
Apply or cancelled with the Discard button.
The display parameters can be checked and set. These parameters can also be set on the Advanced tab.
Barco – Apollo – DOC-3197-2 – user's manual – Revision 08 – November 2006 __________________________________________________ 91/402
6. Viewer
6.8.1.2 Decoration
The Decoration tab is identical for all viewers. Here you can select whether to hide or show the title bar and/or
status bar as well as the type and content of the information to be overlaid over the actual content of the viewer
window.
If the entire window content is covered by an image, for example, the term used is Blanking.
If information is displayed covering only certain positions of the actual window, the term used is In Display
Caption (IDC). You can define and activate up to 4 IDCs.
Click on Blanking (or Idc1, Idc2, Idc3, Idc4) to define the information to be depicted in the blanking mode (information to be depicted as IDC1, IDC2, IDC3, IDC4).
The entry of IDC1 will be displayed as banner in the FRGpicture preview in Apollo Explorer,
Remote Desktop, no matter if IDC1 is enabled or not.
The information selected in blanking mode can also be displayed in case the signal is lost (check the option
Activate on SignalLoss).
92/402 __________________________________________________ Barco – Apollo – DOC-3197-2 – user's manual – Revision 08 – November 2006
6. Viewer
For sources of type Streaming Video the option Last Frame on SignalLos can be selected. In case both options
are checked (Activate on SignalLoss, Last Frame on SignalLos) the blanking image is overlaid the last frame
and – depending on the blanking image – probably nothing of the last frame can be seen…
Select the IdcEnable option to overlay the selected information over the actual viewer window content according to settings.
Information can consist of any text, system parameters such as date and time (cf. Placeholders for In Display Caption
Texts), and an image (logo). The available images are defined in the ServerData\Globals.ini file and identical for
all viewers. Colors and font sizes are defined in this file as well.
You can select text color, text background color, size, and position for In Display Caption. Click on the Opaque
option and the text is displayed on the selected color; otherwise, the background is transparent. In case the
Overlap checkbox is ticked, the IDC is displayed within the insertion. Remove the tick to have it displayed outside the insertion! Please note that Overlap has no effect in case the IDC is centered!
The logo is always positioned in the corners of the windows followed by the text unless Center is selected. Selecting the Center position always places the logo to the left of the text.
Changes in the text field are not effective unless the Apply button is clicked. All
remaining settings are applied without additional confirmation.
The available IDC positions are as follows:
•
Northwest (upper left)
•
Northeast (upper right)
•
Southwest (lower left)
•
Southeast (lower right)
•
Center (centered)
•
Center North (centered at the top)
•
Center South (centered at the bottom)
The Center North and Center South positions overlay a banner, i.e., the IDC covers the entire
width of the viewer window. If a logo is part of this IDC it is displayed in the upper or left or
bottom left corner.
An In Display Caption does not overlay the content of the viewer window until the IDC enable option has been
activated. This option always refers to the currently clicked IDC button.
If several IDCs are activated simultaneously, they are aligned across the content of the viewer window in the
order IDC1, IDC2, IDC3, IDC4. For example, if the position Northwest is selected for all IDCs, then IDC1 is depicted
at the upper left, IDC2 below that, etc.
Title bar (EnabelCaption)and status bar (EnableStatusbar) of the window can be hidden or shown. The title bar
shows the Ident parameter of the viewer. The status bar lists the name or URL of the linked source as well as
information about the downloading progress of the page.
In addition the border of the window can be enabled or disabled. If disabled, the caption is automatically disabled, too.
Without border, no caption can be displayed.
Barco – Apollo – DOC-3197-2 – user's manual – Revision 08 – November 2006 __________________________________________________ 93/402
6. Viewer
If the StatusBorder is enabled, the insertion is surrounded by a frame. The type of frame can be defined with
regard to Separator Width, Line Style, Line Width and Color. In case Line Style is not solid, the gap color can
also be defined.
This frame can be set static or blinking (Enable Blinking)
The frame is always surrounding the insertion. It is not surrounding the window!
All selections are immediately applied to the preview. To apply them also to the viewer window, click on Apply.
6.8.1.3 Basic
94/402 __________________________________________________ Barco – Apollo – DOC-3197-2 – user's manual – Revision 08 – November 2006
6. Viewer
Use the Basic tab to load and save the profile file of the source and the timing of the signal
The name of the source profile and of the timing may not contain any empty spaces.
Only the characters up to the empty space are applied to the name and saved.
The following source parameters may be used as well:
Description
Remarks
Brightness
Setting applies to all kind of Video, RGB and HDTV input
cards
Contrast
Setting applies to all kind of Video and HDTV input cards
Saturation
Setting applies for the QuadAnalog Video card, the SDI
Video card and the Streaming Video card.
Hue
Noise Reduction
Noise reduction can be set in the range from zero to 16. The
higher the value, the more noise is reduced, but also details
get lost. Default value is 12.
Setting of red
Setting of green
Setting of blue
Select Freeze to stop the current film scene (freeze-frame).
With Video, there are 5 different de-interlacer modes. The best one to be selected depends on the type of the
displayed video.
Mode 1: deinterlacer off; mode 2: interlace mode 1; mode 3: motion (default value), mode 4: even frame;
mode 5: odd frame.
(Other values than the default mode might be recommended in case the video has been produced from a cinema film)
With RGB sources, in addition to the static reduction (1/3 for dual channel mode) a dynamic frame rate reduction
can be set. The higher the frame rate reduction, the less consumption of bandwidth. The dynamic frame rate
reduction of 100% in total reduces the frame rate by a factor of 384 (dual channel mode), e.g. a signal with 75Hz
is displayed with 1 frames per 5 seconds.
Select Freeze to stop the current film scene (freeze-frame).
Barco – Apollo – DOC-3197-2 – user's manual – Revision 08 – November 2006 __________________________________________________ 95/402
6. Viewer
6.8.1.4 Advanced
Use the Advanced tab to define a section as well as set additional video parameters.
Select the section using its position (left, top, right, bottom; all values in percent) or draw the section with the
mouse. Values indicated in percent are applied immediately when the section is drawn with the mouse. If the
values in percent are changed, the Apply button has to be clicked before the thus selected section is update– as with all editable text fields.
The Force Lasso to Ratio list box offers an additional option of selecting an image section. This box lists the most
frequently used video and film aspect ratios:
96/402 __________________________________________________ Barco – Apollo – DOC-3197-2 – user's manual – Revision 08 – November 2006
6. Viewer
List Box Entry
Aspect Ratio
No restriction
TV 4/3
4:3
CinemaScope1
41:27
CinemaScope2 16/9
16:9
CinemaScope3
41:18
CinemaScope4
41:17
Click Reset All to undo the section selection and to return to displaying the entire image.
As for the entire video, the display options native size, best fit preserve aspect ratio, fit to window are available for the section as well. Select the desired scale mode from the list box.
Depending on the settings and size of the window, the then required scaling factors
could no longer be realized by the used input cards. The video is then depicted with a
black border.
The Video Format can be chosen using the list box with the same name.
Select AutoDetect to apply the settings detected by the hardware. With AutoPosdetect enabled, the visible
portion of the signal is automatically detected and positioned in the FRG Viewer window.
Frame rates can be switched between 25fps/30fps and 50fps/60fps. Default setting is 25fps/30fps.
The scaler settings allow to set transparency, sharpness and pre-scaling factor as well as to select the Pixel
format.
Transparency refers to graphic objects on the video, e.g. the clock. Default value is 0.
Sharpness adjusts the sharpness factor, default value is 0.
Pre-scaling defines how many pixels of a 16-pixel-package in x and y direction are omitted due to downscaling
in the input card, e.g. 8 means: 8 of 16 pixels in x and y direction remain (= ¼ of the entire amount of video
pixels remain).
The default setting for the pixel format for video is YUV 4:2:2. This format gives the impression of 24 bit true
color video image at the bandwidth of 16 bit. For RGB, the default setting is 5:6:5. In case the content is very
critical with respect to color, 8:8:8 can be selected. However, this format requires 1.5 times more bandwidth.
Barco – Apollo – DOC-3197-2 – user's manual – Revision 08 – November 2006 __________________________________________________ 97/402
6. Viewer
6.8.1.5 RGB Presets
It is not possible to define a preset with a number of vertical lines different from the
actual number of vertical lines of the currently connected signal!
The Preset Edit functionality of the RGB Preset tab is only intended to modify the
settings of a connected signal and NOT to edit at will any preset.
Selecting a preset with a different number of vertical lines than the connected signal,
and modification of these settings, results in an inconsistent preset and overwrites a
correct preset!
Whenever you edit a preset, rename it before pressing Apply! This ensures that you do
not overwrite a correct preset.
Select a predefined preset from the list box or define a new preset name. A preset comprises the settings for
all the parameters of the RGB sources which can be defined on this tab:
General Settings
Horz. Res.:
Vert. Res.:
Horz. Pos.:
Vert. Pos.:
PLL:
Phase:
Enter the horizontal resolution of the RGB source
Enter the vertical resolution of the RGB source
The horizontal position of the monitor signal in relation to the window is adjusted
The vertical position of the monitor signal in relation to the window is adjusted
The value represents the actual number of pixels per line
Adjustment of the phase
Advanced Settings
Manually
Sync Type
VCO G
VCO Range:
Charge Pump
SoG Level
HV Level
Enables the automatic setting of the following parameters:
Selects the type of sync of the signal, e.g. H/V Separate
VCO Gain (only applicable with RGB-2774-0)
VCO Range (only applicable with RGB-2774-1)
Charge Pump Current
Level of signals with Sync On Green
Level of signals with Hsync, Vsync
98/402 __________________________________________________ Barco – Apollo – DOC-3197-2 – user's manual – Revision 08 – November 2006
6. Viewer
6.8.1.6 FRG Viewer profile file
Source and RGB profiles are stored in the FRGviewer.ini file located in the project directory. These are global
profiles for a viewer type and apply to all computers of the network.
The name of the profile file may not contain any empty spaces. Only the characters up to
the empty space are applied to the profile name and saved.
The following settings are saved in the profile file:
SourceProfile:
Source Profile (Video Source)
Setting on Tab
VideoBrightness
Brightness
Basic
VideoContrast
Contrast
Basic
VideoHue
Color hue
Basic
VideoSharpness
Focus
Basic
VideoSaturation
Saturation
Basic
WndFreeze
Activates or deactivates freezeframe
Basic
WndScaleMode
Scaling mode
Source
WndViewportRatio
Aspect ratio
Advanced
WndViewport
Selected section
Advanced
AutoDetect
Automatic signal detection
Advanced
Channel
Channel
Advanced
Port
Port
Advanced
VideoNorm
Video standard
Advanced
ReferencedRgbProfileName
Associated RGB profile
RgbProfile:
RGB profile (RGB source)
RGBRed
Red setting
Basic
RGBBlue
Blue setting
Basic
RGBGreen
Green setting
Basic
RGBReduction
Setting of reduction rate
Basic
Loading a source profile also loads the referenced RGB profile.
Barco – Apollo – DOC-3197-2 – user's manual – Revision 08 – November 2006 __________________________________________________ 99/402
6. Viewer
6.8.1.7 Stream Parameter
Use this tab to select and/or configure a digital video stream.
There are two *.ini-files related to the streaming video: the DigitalStreamSource.ini and the
EncoderTypes.ini, cf. The ServerData\DigitalStreamSource.ini-file, The ServerData\EncoderType.ini-file
Stream Source List
This list box shows all the sources defined in the DigitalStreamSource.ini file
Broadcasting Type
Use this list box to select the desired type: Unicast (the signal is exclusively assigned to this port), Multicast (this port is a member of a group and takes part in
multicasting), Broadcast (this port takes part in multicasting)
IP Address
IP address, if multicast is selected
Network Port
The port of the streaming source
Stream Protocol
0: auto (standard), 1: elementary, 2: program, 3: transport
Network Protocol
Read only, gives information about the used protocol, 0: UDP (default), 1: TCP
Program ID
Read only, gives information about the Program ID (0: auto)
100/402 _________________________________________________ Barco – Apollo – DOC-3197-2 – user's manual – Revision 08 – November 2006
6. Viewer
Encoder Type
This list box lists some of the most common encoder types . This types are listed
and defined in the EncoderTypes.ini files.
Encoder Network-Address
IP address of the encoder, this information is read from the EncoderTypes.ini file
Encoder Network Port
Network port of the encoder, this information is read from the EncoderTypes.ini
file
6.8.1.8 Add
Click on the ADD button to add a new digital streaming source. A dialog is displayed where you can enter the
desired name of the source (the proposed name is the name of the currently selected source with the extension
Copy(x)):
A source can also be renamed (Rename) or deleted (Delete) from the stream source list.
Any modifications of the stream source list and parameter of the sources are saved in the
DigitalStreamSource.ini file..
6.8.1.9 Configure encoder
The parameters of the encoder are read from the EncoderTypes.ini-file. These parameters can be modified by
clicking the Edit button:
Barco – Apollo – DOC-3197-2 – user's manual – Revision 08 – November 2006 _________________________________________________ 101/402
6. Viewer
Furthermore, additional encoders can be specified clicking the New button:
Any modifications of the encoder parameters are saved in the EncoderTypes.ini file.
6.8.1.10 Board Settings
This tab shows the settings of the Streaming Video Card. These settings are taken from the Switcher Language
Compiler file, section board settings (mpg3012), cf. Steps required to configure the FRG Viewer.
102/402 _________________________________________________ Barco – Apollo – DOC-3197-2 – user's manual – Revision 08 – November 2006
6. Viewer
6.8.1.11 Interaction
In case you want to manipulate the RGB source displayed in the FRG viewer on the FRG viewer with keyboard
and mouse of the display wall, the ProServer has to be installed on the respective workstation which desktop is
displayed. The tab Interaction of the FRG viewer allows to connect to the ProServer or the VNC server and to
gain control over the respective desktop/source.
The commands to connect to the host workstation, to disconnect, to Release control ownership can be given
using special keys. These keys can be set selecting one of the entries in the list box. In addition the most common Windows key combinations can be defined (Alt+Tab: switch between open items, Alt+Esc: Cycle through
items in the order they were opened, Ctrl+Esc: display Start menu, Ctrl+Alt+DEL: launch Task Manager).
Control is not possible with the SCN (the SCN does not the support the VCN protocol as it is used in Apollo).
Barco – Apollo – DOC-3197-2 – user's manual – Revision 08 – November 2006 _________________________________________________ 103/402
6. Viewer
6.8.2 Visu Viewer
Use the Visu Viewer to view analog videos and RGB sources connected via a Visu Video Input Unit or Visu RGB
Input Unit.
The viewer window does not contain any menu or tool bars. Viewers are controlled via the command interface
(see Viewer command Interface) or the Properties dialog box.
6.8.2.1 Visu Viewer properties dialog box
Open the properties dialog box of the viewer
•
directly on the display wall using the shortcut key combination CTRL+ALT+Enter
or
•
using the viewer’s context menu (right mouse click on viewer name) in the Apollo Explorer, viewer category
•
double click on the mini window of the viewer in the Apollo Explorer
Close the dialog box with the shortcut key Alt+F4 or by click on the Close button in the title bar.
104/402 _________________________________________________ Barco – Apollo – DOC-3197-2 – user's manual – Revision 08 – November 2006
6. Viewer
A simple mouse click on the Source tab selects a video or RGB source from a predefined list of sources.
The video sources listed in the selection list are defined in the
ServerData\viewersources.ini file.
If a name has been assigned to this source, SourceConnected displays this name. SourceCaption shows the
description entered in the ServerDate\viewersources.ini file.
An assigned title is depicted next to Title. Status refers to the status of the link with the source.
Select from scaling options: original resolution (native size), optimized while maintaining aspect ratio (Best Fit),
or fit to window (aspect ratio and resolution are not preserved).
Some control elements are no longer visible if the dialog box size is reduced. Enlarge the
dialog box until all control elements are again visible (drag with mouse).
Select Blanking to hide the entire content of the viewer window.
The depiction of the window content in blanking mode can be selected from the
Decoration tab.
All commands except the selection of a new video or RGB source (from list box) are sent immediately to the
associated viewer and applied.
Barco – Apollo – DOC-3197-2 – user's manual – Revision 08 – November 2006 _________________________________________________ 105/402
6. Viewer
General rule:
All entries into editable text fields (e.g., manual entries such as URLs) as well as the
automatic name import (when selecting from list box) have to be confirmed with the
Apply or cancelled with the Discard button.
6.8.2.2 Decoration
The Decoration tab is identical for all viewers. Here you can select whether to hide or show the title bar and/or
status bar as well as the type and content of the information to be overlaid over the actual content of the viewer
window.
If the entire window content is covered by an image, for example, the term used is Blanking.
If information is displayed covering only certain positions of the actual window, the term used is In Display
Caption (IDC). You can define and activate up to 4 IDCs.
Click on Blanking (or Idc1, Idc2, Idc3, Idc4) to define the information to be depicted in the hide mode (information to be depicted as IDC1, IDC2, IDC3, IDC4).
Then select the IdcEnable option to overlay the selected information over the actual viewer window content
according to settings.
106/402 _________________________________________________ Barco – Apollo – DOC-3197-2 – user's manual – Revision 08 – November 2006
6. Viewer
Information can consist of any text, system parameters such as date and time (cf. Placeholders for In Display Caption
Texts), and an image (logo). The available images are defined in the ServerData\Globals.ini file and identical for
all viewers. Colors and font sizes are defined in this file as well.
You can select text color, text background color, size, and position for In Display Caption. Click on the Opaque
option and the text is displayed on the selected color; otherwise, the background is transparent. In case the
Overlap checkbox is ticked, the IDC is displayed within the insertion. Remove the tick to have it displayed outside the insertion! Please note that Overlap has no effect in case the IDC is centered!
The logo is always positioned in the corners of the windows followed by the text unless Center is selected. Selecting the Center position always places the logo to the left of the text.
Changes in the text field are not effective unless the Apply button is clicked. All
remaining settings are applied without additional confirmation.
The available IDC positions are as follows:
•
Northwest (upper left)
•
Northeast (upper right)
•
Southwest (lower left)
•
Southeast (lower right)
•
Center (centered)
•
Center North (centered at the top)
•
Center South (centered at the bottom)
The Center North and Center South positions overlay a banner, i.e., the IDC covers the entire
width of the viewer window. If a logo is part of this IDC it is displayed in the upper or left or
bottom left corner.
An In Display Caption does not overlay the content of the viewer window until the IDC enable option has been
activated. This option always refers to the currently clicked IDC button.
If several IDCs are activated simultaneously, they are aligned across the content of the viewer window in the
order IDC1, IDC2, IDC3, IDC4. For example, if the position Northwest is selected for all IDCs, then IDC1 is depicted
at the upper left, IDC2 below that, etc.
Title bar (EnableCaption) and status bar (EnableStatusbar) of the window can be hidden or shown. The title bar
shows the Ident parameter of the viewer. The status bar lists the name or URL of the linked source as well as
information about the downloading progress of the page.
In addition the border of the window can be enabled or disabled. If disabled, the caption is automatically disabled, too.
Without border, no caption can be displayed.
If the StatusBorder is enabled, the insertion is surrounded by a frame. The type of frame can be defined with
regard to Separator Width, Line Style, Line Width and Color. In case Line Style is not solid, the gap color can
also be defined.
This frame can be set static or blinking (Enable Blinking)
The frame is always surrounding the insertion. It is not surrounding the window!
All selections are immediately applied to the preview. To apply them also to the viewer window, click on Apply.
Barco – Apollo – DOC-3197-2 – user's manual – Revision 08 – November 2006 _________________________________________________ 107/402
6. Viewer
6.8.2.3 Basic (Video source)
Use the Basic tab to load and save the profile file of the source.
The name of the profile may not contain any empty spaces. Only the characters up to the
empty space are applied to the profile name and saved.
The following source parameters may be used as well:
Symbol
Description
Brightness settings
Contrast settings
Color saturation settings
Color hue settings (only for NTSC)
Select Freeze to stop the current film scene (freeze-frame).
108/402 _________________________________________________ Barco – Apollo – DOC-3197-2 – user's manual – Revision 08 – November 2006
6. Viewer
6.8.2.4 Basic (RGB source)
Use the Basic tab to load and save the profile file of the source and the timing of the signal
The name of the source profile and of the timing may not contain any empty spaces.
Only the characters up to the empty space are applied to the name and saved.
The following source parameters may be modified as well:
Symbol
Description
Horizontal resolution
Vertical resolution
Horizontal total pixels per line
Horizontal phase
Vertical phase
Sampling phase
Barco – Apollo – DOC-3197-2 – user's manual – Revision 08 – November 2006 _________________________________________________ 109/402
6. Viewer
6.8.2.5 Advanced
Use the Advanced tab to define a section as well as set additional video parameters.
Select the image section using its position (left, top, right, bottom; all values in percent) or draw the section with
the mouse. Values indicated in percent are applied immediately when the section is drawn with the mouse. If
the values in percent are changed, the Apply button has to be clicked before the thus selected section is updated
- as with all editable text fields.
The Aspect ratio selection box offers an additional option of selecting an image section. This box lists the most
frequently used video and film aspect ratios:
List Box Entry
Aspect Ratio
Any
Any
TV
4:3
CinemaScope1
41:27
CinemaScope2
16:9
CinemaScope3
41:18
CinemaScope4
41:17
Click Reset to undo the section selection and to return to displaying the entire image.
The display options In Native Size, Best fit, Preserve Aspect Ratio, Fit to Window are available to the entire
video image as well.
110/402 _________________________________________________ Barco – Apollo – DOC-3197-2 – user's manual – Revision 08 – November 2006
6. Viewer
The Video Format can be chosen using the list box with the same name. Use the Video Type field to specify
class S video or composite video (BNC).
Use the Bandwidth Settings box to select the refresh rate and pixel resolution.
The following table lists the entries in the Frame Rate list box:
List Box Entry
Description
Maximum
Max. display refresh rate
PAL:
50 frames/second
NTSC 60 frames/second
Reduced 1
50% of max. refresh rate,
PAL:
25 frames/second
NTSC 30 frames/second
Reduced 2
25% of max. refresh rate,
PAL:
12.5 frames/second
NTSC 15 frames/second
Reduced 3
12.5% of max. refresh rate,
PAL:
6.25 frames/second
NTSC 7.5 frames/second
The following table lists the entries in the Pixel Resolution list box:
List Box Entry
Description
Maximum
Maximum resolution
PAL:
NTSC
720x540
600x450
Reduced 1
50% of max. horizontal resolution
PAL:
360x270
NTSC 300x225
Reduced 2
33% of max. horizontal resolution
PAL:
240x180
NTSC 200x150
Reduced 3
25% of max. horizontal resolution
PAL:
180x135
NTSC 150x112.5
Reduced 4
20% of max. horizontal resolution
PAL:
144x108
NTSC 120x90
Barco – Apollo – DOC-3197-2 – user's manual – Revision 08 – November 2006 _________________________________________________ 111/402
6. Viewer
6.8.2.6 RGB Calibration
Adjust gain, offset and cut-off for each color individually. The values can be set either by means of the slider bar
or via the spin buttons. Values adjusted via the slider bar or the spin button are applied at once, in case the text
boxes are edited, the Apply button has to be clicked in order to activate the modified values.
112/402 _________________________________________________ Barco – Apollo – DOC-3197-2 – user's manual – Revision 08 – November 2006
6. Viewer
6.8.2.7 Visu Viewer profile file
Source and RGB profiles are stored in the visuviewer.ini file located in the project directory. These are global
profiles for a viewer type and apply to all computers of the network.
The name of the profile file may not contain any empty spaces. Only the characters up to
the empty space are applied to the profile name and saved.
The following settings are saved in the profile file:
SourceProfile:
Source Profile (Video Source)
Setting on Tab
VideoBrightness
Brightness
Basic
VideoContrast
Contrast
Basic
VideoHue
Color hue
Basic
VideoInputType
Video type
Basic
VideoFormat
Video format
Basic
VideoSaturation
Saturation
Basic
WndScaleMode
Scaling mode
Source
WndFreeze
Activates or deactivates freeze-frame
Basic
WndViewportRatio
Aspect ratio
Advanced
WndViewport
Selected section
Advanced
HwFrameRateDivider
Refresh rate
Advanced
WndForceHorzVertScaling
Pixel resolution
Advanced
ReferencedRgbProfileName
Associated RGB profile
RgbProfile:
RGB profile (RGB source)
RGBHorzRes
Horizontal resolution
Basic
RGBVertRes
Vertical resolution
Basic
RGBHorzPhase
Horizontal phase
Basic
RGBVertPhase
Vertical phase
Basic
RGBsamplingPhase
Sampling phase
Basic
RGBHorzTotalPixels
Sum of horizontal pixels
Basic
Loading a source profile also loads the referenced RGB profile.
Barco – Apollo – DOC-3197-2 – user's manual – Revision 08 – November 2006 _________________________________________________ 113/402
6. Viewer
6.8.3 Cottus Viewer
Use the Cottus Viewer to view the screen of any workstation within the network.
This requires that the Funk software as well as the Barco-Funk license is installed on the
workstation with the screen to be viewed. Proxy Host Funk licenses for a different
Master than Apollo are not valid!
See Chapter Steps required to configure the Cottus Viewer on how to install the Funk Proxy Host.
The viewer window does not contain any menu or tool bars. Viewers are controlled via the command interface
(see Viewer command Interface) or the Properties dialog box.
6.8.3.1 Cottus Viewer properties dialog box
Open the properties dialog box of the viewer
•
directly on the Display Wall using the shortcut key combination CTRL+ALT+Enter
or
•
using the viewer’s context menu (right mouse click on viewer name) in the Apollo Explorer, viewer category.
•
double click on the mini window of the viewer in the Apollo Explorer
Close the dialog box with the shortcut key Alt+F4 or by click on the Close button in the title bar.
114/402 _________________________________________________ Barco – Apollo – DOC-3197-2 – user's manual – Revision 08 – November 2006
6. Viewer
A simple mouse click on the Source tab selects a workstation from a predefined list of sources.
The
workstations
listed
in
ServerData\viewersources.ini file.
the
selection
list
are
defined
in
the
If a name has been assigned to this source, SourceConnected displays this name. SourceCaption shows the
description entered in the ServerDate\viewersources.ini file.
An assigned title is depicted next to Title. Status refers to the status of the link with the source.
Select Blanking to hide the entire content of the linked desktop.
The depiction of the window content in hide mode can be selected from the Decoration
tab.
All commands except the selection of a new workstation (from list box) are immediately sent to the associated
viewer and applied.
Barco – Apollo – DOC-3197-2 – user's manual – Revision 08 – November 2006 _________________________________________________ 115/402
6. Viewer
General rule:
All entries into editable text fields (e.g., manual entries such as URLs) as well as the
automatic name import (when selecting from list box) have to be confirmed with the
Apply or cancelled with the Discard button.
6.8.3.2 Decoration
The Decoration tab is identical for all viewers. Here you can select whether to hide or show the title bar and/or
status bar as well as the type and content of the information to be overlaid over the actual content of the viewer
window.
If the entire window content is covered by an image, for example, the term used is Blanking.
If information is displayed covering only certain positions of the actual window, the term used is In Display
Caption (IDC). You can define and activate up to 4 IDCs.
116/402 _________________________________________________ Barco – Apollo – DOC-3197-2 – user's manual – Revision 08 – November 2006
6. Viewer
Click on Blanking (or Idc1, Idc2, Idc3, Idc4) to define the information to be depicted in the hide mode (information to be depicted as IDC1, IDC2, IDC3, IDC4). The information selected in blanking mode can also be displayed in case the signal is lost (check the option Activate on SignalLoss)
Then select the IdcEnable option to overlay the selected information over the actual viewer window content
according to settings.
Information can consist of any text, system parameters such as date and time (cf. Placeholders for In Display Caption
Texts), and an image (logo). The available images are defined in the ServerData\Globals.ini file and identical for
all viewers. Colors and font sizes are defined in this file as well.
You can select text color, text background color, size, and position for In Display Caption. Click on the Opaque
option and the text is displayed on the selected color; otherwise, the background is transparent. In case the
Overlap checkbox is ticked, the IDC is displayed within the insertion. Remove the tick to have it displayed outside the insertion! Please note that Overlap has no effect in case the IDC is centered!
The logo is always positioned in the corners of the windows followed by the text unless Center is selected. Selecting the Center position always places the logo to the left of the text.
Changes in the text field are not effective unless the Apply button is clicked. All
remaining settings are applied without additional confirmation.
The available IDC positions are as follows:
•
Northwest (upper left)
•
Northeast (upper right)
•
Southwest (lower left)
•
Southeast (lower right)
•
Center (centered)
•
Center North (centered at the top)
•
Center South (centered at the bottom)
The Center North and Center South positions overlay a banner, i.e., the IDC covers the entire
width of the viewer window. If a logo is part of this IDC it is displayed in the upper or left or
bottom left corner.
An In Display Caption does not overlay the content of the viewer window until the IDC enable option has been
activated. This option always refers to the currently clicked IDC button.
If several IDCs are activated simultaneously, they are aligned across the content of the viewer window in the
order IDC1, IDC2, IDC3, IDC4. For example, if the position Northwest is selected for all IDCs, then IDC1 is depicted
at the upper left, IDC2 below that, etc.
Barco – Apollo – DOC-3197-2 – user's manual – Revision 08 – November 2006 _________________________________________________ 117/402
6. Viewer
Title bar (EnableCaption) and status bar (EnableStatusbar) of the window can be hidden or shown. The title bar
shows the Ident parameter of the viewer. The status bar lists the name or URL of the linked source as well as
information about the downloading progress of the page.
In addition the border of the window can be enabled or disabled. If disabled, the caption is automatically disabled, too.
Without border, no caption can be displayed.
If the StatusBorder is enabled, the insertion is surrounded by a frame. The type of frame can be defined with
regard to Separator Width, Line Style, Line Width and Color. In case Line Style is not solid, the gap color can
also be defined.
This frame can be set static or blinking (Enable Blinking)
The frame is always surrounding the insertion. It is not surrounding the window!
All selections are immediately applied to the preview. To apply them also to the viewer window, click on Apply.
118/402 _________________________________________________ Barco – Apollo – DOC-3197-2 – user's manual – Revision 08 – November 2006
6. Viewer
6.8.3.3 Basic
A server not listed on the selection list on the Source tab can be defined manually on the Basic tab. Enter the
name of the server within the network (Hostname) as well as the Password to display the content of the associated screen. If the Windows Authentication mode has been set during configuration of the Proxy Host, no
password has to be entered, but the credentials are used for authentication. Click on Apply button to establish
the connection with this server and to display its screen content in the viewer window. Disconnect removes the
link between the host and the desktop server. If the connection should be established via the gateway, enter
the name of the gateway server registered for this host workstation.
The Funk Proxy Host software and the associated license have to be installed on the host
server.
With the EnableRemoteHost option activated it is possible to execute mouse and keycard operations of the
operator workstation on the host server.
Deactivate the EnableScaleMode option to display the content of the screen in native size (original resolution) in
the viewer window.
To enter "CTRL+Alt+Del" on the host workstation, use "CTRL+ALT+Backspace"!
Barco – Apollo – DOC-3197-2 – user's manual – Revision 08 – November 2006 _________________________________________________ 119/402
6. Viewer
6.8.3.4 Scaling
To display a desktop, select one of the scaling modes. Depending on the selected mode, the displayed area can
be zoomed and/or scroll bars applied to the window to scroll to a different area than defined as displayed area.
Scale mode
Zooming
Scroll bars
Fit window to source
Yes
No
In native size
Yes
Yes
Best fit, preserve aspect ratio
No
No
Fit into window
No
no
The displayed area can either be defined in percentage of the entire desktop, or specified in pixels, or defined by
drawing in the preview area ("lasso"). No matter which way is chosen – the values of the other ways are immediately adjusted accordingly.
If a zooming factor is selected, the representative of the window beneath the scale is zoomed to show the effect
of zooming. Zooming can be specified between 0% and 2000% of the selected display area. Use the slider bar to
adjust the zooming factor, or use the spin buttons, or enter the desired numeric value.
Click on the Apply button to activate the modified settings.
120/402 _________________________________________________ Barco – Apollo – DOC-3197-2 – user's manual – Revision 08 – November 2006
6. Viewer
6.8.3.5 Record
Recording is only available if the host workstation is connected via a Cottus Gateway
server.
User this tab to record a host session for further playing back. Define the max. length of the session, which can of
course not longer be than the max. length of recording specified for the gateway (Gateway Administrator). The
length of a session is entered in minutes! The max. length is indicated next the entry field.
Define a name for the current session to be recorded.
A user friendly name can only be defined if the respective permissions have been allowed,
cf. How to configure the Proxy Gateway. Otherwise defining a name fails.
In the field below the already recorded sessions stored on the gateway are listed.
Click on the green button with the circle icon to start recording.
To stop recording, press the button with the square.
Barco – Apollo – DOC-3197-2 – user's manual – Revision 08 – November 2006 _________________________________________________ 121/402
6. Viewer
Recording will be stopped automatically after the defined period of the session length has been expired.
The session is stored on the gateway server. A typical desktop requires between 1 and 2
Mbytes per minute..
6.8.3.6 Play
A session which has been recorded can also be played back.
Select the gateway server where the session is stored.
Only gateway server which are listed in the viewersources.ini file can be selected. No
unknown gateway server can be entered..
Subsequently a list with all stored sessions of this server is displayed, indicating the host which has been recorded, the duration and the date.
Select the desired session and click on the play button (arrow).
The session can be paused or stopped using the corresponding buttons.
You can also run forward or to the end.
When a session is played back, the viewer automatically disconnects from a previously
connected host.
If desired, the connection has to be re-established after the play back.
122/402 _________________________________________________ Barco – Apollo – DOC-3197-2 – user's manual – Revision 08 – November 2006
6. Viewer
6.8.4 VNC Viewer
Use the VNC Viewer to view the screen of any workstation within the network.
Please mind that the color depth of the connected host has to match the client's color depth, cf. Steps required to
configure the VNC Viewer
The viewer window does not contain any menu or tool bars. Viewers are controlled via the command interface
(see Viewer command Interface) or the Properties dialog box.
6.8.4.1 VNC Viewer properties dialog box
Open the properties dialog box of the viewer
•
directly on the Display Wall using the shortcut key combination CTRL+ALT+Enter
or
•
using the viewer’s context menu (right mouse click on viewer name) in the Apollo Explorer, viewer category.
•
double click on the mini window of the viewer in the Apollo Explorer
Close the dialog box with the shortcut key Alt+F4 or by click on the Close button in the title bar.
Barco – Apollo – DOC-3197-2 – user's manual – Revision 08 – November 2006 _________________________________________________ 123/402
6. Viewer
A simple mouse click on the Source tab selects a workstation from a predefined list of sources.
The workstations listed in the selection list are defined in the
ServerData\viewersources.ini file.
If a name has been assigned to this source, SourceConnected displays this name. SourceCaption shows the
description entered in the ServerDate\viewersources.ini file.
An assigned title is depicted next to Title. Status refers to the status of the link with the source.
Select Blanking to hide the entire content of the linked desktop.
The depiction of the window content in hide mode can be selected from the Decoration
tab.
All commands except the selection of a new workstation (from list box) are immediately sent to the associated
viewer and applied.
General rule:
All entries into editable text fields (e.g., manual entries such as URLs) as well as the
automatic name import (when selecting from list box) have to be confirmed with the
Apply or cancelled with the Discard button.
124/402 _________________________________________________ Barco – Apollo – DOC-3197-2 – user's manual – Revision 08 – November 2006
6. Viewer
6.8.4.2 Decoration
The Decoration tab is identical for all viewers. Here you can select whether to hide or show the title bar and/or
status bar as well as the type and content of the information to be overlaid over the actual content of the viewer
window.
If the entire window content is covered by an image, for example, the term used is Blanking.
If information is displayed covering only certain positions of the actual window, the term used is In Display
Caption (IDC). You can define and activate up to 4 IDCs.
Click on Blanking (or Idc1, Idc2, Idc3, Idc4) to define the information to be depicted in the hide mode (information to be depicted as IDC1, IDC2, IDC3, IDC4). The information selected in blanking mode can also be displayed in case the signal is lost (check the option Activate on SignalLoss)
Then select the IdcEnable option to overlay the selected information over the actual viewer window content
according to settings.
Information can consist of any text, system parameters such as date and time (cf. Placeholders for In Display Caption
Texts), and an image (logo). The available images are defined in the ServerData\Globals.ini file and identical for
all viewers. Colors and font sizes are defined in this file as well.
You can select text color, text background color, size, and position for In Display Caption. Click on the Opaque
option and the text is displayed on the selected color; otherwise, the background is transparent. In case the
Overlap checkbox is ticked, the IDC is displayed within the insertion. Remove the tick to have it displayed outside the insertion! Please note that Overlap has no effect in case the IDC is centered!
Barco – Apollo – DOC-3197-2 – user's manual – Revision 08 – November 2006 _________________________________________________ 125/402
6. Viewer
The logo is always positioned in the corners of the windows followed by the text unless Center is selected. Selecting the Center position always places the logo to the left of the text.
Changes in the text field are not effective unless the Apply button is clicked. All
remaining settings are applied without additional confirmation.
The available IDC positions are as follows:
•
Northwest (upper left)
•
Northeast (upper right)
•
Southwest (lower left)
•
Southeast (lower right)
•
Center (centered)
•
Center North (centered at the top)
•
Center South (centered at the bottom)
The Center North and Center South positions overlay a banner, i.e., the IDC covers the entire
width of the viewer window. If a logo is part of this IDC it is displayed in the upper or left or
bottom left corner.
An In Display Caption does not overlay the content of the viewer window until the IDC enable option has been
activated. This option always refers to the currently clicked IDC button.
If several IDCs are activated simultaneously, they are aligned across the content of the viewer window in the
order IDC1, IDC2, IDC3, IDC4. For example, if the position Northwest is selected for all IDCs, then IDC1 is depicted
at the upper left, IDC2 below that, etc.
Title bar (EnableCaption) and status bar (EnableStatusbar) of the window can be hidden or shown. The title bar
shows the Ident parameter of the viewer. The status bar lists the name or URL of the linked source as well as
information about the downloading progress of the page.
In addition the border of the window can be enabled or disabled. If disabled, the caption is automatically disabled, too.
Without border, no caption can be displayed.
If the StatusBorder is enabled, the insertion is surrounded by a frame. The type of frame can be defined with
regard to Separator Width, Line Style, Line Width and Color. In case Line Style is not solid, the gap color can
also be defined.
This frame can be set static or blinking (Enable Blinking)
The frame is always surrounding the insertion. It is not surrounding the window!
All selections are immediately applied to the preview. To apply them also to the viewer window, click on Apply.
126/402 _________________________________________________ Barco – Apollo – DOC-3197-2 – user's manual – Revision 08 – November 2006
6. Viewer
6.8.4.3 Basic
A server not listed on the selection list on the Source tab can be defined manually on the Basic tab. Enter the
name of the server within the network (Hostname) as well as the (Password) to display the content of the
associated screen. Click on Apply button to establish the connection with this server and to display its screen
content in the viewer window. Disconnect removes the link between the host and the desktop server.
With the EnableRemoteHost option activated it is possible to execute mouse and keycard operations of the
operator workstation on the host server.
Enable Clipboard allows inserting the host's clipboard into the local application.
Barco – Apollo – DOC-3197-2 – user's manual – Revision 08 – November 2006 _________________________________________________ 127/402
6. Viewer
6.8.4.4 Aspect
Select In Native Size to display the content of the host workstation in the original resolution and aspect ratio or
click Fit into Window to display the content in the viewer window.
128/402 _________________________________________________ Barco – Apollo – DOC-3197-2 – user's manual – Revision 08 – November 2006
6. Viewer
6.8.4.5 Encoding
On this tab the encoding algorithm can be selected. This algorithm depends on the bandwidth and on the CPU
usage.
Barco – Apollo – DOC-3197-2 – user's manual – Revision 08 – November 2006 _________________________________________________ 129/402
6. Viewer
6.8.5 ProViewer
Use the ProViewer to view the screen of any workstation within the network.
Please mind that the ProServer has to be installed on the workstation which screen should be viewed, cf. Steps
required to configure the ProViewer
The viewer window does not contain any menu or tool bars. Viewers are controlled via the command interface
(see Viewer command Interface) or the Properties dialog box.
6.8.5.1 Pro Viewer properties dialog box
Open the properties dialog box of the viewer
•
directly on the Display Wall using the shortcut key combination CTRL+ALT+Enter
or
•
using the viewer’s context menu (right mouse click on viewer name) in the Apollo Explorer, viewer category.
•
double click on the mini window of the viewer in the Apollo Explorer
Close the dialog box with the shortcut key Alt+F4 or by click on the Close button in the title bar.
130/402 _________________________________________________ Barco – Apollo – DOC-3197-2 – user's manual – Revision 08 – November 2006
6. Viewer
A simple mouse click on the Source tab selects a workstation from a predefined list of sources.
The workstations listed in the selection list are defined in the
ServerData\viewersources.ini file.
If a name has been assigned to this source, SourceConnected displays this name. SourceCaption shows the
description entered in the ServerDate\viewersources.ini file.
An assigned title is depicted next to Title. Status refers to the status of the link with the source.
Select Blanking to hide the entire content of the linked desktop.
The depiction of the window content in hide mode can be selected from the Decoration
tab.
All commands except the selection of a new workstation (from list box) are immediately sent to the associated
viewer and applied.
General rule:
All entries into editable text fields (e.g., manual entries such as URLs) as well as the
automatic name import (when selecting from list box) have to be confirmed with the
Apply or cancelled with the Discard button.
Barco – Apollo – DOC-3197-2 – user's manual – Revision 08 – November 2006 _________________________________________________ 131/402
6. Viewer
6.8.5.2 Decoration
The Decoration tab is identical for all viewers. Here you can select whether to hide or show the title bar and/or
status bar as well as the type and content of the information to be overlaid over the actual content of the viewer
window.
If the entire window content is covered by an image, for example, the term used is Blanking.
If information is displayed covering only certain positions of the actual window, the term used is In Display
Caption (IDC). You can define and activate up to 4 IDCs.
Click on Blanking (or Idc1, Idc2, Idc3, Idc4) to define the information to be depicted in the hide mode (information to be depicted as IDC1, IDC2, IDC3, IDC4). The information selected in blanking mode can also be displayed in case the signal is lost (check the option Activate on SignalLoss)
Then select the IdcEnable option to overlay the selected information over the actual viewer window content
according to settings.
Information can consist of any text, system parameters such as date and time (cf. Placeholders for In Display Caption
Texts), and an image (logo). The available images are defined in the ServerData\Globals.ini file and identical for
all viewers. Colors and font sizes are defined in this file as well.
132/402 _________________________________________________ Barco – Apollo – DOC-3197-2 – user's manual – Revision 08 – November 2006
6. Viewer
You can select text color, text background color, size, and position for In Display Caption. Click on the Opaque
option and the text is displayed on the selected color; otherwise, the background is transparent. In case the
Overlap checkbox is ticked, the IDC is displayed within the insertion. Remove the tick to have it displayed outside the insertion! Please note that Overlap has no effect in case the IDC is centered!
The logo is always positioned in the corners of the windows followed by the text unless Center is selected. Selecting the Center position always places the logo to the left of the text.
Changes in the text field are not effective unless the Apply button is clicked. All
remaining settings are applied without additional confirmation.
The available IDC positions are as follows:
•
Northwest (upper left)
•
Northeast (upper right)
•
Southwest (lower left)
•
Southeast (lower right)
•
Center (centered)
•
Center North (centered at the top)
•
Center South (centered at the bottom)
The Center North and Center South positions overlay a banner, i.e., the IDC covers the entire
width of the viewer window. If a logo is part of this IDC it is displayed in the upper or left or
bottom left corner.
An In Display Caption does not overlay the content of the viewer window until the IDC enable option has been
activated. This option always refers to the currently clicked IDC button.
If several IDCs are activated simultaneously, they are aligned across the content of the viewer window in the
order IDC1, IDC2, IDC3, IDC4. For example, if the position Northwest is selected for all IDCs, then IDC1 is depicted
at the upper left, IDC2 below that, etc.
Title bar (EnableCaption) and status bar (EnableStatusbar) of the window can be hidden or shown. The title bar
shows the Ident parameter of the viewer. The status bar lists the name or URL of the linked source as well as
information about the downloading progress of the page.
In addition the border of the window can be enabled or disabled. If disabled, the caption is automatically disabled, too.
Without border, no caption can be displayed.
If the StatusBorder is enabled, the insertion is surrounded by a frame. The type of frame can be defined with
regard to Separator Width, Line Style, Line Width and Color. In case Line Style is not solid, the gap color can
also be defined.
This frame can be set static or blinking (Enable Blinking)
The frame is always surrounding the insertion. It is not surrounding the window!
All selections are immediately applied to the preview. To apply them also to the viewer window, click on Apply.
Barco – Apollo – DOC-3197-2 – user's manual – Revision 08 – November 2006 _________________________________________________ 133/402
6. Viewer
6.8.5.3 Basic
A server not listed on the selection list on the Source tab can be defined manually on the Basic tab. Enter the
name of the server within the network (Hostname) as well as the Password to display the content of the associated screen. Click on Apply button to establish the connection with this server and to display its screen content
in the viewer window. Disconnect removes the link between the host and the desktop server.
With the EnableRemoteHost option activated it is possible to execute mouse and keycard operations of the
operator workstation on the host server.
Enable Clipboard allows inserting the host's clipboard into the local application.
By looking at the Host Ownership you are informed if you can connect to the host or if this host is already connected to someone else.
A host can only be connected to one client!
In case there has been a reboot on the host workstation and Windows ask to enter CTRL+ALT+DEL to log in, these
keys cannot be send remotely. Therefore a button to send the CTRL+ALT+DEL command has been implemented.
After this command has been sent, all further actions can be done remotely.
134/402 _________________________________________________ Barco – Apollo – DOC-3197-2 – user's manual – Revision 08 – November 2006
6. Viewer
Check Manual Update Mode to be able to specify the time interval and to enable the Update button. This will
update the desktop content either immediately (click on Update) or within the specified intervals. If Manual
Update Mode is not checked, the update will be done automatically (depends on content, can be in intervals of
milliseconds, resulting in a big load on the bus).
6.8.5.4 Aspect
Select on of the scale modes: In Native Size to display the scraped content of the host workstation in the original resolution and aspect ratio or click Fit into Window to display the content in the viewer window.
Select the option Best Fit, Preserve Aspect Ratio to display the screen contents without distortions in the
viewer window.
To adjust the window according the source, select Fit Window To Source.
ProViewer offers three different scraping modes: FullScreen (the entire desktop is scraped), Window (only a
specific window is scraped, the windows of the currently launched applications are listed in the Window List
box), or Region.
These options have to be selected first and applied. Subsequently these options can be
specified in detail.
Barco – Apollo – DOC-3197-2 – user's manual – Revision 08 – November 2006 _________________________________________________ 135/402
6. Viewer
Select a Window from the list box. It's content will be scraped.
Only windows which window state is NOT minimized are listed in the list box.
Windows NT: ‘DOS’ / ‘command line’ windows are not listed in the window list.
In case a window which is selected to be scraped is overlayed on the host workstation by
another window, the scraped area has the dimensions of the orignal window but the
information of the topmost window.
By means of the Region option a part of the host desktop can be selected for being scraped: define this part in
the desktop representative in the Scraping Layout frame by drawing up a rectangle of the desired scraping area.
The size of this area is indicated in the Display Area, either In Pixel or In Percent.
Of course it also works the other way round: define a size (In Pixel or In Percent), and the scraping rectangle in
the display representative is adjusted accordingly.
Starting with Apollo 1.8 the preview shows the actual content of the desktop.
The display area can be enlarged using Pixel Zooming.
The settings are saved automatically.
Confirm all your selections by clicking on the Apply button! In case this button is not clicked,
the selections are not applied. When switching between the multiple tabs, and having not
clicked the Apply button, your are asked if your commands are to be applied or not.
136/402 _________________________________________________ Barco – Apollo – DOC-3197-2 – user's manual – Revision 08 – November 2006
6. Viewer
6.8.5.5 Encoding
On this tab the encoding algorithm can be selected. This algorithm depends on the bandwidth and on the CPU
usage.
The render mode can be set to ColorOnColor (default), WhiteOnBlack, BlackOnWhite and Halftone.
This option optimizes the display of a scaled source and depend on the current source. Just try which render
mode return the best result for the specific source.
Barco – Apollo – DOC-3197-2 – user's manual – Revision 08 – November 2006 _________________________________________________ 137/402
6. Viewer
6.8.5.6 Special keys
Since Apollo Rel. 1.9 the ProViewer supports customizable hot keys to show the user manual, to connect, to release control, to disconnect, to send ALT+ESC to the server, to send ALT+TAB to the server, to send CTRL+ESC to
the server, and to send CTRL+ALT+DEL to the server.
This hotkeys can be set and enabled/disabled on the property page Special keys.
Each hotkey definition can be freely chosen from the following predefined entries:
F1, F2, F3, F4, F5, F6, F7, F8, F9, F10, F11, F12;
CTRL+F1, CTRL+F2, CTRL+F3, CTRL+F4, CTRL+F5, CTRL+F6, CTRL+F7, CTRL+F8, CTRL+F9, CTRL+F10, CTRL+F11,
CTRL+F12
If the checkbox leading a hotkey definition is ticked, this hotkey is enabled. If it is unchecked, the hotkey is disabled. The Viewer will only process enabled hotkey combinations!
A hotkey combination can only be used once. Trying to apply duplicates for different
hotkeys will be rejected.
138/402 _________________________________________________ Barco – Apollo – DOC-3197-2 – user's manual – Revision 08 – November 2006
6. Viewer
Changing hotkey combinations have to be confirmed by pressing the Apply button.
Otherwise they are not valid.
Use the button "Reset to default" to apply the default settings for all hotkeys. This will result in the following
settings:
Description
Hotkey
Enabled
ShowUserManual
F1
Enabled
Connect
F9
Enabled
ReleaseControl
F11
Enabled
Disconnect
F12
Enabled
ALT+Tab
CTRL+F1
Enabled
ALT+ESC
CTRL+F2
Enabled
CTRL+ESC
CTRL+F3
Enabled
CTRL+ALT+DEL
CTRL+ALT+F4
enabled
Barco – Apollo – DOC-3197-2 – user's manual – Revision 08 – November 2006 _________________________________________________ 139/402
6. Viewer
6.8.6 Web Viewer
Use the Web Viewer to view Internet pages.
The viewer window does not contain any menu or tool bars. Viewers are controlled via the command line interface (cf.Viewer command Interface) or the Properties dialog box.
6.8.6.1 Web Viewer properties dialog box
Open the properties dialog box of the Web Viewer
•
directly on the display wall using the shortcut key combination CTRL+ALT+Enter
or
•
using the viewer’s context menu (right mouse click on viewer name) in the Apollo Explorer, viewer category.
•
double click on the mini window of the viewer in the Apollo Explorer
Close the dialog box with the shortcut key Alt+F4 or by click on the Close button in the title bar.
140/402 _________________________________________________ Barco – Apollo – DOC-3197-2 – user's manual – Revision 08 – November 2006
6. Viewer
A simple mouse click on the Source tab selects and opens a Web address from a predefined list of sources or you
can enter a URL directly.
The Internet pages listed in the selection list as well as the associated URLs and
addresses are defined in the ServerData\viewersources.ini file.
If a name has been assigned to this source, SourceConnected displays this name. SourceCaption shows the
description entered in the ServerDate\viewersources.ini file.
An assigned title is depicted next to Title. Status refers to the status of the link with the source.
Navigate with the Back, Forward, Stop buttons. Reload the page with Refresh. If the Internet pages support
different font sizes, use the selection list to choose the desired Text Size.
The Scroll Bars can be enabled (visible) or hidden.
Some control elements are no longer visible if the dialog box size is reduced. Enlarge the
dialog box until all control elements are again visible (drag with mouse).
Barco – Apollo – DOC-3197-2 – user's manual – Revision 08 – November 2006 _________________________________________________ 141/402
6. Viewer
Select Blanking to hide the entire content of the viewer window.
The depiction of the window content in blaniking mode can be selected from the
Decoration tab.
All commands except the selection of a new Internet address (from list box or manual input of URL) are immediately sent to the associated viewer and applied.
General rule:
All entries into editable text fields (e.g., manual entries such as URLs) as well as the
automatic name import (when selecting from list box) have to be confirmed with the
Apply or cancelled with the Discard button.
6.8.6.2 Decoration
The Decoration tab is identical for all viewers. Here you can select whether to hide or show the title bar and/or
status bar as well as the type and content of the information to be overlaid over the actual content of the viewer
window.
If the entire window content is covered by an image, for example, the term used is Blanking.
If information is displayed covering only certain positions of the actual window, the term used is In Display
Caption (IDC). You can define and activate up to 4 IDCs.
142/402 _________________________________________________ Barco – Apollo – DOC-3197-2 – user's manual – Revision 08 – November 2006
6. Viewer
Click on Blanking (or Idc1, Idc2, Idc3, Idc4) to define the information to be depicted in the hide mode (information to be depicted as IDC1, IDC2, IDC3, IDC4).
Then select the IdcEnable option to overlay the selected information over the actual viewer window content
according to settings.
Information can consist of any text, system parameters such as date and time (cf. Placeholders for In Display Caption
Texts), and an image (logo). The available images are defined in the ServerData\Globals.ini file and identical for
all viewers. Colors and font sizes are defined in this file as well.
You can select text color, text background color, size, and position for In Display Caption. Click on the Opaque
option and the text is displayed on the selected color; otherwise, the background is transparent. In case the
Overlap checkbox is ticked, the IDC is displayed within the insertion. Remove the tick to have it displayed outside the insertion! Please note that Overlap has no effect in case the IDC is centered!
The logo is always positioned in the corners of the windows followed by the text unless Center is selected. Selecting the Center position always places the logo to the left of the text.
Changes in the text field are not effective unless the Apply button is clicked. All
remaining settings are applied without additional confirmation.
Barco – Apollo – DOC-3197-2 – user's manual – Revision 08 – November 2006 _________________________________________________ 143/402
6. Viewer
The available IDC positions are as follows:
•
Northwest (upper left)
•
Northeast (upper right)
•
Southwest (lower left)
•
Southeast (lower right)
•
Center (centered)
•
Center North (centered at the top)
•
Center South (centered at the bottom)
The Center North and Center South positions overlay a banner, i.e., the IDC covers the entire
width of the viewer window. If a logo is part of this IDC it is displayed in the upper or left or
upper right corner.
An In Display Caption does not overlay the content of the viewer window until the IDC enable option has been
activated. This option always refers to the currently clicked IDC button.
If several IDCs are activated simultaneously, they are aligned across the content of the viewer window in the
order IDC1, IDC2, IDC3, IDC4. For example, if the position Northwest is selected for all IDCs, then IDC1 is depicted
at the upper left, IDC2 below that, etc.
Title bar (EnableCaption) and status bar (EnableStatusbar) of the window can be hidden or shown. The title bar
shows the Ident parameter of the viewer. The status bar lists the name or URL of the linked source as well as
information about the downloading progress of the page.
In addition the border of the window can be enabled or disabled. If disabled, the caption is automatically disabled, too.
Without border, no caption can be displayed.
If the StatusBorder is enabled, the insertion is surrounded by a frame. The type of frame can be defined with
regard to Separator Width, Line Style, Line Width and Color. In case Line Style is not solid, the gap color can
also be defined.
This frame can be set static or blinking (Enable Blinking)
The frame is always surrounding the insertion. It is not surrounding the window!
All selections are immediately applied to the preview. To apply them also to the viewer window, click on Apply.
144/402 _________________________________________________ Barco – Apollo – DOC-3197-2 – user's manual – Revision 08 – November 2006
6. Viewer
6.8.7 MPEG Viewer
Use the MPEG Viewer to view digital video.
The viewer window does not contain any menu or tool bars. Viewers are controlled via the command line interface (cf. Viewer command Interface) or the Properties dialog box.
6.8.7.1 MPEG Viewer properties dialog box
Open the properties dialog box of the viewer
•
directly on the display wall using the shortcut key combination CTRL+ALT+Enter
or
•
using the viewer’s context menu (right mouse click on viewer name) in the Apollo Explorer, viewer category.
•
double click on the mini window of the viewer in the Apollo Explorer
Close the dialog box with the shortcut key Alt+F4 or by click on the Close button in the title bar.
Barco – Apollo – DOC-3197-2 – user's manual – Revision 08 – November 2006 _________________________________________________ 145/402
6. Viewer
A simple mouse click on the Source tab selects an address from a predefined quantity or you can open any video
by entering the URL directly.
The videos listed in the selection list as well as the associated URLs and addresses are
defined in the ServerData\viewersources.ini file.
If a name has been assigned to this source, SourceConnected displays this name. SourceCaption shows the
description entered in the ServerDate\viewersources.ini file.
An assigned title is depicted next to Title. Status refers to the status of the link with the source.
Use Start, Pause, Stop for playback. Use SkipBack or SkipForward to jump to the previous or next marker. The
name of the current marker and its position are shown in the fields with the same name.
If Enable Loop Mode is checked, the viewer restarts playing after the end of the stream has been reached.
If no markers are defined for the data stream, the SkipBack or SkipForward buttons are deactivated.
Check the Audio functionality to control audio volume and audio balance. Modify the settings by means of the
sliders or of the spin buttons.
146/402 _________________________________________________ Barco – Apollo – DOC-3197-2 – user's manual – Revision 08 – November 2006
6. Viewer
Audio is only active for one instance of the Mpeg Viewer. This instance also needs to
have the focus on the Display Wall! Otherwise there is no sound available.
Some control elements are no longer visible if the dialog box size is reduced. Enlarge the
dialog box until all control elements are again visible (drag with mouse).
Select Blanking to hide the entire content of the viewer window.
If you stop the video and then restart playback by clicking Play, the window remains gray until
the Blanking option has been activated and then deactivated again.
The depiction of the window content in blanking mode can be selected from the
Decoration tab.
All commands except the selection of a new video address (from list box or manual input of URL) are immediately sent to the associated viewer and applied.
General rule:
All entries into editable text fields (e.g., manual entries such as URLs) as well as the
automatic name import (when selecting from list box) have to be confirmed with the
Apply or cancelled with the Discard button.
Barco – Apollo – DOC-3197-2 – user's manual – Revision 08 – November 2006 _________________________________________________ 147/402
6. Viewer
6.8.7.2 Decoration
The Decoration tab is identical for all viewers. Here you can select whether to hide or show the title bar and/or
status bar as well as the type and content of the information to be overlaid over the actual content of the viewer
window.
If the entire window content is covered by an image, for example, the term used is Blanking.
If information is displayed covering only certain positions of the actual window, the term used is In Display
Caption (IDC). You can define and activate up to 4 IDCs.
Click on Blanking (or Idc1, Idc2, Idc3, Idc4) to define the information to be depicted in the hide mode (information to be depicted as IDC1, IDC2, IDC3, IDC4).
Then select the IdcEnable option to overlay the selected information over the actual viewer window content
according to settings.
Information can consist of any text, system parameters such as date and time (cf. Placeholders for In Display Caption
Texts), and an image (logo). The available images are defined in the ServerData\Globals.ini file and identical for
all viewers. Colors and font sizes are defined in this file as well.
You can select text color, text background color, size, and position for In Display Caption. Click on the Opaque
option and the text is displayed on the selected color; otherwise, the background is transparent. In case the
Overlap checkbox is ticked, the IDC is displayed within the insertion. Remove the tick to have it displayed outside the insertion! Please note that Overlap has no effect in case the IDC is centered!
148/402 _________________________________________________ Barco – Apollo – DOC-3197-2 – user's manual – Revision 08 – November 2006
6. Viewer
The logo is always positioned in the corners of the windows followed by the text unless Center is selected. Selecting the Center position always places the logo to the left of the text.
Changes in the text field are not effective unless the Apply button is clicked. All
remaining settings are applied without additional confirmation.
The available IDC positions are as follows:
•
Northwest (upper left)
•
Northeast (upper right)
•
Southwest (lower left)
•
Southeast (lower right)
•
Center (centered)
•
Center North (centered at the top)
•
Center South (centered at the bottom)
The Center North and Center South positions overlay a banner, i.e., the IDC covers the entire
width of the viewer window. If a logo is part of this IDC it is displayed in the upper or left or
upper right corner.
An In Display Caption does not overlay the content of the viewer window until the IDC enable option has been
activated. This option always refers to the currently clicked IDC button.
If several IDCs are activated simultaneously, they are aligned across the content of the viewer window in the
order IDC1, IDC2, IDC3, IDC4. For example, if the position Northwest is selected for all IDCs, then IDC1 is depicted
at the upper left, IDC2 below that, etc.
Title bar (EnableCaption) and status bar (EnableStatusbar) of the window can be hidden or shown. The title bar
shows the Ident parameter of the viewer. The status bar lists the name or URL of the linked source as well as
information about the downloading progress of the page.
In addition the border of the window can be enabled or disabled. If disabled, the caption is automatically disabled, too.
Without border, no caption can be displayed.
If the StatusBorder is enabled, the insertion is surrounded by a frame. The type of frame can be defined with
regard to Separator Width, Line Style, Line Width and Color. In case Line Style is not solid, the gap color can
also be defined.
This frame can be set static or blinking (Enable Blinking)
The frame is always surrounding the insertion. It is not surrounding the window!
All selections are immediately applied to the preview. To apply them also to the viewer window, click on Apply.
Barco – Apollo – DOC-3197-2 – user's manual – Revision 08 – November 2006 _________________________________________________ 149/402
6. Viewer
6.8.8 VTplus Viewer
Use the VTplus Viewer to view video text pages.
The Apollo VTplus Viewer support applies only to Hauppage hardware WinPC TV..
The viewer window does not contain any menu or tool bars. Viewers are controlled via the command line interface (see Viewer command Interface) or the Properties dialog box.
6.8.8.1 VTplus Viewer properties dialog box
Open the properties dialog box of the viewer
•
directly on the display wall using the shortcut key combination CTRL+ALT+Enter
or
•
using the viewer’s context menu (right mouse click on viewer name) in the Apollo Explorer, viewer category.
•
double click on the mini window of the viewer in the Apollo Explorer
Close the dialog box with the shortcut key Alt+F4 or by click on the Close button in the title bar.
150/402 _________________________________________________ Barco – Apollo – DOC-3197-2 – user's manual – Revision 08 – November 2006
6. Viewer
A simple mouse click on the Source tab selects a video text page from a predefined list of sources.
The video text pages listed in the selection list as well as the associated broadcasting
stations are defined in the ServerData\viewersources.ini file.
If a name has been assigned to this source, SourceConnected displays this name. SourceCaption shows the
description entered in the ServerDate\viewersources.ini file.
An assigned title is depicted next to Title. Status refers to the status of the link with the source.
Navigate with the Back, Forward, Stop buttons. Reload the page with Refresh.
Some control elements are no longer visible if the dialog box size is reduced. Enlarge the
dialog box until all control elements are again visible (drag with mouse).
Select Blanking to hide the entire content of the video text page window.
The depiction of the window content in blanking mode can be selected from the
Decoration tab.
All commands except the selection of a videotext page (from list box) are immediately sent to the associated
viewer and applied.
Barco – Apollo – DOC-3197-2 – user's manual – Revision 08 – November 2006 _________________________________________________ 151/402
6. Viewer
General rule:
All entries into editable text fields (e.g., manual entries such as URLs) as well as the
automatic name import (when selecting from list box) have to be confirmed with the
Apply or cancelled with the Discard button.
6.8.8.2 Decoration
The Decoration tab is identical for all viewers. Here you can select whether to hide or show the title bar and/or
status bar as well as the type and content of the information to be overlaid over the actual content of the viewer
window.
If the entire window content is covered by an image, for example, the term used is Blanking.
If information is displayed covering only certain positions of the actual window, the term used is In Display
Caption (IDC). You can define and activate up to 4 IDCs.
Click on Blanking (or Idc1, Idc2, Idc3, Idc4) to define the information to be depicted in the hide mode (information to be depicted as IDC1, IDC2, IDC3, IDC4).
Then select the IdcEnable option to overlay the selected information over the actual viewer window content
according to settings.
Information can consist of any text, system parameters such as date and time (cf. Placeholders for In Display Caption
Texts), and an image (logo). The available images are defined in the ServerData\Globals.ini file and identical for
all viewers. Colors and font sizes are defined in this file as well.
152/402 _________________________________________________ Barco – Apollo – DOC-3197-2 – user's manual – Revision 08 – November 2006
6. Viewer
You can select text color, text background color, size, and position for In Display Caption. Click on the Opaque
option and the text is displayed on the selected color; otherwise, the background is transparent. In case the
Overlap checkbox is ticked, the IDC is displayed within the insertion. Remove the tick to have it displayed outside the insertion! Please note that Overlap has no effect in case the IDC is centered!
The logo is always positioned in the corners of the windows followed by the text unless Center is selected. Selecting the Center position always places the logo to the left of the text.
Changes in the text field are not effective unless the Apply button is clicked. All
remaining settings are applied without additional confirmation.
The available IDC positions are as follows:
•
Northwest (upper left)
•
Northeast (upper right)
•
Southwest (lower left)
•
Southeast (lower right)
•
Center (centered)
•
Center North (centered at the top)
•
Center South (centered at the bottom)
The Center North and Center South positions overlay a banner, i.e., the IDC covers the entire
width of the viewer window. If a logo is part of this IDC it is displayed in the upper or left or
upper right corner.
An In Display Caption does not overlay the content of the viewer window until the IDC enable option has been
activated. This option always refers to the currently clicked IDC button.
If several IDCs are activated simultaneously, they are aligned across the content of the viewer window in the
order IDC1, IDC2, IDC3, IDC4. For example, if the position Northwest is selected for all IDCs, then IDC1 is depicted
at the upper left, IDC2 below that, etc.
Title bar (EnableCaption) and status bar (EnableStatusbar) of the window can be hidden or shown. The title bar
shows the Ident parameter of the viewer. The status bar lists the name or URL of the linked source as well as
information about the downloading progress of the page.
In addition the border of the window can be enabled or disabled. If disabled, the caption is automatically disabled, too.
Without border, no caption can be displayed.
If the StatusBorder is enabled, the insertion is surrounded by a frame. The type of frame can be defined with
regard to Separator Width, Line Style, Line Width and Color. In case Line Style is not solid, the gap color can
also be defined.
This frame can be set static or blinking (Enable Blinking)
The frame is always surrounding the insertion. It is not surrounding the window!
All selections are immediately applied to the preview. To apply them also to the viewer window, click on Apply.
Barco – Apollo – DOC-3197-2 – user's manual – Revision 08 – November 2006 _________________________________________________ 153/402
6. Viewer
6.8.8.3 Basic
Select a Channel from the list box. The selection lists all broadcasters received by the broadband cable, satellite,
or analog antenna. Enter the desired page as well as subpages.
The valid value range for videotext pages is from 100 to 899. Input of a nonexistent
page or subpage does not result in an error message.
The VTplus Viewer waits for the corresponding signal until timeout.
Select Text Mode to view the videotext pages as pure ASCII text. Otherwise the page is displayed in graphics
mode.
Use Text Mode if you want to highlight, copy (Ctrl+C), and paste the entire content or sections to other program
such as Word, for example.
Available keycard shortcuts: Ctrl +C (copy), Ctrl +V (paste), and Ctrl +A (select all).
154/402 _________________________________________________ Barco – Apollo – DOC-3197-2 – user's manual – Revision 08 – November 2006
6. Viewer
6.9 Placeholders for In Display Caption Texts
Placeholders can be specified for In Display Caption texts, which then display current system parameters during
operation.
The following table lists placeholders that apply to all viewers:
Warning: Placeholder names are case sensitive!!
Placeholder
Description
%SourceRequested%
The CRB (control room bus) name of the source to be displayed. This
name has been defined in the ServerData\viewersources.ini file.
This placeholder normally corresponds with the %SourceConnected%
placeholder
%SourceConnected%
CRB name of the source currently displayed. For predefined sources,
this name has been defined in the ServerData\viewersources.ini file.
For non-predefined sources, the name can freely be assigned to using
this parameter
%SourceCaption%
Suitable name for the currently displayed source
%SourceTitle%
A title assigned to the source is depicted.
%Description%
Suitable name of the viewer instance
%Date%
Current date
%Time%
Current time
%Status%
Connection status or status of data stream after connection has been
established.
Status display description:
Not connected (viewer waits for the control room bus); viewer is active
but cannot be controlled in this state.
Unknown source: The name of the source is unknown to the control
room bus.
Connecting ... : Waiting for the source object
Unknown resource: (e.g., incorrect Visu input card, wrong channel with
BigVideo, Quadvideo, RGB input cards, wrong workstation (Cottus), etc.
Resource unavailable (the corresponding source is already controlled by
another server within the Apollo network)
Barco – Apollo – DOC-3197-2 – user's manual – Revision 08 – November 2006 _________________________________________________ 155/402
6. Viewer
6.9.1 Specific FRG Viewer placeholders
Placeholder
Description
%Channel%
Active channel of input card
%Port%
Active port of input card
%SVSSourcName%
Name of source connected to Streaming Video Card
%Status% (specific values)
Freeze frame (video stopped)
Playback
Connecting with Manager (a connection with the Manager software is
being established)
6.9.2 Specific Visu Viewer placeholders
Placeholder
Description
%IPUs%
Number of video input card (“1, 5, 10”)
%DeviceName%
Control room bus name for connected Visu device
%Status%
Freeze frame (video stopped)
Playback
Connecting with Manager (a connection with the Manager software is
being established)
6.9.3 Specific Cottus Viewer placeholders
Placeholder
Description
%Hostname%
Name of connected workstation
%Status%
Status of connection
6.9.4 Specific VNC Viewer placeholders
Placeholder
Description
%Hostname%
Name of connected workstation
%Status%
Status of connection
6.9.5 Specific Pro Viewer placeholders
Placeholder
Description
%Hostname%
Name of connected workstation
%Status%
Status of connection
6.9.6 Specific Web Viewer placeholders
Placeholder
Description
%URL%
Name of Internet page
%Status%
Loading (page is loading)
Ready (page has finished loading)
156/402 _________________________________________________ Barco – Apollo – DOC-3197-2 – user's manual – Revision 08 – November 2006
6. Viewer
6.9.7 Specific MPEG Viewer placeholders
Platzhalter
Bedeutung
%URL%
Name of digital data stream
%Position%
Position in digital data stream
%Marker%
Name of current marker in the data stream (only if markers are supported)
%Status%
Pause: the Mpeg-data stream is paused (if resumed, it starts playing at
the actual position)
Stop: the Mpeg data stream is stopped (if resumed, it starts playing at
the beginning)
6.9.8 Specific VTplus Viewer placeholders
Placeholder
Description
%Channel%
Name of videotext channel
%Page%
Number of videotext page
%SubPage%
Number of videotext subpage
%Status%
Loading (page is loading)
Ready (page has finished loading)
Connecting with Manager (a connection with the Manager software is
being established)
Barco – Apollo – DOC-3197-2 – user's manual – Revision 08 – November 2006 _________________________________________________ 157/402
6. Viewer
6.10 The ServerData\Globals.ini File
Text colors, background colors, and font sizes, as well as other selections and definitions are defined in this file.
There are no limits on the number of definitions.
The ServerData\Globals.ini file is located in the subfolder ServerData of the
ApolloProject. Changes in files with the same names located in other directories are
immediately overwritten by the ServerData\Globals.ini file located in the ServerData
subdirectory.
Specify text colors in the section IdcTextColorSelections as RGB triple in hexadecimals. The same colors are also
available as background colors.
Available text sizes are specified under the section header IdcTextSizeSelections; values are in pica points. The
specified vertical size is also applied to the scaling factor for the logo.
Use section IdcImageSelections to define graphics or images to be available in the selection box for the blanking mode.
Use section IdcImageSelections2 to define logo overlays.
For graphics, it is recommended to use .bmp files only! With .jpg files, the system may
sometimes hang!
158/402 _________________________________________________ Barco – Apollo – DOC-3197-2 – user's manual – Revision 08 – November 2006
6. Viewer
6.11 The ServerData\viewersources.ini File
The ServerData\viewersources.ini file is located in the subfolder ServerData of the ApolloProject. Use this file
to define those sources for all viewers that can be activated with a mouse click.
6.11.1 FRG Viewer source specification
Name is the entry displayed in the selection list on the Source tab of the properties dialog box. Entries are listed
in the form of a tree structure. Every dot in a name represents another branch.
Channel is the name of the channel of the QuadVideo Card, BigVideo Card, or RGB-Input Card as defined in
the switcher definition file; cf. Chapter 6.2.3 of the user's manual TransForm A Workstation for Windows NT /
Windows 2000.
Port is the input source type of the analog input card (Composite1, Composite2, S-Video), cf. Advanced
Profiles lists the complete file name used to save the settings of certain source parameters (brightness, resolution, etc.).
Description is a freely selectable description for the depicted source. This description is then shown in the status
bar of the viewer window as well and indicated as SourceCaption on the Property dialog|Source.
6.11.2 FRG Viewer streamingsource specification
Name is the entry displayed in the selection list on the Source tab of the properties dialog box. Entries are listed
in the form of a tree structure. Every dot in a name represents another branch.
Channel is the name of the channel of the Streaming Video Card as defined in the SwitcherLanguageCompiler.
Port is the port of the card
Profiles lists the complete file name used to save the settings of certain source parameters (brightness, resolution, etc.).
StrmSrcName is a freely selectable Name of the streaming source. The parameters of the streaming source are
specified in the DigitalStreamSource.ini-file and are allocated by means of this name.
Description is a freely selectable description for the depicted source. This description is then shown in the status
bar of the viewer window as well and indicated as SourceCaption on the Property dialog|Source.
Barco – Apollo – DOC-3197-2 – user's manual – Revision 08 – November 2006 _________________________________________________ 159/402
6. Viewer
6.11.3 Visu Viewer source specification
Name is the entry displayed in the selection list on the Source tab of the properties dialog box. Entries are listed
in the form of a tree structure. Every dot in a name represents another branch.
IPU indicates the number of the input card(s). Numbering from top down.
Profiles lists the complete file name used to save the settings of certain source parameters (brightness, resolution, etc.).
Description is a freely selectable description for the depicted source. This description is then shown in the status
bar of the viewer window as well and indicated as SourceCaption on the Property dialog|Source.
6.11.4 Cottus Viewer source specification
Name is the entry displayed in the selection list on the Source tab of the properties dialog box. Entries are listed
in the form of a tree structure. Every dot in a name represents another branch.
Hostname is the server name within the network. Enter here the IP address of the server if it has no assigned
name. Proxy Host by Funk Software Inc. and the host license have to be installed on this server!
Password is the password defined during the installation of Proxy Host on the host server and which enables or
disables the display of the screen of a workstation using the viewer. This freely defined password is NOT the
password of the computer user within the network.
Description is a freely selectable description for the connected server. This description is then shown in the
status bar of the viewer window as well and indicated as SourceCaption on the Property dialog|Source.
Gatewayname is the name of the gateway server registered for the respective workstation. If the gateway is
not specified in the viewersources.ini –file, it is not available, and recording or playing back of host sessions is
not supported.
160/402 _________________________________________________ Barco – Apollo – DOC-3197-2 – user's manual – Revision 08 – November 2006
6. Viewer
6.11.5 VNC Viewer source specification
Name is the entry displayed in the selection list on the Source tab of the properties dialog box. Entries are listed
in the form of a tree structure. Every dot in a name represents another branch.
Hostname is the server name within the network. Enter here the IP address of the server if it has no assigned
name. Proxy Host by Funk Software Inc. and the host license have to be installed on this server!
Password is the password defined during the installation of Proxy Host on the host server and which enables or
disables the display of the screen of a workstation using the viewer. This freely defined password is NOT the
password of the computer user within the network.
Description is a freely selectable description for the connected server. This description is then shown in the
status bar of the viewer window as well and indicated as SourceCaption on the Property dialog|Source.
6.11.6 Web Viewer source specification
Name is the entry displayed in the selection list on the Source tab of the properties dialog box. Entries are listed
in the form of a tree structure. Every dot in a name represents another branch.
URL is the address the Web Browser is to open when selecting the associated name.
Description is a freely selectable description for the depicted source. This description is then shown in the status
bar of the viewer window as well and indicated as SourceCaption on the Property dialog|Source.
Barco – Apollo – DOC-3197-2 – user's manual – Revision 08 – November 2006 _________________________________________________ 161/402
6. Viewer
6.11.7 MPEG Viewer source specification
Name is the entry displayed in the selection list on the Source tab of the properties dialog box. Entries are listed
in the form of a tree structure. Every dot in a name represents another branch.
URL is the path of the video source.
Description is a freely selectable description for the depicted source. This description is then shown in the status
bar of the viewer window as well and indicated as SourceCaption on the Property dialog|Source.
6.11.8 VTplus Viewer source specification
Name is the entry displayed in the selection list on the Source tab of the properties dialog box. Entries are listed
in the form of a tree structure. Every dot in a name represents another branch.
Station is the name of the broadcast station.
Enter the page number of the video text under Page and the subpage number under Subpage.
Description is a freely selectable description for the depicted source. This description is then shown in the status
bar of the viewer window as well and indicated as SourceCaption on the Property dialog|Source.
162/402 _________________________________________________ Barco – Apollo – DOC-3197-2 – user's manual – Revision 08 – November 2006
6. Viewer
6.11.9 ProViewer source specification
Those specifications do not only apply for the ProViewer, it is the Remote Pointer, too, which uses these specifications.
Name is the entry displayed in the selection list on the Source tab of the properties dialog box. Entries are listed
in the form of a tree structure. Every dot in a name represents another branch.
Hostname is the server name within the network.
Password is the password defined during the installation of ProServer on the host server and which enables or
disables the display of the screen of a workstation using the viewer. This freely defined password is NOT the
password of the computer user within the network.
Description is a freely selectable description for the connected server. This description is then shown in the
status bar of the viewer window as well and indicated as SourceCaption on the Property dialog|Source.
Barco – Apollo – DOC-3197-2 – user's manual – Revision 08 – November 2006 _________________________________________________ 163/402
6. Viewer
6.12 The ServerData\DigitalStreamSource.ini-file
Digital video sources have to be defined in a dedicated.ini-file since a lot of parameters are to be specified.
Paramter
description
Name:
name in the ControlRoomDataBase
EncTypeName:
name of the encoder type of the streaming source (configured in EncoderTypes.ini)
Address:
IP-Address of the stream (real IP address for “multicast” or "broadcast" "unicast")
Port:
IP-Port to listen for the stream
ProtocolId:
IP-Protocol to use to receive the stream
StreamProtocolId:
Stream Protocol
ProgamId:
Program Id
EncAddress:
Encoder IP-Address (only used if needed to send start command)
EncPort:
Encoder IP-Port (only used if needed to send start command)
Description
description
164/402 _________________________________________________ Barco – Apollo – DOC-3197-2 – user's manual – Revision 08 – November 2006
6. Viewer
6.13 The ServerData\EncoderType.ini-file
This file lists some of the well known encoders and their default parameters thus providing a convenient way to
specify the encoder of the video stream.
[EncType_xxx]:
unique name
EncTypeName:
name in the Encoder Type
SVSSkipAtStart:
bytes to skip at start of IPPacket*
SVSSkipAtEnd:
bytes to skip at end of IPPacket*
SVSEncProtocolId:
protocol id (0:UDP default, 1:TCP)*
SVSEndStartCmd:
start command to send
Barco – Apollo – DOC-3197-2 – user's manual – Revision 08 – November 2006 _________________________________________________ 165/402
6. Viewer
6.14 Global Viewer Parameters
The following table lists the parameters that apply to all viewers.
A parameter can be activated or deactivated (values 1 or 0) or have a value specified with the list position of the
corresponding entry in the ServerData\Globals.ini file.
Exception: The position of the In Display Caption is not defined in the ServerData\Globals.ini
file. The following assignments apply to the positions:
1
Northeast
2
Northwest
3
Southeast
4
Southwest
5
Center
6
North Center
7
South Center
The viewers can be controlled by the viewer command interface, cf. Viewer command Interface.
Parameter
Values
?
Description
Writes the help command line parameter into the log file
splash
[1|2500]
Disables (1) or enables splash screen when starting viewer (2500:
time in ms the splash screem is displayed)
Ident
[]
Unambiguous name of the viewer instance
IdcEnabled
[0|1]
Deactivates/activates blanking
IdcPosition
[1..7]
Position of the displayed text in blanking mode; the value is converted based on the assignment listed above.
IdcText
[]
Text in blanking mode
IdcTextColor
[1..]
Text color; value matches the list position in definition file ServerData\Globals.ini.
IdcBackColor
[1..]
Background color; value matches the list position in definition file
ServerData\Globals.ini.
IdcOpaque
[0|1]
Activates or deactivates background color. Zero: the background is
transparent. One: the color defined as IdcBackColor is used as the
background color.
IdcOverlap
[0|1]
0: IDC is placed outside the insertion, 1: IDC is placed inside the
insertion
IdcTextSize
[1..]
Text size; value matches the list position in definition file ServerData\Globals.ini.
IdcImage
[1..]
Bitmap used as overlay over the viewer window when blanking
166/402 _________________________________________________ Barco – Apollo – DOC-3197-2 – user's manual – Revision 08 – November 2006
6. Viewer
Parameter
Values
Description
mode is selected. The value matches the list position in the definition file ServerData\Globals.ini [IdcImageSelection].
IdcBoSLEnabled
[0|1]
1: at signal loss, the blanking image is displayed; 0: blue screen at
signal loss
Idc[1..4]Enabled
[0|1]
Activate (1) or deactivate (0) In Display Caption [ 1...4]
Idc[1..4]Position
[1..7]
Position of the displayed text for the Idc[1...4]; the value is converted based on the assignment listed above.
Idc[1..4]Text
[]
Text of the In Display Caption [1...4]
Idc[1..4]TextColor
[1..]
Text color, value matches the list position in definition file ServerData\Globals.ini
Idc[1..4]BackColor
[1..]
Background color; value matches the list position in definition file
ServerData\Globals.ini.
Idc[1..4]Opaque
[0|1]
Activates or deactivates background color. Zero: the background is
transparent. One: the color defined as IdcBackColor is used as the
background color.
Idc[1..4]Overlap
[0|1]
0: IDC is placed outside the insertion, 1: IDC is placed inside the
insertion
Idc[1..4]TextSize
[1..]
Text size; value matches the list position in definition file ServerData\Globals.ini.
Idc[1..4]Image
[1..]
Logo used overlay over the actual content of the viewer window.
The value matches the list position in the definition file ServerData\Globals.ini [IdcImageSelection2].
ReconnectionTimeInterval
[1..]
number to customize the time interval in seconds used before
trying to reastablish a lost connection. Default is 30 seconds.
FontName
[font]
Set the main font
FontSize
[size]
Set size of the main font
LabelFontName
[font]
Set the font of the label
LabelFontSize
[size]
Set the size of the font for the labels
CaptionVisible
[0|1]
Activates (1) or deactivates (0) title bar
StatusBarVisible
[0|1]
Activates (1) or deactivates (0) status bar
BorderVisible
[0|1]
Activates (1) or deactivates (0) border
Description
[]
Suitable name for the viewer instance
SourceCaption
[]
Suitable name for the viewer source
SourceTitle
[]
Title of the selected source
SourceRequested
[]
Name of a source as defined in the ServerData\viewersources.ini
file. The viewer will activate the settings selected for this source
and display the source.
SourceConnected
[]
Freely definable name of the currently applicable source. The
viewer will activate the preceding settings and display the source.
End
Ends the viewer application
Barco – Apollo – DOC-3197-2 – user's manual – Revision 08 – November 2006 _________________________________________________ 167/402
6. Viewer
Parameter
Values
Description
StartMinimized
[0|1]
Deactivates/activates minimized launch. The viewer window is
minimized when first launched until the Desktop server has positioned the window according to the active layout.
PropertyPagePermission
[0|1]
Permission to open the properties dialog box of the viewer (0: not
permitted, 1 permitted)
PropertyPage
The properties dialog box is displayed immediately
PropertyPageAccelerator
[CTRL+SHIFT+AL
T+<char>
User defined shortcut to open the properties dialog box (default:
CTRL+ALT+ENTER)
StatusBorderEnabled
[0|1],
disable / enable the Out-Display-Frame
StatusBorderEnableBlink
[0|1],
disable / enable blinking, <0: disable (default)
StatusBorderBlinkPeriod
[200..],
the blink period in milliseconds, (1000 default)
StatusBorderLineBlinkColor
[1..],
blink color of the frame (reference ID to Globals.ini file section)
StatusBorderLineBlinkGapColor
[1..],
blink color of line gaps, only visible if line style <> solid. (reference ID to Globals.ini file section)
StatusBorderLineColor
[1..],
normal color of the frame (reference ID to Globals.ini file section)
StatusBorderLineGapColor
[1..],
normal color of line gaps, only visible if line style <> solid. (reference ID to Globals.ini file section)
StatusBorderLineStyle
[1..],
line style, (reference ID into Globals.Ini file)
StatusBorderLineWidth
[1..],
line width of the frame in pixels
StatusBorderSeparatorWidth
[0..],
separator width of the frame in pixels
6.14.1 FRG Viewer parameters
Parameter
Values
Description
AutoDetect
[0|1]
Activates (1) or deactivates (0) the AutoDetect mode of the
video standard
Disables/enables auto detection of video standard
AutoPhasePosDetect
[0|1]
enable/ disable (default) auto detection of signal phase and
position
Brightness
[1..100]
Brightness (in percent)
Channel
[]
Name of the channel of the video/RGB input card
Contrast
[1..100]
Contrast (in percent)
DeInterlaceMode
[1|2|3|4|5]
Selects the respective Mode (1:Mode1, 2:Mode2, 3:Mode3,
4:Mode4, 5:Mode5)
Framerate
[0|1]
0: 25/30 fps; 1: 50/60 fps
Frameratereduction
[1..100]
specify some frame rate reduction factor, zero means no reduc-
168/402 _________________________________________________ Barco – Apollo – DOC-3197-2 – user's manual – Revision 08 – November 2006
6. Viewer
Parameter
Values
Description
tion , 100 means max reduction
Frameratereductionmode
[0|1|2]
specifies if to use the default frame reate reduction (mode:0)
which is also the default setting, or if to use no reduction (mode:
1), or if to specify a variable frame rate reduction (mode:2)
Hue
[1..100]
Hue (in percent)
LastFrameOnSignalLoss
[0|1],
disable, enable signal loss detection (default is 0, disabled) This
option only makes sense for streaming video card types. If disabled the insertion will get blue during signal loss. If enabled
the insertion will still hold the last frame during signal loss.
Port
[1..9]
Port of the channel on the input card
RemotingSettingsEnabled
[0|1]
disable | enable remoting capabilities (default is 0: disabled)
RemotingSettingsLogicalHostname
[]
string specifying a configured Pro- or VNC- source out of the
viewer sources
rgbBlue
[0..100]
Blue fraction of the RGB signal
(in percent)
rgbGreen
[0..100]
Green fraction of the RGB signal
(in percent)
RGBPresetName
[]
name of the preset to load
RgbProfileName
[]
Name of the profile for the RGB source
rgbRed
[0..100]
Red fraction of the RGB signal
(in percent)
rgbReduction
[0..100]
Factor of the dyn. reduction rate
Saturation
[1..100]
Saturation (in percent)
SclPixelFormat
[],
name of the pixel format to choose manually (RGB 8:8:8, RGB
5:6:5, YUV 4:2:2), default is automatic mode
SclPixelFormatAutomatic
[0|1],
disable / enable automatic pixel format mode (default is 1,
automatic mode)
SclSharpness
[0..15],
number to change the scale sharpness (0 is default)
Sharpness
[1..100]
Focus/sharpness (in percent)
SrcProfileName
[]
Name of the profile for the video source
SVBAddress
[]
string to change the IP address of a streaming video board
SVBCodecName
[]
string to change the codec for streaming video boards (mpeg2,
mpeg4, visiowave, ...)
SVBGateway
[]
string to change the gateway used by a streaming video board
SVBNetmask
[]
string to change the netmask used by a streaming video board
SVSAddress
[]
'unicast', 'broadcast', real IP-Address if multicast
SVSEncAddress
[]
network: IP-Address of the encoder
SVSEncPort
[]
network: Port of the encoder listening for commands
SVSEncProtocolId
[0|1]
encoder type: IP-Protocol index 0 (default): udp, 1: tcp*
SVSEncStartCmd
[]
encoder type: optional command to send to encoder to start
streaming ("" is default)
Barco – Apollo – DOC-3197-2 – user's manual – Revision 08 – November 2006 _________________________________________________ 169/402
6. Viewer
Parameter
Values
Description
SVSEncTypeName
[]
name of logical encoder type defined in EncoderTypes.ini, covers
the following settings
SVSPid
[0,…]
program id (0 special meaning: auto)"
SVSPort
[]
network: port number to listen for stream
SVSProtocolId
[0|1]
network: IP-Protocol index 0: udp (default), 1: tcp
SVSSkipAtEnd
[0,…]
encoder type: number of bytes to skip at end of each IP-Packet
(0 is default)
SVSSkipAtStart
[0,…]
encoder type: number of bytes to skip at start of each IP-Packet
(0 is default)
SVSSrcName
[]
name of logical streaming source defined in DigitalStreamSources.ini
SVSStreamProtocolId
[0,..3]
stream protocol id 0:auto (default), 1: elementary, 2: program,
3: transport
Transparency
[0..255]
number to change the alpha (transparency) of the insertion (0 is
default)
VideoNorm
[]
Name of the video standard the video is forced to use if AutoDetect is disabled
VideoSourceRatioToForceTo
[0|1|2]
Tithe parameter determines how to interpret the source extend:
0: use the extend of the sampled source (default, the compatible mode compared to versions < 1.8)
1: force to ratio 4:3 by adjusting the height
2: force to ratio 16:9 by adjusting the height
WndFreeze
[0|1]
Freeze frame
0: Continues playback
1: Frame is stopped
WndScaleMode
[1..3]
Scaling types of the selected section:
1: Native size/resolution
2: Preserve aspect ratio
3: Fit window
WndViewPort
[Left, Top,
Right, Bottom]
Selected section (position indicated in boundary values left,
right, top, bottom); each with a possible range of 0 to 100.
WndViewPortRatio
[1..6]
Predefined aspect ratios for the selected section:
1: Any
2: 4:3
3: 41:47
4: 16:9
5: 41:18
6: 41:17
170/402 _________________________________________________ Barco – Apollo – DOC-3197-2 – user's manual – Revision 08 – November 2006
6. Viewer
6.14.2 Visu Viewer parameters
Parameter
Values
Description
Brightness
[1..100]
Brightness (in percent)
Contrast
[1..100]
Contrast (in percent)
DeviceName
[]
Name of the Visu device in the control room database
Hue
[1..100]
Hue (in percent; only with NTSC)
hwFrameRateDivider
[0..3]
Frame refresh factor
0: 1
1: 1/2
2: 1/4
3: 1/8
hwFrameRateReductionMax
[0..4]
Reserved for future use
IPUs
[]
Number(s) of the Visu input card(s); separator is ":"
RGBBlueCoarseGain
[0..100]
number to calibrateRGB insertion
blue coarse gain
RGBBlueCoarseGainOffset
[0..100]
number to calibrateRGB insertion
blue coarse offset gain
RGBBlueCutOff
[0..100]
number to calibrateRGB insertion
blue cut off
RGBBlueCutOffOffset
[0..100]
number to calibrateRGB insertion
blue cut off offset
RGBBlueFineGain
[0..100]
number to calibrateRGB insertion
blue fine gain
RGBBlueFineGainOffset
[0..100]
number to calibrateRGB insertion
blue fine offset gain
RGBGreenCoarseGain
[0..100]
number to calibrateRGB insertion
green coarse gain
RGBGreenCoarseGainOffset
[0..100]
number to calibrateRGB insertion
green coarse offset gain
RGBGreenCutOff
[0..100]
number to calibrateRGB insertion
green cut off
RGBGreenCutOffOffset
[0..100]
number to calibrateRGB insertion
green cut off offset
RGBGreenFineGain
[0..100]
number to calibrateRGB insertion
green fine gain
RGBGreenFineGainOffset
[0..100]
number to calibrateRGB insertion
green fine offset gain
rgbHorzPhase
[1..511]
Horizontal phase
rgbHorzRes
[1..1280]
Horizontal resolution
rgbHorzTotalPixels
[1..2047]
Sum of pixels (visible and hidden)
rgbInputType
[0|1] [0…2]
Disables/enables RGB input
Barco – Apollo – DOC-3197-2 – user's manual – Revision 08 – November 2006 _________________________________________________ 171/402
6. Viewer
Parameter
Values
Description
RgbProfileName
[]
Name of the profile for the RGB source
RGBRedCoarseGain
[0..100]
number to calibrateRGB insertion; red coarse gain
RGBRedCoarseGainOffset
[0..100]
number to calibrateRGB insertion; red coarse offset gain
RGBRedCutOff
[0..100]
number to calibrateRGB insertion; red cut off
RGBRedCutOffOffset
[0..100]
number to calibrateRGB insertion; red cut off offset
RGBRedFineGain
[0..100]
number to calibrateRGB insertion; red fine gain
RGBRedFineGainOffset
[0..100]
number to calibrateRGB insertion; red fine offset gain
rgbSamplingPhase
[1..31]
Sampling phase
rgbVertPhase
[1..511]
Vertical phase
rgbVertRes
[1..1024]
Vertical resolution
Saturation
[1..100]
Saturation (in percent)
Sharpness
[1..100]
Focus/sharpness (in percent)
SrcProfileName
[]
Name of the profile for the video source
VideoFormat
[1..9]
Video standard
1: Auto PAL
2: Auto NTSC
3: Force PAL
4: Force PALN
5: Force PAL Combination
6: Force PALM
7: Force NTSCM
8: Force NTSC Japan
9: Force SECAM:
VideoInputType
[1..2]
Video type
1: Composite (BNC); 2: S-Video
WndForceHorzVertScaling
[1..5]
Scaling factors for the selected section:
1: Native size
2: Half of native size (1/2)
4: Third of native size (1/3)
4: Quarter of native size (1/4)
5: Fifth of native size (1/5)
WndFreeze
[0|1]
Freeze frame
0: Continues playback; 1: Freeze frame
WndScaleMode
[1..3]
Scaling mode of the selected section: Native size/resolution
2: Preserve aspect ratio
3: Fit window
WndViewport
[Left,
Top,
Right, Bottom]
Selected section (position indicated in boundary values left,
right, top, bottom); each with a possible range of 0 to 100.
WndViewPortRatio
[1..6]
Predefined aspect ratios for the selected section:
1: Any;2: 4:3; 3: 41:27; 4: 16:9; 5: 41:18; 6: 41:17
6.14.3 Cottus Viewer parameters
172/402 _________________________________________________ Barco – Apollo – DOC-3197-2 – user's manual – Revision 08 – November 2006
6. Viewer
Parameter
Values
Description
EnableRemoteHost
[0|1]
Permits (1) or deactivates (0) local mouse and keycard activities
on the linked workstation
EnableScaleMode
[0|1]
The displayed screen content can be scaled in the viewer window
(1) or is displayed only as 1:1 (0)
EnableScrollBars
[0|1],
GatewayName
[],
disable / enable mouse and keyboard redirection to the scraped
host
name of the gateway
Hostname
[]
Name of the workstation in network with the screen content to be
depicted on the display wall
Password
[]
Password of the workstation to be displayed
PlayerAction
ScaleZoomFactor
[0..3],
[0..2000],
number to set player action: 0 stop, 1 play, 2 record, 3 pause
number to set scale zoom factor X/Y in percent, 100 is default
ScalingViewPortPosPercent
ScalingViewPortPosPixel
[],
string to set viewport coordinates in percent, "0;0;100;100" is
default, will activate unit type pixel too
string to set viewport coordinates in pixel, will activate unit type
percentage too
ScalingViewPortPosUnitType
[0|1],
switch between pixel and percentage viewport coordinate mode,
default is percentage
SessionLength
[1....]
length of recorded session in minutes
SessionName
[],
name of the recorded (or to be recorded) session
[],
6.14.4 VNC Viewer parameters
Parameter
Values
Description
AutoDetect
[0|1]
Disable/enable automatic selection of the encoding
EnableClipboard
[0|1]
The clipboard of the host is transferred into the local clipboard and
thus can be pasted into the local application (1) or not (0)
EnableRemoteHost
[0|1]
Permits (1) or deactivates (0) local mouse and keycard activities
on the linked workstation
Encoding
[0|1|2|3]
Set different types of encodings:
0: ZRLE (use for low bandwidth)
1: Hextile (use for low bandwidth
2: CoRRE (use for low CPU usage
3: RRE (use for low CPU usage)
Hostname
[]
Name of the workstation in network with the screen content to be
depicted on the display wall
JpegQualityLevel
[]
Define Jpeg Quality level (compression, 0: best quality)
Password
[]
Password of the workstation to be displayed
WndScaleMode
[0|1]
Disable/enable scaling of the scraped desktop into the viewer
window
Barco – Apollo – DOC-3197-2 – user's manual – Revision 08 – November 2006 _________________________________________________ 173/402
6. Viewer
6.14.5 Pro Viewer parameters
Parameter
Values
Description
AutoResize
[0|1]
If enabled (1), in window scraping mode or in region scraping
mode the ProViewer window is adjusted to match the scraped
area
CopyRectEncoding
[0, 1]
0: disabled, 1: enabled (better performance)
DisconnectFrom
[]
The viewer will only cut its connection if it is currently connected
to the specified host. Otherwise it will ignore this command.
If the value of the argument ‘NameOfHost’ is empty then the
viewer will force to disconnect.
If the viewer disconnects then it will also implicitly reset it’ s
SourceConnected, SourceRequested property.
EightBitPixel
[0, 1]
0: disabled, 1: enabled (very low bandwidth)
EnableClipboard
[0|1]
The clipboard of the host is transferred into the local clipboard and
thus can be pasted into the local application (1) or not (0)
EnableRemoteHost
[0|1]
Permits (1) or deactivates (0) local mouse and keycard activities
on the linked workstation
Encoding
[0, 1, 2, 3, 4,
5, 6]
Set different types of encondings:
Hostname
[]
Name of the workstation in network with the screen content to be
depicted on the display wall
HostServerType
[0..3]
0: ProServer (default), 3: SCN server
HostServerPort
[-1,0..]
-1: use standard (default), or specify port to use for connection
HotKeyDefinitionAltEsc
[{ctrl+} {f1 | f2
|,…|, f12}]
[{ctrl+} {f1 | f2 |,…|, f12}], specify the hot key for the action. Hot
keys can only be accepted if the resulting settings do not contain
any duplicates.
Default is Ctrl+F2
HotKeyDefinitionAltTab
[{ctrl+} {f1 | f2
|,…|, f12}]
[{ctrl+} {f1 | f2 |,…|, f12}], specify the hot key for the action. Hot
keys can only be accepted if the resulting settings do not contain
any duplicates.
Default is Ctrl+F1
HotKeyDefinitionConnect
[{ctrl+} {f1 | f2
|,…|, f12}]
[{ctrl+} {f1 | f2 |,…|, f12}], specify the hot key for the action. Hot
keys can only be accepted if the resulting settings do not contain
any duplicates.
Default is F9
HotKeyDefinitionCtrlAltDel
[{ctrl+} {f1 | f2
|,…|, f12}]
[{ctrl+} {f1 | f2 |,…|, f12}], specify the hot key for the action. Hot
keys can only be accepted if the resulting settings do not contain
any duplicates.
Default is Ctrl+Alt+F4
HotKeyDefinitionCtrlEsc
[{ctrl+} {f1 | f2
|,…|, f12}]
[{ctrl+} {f1 | f2 |,…|, f12}], specify the hot key for the action. Hot
keys can only be accepted if the resulting settings do not contain
any duplicates.
0: Tight (use for low bandwidth)
1: Zlib (use for low bandwidth)
2: Zlib Hex (use for low bandwidth)
3: Hextile (use for low CPU usage)
4: CoRRE (use for low CPU usage)
5: RRE (use for low CPU usage)
6: Raw (use for low CPU usage)
174/402 _________________________________________________ Barco – Apollo – DOC-3197-2 – user's manual – Revision 08 – November 2006
6. Viewer
Default is Ctrl+F3
HotKeyDefinitionDisconnect
[{ctrl+} {f1 | f2
|,…|, f12}]
[{ctrl+} {f1 | f2 |,…|, f12}], specify the hot key for the action. Hot
keys can only be accepted if the resulting settings do not contain
any duplicates.
Default is F12
HotKeyDefinitionReleaseControl
[{ctrl+} {f1 | f2
|,…|, f12}]
[{ctrl+} {f1 | f2 |,…|, f12}], specify the hot key for the action. Hot
keys can only be accepted if the resulting settings do not contain
any duplicates.
Default is F11
HotKeyDefinitionShowUserManual
[{ctrl+} {f1 | f2
|,…|, f12}]
[{ctrl+} {f1 | f2 |,…|, f12}], specify the hot key for the action. Hot
keys can only be accepted if the resulting settings do not contain
any duplicates.
Default is F1
HotKeyEnabledAltEsc
[1|0]
specify if to handle the hot key, default is enabled
HotKeyEnabledAltTab
[1|0]
specify if to handle the hot key, default is enabled
HotKeyEnabledConnect
[1|0]
specify if to handle the hot key, default is enabled
HotKeyEnabledCtrlAltDel
[1|0]
specify if to handle the hot key, default is enabled
HotKeyEnabledCtrlEsc
[1|0]
specify if to handle the hot key, default is enabled
HotKeyEnabledDisconnect
[1|0]
specify if to handle the hot key, default is enabled
HotKeyEnabledReleaseContol
[1|0]
specify if to handle the hot key, default is enabled
HotKeyEnabledShowUserManual
[1|0]
specify if to handle the hot key, default is enabled
HotKeyResetToDefault
[1|0]
specify if to handle the hot key, default is enabled
JPEGCompression
[0, 1]
0: disabled, 1: enabled
JPEGCompressionLevel
[0, …9]
0: best quality
JpegQualityLevel
[]
Define Jpeg Quality level (compression, 0: best quality)
Password
[]
Password of the workstation to be displayed
RegionH
[0….]
Define height of the region to be scraped
RegionW
[0….]
Define width of the region to be scraped
RegionX
[0….]
Define x position of the region to be scraped
RegionY
[0….]
Define y position of the region to be scraped
ScrapingMode
[0, 1, 2]
0: full screen, 1: window, 2: region
UpdateModeManualTimeInterval
[1|60]
set update poll time interval if in manual mode, default is 10
UpdateModeModus
[1|2]
set the update mode: 1:Automatic (default), 2:Manual
UseCustomCompression
[0, 1]
0: disabled, 1: enabled (increases CPU load on host/client side)
UseCustomCompressionLevel
[0, …9]
0: disabled, 1: enabled (increases CPU load on host/client side)
WndScaleMode
[1, 2, 3]
1: native resolution, 2: native aspect ratio, 3: free scaled
Barco – Apollo – DOC-3197-2 – user's manual – Revision 08 – November 2006 _________________________________________________ 175/402
6. Viewer
6.14.6 Web Viewer parameters
Parameter
Values
Description
EnableScrollBars
[0|1]
Hide/show scroll bars of viewer window
Go
[Back|Forward|Stop|Refresh]
Navigation
TextSize
[0..4]
0: Largest
1: Large
2: Medium
3: Small
4: Smallest
URL
[]
Address of http page
6.14.7 MPEG Viewer parameters
Parameter
Values
Description
EnableLoopMode
[0|1]
disable | enable playback in a loop
Marker
[x]
x is the marker number
Motion
[0..4]
Playback options
AudioBalance
AudioVolume
0: Stop
1: Pause
2: Play
3: To next marker
4: To previous marker
Position
[…]
Offset (delay) in seconds
URL
[]
Name of digital video
WndScaleMode
[1..4]
number to set scale mode: 1 native, 2 hold aspect ratio, 3
free scaled, 4 WndFitToSrc
6.14.8 VTplus Viewer parameters
Parameter
Values
Description
Channel
[]
TV channel
Page
[100..899]
Number of video text page
SubPage
[0..63]
Number of subpage, default = 0 (all)
TextMode
[0|1]
Activates (1) or deactivates (0) text mode
176/402 _________________________________________________ Barco – Apollo – DOC-3197-2 – user's manual – Revision 08 – November 2006
6. Viewer
6.15 Remote Pointer
Like ProViewer, the Remote Pointer is a client application of the ProServer, and therefore it requires that ProServer is installed, cf. Steps required to configure the ProViewer.
Remote Pointer allows to control the applications on the host desktop via the local keyboard and mouse. Up to
four different host desktops can be managed, each of them activated by moving the local mouse into the respective activation zone on the local desktop. This behavior is called squid mode.
The assignment of the activation zone to a host desktop as well as the definition of shortcuts can be configured
individually.
6.15.1 Launching the Remote Pointer application
Select Start|Programs|Barco Apollo|Remote Pointer to lauch the application. The main window of Remote Pointer
is displayed.
The menu bar comprises the menus File, View, Tools, and Help.
If control of a host is estabished, the menus and their commands are no longer available. To
make use of them, first control has to be released by means of the respective special key!
Barco – Apollo – DOC-3197-2 – user's manual – Revision 08 – November 2006 _________________________________________________ 177/402
6. Viewer
6.15.2 File menu
Use this menu to connect/disconnect to/from a host. Exit hides the GUI, but the application is still running and
can be activated again by clicking on its icon in the system tray. Shutdown closes the application.
The entries Exit and Shutdown and the commands assigned to depend on the checkbox
Iconize application on Tools|Options, cf. Options
6.15.2.1 Connect
The command Connect opens a list with all hosts which could be connected to. These hosts are specified in the
viewersource.ini file in the section ProServer.
Since both, the Remote Pointer application and the ProViewer application are clients of ProServer, they make use
of the same pre-configured sources.
Select one of the pre-configured hosts, or enter a new one, and press Connect.
178/402 _________________________________________________ Barco – Apollo – DOC-3197-2 – user's manual – Revision 08 – November 2006
6. Viewer
6.15.2.2 Authentication
In case the host is not specified in the viewersource.ini file, a dialog pops up where you have to enter the
password (for the pre-configured hosts, the password is taken from the viewersource.ini-file):
After the connection is established, the RemotePointer window is split: in the left area, the desktop of the host is
visible (host window), on the right side, the cursor position on the host’s desktop is indicated by a black dot
(locator window). Since the host’s desktop cannot be entirely displayed in the host window, the position indication in the locator window ensures easy navigation.
Look at the status bar to get information learn which host is connected and how to take control on the host’s
desktop. After the connection is established, the status bar informs about the hotkeys to release control or to
disconnect, respectively.
Barco – Apollo – DOC-3197-2 – user's manual – Revision 08 – November 2006 _________________________________________________ 179/402
6. Viewer
6.15.3 View menu
The locator window can be hidden by removing the tick from View|Locator:
Removing the tick from View | Locator, will hide the locator window, but will not enlarge
the host window.
View|Enable Magnifier displays the scraped desktop in the host window of the RemotePointer application. In
case it is unselected, the host window turns black and does not show the scraped desktop.
180/402 _________________________________________________ Barco – Apollo – DOC-3197-2 – user's manual – Revision 08 – November 2006
6. Viewer
6.15.4 Tools menu
The Tools menu has two entries, Options and Special keys:
6.15.4.1 Options
Selecting Options opens a dialog to configure the RemotePointer Application.
Barco – Apollo – DOC-3197-2 – user's manual – Revision 08 – November 2006 _________________________________________________ 181/402
6. Viewer
Auto scroll width
Auto scroll width can be defined in the range of 20% to 50%. This range defines the area where the cursor can
be moved next to the current location without updating the host window. As soon as it moves out this range, the
host window is updated thus again centering the cursor in mid of the auto scroll width area.
Enable Magnifier
In case the this checkbox is ticked, the scraped desktop is displayed in the host window of the RemotePointer
application. In case the mark is removed from the checkbox, the host window turns black and does not show the
scraped desktop.
Behavior on Close
If Iconize Application is selected, the File menu shows both entries, Exit and Shutdown. Selecting Exit, the
application is hidden, but still running, and can be activated again by double clicking on its icon in the system
tray. Shutdown closes the application.
If Shutdown Application on Close is selected, the File menu only shows Exit, and this command then not only
hides, but closes the application.
The same applies for the "close" button on the window border: In case Iconize application is
selected, clicking this button doesnot shutdown the application, but iconizes it in the
system tray.
The application can be iconized during controlling (Hide while controlling) or when control is released again
(Iconize Application on Release Control). In case it is hidden while controlling, be sure to remember the keys
for releasing control and/or disconnect: they are no longer displayed….
Squid mode
In squid mode, when moving the local cursor to an edge of the local desktop, automatically
control is taken on the host which is assigned to this edge!
Up to four different hosts can be assigned – one for each edge.
Enter the name of the desired host and the password which has been given during the configuration of
ProServer application:
In case you want to disable squid mode, remove the mark from the checkbox.
To prevent the user from unintentionally taking control on the host, the time interval can be specified for taking
and releasing control (hover delay connect, hover delay disconnect (from 0 to 5000ms).
If squid mode is activated, and if the mouse is moved to one of the edges and stays there the time as defined in
hover delay connect, the mouse will "move to the host".
If the mouse is moved to one of the edges of the host and stays there the time as defined in hover delay disconnect, the mouse will leave the host and "come back" without the need of pressing F12 (assumed: default key
assignment for connect/disconnect).
182/402 _________________________________________________ Barco – Apollo – DOC-3197-2 – user's manual – Revision 08 – November 2006
6. Viewer
6.15.4.2 Special keys
Selecting Special keys opens a dialog where the special keys (hot keys) of the Remote Pointer application can
be defined. These special keys perform Release Control and Disconnect, respectively. In addition, some of the
most common Windows keys can be specified (Alt+Tab: switch between open items, Alt+Esc: Cycle through items
in the order they were opened, Ctrl+Esc: display Start menu, Ctrl+Alt+del: launch Task Manager).
Alt+Tab is not fully implemented. An Alt+Tab command can be sent, but pressed Alt+Tab (to
switch the selection in the form with all launched applications) cannot be sent.
The special keys for releasing control and disconnecting are always displayed in the task
bar.
Barco – Apollo – DOC-3197-2 – user's manual – Revision 08 – November 2006 _________________________________________________ 183/402
6. Viewer
6.15.5 Help menu
The Help menu has the two entries Contents and About. Contents gives access to the online help, About informs about the software version:
6.15.6 Status bar
In the status bar, information is given how to take/release control and how to disconnect, respectively. Since
having taken control on a host desktop, the menu items of the Remote Pointer applications are no longer available, and the only hint how to release control is given in the status bar.
On the system tray the name of the connected host is indicated and the status of the host. The following colors
are assigned:
Color
description
green:
host is free, control can be taken
yellow:
if a client has input control but has not exercised it for a certain time (configured on the ProServer configuration tab, entry arbitration time), a new request will be granted and the owning
channel will loose its control
blue:
a client has input control and has been busy, a request of another client is denied.
red:
The host is locked since another client has input control
184/402 _________________________________________________ Barco – Apollo – DOC-3197-2 – user's manual – Revision 08 – November 2006
6. Viewer
6.15.7 Remote Pointer parameters
Parameter
Values
Description
AutoScrollWidth
[value]
Between 20 and 50, size of the auto scroll area in percent
BottomHost
[name]
Name of the host to be controlled if in squid mode the cursor
moves on the bottom edge
BottomHostPassword
[password]
Password of the host to be controlled if in squid mode the cursor
moves on the bottom edge
DisconnectFrom
[]
The viewer will only cut its connection if it is currently connected
to the specified host. Otherwise it will ignore this command.
If the value of the argument ‘NameOfHost’ is empty then the
viewer will force to disconnect.
If the viewer disconnects then it will also implicitly reset it’ s
SourceConnected, SourceRequested property.
EnableMagnifier
[0 |1 ]
End
Disabled (0) or enabled (1)
Ends the viewer application
FontName
[font]
Set the main font
FontSize
[size]
Set size of the main font
Height
[pixel]
Height of the Remote Viewer main window
Help
Writes the help command line parameter into the log file
HideAppWhileControlling
[0|1]
specifies if to hide the application while controlling, 0(default)
HostName
[name]
Name of the workstation in network with the screen content to be
depicted on the display wall
HostServerType
[0..3]
0: ProServer (default), 3: SCN server
HostServerPort
[-1,0..]
-1: use standard (default), or specify port to use for connection
IconizeApplication
[0 |1 ]
Disabled (0) or enabled (1)
IconizeAppOnReleaseCtrl
[0|1]
Specifies if to iconize the app on release control, 0(default)
Ident
[]
Unambiguous name of the Remote Viewer instance
LabelFontName
[font]
Set the font of the label
LabelFontSize
[size]
Set the size of the font for the labels
Left
[Pixel]
Left position of the application window
LeftHost
[name]
Name of the host to be controlled if in squid mode the cursor
moves on the left edge
LeftHostPassword
[password]
Password of the host to be controlled if in squid mode the cursor
moves on the left edge
LocatorVisible
[0 |1 ]
Disabled (0) or enabled (1)
Password
[password]
Password of the workstation to be displayed
RightHost
[name]
Name of the host to be controlled if in squid mode the cursor
moves on the right edge
RightHostPassword
[password]
Password of the host to be controlled if in squid mode the cursor
Barco – Apollo – DOC-3197-2 – user's manual – Revision 08 – November 2006 _________________________________________________ 185/402
6. Viewer
moves on the right edge
SourceConnected
[name]
Freely definable name of the currently applicable source. The
viewer will activate the preceding settings and display the source.
SourceRequested
[name
Name of a source as defined in the ServerData\viewersources.ini
file. The viewer will activate the settings selected for this source
and display the source.
Splash
[0 | 1]
Displays (1) or hides (0) the splash screen when launching the
application
SquidHoverLatencyIntervals
[shlt:x;y];
x:0…1;
customize squid mode latency to connect or disconnect if hoovering the edges. String of the form -shlt:x;y. x determines the latency specified in milliseconds to be passed hovering the mouse
before connecting in squid mode.
y determines the latency
specified in milliseconds to be passed hovering the mouse before
disconnecting if connected in squid mode. Valid range for x is: [0,
..], 0 means to react immediately. Valid range for y is: [-1, 0, ..],
-1 means disabled, 0 means react immediately. Default value for
x is 0. Default value for y is -1.
Y:-1…0
SquidMode
[0 |1 ]
Disabled (0) or enabled (1)
TakeControl
[0 |1 ]
Disabled (0) or enabled (1)
Top
[Pixel]
Top position of the application window
TopHost
[name]
Name of the host to be controlled if in squid mode the cursor
moves on the top edge
TopHostPassword
[password]
Password of the host to be controlled if in squid mode the cursor
moves on the top edge
Width
[Pixel]
Width of the Remote Viewer main window
186/402 _________________________________________________ Barco – Apollo – DOC-3197-2 – user's manual – Revision 08 – November 2006
7. Explorer
7 Explorer
The Apollo Explorer offers a new user interface with access to all functions of the Device Manager, Remote
Desktop, and Layout Selector. The applications are integrated in the Explorer but can also still be launched as
stand-alone programs.
The descriptions of the functions of the Device Manager, Remote Desktop, and Layout Selector in the manual
apply exclusively to working from within the Apollo Explorer.
Barco – Apollo – DOC-3197-2 – user's manual – Revision 08 – November 2006 _________________________________________________ 187/402
7. Explorer
7.1 Starting the Explorer
Use the following shortcut to launch the Explorer:
Start|Programs|Barco Apollo|Explorer.
7.2 Explorer User Interface
The Explorer offers access to all functions of the Apollo applications Device Manager, Remote Desktop, and
Layout Selector.
7.2.1 Default settings
A vertically split window with menu bar, tool bar, and status bar opens when the Explorer is launched for the
first time after installation. You can customize this view and the Explorer opens with the modified view when
launched again.
Delete the AolloExplorer.ini file located in the user-specific folder to reset the user
interface!
Windows NT: …./Winnt/Profiles/User/Local Settings/Apollo/ApolloExplorer.ini
Windows 2000: …/Documents and Settings/User/Local
Settings/Apollo/ApolloExplorer.ini.
Exit the Explorer before resetting!
The Explorer user interface is then set back to the default settings when launched again.
7.2.2 Split window
All objects of an Apollo Project are listed in an object tree. A selected object is displayed in the workspace (second pane of window), either in the form of a list with name and type or graphically (mini window).
Use the context menu (right mouse click) to control the selected object within the workspace.
188/402 _________________________________________________ Barco – Apollo – DOC-3197-2 – user's manual – Revision 08 – November 2006
7. Explorer
7.2.3 Adjusted menu bar
Menu bar and tool bar are adjusted depending on the object type. If the Desktop Server is selected, the menu
bar and the tool bar are expanded to give access to the functionalities of the Remote Desktop and the Layout
Selector.
7.2.4 Task bar
The task bar always depict type and name of the selected object in the object tree.
Barco – Apollo – DOC-3197-2 – user's manual – Revision 08 – November 2006 _________________________________________________ 189/402
7. Explorer
7.3 Object Tree
The object tree displays an alphabetical list of all object types of the current Apollo Project.
The Explorer’s object tree depicts object types from the following sources:
Object Type
Source
Device
File devices.ini, generated by the Control Room Configurator when exporting the Visio
file of the Apollo Project
Display source
File ServerData\viewersources.ini, entries have to be edited manually,
cf. The ServerData\viewersources.ini File
Web source
File ServerData\viewersources.ini, entries have to be edited manually,
cf. The ServerData\viewersources.ini File
TV source
File ServerData\viewersources.ini, entries have to be edited manually,
cf. The ServerData\viewersources.ini File
Desktop Server
File DesktopServer.ini, generated by the Control Room Configurator when exporting
the Visio file of the Apollo Project
Viewer
Configured and launched viewers
This information is written to the file ApolloExplorer.ini, by the Control Room Configurator when exporting a
valid Apollo Project. This file is located in the subfolder ServerData of the Apollo Project and is automatically
distributed to all Apollo network servers.
The different sources have to be defined in the ServerData\viewersources.ini file before
they can be displayed in the object tree!
Object tree entries are updated immediately as soon as the ServerData\viewersources.ini
file has been saved.
The ServerData\viewersources.ini file has to be customized in the subfolder ServerData of
the Apollo Project. Changes in files with the same names located in other directories are
always overwritten by the file located in the ServerData subdirectory.
Starting with Apollo Release 1.6, it is possible to exclude an object type from being listed in the object tree. If the
object type listed in the ApolloExplorer.ini file starts with a dash, it is not added to the list:
190/402 _________________________________________________ Barco – Apollo – DOC-3197-2 – user's manual – Revision 08 – November 2006
7. Explorer
In the object tree of the Apollo Explorer the devices HermesD2D are listed, whereas Hermes V2A is excluded (the
object type starts with a dash). The pictures show the influence of this section in the ApolloExplorer.ini of the
object tree before and after excluding Hermes V2A:
As default, the Digital Stream Source is excluded since these sources cannot be applied with /Source
requested. The Security Provider is excluded to be compatible with previous versions.
The ApolloExplorer.ini file is located in the subfolder ServerData of the Apollo Project and is
automatically distributed to all Apollo network servers.
A user-specific ApolloExplorer.ini file also exists to save the customized settings of the user
interface.
Windows NT: …./Winnt/profiles/user/Local Settings/Apollo/ApolloExplorer.ini
Windows 2000: …/Documents and Settings/User/Local
Settings/Apollo/ApolloExplorer.ini.
7.3.1 Desktop Server
All active Desktop Servers of the Apollo Project are listed with the Desktop Server entry and the subentry of the
associated display wall.
Select the Desktop Server entry to display the complete name of the Desktop Server in the workspace. Use the
context menu of the Desktop Server to establish a link with the Display Wall.
Barco – Apollo – DOC-3197-2 – user's manual – Revision 08 – November 2006 _________________________________________________ 191/402
7. Explorer
Click on the + sign next to Desktop Server to view the name of the display wall.
The link with the Display Wall is established as well by clicking on the name of the Display Wall
listed in the object tree.
192/402 _________________________________________________ Barco – Apollo – DOC-3197-2 – user's manual – Revision 08 – November 2006
7. Explorer
Select the Display Wall and the menu and tool bar of the Explorer are expanded with the entries and the functionality of the Remote Desktop and the Layout Selector. The workspace shows the configuration of the Display
Wall (Remote Desktop), the defined and loaded layouts (Layout Selector).
7.3.2 Device
Click on the + sign next to Device to view all device types of the Apollo Project.
Select a device type to view the names of the devices assigned to this device type.
The device types and device names are specified by the Control Room Configurator.
Barco – Apollo – DOC-3197-2 – user's manual – Revision 08 – November 2006 _________________________________________________ 193/402
7. Explorer
7.3.3 Overview: device
Lists only device supported by Apollo and with the corresponding template prepared by
the Visio Configurator. Of course, the device has to be actually part of the current Apollo
Display Wall configuration to be listed in the object tree.
Click on the name in the workspace (right mouse button) of a device to open the context menu.
The context menu includes the Properties menu item used to open the Properties dialog box to
control the device.
This allows you access to the device manager functionality, cf. Device Manager in the
Explorer.
Use the Explorer.ini file to define additional menu items for the context menu.
Customization of the context menu also allows to define commands that are active even
when multiple devices are selected at once. This makes it possible, for example, to turn
of all projectors with just one mouse click.
7.3.4 Display Source
The display source object is depicted in different forms: Proxy Host, Frame Grabber Source, Visu Source, VNC
Source. These are the sources defined in the current Apollo project. There could also be listed Framegrabber
Stream Source, ProServer Source.
These variations are displayed when clicking on the + sign of the display source.
7.3.4.1 Framegrabber source
This object type represents all TransForm A input cards of the project used to display analog video and RGB
sources (BigVideo Card, QuadVideo Card, RGB-Input Card, QuadAnalog Input Card, Dual RGB Input Card) .
Select Framegrabber Source in the object tree to list in the workspace all of the input card names defined in the
ServerData\viewersources.ini file.
7.3.4.2 Framegrabber stream source
This object type represents all Streaming Video Cards of the project used to display a digital video stream.
Select Framegrabber Stream Source in the object tree to list in the workspace all of the input card names defined
in the ServerData\viewersources.ini file.
7.3.4.3 Proxy host:
This object type represents all workstations of the project with screen contents to be shown on the Display Wall
with the help of the Cottus Viewer.
Select Proxy Host in the object tree to list in the workspace all of the workstation names defined in the
ServerData\viewersources.ini file.
194/402 _________________________________________________ Barco – Apollo – DOC-3197-2 – user's manual – Revision 08 – November 2006
7. Explorer
7.3.4.4 Visu source
This object type represents all Visu input cards of the project used to display analog video and RGB sources (video
input, input card).
Select Visu Source in the object tree to list in the workspace all of the Visu Input Unit names defined in the
ServerData\viewersources.ini file.
7.3.4.5 VNC source:
This object type represents all workstations of the project with screen contents to be shown on the Display Wall
with the help of the VNC Viewer.
Select VNC Source in the object tree to list in the workspace all of the workstation names defined in the
ServerData\viewersources.ini file.
7.3.4.6 Pro Server source:
This object type represents all workstations of the project with screen contents to be shown on the Display Wall
with the help of the ProViewer.
Select Pro Server Source in the object tree to list in the workspace all of the workstation names defined in the
ServerData\viewersources.ini file.
7.3.5 Web Source
The Web Source object type takes two different forms: General page and general data stream.
These variations are displayed when clicking on the + sign of the Web source.
7.3.5.1 General page
This object type represents all predefined Internet pages of the project to be shown on the Display Wall with the
help of the Web Viewer.
Select General Page in the object tree to list in the workspace all of the Internet address names defined in the
ServerData\viewersources.ini file.
Barco – Apollo – DOC-3197-2 – user's manual – Revision 08 – November 2006 _________________________________________________ 195/402
7. Explorer
7.3.5.2 General data stream
This object type represents all predefined digital media streams to be shown on the display wall with the help of
the MPEG Viewer.
Select General Data Stream in the object tree to list in the workspace all media stream addresses defined in the
ServerData\viewersources.ini file.
7.3.6 TV Source
The TV Source object type takes the form of a videotext page.
This variation is displayed when clicking on the + sign of the TV source.
7.3.6.1 Videotext page
This object type represents all predefined videotext pages of the project to be shown on the Display Wall with
the help of the VTplus Viewer.
Select Videotext Page in the object tree to list in the workspace all of the videotext page names defined in the
ServerData\viewersources.ini file.
7.3.7 Overview: object tree sources
The entries Display Source, Web Source, and TV Source together with their subentries serve only as a graphical
source of information using the defined viewer-specific sources. They cannot be edited or controlled. These entries do not feature a context menu.
196/402 _________________________________________________ Barco – Apollo – DOC-3197-2 – user's manual – Revision 08 – November 2006
7. Explorer
7.3.8 Viewer
Click on the + sign next to the viewer to list all configured and launched viewers (FRG Viewer, Visu Viewer,
Cottus Viewer, VNC Viewer, Web Viewer, Mpeg Viewer, VTplus Viewer, ProViewer, Remote Pointer).
This entry will be missing from the object tree if none of the viewers have been started.
7.3.8.1 Web Viewer
This object type represents all started Web Viewers of the Apollo Project.
Select Web Viewer in the object tree to list in the workspace all names of the launched Web Viewer instances
(Ident).
7.3.8.2 Cottus Viewer
This object type represents all started Cottus Viewers of the Apollo Project..
Select Cottus Viewer in the object tree to list in the workspace all names of the launched Cottus Viewer instances
(Ident).
The same applies to the FRG Viewer, Visu Viewer, VNC Viewer, ProViewer, Remote Pointer,
MPEG Viewer, and the VTplus Viewer:
The corresponding entry and the name of the instances are listed in the workspace as soon as a
viewer is launched.
Barco – Apollo – DOC-3197-2 – user's manual – Revision 08 – November 2006 _________________________________________________ 197/402
7. Explorer
7.3.8.3 Overview: Viewer
Lists only launched viewers regardless of how the viewers were launched, whether together
with a layout, a shortcut on the Display Wall, or the command interface.
Click on a viewer name in the workspace (right mouse button) to open the context menu. The
context menu includes the Properties menu item used to open the Properties dialog box to
control the device.
This allows you access to the viewer control functionality, cf. Controlling Viewers.
Use the Explorer.ini file to define additional menu items for the context menu.
Customization of the context menu also allows to define commands that are active even
when multiple devices are selected at once. This makes it possible, for example, to hide or
show the contents of all viewer windows with just one mouse click.
7.4 Source Tree View
Since Apollo 1.9 the Apollo Explorer provides a separate window with a second tree view listing all available
viewer sources. The window is displayed / hidden via the command button on the bottom of the object tree
labled Tree view for viewer sources.
Via drag and drop, a source listed in the tree view can be assigned to a viewer, cf. Working with the Remote Desktop.
198/402 _________________________________________________ Barco – Apollo – DOC-3197-2 – user's manual – Revision 08 – November 2006
7. Explorer
7.5 Explorer workspace
The selection of the node in the object tree determines what is displayed and how it is displayed; see Object Tree
Objects in the workspace have a context menu, with the exception of the sources, which can be accessed by
clicking with the right mouse button..
The context menu includes the Properties menu item used to open the Properties dialog box to control the objects.
7.6 Explorer menu bar
The Explorer menu bar includes the following items: Explorer, View, Remote Desktop, Layout Selector, Tools, and
Help.
Menu items depend on the selected node in the object tree: The menu items Remote Desktop
and Layout Selector are only available if the selected display wall is controlled by a Desktop
Server.
7.6.1 Explorer menu
Select Exit to close the Apollo Explorer. Specified settings are saved and the Explorer opens with these settings
next time it is launched.
Barco – Apollo – DOC-3197-2 – user's manual – Revision 08 – November 2006 _________________________________________________ 199/402
7. Explorer
7.6.2 View menu
Use this menu to select how and what the Explorer window shows. Related commands are grouped together: A
checkmark before the menu item enables this item.
Object Tree: Checkmark set = object tree is shown; no checkmark = object tree is hidden
Left: Object tree position, only active if object tree is displayed. Results in a vertically split window: Object tree on
left, workspace on right.
Top: Object tree position, only active if object tree is displayed. Results in a horizontally split window: Object tree on top,
workspace on bottom.
Left/top are toggle commands if “Show object tree” has been enabled.
Refresh: Redraws the Explorer window. Corresponds with the button in the tool bar with the same name. Use this function, for
example, to apply changes in the ServerData\viewersources.ini or in the ApolloExplorer.ini file to the object tree.
Sorted by Groups: Sorts the objects of the object tree by groups as defined in the configuration plan. A group
always starts with the same name.
Sorting by Types: Sorts the objects of the object tree by types (classes), i.e., according to sources, devices, desktop servers, viewers, etc. as defined in the configuration plan.
View sorted by groups or types are toggle commands.
Full Names: Objects are displayed with the full name used to define the objects in the control room bus. Only the
last characters (after the last dot/extensions) are displayed as names if this option is disabled.
200/402 _________________________________________________ Barco – Apollo – DOC-3197-2 – user's manual – Revision 08 – November 2006
7. Explorer
Menu Bar: Menu bar is shown if the checkmark is set.
The command to show the menu bar again is located in the context menu of the window's title
bar. This context menu, opened by clicking with the right mouse button, offers not only the
familiar Windows commands to manipulate the window but also the command to show the
menu bar.
The command to hide the menu bar can also be reversed by editing the ApolloExplorer.ini file
located in the user-specific folder.
Windows NT: …./Winnt/profiles/user/Local Settings/Apollo/ApolloExplorer.ini
Windows 2000: …/Documents and Settings/User/Local Settings/Apollo/ApolloExplorer.ini.
Changes to this file are not applied if the Apollo Explorer is in use! Close the Explorer
before editing this file!
Tool Bar: Checkmark set = tool bar is shown; no checkmark = tool bar is hidden
Status Bar: Checkmark set = status bar is shown; no checkmark = status bar is hidden
7.6.3 Tools menu
Menu item Options in the Tools menu opens a dialog box featuring five tabs used to customize the graphical
workspace.
The commands on these tabs refer to the Remote Desktop and the Layout Selector, both of
which are active only if the Display Wall has been selected in the object tree. Only then does
the workspace show the graphical display.
However, the configuration of this graphical display can be customized regardless of the
selection made in the object tree.
Barco – Apollo – DOC-3197-2 – user's manual – Revision 08 – November 2006 _________________________________________________ 201/402
7. Explorer
7.6.3.1 Remote Desktop tab
Layout Selector
All of the options are only selectable when the Layout Selector is displayed.
Choose Show Selector to display the Layout Selector in the workspace. The position of the Layout Selector in the
workspace can be specified in reference to the Remote Desktop: Either on Left Side (workspace is split vertically)
or Above the Desktop (workspace is split horizontally).
The Layout Selector covers the entire workspace if the Remote Desktop is not displayed.
Choose Show Stack to display all loaded layouts. These can be depicted either to the right of the available layouts
(Show Buttons on Left Side) or below the available layouts (Show Buttons Above the Stack).
Use the list box to specify the icon size of the available layouts. Layouts can be listed only by name (without
icon) as well.
Use the Lock Selector option to disable the Layout Selector functionality. Already loaded layouts cannot be unloaded and not yet loaded layouts cannot be loaded. The buttons of all layouts are then disabled as well.
Remote Desktop:
All of the options are only selectable when the Remote Desktop is displayed.
Select Show Desktop to display the Remote Desktop in the workspace. The Keep Aspect Ratio option has to be
checked to show the display wall with the actual aspect ratio. This preserves the aspect ratio of the virtual desktop and matches the aspect ratio of the actual module configuration. The mini windows have the same aspect
ratios as the display wall windows.
Use the Lock Desktop option to disable and lock the functionality of the Remote Desktop application as well. The
mini windows can then no longer be manipulated and the Display Wall cannot be changed via the Remote
Desktop. Changes carried out on the Display Wall continue to be shown.
202/402 _________________________________________________ Barco – Apollo – DOC-3197-2 – user's manual – Revision 08 – November 2006
7. Explorer
Select Keep Connection to maintain the link between Remote Desktop and Desktop Server even when clicking
on device, for example, in the object tree, which deactivates the Remote Desktop and the Layout Editor.
If the Keep Connection option is not checked, the link is severed when switching to the a different node in the object tree and has to be reestablished by clicking on the Display Wall.
Starting with Apollo 1.9 there is an option Allow to resize 'non-sizable' windows. As default, this option is not
selected. When ticked, the size of e.g. viewer windows which have no borders (and which therefore cannot be
resized) can be modified.
The taskbar can be shown or hidden. If shown, you can select the position of the taskbar.
7.6.3.2 Preview tab
Starting with Apollo 1.8, the remote desktop offers to show content preview of the applications running on the
display wall (also for viewers, except for the FRG viewer, for this viewer "content placeholders" can be defined,
see below 7.6.3.3 Frg Pictures tab).
This functionality is built on the Pro Sever which has to be installed on the desktop server. Select it from one of
the Pro Server sources defined in the viewersources.ini (use Pro Server source) or define it (specify Pro
Server). Then the name of the host computer and the password has to be specified.
Check Show preview to see the content of the viewer in the mini window on the remote desktop. Define the
refresh interval for updating the preview content.
The following pictures show the appearance of the remote desktop in case preview is switched off (not selected)
and switched on (selected), respectively.
Please note that for the FRG viewer windows no preview can be shown (blue window). To
get information about the sources displayed via the FRG viewer, cf. 7.6.3.3 Frg Pictures tab
Barco – Apollo – DOC-3197-2 – user's manual – Revision 08 – November 2006 _________________________________________________ 203/402
7. Explorer
The content preview can also be switched on/off using the respective button on the
toolbar.
204/402 _________________________________________________ Barco – Apollo – DOC-3197-2 – user's manual – Revision 08 – November 2006
7. Explorer
7.6.3.3 Frg Pictures tab
As already mentioned, it is not possible to show a preview of an FRG viewer window on the remote desktop. To
get at least information about the source, the functionality Show FRG Pictures has been implemented. This
functionality allows you to specify a bitmap for every state of the source (playing, frozen, paused, no signal).
According the actual status of the source, the respective bitmap is shown on the representative of the viewer
window on the remote desktop.
The following pictures show the remote desktop with Show FRG Pictures switched off (Show FRG pictures unselected) and switched on (Show FRG pictures selected)
Barco – Apollo – DOC-3197-2 – user's manual – Revision 08 – November 2006 _________________________________________________ 205/402
7. Explorer
Switching on and off the FRG pictures can be also done using the respective button on the
toolbar.
When activating the FRG pictures, the windows also show a top banner: this is the entry of the IDC1 (to be
specified in the Decoration tab on the property page of the viewer.
To remove the banner from the FRG viewer window in the remote desktop, it is not
sufficient to disable IDC1.
In case you do not want a caption on these windows, enter an empty string as value for
the IDC1!
Any desired bitmap can be used to visualize the respective status of the viewer.
To replace the bitmap, first select the input type you want to define the bitmap for. The list box shows the entries for the Quad Analog Video Card, the Dual RGB Input card, the Quad SDI Video Card, the Streaming Video Card
and the SCN.
Select one of the status. Click on Open (or double click on the entry) to open the folder where the bitmaps are
stored. If desired, browse for a different bitmap.
206/402 _________________________________________________ Barco – Apollo – DOC-3197-2 – user's manual – Revision 08 – November 2006
7. Explorer
Barco – Apollo – DOC-3197-2 – user's manual – Revision 08 – November 2006 _________________________________________________ 207/402
7. Explorer
7.6.3.4 Appearance tab
Use this tab to set the colors for the following elements:
•
Desktop color
•
Desktop border
•
Active window
•
Inactive window
•
Locked window
•
Selected region
•
Region color
•
Disabled region
Select an element to be customized from the list box. The current color of the element is displayed.
Click on the button next to the displayed color to open the Windows standard color selection dialog box.
Select a color.
208/402 _________________________________________________ Barco – Apollo – DOC-3197-2 – user's manual – Revision 08 – November 2006
7. Explorer
7.6.3.5 Command Line options tab
Use the Command Line Options tab to open the Explorer using a shortcut with the preset values for such functions as viewing settings. This requires assigning the corresponding parameters to the shortcut.
These parameters are listed in the following table.
The easiest way to pass the right parameter set to the shortcut is to customize the user
interface of the Explorer as desired and then to update and highlight the entries on the
Command Line Options tab. Use CTRL+C or the copy command from the context menu to copy
these entries and then paste them into the Properties dialog box of the shortcut.
The Explorer's user interface can be customized as needed. For example, a screen similar to the former independent application Layout Selector can be specified by hiding the object tree and the Remote Desktop.
Cerate a shortcut incl. the corresponding command line options to launch an instance of the Explorer using this
user interface.
The number of parameters definable for a Windows shortcut is limited.
The user-specific ApolloExplorer.ini file is NOT overwritten when launching an Explorer instance
using a shortcut with an Ident parameter.
Barco – Apollo – DOC-3197-2 – user's manual – Revision 08 – November 2006 _________________________________________________ 209/402
7. Explorer
7.6.4 Valid Command line options
Syntax: ApolloExplorer.exe [/<option>:<value>][/<option>:<value>].
Option
Value
Meaning
/aspectratio, /asprat, /ar
0, 1
keep the aspect ratio of the remote desktop
/buttonpanel, /btnpnl, /bp
0, 1 (or left),
2 (or top)
hide layout button panel/show it on the left
side/above the layout stack
/bytype, /bt
0, 1
view objects in the treeview by group/by
type
/columnwidth1, /colw1, /cw1
<width>
width of the first column in the object list
/columnwidth2, /colw2, /cw2
<width>
width of the second column in the object list
/connection, /con, /c
0, 1
keep connection to the desktop server even if
the remote desktop is not visible
/desktoplocked, /dsklock, /dl
0, 1
unlock/lock the remote desktop
/end
End the program
/fontname, /fnt
<font>
Set the main font
/fontsize, /fntsz
<size>
Set size of the main font
/fullnames, /fn
0, 1
show short/full names in the object list
/height, /h
<height>
height of the main window
/help, /?
/ident, /id
Show command options
<name>
Starts the Explorer assigning the specified
name.
If an Explorer with this name is already running, this instance is activated and the command options are sent to it. The second instance is closed.
/labelfontname, /lblfnt
<font>
Set the font for the labels
/labelfontsize, /lblfntsz
<size>
Set size of the font for the labels
/LayoutIconSize, /lis
0,1,2,3,4
0
no icons
1
small icons
2
medium icons
3
large icons
4
extra large icons
/layoutselector, /laysel, /ls
0, 1 (or left),
2 (or top)
hide the layout selector/show it on the left
side/above the remote desktop
/left, /l
<left pos>
left coordinate of the main window
/menubar, /mb
0, 1
hide/show the menu bar
/objecttree, /ot
0, 1 (or left),
hide the objecttree/show it on the left
side/above the object list
2 (or top)
/refresh, /r
refresh the object tree and object list
210/402 _________________________________________________ Barco – Apollo – DOC-3197-2 – user's manual – Revision 08 – November 2006
7. Explorer
Option
Value
Meaning
/remotedesktop, /remdsk, /rd
0, 1
hide/show the remote desktop
/select, /sel, /s
<node>\\<item>
Select the node in the object tree and the
item in the object list. Node and Item are
separated by \\.
/selectorlocked, /sellock, /sl
0, 1
unlock/lock the layout selector
/splash, /spl
Shows the splash screen at startup of the
Explorer.
/splitterbuttonsstack, /sbtnstk, /sbs
<position>
position of the splitter bar between layout
button panel and the layout stack
/splitterposition, /splitpos, /sp
<position>
position of the splitter bar between the object
tree and the object list
/splitterselectordesktop,/sseldsk, /ssd
<position>
position of the splitter bar between layout
selector and the remote desktop
/splittertaskbardesktop,
/std
<position>
position of the splitter bar between taskbar
and the remote desktop
/stack, /st
0, 1
hide/show the layout stack
/statusbar, /sb
0, 1
hide/show the status
/taskbar, /tskbar, /tsk
0, 1 (or left),
4 (or bottom)
hide the taskbar/show it on
side/below the remote desktop
/toolbar, /tb
0, 1
hide/show the toolbar
/top, /t
<top pos>
top coordinate of the main window
/width, /w
<width>
width of the main window
/stskbdsk,
the
left
7.7 Help menu
The Help menu offers access to the table of contents of the online help.
About shows software version information.
Barco – Apollo – DOC-3197-2 – user's manual – Revision 08 – November 2006 _________________________________________________ 211/402
7. Explorer
7.8 Remote Desktop menu
The component Remote Desktop is installed on every computer that is to have access to the windows of the
Display Wall. Use this component to manipulate the windows of the Display Wall from a separate and remote
workstation.
After the Desktop Server has been launched, it will first determine which windows are currently open. Title, position, and size of each window are determined. This information is dynamically updated.
The window information is passed to the Control Room Bus and therefore at once available for the Apollo Remote Desktop.
A missing link between the Remote Desktop and the Display Wall is indicated on the virtual desktop.
In order to control a Display Wall, a connection has to be established between the Remote Desktop and the
Desktop Server.
212/402 _________________________________________________ Barco – Apollo – DOC-3197-2 – user's manual – Revision 08 – November 2006
7. Explorer
7.8.1 Connect
A dialog opens when selecting the Connect option in the Remote Desktop menu. All of the Display Walls that
can be linked are listed here. Online indicates the Display Walls (Desktop Servers) which had already been
launched and which can be connected at that point in time.
The window now shows on the left area the integrated Layout Selector with the region tabs (if regions are defined in the database), layout icons in the layout area, and the layout stack. The right shows the virtual desktop
with its mini windows and the taskbar.
Barco – Apollo – DOC-3197-2 – user's manual – Revision 08 – November 2006 _________________________________________________ 213/402
7. Explorer
7.8.2 Virtual Desktop
The virtual desktop shows a mini window for every visible window of the loaded layout. Depending on the
permissions, the layouts of the Display Wall can be modified by means of the mini windows on the virtual desktop. The windows are also displayed as a button in a virtual taskbar.
The mini-windows on the desktop feature the properties defined for the windows of the layout loaded on the
Display Wall. The title bar of the mini-windows, the contents of the windows, the buttons on the taskbar do also
have a context menu. The title of the window or, if available, the description is displayed as tool tip. In addition
the description will also be displayed in the client window.
214/402 _________________________________________________ Barco – Apollo – DOC-3197-2 – user's manual – Revision 08 – November 2006
7. Explorer
7.8.3 Task bar
Click on the Start button in the task bar to view all shortcuts which has been defined in
the layout. To launch the desired application, just select it.
Barco – Apollo – DOC-3197-2 – user's manual – Revision 08 – November 2006 _________________________________________________ 215/402
7. Explorer
7.8.4 Window properties
A dialog opens to define the properties of the selected window in the layout.
The Always on top option means that the selected window will always be displayed on top of all the others.
Sizable means that the size of the window can be changed using the mouse or the system menu. A window
with a changeable size can snap to the grid with all four corners.
Use the Visible property to show or hide a window. A hidden window is not displayed in the taskbar either.
Enter a descriptive or explanatory text or commentary about the window into the description field. This text is
displayed as tool tip and saved in the layout
216/402 _________________________________________________ Barco – Apollo – DOC-3197-2 – user's manual – Revision 08 – November 2006
7. Explorer
7.8.5 Invisible windows
This displays a list of programs running in the background. Select the desired program and click on Show to
move the program to the foreground.
7.8.6 Command line
Here, you enter the command for launching an application on the Display Wall. Select the shortcut of the program to be launched from the Shortcut list field or type it into the field. File contains the name of the document
to be opened. The Start in field contains the directory where the program is to be started from. If any additional
parameters are to be passed, enter these into the Parameter field.
7.8.7 Keyboard input
Use an input dialog to send keyboard input to a window. This utilizes the same syntax as for the VB function
SendKeys (see Commands via keyboard ), i.e., special characters exist for special symbols and keyboard combinations.
Select the target from the list box.
Barco – Apollo – DOC-3197-2 – user's manual – Revision 08 – November 2006 _________________________________________________ 217/402
7. Explorer
7.8.8 Show FRG pictures
This command displays/hides the bitmaps indicating the status of the source in the FRG viewer window on the
remote desktop, cf. 7.6.3.3 Frg Pictures tab
7.8.9 Show preview
This command shows/hide a preview of the content of the applications and viewer windows in the representative on the remote desktop, cf. 7.6.3.2 Preview tab.
7.8.10 Refresh preview
This command triggers immediately the refresh of the preview content. The content is automatically updated
according the refresh interval specified in the Options dialog, Preview tab, .cf. 7.6.3.2 Preview tab. Use this command to make sure that the preview shows the current content.
218/402 _________________________________________________ Barco – Apollo – DOC-3197-2 – user's manual – Revision 08 – November 2006
7. Explorer
7.8.11 Permissions
Use this command to edit the permission of the respective item. The Permission dialog pops up, in which all
items are listed which have permissions assigned to: Menu items, regions, layouts, shortcuts.
Select the desired entry and click on Edit. The Permission edit dialogs is displayed. This dialog is also available
via the context menu of the region tabs, layout buttons, and the region area in the virtual desktop.
Please refer to Permissions to get information on the specific permissions of an item.
Barco – Apollo – DOC-3197-2 – user's manual – Revision 08 – November 2006 _________________________________________________ 219/402
7. Explorer
7.8.12 Permission edit
Select the respective access user group to view which permissions are available and how they are given
Click on No Access to remove all permissions. Click on Default Access to assign the permissions as defined in the
AccessGroups.ini file, cf. Defining accessGroups. Check or uncheck the respective item. Click Apply to assign the
modifications to the access user group. Select OK to assign the modifications and to close the dialog. Press
Cancel to close the dialog without any modifications.
The Permission Edit dialog also opens via the Permission command of the context menu
(right mouse click) of the region tab, the layout icons, and the representatives of the
region in the virtual desktop
220/402 _________________________________________________ Barco – Apollo – DOC-3197-2 – user's manual – Revision 08 – November 2006
7. Explorer
7.8.13 Working with the Remote Desktop
It is recommended to define permanent layouts for the windows of the Display Wall. A layout is the arrangement
of different windows on the entire desktop or in one or more regions on the Display Wall. Position and size is
specified in a layout for each window and references to the upper left corner of the region.
If regions are defined, the position of a window is given relative to the upper left corner
of this region.
If regions are defined, and if a region is selected, the virtual desktop shows the region,
not the entire Display Wall. Please keept this in mind when arranging the windows of a
layout – on the Display Wall, it might be necessary to shrink or overlap the windows to
make them fit into the region
The name of each window is listed in the title bar. Layouts are easily defined with the Layout Editor and saved
in the Apollo database.
The Remote Desktop does not access the Apollo Database but the Control Room Bus. The Control Room Bus
has access to the Apollo database, in addition it receives updated information from the Desktop Server of the
Display Wall or and passes updated information to the Desktop Server, respectively.
The following interactions require the appropriate permissions, e. g. it is not possible to click on a layout icon if
these are invisible.
Establish a link with the Display Wall. Select the layouts to be loaded from the layout bar.
Activating or loading a layout rearranges any possibly already open windows or launches additional applications
if their windows have yet to be detected.
Several layouts can be active simultaneously. These are then managed in a stack. If a window is associated with
several layouts, its position and size is determined by the layout activated or loaded last, i.e., the uppermost
layout.
If a layout is removed the windows of the remaining layouts are then rearranged.
You can resize, reposition, minimize, maximize, or close windows on the virtual desktop using the mini-windows
on the virtual desktop. If regions are defined, repositioning of windows belonging to a layout can only be done
within the respective region.
Use the usual mouse interaction on the virtual desktop for these manipulations.
To Start an application select Edit|Command Line. Enter the required parameters into the dialog., see Command
line
Close the windows of an application to end the application using the usual mechanisms. Use the Close entry
from the system menu or the corresponding entry of the context menu of the respective button in the taskbar
(right mouse click).
Closing the window of an application usually also terminates that application. Please note that some applications
require user input with the help of a dialog when they are terminated (save, etc.). As long as you make sure that
a window does not lose its focus, you can send keyboard input to a window. Select Edit|Keyboard Input to send
input via keyboard to a window . Specify the characters you would like to pass to the window, see Commands via
keyboard
To show a preview of the content of viewer windows, select Remote Desktop|Show preview. For the FRG
viewer, no content preview can be shown, but the status of the source can be visualized using dedicated
bitmaps. Select Remote Desktop|Show FRG pictures to display the status indication bitmaps.
Starting with Apollo 1.9, a viewer can be connected to a viewer souce via drag and drop: If the button Tree view
for viewer sources is pressed, a separate window opens showing a tree view which lists all the viewer sources
defined and specified in the files VieweerSources.ini and DigitalStreamSource.ini.
Dropping a source node is only allowed if the mini window is an instance of an appropriate
viewer tye, e.g. generic stream can only be dropped in a window of the Mpeg Viewer.
Dropping a generic stream e.g. into a window of the Cottus Viewer is rejected!
Barco – Apollo – DOC-3197-2 – user's manual – Revision 08 – November 2006 _________________________________________________ 221/402
7. Explorer
222/402 _________________________________________________ Barco – Apollo – DOC-3197-2 – user's manual – Revision 08 – November 2006
7. Explorer
7.9 Layout Selector menu
7.9.1 Layout Selector
Use the Layout Selector to easily load and remove layouts from a remotely linked Display Wall. Layouts have to
be defined in the Layout Editor and saved in a database first.
After the Desktop Server has been launched, it will first determine which windows are currently open. Title, position, and size of each window are determined. This information is dynamically updated.
The window information is passed to the Control Room Bus and therefore at once available for the Apollo clients
Layout Selector.
The changes made by the Layout Editor to the database connected to the Layout Selector, have effect at once
due to the Control Room Bus communication.
Unload and reload the layout again to apply modifications made by the Layout Editor on a
layout which is currently loaded.
Barco – Apollo – DOC-3197-2 – user's manual – Revision 08 – November 2006 _________________________________________________ 223/402
7. Explorer
7.9.2 Connect
Clicking on the connect menu item opens a dialog listing all Desktop Servers managed from the Control Room
Bus. Select a Desktop Server to connect with. Online indicates that the respective Desktop Server has been
launched. Starting and closing Desktop Servers result in adding or removing the online indication.
As soon as the Desktop Server has been launched, the connection is established and the layouts which can be
loaded into this region are displayed with their respective icons.
When loading a layout, its name will be shown in the stack area.
7.9.3 Unload all layouts
Select Unload All Layouts to remove all loaded layouts. The unloaded layouts are removed from the layout stack,
too.
7.9.4 Reload layouts
If a layout that has been manipulated on the Display Wall is to be reset to its original state select Reload. This
command re-arranges the windows as defined in the layout.
In this mode of operation the buttons of the loaded layouts appear released. Pressing the respective button then
reloads the layout.
Reloading layout does not require to unload the layout. Windows are re-arranged according the
definitions in the layout database without having to close applications first.
Changes made in the Layout Editor on a database of a Display Wall which is connected with the Layout Selector
are immediately applied. However, new layouts or deleted layouts are only visible when re-starting the Layout
Selector.
224/402 _________________________________________________ Barco – Apollo – DOC-3197-2 – user's manual – Revision 08 – November 2006
7. Explorer
7.9.5 Save layouts
Changes made to the layout can also directly be saved in the unlocked (shared) database. A dialog opens where
you can save the changed layout or define a new one. The current arrangement of windows can be saved, without requiring a loaded layout.
If a layout is loaded on the Display Wall, its name is suggested when saving.
You can save the layout with a new name and thus add it to the database.
When saving a layout with a new name, you can define if you want to save the windows of the respective layout only or additional windows (e.g. of another layout loaded) (Save all windows of the desktop; only save windows of the layout), or whether to remove closed (missing) windows from the layout (Remove missing windows
from the layout).
A loaded layout is indicated by a ticked green bullet. In case there is no permission to save the layout (read only)
, the layout is indicated by a red crossed bullet.
When entering a new name, only the option Save all windows of the desktop is available.
Layouts should only be saved under an existing name when this layout is loaded on the
Display Wall.
Barco – Apollo – DOC-3197-2 – user's manual – Revision 08 – November 2006 _________________________________________________ 225/402
7. Explorer
The following properties of a window are saved:
new window
window of the loaded layout
Title
Yes
Yes (unchanged)
Window class
Yes
Yes (unchanged)
Shortcut
No
Yes (unchanged)
Position
Yes
Yes
size
Yes
Yes
Window state
Yes
Yes*)
description
Yes
yes
If the title includes special characters, the layout has to be revised using the Layout Editor, see
Identifying windows.
Use the Layout Editor to define the associated shortcut!
*)
If a layout has been loaded with invisible windows (i.e. the respective applications have not been launched yet),
and is then saved as a new layout, the then invisible windows will be saved with window state MINIMIZED regardless of the assigned window state. To assign the desired window state, use the LayoutEditor, please!
Invisible windows of a layout will always be saved with window state minimized!
If a layout is saved as a new layout, the advanced options Topmost, Sizable, Visible, Show title bar, will be explicitly set or cleared, even if these options in the original layout are grayed. These options will be set as the
Desktop server “sees” them.
Any locked database has to be unlocked by the Desktop Server before changes can be saved. Unlock a database
with Save and share Database in the Edit menu of the Layout Editor
226/402 _________________________________________________ Barco – Apollo – DOC-3197-2 – user's manual – Revision 08 – November 2006
7. Explorer
7.9.6 Groups
Specify whether to show all layouts or only those that belong to a specific group. Group association is specified in
the Layout Editor. Select the corresponding group in the Select Layout Group menu to display only layouts of this
group. The menu entries list all groups defined in the In Layout Editor. It is possible to select multiple groups
This menu shows a list of all groups as defined in the Layout Editor. If groups are added or removed, the entries
are dynamically updated by the Control Room Bus.
7.9.7 Active layout only
The last loaded layout can be displayed with the help of the menu button Show active layout only. In this mode
all other layouts are unloaded and removed from the layout stack and therefore displayed depressed. The button
of the active layout is displayed as pressed.
In this mode of operation, loading a layout removes all other layouts.
7.9.8 Permissions
Use this command to edit the permission of the respective item. The Permissions dialog pops up, in which all
items are listed which have permissions assigned to: Menu items, regions, layouts, shortcuts.
Barco – Apollo – DOC-3197-2 – user's manual – Revision 08 – November 2006 _________________________________________________ 227/402
7. Explorer
Select the desired entry and click on Edit. The Permission edit dialogs is displayed. This dialog is also available via
the context menu of the region tabs, layout buttons, and the region area in the virtual desktop.
Please refer to Permissions to get information on the specific permissions of an item.
Select the user group to show the specific permissions assigned to the objects.
Click on No Access to remove all permissions. Click on Default Access to assign the permissions as defined in the
AccessGroups.ini file, cf. Defining accessGroups. Check or uncheck the respective item. Click Apply to assign the
modifications to the access user group. Select OK to assign the modifications and to close the dialog. Press Cancel
to close the dialog without any modifications.
The Permission Edit dialog also opens via the Permission command of the context menu (right
mouse click) of the region tab, the layout icons, and the representatives of the region in the
virtual desktop
228/402 _________________________________________________ Barco – Apollo – DOC-3197-2 – user's manual – Revision 08 – November 2006
7. Explorer
7.9.9 Context menus
Right mouse click on the region tabs or on the layout icon displays the context menu.
Click on Reload to re-arrange the windows of the respective layout according their defined layout.
Click on Permission to view and define the permissions for the defined access user groups.
Please see the respective chapters of the menu items of the Layout Selector menu (Reload
Layout, Permissions).
Barco – Apollo – DOC-3197-2 – user's manual – Revision 08 – November 2006 _________________________________________________ 229/402
7. Explorer
7.10 Explorer tool bar
Just like the menu bar, the tool bar of the Explorer is also dependent on the selected object tree node. The number of buttons depends on whether the Display Wall is selected in the object tree, which means the Remote
Desktop and the Layout Selector are active.
Tool Tips shows which function is assigned to the buttons.
The following table lists which buttons are associated with which menu item. Additional information is listed
with the corresponding menu entries.
Symbol
Description
Note
Hide object tree
Cf. View menu
Top; Toggle button, changes button to
On left side when clicked
Cf. View menu
Sorting by Types:
Cf. View menu
Sorting by Groups:
Cf. View menu
Redraw
Cf. View menu
Complete names
Cf. View menu
Link with Desktop Server
Cf. Remote Desktop, Layout Selector menu
Only active layout
Cf. Layout Selector menu
Layout groups
Cf. Layout Selector menu
Remove all layouts
Cf. Layout Selector menu
Reload layout
Cf. Layout Selector menu
Save layout
Cf. Layout Selector menu
Window properties
Cf. Remote Desktop menu
Hidden windows
Cf. Remote Desktop menu
Command line
Cf. Remote Desktop menu
Keyboard input
Cf. Remote Desktop menu
Show FRG pictures
Cf. Tools|Options
Show preview
Cf. Tools|Options
Refresh preview
Cf. Tools|Options
Options
Correspond to Options menu item in the Tools menu
230/402 _________________________________________________ Barco – Apollo – DOC-3197-2 – user's manual – Revision 08 – November 2006
7. Explorer
7.11 Device Manager in the Explorer
Selecting the node Desktop Server|Display Wall of the object tree, the menu bar and the tool bars are completed
by the menu items and the functions of Remote Desktop and the Layout Selector. The entire functionalities of the
previous stand-alone applications are integrated in the Apollo Explorer.
In addition the object tree also gives access to the functionality of the Device Manager by selecting the node
Device. This node explodes to the tree view known from the previous stand-alone application Device Manager.
It is recommended to view th objects sorted by groups.
Click on the name of the device in the workspace to open the dialog for controlling the device.
Compared to the stand-alone application, the integrated Device Manager offers an enhanced
functionality resulting from customizing the context menu. It is e.g. possible by defining the
respective command for multiple selections to switch on all projectors simultaneously, cf.
Context menus
Devices are controlled with the Simple Network Management Protocol (SNMP). The Apollo SNMP Manager is the
interface between the Control Room Bus and the Simple Network Management Protocol (SNMP) and makes it
possible to integrate an SNMP-compatible device using a configuration file. Device-specific properties, parameters, and commands are assigned to the elements of the control room database.
Barco – Apollo – DOC-3197-2 – user's manual – Revision 08 – November 2006 _________________________________________________ 231/402
7. Explorer
The SNMP Manager runs on the computer that holds the control room database.
The devices supported by Apollo 1.5are all controlled via the Barco RC Agent.
To make use of the Device Manager, the SNMP agents first have to be installed! They are
provided on the Apollo CD-ROM. With each Apollo Release, the required RC agent is provided.
In case there is already an RC Agent installed on your system,check its version, and upgrade if
it's different from the one supplied on the Apollo CD-ROM.
The object tree shows all devices available in the Apollo Project.
However, it is not possible to change the configuration or to remove/add devices from the Apollo project.
The workspace area shows the names of all devices. Double click on the name of a device to open its property
dialog box or select it using the context menu.
Besides showing static information about device type, serial number, firmware version, software version, and
the current status of the device; device-specific settings can be changed by means of the property dialog box.
The following sections explain the property dialog box of all devices supported by Apollo.
232/402 _________________________________________________ Barco – Apollo – DOC-3197-2 – user's manual – Revision 08 – November 2006
7. Explorer
7.11.1 OverView-mP50
7.11.1.1 General
On this tab general information about the device are listed.
Name
Assigned by Control Room Configurator
Type
The rear projection systems OverView-mP50 and AtlasC4 incorporate the identical
projection engine (OverView-mP)
Device State
Gives information if the device can be addressed by the SNMP Agent
Description
Displays the designation for the type of module entered into the Control Room Configurator
Barco – Apollo – DOC-3197-2 – user's manual – Revision 08 – November 2006 _________________________________________________ 233/402
7. Explorer
7.11.1.2 Info
Device Status
Informs about the current operating state of the device
Info Startup
Informs when the SNMP Agent has been launched
Device String
Passes the internal device info about the type of projection module (OverView-mP50,
Atlas67C4)
FirmwareRev
Indicates the Firmware revision
Info Version
Informs about the SNMP Agent (type and version)
234/402 _________________________________________________ Barco – Apollo – DOC-3197-2 – user's manual – Revision 08 – November 2006
7. Explorer
7.11.1.3 Lamp Control
Auto Switches
Use these switches to specify whether a lamp is to be automatically turned off when
reaching a specific temperature and whether the lamp is automatically switched on
once voltage is supplied.
Lamp
Toggle between switching lamp on and off. The ON button is only active if the lamp is
off. The same applies to the OFF button. Displays the service life of the lamp. This value
can be edited after the lamp has been replaced.
Lamp Minutes
Displays the operating time of the lamp. Only edit this value after the lamp has been
replaced! Click Apply to enter the new value.
Lamp State
Informs about lamp state
Lamp On/Off
Informs about the proper lamp state. In normal operation mode this information should
match the value of Lamp State.
Only edit the operating time when replacing a lamp!
Barco – Apollo – DOC-3197-2 – user's manual – Revision 08 – November 2006 _________________________________________________ 235/402
7. Explorer
7.11.1.4 Error
This tab informs about occurrence and kind of error. An error which has taken place is indicated by a tick.
Lamp error
Lamp not working
I2C error
Error on the I2C Bus
Initialize error
Fan could not be initialized
I2C Status
Communication error of the I2C Bus
LatencyCounterActive
Latency counter is still running
Sync error
No video signal present
Over Temperature
Temperature above the limit
Temperature Failure
Lamp has been switched off due to over temperature
Fan Failure
Fan not working
In Load Sequence
Internal tables are initialized (interferences might occur)
Reinitialization
Settings saved in the EEPROM are loaded into the projector's RAM
Reset AC Fail Bit
Interrupts in the power supply set the AC-Fail Bit. The lamp can only be switched
on again after having reset this bit, i. e. after pressing the Reset AC Fail Bit button.
Look at the tab Error (AC Fail) to find out if the bit is set or not.
Reset Temp Bit
Temperatures above the defined limit set the Temp Bit.
Look at the tab Error (Over Temperature) to find out if the bit is set or not.
If the option Off the lamp at Over Temperature is checked, a lamp can only be
switched on again after having reset the Temp Bit.
236/402 _________________________________________________ Barco – Apollo – DOC-3197-2 – user's manual – Revision 08 – November 2006
7. Explorer
7.11.1.5 Projector
Sensor Temperature
Informs about the measured temperature
Fan Speed
Informs about the revolutions of the fan
Sensor Correction
Enter the correction factor for the sensor before starting up
Temperature Limit
Enter the permissible temperature
Barco – Apollo – DOC-3197-2 – user's manual – Revision 08 – November 2006 _________________________________________________ 237/402
7. Explorer
7.11.1.6 Identification
On this tab the "fingerprint" of the device can be found. Any on-site changes have to be entered in the respective text box.
IdLocation
Informs about the location of production
IdVersion
Informs about the version of the product
IdIdentNumber
Indicates the identification number of the device
IdSerialNumber
Indicates the serial number of the device
IdGAEIndex
Informs about engineering changes
IdProductionTime
Informs about the production time
IdFMWStatus
Shows the Firmware status
IdCTWStatus
Shows the Controlware status
IdLast Modification Time
Informs when the last modifcation took place
238/402 _________________________________________________ Barco – Apollo – DOC-3197-2 – user's manual – Revision 08 – November 2006
7. Explorer
7.11.2 LCD_DLP Projectors
7.11.2.1 General
On this tab general information about the device are listed.
Name
Device name.
Type
All BR6xxx, BG6xxx projectors as well as the projection module S70 and Atlas CS4 are
type LCD_DLP_Projectors.
Device State
Displays the current device status.
Description
Displays the designation for the type of module entered into the Control Room Configurator.
Barco – Apollo – DOC-3197-2 – user's manual – Revision 08 – November 2006 _________________________________________________ 239/402
7. Explorer
7.11.2.2 Info
Peri Connection
Informs about a peripheral connection
Lamp Serial Number
Indicates the serial number of the lamp
LampRun Time
Informs about the operating time of the lamp
Projector Runtime
Informs about the operating time of the projector
MOCA Version
indicates MOCA version
Software Type
Informs about the software type
Projector Type
Informs about the type of projector
Software Language
Indicates the language of the software
Software Version
Informs about software version
Projector Serial No.
Indicates the serial number of the projector
240/402 _________________________________________________ Barco – Apollo – DOC-3197-2 – user's manual – Revision 08 – November 2006
7. Explorer
7.11.2.3 Mode Control
StandBy
Starts and stops the standby mode
Text Status
Starts and stops the text mode
Video Mute
Starts and stops video projection
Picture Freeze
Freezes and unfreezes a video
Active Source
Select the active source from the list box
Backup
Save the settings in a file. Enter the name of the file into the text field.
Restore
Restore the settings from a file. Enter the name of the file into the text field.
VCR
Click on this button to get access to the virtual remote control
Barco – Apollo – DOC-3197-2 – user's manual – Revision 08 – November 2006 _________________________________________________ 241/402
7. Explorer
7.11.2.4 Commands
All devices of the type LCD_DLP_Projector can be controlled via an infrared remote control. Click on the –VRC
button to display a 1:1 image of the IR remote control. The following settings are possible
242/402 _________________________________________________ Barco – Apollo – DOC-3197-2 – user's manual – Revision 08 – November 2006
7. Explorer
Function
F1, F2, F3, F4, F5
Keys These are keys with direct access to almost all setting functions programmable by
the user.
Adj Key
Start or end of the setting mode.
Exit Key
Jumping to previous branch of the setting mode menu tree or exiting the setting
mode altogether.
Enter Key
Starting the setting mode as well as confirmation of a settings or selection during
the setting mode.
Cursor Keys
Select menus in the setting mode and correct settings requiring continuous adjustment.
Standby Key
Activates and deactivates the projector if the power of the projector has been
turned on with the projector’s ON switch.
Pause
Short interruption of the projection. The image is no longer displayed but an immediate projection is possible.
* (Selection Key)
Direct access to the zoom, focus, shift functions.
Txt
Active only during operation. Use this feature to activate/deactivate the bar scale
displayed during the image or sound parameter modification.
Freeze
Displays freeze-frame of image.
Mute
Turns sound on or off.
Help
Starts the help menu.
Numeric Keys 1-9
Direct access selection; use to enter the address of a projector.
Phase, Sharpness, Tint,
Color, Brightness, Con- Set image properties as desired. Push on < to reduce, on > to increase the set value.
trast
Tremble, Balance, Bass,
Set audio properties as desired. Push on < to reduce, on > to increase the set value.
Volume
Use Virtual IR Control to gain access to the setting mode and with that to all menus to modify the source parameters, image and sound settings, as well as the geometric setting. The setting mode is described in detail in
the user manual of the device.
Any modifications can be saved (Backup) or restored (Restore) from binary file located on a linked computer.
Detailed descriptions and the user element functions are listed in the respective user manual of the device.
Barco – Apollo – DOC-3197-2 – user's manual – Revision 08 – November 2006 _________________________________________________ 243/402
7. Explorer
7.11.2.5 Picture Control
Corresponds to the respective keys on the virtual IR remote control. The actual value of the setting is displayed.
The slider bars are only active if the option is available
Brightness
Increases or decreases brightness
Color
Changing of color saturation is only possible for video and S-video
Contrast
Increases or decreases contrast
Sharpness
Increases or decreases sharpness
Shift Horizontal
Shifts picture horizontally
Shift Vertical
Shifts picture vertically
244/402 _________________________________________________ Barco – Apollo – DOC-3197-2 – user's manual – Revision 08 – November 2006
7. Explorer
7.11.2.6 Audio Control
Corresponds to the respective keys on the virtual IR remote control. The actual value of the setting is displayed.
The slider bars are only active if the option is available.
Audio Volume
adjusts audio volume
Audio Balance
Adjusts balance
Audio Bass
Adjusts bass
Audio Treble
Adjusts treble
Barco – Apollo – DOC-3197-2 – user's manual – Revision 08 – November 2006 _________________________________________________ 245/402
7. Explorer
7.11.3 Hermes D2D
7.11.3.1 General
On this tab general information about the device are listed.
Name
Assigned by Control Room Configurator
Type
Indicates the device (Hermes D2D)
Device State
Gives information if the device can be addressed by the SNMP Agent
Description
Displays the designation for the type of module entered into the Control Room Configurator
246/402 _________________________________________________ Barco – Apollo – DOC-3197-2 – user's manual – Revision 08 – November 2006
7. Explorer
7.11.3.2 Info
Device Status
Informs about the current operating state of the device
Info Startup
Informs when the SNMP Agent has been launched
Device String
Passes the internal device info
FirmwareRev
Indicates the Firmware revision
Info Version
Informs about the SNMP Agent (type and version)
Barco – Apollo – DOC-3197-2 – user's manual – Revision 08 – November 2006 _________________________________________________ 247/402
7. Explorer
7.11.3.3 Input Control
Digital1
Selection of Digital In 1 to be the active input
Digital2
Selection of Digital In 2 to be the active input
248/402 _________________________________________________ Barco – Apollo – DOC-3197-2 – user's manual – Revision 08 – November 2006
7. Explorer
7.11.4 Hermes V2A
7.11.4.1 General
On this tab general information about the device are listed.
Name
Assigned by Control Room Configurator
Type
Indicates the device (Hermes V2A)
Device State
Gives information if the device can be addressed by the SNMP Agent
Description
Displays the designation for the type of module entered into the Control Room Configurator
Barco – Apollo – DOC-3197-2 – user's manual – Revision 08 – November 2006 _________________________________________________ 249/402
7. Explorer
7.11.4.2 Info
Device Status
Informs about the current operating state of the device
Info Startup
Informs when the SNMP Agent has been launched
Device String
Passes the internal device info
FirmwareRev
Indicates the Firmware revision
Info Version
Informs about the SNMP Agent (type and version)
250/402 _________________________________________________ Barco – Apollo – DOC-3197-2 – user's manual – Revision 08 – November 2006
7. Explorer
7.11.4.3 Input Control
Source Type
Select Digital to activate the digital input, Analog to activate the analog input
Source Configuration
If the active input is the analog one, the settings of the source can be adjusted
The following table gives an overview about operating the onscreen menu:
Menu
description
navigating in main menu or submenu
navigating in main menu or submenu
leaving a submenu or the main menu
entering a submenu
increasing a value
decreasing a value
opening main menu or leaving main menu
selecting
a
menu
saving a value (confirmation when leaving the corresponding submenu)
item
Barco – Apollo – DOC-3197-2 – user's manual – Revision 08 – November 2006 _________________________________________________ 251/402
7. Explorer
7.11.5 Matrix Switcher
7.11.5.1 General
On this tab general information about the device are listed.
Name
Assigned by Control Room Configurator
Type
Indicates the device (Matrix Switcher)
Device State
Gives information if the device can be addressed by the SNMP Agent
Description
Displays the designation for the type of module entered into the Control Room Configurator
252/402 _________________________________________________ Barco – Apollo – DOC-3197-2 – user's manual – Revision 08 – November 2006
7. Explorer
7.11.5.2 Info
Device Status
Informs about the current operating state of the device
Info Startup
Informs when the SNMP Agent has been launched
Device String
Passes the internal device info
FirmwareRev
Indicates the Firmware revision
Info Version
Informs about the SNMP Agent (type and version)
Barco – Apollo – DOC-3197-2 – user's manual – Revision 08 – November 2006 _________________________________________________ 253/402
7. Explorer
7.11.5.3 Input/Output
On this tab is indicated which inputs are assigned to which outputs.
The signal of input 2 is connected to the outputs 4, 5, 6, and 7, the signal of the input 4 is connected to the outputs 1 and 3 and so on.
The assignments can be changed.
254/402 _________________________________________________ Barco – Apollo – DOC-3197-2 – user's manual – Revision 08 – November 2006
7. Explorer
7.11.6 Visu
7.11.6.1 General
On this tab general information about the device are listed.
Name
Assigned by Control Room Configurator
Type
Indicates the device (Visu plus)
Device State
Gives information if the device can be addressed by the SNMP Agent
Description
Displays the designation for the type entered into the Control Room Configurator
Barco – Apollo – DOC-3197-2 – user's manual – Revision 08 – November 2006 _________________________________________________ 255/402
7. Explorer
7.11.6.2 Info
Device Status
Informs about the current operating state of the device
Info Startup
Informs when the SNMP Agent has been launched
Device String
Passes the internal device info
FirmwareRev
Indicates the Firmware revision
Info Version
Informs about the SNMP Agent (type and version)
256/402 _________________________________________________ Barco – Apollo – DOC-3197-2 – user's manual – Revision 08 – November 2006
7. Explorer
7.11.6.3 HardwareAttributes
On this tab the Visu parameters can be adjusted if the ones loaded into the Visu from the
VisuBaseConfiguration.ini file are not satisfying.
The modifications are not written into to VisuBaseConfiguration.ini file. You have to
manually adjust the parameters in the Visio drawing and export the configuration in
order to preserve them. As a "small solution" you can manually edit the
VisuBaseConfiguration.ini file. However, as soon the the project is updated, these
modifications will be lost and overwritten by the Control Room Configurator.
Apollo only supports Digital Visu.
Barco – Apollo – DOC-3197-2 – user's manual – Revision 08 – November 2006 _________________________________________________ 257/402
7. Explorer
7.11.6.4 Hardware Color
Define the color key as an RGB-Trippel as well as the color of the Visu window if no signal is applied.
Modification of these settings are restricted to authorized personnell only!
On this tab also the option Freeze can be selected and the factor of the frame rate reduction can be set.
These settings apply for the visu device, not for an input unit! Therefore, if the Visu e.g.
has 4 video input units, e.g. all four videos are frozen.
258/402 _________________________________________________ Barco – Apollo – DOC-3197-2 – user's manual – Revision 08 – November 2006
7. Explorer
7.11.6.5 Output Unit
Use this tab to view the assignment of the Visu outputs to the projection modules.
This assignment depends on the actual cabling!
Modification of these settings are restricted to authorized personnell only!
A projection cube can only be assigned to one single Visu output unit. When changing the hardware configuration
without re-starting Apollo, this kind of modifications can be applied by means of the entries of this tab.
Since the projection cube cannot be assigned simultaneously to the previous and to the current Visu output unit,
the previous output unit has to be assigned first to a "cube which is not available" (-1, -1).
Barco – Apollo – DOC-3197-2 – user's manual – Revision 08 – November 2006 _________________________________________________ 259/402
7. Explorer
7.11.6.6 Input Unit
Use this tab to view what kind of input unit is plugged into the Visu; InputType_4 refers to a VideoInput Unit,
InputType_6 to a RGBInput Unit.
The assignment of the input units to the windows are made internally by the Visu device itself.
Modification of these settings are restricted to authorized personnell only!
260/402 _________________________________________________ Barco – Apollo – DOC-3197-2 – user's manual – Revision 08 – November 2006
7. Explorer
7.11.7 Phoenix Projector DX
7.11.7.1 General
On this tab general information about the device are listed.
Name
Device name.
Type
Phoenix
Device State
Displays the current device status.
Description
Displays the designation for the type entered into the Control Room Configurator.
Barco – Apollo – DOC-3197-2 – user's manual – Revision 08 – November 2006 _________________________________________________ 261/402
7. Explorer
7.11.7.2 Info
Device Status
Informs about the current operating state of the device
Serial Number
Indicates the serial number of the projector
Info Startup
Informs when the SNMP Agent has been launched
Device String
Passes the internal device info
FirmewareRev
Indicates the Firmware revision
Info Version
Informs about the SNMP Agent (type and version)
262/402 _________________________________________________ Barco – Apollo – DOC-3197-2 – user's manual – Revision 08 – November 2006
7. Explorer
7.11.7.3 Lamp Control
Lamp
Toggle between switching lamp on and off. The ON button is only active if the lamp is off.
The same applies to the OFF button. Displays the service life of the lamp. This value can
be edited after the lamp has been replaced.
Lamp Minutes
Shows the current lamp operation time
Lamp State
Indicates the lamp status (on, off, on-wait, off-wait)
Barco – Apollo – DOC-3197-2 – user's manual – Revision 08 – November 2006 _________________________________________________ 263/402
7. Explorer
7.11.7.4 Picture Control
Brightness Red
Increases or decreases brightness for red
Brightness Green
Increases or decreases brightness for green
Brightness Blue
Increases or decreases brightness for blue
Contrast Red
Increases or decreases contrast for red
Contrast Green
Increases or decreases contrast for green
Contrast Blue
Increases or decreases contrast for blue
264/402 _________________________________________________ Barco – Apollo – DOC-3197-2 – user's manual – Revision 08 – November 2006
7. Explorer
7.11.7.5 Profile
The settings of the projector (brightness, contrast…) can be saved in file (Backup) or restored from a file
(Restore). Enter the name of the profile file.
Click on the VRC button to get access to the Virtual Remote Control. The keys and the functions are identical to
the Infra Red Remote Control Unit to control the projector.
Barco – Apollo – DOC-3197-2 – user's manual – Revision 08 – November 2006 _________________________________________________ 265/402
7. Explorer
7.11.7.6 Commands
The device can be controlled via an infrared remote control. Click on the –VRC button to display a 1:1 image of
the IR remote control. The following settings are possible
Adj Key
Start or end of the setting mode.
Exit Key
Jumping to previous branch of the setting mode menu tree or exiting the setting
mode altogether.
Enter Key
Starting the setting mode as well as confirmation of a settings or selection during
the setting mode.
Cursor Keys
Select menus in the setting mode and correct settings requiring continuous adjustment.
Standby Key
Activates and deactivates the projector if the power of the projector has been
turned on with the projector’s ON switch.
Numeric Keys 1-9
Direct access selection; use to enter the address of a projector.
Brightness, Contrast
Set image properties as desired. Push on < to reduce, on > to increase the set
value.
Use Virtual IR Control to gain access to the setting mode and with that to all menus to modify the source parameters, image and sound settings, as well as the geometric setting. The setting mode is described in detail in
the user manual of the device.
Any modifications can be saved (Backup) or restored (Restore) from binary file located on a linked computer.
Detailed descriptions and the user element functions are listed in the respective user manual of the device.
266/402 _________________________________________________ Barco – Apollo – DOC-3197-2 – user's manual – Revision 08 – November 2006
7. Explorer
7.11.8 OverView D
7.11.8.1 General
On this tab general information about the device are listed.
Name
Assigned by Control Room Configurator
Type
OverView D:
technology
Device State
Gives information if the device can be addressed by the SNMP Agent
Description
Displays the designation for the type of module entered into the Control Room Configurator
rear
projection
system
which
projector
is
based
on
DLP
Barco – Apollo – DOC-3197-2 – user's manual – Revision 08 – November 2006 _________________________________________________ 267/402
7. Explorer
7.11.8.2 Info
Device Status
Informs about the current operating state of the device
Info Startup
Informs when the SNMP Agent has been launched
Device String
Passes the internal device info about the type of projection module
(OverView D)
FirmwareRev
Indicates the Firmware revision
Device Ident
worldwide unique identifier of the device
Projector Runtime
Displays the runtime of the projector
Info Version
Informs about the SNMP Agent (type and version)
Projection Unit Serial Number
Displays the serial number of the projector
Illumination Unit Serial Number
Displays the serial number of the projector
Address
Indicates the projector address
Row
Indicates the row of the Display Wall where the projector is installed
Column
Indicates the column of the Display Wall where the projector is
installed
Lamp Hot Standby Mode Released
Indicates whether the projector is allowed to be operated in hot
standby mode
General Device State
Indicates whether the device is ok. If it is not ok, please see the
Error tab
268/402 _________________________________________________ Barco – Apollo – DOC-3197-2 – user's manual – Revision 08 – November 2006
7. Explorer
7.11.8.3 Lamp Control
Operation State
Shows whether the lamp is switched on or off.
Lamp Status
Informs about lamp state On-OnWait-Off-OffWait.
Serial Number
Set the Serial Number of a new lamp by entering the data into the field and pressing
Apply.
Runtime
Set the Runtime of a new lamp by entering the data into the field and pressing Apply.
Lamp Active
Informs whether this lamp is the active lamp (illuminating the optics). In case of the
active lamp, the button is disabled, and the checkbox is ticked.
To select the other lamp as active lamp, click on the corresponding Lamp Active button!
Lamp Optimization
Run this procedure whenever a lamp has been replaced. This procedure optimizes the
mirror position and thus the available amount of light.
Hot Standby
Click on Hot Standby to activate the Hot Standby operation mode (only available if
Hot Standby has been released).
Cold Standby
Click on Cold Standby to activate the Cold Standby operation mode
AutoSwitch
Click on AutoSwitch to activate the AutoSwitch operation mode
Barco – Apollo – DOC-3197-2 – user's manual – Revision 08 – November 2006 _________________________________________________ 269/402
7. Explorer
7.11.8.4 Error
This tab informs about some operating conditions. If the checkboxes are ticked, everything is ok.
Temperature
Ticked: Temperature below the temperature limit
Voltage Status
Ticked: Voltage ok
Brightness
Reached
Target
Ticked: the pre-defined brightness target of the Display Wall is reached by this
projector
Illumination Communication
Ticked: Communication between projection unit and illumination unit is ok.
Fan:
Ticked: both fans are working
Dimmer home position
reached
Ticked: dimmer initialization was ok
Lamp lift position reached
Ticked: lamp lift has reached its position (up or down)
Lamp Door closed
Ticked: the lamp door is closed.
270/402 _________________________________________________ Barco – Apollo – DOC-3197-2 – user's manual – Revision 08 – November 2006
7. Explorer
7.11.8.5 Projector
This tab informs about brightness, OnScreen Display und Source Input Selection (firmware 3.x only).
Direct Illumination
Operation State
Sensor
Indicates whether the DIS sensor is busy or free
Brightness Target Reached
The pre-defined brightness target of the Display Wall is reached by this projector
Brightness Target
Modify or check the value of the Brightness Target. To use the brightness
target, in case the display wall is controlled by the OCM, the automatic
brightness regulation of the OCM has to be switched off!
Brightness Regulation Active
Modify or check the Brightness Regulation (Lumens lock mode). Is always
switched on (also in case the display wall is controlled by the OCM)
Projector On / Off
Switch the main power of the projector on or off. A green square indicates
that the projector is running.
Reboot Projector
If Firmware upgrade has been performed, the projector has to be reset Click
on this button the start the rebooting
InfraRed Control
Enable or disable controlling the projector with the IR Remote-Control Unit.
Over Temperature Protection
Enabled
Set or check the behavior of the projectors when the temperature limit is
reached. Recommended: enabled. If enabled, the projector shuts down if
the temperature is too high (otherwise the systems might be damaged!)
Message Box Enabled
Set or check if message boxes are displayed (overlaying the application) or
not
Barco – Apollo – DOC-3197-2 – user's manual – Revision 08 – November 2006 _________________________________________________ 271/402
7. Explorer
Error Box Enabled
Set or check if error boxes are displayed (overlaying the application) or not
Mode
Allows to select one of the following operation modes:
Manual
Auto Preference
Auto Switch
Preferred
Allows the set the preferred input, source 1 or source 2
Active
Informs about the active input
State
Informs about the state of the active input
7.11.8.6 Lamp History
This tab gives an overview about the employed lamps, their position, serial number and runtime.
Entry
Indicates the projector mode: starting/stopping/stopped/running
Position
Indicates if it is Lamp Top or Lamp Bottom
Serial Number
Displays the serial number of the lamp
Runtime
Indicates the operation time of the lamp
272/402 _________________________________________________ Barco – Apollo – DOC-3197-2 – user's manual – Revision 08 – November 2006
7. Explorer
7.11.9 OverView cPU67-DL
7.11.9.1 Info
On this tab information about the device are listed.
Name
Assigned by Control Room Configurator
Type
OverView _PU: rear projection system which projector is based on
pSi-technology, UXGA resolution
Description
Displays the designation for the type of module entered into the
Control Room Configurator
State
Gives information if the device can be addressed by the SNMP
Agent
Compound Status
Indicates whether the device is ok. If it is not ok, please see the
Error tab
Operation
Informs about the current operating state of the device
Software version
Indicates the Firmware revision
Barco – Apollo – DOC-3197-2 – user's manual – Revision 08 – November 2006 _________________________________________________ 273/402
7. Explorer
Software type
Informs about the software type
Software language
Language of the OSD
Ident
worldwide unique identifier of the device
Serial Number
Displays the serial number of the projection engine
Address
Indicates the projector address
Row
Indicates the row of the Display Wall where the projector is installed
Column
Indicates the column of the Display Wall where the projector is
installed
Runtime
Displays the runtime of the projection engine
Hot standby runtime
Indicates the time the projector has been operated in hot standby
mode.
Operation Lamp top
Indicates the operation status of lamp top (off/on-wait/on/offwait)
Operation Lamp bottom
Indicates the operation status of lamp bottom (off/on-wait/on/offwait)
Active
Indicates the active lamp
Mode
Indicates the operation mode (cold standby, hot standby,
autoswitch)
Info Startup
Informs when the SNMP Agent has been launched
Info Version
Informs about the SNMP Agent (type and version)
274/402 _________________________________________________ Barco – Apollo – DOC-3197-2 – user's manual – Revision 08 – November 2006
7. Explorer
7.11.9.2 Projector
Standby
Press this button to switch the projector from standby to operation
or from operation to standby. The current status is indicated next to
the button
InfraRed Control
Press this button to display the virtual InfraRed Control
Input Selection
Use this list box to select the desired source.
Picture Freeze
Tick this check box to freeze the picture, clear it to have it running
again
Over Temperature Protection Enabled
Tick this check box to activate Over Temperature Protection (recommended!)
OSD Error Box Enabled
Tick this check box to display error boxes (overlaying the application)
OSD Text Box Enable
Tick this check box to display text boxes (overlaying the application)
Status Information Lamp Top
If the icon is green, lamp top is ok. The icon turns red in case of a
lamp failure, and the mirror is blocked. If the broken lamp is replaced, reset the error by clicking the Reset button. This also re-
Barco – Apollo – DOC-3197-2 – user's manual – Revision 08 – November 2006 _________________________________________________ 275/402
7. Explorer
leases the mirror.
Status Information Lamp Bottom
If the icon is green, lamp bottom is ok. The icon turns red in case of
a lamp failure, and the mirror is blocked. If the broken lamp is replaced, reset the error by clicking the Reset button. This also frees
the mirror.
Status Information Mirror
A green icon indicates that the mirror is ok
Status Information Fan LCD
A green icon indicates that the fan is ok. The fan speed is also indicated.
Status Information Fan lamp
A green icon indicates that the fan is ok. The fan speed is also indicated.
Status Information Temperature
A green icon indicates that the temperature is ok.
Status Information internal voltage
A green icon indicates that the internal voltage is ok.
7.11.9.3 Lamp Control
This tab gives detail information about the lamps.
276/402 _________________________________________________ Barco – Apollo – DOC-3197-2 – user's manual – Revision 08 – November 2006
7. Explorer
If a lamp is running, the lamp icon is depicted yellow. If the lamp is not running (cold standby, auto switch
mode), the icon is grey.
Serial number and runtime of the current lamp top and lamp bottom can be viewed and set. To change the values, edit them and click on the Apply button. History shows serial number and runtimes of all lamps in the past
and the current lamp. The list comprises up to 20 entries. In case the number exceeds this limit, entries are deleted, starting with the lowest orders numbers (Entry column). In addition lamp operation mode can be set and
specified and the active lamp be selected.
Serial Number
Set the Serial Number of a new lamp by entering the data into the field and pressing
Apply.
Runtime
Set the Runtime of a new lamp by entering the data into the field and pressing Apply.
History
Shows serial number and runtimes of all lamps in the past and the current lamp. The
list comprises up to XXX entries. In case the number exceeds this limit, entries are deleted, starting with the lowest orders numbers (Entry column)
Hot Standby
Click on Hot Standby to activate the Hot Standby operation mode (only available if
Hot Standby has been released).
Cold Standby
Click on Cold Standby to activate the Cold Standby operation mode
Auto Switch
Click on AutoSwitch to activate the AutoSwitch operation mode
Lamp
time
If Auto Switch mode is selected, the autoswitch time can be set in the range between
12 and 500 hours. Click the Apply button to assign the values.
AutoSwitch
Active lamp
If Auto Switch mode is selected, the autoswitch time can be set in the range between
12 and 500 hours. Click the Apply button to assign the values.
7.11.9.4 InfraRed Control
The device can be controlled via an infrared remote control. Click on the InfraRed button to display a 1:1 image
of the IR remote control. The following settings are possible
Barco – Apollo – DOC-3197-2 – user's manual – Revision 08 – November 2006 _________________________________________________ 277/402
7. Explorer
Adj Key
Start or end of the setting mode.
Exit Key
Jumping to previous branch of the setting mode menu tree or exiting the setting
mode altogether.
Enter Key
Starting the setting mode as well as confirmation of a settings or selection during
the setting mode.
Cursor Keys
Select menus in the setting mode and correct settings requiring continuous adjustment.
Standby Key
Activates and deactivates the projector if the power of the projector has been
turned on with the projector’s ON switch.
Numeric Keys 1-9
Direct access selection; use to enter the address of a projector.
Brightness, Contrast
Set image properties as desired. Push on - to reduce, on + to increase the set value.
Use InfraRed Control to gain access to the setting mode and with that to all menus to modify the source parameters, image and sound settings, as well as the geometric setting. The setting mode is described in detail in
the user manual of the device.
278/402 _________________________________________________ Barco – Apollo – DOC-3197-2 – user's manual – Revision 08 – November 2006
7. Explorer
7.12 Explorer Context Menu
Click on an object in the workspace with the right mouse button to open the context menu of the object.
Mini windows feature a context menu as well!
The context menu is expandable, e.g., sources can be accessed via the viewer context menu, or the command
Lamp On can be added in the projector's context menu.
One command can be sent to several recipients at once with the context menu since the object list boxes in the
workspace allow multiple selections.
Press SHIFT to highlight several objects at once.
Press CTRL to select several objects at different positions.
The context menu of a multiple selection contains those commands shared by all selected objects as long as the
commands allow multiple selections.
An attribute applied when defining the command specifies whether a command allows multiple selections or
not.
Barco – Apollo – DOC-3197-2 – user's manual – Revision 08 – November 2006 _________________________________________________ 279/402
7. Explorer
7.12.1 Adding commands to the context menu
Edit the ApolloExplorer.ini file located in the Apollo Project directory in the subfolder Server Data to customize the
context menu.
A file in the Server Data subdirectory is available to all computers of the Apollo network.
This file also overwrites other files with the same name located in other Apollo Project
directories.
Follow these steps to customize the context menu:
•
Open the file …\ApolloProject\ServerData\ApolloExplorer.ini.
The comment section of this file explains which syntax to use for a command in the context menu and
which attributes can be set.
The context menu starts a command line. This means that these commands, parameters, and their possible
values are the same as those that can be passed via the command interface; cf. Viewer command Interface
This file lists all devices supported by Apollo. The section for each device starts with the device name in
brackets.
•
Navigate to the section of the device with the context menu you would like to expand.
For example, if you want to give access to the command "Blanking" in the context menu of a Web Viewer,
and if the image "bluescreen.jpg" is to be displayed in the blanking mode, add the following to the end of
the entries for the Web Viewer:
"Blue" = <cmd>"%ApolloProgram%\ViewerCmd.exe" -name:$ObjectName$ /IdcImage:2 /IdcEnabled: 1
</cmd>
The context menu now features the entry "Blue."
This command is now available to all instances of the Web Viewer by clicking with the right mouse button
regardless whether one or several instances are selected in the workspace of the viewer.
Add the attribute multi to the command if this command is to apply only if all instances of the Web Viewer
are selected:
"Blue_multi" = <attrib> multi <\attri> <cmd>"%ApolloProgram%\ViewerCmd.exe" -name:$ObjectName$
/IdcImage:2 /IdcEnabled: 1 </cmd>
A command with the multi attribute is only available in the context menu with multiple
selection.
Add the attribute single to the command if this command is to apply only if exactly one instance of the
Web Viewer is selected:
"Blue_single" = <attrib> single <\attri> <cmd>"%ApolloProgram%\ViewerCmd.exe" -name:$ObjectName$
/IdcImage:2 /IdcEnabled: 1 </cmd>
A command with the single attribute is only available in the context menu with single
selection.
The multi and single attributes can also be used so execute different commands by
context entries with the same name depending on the selection.
280/402 _________________________________________________ Barco – Apollo – DOC-3197-2 – user's manual – Revision 08 – November 2006
7. Explorer
Barco – Apollo – DOC-3197-2 – user's manual – Revision 08 – November 2006 _________________________________________________ 281/402
7. Explorer
7.13 Drag&Drop functionality
Use the Drag&Drop function to connect launched viewers with a different source without opening the properties
dialog box.
Assumption: The Apollo Explorer runs in two instances.
Now you can click on Web Sources|General Pages in the object tree in one instance of the Explorer and on the
Display Wall in the other instance of the Explorer, for example:
Please make sure that the option Show Desktop is selected! ( Tools|Options| Remote
Desktop)!
Now use the mouse to drag a Web Source from the workspace of the first Explorer to the mini window of the
Web Viewer of the second Explorer. The Web Viewer is now linked with this source.
Please make sure to release the mouse button only when directly in the mini window of
the viewer!
282/402 _________________________________________________ Barco – Apollo – DOC-3197-2 – user's manual – Revision 08 – November 2006
7. Explorer
Follow these steps if only one Explorer instance is running:
•
Click on Web Source | General Page in the object tree.
•
Select a source from the workspace.
•
Keep the mouse button depressed and navigate to the Desktop Server in the object tree. The + sign (node)
of the Desktop Server expands.
•
Keep the mouse button depressed and navigate to the desired Display Wall.
•
Keep the mouse button depressed and move the cursor to the mini window of the Remote Desktop Web
Viewer.
•
Release the mouse button.
Barco – Apollo – DOC-3197-2 – user's manual – Revision 08 – November 2006 _________________________________________________ 283/402
7. Explorer
To connect the Web Viewer to sources which are not defined in the ServerData\Globals.ini
file and which therefore are not available in the workspace of the Explorer, enter the
URLs in e.g. Wordpad using the following syntax:
/Type: Viewer_WebViewer /URL:www.anypage.de /SourceConnected
Highlight this line and drag it with the mouse into the mini window of the Apollo Explorer
Web Viewer.
The Drag&Drop functionality supports all parameter valid for the respective viewer.
The syntax starts with the type of the viewer, see examples below.
/Type:Viewer_FrgViewer /SourceRequested:Frg.frg4
/Type:Viewer_VISUViewer /SourceRequested:VISU.Video1
/Type:Viewer_CottusViewer /SourceRequested:Desktops.BARCOEUROPE.karclt8s
/Type:Viewer_WebViewer /SourceRequested:Web.Barco
/Type:Viewer_MpegViewer /SourceRequested:MovieServer.YellowPages
/Type:Viewer_VTplusViewer /SourceRequested:TV.Home
/Type:Viewer_VNCViewer /SourceRequested:VNC_desktops.karclt24
/Type:Viewer_ProViewer /SourceRequested:Pro_Desktops.nioclteos
To connect to a source predefined in ServerData\viewersources.ini; the parameter SourceRequested includes all
necessary information.
To connect to non-predefined sources, the respective parameters for this source have to be entered (e.g. URL,
hostname etc.) followed by the parameter SourceConnected to make the viewer instance connecting to the
source.
The Drag&Drop function is very useful, e.g., for GIS applications where you can drag the camera icon into the
mini window of the Web Viewer to view camera data.
284/402 _________________________________________________ Barco – Apollo – DOC-3197-2 – user's manual – Revision 08 – November 2006
8. Layout Editor
8 Layout Editor
The Layout Editor is used to specify regions and to create and modify so-called layouts. Regions define rectangular areas on the Display Wall. Layouts usually consist of several windows and define which windows are to be
loaded in which position using what size.
Every layout is saved in a database using a unique name. Every Display Wall has its own database located on the
associated control computer or on any other network computer.
This release of Apollo shows the region functionality only if explicitly selected.
When converting existing databases, the option Use Region in the Database convertor has
to be checked
When creating new databases, the option Use Region has to be checked in the menu
Properties|Display Wall.
Barco – Apollo – DOC-3197-2 – user's manual – Revision 08 – November 2006 _________________________________________________ 285/402
8. Layout Editor
8.1 Layout database
The Layout Editor is used to specify regions on the Display Wall and to create and modify so-called layouts.
8.1.1 Regions
A region is a rectangular area on the Display Wall. A Display Wall has at least one region (= entire Display Wall).
Multiple regions can be defined, which can be overlapping. In contrast to previous versions of Apollo, now a
layout no longer is defined for the Display Wall, but for the specified region(s), thus enabling the reuse of layouts
at different locations on the Display Wall.
The concept of regions allows assigning individual permissions to access user groups. Multiple access user
groups can simultaneously have access to one region (and thus to the layouts/applications of this regions). By
means of well-defined permissions, the interactions of various users become coordinated.
For defining regions, select Use Regions in the Properties Menu (Properties|Display Wall).
After applying this selection, Regions are added to the tree view of the Layout Editor.
In case a layout is in in auto load mode the option "Use Region" cannot be changed!
286/398 ________________________________________________________________________________________ Apollo Rel. 1.9 User's Manual
8. Layout Editor
8.1.2 Layouts
Layouts consist of several windows and/or shortcuts and define window size and position of any active window
in one ore more regions. Every layout is saved in a database using a unique name. Every Display Wall has its own
database located on the associated control computer or any other network computer.
Layouts can be edited in the Layout Editor or interactively on the Display Wall (Remote Desktop). Provided the
respective permissions are given, several users can access the layout database simultaneously but only one user
can edit the database. The first user locks the database so that subsequent users cannot make changes while the
database is in use.
8.2 Launching the Layout Editor
Launch the program using the shortcut
Start|Programme|Barco Apollo|Layout Editor
The main window of the Layout Editor is displayed:
Barco – Apollo – DOC-3197-2 – user's manual – Revision 08 – November 2006 _________________________________________________ 287/402
8. Layout Editor
The menu bar of the Layout Editor contains the entries File, Edit, Properties, Windows , Favorites, Tools,
Settings, and Help.
A tree structure in the left pane of the Layout Editor is used to display the layouts, shortcuts and regions defined in an opened database.
The Tree View depicts the windows and shortcuts defined in a layout as well as the associated windows in the
right pane (Desktop) according to their properties.
Every window defined in the layout is represented in the Task bar with an icon.
A second treeview can be launched to conveniently copy and past items (e.g. windows into a layout) via drag
and drop.
288/398 ________________________________________________________________________________________ Apollo Rel. 1.9 User's Manual
8. Layout Editor
Barco – Apollo – DOC-3197-2 – user's manual – Revision 08 – November 2006 _________________________________________________ 289/402
8. Layout Editor
8.3 Layout Editor menus
8.3.1 File menu
Use the Open command to search for an open an Apollo database within the network. Select Reopen at startup
to automatically open the same database next time you start the Layout Editor. The last 4 opened databases are
displayed as MRU entries (Most Recently Used) in the file menu and can be opened from there.
Use the Save command to save any database modifications. Saving a database means the original database
without the changes is saved first in the same directory under the name ApolloDatabase.mdb.back. You can thus
restore the original file by closing the database, deleting it, and then renaming the saved backup copy. Use Exit
to close the database and the Layout Editor.
Any unsaved layout or shortcut changes can be saved when closing the file by responding accordingly when
using File|Close or File|Exit:
Click on Yes to save changes or on No to close/exit without saving changes. The database is then closed.
Click on Cancel if the database should remain open..
290/398 ________________________________________________________________________________________ Apollo Rel. 1.9 User's Manual
8. Layout Editor
8.3.2 Edit menu
The commands are also available via the context menu and can be executed via the known
window shortcuts. The following shortcuts are supported:
CTRL+X , CTRL+C, CTRL+V, CTRL+INS, SHIFT+INS, SHIFT+DEL (cut, copy, paste, copy, paste, cut)
The Edit menu features the commands Cut, Copy, and Paste. Use these commands to copy complete layouts or
individual windows of a layout and paste them to the Tree View or a different layout. The selected command
always applies to the currently selected object (layout, window, shortcut, region). Use the commands Insert
layout, Insert window, Insert viewer, Insert shortcut or Insert region to add a layout, window, viewer, shortcut, or region. Creating new objects triggers the associated property dialog, which may also be called via the
corresponding command in the Properties menu.
Regions are only available if the option Use Region is set (Properties|Display Wall|Use
Regions)
A convenient method to create new layouts or to modify existing layouts is provided by
the second tree view which allows to insert the desired items via drag&drop.
Use the Delete Layout(s) command to delete the selected layout from the database. The Delete Window(s)
command removes the selected window from the layout.
Barco – Apollo – DOC-3197-2 – user's manual – Revision 08 – November 2006 _________________________________________________ 291/402
8. Layout Editor
A layout or a region cannot be deleted from the database while it belongs to the list of
autoloaded layouts!
Use Delete Shortcut to remove a shortcut. Please note:
•
A shortcut can always be removed from a layout
•
A shortcut can always be removed from a window
•
A shortcut can only be deleted from the database if not required by any of the defined layouts or windows.
Use the Delete region command to delete the selected region. This command won’t delete the layouts assigned
to this region, but of course these layouts no longer can be loaded. To make further use of them, assign them to
a different region!
If regions are defined, then layouts can only be loaded into a region!
Save & and share database saves changes in the database and then shares this database so that other Layout
Editors, the Desktop Server, or the Remote Desktop can save their changes in the layout located in the database. The desktop turns black and the following dialog is displayed:
The other Apollo application has write access to the database as long as this dialog is active. Confirming this
dialog with OK ends the release of the database to other applications and the database is reloaded. The desktop
color changes back to system color set for the desktop.
Example: When manipulating layouts or windows directly on the Display Wall, these modifications can only be
saved by the Desktop Server after the layout database has been unlocked and shared by means of the command Save and share database.
292/398 ________________________________________________________________________________________ Apollo Rel. 1.9 User's Manual
8. Layout Editor
8.3.3 Properties menu
You can define properties for the entire Display Wall as well as for a layout, a window of a layout, a shortcut, a
viewer source, a region, the Default Area. Only those items are listed in the properties menu which exist in the
database. So if e.g. no default area is used and defined, the properties menu won't show this entry.
Barco – Apollo – DOC-3197-2 – user's manual – Revision 08 – November 2006 _________________________________________________ 293/402
8. Layout Editor
8.3.3.1 Display Wall properties
Use the Properties|Display Wall menu to enter the module configuration and the resolution of the Display Wall.
These properties are required only within the Layout Editor module. They do not have any impact on the Display
Wall when a layout is loaded. Enter any description of the Display Wall in the respective field
Check Maintain aspect ratio to have a the actual ratio of the module configuration reflected in the ratio of the
desktop of the Layout Editor. To ensure a constant ratio, when resizing the window of the Layout Editor gray
borders might occur.
Check Use Regions to organize the entire Desktop in multiple regions with e.g. restricted permissions.
If the option Use Regions is set, in addition to the layouts and shortcuts the tree view
will show regions as well.
If this option is not set, regions are hidden.
This option cannot be changed, if a layout is in autoload mode.
Furthermore you can select where unexpected windows are positioned. To prevent them from overlaying the
application, a dedicated area for unexpected windows can be defined and where these windows are moved to.
Check the option Move unexpected windows to default area.
The location of the default area and the arrangement of the unexpected windows in this
area is defined via the Default Area properties.
As soon as the option to move unexpected windows to default area is set, the tree view is
enhanced by the entry "Default area".
294/398 ________________________________________________________________________________________ Apollo Rel. 1.9 User's Manual
8. Layout Editor
8.3.3.2 Layout properties
Enter the Name, Short Name and Description for a new layout or edit these parameters for an existing layout.
The Short Name is used by the Layout Selector to label the layout button. This attribute does not have any
other use. If no Short Name is defined, the Layout Selector labels the layout button with the Name. Short
Name and Name can be identical..
Description is a free text field you can use to enter additional layout information such as use, author, etc. The
Layout Group field is used by the Layout Selector to display all or only certain layouts. Select a suitable group
for the layouts and assign a group designation to each layout. Each layout can belong to only one group! A layout
to be used with different groups has to be copied to each group.
In the tree view of the Layout editor, the layouts are listed as entries of the node of the layout group.
Use the selected name to later load this window arrangement.
Assign one or more categories: A layout can only be loaded into a region if the category matches Enter a semicolon to separate multiple categories.
If category is left empty, a layout can be loaded into every region.
Check opaque if you want to display exclusively the windows of this layout. All other windows (e.g. from other
layouts) are minimized. This command and its effects are applied only to the region in which the layout is
loaded. In case no regions are defined, the windows of the entire Display Wall are minimized.
Use Tiles to divide the screen into horizontal and vertical fields, which facilitates the accurate positioning and
sizing of a window. If a window is moved , it snaps to the tile grid with its upper left corner; height and width
are always multiples of the grid distance.
The layout can be protected against being managed by setting the hidden property. A hidden layout is accessible neither via the user interface nor by the Control Room Bus.
Barco – Apollo – DOC-3197-2 – user's manual – Revision 08 – November 2006 _________________________________________________ 295/402
8. Layout Editor
To prevent a layout from being unloaded by chance, set the hidden property!
Please note: A hidden layout can only be loaded automatically! A hidden layout can be
visible or invisible, depending on Visible property to be set on the windows of the
respective layout.
The Layout properties dialog also includes two buttons which applies to all layouts defined for a display wall, the
button load automatically and the button hidden layouts.
Load automatically
This command opens a dialog where the layouts to be loaded automatically can be managed. Click on the Add
button to get a list of the layouts defined for the current display wall, and select the desired layouts. Check
hidden if the layout should be prevented from being managed.. If the list of the layouts to be loaded automatically comprises more than one entry, the sequence can be changed using the Up and Down buttons.
To prevent a layout from being loaded automatically, select it in the list, and click Remove.
Using this dialog, the hidden property of all layouts which are to be loaded automatically
can be set.
The list has to be empty in order to modify the Use region property on the display wall
properties dialog.
While a layout belongs to the list of automatically loaded layouts, it cannot be deleted
from the database.
296/398 ________________________________________________________________________________________ Apollo Rel. 1.9 User's Manual
8. Layout Editor
Hidden layouts
This command opens a dialog where all the layouts defined are listed. In case the layout is hidden, the checkbox
of the layout is ticked.
Use this dialog to check or to change the hidden property of a layout.
Check show automatically loaded layouts only to confine the list to the layouts loaded automatically.
Hidden layouts are not known to the Control Room Bus and are not manageable via the Layout Selector. Depending on the respective property of the windows belonging to the layout, it is visible or not. Hidden means
protected against being accessed.
Use the default timeout for loading, or specify the time explicitly by clearing the checkbox and entering a numeric value (timeout in seconds). Use the same timeout for unloading, or define a new one.
To prevent a user from accidentally unloading an autoloaded layout, it is recommended to
set the hidden property! If the hidden property is set, the layout is completely hidden from
the Control Room Bus and from the graphical user interface.
Barco – Apollo – DOC-3197-2 – user's manual – Revision 08 – November 2006 _________________________________________________ 297/402
8. Layout Editor
8.3.3.3 Window properties
This dialog has 3 tabs: General, Start and terminate, Advanced.
General
Caption includes the window title used by the system, together with the Window Class, to uniquely identify the
window. The Apollo Layout Management module can work properly only if every window can be clearly identified with these two attributes.
Activate uppercase/lowercase for a very precise and descriptive caption (case sensitive).
Parts of the title can remain undetermined unless relevant for identification (cf.Identifying windows ). For example,
the caption often depends on the opened file . In this case, an * is indicated in place of the undefined characters.
The Window Class permits distinguishing between different window classes. We recommend retaining the default setting *. This parameter is useful, however, if you want to distinguish between different windows, which
might have the same title but different window classes. Use the enclosed tool Window Spy to determine window classes.
Defining Caption and Window Class requires that the characters are entered correctly, see
Identifying windows. Otherwise the windows won't be recognized!
With Type information about the window type is given (normal: application, Pro: ProViewer window, etc.).
You may also enter descriptive information about the window in Description. The description is displayed in the
client area of the window in Remote Desktop. In addition this information is also showed as Tool Tips of the
mini window as well as Tool Tip on the button of this window in the task bar.
Enter the coordinates of the upper left corner point of the window as well as its height and width. If the layout
is assigned to one or more regions, these coordinates refer to the upper left corner of the respective region.
When loading a layout, windows are resized to fit into the respective region even when this option is not
checked on the Advanced tab. Click on ? to specify for the thus marked value that loading a layout does not
modify it.
The Normal, Minimized, Maximized fields allow you to specify the window state when opening a window.
298/398 ________________________________________________________________________________________ Apollo Rel. 1.9 User's Manual
8. Layout Editor
Start and terminate
Shortcut defines the applications to be launched when a window with the indicated title has not yet been found
when activating the layout.
Only shortcuts defined in the database can be selected!
Click on Edit to open the shortcut property dialog. In case the window type on the General tab is indicated as
normal, the standard dialog to configure a shortcut pops up, cf. 8.3.3.4 Shortcut properties.
In cases the window type is of type Frg, or Cot, or Web (= creating via drag&drop of the viewer sources into a
layout), Edit displays the property dialog to configure the start parameters of the viewers, cf.8.4.4.4 Inserting
viewers in a layout.
Windows that are part of a layout are usually closed when the layout is removed again. However, this is only
possible if the window is not required by a layout that is still active. If a window is associated with two loaded
layouts it is closed only when the last of the two layouts has been removed.
Windows which were already open before loading the layout are not closed.
The Don't Close Windows option determines that such a window is to remain open even if not required by any
of the active layouts.
The Close Window option specifies that such a window be to be removed. If the application then opens additional windows (e.g., “Save Changes?” dialog), these windows are not considered.
Close Application terminates the window linked with the program so that all associated windows are closed.
(including e.g. a "Save Changes?" dialog)
Close with Keyboard Input specifies that the window be to be closed using special means. The required keyboard input can be entered into the edit field. Mind the correct input of characters, see Commands via keyboard
Barco – Apollo – DOC-3197-2 – user's manual – Revision 08 – November 2006 _________________________________________________ 299/402
8. Layout Editor
Advanced
Use this tab to define the following properties for the window:Topmost, Sizeable, Visible, Show title bar.
The default setting (indicated with gray checkmark in checkbox) maintains the properties of a window. Select a
property you want to change by clicking on it (black checkmark) or unselect a property (no checkmark).
The Topmost option means that the selected window will always be displayed on top of all the others.
Sizable means that the size of the window can be changed using the mouse or the system menu. A window
with an unchangeable size setting snaps to the grid with its upper left corner if Tile has been activated while a
window with a changeable size can snap to the grid with all four corners.
Use the Visible property to show or hide a window. A invisible window is not displayed in the taskbar either.
Windows are invisible when loading a layout if the Visible property has not been activated.
Select Show title bar to show the title bar of the window, clear the checkmark to hide the title bar.
How to treat unexpected windows (error messages, etc.) is specified on this tab as well. Unexpected windows
are not defined in the layout but should not appear on the desktop randomly. Choose from the following options:
Do Not Treat Unexpected Windows, Center on this Window, Hide Unexpected Windows.
These settings overrule the settings which might be defined in the Default Area. Settings
of the Default Area ar only applied in case of "Don't handle unexpedted windows".
However, the Center on this Window option also minimizes unexpected windows that are larger than the windows of the application and centers all unexpected windows of the same application (identical process ID) within
its window.
To change the settings subsequently, select the desired entry in the Tree View and then click on
Properties|Layout in the menu bar.
300/398 ________________________________________________________________________________________ Apollo Rel. 1.9 User's Manual
8. Layout Editor
8.3.3.4 Shortcut properties
Specify the Name and Description of the shortcut. In the File field, indicate the application linked with the
shortcut. If the application is to be launched with special options, enter these Parameters into the respective
field. Indicate the entire path of the files required by this application in the Start in field.
Since viewer idents have to be unique, copying a layout with viewers to another desktop
server might fail due to the same name. Therefore it is recommended to introduce an
environment variable (system level) on the desktop server for the wall and to start the
viewer idents with this environment variable (e.g. "ApolloWall" equals "wall1" on desktop
server 1, "wall2" on desktop server 2.
Barco – Apollo – DOC-3197-2 – user's manual – Revision 08 – November 2006 _________________________________________________ 301/402
8. Layout Editor
8.3.3.5 Viewer sources properties
This dialog displays the definition of the viewer source as listed in the file viewersources.ini. In the layout editor,
these properties can only be viewed. To change them, edit the file viewersources.ini.
8.3.3.6 Region properties
Specify the Name and the Description of the region. Assign a category to this region. This category acts as a
filter for the layouts: only layouts which category matches or which have the general category (== category is
empty) can be loaded into this region. Enter the position of this region on the Display Wall by defining the position of the upper left corner (left, top) and the size of the region (width, height). All values are given in pixels.
302/398 ________________________________________________________________________________________ Apollo Rel. 1.9 User's Manual
8. Layout Editor
8.3.3.7 Default Area
This property dialog can only be selected if unexpected windows are moved to the default area (option selected
in display wall properties dialog).
A dialog pops up to define the position of the area (enter left position, top position, width of area and height of
area in pixels), the alignment of the unexpected windows inside the area, and the advanced handling of
unexpected windows which do not fit into the default area. Furthermore exceptions can be defined, e.g. unexpected windows which are allowed to pop up outside the default area.
In the layout editor, the desktop depicts the area for unexpected windows as reddish grid.
In the tree view, the default area is added on the bottom of the list.
Barco – Apollo – DOC-3197-2 – user's manual – Revision 08 – November 2006 _________________________________________________ 303/402
8. Layout Editor
8.3.4 Window menu
The Window menu lists the commands for Minimizing, Maximizing, Move, Change Size, Restore, and Close.
These window commands correspond with the system commands and are available via the context menu (right
mouse button) of the title bar of the windows and of the window buttons in the taskbar as well. You can also
minimize/restore and activate/deactivate a window by directly clicking on the respective button.
A window being closed is removed from the layout!
8.3.5 Favorites menu
Use this menu option to store the Apollo databases of as many Display Walls as desired in the form of favorites,
which then can be activated with a simple click of the mouse.
Use the Add to Favorites to add the currently opened database to the list of favorites. The following dialog
opens:
8.3.5.1 Add to favorites
304/398 ________________________________________________________________________________________ Apollo Rel. 1.9 User's Manual
8. Layout Editor
8.3.5.2 Organize favorites
Use this command to add the Apollo databases of all Desktop Servers within the Apollo network to the list of
favorites. Select Rename to address the database using a freely selectable name.
The names of all databases organized with the favorites function are listed as a menu entry. Open a database by
clicking on the corresponding entry. Selecting a database closes any already open databases and you are asked if
you want to save any changes:
Confirm this dialog with Yes, No, or Cancel.
Barco – Apollo – DOC-3197-2 – user's manual – Revision 08 – November 2006 _________________________________________________ 305/402
8. Layout Editor
8.3.6 Tools menu
The Tools menu gives access to the applications Window Detector and Database Convertor.
8.3.6.1 Window Detector
Use this application to find out caption and window class as well as the positions of visible windows of an
application. Just drag the colored icon into the desired window. Mark the required information, copy it and paste
it into the respective fields in the dialog Window Properties. In addition, special characters can be replaced
using the replacement convention as described in Commands via keyboard
306/398 ________________________________________________________________________________________ Apollo Rel. 1.9 User's Manual
8. Layout Editor
8.3.6.2 Database Convertor
The Database Convertor converts a database of previous Apollo versions to the current Apollo version.
Select Use Regions to show the regions defined in an Apollo 1.3 database. (The regions are shown in the Layout
Editor and in the Layout Selector).
If this option is not checked, the regions (if existing) will be hidden. Later they can be shown again by means of
the Option Use Regions of the menu item Display Wall of the Properties menu.
8.3.7 Settings menu
Use the Settings menu to assign a color to the desktop, the desktop border, active and inactive windows, OffRegion windows, the region, and the selected region, the default areas.
Selecting an menu item opens the standard windows color dialog where you can select or edit the color you
want to assign to this item.
Barco – Apollo – DOC-3197-2 – user's manual – Revision 08 – November 2006 _________________________________________________ 307/402
8. Layout Editor
The menu also includes the item Configure Viewer Sources. Basically the viewer sources and the sources for the
digital streams are those defined in the local project in the file Viewersources.ini and the DigitalStreamSources.ini, respectively.
It is possible to ignore these files, or to select viewer source files different from the default files.
Use the command Settings|Configure Viewer Sources to select different files for the viewer sources and the
digital streams.
The following dialog is displayed
Uncheck the respective configuration file to ignore it.
Double click on the entry, or click on Change to browse for a different file.
Activate your modification by clicking Apply.
These modifications are stored in the user specific files. (Windows NT: ….\WinNT\Profile\User Name or. Windows 2000:… \Documents and Settings\User Name), using the subfolder … \Local Settings\Application
Data\Apollo).
If you edit the .ini-files while the Layout Editor is running, modifications will ony be visible
in the Layout Editor after clicking Reset all. There is no automatic update of the file
entries!
The command Options opens a dialog to define the behavior when deleting objects, the initial size of inserted
windows and how viewers are to be integrated. Customize the behavior to your needs by selecting/unselecting
the respective options.
308/398 ________________________________________________________________________________________ Apollo Rel. 1.9 User's Manual
8. Layout Editor
8.3.8 Help menu
The menu option Contents opens the table of contents of the online help file. About Layout Editor provides
application information.
Barco – Apollo – DOC-3197-2 – user's manual – Revision 08 – November 2006 _________________________________________________ 309/402
8. Layout Editor
8.4 Working with the Layout Editor
8.4.1 Loading layouts and shortcuts
The shared Apollo Database directory located on the control computer of a Display Wall or any network computer contains a database with the layout (Apollo Layouts Database) definitions and linked programs for this
Display Wall.
Use the File|Open command to open the desired database or select the corresponding entry from the MRU list or
select the database from the list of Favorites.
Already defined layouts are represented in a tree-like structure (Tree View) . Click on the entry Layouts to expand the view. The Layouts node is expanded to show the layout groups, the group node is expanded to show
the names of the layouts belonging to this group. Finally a specific layout is expanded to show its windows,
shortcuts and viewers (if defined in this layout).
Select a layout. The windows are displayed on the desktop, and you can interactively specify position and size.
Specify additional parameters with the Properties|Window menu.
There is also the possibility to show a Second tree view. Click on the respective button in the task bar of the
Layout Editor. The second tree view, a 1:1 copy of the tree view, is displayed. Use this second tree view to drag
and drop the desired windows, shortcuts, viewers into the respective layout.
310/398 ________________________________________________________________________________________ Apollo Rel. 1.9 User's Manual
8. Layout Editor
Of course you may also use the respective commands from the Edit menu or from the context menu (right click
on the respective object).
When you copy a window, a layout, a shortcut (either via copy/paste or via drag&drop), the name of the copy
will automatically be set to Copy of... Copy(2) of... Copy(3) of (as with Windows Explorer).
The Tree View also depicts program shortcuts associated with the defined layout windows and the regions of the
Display Wall. As default one region is defined which covers the entire Display Wall. Multiple regions can be created which may overlap.
The names of the viewers, however, when the viewer is taken from the Viewer sources, are built differently:
instead of copy(1) of … copy(2) of … the last character is a digit which is incremented for every viewer: frg0,
frg1, frg2…
8.4.1.1 Structure of tree view
Starting with Apollo 1.8, the tree view features an enhanced structure! This structure is
applied automatically on every object. When addressing objects via command lines it is
mandatory to use the "fullname" inlcuding the "path" and not only the name of the object.
The "directories" have to be separated with a dot.
The naming convention gets a bit more clear when looking at the screenshot below. To send commands to frg0,
the recipient has to be addressed as English.Deutsch1.Frg_Frg.frg0. The actual name is derived from the string
following the last dot (seen from left to right).
Barco – Apollo – DOC-3197-2 – user's manual – Revision 08 – November 2006 _________________________________________________ 311/402
8. Layout Editor
8.4.2 Defining regions
This functionality is only available after selecting the option Use Regions in the
Properties|Display Wall menu item.
A region is a rectangular area of the Display Wall. The Edit menu features the Cut, Copy, and Paste commands.
Select a region defined in the database. Use these commands to copy and paste the desired region and paste
them to the Tree View.
Use the context menu (click with right mouse button) of the region to copy, paste, delete a region. If you want
to change its name, click on rename. The properties of a region defined in the database can be edited via the
Properties command.
Create a new region with Edit|Insert region. The dialog to enter the region properties is displayed.
The command Set as Testing Region will inactivate all layouts which are not assigned to this region (which
category does not match). Only the active layouts of the testing regions are available and can be edited. When
selecting a layout, the respective windows are arranged in the testing region. If a window goes across the borders of the region, it’s displayed in the color assigned to OffRegion windows.
Only windows which are completely within a region are displayed on the Display Wall or on the Remote
Desktop. If a window exceeds the borders of a region, it is automatically resized to fit into the region.
8.4.3 Defining shortcuts in the database
The Edit menu features the commands Cut, Copy, and Paste. These commands can be applied on the following
objects: layout, window, shortcut.
Select a shortcut defined in the database. Use these commands to copy and paste the desired shortcut.
The properties of a shortcut defined in the database can be edited via the context menu (click with right mouse
button) or with the Properties|Shortcut command.
312/398 ________________________________________________________________________________________ Apollo Rel. 1.9 User's Manual
8. Layout Editor
Create a new shortcut with Edit|Insert Shortcut. The dialog to enter the shortcut properties is displayed.
A shortcut is globally applied to the entire database, i.e., the defined properties are valid
in every layout or window where this shortcut is used.
A shortcut added to a layout has to first be defined and specified in the database.
The selected shortcut is deleted with Edit|Delete Shortcut. Only shortcuts no longer needed by any other layout
or window can be deleted. The following dialog displays information about where this shortcut is still needed if
this condition is not met:
8.4.4 Defining layouts
The Edit menu features the Cut, Copy, and Paste commands. Use these commands to copy complete layouts or
individual windows of a layout and paste them to the Tree View or a different layout. Shortcuts can also be
copied and added to a layout.
You can also use the Insert Layout command from the Edit menu to define a new layout or copy and modify an
existing layout. The dialog to enter the layout properties is displayed.
To change the settings subsequently, select the desired layout in the Tree View. Use Properties from the context
menu (right mouse button) or Properties|Layout in the menu bar; the dialog described above is then displayed,
see .
A layout includes the window arrangement of all applications launched on the respective region on Display Wall.
If an application not running in a window is to be launched when loading a layout, the corresponding shortcut to
this application is added to the layout.
The arrangement of the windows are referenced to the region with the same categories. The position of the
windows are relative to the upper left corner of the region.
When loading a layout, all windows which don’t fit into the respective region are automatically resized until they
are within the region.
To see whether loading a layout will have to adjust the windows, the region in which this layout is loaded can be
set as testing region (right click on the region in the Tree View and check Set As Testing Region. Windows
which don’t fit into the region are then displayed in the OffRegion color. Resize the windows manually until
they fit into the region or click on Adjust layout to the region on the Layout context menu in the Tree View.
8.4.4.1 Inserting windows into a layout
Select the Edit|Insert Window command. The dialog for specifying window properties, described above, is displayed. Enter the desired parameters.
Barco – Apollo – DOC-3197-2 – user's manual – Revision 08 – November 2006 _________________________________________________ 313/402
8. Layout Editor
8.4.4.2 Inserting shortcuts into a layout
Select Edit|Insert Shortcuts. A dialog opens where you can select a shortcut from those already defined in the
database. Select the desired item from the Available Shortcuts list box.
Only a shortcut already defined in the database can be added to a layout!
8.4.4.3 Properties dialog of shortcuts in the layout
The shortcut properties are fixed with the definition of the shortcuts in the database and cannot be modified
according to layout. This means the Properties dialog of a shortcut in a layout cannot be edited:
314/398 ________________________________________________________________________________________ Apollo Rel. 1.9 User's Manual
8. Layout Editor
8.4.4.4 Inserting viewers in a layout
Viewers can be inserted via the command Edit|Insert viewer or via the context menu of a layout.
Barco – Apollo – DOC-3197-2 – user's manual – Revision 08 – November 2006 _________________________________________________ 315/402
8. Layout Editor
There is also the possibility to insert it via drag and drop by means of the second tree view.
Viewers are completely integrated in the layout editor: drag&drop or copy/paste one of
the objects in Viewer Sources into the layout, and the respective viewer window will be
created with an internal shortcut to the viewer application. The parameters for the viewer
then can be set via the Edit button of the dialog Window properties, see below.
To include a viewer window in a layout via drag and drop by means of the second tree view, proceed as follows:
Click on Second Tree View to open the tree view for drag&drop.
In the tree view for drag&drop, expand the node Viewer Sources. All sources defined in the configuration file
viewersources.ini are listed.
Select the desired viewer source and drag it in the tree view of the Apollo Layout editor.
When the desired layout entry is activated, release the mouse: the viewer source is inserted into this layout.
A viewer source inserted in a layout via drag&drop creates the respective viewer window
with its associated shortcut and with the source requested parameter.
Subsequently the property pages of this viewer window pops up. As default, the names are counted starting
from zero to the last window of this type. This name is used as viewer ident (check the respective option).
316/398 ________________________________________________________________________________________ Apollo Rel. 1.9 User's Manual
8. Layout Editor
The type of window is indicated as Frg. Specify description, position and window state. Switch to the Start and
terminate tab. You can see that the shortcut is indicated as internal shortcut (with a "real" shortcut, the window
type would have been normal).
Click on Edit to define the viewer parameters.
Barco – Apollo – DOC-3197-2 – user's manual – Revision 08 – November 2006 _________________________________________________ 317/402
8. Layout Editor
A dialog pops up where all the valid command line parameters of the viewer can be listed in the list view pane
of this window. The list is populated according the selected objects in the tree view of this dialog.
On the list view, select the parameter you want to set. Double click to edit it, or click on the Edit button.
A dialog pops up:
318/398 ________________________________________________________________________________________ Apollo Rel. 1.9 User's Manual
8. Layout Editor
The range of values as well as their meaning is listed on the dialog.
Check Use this parameter to be able to enter the desired value.
Click on OK to activate it.
In the list view, the respective value is entered, and the set parameter is indicated by a black dot.
It is also possible to enter the desired parameter and it's value manually by editing Additional options. The
entered text is displayed red.
To activate this entry and to include it in the list of parameters click on the button Integrate. This will also clear
the edit field.
Barco – Apollo – DOC-3197-2 – user's manual – Revision 08 – November 2006 _________________________________________________ 319/402
8. Layout Editor
To modify a value or to deactivate a parameter, edit the respective entry again and adjust
it to your needs.
It is not possible to insert digital stream sources via drag&drop.
First a viewer source has to be inserted into the layout to provide a valid FRGviewer with
its start parameters.
Subsequently the digital stream source can be dragged into the FRGviewer window.
To create identical parameter settings for multiple viewers, create one viewer window, specify the parameters,
and then copy the window multiple times.
To see which parameters are applied, sort the list by clicking on the column caption used in the list view (clicking
on a column caption will sort the entries using this criteria.
320/398 ________________________________________________________________________________________ Apollo Rel. 1.9 User's Manual
8. Layout Editor
8.4.5 Preloading viewers
To reduce the time for the FRG viewers to display the desired source on the desired position with the desired
decoration when being launched via loading a layout with these viewers, it is recommended to invisible preload
these viewers.
For each instance of the viewer, the respective shortcut has to be defined in the
database.
To define the viewer shortcut in the database, proceed as follows:
•
Open the layout database.
•
On the tree view, select the nod Shortcuts.
•
Select Edit|Insert Shortcut
•
The Shortcut properties dialog pops up. Specify all properties for the viewer
Now these shortcuts can be inserted into the various layouts.
To shorten the activation time when launching the FRG viewers, define a special invisible layout with the FRG
viewers only.
Insert a window for every FRG viewer in the project.
Define the window properties (position, window state, size) as desired.
To save activation time when launching a viewer in a layout, the specified properties of the
invisible viewer windows should completely be the same as required later, especially with respect to position, size and window state!
Barco – Apollo – DOC-3197-2 – user's manual – Revision 08 – November 2006 _________________________________________________ 321/402
8. Layout Editor
The layout hidden_viewer may look like this:
322/398 ________________________________________________________________________________________ Apollo Rel. 1.9 User's Manual
8. Layout Editor
To launch the viewer invisible, it is essential to unselect the Visible checkbox on the Advanced Tab!
The Visible checkbox is a triple state checkbox. Make sure to remove the gray checkmark to
launch the viewer window invisible!
Likewise for all FRG viewers in the hidden layout.
Barco – Apollo – DOC-3197-2 – user's manual – Revision 08 – November 2006 _________________________________________________ 323/402
8. Layout Editor
If all the viewers are invisible, the layout doesn't show any windows:
To benefit from the preloaded viewer, copy the desired viewer window of the invisible layout and paste it into
the desired layout. This guarantees that position, size etc. match.
To show the respective viewer window in a layout, the Visible checkbox on the Advanced tab
has to be checked (black checkmark!)
324/398 ________________________________________________________________________________________ Apollo Rel. 1.9 User's Manual
8. Layout Editor
Before launching any layout with an FRG viewer, launch the hidden layout!
Please note that the invisible layout is treated like all other layouts, e.g. the command Unload
all layouts of the Layout Selector also unloads the invisible layout and thus closes the preloaded
viewer applications.
To start them again without any delay in a layout, the invisible layout has to be explicitly
launched again!
Saving layouts and shortcuts
Select Save from the File menu to save all shortcut and layout changes in the database. A copy of the database
with the name ApolloDatabase.mdb.back is placed into the same directory before saving any changes.
Drag&Drop, shortcuts, context menu
Use Drag&Drop to insert windows and shortcuts in the TreeView. For a convenient handling click on the button
Second tree view. This opens a 1:1 copy of the tree view and allows easy dragging of objects.
The commands Cut, Copy, Paste are also available by means of the Windows shortcuts Ctrl+X, Ctrl+C, Ctrl+V.
Right mouse click on an object displays the associated context menu and gives access to the respective edit
commands. Context menus are available for the objects of the TreeView, of the Desktop, and of the task bar.
A window on the desktop has two context menus, one associated with the title bar, the other
associated with the contents of the windows.
Barco – Apollo – DOC-3197-2 – user's manual – Revision 08 – November 2006 _________________________________________________ 325/402
8. Layout Editor
8.4.6 Valid command line options
Syntax: LyoutEditor.exe [/<option>:<value>][/<option>:<value>].
Option
Value
/end
Meaning
End the program
/fontname, /fnt
<font>
Set the main font
/fontsize, /fntsz
<size>
Set size of the main font
/height, /h
<height>
height of the main window
/help, /?
/ident, /id
Show command options
<name>
Starts the Layout Editor assigning the specified name.
If an instance with this name is already running, this instance is activated and the command options are sent to it. The second instance is closed.
/labelfontname, /lblfnt
<font>
Set the font for the labels
/labelfontsize, /lblfntsz
<size>
Set size of the font for the labels
/left, /l
<left pos>
left coordinate of the main window
/splash, /spl
Shows the splash screen at startup of the
program.
/top, /t
<top pos>
top coordinate of the main window
/width, /w
<width>
width of the main window
326/398 ________________________________________________________________________________________ Apollo Rel. 1.9 User's Manual
9. Desktop Server
9 Desktop Server
After the Desktop Server has been launched, it will first determine which windows are currently open. Title,
position, and size of each window are determined.
The window information is kept ready for subsequently started clients and passed on to them via the Control
Room Bus.
Barco – Apollo – DOC-3197-2 – user's manual – Revision 08 – November 2006 _________________________________________________ 327/402
9. Desktop Server
9.1 Login
Users working with the servers and with the Layout Editor should have the required access rights for the central
layout database.
9.2 Launching the Desktop Server
Before you can utilize the individual client applications, the Desktop Server has to be launched. The default setting launches and initializes the Desktop Server automatically when logging in on the control computer of the
Display Wall. The initialized server is represented by a green icon.
After the Desktop Server has been launched, it will first determine which windows are currently open. Title,
position, and size of each window are determined. This information is dynamically updated.
The window information is passed to the Control Room Bus and therefore at once available for the Apollo clients
(Layout Selector, Remote Desktop) .
The Layout Editor can be used regardless whether the Desktop Server is activated or not.
9.2.1 Starting the Desktop Server manually
The Desktop Server is either automatically started when logging in (default setting) or started using the shortcut
Start | Programs | Barco Apollo | Settings.
Close the Settings dialog with OK to start the Control Room Bus and the Desktop Server.
The icon of the Desktop Servers is initially displayed in red (taskbar).
The server is initialized after the splash screen disappears (after approx. 4 seconds). The initialized server is represented by a green icon..
9.2.1.1 Problems launching the Desktop Server
If the Remote Control Bus has not been started, the Desktop Server cannot be initialized and the following
error message is returned:
The red Desktop Servers icon is removed from the taskbar once you have acknowledged this error message.
Open the Settings program to manually start the Control Room Bus.
Close the Settings dialog with OK to start the Control Room Bus and the Desktop Server.
328/398 ________________________________________________________________________________________ Apollo Rel. 1.9 User's Manual
9. Desktop Server
9.3 Closing the Desktop Server
To end the Desktop Servers use the Close Desktop Server command from the context menu (right mouse click
on icon).
9.4 Saving layouts in the database
Changes made to the layout directly on the Display Wall can also directly be saved unlocked (shared) database.
Just select Save Layout from the context menu of the Desktop Server (right mouse button). A dialog opens
where you can save the changed layout or define a new one. The current arrangement of windows can be
saved, without requiring a loaded layout.
A dialog opens where you can save the changed layout or define a new one. The current arrangement of windows can be saved, without requiring a loaded layout.
If no regions have been defined, the dialog for saving a layout resembles the one of the
Apollo Explorer|Remote Desktop.
If a layout is loaded on the Display Wall, its name is suggested when saving, provided the selected region
matches. If the region does not match, no name is suggested!
You can save the layout with a new name and thus add it to the database. .
You can save the layout in a new region, thus assigning a new category to it.
When saving a layout with a new name or in a new region, only the option Include windows that don't belong
to a region can be checked or uncheck. This option refers to the windows which have not been launched by
loading a layout
Should you want to save the layout using the same name, you can define if you want to save the windows of
the respective layout only or additional windows (e.g. of another layout loaded into this region) (Save all windows of this region, Only save windows of this layout), to include windows that don’t belong to a region (to
include windows that don’t belong to a region) or whether to remove closed (missing) windows from the
layout (Remove missing windows from the layout).
Barco – Apollo – DOC-3197-2 – user's manual – Revision 08 – November 2006 _________________________________________________ 329/402
9. Desktop Server
If a region is selected, the layouts which categories match (or which have the general category) are indicated by
a green bullet. If in addition the layout is already loaded, then the green bullet gets ticked. In case there is no
permission to save the layout (read only) , the layout is indicated by a red crossed bullet.
When entering a new name, or assigning an existing layout (name) to a new region, only the
option Include windows that don't belong to a region is available.
Layouts should only be saved under an existing name when this layout is loaded on the Display Wall.
The following properties of a window are saved:
new window
window of the loaded layout
Title
Yes
Yes (unchanged)
Window class
Yes
Yes (unchanged)
Shortcut
No
Yes (unchanged)
Position
Yes
Yes
size
Yes
Yes
Window state
Yes
Yes*)
description
Yes
yes
Category (selected region)
Yes
yes
If the title includes special characters, the layout has to be revised using the Layout Editor, see
Identifying windows.
Use the Layout Editor to define the associated shortcut!
*)
If a layout has been loaded with invisible windows (i.e. the respective applications have not been launched yet),
and is then saved as a new layout, the then invisible windows will be saved with window state MINIMIZED regardless of the assigned window state. To assign the desired window state, use the LayoutEditor, please!
Invisible windows of a layout will always be saved with window state minimized!
If a layout is saved as a new layout, the advanced options Topmost, Sizable, Visible, Show title bar, will be
explicitly set or cleared, even if these options in the original layout are grayed. These options will be set as the
Desktop server “sees” them.
Any locked database has to be unlocked by the Desktop Server before changes can be saved. Unlock a database
with Save and share Database in the Edit menu of the Layout Editor
330/398 ________________________________________________________________________________________ Apollo Rel. 1.9 User's Manual
10. Project Backup
10 Project Backup
Barco – Apollo – DOC-3197-2 – user's manual – Revision 08 – November 2006 _________________________________________________ 331/402
10. Project Backup
10.1 General
To backup an Apollo project, Apollo makes use of the backup tool of Windows 2000/Windows XP.
The Backup and Restore tool supports the plattforms Windows 2000 and Windows XP.
Windows NT is not supported!
Although Apollo makes use of a system tool of Windows, for creating a backup file which includes all Apollo specific settings (incl. registry keys etc.) it is recommended to start the backup process by means of the shortcut
Start|Programs|Barco Apollo|Project Backup.
To backup an Apollo project, always use the shortcut Start|Programs|Barco Apollo|Project
Backup.
To restore an Apollo project, double click on the backup file (*.bkf) or start the Windows
Backup and Restore tool via the shortcut Start|Programs|Accessories|System Tools|Backup
The backup of an Apollo project comprises:
•
Backup of the Apollo project folder
•
Backup of user settings
•
Backup of the RC Agent.ini file (in case of the Desktop Server only)
•
Backup of the Switcher Language Compiler (SLC) configuration files (in case of the Desktop Server only)
332/398 ________________________________________________________________________________________ Apollo Rel. 1.9 User's Manual
10. Project Backup
10.2 Creating the backup file
Before launching the Backup tool, make sure that all files of the Apollo project are closed! The Backup tool will
skip all files in use!
When the backup procedure is launched on a computer where an Apollo Desktop Server
is activated, the Desktop Server must be terminated before starting the backup.
Otherwise the Apollo Layout database will be regarded as "to be in use" and therefore
be skipped!
For the same reason it is strongly recommended that no Apollo LayoutEditor has opened
a layout database of an Apollo project which is intended to be backuped.
To backup the Apollo project, select Start|Programs|Barco Apollo|Project Backup.
A dialog pops up which indicates the project of which the back up will be made as well as the entire file name
and location of the backup file:
Barco – Apollo – DOC-3197-2 – user's manual – Revision 08 – November 2006 _________________________________________________ 333/402
10. Project Backup
It is always the currently active project of which a backup is made (= the project which
has been entered in the Apollo Settings dialog).
If not specified differently by means of a start parameter, as default the backup file will
be located in the folder
…\Documents and Settings\username\My Documents.
Project Backup can also be started with a start parameter which comprises the entire
path and file name (with extension!) of the backup file. To make use of this
functionality, create a shortcut of Project Backup (e.g. right click on the entry
Start|Programs|Barco Apollo|Project Backup and drag it on the desktop). Then right click
on the shortcut and select Properties. In the target field, add a space and then the
desired path and file name.
With this start parameter, location and name of the backup file can be adjusted to your needs:
334/398 ________________________________________________________________________________________ Apollo Rel. 1.9 User's Manual
10. Project Backup
Acknowledge of this dialog, starts the backup procedure. No access to the Windows Backup Wizard is given, the
procedure runs on its own:
A message pops up to indicate the completion of the procedure:
Store the backup file on a server where regularly a backup is made, and/or on a CD-ROM
Barco – Apollo – DOC-3197-2 – user's manual – Revision 08 – November 2006 _________________________________________________ 335/402
10. Project Backup
10.3 Restoring an Apollo project
To restore an Apollo project, double click on the backup file of the project (*.bkf) or start the Windows Backup
and Restore Tool via the shortcut Start|Programs|Accessories|System Tools|Backup.
Follow the instructions of the Wizard.
Make sure to select all desired components of the backup file to be restored! In case you
restore the project as a different user and/or on a different machine, you might want to
skip the user settings (...\Documents and settings\username\Local settings\application
data\apollo) or restore them into a different folder (in the Backup or Restore Wizard,
click on the Advanced button and enter the desired location into the field Alternate
location on the Where to Restore dialog).
After the project has been restored, you can start the Apollo project by selecting it in the Apollo Settings dialog.
Launch the dialog by means of the shortcut Start|Programs|BarcoApollo|Settings.
336/398 ________________________________________________________________________________________ Apollo Rel. 1.9 User's Manual
11. Command Interface
11 Command Interface
Barco – Apollo – DOC-3197-2 – user's manual – Revision 08 – November 2006 _________________________________________________ 337/402
11. Command Interface
11.1 Device command Interface
This Apollo component is available only if the TransForm A has been equipped with this software component in the Visio file.
This component is provided on every operator workstation.
Device Command Interface is a WindowsNT/2000 application, which converts command line input to control
commands for the devices.
Start MS-DOS and enter the desired command behind the prompt. The general syntax is as follows:
devicecmd -name:<devname> {-<specifier>[:<value>]}
<devname>
Complete device name (as depicted in the Tree View of the Device Manager).
<specifier>
Name of a (usually device-specific) argument
<value>
Value of an argument.
Apollo Rel. 1.6 supports the devices of the OverView D series, OverView-mP50, Atlas67C4, Atlas67CS4, Atlas84CS4, S70, BR6xxx, BG6xxx, Hermes D2D, Hermes V2A, Visu, Matrix Switcher and the Serial Interface.
The following table provides an overview over the device-specific commands and parameters:
The specifiers and values are not case sensitive!
Device
Specifier
Value
Atlas67CS4, Atlas84CS4, S70, BRxxx, BGxxx
ProjectorStandBy (psb)
True | false
IncBrightness (ibr)
+ |- value
Brightness (br)
Value
Contrast (co)
Value
IncContrast (ico)
+ |- value
PictureFreeze (picf)
True |false
VideoMute (vm)
True |false
Restore (rst)
File name
Backup (bck)
File name
ActiveSourceSlot (ass)
value
LampOnOff (loo)
On | Off
IncBrightnessRed (ibrr)
+ |- value
IncBrightnessGreen (ibrg)
+ |- value
IncBrightnessBlue (ibrb)
+ |- value
BrightnessRed (brr)
Value
BrightnessGreen (brg)
Value
Phoenix DX
338/398 ________________________________________________________________________________________ Apollo Rel. 1.9 User's Manual
11. Command Interface
Device
Specifier
Value
BrightnessBlue (brb)
Value
ContrastRed (cor)
Value
ContrastGreen (cog)
Value
ContrastBlue (cob)
Value
IncContrastRed (icor)
+ |- value
IncContrastGreen (icog)
+ |- value
IncContrastBlue (icob)
+ |- value
LampOnOff (loo)
On | Off
OverView-mP50, Atlas67C4, Atlas84C4
LampOnOff (loo)
On | Off
OverView D
LampOnOff (loo)
On | Off
ActiveLamp (al)
Top | Bottom
BrightnessTarget (brt)
[0-16384]
InfraredOnOff (iroo)
On | Off
LampMode (lm)
hot_standby |
cold_standby |
auto_switch
OptimizeMirror (om)
[1]
For OverView D with 2xDVI
SourceSlotSelectionMode
(sssm)
[1,2,3]
1: auto
2: manual
3: autoSwitch
For OverView D with 2xDV
ActiveSourceSlot (ass)
[1,2]
LampOnOff (loo)
On | Off
ActiveLamp (al)
Top | Bottom
ActiveSourceSlot (ASS)
1-BNC, 2-BNC, 3Composite, 4-SVideo, 5-DVI,
7-SDI, 9-Logo
LampMode (lm)
hot_standby |
cold_standby |
auto_switch
Picture Freeze (picf)
True | False
Hermes D2D
SwitchBoxInput (sbi)
Digital1 | Digital 2
Hermes V2A
SwitchBoxInput (sbi)
Digital | Analog
Matrix Switcher*
Output (out)
value
Input (inp)
value
Send (send)
Characters to be send to
the serial interface, binary
data is entered as escape
sequences,
cf.
Escape
sequences supported by the
send command of the Serial
Interface
OverView cPU67-DL
SerialInterface
Barco – Apollo – DOC-3197-2 – user's manual – Revision 08 – November 2006 _________________________________________________ 339/402
11. Command Interface
The following example shows the command for turning on the lamp of an OverView-mP50 projection module
"%ApolloProgram%\devicecmd.exe" -name:Wall1.Module1x1 -LampOnOff:on
The following example sends "Hallo World" to the serial interface:
"%ApolloProgram%\devicecmd.exe" -name:Wall1.Port1 -Send:"Hallo World"
*
With Matrix Switcher, please mind the sequence of the commands, FIRST outputs, then
Input.
The following command switches Input 3 to Output 3
"%ApolloProgram%\devicecmd.exe" -name:<switcher name> -Output:3 –Input:3
340/398 ________________________________________________________________________________________ Apollo Rel. 1.9 User's Manual
11. Command Interface
11.2 Desktop command Interface
This Apollo component is available only if the TransForm A has been equipped with this software component in the Visio file.
This component is provided on every operator workstation.
Desktop Command Interface is a WindowsNT/2000 application, which converts command line input to control
commands for the devices.
Start MS-DOS and enter the desired command behind the prompt. The general syntax is as follows:
DesktopCmd -name:<desktop server> -<command>:<value>
The commands and values are not case sensitive!
The following table provides an overview over the available commands and parameters:
Command
Parameter
Parameter
LayoutLoad
Region
Layout Name
LayoutUnload
Region
Layout Name
LayoutUnloadAll
Region
Shortcut
Region
Shortcut Name
If no regions are defined, the parameter region has to be omitted!
The following example shows the command for loading the layout with the name English 1 in the region .
“%ApolloProgram%\DesktopCmd.exe” -name:Wall1 –Region: Region1 -LayoutLoad:English1
The region has to be specified, otherwise "Default" region is taken.
Only one command per command line!
Starting with Apollo 1.4SR3, also shortnames of the commands are supported:
Command
shortname
LayoutLoad
ll
LayoutUnload
lul
LayoutUnloadAll
lula
Shortcut
shrtc
Barco – Apollo – DOC-3197-2 – user's manual – Revision 08 – November 2006 _________________________________________________ 341/402
11. Command Interface
11.3 Viewer command Interface
Viewer Command Interface is a Windows NT/2000 application converting command line input into control
commands for the viewers.
Start MS-DOS and enter the desired command behind the prompt. The general command syntax is as follows:
viewercmd -name:<Ident> {-<specifier>[:<value>]}
<Ident>
The complete device name (as listed in the tree view of the Apollo Explorer)
<specifier>
Name of a parameter
<value>
Value of a parameter
Please find the list of parameters and their values in Global Viewer Parameters and in the viewer specific sub chapters.
Since Apollo1.7 the viewer buffers all parameters from a command line, or several command lines, until the
command line contains a ‘SourceRequested’ (sr) or ‘SourceConnected’ (sc) parameter. If one of these two parameters are specified, then all previous parameter including the sr/sc parameter are execute in one cycle!
To connect to a new source, use the source requested parameter in the usual way, specify the new source, and
the viewer will connect to this source! (SourceRequested:<new source>)
Every time you want the viewer to execute the transferred command line parameter, use this command to complete the command line.
Examples:
Make the caption visible:
viewercmd.exe /name:<viewer ident> /CaptionVisible:1 /sc:<some text>
Remove caption, status bar and border:
viewercmd.exe /name:<viewer ident> /CaptionVisible:0 /BorderVisible:0 /StatusBarVisible:0 /sc:<some
text>
11.4 Apollo Explorer command interface
Please see the chapter in the Apollo Explorer section, Valid Command line options
11.5 Apollo Layout Editor command interface
Please see the chapter in the Apollo Layout Editor section.
342/398 ________________________________________________________________________________________ Apollo Rel. 1.9 User's Manual
11. Command Interface
11.6 Apollo Layout Selector command interface
Syntax: LayoutSelector.exe [/<option>:<value>][/<option>:<value>].
Option
Value
/help, /?
/ident, /id
Meaning
Show command options
<name>
Starts an instance of the program assigning the
specified name.
If an instance with this name is already running,
this instance is activated and the command options
are sent to it. The second instance is closed.
/splash, /spl
Shows the splash screen at startup of the program.
/left, /l
<left pos>
left coordinate of the main window
/top, /t
<top pos>
top coordinate of the main window
/width, /w
<width>
width of the main window
/height, /h
<height>
height of the main window
/fontname, /fnt
<font>
Set the main font
/fontsize, /fntsz
<size>
Set size of the main font
/labelfontname, /lblfnt
<font>
Set the font for the labels
/labelfontsize, /lblfntsz
<size>
Set size of the font for the labels
/end
End the program
11.7 Apollo Remote Desktop command interface
Syntax: RemoteDesktop.exe [/<option>:<value>][/<option>:<value>].
Option
Value
/help, /?
/ident, /id
Meaning
Show command options
<name>
Starts an instance of the program assigning the
specified name.
If an instance with this name is already running,
this instance is activated and the command options
are sent to it. The second instance is closed.
/splash, /spl
Shows the splash screen at startup of the program..
/left, /l
<left pos>
left coordinate of the main window
/top, /t
<top pos>
top coordinate of the main window
/width, /w
<width>
width of the main window
/height, /h
<height>
height of the main window
/fontname, /fnt
<font>
Set the main font
/fontsize, /fntsz
<size>
Set size of the main font
/labelfontname, /lblfnt
<font>
Set the font for the labels
/labelfontsize, /lblfntsz
<size>
Set size of the font for the labels
/end
End the program
Barco – Apollo – DOC-3197-2 – user's manual – Revision 08 – November 2006 _________________________________________________ 343/402
11. Command Interface
11.8 Apollo Database Convertor command interface
Syntax: DatabaseConvertor.exe [/<option>:<value>][/<option>:<value>].
Option
Value
/help, /?
/ident, /id
Meaning
Show command options
<name>
Starts an instance of the program assigning the
specified name.
If an instance with this name is already running,
this instance is activated and the command options
are sent to it. The second instance is closed.
/splash, /spl
Shows the splash screen at startup of the program.
/database, /db
<file>
Selects the specified layout database
/left, /l
<left pos>
left coordinate of the main window
/top, /t
<top pos>
top coordinate of the main window
/width, /w
<width>
width of the main window
/height, /h
<height>
height of the main window
/fontname, /fnt
<font>
Set the main font
/fontsize, /fntsz
<size>
Set size of the main font
/labelfontname, /lblfnt
<font>
Set the font for the labels
/labelfontsize, /lblfntsz
<size>
Set size of the font for the labels
/end
End the program
11.9 Apollo Window Detector command interface
Syntax: WindowDetector.exe [/<option>:<value>][/<option>:<value>].
Option
Value
Meaning
/help, /?
/ident, /id
Show command options
<name>
/splash, /spl
Starts an instance of the program assigning the
specified name.
If an instance with this name is already running,
this instance is activated and the command options
are sent to it. The second instance is closed.
Shows the splash screen at startup of the program.
/left, /l
<left pos>
left coordinate of the main window
/top, /t
<top pos>
top coordinate of the main window
/width, /w
<width>
width of the main window
/height, /h
<height>
height of the main window
/fontname, /fnt
<font>
Set the main font
/fontsize, /fntsz
<size>
Set size of the main font
/labelfontname, /lblfnt
<font>
Set the font for the labels
/labelfontsize, /lblfntsz
<size>
Set size of the font for the labels
/end
End the program
344/398 ________________________________________________________________________________________ Apollo Rel. 1.9 User's Manual
12. Control Room Bus services
12 Control Room Bus services
Barco – Apollo – DOC-3197-2 – user's manual – Revision 08 – November 2006 _________________________________________________ 345/402
12. Control Room Bus services
12.1 Control Room Bus
To run the Apollo software, you have to first set up the Control Room Bus on each computer. Then you can start
the respective applications.
The Control Room Bus starts automatically when the computer is booting. The following icon appears in the
taskbar.
Click with the right mouse on the Control Room Bus icon to open the context menu::
Use Component Viewer to see a list of all the networked computers the desktop server can access.
Use Process Data Viewer to view control room database data. This option can be used by system engineers
when initially starting the system but requires expert knowledge about the database structure.
About informs about the software.
346/398 ________________________________________________________________________________________ Apollo Rel. 1.9 User's Manual
12. Control Room Bus services
12.2 Serial command interface
This Apollo component is available only if the TransForm A has been connected with the
rd
Command Source (shape in Barco 3 Party Devices) in the Visio file. Serial Port and baud rate
are defined via the related Custom Properties of the connected TransForm A.
Serial Command Interface makes it possible to connect Apollo with external systems. Serial Command Interface receives data via the serial interface (COM port) and converts it to Apollo-specific commands.
The Serial Command Interface represents a device which can be controlled via the Device Command. As for all
devices, it has to be configured in the Apollo Control Room Configurator (shape: Command Source). When
exporting the Visio drawing, the respective ini-file is created and has, like all other configuration files, to be
copied to the Apollo Project.
12.2.1 Customizing configuration files
If the Apollo Project comprises the SerialCommandInterface (the shape Command Source is part of the respective Visio drawing), then starting the project by means of Apollo Settings will create the file
SerialCommandInterface.ini in the project folder (provided this file does not exist in this folder yet).
Open the file with a text editor and adjust the command allocation sample as necessary.
Starting with Apollo 1.4SR1, the baud rate and the serial port are specified via the Control
Room Configurator in the SerialCommandInterfaceBasic.ini.
If the file SerialCommandInterface.ini has been created with former Apollo releases, the
entries referring to the COM Port and the baudrate have to be deleted manually!
If the SerialCommandInterface.ini does not match the current configuration, the
application is terminated, and a log entry is made. To check whether the application is
running or not, right click on the icon of the Control Room Bus in the status bar and select
Component Viewer.
If the configuration file includes a wrong syntax, Notepad opens and shows the line in
question.
Barco – Apollo – DOC-3197-2 – user's manual – Revision 08 – November 2006 _________________________________________________ 347/402
12. Control Room Bus services
12.2.2 Mode of operation
Data received via the serial interface are stored by the application until the character indicating the end of the
command has been received as well (terminator). The application then compares all samples saved in SerialCommandInterface.ini with the received data. In case of a match, the program launches the corresponding
application with the configured parameters.
Example:
Configuration:
$assign pattern program parameter terminator
assign "LoadFree" "ApolloProgram\DesktopCmd.exe" "-name:" CR
string sent:
„LoadFree Wall1 –region:Left –LoadLayout:English1<CR>“
The program launches the application "ApolloProgram\DesktopCmd.exe" with the
parameters „-name:Wall1 –region:Left –LoadLayout:English1“
In case the SerialCommandInterface.ini file includes a wrong configuration, the process is
terminated, and the respective entry into the log-file is written.
After startup of Apollo, there is a short period in which the Desktop Command interface
is not ready yet. Make sure that you only send commands via the serial command
interface when the Desktop Command has been started by Apollo (you can check this by
clicking onto the Control Room Bus icon in the status bar and then selecting Component
Viewer.
If the Desktop Command interface is not yet ready, and commands are sent via the
SerialCommandInterface, the SerialCommandInterface will start an own instance of the
Desktop Command Interface, thus running a second instance of this service. This is a very
instable situation; you have to stop both Desktop Command instances using the
Windows TaskManager. The next serial command will restart the DesktopCmd and the
system will function again.
348/398 ________________________________________________________________________________________ Apollo Rel. 1.9 User's Manual
12. Control Room Bus services
12.3 TCPIP command interface
This Apollo component is available only if the TransForm A has been connected with the
rd
Command Source (shape in Barco 3 Party Devices) in the Visio file.
TCPIP Command Interface makes it possible to connect Apollo with external systems. TCPIP Command Interface receives data via the Ethernet interface and converts it to Apollo-specific commands.
TCPIP Command Interface uses the default LAN connection. Port is set to 4585. In case a different port has to be
used, enter desired port in the shape of TCP command in the Control Room Configurator. Make sure then that this
port is opened (firewall).
You may also edit the file TCPCommandInterfaceBasic.ini
The TCPIP Command Interface represents a device which can be controlled via the Device Command. As for all
devices, it has to be configured in the Apollo Control Room Configurator (shape: TCP CMD). When exporting the
Visio drawing, the respective ini-file is created and has, like all other configuration files, to be copied to the
Apollo Project.
12.3.1 Mode of operation
Data received via the LAN interface are stored by the application until the character indicating the end of the
command has been received as well (terminator). The application then compares all samples saved in
TCPCommandInterface.ini with the received data. In case of a match, the program launches the corresponding
application with the configured parameters.
Example:
Configuration:
$assign pattern program parameter terminator
assign "LoadFree" "ApolloProgram\DesktopCmd.exe" "-name:" CR
string sent:
„LoadFree Wall1 –region:Left –LoadLayout:English1<CR>“
Barco – Apollo – DOC-3197-2 – user's manual – Revision 08 – November 2006 _________________________________________________ 349/402
12. Control Room Bus services
The program launches the application "ApolloProgram\DesktopCmd.exe" with the
parameters „-name:Wall1 –region:Left –LoadLayout:English1“
350/398 ________________________________________________________________________________________ Apollo Rel. 1.9 User's Manual
12. Control Room Bus services
12.4 Application management
Application Management is a utility used to monitor all locally running Apollo applications.
Use the command Component Viewer from the context menu of the Control Room Bus in the taskbar to open
a dialog displaying the currently running Apollo components using a tree-like structure.
Application Management closes all still running Apollo applications once the Control Room Bus is finished
Barco – Apollo – DOC-3197-2 – user's manual – Revision 08 – November 2006 _________________________________________________ 351/402
12. Control Room Bus services
12.5 License management
Use the command Component Viewer from the context menu of the Control Room Bus in the taskbar to open
a dialog with the menu entries Component, View, Help.
Select View|Licenses to check all available Apollo licenses. The following dialog opens:
This service is only for information about the licenses, not for modifying the licenses.
There is no license for the Web Viewer. The Web Viewer is for free!
In order to get a new license (e.g. the demo license has expired or the Apollo project has been changed), please
send the MAC Address of the network card of the Desktop Server as well as the complete Visio plan of the
Apollo configuration to mailto:[email protected]. You then will receive a new Apollo license file which
is to copy into the folder of the Apollo project.
Determine the correct MAC Address by launching the command prompt and entering
ipconfig /all
The MAC Address of the network card is listed as value of Physical Address.
The MAC Address of the network card is used to generate the license file. Therefore when replacing a network card, a new license has to be ordered!
352/398 ________________________________________________________________________________________ Apollo Rel. 1.9 User's Manual
12. Control Room Bus services
12.6 Time synchronization
All computers within one network have to have the same time. Use the Control Room Configurator to specify
which computer is to be the clock server for all other Apollo network computers. Just set the Clock Server property in the Custom Properties of the master in the Apollo database to True.
Now all Apollo network computers can be synchronized and set to the same time
12.7 Log file
All status and error messages are written to a file in order to check the system. This log-file is located in the
folder ..\ApolloProject\LOG.
The general syntax is as follows:
<class> <node> <task> <stamp> <module> <function>:<text>
class
One character
m (message)
v (verbose)
r (error)
node
Name of the computer or his IP address
task
Name of application
stamp
time (dd.mm.yy hh.mm.ss.mmm)
module
Name of the module
function:
Name of the function
text
message
The general file name of the log file is <yyyy><mm><dd>.<no>. It includes the current date and a number between 000 and 999.
The log-files of all computers of the Apollo network are merged in the log-file on the master (control computer
of the Display Wall).
The file size is limited to 20MB. When this size is exceeded, entries are deleted according the sequence of generation, first the oldest ones.
12.8 Security Provider
The Apollo security mechanism is based on AccessGroups and restricted objects. Apollo allows configuring an
individual permission for every AccessGroup of every object.
The AccessGroups are configured with an ASCII editor. The restricted objects are configured dynamically via the
Permission command available in the Remote Desktop and in the Layout Selector.
Apollo assigns permissions to AccessGroups and not to individual users. A user is identified by his Windows login
name.
A user can be assigned to multiple AccessGroups. In case the respective AccessGroups have different permissions
on an object, the user assigned to multiple AccessGroups has the most significant permission given to one of
these AccessGroups.
Without any specific assignment, as default every user is assigned to the AccessGroup Everyone.
Barco – Apollo – DOC-3197-2 – user's manual – Revision 08 – November 2006 _________________________________________________ 353/402
12. Control Room Bus services
12.8.1 Defining accessGroups
The AccessGroups and the assigned members are configured in the file AccessGroups.ini. This file is located in
the subfolder ServerData in the ApolloProject folder.
The subfolder ServerData and a sample AccessGroups.ini file is created by quitting the
Settings Dialog with OK. Then the AccessGroups.ini file can be edited and customized. The
modifications will be valid after an additional launching of Apollo Settings.
To add a new user to an AccessGroup, proceed as follows:
Add an additional line at the end of the specific AccessGroup
Assign the new user by means of his network name to a new UserName (the UserName have to be counted in
ascending order, e.g. for AccessGroup2 a new user is assigned to UserName8)
To add a new AccessGroup, proceed as follows:
add the desired AccessGroup (e.g. [AccessGroup3]) at the bottom of the AccessGroups.ini file
enter a name for this AccessGroup, the DefaultPermission (cf. DefaultPermission), and a Description
assign the first member of this new AccessGroup to UserName1.
When defining a new AccessGroup or adding a new user to an existing one, mind the
correct syntax as given in the existing AccessGroups / user assignment.
To activate the modifications made in the AccessGroup.ini file:
Select Start|Programs|Barco Apollo|Settings. Make sure that the checkbox Activate Apollo is checked and click
OK. Apollo will be terminated and restarted with the updated AccessGroups.
354/398 ________________________________________________________________________________________ Apollo Rel. 1.9 User's Manual
12. Control Room Bus services
12.8.1.1 DefaultPermission
DefaultPermission is coded as 16 bit hexadecimal. The following table gives an overview about the bits. Please
see the respective item to get information about the assignment.
n.a.
n.a.
n.a.
s7
s6
s5
s4
s3
s2
s1
save
per
m
wr_ad
wr
rd
restricte
d
Bit
Meaning
Description (example: layout)
Restricted
Restricted
Has to be set, otherwise the security provider neglects the respective object
Rd
Read
Layout is visible
Wr
Write
Layout can be loaded
Wr_ad
Write advanced
Windows of a layout can be moved
Perm
permission
Edit permission is available
Save
Save
Layouts can be saved
S1 to S7
Special 1 … Special 7
-
n.a.
Not assigned
-
To get information about the meaning of a specific bit with respect to a different object
than a layout, please refer to Permissions
Barco – Apollo – DOC-3197-2 – user's manual – Revision 08 – November 2006 _________________________________________________ 355/402
12. Control Room Bus services
12.8.2 Configuration of restricted objects
Regions, layouts and shortcuts can be restricted in order to give the different user groups limited access to these
objects. The dialog for changing the permissions at run-time can be launched from Remote Desktop. and Layout
Selector Use this dialog to modify or remove access rights.
By means of this dialog, the permissions can only be reduced. To enhance permission,
edit the AccessGroups.ini-file, please!
Use the file Restrictions.ini in the subfolder ServerData in the ApolloProject folder to view how the default
permissions as defined in the file AccessGroups.ini have been adjusted by means of the Permission edit dialog.
Modifications by means of the Permission edit dialog apply for the entire AccessGroup.
356/398 ________________________________________________________________________________________ Apollo Rel. 1.9 User's Manual
12. Control Room Bus services
12.8.3 Permissions
The Permission edit dialog pops up where the permissions for the defined access user groups can be viewed
and defined.
Select the desired access user group and check the respective permission to give allowance or uncheck the feature to deny access to it.
Click on No Access to remove all permissions for the selected access user group.
Click on Default Access to restore the default permissions as set in the security provider.
Restrictions are specific for the respective object. The following overview shows what a user is allowed to do if
he is given the specific permission.
12.8.3.1 Restrictions for regions
A region object has got the following permissions:
Visible
Remote Desktop and Layout Selector:
the tab for this region is visible
required to show the layout buttons for this region
Remote Desktop only: the region and the region’s windows visible
Access windows
Remote Desktop and Layout Selector:
required to have enabled layout buttons
Remote Desktop only: the windows of this region can be moved and sized
Move region
Remote Desktop only: the region can be moved and sized
Edit permissions
The user is allowed to open the Permission edit dialog
Barco – Apollo – DOC-3197-2 – user's manual – Revision 08 – November 2006 _________________________________________________ 357/402
12. Control Room Bus services
12.8.3.2 Restrictions for layouts
A layout object has got the following permissions:
Read
Remote Desktop and Layout Selector:
the layout button is visible
Load/Unload
Remote Desktop and Layout Selector:
the layout button is enabled so that it can be clicked to load/unload the layout
Edit permissions
The user is allowed to open the Permission edit dialog
Save
The user is allowed to overwrite the layout in the database when he wants to configure a layout online
12.8.3.3 Restrictions for shortcuts
A shortcuts object has got the following permissions (Remote Desktop only):
Visible
The shortcut is visible in the combo box in the Commandline dialog
Execute
The shortcut can be executed. (The Execute button in the Commandline dialog is
enabled when the shortcut is selected.)
Modify
The user is allowed to edit the shortcut before executing it
Edit permissions
The user is allowed to open the Permission edit dialog
12.8.3.4 Restrictions for advanced menus
In the Remote Desktop some menus can be enabled/disabled using the following permissions:
12.8.3.5 Window Properties|Description
Enabled
Enables the menu: Window Properties | Description
Edit permissions
The user is allowed to open the Permission edit dialog
12.8.3.6 Window Properties|Sizable
Enabled
Enables the menu: Window Properties | Sizable
Edit permissions
The user is allowed to open the Permission edit dialog
12.8.3.7 Window Properties|Always on Top
Enabled
Enables the menu: Window Properties | Topmost
Edit permissions
The user is allowed to open the Permission edit dialog
358/398 ________________________________________________________________________________________ Apollo Rel. 1.9 User's Manual
12. Control Room Bus services
12.8.3.8 Window Properties|Visible
Enabled
Enables the menu: Window Properties | Visible
Edit permissions
The user is allowed to open the Permission edit dialog
12.8.3.9 Edit|Invisible Windows
Enabled
Enables the menu: Edit | Invisible Windows…
Edit permissions
The user is allowed to open the Permission edit dialog
12.8.3.10 Edit|Keyboardinput
Enabled
Enables the menu: Edit | Keyboardinput
Edit permissions
The user is allowed to open the Permission edit dialog
12.8.3.11 Edit|CommandLine
Enabled
Enables the menu: Edit | Commandline…
Edit permissions
The user is allowed to open the “Permission edit” dialog
12.8.3.12 Edit|Permissions
Enabled
Enables the menu Permissions
Edit permissions
The user is allowed to open the Permission edit dialog
12.8.3.13 Edit|SaveLayout
Enabled
Enables the menu: Edit | Layout | Save…
Edit permissions
The user is allowed to open the Permission edit dialog
Barco – Apollo – DOC-3197-2 – user's manual – Revision 08 – November 2006 _________________________________________________ 359/402
13. Customized configuration and uninstallation of Apollo
13 Customized configuration and uninstallation of Apollo
Barco – Apollo – DOC-3197-2 – user's manual – Revision 08 – November 2006 _________________________________________________ 361/402
13. Customized configuration and uninstallation of Apollo
13.1 Settings
The system can be reconfigured to fit the needs of any project at any time after the initial installation using the
shortcut Start|Programs|Barco Apollo|Settings. The following dialog opens:
13.1.1 Project directory
Enter a directory for your project. This directory will contain the license, project-specific ini files, the subdirectory
ApolloDatabase and the subdirectory Log, among others. The database ApolloLayouts.mdb saved in this subdirectory contains the layout definitions.
This subdirectory has to be made accessible (shared) to all workstations operating the Layout Editor.
Select this directory using the Windows Explorer and open the Properties dialog. Then select the Share tab followed by selecting Share as. The share name should be ApolloDatabase.
The project directory is generated only if the Settings dialog is exited with OK!
13.1.2 Language
Select the language from the list field. Apollo is provided in English and in German. However, the user interface
of Apollo can be converted to any 8-bit language using the respective language files; see Apollo Internationalization.
These languages are then also available from the list field.
Close the Settings dialog with OK to accept the settings and close all Apollo applications and restart with the
new settings.
13.2 Apollo Internationalization
User Apollo user interfaces can be translated. Just copy the folder English from the C:\Program Files\Barco
Apollo\Language directory to the same directory and give the folder the name of the desired language.
Edit the *.lng files located in this folder and translate the second column.
Launch Settings using the shortcut Start | Programs |Barco Apollo |Settings and select the desired language,
see Settings.
13.2.1 Asian languages
Starting with Apollo 1.4SR2, Asian languages are supported. Before you can use the Japanese localization, the
system default locale has to be set to Japanese! (Start|Settings|Control Panel|Regional Options)
The following texts cannot be localized in Asian languages (2 byte) character fonts:
•
All names in the Control Room Configurator (group names, device names, ..)
•
All source names in viewersources.ini
•
LayoutEditor; Layout names, instead you can use the 'short name'
•
LayoutEditor; Shortcut names
•
LayoutEditor; Region names
362/398 ________________________________________________________________________________________ Apollo Rel. 1.9 User's Manual
13. Customized configuration and uninstallation of Apollo
13.3 Layout icons
The icons of the layouts displayed in the Layout Selector can be customized. As default the standard icon is
used. Edit the ini-file of the Layout Selector to customize the icons. In this ini-file, assign to the Icons attribute
of the respective Display Wall the entire path of the folder where the icons for the layouts are located. In this
folder, for every layout an individual icon can be defined as nameoflayout.ico.
Barco – Apollo – DOC-3197-2 – user's manual – Revision 08 – November 2006 _________________________________________________ 363/402
13. Customized configuration and uninstallation of Apollo
13.4 Apollo font settings
Besides the general system font properties as set on the Properties|Display Properties|Appearance tab (right
mouse click on the windows desktop), the appearance of Apollo can be adjusted independently from all other
applications.
To adjust the Apollo appearance, proceed as follows:
•
define environment variables:
ApolloFontSize: for general texts and menu texts
ApolloFontName: for general texts and menu texts
ApolloLabelFontSize: for all labels and tool tip texts
ApolloLabelFontName: for all labels and tool tip texts
To add or change the values of environment variables
•
Open System in Control Panel.
•
On the Advanced tab, click Environment Variables, then click the name of the user variable or system variable you want to change, as follows:
•
Click New to add a new variable name and value.
•
Click Edit to change a current variable name and value.
•
Click Delete to remove a variable name and value.
If you are not logged on as administrator to the local computer, the only environment variables
you can change are user variables.
To open a Control Panel item, click Start, point to Settings, click Control Panel, and then double-click the appropriate icon.
The changes are saved in the registry so they are available automatically the next time you
start your computer.
You may have to close and reopen running programs for the new settings to take effect.
Or
•
use the command line parameter
/FontName: /FontSize for general texts and menu texts
/LabelFontName: /LabelFontSize for all labels and tool tip texts
364/398 ________________________________________________________________________________________ Apollo Rel. 1.9 User's Manual
13. Customized configuration and uninstallation of Apollo
13.5 Apollo uninstall
Use the following shortcut to uninstall Apollo: Start | Settings | Control Panel | Add/Remove Programs. Select
Barco Apollo and click on the Change/Remove button. Follow the onscreen instructions.
The InstallShieldwizard pops up indicating Preparing Setup. Subsequently you are asked if you really want to
completely remove the selected application. Confirm this dialog with OK. Uninstall then continues.
In the now opening dialog, indicate whether the registry entries are deleted during uninstall (select Remove
Settings) or if they are to remain on the computer (do not select Remove Settings). Retaining the content of
the registry entries is recommended when the Apollo uninstall is followed by a new Apollo install.
Uninstall then continues.
Everything that was installed by default is removed during the uninstall process.
Folder and files with project-specific modifications (e.g., C:\Program Files\Barco Apollo\Language) remain
intact just as the project directory.
Barco – Apollo – DOC-3197-2 – user's manual – Revision 08 – November 2006 _________________________________________________ 365/402
14. Soap API Service
14 Soap API Service
Barco – Apollo – DOC-3197-2 – user's manual – Revision 08 – November 2006 _________________________________________________ 367/402
14. Soap API Service
14.1 Requirements
The Apollo SOAP API Service is only supported by Windows 2000 and Windows XP, not by Windows NT.
For the client side setup please refer to doc-3338-2: Reference Manual Apollo !.5 Soap
Interface
To install this service, the following configuration is mandatory
•
Windows 2000 Service Pack 3
•
Internet Explorer 5.5 SP2 or later
•
Windows Scripting Host 5 or later
•
Internet Information Service (IIS)
•
Soap SDK 3.0
The installation and configuration of the SOAP API requires the following steps:
•
Installation of the Internet Information Service IIS
•
Installation of the SOAP SDK 3.0
•
Creation and configuration of virtual directories
•
Configuration of the DCOM
14.2 Installation of the Internet Information Service IIS
The Internet Information Service IIS is provided on the Windows2000 Professional CD-ROM.
To install the IIS, proceed as follows:
Insert the Windows2000 Professional CD-ROM into the CD-ROM drive.
If Autorun is enabled, the following dialog pops up offering various options. Select Install Add-On Components:
368/398 ________________________________________________________________________________________ Apollo Rel. 1.9 User's Manual
14. Soap API Service
From the list of available components, select Internet Information Service:
Setup then continues.
Barco – Apollo – DOC-3197-2 – user's manual – Revision 08 – November 2006 _________________________________________________ 369/402
14. Soap API Service
The Internet Information Service is installed on your system.
To configure the Internet Information Service, select
Start|Control Panel|Administrative Tools|Internet Services Manager.
Right click on Default Web Site, and select Properties from the context menu.
A dialog opens with 8 tabs.
370/398 ________________________________________________________________________________________ Apollo Rel. 1.9 User's Manual
14. Soap API Service
•
Activate the tab Web Site.
•
Check HTTP Keep Alives Enabled.
•
Reduce Connection Timeout to 120 seconds.
The Internet Information Service on Windows workstations comes configured for a maximum of 10 HTTP connections. This can be bumped up to 40 connections (the hard coded limit).
To increase the number of connections,
•
select Start|Run|cmd
•
Change the directory to …\Inetpub\adminscripts.
•
Enter the following command
Cscript adsutil.vbs set w3svc/MaxConnections 40
•
Press the carriage return key.
•
Subsequently restart the IIS by entering the command iisreset
Barco – Apollo – DOC-3197-2 – user's manual – Revision 08 – November 2006 _________________________________________________ 371/402
14. Soap API Service
14.3 Installation of the SOAP SDK
The SOAP SDK from Microsoft is provided on the Apollo CD-ROM and located in the folder
…\3rd Party\Microsoft SOAP Toolkit 3.0\soapsdk.exe
Double click on the soapsdk.exe to install it. The following dialog pops up:
Select the Microsoft SOAP Toolkit 3.0:
Setup then continues, and the SOAP SDK is installed on your system.
372/398 ________________________________________________________________________________________ Apollo Rel. 1.9 User's Manual
14. Soap API Service
14.4 Creation and configuration of virtual directory in the Internet Information Service
A virtual directory has to be created on the Apollo API server for the .Net clients and for the Java clients.
To create it, proceed as follows:
Open the command prompt.
Change the directory to ..\MSSOAP\Binaries (if installation was made with the default settings, the entire path
is C:\Program Files\MSSOAP\Binaries .
Type in the following command:
•
soapvdir Create ApolloApi “C:\Program Files\Barco Apollo\API Service”
•
Press the Enter key
This will make a virtual directory s with name ApolloApi in the IIS.
Now the virtual directory has to be configured.
On the local desktop, click on My Computer. Select Manage from the context menu (right mouse click):
The Computer Management dialog opens. Browse to the Internet Information Service. Right click on Apollo
API.
Barco – Apollo – DOC-3197-2 – user's manual – Revision 08 – November 2006 _________________________________________________ 373/402
14. Soap API Service
From the context menu, select Properties. On the tab Virtual directory check Read and Directory browsing:
374/398 ________________________________________________________________________________________ Apollo Rel. 1.9 User's Manual
14. Soap API Service
14.5 Configuration of the DCOM
To configure the DCOM, log in with administrative rights!
It is mandatory to proceed as described in this chapter!
14.5.1 Windows 2000
Select Start | Run. In the dialog box, enter dcomcnfg:
A multipage pops up. Select the tab Default Security.
Barco – Apollo – DOC-3197-2 – user's manual – Revision 08 – November 2006 _________________________________________________ 375/402
14. Soap API Service
Now the access permissions have to be edited. Access has to be given to the local user Interactive, System,
Administrators, IUSR, and IWAM.
When clicking on Edit Default, in Windows2000 the Registry Value Permissions opens
with an empty list. All users have to be added.
Click on the Add button to add the required members.
376/398 ________________________________________________________________________________________ Apollo Rel. 1.9 User's Manual
14. Soap API Service
Make sure that in the "List Names From" box the local PC is selected!
Select the following users and add them:
•
IUSR
•
IWAM
•
System
•
Interactive
•
Administrator
Accept the dialog with OK. Check if the required members are added in the Registry Value Permissions.
Subsequently reboot the system!
Barco – Apollo – DOC-3197-2 – user's manual – Revision 08 – November 2006 _________________________________________________ 377/402
14. Soap API Service
14.5.2 Windows XP
Select Start | Run, and enter the command dcomcnfg:
A dialog opens. In the treeview, navigate to apoApiMngr.* (the extension may vary from system to system)
Right click on this entry to open the context menu. Select Properties and then activate the tab Security.
378/398 ________________________________________________________________________________________ Apollo Rel. 1.9 User's Manual
14. Soap API Service
For the local users IUSR and IWAM the following rights have to be set: Launch and Activation Permissions, and
Access Permission.
To edit the permissions, select Customize.
Barco – Apollo – DOC-3197-2 – user's manual – Revision 08 – November 2006 _________________________________________________ 379/402
14. Soap API Service
14.5.2.1 Launch Permissions
Select Add to enter the local users IUSR and IWAM.
Make sure that the local computer is sselected!
Add the following users:
•
IUSR
•
IWAM
Subsequently exit the dialog by clicking OK.
380/398 ________________________________________________________________________________________ Apollo Rel. 1.9 User's Manual
14. Soap API Service
14.5.2.2 Access Permissions
The local users IUSR and IWAM have to be given access rights.
Subsequently reboot the system!
14.5.3 How to check the Apollo API
To check if the server is online,
•
Open the command prompt
•
Subsequently enter the commands:
Ping ApolloApiServer
If the server answer, it is running and connected.
If there is no response, navigate to…Windows\System32\drivers\etc.
Edit the file Hosts and check the IP addresses for the ApolloApiServer
Barco – Apollo – DOC-3197-2 – user's manual – Revision 08 – November 2006 _________________________________________________ 381/402
14. Soap API Service
To check the correct installation of Apollo and the Apollo API, use the tool VerifyAPI.exe provided on the Apollo
CD-ROM:
•
Navigate to the folder Apollo (CRS-3045)\Apollo 1.9\API
•
Double click on VerifyAPI.exe
The verification tool launches and checks the configuration. If everything is ok, after several instances it shows
the build of the Apollo Software.
In a second step you can click on the button "List Desktops". The tool will look for all desktop servers of the related Apollo project and lists them. The entries of the list can be viewed opening the list box:
382/398 ________________________________________________________________________________________ Apollo Rel. 1.9 User's Manual
15. Appendix
15 Appendix
Barco – Apollo – DOC-3197-2 – user's manual – Revision 08 – November 2006 _________________________________________________ 383/402
15. Appendix
15.1 Commands via keyboard
Please note the following issues when sending keyboard input to a window:
•
To send one of the following characters, enclose it in curly brackets:
•
+ ^ % ~ ( ) [ ] { }
Example: For the plus sign, enter {+}.
•
Non printable characters are represented by the following codes:
Key
Code
Key
Code
BACKSPACE
{BACKSPACE},
{BKSP}
F1
{F1}
BREAK
{BREAK}
F2
{F2}
CAPS LOCK
{CAPSLOCK}
F3
{F3}
DEL or DELETE
{DELETE} or {DEL}
F4
{F4}
DOWN ARROW
{DOWN}
F5
{F5}
END
{END}
F6
{F6}
ENTER
{ENTER}or ~
F7
{F7}
ESC
{ESC}
F8
{F8}
HELP
{HELP}
F9
{F9}
HOME
{HOME}
F10
{F10}
INS or INSERT
{INSERT} or {INS}
F11
{F11}
LEFT ARROW
{LEFT}
F12
{F12}
NUM LOCK
{NUMLOCK}
F13
{F13}
PAGE DOWN
{PGDN}
F14
{F14}
PAGE UP
{PGUP}
F15
{F15}
PRINT SCREEN
{PRTSC}
F16
{F16}
RIGHT ARROW
{RIGHT}
SCROLL LOCK
{SCROLLLOCK}
TAB
{TAB}
UP ARROW
{UP}
{BS},
or
Use the following codes for key combinations with the SHIFT, Control, or ALT keys:
Key
Code
SHIFT Key
+
CONTROL Key
^
ALT Key
%
384/398 ________________________________________________________________________________________ Apollo Rel. 1.9 User's Manual
15. Appendix
15.2 Identifying windows
If you specify the title of a window in the Layout Editor module, you can enter placeholders for characters and
digits..
Placeholder
Meaning
?
Any single character
*
Zero or more characters
#
Any single digit (0-9)
[List]
Individual character in List
[!List]
Individual character not contained in List
•
An entire range can be indicated in a list by using a hyphen, e.g. [A-M].
•
If a special character is not to be used as placeholder, it is enclosed in square brackets, e.g., [#]., [[]
Barco – Apollo – DOC-3197-2 – user's manual – Revision 08 – November 2006 _________________________________________________ 385/402
15. Appendix
15.3 Redundant Apollo System
The Control Room Bus supplies the communication infrastructure for the computers integrated into the Apollo
network. A redundant Apollo system can be generated to ensure the max. availability of this infrastructure. Such
a redundant system monitors the function of the communication server and assumes the functions of this server
in case of malfunction or failure.
A redundant Apollo system consists of a communication server master and a communication server slave , which
start the Control Room Database, the Desktop Server running on the control computer of the Display Wall, and
the computers of the client components (Remote Desktop, Layout Selector, etc.)
Communication server
(Master)
redundant communication server
(Slave)
Infrastructure
LAN
Wall Management
Desktop Server
(control unit of
the Display Wall)
Apollo Client
(Remote Desktop,
Layout Editor)
Apollo Client
(Layout Selector,
Projector Control,
Layout Editor)
Apollo Client
(Layout Selector,
Projector Control,
Layout Editor)
15.3.1 Setup
The configuration has to be created with the help of the Visio template Control Room Configuration and the
configuration files have to be exported.
15.3.1.1 Master:
Select only Display Wall in the Select Components dialog.
Once the installation is finished, the configuration files Filename_Name of Master Computer generated by the
Control Room Configurator have to be copied to the Apollo project directory of the master.
15.3.1.2 Slave:
Select only Display Wall in the Select Components dialog.
Once the installation is finished, the configuration files Filename_Name of Slave Computer generated by the
Control Room Configurator have to be copied to the Apollo project directory of the master.
15.3.2 System checkup
Click with the right mouse on the Control Room Bus icon to open the context menu. Use the Viewers | Component Viewers menu option to display a list of all active computers within the Apollo network. The
list should display the name of the master as well as that of the slave. If only one name is listed the other computer's functionalities have to be checked to maintain redundancy.
.
386/398 ________________________________________________________________________________________ Apollo Rel. 1.9 User's Manual
15. Appendix
15.4 Placeholders for In Display Caption Texts
Placeholder
Description
%SourceRequested%
The CRB (control room bus) name of the source to be displayed. This
name has been defined in the ServerData\viewersources.ini file.
This placeholder normally corresponds with the %SourceConnected%
placeholder
%SourceConnected%
CRB name of the source currently displayed. For predefined sources,
this name has been defined in the ServerData\viewersources.ini file.
For non-predefined sources, the name can freely be assigned to using
this parameter
%SourceCaption%
Suitable name for the currently displayed source
%SourceTitle%
A title assigned to the source is depicted.
%Description%
Suitable name of the viewer instance
%Date%
Current date
%Time%
Current time
%Status%
Connection status or status of data stream after connection has been
established.
Status display description:
Not connected (viewer waits for the control room bus); viewer is active
but cannot be controlled in this state.
Unknown source: The name of the source is unknown to the control
room bus.
Connecting ... : Waiting for the source object
Unknown resource: (e.g., incorrect Visu input card, wrong channel with
BigVideo, Quadvideo, RGB input cards, wrong workstation (Cottus), etc.
Resource unavailable (the corresponding source is already controlled by
another server within the Apollo network)
15.4.1 Specific FRG Viewer placeholders
Placeholder
Description
%Channel%
Active channel of input card
%Port%
Active port of input card
%SVSSourceName%
source name of source connected to Streaming Video Card
%Status%
Freeze frame (video stopped)
Playback
Connecting with Manager (a connection with the Manager software is
being established)
15.4.2 Specific Visu Viewer placeholders
Placeholder
Description
%IPUs%
Number of video input card (“1, 5, 10”)
%DeviceName%
Control room bus name for connected Visu device
%Status%
Freeze frame (video stopped)
Playback
Connecting with Manager (a connection with the Manager software is
being established)
Barco – Apollo – DOC-3197-2 – user's manual – Revision 08 – November 2006 _________________________________________________ 387/402
15. Appendix
15.4.3 Specific Cottus Viewer placeholders
Placeholder
Description
%Hostname%
Name of connected workstation
%Status%
State of connection
15.4.4 Specific VNC Viewer placeholders
Placeholder
Description
%Hostname%
Name of connected workstation
%Status%
State of connection
15.4.5 Specific Pro Viewer placeholders
Placeholder
Description
%Hostname%
Name of connected workstation
%Status%
Status of connection
15.4.6 Specific Web Viewer placeholders
Placeholder
Description
%URL%
Name of Internet page
%Status%
Loading (page is loading)
Ready (page has finished loading)
15.4.7 Specific MPEG Viewer placeholders
Platzhalter
description
%URL%
Name of digital data stream
%Position%
Position in digital Datenstrom
%Marker%
Name of current marker in the data stream (only if markers are supported)
%Status%
Pause: the Mpeg-data stream is paused (if resumed, it starts playing at
the actual position)
Stop: the Mpeg data stream is stopped (if resumed, it starts playing at
the beginning)
388/398 ________________________________________________________________________________________ Apollo Rel. 1.9 User's Manual
15. Appendix
15.4.8 Specific VTplus Viewer placeholders
Placeholder
Description
%Channel%
Name of videotext channel
%Page%
Number of videotext page
%SubPage%
Number of videotext subpage
%Status% (specific values)
Loading (page is loading)
Ready (page has finished loading)
Connecting with Manager (a connection with the Manager software is
being established)
Barco – Apollo – DOC-3197-2 – user's manual – Revision 08 – November 2006 _________________________________________________ 389/402
15. Appendix
15.5 Overview: List of commandline parameters and their shortcuts
Security Provider
Viewer Command
Frg Viewer
Visu Viewer
Web Viewer
Cottus Viewer
Mpeg Viewer
VTPlus Viewer
Pro Viewer
VNC Viewer
Remote Pointer
Apollo Explorer
Path Finder
DB Converter
Layout Editor
Layout Selector
Remote Desktop
Wnd Descriptor
SveLayout Launcher
Desktop Command
Device Command
Device Manager
Visu Mngr Holder
Remote Control
Source Initializer
Window Detector
Please note that some parameters are only available when starting the application via a
command line (and not to control the application), e.g. StartMinimized
CommandLine Parameter
Short forms
ActiveLamp
al
x
ActiveSourceSlot
ass
x
AspectRatio
ar
x
AspectRatio
asprat
x
AudioBalance
ab
x
x
AudioVolume
av
x
x
AutoDetect
ad
x x
x
AutoPhsePosDetect
Appd
x
x
AutoResize
arz
x
AutoScrollWidth
asw
x
Backup
bck
BorderVisible
bv
x x x x
BottomHost
bhst
x
x
BottomHostPassword
bhstpwd
x
x
Brightness
br
x x
BrightnessBlue
brb
x
BrightnessGrenn
brg
x
BrightnessRed
brr
x
BrightnessTarget
brt
x
BrowserStatus
bs
ButtonPanel
bp
x
ButtonPanel
btnpnl
x
ByType
bt
x
CaptionVisible
cv
x x x x
Channel
ch
x x
ColumnWidth1
colw1
x
ColumnWidth1
cw1
x
ColumnWidth2
colw2
x
ColumnWidth2
cw2
x
x
x
x
x
x x x x x
x
x
x x x x x
x
x
x
390/398 ________________________________________________________________________________________ Apollo Rel. 1.9 User's Manual
Security Provider
Viewer Command
Frg Viewer
Visu Viewer
Web Viewer
Cottus Viewer
Mpeg Viewer
VTPlus Viewer
Pro Viewer
VNC Viewer
Remote Pointer
Apollo Explorer
Path Finder
DB Converter
Layout Editor
Layout Selector
Remote Desktop
Wnd Descriptor
SveLayout Launcher
Desktop Command
Device Command
Device Manager
Visu Mngr Holder
Remote Control
Source Initializer
Window Detector
15. Appendix
CommandLine Parameter
Short forms
CompressLevel
cl
ConfigFile
cf
ConfiguredTests
ct
Connection
c
x
Connection
con
x
Contrast
co
ContrastBlue
cob
x
ContrastGreen
cog
x
ContrastRed
cor
x
CopyRectEncoding
cre
Database
db
DeInterlacerMode
dim
Description
dscr
DesktopLocked
dl
x
DesktopLocked
dsklock
x
DeviceName
dn
x
DisconnectFrom
df
X
DoZordering
dz
EightBitsPixel
ebp
x
EnableAudio
ea
x
EnableClipboard
ec
x
x x
EnableJpegCompression
ejc
x
x x
EnableLoopMode
elm
EnableMagnifier
em
EnableRemoteHost
erh
EnableScaleMode
esm
x
x
EnableScrollBars
esb
x
x
Encoding
enc
x
End
end
x x x x
x x x x x x x
x x x x x x
FontName
fnt
x x x x
x x x x x x x
x x x x x x
x
FontSize
fntsz
x x x x
x x x x x x x
x x x x x x
x
Framerate
fr
x x
FrameRateReduction
frr
x x
FrameRateReductionMode
frrm
x x
FullNames
fn
GatewayName
gwn
x
x
x
x
x
x x
x
x
x x x x
x x x x x
x
X
x
x
x x
x
x
x
x
x
x
x x
x x
x
x
x
Barco – Apollo – DOC-3197-2 – user's manual – Revision 08 – November 2006 _________________________________________________ 391/402
Security Provider
Viewer Command
Frg Viewer
Visu Viewer
Web Viewer
Cottus Viewer
Mpeg Viewer
VTPlus Viewer
Pro Viewer
VNC Viewer
Remote Pointer
Apollo Explorer
Path Finder
DB Converter
Layout Editor
Layout Selector
Remote Desktop
Wnd Descriptor
SveLayout Launcher
Desktop Command
Device Command
Device Manager
Visu Mngr Holder
Remote Control
Source Initializer
Window Detector
15. Appendix
CommandLine Parameter
Short forms
Go
go
Height
h
Help
?
x x x x
Hide
hide
x
HostName
hn
x
HostServerType
hst
X
X
x
HostServerPort
hsp
X
X
x
HotKeyDefinitionAltEsc
hkdae
X
HotKeyDefinitionAltTab
hkdat
X
HotKeyDefinitionConnect
hkdc
X
HotKeyDefinitionCtrlAltDel
hkdcad
X
HotKeyDefinitionCtrlEsc
hkdce
X
x
x
x x
x x x x x x x
x x x x x
x x x x x x
x x
x
x x x
HotKeyDefinitionDisconnect hkdd
X
HotKeyDefinitionReleaseControl
X
hkdrc
HotKeyDefinitionShowUserManual
hkdsum
HotKeyEnabledAltEsc
hkeae
X
HotKeyEnabledAltTab
hkeat
X
HotKeyEnabledConnect
hkec
X
HotKeyEnabledCtrlAltDel
hkecad
X
HotKeyEnabledCtrlEsc
hkece
X
HotKeyEnabledDisconnect
hked
X
HotKeyEnabledReleaseContol
hkerc
HotKeyEnabledShowUserManual
hkesum
HotKeyResetToDefault
hkrtd
HideAppWhileControlling
hawc
x
Hue
hue
x x
HWBackgroundBlue
hwbb
x
x
HWBackgroundGreen
hwbg
x
x
HWBackgroundRed
hwbr
x
x
HWColorKeyBlue
hwcb
x
x
HWColorKeyGreen
hwcg
x
x
HWColorKeyRed
hwcr
x
x
HWFrameRateDivider
hwfrd
x
x
X
X
X
x
x
X x x
392/398 ________________________________________________________________________________________ Apollo Rel. 1.9 User's Manual
Security Provider
Viewer Command
Frg Viewer
Visu Viewer
Web Viewer
Cottus Viewer
Mpeg Viewer
VTPlus Viewer
Pro Viewer
VNC Viewer
Remote Pointer
Apollo Explorer
Path Finder
DB Converter
Layout Editor
Layout Selector
Remote Desktop
Wnd Descriptor
SveLayout Launcher
Desktop Command
Device Command
Device Manager
Visu Mngr Holder
Remote Control
Source Initializer
Window Detector
15. Appendix
CommandLine Parameter
Short forms
HWFrameRateReductionMax
hwfrrm
x
IconizeApplication
ia
x
x
IconizeAppOnReleaseCtrl
Iarc
x
x
Idc[1..4]BackColor
idc[1..4]bc
x x x x
x x x x x
Idc[1..4]Enabled
idc[1..4]e
x x x x
x x x x x
Idc[1..4]Image
idc[1..4]i
x x x x
x x x x x
Idc[1..4]Opaque
idc[1..4]o
x x x x
x x x x x
Idc[1..4]Overlap
idc[1..4]ov
x x x x
x x x x x
Idc[1..4]Position
idc[1..4]pos
x x x x
x x x x x
Idc[1..4]TesxtSize
idc[1..4]ts
x x x x
x x x x x
Idc[1..4]Text
idc[1..4]t
x x x x
x x x x x
Idc[1..4]TextColor
idc[1..4]tc
x x x x
x x x x x
IdcBackColor
idcbc
x x x x
x x x x x
IdcBoSLEnabled
idcbosle
x x
x
IdcEnabled
idce
x x x x
x x x x x
IdcImage
idci
x x x x
x x x x x
IdcOpaque
idco
x x x x
x x x x x
IdcOverlap
idcov
x x x x
x x x x x
IdcPosition
idcpos
x x x x
x x x x x
IdcTesxtSize
idcts
x x x x
x x x x x
IdcText
idct
x x x x
x x x x x
IdcTextColor
idctc
x x x x
x x x x x
Ident
id
x x x x
x x x x x x x x x x x
IncBrightness
ibr
x
IncBrightnessBlue
ibrb
x
IncBrightnessGreen
ibrg
x
IncBrightnessRed
ibrr
x
IncContrast
ico
x
IncContrastBlue
icob
x
IncContrastGreen
icog
x
IncContrastRed
icor
x
InfraredOnOff
iroo
x
Input
inp
x
IPUs
ipu
x
IpuSrcType
ipust
x x
JpegQualityLevel
jql
x
x
x x
x x x x x
x
x x
Barco – Apollo – DOC-3197-2 – user's manual – Revision 08 – November 2006 _________________________________________________ 393/402
Security Provider
Viewer Command
Frg Viewer
Visu Viewer
Web Viewer
Cottus Viewer
Mpeg Viewer
VTPlus Viewer
Pro Viewer
VNC Viewer
Remote Pointer
Apollo Explorer
Path Finder
DB Converter
Layout Editor
Layout Selector
Remote Desktop
Wnd Descriptor
SveLayout Launcher
Desktop Command
Device Command
Device Manager
Visu Mngr Holder
Remote Control
Source Initializer
Window Detector
15. Appendix
CommandLine Parameter
Short forms
LabelFontName
lblfnt
x x x x
x x x x x x x
x x x x x x
x
LabelFontSize
lblfntsz
x x x x
x x x x x x x
x x x x x x
x
LampMode
lm
x
LampOnOff
loo
x
LastFrameOnSignalLoss
Ifsl
LayoutIconSize
lis
LayoutLoad
ll
LayoutSelector
laysel
x
LayoutSelector
ls
x
LayoutUnLoad
lul
x
LayoutUnLoadAll
lula
x
Left
l
x
x x
LeftHost
lhst
x
x
LeftHostPassword
lhstpwd
x
x
LocatorVisible
lv
x
x
Marker
mkr
x
Master
master
MenuBar
mb
Motion
mo
Name
name
Navigate
nav
ObjectTree
ot
OptimizeMirror
om
Output
out
Page
pg
x
PassWord
pwd
x
PictureFreeze
picf
PlayerAction
pa
x
Port
port
x x
Position
pos
PresetName
Psn
ProjectorStandBy
psb
PropertyPage
pp
x x x x
x x x x x
PropertyPageAccelerator
ppa
x x x x
x x x x x
PropertyPagePermission
ppp
x x x x
x x x x x
ReconnectionTimeInterval
Rti
X
x
x
x
x
x x x x x
x
x
x
x
x
x
x x
x
x
x
x
x
x
x
x x x
x
x
x
X X
x
x
x
X
X x
x
394/398 ________________________________________________________________________________________ Apollo Rel. 1.9 User's Manual
Security Provider
Viewer Command
Frg Viewer
Visu Viewer
Web Viewer
Cottus Viewer
Mpeg Viewer
VTPlus Viewer
Pro Viewer
VNC Viewer
Remote Pointer
Apollo Explorer
Path Finder
DB Converter
Layout Editor
Layout Selector
Remote Desktop
Wnd Descriptor
SveLayout Launcher
Desktop Command
Device Command
Device Manager
Visu Mngr Holder
Remote Control
Source Initializer
Window Detector
15. Appendix
CommandLine Parameter
Short forms
Refresh
r
Region
rgn
RegionH
rh
x
x
RegionW
rw
x
x
RegionX
rx
x
x
RegionY
ry
x
x
RemoteDesktop
rd
x
RemoteDesktop
remdsk
x
RemoteSettingsEnabled
Se
X x
RemoteSettingsLocigcalHostname
Rslhn
X x
Restore
rst
RGBBlue
rgbb
x x
RGBBlueCoarseGain
rgbbcg
x
x
RGBBlueCoarseGainOffset
rgbbcgo
x
x
RGBBlueCutOff
rgbbco
x
x
RGBBlueCutOffOffset
rgbbcoo
x
x
RGBBlueFineGain
rgbbfg
x
x
RGBBlueFineGainOffset
rgbbfgo
x
x
RGBGreen
rgbg
x x
RGBGreenCoarseGain
rgbgcg
x
x
RGBGreenCoarseGainOffset
rgcgo
x
x
RGBGreenCutOff
rgbgco
x
x
RGBGreenCutOffOffset
rgbgcoo
x
x
RGBGreenFineGain
rgbgfg
x
x
RGBGreenFineGainOffset
rgbgfgo
x
x
RGBHorzPhase
rgbhp
x
x
RGBHorzRes
rgbhr
x
x
RGBHorztotalPixels
rgbhpx
x
x
RGBInputType
rgbit
x
x
RGBPresetName
rgbpn
x x
RGBProfileName
rgbpfn
x x x
RGBRed
rgbr
x x
RGBRedCoarseGain
rgbrcg
x
x
RGBRedCoarseGainOffset
rgbrcgo
x
x
RGBRedCutOff
rgbrco
x
x
x
x x
x
Barco – Apollo – DOC-3197-2 – user's manual – Revision 08 – November 2006 _________________________________________________ 395/402
Security Provider
Viewer Command
Frg Viewer
Visu Viewer
Web Viewer
Cottus Viewer
Mpeg Viewer
VTPlus Viewer
Pro Viewer
VNC Viewer
Remote Pointer
Apollo Explorer
Path Finder
DB Converter
Layout Editor
Layout Selector
Remote Desktop
Wnd Descriptor
SveLayout Launcher
Desktop Command
Device Command
Device Manager
Visu Mngr Holder
Remote Control
Source Initializer
Window Detector
15. Appendix
CommandLine Parameter
Short forms
RGBRedCutOffOffset
rgbrcoo
x
x
RGBRedFineGain
rgbrfg
x
x
RGBRedFineGainOffset
rgbrfgo
x
x
RGBReduction
rgbred
x x
RGBSamplingPhase
rgbsp
x
x
RGBVertPhase
rgbvp
x
x
RGBVertRes
rgbvr
x
x
RightHost
rhst
x
x
RightHostPassword
rhstpwd
x
x
Saturation
sat
x x
ScaleZoomFactor
szf
x
x
ScalingViewPortPosPercent
svpppe
x
x
ScalingViewPortPosPixel
svpppx
x
x
ScalingViewPortPosUnitType
svpput
x
x
SclPixelFormat
sclpf
x x
SclPixelFormatAutomatic
sclpfa
x x
SclSharpness
sclsh
x x
ScrapingMode
spm
x
Select
s
x
x
Select
sel
x
x
Selector
se
SelectorLocked
sellock
x
SelectorLocked
sl
x
Send
send
Server
svr
SessionLength
slen
x
x
SessionName
sn
x
x
SetWindow
sw
x
Sharpness
sh
x x
Shortcut
shrtc
Show
show
Silent
slt
Slave
slave
SourceCaption
scap
x x x x
x x x x x
SourceConnected
sc
x x x x
x x x x x x
x
x
x
x
x
x
x x
x x
x
x
396/398 ________________________________________________________________________________________ Apollo Rel. 1.9 User's Manual
Security Provider
Viewer Command
Frg Viewer
Visu Viewer
Web Viewer
Cottus Viewer
Mpeg Viewer
VTPlus Viewer
Pro Viewer
VNC Viewer
Remote Pointer
Apollo Explorer
Path Finder
DB Converter
Layout Editor
Layout Selector
Remote Desktop
Wnd Descriptor
SveLayout Launcher
Desktop Command
Device Command
Device Manager
Visu Mngr Holder
Remote Control
Source Initializer
Window Detector
15. Appendix
CommandLine Parameter
Short forms
SourceRequested
sr
SourceSlotSelectionMode
sssm
SourceTitle
srct
x x x x
Splash
spl
x
SplitterButtonsStack
sbs
x
SplitterButtonsStack
sbtnstk
x
SplitterPosition
sp
x
SplitterPosition
splitpos
x
SplitterSelectorDesktop
ssd
x
SplitterSelectorDesktop
sseldsk
x
SplitterTaskbarDesktop
std
x
SplitterTaskbarDesktop
stskbdsk
x
SquidHoverLatencyIntervals e
shli
x
x
SquidMode
smod
x
x
SrcProfileName
spfn
x x x
Stack
st
StartMinimized
sm
StatusBar
sb
StatusBarVisible
sbv
x x x x
x x x x x
StatusBorderBlinkPeriod
sbbp
x x x x
x x x x x
StatusBorderEnableBlink
sbeb
x x x x
x x x x x
StatusBorderEnabled
sbe
x x x x
x x x x x
StatusBorderLineBlinkColor
sblbc
x x x x
x x x x x
StatusBorderLineBlinkGapColor
sblbgc
x x x x
x x x x x
StatusBorderLineColor
sblc
x x x x
x x x x x
StatusBorderLineGapColor
sblgc
x x x x
x x x x x
StatusBorderLineStyle
sbls
x x x x
x x x x x
StatusBorderLineWidth
sblw
x x x x
x x x x x
StatusBorderSeparatorWidth
sbsw
x x x x
x x x x x
SubPage
spg
x
SVBAddress
svba
x x
SVBCodecName
svbcn
x x
SVBGateway
svbg
x x
SVBNetmask
svbn
x x
x x x x
x x x x x x
x
x x x x x
x x
x x x x x
x
x x x x
x x x x x
x
x
x
Barco – Apollo – DOC-3197-2 – user's manual – Revision 08 – November 2006 _________________________________________________ 397/402
Security Provider
Viewer Command
Frg Viewer
Visu Viewer
Web Viewer
Cottus Viewer
Mpeg Viewer
VTPlus Viewer
Pro Viewer
VNC Viewer
Remote Pointer
Apollo Explorer
Path Finder
DB Converter
Layout Editor
Layout Selector
Remote Desktop
Wnd Descriptor
SveLayout Launcher
Desktop Command
Device Command
Device Manager
Visu Mngr Holder
Remote Control
Source Initializer
Window Detector
15. Appendix
CommandLine Parameter
Short forms
SVSAddress
svsa
x x
SVSEncAddress
svsea
x x
SVSEncPort
svsep
x x
SVSEncProtocolId
svsepi
x x
SVSEncStartCmd
svsesc
x x
SVSEncTypeName
svsetn
x x
SVSPid
svspid
x x
SVSPort
svsp
x x
SVSProtocolId
svspi
x x
SVSSkipAtEnd
svssae
x x
SVSSkipAtStart
svssas
x x
SVSSrcName
svssn
x x
SVSStreamProtocolId
svsspi
x x
SwitchBoxInput
sbi
TakeControl
tc
TaskBar
tsk
x
TaskBar
tskbar
x
TextMode
tm
x
TextSize
ts
x
ToolBar
tb
Top
t
x
x x
TopHost
thst
x
x
TopHostPassword
thstpwd
x
x
Transparancy
Tp
X x
Types
t
UdateModeManualTimeInterval
Ummti
X
UdateModeModus
Umm
X
URL
url
x
UseCompressLevel
ucl
x
UseRegions
urg
Verbose
v
x x
VideoFormat
vf
x
x
VideoInputType
vit
x
x
VideoMute
vm
VideoNorm
vn
x x x
VideoSourceRatioToForceTo
Vsrf
x x
x
x
x
x
x
x
x
x x x x x
x
x
X
X
x
x
x x
x
x
398/398 ________________________________________________________________________________________ Apollo Rel. 1.9 User's Manual
Security Provider
Viewer Command
Frg Viewer
Visu Viewer
Web Viewer
Cottus Viewer
Mpeg Viewer
VTPlus Viewer
Pro Viewer
VNC Viewer
Remote Pointer
Apollo Explorer
Path Finder
DB Converter
Layout Editor
Layout Selector
Remote Desktop
Wnd Descriptor
SveLayout Launcher
Desktop Command
Device Command
Device Manager
Visu Mngr Holder
Remote Control
Source Initializer
Window Detector
15. Appendix
CommandLine Parameter
Short forms
ViewerPeerTests
vpt
Width
w
WiringTests
wt
WndForceHorzScaling
wndfhs
x
x
WndForceHorzvVertScaling
wndfs
x
x
WndForceVertScaling
wndfvs
x
x
WndFreeze
wndf
x x x
WndScaleMode
wndsm
x x x
WndViewport
wndvp
x x x
WndViewportRatio
wndvpr
x x x
x
x
x x
x x x x x
x
x x
Barco – Apollo – DOC-3197-2 – user's manual – Revision 08 – November 2006 _________________________________________________ 399/402
15. Appendix
15.6 Escape sequences supported by the send command of the Serial Interface
Escape Sequence
Represents
\a
Bell (alert)
\b
Backspace
\f
Formfeed
\n
New line
\r
Carriage return
\t
Horizontal tab
\v
Vertical tab
\'
Single quotation mark
\\
Backslash
\?
Literal question mark
\ooo
ASCII character in octal notation
\x hhh
ASCII character in hexadecimal notation
Octal notation:
The ASCII character is entered with up to three digits. Subsequent ASCII characters have
to be separted by "\"
The following example sends "[0] abc [1] de [13]" to the serial interface:
"%ApolloProgram%\devicecmd.exe" -name:Wall1.Port1 -Send:"\0 abc \1 de \15"
Hexadecimal notation:
The ASCII character has to be entered as a two digit value. Subsequent ASCII characters
are just added. Evaluation of the string as notation in hexadecimal stops as soon as a
character can not be taken as a hexadecimal digit
The following example sends "[1 2 3 4 171]Hallo" to the serial interface:
"%ApolloProgram%\devicecmd.exe" -name:Wall1.Port1 -Send:"\x01020304ABHallo"
The \" is not supported, since the double quotation mark is used to brace the parameters of the
command line. To send the double quoatation mark ", use its octal notation \042
To send "Hello World", the following command has to be entered:
"%ApolloProgram%\devicecmd.exe" -name:Wall1.Port1 -Send: "\042Hello World\042"
400/398 ________________________________________________________________________________________ Apollo Rel. 1.9 User's Manual
16. Hotline
16 Hotline
Barco – Apollo – DOC-3197-2 – user's manual – Revision 08 – November 2006 _________________________________________________ 401/402
16. Hotline
16.1 Addresses
Please do not hesitate to contact us if you have any questions..
•
Barco Control Rooms GmbH
An der Rossweid 5, D-76229 Karlsruhe
Phone: +49-721-6201-0, Fax: +49-721-6201-298
E-mail: [email protected], Web: www.barcocontrolrooms.de
•
BARCO N.V. Projection Systems
Nordlaan 5, B-8520 Kuurne
Phone: +32-56-36-8282, Fax: +32-56-368-251
E-mail: [email protected], Web: www.barcocontrolrooms.com
402/398 ________________________________________________________________________________________ Apollo Rel. 1.9 User's Manual