1
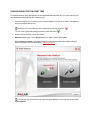
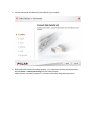
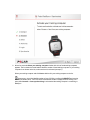
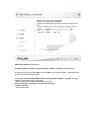
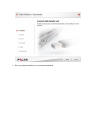
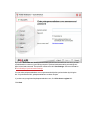
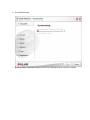
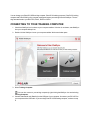
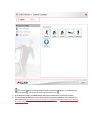
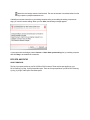
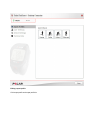
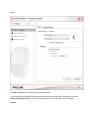
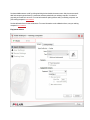
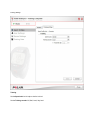
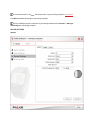
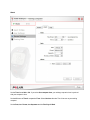
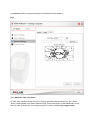
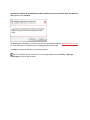
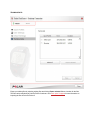
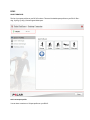
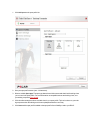
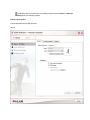
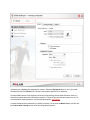
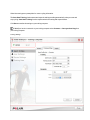
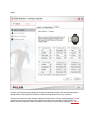
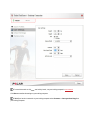
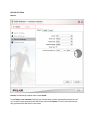
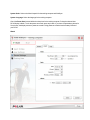
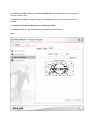
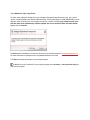
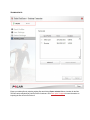
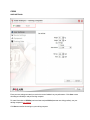
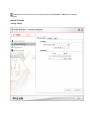
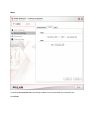
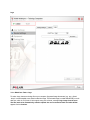
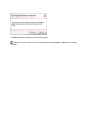
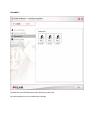
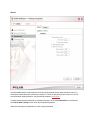
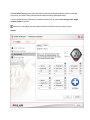
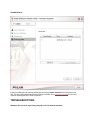
POLAR WEBSYNC FOR POLARPERSONALTRAINER.COM USERS
You can transfer data between your training computer and polarpersonaltrainer.com web service with Polar
WebSync 2.x software and a Polar DataLink data transfer unit, a Polar FlowLink data transfer unit or a USB
cable.
Download Polar WebSync 2.x from polarpersonaltrainer.com APPLICATIONS / DOWNLOADS free of
charge. Click PC MS Windows (XP/Vista/7) and the installation wizard guides you through the installation.
You cannot have WebSync 1.x.x and WebSync 2.x installed on the same computer.
For data transfer you also need a Polar DataLink or Polar FlowLink data transfer unit or a USB cable. Use
Polar DataLink with Polar RCX3 training computer, Polar RCX5 training computer and Polar CS500 cycling
computer and Polar FlowLink with Polar FA20 activity computer and Polar FT7, FT40, FT60, FT80 and
RS300X training computers. Use a USB cable with Polar RC3 GPS training computer.
If the data transfer unit is not included in the product box, you can buy it separately as an accessory.
DATA TRANSFER WITH POLAR WEBSYNC AND DATALINK
Use WebSync and DataLink data transfer unit with Polar RCX3 training computer, Polar RCX5 training computer and Polar CS500 cycling computer.
SYNCHRONIZING FOR THE FIRST TIME
To avoid disturbances during data transfer, do not wear WearLink® transmitter W.I.N.D. Also make sure you
have turned active Bluetooth and WiFi connections off.
1. Check that WebSync icon is shown on your computer taskbar. If the icon is not shown, start WebSync
from your computer desktop icon.
WebSync icon is red if WebSync has not detected any training computers.
The icon turns to green after training computer(s) have been found.
2. Double-click the WebSync icon on the taskbar.
3. Welcome window opens. Select Synchronize, if you want to transfer training data.
Select Training Computer, if you want to connect to your training computer and modify settings or
export training files. See more information in Training Computer.
You can also start synchronization by right-clicking the WebSync icon on the task bar and selecting Synchronize.
4. Connect data transfer unit (DataLink) to the USB port of your computer.
5. RCX3 and RCX5: Activate your training computer, if it is in power save mode by pressing any button.
Select Connect => Start synchronizing from your training computer.
CS500: Activate your training computer, if it is in power save mode by long pressing any button.
6. After a few seconds Select your training computer window with a list of found training computers
appears. The list shows the model and the identifier number of found training computers. If your training
computer is not shown on the list, make sure that it is activated (see step 5).
Select your training computer and click Next or double-click your training computer on the list.
If necessary, check the identifier number of your CS500 by scrolling to CONNECT and pressing
START (red button) twice. The RCX3 and RCX5 identifier number is displayed on the training computer when Connect => Start synchronizing is selected and the training computer is connecting to
WebSync.
7. Authorizing WebSync window opens.
Accept connection "number" from your training computer "number" message appears.
Accept the connection by pressing OK or selecting YES on your training computer. The pairing of WebSync and your training computer starts.
If pairing fails, Failed pairing WebSync with training computer "number". Try again. message
appears. Close the message by clicking OK.
- Restart connection from your training computer as follows:
RCX3 and RCX5: Press BACK. Select Start synchronizing.
CS500: Press Start.
- Continue from step 6.
You can press Back from Authorizing WebSync window to return to the found training computers
list, if you have chosen a wrong training computer, for example.
8. Enter your polarpersonaltrainer.com username and password.
If you select Remember me, WebSync does not ask your account information the next time you start
synchronization or connect to your training computer. Synchronization starts after your training computer is found and connected. This selection can be removed in User Settings. See more information
in Polar WebSync Synchronization Settings.
You can select polarpersonaltrainer.com to open automatically after synchronization by ticking the
box. If synchronization fails, polarpersonaltrainer.com does not open.
If you have not yet registered at polarpersonaltrainer.com, click Click here to register link.
Click Next.
Make sure that your RCX3 or RCX5 is synchronizing or your CS500 is activated before clicking
Next.
9. Synchronization starts.
10. Synchronization completed message informs that synchronization has successfully completed.
If synchronization fails, see Troubleshooting for more information on how to proceed.
11. Click Close.
Your training computer and WebSync are paired in the first synchronization, which means that your training
computer identifier is stored in the WebSync memory.
SYNCHRONIZING AFTER YOUR TRAINING COMPUTER AND WEBSYNC HAVE
BEEN PAIRED
1. Check that WebSync icon is shown on your computer taskbar. If the icon is not shown, start WebSync
from your computer desktop icon.
2. Connect data transfer unit (DataLink) to the USB port of your computer and activate your training computer.
3. CS500 Users
A) If you have new data on your training computer, or if you have changed the settings, the synchronization starts automatically when Remember me is selected.
B) If you have not selected Remember me, start synchronization by right-clicking the WebSync icon
on your computer taskbar and selecting Synchronize or double-clicking the WebSync icon and selecting Synchronize.
- If WebSync finds only your training computer, Enter your username and password window opens.
Continue from step 8 in chapter Synchronizing for the first time.
- If WebSync finds several training computers, the list of found training computers opens. Double-click
your training computer from the list. Enter your username and password window opens. Continue
from step 8 in chapter Synchronizing for the first time.
C) If training computer is on power save mode, Found training computers window opens. Activate
your training computer and it appears on the list. Select your training computer and click Next. If you
have selected Remember me, synchronization starts. If you have not selected Remember me,
Enter your username and password window opens. Continue from step 8 in chapter Synchronizing
for the first time.
If synchronization does not start automatically, start it manually by double-clicking the WebSync
icon on the taskbar or right-clicking the icon and selecting Synchronize.
To speed up the start of synchronization, select Connect mode from your training computer.
RCX3 and RCX5 Users
If you have new data or changed settings on your training computer and
A)
- Training computer AutoSync is On
- Remember me in WebSync is selected
=> Synchronization starts automatically.
B)
- Training computer AutoSync is On
- Remember me in WebSync is not selected
=> Start synchronization by right-clicking the WebSync icon on your computer taskbar and selecting
Synchronize or double-clicking the WebSync icon and selecting Synchronize. Select your training
computer from the list and enter your username and password. Synchronization starts.
C)
- Training computer AutoSync is Off
- Remember me in WebSync is selected
=> Start synchronization by right-clicking the WebSync icon on your computer taskbar and selecting
Synchronize or double-clicking the WebSync icon and selecting Synchronize. Activate your training
computer by selecting Connect => Start synchronizing. Synchronization starts.
D)
- Training computer AutoSync is Off
- Remember me in WebSync is not selected
=> Start synchronization by right-clicking the WebSync icon on your computer taskbar and selecting
Synchronize or double-clicking the WebSync icon and selecting Synchronize. Activate your training
computer by selecting Connect => Start synchronizing. Select your training computer from the list.
Enter your username and password. Synchronization starts.
If there is no new data on your RCX3, RCX5 or CS500, the following window appears. You can either
continue or cancel synchronizing.
DATA TRANSFER WITH POLAR WEBSYNC AND FLOWLINK
SYNCHRONIZABLE DATA
l
Training results from FT7, FT40, FT60, FT80 and RS300X training computers and daily activity results
from FA20 activity computer to polarpersonaltrainer.com
l
User data (weight, height, date of birth and sex) from FT40, FT60, FT80 and RS300X training computers and FA20 activity computer to polarpersonaltrainer.com
For FT7, user data transfer is bidirectional. The most recent data is transferred either from the training
computer or polarpersonaltrainer.com.
l
Test results from FT40, FT60, FT80 and RS300X training computers
l
Strength training targets from polarpersonaltrainer.com to FT80 training computer. The next three
strength training targets are transferred from polarpersonaltrainer.com Diary.
l
STAR training program status is automatically updated from FT60 and FT80 training computers to
polarpersonaltrainer.com.
SYNCHRONIZING
1. Check that WebSync icon is shown on your computer taskbar. If the icon is not shown, start WebSync
from your computer desktop icon.
WebSync icon is red if WebSync has not detected any training computers.
The icon turns to green after training computer(s) have been found.
2. Double-click the WebSync icon on the taskbar.
3. Welcome window opens. Select Synchronize.
Training Computer is available only for RCX3, RCX5 and CS500.
You can also start synchronization by right-clicking the WebSync icon and selecting Synchronize.
4. Connect data transfer unit (FlowLink) to the USB port of your computer.
5. Set your activity/training computer face down onto FlowLink. The ALIGN symbol in FlowLink turns
green when the training computer is correctly aligned.
6. Enter your polarpersonaltrainer.com username and password.
If you select Remember me, synchronization starts automatically next time without asking your
account information. Synchronization starts after your training computer is found and connected. This
selection can be removed in User Settings. See more information in Polar WebSync Synchronization
Settings.
You can select polarpersonaltrainer.com to open automatically after synchronization by ticking the
box. If synchronization fails, polarpersonaltrainer.com does not open.
If you have not yet registered at polarpersonaltrainer.com, click Click here to register link.
Click Next.
7. Synchronization starts.
It is important that you do not move the training computer during the data transfer. Even a slight
movement will disrupt the data transfer.
8. Synchronization completed message informs that synchronization has successfully completed.
If synchronization fails, see Troubleshooting for more information on how to proceed.
9. Click Close.
When transferring the data next time, synchronization starts automatically if you have selected Remember
me. If synchronization does not start automatically, start it manually by double-clicking the WebSync icon on
the taskbar or right-clicking the icon and selecting Synchronize.
DATA TRANSFER WITH POLAR WEBSYNC AND USB CABLE
Use WebSync and a USB cable with Polar RC3 GPS training computer.
1. Check that WebSync icon is shown on your computer taskbar. If the icon is not shown, start WebSync
from your computer desktop icon.
WebSync icon is red if WebSync has not detected any training computers.
The icon turns to green after training computer(s) have been found.
2. Double-click the WebSync icon on the taskbar.
3. Welcome window opens. Select Synchronize, if you want to transfer training data.
Select Training Computer, if you want to connect to your training computer and modify settings or
export training files. See more information in Training Computer.
You can also start synchronization by right-clicking the WebSync icon on the task bar and selecting Synchronize.
4. Connect the training computer to your computer with a USB cable: Plug the micro USB connector into
the USB port of the training computer. Plug the USB connector into the computer USB port.
5. Enter your polarpersonaltrainer.com username and password.
If you select Remember me, WebSync does not ask your account information the next time you start
synchronization or connect to your training computer. Synchronization starts after your training computer is found and connected. This selection can be removed in User Settings. See more information
in Polar WebSync Synchronization Settings.
You can select polarpersonaltrainer.com to open automatically after synchronization by ticking the
box. If synchronization fails, polarpersonaltrainer.com does not open.
If you have not yet registered at polarpersonaltrainer.com, click Click here to register link.
Click Next.
6. Synchronization starts.
7. Synchronization completed message informs that synchronization has successfully completed.
If synchronization fails, see Troubleshooting for more information on how to proceed.
8. Click Close.
POLAR WEBSYNC SYNCHRONIZATION SETTINGS
1. Right-click the WebSync icon on your computer taskbar.
2. Select WebSync Settings.
3. Edit the settings.
4. Click Save and Close.
GENERAL SETTINGS
If Show synchronization process with a notification message box is ticked, WebSync informs the start
and completion of the synchronization process with a small notification message on the bottom right corner of
your computer screen. You can click the notification message to view the process in a window.
Click Clear WebSync memory to delete the paired training computers and saved login data from WebSync
memory.
USER SETTINGS
To edit user settings, activate your training computer and connect it to your computer via the data transfer unit
or connect your RC3 GPS training computer to your computer with a USB cable.
For RCX3, RCX5 and CS500 users: If you have not chosen WebSync to remember your username and
password (ticked Remember me box) or if WebSync finds several training computers, a list of found training
computers appears. Select your training computer and click Next or double-click your training computer on the
list. Accept connection "number" from your training computer "number" message appears. Allow
PC? and the connection number appears on your training computer display. Accept the connection by pressing OK on your training computer.
If you enter and save your polarpersonaltrainer.com username and password, next time you start WebSync
synchronization starts without asking your account information. Synchronization starts after your training computer is found and connected. To remove your account information from the WebSync memory, delete your
username and password and click Save.
You can select polarpersonaltrainer.com to open automatically after synchronization by ticking the box.
If you have not yet registered at polarpersonaltrainer.com, click Click here to register link.
NETWORK SETTINGS
Direct connection to the internet
Choose this if you do not want to use any proxy.
Automatically detect network settings
This has been chosen as a default. Polar WebSync automatically uses the same network settings as e.g.
your Internet browser.
Manual proxy settings
If Polar WebSync cannot find a proxy server, ask the HTTPS proxy server's IP address from your administrator and add the information to the fields.
You can change your Polar RC3 GPS training computer, Polar RCX3 training computer, Polar RCX5 training
computer and Polar CS500 cycling computer settings and export your training files with WebSync. The settings are transferred to your RC3 GPS, RCX3, RCX5 or CS500.
CONNECTING TO YOUR TRAINING COMPUTER
1. Check that WebSync icon is shown on your computer taskbar. If the icon is not shown, start WebSync
from your computer desktop icon.
2. Double-click the WebSync icon on your computer taskbar. Welcome window opens.
3. Select Training Computer.
You can also connect to your training computer by right-clicking the WebSync icon and selecting
Training Computer.
4. Connect data transfer unit (DataLink) to the USB port of your computer. Or connect your RC3 GPS to
your computer with a USB cable. If you are using Polar RC3 GPS training computer, continue to step
8.
5. RCX3 and RCX5: Activate your training computer, if it is in power save mode, by pressing any button.
If your training computer's AutoSync (automatic synchronization) function is off, select Connect =>
Start synchronizing from your training computer. For more information on AutoSync function, see
your training computer's user manual.
CS500: Activate your training computer, if it is in power save mode, by pressing and holding any button.
6. After a few seconds Select your training computer window with a list of found training computers
appears. The list shows the model and the identifier number of found training computers. If your training
computer is not shown on the list, make sure that it is activated (see step 5). Select your training computer and click Next or double-click your training computer on the list.
If necessary, check the identifier number of your CS500 by scrolling to CONNECT and pressing
START (red button) twice. The RCX3 and RCX5 identifier number is displayed on the training computer when Connect => Start synchronizing is selected and the training computer is connecting to
WebSync.
7. If you have not synchronized your training computer with WebSync before or if you have removed pairings from your training computer, Authorizing WebSync window opens.
Accept connection "number" from your training computer "number" message appears.
Accept the connection by pressing OK or selecting YES on your training computer. The pairing of WebSync and your training computer starts.
If pairing fails, Failed pairing WebSync with training computer "number". Try again. message
appears. Close the message by clicking OK.
- Restart connection from your training computer as follows:
RCX 3 and RCX5: Press BACK. Select Start synchronizing.
CS500: Press Start.
- Continue from step 6.
8. Training Computer window opens and WebSync starts transferring the data from your training computer to WebSync.
RC3 GPS, RCX3: You can edit your user settings and device settings and export your training data.
RCX5: You can edit your sport profiles, user settings and device settings and export your training data.
CS500: You can edit your user settings, device settings and equipment and export your training data.
The symbol beside your training computer model is green when WebSync is connected to your
training computer . The symbol turns red if the connection is lost .
9. After editing the settings, click Save and the settings are transferred to your training computer.
10. The settings are transferred from your training computer to polarpersonaltrainer.com in the next synchronization. See Data Transfer with Polar WebSync and DataLink and Data transfer with Polar WebSync and USB cable for more information on synchronization.
Note that user settings transfer is bidirectional. The most recent data is transferred either from the
training computer or polarpersonaltrainer.com.
If WebSync loses the connection to your training computer while you are editing the training computer settings, you can still continue editing. When you click Save, the following message appears.
If you want to save the changes, select Connect => Start / Start synchronizing from your training computer
and click Retry to re-establish the connection.
RC3 GPS AND RCX3
SPORT PROFILES
The list of your sport profiles on your RC3 GPS or RCX3 is shown. There are four sport profiles on your
RCX3: Running, Cycling, Cycling 2 and Other sport. There are five sport profiles on your RC3 GPS: Running,
Cycling, Cycling 2, Other sport 1 and Other sport 2
Editing a sport profile
Click a sport profile on the sport profile list.
General
The Name, Type and icon of the sport profiles cannot be edited.
If you want the sport profile be hidden on the sport profile list on pre-training mode of your RCX3, tick the box
Hide in pre-training mode. This is useful if you do the sport only in certain time of year, for example.
Sensors
Set the available sensors on/off by ticking/unticking the box beside the sensor name. Only the sensors available for that sport type are listed. If a sensor has not been paired with your training computer, it is shown in
grey and you cannot set it on or off. For more information on pairing sensors with your training computer, see
your training computer's user manual.
Set the calibration factor for the stride sensor. For more information on the calibration factor, see your training
computer's user manual.
Equipment sensors
If the sport type is Cycling, the equipment list is shown. Select the Equipment (bike) for use. You can edit
the equipment name in the Name field. The name can contain a maximum of 14 characters.
Set the available sensors for the equipment on/off by ticking/unticking the box beside the sensor name. If a
sensor has not been paired with your training computer, it is shown in grey and you cannot set it on or off. For
more information on pairing sensors, see your training computer's user manual.
If a speed sensor has been paired with your training computer, you can enter the Wheel Size of your bike and
set the Auto Start Training function on/off by ticking/unticking the box.
Wheel size settings are a prerequisite for correct cycling information.
The Auto Start Training function starts and stops the training recording automatically when you start and
stop cycling. Auto Start Training function requires wheel size setting and a speed sensor.
Click Save to transfer the settings to your training computer.
RCX3: If WebSync has lost connection to your training computer select Connect => Start synchronizing from your training computer.
Training Settings
Training
Set the Speed unit: km/h / mph or min/km / min/mi.
Set the Training sounds: Off, Soft, Loud, Very loud.
Set the Automatic lap function on by ticking the box and adding the lap distance. Untick the box to set the
function off.
RCX3: If WebSync has lost connection to your training computer select Connect => Start synchronizing from your training computer.
USER SETTINGS
Enter your user settings accurately to receive the correct feedback on your performance. Click Save to save
the changes to WebSync and your training computer.
For more information on VO
and activity levels, see your training computer's user manual.
2max
Click Save to transfer the settings to your training computer.
RCX3: If WebSync has lost connection to your training computer select Connect => Start synchronizing from your training computer.
DEVICE SETTINGS
General
Sounds: Set the training computer button sounds On/Off.
Set the Button Lock. Automatic: Button lock is activated when you have not pressed the buttons for a minute. To unlock buttons, press and hold LIGHT button in time mode. Manual: To lock or unlock buttons manually, press and hold LIGHT button in time mode.
System Units: Select units Metric/Imperial for the training computer and WebSync.
System Language: Select the language for the training computer.
RCX3: Check the Power Save box and define the sleep time for the training computer. During the selected
time RCX3 display is blank. To exit the power save mode, press any button. If you have not pressed any button for five minutes, the display returns to power save mode. Using power save maximizes the battery lifetime
of your RCX3.
Watch
Set the Time format 24h or 12h. If you select Use computer time, your training computer's time is synched
with your computer's time.
Set the difference of Time 2 compared to Time. Select Use time 2 to take Time 2 into use on your training
computer.
Set the Date, date Format, date Separator and the First Day of Week.
Set the Alarm On/Off by ticking/unticking the box. Set the alarm time and frequency.
Logo Select Watch face: Date, Logo, Event.
To select a logo, browse to the logo file on your computer. Supported image formats are. jpg, .png, .gif and
.bmp. It is recommended to use a black-and-white image. The selected image is scaled automatically to a suitable size, which is 64x30 pixels. If the image is wrong size or format, message Logo image from the
specified file needs to be automatically scaled to optimal size and converted to black and white format. appears. Select Continue.
The Event option is available, if you have set an event to your training computer in polarpersonaltrainer.com.
For more information on setting an event, see polarpersonaltrainer.com help.
Click Save to transfer the settings to your training computer.
RCX3: If WebSync has lost connection to your training computer select Connect => Start synchronizing from your training computer.
TRAINING DATA
Export your training files by selecting training files and clicking Export selected. Select a location for the files.
The files can be transferred to Polar ProTrainer 5 software. Go to www.polar.fi/support for more information on
importing the files in Polar ProTrainer 5.
RCX5
SPORT PROFILES
The list of your sport profiles on your RCX5 is shown. There are five default sport profiles on your RCX5: Running, Cycling, Cycling 2, Swimming and Other sport.
Add a new sport profile
You can have a maximum of 15 sport profiles on your RCX5. 1. Click Add sport on the sport profile list.
2. Give your sport profile a name (max. 14 characters).
3. Select a suitable Sport type. The sport type determines which sensors and what kind of training views
you can use in the sport profile. For more information on compatible sensors and training views, see
your training computer's user manual.
4. Click the white rectangle to select a suitable icon for your sport profile. The icon is shown on your training computer and on the training result view on polarpersonaltrainer.com Diary.
5. Click Save and the sport profile is added to the sport profile list on WebSync and to your RCX5.
If WebSync has lost connection to your training computer select Connect => Start synchronizing from your training computer.
Editing a sport profile
Click a sport profile on the sport profile list.
General
You can edit the Name and Type of the sport profiles you have created in WebSync. These cannot be edited
for the RCX5 default sport profiles.
If you want the sport profile be hidden on the sport profile list on pre-training mode of your RCX5, tick the box
Hide in pre-training mode. This is useful if you do the sport only in certain time of year, for example.
Sensors
Set the available sensors on/off by ticking/unticking the box beside the sensor name. Only the sensors available for that sport type are listed. If a sensor has not been paired with your training computer, it is shown in
grey and you cannot set it on or off. For more information on pairing sensors with your training computer, see
your training computer's user manual.
Set the calibration factor for the stride sensor. For more information on the calibration factor, see your training
computer's user manual.
Equipment sensors
If the sport type is Cycling, the equipment list is shown. Select the Equipment (bike) for use. You can edit
the equipment name in the Name field. The name can contain a maximum of 14 characters.
Set the available sensors for the equipment on/off by ticking/unticking the box beside the sensor name. If a
sensor has not been paired with your training computer, it is shown in grey and you cannot set it on or off. For
more information on pairing sensors, see your training computer's user manual.
If a speed sensor has been paired with your training computer, you can enter the Wheel Size of your bike and
set the Auto Start Training function on/off by ticking/unticking the box.
Wheel size settings are a prerequisite for correct cycling information.
The Auto Start Training function starts and stops the training recording automatically when you start and
stop cycling. Auto Start Training function requires wheel size setting and a speed sensor.
Click Save to transfer the settings to your training computer.
If WebSync has lost connection to your training computer select Connect => Start synchronizing from
your training computer.
Training Settings
Training
Set the Speed unit: km/h / mph or min/km / min/mi.
Set the Training sounds: Off, Soft, Loud, Very loud.
Set the function for HeartTouch: Off, Backlight, Change view, Show limits, Show time of day, Take lap. By
bringing your training computer close to your transmitter during training you can activate backlight, change the
training view, show limits, show time of day or take a lap.
Set the Automatic lap function on by ticking the box and adding the lap distance. Untick the box to set the
function off.
Reminder
Training reminder reminds you to drink, eat or take other important actions during training. Reminder is based
on energy consumption (kcal), distance (km/mi) or time. Reminder alarms when certain calories, distance or
time has been reached during training. When reminder alarms, reminder counter is reset. That means reminder
alarms regularly (for example if reminder is set for 300 kcal, reminder alarms when 300 kcal, 600 kcal, 900
kcal...is consumed).
Select On to set the reminder. Add the reminder text (Name) (max. 10 characters) that is shown on your training computer display when the reminder alarms. Set the frequency for the reminder (When). Select Off to disable the reminder. For more information on reminders, see your training computer's user manual.
Click Save to transfer the settings to your training computer.
If WebSync has lost connection to your training computer select Connect => Start synchronizing from
your training computer.
Display
Customize your training computer display to see the information that you think is the most important during a
training session. Each sport profile can have six different training views which you can customize.
Training views that are in use are checked. Training views that are not in use are unchecked and grey. To start
using a new view, check the Training view "number" box and the view is activated. Choose the items you
want to see from the drop-down menu. Explanations for the items are in your training computer's user manual.
The items that are available in the drop-down menu depend on the sensors that have been paired with
your training computer.
Enable Show view numbers when changing training view to make view selection easier during training.
Click Save to transfer the settings to your training computer.
If WebSync has lost connection to your training computer select Connect => Start synchronizing from
your training computer.
USER SETTINGS
Enter your user settings accurately to receive the correct feedback on your performance. Click Save to save
the changes to WebSync and your training computer.
For more information on VO
and activity levels, see your training computer's user manual.
2max
Click Save to transfer the settings to your training computer.
If WebSync has lost connection to your training computer select Connect => Start synchronizing from
your training computer.
DEVICE SETTINGS
General
Sounds: Set the training computer button sounds On/Off.
Set the Button Lock. Automatic: Button lock is activated when you have not pressed the buttons for a minute. To unlock buttons, press and hold LIGHT button in time mode. Manual: To lock or unlock buttons manually, press and hold LIGHT button in time mode.
System Units: Select units Metric/Imperial for the training computer and WebSync.
System Language: Select the language for the training computer.
Check the Power Save box and define the sleep time for the training computer. During the selected time
RCX5 display is blank. To exit the power save mode, press any button. If you have not pressed any button for
five minutes, the display returns to power save mode. Using power save maximizes the battery lifetime of
your RCX5.
Watch
Set the Time format 24h or 12h. If you select Use computer time, your training computer's time is synched
with your computer's time.
Set the difference of Time 2 compared to Time. Select Use time 2 to take Time 2 into use on your training
computer.
Set the Date, date Format, date Separator and the First Day of Week.
Set the Alarm On/Off by ticking/unticking the box. Set the alarm time and frequency.
Logo Select Watch face: Date, Logo, Event.
To select a logo, browse to the logo file on your computer. Supported image formats are. jpg, .png, .gif and
.bmp. It is recommended to use a black-and-white image. The selected image is scaled automatically to a suitable size, which is 64x30 pixels. If the image is wrong size or format, message Logo image from the specified file needs to be automatically scaled to optimal size and converted to black and white format.
appears. Select Continue.
The Event option is available, if you have set an event to your training computer in polarpersonaltrainer.com.
For more information on setting an event, see polarpersonaltrainer.com help.
Click Save to transfer the settings to your training computer.
If WebSync has lost connection to your training computer select Connect => Start synchronizing from
your training computer.
TRAINING DATA
Export your training files by selecting training files and clicking Export selected. Select a location for the files.
The files can be transferred to Polar ProTrainer 5 software. Go to www.polar.fi/support for more information on
importing the files in Polar ProTrainer 5.
CS500
USER SETTINGS
Enter your user settings accurately to receive the correct feedback on your performance. Click Save to save
the changes to WebSync and your training computer.
For more information on HR Max (maximum heart rate) and HrSit (heart rate on a sitting position), see your
training computer's user manual.
Click Save to transfer the settings to your training computer.
If WebSync has lost connection to your training computer select Connect => Start from your training
computer.
DEVICE SETTINGS
Training settings
Training
Set the Training sounds: Off, Soft, Loud, Very loud.
Set the Automatic lap function on by ticking the box and adding the lap distance. Untick the box to set the
function off.
Reminder
Training Reminder reminds you to drink, eat or take other important actions during training. Reminder is
based on energy consumption (kcal), distance (km/mi) or time. Reminder alarms when certain calories, distance or time has been reached during training. When reminder alarms, reminder counter is reset. That means
reminder alarms regularly (for example if reminder is set for 300 kcal, reminder alarms when 300 kcal, 600
kcal, 900 kcal...is consumed).
Select On to set the reminder. Add the reminder text (Name) (max. 8 characters) that is shown on your training computer display when the reminder alarms. Set the frequency for the reminder (When). Select Off to disable the reminder. For more information on reminders, see your training computer's user manual.
Watch
If you select Use computer time, your training computer's time is synched with your computer's time. Set the Date.
Logo
Select Watch face: Date or Logo.
To select a logo, browse to the logo file on your computer. Supported image formats are. jpg, .png, .gif and
.bmp. It is recommended to use a black-and-white image. The selected image is scaled automatically to a suitable size, which is 47x7 pixels. If the image is wrong size or format, message Logo image from the specified file needs to be automatically scaled to optimal size and converted to black and white format.
appears. Select Continue.
Click Save to transfer the settings to your training computer.
If WebSync has lost connection to your training computer select Connect => Start from your training
computer.
EQUIPMENT
The bikes from your CS500 are listed. Select the bike you want to use.
By clicking the bike icon, you can edit the bike's settings.
General
Set the available sensors for the equipment on/off by ticking/unticking the box beside the sensor name. If a
sensor has not been paired with your training computer, it is shown in grey and you cannot set it on or off. For
more information on pairing sensors, see your training computer's user manual.
If a speed sensor has been paired with your training computer, you can set the Wheel Size of your bike and
set the Auto Start Training function on/off by ticking/unticking the box.
Wheel size settings are a prerequisite for correct cycling information.
The Auto Start Training function starts and stops the training recording automatically when you start and
stop cycling. Auto Start Training function requires wheel size setting and a speed sensor.
If a power sensor has been paired with your training computer, you can set the Chain weight, Chain length
and Span length of your bike. Wheel size, chain length, and span length should be in millimeters and chain weight in grams.
Display
Customize your training computer display to see the information that you think is the most important during a
training session. There are eight different training views which you can customize.
You can remove a training view by clicking the cross on the upper right corner of a training view. The first view
cannot be removed. Add a training view by clicking the Add Display icon. The icon is not available if all eight
training views are created.
Choose the items you want to see from the drop-down menu.
If you pair a new sensor with your training computer or set a sensor on/off using your training computer,
the training views are reset.
If you select Zone pointer as one of the items on a training view, the Limits SET on your training computer must be either OwnZone or Manual. If Limits SET is Off, the training view with Zone pointer item is
not visible on your training computer display during training.
Click Save to transfer the settings to your training computer.
If WebSync has lost connection to your training computer select Connect => Start from your training
computer.
TRAINING DATA
Export your training files by selecting training files and clicking Export Selected. Select a location for the
files. The files can be transferred to Polar ProTrainer 5 software. Go to www.polar.fi/support for more information on importing the files in Polar ProTrainer 5.
TROUBLESHOOTING
WebSync does not show my training computer even if it has been activated.
=> Close WebSync by right-clicking the WebSync icon on the taskbar and selecting Exit WebSync. Go to
Start > (Settings) > Control Panel > Administrative Tools > Services. Check that Polar Daemon is running and
the status is Started. If the status is not started, click Polar Daemon and 'Start the service'. If Daemon is
already running (Started), click 'Restart the service'.
Synchronization failed. Connection to the training computer lost.
=> Check that your training computer is activated. If you have selected Remember me, synchronization
restarts automatically when WebSync finds your RCX3, RCX5 or CS500 training computer or when you place
your activity/training computer onto FlowLink. If synchronization does not restart automatically, click Synchronize again.
Incorrect username or password.
=> Check that your username and password are correct. If you have forgotten your password, click Have you
forgotten your password? Click here link.
No connection to the server; please check your network settings.
=> Click Cancel to close the window. Right-click the WebSync icon on the taskbar and select Settings.
Check that Network Settings are correct.
=> Check if you can access to polarpersonaltrainer.com. If no, there may be problems in your Internet connection.
WebSync could not initialize properly. Check that Polar Daemon is running and start WebSync
again.
=> Click Cancel to close the window. Close WebSync by right-clicking the WebSync icon on the taskbar and
selecting Exit WebSync. Go to Start > (Settings) > Control Panel > Administrative Tools > Services. Check
that Polar Daemon is running and the status is Started. If the status is not started, click Polar Daemon and
'Start the service'. If Daemon is already running (Started), click 'Restart the service'.
Synchronization failed. Restart WebSync and/or reconnect data transfer unit and try again.
=> Click Cancel to close the window. Close WebSync by right-clicking the WebSync icon on the taskbar and
selecting Exit WebSync. Reconnect DataLink/FlowLink. Restart WebSync and start synchronization.
Problems reading the sent data. Try again. If the problem persists, contact [email protected].
=> Click Cancel to close the window. Close WebSync by right-clicking the WebSync icon on the taskbar and
selecting Exit WebSync. Go to Start > (Settings) > Control Panel > Administrative Tools > Services. Check
that Polar Daemon is running and the status is Started. If the status is not started, click Polar Daemon and
'Start the service'. If Daemon is already running (Started), click 'Restart the service'. Reconnect DataLink/FlowLink. Restart WebSync and start synchronization. If the problem persists, contact [email protected].
Automatic synchronization failed. To try again, start synchronization manually.
=> Click Cancel to close the window. Start manual synchronization by right-clicking the WebSync icon on the
taskbar and selecting Synchronize.
If WebSync is not responding:
Close WebSync by right-clicking the WebSync icon on the taskbar and selecting Exit WebSync. Check from
your computer Task Manager that WebSync process is not running. Restart WebSync. If this does not help,
restart your computer. If WebSync is still not responding, remove Polar WebSync and Polar Daemon from
your computer and reinstall WebSync.
Check also www.polar.fi/support for more information. In case you continue having problems or if you need
any further assistance, contact Polar Helpdesk ([email protected]).
SYSTEM REQUIREMENTS
POLAR WEBSYNC AND POLAR DATALINK OR POLAR FLOWLINK
PC MS Windows (XP/Vista/7), 64/32 bit.
Intel-based Macintosh system running Mac OS X 10.5 (Leopard) or newer.
POLAR WEBSYNC AND USB CABLE
Microsoft Windows XP/Vista/7 or Mac OS X 10.5 (Intel) or newer
Internet connection
Free USB port for the USB cable
DISCLAIMER
The material in this manual is for informational purposes only. The products it describes are subject to change
without prior notice, due to the manufacturer’s continuous development program.
Polar Electro Inc. / Polar Electro Oy makes no representations or warranties with respect to this manual or
with respect to the products described herein.
Polar Electro Inc. / Polar Electro Oy shall not be liable for any damages, losses, costs or expenses, direct,
indirect or incidental, consequential or special, arising out of, or related to the use of this material or the products described herein.
© 2012 Polar Electro Oy, FIN-90440 KEMPELE, Finland.
Polar Electro Oy is a ISO 9001:2008 certified company. All rights reserved. No part of this manual may be
used or reproduced in any form or by any means without prior written permission of Polar Electro Oy. The
names and logos marked with a ™ symbol in this user manual are trademarks of Polar Electro Oy. The names
and logos marked with a ® symbol in this user manual are registered trademarks of Polar Electro Oy, except
that Windows is a trademark of Microsoft Corporation.