1
BS-373 2-LINE 2.4GHz DIGITAL DSS
EXPANDABLE CORDLESSSYSTEM
Caller ID/Call Waiting Type 2.5 with Call Waiting Deluxe
Owner’
s Manual
Instal
lation and
Operating Instructions
Please read
this m anual
carefully
before use.
Keep for your
reference.
CALLER ID /CALLER ID CALL W AITING /
CALL W AITING DELUXE COM PATIBLE
Caller ID, Caller ID Call Waiting, and/or Call Waiti ng Deluxe
Services, where available, are available f
rom Bellsouth. Af
ter
subscribing to Caller ID, Caller ID Call Waiting and/or Call
Waiting Deluxe Services, thisphone will displayCaller/Caller
Waited party’
sname and phone number, and the associated sof
t
keysofthe Call Waiting Deluxe ser vice.
C ONT E NT S
PAG E
IMPORTANT INFORM ATION
IM PO RTANT SAFETY INSTRUCTIO NS ....................................................................................3
SPECIAL FEATURES.........................................................................................................4
CHOOSE THE BEST LOC ATION ....................................................................................5
LOCATION OF CONTROLS..............................................................................................6
LCD DISPLAY................................................................................................................... 10
DATA PORT ...................................................................................................................... 10
QUICK REFERENCE.......................................................................................................11
GETTING STARTED
CHARGING THE BATTER Y PACK ............................................................................... 14
CONNECTING THE BASE UNIT .................................................................................. 15
SPARE /BACK UP BATTERY ....................................................................................... 15
REGISTRATION & DE-REGISTR ATION O F H ANDSETS ........................................ 16
CHOOSE THE DIALING MODE .................................................................................... 18
W ALLM OUNTING BASE UNIT...................................................................................... 19
MENU SETTINGS
STRUCTURE AND OPTIONS ....................................................................................... 21
MENU FUNCTIONS ........................................................................................................ 21
BASIC OPERATION
M AKING A C ALL.............................................................................................................. 28
ANSW ERING A CALL..................................................................................................... 29
TO REDIAL A CALL......................................................................................................... 29
ADJUSTING H ANDSET RECEIVER VOLUME .......................................................... 30
TO MUTE A C ALL............................................................................................................ 30
USING HANDSET SPEAKERPHONE.......................................................................... 31
INSTALLING AND USING HEADSET .......................................................................... 31
PAG ING FRO M BASE UNIT TO H ANDSET ............................................................... 31
ADVANCED OPERATION
FLASH ................................................................................................................................ 32
PAUSE ............................................................................................................................... 32
HOLD.................................................................................................................................. 32
SENDING TONE SIGN ALS IN PULSE DIALING M ODE .......................................... 33
DIAL VO ICE M AIL............................................................................................................ 33
DIAL BACK FRO M CALLER ID LIST............................................................................ 34
DAILING FRO M PHONE BO OK DIRECTORY ........................................................... 34
CONFERENCE CALL...................................................................................................... 35
CALLER ID OPERATION
ABOUT CALLER IDENTIFICATION .............................................................................. 37
CALLER LIST.................................................................................................................... 37
VO ICE ANNOUNCE CALLER ID .................................................................................. 39
CALL W AITING ID OPTIONS ........................................................................................ 40
1
C ONT E NT S
PHONE BOOK DIRECTORY
CREATING A PHONE BOOK DIRECTORY RECORD.............................................. 42
RECORDING VOICE ANNOUNCE NAME .................................................................. 43
REVIEW ING PHONE BO OK DIRECTORY ................................................................. 44
EDITING A PHONE BOOK NU MBER .......................................................................... 45
DELETING AN ENTR Y FRO M A PHONE BO OK DIRECTORY .............................. 45
DELETING ALL PHONE BO OK DIRECTORY RECORDS....................................... 46
DIALING FRO M PHONE BO OK DIRECTORY ........................................................... 46
MULTI-HANDSET OPERATION
INTERCOM ....................................................................................................................... 47
CALL TRANSFER ............................................................................................................ 48
OPTIONAL FEATURES DIAL LIST
DIALING SER VICES ....................................................................................................... 49
ADDITIONAL INFORMATION
CAPACITY......................................................................................................................... 50
OUT OF RANGE .............................................................................................................. 50
NO CONNECTION........................................................................................................... 50
TROUBLESHOOTING........................................................................................................ 51
CARE AND MAINTENANCE............................................................................................. 52
FCCREQUIREM ENTS ........................................................................................................ 53
WARRANTY.......................................................................................................................... 55
56
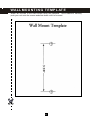
WALLMOUNTING TEMPLATE
2
IM PORTAN T IN FOR M AT ION
Important Safety Instructions:
To reduce the risk offire,electric shock and/or injury to persons,always follow
these basic safety precautions when using your telephone equipm ent.
1.
Read,under
stand,andfol
l
ow al
li
nstructi
ons.
2.
Unpl
ug thi
s tel
ephone from the wal
l outl
et
before cl
eani
ng. Do notuse l
i
qui
d oraerosol
cl
eaners. I
fnecessar
y,use a softcl
oth l
i
ghtl
y
m oi
stenedwi
th am i
l
ddetergentsol
uti
on.
3.
Do not use thi
s tel
ephone near a bathtub,
ki
tchensi
nk,wash bowl
,l
aundr
y tub,swi
mmi
ng
pool
,a wetbasem entoranywhere el
se there i
s
waterorl
i
qui
d.
4.
Do notpl
acethi
stel
ephone onan unstabl
ecar
t,
stand or tabl
e. A fal
lcoul
d cause seri
ous
dam age tothephone.
5.
Sl
ots andopeni
ngs i
nthecabi
netattheback or
bottom areprovi
dedforventi
l
ati
ontoprotectthe
uni
tfrom overheati
ng. These openi
ngs m ust
notbe bl
ocked orcovered. Do notpl
ace thi
s
tel
ephone on a bed,sofa,rug orothersi
mi
l
ar
sur
face.
Thi
s tel
ephone shoul
d never be
pl
aced nearorovera radi
atororheatregi
ster.
Thi
s tel
ephoneshoul
d notbepl
acedi
n abui
l
t-i
n
i
nstal
l
ati
onunl
essproperventi
l
ati
oni
s provi
ded.
6.
Neverpush obj
ect
s ofany ki
ndthrough sl
ots i
n
the phone.
They coul
d touch dangerous
vol
tagepoi
nt
s orshor
toutpart
sthatcoul
dresul
t
i
n a ri
sk offi
re orel
ectri
c shock. Neverspi
l
l
l
i
qui
d ofanyki
nd onthetel
ephone.
7.
Unpl
ug thi
s tel
ephone from the wal
loutl
etand
referto aqual
i
fi
edser
vi
ce representati
ve i
nany
ofthefol
l
owi
ngsi
tuati
ons:a)I
fl
i
qui
dhasbeenspi
l
l
ed i
ntothetel
ephone.
b)I
fthe tel
ephone has been exposedto rai
n or
water.
c)I
fthetel
ephonedoes notoperatenorm al
l
y by
fol
l
owi
ng the operati
ng i
nstructi
ons. Adj
ust
onl
y those control
s thatare covered by the
operati
ng i
nstructi
ons. I
m proper adj
ust
m ent
ofothercontrol
s m ay resul
ti
n dam age and
wi
l
l often requi
re extensi
ve work by a
qual
i
fi
ed techni
ci
an to restore the tel
ephone
to norm aloperati
on.
d)I
f the tel
ephone has been dropped orthe
case has beendam aged.
e)I
fthetel
ephone exhi
bi
ts a di
sti
nctchange i
n
perfor
m ance.
8.
Do notusethetel
ephoneto repor
ta gas l
eak i
n
thevi
ci
ni
t
y ofthe l
eak.
9.
Avoi
d usi
ng a tel
ephone (otherthan a cordl
ess
t
ype)duri
ngan el
ectri
calstorm. There m ay be
a rem oteri
sk ofel
ectri
cshockfrom l
i
ghtni
ng.
10.
Neveri
nstal
lj
acks i
n a wetl
ocati
on unl
ess the
j
ack i
sspeci
fi
cal
l
y desi
gnedforwetl
ocati
ons.
11.
Never touch uni
nsul
ated tel
ephone wi
res or
term i
nal
s unl
ess the tel
ephone l
i
ne has been
di
sconnected atthe network i
nter
face.
12.
Use wi
th cauti
on when i
nstal
l
i
ng orm odi
fyi
ng
tel
ephone l
i
nes.
13.
To reduce the ri
sk of el
ectri
c shock, do not
di
sassem bl
e thi
s product
, but take i
t to a
qual
i
fi
ed ser
vi
cem an when som e ser
vi
ce or
repai
rwork i
s requi
red. Openi
ng orrem ovi
ng
coversm ay expose you to dangerousvol
tages
orotherri
sks. Incorrectreassem bl
ycancause
el
ectri
c shock when the appl
i
ance i
s
subsequentl
y used.
14.
Use onl
ythe powercordand batteri
es i
ndi
cated
i
n thi
s m anual
. Do notdi
spose ofbatteri
es i
n
fi
re. They m ay expl
ode. Check wi
th l
ocal
codesforpossi
bl
especi
aldi
sposali
nstructi
ons.
15.
Pl
ug the adaptorto the socket-outl
etthatnear
the equi
pm entandshal
lbe easi
l
y accessi
bl
e.
16.
CAUTION
RISK OF EXPLOSION IF BATTERY IS
REPLACED BY AN INCORRECT TYPE.
Sanyo Energy (
Hong Kong) Co., Ltd,
3KR-600AAL,Ni
Cd3.6V,600m Ah
DISPOSE OF USED BATTERIES ACCORDI
NG
TO YOUR LOCALCODE.
Use only with Class 2 Power Source,9V DC,1000m A for base unit
THESE INSTRUCTIONS
SAVESAVE
THESE
INSTRUCTIONS
SAVE THESE INSTRUCTIONS
3
IM PORTAN T IN FOR M AT ION
SPECIAL FEATURES
YourBS-373 is designed and engineered to exacting standards forreliabil
ity,long life,
and out
standing perform ance.
Note:
Charge all ofthe batteries for at least 15 hours prior to initial use. SEE PAGE 14
FOR DETAILS!
•
•
2-Line cordl
ess system ,both l
ines can be operated si
m ultaneously
2.4 GHzDigitalDSS Cordl
ess Phone
•
Multiple handset
s capabil
ity,support
s up to 8 handsets
•
3 W ayConference callbetween Line 1 and Line 2
•
•
•
•
•
•
•
•
•
•
•
•
•
•
•
•
•
•
(If you want an additional handset(s) for this m ulti-handset system , you m ay
purchase m odelBS-371 from Bel
l
south Prem ium Products at1-800-733-2355)
3 W ayConference callbetween a handset,the base unitand an externalli
ne
Two-wayintercom between 2 handset
s orbetween base and handset
Handset-to-HandsetFRS-like two-wayintercom independentofthe base unit.
Handsfree speakerphone on handset
Handsfree speakerphone on base unit,giving the base unitcom plete functionalityof
anotherhandset
Dedicated keys on the base unit: Redial / Flash / Line1 Speakerphone / Line2
Speakerphone /Intercom /Conference /Mute /Directory / Voicem ail/Shortcutto
OptionalFeatures Dial
Call
erID Type I,II and CallW aiting ID Options capabil
ity
Voice Announce Cal
lerID
Backlit7-Li
ne Multi-Function LCD on both the handsetand the base unit
Five Softkeys on both handsetand base unitto access differentfunctions dependi
ng
on which m ode the phone i
s currentlyin.
Handsetand base unitVolum e Control
New Call/Voice MailMessage W aiti
ng Indicatoron both handsetand base unit
OutofRange indication
Non-volatil
e m em ory for 50 Nam e and Num ber Caller ID Records,50 Nam e and
Num berPhone Book DirectoryRecords,and 20 LastDi
aled num bers.
Engli
sh/Spani
sh Intell
igentLCD Di
splay
Spare BatteryCapabi
lity
Data Port
2.5 m m HeadsetJack
4
IM PORTAN T IN FOR M AT ION
Check to be sure the fol
lowing item s com e with the phone. Ifthere is anything m i
ssing
orany visible dam age,contactthe ori
ginalpl
ace ofpurchase. Do notattem ptto
operate the system ifitis dam aged.
•
•
•
•
•
•
•
•
•
Base Unit
One Handsetwith BeltCli
p
Two Battery Packs
One Long Telephone Line Cord
One ShortTelephone Line Cord forW al
lMounting
One 4-wire Long Telephone Line Cord
One AC Adapter
One W all-Mounting Bracket
Owner’
s Manual(s)
CHOOSE THE BEST LOCATION
Call
s are transm itted between the base unitand the handset,or between handset&
handset, by using wireless radi
o waves. For m axim um di
stance and noi
se-free
operati
on,here are som e i
m portantgui
del
ines you shoul
d consi
der:
1.
2.
3.
4.
The location should be close to both a phone j
ack and a continuous poweroutlet
which i
s notswitch control
led.
Keep the base and the handsetaway from sources ofelectricalnoi
se such as TV,
personalcom puter,oranothercordless phone.
Place base in a HIGH,CENTRAL location with no obstructi
ons such as wall
s.
The base can be placed on a desk,tabletop orm ounted on wall.
Note:
W hile usi
ng the handset:
Ifyou are neara m icrowave oven which is bei
ng used,noi
se m ay be heard from the
receiverorthe speaker. Move away from the m icrowave oven and closerto the base
unit.
If m ore than one cordless phone i
s bei
ng used and your handset is near another
cordless phone’
s base unit, noi
se m ay be heard. Move away from other cordless
phone’
s base unitand closerto yourbase unit.
5
I MP OR TAN T IN FOR MAT ION
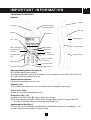
LOCATION OF CONTROLS
Handset
Receiver
M essage W aiting /
New CallIndicator
Display
Softkeys
Dial7 /M ute Key
ScrollKeys
Speakerphone
Indicator
DialPad
Intercom .Key
BeltClip
Speakerphone
Line 1 Key
Speakerphone
Key
Antenna
HeadsetJack
Line 2 Key
Bye Key
Dial11 /Flash Key
Battery Cover
Dial10 /Redial/
Pause Key
Conference Key
M icrophone
Message W ai
ti
ng /New CallIndi
cator
(a) Flashes rapidlywhen ringing.
(b) Flashes regularlyifyou have m essage in yourvoicem ailornew Call
erID in Cal
lLog.
(c) Light
s when the handsetis in use.
Speakerphone I
ndi
cator
Light
s when speakerphone is in use.
HeadsetJack
The headsetjack all
ows the use ofa headsetwith a standard 2.5m m pl
ug.
Li
ne 1 / Line 2 Key
Allows you to access the telephone line.
Scrol
lKeys [▼] / [▲]
(a) W hile on a call,press [▼ ] /[▲ ] to adjustthe volum e.
(b) During standby,press [▼ ] /[▲ ] to scrollthrough Menu options;access Cal
lerID
Records,Phonebook DirectoryRecords and RedialList.
Speakerphone Key[Spk.]
Press to turn on the handsfree speakerphone and dialthe num beron the display. You
are stillrequired to press [Bye] to end yourcall.
6
I MP OR TAN T IN FOR MAT ION
Bye key
To end a cal
l
Di
al7 / Mute Key
(a) W hile reviewing the Cal
lID Record,press [Dial7] and then a LINE keyto CallBackin
7-digitform at.
(b) W hile on a call,press [Mute] to m ute the m icrophone forprivacy.
Di
al10 / Redi
al/ Pause Key
(a) W hile reviewing the CallID Record,press [Dial10] and then a LINE keyto CallBack
in 10-digitform at.
(b) W hile off-hook,press [Redial] to recalland dialthe lastphone num berdialed.
(c) W hile on-hook,press [Redial] to access the RedialList. Using [▼ ] or[▲ ] to select
the desired num berand press a LINE keyor[Spk.] to dialit.
(d) Pressing the keyduring Pre-dialorPhone book directorynum berentrywillentera
3-second pause into a dialing sequence,indicated by“P”.
Di
al11 / Fl
ash Key
(a) W hile reviewing the CallID Record,press [Dial11] and then a LINE keyto CallBack
in 11-digitform at.
(b) The [Flash] keyis used to access telephone com panyservices such as CallW aiting.
Di
alPad
The num eric keys are used in the conventionalm annerfordial
ling.
I
ntercom Key[I
nt.]
During standby,press the keyto activate the intercom function between handset
s or
between handsetand base unit,answera paging call,orterm inate an intercom call.
W hile on a l
ine,press the keyto transferthe cal
lto a particul
arhandsetorthe base.
Conference Key [Conf.]
Press to startconference callbetween Line 1 and Line 2.
5 Softkeys
These softkeys are used to sel
ect functions displayed directly above the keys.
Functions displayed above the keys willchange depending on the m ode ofoperation.
For exam ple,on the displ
ay below,[SAVE], [M ENU], [SER VICE], [DIR.] & [DIAL V.M.] are
displ
ayed above the sofkeys. To operate the phone book directory,press the second
softkeyfrom the right-hand-side.
e.g.
Pressing this softkey
willenterinto phone
book directory
7
I MP OR TAN T IN FOR MAT ION
Base Uni
t
Charge Indicator
Spare batter
yIndicator
Dial11/Fl
ashkey
Scrol
lkeys
Dial10/Redial/
Pause key
Displ
ay
Dial7/Mutekey
Conferencekey
& indicator
MessageW aiting/
New Cal
lIndicator
Int.
/Pagekey
Softkeys
Byekey
DialPad
Line in-use
indicators
Line keys
Microphone
Speaker
Message W ai
ti
ng / New Cal
lI
ndi
cator
Flashes when there is/are m essage(s) in yourvoicem ailornew Cal
lerID in CallLog.
Li
ne 1 in-use I
ndi
cator
(a) Light
s when Line 1 is in use.
(b) Flashes when Line 1 is on hold orthere is an incom ing callin l
ine 1.
Li
ne 2 in-use I
ndi
cator
(a) Light
s when Line 2 is in use.
(b) Flashes when Line 2 is on hold orthere is an incom ing callin l
ine 2.
Conference I
ndi
cator
Light
s when 2 Lines are engaged in conference call.
Charge I
ndi
cator
Light
s when handsetis on the cradle and being charged.
Spare BatteryI
ndi
cator
Light
s when the spare batteryis in the charging com part
m ent.
Di
alPad
The num eric keys are used in the conventionalm annerfordial
ling.
Li
ne 1 Key
Press to turn on the speakerphone and m ake oranswercallon Line 1.
Li
ne 2 Key
Press to turn on the speakerphone and m ake oranswercallon Line 2.
8
I MP OR TAN T IN FOR MAT ION
Scrol
lKeys [▼] / [▲]
(a) W hile on a call,press [▼ ] /[▲ ] to adjustthe volum e.
(b) During standby,press [▼ ] /[▲ ] to scrollthrough Menu;access CallerID Records,
Phonebook DirectoryRecords and RedialList.
Di
al7 / Mute Key
(a) W hile reviewing the Call
erID Record,press [Dial7] and then a LINE keyto CallBack
in 7-digitform at.
(b) W hile off-hook,press [Mute] to m ute the m icrophone forprivacy.
Di
al10 / Redi
al/ Pause Key
(a) W hile reviewing the CallerID Record,press [Dial10] and then a LINE key to Call
Back in 10-digitform at.
(b) W hile off-hook,press [Redial] to recalland dialthe lastnum berdialed.
(c) W hile on-hook,press [Redial] to access the RedialList. Using [▼ ] /[▲ ] scrollkeys
to sel
ectthe desired num berand press [Line1] or[Line2] to dialit.
(d) Pressing the key during Pre-dialorPhone book directory num berentry to inserta
3-second pause into the dialing sequence,indicated by“P”.
Di
al11 / Fl
ash Key
(a) W hile reviewing the CallerID Record,press [Dial11] and then a LINE key to Call
Back in 11-digitform at.
(b) The [Flash] keyis used to access telephone com panyservices such as CallW aiting.
I
ntercom / Page Key[Int./Page]
(a) During standby, press the [Int./Page] key to page handset (1-8, or # for all
handsets) or activate the intercom function between base and handset,answer or
term inate an intercom cal
l.
(b) W hile on an externalline,press the [Int./Page] key to transferthe cal
lto a particular
handset.
Conference Key
Pressing to startconference callbetween Line 1 and Line 2.
Bye key
To end a cal
l
5 Softkeys
Depending on the m ode ofoperation,the corresponding functions ofthe 5 Softkeys are
displ
ayed on the screen. Pl
ease referto the figure on page 7 fordetail
ed descriptions.
9
I MP OR TAN T IN FOR MAT ION
LCD DI
SPLAY
Call
er’
s Num ber
Call
er’
s Nam e
Call
ing Date
& Tim e
Sequence in callerl
ist
Label
s of5 softkeys
Backl
i
tLCD Di
spl
ay
Both the handsetand the base unithave the backlitLCD display. Itwilllightwhen you
startusing the handsetorthe base unit,orwhen a cal
lis received. The displaylightwill
stayon fora few seconds afterpressing a button orl
ifting the handsetoffthe base unit.
Backl
i
tKeypad
The num eric keys willl
ightwhen you press a keyorwhen a callis received. The light
willstayon fora few seconds afterpressing a keyoranswering a call.
DATA PORT
You can connecta com m unication device (like
com puter,m odem ,faxm achine,answering
m achine,and etc) through this unitusing the
DATA jacks atthe bottom ofthe base unit.
You could choose to connectthe com m unication
device to Line 1 orLine 2 with the j
acks labeled
“L1 Data”or“L2 Data”respectively. However,if
you have 2 telephone l
ines occupied the jacks
“L1 only”and “L2 only”. Then yourcom m unication device can onlybe connected to
Line 1 via the jack label
ed “L1 & L2”. SEE PAGE 15 FOR DETI
ALS OF TELEPHONE
LI
NE(S)CONNECTION
Note: Make sure the data device is notin use priorto using yourphone orel
se the data
device m aynotbe operated properly. W hile data transm ission is in progress,use ofthe
sam e line on yourBS-373 ora CallW aiting ID alertm ayinterruptthe transm ission.
10
I MP OR TAN T IN FOR MAT ION
QUICK REFERENCE
Task
1
Adjustreceiver/
Speakerphone volum e
2
Making a call
Steps
Page
1. Press [Line1] or[Line2] or[Spk.] on the
handsetorpress [Line1] or[Line2] on
the base unitand listen fora dialtone.
*([Li
ne1] or[Li
ne2] willbe col
lectively
referred as a LI
NE key throughout
this m anual)
28
The handsetand the base unithave 4
volum e l
evels adjustable during offhook.
Press [▼ ] /[▲ ] to adjustduring a call.
30
2. Dialnum ber
3
Answering a cal
l
3. To hang up,press [Bye] on the handset
orbase unitorreturn the handsetto
charge cradle.
Auto-answeris the defaultm ode setting of
the phone:
29
Ifthe handsetis on the charge cradl
e,just
liftthe handsetand the line is autom atically
connected.
Ifthe phone is setto Manual
-answer
m ode,orwheneverthe handsetis noton
the charge cradle,to answera call:
1. Press a LI
NE key or[Spk.] on the
handsetorpress a LI
NE keyon the
base unitcorresponding to the line
num berflashing on the displayto pick
up a call
4
Lastnum berredial
2. To hang up,press [Bye] on the handset
orbase unitorreturn the handsetto
charge cradle.
1. Press a LI
NE key and listen fordial
tone.
2. Press [Redial] to dialthe lastdialed
num ber.
11
29
I MP OR TAN T IN FOR MAT ION
QUICK REFERENCE
5
Task
Dialfrom the RedialList 1. Press [Redial].
2. Use [▼ ] /[▲ ] scrollkeys to access
desired num berfrom the l
istofup to 20
lastdial
ed num bers.
6
Review Cal
lerList
7
Callback a num berin
Call
erList
8
9
Steps
3. Press a LI
NE key to dialthe num ber.
Page
30
Use [▼ ] /[▲ ] scrollkeys to review call
er’
s
inform ation during standbym ode.
37
1. Scrollto a desired record in CallerList.
38
2. Ifthe num berdispl
ayed is notin the
desired dialing pattern,press [Dial7],
[Dial10] or[Dial11] to sel
ectthe num ber
ofdigit
s to dialfirst.
3. Press a LI
NE key to dial.
Store Call
erID num ber 1. Scrollto the desired CallerID num ber.
into Phone Book
2. Press [SAVE] softkey to store the
Directory
num berinto Phone Book Directory.
Manuallyadd a new
1. Press [DIR.] softkey.
num berinto Phone Book 2. Press [SAVE] softkeyand then key-in
Directory
the num ber.
42
42
3. Press [O.K.] softkeyand key-in the
nam e.
10 Dialfrom Phone Book
Directory
4. Press [SAVE] softkey to store.
1. Press [DIR.] softkey.
2. Use [▼ ] /[▲ ] scrollkeys to find the
desired directoryrecord.
46
3. Ifthe num berdispl
ayed is notin the
desired dialing pattern,press [Dial7],
[Dial10] or[Dial11] to sel
ectthe num ber
ofdigit
s to dialfirst.
11
4. Press a desired LI
NE key to dialthe
num ber
Switch to a waiting call Press [Flash] to putthe talking partyon
hold and talk to the waiting party.
IfCallW aiting DELUXE is subscribed to,
m ore options are available.
12
32
40
I MP OR TAN T IN FOR MAT ION
QUICK REFERENCE
12
13
14
15
Task
Page from base to
handset(s)
Intercom callbetween
two handsets
Steps
1. Press [Int./Page].
2. Press the desired handsetnum ber[1] to
[8] or[] /[#] forallhandset
s.
3. To term inate the paging,press [EXIT]
softkeyor[Int./Page] or[Bye] key.
1. Press [Int.].
2. Press the desired handsetnum ber.
3. To term inate the paging,press [EXIT]
softkeyor[Int./Page] or[Bye] key.
Intercom callfrom a
1. Press [Int.]
handsetto the base unit 2. Press [0] to access the base unit.
CallTransfer
Page
31
47
47
3. To term inate the paging,press [EXIT]
softkeyor[Int./Page] or[Bye] key.
1. Press [Int.] on handsetor[Int./Page] on
48
base unitwhile connected to an external
line.
2. Press the desired handsetnum beror
press [0] forthe base unit.
16
2-line conference cal
l
3. Press corresponding LI
NE keyon
handsetoron the base unitto take back
the callatanypoint,orthe callwillbe
returned to you ifitis notanswered
within 20 seconds.
1. W hile m aking oranswering a cal
lon
Line1 orLine2
2. Press [HOLD] softkeyeitheron the
handsetorthe base unitto putthe call
on hol
d
3. Make oranswera second callon the
otherline
4. Afterthe second callis connected,
press [Conf.] /[Conference] to add the
firstcall
erinto the conference call
5. To end the conference cal
l,press a
LINE keyto retain the party on thatline
and drop the otherone,orjustpress
[Bye] to end both lines.
13
36
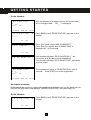
G ET T IN G STAR T ED
Yournew tel
ephone i
ncl
udes the highestquali
ty Ni
Cd (Ni
ckelCadm ium )batteri
es
avai
l
abl
e. Fol
lowi
ng these si
m pl
ei
nstructi
ons can signi
fi
cantl
yi
m prove your
operati
onalresul
ts.
CHARGING THE BATTERY PACK
Charge allbatterypacks foratleast15 hours priorto connecting to the telephone line.
**AFTER INI
TI
AL CHARGE:To enhance battery l
i
fe and tel
ephone perform ance,
com pl
etel
y charge and then com pl
etel
y di
scharge the batteri
es before
returni
ng the handsets to the chargi
ng cradl
e. Thi
s wi
l
lextend yourbattery
l
i
fe al
l
owi
ng longertal
k-ti
m e and stand-by.
1.
2.
3.
4.
5.
Press the battery release pointon the back ofthe handsetand sl
ide downward to
open the batterycom part
m ent.
Insertthe battery pack into the battery com partm entand m ake sure to position
according to pol
aritym arkings.
Slide the batterycoverupward untilitsnaps into place.
Connectthe AC adapterto the 9 V DC jack ofthe base unitand to a standard 120V
AC walloutlet.
Place the handseton the base unit. Make sure the Charge LED on the base unit
light
s,and charging begins.
Low Battery
W hen the batterypoweris low,the battery icon
on the rightofthe displ
aywillbe on
and the handsetbeeps interm ittently while itis in use. Ifthe handsetbattery is not
properly charged,
wil
l be on for certain period, and then “LOW BATTER Y” is
displ
ayed. Ifthe handsetis leftun-recharged,“BACK TO CH ARGER”willbe displ
ayed.
W hen this occurs the handsetdoes notfunction when you press the keys.
Cl
ean the Battery Contacts
To m aintain a good charge,itis im portantto clean allbattery contacts on the handset
and the base unitwith a soft,dry cloth aboutonce a m onth. You m ayalso use a pencil
eraserorothercontactcleaner. Do notuse anyli
qui
ds orsol
vents.
Cauti
on:
1. Use ONLY with BS-373 AC Adapter(AC 120V,DC9V,1000m A).
2. The AC adapterm ustrem ain connected atalltim es (Itis norm alforthe adapterto
be warm during use).
3. Do notrem ove the batteryfrom the handsetto charge it.
4. Neverthrow the batteryinto a fire,disassem ble it,orheatit.
5. Do notrem ove ordam age the batterycasing.
6. Ifyou do notexpectto use yourphone fora m onth orlonger,rem ove the batteries.
Batteries can leak chem ical
s thatcan destroyelectronic part
s.
7. For the longestbattery life and optim aloperation ofthe phone system ALW AYS
com pletely charge and discharge the batteries. 3 batteries have been included to
allow you to keep 1 batterycontinuallycharging foruse in a low batterycondition.
14
G ET T IN G STAR T ED
CONNECTI
NG THE BASE UNI
T
Connecti
ng Tel
ephone l
ine cord(s)
Your BS-373 2-Line phone wil
l operate no m atter
whether you connect1 or 2 tel
ephone l
ines. Ifyou
have 2 Li
nes com ing out of a Singl
e W al
lJack,
connect a 4-wire (RJ-14) m odul
ar phone cord
between the walljack and the phone jacklabeled L1 &
L2. Ifyou ha ve 2 l
ines com ing outofSeparate W al
l
Jacks,connect2 phone cords with 2 wires from each
walljack to the phone jack l
abeled L1 onl
yorL1 Data
& L2 onl
y orL2 Data.
Ifyou would like to connectto 1 li
ne only,connecta cord with 2 wires to eitherL1 only
orL1 Data orL2 only orL2 Data.
Connecti
ng PowerSupply
1.
2.
3.
Plug the AC adapter into the 9V DC jack on the base and the other end into a
standard 120V AC walloutlet.
Press the cords in the sloton the housing to preventthe cords from pulling loose.
Setthe base uniton a tabletop and then pl
ace the handseton the base unit.
Note:
1. Use onlythe powercord and batteries indicated in this m anual. Do notdispose of
batteries in a fire. Theym ayexplode. Check with l
ocalcodes forpossibl
e special
disposalinstructions.
2. Connectthe AC adapterto a continuous poweroutlet.
3. Plug the adaptorto the socket-outletthatnearthe equipm entand shal
lbe easily
accessible.
Ti
p:
Ifyourtelephone outletis notm odular,contactyourtelephone com panyforassistance.
SPARE / BACK UP BATTERY
The extra batterywillenable the phone function tem porarilyduring an electricaloutage.
You can also use the spare batterypack to replace a drained handsetbattery to ensure
uninterrupted use.
1. Open the spare battery com part
m entby pressing
t
he
r
el
eas
e
but
t
on
o
n
t
he
r
ig
ht
side
ofthe base unit.
2
2. Place a battery pack in the drawerwith the charge
contacts facing up and to the left.
3. Close the drawer. Make sure the Spare Battery
LED lights,and charging begins.
3
4. The LED light
s untilthe batteryis rem oved from the
com part
m ent.
1
15
GET T IN G STAR T E D
Changi
ng drai
ned handsetbatteryin the m iddl
e ofa cal
l
W hen the handsetdisplays “LOW BATTERY”in the m iddle ofa telephone cal
l,you can
swap the cal
lto the base unitspeakerphone firstand then change the handsetbattery
following these sim pl
e steps:
1. Press the LI
NE key with the In-use indicatorliton the
base unit. The callis then transferred to a 3-waycall
conference between the handset,the base unitand the
externalparty.
1
2.
4
Press the [Bye] key on the handset;the
callwillbe total
lyswapped from the
handsetto the base unitspeakerphone.
3
2
3. Takeoutthesparebat
teryfrom thebaseuni
tbatter
ycompar
tment
andrepl
acei
ttothehandset.
4. Press the LI
NE key (the in-use line) on the handsetand
press the [Bye] keyon the base unitto swap the callback to
the handset.
Note: Make sure the drained batteryis putin the base unit
batterycom part
m entto be re-charged.
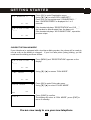
REGI
STRATI
ON & DE-REGI
STRATI
ON OF HANDSET
The firstregistered handsetwillbe autom atically assigned as HS-1 to the base unit.
W hen additionalhandset
s are registered to the system ,theywillbe assigned extension
num bers in the following sequence: HS-2,HS-3,and up to HS-8.
On the Base Uni
t:
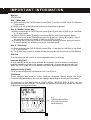
REGISTRATION
O.K.
Press [MENU] and “REGISTRATION”appears on the
displ
ay.
EXIT
WAITING REGISTER Press [O.K.] and “W AITING REGISTER”is displayed.
EXI
T
You are now readyto registeryourhandset.
Note:The base unitwillreturn to standby m ode ifno
handsetregistration takes place within 25 seconds.
16
GET T IN G STAR T E D
On the Handset:
Afterthe handseti
s charged,rem ove itfrom the base
unitorcharge cradl
e. “HS_ _”i
s di
splayed
NO NEW CALL
HS_ _
10:00AM 1/01
SAVE SERVICE
MENU
DIR.
REGISTRATION
HS_ _
O.K.
DI
AL V.M.
Press [MENU]and “REGISTRATION”appears on the
di
spl
ay.
EXIT
ADD A HANDSET? Press [O.K.]and select“ADD A H ANDSET?”.
Press [O.K.]to registerand “CONNECTING”is
di
spl
ayed for1 to 2 seconds.
O.K.
EXIT
REG OK NEW ID=1
The handsetwillreturn to “REGISTRATION”after2
seconds. Press [EXIT]to end the regi
stration.
NO NEW CALL
HS-1
10:00AM 1/01
SAVE SERVICE
MENU
DIR.
Ifthe handsetdi
spl
ays “REG OK NEW ID=1”,the
connecti
on with the base unitis establi
shed.
Ifthe handsetdi
spl
ays “NO CONNECTION”,repeatthe
previous steps.
DI
AL V.M.
De-regi
stera handset
Ifyou wantto de-regi
stera regi
stered handsetfrom the base unit,getthe base unitinto
REGISTRATION m enu and di
splays “W AITING REGISTER”first.(see page 16).
On the Handset:
REGISTRATION
HS - 2
O.K.
Press [MENU]and “REGISTRATION”appears on the
di
spl
ay.
EXIT
17
GET T IN G STAR T E D
DEL HANDSET?
O.K.
Press [OK]to enterRegi
stration m enu.
Using [▼ ]/ [▲ ]to select“DEL HANDSET?”.
Press [O.K.]to de-registerand “CONNECTING … ”
then “UNREGISTERED’i
s di
spl
ayed for1 to 2
seconds.
Ifthe handsetdi
spl
ays “REGISTRATION”and “HS_ _”,
the handsetis di
sconnected from the base unit.
Ifthe handsetdi
spl
ays “NO CONNECTION”,repeatthe
previous steps.
EXIT
REGISTRATION
HS_ _
O.K.
EXIT
CHOOSE THE DIALING MODE
Ifyourtelephone i
s equi
pped with a touchtone di
ali
ng system ,the phone willbe readyto
use as soon as the battery is charged. Ifyourline uses pul
se (rotary)dialing,you wi
ll
need to setthe dialing m ode as fol
lows:
REGISTRATION
HS_ _
O.K.
SAVED!
Using [▼ ]/ [▲ ]to access “DIAL M ODE”.
EXIT
PULSE MODE
SAVE
Press [MENU]and “REGISTRATION”appears on the
di
spl
ay.
EXIT
DIAL MODE
O.K.
Press [OK]to enterDialm ode m enu.
Using [▼ ]/ [▲ ]to select“PULSE MODE”.
EXIT
Press [SAVE]to confirm .
The di
spl
aywillreturn to “DIAL MODE”,press [EXIT]to
return to standby.
You are now ready to use your new telephone
18
GET T IN G STAR T E D
W ALLMOUNTING BASE UNIT
The base unitcan be m ounted on a wallphone plate byusing
the suppl
ied wall-m ounti
ng bracket.
1. Bring the barrelpl
ug ofthe AC adapterthrough the
rectangularopeni
ng ofthe wal
l-m ounting bracket.
2. Plug the adapter’
s barrelpl
ug into the j
ack m arked
“1000m A DC 9V”atthe bottom ofthe base unitand
press the cord in the sl
otabove the jack.
3. Ifyourprem i
se i
s equipped with 2 Li
nes com ing outofa
Si
ngl
e W al
lJack:
Bring the telephone l
ine cord with RJ-14 plug (you can
see 4 wires in the pl
ug)through the rectangularopening
ofthe wall-m ounting bracketand plug itinto the jackm arked “LINE 1/2”.
Ifyourprem i
se has 2 Li
nes,each com ing outofSeparateW al
lJacks:
Bring the telephone li
ne cords with RJ-11 pl
ug (you can see 2 wires in the pl
ug)
through the rectangularopening ofthe wall-m ounti
ng bracketand plug them into the
jack m arked “LINE 1/2”and “LINE 2”separately.
Ifyourprem i
se has only1 Line com ing outofa wallplate:
Take the shorttelephone line cord and plug itinto the jack m arked”LINE 1/2”.
Hook tab
4. Insert2 hook-tabs and 2 shorttabs ofthe
wall-m ounti
ng bracketinto the slot
s atthe back and
bottom ofthe base unitsi
m ultaneously.
5. Press the wall-m ounti
ng bracketagai
nstthe base
unituntiltheyare resting on each otherfirm ly.
Short tab
6. Hold the base
unitup nextto
the wallj
ack and
plug the l
ine
cord into the wall
jack,anyloose line cord
can be hi
d insi
de the
wall-m ounti
ng bracket.
7. Place the base uniton the posts ofthe wallpl
ate and
push down unti
lthe uniti
s secured firm ly.
8. Plug the AC adapterinto a standard walloutlet.
Note: Ifyou are notusi
ng a standard wallpl
ate to m ountthe
phone on a wall,you m ayalso m ountitwith ordinaryscrews.
Use the W allMountTem pl
ate on page 56 to affixtwo screws atyourdesired l
ocation.
Rem em berto leave 1/8 inch ofthe screw extending from the wall.
Please charge all the batteries for at least 15 hours prior to initial use.
19
ME N U S E T T IN GS
The phone offers an extensive range offunctions which are grouped in m enus. You can
custom ize yourphone bypressi
ng the Menu keyand usi
ng [▼ ]/ [▲ ]scrollkeys to scrol
l
through the options.
20
ME N U S E T T IN GS
STRUCTURE AND OPTIONS
The m enu settings have two levels. There are twelve item s on the handsetand on the
base unitrespectivelyin the firstleveland the num berofitem s i
n the second level
depends on the firstlevelm enu.
Note:The settings are independenton the base unitand each handset.
MENU FUNCTIONS
Regi
strati
on
You m ustfirstsetthe base unitto regi
stration m ode pri
orto addi
ng ordeleting handset
s.
Sim plypress [MENU]on the base unitto sel
ect“Regi
strati
on”then press [O.K.]to
confirm .(referto page 16) The base unitwi
llreturn to standbym ode ifno handset
regi
stration takes place withi
n 25 seconds.
To add a handsetto a desi
red base
REGISTRATION
HS_ _
O.K.
Press [MENU]on the handsetduring standby.
Using [▼ ]/ [▲ ]to select“REGISTRATION”.
Press [O.K.]to enterinto the selecti
on.
EXIT
ADD A HANDSET? In the second level,using [▼ ]/ [▲ ]to access “ADD A
O.K.
EXIT
HANDSET?”
Follow the steps ofREGISTRATION OF HANDSET in
GETTING STARTED.
Note:If a new base i
s selected,the originalregi
stration willbe replaced by the new
regi
stration.
To del
ete a handsetfrom the base
DEL HANDSET?
O.K.
In the second level,using [▼ ]/ [▲ ]to select“DEL
HANDSET?”.
Press [O.K.]to de-registerthe handset.
EXIT
UNREGISTERED!
“UNREGISTERED!”appears on the di
splayto confirm
handsetde-regi
stration. The handsetreturns to
“REGISTRATION”after2 seconds. Press [EXIT]to
return and “HS_ _”i
s di
splayed.
21
ME N U S E T T IN GS
To del
ete al
lhandsets from the base
DEL ALL HANDSET In the second level,using [▼ ]/ [▲ ]to select“DEL ALL
HANDSET”.
Press [O.K.]to de-registerallhandset
s from the base.
O.K.
EXIT
DEL ALL HS OK!
“DEL ALL HS OK!”appears on the di
splayto confirm
globalde-regi
strati
on. The handsetreturns to
“REGISTRATION”after2 seconds. Press [EXIT]to
return and “HS_ _”i
s di
splayed.
Note:In case ofregi
stration failure or“REG FAIL ID FULL”is di
spl
ayed when regi
steri
ng,
si
m plydelete al
lhandset
s from the base and restartthe regi
stration ofhandset
s.
Di
alM ode
Press [MENU].
DIAL MODE
O.K.
Using [▼ ]/ [▲ ]to select“DIAL M ODE”.
Press [O.K.]to enterinto the selecti
on.
EXIT
Using [▼ ]/ [▲ ]to selectthe desired dialm ode,then
TONE MODE
press [SAVE]to confirm . Press [EXIT]to return to
stand-by.
EXIT
SAVE
Language
Press [MENU].
LANGUAGE
O.K.
Using [▼ ]/ [▲ ]to select“LANGUAGE”.
Press [O.K.]to enterinto the selecti
on.
EXIT
22
ME N U S E T T IN GS
Using [▼ ]/ [▲ ]to selectthe desired language,then
ENGLISH?
press [SAVE]to confirm . Press [EXIT]to return to
stand-by.
EXIT
SAVE
Ri
ngerVol
um e
RINGER VOLUME
O.K.
Press [MENU].
Using [▼ ]/ [▲ ]to access “RINGER VOLUME”.
EXIT
ess [O.K.]to enterand the currentringervolum e will
Pr
be di
splayed.
LEVEL:06
EXIT
SAVE
Using [▼ ]/ [▲ ]to adjustringervolum e. The ringer
LEVEL:00
EXIT
SAVE
willbe ringed with the correspondi
ng volum e levelas
shown i
n the LCD di
spl
ayfora few seconds. Press
[SAVE]to confirm ,and then press [EXIT]to return to
stand-by.
Note:There are (00 - 08)nine l
evels ofringervolum e. Ifthe ringervolum e i
s off,the
handsetwilldi
spl
aythe
icon and the LED will blink while receiving a call. The
handset will ring ONLY with intercom call from base unit or other handsets.
Answer Modes (Onlya vailable in handset m enu)
Handsets m aybe program m ed to either auto or m anual answer m ode. W hen the
handset is not in the base unit or the charge cradle,a LI
NE ke ym ust be pressed to
answer incom ing calls. Auto answer m ode will onlybe activated when the handset is in
the base unit or in the charge cradle. In which case,the line is autom aticallyconnected
when handset is picked up from the charge cradle.
ANSWER MODE
O.K.
Press [MENU].
Using [▼ ]/[▲ ]to select “ANSW ER M ODE”.
Press [O.K.]to enter into the selection.
EXIT
23
ME N U S E T T IN GS
Using [▼ ]/[▲ ]to select “AUTO MODE”or “M ANU AL
AUTO MODE
MODE”.
Press [SAVE ]to confirm ,and then press [EXIT]to
return to stand-by.
EXIT
SAVE
Contrast
CONTRAST
O.K.
Press [MENU].
Using [▼ ]/[▲ ]to access “CONTRAST”.
Press [O.K.]to enter into the selection.
EXIT
Using [▼ ]/[▲ ]to adjust the contrast level.
LEVEL:05
Press [SAVE ]to confirm ,and then press [EXIT]to
return to stand-by.
EXI
T
SAVE
Cal
lW ai
ti
ng ID Options *
CW ID OPTION
O.K.
Press [MENU].
Using [▼ ]/[▲ ]to access “CW ID OPTION”.
Press [O.K.]to enter into the selection.
EXI
T
OPTION IS ON
EXIT
Using [▼ ]/[▲ ]to switch the Call W aiting ID Options
ON or OFF.
Press [SAVE ]to confirm ,and then press [EXIT]to
return to stand-by.
SAVE
Note:*Call W aiting ID Options m aybe available from your telephone com pany.
Subscription m aybe required.
24
ME N U S E T T IN GS
PBX Mode
Ifyou are using a PBX (Private Branch E xchange)telephone system ,you m aybe
required to dial an external access code,such as [8]or [9],prior to reaching an outside
line. Follow the steps below and enter that code in the PBX PREFIX field. This code
will then be added to all stored num bers upon dialing.
Press [MENU].
PBX MODE
O.K.
Using [▼ ]/[▲ ]to access “PBX MODE”.
Press [O.K.]to enter into the selection.
EXIT
L1 PBX PREFIX:_ Using [▼ ]/[▲ ]to select “L1 PBX Prefix”or “L2 PBX
EXIT
SAVE
Prefix”.
Enter the code using num eric keys “0 - 9”.
Press [SAVE ]to confirm ,and then press [EXIT]to
return to stand-by.
Note:The phone will autom aticallyscreen all Pre-dial num bers prior to dialing ifPBX
Prefixis set. Enter the access code and the phone num ber you wish to dial,the
phone will autom aticallyinsert a ‘pause’after the first digit when dialing the num ber.
On the contrary,ifthe first digit is not the access code,the system will classifyit as an
internal call and dial the displayed num ber only.
New Cal
lLam p
The Message W ai
ti
ng I
ndi
cator /New Cal
lLam p will flash when there are new or
unviewed Caller ID entries in call log ifthe lam p is switched on.
NEW CALL LAMP
O.K.
Press [MENU].
Using [▼ ]/[▲ ]to access “NEW CALL LAMP”.
Press [O.K.]to enter into the selection.
EXIT
NEW CL LAMP IS OFF EXIT
Using [▼ ]/[▲ ]to switch the New Call Lam p ON or
OFF.
Press [SAVE ]to confirm ,and then press [EXIT]to
return to stand-by.
SAVE
25
ME N U S E T T IN GS
Audi
bl
e Cal
l
er ID (Onlya vailable in base unit m enu)
Press [MENU].
AUDIBLE CID
Using [▼ ]/[▲ ]to access “AUDIBLE CID”.
Press [O.K.]to enter into the selection.
O.K.
EXIT
Voice Announce Cal
l
erNam e (Audibl
e Nam e)
Us
ing
[▼
]
/
[▲
]
to
acces
s
“
AUDI
BLE
NAME
:”. The
AUDIBLE NAME:2 default volum e level for Audible Nam e is “3”. Press [0]
- [4]to adjust the voice announcem ent to your desired
volum e level. Press [SAVE ]to confirm and then
EXIT
press [EXIT]to return to stand-by.
SAVE
AUDIBLE NUM:0 OFF
EXIT
SAVE
Voice Announce Cal
l
erNum ber(Audibl
e Num ber)
Using [▼ ]/[▲ ]to access “AUDIBLE NUM :” The
defaultlevelforAudible Num beris “0”. Press [0]- [4]
to adjus tthe announcem entto yourdesired volum e
level. Press [SAVE]to confirm and then press [EXIT]
to return to s tand-by.
Note:W hen the volum e levelis setto “0”. The corresponding announcem entis
dis abled. The phone wil
lceas e to m ake audible announcem ent(s ).
Time and Date Setting
SET DATE/TIME
10:05AM 05/03
O.K.
Press [MENU].
Using [▼ ]/[▲ ]to s elect“SET DATE/TIME”.
Press [O.K.]to enterinto the s election.
EXIT
ENTER DATE/TIME: Using [▼ ]/[▲ ]to adjusAMttim e and date. Press [O.K.]
10:05
AM
03/25
O.K.
SAVE
EXIT
to m ove thru.Hour(12 – 11PM),Minute,Month and
Date.
Press [SAVE]to confirm ,and then press [EXIT]to
return to s tand-by.
26
ME N U S E TTIN G S
Last Cal
lTimer
LAST CALL TIMER Press [MENU].
00-06-25
EXIT
Using [▼ ]/[▲ ]to dis play“LAST CALL TIMER”.
You can check the duration oflas tcall.
Press [EXIT]to return to s tand-by.
Message W aiting Lamp
The m enu item “DEL MESSAGE”is onlyavailabl
e when there are new ornon-read
m essage(s )in you voicem ailbox. “DEL MESSAGE”does notdelete yourm ess age,but
ratherdeactivate the Mess age W aiting Indicatorfrom flas hing untila new m ess age
arrives . (To read ordel
ete the m ess age,use “DialVoice Mail”,fordetails see page 33)
2 NEW MESSAGES
HS-1
10:05AM 05/03
SAVE SERVICE
MENU
DIR.
DI
AL V.M.
DELETE MESSAGE?
O.K.
This m ode is available onlywhen there is new or
non-read m ess age in yourvoicem ail.
Press [MENU].
Using [▼ ]/[▲ ]to access “DELETE MESSAGE?”
EXIT
DELETE L1 MESSAGE Press [O.K]to enterinto the s election.
O.K.
EXIT
Using [▼ ]/[▲ ]to access “DELETE L1 MESSAGE?”or
“DELETE L2 MESSAGE”as desired.
Press [O.K.]to delete allm ess ages ofthe line.
The word “m ess age”and the vis ualm ess age waiting
lam p willbe cl
eared.
27
BAS IC O PE RATIO N
MAKING A CALL
Di
rectDi
alfrom Handset
Press a LINE keyand li
sten forthe dialtone. The
“In-Use” indicatorofthe selected line on the base unit
willbe turned ON. Li
ne num berwi
llappearon the
handsetdi
spl
ay.
L1 ON
HOLD
SERVICE
DIR.
DI
AL V.M.
Note:Ifthe selected l
ine i
s engaged byanotherHandset,“L1 BUSY USE L2?” wil
l
appearon the di
splayand the handsetwi
llreturn to stand-byin a few seconds.
Ifthe selected l
ine i
s engaged bythe base unit,the phone wi
llenteri
nto Conference
Call. (see page 36)
— OR —
Press [Spk.]and li
sten forthe dialtone. The
Speakerphone i
ndicatoron the handsetand the “Li
ne 1
In-Use” indicatoron the base unitwillbe turned ON.
“L1 ON” willappearon the handsetdi
splay.
L1 ON
HOLD
SERVICE
DIR.
DI
AL V.M.
Note:
Ifboth lines are i
dle,pressing [Spk.]wil
lactivate Line 1. Ifyou wantto access Li
ne 2,
press [Line 2]first,then press [Spk.]
IfLine 1 is engaged byanotherhandset,“L1 BUSY” willappearon the di
splayfora
whil
e and Line 2 willbe activated.
IfLine 1 is engaged bythe base unit,the phone wi
llenteri
nto Conference Call.
L1 ON
00:01
1234567
HOLD
3W AY
W ith a dialtone,di
althe phone num ber. The phone
num berwillbe shown on the di
spl
ayalong with the call
tim er.
Press [Bye]to end yourcall.
SERVICE
Di
rectDi
alfrom Base Uni
t
SPEAKER
LINE1
HOLD
SERVICE
DIR.
DI
AL V.M.
Press an available LINE keyand li
sten forthe di
altone.
The “In-Use” indicatorofthe selected line on the base
unitwil
lbe turned ON. “SPEAKER” and “Line
num ber” willappearon the base unitdi
splay.
Dialthe phone num ber.
Note:Pressing a l
ine engaged bya handsetwillenterinto Conference Cal
l
.
28
BAS IC O PE RATIO N
Pre-di
al
Pre-dialall
ows you to key-in the phone num berto verify itbefore dialing.
1234568
O.K.
EXIT
DELETE
Dialthe phone num ber.
To editthe num beron the di
splay,press [DELETE]to
clearthe lastdi
git. To clearthe entire num ber,press
[EXIT]. Re-enterthe correctdigits.
SAVE
L1 ON
00:01
1234568
HOLD
3W AY
SERVICE
Press [Spk.]on the handsetora LINE keyon the
handsetorbase unitto dialthe num ber. The cal
l
tim erwillstartcounti
ng.
Press [Bye]on the handsetor[Bye]on the base unitto
end yourcall.
Note:Ifone line i
s engaged bythe handset,pre-dialwith anotherl
ine on the Base Unit
cannotbe used. Onlydirectdiali
s possible.
ANSW ERING A CALL
From the Handset
L1 ON
00:01
1234568
HOLD
3W AY
SERVICE
Press the appropriate LINE ke yas di
spl
ayed,or[Spk.]to
answer. Ifthe phone i
s setto Auto Answerm ode and
the handseti
s on the charging cradle,you can answera
call by lifting the handset off the base unit, or the
chargi
ng cradle,withoutpressing anykey.
To end the call,press [Bye].
From the Base Uni
t
Press the appropriate LINE key to answer. To end the call,press [Bye].
Note:Two call
s can be handled si
m ultaneouslyon separate telephone lines bythe
handsetand the base unit,orbytwo handsets.
TO REDIAL A CALL
Di
rectl
y Redi
alLastDi
al
ed Num ber
Press a LINE key /[Spk.]on the handsetora LINE key
on the base unitand l
i
sten forthe dialtone.
L1 ON
HOLD
SERVICE
DIR.
DI
AL V.M.
29
BAS IC O PE RATIO N
L1 ON
00:01
1234568
Press [Redial]to dialthe lastdi
aled num ber.
HOLD
3W AY
SERVICE
Di
alfrom the Redi
alLi
st
The Redi
alLi
ststores up to 20 l
atestdial
ed phone num bers,each one can be up to 32
digit
s. Num bers longerthan 32 di
git
s wil
lbe truncated with the first32 digits rem aining.
Each handsetorbase unitstores its own RedialLi
st.
REDIAL
↓=VIEW
num bers.
EXIT
Scrollto the desired num ber,and press a LINE key to
dialthe num ber.
REDIAL LIST
1234568
O.K.
EXIT
In Standby Mode,press [Redial]once to access the
redialli
st. Press [▼ ]to view the latest20 di
aled
DELETE
SAVE
Note:You m aydelete an individualrecord from the Redi
alLi
storenterthe record to the
Phone book directory. Scrollto the num ber you want. Press [DELETE]once and
“DELETED!” is di
spl
ayed to confirm the del
etion,orpress [SAVE]and “SAVED TO DIR!”
is di
spl
ayed to confirm the entry.
ADJUSTING HANDSET RECEIVER VOLUME
There are 4 receivervolum e level
s in the handset(s). Itcan be adj
usted bypressing
[▼ ]/[▲ ]during talk m ode orintercom m ode. (Also appl
ies to headsetoperation)
Note:The volum e wil
lreturn to level“3” afterthe cal
lifitis adjusted to level“4”. Ifthe
volum e i
s setto “1” to “3”,the levelwillrem ain unchanged afterthe call.
TO MUTE A CALL
L1 MUTE
00:11
3W AY
SERVICE
1234568
HOLD
W hile on a call, press [MUTE] to turn OFF the
m icrophone. The di
splaywillshow “MUTE” and the other
party willnothearyou. Press [MUTE]again to resum e
conversati
on and the “MUTE ” on the di
splay will
di
sappear.
30
BAS IC O PE RATIO N
USING HANDSET SPEAKERPHONE
To m ake a callorwhile on a call,press [Spk.]to turn the speakerphone ON and OFF.
The Speakerphone Li
ghtcom es ON when the speakerphone i
s in use.
INSTALLING AND USING HEADSET
W henevera com patible 2.5m m headseti
s pl
uged-in the jack l
ocated atthe side ofthe
handset,eitherbefore orduring a call,the audio signalwillbe diverted to the headset.
Unpl
ugging the headsetfrom the j
ack wi
llreturn the si
gnalto the handsetearpi
ece and
m icrophone i
m m edi
ately.
PAGING FROM BASE UNIT TO HANDSET
To locate the handset(s)whi
le noton the base unit,press [Int./Page]on the base unit
and “EXTENSION #:?” willappearon the screen. Press handsetnum ber1-8 ([]/[#]
forallhandset
s)and the paged handset(s)in the range wil
ldi
splay“PAGING FRO M
BASE”,and si
m ultaneouslyem itan al
ertsi
gnalthatis differentfrom others,e.g.
incom i
ng cal
l.
To stop a paging call,press [Int./Page]agai
n orpress [EXIT]on the handsetoron the
base unit. Ifno handsetanswers,the pagi
ng callwil
lautom aticallystop after30
seconds.
Note:The handsetbeing paged wi
llring even ifthe ringeri
s setto OFF.
31
ADVAN CE D O PE RATIO N
FLASH
Cal
lW ai
ti
ng
1.
2.
Use [Flash] for accessing Call W aiting service. For exam ple, if you receive a
second callduri
ng yourinitialcall,press [Flash]to swap to the waiting calland put
the initialcall
eron hold.
Afteryou fini
sh the conversation with the second call
er,press [Flash]to return to the
firstcall
er.
Note:Ifyou also have conference Three-W ayCalling service,press [Flash]to allow the
firstcall
erto enterinto a conference callwith you and the second cal
ler.
PAUSE
The [Pause]keyallows you to add a 3-second pause i
n a phone num bersequence
during pre-dial
ing orstori
ng num berin the Phone Book Directory.
Entera Pause i
n Di
al
i
ng Sequence
To add a pause,press [Redi
al/P]atthe desired position when you are creati
ng or
editing a phone num berand “P ” appears on the di
splay. Fora longerdelay,press
[Pause]additi
onaltim es.
Note:Rem em ber,the phone num beryou wish to store cannothave m ore than 32 digits,
including anypause. Each “P ” count
s as one digit.
HOLD
A callcan be puton hold duri
ng conversation to all
ow you to m ake a separate phone call
using the otherline orto be picked up byanotherhandset.
W hen engaged with an externall
ine on the handset,
press [HOLD]softkey.
L1 ON
HOLD
SERVICE
DIR.
DI
AL V.M
L1 HOLD
HS- 1
08:30AM 7/04
SAVE
SERVICE
MENU
W hen the line i
s on hold,“L1 HOLD” appears on the
handsetdi
spl
ay. The Line in use indicatorin the base
unitwil
lkeep flashing
DIR. DI
AL V.M
Note :The callcan be picked up bythe base unitoranyhandsetregi
stered to the sam e
base unitbypressing the corresponding LINE ke y..
32
AD VAN C E D OP E R AT ION
SENDING TONE SIGNALS IN PULSE DIALING MODE
Ifyourtelephone line uses pul
se di
ali
ng (such as fora rotarydialphone),you can
tem porari
lyoverride the Pulse Mode setting with the Tone Mode untilthe unitgoes
back on-hook. Thi
s m aybe necessaryto access certai
n speci
alservices such as
bank-by-phone services:
1.
Use pul
se dialing to callthe service.
3.
Follow the norm alprocedure forthe specialservice you are using. Any additional
num bers you dialare sentas tone si
gnal
s.
2.
4.
W hen the service answers,press [ ].
W hen you hang up,the telephone returns to pul
se m ode.
DIAL VOICE MAIL
Ifyou have subscribed to the Voice Mailand Message W aiting Indicatorservices,you
can access yourvoice m ai
lsystem by pressing [DIAL V.M.]. To use thi
s feature,you
m ustfirstprogram yourvoicem ailaccess num berinto the handsetand base unit.
Program yourown Voi
cem ai
laccess num ber
DIAL VOICE MAIL
----------EDI
T
Press the [DIAL V.M.] softkey.
Press the [EDIT] softkey,you willthen be prom pted to
“ENTER NUMBER :”.
EXI
T
ENTER NUMBER:
1234567_
EXIT
DELETE
Enteryouraccess num ber. Ifyou m ake a m i
stake,
press [DELETE] to erase the l
astdigitand re-enter.
Press [SAVE] to confirm program m ing.
You are now readyto use the Di
alvoi
cem ai
lkey.
SAVE
Usi
ng DIAL V.
M.softkey
DIAL VOICE MAIL
1234567
EDI
T
Press the softkey[DIAL V.M.].
num berwillbe di
splayed.
EXI
T
33
Your7-digitaccess
AD VAN C E D OP E R AT ION
L1 ON
00:01
1234567
Press a LINE key to dial. Follow the voice prom ptafter
the line i
s connected.
HOLD
3 WA Y
SERVICE
Im portantNote:
1. Beware anyone coul
d view yourvoice m ailPIN bypressi
ng your[DIAL V.M.] softkey.
2. Voice m ai
lsystem s operate differently and m ay require additi
onal pauses to be
entered.
DIAL BACK FROM CALLER ID LIST
See Cal
lBack from Call
erID Li
stin CALLER ID OPERATION fordetails. (See page
38)
DAILING FROM PHONE BOOK DIRECTORY
In standbym ode,press [DIR.] softkeyand then usi
ng [▼ ] /[▲ ] scrollthrough the
m em orycontents in alphabeticalorderto the nam e and num beryou want. Press [O.K.]
softkeyto callthe num ber.
Tip:To quicklyfind a nam e and phone num ber,press [DIR.] softkeyin standbym ode.
Keyin the firstletterofthe nam e,and scrollto the nam e you want.
34
AD VAN C E D OP E R AT ION
CONFERENCE CALL & 3 W AY CALLING
Yournew 2-line cordl
ess system support
s conference call
s up to 4 parti
es :
•
•
•
1 handset,the base unitand 1 externalcall;
1 handsetand/orthe base unitand 2 externalcall
s on a si
ngl
e line ;
1 handsetand/orthe base unitand 2 externalcall
s on differentli
nes;
Handsetand base uni
tconference cal
l
W hen engagi
ng an externall
ine on the handset,press
the Line keywith the in use i
ndicatorliton the base unit
to entera conference call.
L1 ON
HOLD
SERVICE
DIR.
DI
AL V.M
CONFERENCE
LINE1 0 1
.
“CONFERENCE”(orCONF in handset),Line num ber
and engaged handsetnum bers (0 stands forbase unit)
appearon the di
splays.
Press [Bye] on the base unitoron the handsetwillonly
end thatpartyfrom the call. To end the call,m ake
sure allparties have di
sconnected from the l
ine.
Note:
This phone system can all
ow you to conference ori
ntercom byusing the handsetand
base si
m ultaneously. Ifthe handsetis operated too close to the base unit,you m ay
experience feedback noi
se. Shoul
d thi
s occur,m ove the handsetawayfrom the
base unitand the feedback wi
llstop.
Si
ngl
el
i
ne conference cal
l(3 W aycal
l
i
ng)
W hile on a call,press [3W AY] softkey to access 3 W ay
Call
ing service. The system wil
ldialouta long Flash to
putthe initialcallon hol
d and obtain a new dialtone to
m ake a second call.
L1 ON
HOLD
SERVICE
L1 ON
00:30
DIR.
DI
AL V.M.
3456812
HOLD
Keyin the phone num berofthe second party. Afterthe
private conversation with the second cal
ler,press [3W AY]
softkeyto add the firstcall
erinto the conference call.
3W AY
SERVICE
Note:This tel
ephone support
s 3 waycalli
ng service provided byyourlocaltelephone
com pany. W hen the handseti
s engaged in 3-wayconference call,press the LINE
keyofthe in-use li
ne on the base unitto join the conference cal
l. W hen the 3-way
conference calli
si
nitiated from the base unit,pressing the handsetLINE keyofthe
in-use l
ine can al
so j
oin the 3-wayconference call. 3-wayCalling m ayrequire
subscripti
on from yourtelephone com panyorm aybe available on a charged use
basi
s.
35
AD VAN C E D OP E R AT ION
2 Li
ne conference cal
l
L1 HOLD
HS- 1
08:30AM 7/04
SAVE
SERVICE
MENU
DIR.
DI
AL V.M.
L1 HOLD L2 ON
00:35
3456812
HOLD
W hile on a call,press [HOLD] softkeyto putthe callon
hold.
Press [Line 2] to obtain a new dialtone to m ake a second
callusi
ng Li
ne 2.
Keyin the phone num berofthe second party.
3W AY
SERVICE.
CONF: 1
L1-L2
Afteryourprivate conversation with the second call
er,
press [Conf.] to add the calleron Line 1 into the
conference call.
CONF: 1 0
Press [Li
ne 1] or[Line 2] on the base unitto join the
conference call.
L1-L2
Note:Press anyLINE keyagain to end the conference butm aintain both call
s
separatelyon the handsetand the base unit,e.g. Press [Li
ne1] on handsetwi
llkeep Li
ne
1 with handsetand transferl
ine 2 to base unit.
To end both call
s,press [Bye] keyon the handsetand the base unit.
36
C AL LE R ID OP E R AT ION
ABOUT CALLER IDENTIFICATION
This telephone supports Call
erID service and Cal
lW aiting ID Option service provided by
yourlocaltelephone com pany. There m aybe a fee forthis service,and itm aynotbe
availabl
e in allareas. Thi
s phone can provide inform ati
on onlyifboth you and the cal
ler
are in areas offering Call
erID service,and ifboth tel
ephone com panies use com patible
equi
pm ent. Depending on yourservice,you willbe able to see the num ber,orthe
nam e and num berofyourcaller.
JOHN SMITH
L2
123-123-4568
11:00AM 1/01 #50 X1
O.K.
EXI
T DELETE
SAVE
Ifyou have CallerID service,the incom ing call
inform ation incl
udi
ng num berand nam e (ifavailable),the
calli
ng li
ne,tim e and date wil
lbe shown on the di
splay.
The phone wil
lal
so save the calli
nform ation in the Caller
ID List.
CALLER LIST
The Call
erLi
sti
s yourincom ing callhi
story. W hen a new Call
erID record arrives,itis
assigned a num berfrom #01 to #50. The m ostrecentrecord wi
llhave the lowest
num ber. W hen the Call
erLi
sti
s full,the oldestrecord i
s deleted to m ake room fornew
record,and allthe record num bers are shifted one num berhigher.
Mem oryMatch
Nam es stored i
n the Phone Book Directorywilloverride CallerNam e signalsentfrom
the telephone com pany. Forexam ple,ifyou store yourparent
s’telephone num ber
with theirnicknam e,“MO M AND DAD”,in m em ory,the CallerID di
splaywillshow
“MO M AND DAD”wheneveryou receive an incom ing callfrom theirphone num ber.
Revi
ew Call
erLi
st
50 CALLS ↓=VIEW
EXIT
DELETE
JOHN SMITH
123-123-4568
10:00AM 1/01 #01
O.K.
L2
X1
EXIT
Press [▼ ] /[▲ ] during standbym ode.
Press [▼ ] to show the latestrecord.
W hile reviewi
ng the CallerLi
st,press [SAVE] softkey to
copythe displayed record i
nto the Phone Book Directory.
DELETE
SAVE
37
C AL LE R ID OP E R AT ION
Delete Record(s) from Caller List
50 CALLS ↓=VIEW
EXIT
DELETE
JOHN SMITH
123-123-4568
10:00AM 1/01 #01
O.K.
L2
X1
EXIT
To delete all Caller I
D records:
Press [▼ ]/[▲ ]during standbym ode to enteri
nto Cal
ler
Li
stdefaultpage.
Press [DELETE]softkeyand “DELETE ALL?”is
di
spl
ayed,then press [O.K.]softkeyto confirm deleti
on.
To delete an individual Caller I
D record:
W hile reviewi
ng the CallerLi
st,press [DELETE]softkey
to erase the di
splayed record from the li
st.
DELETE
SAVE
Call Back from Caller List
Yourphone i
s equipped with three CallerID CallBack keys,which all
ow you to diala
Call
erID record in the correctform at.
JOHN SMITH
L2
123-123-4568
10:00AM 1/01 #01 X1
O.K.
EXIT
DELETE
SAVE
L1 ON
00:05
W hile you are reviewing the Cal
lLi
st,you can diala
di
spl
ayed num beri
n the correctform atbypressing [Dial
7],[Dial10]or[Di
al11]key,then press a LINE keyto dial.
Forinstance,ifa 10-di
gitphone num beri
s di
splayed and
you wantto callback in a 7-digitform at,you can si
m ply
press [Dial7]then a LINE keyto dialonlythe lastseven
digit
s ofthe num ber.
1234568
3W AY
SERVICE
Note:
[Dial7]: Dial
s onlythe lastseven digits ofthe num beryou are calli
ng,i.e.withoutan
area code.
[Dial10]: Dial
s all10 digits on the di
splay,i.e.3 digits ofarea code plus 7 digit
s of
phone num ber.
[Dial11]: Dial
s all10 digits on the di
splayplus autom aticallyinserts a “1”before the
area code.
Special Call Display
JOHN SMITH
L2
123-123-4568
LDC
10:00AM 1/01 #01 X1
O.K.
EXIT
Long Distance Call
W hen a long di
stance calli
s received,the [LDC]icon wi
ll
appearon the screen with the cal
linform ati
on.
DELETE
SAVE
38
C AL LE R ID OP E R AT ION
JOHN SMITH
123-123-4568
10:00AM 1/01 #01 X1
O.K.
EXIT
L2
DELETE
SAVE
JOHN SMITH
123-123-4568
10:00AM 1/01 #01 X6
O.K.
SAVE
EXIT
L2
DELETE
Forwarded Call
Ifthe callwas forwarded from anothernum berthrough
the callforwarding service provided bythe telephone
com pany,the
icon willappearon the screen with the
callinform ation.
Repeated Call
Ifa callis received from the sam e phone num berm ore
than once,the num beroftim es repeated wi
llbe shown
on the di
splay. Forexam ple,“x6”appears afterthe date
indicating the sam e num berhas been received sixtim es.
Call DisplayMessages
W hen a new CallerID record arrives with incom pl
ete callinform ati
on,the foll
owi
ng call
di
spl
ay m essages wil
l be shown. The m essages m ay accom pany, if available, an
actualnam e oran actualnum ber.
1. “PRIVATE NAME”– The otherpartyis blocking nam e i
nform ation.
2. “PRIVATE NUM”– The otherpartyis blocking telephone num berinform ati
on.
3. “UNKNOW N NAME”– Caller’
s nam e i
s notavailable.
4. “UNKNOW N NUM ”– Caller’
s num beri
s notavailable.
The situations forcal
ldi
splaym essages m ayinclude,butare notli
m ited to,the
following reasons:
1. The Call
erID was blocked forprivacyreasons.
2. The callorigi
nates from an area office ora long-di
stance service providerthatdoes
notsupportCallerID service.
3. The calli
s m ade with a cal
ling card.
4. The calli
s an operator-assi
sted call.
VOI
CE ANNOUNCE CALLER I
D
Yourphone can announce a caller’
s nam e ornum berthrough the speakerin the base
unit. You don’teven have to look atthe displayto know who i
s calli
ng.
You can record in yourown voice a 3-second m essage,such as “John Sm ith”or“It’s
Mom and Dad”,to associate with callernum beri
n yourphone book directory(see
Recording Voice Announce Nam e section in PHONE BOOK DIRECTORY fordetails).
W hen you receive a callfrom a num berm atching one stored i
n yourdirectory,the base
unitwil
lsaythe recorded nam e instead ofthe telephone num berto hel
p identifycalls.
The defaultsetting forVoice Announce CallerNam e i
s ON atsound level3 and Voice
Announce CallerNum beri
s OFF. The currentsettings provide you the convenience
thatonce yourm essage i
s recorded the Voice Announce CallerNam e wi
llbe i
n effect
im m edi
ately. To change the settings,pl
ease see Audible Call
erID secti
on in MANUAL
SETTINGS section (Page 27)fordetail
s.
Ifyou activated the Voice Announce Cal
lerNum ber,“Blocked Call”willbe em itted to
alertyou the incom ing callfrom anonym ous/private callerwho have blocked hi
s/her
num ber,and “Unknown Call”willbe em itted when UNKNOW N NUMBER is received.
39
C AL LE R ID OP E R AT ION
CALL W AI
TI
NG ID OPTIONS
Ifyou have subscribed the CallW aiti
ng and Cal
lW aiting ID Options from yourlocal
telephone com pany,you willheara Cal
lW aiti
ng tone when a new callcom es in while
you are talking. You can eitherswap between call
s ordi
spose ofthe cal
l.
Call W aiting ID Options Set to OFF (see page 24)
JOHN SMITH
123-123-4568
10:00AM 1/01
ANS
L2 ON
L2
X1
You can also press [Flash]to switch between cal
l
s.
F
00:05
Ifthere is an incom ing callduring a conversation,the
Call
erID CallW aiting i
nform ation appears on the di
spl
ay.
Press [ANS]softkeyto answerthe CallW aiti
ng partyand
putthe firstcallon hol
d.
HOLD
3W AY
SERVICE
Call W aiting ID Options Set to ON (see page 24)
JOHN SMITH
123-123-4568
10:00AM 1/01
J OI N
D R OP A N S
H O LD
X1
S A Y B US Y S EN D V.M.
Ifthere is an incom ing callduring a conversation,al
lthe
five label
s forCallW aiting ID Option features wil
lbe
autom aticallyshown on the di
spl
ay.
W hen you hearthe Cal
lW aiting tone,press the
correspondi
ng softkeyto applya disposition to the call.
L2 ON
00:05
L2
HOLD
3W AY
SERVICE
Note:
You m ustdi
sposition the callwithin 26 seconds ofthe Cal
lW aiting tone. The
following options are available.
[JOI
N]:
Add the waiting cal
lto yourfirstcall.
[DROP ANS]: End the firstcal
land answerthe waiting call.
[HOLD]:
Place the waiting callon hold and send a hold announcem ent.
[SAY BUSY]: Playa pre-recorded m essage from yourphone com panythatthe line
is busyand end the waiting call.
[SEND V.
M.
]: Forward the waiting callto yourvoice m ailoranswering service.
Tip: CallW aiting ID Options m aynotbe available i
n allareas. Contactyourlocal
telephone com panyfordetail
s.
40
C AL LE R ID OP E R AT ION
Call Waiting ID Option: JOIN
JOHN SMITH
123-123-4568
10:00AM 1/01
D R OP
L1
X1
If[JOIN]softkey is pressed,“CONFERENCE”wi
llbe
di
spl
ayed fora shortwhile and then the waiting partyis
being added to the originalcallas a 3-parties conference
call.
Afterthe 3-parties conference cal
l,you m ayselectto drop a l
ine and retain the other:
DROPPED #1
•
00:05
•
3W AY
To drop the firstcall
er(the originalcall),press [DROP]
softkeyand “DROPPED #1”willbe di
splayed.
To drop the second cal
ler(the waiting call),press
[Flash]and “DROPPED #2”willbe di
splayed.
SERVICE
Call Waiting ID Option: HOLD
JOHN SMITH
123-123-4568
10:00AM 1/01
J OI N
D R OP
L1
X1
If[HOLD]softkey is pressed,“HOLD”wil
lbe di
splayed.
A hold announcem entwi
llbe sentand the waiting callwill
be placed on hold.
Afterthe private conversation with the origi
nalcaller,you m ayselectto drop the origi
nal
calland take the waiti
ng cal
lorto add the waiting callerinto the callconference.
L1 ON
00:05
3W AY
SERVICE
•
HOLD
•
To drop the talki
ng li
ne and answerthe waiti
ng cal
l,
press [DROP]softkey.
To add the waiting calleri
nto the calland form a
3-partyconference cal
l,press [JOIN]softkey. For
furtherdi
sposition ofthe 3-partycallconference,refer
to Call Waiting ID Option: JOIN section above.
41
P H ON E B OOK D IR E CT ORY
Yourphone has a Phone Book Directoryforstoring up to 50 i
m portantnam es and
telephone num bers. Each m em orycan store 32 digits and 15 characters. You can
editthe Phone Book Directoryrecords,butnotthe Call
erID Li
strecords. The Directory
records are saved in alphabeticalorder. The Phone Book Directorycan be accessed
bypressing [DIR.]softkeyduring standbym ode.
CREATING A PHONE BOOK DIRECTORY RECORD
Copyfrom a CallerID Num ber
JOHN SMITH
123-123-4568
10:00AM 1/01 #01
O.K.
X1
EXIT
lerID reviewing,selectthe valid record you
↓ During Cal
wantto save as a Phone Book Directoryrecord.
DELETE
SAVE
SAVED TO DIR!
Press [SAVE]softkeyand “SAVED TO DIR!”is shown on
the di
spl
ayto confirm the entry.
Note: Ifthe m em orylocations are full,the m essage “LIST
FULL”wil
lappearand yourrequesti
s rejected.
RECORD ?
Ifthis is done on the base unit,the displ
aywillthen
prom ptyou to record a nam e forVoice Announce to
associate with the copi
ed cal
lerID num berafter2
seconds. Ifyou wantto record a nam e forVoice
Announce,see nextsection. Orpress [EXIT]softkeyto
decli
ne nam e recording.
1231234568
O.K.
EXIT
Add a New Num ber/
Nam e
Press [DIR.]during standbym ode.“NO ITEM”appears if
no records i
n the directory,or“20 ITEMS ↓=VIEW ”
appears ifthere i
s 20 records in the directory. Ifthe
m em orylocations are ful
l,the m essage “LIST FULL”wi
ll
appearand yourrequestis rejected.
NO ITEM
EXIT
SAVE
USE SAVE=CREATE
After3 seconds,“USE SAVE=CREATE”appears on the
di
spl
ay.
EXIT
SAVE
ENTER NUMBER:
12312_
O.K. EXIT
DELETE
Press [SAVE].Enterthe num ber.
Tip:1.Press [Pause]to add a 3-second del
ay(pause)
in the num berfield. P i
s di
splayed.
2.Press [Flash]to add a flash i
n the num berfield.
F is di
splayed.
42
P H ON E B OOK DIRE CTORY
Afternum berentry,press [O.K.]softkeyand “_NAME”is
di
spl
ayed.
_NAME
1231234567
EXIT
DELETE
SAVE
Use the digitkeys to enterthe nam e. Ifyou m ake a
mi
stake,press [DELETE]softkeyand re-enter. W hen
fini
shed,press [SAVE]softkey.
JOHN SMITH_
1231234567
EXIT
DELETE
SAVE
SAVED TO DIR!
You willsee “SAVED TO DIR!”on the displayto confirm
the entry.
RECORD ?
Ifthis is done on the base unit,the di
spl
aywillprom pt
you to record a nam e forVoice Announce to associate
with the di
splayed phone num berafter2 seconds. If
you wantto record a nam e forVoice Announce,see next
secti
on. Orpress [EXIT]to decline nam e recording.
1231234567
O.K.
EXI
T
Entering Alphanumeric Characters:
Each num eric keyis assigned a setofletters and sym bol
s as pri
nted on the key. Press
the correspondi
ng num berunti
lthe desired letteri
s di
splayed.
Num eric:
1
2
3
4
5
6
7
8
9
0
Characters: Space A,B,C D,E,F G,H,I J,K,L M,N,O P,Q,R,S T,U,V W ,X,Y,Z
Adding Special Symbols
You can also use []or[#]to insertthe following speci
alsym bol
s in the nam e field.
+ , - . /@ :;< = > ?{¦}~ [ \ ]^ _`!″ # $ % & ´ ( )
RECORDING VOICE ANNOUNCE NAM E
You can record up to 25 names in your own voice and associate them to the records in
your phone book directory. W hen the phone rings from any ofthes e num bers ,the
recorded nam e is announced ins tead ofthe number.
RECORD ?
1231234567
O.K.
EXIT
After a num ber and nam e is entered,you wills ee
“SAVED TO DIR!”and the dis play willprompt you to
record a name for Voice Announce to ass ociate with the
dis pl
ayed phone num ber after 2 s econds .
Note: Ifyou enter a num ber that is already exis ted in
the directory,“RE-RECORD?”willbe dis pl
ayed.
43
P H ON E B OOK DIRE CTORY
SPEAK AFTER TONE Press [O.K.]s oftkey and “SPEAK AFTER TONE”will
appear on the display. W ait for the “Beep”and then s ay
clearly the word(s )you want to record.
EXIT
You willhave 3 s econds for recording. You can s ave
your m ess age by press ing [SAVE]s oftkey right after you
finis hed,or your m ess age wil
lbe s aved autom atically
after you hear the “Beep”.
REC TIME:03
EXIT
SAVE
After recording,the phone plays the recorded m essage.
W hen finis hed,press [EXIT]s oftkey.
PLAYING
1231234567
EDIT
EXI
T
SPEAK AFTER TONE Ifyou want to re-record it,press [EDIT]s oftkey during
m essage playing. “SPEAK AFTER TONE”is dis pl
ayed,
wait for the “beep”and then repeat the previous s teps .
EXIT
REVIEW ING PHONE BOOK DIRECTORY
50 ITEMS ↓=VIEW
EXIT
SAVE
123-123-4568
O.K.
DELETE
↓ Press [▼ ]/[▲ ]to review the Directory in alphabetical
order. Ifa caller’
s nam e has been recorded,it willbe
played.
JOHN SMITH
EDIT
Press [DIR.]s oftkey during s tandby m ode.
EXI
T
DELETE
SAVE
Tip:To quickly find a nam e and phone num ber,press [DIR.]in s tandby m ode. Key in
the firs t letter ofthe nam e,and the dis play willjump to the firs t record s tarting with that
letter.
44
P H ON E B OOK DIRE CTORY
EDITING A PHONE BOOK NUMBER
↓ Select the record you want to edit.
The recorded nam e willbe played back ins tead ifthere
was call
er nam e being recorded.
JOHN SMITH
1231234568
EDIT
O.K.
EXI
T
DELETE
SAVE
PLAYING
1231234568
EDIT
O.K.
EXI
T
DELETE
ENTER NUMBER:
1231234568_
O.K.
EXIT
DELETE
JOHN SMITH_
1231234568
EXIT
SAVE
JOHNNY SMITH
1231234568
EDIT
O.K.
EXI
T
DELETE
Press [EDIT]s oftkey during pl
ayback to re-record the
m essage (see las t s ection for detail
s ),or press [DELETE]
s oftkey during playback to remove the recorded nam e.
The dis pl
ay s hows “VOICE DELETED !”to confirm the
deletion.
W hen you s ee the record you want to edit dis played,
press [EDIT]s oftkey and then edit the num ber. Press
[DELETE]s oftkey to rem ove any error and enter the
correction as needed. Press [O.K.]s oftkey to confirm
the edited num ber.
Repeat the process for [NAME]. Press [SAVE]and
“SAVE TO DIR!”appears on the dis pl
ay. Press [O.K.]if
you want to re-record the Voice Announce Nam e as well,
or press [EXIT]to finis h.
ay the edited entry.
↓ W hen finis hed,the s creen willdis pl
DELETE
SAVE
DELETING AN ENTRY FROM A PHONE BOOK DIRECTORY
JOHN SMITH
123-123-4568
EDIT
O.K.
SAVE
DELETED!
EXI
T
↓ Scrollto the record to be deleted.
Ifa Voice Announce Nam e was recorded,wait untilthe
playback is finis hed and the record you want to delete is
dis pl
ayed.
DELETE
Press [DELETE]and you wil
lsee “DELETED!”on the
dis pl
ay to confirm the del
etion ofthe current record.
The phone wil
lthen m ove to the next a vailable record in
the directory. Press [EXIT]to return to s tandby m ode.
45
P H ON E B OOK DIRE CTORY
DELETING ALL PHONE BOOK DIRECTORY RECORDS
20 ITEM ↓=VIEW
EXIT
SAVE
DELETE ALL?
O.K.
Press [DIR.]s oftkey to enter into Phone Book Directory
default page.
DELETE
Press [DELETE]softkey and “DELETE ALL?”is
dis pl
ayed. To confirm the del
etion ofal
lrecords ,press
[O.K.]. To e xit without deleting,press [EXIT].
EXI
T
DIALING FROM THE PHONE BOOK DIRECTORY
During s tand-by m ode,press [DIR.]and find the entry you want to call. Press a LINE
key to callthe num ber.
46
M U LTI- H AN DSET OP E RATION
Your new phone provides a m ultiple handset capability that s upports up to 8 hands ets .
Each additionalhands et com es with a charging cradle you can plug into any electrical
outlet. No extra phone j
ack is required. Intercom or cal
ltransferbetween hands ets
becom es poss ible when there is m ore than one handset in your s ys tem . Regis ter the
additionalhands ets (CY-371)see page 16.
It is poss ible to make an intercom cal
lbetween two hands ets while another hands et is
engaging the externalline
INTERCOM
The bas e unit ofBS-373 can s upport up to 4 groups ofintercom conversation and an
externalcalls im ultaneous ly ifyou have 8 hands ets in your s ys tem .
Handset-to-Hands et two-way intercom is operated independent ofthe bas e unit.
EXTENSION #:?
W hen a Hands et is in s tandby m ode,press [Int.],LCD
dis pl
ay s hows “EXTENSION #:?”
EXIT
Key-in the num ber ofthe handset (1,2… 8)or base unit (0)
you want to call. For ins tance,ifHandset #2 is being
paged,LCD display s hows “PAGING #2”
PAGING #2
EXIT
PAGING FROM #1
EXIT
The handset being call
ed willring and the dis pl
ay
s hows “PAGING FRO M # 1”.
Press [Int.]on the called handset to answer the
intercom .
Press [EXIT]s oftkey to term inate the intercom .
Note:
This phone s ys tem can all
ow you to conference or intercom by us ing the hands et and
bas e s im ultaneous ly. Ifthe handset is operated too clos e to the bas e unit,you m ay
experience feedback nois e. Shoul
d this occur,move the hands et away from the
bas e unit and the feedback wills top.
47
M U LTI- H AN DSET OP E RATION
CALL TRANSFER
Your new cordless s ys tem al
lows you to trans fer call
s from Bas e to Hands et,Handset to
Handset,or Hands et to Bas e.
EXTENSION #:?
EXIT
.
INVALID NUMBER
W hen the hands et is engaged in an externalcal
lin
Line1,press [Int.]and followed by the num ber ofthe
handset (1-8 or 0 for bas e unit)you want to trans fer the
callto.
Ifyou are entering an unregis tered hands et num ber,
“INVALID NUMBER”is display and you need to repeat
the above s teps .
EXIT
TRANSFER FROM
L1
EXIT
L1 ON
00:07
HOLD
Ifyou did this from HS1 to HS2 then HS2 rings and
“TRANSFER FRO M L1”appear on the display. Press
[Line1]on the called hands et to pick up.
Ifthe handset you called does not ans wer in 20 s econds ,
the unanswered callwillring back to you again.
Press Line 1 to pick up the cal
lagain,or the line willbe
released automatical
ly after 20 s econds ifnot taken
up.
3W AY
SERVICE
48
OPT ION A L FE AT U R E S D IAL L IS T
You phone has been pre-programm ed at the factory with an optionals ervices diallis t.
DISPLAY
CLASS SERVICE
CALL RETURN
REPEAT DIAL ON
REPEAT DIAL OFF
CANCEL CW
RING CONTROL
BLOCKER ON
BLOCKER OFF
BLOCK CALL
3W AY
CALL FW D ON
CALL FW D O FF
Acti vate CallReturn
Activate RepeatDial
ing
CancelRepeatDialing
CancelCal
lW aiting
Message Ring Control
Activate RejectPrivate Call
CancelRej
ectPrivate Call
Activate Private Call
Three W ayCalling
Activate CallForwardi
ng
CancelCal
lForwarding
DIAL CODE
69
66
86
70
47
77
87
60
Flash
72#
73#
Note:
These optionalservices are accessible onlyifyou subscri
be from yourlocaltelephone
com pany.
DIALING SERVICES
50 NEW CALLS
HS-1
10:05AM 05/03
SAVE SERVICE
MENU
DIR.
DIAL V.M.
CALL RETURN
├69
O.K.
EXIT
CANCEL CW
├70
O.K.
L1 ON
00:05
3W AY
EXIT
├70
HOLD
During standbym ode,press [SERVICE]softkey.
“CALL RETURN ├ 69 ”willbe shown on the di
splay.
Press scrollkeys [▼ ]/[▲ ]repeatedlyto selectthe
optionalservice you wish to activate.
Forinstance,ifyou wantto CancelCallW aiting,press
[O.K.]softkeywhen you see “CANCEL CW ├ 70”
di
spl
ays on the screen.
The dialcode wi
llbe shown on the di
splay. W hen you
can heara second dial
ing tone,the code i
s accepted.
Press [Talk]on the handsetorreturn itto the cradl
e to
hang up.
SERVICE
49
AD D IT ION A L IN FOR M AT ION
CAPACITY
Mem ory
The Call
erID Li
st:50 m em orylocations;24 di
git
s and 15 characters perl
ocation.
Phone Book Directory:50 m em orylocations;32 di
git
s and 15 characters perl
ocation.
Voice Announce Cal
lerNam e:25 m em orylocations;3 seconds perlocation.
Redi
alLi
st:20 m em orylocations;32 digits perlocati
on.
Cal
lRepeatNum ber
The CallRepeatnum beri
s 7 m axi
m um .
OUT OF RANGE
Ifthe handsetcannotcom m unicate with the base unitorthe handsetis too faraway
from the base duri
ng a conversation and the RF signali
s notpresent,the m essage
“OUT OF RANGE”willappearon the di
spl
ay.
NO CONNECTION
Ifthe handsetcannotconnectto the base unitwhen m aki
ng a cal
l,the m essage “NO
CONNECTION”appears on the di
splayfor2 seconds,and then returns to stand-by
m ode.
50
T R OU BLE S HOOT IN G
Before call
ing forservice,please check thi
s li
stofthe m ostcom m on problem s.
Probl
em
The phone does notwork
Check
Are the LINE CORD and AC adapterconnected properly?
Is the handsettoo farawayfrom the base unit?
Is the batterypack weak? Charge the batteryon the base
unitforabout15 hours.
The phone does notring
Check the RINGER setting.
Cannotdial
Do you have touch-tone service?
The audi
o sounds scratchy
Is the base unitlocated nextto m etalobj
ects or
appl
iances? Tryrelocation.
CALLER ID doesn’twork
Do you have CALLER ID service?
No call
er’
s nam e
Does the CALLER ID service to which you subscribed
include the CALLING NAME DELIVERY feature?
Check the TONE/PULSE setting.
You cannothearorbe heard Increase the handsetreceivervolum e.
clearly
Call
er’
s inform ati
on i
s not
regi
stered
Did you oryouranswering m achi
ne answercal
l
s before
the second ri
ng?
Interference from wireless
networki
ng device
Change the location ofthe wireless networki
ng device
and/orthe base ofthe cordless phone.
Switch the channelon the wireless networking device.
Please referto the m anualofyourwirel
ess networking
device,orconsulta qualified technician on how to switch
the channel. Foropti
m um result,switch to a m id transm it
range channel,(e.g.channel6 at2.437GHz).
SAVE THESE INSTRUCTIONS.
51
CAR E AN D M A IN T E N AN CE
The following suggesti
ons wi
llhelp you care forthe system so you can enj
oyitforyears.
Keep the system dry.Ifitgets wet,wipe itdry im m ediately.Liquids m ight contain m i
neral
s that can corrode the electronic
circuit
s.
Use and store the system only in norm al tem perature environm ent
s. Tem perature extrem es can shorten the life of
electronic devices,and di
stortorm eltpl
astic part
s.
Handle the system gently and carefully. Dropping it can
dam age circuitboards and cases and can cause the system to
work i
m properly.
Keep the system away from excessive dustand dirt,which can
cause prem ature partwear.
W ipe the system with a dam p cloth occasional
ly to keep it
looki
ng new.Do notuse harsh chem ical
s,cleaning solvents,or
strong detergent
s to clean the system .
Modi
fyi
ng or tam peri
ng wi
th the system ’
si
nternal com ponents can cause a
m al
functi
on and m ight i
nval
i
date the system ’
s warranty and voi
d your FCC
authori
zati
on to operate i
t.
52
FCC R E Q U IR E M E N T S
This equi
pm entcom plies with Part68 ofFCC rul
es and the requirem ents adopted bythe
ACTA. On the b ottom ofthis equipm enti
s a labelthatcontai
ns,am ong other
inform ation,a producti
dentifi
erin the form atUS:CACW400B373001. Ifrequested,thi
s
num berm ustbe provided to the telephone com pany.
The REN i
s used to determ ine the num ber of devices that m ay be connected to a
telephone li
ne. Excessive RENs on a telephone li
ne m ay resultin the devices not
ringi
ng in response to an incom ing cal
l. In m ostbutnotallareas,the sum ofthe RENs
shoul
d notexceed five (5.0). To be certain of the num ber of devices thatm ay be
connected to a line, as determ ined by the total RENs, contact the local telephone
com pany. [Forproduct
s approved afterJuly 23,2001,the REN forthi
s producti
s part
of the product identifier that has the form at US:CACW400B373001. The digit
s
represented by 00B are the REN withouta deci
m alpoi
nt(e.g.,03B i
s a REN of0.3B).
Forearlierproduct
s,the REN i
s separatelyshown on the label.]
Shoul
d you experience trouble with thi
s equi
pm ent,please callBell
south at:
1-800-733-2355
forrepairorwarranty inform ation. Ifthe equipm entis causing harm to the telephone
network,the telephone com pany m ay requestthatyou disconnectthe equipm entuntil
the probl
em i
s resolved.
NOTICE:Ifyourhom e has speci
allywired alarm equipm entconnected to the telephone
line,ensure the install
ation ofthi
s equi
pm entID does notdi
sable youralarm equipm ent.
Ifyou have questi
ons aboutwhatwi
lldi
sabl
e alarm equipm ent,consultyourtelephone
com panyora qual
ified i
nstall
er.
Ifyourequipm entshould cause harm to the telephone network,the telephone com pany
m ay tem porarily disconnectyour service. Ifpossible,they willnotify you in advance
thattem porarydiscontinuance ofservice m aybe required.
However,when advance written notice is notpossible,the telephone com pany m ay
tem porari
ly discontinue service without notice ifsuch action i
s necessary under the
circum stances.
The telephone com pany m ay m ake changes i
n its com m unication faciliti
es,equipm ent,
operati
ons,orprocedures where such acti
on i
s reasonably required in the operation of
its business and i
s not inconsi
stent with the rul
es and regulati
ons of the Federal
Com m unications Com m i
ssion.
53
FCC R E Q U IR E M E N T S
Do notattem ptto repai
ror m odi
fy thi
s equipm ent. Changes orm odifications not
expressly approved by the party responsi
ble for it
s com pl
iance coul
d void the user’
s
authorityto operate the equipm ent.
This equipm entshould notbe used on coin telephone li
nes. Connection to party line
services i
s subj
ectto state tariffs. Iftrouble i
s experienced,di
sconnectthi
s equi
pm ent
from the telephone line to determ i
ne ifitis causi
ng the m alfuncti
on. Ifthe equipm entis
determ ined to be m alfunctioning,it
s use shoul
d be di
sconti
nued untilthe problem has
been corrected.
CurrentFCC regul
ations specifythatanydirectconnections to a telephone com panyline
be done using only standard phone jacks USOC RJ11C /RJ14C and pl
ugs thatare
TIA-968-A com pli
ant.
Note
This equipm enthas been tested and found to com plywith the lim it
s fora Class B digital
device,pursuantto Part15 ofthe FCC Rules. These li
m its are designed to provide
reasonabl
e protecti
on against harm ful i
nterference in a resi
dential installati
on. Thi
s
equi
pm entgenerates,uses,and can radiate radi
o frequencyenergyand,ifnotinstall
ed
and used i
n accordance with the instructi
ons,m ay cause harm fulinterference to radio
com m unications. However,there is no guarantee thatinterference willnotoccurin a
particul
ar install
ation. Ifthis equipm entdoes cause harm fulinterference to radio or
televisi
on reception,which can be determ i
ned by turning the equi
pm entoffand on,the
user i
s encouraged to try to correctthe interference by one or m ore ofthe foll
owi
ng
m easures:
1. Reori
entorrelocate the receiving antenna.
2. Increase the separation between the equipm entand receiver.
3. Connectthe equipm enti
nto an outleton a circuitdifferentfrom thatto which the
receiveris connected.
4. Consultthe deal
eroran experienced radio /TV technician forhelp.
NOTI
CE TO HEARI
NG AI
D WEARERS: Thi
s tel
ephone has been regi
stered wi
th the
FCC as heari
ng ai
d com pati
bl
e.
W arni
ng:Changes or m odi
fi
cati
ons to thi
s uni
t not expressl
y approved by the
party responsi
bl
e for com pl
i
ance could voi
d the user’
s authori
ty to operate the
equi
pm ent.
Cauti
on:To m ai
ntai
n com pl
i
ance wi
th the FCC’
s RF exposure guidel
i
nes pl
ace the
base uni
tatl
east20 cm from nearbypersons.
54
W AR R AN T Y
Q & A:
W HAT DOES OUR W ARRANTY COVER?
• Anydef
ectin m aterialorworkm anshi
p.
FOR HOW LONG AFTER THE ORIGINAL PURCHASE?
• To t
he originalpurchaseronly- ONE YEAR.
W HAT W ILL BELLSOUTH DO?
•
Atouroption,repairorrepl
ace yourunit.
HOW DO I SEND M Y UNIT,IN OR OUT OF W ARRANTY?
• I
n the U.S.,callCustom erService forReturn Authorization at:1-800-733-2355.
• Pr
operlypack yourunit. Include anycables and accessories which were ori
ginally
provided with the product. W e recom m end usi
ng the ori
ginalcarton and packi
ng
m aterial
s.
• I
nclude in the package a copyofthe sal
es receiptorotherevidence ofdate ofori
ginal
purchase (ifthe unitwas purchased withi
n the lasttwelve m onths).
• Pr
intyournam e and address,along with a descripti
on ofthe defect,and incl
ude thi
s
in the package.
• I
nclude paym entforanyservice orrepairnotcovered bywarranty,as determ i
ned by
BellSouth.
W HAT DOES OUR W ARRANTY NOT COVER?
• Bat
teries
• Dam age f
rom m i
suse,neglect,oract
s ofnature (lightning,floods,powersurges,etc.)
• Pr
oduct
s which m ayhave been m odified orincorporated into otherproduct
s.
• Pr
oduct
s purchased and/oroperated outside the USA,its territories,orCanada.
• Pr
oduct
s serviced bythe ownerora service facilitynotexpresslyauthorizes by
BellSouth.
• Pr
oduct
s purchased m ore than 12 m onths from currentdate.
• Uni
t
s purchased i
n "AS IS"condition,orunit
s purchased as "Di
stressed
Merchandi
se".
HOW DOES STATE LAW OR PROVINCIAL LAW RELATE TO THIS W ARRANTY?
• Thi
s warrantygives you specific right
s. You m ayal
so have otherrights which vary
from state to state orprovince to province.
55
W ALL M OU N T IN G T E M P L AT E
Attach two screws to the wallsurface using this tem plate. Once attached,carefully
push yourunitonto the screws and sli
de down unti
litis secured.
•
56
N OT E
57