1
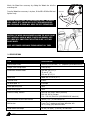
TM
www.arbor tech.com.au
AS160
Brick + Mortar Saw
Instruction Manual
Double Insulation used throughout,
no provision for earthing.
MADE IN AUSTRALIA
REV-130607
Please read this manual carefully to ensure correct operation and care of the machine. If
you use the AS160 correctly, it will provide you with years of reliable service and save you
time and money.
TABLE OF CONTENTS
1. INTRODUCTION
Page
2
2. GENERAL SAFETY RULES
2-4
3. SPECIFIC SAFETY RULES
5
4. FUNCTIONAL DESCRIPTION
6
4.1 Tool Description
6
4.2 Blade Description
6
5. ASSEMBLY
7-8
6. OPERATION
6.1 Setup
6.2 Operation
9
10-11
7. MAINTENANCE
7.1 Motor
12
7.2 Brushes
12
7.3 V-Belt and Pulleys
13
7.4 Blade Mount Bolts and Threads
13
7.5 Top Handle and Rubber Bushes
14
7.6 Tooth Sharpness
14-15
8. ACCESSORIES
8.1 Dust Extraction
8.2 Wood Blade and Wood Jaw
16
16-17
9. SPECIFICATIONS
17
10. MATERIALS GUIDE
18
11. TROUBLESHOOTING
12. WARRANTY AND SERVICE
Please read these instructions before you use your
AS160 Brick + Mortar Saw
19-20
21
1. INTRODUCTION
The Arbortech AS160 is designed and manufactured in Australia, using only the highest quality components and
manufacturing processes.
The unique patented orbital cutting action of two reciprocating blades, allows cutting of brick, mortar and
masonry (see material specifications, table 3) faster than traditional reciprocating saws.
This cutting action also produces minimal amounts of airborne dust, offers safe and controllable operation, has
the ability to "plunge" cut to 120mm (5”) depth, and into square corners, and make variable width cuts. The AS160
is ideally suited to a variety of tasks including:
• removal of mortar for "tuck pointing" of bricks.
• removal of single bricks from walls.
• cutting of bricks without damage to adjacent areas or “blow-out”.
• stitching, keying or toothing of brick walls.
• "chasing" cuts for conduits and similar items into walls.
• cutting holes in walls or other surfaces.
• finishing corner cuts in walls.
• cutting in dirty wood.
• cutting wood in the ground.
• tree root removal.
• pruning trees.
The tool can be fitted with a range of blades to best suit different applications.
IMPORTANT
INCORRECT USE OF THE AS160 MAY LEAD TO PREMATURE WEAR AND/OR DAMAGE.
PLEASE READ THESE USER INSTRUCTIONS FULLY BEFORE
USE TO ENSURE CORRECT OPERATION.
2. GENERAL SAFETY RULES
WARNING! Read all instructions. Failure to follow all instructions listed below, may result in
electric shock, fire and/or serious personal injury. The term "power tool" in all of the warnings listed below refers
to your mains-operated (corded) power tool or battery-operated (cordless) power tool.
SAVE THESE INSTRUCTIONS
1) Work area
a) Keep work area clean and well lit. Cluttered and dark areas invite accidents.
b) Do not operate power tools in explosive atmospheres, such as in the presence of flammable
liquids, gases or dust. Power tools create sparks which may ignite the dust or fumes.
2
AS160
GENERAL SAFETY RULES CONTINUED
c) Keep children and bystanders away while operating a power tool. Distractions can cause you
to lose control
2) Electrical safety
a) Power tool plugs must match the outlet. Never modify the plug in any way. Do not use any
adapter plugs with earthed (grounded) power tools. Unmodified plugs and matching outlets will
reduce risk of electric shock
b) Avoid body contact with earthed or grounded surfaces such as pipes, radiators, ranges and
refrigerators. There is an increased risk of electric shock if your body is earthed or grounded.
c) Do not expose power tools to rain or wet conditions. Water entering a power tool will increase
the risk of electric shock.
d) Do not abuse the cord. Never use the cord for carrying, pulling or unplugging the power tool.
Keep cord away from heat, oil, sharp edges or moving parts. Damaged or entangled cords increase
the risk of electric shock.
e) When operating a power tool outdoors, use an extension cord suitable for outdoor use. Use of
a cord suitable for outdoor use reduces the risk of electric shock.
3) Personal safety
a) Stay alert, watch what you are doing and use common sense when operating a power tool. Do
not use a power tool while you are tired or under the influence of drugs, alcohol or medication.
A moment of inattention while operating power tools may result in serious personal injury.
b) Use safety equipment. Always wear eye protection. Safety equipment such as dust mask, nonskid safety shoes, hard hat, or hearing protection used for appropriate conditions will reduce
personal injuries.
c) Avoid accidental starting. Ensure the switch is in the off-position before plugging in. Carrying
power tools with your finger on the switch or plugging in power tools that have the switch on invites
accidents.
d) Remove any adjusting key or wrench before turning the power tool on. A wrench or a key left
attached to a rotating part of the power tool may result in personal injury.
e) Do not overreach. Keep proper footing and balance at all times. This enables better control of
the power tool in unexpected situations.
f) Dress properly. Do not wear loose clothing or jewellery. Keep your hair, clothing and gloves
away from moving parts. Loose clothes, jewellery or long hair can be caught in moving parts.
g) If devices are provided for the connection of dust extraction and collection facilities, ensure
these are connected and properly used. Use of these devices can reduce dust-related hazards.
AS160
3
GENERAL SAFETY RULES CONTINUED
4) Power tool use and care
a) Do not force the power tool. Use the correct power tool for your application. The correct power
tool will do the job better and safer at the rate for which it was designed.
b) Do not use the power tool if the switch does not turn it on and off. Any power tool that cannot
be controlled with the switch is dangerous and must be repaired.
c) Disconnect the plug from the power source and/or the battery pack from the power tool before
making any adjustments, changing accessories, or storing power tools. Such preventive safety
measures reduce the risk of starting the power tool accidentally.
d) Store idle power tools out of the reach of children and do not allow persons unfamiliar with
the power tool or these instructions to operate the power tool. Power tools are dangerous in the
hands of untrained users.
e) Maintain power tools. Check for misalignment or binding of moving parts, breakage of parts
and any other condition that may affect the power tools operation. If damaged, have the power
tool repaired before use. Many accidents are caused by poorly maintained power tools.
f) Keep cutting tools sharp and clean. Properly maintained cutting tools with sharp cutting edges
are less likely to bind and are easier to control.
g) Use the power tool, accessories and tool bits etc. in accordance with these instructions and
in the manner intended for the particular type of power tool, taking into account the working
conditions and the work to be performed. Use of the power tool for operations different from those
intended could result in a hazardous situation.
5) Service
a) Have your power tool serviced by a qualified repair person using only identical replacement
parts. This will ensure that the safety of the power tool is maintained.
NOTE: Refer to the assembly (section 5) for a list of user replacable parts.
4
AS160
3. SPECIFIC SAFETY RULES
1. Hold tool by insulated gripping surfaces when performing an operation where the cutting tool may
contact hidden wiring or its own cord. Contact with a "live" wire will make exposed metal parts of the tool
"live" and shock the operator.
2. Remove adjusting tools such as Allen & Ian keys and wrenches before operating the tool.
3. Do not operate the tool with any attachment other than those recommended in this instruction manual.
4. Only use the tool with the correct voltage, as specified in the tool lable.
5. Never start a tool under load. Start the tool before engaging the work piece.
6. Never start or operate the tool with fingers or other objects through the holes in the blades.
7. Use care when handling blades during and after use. The blades and some areas of the tool become hot
in use.
8. Always ensure that before cutting there are no hazards such as electrical wiring, pipes or insulation in
the area to be cut.
9. Allow for resting periods to ease the effect of the vibration of the tool. Use work gloves to minimise
vibration effect on the body.
10. Ensure the dust extraction equipment is connected and properly used.
11. Keep handles dry, clean and free from oil and grease.
12. If the guard or other part appears to be damaged, it should be carefully checked to determine that it will
operate properly and perform its intended function.
13. The use of any accessory or attachment other than those recommended in this instruction manual may
present a risk of personal injury.
14. Do not force the tool. It is designed to operate with moderate effort. Overheating of the drive system and
motor can occur if the tool is overloaded.
15. Always operate the tool holding it with both hands.
SYMBOLS
The following show the symbols used in this manual
..........
Class 2 Construction (Double Insulation used throughout, no provision for earthing.)
VAC
..........
volts alternating current
dB
..........
decibels
A
..........
amperes
Nm
..........
newton meters
Hz
..........
hertz
m
..........
meters
W
..........
watt
n0
..........
no load speed
rpm
..........
revolutions per minute
AS160
5
m/s ..........
meters per second
mm ..........
millimeters
kg-m ..........
kilogram meters
ft-lb ..........
foot pounds
4. FUNCTIONAL DESCRIPTION
4.1 AS160 TOOL DESCRIPTION
The AS160 is designed to cut rigid materials such as mortar, clay fired bricks, plasterboard, fibreboard,
weatherboard and wood. The AS160 uses a variety of blades to suit the material being cut. Blades may also be
changed to suit the required depth or length of cut.
The blades are driven via conrods and a camshaft, which is belt-driven. The V-belt is designed to allow some
slip in case of the blades jamming. It is easily replaced by removing the plastic cover and is tensioned using
the adjustable idler pulley (see section 11.3).
Blades are mounted to the conrods using high tensile Allen™ head bolts.
A replaceable metal guard is provided to limit the maximum cutting depth and prevent the blade mounts from
damaging the surface of the material being cut.
Shock and vibration to the operator are reduced by a rubber-mounted top handle. The top handle is also
designed for comfort when used in a variety of cutting orientations. The rubber bushes on the top handle can
be replaced if they become worn or damaged.
4.2 BLADE DESCRIPTION
The AS160 uses a variety of blades to cut different materials and different profiles.
General Purpose blades use Tungsten Carbide teeth and are suited for working
general masonry and “in the ground” cutting. Refer to materials guide. General
Purpose blades are designed to cut to a depth of 115mm (4 1/2”).
Mortar Plunge blades use Tungsten Carbide teeth and have a maximum cutting depth
of 120mm (5”). Mortar plunge blades can cut slots of 75mm (3”) length (single brick
height).
Switch Box blades use Tungsten Carbide teeth and have a maximum cutting depth of
115mm (4 1/2”). Suitable for installing small electrical switch boxes into plaster,
brick/masonry walls.
Tuckpointing blades are used for removing the mortar between the bricks in
restoration work (known as Tuckpointing). Maximum cutting depth of 35mm (1 3/8”).
Wood blades are used for cutting clean wood and have a maximum cutting depth of
110mm (4 1/2”).
NOTE: All blades can be re-sharpened if not excessively worn.
Refer to instructions in section 11.6.
6
AS160
AL
LS
AW
™
16TM
0
*
*
ITEM
PART NAME
QTY
1*
PHILLIPS-HEAD SELF-TAPP. SCREW
4
2*
M6-SOCKET HEAD CAP SCREW
4
3*
BRUSH CAP
2
4*
ROUND STEP WASHER
1
5*
M6 HEXAGON NUT
1
6*
BALL BEARING
1
7*
ELECTRIC BRUSH
2
8*
INTERNAL CIRCLIP
2
9*
PIN
2
10*
TENSION PULLEY
1
11
POWER PULLEY
1
12
DRIVEN PULLEY
1
13*
BELT
1
4
14*
RUBBER BUSH
15*
GUARD
1
16*
HANDLE
1
17
CONROD
2
18*
BELT COVER
1
19
LEFT HAND HOUSING
1
20
RIGHT HAND HOUSING
1
21*+
22*+
*
*
L-HAND GENERAL PURPOSE CUT. BLADE
1
R-HAND GENERAL PURPOSE CUT. BLADE
1
23
ELECTRIC MOTOR
1
24*
ROUND LOGO STICKER
1
25
CORD PROTECTOR
1
26
ELECTRICAL CORD
1
27
ELECTRICAL PLUG (regional)
1
28*
ELECTRICAL STICKER
1
29*
SIDE LOGO STICKER
2
30*
DUST EXTRACTION FUNNEL
1
32*
DUST EXTRACTION FITTING
1
33*
HEX SOCKET BOLT M5 X 25
1
(
) Indicates user replaceable parts
*
CAUTION
Parts not marked with (
) should
only be replaced by the manufacturer,
its service agent or similar qualified
persons.
*
(
*
*
* * *
+ ) replace blades as a set
*
8
AS160
6. OPERATION
6.1 Setup
The AS160 is supplied ready for operation. However in some cases the
blades may need to be changed to suit the application.
• Before changing blades, the guard around the blade mounts must be levered
gently out of its groove at the front of the tool and swung away to give
access to the cap screws. (See Fig.1)
Guard
• Use the Hex key supplied to loosen and remove the cap screws securing
Fig.1
the blades, then remove the blades as shown in fig.2.
• Select the correct blades for the cutting task and mount each with their cap
screws . Verify that the surfaces of the blade mounts, conrod thread and
screws are clean and free of grit or lubricant of any kind before mating
them. Ensure the guard can be closed before fixing the blades to the
conrod (See fig.2).
Torque
indicator
coil
NOTE: Always use matched pairs of blades. Never mix used blades
with new blades. Use only the bolts supplied with the tool.
• Tighten the blade mounting screws to the Specifications in section 9. If
using the special ‘Ian key’, tighten the blade mounting screws until the
torque indicator coil deflects sufficiently so that the sides meet. Using
the Ian Key in this manner will tighten the bolts to the required
16nm.
Hold near
end
Ian Key
Fig.2
CAUTION: Do not operate the tool if the blades are loose. Operation
with loose blades will severely damage the blade mount & bolts
requiring repair at a service centre.
• Check that the teeth of the blades are lightly contacting, or within
approximately 1mm (1/16”) of contacting each other (fig.4). If the gap
between the blades is too large, as may be the case after some use,
they can be removed and gently bent inward to adjust the gap.
Fig.3
• Ensure that both blades are aligned vertically to the tool
(See fig.4).
CAUTION: If the blades rub against each other anywhere other than
within 20 mm/1” of the cutting edge, or contact force is high, it is
possible to overload the tool and cause premature belt wear.
• Swing the guard to its groove at the front of the tool and snap it into
90o
1mm
Max.
(1/16”)
place. (See fig.1)
Fig.4
AS160
9
6.2 Operation
Before attempting to operate the tool, please ensure that the safety section of this manual has been consulted.
• Apply protective gear for hearing, breathing, eyes and body as appropriate.
• With the blades secured and verifying that the tool switch is OFF, plug the tool into the power socket.
• Hold the tool by both the top handle and the motor housing, in a way which is most comfortable to do the
work. (Fig.5 & 6)
Correct Tool Hold
AL
AL
™
AW
LS
160
LS
AW
™
16
0
Fig.5
Fig.6
AL
LS
AW
™
16
0
CAUTION: Do not block the cooling intake vents or ingest
dust or debris at the rear of the motor as this may cause the
motor to overheat. If working in dusty conditions, it is
recommended that the vents be regularly cleaned with an
air blast. (See fig.7)
Fig.7
• To start the cut, hold the tool firmly in your hands and apply the middle of the blade cutting edge to the work,
keeping in mind that the direction of cut is towards the rear of the blades.
• While cutting, move the tool and blade in a slow "sawing" motion, which improves the cut rate, reduces
concentrated heat build-up and evens the wear on the blades. (See fig.8 & 9)
Direction of cut
ALL
™
SAW
160
™
SAW
160
Fig.8
ALL
3
3
Direction of cut
Fig.9
CAUTION: DO NOT OVERLOAD THE MOTOR.
10
AS160
Operation continued
CAUTION: Do Not allow the forward or rear end of the blades to hammer onto hard surfaces (shown in figs:
10,11 & 13) as this will damage the blades and tool. If unintentional hammering occurs, stop the tool or withdraw
it from the cut immediately.
• When using any of the blade types, avoid hammering of the ends of the blades into the ends of the cut by using
a slow rocking and sweeping motion. For best performance try to ensure that the teeth are the only part of the
blade in contact with the workpiece.
™ 160
ALLSAW
CAUTION: Take care when setting the tool down to avoid chipping the tungsten carbide teeth.
7
7
160
ALLSAW™
“Hammering!”
3
160
ALLSAW™
“Hammering!”
Fig.10
ALLSAW
™ 160
7
Fig.11
“Hammering!”
AW™
ALLS
160
™ 160
SAW
ALL
Clearance
each end
Fig.12
Fig.13
• When using the Mortar Plunge blades, the cut should have enough clearance on each end (shown in fig:12),
to ensure that no hammering of the blade ends occurs (as shown in fig.13).
AS160
11
7. MAINTENANCE
The tool must be maintained and used with care to ensure it operates at its peak performance. This is relatively
simple as the tool has only a few user-serviceable parts.
NOTE: Only authorised service centres should perform any repair requiring
splitting of the aluminium castings or removal of the motor.
The following checks should be made regularly and maintenance carried out as necessary:
For spare parts information please contact the manufacturer.
7.1 Motor
• Because this machine operates in a rugged environment, the motor brushes must be inspected for wear after
the first 15 hours and every few hours after that. (See Brush maintenance below). Brushes are a wearing
component and are not a warranty item.
• The motor power cord, strain relief and plug should be regularly checked to ensure it is not chafed, cut or
otherwise damaged. These components should only be repaired or replaced by a qualified person.
• The motor cooling vents on the rear cover should be frequently inspected and cleared of obstructions which
would reduce cooling flow. Use air pressure to clean the vents effectively.
7.2 Brushes
Inspect & replace brushes before they wear to minimum length.
To do this, unplug tool from power socket and unscrew the plastic brush covers on either side of the tool.
Carefully remove the brushes. Measure the brush length & replace if worn to 7mm (9/32”) (See fig.14).
CAUTION: UNPLUG TOOL BEFORE CHECKING/REPLACING BRUSHES.
IMPORTANT: DO NOT OVER-TIGHTEN THE BRUSH CAPS.
Insert new brushes, replacing in the same orientation as the original brushes.
Ensure brush contact correctly engaged in brush holder
Brushes
Min. length:
7mm (9/32”)
Brush cap
Fig.14
12
AS160
7.3 V belt and Pulleys
The V-belt and pulleys are not required to be inspected unless the belt slips frequently. To access these items,
remove the 4 screws holding the plastic cover on the right side of the tool (see fig.15). Inspect the belt for correct
tension and signs of damage or failure. If tensioning is required, loosen the the tension idler nut, but do not
remove (one turn only). Slide the tension idler outward to increase the tension to the value noted in the General
Specifications in Section 3 and re-tighten. If belt replacement is required, loosen the tensioner idler, replace the
belt and re-tension the idler as specified.
Tension Idler
Cover
ALL
SA
W™
16TM
0
Fig.15
If excessive slipping has occurred, the pulleys can become worn to the point where they require replacement. A
worn pulley is evidenced by the groove having lost its well defined "V" shape, resulting in a rounded or flattened
groove. To replace either pulley, contact your authorised service centre.
7.4 Blade Mount Bolts and Threads
The blade cap screws should be regularly checked for correct torque (16Nm.)(11.5 ft lb).
Whenever blades are changed, the bolt and conrod threads should be checked to ensure they are not worn or
filled with debris. If in doubt, the bolts should be replaced as continued use can strip or damage the blade mounts
on the tool. Use only correct genuine spares and do not lubricate bolts, threads or conrod mating surfaces.
CAUTION: Make sure NOT to operate the tool with loose blades. If blades should come loose while operating,
the blade mounts and threads can become damaged, requiring significant repairs to the tool.
Fig.16
AS160
13
7.5 Top Handle and Rubber Bushes
It is recommended that the rubber shock isolation bushes on the top
handle be regularly checked visually (by viewing down into the sides of the
handle) and by "feel" to verify that the bushes are not damaged or worn
significantly. Excessive movement of the handle may indicate damaged
rubber bushes. If replacement of either the bushes or handle is necessary:
Bushes
Circlip
Pin
1. remove retaining rings holding the handle pin using a circlip remover.
2. push pins from the aluminium housing.
3. remove handle and rubber bushes.
4. replace rubber bushes and reassemble in reverse order.
TM
AW™
ALLS
160
Fig.17
7.6 Tooth Sharpness
The blades should be regularly inspected for fatigue cracks in the area near the mounting plate of the blade and
on the blade frame (see Fig. 18). This usually occurs near the end of the design life of the blades and the blades
should then be replaced.
With use, the blades will become dull and the cutting performance will decrease. This can be largely restored by
re-sharpening the teeth. Refer to Fig. 19 for correct tooth grinding profiles, noting that the tungsten-carbide
tipped blades require a diamond tool for sharpening.
The teeth are designed with a slight side clearance. Do not use blades once the side clearance has worn away.
Using blades with worn side clearance will cause excessive heat build up and may overload the motor & belt.
Occasionally, if very hard materials are cut, or the teeth impact a hard surface at an odd angle, teeth may become
chipped or broken. The blades can still be used, but cutting performance will be reduced.
If "blueing" of the blade periphery occurs, the blades are running too hot. This is usually due to the teeth being
worn, but can also be due to too much force being used, insufficient "sweeping" motion by the operator, or
material being too hard.
Tungsten Carbide Sharpening Instructions:
Using a diamond file or fine grade diamond disc, grind the tungsten carbide teeth to the angles shown in the
diagrams below. Grind the back tooth face only until both surfaces of the tooth create a definite sharp point.
Note that the teeth orientations alternately point inside and outside.
Fatigue fracture
SIDE
CLEARANCE
WORN
END VIEW OF TEETH
Fig.19
Fig.18
D
EN
EW
VI
BACK FACE ANGLE
IMPORTANT
To ensure optimal
performance and reduce
load on motor, Blades
should be kept sharp
NOTE:
GRIND BACK
FACE ONLY
14
AS160
Wood blade (Hardened steel) teeth sharpening instructions
Use a fine 80 grit grinding wheel and avoid overheating teeth as this causes a loss of hardness of the steel.
Sharpen to profiles shown below:
END VIEW OF TEETH (TYP)
(LEFT BLADE SHOWN ONLY (TYP))
AS160
15
8. ACCESSORIES
8.1 Dust Extraction
The AS160 should be fitted with a dust extraction funnel, which
significantly reduces airborne and heavy dust when used correctly. It
consists of a fitting which attaches to the underside of the aluminium
housing and an adjustable extraction funnel which is replaceable when
it becomes worn.
The dust extraction fitting has a standard 30mm (1 3/16”) bore.
NOTE: Failure to use the dust extraction funnel when cutting masonry
materials will cause excessive wear of electrical components.
Damage caused by dust will lead to premature failure of the motor,
which will affect the warranty.
Dust extraction funnel
CAUTION: Verify that the vacuum machine being used has a filter
system appropriate for the material being cut. Incorrect filtration can
result in inadequate dust control and also possible damage to the
vacuum machine.
8.2 Wood Blade and Wood Jaw
The AS160 Wood Jaw, is an optional accessory, which can be added to the machine, to increase the cutting
speed in timber by up to 3 times.
Only the Wood Blades may be used with the Wood Jaw. The general purpose blades are too wide, and will
damage the tool & blades.
Fitting Instructions:
To use the Wood Jaw accessory, first remove the general purpose
blades.
Next remove the Dust Extraction Boot and clamp by removing the M5 x
25 bolt at the bottom of the tool.
Bolt
Attach the Wood blades.
Clamp
Dust Extraction
Boot
CAUTION: DO NOT USE THE GENERAL PURPOSE BLADES WITH THE
WOOD JAW ACCESSORY, AS IT WILL DAMAGE THE TOOL
16
AS160
Attach the Wood Jaw accessory by sliding the Wood Jaw into the
mounting slot.
Once the Wood Jaw accessory is in place, fit the M5 x 25 Allen Bolt and
tighten firmly.
Wood Blade
CAUTION: DO NOT FORCE THE TOOL WHEN CUTTING . THE AS160
USES A DRIVE BELT, WHICH WILL SLIP IF THE BLADES SHOULD
JAM. EXCESSIVE SLIPPING WILL WEAR THE BELT PREMATURELY.
Wood Jaw
CAUTION: THE WOOD JAW ACCESSORY ALLOWS THE AS160 TO CUT
SOFT MATERIALS SUCH AS WOOD, PLASTIC AND RUBBER. KEEP
ALL LIMBS WELL AWAY FROM THE CUTTING BLADE, AS IT MAY
CAUSE INJURY.
NOTE: KEEP POWER CORD AWAY FROM BLADES AT ALL TIMES
M5 x 25
Bolt
9. SPECIFICATIONS
ITEM
SPECIFICATION
Cutting depth/width
120mm (4 3/4”)/6.5mm (1/4”), (depending on blade/material)
Weight, with cutting blades
4.3kg (9.5lb)
Dimensions without blades
415 mm (16 11/32”) L
75 mm (3”) W
210 mm (8 1/4”) H
Noise level
96dB max. at 1.0 m (3’ 3”)
Vibration level:
6.9m/s
No load speed n0
6,500rpm
Rated operating time:
4min
Rated resting time:
1min
Electrical rating, nominal
230-240 VAC, 50Hz, 900W (Australia)
230 VAC, 50 Hz (Europe)
110 - 120 VAC, 50-60 Hz (USA/CANADA/UK Industrial)
Dust extraction vacuum hose interface
30mm (1 3/16”) ID, EN 60335-2-69
Belt tension
1 mm (1/16”) maximum mid-span deflection with
25 N (2.5 kg) (5lb) deflection force
Blade mount bolt torque
16 Nm (1.6 kg-m), (11.5ft-lb), un-lubricated
AS160
17
2
G.P.B.: General Purpose Blade
P.B.: Plunge Blade
18
CUTS VERY WELL
CUTS WELL
HARD TO BREAK THROUGH STONEY SURFACE BUT CUTS WELL THEREIN
NOT RECOMMENDED
ASPHALT
ASPHALT BITUMENASPHALT BITUMENASPHALT BITUMENASPHALT BITUMEN-
S.B.: Switch Box Blades
W.B.: Wood Blade
CUTS EXTREMELY FAST
CANNOT BE TOO SOFT, OR TOO HARD WHEN SETTING
CAN CUT WELL, TOO SOFT AND CRUMBLES- TOO HARD WON’T CUT
WILL NOT CUT
CAN CUT WELL, TOO SOFT AND CRUMBLES- TOO HARD WON’T CUT
EASILY CUT
CAN CUT IF DRY AND CRUMBLING. WILL NOT CUT IF TOO WET.
WILL NOT CUT VERY HARD CALCIFIED DEPOSITS
CAN CUT BUT QUITE SLOW
WILL NOT CUT
WILL NOT CUT
WILL NOT CUT
CONCRETE
FOAMED CONCRETE
FRESH CONCRETE (GREEN)-MINUS AGG
SANDY CONCRETE- MINUS AGG <7mm
SOLID CONCRETE
ROCK
SANDSTONE- SOFT
LIMESTONE- NATURAL
CLAY- NATURAL
LIMESTONE- incl. CALCIFIED DEPOSITS
LIMESTONE- RECONSTITUTED
CLAY- FIRED
SANDSTONE- HARD
GRANITE/ MARBLE
2-4mm AGG
8-18mm AGG
5-10mm AGG
8-18mm AGG
CUTS WELL
MAY CHIP PLASTIC VENEERS. WILL NOT CUT NAILS
WILL CUT, BUT AVOID DIRT CONTAMINATION INTO MOTOR/BELT.
CUTS WELL, SOME TEARING
CUTS WELL
CUTS WELL
WILL CUT UP TO MAXIMUM 52MPa - PERFORM TEST CUT TO CHECK HARDNESS
CUTS WELL
WILL CUT TO CERTAIN HARDNESS. PERFORMANCE WILL DECREASE WITH
INCREASING HARDNESS.
CAN BE NIBBLED, BUT NOT CUT
WILL NOT CUT
MAY CUT, WILL CAUSE DAMAGE TO TEETH & BLADE FRAME
CUTS WELL
SOME TEARING OF PAPER. EASY CUT
WILL CUT BUT ROUGH
G.P./P./
CUTS WELL
PERFORMANCE
WOOD
CHIP OR PLY BOARD OVER TO 25MM
DIRTY WOOD
TREE ROOT
CARDBOARD-DENSE TUBE ETC
GREEN WOOD
MEDIUM DENSITY FIBRE BOARD
BUILDING MATERIALS- COMMON
FIBRE CEMENT- PANEL AND FENCING
UNISPAN PLASTER BOARD
CLEAR PLASTIC ROOF SHEET
BRICK- CLAY FIRED <30MPaCUTS WELL
MORTAR - SOFT
(LIME BASED, HIGH SAND CONTENT)
BRICK- CLAY FIRED >30MPa
FIBRE CEMENT- HEAVY SHEET, COLUMN
MORTAR - HARD
(CONCRETE BASED, LOW SAND CONTENT)
CLAY ROOF TILE
CEMENT ROOF TILE
BRICK - CLAY FIRED >52MPa
MATERIAL
G.P.B./P.B.
G.P.B./P.B.
G.P.B./P.B.
G.P.B./P.B.
G.P.B./P.B.
NA
NA
NA
G.P.B./P.B.
G.P.B./P.B.
G.P.B./P.B.
NA
G.P.B./P.B.
G.P.B./P.B.
G.P.B./P.B.
G.P.B./P.B.
G.P.B./P.B./W.B.
G.P.B./P.B.
G.P.B./P.B.
W.B.
W.B.
W.B.
G.P.B./P.B.
NA
N/A
G.P.B./P.
G.P.B./P.
G.P.B./P.B.
TP.
G.P./P./S.B./
G.P./P./S.B./
G.P../P.
GBLADE TYPE.
10. MATERIALS GUIDE
TP.B.: Tuckpointing Blades
NOTE: During operation the AS160 may cause hand-arm vibration, which can result in fatigue or discomfort after
long periods of continuous use. Vibration will increase with the hardness of material. Do not operate the tool if
discomfort is experienced, and ensure that sufficient rest periods are taken during cutting. For further information,
contact the manufacturer.
NOTE: Blades are a wearing part. In normal operation, blade life may vary with the hardness of materials cut.
ATTN: Torque mounting bolts to 16Nm (11.5 ft lb).
AS160
11. TROUBLESHOOTING
This fault diagnosis is intended for use by persons familiar with mechanical devices, and provides a basic
capability to maintain the tool. To correct the user serviceable faults, refer to the Maintenance section of this
manual. The more complex repairs as noted below, must be performed by an authorised service centre.
ITEM
1
SYMPTOM
Motor overheating
CHECK/REMEDY
Verify that all cooling vents are not obstructed by operators hand,
debris in vents, or other. Remedy or clean as required.
Verify blades are not rubbing against each other with excessive
force, either at cutting edge or close to blade mounts. Blades
may be worn and overheating. Replace as required.
Check that belt tension is not excessive.
Check that bearings have not failed by removing plastic side cover and
belt and rotating both pulleys independently checking for
roughness. The power pulley should rotate easily and smoothly.
The driven pulley should rotate smoothly but will have a "springy"
feel, wanting to stay in either of 2 positions.
Verify that the motor housing is secure with the tool. If loose, refer
to authorised service centre immediately.
2
Noisy operation or
unusual vibration
Blades loose -tighten blade mount bolts.
Blade failure - replace blade set.
Leaf spring failure - contact authorised service centre.
Bearing failure - contact authorised service centre.
Gearbox failure - contact authorised service centre.
Handle rubber mounts damaged or worn - replace.
3
One or both conrods/blades
Leaf spring failure - contact authorised service centre.
loose, even when mounting
bolts tightened
4
Belt slipping
Loose belt - re-tension as necessary.
Worn belt - replace belt.
Worn pulleys - contact authorised service centre.
5
Slow cutting performance
Teeth worn, chipped or lost. Sharpen or replace blade.
Belt slipping - see Symptom 4.
Blades rubbing against each other with excessive force
- see Symptom 8.
Attempting to cut material which is too hard.
AS160
19
11. TROUBLESHOOTING
6
Grease/oily leakage from
This is normal in approximately the first hour that the new tool is
bearings near blade mounts.
operated or if new bearings have been installed. Leakage should
reduce and stop thereafter.
7
Grease/oily leakage
Leaking gearbox grease seal - a very minor "weep" is normal,
from aft end of aluminium
but if excessive contact authorised service centre.
housing.
8
Blades rubbing together
Remove blade/s and bend slightly to correct.
with excessive force.
9
Blade teeth chipped or lost.
Occurs occasionally if hard material is encountered, or if the
"back side" of teeth are impacted.
Care not taken in setting tool down on teeth on hard surfaces
or loose in tool box.
Worn blades will start to become hot in certain areas, causing
teeth to de-bond - replace blades.
Material too hard.
10
Loose top handle.
11
Sticking switch/
Worn or damaged rubber bushes - replace.
Blow out with compressed air. If problem persists contact
authorised service centre.
switch not turning off.
12
Blades "blueing".
Worn teeth - replace blades.
Excessive force being used.
Insufficient "sawing" motion by the operator.
Material too hard.
Blades rubbing together with excessive force (see section 8).
13
14
Blade mounting bolts not
Threads on bolts stripped - replace bolts not tightening.
tightening fully.
Threads on tool stripped - contact authorised service centre.
Tool will not run.
Check brushes are not damaged or excessively worn - replace
as required.
Check power cord for damage - contact authorised service centre.
20
AS160
12. WARRANTY AND SERVICE
For warranty repair, inspection, service and spare parts,
please contact your place of purchase,
or
Check out our website www.arbortech.com.au
to locate a dealer or service agent in your area
or
Contact us directly:
ARBORTECH PTY LTD
67 WESTCHESTER ROAD • MALAGA
PERTH • WESTERN AUSTRALIA • 6090
T: +61 8 9249 1944
F: +61 8 9249 2936
US Fax: (866) 515 8104
US Website:www.arbortechusa.com
E: [email protected]
TM
AS160
21
NOTES:
_____________________________________________________
_____________________________________________________
_____________________________________________________
_____________________________________________________
_____________________________________________________
_____________________________________________________
_____________________________________________________
_____________________________________________________
_____________________________________________________
_____________________________________________________
_____________________________________________________
_____________________________________________________
_____________________________________________________
_____________________________________________________
_____________________________________________________
_____________________________________________________
_____________________________________________________
_____________________________________________________
_____________________________________________________
_____________________________________________________
_____________________________________________________
_____________________________________________________
_____________________________________________________
_____________________________________________________
_____________________________________________________
_____________________________________________________
_____________________________________________________
_____________________________________________________
_____________________________________________________
_____________________________________________________
_____________________________________________________
_____________________________________________________
_____________________________________________________
22
TM
www.arbor tech.com.au
BOOK/012