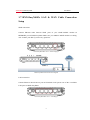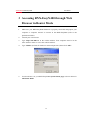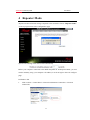
1
Wireless Router RNX-EasyN400 User Manual Wireless RouterRNX-EasyN400 User Manual Safety Warning • • • • • • • • • • • • • • • • • Place connecting cables carefully so that no one will step on them or stumble over them. Always disconnect all cables from this device before servicing or disassembling. Use ONLY an appropriate power adaptor or cord for your device. Connect the power adaptor or cord to the right supply voltage (for example, 110V AC in North America or 230V AC in Europe). Do not allow anything to rest on the power adaptor or cord and do not place the product where anyone can walk on the power adaptor or cord. Do not use the device if the power adaptor or cord is damaged as it might cause electrocution. If the power adaptor or cord is damaged, remove it from the power outlet. Do not attempt to repair the power adaptor or cord. Contact your local vendor to order a new one. Do not use the device outside, and make sure all the connections are indoors. Do not obstruct the device ventilation slots, as insufficient airflow may harm your device. Do not use this product near water, eg, in wet basement, or near a swimming pool. Do not expose your device to dampness, dust or corrosive liquids. Do not install, use, or service this device during a thunderstorm. There is a remote risk of electric shock from lightning. Connect ONLY suitable accessories to the device. Do not open the device or unit. Opening or removing covers can expose you to dangerous high voltage points or other risks. ONLY qualified service personnel should service or disassemble this device. Please contact your vendor for further information. Make sure to connect the cables to the correct ports. If you wall mount your device, make sure that no electrical lines, gas or water pipes will be damaged. Your product is marked with this symbol, which is known as the WEEE mark. WEEE stands for Waste Electronics and Electrical Equipment. It means that used electrical and electronic products should not be mixed with general waste. Used electrical and electronic equipment should be treated separately. 1 Wireless RouterRNX-EasyN400 User Manual Table of Contents TABLE OF CONTENTS .......................................................................................................................2 BEFORE WE BEGIN ............................................................................................................................4 1 INTRODUCTION ........................................................................................................................5 1.1 OVERVIEW.....................................................................................................................................5 1.2 KEY FEATURES .............................................................................................................................5 1.3 PACKAGE CONTENTS ....................................................................................................................6 1.4 PRODUCT LAYOUT AND LED SIGNAL ..........................................................................................7 1.5 NETWORK + SYSTEM REQUIREMENTS .........................................................................................8 1.6 RNX-EASYN400 PLACEMENT ......................................................................................................8 1.7 RNX-EASYN400’S LAN & WAN CABLE CONNECTION SETUP..................................................9 2 SETUP WIZARD........................................................................................................................11 2.1 SETUP WIZARD – GETTING START .............................................................................................11 2.2 SETUP WIZARD – CONFIGURATION ............................................................................................12 2.3 SETUP WIZARD – CONNECT MODE SELECTION ........................................................................16 2.3.1 AP Router Mode ....................................................................................................................... 16 2.3.2 AP Repeater Mode .................................................................................................................... 21 2.3.3 Connecting to RNX-EasyN400 in AP Repeater Mode.............................................................. 22 3 ACCESSING RNX-EASYN400 THROUGH WEB BROWSER IN ROUTER MODE .......26 3.1 RESETTING THE RNX-EASYN400 ..............................................................................................27 3.1.1 Procedure to Use the Reset Button............................................................................................ 27 3.2 NAVIGATE RNX-EASYN400 .......................................................................................................27 3.2.1 Navigating RNX-EasyN400 in AP Router Mode...................................................................... 28 3.2.1.1 RNX-EasyN400 Side Menu Description Table – AP Router Mode....................................... 28 3.2.2 Navigating RNX-EasyN400 in AP Repeater Mode .................................................................. 30 3.2.2.1 RNX-EasyN400 Side Menu Description Table – AP Repeater Mode ................................... 31 3.3 RNX-EASYN400’S SYSTEM PAGE ..............................................................................................33 3.3.1 Status......................................................................................................................................... 33 3.3.2 LAN .......................................................................................................................................... 34 3.3.3 DHCP........................................................................................................................................ 35 3.3.4 Schedule.................................................................................................................................... 37 3.3.5 Log............................................................................................................................................ 38 3.3.6 Monitor ..................................................................................................................................... 38 3.3.7 Language................................................................................................................................... 39 3.4 RNX-EASYN400’S WIZARD PAGE .............................................................................................40 3.5 RNX-EASYN400’S INTERNET PAGE...........................................................................................41 3.5.1 Status......................................................................................................................................... 41 3.5.2 Dynamic IP ............................................................................................................................... 41 3.5.3 Static IP..................................................................................................................................... 42 3.5.4 Point-to-Point over Ethernet Protocol (PPPoE)......................................................................... 42 3.5.5 Point-to-Point Tunneling Protocol (PPTP)................................................................................ 43 3.6 RNX-EASYN400’S WIRELESS PAGE ..........................................................................................44 3.6.1 Basic ......................................................................................................................................... 44 3.6.2 WDS with AP Router................................................................................................................ 47 3.6.3 Advanced .................................................................................................................................. 48 3.6.4 Security ..................................................................................................................................... 49 3.6.5 Filter.......................................................................................................................................... 53 3.6.6 WPS (Wi-Fi Protected Setup) ................................................................................................... 55 3.6.7 Client List ................................................................................................................................. 56 3.6.8 Policy ........................................................................................................................................ 56 3.7 RNX-EASYN400’S FIREWALL PAGE ..........................................................................................58 2 Wireless RouterRNX-EasyN400 User Manual 3.7.1 Advanced .................................................................................................................................. 58 3.7.2 Demilitarized Zone (DMZ) ....................................................................................................... 58 3.7.3 Denial of Service (DoS) ............................................................................................................ 59 3.7.4 MAC Filter................................................................................................................................ 60 3.7.5 IP Filter ..................................................................................................................................... 61 3.7.6 URL Filter................................................................................................................................. 62 3.8 RNX-EASYN400’S ADVANCED PAGE .........................................................................................64 3.8.1 Network Address Translation (NAT)........................................................................................ 64 3.8.2 Port Mapping ............................................................................................................................ 64 3.8.3 Port Forwarding (Virtual Server) .............................................................................................. 66 3.8.4 Port Triggering (Special Applications) ..................................................................................... 67 3.8.5 Application Layer Gateway (ALG)........................................................................................... 69 3.8.6 UPnP ......................................................................................................................................... 70 3.8.7 Quality of Service (QoS)........................................................................................................... 70 3.8.8 Routing ..................................................................................................................................... 72 3.9 RNX-EASYN400’S TOOLS PAGE ................................................................................................73 3.9.1 Admin and Remote Management.............................................................................................. 73 3.9.2 Time.......................................................................................................................................... 75 3.9.3 DDNS ....................................................................................................................................... 77 3.9.4 Power ........................................................................................................................................ 77 3.9.5 Diagnosis .................................................................................................................................. 78 3.9.6 Firmware................................................................................................................................... 78 3.9.7 Back-up..................................................................................................................................... 81 3.9.8 Reset ......................................................................................................................................... 81 4 REPEATER MODE ...................................................................................................................83 4.1 RNX-EASYN400 IN REPEATER MODE’S SYSTEM PAGE ............................................................87 4.1.1 Status......................................................................................................................................... 87 4.1.2 LAN .......................................................................................................................................... 87 4.1.3 Schedule.................................................................................................................................... 88 4.1.4 Log............................................................................................................................................ 89 4.1.5 Monitor ..................................................................................................................................... 90 4.1.6 Language................................................................................................................................... 90 4.2 RNX-EASYN400 IN REPEATER MODE’S WIZARD PAGE ...........................................................92 4.3 RNX-EASYN400 IN REPEATER MODE’S WIRELESS PAGE ........................................................92 5 PC NETWORK ADAPTER SETUP (UNDER WINDOWS XP) .............................................97 APPENDIX A – PRODUCT SPECIFICATION ..............................................................................100 APPENDIX B – TROUBLESHOOTING.........................................................................................102 APPENDIX C – FCC INTERFERENCE STATEMENT ...............................................................109 APPENDIX D – IC INTERFERENCE STATEMENT ................................................................... 111 3 Wireless RouterRNX-EasyN400 User Manual Before We Begin • Please configure RNX-EasyN400 with the computer that was last connected directly to your modem. • You can only use the Ethernet port on your modem. If you were using the USB connection before using RNX-EasyN400, then you must turn off your modem, disconnect the USB cable and connect an Ethernet cable to the Internet port on RNXEasyN400, and then turn the modem back on. In some cases, you may need to call your ISP to change connection types (USB to Ethernet). • If you have DSL and are connecting via PPPoE, make sure you disable or uninstall any PPPoE software such as WinPoet, Broadjump, or Enternet 300 from your computer or you will not be able to connect to the Internet. • When running the Setup Wizard from the Rosewill CD, make sure the computer you are running the CD from is connected to the Internet and online or the wizard will not work. If you have disconnected any hardware, re-connect your computer back to the modem and make sure you are online. 4 Wireless RouterRNX-EasyN400 User Manual 1 Introduction 1.1 Overview Congratulations on your purchase of RNX-EasyN400 Wireless Network Broadband Router. RNX-EasyN400 is compatible with 802.11g & 802.11b and draft 802.11n v2.0. RNX-EasyN400 is not only a Wireless Access Point, but also doubles as a 4-port fullduplex Switch that connects your wired-Ethernet devices together at incredible speeds. At 150Mbps wireless transmission rate, RNX-EasyN400’s Access Point function built into RNX-EasyN400 uses advanced MIMO (Multi-Input, Multi-Output) technology to transmit multiple steams of data in a single wireless channel giving you seamless access to multimedia content. Robust RF signal travels farther, eliminates dead spots and extends network range. For data protection and privacy, RNX-EasyN400 can encodes all wireless transmissions with either WEP or WPA, or WPA2 encryption. 1.2 Key Features Features Advantages Heavy data payloads such as MPEG Incredible Data Rate up to 150Mbps** video streaming Fully Interoperable with IEEE 802.11b / IEEE 802.11g compliant IEEE 802.11b/g Compliant devices with legacy protection Four 10/100 Mbps Fast Switch Ports (AutoCrossover) Firewall supports, DMZ, MAC Filter, IP Scalability, extend your network. Avoids the attacks of Hackers or Filter, URL Filter, ICMP Blocking, SPI, Port Viruses from Internet Mapping, Port Forwarding, Port Trigger Support 802.1x Authenticator, 802.11i (WPA/WPA2, AES), VPN pass-through Provide mutual authentication (Client and dynamic encryption keys to 5 Wireless RouterRNX-EasyN400 User Manual enhance security Make wireless AP and Bridge mode WDS (Wireless Distribution System) simultaneously as a wireless repeater ** Theoretical wireless signal rate based on IEEE standard of 802.11a, b, g, n chipset used. Actual throughput may vary. Network conditions and environmental factors lower actual throughput rate. All specifications are subject to change without notice. 1.3 Package Contents Open the package carefully, and make sure that none of the items listed below are missing. Do not discard the packing materials, in case of return; the unit must be shipped back in its original package. 1. 1x 802.11n EasyN400 Router with 2dBi 2.4GHz Fixed Antennas 2. 1x 100V~240V Power Adapter 3. 1x Quick Install Guide 4. 1x CD (User’s Manual) 6 Wireless RouterRNX-EasyN400 User Manual 1.4 Product Layout and LED Signal LED Color Status On POWER Amber Blinking Off On Description RNX-EasyN400 is receiving power and functioning properly. RNX-EasyN400 is performing test or reset RNX-EasyN400 is not receiving power RNX-EasyN400 is ready, but not sending/receiving wireless signals RNX-EasyN400 is sending/receiving wireless signals WLAN/WPS Blue Blinking RNX-EasyN400 is connecting WPS with a wireless client. WAN Blue Off The Wireless LAN is not ready or fail On RNX-EasyN400 is connecting successfully on WAN 7 Wireless RouterRNX-EasyN400 User Manual Blinking LAN 1~4 port Blue RNX-EasyN400 is sending/receiving data through WAN Off The WAN is not ready or fail On RNX-EasyN400 has a successful Ethernet connection. Blinking Off RNX-EasyN400 is sending/receiving data through LAN port The LAN is not ready or fail Press this button for 1 second to set up a wireless connection via WiFi Protected Setup with WPS another WPS-enabled client. You must press the WPS button on the client side within 120 seconds for a successful connection. 1.5 Network + System Requirements To begin using the RNX-EasyN400, make sure you meet the following as minimum requirements: h PC/Notebook. h Operating System – Microsoft Windows 98SE/ME/XP/2000/VISTA h 1 Free Ethernet port. h WiFi card/USB dongle (802.11b/g/n) – optional. h External xDSL (ADSL) or Cable modem with an Ethernet port (RJ-45). h PC with a Web-Browser (Internet Explorer, Safari, Firefox, Opera etc.) h Few Ethernet compatible CAT5 cables. 1.6 RNX-EasyN400 Placement We suggest that you can place RNX-EasyN400 on a desk or other flat surface, or you can mount it on a wall, however, for optimal performance, place your RNX-EasyN400 in the center of your office (or your home) that is away from any potential source of interference, such as a metal wall or microwave oven. This location must be close to a power connection and your ADSL/Cable modem. If the antennas are not positioned correctly, performance loss may occur. 8 Wireless RouterRNX-EasyN400 User Manual 1.7 RNX-EasyN400’s LAN & WAN Cable Connection Setup WAN connection: Connect Ethernet cable between WAN ports of your ADSL/CABLE modem & INTERNET port of RNX-EasyN400. Make sure your ADSL/CABLE modem is working well. Contact your ISP if you have any questions. RNX-EasyN400 Rear View + Intnernet plugin RNX-EasyN400 WAN Connection Diagram LAN connection: Connect Ethernet cable between your PC/Notebook LAN port & one of the 4 available LAN ports on RNX-EasyN400. RNX-EasyN400 Rear View + LAN Plugin 9 Wireless RouterRNX-EasyN400 User Manual RNX-EasyN400 LAN Connection Diagram 10 Wireless RouterRNX-EasyN400 User Manual 2 Setup Wizard We will introduce the Smart Wizard in this section. Please make sure the following before insert the CD into the CD/DVD drive: • Internet connection should be setup & ready to use (ADSL or cable modem). • Modem must provide a RJ45 port to connect with RNX-EasyN400. ¾ Please refers to previous page’s “RNX-EasyN400 LAN Connection Diagram“ • Microsoft Windows compatible PC/Notebook with UPnP enabled network adapter. • CAT 5 network cable(s) connects to the LAN port on PC/Notebook. 2.1 Setup Wizard – Getting Start Insert the RNX-EasyN400 CD into your DVD/CD drive. The SETUP WIZARD should run automatically with a few seconds. If not, please open Windows Explorer and find the root directory of the CD (Usually “your DVD/CD Drive, eg D:\”). Double click on Wizard.exe icon to run it. Wizard.exe After Double Click on the icon, the window below should popup: Click Setup Wizard to setup your RNX-EasyN400. 11 Wireless RouterRNX-EasyN400 User Manual Click User Manual to open user manual. Click Adobe Reader to install Adobe Acrobat reader on your PC/Notebook. Click EXIT anytime you want to abort. 2.2 Setup Wizard – Configuration Click <Next> to proceed. Click <Exit> to abort. RNX-EasyN400 should be setup as depicted above. 12 Wireless RouterRNX-EasyN400 User Manual Make sure your DSL/CABLE modem is setup and working. Else take the help of your internet service provider. Click <Next> to proceed. Check the MODEM and RNX-EasyN400 connection. It should be as shown below. Check power connection for modem as well as RNX-EasyN400. Click <Next> to proceed. 13 Wireless RouterRNX-EasyN400 User Manual Notice the LED will light up at this stage. If not, check your procedures again. Click <Next> to configure WAN & Wireless settings. The Wizard page will show up as below: 14 Wireless RouterRNX-EasyN400 User Manual Then, you will be prompt to RNX-EasyN400 login page User name and password are admin/admin. Click <OK>. Your default browser will connect to RNX-EasyN400 Web Server http://192.168.0.1 . 15 Wireless RouterRNX-EasyN400 User Manual Click <Next> to enter mode selection. 2.3 Setup Wizard – Connect Mode Selection This is where you select the mode that RNX-EasyN400 is going to be use and set its configurations. You can choose AP Router Mode is when you want to set RNXEasyN400 as a wireless LAN administrator for your computer or gaming console to connect to. Or you can choose AP Repeater mode is the WDS/Bridge mode which will extend your wireless signal, but does not enable WAN interface. Setup Wizard will skip WAN Configuration when you select this mode. 2.3.1 AP Router Mode Click <Next>, Setup Wizard will automatically detect your Internet Network settings. 16 Wireless RouterRNX-EasyN400 User Manual Depending on your Network setting, Wizard will show you either one of the pages below, the best detecting option will be selected, please click <Next> unless you want to manually configure your connecting option. 2.3.1.1 DHCP Mode Selection Smart Wizard has detected DHCP client. Click <Next>, you will see the page show below which ask you to configure the host name and MAC address of RNX-EasyN400. 17 Wireless RouterRNX-EasyN400 User Manual LABEL DESCRIPTION Host Name This is optional. Depending on if your ISP require you to provide this information. Please leave this blank, if you are not sure. MAC address The default value when Click <Clone MAC Address> is set to the WAN’s physical interface of the broadband router. Smart Wizard has finished setting up WAN Configuration. Click <Next> to proceed. 2.3.1.2 Wireless Security Selection After Click <Next>, you should see the page as show below. By moving your mouse curser on the <Security Bar>; you will see different Options for you to set up your Wireless Router’s Connecting Mode. 18 Wireless RouterRNX-EasyN400 User Manual Please choose your security level, and enter your desired name for your wireless network (SSID) and security key (Key); Click <Next> to proceed. Depending on how you set up RNX-EasyN400, you will see different result pages before you reboot your RNX-EasyN400. 19 Wireless RouterRNX-EasyN400 User Manual Below is the example page, if you select the highest security to be your RNX-EasyN400 Connecting option. To apply the entire configuration, click <Reboot>. You will see the below count down when <Reboot> clicked. LABEL DESCRIPTION SSID Enter a descriptive name (up to 32 printable 7-bit ASCII characters) for the wireless LAN. If you change this field on the RNX-EasyN400, make sure all wireless stations use the same SSID in order to connect to RNX-EasyN400 to access the network. Key Based on selected Security Level, you will have None, WEP, WPA, and WPA2 to select from. None: Choose this to have no wireless LAN security configured. If you do not enable any wireless security on your RNX-EasyN400, your network is accessible to any wireless networking device that is within range. WEP: WEP is the original wireless encryption standard which has less security level compare to WPA and WPA2. WPA and WPA2: Security to configure a Pre-Shared Key. Choose this option only if your wireless clients support WPAPSK or WPA2-PSK respectively. 20 Wireless RouterRNX-EasyN400 User Manual NOTE: After Wireless settings are applied, you need to connect from your WLAN client with the security settings you just finished configuring. Remember to write down the type of security & security key you selected. 2.3.2 AP Repeater Mode AP Repeater mode is the Repeater mode which will extend your wireless signal, but does not enable WAN interface. Setup Wizard will skip WAN Configuration when you select this mode. Click <Next> when select AP Repeater Mode. NOTE: For Detail step by step guides, please refer to page 89 for AP Repeater Mode. The Wizard will prompt you to enter the SSID which you want to use for this Repeater based on your security level. After type-in your desire SSID, click <Next> 21 Wireless RouterRNX-EasyN400 User Manual You should see the below page, click <Reboot> You will see the count down of the system rebooting 2.3.3 Connecting to RNX-EasyN400 in AP Repeater Mode RNX-EasyN400 will restart as a repeater now. However, in order to access to the configuration web page of the repeater, you will need to manually adjust your computer’s IP. Windows XP: 22 Wireless RouterRNX-EasyN400 User Manual 1. Click on Start > Control Panel > Network and Internet Connections > Network connections. 2. Right-click on the Local Area Connection which represents your network card and selects Properties. 3. Highlight Internet Protocol (TCP/IP) and click Properties. 4. Click to use the B section like below page. You will need to set IP address for default. Example: If RNX-EasyN400’s LAN IP address is 192.168.0.1, make your IP address 23 Wireless RouterRNX-EasyN400 User Manual 192.168.0.X where X is a number between 100 and 200. Make sure that the number you choose is not in use on the network. Set Subnet mask as 255.255.255.0. 5. Set Default Gateway the same as the LAN IP address of your router (192.168.0.1). 6. After finish, Click <OK>, Then <OK> on below page 7. Open your web browser and type in 192.168.0.1 on the address bar. At the login, enter your username and password (default username: admin, password: admin). 24 Wireless RouterRNX-EasyN400 User Manual 8. You will see the configuration homepage under “REPEATER” mode now. 25 Wireless RouterRNX-EasyN400 User Manual 3 Accessing RNX-EasyN400 through Web Browser in Router Mode 1. Make sure your RNX-EasyN400 hardware is properly connected and prepare your computer or computer network to connect to the RNX-EasyN400 (refer to the Quick Start Guide). 2. Launch your web browser. 3. Type "http://192.168.0.1" as the website address. Your computer must be in the same subnet in order to access this website address. 4. Type "admin" (default) for both user name and password, then Click <OK>. 5. You should now see your RNX-EasyN400 System Status page as shown below in AP Router Mode. 26 Wireless RouterRNX-EasyN400 User Manual 3.1 Resetting the RNX-EasyN400 If you forget your password or IP address, or you cannot access the RNX-EasyN400 through Web Browser, you will need to use the <RESET> button at the back of the RNX-EasyN400 to reload the factory-default configuration file. This means that you will lose all configurations that you had previously saved, the Username and password will be reset to “admin” and the IP address will be reset to “192.168.0.1”. 3.1.1 Procedure to Use the Reset Button 1. Make sure the power LED is on. 2. Press the RESET button for longer than 1 second to restart/reboot the RNXEasyN400. 3. Press the RESET button for longer than 10 seconds until you see the power LED is blinking to set the RNX-EasyN400 back to its factory-default configurations. 3.2 Navigate RNX-EasyN400 The following will summarize on how to navigate RNX-EasyN400 in both AP Router Mode and Repeater Mode. 27 Wireless RouterRNX-EasyN400 User Manual 3.2.1 Navigating RNX-EasyN400 in AP Router Mode Click on the side menu selection on System, The picture screen below shows the status screen in AP Router Mode. 3.2.1.1 RNX-EasyN400 Side Menu Description Table – AP Router Mode LABEL DESCRIPTION Status This shows the RNX-EasyN400’s general device, system and interface status information. LAN This is where you can configure LAN IP address, subnet mask, also to enable DHCP server and IP range. System DHCP (For detail, Use this screen to view current DHCP client information and to always assign an IP address to a MAC address (and host name). please see Schedule Page 34.) Log This is where you can set to schedule your wireless internet service This is where RNX-EasyN400 stores the event log file based on the process. Monitor You will see graphical diagrams showing the Bandwidth for WAN and WLAN. Language You can select to have other language. Wizard (For detail, please see Page You will be guide to setup your router based on a step by step process to either AP router mode or AP Repeater mode. 42.) 28 Wireless RouterRNX-EasyN400 Status Internet (For detail, please see Dynamic IP Static IP PPPoE Page 43.) PPTP Basic User Manual This page shows the current Internet connection type and status. This page is only use when your ISP provides you with below information This page is when your ISP assigns you with a fix IP address to connect. This is used when you set your ISP login account name and password in your wireless router instead in your modem or your computer. This is when your ISP provider provides you by simply dialing in a local point provided by your ISP provider. This is where you can set wireless Radio, Mode, Band, SSID, and Channel. This allows you to set the advanced wireless options. These parameters will affect Advanced your wireless router’s performance, please keep these parameters default unless you know the effects that these changes will have on RNX-EasyN400. Wireless Security (For detail, please see Page 46.) Filter WPS Client List Policy Enable Advanced This part allows you to set your wireless router encryption method to prevent illegal access. This page gives you control over MAC address control. This page allows you to use WPS method to establish connection between a wireless clients and the wireless router You can find out here which Wireless client that is associating with the Wireless router. This page is where you can set up the Wireless Access Policy. Firewall gives you extensive protection over your wireless Router based on different policy. This section allows you to set whether to let VPN packet to pass through Firewall (For detail, DMZ DMZ is where you can re-direct your packet based on your needs DoS This is the option which provides you prevention from common Hacker attack. please see Page 61.) MAC Filter IP Filter URL Filter Advanced NAT (For detail, please see Port map. Page 68) This allows you to define the traffic type permitted in your LAN based on MAC. This allows you to define the traffic type permitted in your LAN based on IP address. This allows you to block certain website by full URL address or just the keyword. This is where you set to allows multiple users at your local site to access the Internet through a single Public IP Address or multiple Public IP Addresses Port Mapping allows you to re-direct a particular range of service port numbers (from the Internet / WAN Port) to a particular LAN IP address. Use the Port Forwarding (Virtual Server) function when you want different Port fw. 29 Wireless RouterRNX-EasyN400 User Manual servers/clients in your LAN to handle different service/Internet application type (e.g. Email, FTP, Web server etc.) from the Internet. Port tri. ALG UPnP In this section you can configure RNX-EasyN400 to support multiple connections for these types of applications In this section, you can let the selected application to correctly pass through the NAT gateway. This allows you to discover PCs within your intranet for them to easily access through internet. QoS lets you classify Internet application traffic by source/destination IP address and QoS port number. You can assign priority for each type of application and reserve bandwidth for it. Routing Admin Time This function allows You to set enable Static Routing to let RNX-EasyN400 forward packets by your routing policy You can change the password required to log into the broadband router's system web-based management The Time Zone allows your router to reference or base its time on the settings. Tools DDNS DDNS allows you to map the static domain name to a dynamic IP address. (For detail, Power You can enable or disable Saving power in WLAN mode please see Diagnosis This page could let you diagnosis your current network status. Page 78.) Firmware This page allows you to upgrade RNX-EasyN400’s firmware. Back-up This page allows you to save the current router configurations. Reset You can reset the broadband router when system stops responding correctly or stop functions. 3.2.2 Navigating RNX-EasyN400 in AP Repeater Mode AP Repeater mode has limited function compare to the AP Router mode. 30 Wireless RouterRNX-EasyN400 User Manual 3.2.2.1 RNX-EasyN400 Side Menu Description Table – AP Repeater Mode LABEL DESCRIPTION Status This shows the RNX-EasyN400’s general device, system and interface status information. LAN System This is where you can configure LAN IP address, subnet mask, also to enable DHCP server and IP range. (For detail, please see Schedule Page 94.) Log This is where you can set to schedule your wireless internet service This is where RNX-EasyN400 stores the event log file based on the process. Monitor You will see graphical diagrams showing the Bandwidth for WAN and WLAN. Language You can select to have other language. Wizard (For detail, please see Page You will be guide to setup your router based on a step by step process to either AP router mode or AP Repeater mode. 100.) Wireless (For detail, Basic Client List Tools You can find out here which Wireless client that is associating with the Wireless router. please see Page 100.) This is where you can set wireless Radio, Mode, Band, SSID, and Channel. Policy This page is where you can set up the Wireless Access Policy. Admin You can change the password required to log into the broadband router's system 31 Wireless RouterRNX-EasyN400 User Manual web-based management Time The Time Zone allows your router to reference or base its time on the settings. DDNS DDNS allows you to map the static domain name to a dynamic IP address. (For detail, Power You can enable or disable Saving power in WLAN mode please see Diagnosis This page could let you diagnosis your current network status. Page 78.) Firmware This page allows you to upgrade RNX-EasyN400’s firmware. Back-up This page allows you to save the current router configurations. Reset You can reset the broadband router when system stops responding correctly or stop functions. 32 Wireless RouterRNX-EasyN400 User Manual 3.3 RNX-EasyN400’s System Page 3.3.1 Status This page allows you to monitor the current status of your router. System: You can see the Uptime, hardware information, serial number as well as firmware version information. WAN Settings: This section displays whether the WAN port is connected to a Cable/DSL connection. It also displays RNX-EasyN400’s WAN IP address, Subnet Mask, ISP Gateway, MAC address and the Primary DNS. LAN Settings: This section displays the Broadband router LAN port’s current information. It also shows whether the DHCP Server function is enabled / disabled. WLAN Settings: This section displays the current WLAN configuration settings. Wireless configuration details such as SSID, Security settings, BSSID, Channel number and mode of operation are briefly shown. 33 Wireless RouterRNX-EasyN400 User Manual 3.3.2 LAN The LAN Tabs reveals LAN settings which can be altered at will. If you are an entry level user, try accessing a website from your browser. If you can access website without a glitch, just do not change any of these settings. Click <Apply> at the bottom of this screen to save the changed configurations. LAN IP IP address: 192.168.0.1. It is RNX-EasyN400’s LAN IP address (the “Default Gateway” IP address of your LAN clients). It can be changed based on your own choice. IP Subnet Mask: 255.255.255.0 Specify a Subnet Mask for your LAN segment. 802.1d Spanning Tree: This is disabled by default. If 802.1d Spanning Tree function is enabled, this router will use the spanning tree protocol to prevent network loops. 34 Wireless RouterRNX-EasyN400 User Manual DHCP Server DHCP Server: This can enable or disable the Dynamic Pool setting. Lease time: This is the lease time of each assigned IP address. Start IP: This is the beginning of the IP pool for DHCP client hosts. End IP: This is the end of the IP pool for DHCP client hosts Domain name: The Domain Name for the existing or customized network. 3.3.3 DHCP View the current LAN clients which are assigned with an IP Address by the DHCPserver. This page shows all DHCP clients (LAN PCs) currently connected to your network. The table shows the assigned IP address, MAC address and expiration time for each DHCP leased client. Use the <Refresh> button to update the available information. Hit <Refresh> to get the updated table. You can check “Enable Static DHCP IP“. It is possible to add more static DHCP IPs. They are listed in the table “Current Static DHCP Table“. IP address can be deleted at will. Click <Apply> button to save the changed configuration. 35 Wireless RouterRNX-EasyN400 User Manual 36 Wireless RouterRNX-EasyN400 User Manual 3.3.4 Schedule This page allows users to set up schedule function for Firewall and Power Saving. Edit schedule options to allow configuration of firewall and power savings services to take effect. Fill in the schedule and select type of service. Click <Apply> to keep the settings. The schedule table lists the pre-schedule service-runs. You can select any of the schedule record using the check box. 37 Wireless RouterRNX-EasyN400 User Manual 3.3.5 Log View operation event log. This page shows the current system log of the Broadband router. It displays any event occurred after system start up. At the bottom of the page, the system log can be saved <Save> to a local file for further processing or the system log can be cleared <Clear> or it can be refreshed <Refresh> to get the most updated information. When the system is powered down, the system log will be cleared if not saved to a local file. 3.3.6 Monitor Show histogram for network connection on WAN, LAN & WLAN. Auto refresh keeps information updated frequently. 38 Wireless RouterRNX-EasyN400 User Manual 3.3.7 Language This Wireless Router support multiple language, You can select your desired language here. 39 Wireless RouterRNX-EasyN400 User Manual 3.4 RNX-EasyN400’s Wizard Page Click Wizard to configure the Broadband Router. Setup wizard will be displayed; check that the modem is connected and click <Next>. The details please refer to Setup Wizard at <Page 10>. 40 Wireless RouterRNX-EasyN400 User Manual 3.5 RNX-EasyN400’s Internet Page 3.5.1 Status This page shows the current Internet connection type and status. 3.5.2 Dynamic IP Use the MAC address when registering for Internet service, and do not change it unless required by your ISP. If your ISP used the MAC address of the Ethernet card as an identifier, connect only the PC with the registered MAC address to the broadband router and click the <Clone MAC Address> button. This will replace the current MAC address with the already registered Ethernet card MAC address. 41 Wireless RouterRNX-EasyN400 User Manual Host Name: This is optional. Please enter only when your ISP provider provides you with this information. MAC address: The default value is set to the WAN’s physical interface of the broadband router. 3.5.3 Static IP If your ISP Provider has assigned a fixed IP address to your internet plan. Please enter the assigned IP address, Subnet mask, Default Gateway IP address, and Primary DNS and Secondary DNS (if available) provided by your ISP provider. 3.5.4 Point-to-Point over Ethernet Protocol (PPPoE) Login/Password: Enter the PPPoE username and password assigned by your ISP Provider. Service Name: This is optional. Maximum Transmission Unit (MTU): This is the maximum size of the packets. 42 Wireless RouterRNX-EasyN400 User Manual Authentication type: Please use default <Auto> to auto-detect the best type. Type: Enable the Automatic Connection option to automatically re-establish the connection when an application attempts to access the Internet again. Idle Timeout (Available only under Automatic Connection): This is a maximum period of time for which the Internet connection is maintained during inactivity. If the connection is inactive longer than the Maximum Idle Time that has set, it will be dropped. 3.5.5 Point-to-Point Tunneling Protocol (PPTP) PPTP allows the secure connection over the Internet by simply dialing in a local point provided by your ISP provider. The following screen allows client PCs to establish a normal PPTP session and provides hassle-free configuration of the PPTP client on each client PC. Click <Apply> to save configuration and connect to ISP provider. 43 Wireless RouterRNX-EasyN400 User Manual 3.6 RNX-EasyN400’s Wireless Page 3.6.1 Basic In this wireless basic setting page, you can set your wireless connection based on Radio, Mode, Band, SSID, and Channel. Radio: You can turn on/off wireless radio. If wireless Radio is off, you cannot associate with AP through wireless. Mode: In this device, we support two operation modes under AP Router Mode. If you choose AP Router Mode, you can select AP or WDS function in the drop-down menu. Band: You can select the wireless standards running on your network environment. 44 Wireless RouterRNX-EasyN400 User Manual 2.4 GHz (B): If all of your clients are 802.11b, select this one. 2.4 GHz (N): If all of your clients are 802.11n, select this one. 2.4 GHz (B+G): Either 802.11b or 802.11g wireless devices are in your environment. 2.4 GHz (G): If all of your clients are 802.11g, select this one. 2.4 GHz (B+G+N): if all 802.11b, 802.11g, or 802.11n wireless devices are in your environment. 45 Wireless RouterRNX-EasyN400 User Manual Enable SSID: We support upto 4 multiple SSIDs in this device. Please select how many SSIDs you would like to use in your network environment. SSID1~4: ESSID is the name of your wireless network. It might be a unique name to identify this wireless device in the Wireless LAN. It is case sensitive and up to 32 printable characters. You might change the default ESSID for added security. Auto Channel: Device will search all valid channels, then select a cleanest channel and change to this channel if you enable this function. Depend on this function is enabled or not, you will see different items below Auto Channel. Channel: If Auto Channel is disabled, you should choose a static channel and AP will use this channel to communicate with other clients. Check Channel Time: If Auto Channel is enabled, you can choose a period from the drop-down menu. AP will change to a clean channel periodically. 46 Wireless RouterRNX-EasyN400 User Manual 3.6.2 WDS with AP Router WDS (Wireless Distribution System), a system that enables the wireless interconnection of access point, allows a wireless network to be extended using multiple APs without a wired backbone to link them. Each WDS AP needs same channel and encryption type settings. MAC address 1~4: Please enter the MAC address(es) of the neighboring APs which participate in WDS. You can enter up to 4 devices now. Set Security: WDS Security depends on your AP security settings. Note: This does not support mixed mode such as WPA-PSK/WPA2-PSK Mixed mode. 47 Wireless RouterRNX-EasyN400 User Manual 3.6.3 Advanced Advanced function allows you to set your RNX-EasyN400 in advanced wireless options. You should not change these parameters unless you know what effect the changes will have on RNX-EasyN400. Fragment Threshold: This specifies the maximum size of a packet during the fragmentation of data to be transmitted. If you set this value too low, it will result in bad performance. RTS Threshold: When the packet size is smaller than the RTS threshold, the wireless router will not use the RTS/CTS mechanism to send this packet. Beacon Interval: This is the interval of time that this wireless router broadcasts a beacon. A Beacon is used to synchronize the wireless network. DTIM Period: Enter a value between 1 and 10 for the Delivery Traffic Indication Message (DTIM). A DTIM is a countdown informing clients of the next window for listening to broadcast and multicast messages. 48 Wireless RouterRNX-EasyN400 User Manual Data Rate: The “Data Rate” is the rate that this access point uses to transmit data packets. The access point will use the highest possible selected transmission rate to transmit the data packets. N Data Rate: The “N Data Rate” is the rate that this access point uses to transmit data packets for N compliant wireless nodes. Highest to lowest data rate can be fixed. Channel Bandwidth: This is the range of frequencies that will be used. Preamble Type: The “Long Preamble” can provide better wireless LAN compatibility while the “Short Preamble” can provide better wireless LAN performance. CTS Protection: It is recommended to enable the protection mechanism. This mechanism can decrease the rate of data collision between 802.11b and 802.11g wireless stations. When the protection mode is enabled, the throughput of the AP will be a little lower due to a lot of framenetwork that is transmitted. TX Power: This can be set to a bare minimum or maximum power. 3.6.4 Security RNX-EasyN400 provides complete wireless LAN security functions, included are WEP, IEEE 802.1x, IEEE 802.1x with WEP, WPA with pre-shared key and WPA with RADIUS. With these security functions, you can prevent your wireless LAN from illegal access. Please make sure your wireless stations and wireless adapters use the same security function, and are setup with the same security key. 49 Wireless RouterRNX-EasyN400 User Manual SSID Selection: This broadband router support multiple SSID, you could select and set up the wanted SSID. Broadcast SSID: If you enabled “Broadcast SSID”, every wireless station located within the coverage of the RNX-EasyN400 can discover its signal easily. WMM: Enabling Wi-Fi Multi-Media can supports QoS for experiencing better audio, video and voice in applications. Encryption: When you choose to disable encryption, any wireless clients can connect to your RNX-EasyN400 without requiring password. Enable 802.1x Authentication IEEE 802.1x is an authentication protocol. Every user must use a valid account to login to RNX-EasyN400 before accessing the wireless LAN. The authentication is processed by a RADIUS server. This mode only authenticates users by IEEE 802.1x, but it does not encrypt the data during communication. 50 Wireless RouterRNX-EasyN400 User Manual WEP Encryption When you select 64-bit or 128-bit WEP key, you have to enter WEP keys to encrypt data. You can generate the key by yourself and enter it. You can enter four WEP keys and select one of them as a default key. Then AP can receive any packet encrypted by one of the four keys. 51 Wireless RouterRNX-EasyN400 User Manual Authentication Type: There are two authentication types: "Open System" and "Shared Key". Both AP and wireless client must be configured with the same authentication type. Key Length: You can select the WEP key length for encryption, 64-bit or 128-bit. The larger the key will be the higher level of security is used, but the throughput will be lower. Key Type: You can select ASCII Characters (alphanumeric format) or Hexadecimal Digits (in the "A-F", "a-f" and "0-9" range) to be the WEP Key. Default Key: This is the key used to encrypt data. Key1 - Key4: The WEP keys are used to encrypt data transmitted in the wireless network. Use the following rules to setup a WEP key on the device. 64-bit WEP: input 10-digits Hex values (in the "A-F", "a-f" and "0-9" range) or 5- digit ASCII character as the encryption keys. 128-bit WEP: input 26-digit Hex values (in the "A-F", "a-f" and "0-9" range) or 13-digit ASCII characters as the encryption keys. Click <Apply> at the bottom of the screen to save the above configurations. WPA Pre-Shared Key Encryption Wi-Fi Protected Access (WPA) is an advanced security standard. You can use a preshared key to authenticate wireless stations and encrypt data during communication. It uses TKIP or CCMP (AES) to change the encryption key frequently. So the encryption key will not easy to be cracked by hackers. This is the best security available. 52 Wireless RouterRNX-EasyN400 User Manual WPA-Radius Encryption Wi-Fi Protected Access (WPA) is an advanced security standard. You can use an external RADIUS server to authenticate wireless stations and provide the session key to encrypt data during communication. It uses TKIP or CCMP (AES) to change the encryption key frequently. Press <Apply> button when you are done. 3.6.5 Filter This wireless router supports MAC Address Control, which prevents unauthorized clients from accessing your wireless network. 53 Wireless RouterRNX-EasyN400 User Manual Enable wireless access control: Enable the wireless access control function. Adding an address into the list Enter the "MAC Address" and "Description" of the wireless station to be added and then click <Add>. The wireless station will now be added into the "MAC Address Filtering Table" below. If you are having any difficulties filling in the fields, just click "Reset" and both "MAC Address" and "Description" fields will be cleared. Remove an address from the list If you want to remove a MAC address from the "MAC Address Filtering Table", select the MAC address that you want to remove in the list and then click <Delete Selected>. If you want to remove all the MAC addresses from the list, just click the <Delete All> button. Click <Reset> will clear your current selections. Click <Apply> at the bottom of the screen to save the above configurations. 54 Wireless RouterRNX-EasyN400 User Manual 3.6.6 WPS (Wi-Fi Protected Setup) WPS is the simplest way to establish a connection between the wireless clients and the wireless router. You don’t have to select the encryption mode and fill in a long encryption passphrase every time when you try to setup a wireless connection. You only need to press a button on both wireless client and wireless router, and the WPS will do the rest for you. The wireless router supports two types of WPS: WPS via Push Button and WPS via PIN code. If you want to use the Push Button, you have to push a specific button on the wireless client or in the utility of the wireless client to start the WPS mode, and switch the wireless router to WPS mode. You can simply push the WPS button of the wireless router, or click the ‘Start to Process’ button in the web configuration interface. If you want to use the PIN code, you have to know the PIN code of the wireless client and switch it to WPS mode, then fill-in the PIN code of the wireless client through the web configuration interface of the wireless router. WPS: Check the box to enable WPS function and uncheck it to disable the WPS function. WPS Current Status: If the wireless security (encryption) function of this wireless router is properly set, you’ll see a “Configured” message here. Otherwise, you’ll see “UnConfigured”. Self Pin Code: This is the WPS PIN code of the wireless router. You may need this 55 Wireless RouterRNX-EasyN400 User Manual information when connecting to other WPS-enabled wireless devices. SSID: This is the network broadcast name (SSID) of RNX-EasyN400. Authentication Mode: It shows the active authentication mode for the wireless connection. Passphrase Key: It shows the passphrase key that is randomly generated by the wireless router during the WPS process. You may need this information when using a device which doesn’t support WPS. WPS via Push Button: Press the button to start the WPS process. RNX-EasyN400 will wait for the WPS request from the wireless devices within 2 minutes. You can fill-in the PIN code of the wireless device and press the button to start the WPS process. RNX-EasyN400 will wait for the WPS request from the wireless device within 2 minutes. 3.6.7 Client List This WLAN Client Table shows which the Wireless client associate to this Wireless Router. 3.6.8 Policy This function gives you abilities to set up the Wireless Access Policy for RNX-EasyN400. WAN Connection: Allow Wireless Client on specific SSID to access WAN port. 56 Wireless RouterRNX-EasyN400 User Manual Communication between Wireless clients: Allow Wireless Client to communicate with other Wireless Client on specific SSID. Communication between Wireless clients and wired clients: Allow Wireless Client to communicate with Wired Client on the switch on specific SSID. Or Wireless Client will allow to communicate with other Wireless Client and access WAN port only. 57 Wireless RouterRNX-EasyN400 User Manual 3.7 RNX-EasyN400’s Firewall Page The Broadband router provides extensive firewall protection by restricting connection parameters, thus limiting the risk of hacker attacks, and defending against a wide array of common Internet attacks. However, for applications that require unrestricted access to the Internet, you can configure a specific client/server as a Demilitarized Zone (DMZ). Note: To enable the Firewall settings select Enable and click <Apply> 3.7.1 Advanced You can allow the VPN packets to pass through this Broadband router. 3.7.2 Demilitarized Zone (DMZ) If you have a client PC that cannot run an Internet application (e.g. Games) properly behind the NAT firewall, then you can open up the firewall restrictions to unrestricted two-way Internet access by defining a DMZ Host. The DMZ function allows you to redirect all packets going to your WAN port IP address to a particular IP address in your LAN. The difference between the virtual server and the DMZ function is that the virtual 58 Wireless RouterRNX-EasyN400 User Manual server re-directs a particular service/Internet application (e.g. FTP, websites) to a particular LAN client/server, whereas DMZ re-directs all packets (regardless of services) from your WAN IP address to a particular LAN client/server. Enable DMZ: Enable/disable DMZ LAN IP Address: Fill-in the IP address of a particular host in your LAN Network or select a PC from the list on the right that will receive all the packets originally from the WAN port/Public IP address. Click <Apply> at the bottom of the screen to save the above configurations. 3.7.3 Denial of Service (DoS) RNX-EasyN400's firewall can block common hacker attacks, including Denial of Service, Ping of Death, Port Scan and Sync Flood. If Internet attacks occur, RNX-EasyN400 can also log the events. Ping of Death: Protections from Ping of Death attack. 59 Wireless RouterRNX-EasyN400 User Manual Discard Ping From WAN: RNX-EasyN400’s WAN port will not respond to any Ping requests Port Scan: Protects RNX-EasyN400 from Port Scans. Sync Flood: Protects RNX-EasyN400 from Sync Flood attack. 3.7.4 MAC Filter If you want to restrict users from accessing certain Internet applications / services (e.g. Internet websites, email, FTP etc.), and then this is the place to set that configuration. MAC Filter allows users to define the traffic type permitted in your LAN. You can control which PC client can have access to these services. Enable MAC Filtering: Check to enable or disable MAC Filtering. Deny: If you select “Deny” then all clients will be allowed to access Internet except the clients in the list below. Allow: If you select “Allow” then all clients will be denied to access Internet except the PCs in the list below. Add PC MAC Address 60 Wireless RouterRNX-EasyN400 User Manual Fill in “LAN MAC Address” and <Description> of the PC that is allowed / denied to access the Internet, and then click <Add>. If you find any typo before adding it and want to retype again, just click <Reset> and the fields will be cleared. Remove PC MAC Address If you want to remove some PC from the "MAC Filtering Table", select the PC you want to remove in the table and then click <Delete Selected>. If you want to remove all PCs from the table, just click the <Delete All> button. If you want to clear the selection and re-select again, just click <Reset>. Click <Apply> at the bottom of the screen to save the above configurations. 3.7.5 IP Filter Enable IP Filtering: Check to enable or uncheck to disable IP Filtering. 61 Wireless RouterRNX-EasyN400 User Manual Deny: If you select “Deny” then all clients will be allowed to access Internet except for the clients in the list below. Allow: If you select “Allow” then all clients will be denied to access Internet except for the PCs in the list below. Add PC IP Address You can click <Add> PC to add an access control rule for users by an IP address or IP address range. Remove PC IP Address If you want to remove some PC IP from the <IP Filtering Table>, select the PC you want to remove in the table and then click <Delete Selected>. If you want to remove all PCs from the table, just click the <Delete All> button. Click <Apply> at the bottom of the screen to save the above configurations. 3.7.6 URL Filter You can block access to some Web sites from particular PCs by entering a full URL address or just keywords of the Web site. Enable URL Blocking: Enable or disable URL Blocking Add URL Keyword 62 Wireless RouterRNX-EasyN400 User Manual Fill in “URL/Keyword” and then click <Add>. You can enter the full URL address or the keyword of the web site you want to block. If you happen to make a mistake and want to retype again, just click "Reset" and the field will be cleared. Remove URL Keyword If you want to remove some URL keywords from the "Current URL Blocking Table", select the URL keyword you want to remove in the table and then click <Delete Selected>. If you want remove all URL keywords from the table, click <Delete All> button. If you want to clear the selection and re-select again, just click <Reset>. Click <Apply> at the bottom of the screen to save the above configurations 63 Wireless RouterRNX-EasyN400 User Manual 3.8 RNX-EasyN400’s Advanced Page 3.8.1 Network Address Translation (NAT) Network Address Translation (NAT) allows multiple users at your local site to access the Internet through a single Public IP Address or multiple Public IP Addresses. NAT provides Firewall protection from hacker attacks and has the flexibility to allow you to map Private IP Addresses to Public IP Addresses for key services such as Websites and FTP. Select Disable to disable the NAT function. 3.8.2 Port Mapping Port Mapping allows you to re-direct a particular range of service port numbers (from the Internet / WAN Port) to a particular LAN IP address. It helps you to host servers behind RNX-EasyN400 NAT firewall. 64 Wireless RouterRNX-EasyN400 User Manual Enable Port Mapping: Enable or disable port mapping function. Description: description of this setting. Local IP: This is the local IP of the server behind the NAT firewall. Protocol: This is the protocol type to be forwarded. You can choose to forward “TCP” or “UDP” packets only, or select “BOTH” to forward both “TCP” and “UDP” packets. Port Range: The range of ports to be forward to the private IP. Add Port Mapping Fill in the "Local IP", “Protocol”, “Port Range” and "Description" of the setting to be added and then click "Add". Then this Port Mapping setting will be added into the "Current Port Mapping Table" below. If you find any typo before adding it and want to retype again, just click <Reset> and the fields will be cleared. Remove Port Mapping If you want to remove a Port Mapping setting from the "Current Port Mapping Table", select the Port Mapping setting that you want to remove in the table and then click 65 Wireless RouterRNX-EasyN400 User Manual D<Delete Selected>. If you want to remove all Port Mapping settings from the table, click <Delete All> button. Click <Reset> will clear your current selections. Click <Apply> at the bottom of the screen to save the above configurations. 3.8.3 Port Forwarding (Virtual Server) Use the Port Forwarding (Virtual Server) function when you want different servers/clients in your LAN to handle different service/Internet application type (e.g. Email, FTP, Web server etc.) from the Internet. Computers use numbers called port numbers to recognize a particular service/Internet application type. The Virtual Server allows you to re-direct a particular service port number (from the Internet/WAN Port) to a particular LAN private IP address (See Glossary for an explanation on Port number). Enable Port Forwarding: Enable or disable Port Forwarding. Description: The description of this setting. Local IP / Local Port: This is the LAN Client/Host IP address and Port number that the Public Port number packet will be sent to. 66 Wireless RouterRNX-EasyN400 User Manual Protocol: Select the port number protocol type (TCP, UDP or both). If you are unsure, then leave it to the default “both” setting. Public Port enters the service (service/Internet application) port number from the Internet that will be redirected to the above Private IP address host in your LAN Network. Public Port: Port number will be changed to Local Port when the packet enters your LAN Network. Add Port Forwarding Fill in the "Description" , "Local IP", "Local Port", "Protocol" and “Public Port” of the setting to be added and then click <Add> button. Then this Virtual Server setting will be added into the "Current Port Forwarding Table" below. If you find any typo before adding it and want to retype again, just click <Reset> and the fields will be cleared. Remove Port Forwarding If you want to remove Port Forwarding settings from the "Current Port Forwarding Table", select the Port Forwarding settings you want to remove in the table and then click "Delete Selected". If you want to remove all Port Forwarding settings from the table, just click the <Delete All> button. Click <Reset> will clear your current selections. Click <Apply> at the bottom of the screen to save the above configurations. 3.8.4 Port Triggering (Special Applications) Some applications require multiple connections, such as Internet games, video Conferencing, Internet telephony and others. In this section you can configure RNXEasyN400 to support multiple connections for these types of applications. 67 Wireless RouterRNX-EasyN400 User Manual Enable Trigger Port: Enable or disable the Port Trigger function. Trigger Port: This is the outgoing (Outbound) range of port numbers for this particular application. Trigger Type: Select whether the outbound port protocol is “TCP”, “UDP” or “BOTH”. Public Port: Enter the In-coming (Inbound) port or port range for this type of application (e.g. 2300-2400, 47624) Public Type: Select the Inbound port protocol type: “TCP”, “UDP” or “BOTH” Popular Applications: This section lists the more popular applications that require multiple connections. Select an application from the Popular Applications selection. Once you have selected an application, select a location (1-5) in the “Add” selection box and then click the <Add> button. This will automatically list the Public Ports required for this popular application in the location (1-5) you specified. 68 Wireless RouterRNX-EasyN400 User Manual Add Port Triggering Fill in the "Trigger Port", "Trigger Type”, “Public Port”, "Public Type", "Public Port" and "Description" of the setting to be added and then Click <Add>. The Port Triggering setting will be added into the "Current Trigger-Port Table" below. If you happen to make a mistake, just click <Reset> and the fields will be cleared. Remove Port Triggering If you want to remove Special Application settings from the "Current Trigger-Port Table", select the Port Triggering settings you want to remove in the table and then click <Delete Selected>. If you want remove all Port Triggering settings from the table, just click the <Delete All> button. Click <Reset> will clear your current selections. 3.8.5 Application Layer Gateway (ALG) You can manually select the applications that need ALG support. RNX-EasyN400 will let the selected application to correctly pass through the NAT gateway. 69 Wireless RouterRNX-EasyN400 User Manual 3.8.6 UPnP With UPnP, all PCs in you Intranet will discover this router automatically. So, you don’t have to configure your PC and it can easily access the Internet through this router. Enable/Disable UPnP: You can enable or Disable the UPnP feature here. After you enable the UPnP feature, all client systems that support UPnP, like Windows XP, can discover this router automatically and access the Internet through this router without having to configure anything. The NAT Traversal function provided by UPnP can let applications that support UPnP connect to the internet without having to configure the virtual server sections. 3.8.7 Quality of Service (QoS) QoS can let you classify Internet application traffic by source/destination IP address and port number. You can assign priority for each type of application and reserve bandwidth for it. The packets of applications with higher priority will always go first. Lower priority applications will get bandwidth after higher priority applications get enough bandwidth. This can let you have a better experience in using critical real time services like Internet phone, video conference …etc. All the applications not specified by you are classified as rule “Others”. Priority Queue 70 Wireless RouterRNX-EasyN400 User Manual This can put the packets of specific protocols in High/Low Queue. The packets in High Queue will process first. Unlimited Priority Queue: The LAN IP address will not be bounded in the QoS limitation. High/Low Priority Queue: This can put the packets in the protocol and port range to High/Low QoS Queue. Bandwidth Allocation: 71 Wireless RouterRNX-EasyN400 User Manual This can reserve / limit the throughput of specific protocols and port range. You can set the upper bound and Lower bound. Type: Specify the direction of packets. Upload, download or both. IP range: Specify the IP address range. You could also fill one IP address Protocol: Specify the packet type. The default ALL will put all packets in the QoS priority Queue. Port range: Specify the Port range. You could also fill one Port. Policy: Specify the policy the QoS, Min option will reserve the selected data rate in QoS queue. Max option will limit the selected data rate in QoS queue. Rate: The data rate of QoS queue. Disabled: This could turn off QoS feature. 3.8.8 Routing You can set enable Static Routing to let RNX-EasyN400 forward packets by your routing policy. To Start, first you will need to disable NAT. Upon disable the NAT function. You will see below page appear. 72 Wireless RouterRNX-EasyN400 User Manual Destination LAN IP: Specify the destination LAN IP address of static routing rule. Subnet Mask: Specify the Subnet Mask of static routing rule. Default Gateway: Specify the default gateway of static routing rule. Hops: Specify the Max Hops number of static routing rule. Interface: Specify the Interface of static routing rule. 3.9 RNX-EasyN400’s Tools Page 3.9.1 Admin and Remote Management 73 Wireless RouterRNX-EasyN400 User Manual You can change the password required to log into the broadband router's system webbased management. By default, the password is: admin. Passwords can contain 0 to 12 alphanumeric characters, and are case sensitive. Old Password: Fill in the current password to allow changing to a new password. New Password: Enter your new password and type it again in Repeat New Password for verification purposes Remote management This allows you to designate a host in the Internet the ability to configure the Broadband router from a remote site. Enter the designated host IP Address in the Host IP Address field. However, please note that Remote Management has its limitation, it will not work when: 1. Remote Management has been disabled in one of the remote management screens. 2. The IP address in the Secured Client IP Address field does not match the client IP address. If it does not match, RNX-EasyN400 will not premit the connection of the session. 3. There is a firewall rule that blocks you from access. 74 Wireless RouterRNX-EasyN400 User Manual Host Address: This is the IP address of the host in the Internet that will have management/configuration access to the Broadband router from a remote site. If the Host Address is left 0.0.0.0 this means anyone can access RNX-EasyN400’s web-based configuration from a remote location, providing they know the password. Port: The port number of the remote management web interface. Enabled: Check to enable the remote management function. Click <Apply> at the bottom of the screen to save the above configurations. For details on how to set Remote Management, please refer to troubleshooting in Appendix. 3.9.2 Time The Time Zone allows your router to reference or base its time on the settings configured here, which will affect functions such as Log entries and Firewall settings. Time Setup: Synchronize with the NTP server 75 Wireless RouterRNX-EasyN400 User Manual Time Zone: Select the time zone of the country you are currently in. RNX-EasyN400 will set its time based on your selection. NTP Time Server: RNX-EasyN400 can set up external NTP Time Server. Daylight Savings: RNX-EasyN400 can also take Daylight Savings into account. If you wish to use this function, you must select the Daylight Savings Time period and check/tick the enable box to enable your daylight saving configuration. Click <Apply> at the bottom of the screen to save the above configurations. `Synchronize with PC: You could synchronize timer with your Local PC time. PC Date and Time: This field would display the PC date and time. Daylight Savings: RNX-EasyN400 can also take Daylight Savings into account. If you wish to use this function, you must select the Daylight Savings Time period and check/tick the enable box to enable your daylight saving configuration. Click <Apply> at the bottom of the screen to save the above configurations. 76 Wireless RouterRNX-EasyN400 User Manual 3.9.3 DDNS DDNS allows you to map the static domain name to a dynamic IP address. You must get an account, password and your static domain name from the DDNS service providers. This router supports DynDNS, TZO and other common DDNS service providers. Enable/Disable DDNS: Enable or disable the DDNS function of this router Server Address: Select a DDNS service provider Host Name: Fill in your static domain name that uses DDNS. Username: The account that your DDNS service provider assigned to you. Password: The password you set for the DDNS service account above Click <Apply> at the bottom of the screen to save the above configurations. 3.9.4 Power Saving power in WLAN mode can be enabled / disabled in this page. 77 Wireless RouterRNX-EasyN400 User Manual 3.9.5 Diagnosis This page could let you diagnosis your current network status. By entering any website address, you will know if the internet connection is connected. 3.9.6 Firmware This page allows you to upgrade RNX-EasyN400’s firmware. To upgrade the firmware of your Broadband router, you need to download the firmware file to your local hard disk, and enter that file name and path in the appropriate field on this page. You can also use the Browse button to find the firmware file on your PC. 78 Wireless RouterRNX-EasyN400 User Manual Once you’ve selected the new firmware file, click <Apply> at the bottom of the screen to start the upgrade process Caution: • To upgrade firmware, please make sure the wireless connection is disabled and the computer is connected with a cable to the router. • Also make sure the computer and the wireless router are both plug-in with power adapter during this whole process Step 1 Download the latest firmware from the Rosewill website at www.rosewill.com. Save it on the Desktop of your PC. Then unzip the file. (Using RNX-N4PS as an example) 79 Wireless RouterRNX-EasyN400 User Manual Step 2 Log on to the management web page of the AP. By default, the management IP is http://192.168.0.1 , and the user name is “admin”; password is “admin” . Step 3 Click <Tools> and <Firmware>, then Click <Browse>. Step 4 Select the latest firmware that you saved and unzipped onto your computer. 80 Wireless RouterRNX-EasyN400 User Manual Step 5 Click <Apply> button. Step 6 Click <OK> button for writing the latest firmware to your router. Step 7 Click <OK> button. 3.9.7 Back-up This page allows you to save the current router configurations. When you save the configurations, you also can re-load the saved configurations into RNX-EasyN400 through the Restore Settings. If extreme problems occur you can use the Restore to Factory Defaults to set all configurations to its original default settings. Backup Settings: This can save the Broadband router current configuration to a file named "config.dlf" on your PC. You can also use the <Upload> button to restore the saved configuration to the Broadband router. Alternatively, you can use the "Restore to Factory Defaults" tool to force the Broadband router to perform a power reset and restore the original factory settings. 3.9.8 Reset You can reset the broadband router when system stops responding correctly or stop functions. 81 Wireless RouterRNX-EasyN400 User Manual 82 Wireless RouterRNX-EasyN400 User Manual 4 Repeater Mode Repeater mode has limited settings compared to the AP mode. Choose “Repeater mode” on the top right corner of the configuration page. System will counting down and restarts automatically. Before your computer connected to the RNX-EasyN400 in AP Repeater Mode, you will need to manually setup your computer’s IP address, in order to login to the web configure page. In Windows XP: 1. Click on Start > Control Panel > Network and Internet Connections > Network connections. 83 Wireless RouterRNX-EasyN400 2. User Manual Right-click on the Local Area Connection which represents your network card and selects Properties. 3. Highlight Internet Protocol (TCP/IP) and click Properties. 4. Click to use the B section like below page. You will need to set IP address for default. Example: If RNX-EasyN400’s LAN IP address is 192.168.0.1, make your IP address 192.168.0.X (X is a number between 100 and 200). Make sure that the number you choose is not in use on the network. Set Subnet mask as 255.255.255.0. 84 Wireless RouterRNX-EasyN400 User Manual 5. Set Default Gateway the same as the LAN IP address of your router (192.168.0.1). 6. After finish, Click <OK>, Then <OK> on below page 7. Open your web browser and type in 192.168.0.1 on the address bar. At the login, enter your username and password (default username: admin, password: admin). 85 Wireless RouterRNX-EasyN400 8. User Manual You will see the configuration homepage under “Repeater mode” now. Note: After finishing co figurate your RNX-EasyN400 in Repeater mode, please do remember to adjust your computer’s IP address function back to DHCP function. 86 Wireless RouterRNX-EasyN400 User Manual 4.1 RNX-EasyN400 in Repeater Mode’s System page 4.1.1 Status This page allows you to monitor the current status of your RNX-EasyN400 in Repeater mode. System: You can see the Uptime, hardware information, serial number as well as firmware version information. LAN Settings: This section displays the Broadband router LAN port’s current information. It also shows whether the DHCP Server function is enabled / disabled. WLAN Settings: This section displays the current WLAN configuration settings. Wireless configuration details such as SSID, Security settings, BSSID, Channel number and mode of operation are briefly shown. 4.1.2 LAN 87 Wireless RouterRNX-EasyN400 User Manual The LAN Tabs reveals LAN settings which can be altered at will. If you are an entry level user, try accessing a website from your browser. If you can access website without a glitch, just do not change any of these settings. Click <Apply> at the bottom of this screen to save the changed configurations. IP address: This is RNX-EasyN400’s LAN IP address (Your LAN clients default gateway IP address). It can be changed based on your own choice. IP Subnet Mask: Specify a Subnet Mask for your LAN segment. Default Gateway: This is the IP address of your host router. 802.1d Spanning Tree: This is disabled by default. If 802.1d Spanning Tree function is enabled, this router will use the spanning tree protocol to prevent network loops. 4.1.3 Schedule Add schedule, edit schedule options allow configuration of power savings services. Fill in the schedule and select type of service. Click <Apply> to implement the settings. 88 Wireless RouterRNX-EasyN400 User Manual The schedule table lists the pre-schedule service-runs. You can select any of them using the check box. 4.1.4 Log View operation log of RNX-EasyN400. This page shows the current system log of the Broadband router. It displays any event occurred after system start up. At the bottom of the page, the system log can be saved <Save> to a local file for further processing or the system log can be cleared <Clear> or it can be refreshed <Refresh> to get the most updated information. When the system is powered down, the system log will disappear if not saved to a local file. 89 Wireless RouterRNX-EasyN400 User Manual 4.1.5 Monitor Show the network packets histogram for network connection on WAN, LAN & WLAN. Auto refresh keeps information updated frequently. 4.1.6 Language This Wireless Router support multiple language of web pages, you could select your native language here. 90 Wireless RouterRNX-EasyN400 User Manual 91 Wireless RouterRNX-EasyN400 User Manual 4.2 RNX-EasyN400 in Repeater Mode’s Wizard page Click Wizard to configure the Broadband Router. Setup wizard will be displayed; check that the modem is connected and click <Next>. The details please refer to Setup Wizard at <Page 10>. 4.3 RNX-EasyN400 in Repeater Mode’s Wireless Page This is where you select the Wireless Router that you want RNX-EasyN400 to receive from and broadcast. RNX-EasyN400 allows you to add multiple SSIDs to give you more freedom to assign who can connect to which SSID. When multiple SSIDs are added, you will see more options for you to manage your RNX-EasyN400 in Repeater Mode. You will see the below page shown as RNX-EasyN400 in Repeater Mode that has only 1 SSID enable. 92 Wireless RouterRNX-EasyN400 User Manual You will see that when add SSID # 2 and SSID #3, you have “Security” in option to set up for your SSID #2 and SSID #3. Radio: This is where you set your RNX-EasyN400 to broadcast the signal from your wireless router. 93 Wireless RouterRNX-EasyN400 User Manual Mode: This is predefined as Repeater. Band: Depending on the wireless router you want to connect to, you will need to adjust the band accordingly to the wireless router. Enable SSID #: By default, RNX-EasyN400 has 1 set of SSID in Repeater mode. However, you can add two more SSIDs for your designate groups to link to. SSID 1: This is the default SSID #. It will automatically adjust when you select your desired signal to broadcast. SSID 2: When you add the second SSID. You will see this option where you can enter your desired SSID 2 name. SSID 3: When you add the third SSID. You will see this option where you can enter your desired SSID 3 name. Site Survey: Once click this option, you will see a popup page which scan through your local wireless signal. Below is the popup sample page which you will see. Once you selected the SSID which you want to connect to, you will be ask for the password depending on your setting in the wireless router you want to connect to. 94 Wireless RouterRNX-EasyN400 User Manual Once selected your desired SSID connection, Click <Connect>, then you will see below page popup. Depending on the wireless signal that you want to connect to, RNX-EasyN400 will automatically configures to the current Encryption based on WEP, WPA and WPA2. For example, under the encryption type of WPA/PSK and WPA2/PSK, you will see: 95 Wireless RouterRNX-EasyN400 User Manual All you have to do is to enter the password of the wireless router you want to connect with. Then Click <Apply> You will see the RNX-EasyN400 start countdown and below page appear: Once complete, if successful, you should be the below message: Your RNX-EasyN400 is now ready to broadcast your wireless router’s signal and extend your wireless router’s range. 96 Wireless RouterRNX-EasyN400 User Manual 5 PC Network Adapter setup (Under Windows XP) • Enter [Start Menu] Æ select [Control panel] Æ select [Network]. • Select [Local Area Connection]) icon=>select [properties] 97 Wireless RouterRNX-EasyN400 User Manual • Select [Internet Protocol (TCP/IP)] =>Click [Properties]. • Select the [General] tab and Click “a” on both selections. a. RNX-EasyN400 supports [DHCP] function, please select both [Obtain an IP address automatically] and [Obtain DNS server address automatically]. 98 Wireless RouterRNX-EasyN400 User Manual 99 Wireless RouterRNX-EasyN400 User Manual Appendix A – Product Specification Hardware Feature Dimensions 125mm (L) x 98mm (W) x 25mm (H) WAN: One 10/100 Fast Ethernet RJ-45 LAN: Four 10/100 Fast Ethernet RJ-45 Physical Interface Reset button Power Jack WPS button (WiFi Protected Setup) Power Status WAN (Internet connection) LEDs Status 10/100Mbps LAN1~LAN4 WLAN (Wireless connection) Power Supply: 200 to 240 VDC ± 10% (ETSI) 100 to 120 VDC ± 10% (FCC) Power Requirements Device: 12V/1A The reset button is built into the rear panel. Use this button to restore the RNXReset Button EasyN400 to its factory default settings. Press for 1 second to restart the device. Press for 10 seconds to restore to factory default settings. WPS button Press the WPS on two WPS enabled devices within 120 seconds for a security-enabled wireless connection. Temperature Range 0 to 45° C - Operating, -10 to 70 ° C – Storage Environment Humidity (non-condensing) 15%~95% typical 100 Wireless RouterRNX-EasyN400 User Manual 101 Wireless RouterRNX-EasyN400 User Manual Appendix B – Troubleshooting Q: How do I configue to set up Remote Management? A: Depending on your internet connect plans, your methods of setting up remote management will be different. 1. After Login to the RNX-EasyN400 management page, Click 「Tools」, then 「Admin」. We should see as below. 2. Host Address is referring a set of IP address that represent the designated computer in your network which you allow to access to your wireless router. But once you enter a set IP, you won't be able to link to your wireless router from any other computer except the computer that has the correct IP address when you are login within your network. 3. In order to access from different remote places (eg. Remote connect to your RNXEasyN400 at home from your office), we will need to leave Host Address blank. 4. Type in 8080 or 80 or 8888 in <port>; these are the numbers normally won't be use by other applications or you can input your desired port number, however you will need to make sure that the port number you use wasn’t use by other applications. Click <Enable>; then <Apply> 102 Wireless RouterRNX-EasyN400 User Manual 5. After RNX-EasyN400 finish reset, please Click “System”, then from “Status” page below you will see under “WAN Settings” which shows your External IP address (where has been red circled under “WAN Settings”). 6. External IP Address is the IP address which assign by your ISP provider to your service. When under dynamic IP plans, this IP address should remain the same unless your ISP resets your external IP address or when you have reboot your Modem. 103 Wireless RouterRNX-EasyN400 User Manual 7. We suggest that you change the default login name and password to your desired login name and password which are difficult for others to guess or hack. (Rosewill default login/Password is admin) 8. Use above picture as an example. The External IP address is 10.16.196.62. The port number that we set is as 8080 or 80 or 8888. 9. Then to remote access to your wireless router: - From a different location, type in 「10.16.196.62:8080」 or 「10.16.196.62:80」 or 「10.16.196.62:8888」 in the address bar of the Web Browser. - You should be able to see the below login page. Once entered your 104 Wireless RouterRNX-EasyN400 User Manual Q: What is the IP address of my RNX-EasyN400? A: The default IP address is 192.168.0.1. However If you changed the IP address and have forgotten it, you might get the IP address of RNX-EasyN400 by looking up the IP address of the default gateway for your computer. To do this in most Windows computers, click Start > Run, Type “cmd”, then enter “ipconfig”. The IP address of the Default Gateway might be the IP address of the RNXEasyN400 (depending on the network). If your RNX-EasyN400 is a DHCP client, you can find your IP address from the DHCP server. This information is only available from the DHCP server which allocates IP addresses on your network. Find this information directly from the DHCP server or contact your system administrator for more information. Or you will need to reset your RNX-EasyN400 to change all settings back to their default. This means your current settings are lost. See Section 3.1 on page 27 for information on resetting your RNX-EasyN400. Q: I don’t remember my password. A: The default password is admin. If this doesn’t work, you have to reset your RNX-EasyN400, please refer to Section 3.1 on Page 27. Q: I cannot see or access the Login screen in the Web Configurator. A: Make sure you are using the correct IP address. • The default IP address is 192.168.0.1. • If you changed the default IP address, please use your changed IP address. 105 Wireless RouterRNX-EasyN400 • User Manual If you changed the IP address and have forgotten it, see the troubleshooting on how to find the IP address of your RNX-EasyN400. • Make sure your Internet browser does not block pop-up windows and has JavaScripts and Java enabled. • Reset the device to its factory defaults, and try to access the RNX-EasyN400 with the default IP address • If the problem continues, contact the network administrator or Rosewill. Q: I can see the Login screen, but I cannot log in to the RNX-EasyN400. A: Make sure you have entered the password correctly. The default password is admin. This field is case-sensitive, so make sure [Caps Lock] is not on. • You cannot log in to the Web Configurator while someone is using Telnet to access the RNX-EasyN400. Log out of the RNX-EasyN400 in the other session, or ask the person who is logged in to log out. • This can happen when you fail to log out properly from your last session. Try logging in again after 5 minutes. • Disconnect and re-connect the power adaptor or cord to the RNX-EasyN400. • If this does not work, you have to reset the device to its factory defaults. Q: I cannot access the Internet. A: Check the hardware connections, and make sure the LEDs are behaving as expected. • Please follow the steps below to make sure the RNX-EasyN400 is connected with the modem. Configure your settings correctly i.e. DHCP, SSID, Password. Save your settings. Reboot your Rosewill Router and your ADSL/Cable modem. If rebooting your ADSL/Cable modem doesn’t work, please call your ADSL/Cable provider and ask them to reset and restart your ADSL/Cable Modem. (This is due to some newer ADSL/Cable modems are now equipped 106 Wireless RouterRNX-EasyN400 User Manual with a battery for when power is lost, i.e. Time Warner Cable Modems, will keep the modem on and connected. Due to the ADSL/Cable modem not assigning the correct DHCP information, the Rosewill Routers can not work correctly and assign a DHCP to the client computers.) • Make sure you entered your ISP account information correctly in the wizard. These fields are case-sensitive, so make sure [Caps Lock] is not on. • If you are trying to access the Internet wirelessly, make sure the wireless settings in the wireless client are the same as the settings in the Router Mode. • Follow the process of Section 1.7 on Page 7. Use cable to connect your RNX-EasyN400, use web browser to link to RNX-EasyN400. • If your RNX-EasyN400 is being set as a repeater, you will need to manually set your computer’s IP address. Please follow the steps in Section 2.3.3 Connecting to RNX-EasyN400 in AP Repeater Mode on Page 22. • If the problem continues, contact your ISP. Q: I cannot access the Internet anymore. I had access to the Internet (with the RNXEasyN400), but my Internet connection is not available anymore.. A: Check the hardware connections, and make sure the LEDs are behaving as expected. • Reboot the RNX-EasyN400. • If the problem continues, contact your ISP. Q: My internet connection is slow. A: There might be a lot of traffic on the network. Look at the LEDs, to see if RNXEasyN400 is transferring and receiving a lot of information. Try closing some programs that use the Internet, especially peer-to-peer applications. • Check the signal strength. If the signal strength is low, try moving the RNXEasyN400 closer to the AP if possible, and look around to see if there are any devices 107 Wireless RouterRNX-EasyN400 User Manual that might be interfering with the wireless network (for example, microwaves, other wireless networks, and so on). • Reboot the RNX-EasyN400. • Please update the Wireless Adapter’s Firmware of your Notebook and PC to the latest version to ensure the best connection. • You may consider to activate Qos function, please see section 3.8.7 Quality of Service (QoS) on Page 69. • If problem remainds, please contact the network administrator or Rosewill. Q: I cannot access the RNX-EasyN400 or ping any computer from the WLAN (wireless AP or router). A: Make sure the wireless LAN is enabled on the RNX-EasyN400 • Make sure the wireless adapter on the wireless station is working properly. • Make sure your Notebook’s wireless adapter has the most current firmware. • Make sure the wireless adapter installed on your computer is IEEE 802.11 compatible and supports the same wireless standard as the RNX-EasyN400. • Make sure your computer (with a wireless adapter installed) is within the transmission range of the RNX-EasyN400. • Check that both the RNX-EasyN400 and your wireless station are using the same wireless and wireless security settings. • Make sure traffic between the WLAN and the LAN is not blocked by the firewall on the RNX-EasyN400. • Make sure you allow the RNX-EasyN400 to be remotely accessed through the WLAN interface. Check your remote management settings. 108 Wireless RouterRNX-EasyN400 User Manual Appendix C – FCC Interference Statement Federal Communication Commission Interference Statement This equipment has been tested and found to comply with the limits for a Class B digital device, pursuant to Part 15 of the FCC Rules. These limits are designed to provide reasonable protection against harmful interference in a residential installation. This equipment generates, uses and can radiate radio frequency energy and, if not installed and used in accordance with the instructions, may cause harmful interference to radio communications. However, there is no guarantee that interference will not occur in a particular installation. If this equipment does cause harmful interference to radio or television reception, which can be determined by turning the equipment off and on, the user is encouraged to try to correct the interference by one of the following measures: z Reorient or relocate the receiving antenna. z Increase the separation between the equipment and receiver. z Connect the equipment into an outlet on a circuit different from that to which the receiver is connected. z Consult the dealer or an experienced radio/TV technician for help. This device complies with Part 15 of the FCC Rules. Operation is subject to the following two conditions: (1) This device may not cause harmful interference, and (2) this device must accept any interference received, including interference that may cause undesired operation. FCC Caution: Any changes or modifications not expressly approved by the party responsible for compliance could void the user's authority to operate this equipment. IMPORTANT NOTE: FCC Radiation Exposure Statement: This equipment complies with FCC radiation exposure limits set forth for an uncontrolled environment. This equipment should be installed and operated with minimum distance 20cm between the radiator & your body. We declare that the product is limited in CH1~CH11 by specified firmware controlled in the USA. This transmitter must not be co-located or operating in conjunction with any other antenna or transmitter. Requirements for indoor vs. outdoor operation, license requirements and allowed channels of operation apply in some countries as described below: . In Italy the end-user must apply for a license from the national spectrum authority to operate this device outdoors. . In Belgium outdoor operation is only permitted using the 2.46 - 2.4835 GHz band: Channel 13. . In France outdoor operation is only permitted using the 2.4 - 2.454 GHz band: Channels 1 - 7. 109 Wireless RouterRNX-EasyN400 User Manual Italian: In alcuni Paesi si applicano i requisiti per il funzionamento in interni-esterni, i requisiti di licenza e i canali consentiti, come descritto si seguito: - In Italia l'utente finale deve richiedere una licenza all'Autorità competente nazionale per il funzionamento in esterni del device. Dutch: Vereisten voor werking indoor versus outdoor, licentie vereisten en toegestane kanalen voor gebruik zijn van toepassing in bepaalde landen zoals hieronder beschreven. - In Belgïe is outdoor gebruik enkel toegestaan gebruik makend van de 2.46 - 2.4835 GHz band: Kanaal13. French: Conditions requises pour des installations intérieures ou extérieures, licences requises et canaux autorisés dans certains pays comme décrits ci-dessous: - En Belgique, l'installation extérieure est seulement autorisée sur la bande 2.46 - 2.4835 GHz:: Canal 13 - En France, l'installation extérieure est seulement autorisée sur la bande 2.4 2.454 GHz : Canal 1-7 110 Wireless RouterRNX-EasyN400 User Manual Appendix D – IC Interference Statement Industry Canada statement: This device complies with RSS-210 of the Industry Canada Rules. Operation is subject to the following two conditions: (1) This device may not cause harmful interference, and (2) this device must accept any interference received, including interference that may cause undesired operation. IMPORTANT NOTE: Radiation Exposure Statement: This equipment complies with IC radiation exposure limits set forth for an uncontrolled environment. This equipment should be installed and operated with minimum distance 20cm between the radiator & your body. This device has been designed to operate with an antenna having a maximum gain of 2 dBi. Antenna having a higher gain is strictly prohibited per regulations of Industry Canada. The required antenna impedance is 50 ohms. Thank you for purchasing a quality Rosewill Product. Please register your product at : www.rosewill.com for complete warranty information and future support for your product. 111