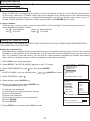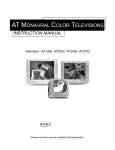
1
Instruction ManualManual
WARNING
To reduce the risk of fire or electric shock, do not expose this product to rain or moisture.
The apparatus shall not be exposed to dripping or splashing and that no objects filled with liquids, such as
vases, shall be placed on the apparatus.
CAUTION
Caution: To reduce the risk of electric shock, do not
remove cover (or back). No user serviceable parts
inside. Refer servicing to qualified service personnel.
RISK OF ELECTRIC SHOCK
DO NOT OPEN
This symbol indicates "dangerous voltage"
inside the product that presents a risk of
electric shock or personal injury.
This symbol indicates important
instructions accompanying the product.
Caution: To prevent electric shock, match wide blade of plug to wide slot, fully insert.
Attention: Pour é viter les chocs é lectriques, introduire la lame la plus large de la fiche dans la borne
correspondante de la prise et pousser jusqú au fond.
USE OF CONTROLS OR ADJUSTMENTS OR PERFORMANCE OF PROCEDURES OTHER THAN THOSE
SPECIFIED HEREIN MAY RESULT IN HAZARDOUS RADIATION EXPOSURE. DO NOT STARE INTO
BEAM.
The unit employs a Laser System. To prevent direct exposure to the laser beam, do not try to open the
enclosure. Visible laser radiation when open and interlocks defeated.
Refer to the identification/rating label located on the back panel of your product for its proper operating
voltage.
Caution: Using video games or any external accessory with fixed images for extended periods of time
can cause them to be permanently imprinted on the picture tube (or projection TV picture tubes).
ALSO, some network/program logos, phone numbers, etc. may cause similar damage. This damage
is not covered by your warranty.
Cable TV Installer
This reminder is provided to call your attention to Article 820-40 of the National Electrical Code (Section 54
of the Canadian Electrical Code, Part 1) which provides guidelines for proper grounding and, in particular,
specifies that the cable ground shall be connected to the grounding system of the building as close to the
point of cable entry as practical.
Customer Record
You will find the model number and chassis number of your unit on the back of your unit. Record these
numbers in the spaces provided below. Refer to them whenever you call APEX Digital customer service or
your APEX dealer regarding this product.
Chassis Number:
Model Number:
PACKING LIST
Parts
TV/DVD Combo
QTY
1
Remote Control
Operation Manual
AAA Alkaline Batteries
1
1
1
2
Instruction ManualManual
IMPORTANT SAFETY INSTRUCTIONS
1.
2.
3.
4.
5.
6.
7.
8.
Read these instructions.
Keep these instructions.
Heed all warnings.
Follow all instructions.
Do not use this apparatus near water.
Clean only with dry cloth.
Do not block any ventilation openings. Install in accordance with the manufacturer's instructions.
Do not install near any heat sources such as radiators, heat registers, stoves, or other apparatus
(including amplifiers) that produce heat.
9. Do not defeat the safety purpose of the polarized or grounding-type plug. A polarized plug has two
blades with one wider than the other. A grounding type plug has two blades and a third grounding prong.
The wide blade or third prong is provided for your safety. If the provided plug does not fit into your outlet,
consult an electrician for replacement of the obsolete outlet.
10.Protect the power cord from being walked on or pinched particularly at plugs, convenience receptacles,
and the point where they exit from the apparatus.
11.Only use attachments/accessories specified by the manufacturer.
12.Use only the cart, stand, tripod, bracket, or table specified by the manufacturer, or sold with
the apparatus. When a cart is used, use caution when moving the cart/apparatus
combination to avoid injury from tip-over.
13.Unplug this apparatus during lightning storms or when unused for long periods of time.
14.Refer all servicing to qualified service personnel. Servicing is required when the apparatus has been
damaged in any way, such as power-supply cord or plug is damaged, liquid has been spilled or objects
have fallen into the apparatus, the apparatus has been exposed to rain or moisture, does not operate
normally, or has been dropped.
15.Warning - This unit should only be serviced by an authorized and properly trained technician.
Opening the cover or other attempts by the user to service this unit may result in serious injury
or death from electrical shock, and may increase the risk of fire.
IMPORTANT STAND AND BASE SAFETY INFORMATION
Choose the location for your unit carefully. Place the unit on a stand or base that is of adequate size and
strength to prevent the unit from being accidentally tipped over, pushed off, or pulled off. This could cause
personal injury and/or damage the unit. Refer to the Important Safety Instructions above.
FCC Warning
Class B Computing Device
Information to User
This equipment has been tested and found to comply with the limits for a Class B Digital Device pursuant
to part 15 of FCC Rules. These limits are designed to provide reasonable protection against harmful
interference in a residential installation. This equipment generates, uses, and can radiate radio frequency
energy and, if not installed and used in accordance with the instructions, may cause harmful interference to
radio communications. However, there is no guarantee that interference will not occur in a particular
installation. lf this equipment receives interference while off and on, the user is encouraged to try to correct
the interference by one or more of the following measures:
1) Reorient or relocate the receiving antenna.
2) lncrease the separation between the equipment and unit.
3) Connect the equipment into an outlet on a circuit different from that to which the unit is connected.
4) Consult the dealer or an experienced radio/TV technician for help and for additional suggestions.
The user may find the following booklet prepared by the Federal Communications Commission helpful:
"How to Identify and Resolve Radio - TV Interference Problems". This booklet is available from the US
Government Printing Office. Washington, D.C. 20402, Stock No. 004-000-00345-4.
FCC Warning
The user is cautioned that changes or modifications not expressly approved by the manufacturer could void
the user's authority to operate the equipment.
NOTE: In order for an installation of the product to maintain compliance with the limits for a Class B
Device, shielded cables must be used.
2
Instruction ManualManual
WARNING:
THE REGION CODE FOR THE UNIT IS 1.
CLASS 1
LASER PRODUCT
Since it is very usual for DVD movies to be released at different times in different regions of
the world, all players have region codes and disks can have an optional region code. If you
load a disk of a different region code to your player, you will see the region code notice on
the screen. The disk will not play, and should be unloaded.
Notes on Discs
HOW TO HANDLE, CLEAN, AND STORE DISCS.
Handling discs
• DO NOT TOUCH THE PLAYBACK SIDE OF THE DISC.
• DO NOT ATTACH PAPER OR TAPE TO DISCS.
Note:
APEX DIGITAL INC. SHALL NOT BE RESPONSIBLE FOR DAMAGE
THAT MAY OCCUR TO A DISC FROM BEING OPERATED IN THE UNIT.
Cleaning discs
• Fingerprints and dirt on the disc cause picture and sound deterioration.
Wipe the disc from the center outward with a soft cloth. Always keep the disc clean.
• If you cannot wipe off the dirt off, wipe the disc lightly with a slightly moistened soft cloth a finish with
a dry cloth.
• Do not use any of solvent such as paint thinner, benzine, commercially available cleaners or antistatic spray for vinyl LP's.
Storing discs
• Do not store discs in places subject to direct sunlight or near heat sources.
• Do not store discs in places subject to moisture and dust.
• Store discs vertically in a case. Stacking or placing objects on discs outside of their case may cause
warping.
Playable discs
This unit can play back the following discs.
Disk Mark
DVD
video
disc
Audio
CD
WMA
MP3 CD
KODAK
Picture
CD
Designed for
Windows
MediaTM
Contains
Audio
+Video
(moving
pictures)
Disc Size Maximum playback time
Approx. 4 hours
(single sided disc)
12cm
Approx. 8 hours
(double sided disc)
Audio
12cm
8cm
(CD single)
Approx. 74 minutes
Audio
12cm
Up to 22 hours playback
Audio
12cm
Up to 10 hours
Spec.
12cm
Approx. 20minutes
3
Notes
on
regional
numbers
DVDs are divided into
separate regions. The
United States and Canada
are designated as region 1
DVD.
Your unit plays region 1
DVDs only.
Instruction ManualManual
TABLE OF CONTENTS
INTRODUCTION
Safety Precautions ..........................................................................................................................1
Feature Descriptions ......................................................................................................................5
Specifications ..................................................................................................................................5
Front and Rear Unit Profiles ..........................................................................................................6
Remote Control Features ................................................................................................................7
INSTALLATION
Connecting the Antenna ..................................................................................................................9
Installing the Remote Control Batteries ..........................................................................................9
Connecting A/V Equipment ..........................................................................................................10
FUNCTIONS & FEATURES
Turn On/Off....................................................................................................................................12
Basic Functions ............................................................................................................................12
Function Selection Menus
Picture Menu ..........................................................................................................................12
Audio Menu ............................................................................................................................12
Tuner Menu ............................................................................................................................13
Timer Menu ............................................................................................................................13
System Menu..........................................................................................................................13
Useful Remote Control Features ..................................................................................................15
DVD FUNTIONS
Playing Back a Disc ......................................................................................................................16
Using the On-Screen Display ........................................................................................................17
Locating a Specific Title, Chapter or Track ....................................................................................18
Selecting Subtitles ........................................................................................................................19
Selecting the Camera Angles/Language/Audio Settings ..............................................................19
WMA/MP3 Operation ....................................................................................................................20
Playing Back Your KODAK Picture CD..........................................................................................20
Playing Your JPEG Files................................................................................................................21
Setting the Parent Lock ................................................................................................................21
Customizing the Function Selectings ............................................................................................22
TROUBLESHOOTING GUIDE.............................................................................................................23
TV/DVD Combo Warranty Information..............................................................................................24
4
Instruction ManualManual
Feature Descriptions
181 Channel Tuner - total number of channels the TV can receive: 2-69 in Air mode, or 1-125 in Cable
mode
AV Input (Rear) - standard composite input designed for use with A/V devices, such as a VCR or DVD
player
AV Output (Rear) - output signals from TV to devices such as VCR's
S-Video Input - input designed for greater clarity and sharpness; also known as S-VHS
RF IN Jack - standard coaxial antenna jack
Channel Recall - instant return to the last channel viewed
Closed Captions Display - feature that displays the closed captions or text of a TV broadcast
Remote Control - A wireless remote control unit for the TV
On/Off Timer - feature that allows the user to set a time for the TV to turn on or off
Parental Control - feature that allow parents to block out selected type of programming
Screen Size - the diagonal size of the TV screen
Selectable Picture Modes - preset standards for TV display: User, Normal, Movie and Sports
Selectable Sound Modes - preset standards for TV sound: User, Normal, Speech Movie and Music
Trilingual On Screen Display (OSD) - TV's on screen display can be either English, French or Spanish
MTS Stereo/Video Stereo- stereo sound for superior TV viewing experience
AVC - Auto Volume Correction
DVD/CD/MP3/WMA/KODAK Picture CD Support
Digital Audio COAXIAL Output (Rear)
3 Line Comb Filter
SPECIFICATIONS
MODEL
GT1417DV
Channel Coverage
VHF 2-13, UHF 14~69
Television System
Cable TV Coverage
Channels Preset
NTSC-M
Mid Band (A-8~A-1, A~I);
Super Band (J~W)
Hyper Band (AA~ZZ, AAA, BBB)
Ultra Band (65~94, 100~125)
181
Antenna Input
75 ohm (unbalanced)
Audio Output
1W + 1W
Screen Dimensions
11.22 x 8.43 in.
285 x 214 mm
Total Harmonic Distortion
<7%
~120Vac 60Hz
Power Source
30.8 lbs. (14 kg)
Unit Weight
14.80 x 15.08 x 16.77 in.
376 x 383 x 426 mm
Unit Dimensions
16.81 x 17.52 x 18.78 in.
427 x 445 x 477 mm
Packaged Dimensions
100W
Power Consumption
5
Instruction ManualManual
Front and Rear Unit Profiles
Front panel
INFRARED SENSOR
POWER INDICATOR
MENU SELECT
TV/VIDEO SELECT
DVD TRAY
DVD TRAY
OPEN/CLOSE
CHANNEL DOWN/UP
TV/DVD SELECT
VOLUME DOWN/UP
Rear panel
ANTENNA IN
6
STOP
PLAY/PAUSE
Instruction ManualManual
Remote Control Features
Programming the Remote Control
1. Set the TV/DVD/VCR switch to the device you want to
control.
2. To program the remote control
1) Press and hold the SET key for over 3 seconds until the
LED indicator on the remote control lights up. The remote
control is now in the PROGRAMMING mode.
2) Use the 0-9 keys to enter two-digit code number for your
device. If the right code number was entered, the LED
blinks three times and the remote control exits from the
PROGRAMMING mode. If you enter a code not listed
below, the LED blinks five times and then lights up until
you reenter a right code number.
3) In the PROGRAMMING mode, press any other keys than
0-9 and F to quit the mode.
4) If there is no operation within 10 seconds, the remote
control will automatically exit from the PROGRAMMING
mode.
3. Code table
TV
00, 01
DVD 00, 01, 02, 03, 04, 05, 06, 07, 08, 09, 10, 11, 12
VCR 00, 01
Notes:
1. When in operation, please point your remote control
directly to the infrared sensor.
2. Do not expose the remote control to impacts, water
or disassemble it.
3. Do not repeatedly press the buttons on theremote control.
Allow interval of no less than one second between
selections.
4. When "
" displayed during DVD playback, the function
is not operational.
7
Instruction ManualManual
Remote Control Features
The keys marked with * have composite functions and the key in boldface type function for DVD only as
shown below.
Button
No.
1
2
3
*4
5
6
7
8
9
10
*11
*12
13
14
15
LED indicator
0~9
VIDEO (SETUP)
PICTURE
D_MENU
,
CH+/CH-
,
/ENTER
DISPLAY
F+VOL-/F+VOL+
F+MUTE
MTS/SAP (SUB_T)
CC (AUDIO)
Channel number (0~9)
TV/Video select
Number (0~9)
Picture mode select
Channel up/down
Decrease/Increase volume by 4 levels
Child lock
Stereo/SAP
Sub title
CCD/Text
Audio channel select
Slow playback
SLOW
Play/Pause
Previous track/Next track
Standby
Shifts the remote to control one of the three devices
19
TV/DVD/VCR switch
21
SOUND
Sound mode select
SLEEP
Sleep off
22
23
24
*25
*26
27
28
29
MENU
Menu select
VOL+/VOLMUTE
RECALL (RESUME)
SCAN (ANGLE)
DVD/TV
TITLE
DVD menu
On-screen display
17
20
Setup
Used to navigate the menus/Accesses the sub menus
16
18
DVD
Used to program the remote control
SET
,
TV
Function Description
Volume up/down
Recall
Channel scan
DVD on (TV/Video off)
Mute on/off
Resume
Angle select
TV/Video on (DVD off)
Title
Open/Close
Stop
30
Fast rewind/Fast forward
31
8
Instruction ManualManual
INSTALLATION
- Please read the safety instructions in this manual completely before installation.
- Install your TVan area where direct sunlight will not fall upon the screen.
- Soft, indirect light is best for television viewing.
- Allow enough space (at least 4 in.) between the TV and any walls or enclosures for proper ventilation.
- Optimum television viewing distance is 3-5 times the screen's size.
Auto-Degaussing
Color TV is easily affected by magnetism which leads to color distortion. If your unit is moved or affected by
near magnetic components or appliances with power on, please power off your unit for at least 1 hour. The
built-in auto-degaussing circuit will eliminate the magnetism interference.
Auto off when no signal received
The TV set will automatically enter into Standby mode when the following conditions are met.
1.TV is in antenna mode.
2.Current channel has no signal.
3.No key is pressed within 15 minutes.
Connecting the Antenna
75-ohm coaxial cable (not supplied)
VHF
UHF
or Cable
VHF
OR
300-ohm twin-lead cable (not supplied)
Antenna adapter
(not supplied)
OR
RF Input
(back of TV unit)
U/V mixer
(not supplied)
UHF
Notes:
1) It is recommended that a 75 ohm coaxial cable be used in order to eliminate interference and noise which
may occur due to nearby radio transmissions.
2) The antenna cable should not be tied together with other wiring.
3) Set up a lightning rod and check it regularly when an outdoor antenna is used.
Installing the Remote Control Batteries
1. Remove the battery compartment lid.
2. Insert two AAA batteries (included). Make sure the positive (+) and negative (-) polarities are correctly aligned.
3. Reattach the battery lid.
Notes:
1) Alkaline batteries are recommended for longer life.
2) Always replace both batteries at the same time.
3) Do not expose batteries to fire or break them open.
4) To avoid battery leakage, remove batteries from the remote control when it is not being used for a long period
of time.
9
Instruction ManualManual
INSTALLATION (continued)
Connecting A/V Equipment
The following are diagrams showing basic instructions for attaching external equipment, like a VCR or
DVD player, to your unit. Please refer to operation manuals of external audio/video equipment that will
be connected to your set for additional instructions. PLEASE TURN OFF ALL POWER BEFORE
CONNECTING DEVICES TOGETHER.
Connect VCR's RF OUT terminal to the RF IN jack located on the real panel of the TV.
Coaxial Cable
RF IN
VCR
Input from Device to TV
AUDIO/VIDEO OUT
DO NOT connect both composite (yellow video terminal) and S-Video terminal. Use only
one of the two. Also, remember to connect the audio cables when using S-Video.
DVD Player
With S - VIDEO Terminal
Yellow
Camcorder
Red
White
VIDEO
Yellow
Red
AUDIO
White
VCR
Output from TV to Device
AUDIO/VIDEO IN
VCR
Yellow
Red
White
VIDEO
Yellow
Red
AUDIO
White
10
Instruction ManualManual
INSTALLATION (continued)
Connecting A/V Equipment (continued)
Enjoying Digital Stereo Sound (Digital Stereo)
Enjoy the dynamic sound of Digital Stereo by connecting
an amplifier equipped with a digital audio input and speaker
system (right and left front speakers).
Set "AUDIO OUT" to "SPDIF/DIM"via the setup menu.
Enjoy DTS
DTS programming can deliver surround sound with five
discrete full range channels plus a sixth channel for a
subwoofer. You can enjoy your APEX unit with a DTS
Digital Surround Sound System. All you need is to connect
your unit to a DTS receiver with an external decoder.
• How to setup the sound output:
From the SETUP MENU display, select AUDIO SETUP
by pressing ENTER. Use V key, set "AUDIO OUT" to
"SPDIF/RAW".
This product incorporates copyright protection technology
that is protected by method claims of certain U.S. patents
and other intellectual property rights owned by Macrovision
Corporation and other rights owners. Use of this copyright
protection technology must be authorized by Macrovision
Corporation, and is intended for home and other limited
viewing uses only unless otherwise authorized by
Macrovision Corporation. Reverse engineering or
disassembly is prohibited.
It is forbidden by law to copy, broadcast, show, play in
public, or rent copyrighted material without permission.
DVD video discs are copy protected, and any recordings
made from these discs will be distorted.
Notes:
(1) Do not connect the PCM/BITSTREAM jack of the
unit to the AC-3 RF input of a Dolby Digital receiver.
Instead, connect to the "DIGITAL" or "COAXIAL"
input of a Dolby Digital/DTS receiver or Processor.
The input of the AV receiver is not compatible with
the PCM/BITSTREAM jack and is primarily for
Laserdiscs only.
(2) Connect the PCM/BITSTREAM jack of unit to the
"DIGITAL" or "COAXIAL" input of a DTS receiver or
Processor.
(3) Refer to the manual of the connected
Equipment.
(4) Adjus t t h e volume of your receiver to a
comfortable listening level to avoid any speaker
damage.
11
COAXIAL
To PCM/BITSTREAM
Coaxial cable
(Optional)
Connection
Example
To digital
audio input
Amplifier equipped
with digital audio input
Front
speaker
(left)
Front
speaker
(right)
COAXIAL
To PCM/BITSTREAM
(Optional)
Instruction ManualManual
FUNCTIONS & FEATURES
Turn On/Off
1. Turn On
Plug in the power cord, and the TV should enter into Standby mode. Pressing STANDBY key will turn on
the TV and its power indicator light.
2. Standby (Soft Off)
While the TV is on, press the STANDBY key will put the TV in Standby or off mode. The power indicator
light on the TV set will turn off.
Basic Functions
Changing the Channel
While in Tuner mode, press the CH+/- keys to change the channel, or use the numeric keypad to enter a
new channel.
Adjusting the Volume
To adjust the volume, press the VOL+/ - keys. Also, you may press the FUNCTION (F) key along with the
VOL +/ - keys to adjust the volume in increments or decrements of 4.
Muting the Volume
To mute the volume, press the MUTE key. To restore the volume, press MUTE again or press the VOL + key.
Function Selection Menus
To change the setting of any function, press the MENU key to bring up the main menu. Press
to highlight
the desire sub-menu and press
(or ENTER key) to access. While in the sub-menu, press
to
select the item and
to adjust the setting. Press the MENU key to return to the main menu and exit.
on the
While in the setup menu, CH-/+ and VOL-/+ key on the front panel will function as the
remote control.
Picture Menu
Features
This menu allows you to adjust the various picture settings.
Press
to move between the various settings, and
to adjust
them. When finished, press the MENU key to return to the main menu.
Tint:
-31 (more greenish) to +31 (more purplish)
Brightness:
0 (dimmest) to 63 (brightest)
Contrast:
0 (minimum contrast) to 63 (maximum contrast)
Color:
0 (minimum color) to 63 (maximum color)
Sharpness:
0 (minimum sharpness) to 63 (maximum sharpness)
Note:
To control picture artifacts reduce the sharpness setting when
viewing DVD discs.
Picture
Tint
Brightness
Contrast
Color
Sharpness
00
32
32
32
32
Audio Menu
Features
This menu allows you to adjust the various audio settings.
Press
to move between the various settings, and
to adjust
them. When finished, press the MENU key to return to the main menu.
Bass:
Treble:
Balance:
Surround:
AVC:
MTS:
0 (less Bass) to 63 (more Bass)
0 (less Treble) to 63 (more Treble)
L31 (Left Dominance) to R31 (Right Dominance)
Off; On
Off, On
Please refer to the discription of MTS/SAP key (P15)
12
Audio
Bass
Treble
Balance
Surround
AVC
MTS
32
32
On
Off
Mono
00
Instruction Manual
FUNCTIONS & FEATURES (continued)
Tuner Menu
Note: This menu is only accessible while the TV is in Tuner mode.
Channel: This feature allows you to change the channel displaying on
screen. Press </> or the numeric keypad to change the channel.
Add/Erase: This feature allows you to add or remove the channel
currently display on screen to the "active channel list" . Active channel list
is the list of channel that is available by pressing the CH+/- keys. Press
</> to add or erase.
Antenna: This feature sets the TV tuner to an Air antenna or a Cable
antenna. Please use Air mode when using an over-the-air antenna; use
Cable mode for a cable hookup. Press
to select between the two
options.
Tuner
2
Add
Air
Channel
Add/Erase
Antenna
Auto Program
Stop
Start
Auto Program: This feature will setup the Active channel list for the user.
The list will include only the channels with a signal detected. Press > to
begin and < to stop the process.
Timer Menu
Time
This feature allows you to set the clock on the TV.
On Time
This feature allows you to preset a time when the TV set will turn
on.
On Channel
This feature allows you to preset the channel on display when the
On Time is activated.
Timer
Time
On Time
On Channel
Off Time
Timer
--:---:---:-Once
Off Time
This feature allows you to preset a time when the TV set will turn
off.
Timer
Timer can be set to Once or Always.
System Menu
Language
This feature allows you to pick a language used for the on screen display
(OSD). Press </> to select the language of your choice - English (Eng.),
French (Fra.) or Spanish (Esp.).
Blue Back
This feature gives you the option to display a blue background on the TV
screen when there is no signal present. Press
to toggle between
on and off.
Closed Captions
Closed caption is a feature that allows your TV set to display, on screen,
the dialogue, narration, and sound effect of a TV program. It also allows
you to display teletext signal. Text and caption will be displayed at either
the top or the bottom of the screen. There is nine different setting for
closed caption. You can set it to one of the 4 Closed Caption settings
(CC1-4), one of the 4 Text settings (T1-4), or set this feature to off
(CCD/Text off).
Notes: A Closed Caption signal may not be display under the following
conditions:
-When there is no Closed Caption/Text signal to decode
-When the signal is weak or altered (due to interference or poor
reception)
-When viewing a dubbed video tape
13
System
Eng.
Language
Blue Back
CCD/Text
Parental Guide
MPAA - X
Fra. Esp.
On
Off
On
TV - MA
Instruction ManualManual
FUNCTIONS & FEATURES (continued)
System Menu (continued)
Parental Guide
This feature allows parents to block certain programs from being
viewed, based on the programs' rating. In order to access this
menu, you must first enter a pass code. The factory default is 6688.
Enter the pass code while the Parental Guide is highlighted. Now,
with Parental Guide set as On, press > to access the TV Rating
grid.
TV Rating
Press
to navigate between the ratings, press the MENU
key to block out a particular rating completely. Or, if you wish,
press
to highlight an individual rating (anywhere a U is
displayed in the middle of the grid.) Pressing the MENU key with
one of these individual ratings highlighted will block only
programs that feature that particular aspect. See the TV rating
diagram at right for an example. TV ratings are defined in the
charts below:
Age
Defined as
Contents
Directed to Older Children (over 7)
D
TV - Y
All Children
TV - G
General Audience
TV - Y7
TV - PG
TV - 14
TV - MA
Parental Guidance Suggested
Parents Strongly Cautioned
Mature Audience Only
Defined as
FV
Fantasy Violence
L
Adult Language
S
V
Sexual Dialogue
System
Eng. Fra. Esp.
Language
Blue Back
On
CCD/Text
Off
Parental Guide On
MPAA-X
TV-MA
Enter Pass Code - - - -
TV-Rating
Rating
TV-Y
TV-Y7
TV-G
TV-PG
TV-14
TV-MA
U
U
U
U
B
B
FV D L S V
U
U U U U
B B B B
B B B
Age Based Rating
Sexual Situations
Violence
MPAA Rating
Press
while in the TV Rating grid to access this grid. Press
to navigate between the MPAA ratings. Pressing the MENU
key with a rating highlighted will block that particular rating from
being shown on this TV. A B will show in red next to the blocked
rating. Please note that blocking a lower rating (for example, PG)
will block all higher ratings (PG-13, R, NC-17, X.)
Pass Code Menu
This menu allows you to change the access code for the
Parental Guide functions of the TV set. Press the MENU key
when Pass Code Control is highlighted. This will turn on or off the
Pass Code function. With the Pass Code function ON, you can
also change the Pass Code. Press
to highlight Pass Code,
then enter the new Pass Code using the numeric keypad.
Note:
The factory pre-set password is 6688. The initial password
will be replaced when the new one is used. Please contact
the service centre in case you forget the password.
14
MPAA - Rating
Movie
G
PG
PG-13
R
NC-17
X
Rating
U
U
U
U
U
U
Age Based Rating
Pass Code Menu
Pass Code Control
Pass Code
6688
Enter Pass Code - - - -
Instruction ManualManual
FUNCTIONS & FEATURES (continued)
Useful Remote Control Features
DISPLAY
This key allows you to display the current information of the TV screen on the upper right hand corner of the
screen. (channel, antenna mode, time, video, etc.)
SCAN
Press the SCAN key twice, and the TV will begin to scan through all active channels. To stop the Scan,
pressing any key can interrupt scanning. Please note that Scan will only work in Antenna mode.
PICTURE
Your TV has factory preset picture modes that allow you to optimize your TV viewing. To activate these picture
modes, press this key, and you can choose among User, Normal, Movie and Sports.
SOUND
Press this key repeatedly, and you can choose among User, Normal, Speech, Movie and Music.
RECALL
This key will allow you to return to the last channel you were viewing. Pressing it again will return you to the
channel you just left.
CC
Pressing the CC key will activate the currently selected Closed Caption or Text under the System Menu.
Pressing it again will turn off the Closed Caption or Text.
VIDEO
This key allows you to toggle between antenna and different video modes.
Child Lock
The Child Lock feature prevents unauthorized viewing of the TV. To activate, press and hold the F key, and
then press MUTE. You should see a key symbol appear on the screen. This will lock out all remote functions
(except for Standby). To unlock the TV, press and hold the F key and press MUTE. This will unlock the TV.
Please note that the only way to activate or deactivate the Child Lock feature is via remote control - please
insure that it is stored securely.
Sleep
Press the SLEEP key repeatedly to switch the TV to one of the following modes :
-15
30
45
60
90
120
150
180 (Unit: Minute)
The TV will automatically enter the Standby mode when the preset Sleep time is up.
The TV will display a message one minute before the Sleep timer runs out.
0-9
Press the 0-9 keys to enter channel numbers directly (2-69 in the Air mode or 1-125 in the Cable mode).
Press the corresponding Number key(s) to enter a channel number from high-digit to low-digit.
Each digit should be entered at 3 seconds time interval.
Signal Received Press MTS/SAP key
MTS/SAP
Mono
Mono
In the TV mode, the TV can automatically identify MTS stereo
Stereo
Stereo, Mono
modes among Mono, Stereo, Stereo/SAP and Mono/SAP.
Stereo/SAP
Stereo, SAP, Mono
Mono/SAP
15
Mono, SAP
Instruction ManualManual
DVD FUNCTIONS
Playing Back a Disc
1. How to playback a disc
Set the AUDIO OUTPUT to ANALOG from the SETUP MENU display if you don't have the necessary
equipment to enjoy Dolby Digital or DTS surround sound.
1) Press DVD/TV to enter the DVD mode.
2) Press OPEN/CLOSE to open the disc tray.
3) Place the disc on the disc tray. Be sure the playback side is faced down.
Notes:
(1) A disc may be damaged if not correctly placed on the guides in the disc tray.
This may also cause the DVD player to malfunction.
(2) Do not force or place anything other than 8cm /12cm DVDs or CDs on the disc tray.
4) Press the PLAY key. After closing the disc tray playback will start.
If the disc you want to playback is a DVD or CD, the DVD player will start playback automatically.
The menu screen will appear automatically or you may access the menu screen by pressing the TITLE key.
Notes:
(1) Moving the unit during playback may cause damage to the disc as well as the unit.
(2) To open and close the disc tray, you should only use the OPEN/CLOSE key.
2.About DVD CD
DVD or CD icons will appear depending on the disc being played back.
DVD: DVD video discs
CD: Audio CDs
3. How to start playback from the menu screen
1) Press
or the Number keys to select the title.
2) Press the ENTER key. The DVD player will start playback from the title
selected.
4. How to pause playback (still playback)
Press the PAUSE key during playback.
Press the PAUSE key to resume normal playback.
Title 1
Title 2
Title 3
Title 4
5. How to stop playback
Press the STOP key. The DVD player is stopped.
Press the PLAY or RESUME key to replay.
Press the STOP key twice.
6. How to remove the disc
Press the OPEN/CLOSE key. Wait until the disc tray is completely open before removing any discs. After
removing the discs, press the OPEN/CLOSE key to close the disc tray.
Note:
At the completion of each movie a menu screen may appear. Be aware that the on-screen setup menu
may damage your TV by permanently burning that image onto the screen. To avoid this, press the STOP
key at the completion of each movie. You may also decide to setup the SCREEN SAVER.
7. Playing in slow-motion
A disc can also be played back in slow-motion. Press the SLOW key during playback
TV SCREEN(FORWARD)
SF 2X
/2 the normal speed
SF 4X
1/4 the normal speed
SF 8X
1/8 the normal speed
SR 2X
SR 4X
SR 8X
1/2 the normal speed 1/4 the normal speed 1/8 the normal speed
PLAY
normal speed
The playback speed becomes 1/2,1/4,or 1/8 of the normal speed each time you press the SLOW key.
(Reverse slow play as the same.)
Notes:
(1) During the slow-motion playback, the sound is muted.
(2) MP3 CD/CDDA does not utilize this feature.
16
Instruction ManualManual
DVD FUNCTIONS(continued)
Playing Back a Disc (continued)
8. Resuming playback from the same location
This DVD player allows you to stop playback and continue playback later from the same location on the
disc.
1) Press the STOP key.
This will interrupt the playback and the DVD player will memorizes the location where you stopped playback.
2) Press the PLAY or RESUME key.
The DVD player will resume the playback from the location where you stopped playback.
Notes:
(1)The following actions will cancel the RESUME function:
-Unplugging the unit after you stop playback.
-Ejecting the disc.
-Adjusting/changing the parental lock.
(2) On occasion depending on the disc, you may experience a difference of location where playback
resumes.
(3) MP3 CD/CD does not utilize this feature.
9. Playing at 2X 4X 6X or 8X the normal speed
You can play back a disc at 2x, 4x, 6x or 8x the normal speed.
Press the REV or FWD key during playback. The playback speed becomes 2x the normal speed.
REV: Fast reverse
FWD: Fast forward
FF 2X
2X the normal speed
FR 2X
2X the normal speed
FF 4X
FF 6X
4X the normal speed
6X the normal speed
FR 6X
FR 4X
4X the normal speed
6X the normal speed
FF 8X
8X the normal speed
FR 8X
8X the normal speed
• Audio CD: The reverse or forward playback alternates between 1x, 2x, 3x, 4x speed.
Note: The speeds may vary slightly from disc to disc and are only approximate.
PLAY
normal speed
PLAY
normal speed
Using the On-Screen Display
THE UNIT ALLOWS YOU TO VIEW THE DISC INFORMATION ON THE TV SCREEN.
Press DISPLAY during playback, you can view the following on the TV:
-Current title, Track number, Total playing time
Current Title
Current Chapter
TITLE ELAPSED
TITLE REMAIN
CHAPTER ELAPSED
T 50/55 C01/03 T00:03:12
T 50/55 C01/03 T00:02:36
T 50/55 C01/03 T00:05:03
Total Title
Total Chapter
OFF
CHAPTER REMAIN
T 50/55 C01/03 T00:01:58
To turn off the on-screen display, press DISPLAY repeatedly.
17
Instruction ManualManual
DVD FUNCTIONS(continued)
Locating a Specific Title, Chapter or Track
THE DVD VIDEO DISCS ARE NORMALLY DIVIDED INTO TITLES. THE TITLES ARE SUB-DIVIDED
INTO CHAPTERS. MOREOVER, AUDIO CD and MP3 CD ARE DIVIDED INTO TRACKS. YOU CAN
CONVENIENTLY LOCATE ANY SPECIFIC TITLE, CHAPTER, OR TRACK WITH THIS UNIT.
Chapter1 Chapter2
TITLE 1
Chapter3
DVD Video Disc
Chapter4 Chapter5
Track1 Track2 Track3
TITLE 2
Track4
Track5
Audio CD
1. Locating a title using the title menu
You can locate a specific title using the title menu function, if a DVD video disc contains a title menu.
1) Press the TITLE key. On the TV screen, the title menu will appear.
2) Press the
keys to select the title you want.
You can also directly locate a specific title by pressing its assigned number with the Number keys.
3) Press the ENTER key. This will cause the unit to start playback from chapter 1 of the title selected.
Notes:
(1) You may find that some discs will not respond to this function.
(2) If different instructions appear on the TV screen, follow those instructions. The instructions above are
describing the basic procedure where the procedures may vary depending on the contents of
the DVD video disc.
2. Locating a specific chapter or track
This unit allows you to locate consecutive chapters or tracks.
Press the PREV or NEXT key repeatedly to display the requested chapter or track.
The DVD player starts playback from the selected chapter or track.
How to locate proceeding chapters or tracks
• When you press the PREV key, the DVD player starts playback from the beginning of the proceeding
chapter or track.
How to locate succeeding chapters or tracks
• When you press the NEXT key, the DVD player starts playback from the beginning of the succeeding
chapter or track.
Note:
On some discs the titles may not display the sub-divided chapters.
3. Locating a title
If a DVD video disc contains title numbers, you can locate a specific title by directly selecting a title
number.
Press the Number keys to select the title and chapter you want. e.g. To select title 3
Way 1: Press 0 first, then 3.
TITLE 03/03 CHAPTER 04/04
Way 2: Press 3 first, then ENTER to confirm.
Way 3: Press 3 directly to shift to title 3 in 2 seconds.
To select two-digit, enter a first-digit and second-digit.
Note:
By pressing
you may shift the highlights between the TITLE and CHAPTER.
18
Instruction ManualManual
DVD FUNCTIONS(continued)
Selecting Subtitles
THIS UNIT ALLOWS YOU TO DISPLAY THE SUBTITLES FROM THOSE
INCLUDED ON THE DISC, ON TO YOUR TV SCREEN.
How to display subtitles
You have the option to select a preferred subtitle from those included on the
DVD video disc.
Press the SUB-T during playback until the subtitles disappears.
Notes:
• With some DVD's, you may not be able to turn off the subtitles and they
will appear on screen automatically.
• If the subtitles continue to show on your TV even after the DVD has been
turned off, please refer to the TV's close caption settings.
• As you press the SUB-T, the subtitles may not appear immediately during
some scenes.
SUBTITLE 01 01/03: ENGLISH
SUBTITLE 02 02/03: FRENCH
SUBTITLE 03 03/03: SPANISH
SUBTITLE OFF
Selecting the Camera Angles/Language/Audio Settings
THIS UNIT ALLOWS YOU TO SELECT FROM SEVERAL DIFFERENT ANGLES AND LANGUAGES.
ANGLE 1
ANGLE 2
Good evening
Bonsoir
Buenas tardes
Selecting the camera angle
Selecting a language
1. How to change the camera angle
2/2
Press the ANGLE key while playing back a scene recorded with
multiple angles.
You may only press the ANGLE key when the angle icon is flashing
1/2
on the DVD display. Each time you press the ANGLE key, the angle
will change.
Notes:
(1) The angle function will not work on DVD video discs that do not contain recorded multiple angles.
(2) During still playback, you are able to change the camera angle. However, when you resume to
normal playback, the camera angle changes to the new settings.
(3) The angle icon indicator will illuminate while playing back a title that contains at least one scene
recorded from multiple angles.
2. How to select a playback audio setting
This DVD player allows you to select a preferred language and sound recording system from those included
on the DVD video disc.
2) Press the AUDIO key again to cycle backwards.
1) Press the AUDIO key during playback.
AUDIO 1/3: AC-3 5.1 ENGLISH
Language
Total Audio Channels
Current Audio Position
AUDIO 2/3: AC-3 5.1 FRENCH
AUDIO 3/3: AC-3 5.1 SPANISH
AUDIO 1/3: AC-3 5.1 ENGLISH
Recording systems
This DVD player uses the MPEG 2, PCM and DTS recording systems. It cannot playback DVD video discs
recorded in any other recorded format.
Notes:
(1) The DVD player returns to the initial default settings when you turn on the DVD player or replace a disc.
(2) The DVD player plays the prior sound programmed on the disc when you select a format which is not
included.
19
Instruction ManualManual
DVD FUNCTIONS(continued)
WMA/MP3 Operation
1. Insert a WMA/MP3 CD, the DVD player will initialize the disc when the tray is closed and the directory
(folder) will be shown in the MENU on screen.
MENU
2. Press
to select and highlight the
PLAY MODE. Then press
each way
to select play mode options (repeat,
shuffle, etc.) Then press
to
select and highlight a file (song).
3. Press ENTER or PLAY to play the file.
Press PREV or NEXT during playback to
skip the tracks. If you need to return to the
main directory (folder), press STOP, then
press
to return, then ENTER
to confirm.
Notes:
* The upper left column is a list showing the name of the folder. The upper right column is a list showing the
name of the song and the sub-folder.
*"
" sign in front of a file name indicates that this is a folder, not a WMA /MP3 file.
* "MP3" sign in front of a file name indicates that this is an MP3 file. " " sign indicates that this is a WMA file.
* During playback, you cannot gain access to "PLAY MODE" folder or songs.
* You are allowed a maximum of 11 characters for each folder or song.
* For "SHUFFLE" playback, you are allowed playback randomly in a folder only.
Playing Back Your KODAK Picture CD
1. Normal
When a KODAK Picture CD is inserted, an automated slide show is launched. Each picture in the current
directory will be displayed consecutively in a slide-show fashion and will be scaled to fit most of the TV
screen. Twelve slideshow transition modes are provided. Use RESUME key to select: Customers can set
"transition" effects for every picture at any time during the slideshow.
mode 0: no special transition effect (by default)
mode 1: wipe from top to bottom
mode 7: wipe from right to left
mode 2: wipe from bottom to top
mode 8: wipe from left/right to center
mode 3: wipe from top/bottom to center
mode 9: wipe from center to left/right
mode 4: wipe from center to top/bottom
mode 10: wipe from edge to center
mode 5: vertical blind
mode 11: horizontal blinds
mode 6: wipe from left to right
mode 12: random
To display an image in definitively, press the PAUSE key. To view the Next or Previous picture, press the
NEXT or PREV key. To resume the slideshow press the PLAY key.
2. Image rotation
There are four modes to transformation: "Invert", "Mirror", "Left", and "Right". The arrow keys are used to
select the different transformation modes:
UP
- lnvert/Normal
Down
- Mirror/Normal
Left - Turn left
Right
- Turn right
3. Menu
The D_MENU key is used to display thumbnail pictures. After it is enabled, up to twelve scaled-down
thumbnails pictures will be displayed on the screen. The NEXT and PREV keys can be used to display
the NEXT and PREVIOUS twelve pictures in the current directory.
Note:You can use the
/ENTER keys to select.
20
Instruction ManualManual
DVD FUNCTIONS(continued)
Playing Your JPEG Files
1. Normal Slide Show Presentation
When a JPEG disc is loaded into the player, a menu will appear on screen. From the Play Mode shown
on the menu, select the "FOLDER" option using your direction keys. Each picture in the current directory
will be displayed consecutively in a slideshow presentation and will be seated to the most of your TV
screen. Twelve slideshow "transition" modes are provided. Use RESUME key to select.
2. Image rotation
There are four modes to rotate a picture: Invert, Mirror, Left, and Right. The arrow keys are used to
select the different rotation modes:
UP
- lnvert/Normal
Down
- Mirror/Normal
Left
- Turn left
Right
- Turn right
Setting the Parental Lock
YOU CAN USE THE PARENTAL LOCK FUNCTION ONLY WITH DVD VIDEO DISCS EQUIPPED WITH
THE PARENTAL LOCK FEATURE.
Setting the parental lock
DVD video discs equipped with the parental lock function are rated according to their content. The contents
allowed by a parental lock level and the way a DVD video disc can be controlled may vary from disc to
disc. For example, if the disc allows, you can edit out violent scenes unsuitable for children and replace
them with more suitable scenes, or lock out playback of the disc all together.
1. Press STOP twice during playback.
2. Press SETUP. The SETUP MENU appears on the TV screen.
3. Select PREFERENCES using
key then press ENTER.
Note:
• In SETUP MENU, you can directly press
/ENTER to select.
4. Select PARENTAL, press
.
SETUP MENU - - MAIN PAGE
GENERAL SETUP
SPEAKER SETUP
AUDIO SETUP
PREFERENCES
EXIT SETUP
GOTO PREFERENCES PAGE
5. Select ratings, press ENTER key
- - PREFERENCE PAGE - AUDIO
SUBTITLE
DISC MENU
PARENTAL
PASSWORD
DEFAULTS
6. Enter your password then press ENTER key.
The preset password is 1225.
To change your password:
1) Follow step 4 to select password change.
2) Enter old password.
3) Enter new password.
4) Re-enter to confirm your new password.
5) Press ENTER.
6) Press SETUP.
MAIN PAGE
1 G
2
3 PG
4 PG 13
5
6 PG-R
7 NC-17
8 ADULT
NO_PARENTAL
SET PARENTAL CONTROL
PASSWORD VERIFY PAGE
INPUT PASSWORD
PLEASE ENTER PASSWORD
7. Press SETUP to exit setup, press PLAY to start
21
Instruction ManualManual
Customizing the Function Settings
THIS UNIT ALLOWS YOU TO CUSTOMIZE THE PERFORMANCE TO YOUR PERSONAL PREFERENCES.
SETUP MENU
GENERAL SETUP
SPEAKER SETUP
AUDIO SETUP
PREFERENCES
Displaying the setup menu screen
The SETUP MENU screen asks you to select a setting category from General Setup, Speaker Setup,
Audio Setup, and Preferences. The selected category will provide you the setting details on-screen.
NORMAL/PS
NORMAL/LB
WIDE
SETUP MENU - - MAIN PAGE
GENERAL SETUP
SPEAKER SETUP
AUDIO SETUP
PREFERENCES
EXIT SETUP
GENERAL SETUP PAGE
TV DISPLAY
PIC MODE
ANGLE MARK
OSD LANG
AUTO
HI-RES
N-FLICKER
CAPTIONS
ENGLISH
FRENCH
SPANISH
SCR SAVER
GOTO GENERAL SETUP PAGE
MAIN PAGE
ON
OFF
ON
OFF
SET TV DISPLAY MODE
ON
OFF
ENGLISH
FRENCH
SPANISH
CHINESE
JAPANESE
ENGLISH
FRENCH
SPANISH
CHINESE
JAPANESE
OFF
--SPEAKER SETUP PAGE-DOWNMIX
LT/RT
STEREO
MAIN PAGE
SET DOWNMIX MODE
ENGLISH
FRENCH
SPANISH
CHINESE
JAPANESE
- - PREFERENCE PAGE - AUDIO
SUBTITLE
DISC MENU
PARENTAL
PASSWORD
DEFAULTS
ANALOG
SPDIF/RAW
SPDIF/PCM
1G
2
3 PG
4 PG 13
5
6 PG-R
7 NC-17
8 ADULT
NO_PARENTAL
MAIN PAGE
PREFERED AUDIO LANGUAGE
AUDIO SETUP PAGE
AUDIO OUT
DUAL MONO
STEREO
L-MONO
R-MONO
MIX-MONO
DYNAMIC
FULL
LPCM OUT
6/8
4/8
MAIN PAGE
2/8
OFF
CHANGE
SELECT AUDIO OUTPUT
RESET
Notes:
• Preset password is 1225.
• Highlighted function will be expanded at bottom of the screen.
• The SETUP MENU screen disappears if you press the SETUP key while it is displayed.
• Functions and menu may change without notice.
• You must press STOP twice to set up PREFERENCES.
22
LPCM 48K
LPCM 96K
Instruction ManualManual
TROUBLESHOOTING GUIDE
Check the following guide for a possible correction to a problem before contacting customer service.
Check FAQ at our website: www.apexdigitalinc.com
Symptoms
No power
No picture
No sound
No TV signal
Stripe or purple interference
appears in the screen
Picture becomes snowy.
Picture with multi-image
TV channel not received
Black box appears on screen.
Remote control doesn't
operate.
Brightness is unstable or
noises are produced on
playback pictures
The DVD video player doesn't
start playback
MP3 won't read disc or it skips
Correction
• Connect the power plug into the wall outlet securely.
• Verify the connection from the VCR video output to the TV video input is secure.
Then switch TVto the appropriate Video mode.
• Verify coaxial cable from antenna is connected to RF IN.
• Connect the audio cables into the terminals securely.
• Verify the connection from the VCR audio output to the TV audio input. Then
switch to the appropriate mode on the receiver. Refer to your audio amplifier
wner's manual.
• Verify the volume is at an appropriate level and the mute feature is not on.
• Verify the TV is set to Antenna mode.
• Make sure the antenna is securely connected to the RF in jack.
Unplug the TV from the wall for 30 seconds, then plug in and try again.
Unplug the antenna connection from the back of the TV, unplug the TV from the
wall, wait for 30 seconds, then try again.
• Verify the speakers around the TV set are shielded.
• Verify the antenna lead wire is in working condition.
• Verify the antenna is connected securely to the RF in jack.
• Move the antenna around to minimize multi-images.
• Make sure the Air/Cable setting is correct.
• Channel may be locked with block channel feature, such as Parental Control.
• Check Add/Erase feature, as channel may be have been erased during set up.
• Verify Closed Caption feature is off.
• Batteries may be weak. Replace batteries.
• Make sure nothing is in between the remote and the remote sensor.
• What you're viewing may be effect of the copy protection circuitry required on all
DVD players.Change another disc, and try again.
Place the disc with the graphics side up.
Place the disc on the disc tray correctly inside the guide.
Make sure the disc is free from scratches & fingerprints.
Press the SETUP button to turn off the menu screen.
Cancel the parental lock function or change the parental lock level. (The preset
password is 1225.)
• Turn the power off then disconnect the power plug and reinsert it back into the
wall. again.
• Use region 1 disc only.
•
•
•
•
•
• Reburn disc as the software edition used may not be compatible with the player.
Check web site for instruction.
• Use new editions of software such as Voyetra Audiostation 4, Adaptec's "Easy
CD Creator" or NT Roxio's Toast Titanium, etc.
• Make sure MP3 file are not encoded with a variable bit rate such as provided by
Real Networks.
23
Instruction ManualManual
TV/DVD Combo Warranty Information
Apex Digital, Inc. makes the following limited warranties. These limited warranties extend to the original consumer purchaser
or any person receiving this product as a gift from the original consumer purchaser and to no other purchaser or transferee.
Limited Ninety (90) Days Warranty
Apex Digital, Inc. warrants this product and its parts against defects in material or workmanship for a period of ninety (90)
days after the date of original retail purchase. During this period Apex Digital, Inc. will repair or replace a defective part or
product at their option, with a new or refurbished part or product, without charge to you.You must deliver the entire product
to an Authorized Apex Digital, Inc. Service Center. You are responsible for all packing, transportation and insurance charges
for the set to and from the Service Center.
Limited One (1) Year Warranty
Apex Digital, lnc. further warrants the parts in this product against defects in material or workmanship for a period of one (1)
year after the date of original retail purchase with exception of the remote control which is guaranteed for ninety (90) days.
During this period Apex Digital, Inc. will replace a defective part with a new or refurbished part without charge to you, except
that if a defective part is replaced after ninety (90) days from the date of original retail purchase, you are responsible to pay
all labor charges involved in the part(s) replacement. You must also deliver the entire product to an Apex Digital, Inc.
Authorized Service Center. You are responsible for all packing, transportation and insurance charges for the set to and from
the Service Center.
Rental Product
The warranty for a rental product begins with the original date of receipt by the rental firm.
Your Responsibility
The above warranties are subject to the following conditions:
• You must retain your bill of sale to provide proof of purchase.
• You must retain all packing materials for return shipment.
• All warranty service of this product must be made by an Authorized Apex Digital, Inc. Service Center.
• These warranties are effective only if the product is purchased and operated in the U.S.A.
• Labor service charges for set installation, setup, adjustment of customer controls and installation or repair of any type
of antenna or cable systems are not covered by this warranty. Reception problems caused by inadequate antenna or
cable system are your responsibility.
• Warranties extend only to defects in materials or workmanship as limited above and do not extend to any product
or parts which have been lost or discarded by you or damage to product or parts caused by misuse, accident,
damage caused by Acts of God, such as lightning or fluctuations in electrical power, improper installation,
improper maintenance or use in violation of instructions furnished by us; or to product which has been modified
or had the serial number removed, altered, defaced or rendered illegible.
How to Obtain Warranty Service
lf after following all the operating instructions in this manual and reading the section TROUBLESHOOTING you find that
service is necessary:
1. Contact our Customer Service Center directly call 866 4 APEXlNC (866 427 - 3946), Mon - Fri 8:30am - 5pm (California).
2. After obtaining the requested information, you must present your receipt to the Authorized Service Center to obtain
warranty service.
3. You must deliver the entire product to the Authorized Service Center. You are responsible for all transportation for the
product to and from the Service Center.
Limitations
All warranties implied by state law, including the implied warranties of merchantability and fitness for a particular purpose,
are expressly limited to the duration of the limited warranties as set forth above. With the exception of any warranties implied
by state law as hereby limited, the foregoing warranty is exclusive and in lieu of all other warranties, guarantees, agreements
and similar obligations of manufacturers or seller with respect to the repair or replacement of any parts. In no event shall
Apex Digital, Inc. be liable for consequential or incidental damages.
No person, agent, distributor, dealer or company is authorized to change, modify or extend the terms of these warranties in
any manner whatsoever. The time within which action must be commenced to enforce any obligation of Apex Digital, lnc.
arising under this warranty or under any stature, or law of the United States or any state thereof, is hereby limited to ninety
(90) days from the date you discover or should have discovered the defect. This limitation does not apply to implied
warranties arising under state law.
This warranty gives you specific rights and you may also have these rights which may vary from state to state. Some states
do not allow limitation on how long an implied warranty lasts, when an action may be brought, or the exclusion or limitation
of incidental or consequential damages, so the above provisions may not apply to you.
24
APEX Digital, Inc.
Ontario, CA 91761
FOR SERVICE CALL: 866-4-APEX-INC
http://www.apexdigitalinc.com