1
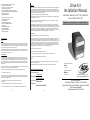
The PYRO 1394 Drive Kit includes:
• PYRO 1394 Drive Enclosure
• 2 meter - 6 pin to 6 pin 1394 cable
• Flat ribbon cable (ATA-100)
• Screw kit for installing hard drive or CD drives
• Removable bezel cover for hard drive installations
• External Power Supply
• CD Includes: Drivers
The USB 2.0 Drive Kit includes:
• USB 2.0 Drive Enclosure
• 6’ USB 2.0 cable
• Flat ribbon cable (ATA-100)
• Screw kit for installing hard drive
or CD drives
• Removable bezel cover for
hard drive installations
• External Power Supply
• CD Includes: Drivers
Warranty:
This ADS Technologies, Inc. product comes with a One (1) year hardware warranty. ADS Technologies, Inc. (ADS) warrants
this product against defects in material and workmanship for a period of One (1) year from the date of original purchase
from ADS or an authorized ADS dealer. This warranty applies only to the original purchase of the product and is not transferable. This warranty does not cover any incompatibilities due to the user’s computer, hardware, software or other related
system configuration in which the product interfaces. Proof of
purchase will be required before any warranty consideration by ADS occurs.
This warranty does not cover any damage caused by negligence, non-authorized modifications, or parts installed without
prior written permission from ADS.
This warranty does not apply if the product has been damaged by accident, abuse, or misapplication, nor as a result of
service to the product by anyone other than ADS.
Drive Kit
Installation Manual
Installation Manual for the PYRO 1394 Drive
Kit and USB 2.0 Drive Kit
Upgrade Your Hard Drive to FireWire/USB 2.0
If your ADS product is not in working order, your only recourse is repair or warranty replacement, as described above.
UNDER NO CIRCUMSTANCES will ADS Technologies, Inc. be liable for consequential damages, including but not limited
to any lost savings, lost profits, or any other damages, caused by the use of any ADS Technologies, Inc. product or inability
to use the product, even if the dealer or ADS Technologies, Inc. has been advised of such liability or other claims. This
includes damage to property and, to the extent permitted by law, damages for personal injury. This warranty is in lieu of all
other warranties including implied warranties of merchantability and fitness for a particular purpose.
FCC Information
Federal communications Commission Radio Frequency Interference Statement
Service and Warranty:
Service:
If you require assistance with the installation, operation, or application of your ADS Technologies, Inc. product there
are several options available to you as described in the technical support section of this manual. Your primary source
for information and assistance is always your computer store or computer parts dealer. If your ADS product needs
repair or replacement, contact your dealer for on-site repair service.
The ADS Technologies technical support and customer service staff can aid in solving many problems. Our technical
support department is available to repair any ADS Technologies product. You or your dealer must return products to
our factory for repair or warranty replacement.
Note: This equipment has been tested and found to comply with the limits for a class B digital device, pursuant to Part 15 of
the FCC Rules. These limits are designed to provide reasonable protection against harmful interference when the equipment is operated in a residential installation. This equipment generates, uses and can radiate radio frequency energy and if
not installed and used in accordance with the instruction manual may cause harmful interference to radio communications.
However, there is no guarantee that interference will not occur in a particular installation. If this equipment does cause
harmful interference to radio or television reception, which can be determined by turning the equipment off and on, the user
is encouraged to try to correct the interference by one or more of the following measures:
* Reorient or relocate the receiving antenna
.
* Increase the separation between the equipment and receiver.
* Connect the equipment into an outlet on a circuit different from that to which the receiver is connected.
Return/Replacement:
* Consult the dealer or an experienced radio TV technician for help.
If you need to return your ADS Technologies product you should return the product directly to the dealer or store
where you purchased the product. Each individual computer store or dealer sets product return policies for their customers. ADS Technologies, Inc. cannot be responsible for the actions or policies set by our dealers. If you desire to
return the product for a refund, you must get the refund from the dealer or store you purchased the product from. If
you purchased the product directly from ADS, please see the "Terms and Conditions of Sale" on the reverse side of
your sales invoice.
Notice:
(1) The changes or modifications not expressly approved by the party responsible for compliance could void the user’s
authority to operate the equipment.
(2) Shielded interface cables and AC power cord, if any, must be used in order comply with the emission limits.
Returns to ADS Technologies, Inc. are for repair or warranty replacement only. If you need to return a product to ADS
Technologies, Inc. for repair or replacement you must follow these steps:
1. Call our Technical Support department to obtain a Return Merchandise Authorization (RMA) number.
2. The RMAnumber is valid for 30 days.
3. Ship the product to the ADS factory with the RMAnumber marked on the inside and outside of the package. If
there is no RMAnumber on the package or the RMAnumber has expired, the shipment will be refused. ADS will not
be liable for lost or mis-shipped products.
4. Replacement product cannot be shipped to you until the defective product has been
received by ADS.
5. Once the product is received at the factory, it will be tested and then repaired or replaced.
6. Turn around time is approximately one week. The repaired or replaced product will be shipped back to you.
5
PYRO 1394 Drive Kit
API-800
7-57887-38021-2
For Technical Support Questions:
Check the ADS web site :
www.adstech.com
E-mail ADS for help:
[email protected]
Call ADS for help:
1-562-926-4338
Support Hours:
M-F 8:00 AM – 5:00 PM PST
6
USB 2.0 Drive Kit
USBX-804
7-57887-80400-8
http://www.adstech.com
email: [email protected]
ADS Technologies USA
12627 Hidden Creek Way - Cerritos - CA - 90703, USA
Phone: 562.926.1928 - Fax: 562.926.0518 - Support: 562.926.4338
ADS Technologies IRELAND
Phone Sales/Support: +353-61-702-042
Installation manual for the Pyro 1394
Drive Kit and USB 2.0 Drive Kit
* Caution: Sharp metal parts inside. Care must be taken to prevent injury.
Step 1
Remove the black/grey plastic shell from the
Drive Kit case by pulling it away from the front
of the drive case.
Step 2
Step 6
Step 11
With the provided screws, mount the hard drive or cd-rom in place. For a
hard drive this would be done from the bottom of the Drive kit. For CD
ROM’s, you need to secure it with the supplied screws from the sides of
the drive kit.
Once the software has been properly installed, turn on your drive kit
(green switch in the back), plug one end of the USB 2.0 or 1394 cable int
the Drive case. With the computer running, plug the remaining end of the
cable into your computer ’s available 1394/FireWire port for PYRO 1394
DRIVE KIT users or a USB 2.0 Port/USB 1.1 Port for USB 2.0 Drive Kit owne
Step 7
Replace the metal protective shield on the top of the Drive Kits internal
module by sliding it towards the front of the drive case. Secure the metal
plate with the supplied screws.
Remove the metal protective shield from the
top of the Drive Kit’s internal module by sliding
it away from the front of the drive case.
Step 8
Replace the shell on the Drive Kit case by sliding in the black/grey plastic. Please secure it
with the screws supplied.
Step 3
Set the Hard Drive or CD ROM drive’s jumper to “MASTER” or single drive
setting (Western Digital). For more information about jumper settings refer to
the documentation of the drive you are installing.
Step 9
Plug the power cable to the Drive Kit case.
After you have done this, plug the remaining
end of the cable into a surge protected power
source. Take note of the green on/off switch
in the back of the Drive Kit.
Step 4
For Hard Drive installation, connect the LED
activity light cable from the front of the Drive
Kit to its connector located towards the back of
the drive kit. Gently place the hard drive on
top of the black cable between the rails that
we have in the bottom of the drive kit. For
Optical Drive Installations, pop out the front
bezel and slide your drive in.
Connect the power supply cable from the drive
kit into the hard drive or optical drive you are
installing.
Step 5
Connect the flat ribbon cable to the drive.
NOTE: The red line on the ribbon must be
facing toward the power connector of the drive
and for the end connected to the drive kit, the
red line must be on the side closest to the outside casing of the drive kit.
2
Step 10
The physical assembly of your drive kit is complete. Read the instructions
below to install the software before you connect the USB 2.0 or FireWire
cable between your computer and your drive kit for the first time. Now
insert the Drive Kit CD.
USB 2.0 Drive Kit Software
-For Windows 98/98SE/ME/2000/XP Insert the CD and follow directions
to install the driver. If you do not have a USB 2.0 host card your USB 2.0
Drive Kit will run at USB 1.1 speeds.
-For MAC 9.X/OS X No drivers are required. Since Apple does not support
USB 2.0 at this time your Mac will run at USB 1.1 speeds.
PYRO 1394 Drive Kit Software
-For Windows 98Second Edition Insert the CD and install the Windows
98 SE update. For Windows ME/2000/XP no software installation is
required. 1394 Storage is not supported in Windows 98 Gold.
-For MAC 9.X Install the HDST software from the CD and restart your MAC.
-For OS X No drivers are required.
3
If all the software was installed correctly, your drive kit should mount at th
point. Some drives need to be partitioned or formated before they can
mount properly.
Things to Remember:
- The Drive Kit is not a portable device, it should be handled with care.
- Do not unplug the Drive Kit FireWire/USB cable without safely un-moun
ing or ejecting the drive first
WINDOWS XP AND WINDOWS 2000 HARD DISK DRIVE INSTALLATION NOTES
READ THIS AFTER YOU HAVE INSTALLED YOUR HARD DRIVE INTO THE DRIVE KIT.
AFTER YOU PLUG THE DRIVE KITINTO YOUR COMPUTER AND YOUR HARD DRIVE DOES NOTSHOW UP
AS A DRIVE LETTER IN MYCOMPUTER, YOU WOULD NEED TO DO THE FOLLOWING:
- RIGHTCLICK ON MYCOMPUTER, CLICKONMANAGE
- CLICK ON DISK MANAGEMENTAND THIS WILLSHOW ALLTHE DRIVES IN YOUR SYSTEM.
- IF PROMPTED TO INITIALIZE YOUR DRIVE, GO AHEAD AND DO SO. (FOR NEW HARD DRIVES ONLY, FOR
HARD DRIVES WITH DATA IN THEM, INITIALIZING ITERASES THE DATA ON THAT DRIVE.)
YOU WILLNOW SEE THE FIREWIRE ORUSB2.0 DRIVE IN THE LISTOF DRIVES IN THE LOWER RIGHTSID
OF THE WINDOW. YOU MAY GO AHEAD AND RIGHTCLICK ON THE DRIVE AND MAKE A NEW PARTITION.
THIS WILLRUN A WIZARD THAT ALLOWS YOU TO PARTITION THE DRIVE, FORMAT ITAND ASSIGN IT A
DRIVE LETTER.
WINDOWS 98SE AND WIN ME HARD DISK DRIVE INSTALLATION NOTES
READ THIS AFTER YOU HAVE INSTALLED YOUR HARD DRIVE INTO THE DRIVE KIT. AFTER YOU PLUG TH
DRIVE KIT INTO YOUR COMPUTER AND YOUR HARD DRIVE DOES NOTSHOW UPAS A DRIVE LETTER IN
MYCOMPUTER, YOU WOULD NEED TO DO THE FOLLOWING:
- RIGHTCLICK ON MY COMPUTER, CLICK ON PROPERTIES
- CLICK ON DEVICE MANAGER
- CLICK ON DISK DRIVES
- DOUBLE CLICK ON THE DRIVE THAT YOU JUSTPLUGGED IN (FOR EXAMPLE: IF YOU PLUGGED IN MAX
TOR YOU SHOULD CLICK ON THE MAXTOR)
- CLICK ON THE SETTINGS TAB
- CHECK THE REMOVABLE BOX
- ASSIGN A DRIVE LETTER (MAKE SURE YOU ASSIGN A DRIVE LETTER THAT IS NOTIN USE, THE START
AND ENDING DRIVE LETTER SHOULD BE THE SAME LETTER ALSO. SO IF YOU TYPED IN DRIVE M, AS TH
STARTING DRIVE LETTER, ITSHOULD ALSO BE THE ENDING DRIVE LETTER)
- CLICK OK THEN RESTART THE COMPUTER
- AFTER RESTART, OPEN UPMY COMPUTER, THIS WILLSHOW THE DRIVE LETTER THAT YOU JUST
ASSIGNED TO THE FIREWIRE ORUSB 2.0 DRIVE KIT. IF THIS IS A NEW DRIVE, YOU CAN DOUBLE CLICK
THE DRIVE TO FORMAT IT.
FDISK
FDISK IS A DOS APPLICATION THAT WILLALLOW YOU TO PARTITION NEW HARD DRIVES IN THE COMPU
ER (I.E.: DRIVE KITW/ HARD DRIVE). YOU MUSTUSE FDISK IF YOU PLAN TO UPGRADE THE OS IN YOUR
COMPUTER OR PLAN TO MOVE THE DRIVE KIT TO DIFFERENTCOMPUTERS FROM TIME TO TIME. FDIS
IS REALLY HARD TO USE AND ONLY INTENDED FOR ADVANCED USERS. ITCAN BE ACCESSED FROM TH
DOS PROMPTBYTYPING FDISK. FOR MORE HELPON FDISK, CHECK OUTTHE MICROSOFTWEBSITE AN
SEARCH FOR HELPONFDISK.
4