1
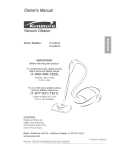
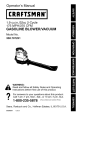
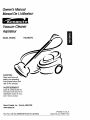
Owner'sManual
Manuel De L'utilisateur
Vacuum Cleaner
Aspirateur
Model, Mod_.le
116.23637C
CAUTION:
Read and follow all
safety and operating
instructions before first
use of this product.
AVERTISSEMENT:
Lisez et suivez.toutes les
instructions de s_curit_ et
d'op_ration avant de vous
servir de ce produit.
Sears Canada, Inc., Toronto, M5B 2B8
www,sears.ca
Part No. CO1ZCJWO(_KI_I_-KC_1ZCJWZI3KQ
Printed in U.S.A.
Imprim_ aux Etats-Unis
Canister Care .......................
Cleaning Exterior and Attachments
Dust Bin Cleaning ..................
Filter Changing/Cleaning ...........
Before Using Your New Vacuum ........
2
Kenmore Vacuum Cleaner Warranty .... 2
ImportantSafety Instructions ...........
3
Parts and Features .................
4-5
Assembly Instructions...............
USe
6-7
................................
12
12
13
14-15
Power-Mate ®Care ...................
16
Belt Changing and Agitator Cleaning .. 16-17
Light Bulb Changing .................
18
Agitator Servicing ...................
18
8
How to Start ........................
Vacuuming Tips .....................
Suggested Pile Height Settings .........
Attachments .......................
Attachment Use Chart ...............
Performance Features ...............
How Your Vacuum Works .............
.....
8
9
9
10
10
11
-12
Troubleshooting
.....................
Requesting Assistance
Or Service ...................
Please read this guide. It will help you assemble
the safest and most effective way.
19
Back Cover
and operate your new Kenmore vacuum
in
For more information about vacuum cleaner care and operation, call your nearest Sears store.
You will need the complete model and serial numbers when requesting information. Your vacuum's model and serial numbers are located on the Model and Serial Number Plate.
Use the space below to record the model number and serial number of your new Kenmore
vacuum.
Model No.
Serial No.
Date of Purchase
Keep this book and your sales check (receipt) in a safe place for future reference.
LIMITED ONE YEAR WARRANTY
ON KENMORE VACUUM CLEANER
This warranty is for one year from the date of purchase, and includes only private household
vacuum cleaner use. During the warranty year, when this vacuum cleaner is operated and
maintained according to the owner's manual instructions, Sears will repair any defects in material
or workmanship free of charge.
This warranty excludes vacuum bags, belts, light bulbs, and filters, which are expendable parts
and become worn during normal use.
Forwarranty service, retum this vacuumcleaner to the nearest Sears Service Centre In Canada.
This warranty applies only while this product is in use in Canada. This warranty gives you specific
legal rights, and you may also have other rights which vary from province to province.
Sears Canada, Inc., Toronto, M5B 2B8
2
Your safety is importantto us. To reduce the risk of fire, electrical shock, injuryto persons or damage when using your vacuum cleaner, follow basic safety precautions
Including the following:
Read this manual before assembling or
using your vacuum cleaner.
Do not operate the cleaner with a punctured
hose. The hose contains electrical wires.
Use your cleaner only as described in this
manual. Use only with Sears recommended
attachments.
Replace if cut or worn. Avoid picking up
sharp objects.
To reduce the risk of electrical shock - Do
not use outdoors or on wet surfaces.
Do not use with any opening blocked; keep
free of dust, lint, hair and anything that may
reduce air flow.
Disconnect electrical supply before servicing or cleaning out brush area. Failure to
do so could result in electrical shock or
brush suddenly starting.
Keep hair, loose clothing, fingers, and all
parts of body away from openings and moving parts.
Always turn cleaner off before connecting or
disconnecting the hose or Power-Mate ®.
Do not use cleaner without dust bin and/or
filters in place.
Always turn cleaner off before unplugging.
Always empty the dust bin after vacuuming
carpet cleaners or freshener, powders and
fine dust.
Do not unplug by pulling on cord. To
unplug, grasp the plug, not the cord.
Hold plug when rewinding onto cord reel.
Do not allow plug to whip when rewinding.
Do not use the cleaner to pick up sharp
hard objects, small toys, pins, paper clips,
etc. They may damage the cleaner.
Do not use with damaged cord or plug. If
cleaner is not working as it should, has
been dropped, damaged, left outdoors, or
dropped into water, return it to a Sears
Service Center.
Do not
handle,
around
cleaner
heated
Do not pick up anything that is burning or
smoking, such as cigarettes, matches, or
hot ashes.
pull or carry by cord, use cord as a
close door on cord, or pull cord
sharp edges or corners. Do not run
over cord. Keep cord away from
surfaces.
Do not use cleaner to pick up flammable or
combustible liquids (gasoline, cleaning fluids, perfumes, etc.), or use in areas where
they may be present. The fumes from these
substances can create a fire hazard or
explosion.
De not leave cleaner when plugged in.
Unplug from outlet when not in use and
before servicing.
Use extra care when cleaning on stairs. Do
not put on chairs, tables, etc. Keep on floor.
De not allow to be used as a toy. Close
attention is n_cessary when used by or
near children.
You are responsible for making sure that
your vacuum cleaner is not used by anyone
unable to operate it properly.
Do not handle plug or cleaner with wet
hands.
Do not put any objects into openings.
SAVE THESE NSTRUCTIONS
Proper assembly and safe use of your vacuum cleaner are your responsibilities. Your cleaner
is intended only for household use. Read this Owner's Manual carefully for important use and
safety information. This guide contains safety statements under warning and caution symbols.
Please pay special attention to these boxes and follow any instructions given. WARNING
statements alert you to such dangers as fire, electrical shock, burns and personal injury.
, CAUTION statements alert you to such dangers as personal injury and/or property damage.
3
It is importantto knowyourvacuumcleaner'spartsandfeaturesto assureits properandsafe
use.Reviewthesebeforeusingyourcleaner.
Item
PartNo.
In U.S.
PartNo.
InCanada
HeadlightBulb
Belt
20-5240
20-5201
596181
20-40979
_-- Cord and
Cord and
Cord
_
I
i
Plug Holder
Holder_
--
U. er
Handle Quick
Release
I
Wand
Wand
!_
Swivel
(Some
--Upper
Models)
Wand
------------_
Cord Holder
_11]1111111
Power
Cord
Belt
_
Power_Mate
=
POWER-MATE®
WandQuickFlange____
Release
Pedal
_
Power-Mate =
Model/Serial
Numbers
(On Bottom)
Handle
Pile Height
ght Indicator
Release
Protector
ResetBu_on
PedaJ
Edge Cleaner
(NotShow_
4
HOSE
A'I-I'ACHMENTS
Power-Mate
Jr.=
(Some Models)
3-Way On/Off Switch
Off/Floor/Carpet
Crevice
Tool
Combination
Brush
Floor
Brush
Handi-Mate
(Some
Jr. =
Models)
CANISTER
Item
Part No.
In U.S.
Part No.
In Canada
Exhaust Filter
20-86889
20-86889C
Cord Rewind
Button
(not shown)
Power-Mate +
Storage slot
Cord
Cover
Exhaust
Filter (inside)
Attachment
Stora,
5
I Electrical Shock Hazard
I DO NOT plug Into electrical supply
I until assembly is complete. Failure to
WARNIN G
I do so could result in electrical
shock or
I
Handle
I mjury.
__
Handle
Before assembling your vacuum cleaner, be
sure you have all parts shown in PARTS
AND FEATURES.
ButtoL---_
U
WANDS
Slide wands
together until wand
button snaps into
place. Turn wand
button
button to
to the
the slotslotted area of the
Button
Upper
Wand
The swivel allows
allows
you to turn the
wandswivel,
handle to the _left
left
side to
to reach ,farfarside
ther under
ther
ur
low
w furfur
Wan_
_
"_
_,
Wand
Button
swivel--'_1_
n,ture.
'-M
:eri
Wand
Swivel
POWER-MATE®
1. Insert wands
_ds into
ir
Power-Mate
rer-Mal.= ® until the
tL
wand buttons snaps into place.
sna
Raise
Area
L
Wand
place.
,
2. Connect
Con ic ct Pew
PowerMate ® plug
Idl tg and cord
as
she Vl I. DO
DO NOT
as shown.
force. Raised
I t_ised area
ar
of plug must be
toward hand.
Wand
Button
3. Secure cord into
cord holder on
wand swivel.
Release
To remove: Step on wand release pedal,
then pull up on wands.
6
Pedal
HOSE
Handle ---_
1. Line up the hose latch tab with notch in
canister and insert hose into canister until it
snaps in place.
Handle
II_
To remove: Press hose latch tab and pull
hose out,
Hose
Latch
Tab
Release_
2. Insert handle into wand until lock
button snaps in place. Be sure hose is
not twisted.
To remove: Press handle release button and pull up on handle.
Notch
To store: Disconnect hose from wands
and canister to prevent stress on hose
during storage, Store hose in a loosely
coiled position so the hose material is
not stressed.
Carrying
Cover
"Dust Bin
Hose
Latch Tab
Attachment
Storage
HOW TO START
!
Pile Height
Indicator
WARNING
Personal
Hazard
Injury and Product
Damage
Handle
Release
• DO NOT plug in if switch is in ON
position.Personal Injuryor
damage could result.
• The cord moves rapidlywhen
rewinding. Press cord rewind
withfoot only. Keep children away and providea clear path when
rewindingthe cord to prevent
personal injury.
• DO NOT use outlets above
counters. Damage from cord to
itemsin surroundingarea
could occur.
Pile Height
Pedro
3. Lower wand from upright position by
pressing on the handle release pedal,
CAUTION
DO NOT leave the Power-Mate •
runningin one spot in the upright
positionfor any lengthof time. Damage
to carpet may occur.
Cord
Rewind
Button
4. Select a pile height setting by pressing
the small pedal on the rear of the PowerMate ®. The pile height setting shows on the
indicator. See SUGGESTED PILE HEIGHT
SETTINGS.
Attention: Refer to your carpet manufacturers cleaning recommendations.
Some more
delicate carpets may require that they be
vacuumed with the Power-Mate ® agitator
turned off, to prevent carpet damage.
1. Pull cord out of canister to desired length.
The cord will not rewind until the cord
rewind button is pushed.
,f
\
NOTE: To reduce the risk of electric shock,
this vacuum cleaner has a polarized plug;
one blade is wider than the other. This plug
will fit in a polarized outlet only one way. If
the plug does not fit fully in the outlet,
reverse the plug. If it still does not fit, contact a qualified electrician to install the proper outlet. Do not change the plug in any
way.
OFF
n.OOR
,_ARPrt
5. Select a switch
position on the
handle.
©
OFF
+
OFF
FLOOR - turns on the canister motor only.
2. Plug the polarized power cord into a 120
Volt outlet located near the floor.
CARPET - turns on both the canister and
the Power-Mate ® motors.
To rewind: Unplug the cleaner. Hold the
plug while rewinding to prevent damage or
injury from the moving cord. Push cord
rewind button.
NOTE - When this switch is in the FLOOR
position, the headlight DOES NOT function
since no electricity flows to the PowerMate*.
8
Suggested sweeping pattern.
For best cleaning action, the Power-Mate ®
should be pushed straight away from you
and pulled straight back. At the end of each
pull stroke, the direction of the Power-Mate ®
should be changed to point into the next
section to be cleaned. This pattern should
be continued across the rug with slow, gliding motions.
Personal
Injury
Damage Hazard
and
Product
• DO NOT run over power cord
with Power-Mate". Personal
injury or damage could result.
• DO NOT pull plug from wall by
the power cord. If there is
damage to the cord or plug,
personal injury or property
damage could result.
NOTE: Fast,
jerky strokes do
not provide
complete cleaning.
Suction
Control
The hose swivel
allows the hose to
turn without moving
the canister. This is
\
helpful for cleaning
in small areas.
Check hose for
•
Carpeted stairs need to be vacuumed regularly. For best cleaning results, fully close
the suction control.
twisting before
pulling canister.
WARNING
Personal Injury Hazard
Use care if canister is placed on stairs.
If it falls, personal injury or property
damage could result.
Product Damage Hazard
Use care if the Power-Mate®and wand
Is left in the uprightpositionas it may tip
over easily. Property damage can occur
if Upped.
For best cleaning results, keep the airflow
passage open. Check each assembly area
in HOW YOUR VACUUM WORKS occasionally for clogs. Unplug from oiJUet before
checking.
For best deep down cleaning, use the XLO
setting. However, you may need to raise the
height to make some jobs easier, such as
scatter rugs and some deep pile carpets,
and to prevent the vacuum cleaner from
shutting off. Suggested settings are:
HI - Shag, deep pile, or scatter rugs.
MED - Medium to deep pile.
LO - Low to medium pile.
XLO - Most carpets and bare floors
9
,
A'I-I'ACHMENTS ON WANDS
CAUTION
1. To remove
wands from PowerMate ®, lock wands
in straight-up position.
ATTACHMENTS ON HANDLE
NOTE: If the
Power-Mate ® is
attached, turn
cleaner off
before removing
handle from
wands.
_
Wand
Quick
Release
Pedal
i
2. Press wand
release pedal
with foot and
pull the wands
straight up out of
Power-Mate ®.
1. Press lock
button, then pull
to remove handle from wand.
I
The Power-Mate ® plug and cord do not have
to be removed to use attachments on the
wands.
Upper
Wand
If your model has the optional feature of a
handle release, press it
3. Put attachments on
wands as needed. See
chart below.
2. Slide attachments
firmly
on handle as needin similarly.
ed. See chart below.
CLEANING AREA
Between
Furniture"Cushions* Drapes*
A'I-I'ACHMENT
CombinationBrush
x
Crevice Tool
x
X
x
Walls
x
x
x**
HandI-Mat
•
Soma Model _J,r_
Mooels)
Caxpeted
Roors_ugs
x
Power-Mate •
Power;_ate
Sate
Roots
x
=5=
Roor Brush
Stairs
x
x
X
Jr e(sor_e_,
_
X
X
*Always clean attachments before using on fabrics.
"'" Handi-Mate Jr. ='and Power-Mate Jr." attachment
** Power-Mate e switch should be in FLOOR position.
instructions are included with the products.
NOTE: When separating wands, depress lock button completely before pullingwands
apart. If
wand lock button is difficult to depress push the two wands more tightly together to line up
the lock button with the hole. Depress ock button and then pull wands apart.
10
AUTO-CLEANINGSYSTEM
EDGE CLEANER
Active brush edge
cleaners are on
both sides of the
Power-Mate ®.
Guide either side
of the Power-Mate ®
along base-boards
or next to furniture
This vacuum is equipped with an auto-cleaning system. Each time the power cord is
extended a cleaning cam located inside the
dust bin rotates and cleans the filter.
POWER-MATE ®STORAGE
m
to help remove dirt
trapped at carpet
edges.
The lower wand has
a "U" shaped flange
in the area where
the power cord
attaches. The canister has a "U"
OVERLOAD PROTECTOR
The Power-Mate ® has
built-in protection
against motor and belt
damage should the
brush jam. If the brush
slows down or stops, the
overload protector button
pops up and shuts off
the Power-Mate ®. The
canister motor will continue to run.
shaped slot near
the rear of the canister.
The slot allows the wands and Power-Mate ®
to be stored with the canister to conserve
storage space.
The wand will slip out of the slot as it is lifted up for use and will slide into the slot as it
is lowered for storage.
To correct problem: See
TROUBLESHOOTING.
To reset: Push in the overload
button.
!!
protector
THERMAL PROTECTOR
This vacuum has a thermal protector which
automatically trips to protect the vacuum
from overheating. The thermal protector
turns the motor off automatically to allow the
motor to cool in order to prevent possible
damage to the vacuum.
SUCTION CONTROL
The suction
control allows
you to change
the vacuum
Suction
Suction
suction for
different fabric
and carpet weights. Opening the control
decreases suction for draperies and
lightweight rugs,'=while closing the control
increases suction for upholsteries and
carpets.
To reset: Turn off and unplug the vacuum
from the outlet to allow the vacuum to cool.
Check for and remove any clogs. Also
check and replace any clogged filters.Walt
approximately 30 minutes and plugthe
vacuum in and turn back on to see if the
thermal protector has reset. In some cases,
the unit may suddenly restart. DO NOT
leave unattendedwhile plugged in.
Personal InjuryHazard
Always unplugthe vacuum cleaner
before cleaning the brush area as
brush may suddenly restart. Failure to
do so can result in personal Injury.
11
The vacuum
cleaner creates suction that
picks up dirt. Rapidly moving air carries
the dirt to the dust bin through the
/'r L_'_-_
airflow passages, The dust bin lets
,//z,,."_-"-_4
the air pass through, while it traps
J//"
the dirt.
Z7
For best cleaning results, keep
_,,_**_"
the airflow passage open.
,,,_*'J
Check the starred areas
_'_"
occasionally for clogs.
,_'__"
Unplug from outlet
/7,./
Dust
Bin
before checkLng_J
1. Unplug cord from wall outlet.
2. Clean exterior using a clean, soft cloth
that has been dipped in a solution of mild
liquid detergent and water, then wrung dry.
Wipe dry after cleaning. DO NOT drip
water on cleaner.
Do not use attachments ifthey are
wet. Attachments used In dirty
areas, such as under a refrigerator,
should not be used on other
surfaces untilthey are washed.
They could leave marks.
3. To reduce static electricity and dust buildup, wipe outer surface of cleaner and
attachments,
12
TO EMPTY DUST BIN:
Always empty the dust bin when dirt level
reaches the "MAX FILL" line.
TO REMOVE DUST BIN:
While holding dust bin
over a trash can,
remove lid from dust
Press down on
the dust bin
release tab located above the
handle of the dust
bin.
bin by lifting off.
Pull
and
out
um
the handle
lift dust bin
of the vacucleaner.
Pour dust bin
contents into a
trash container.
TO CLEAN FILTER
Every time the
dust bin is removed,
rotate cleaning knob
on top of dust bin at
least two complete
revolutions to clean
filter and maintain
Cleaning
Knob
See 'To Clean Filter" under FILTER
CHANGING/CLEANING.
cleaning performance.
Iter
ou,,
po. -------L__
Remove any
clogs that
might be
located in
the dust bin
TO REPLACE DUST BIN
Replace dust bin
lid assembly by
placing back on
dust bin with the
alignment rib on
the lid aligned
with the edge on
the dust bin
port or the
secondary
filter.
rib
Place dust bin
back into vacuum
cleaner by inserting until the dust
bin release button locks dust
bin securely
place.
13
In
!
TO CLEAN FILTER
WARNING
Clean primary filter by gently tapping over a
trash container. Tap on several sides to
ensure best cleaning. Rinse with water only
as needed. Allow 24 Hours to dry.
Electrical Shock Hazard
Unplug power cord from electrical outleL Do not operate the cleaner without
the primary or exhaust filters. Be sure
the filters are properlyinstalled to prevent motor failure and/or electrical
shock.
When cleaning the filter no longer restores
vacuum suction to full power you need to
replace the filter.
TO REPLACE
PRIMARY FILTER
Check primary
when dirty.
TO REMOVE
filter frequently
PRIMARY
PRIMARY
FILTER
Slide knocking cam inside the filter and align
UNLOCK arrow on lid with one of four tabs
located on the rim of the filter, rotate clock-
and clean
wise until the tab on the filter aligns with the
LOCK arrow on the lid.
FILTER
Remove the dust bin and dust bin lid
assembly as outlined in the DUST BIN
CLEANING section.
Unlock
Filter
While holding the dust bin lid assembly over
a trash container, grasp filter, rotate counterclockwise and lift
off.
Arrow
_\_
Lock
Arrow
Cover_\_
Filter Cover
Note: Under normal use and care, your filter
can be expected to last up to 5 years.
Filter
14
EXHAUST FILTER
SECONDARY FILTER
HEPA
FOAM
The exhaust filter must be replaced when
dirty. It should be replaced regularly
depending on use conditions.
Electrical Shock Hazard
The filter CANNOT be washed as it will lose
its dust trappingability.
Do not operate the cleaner without the
motor safety filter. Be sure the tilter is
properlyInstalled to prevent motor failura and/or electrical shock.
NOTE: See PARTS AND FEATURES
for the exhaust filter number.
Always unplug power cord from electrical outlet before performing any service on vacuum,
Check secondary
when dirty,
filter frequently
Press release tab
on filter cartridge
and pull out of
canister. (Cover
not shown for
clarity).
and clean
Remove the dust bin as outlined in the
DUST BIN CLEANING section.
Remove secondary
cleaner.
Remove
filter
from cartridge by
pushing out
through the slot in
the cartidge.
filter from vacuum
TO REPLACE FILTER
Slide new filter into
Filter
cartridge so that
the foam side will
face towards the
canister, as shown.
The filter
should be
placed into the
cartridge so
that the ,,A.
Wash the secondary filter in warm soapy
water, rinse anddry thoroughly by squeezing the filter in your hand and letting it air
dry.
symbols align.
DO NOT wash in the dishwasher.
Replace the
exhaust filter
catridge by placing tabs in slots
and pushing down
until cartridge
DO NOT install damp.
Replace dry secondary filter. Ensure filter is
properly installed over filter opening.
Replace the dust bin as outlined in the
DUST BIN CLEANING section.
J
15
snaps into place.
!
Always follow all safety precautions when
cleaning and servicing the Power-Mate _,
WARNING
Electrical Shock Or Personal Injury
Hazard
Disconnect alectrical supply before
servicing or cleaning the unit. Failure
to do so could result in electrical shock
or personal injury from cleaner suddenly starting.
Disconnect cleaner from electrical
outlet.
5. Depress tabs
on rear of
agitator cover
and rotate
forward to
release from
the PowerMate ® base.
Check and remove hair, string and lint buildup frequently in the Power-Mate ® brush and
brush support areas. If build-up becomes
excessive, disconnect Power-Mate" from
wand and follow the steps below.
TO REMOVE BELT
Tabs
Agitator
Cover
1. Turn PowerMate ® upside
down.
6. Lift agitator
assembly out
and remove
worn belt.
2. Unscrew the
two (2) PowerMate ® cover
screws.
End Cap
3. Turn PowerMate ® right side
up. Press handle
release pedal and
lower the swivel.
7. Check and clean end cap areas.
Lift rear latches up.
4, To remove cover,
grasp the sides and pull
out.
16
TO CLEAN AGITATOR
TO REPLACE BELT
NOTE: In order to keep cleaning efficiency
high and to prevent damage to your vacuum, the agitator must be cleaned every time
the belt is chart eqe#_d.
1. Install new
belt over motor
drive, then
over brush
sprocket.
The agitator must also be cleaned according to the following schedule:
Vacuum Use
Clean Agitator
HEAVY (used daily)
every week
NOTE: See
PARTS AND
FEATURES for
belt number.
End Cap
MODERATE
-
Agitator
every month
(used 2-3 times/week)
LIGHT -
assembly back
into Power-Mate e
every 2 months
(used 1time/week)
m
Agitator Assembly
3. Reinstall
agitator
cover by linTabs
ing up the
front tabs
and slots
and rotating
downward
Agitator Cover
until the
latches snap into place.
Brush Unit
End Cap
i
L_ Belt Pulley
Cover
5. Rotate cover
back. Press
cover firmly
until side and
rear tabs snap
into place. Turn
Power-Mate ®
upside down
and replace two
(2) cover
screws.
17
Base
4. Line up
front of
cover and
base. Rest
cover on
front edge
of base as
shown.
_Push
1. Remove Power-Mate ® cover as shown in
BELT CHANGING AND AGITATOR CLEANING section.
Push In
And Turn
i_.._
In
And Turn
bulb counterclock2. Push
wise,
then
in and
pull out
turn
to remove.
3. Push in and turn
bulb clockwise, to
replace. Bulb must
not be higher than
15 Watts(130 Volts).
4. Reinstall Power-Mate ® cover as shown in
BELT CHANGING AND AGITATOR CLEANING section.
NOTE: See PARTS AND FEATURE[S for
bulb number.
TO REPLACE AGITATOR
E',f WARNING
Electrical Shock Or Personal
Hazard
1. Remove Power-Mate ® cover, belt and
agitator assembly. See "To Remove Belt" in
BELT CHANGING AND AGITATOR
CLEANING.
Injury
Disconnect electrical supply before
servicing or cleaning the unit. Failure
to do so could result in electrical shock
2. Replace agitator assembly
3. Reassemble belt, agitator assembly,
Power-Mate*cover,
light bulb and light cover.
See 'q-o replace belt" in BELT CHANGING
AND AGITATOR CLEANING.
or personal injury from cleaner suddenly starting.
TO CHECKBRUSHES
When
brushes
level of the base
support bars,
replace
re wornthe
to the
agitator.
_
Base Support
Bars
18
•
_
_
_
i_!
!lm
Review this table to find do-it-yourself solutions for minor performance problems. Any service
needed, other than those described in this owner's manual, should be performed by an authorized Sears Service Center.
Cleanerwon'tstart.
1, Unplugged at wall outlet.
2. Tripped circuit breaker/blownfuse
at household service panel.
3. Loose hose electrical connections.
4. Tripped thermal protector in
canister.
Poorjob ofdid
pick-up.
1.
2.
3.
4.
5.
6.
7.
8.
9.
Cleanerstartsbut
cutsoff.
1. Hose electrical connections.
Full or clogged dust bin.
Clogged airflow passages.
Dirty filters.
Wrong pile height setting.
Open suction controL.
Hole in hose.
Worn Power-Mate®agitator.
Worn or broken belt.
Dirty brush or brush supports.
2. Tripped overload protector in
PoweroMate_,.
3.
Power-Matet willnot
Nn whenattached.
Tripped thermal protector
in canister.
1. Power-Mate" connections
unplugged.
2. Worn or broken belt.
3. Dirty agitator or agitator supports.
4, Tripped overload protector in
Power-Mate*
1. Plugin firmly,pushON/OFF switchto ON.
2. Reset circuit breaker or replace fuse.
3. Reconnecthose ends,(page 7)_
4. Reset thermalprotector, (page 11).
1.
2.
3.
4.
5.
6.
7.
8 & 9.
Empty dust din, (page 13).
Clear airflow passages, (page 12).
Clean!changefilters, (page 14, 15).
Adjust setting, (page 8, 9).
Adjustcontrol, (page 11).
Replace hose.
Change agitator, (page 18).
See BELT CHANGING AND AGITATOR
CLEANING, (pages 16, 17).
1. Check connections,reconnect hose
ends, (page 7).
2. Remove any items that may be caught
or jammed, then reset. If cleanerstarts
and stops again, clean agitator and agitator
supports, then reset, (pages 11, 16-17).
3. Reset thermalprotector, (page 11).
1. Plug in firmly,(page6).
2&3.
See BELTCHANGING AND AGITATOR
CLEANING, (pages 16-17).
4. Check brush area for excessive lint
build-up or jamming. Clean agitator and
agitator supports, then reset,
(pages 11, 16-17).
Cleaner picksup moveable
rugs-or- Power-Mate"
pushestoohard.
1. Wrong pile height setting.
2. Suction toostrong.
1. Adjust setting, (page 8, 9).
2. Open suctioncontrol,(page 11).
Ught won'twork.
1. Burned o_Jtlightbulb.
1. Changelightbulb,(page 18).
Cordwon'trewind.
1. Dirtypowercord.
2. Cord jammed.
1. Clean the powercord.
2. Pulloutcordandrewind.
Cleanerleavesmarks
1. Wrongvacuumingpattern.
1. See VACUUMINGTIPS, (page9).
on carpet.
19
2O
Your Home
For repair - in your home - of all major brand appliances,
lawn and garden equipment, or heating and cooling systems,
no matter who made it, no matter who sold it!
For the replacement parts, accessories and
owner's manuals that you need to do-it-yourself.
For Sears professional installation of home appliances
and items like garage door openers and water heaters.
iiiiii!;iii!iii!_i_
_
1-800-4-MY-HOME
®
(1-800-469-4663)
Anytime, day or night
(U.S.A. and Canada)
www.sears.com
www.sears.ca
i_iiiiiil
__i_i_
_11 _ _
iiii!iiii!ii
_!i!iiiiii_
ii!iiii!ilili!i ¸I
Our Home
i_!iiill
For repair of carry-in products like vacuums, lawn equipment,
and electronics, call or go on-line for the nearest
Sears Parts and Repair Center.
1-800-488-1222
Anytime, day or night (U.S.A. only)
www.sears,com
To purchase a protection
or maintenance agreement (Canada)
1-800-827-6655
(U.S.A.)
agreement (U.S.A.)
on a product serviced
1-800-361-6665
Para pedir servicio de reparaci6n
a domicilio, y para ordenar piezas:
1-888-SU-HOGAR sM
by Sears:
(Canada)
Au Canada pour service en fran_ais:
1-800-LE-FOYER Mc
(1-800-533-6937)
www.sears.ca
(1-888-784-6427)
S ARS
© Sears, Roebuck and Co.
® Registered Trademark / TMTrademark / SMService Mark of Sears, Roebuck and Co.
® Marca Registrada / TM Marca de Fabrica / SMMarea de Servicio de Sears, Roebuck and Co.
Mc Marque
de commerce
/ MD Marque
deposde
de Sears, Roebuck
and Co.