1
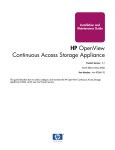
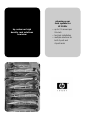
planning your
rack system for
LP 2000r
hp netserver high
density rack solutions
overview
• up to 21 servers per
2m rack
• tool-less installation
• multiple solutions for
both 2-post and
4-post racks
HP Netserver High Density Rack Solutions Overview (LP 2000r)
Executive Summary
This white paper is designed to provide information for individuals charged with deploying multiple HP
Netserver LP 2000r units into racks and cabinets. The incredible density available when using the HP
Netservers LP 2000r - up to 21 servers in a single rack - allows for the ultimate in computing power but
presents new challenges to those actually assigned to assemble the system. The purpose of this white
paper is to help you plan and install a reliable computing system using the HP Netserver LP 2000r.
It provides information about accessories that complete a rack solution (pages 12 - 18), installation options
for your HP Netserver LP 2000r (pages 19 - 24) and cable management suggestion to insure a reliable system (pages 25 - 27). In addition, it provides information regarding how to calculate power consumption
and thermal dissipation based on your hardware configuration so that you can assess and design your
power and cooling infrastructures appropriately (see pages 5 - 9).
The paper is intended for Information Technology (IT) managers, IT staff, and consultants who plan and
install Hewlett-Packard PC-based server systems, especially where multiple servers are to be mounted in
EIA standard racks.
i
HP Netserver High Density Rack Solutions Overview (LP 2000r)
Additional resources about the HP Netserver LP 2000r and
the HP System/E Racks
Publications
HP Netserver LP 2000r User Guide (HP publication P1824-90009)
HP Rack Systems/E User ’s Manual (HP publication 5967-6409)
Websites
HP Netserver website: http://netserver.hp.com
HP Netserver Configuration Guide: http://netserver.hp.com/netserver/tools/rack_asst.asp
HP Netserver Configuration Guide: http://netserver.hp.com/netserver/tools/
HP Rack Solutions website: http://www.hp.com/racksolutions/index.html
HP Rack Accessories website: http://www.hp.com/racksolutions/menu_products.html
HP Rack System/E User Manual: http://www.hp.com/racksolutions/I_installguides.html
ii
HP Netserver High Density Rack Solutions Overview (LP 2000r)
Reader Assumptions
This white paper is for the person who installs, administers, and troubleshoots PC-based networked
servers. Hewlett-Packard Company assumes that you are qualified in the servicing of computer equipment
and trained in recognizing the risks posed by products with hazardous energy levels.
We also assume that you are familiar with personal computing terminology, PC specifications, networking
standards, and software applications.
iii
HP Netserver High Density Rack Solutions Overview (LP 2000r)
Table of Contents
Section
Page
Executive Summary....................................................................................................................................i
List of Additional Resources .....................................................................................................................ii
Reader Assumptions.................................................................................................................................iii
Table of Contents......................................................................................................................................iv
Notices........................................................................................................................................................1
Safety and Regulatory Information...........................................................................................................2
Glossary ......................................................................................................................................................3
Planning Your Racked System...................................................................................................................5
The HP Rack System/E............................................................................................................................10
HP Rack Accessories................................................................................................................................12
Installation................................................................................................................................................19
Cable Management...................................................................................................................................25
Conclusion................................................................................................................................................28
iv
HP Netserver High Density Rack Solutions Overview (LP 2000r)
Notices
The information contained in this document is subject to change without notice.
Hewlett-Packard makes no warranty of any kind with regard to this material, including, but
not limited to, the implied warranties of merchantability and fitness for a particular purpose.
Hewlett-Packard shall not be liable for errors contained herein or for incidental or consequential damages
in connection with the furnishing, performance, or use of this material.
This document contains proprietary information that is protected by copyright. All rights are reserved. No
part of this document may be photocopied, reproduced, or translated to another language without the
prior written consent of Hewlett-Packard Company.
Hewlett-Packard Company
10955 Tantau Avenue
Cupertino, CA 95014
© Copyright 2002, Hewlett-Packard Company.
1
HP Netserver High Density Rack Solutions Overview (LP 2000r)
Safety and Regulatory Information
For your protection, Hewlett-Packard products are tested for conformance to various national and international regulations and standards. The scope of this regulatory testing includes electrical and mechanical
safety, electromagnetic emissions, immunity, ESD, and hazardous materials.
Where required, certifications are obtained from third party test agencies. Certification marks, when
required, appear on the product label. In addition, various regulatory bodies require some information
under the headings below.
These products and related documentation must be reviewed for familiarization with safety markings and
instructions before operation.
WARNING
The WARNING sign denotes a hazard. It calls attention to a procedure, practice, or
situation which, if not done correctly or adhered to, could result in injury. Do not proceed
beyond a WARNING sign until the indicated conditions are fully understood and met.
CAUTION
The CAUTION sign denotes a hazard. It calls attention to an operating procedure, practice,
or situation which, if not done correctly or adhered to, could damage or destroy part or
the entire product. Do not proceed beyond a CAUTION sign until the indicated conditions
are fully understood and met.
Safety Warnings
The following warnings and cautions are applicable to the System/E rack. Please observe all safety
precautions and warnings.
This product has not been evaluated for connection to an IT power system (an AC distribution system having no direct connection to earth (ground) according to EN60950.
Grounding
WARNING
The HP System/E Racks are safety class I product and has a protective earthing
(grounding) terminal. There must be an uninterruptible safety earth ground from the main
power source to the product’s input wiring terminals, power cord, or supplied cord set.
Whenever it is likely that the protection has been impaired, disconnect the power cord
until the ground has been restored.
Leakage Current
WARNING
Due to types of products that can be installed in the System/E rack, there is a risk of high
leakage current (3.5 mA). Reliable ground circuit continuity is vital for safe operation of
this product. To reduce the risk of electric shock, earth (ground) connection is essential
before connecting the power supply. Never operate this cabinet with the ground
conductor disconnected.
Power Limitations
CAUTION
To reduce the risk of overload, do not load any single Power Distribution Unit (PDU) or
IEC-320C19 receptacle with more than a maximum of 16 A. In addition, do not load a single
NEMA 5-15 or IEC-320 C13 receptacle with more than a maximum of 10 A.
Cabinet Stability
CAUTION
To reduce the risk of cabinet instability, deploy the anti-tip feet before installing or
extending any devices. Extend only one device at a time. Do not stand or sit on any
extended device. Qualified service personnel should do all non-operator servicing.
Accessories
CAUTION
2
This product is designed for use with specific electrical accessories. The use of any other
accessory is not recommended or supported.
HP Netserver High Density Rack Solutions Overview (LP 2000r)
Glossary
This glossary provides entry-level explanations of common words and phrases used when mounting multiple
servers in racks. Detailed HP product information is available in numerous documents available from HewlettPackard, such as technical data sheets and configuration guides. You can find them on our website at
h t t p : / / w w w. h p . c o m / r a c k s o l u t i o n s / m e n u _ l i t . h t m l.
1U – One EIA rack unit or 44.45 mm (1.75 inches) of vertical rack space. The
height of devices, when mounted in racks, are often expressed in multiples of
"units", for example, a 2U device requires two times 44.45 mm (1.75 inches) or a
total of 88.9 mm (3.5 inches) of vertical space in a rack. The actual device will in
reality be of slightly less height to eliminate mechanical interference with adjacent
devices.
Cable Management – Refers to a method of organizing and routing cables
(power and data) in the rear of the rack. Effective cable management means to
secure and bundle cables with the capability to efficiently route and channel the
cables in an organized fashion. HP offers a Rack Cable Management Kit (J1481A)
to provide a solution for the high-density rack environments associated with the
HP Netserver LP 2000r.
Console (sometimes referred to as a console system or KVM system) – Consists
of the video monitor, keyboard and mouse connected directly, or via a console
switch, to the rackmounted server for system administration purposes. Remote
management technologies enable the console and server to be physically separated.
Console Switch – A device that allows a user to operate multiple servers with
a single keyboard, monitor, and mouse.
KVM – Abbreviation for Keyboard/Video (Monitor)/Mouse as used in "KVM cable"
or "KVM switch." A console switch (above) is often referred to as a KVM switch.
PDU or Power Distribution Unit – Generally refers to a "power strip" with built-in
power protection and mounted within the rack to furnish AC power to a group of
rackmounted servers.
Rackmount Flat Panel Display – A system by which a flat panel monitor,
keyboard, and pointing device can be rack mounted to be used as system console
but only requiring 2U of “vertical rack space” instead of 13U as is common with
traditional monitor and keyboard combinations.
3
HP Netserver High Density Rack Solutions Overview (LP 2000r)
Retractable Keyboard Kit - A product, which allows for mounting a full-size
keyboard and mouse in a rack, occupying only 2U of vertical space and retracting
into the rack when not used.
Slides - A sliding rackmount solution comes standard with the HP Netserver LP
2000r. Slides enable in-rack serviceability of the server from the front of the rack.
Also included is a cable management arm, which allows the cabling to travel
effortlessly as the server extends from and retracts into the rack, similar to a
drawer in a filing cabinet.
UPS - Uninterruptible Power Supply. A device that provides battery power for a
server should the local AC power source fail. By providing this temporary power,
data corruption can be avoided when a power failure occurs.
4
HP Netserver High Density Rack Solutions Overview (LP 2000r)
Planning your racked system
After you've decided what computer and networking equipment and racks you need, you're faced with the
daunting task of physically locating the systems somewhere.
There are several conditions that must be met to assure that your system will work reliably and without
interruptions. First, you must plan for the physical space the equipment will occupy. Second, you must
ensure that the floor where the equipment will be located is strong enough to dependably support the
weight. Electronic equipment, although small in size, can be physically heavy—especially Uninterruptible
Power Supplies (UPS) that often use dense batteries.
Third, the system planner must calculate the power requirements and determine the number of Power
Distribution Units (PDU) and UPSs needed, as well as insuring that adequate circuitry is available in the
facility.
Lastly, you must insure that you can provide cooling for the equipment. Thermal requirements become a
concern when mounting a mass of electronic equipment in a small physical space and a conscientious planner will deal with thermal buildup in the preparation phase before the system is delivered and ready for
mounting in the rack.
Many of these calculations can easily be made with the special HP Netserver Rack Configuration
software available from HP for free at http://netserver.hp.com/netserver/tools/rack_asst.asp or by following
these basic steps:
1
List all components.
2
Configure those components into racks to determine the number and
size required.
Use the HP Netserver Configuration Guide, available at: http://http://netserver.hp.com/netserver/tools/, for
the height of the equipment. With this aid, calculate how many devices can be installed into any one rack
and its preliminary layout.
3
Calculate the power requirements.
The electrical power required for a racked system must be calculated to:
1) Plan for an adequate facility supply for either 100-120V or 200-240V
2) Determine the number of Power Distribution Units needed
3) Determine the number of Uninterruptible Power Supplies required
Determine power requirements for the servers.
As mentioned above, the amount of servers that can be installed in one rack depends on a number of
parameters: Physical space in the rack, electrical (power) requirements and thermal limitations.
The worksheet at the end of this section allows you to calculate the actual power consumption for your
servers, including differences due to the number of processors, HDDs, and communication cards. Knowing
the actual power consumption lets you design a system, which precisely meets your current— and future—
requirements.
NOTE
Always plan your infrastructure for appropriate expandability and future growth.
5
HP Netserver High Density Rack Solutions Overview (LP 2000r)
Calculate total input current requirements.
Input current requirements
Once you know the input power needed to operate the servers and other devices installed in the rack, you
can calculate the input current that is required for the rack by using this formula:
I n p u t / C u rrent (A) =
Input Power (W)
AC Voltage (V)
Using this basic formula, you can evaluate whether your PDU, UPS and/or local AC power circuit can provide
the amount of current the equipment connected to it needs.
For example, if you are connecting four servers to a 16 A PDU, you can use the tables above and determine the total input power requirements for each server. In this example let’s assume we have calculated
these to be:
Server
Total Input Power (W)
HP Netserver LP 2000r #1
176
HP Netserver LP 2000r #2
177
HP Netserver LP 2000r #3
180
HP Netserver LP 2000r #4
180
The total input power requirements for these four servers come to 713 W. By knowing that we are operating at a line power of 100 VAC and using the formula above we can calculate that the four servers will
require an input current of 7.13 A—well below the capacity of the 16 A rated PDU.
Circuit breakers
The HP Netserver LP 2000r power supply has been designed for low AC inrush current to reduce the possibility of tripping circuit breakers, typically located at a distribution panel.
Tripping of circuit breakers in the distribution panel may result from use of circuit breakers that are not
adequately rated for inrush current found in most electronic devices. Replacing the circuit breaker with a
suitable type is often the best solution.
The largest inrush current occurs when AC is first applied to the equipment in the rack. Often this inrush
current is independent of the “on” or “off” state of the individual devices. However, you can usually reduce
the total inrush current by applying power to the rack with the equipment in the “off” stage.
Power up sequence
Follow these instructions to minimize inrush currents and to minimize circuit breakers from tripping:
1. Power on peripherals one at a time; beginning with the tape back-up unit, followed by the mass-storage
units, keyboard, video monitor, and mouse switch, if any.
2. If your system includes an HP Console Switch, it must be powered on before the HP Netserver LP 2000r.
3. Last, power on each HP Netserver LP 2000r and wait for the fan in each server to spin up before powering on the next one. If the HP Netserver LP 2000r doesn’t detect all the required components, it will not
complete the boot process and will report an error.
Power down sequence
There is no specific order to power down the equipment in a rack; however, there is an HP recommendation that it be done in the following sequence:
1. Ensure that the network users are properly warned of the power down.
2. Shut down the Network Operating System.
3. Power down the peripherals.
4. Power down the Netservers.
6
HP Netserver High Density Rack Solutions Overview (LP 2000r)
4
Assess the thermal dissipation and ensure that there are adequate
cooling systems in place.
5
Calculate the thermal conditions.
When mounting multiple servers in a rack you must also manage the thermal requirements. Although the
HP Netserver LP 2000r is specifically designed with excellent heat characteristics, you must know the
thermal load your particular rack configuration produces. This will allow you to manage the thermal environment within the rack to provide the conditions required for optimum server operation.
The operating temperature specifications for the HP Netserver LP 2000r are:
5 to 35°C (41 to 95°F)1, 2
It is very easy to calculate the BTU/Hr an HP Netserver LP 2000r dissipates. Simply use the following
formula:
Input Power (watts) x 3.41=Thermal dissipation (BTU/hr)
If we use the example with the four servers above, we can easily calculate how many BTU/hr our servers
will produce:
713 W x 3.41 = 2,431 BTU/Hr
6
Check your calculations.
As with any calculation or measurement, it is always valuable to check your numbers more than one time.
This is also the time to make adjustments to your layout. As you have gained insight into the power needs
and weight issues, you should adjust the placement of the equipment and add racks as needed. Plan for
easy access to equipment, which needs regular servicing, ensure that monitors and keyboards are easily
accessible to operators, and heavier items are placed low to provide stability for the system.
The special HP Netserver Rack Configuration software is available free of charge at:
h t t p : / / n e t s e rv e r. h p . c o m / n e t s e rv e r / t o o l s / r a c k _ a s s t . a s p.
1
Subtract 1°C (2°F) to the maximum temperature for each 600 m (2000 ft) above sea level.
2
Subtract 3°C (5°F) to the maximum temperature when it is mounted in a non-HP cabinet.
7
HP Netserver High Density Rack Solutions Overview (LP 2000r)
Power consumption worksheet - sample
The following worksheet makes it easy to make all the calculations you need to make.
Using the worksheet is simple. Inventory the HP Netservers LP 2000r that you will be rackmounting as to
the number of CPUs, memory boards, HDDs and add-in cards installed and input these numbers into the
“Number Installed” column. Multiply this number with the value in the “Unit Input Power (Watts)” column
to get the “Total Input Power (Watts)” for this particular server section. Finally, add all the values in the
“Total Input Power (Watts)” column to arrive at a total power consumption figure for the server.
Then using the formulas provided, calculate the current requirements and the BTUs/Hr.
For example: The calculations for an HP Netserver LP 2000r with 2 each 933 MHz processors, 2 GB of
memory, 2 each HDDs and a NetRAID 1M controller will show the following results:
Category
Part Number
Server
CPU’s
Memory
Description
Unit Input Power (Watts) Number Installed Total Input Power (Watts)
LP 2000r Basic boardset,
FDD, CD, fans, etc
P2467A
Pentium III 866 MHz
35.05
P2468A
Pentium III 933 MHz
37.90
41.30
1
63.30
2
75.80
P2453A
Pentium III 1 GHz
P4632A
Pentium III 1.13 GHz
27.9
P4634A
Pentium III 1.26 GHz
29.5
P5476A
Pentium III 1.4 GHz
31.2
CPU Terminator (if no 2nd CPU)
2.40
D8265A
128 MB 133 MHz ECC SDRAM
3.45
D8266A
256 MB 133 MHz ECC SDRAM
3.90
D8267A
512 MB 133 MHz ECC SDRAM
4.75
D8268A
1 GB 133 MHz ECC SDRAM
8.05
2
16.10
2
35.10
3
73.05
1
19.50
Hard Disk
P2472A
9.1 GB, 10k RPM Ultra3 SCSI Disk Drive
17.55
Drives
P2473A
18.2 GB, 10k RPM Ultra3 SCSI Disk Drive
21.50
P2474A
36.4 GB, 10k RPM Ultra3 SCSI Disk Drive
24.35
P3579A
73.4 GB, 10k RPM Ultra3 SCSI Disk Drive
15.3
P2507A
18.2 GB, 15k RPM Ultra3 SCSI Disk Drive
22.25
P4507A
36.4 GB, 15k RPM Ultra3 SCSI Disk Drive
RAID
D2140A
NetRAID 1Si
9.10
Controllers
D5955A
NetRAID 3Si
19.20
P3410A
NetRAID 1M
10.80
P3411A
NetRAID 2M (64 MB cache)
19.50
P3475A
NetRAID 2M (128 MB cache)
19.50
17
D9161A
NetRAID 4M (64 MB cache)
24.55
D9351A
NetRAID 4M (128 MB cache)
24.55
10/100TX NIC
3COM 3C980C-TX 10/100 NIC
2.55
4.50
Network
D5013B
Interface Cards N/A
N/A
Intel PILA8472B Dual Port 10/100TX NIC
9.95
N/A
Intel Pro/1000 PWLA8490T Gigabit NIC
7.25
N/A
Intel Pro/1000 PWLA8490SX Gigabit NIC
7.25
FC HBA
8.70
Other PCI Cards D6802B
P3413A
Ultra-160 SCSI HBA
8.70
P1218A
Top Tools Remote Control Card
8.70
A)
B)
C)
D)
8
63.30
Total Input Power (Watts) from the worksheet above
Input the AC line power (Volts) that the system is operating on.
Calculate Input Current (A) = A/B
Calculate the Thermal Dissipation (BTUs/Hr) = A x 3.41
272.05
220
1.24
927.69
HP Netserver High Density Rack Solutions Overview (LP 2000r)
Power consumption worksheet - actual
Use the following blank worksheet to make the same, easy calculations for your particular configuration:
Category
Part Number
Server
CPU’s
Memory
Description
Unit Input Power (Watts) Number Installed Total Input Power (Watts)
LP 2000r Basic boardset,
FDD, CD, fans, etc
63.30
P2467A
Pentium III 866 MHz
35.05
P2468A
Pentium III 933 MHz
37.90
P2453A
Pentium III 1 GHz
42.30
P4632A
Pentium III 1.13 GHz
27.9
P4634A
Pentium III 1.26 GHz
29.5
P5476A
Pentium III 1.4 GHz
31.2
CPU Terminator (if no 2nd CPU)
2.40
D8265A
128 MB 133 MHz ECC SDRAM
3.45
D8266A
256 MB 133 MHz ECC SDRAM
3.90
D8267A
512 MB 133 MHz ECC SDRAM
4.75
D8268A
1 GB 133 MHz ECC SDRAM
Hard Disk
P2472A
9.1 GB, 10k RPM Ultra3 SCSI Disk Drive
17.55
Drives
P2473A
18.2 GB, 10k RPM Ultra3 SCSI Disk Drive
21.50
P2474A
36.4 GB, 10k RPM Ultra3 SCSI Disk Drive
24.35
P3579A
73.4 GB, 10k RPM Ultra3 SCSI Disk Drive
15.3
P2507A
18.2 GB, 15k RPM Ultra3 SCSI Disk Drive
22.25
P4507A
36.4 GB, 15k RPMUltra3 SCSI Disk Drive
17
RAID
D2140A
NetRAID 1Si
9.10
Controllers
D5955A
NetRAID 3Si
19.20
P3410A
NetRAID 1M
10.80
Network
P3411A
NetRAID 2M (64 MB cache)
19.50
NetRAID 2M (128 MB cache)
19.50
D9161A
NetRAID 4M (64 MB cache)
24.55
D9351A
NetRAID 4M (128 MB cache)
24.55
D5013B
10/100TX NIC
2.55
3COM 3C980C-TX 10/100 NIC
4.50
N/A
Intel PILA8472B Dual Port 10/100TX NIC
9.95
N/A
Intel Pro/1000 PWLA8490T Gigabit NIC
7.25
N/A
Intel Pro/1000 PWLA8490SX Gigabit NIC
7.25
FC HBA
8.70
P3413A
Ultra-160 SCSI HBA
8.70
P1218A
Top Tools Remote Control Card
8.70
Other PCI Cards D6802B
63.30
8.05
P3475A
Interface Cards N/A
1
A) Total Input Power (Watts) from the worksheet above
B) Input the AC line power (Volts) that the system is operating on.
C) Calculate Input Cur rent (A) = A/B
D) Calculate the Thermal Dissipation (BTUs/Hr) = A x 3.41
9
HP Netserver High Density Rack Solutions Overview (LP 2000r)
HP Rack System/E
The HP Rack System/E is a full-featured, advanced rack for the most demanding rackmount requirements today
and in the future.
Designed for flexibility, the
HP Rack System/E base rack
and accessories can be
c o n f i g u red to adapt to a
b road range of re q u i re m e n t s .
The clean, contemporary look of
HP Rack System/E showcases
your computers and peripherals.
P e rforated doors for
ventilation
12-gauge columns pro v i d e
s t re n g t h
Snap side panel allows
easy access
Anti-tip foot
Selection
Three sizes — 41U, 33U, 25U — offer a range of rackmount capacity. Racks can stand alone or be attached
together in a multi-rack unit. Doors can be mounted to open to the left or right.
As your needs grow, the HP Rack System/E can grow vertically with an 8U extension kit. With the kit, the
25U rack becomes 33U, the 33U rack becomes 41U, and the 41U rack becomes 49U.
Ventilation
The HP Rack System/E allows air to flow freely, for better cooling. The top is fully ventilated, and perforated doors provide 63% opening.
10
HP Netserver High Density Rack Solutions Overview (LP 2000r)
Strength
HP Rack System/E handles your heaviest equipment. The 12-gauge columns and reinforced base support
up to 907kg (2000lb) of equipment in the rack. EIA mounting units are numbered on the columns, making
it easy to correctly position rackmount rails, slides, and shelves.
Mobility
HP Rack System/E carries your equipment where it’s needed. At your site, it rolls easily on polyurethane
wheels that dampen the effect of bumps, jolts, and uneven floors. Even the tallest rack, 41U, can fit
through most doorways, worldwide.
Ease of Use
Cosmetic front filler panels and side panels snap on and off without tools. When it’s necessary to remove
them, doors lift off easily (doors cannot be removed when closed, so security is not compromised).
Stability
The HP Rack System/E has anti-tip feet that attach to both the front and rear of the rack. The feet provide
anti-tip protection while installing or servicing slide-mounted devices.
11
HP Netserver High Density Rack Solutions Overview (LP 2000r)
HP Rack Accessories
In addition to the rack itself, HP offers numerous accessories to increase the convenience and safety of
having your servers installed in a rack.
Front doors, side panels and tie kits
Each HP Rack System/E racks include a perforated, lockable rear door. In addition optional side panels
and a front door can be chosen as your needs demand.
All the three available front doors—different only by their heights—offer 63% perforation so that the equipment mounted in the rack can be clearly seen through the
door. Also, the large perforations allow for optimum ventilation.
The doors can be mounted to open either to the left or to the right and come complete with all the mounting hardware. The quick-disconnect hinges allow the door
to be easily lifted off without tools but prohibit it to be removed when the door is
locked. A torx 25 driver is the only tool required for installation of hinges.
For Use with HP Rack Model Number
HP Front Door Product Number
HP Rack System/E41 (J1500A)
J1509A
HP Rack System/E33 (J1501A)
J1510A
HP Rack System/E25 (J1502A)
J1511A
To cover the sides of the racks - whether for protection or appearance—HP provides kits consisting of
enough PC-ABS injection molded plastic snap-in side panels to cover both sides of the racks. Because they
can be removed and installed easily without tools, access to the equipment inside is always effortless and
convenient.
For Use with HP Rack Model Number
Content
Model Number
HP Side Panel Kit
HP Rack System/E41 (J1500A)
2 each 9U side panels
8 each 8U side panels
J1506A
HP Rack System/E33 (J1501A)
2 each 9U side panels
6 each 8U side panels
J1507A
HP Rack System/E25 (J1502A)
2 each 9U side panels
4 each 9U side panels
J1508A
In some systems with multiple servers, you may decide to install peripherals and
additional equipment in a second, or even third, rack. In such instances, the HP Tie
Kits allow you to add lateral stability by mechanically connecting the racks.
There are two kits to choose from per the following table. The kits include fasteners
to tie the racks together at the top and the bottom (both front and rear) as well as
cosmetic covers.
This hardware has been designed so that you can tie the racks together after the
servers and/or other equipment have already been installed. There is no need to turn
off the power to the system.
12
HP Netserver High Density Rack Solutions Overview (LP 2000r)
To Tie Together the Following
HP Rack System/E
Use Tie Kit
HP Model Number
HP Model Number
Kit Contains
Mount Fastener
2 each 41U racks (J1500A)
J1512B
2 Front Tie Brackets
2 Rear Tie Brackets
2-Part Cosmetic Cover
1 each 41U rack (J1500A) and
1 each 33U rack (J1501A)
J1513B
2 Front Tie Brackets
2 Rear Tie Brackets
2-Part Cosmetic Cover
2 each 33U rack (J1501A)
J1513B
2 Front Tie Brackets
2 Rear Tie Brackets
2-Part Cosmetic Cover
Any combination
that includes a 25U rack
No kit available
Cable Management Accessory
The HP Netserver LP 2000r is delivered complete with slides ready for installation. However, if additional
cable management is needed, the HP Rack Cable Management Kit (J1481A) comes in handy.
It offers a solution to route and organize cables in high-density rack environments.
The kit contains four brackets for routing and channeling cables and 12 Velcro™ ties
for securing and bundling. The J1481A is designed to offer a flexible and scaleable
solution to accommodate various racking and cabling scenarios. Brackets can mount
on both the left and right rear columns and can be used with both rail and slide rackmounting. Multiple kits can be used in combination to provide additional cable management as the rack density increases. Each bracket is designed to contain approximately 30 large SCSI cables (1/2” diameter) or 120 LAN cables (1/4” diameter) or
any combination of the two (i.e. 15 SCSI/60 LAN).
The Rack Cable Management Kit offers complete compatibility with HP System/E
Racks and industry standard non-HP racks.
13
HP Netserver High Density Rack Solutions Overview (LP 2000r)
HP Power Distribution Options
HP offers a series of Power Distribution Units (PDU) for use when the HP Netserver LP 2000r is to be
mounted in a rack. The PDUs are especially convenient when mounting multiple servers as you simply
route each power cord to the closest PDU rather than to the local power source or the Uninterruptible
Power Supply (UPS), if used.
In addition to convenience, the HP PDUs also provide protection for the servers. All feature a circuit protector for each power phase. If one phase shorts, one or both of the circuit protectors trip.
Unlike other PDUs, the HP devices are slim and allow you to easily reach the servers and other equipment
from any angle. All mounting hardware is built in (mounting brackets) or included (mounting screws and
nuts) so there is nothing extra to order.
The PDUs mount quickly out-of-the-way on the rear posts of HP fourpost racks, either vertically along the posts or horizontally between
them, as your needs dictate. The rear columns have four dedicated
spaces to mount the PDUs, so that they won’t interfere with the
hinges and latches of the rack door or the equipment in the rack.
Routing power cords from the HP Netserver LP 2000r is straight forward since the cords and the PDUs are all located at the rear of the
rack.
There are four types of PDUs available for use with the HP Netserver
LP 2000r, depending on your voltage and outlet requirements:
Voltage
Current
100-127 VAC
16 A
100-240 VAC
16 A
100-240 VAC
16 A
100-240 VAC
16 A
1
HP Product Number
Type
NEMA 5-15R
IEC 320 C-13
C-13 receptacles
C-19 receptacles
C-13 receptacles
7
1
1
IEC 320 C-13
IEC 320 C-19
IEC 320 C-20
E7675A1
E7671A
E7676A
E7674A
Hp recommends using the 100-240 VAC PDUs wherever possible
E7675A
(100-127 VA C )
14
Outlets
Number
9
1
6
2
10
E77671A
(100-240 VA C )
E7676A
(100-240 VA C )
HP Netserver High Density Rack Solutions Overview (LP 2000r)
Because of the varying AC plug and receptacle requirements around the world, the PDUs do not come with
attached power cords. Separate cords must be ordered to fit your specific situation. These are the available
cords for each PDU:
Voltage
PDU selected
100-127 VAC
E7675A
100-240 VAC
100-240 VAC
E7671A
E7671A
Power Cord Plug Style
Length
HP Product Number
5-20P
4.5 m (177.2 inches)
E7802A
C20
4.0 m (157.5 inches)
E7804A
No plug
4.5 m (177.2 inches)
E7806A
5-20P
4.5 m (177.2 inches)
E7802A
L6-20P
4.5 m (177.2 inches)
E7803A
C20
4.0 m (157.5 inches)
E7804A
L6-30P
4.5 m (177.2 inches)
E7805A
No plug
4.5 m (177.2 inches)
E7806A
IEC309
4.5 m (177.2 inches)
E7808A
CEE7/7
4.5 m (177.2 inches)
E7809A
5-20P
4.5 m (177.2 inches)
E7802A
L6-20P
4.5 m (177.2 inches)
E7803A
C20
4.0 m (157.5 inches)
E7804A
L6-30P
4.5 m (177.2 inches)
E7805A
No plug
4.5 m (177.2 inches)
E7806A
IEC309
4.5 m (177.2 inches)
E7808A
CEE7/7
4.5 m (177.2 inches)
E7809A.
HP recommends that you connect the power cord of the PDUs to an Uninterruptible Power Supply (UPS),
so be sure to read the chapter about UPSs and how to select the correct one for your application.
15
HP Netserver High Density Rack Solutions Overview (LP 2000r)
Uninterruptible Power Supplies (UPS)
The Uninterruptible Power Supply (UPS) is used to provide power to servers and peripherals should the
AC power fail. Generally, the UPS will maintain an appropriate level of AC voltage and current long enough
for the equipment to save open files and shut itself down in an orderly manner.
All UPSs sold by HP for use with the HP Netserver LP 2000r also feature complete surge protection and
noise filtering.
Sizing a UPS is easy. However, many people are often confused over the differences between Watts and VA
and which rating to use when selecting a UPS.
Power is a measure of energy divided by time. In direct current (DC) environments power is expressed as:
Power = Vol ts x Amps
In alternating current (AC) circuits, however, some of the current may travel into and back out of the
equipment. This current is called a harmonic current and creates an apparent power (VA), which is larger
than the actual power (W).
For many electrical devices the difference between the apparent power (VA) and the actual power (W)
can be ignored. This applies to the HP Netserver LP 2000r. However, some devices without “power factor
correction” may have an apparent power (VA) that is up to two times the Watt rating of the device.
Normally, the required UPS rating may be determined by the total Watts required. However, if the UPS
load consists of a high percentage on non-power factor corrected equipment, the VA rating of the UPS
must also be considered to avoid overloading the UPS.
Uninterruptible
Power Supply
These are the UPSs available for the HP Netserver LP 2000r:
Input Voltage
Volts/Amps
Output Receptacles
Quantity
Type
Input Plug
HP Product Number
120 VAC
2.2 kVA
2
6
NEMA 5-20
NEMA 5-15
NEMA 5-20P
APC2R120
120 VAC
3.0 kVA
2
1
4
NEMA 5-20
NEMA L5-20
NEMA 5-15
NEMA L5-30P
APC3R1201
208 VAC
3.0 kVA
2
2
1
NEMA 5-15
NEMA L6-20
NEMA L6-30
NEMA L6-20P
APC3R208
230 VAC
2.2 kVA
1
8
IEC-19
IEC-320
IEC320
APC2R230
230 VAC
3.0 kVA
1
8
IEC-19
IEC-320
IEC320
APC3R2302
1
2
16
For integrated shipment, order HP Product Number APC3RA
For integrated shipment, order HP Product Number APC31A
HP Netserver High Density Rack Solutions Overview (LP 2000r)
All are designed especially for use with the HP Netservers—including their “look and feel.” But they are
manufactured and supported by American Power Conversion (APC), supplier of the world’s most reliable
power protection, and available exclusively from HP.
All the units are rackmountable in a standard EIA 19 inch rack and occupy only 3U of vertical space.
The UPSs come complete with all rackmounting hardware. In the planning stage be sure to keep in mind
that the units are heavy because of the internal stand-by battery, up to 58 kg (127 lbs.) Therefore they
should be located as low as possible in the rack so as not to contribute to any instability.
A full-featured power management software application comes with each unit, as well as the serial cable
that is used to connect the UPS to the servers. The PowerChute Plus software allows users to monitor and
configure their UPSs and will command the servers to save any open files and execute a “soft” shutdown
during an extended power outage.
Console Switch
A console switch is a convenient way to manage a system with multiple servers. It allows up to 64 HP
Netservers LP 2000r to be controlled from a single keyboard, monitor and mouse (KVM).
HP offers two devices; one that switches four systems into your console and
one that switches eight.
If your system consists of more servers than one Console Switch can accommodate, you can tier multiple switches to allow up to 16 servers (for the 4port switches) or up to 64 servers (for the 8-port switches) to be managed by
one KVM set.
A unique feature of the HP switch is that it can at any time be equipped with an expansion kit that allows a
second user full control from a remote console, concurrently with the original user. This lets you keep your
original investment and add only what you need, the interface for the second user.
Each console switch requires only 1U of vertical height when mounted in the front of the rack. They may
also be mounted in the rear of the rack and, if space allows them to be mounted behind other devices, they
do not require any additional rack height.
The switches are firmware-controlled and allow users to name, select, control, and operate all connected
servers using a simple pop-up menu. A “Keep Alive” feature, available exclusively from HP, safeguards the
servers from locking up if power to the switch is lost.
These are the console switches available from HP:
Description
Includes
HP Console Switch Model Number
Available
HP 2-User Expansion Kit
4-Port Console Switch
Rackmount Kit
U.S. and IEC-320 power cords
J1473A
J1475A
8-Port Console Switch
Rackmount Kit
U.S. and IEC-320 power cords
J1474A
J1475A
The monitor, keyboard and mouse of the system console are connected to the switch using the cables that
came with these devices. They are plugged into three corresponding ports in the rear of the console
switch.
The switch is then connected to the CPUs of the HP Netserver LP 2000r via the optional cables in the table
below, selectable by length.
These cables feature three separate plugs on the CPU side, which are connected where the monitor, keyboard and mouse normally would be attached.
17
HP Netserver High Density Rack Solutions Overview (LP 2000r)
Length
Connectors
CPU side
Connectors
Console Switch side
HP Model Number
4 ft (1.2 m)
1 ea “D” high density video connector
1 ea standard DIN type keyboard connector
and 1 ea standard DIN type mouse connector
1 ea 25-pin “D” connector
J1483A
8 ft (2.4 m)
1 ea “D” high density video connector
1 ea standard DIN type keyboard connector
and 1 ea standard DIN type mouse connector
1 ea 25-pin “D” connector
J1476B
15 ft (4.6 m)
1 ea “D” high density video connector
1 ea standard DIN type keyboard connector
and 1 ea standard DIN type mouse connector
1 ea 25-pin “D” connector
J1477B
The cables above are also used to tier the console switches. The 25-pin end of the cable is connected to
one of the ports in the console switch and the three connectors on the other end goes into the daisychained switch’s video, mouse and keyboard receptacles. So, when you’re planning your multiple server
system, be sure to note that one port in the 4- or 8-Port Console Switch is used for daisy-chaining.
The HP 2-User Expansion Kit is easily connected to the Console Switch using a standard Category 5
Unshielded Twisted Pair cable with a RJ-45 style modular plug on the switch end and an EIA (TIA) 568 B
plug, commonly used for 10BaseT Ethernet, on the expansion kit end. The second system console then
connects to the Expansion Box and can actually be placed up to 500 ft away from the Console Switch.
HP Rackmount Flat Panel Monitor and Keyboard
When planning a multiple server system—as with any system that features a computer—one important
decision you have to make is where to place the system console. It is typically a large device compared to
the rest of the equipment and requires excessive amount of vertical space if placed in the
system rack.
To solve the planner’s dilemma, HP offers a space-saving solution: A high quality
15-inch flat panel display and a full keyboard with a trackball and wrist support
that fits into only 2U of vertical space.
The display is a TFT active matrix and guarantees a flicker-free picture at
refresh rates as low as 60 Hz.
Kit Contains
HP Model Number
15-inch High Quality Monitor
Keyboard with trackball and wrist rest
Sliding drawer assembly with cable management arm
All mounting hardware
J1470A
HP Rack System/E Vertical Extension Kit
How do you add a few more inches of rackmounting space? There really is a way with the HP Rack
System/E Vertical Extension Kit, HP part number J1471A. Suddenly, you get more inches to use for several additional servers, storage units, or networking equipment. Up to 8U, in fact.
The extension kit installs easily in minutes, without emptying the rack or using special tools. It comes
complete with a rear door extension and two each 8U side panels.
18
HP Vertical Extension Kit
Includes
J1471A
Four column extensions, One rear hinge, One rear door extension, Two 8U side panels,
All mounting hardware, Installation instructions
HP Netserver High Density Rack Solutions Overview (LP 2000r)
Installation
Ease of installation is one key to speedier deployment. Fortunately, mounting and bringing multiple HP
Netservers LP 2000r online is quick with only a few steps to follow.
At this point, bring out the power and physical space calculations you made based on the preceding sections and verify that the conditions are still valid. During the deployment, computing requirements are
often modified and therefore changes will have to be made in the racks or the racked equipment, which in
turn affects the thermal or power calculations.
CAUTION
This is a safety class I product and has a protective earthing (grounding) terminal. There
must be an uninterruptible safety earth ground from the main power source to the product’s
input wiring terminals, power cord, or supplied cord set. Whenever it is likely that the
protection has been impaired, disconnect the power cord until the ground has been restored.
CAUTION
Due to types of products that can be installed in this cabinet, there is a risk of high leakage
current (3.5 mA). Reliable ground circuit continuity is vital for safe operation of this product.
To reduce risk of electric shock, earth (ground) connection is essential before connecting
the power supply. Never operate this cabinet with the ground conductor disconnected.
CAUTION
To reduce the risk of overload, do not load any single PDU with more than a maximum of
16 A. In addition, do not load a single NEMA 5-15 or IEC-320 receptacle with more than 15 A.
CAUTION
To reduce the risk of cabinet instability, fully deploy the anti-tip mechanism before
extending any devices. Extend only one device at a time. Do not stand or sit on any
extended device. Qualified service personnel should do all non-operator servicing.
Flexible installation options
A. 4-post (HP System/E racks or EIA standard cabinets)
Slide mounting
This is the perfect solution for in-rack serviceability
All mounting hardware is included as standard equipment with the HP Netserver LP 2000r.
Attaching the slides is a tool-less procedure.
19
HP Netserver High Density Rack Solutions Overview (LP 2000r)
Marking the rack
The HP Netserver LP 2000r rack mount kit requires two EIA units of space in the rack. It is, of course,
imperative that all system components be mounted on the level. To ensure this, you must install all the
equipment in the correct holes. The instructions below describe how to mark the rack before you begin
the installation.
Use this section to mark the front and rear columns of the HP System/E or HP System/U rack. The sliderails mount to the face of the front columns and the inside face of the rear columns. The rack template and
marking pen (or masking tape) are used to identify and mark the locations on the columns.
CAUTION
If other rack components are to be mounted in the rack below the HP Netserver, install
those components before starting to mount the Netserver.
NOTE
Use the HP Rack Configuration Tools to determine where in the rack to mount the HP
Netserver. The tools are available at: h t t p : / / w w w. h p . c o m / n e t s e rv e r / s u p p o rt
1. Find the EIA unit markings on the rack and the location for the Netserver.
The screw holes cover a span of only one EIA unit, two of which is the height requirement of the HP
Netserver LP 2000r.
2. Use the masking tape (or marking pen) to mark above the 3rd hole up on both front columns, as shown
in the figure below.
3. Mark the inside face of the left-rear and right-rear rack columns as shown in figure below.
Marking Rack Columns
20
HP Netserver High Density Rack Solutions Overview (LP 2000r)
B. 2-post EIA standard non-HP racks (3 options)
1. Fixed, center mounting
All mounting hardware brackets are included as standard equipment with the HP Netserver LP 2000r.
Only a T-15 Torx driver and a Number 2 Phillips screwdriver are needed for installation.
2. Fixed, flush mounting
All mounting hardware brackets are included as standard equipment with the HP Netserver LP 2000r.
Only a T-15 Torx driver and a Number 2 Phillips screwdriver are needed for installation.
Additional installation steps may be required and are available at http://www.hp.com/racksolutions/support
21
HP Netserver High Density Rack Solutions Overview (LP 2000r)
3. Slide mounting
Use the HP J1480A, 2-Post Slide Mount Adapter. Attaching the slides is a tool-less procedure.
Marking the Rack
The HP Netserver LP 2000r rack mount kit requires two EIA units of space in the rack. Use this section to
mark the columns of the 2-post non-HP rack. The brackets attach to the front side of the two columns for
either flush mount or center mount brackets. The masking tape (or marking pen) is used to identify and
mark the locations on the columns.
CAUTION
If other rack components are to be mounted in the rack below the HP Netserver,
install those components before starting to mount the Netserver.
NOTE
Use the HP Rack Configuration Tools to determine where in the rack to mount the HP
Netserver. The tools are available at: h t t p : / / w w w. h p . c o m / n e t s e rv e r / s u p p o rt
1. Use the mounting brackets to help find the Netserver location on the columns, as shown in figure below.
The screw holes cover a span of only one EIA unit, which is the height requirement of the HP Netserver.
2. Use the masking tape (or marking pen) to mark above the 3rd hole up the on face of both front
columns, as shown in figure below.
NOTE
The brackets use the 1st and 5th holes on the respective front columns, regardless of the
mounting position.
Location Marks on the Rack's Front Columns
22
HP Netserver High Density Rack Solutions Overview (LP 2000r)
Preparing the HP Netserver for 2-post rack installation
Each HP Netserver has two rails attached at the factory and shipped to customers. These two rails must be
removed to attach the brackets, before the Netserver can be mounted in the rack.
1. Lay the HP Netserver on a flat surface.
2. Remove the 3 screws holding the rails to each side of the chassis. See figure above.
3. Refer to the installation instruction for the HP J1527A Slide Rackmount Kit and HP J1480A 2-post Slide
Mount Adapter.
Before you begin installation
Step 1. Verify that the floor where the equipment will be located can support the weight. Also verify that
there is enough space for slide mounted equipment to be fully extended and that doors can swing freely.
Step 2. Verify that the appropriate electrical power is available.
Step 3. Unpack and place rack at the designated location.
Step 4. Secure and level the rack(s) using the leveling feet. Be sure to deploy the anti-tip feet, if appropriate.
Step 5. Install the equipment.
23
HP Netserver High Density Rack Solutions Overview (LP 2000r)
Installing the Uninterruptible Power Supplies
The Uninterruptible Power Supplies (UPSs) are typically the heaviest devices in your installation due to
the dense back-up batteries they contain. Therefore, they must be located at the bottom of the rack - or
racks. For one, that will provide stability, although you should not rely completely on the equipment to balance the system but also properly deploy the anti-tip feet as your HP System/E Rack User’s Guide advises.
Also because of their weight—typically over 51 kg (112 lbs)—the installation will require at least two people.
The American Power Conversion (APC) labeled UPSs, available from Hewlett-Packard, come complete
with rackmounting rails and all hardware. The only tools required for installation is a Phillips screwdriver.
Complete installation instructions are included in the box with the product, as is the software required to
communicate with the servers. Should you require further information, free support is available from APC.
You can find more information from their website at http://www.apcc.com.
Installing the servers
The HP Netserver LP 2000r User Guide contains easy, detailed instructions on how to mount the HP
Netserver LP 2000r in HP System/E racks, as well as 2-post non-HP and 4-post older HP racks.
Installing Power Distribution Units
You can mount up to four HP Power Distribution Units (PDUs) on the rear columns of the HP System/E
racks.
HP recommends that you power your system using 208-240V AC wherever possible. This will keep the line
current down and reduce the number of PDUs required. Most configurations can be supported by four or
less PDUs, which can all be mounted conveniently and out-of-the-way on the rear columns.
In a maximum configuration, however, an additional PDU must be
used and it mounts horizontally between the two rear columns.
Generallu, HP recomends that it be mountedhalfway up the posts
in the middle.
Installation of the HP PDUs is simple and the products come with
all the mounting hardware, including screws and nuts. A separate
installation kit is not needed. A built-in mounting bracket can be
positioned so outlets face up, down or outward.
The PDUs can be mounted on the re a r
columns in four designated places
24
Horizontal Mounting
HP Netserver High Density Rack Solutions Overview (LP 2000r)
Cable Management
HP System/E racks
Once the servers have been mounted in the rack, the next task is to connect the cables.
Typically, an HP Netserver LP 2000r will have several of these attached: KVM (keyboard, video and
mouse) cables, peripheral (usually SCSI) cables, LAN cables and one or two power cords, since the HP
Netserver LP 2000r can be equipped with a second, redundant power supply. Managing this multitude of
cables can be a challenging assignment, especially in a rack with multiple servers along with the slides.
However, by following HP’s recommendations for cable management the task will require less effort than
expected.
1
Attach the Cable Management Arm.
Attach the Cable Management Arm (CMA) to the rear of each
server per the instructions in the HP Netserver LP 2000r User
Guide. The CMA comes as standard equipment with the servers
(along with the slides).
2
2
Attach the main cable guides.
Attach the brackets from the HP J1481A Rack Cable Management
Kit to the right rear post of the rack. The kit contains four cable
management brackets as well as 12 Velcro™ ties and all the hardware you need for mounting.
We have found it most convenient to attach the brackets at EIA
units 14U, 20U, 27U and 33U (counting from the bottom of the
rack), especially if you need to include the fifth, horizontal PDU
because it needs to be located towards the middle of the rack for
the best routing of the power cords.
25
HP Netserver High Density Rack Solutions Overview (LP 2000r)
3
Begin routing the cables.
Starting with the server mounted on the bottom of the rack, gather its cables in your hand and curve them towards the right. Tie
them with a Velcro™ strap or a cable tie.
4
Secure each cable bundle.
Gently guide the cables into the trough of the cable management
arm, following the suggestions in the installation instructions.
Where they emerge from the arm, secure the bundle to one of
the arm supports with a Velcro™ strap or a cable tie. Make sure
that the power cords are easily identified and can be routed separately from the remaining cables.
5
Route the cables to their destination.
Systems are generally designed for specific requirements and will
differ from each other. But when multiple servers are mounted
in a rack, most KVM (or console switch), peripheral and LAN
cables are routed down towards the floor and out through the
cable opening. Power cords, however, are generally connected to
the appropriate Power Distribution Unit (PDU) within the rack.
As the cables emerge from the cable management arm, guide the
appropriate ones down the right rear post and allow them to be
kept in place by the cable management brackets.
The power cords, however, usually leave the main bundle at
intervals to be connected to the PDUs within the rack. Your particular requirements will determine where these breakouts occur.
26
HP Netserver High Density Rack Solutions Overview (LP 2000r)
6
Route the power cords to the appropriate power distribution unit.
Again, different systems require different solutions but servers with redundant power supplies may require
special care when selecting the PDUs. To maintain the protection of redundancy, both power supplies in a
server can be connected to separate PDUs.
In addition you must ensure that your power cords will be long enough to reach the assigned PDU. This is
why we recommend placing the horizontal PDU in the middle of the rack.
Here is one recommended solution:
In systems with just one server power supply, connecting to the appropriate PDU is less complex but do
keep the current draw in mind so that the PDUs are not overloaded.
7
Maintain the ambient temperature.
When physically routing the power cords make sure that they don’t impede airflow to the servers. When
crossing over from the right side to reach the PDUs mounted on the left rear post, route the cords along
the cable management arm but don’t attach them to the arm. This will prevent the arm from smoothly
articulating when a server is pulled out from the front.
27
HP Netserver High Density Rack Solutions Overview (LP 2000r)
Conclusion
By providing flexible, tool-less rack solutions, superior cable management, and aids to help plan your rack
environment, HP has set the standard for easing rack deployment.
By including all the hardware you need with the server, HP insures that you won’t delay your deployment
because you forgot to order costly miscellaneous rackmounting accessories. And by giving you tools to calculate power and thermal requirements, you can optimize your infrastructure to support your solutions.
28
HP Netserver High Density Rack Solutions Overview (LP 2000r)
Technical information in this document is
subject to change without notice.
© Copyright Hewlett-Packard Company 2002.
All Rights Reserved.
Reproductions, adaptations, or translation
without prior written permission is
prohibited, except as allowed under the
copyright laws.
Printed in January, 2002
Part Number: 5980-5426EN