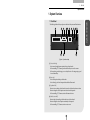
1
DW-709/716 Manual
•This manual is published by Kaltech and contains information on DW-709/716 which will
enable you to use this product properly.
• If you require additional copies of this manual, please print the manual contained in the CD
provided with your purchase.
Introduction
Thank you for purchasing Kaltech DW-709/716 .
This DVR is produced by the most advanced Kaltech technology and its quality is guaranteed
by strict reliability and compatibility testing.
This DW-709/716 manual provides necessary information for the correct use of this product
and also contains some useful tips.
Please read this manual thoroughly before using DW-709/716 in order to prevent possible
breakdown due to any mishandling.
Notice
Manual Edition 7.03 – March 2005
©2003-2005, Kaltech Enterprises
All Rights reserved.
User’s guide for DW-709/716 DVR.
This manual applies to DW-709/716 DVR only.
This manual describes external features of the DW-709/716 DVR, part names, correct
connection methods for supported domes or Pan/Tilt receivers, control devices, peripheral
devices, and the system set up instructions. It should be noted that some features, figures,
pictures and references can only be applied to one model either DW-709 or DW-716.
No part of this documentation may be reproduced in any means, electronic or mechanical, for any
purpose, except as expressed in the Software License Agreement. Digital Watchdog shall not be liable
for technical or editorial errors or omissions contained herein. The information in this document is
subject to change without notice.
The information in this publication is provided “as is” without warranty of any kind. The entire risk
arising out of the use of this information remains with recipient. In no event shall Digital Watchdog be
liable for any direct, consequential, incidental, special, punitive, or other damages whatsoever
(including without limitation, damages for loss of business profits, business interruption or loss of
business information), even if Digital Watchdog has been advised of the possibility of such damages
and whether in an action or contract or tort, including negligence.
• Kaltech can not be held responsible if the DVR is damaged due to non-compatible devices
being used with this product. If you have any doubts please check.
• Kaltech can not be held responsible if the DVR is damaged due to the product being
disassembled or modified by the user.
• If you wish to open the system casing to attempt to modify, repair, or upgrade the system, it
This software and documentation are copyrighted. All other rights, including ownership of the
software, are reserved to DIGITAL WATCHDOG INCORPORATED. DIGITAL WATCHDOG,
Digital Watchdog, DW-Pro, and High Definition Digital Recorder are registered trademarks of
Kaltech Enterprises Inc in the United States and elsewhere; Windows, and Windows 2000 are
registered trademarks of Microsoft Corporation; DirectCD is a registered trademark of Roxio
Corporation. All other brand and product names are trademarks or registered trademarks of the
respective owners.
The following words and symbols mark special messages throughout this guide:
is recommended that you ask for a Kaltech engineer’s assistance by contacting either your
dealer or Kaltech head office.
• DigiNet and DW-709/716 are registered trademarks of Kaltech
• This product is qualified for both domestic and industrial use. This product is qualified under
WARNING: Text set off in this manner indicates that failure to
follow directions could result in bodily harm or loss of life.
CAUTION: Text set off in this manner indicates that failure to
follow directions could result in damage to equipment or loss of
information.
the Radio Equipment Requirements of Korea and acquired international certification
including CE (Europe) and FCC (USA).
Kaltech Enterprises
5436 W Crenshaw St · Tampa, FL 33634 · U.S.A
Office 1-813-888-9555 · Fax 1-813-888-9262 · Tech Support 1-866-446-3595 Ext 242
Kaltech Enterprises
DIGITAL WATCHDOG END-USER SOFTWARE LICENSE AGREEMENT
Version 1.0, June 2001
IMPORTANT: Read this before using any commercial software available from Kaltech Enterprises
This document (“License”) is a legal agreement between you (an individual or business) and Kaltech
Enterprises Inc (“Kaltech Enterprises”). Use of the enclosed or downloaded software indicates your
acceptance of these terms. As used in this License Agreement, the term “SOFTWARE” means the
software included on the CD, via download or disk media provided with this License Agreement.
The term “SOFTWARE” does not include any software that is covered by a separate license offered or
granted by a person other than Kaltech Enterprises and this License does not grant any rights in such
software.
Copyright laws and international copyright treaties, as well as other intellectual property laws and
treaties protect the SOFTWARE. The SOFTWARE is licensed, not sold.
IF YOU DO NOT AGREE TO THESE TERMS AND CONDITIONS, EITHER DESTROY, OR
RETURN INTACT, THE SOFTWARE PACKAGE, CONTAINING THE CD OR DISK MEDIA,
TOGETHER WITH THE OTHER COMPONENTS OF THE PRODUCT TO THE PLACE OF
PURCHASE FOR A REFUND OF THE PURCHASE PRICE.
1.
PROPRIETARY RIGHTS. The SOFTWARE, HARDWARE and any associated
documentation are proprietary products of Kaltech Enterprises or its licensors. And are protected
under U.S. and European copyright, trademark, patent and trade secret laws and international treaty
provisions. Sole ownership of the SOFTWARE, HARDWARE and all copies, modifications,
translations, and merged portions thereof shall at all times remain with Kaltech Enterprises or its
licensors.
2.
GRANT OF LICENSE AND TERM. The SOFTWARE and accompanying documentation
are being licensed to you. This means you have the right to use the SOFTWARE only in accordance
with this license agreement. The SOFTWARE is considered in use on a computer when it is loaded
into temporary memory or installed into permanent memory. This license may not be assigned or
otherwise transferred without prior written consent from Kaltech Enterprises, and any unauthorized
transfer makes the license null and void.
a. LICENSING
i. PERSONAL LICENSE AND COMPUTER-SPECIFIC LICENSE FOR THE
SERVER SOFTWARE.
You the End User are authorized to use the server software on NO MORE THAN the
number of DW-Pro computers for which you have purchased licenses. All copies of the
SOFTWARE must include the Kaltech Enterprises copyright, confidentiality, trademark and
patent notices. This License is personal to you. You may not sublicense, lease, sell or
otherwise transfer the Software or any of the accompanying documentation to any other
person. You may use the Software only for your own personal use if you are an individual
or for your own internal business purposes if you are a business. Each permitted copy of
the SOFTWARE may be used only in connection with a hard drive(s) that is (are)
permanently connected to ONE specific DW-Pro computer (either a stand-alone computer
or a computer connected to a network) owned or leased by you. If the SOFTWARE is made
available on a network, only ONE specific DW-Pro computer may access it. Once the
SOFTWARE has been accessed, by ONE specific computer, it may not be used on any
additional computers without acquiring additional licenses from Ka ltech Enterprises.
ii. PERSONAL LICENSE AND COMPUTER-SPECIFIC LICENSE FOR THE CLIENT
SOFTWARE.
You the End User are authorized to use the client software on NO MORE THAN 30
computers. All copies of the SOFTWARE must include the Kaltech Enterprises copyright,
confidentiality, trademark and patent notices. This License is personal to you. You may
not sublicense, lease, sell or otherwise transfer the Software or any of the accompanying
documentation to any other person. You may use the Software only for your own personal
use if you are an individual or for your own internal business purposes if you are a
business. Each permitted copy of the SOFTWARE may be used only in connection with a
hard drive(s) that is (are) permanently connected to ONE specific DW-Pro computer (either
a stand-alone computer or a computer connected to a network) owned or leased by you.
If the SOFTWARE is made available on a network, only ONE specific DW-Pro computer
may access it. Once the SOFTWARE has been accessed, by ONE specific computer, it may
not be used on any additional computers without acquiring additional licenses from
Kaltech Enterprises.
b. SERVER USE. To the extent that the applicable product invoicing or packaging sets forth,
you may use the SOFTWARE on a Client Device or as a server (“Server”) within a multiuser or networked environment (“Server Use”) for either (i) connecting, directly or
indirectly, to not more than the maximum number of specified Client Devices, or (ii)
deploying not more than the maximum number of agents (pollers) specified for
deployment. If the applicable product invoicing or packaging does not specify a
maximum number of Client Devices, or pollers, this is a single product use license subject to
subsection (a) above. A separate license is required for each Client Device or “seat” that
may connect the SOFTWARE at any time, regardless of whether such licensed Client
Devices or seats are connected to the SOFTWARE concurrently, or are actually using the
SOFTWARE at any particular time. Your use of software or hardware that reduces the
number of Client Devices or seats that connect to and use the SOFTWARE directly
or simultaneously (e.g., “multiplexing” or “pooling” software or hardware) does not reduce
the number of licenses required. Specifically, you must have that number of licenses that
would equal the number of distinct inputs to the multiplexing or pooling software or
hardware “front end”). If the number of Client Devices or seats that can connect to the
SOFTWARE can exceed the number of licenses you have obtained, then you must have a
reasonable mechanism in place to ensure that your use of the SOFTWARE does not exceed
the use limits specified for the license you have obtained. This license authorizes you to
make or download one copy of the Documentation for each Client Device or seat that is
licensed, provided that each such copy contains all the proprietary notices for the
Documentation.
c. VOLUME USE. If the SOFTWARE is licensed with volume use terms specified in the
applicable product invoicing or packaging, you may make, use and install as many
additional copies of the SOFTWARE on the number of Client Devices as the volume use
terms authorize. You must have a reasonable mechanism in place to ensure that the
number of Client Devices on which the SOFTWARE has been installed does not exceed the
number of licenses you have obtained. This license authorizes you to make or download
one copy of the Documentation for each additional copy authorized by the volume license,
provided that each such copy contains all of the proprietary notices for the Documentation.
d. STORAGE/NETWORK USE. You may also store or install a copy of the SOFTWARE on
a storage device, such as a network server, used only to install or run the SOFTWARE on
your other computers over an internal network; however, you must acquire and dedicate a
license for each separate computer on which the SOFTWARE is installed or run form
thestorage device. A license for the SOFTWARE may not be shared or used concurrently
on different computers.
e. TERM. (i) This License is effective form the date of purchase of the License and shall
remain in force until terminated. The End User may terminate this License at any time by
destroying the SOFTWARE and its associated documentation, together with all copies of
any form. (ii) Notwithstanding subparagraph d(i) above, this License may be terminated at
any time by written notice of termination given by Kaltech Enterprises to the End User in
any of the following circumstances: (A) If the End User shall expressly or impliedly
repudiate this License by refusing or threatening to refuse to observe any of the conditions
to which this License is subject; or (B) If the End User shall fail to make any payment due
under and pursuant to this License or to observe any of the conditions to which this License
is subject and, after the End User’s attention has been drawn by notice to such failure, shall
fail to remedy the matter to Kaltech Enterprises’s reasonable satisfaction within thirty days
of the giving of such notice;; or (C) If the End User shall have a receiver or administrative
receiver or administrator appointed or shall enter into liquidation whether compulsory or
voluntary or it the End User shall be unable to pay its debts as and when they fall due.
(iii) On expiry, surrender, or other termination of this License, however such termination
may arise, the End User shall cease to load, store, copy or use the Software and the a
ssociated documentation, shall delete the SOFTWARE from its computers and shall either
surrender the SOFTWARE and the associated documentation, together with all copies in
any form, to Kaltech Enterprises or shall destroy the same. The End User shall continue
termination to observe and enforce confidentiality and secrecy in respect of the SOFTWARE
and its associated documentation for the benefit of Kaltech Enterprises, and however
termination may occur it shall not prejudice any right of action or remedy, which may have
occurred prior to termination.
BACKUP COPY. In addition to any copies authorized for use under this License, the End
3.
User may make a single copy of the SOFTWARE solely for backup purposes.
4.
INTEGRITY OF THE SOFTWARE. The End User shall not enhance or vary any part of the
SOFTWARE nor procure or permit the whole or any part of the SOFTWARE (whether in its original
or in any updated, enhanced, or varied form) to be incorporated into any other software or computer
system. Translations, reverse programming, disassembling, and reverse engineering of the
SOFTWARE are expressly prohibited. Provided, however, that nothing in these conditions shall
restrict (i) decompiling, notwithstanding that decompiling may involve adaptation, if the sole purpose
of such decompiling is to achieve the interoperability of an independently created program with other
programs, or (ii) any other act permitted to the End User by applicable laws and regulations of the
End User’s jurisdictions.
5.
NON-PERMITTED USES. Without the express prior written permission of Kaltech
Enterprises you may not (a) use, copy, modify, alter or transfer electronically or otherwise, the
SOFTWARE or documentation except as expressly permitted in this License Agreement, or (b)
translate, reverse program, disassemble, decompile, or otherwise reverse engineer the SOFTWARE.
6.
U.S. GOVERNMENT RESTRICTED RIGHTS. If you are acquiring the SOFTWARE on
behalf of any unit or agency of the United States Government, the following provision applies: It is
acknowledged that the SOFTWARE and the documentation were developed at private expense and
that no part is in the public domain and that the SOFTWARE and documentation are provided with
RESTRICTED RIGHTS. Use, duplication, or disclosure by the Government is subject to restrictions as
set forth in subparagraph (C)(1)(ii) of the Rights in Technical Data and Computer Software clause at
DFARS 252.227-7013 or subparagraphs c (1) and (2) of the Commercial Computer Software-Restricted
Rights at 48 CFR 52.227-19, as applicable. Contractor/Manufacturer is Kaltech Enterprises 5436 W
Crenshaw St Tampa FL33634
7.
EXPORT CONTROLS. Certain uses of the SOFTWARE by the End User maybe subject to
restrictions under U.S. regulations relating to exports and ultimate end uses of computer software.
The End User agrees to fully comply with all applicable U.S. laws and regulations, including but not
limited to the Export Administration Act of 1979 as amended from time to time and any regulations
promulgated there under.
8.
LIMITED WARRANTY. (a) Kaltech Enterprises warrants to the End User, (i) that the
SOFTWARE (not including any third-party software) will perform substantially in accordance with
the associated documentation and (ii) that the SOFTWARE is properly recorded on the disk media.
This Limited Warranty extends for (90) days from the date of purchase of this License. Kaltech
Enterprises does not warrant any third-party software that is provided with the SOFTWARE, but
Kaltech Enterprises agrees to pass on the End User any warranties of the owner of licensor to the
extent permitted by the owner or licensor. (b) This Limited Warranty does not apply to any software
that has been altered, damaged, abused, mis-applied, or used other than in accordance with this
License and any instructions included on the SOFTWARE and the associated documentation. (c)
Kaltech Enterprises’s entire liability under this Limited Warranty shall be the repair or replacement of
any SOFTWARE that fails to conform with this Limited Warranty or, at Kaltech Enterprises’s option,
the return price paid for this license. Kaltech Enterprises shall have no liability under this Limited
Warranty unless the SOFTWARE is returned to Kaltech Enterprises or its authorized representative,
with a copy of the End User’s receipt, within the warranty period or 30 days, whichever is longer. (d)
THIS WARRANTY IS IN LIEU OF AND EXCLUDES ALL OTHER WARRANTIES NOT
EXPRESSLY SET FORTH HEREIN, WHETHER EXPRESS OF IMPLIED, SUBJECT TO CONTRARY
ORDER PUBLIC REQUIREMENTS IN THE END USER’S JURISDICTION. (e) The End User’s failure
to return the enclosed registration card or complete the electronic registration included with the
SOFTWARE may result in Kaltech Enterprises’s inability to provide the End User with updates to the
SOFTWARE, and the End User assumes the entire risk of performance and result in such en event.
9.
CONFIDENTIALITY AND CONTROL OF THE SOFTWARE. The SOFTWARE, all
associated documentation, and all copies are secret and confidential to Kaltech Enterprises and shall
be retained under the effective control of the End User during the period of this License. The End
User shall take all measures necessary to preserve confidentiality and secrecy in the SOFTWARE
during the period of this License and after its termination, however such termination may arise.
10. INDEMNITIES AND LIMITATION OF LIABILITY. (a) Subject to 9(b) below, Kaltech
Enterprises warrants to the End User that the Software as supplied by Kaltech Enterprises will not
infringe any copyright, patent, or other intellectual property right of any third party. Conditionally
upon the End User’s promptly giving notice to Kaltech Enterprises of any claim of alleged
infringement and allowing Kaltech Enterprises to have sole control of negotiations on, and any
defense of the claim, Kaltech Enterprises shall in its discretion and at its own cost wither compromise
or defend the claim and shall hold the End User harmless from any resulting final judgment, order, or
settlement. Kaltech Enterprises shall have the right to replace or change the SOFTWARE so as to
avoid infringement and require the End User to accept a license to use such replaced or changed
SOFTWARE in substitution for this License, provided that the SOFTWARE as substituted is
substantially suitable for the End User’s utilization. (b) Kaltech Enterprises’s maximum liability to
the End User under 9(a) above shall not exceed the License fees actually paid by the End User for the
SOFTWARE. If Kaltech Enterprises becomes aware of a potential claim under 9(a) above, Kaltech
Enterprises shall be entitled then or at anytime thereafter to discharge its liabilities (including
potential, accruing, and accrued liabilities) to the End User under 9(a) above by requiring the End
User to surrender this License and to cease use of the SOFTWARE upon Kaltech Enterprises’s paying
to the End User a sum equivalent to the maximum amount of Kaltech Enterprises’s liability as stated
above. (c) GENERAL LIMITATION OF LIABILITY AND INDEMNITIES. KALTECH
ENTERPRISES’S MAXIMUM LIABILITY RELATED TO ANY OF THE SOFTWARE SHALL NOT
EXCEED THE LICENSE FEES ACTUALLY PAID BY THE END USER FOR THE SOFTWARE.
FOR BELGIUM, FRANCE, IRELAND, AND THE NETHERLANDS: IN NO EVENT SHALL
KALTECH ENTERPRISES BE LIABLE TO THE END USER, EXCEPT IN RESPECT OF (a) DEATH,
PERSONAL INJURY, OR DAMAGE TO PROPERTY CAUSED BY KALTECH ENTERPRISES’S
NEGLIGENCE OR (b) KALTECH ENTERPRISES’S GROSS NEGLIGENCE OR WILLFUL
MISCONDUCT, FOR AN AMOUNT IN EXCESS OF THE MAXIMUM AMOUNT OF KALTECH
ENTERPRISES’S LIABILITY AS STATED IN 9(b) ABOVE, BY REASON OF ANY
REPRESENTATION OR IMPLIED WARRANTY, CONDITION, OR OTHER TERM OR ANY DUTY
AT LAW, OR UNDER THE TERMS OF THIS AGREEMENT, FOR ANY CONSEQUENTIAL LOSS
OR DAMAGE (WHETHER FOR LOSS OF PROFIT, BUSINESS INTERRUPTION, LOSS OF
BUSINESS INFORMATION, OR OTHERWISE) ARISING OUT OF OR IN CONNECTION WITH
ANY ACT OR OMISSION OF KALTECH ENTERPRISES RELATING TO THE USE OR INABILITY
TO USE THE PRODUCT BY THE END USER.
FOR GREECE: IN NO EVENT SHALL KALTECH ENTERPRISES BE LIABLE TO THE END USER,
EXCEPT IN RESPECT OF DEATH, DAMAGE TO PROPERTY OR PERSONAL INJURY CAUSED
BY KALTECH ENTERPRISES’S FRAUD OR GROSS NEGLIGENCE, FOR AN AMOUNT IN
EXCESS OF THE MAXIMUM AMOUNT OF KALTECH ENTERPRISES’S LIABILITY AS STATED
IN 9(b) ABOVE, BY REASON OF ANY REPRESENTATION OR IMPLIED WARRANTY,
CONDITION, OR OTHER TERM OR ANY DUTY AT LAW, OR UNDER THE TERMS OF THIS
AGREEMENT, FOR ANY CONSEQUENTIAL LOSS OR DAMAGE (WHETHER FOR LOSS OF
PROFIT, BUSINESS INTERRUPTION, LOSS OF BUSINESS INFORMATION, OR OTHERWISE)
ARISING OUT OF OR IN CONNECTION WITH ANY ACT OR OMISSION OF KALTECH
ENTERPRISES RELATING TO THE USE OR INABILITY TO USE THE PRODUCT BY THE END
USER.
FOR ITALY: IN NO EVENT SHALL KALTECH ENTERPRISES BE LIABLE TO THE END USER,
EXCEPT IN RESPECT OF DEATH, DAMAGE TO PROPERTY OR PERSONAL INJURY CAUSED
BY KALTECH ENTERPRISES’S FRAUD OR GROSS NEGLIGENCE OR VIOLATION OF A DUTY
ARISING FORM APPLICABLE ORDINE PUBBLICO RULES FOR AN AMOUNT IN EXCESS OF
THE MAXIMUM AMOUNT OF KALTECH ENTERPRISES’S LIABILITY AS STATED IN 9(b)
ABOVE, BY REASON OF ANY REPRESENTATION OR IMPLIED WARRANTY, CONDITION, OR
OTHER TERM OR ANY DUTY AT LAW, OR UNDER THE TERMS OF THIS AGREEMENT, FOR
ANY CONSEQUENTIAL LOSS OR DAMAGE (WHETHER FOR LOSS OF PROFIT, BUSINESS
INTERRUPTION, LOSS OF BUSINESS INFORMATION, OR OTHERWISE) ARISING OUT OF OR
IN CONNECTION WITH ANY ACT OR OMISSION OF KALTECH ENTERPRISES RELATING TO
THE USE OR INABILITY TO USE THE PRODUCT BY THE END USER.
FOR DENMARK, FINLAND AND NORWAY: IN NO EVENT SHALL KALTECH ENTERPRISES BE
LIABLE TO THE END USER, EXCEPT (i) IN RESPECT OF DEATH OR PERSONAL INJURY
CAUSED BY KALTECH ENTERPRISES’S GROSS NEGLIGENCE OR WILLFUL MISCONDUCT OR
(ii) IF SUCH LIABILITY LIMITATION IS UNREASONABLE UNDER ALL RELEVANT
CIRCUMSTANCES , FOR AN AMOUNT IN EXCESS OF THE MAXIMUM AMOUNT OF
KALTECH ENTERPRISES’S LIABILITY AS STATED IN 9(b) ABOVE, BY REASON OF ANY
REPRESENTATION OR IMPLIED WARRANTY, CONDITION, OR OTHER TERM OR ANY DUTY
AT LAW, OR UNDER THE TERMS OF THIS AGREEMENT, FOR ANY CONSEQUENTIAL LOSS
OR DAMAGE (WHETHER FOR LOSS OF PROFIT, BUSINESS INTERRUPTION, LOSS OF
BUSINESS INFORMATION, OR OTHERWISE) ARISING OUT OF OR IN CONNECTION WITH
ANY ACT OR OMISSION OF KALTECH ENTERPRISES RELATING TO THE USE OR INABILITY
TO USE THE PRODUCT BY THE END USER.
FOR PORTUGAL: IN NO EVENT SHALL KALTECH ENTERPRISES BE LIABLE TO THE END
USER, EXCEPT IN RESPECT OF DEATH, DAMAGE TO PROPERTY OR PERSONAL INJURY
CAUSED BY KALTECH ENTERPRISES’S GROSS NEGLIGENCE OR WILLFUL MISCONDUCT,
FOR AN AMOUNT IN EXCESS OF THE MAXIMUM AMOUNT OF KALTECH ENTERPRISES’S
LIABILITY AS STATED IN 9(b) ABOVE, BY REASON OF ANY REPRESENTATION OR IMPLIED
WARRANTY, CONDITION, OR OTHER TERM OR ANY DUTY AT LAW, OR UNDER THE
TERMS OF THIS AGREEMENT, FOR ANY CONSEQUENTIAL LOSS OR DAMAGE (WHETHER
FOR LOSS OF PROFIT, BUSINESS INTERRUPTION, LOSS OF BUSINESS INFORMATION, OR
OTHERWISE) ARISING OUT OF OR IN CONNECTION WITH ANY ACT OR OMISSION OF
KALTECH ENTERPRISES RELATING TO THE USE OR INABILITY TO USE THE PRODUCT BY
THE END USER.
FOR SPAIN: IN NO EVENT SHALL KALTECH ENTERPRISES BE LIABLE TO THE END USER,
EXCEPT IN RESPECT OF DEATH, DAMAGE TO PROPERTY OR PERSONAL INJURY CAUSED
BY KALTECH ENTERPRISES’S BAD FAITH CONDUCT, FOR AN AMOUNT IN EXCESS OF THE
MAXIMUM AMOUNT OF KALTECH ENTERPRISES’S LIABILITY AS STATED IN 9(b) ABOVE, BY
REASON OF ANY REPRESENTATION OR IMPLIED WARRANTY, CONDITION, OR OTHER
TERM OR ANY DUTY AT LAW, OR UNDER THE TERMS OF THIS AGREEMENT, FOR ANY
CONSEQUENTIAL LOSS OR DAMAGE (WHETHER FOR LOSS OF PROFIT, BUSINESS
INTERRUPTION, LOSS OF BUSINESS INFORMATION, OR OTHERWISE) ARISING OUT OF OR
IN CONNECTION WITH ANY ACT OR OMISSION OF KALTECH ENTERPRISES RELATING TO
THE USE OR INABILITY TO USE THE PRODUCT BY THE END USER.
FOR SWEDEN: IN NO EVENT SHALL KALTECH ENTERPRISES BE LIABLE TO THE END USER,
EXCEPT IN RESPECT OF DEATH, DAMAGE TO PROPERTY OR PERSONAL INJURY CAUSED
BY KALTECH ENTERPRISES’S GROSS NEGLIGENCE OR WILLFUL MISCONDUCT, FOR AN
AMOUNT IN EXCESS OF THE MAXIMUM AMOUNT OF KALTECH ENTERPRISES’S LIABILITY
AS STATED IN 9(b) ABOVE, BY REASON OF ANY REPRESENTATION OR IMPLIED
WARRANTY, CONDITION, OR OTHER TERM OR ANY DUTY AT LAW, OR UNDER THE
TERMS OF THIS AGREEMENT, FOR ANY CONSEQUENTIAL LOSS OR DAMAGE (WHETHER
FOR LOSS OF PROFIT, BUSINESS INTERRUPTION, LOSS OF BUSINESS INFORMATION, OR
OTHERWISE) ARISING OUT OF OR IN CONNECTION WITH ANY ACT OR OMISSION OF
KALTECH ENTERPRISES RELATING TO THE USE OR INABILITY TO USE THE PRODUCT BY
THE END USER.
FOR THE UNITED KINGDOM: IN NO EVENT SHALL KALTECH ENTERPRISES BE LIABLE TO
THE END USER, EXCEPT IN RESPECT OF (a) DEATH OR PERSONAL INJURY CAUSED BY
KALTECH ENTERPRISES’S NEGLIGENCE OR (b) DAMAGE TO PROPERTY OR OTHER LOSS
CAUSED BY KALTECH ENTERPRISES WHERE SUCH LIABILITY LIMITATION IS
UNREASONABLE UNDER ALL RELEVANT CIRCUMSTANCES. FOR AN AMOUNT IN EXCESS
OF THE MAXIMUM AMOUNT OF KALTECH ENTERPRISES’S LIABILITY AS STATED IN 9(b)
ABOVE, BY REASON OF ANY REPRESENTATION OR IMPLIED WARRANTY, CONDITION, OR
OTHER TERM OR ANY DUTY AT LAW, OR UNDER THE TERMS OF THIS AGREEMENT, FOR
ANY CONSEQUENTIAL LOSS OR DAMAGE (WHETHER FOR LOSS OF PROFIT, BUSINESS
INTERRUPTION, LOSS OF BUSINESS INFORMATION, OR OTHERWISE) ARISING OUT OF OR
IN CONNECTION WITH ANY ACT OR OMISSION OF KALTECH ENTERPRISES RELATING TO
THE USE OR INABILITY TO USE THE PRODUCT BY THE END USER
11.
NO LIABILITY FOR DAMAGES, INCLUDING WITHOUT LIMITATION
CONSEQUENTIAL DAMAGES
In no event shall Kaltech Enterprises or its Licensor's be liable for any damages whatsoever
(including, without limitation, incidental, direct, indirect, special or consequential damages, damages
for loss of business profits, business interruption, loss of business information, or other pecuniary loss)
arising out of the use or inability to use this Software, even if Kaltech Enterprises or its Licensor's have
been advised of the possibility of such damages. Because some states/ countries do not allow the
exclusion or limitation of liability for consequential or incidental damages, the above limitation may
not apply to you.
12. NO WAIVER. Any failure by either party to this agreement to enforce a specific part of the
agreement in a specific situation is not a waiver of rights under the agreement. The party may still
enforce the rest of the agreement in that situation and may still enforce some or all of the agreement in
other situations.
13. This License constitutes the entire agreement between the End User and KALTECH
ENTERPRISES pertaining to its subject matter. This License is governed by the laws of the State of
Washington (except the body of laws controlling conflict laws). The state and federal courts having
appropriate jurisdiction over the State of Washington will pursue any litigation arising from this
license. Even if part of the agreement is held invalid, the rest of the agreement shall still be valid,
binding, and enforceable. The failure of either party to exercise a right does not waive future exercise
of that right or other rights.
Should the End User have any questions concerning this License, or if the End User desires to contact
Kaltech Enterprises for any reason, please write: Kaltech Enterprises 5436 W Crenshaw St Tampa Fl
33634
Copyright© 2001, Kaltech Enterprises All rights reserved.
Safety Precautions
Safety Precautions
IMPORTANT SAFETY INSTRUCTIONS
1. Read Owner Manual
After unpacking this product, read the owner manual carefully, and follow all the operating
and other instructions.
2. Power Sources
This product should be operated only from the type of power source indicated on the label. If
you are not sure of the type of power supply to your home or business, consult your product
dealer or local power company.
3. Ventilation
Slots and openings in the cabinet are provided for ventilation and to ensure reliable operation
of the product and to protect it from overheating, and these openings must not be blocked or
covered. The product should not be placed in a built-in installation such as a bookcase or rack
unless proper ventilation is provided or the manufacturer instructions have been adhered
to.
WARNING:
TO REDUCE THE RISK OF ELECTRICAL SHOCK, DO NOT EXPOSE
THIS APPLIANCE TO RAIN OR MOISTURE. DANGEROUS HIGH
VOLTAGES ARE PRESENT INSIDE THE ENCLOSURE. DO NOT
OPEN THE CABINET. REFER SERVICING TO QUALIFIED
PERSONNEL ONLY.
4. Heat
The product should be situated away from heat sources such as radiators. Heat registers,
stoves, or other product that produce heat.
5. Water and Moisture
Do not use this product near water. Do not exceed the humidity specifications for the product
as detailed in the Appendix section in this manual.
6. Cleaning
Unplug this product from the wall outlet before cleaning. Do not use liquid cleaners or aerosol
cleaners. Use a damp cloth for cleaning.
SURGE PROTECTION: A UPS IS MANDATORY FOR EFFICIENT FUNCTIONING OF YOUR
DIGITAL .
7. Power Cord Protection
Power-supply cords should not be routed so that they are not likely to be walked on or
pinched by items placed against them, paying particular attention to cords at plugs,
convenience receptacles, and the point where they exit from the product.
8. Overloading
Do not overload wall outlets; extension cords, or integral convenience receptacles as this can
result in a risk of fire or electrical shock.
9. Lightning
For added protection for this product during storm, or when it is left unattended and unused
for long periods of time, unplug it from the wall outlet. This will prevent damage to the
product due to lightning and power line surges.
10. Object and Liquid Entry Points
Never insert foreign objects into the DW-Pro unit, other than the media types approved by
Kaltech Enterprises, as they may touch dangerous voltage points or short-out parts that could
result in a fire or electrical shock. Never spill liquid of any kind on the product.
11. Accessories
Do not place this product on an unstable cart, stand, tripod, bracket, or table. The product may
fall, causing serious personal injury and serious damage to the product.
12. Disc Tray
Keep your fingers well clear of the disc tray as it is closing. Neglecting to do so may cause
serious personal injury.
13. Burden
Do not place a heavy object on or step on the product. The object may fall, causing serious
personal injury and serious damage to the product.
14. Disc
Do not use a cracked, deformed, or repaired disc. These discs are easily broken and may cause
serious personal injury and product malfunction.
15. Damage Requiring Service
Unplug this product from the wall outlet and refer servicing to qualified service personnel
under the following conditions.
�When the power Supply cord or plug is damaged.
�If liquid has been spilled, or objects have fallen into the product.
�If the product has been exposed to rain or water.
�If the product does not operate normally by following the operating instructions. Adjust
only those controls that are covered by the operating instructions as an improper adjustment
of other controls may result in damage and will often require extensive work by a qualified
technician to restore the product to its normal operation.
�If the product has been dropped or damaged in any way.
�When the product exhibits a distinct change in performance – this indicates a need for
service.
16. Servicing
Do not attempt to service this product yourself as opening or removing covers may expose
you to dangerous voltage or other hazards. Refer all servicing to qualified personnel.
�When shipping the DW-Pro unit, the original
shipping carton packing materials come in handy.
For maximum protection, repack the unit as it was
originally packed at the factory.
�Do not use volatile liquids, such as insect spray,
near the DW-Pro unit. Do not leave rubber or
plastic products in contact with the DW-Pro unit for
long periods of time. They will leave marks on the
finish.
�The top and rear panels of the DW-Pro unit may
become warm after long periods of use. This is not
a malfunction.
�Place the DW-Pro unit on a level surface. Do not
use it on a shaky or unstable surface such as a
wobbling table or inclined stand.
�When you place this DW-Pro unit next to a TV,
radio, or VCR, the playback picture may become
poor and the sound may be distorted. In this case,
place the DW-Pro unit away from the TV, radio, or
VCR.
Use a soft dry cloth for cleaning.
19. UPS / Surge Protection
A UPS is mandatory for efficient functioning of your Digital Watchdog unit.
Moisture condensation damages the DW-Pro
unit. Please read the following carefully.
Moisture condensation occurs during the following
cases.
�When you bring the DW-Pro unit directly from a
cold place to a warm place.
�When you use the DW-Pro unit in a room where
you just turned on the heater, or a place where the
cold wind from the air conditioner directly hits the
unit.
�In the summer, when you use the DW-Pro unit in a
hot and humid place just after you move the unit
from an air conditioned room.
�When you use the DW-Pro unit in a humid place.
Do not use the DW-Pro unit when moisture
condensation may occur.
17. Replacement Parts
When replacement parts are required, be sure the service technician has used replacement
parts specified by the manufacturer or have the same characteristics as the original part.
Unauthorized substitutions may result in fire, electrical shock, or other hazards.
18. Safety Check
Upon completion of any service or repairs to this product, ask the service technician to
perform safety checks to determine that the product is in proper operating condition.
This DW-Pro unit is designed to last for long periods
of time. To keep your DW-Pro unit always
operational we recommend regular inspection
maintenance (cleaning parts or replacement). For
details contact your nearest dealer.
�For stubborn dirt, soak the cloth in a weak
detergent solution, wring well and wipe. Use a dry
cloth to wipe it dry.Do not use any type of solvent,
such as thinner and benzene, as they may
damage the surface of the DW-Pro unit.
�If you use a chemical saturated cloth to clean the
unit, follow that product’s instructions.
If you use the DW-Pro unit in such a situation, it may
damage discs and internal parts. It is not
recommended to use the Digital Watchdog in a
location where moisture condensation may occur.
Warranty Information
Kaltec Electronics (referred to as “the Warrantor”) warrants the Digital Video Recorder against
defects in materials or workmanship as follows:
Equipment
Please check to make sure the following equipment are included when you purchased DW-709/716. If any
items are missing, contact your dealer.
LABOR: For a period of (1) year from the date of original purchase, if Digital Video Recorder is
determined to be defective, Kaltec will repair or replace the unit, with new or refurbished
product at its option, at no charge.
PARTS: In addition, Kaltec Electronics will supply replacement parts for a period of (1) year.
To obtain warranty or out of warranty service, please contact a Technical Support
Representative at 1-866-446-3595 Ext 242 Monday through Friday from 9:00 AM to 5:00 PM
Eastern.
This warranty is extended only to the original purchaser. A purchase receipt or other proof of
the date of the original purchase is required before warranty service is rendered. This warranty
only covers failures due to defects in materials and workmanship which arise during normal
use. This warranty does not cover damage which occurs in shipment or failures which are
caused by products not supplied by the Warrantor or failures which result from accident,
misuse, abuse, neglect, mishandling, misapplication, alteration, modification, faulty installation,
set-up adjustments, improper antenna, inadequate signal pickup, maladjustment of consumer
controls, improper operation, power line surge, improper voltage supply, lightning damage,
rental use of the product or service by anyone other than a Digital Video Recorder authorized
repair facility or damage that is attributable to acts of God.
LIMITS AND EXCLUSIONS
There are no express warranties except as listed above. THE WARRANTOR SHALL NOT BE
LIABLE FOR INCIDENTAL OR CONSEQUENTIAL DAMAGES (INCLUDING, WITHOUT
LIMITATION, DAMAGE TO RECORDING MEDIA) RESULTING FROM THE USE OF THESE
PRODUCTS, OR ARISING OUT OF ANY BREACH OF THE WARRANTY. ALL EXPRESS AND
IMPLIED WARRANTIES, INCLUDING THE WARRANTIES OF MERCHANTABILITY AND
FITNESS FOR PARTICULAR PURPOSE, ARE LIMITED TO THE APPLICABLE WARRANTY
PERIOD SET FORTH ABOVE.
Some states do not allow the exclusion or limitation of incidental or consequential damages, or
limitations on how long an implied warranty lasts, so the above exclusions or limitations may
not apply to you. This warranty gives you specific legal rights and you may also have other
rights that vary from state to state.
If the problem is not handled to your satisfaction, then write to the Address above.
SERVICE CALLS WHICH DO NOT INVOLVE DEFECTIVE MATERIALS OR WORKMANSHIP AS DETERMINED BY THE WARRANTOR, IN ITS SOLEDISCRETION, ARE NOT
COV ERED. COSTS OF SUCH SERVICE CALLS ARE THE RESPONSIBILITY OF THE
PURCHASER.
CD
(Manual / Center)
Remote Control
Manual (Site/Center)
Audio/Video
Connect Cable
Power Cable
Monitor (Option)
Mouse
Contents
Chapter 1. Guide
Contents
5.3.2 Selecting cameras and changing graph bar line ……………………21
5.3.3 Audio Output ………………………………………………………………22
1. System Overview
1.1 Front panel ……………………………………………………………………3
1.2 Rear panel ……………………………………………………………………5
1.3 Description of the Remote Controller………………………………………9
2. Surveillance mode
2.1 Screen Layout …………………………………………………………………10
2.2 Enabing full screen & sequence modes……………………………………11
5.3.4 Playback ……………………………………………………………………23
6. Backup
6.1 Saving backup into local drive ………………………………………………24
6.1.1 Still image backup ………………………………………………………24
6.1.2 Video backup………………………………………………………………25
6.2 Saving backup using remote drive …………………………………………28
6.3 Printing still image ……………………………………………………………31
3. Menu operation
3.1 Using menu in live mode ……………………………………………………12
3.2 Using menu on PAN/TILT mode ……………………………………………13
3.3 Using menu on playback mode ……………………………………………14
4. Pan/Tilt Camera
4.1 Switching to Pan/Tilt control mode …………………………………………15
4.2 Pan/Tilt Camera Control ………………………………………………………16
4.3 Supported Pan/Tilt Camera list………………………………………………17
5. Search
5.1 Accessing Search mode ……………………………………………………18
5.2 Search mode display …………………………………………………………18
5.2.1 Graph color display ………………………………………………………19
5.3 Selecting date and time ………………………………………………………20
5.3.1 Selecting date ……………………………………………………………20
7. System Setup
7.1 Accessing Setup mode ………………………………………………………32
7.2 Setup menu ……………………………………………………………………32
7.3 System Setup …………………………………………………………………34
7.3.1 Password …………………………………………………………………34
7.3.2 Site Information……………………………………………………………35
7.3.3 Software Upgrade…………………………………………………………37
7.3.4 Log Information …………………………………………………………38
7.3.5 OSD / Dwell Time …………………………………………………………41
7.3.6 System management ……………………………………………………42
7.3.7 System Shutdown ………………………………………………………52
7.4 Recording Setup ………………………………………………………………54
Contents
7.4.1 Recording Setup …………………………………………………………54
7.4.2 Motion detection …………………………………………………………55
7.4.3 Motion Link setting ………………………………………………………56
2.2 PSTN (telephone line) Connection (optional) ……………………………81
3. RX Receiver (KRE-303) Connection Diagram (optional)
3.1 Name of Each Part and Description…………………………………………82
7.4.4 Schedule……………………………………………………………………57
4. External Sensor Connection (Input)
7.4.5 Quality/Resolution ………………………………………………………58
5. Control Port Connection (Output)
7.5 Camera Setup …………………………………………………………………59
6. Adding HDD
7.5.1 Camera name ……………………………………………………………60
6.1 Installing new HDD ……………………………………………………………86
7.5.2 Sensor setting ……………………………………………………………61
6.2 Checking HDD Database ……………………………………………………87
7.5.3 Sensor/Control link ………………………………………………………62
7.5.4 Sensor/Camera link ………………………………………………………63
7. HDD Smart Check
7.1 HDD Smart Check ……………………………………………………………88
7.6 Network Setup…………………………………………………………………64
7.7 Backup Schedule ……………………………………………………………68
Appendix
7.7.1 Adding Backup schedule ………………………………………………69
7.7.2 Deleting Backup schedule ………………………………………………74
8. Controls - Manual Control
8.1 Switching to Control Mode …………………………………………………75
1. Viewer for KDB data
2. Specifications
3. FAQ
4. Product Warranty
Chapter 2. DVR Installation
1. Pan/Tilt Connection
2. Connecting LAN/PSTN Communication Lines
2.1 LAN, ISDN (with the Router), and Dedicated Line Connection …………80
1. Guide
1. System Overview
2. Surveillance mode
3. Menu Operation
4. Pan/Tilt Camera
5. Search
6. Backup
7. System Setup
8. Controls - Manual Control
1. Guide
1. System Overview
1. System Overview
The following describes the keys and ports on the front of the system and their functions :
6
7
5
8
9 10
1
2
3
11
4 13
12
[Figure 1-1. System front view]
① [Directional Keys]
• Use to move through the menu options in Setup or Search mode.
• When controlling P/T/Z camera, press the directional keys to move the camera.
• When searching recorded image, you can adjust the size of the image using up and
down directional key.
② [Enter Key]
• Use to select options in Setup or Search mode.
• Use to directly go to Control setup mode from the Surveillance mode.
③ [Jog(inner dial)]
• Rotate to view recordings, in Search mode, forwards or backwards one frame at a time.
• Rotate to change the value of options one unit at a time in Setup mode.
• When controlling P/T/Z camera, rotate to shift camera lens focus.
④ [Shuttle(outer dial)]
• Rotate to play the recordings, in Search mode, forward or backwards.
• Rotate to change the value of options continuously in Setup mode.
• When controlling P/T/Z camera, rotate to zoom in or out.
3
System Overview
1.1 Front Panel
1. Guide
1. Guide
1. System Overview
System Overview
1.2 Rear panel
viewing the recording.
⑤ [CD-RW Open]
• Press button to open CD-RW.
⑥ [Camera/Number keys]
• In Surveillance mode, press for full
screen display of that camera.
• In Search mode, press for full screen
display of that camera recording during
playback.
• Press the keys to enter correct numeric
password when accessing Setup or
Search modes.
⑦ [Auto]
• Press to begin automatic channel
sequence either in full or multi screen
modes.
⑧ [Split screen buttons]
• In Surveillance or Search modes, press
to select 4-splitscreen
, 9-splitscreen
or 16-splitscreen
(DW-716).
⑫ [USB Port]
• You can connect a portable disk drive to
USB port to save backup of recorded
video.
• You can update your system software
with an upgrade package through the
USB port.
• A standard HP PostScript computer
printer can be connected to USB port of
DW-709/716 to print out any still image.
�The table below lists compatible USB
disks. If you want to use other removable
disk, it should be compatible with Linux
2.4.0 or over. Other USB disk may not
work properly.
�It is recommended that you confirm
through the manufacturer the Linux
compatibility of the removal disk you wish
to purchase.
�Removable Disk support
⑩ [Search]
• Press to access Search mode.
⑪ [Search mode control Keys]
• In Search mode, use these keys to view
the recording from either the first or last
recorded image, to play the recording
either forwards or backwards, to pause
4
Name
2
Company
USB Version
1
AnyDrive
AL-tech
Ver 1.1
2
Unidrive
KMIT
Ver 1.1
3
Nexdrive
JUNGSOFT
Ver 1.1
4
SHELLGINO N4
SHELLGINO
Ver 1.1
5
TRANSCEND JF A 128M
Transcend
Ver 1.1
3
14
1
7
☞ [Note] Removable Disk
No.
⑨ [Menu]
• Press to access Setup mode.
The following describes keys and ports on the rear part of the system and their functions
(DW-716) :
9 15 10 11
8
12
13
6
4
5
16
1
[Figure 1-2. System rear view]
① [Power Connector]
•Power cable input, 110V ~ 220V, for system
main power Supply.
[Caution]
�Be careful of electrocution. Please
read [Safety Warnings and Cautions]
② [Camera Video Input BNC]
•16 BNCs for DW-716 and 9BNCs for DW709.
[Caution]
③ [Loop Through Output]
•Video output ports for camera loop through
to view image to another monitor or device.
•The system supports both NTSC and PAL.
�Dependant on the grounding status of
the power supply electric current that
can cause an electric shock may flow
in the video line (coaxial cable). Turn
off the system before connecting the
video line to the BNC port.
⑬ [POWER LED]
• When power switch is on, the LED gives
green light.
5
System Overview
1. System Overview
1. Guide
1. Guide
1. System Overview
System Overview
④ [Sensor Input Port]
•External sensor inputs for channels 1~4.
•The system supports NC and NO sensor types.
⑤ [Control Output Port]
•Control output for connecting control devices for channels 1~4.
System Overview
1. System Overview
⑪ [Audio Out]
•Replay of recorded Audio.
⑫ [External modem terminal] NOT AVAILABLE IN EUROPEAN MODELS
•Provide a connection to the external modem for a remote access.
⑬ [LAN]
•Ethernet 10/100 connection port for connecting the system through network.
[Caution]
�Since control devices use output in a contact point format without polarity at the control
output port, do not connect AC 110V ~ 220V of the power cable or supply DC power.
�When controlling DC power, it is recommended that you cut the (-ve) line.
⑥ [RS-422 Output Port for P/T/Z Control]
•RS-422/RS-485 output for controlling P/T/Z cameras.
⑦ [Video Output Port]
•Video output for connecting with CVBS monitor.
•Supports both NTSC and PAL video format depending on the input.
⑧ [VGA Output Port]
•VGA output for connecting with CRT VGA monitor.
⑨ [S-Video Output Port]
•S-Video output for connecting with SVGA monitor.
•Supports both NTSC and PAL video format depending on the input.
⑩ [Audio In]
• Audio input for recording .
(For audio recording, it is recommended to use any microphone with an amplifier. A
microphone without amplifier may not record audio well enough if the audio input
singnal is too low.)
6
⑭ [Cooling Fan]
•Cooling fan for system ventilation.
⑮ [Mouse]
•Input for using a mouse with the system.
•If the mouse has a scroll wheel, the wheel can be used as system’s jog/shuttle dial.
☞ [Note] Support for Scroll Mouse
•The scroll mouse types supported by the system are listed in the table below.
Scroll mouse types other than those listed below may not be supported by the system .
Please check.
•Applicable Wheel Mouse List
No. Mouse Name Model Name or Support wheel
Type
feature
1 SOLID YEAR SYW1320 SOLID YEAR
YES
2 A4TECH
SWW-35
YES
3 SAMSUNG SMP2000WX
YES
4 TriGem
M-S48a
YES
Place of Manufacture
China
China
CHIC TECH/China
Logitech(China)
7
Remarks
1. Guide
1. Guide
1. System Overview
1. System Overview
external monitors; when VGA is selected, the image will be displayed on the computer
1.3 Description of the Remote Controller
Below picture shows the description of each feature in remote control. All the feature is same
with the front buttons in the system.
MENU
monitors.
(but, when monitor is selected as an image output, it take about 1 minute after power
SEARCH
connection to view the image on the VGA monitor. Be sure to wait until the processing
window appears.)
Number
AUTO
Dot
Delete
Shuttle(+)
Shuttle(-)
Arrow key
Enter
Jog(+)
Jog(-)
Playback
Screen division
☞ [Notice]
•To select a camera from 10 to 16 press
first. And press among
8
9
~
.
System Overview
System Overview
� [IMAGE INPUT/OUTPUT SWITCH]
•Image Input/Output terminal options
•NTSC,PAL : Default settings for input video format.
•CVBS, VGA : Image output types; when CVBS is selected, the image will be displayed on the
1. Guide
1. Guide
2. Surveillance Mode
2. Surveillance Mode
2. Surveillance Mode
Surveillance Mode
2.2 Enabling full screen and sequence modes
[To Select Full Screen mode]
•Press any key 1~16 on the system to enlarge
that camera channel and view in full screen.
4
5
[To Select Quad screen]
•Press the 4-split screen button to select quad
display of cameras 1-4. Press again to move to
next quad screen.
1 2
[Figure 2-2. 16-splitscreen mode]
3
[To Select 9 way split screen]
•Press the 9-split screen button to select display
of cameras 1-9. Press again to move to next 9
way screen.
[Figure 2-1. Main Surveillance Mode by 4 split screen]
① [Camera Number]
④ [P/T/Z Status]
•Displays camera number.
[To Select 16 way split screen]
•Press the 16 way split screen button to view all
cameras on one screen (DW-716).
• Displays Pan/Tilt camera status enabled.
② [Camera Name]
⑤ [Audio Recording Status]
•Displays camera name.
• Shows audio recording enabled.
[Figure 2-3. 9-splitscreen mode]
③ [Recording Status]
•Displays camera recording mode enabled.
Recording Mode
�C : Continuous Recording
�M : Motion Recording
�S : Sensor Recording
�P : Pre-alarm Recording
Available Recording Modes and Screen Display
�No recording
�Continuous Recording
�Motion Recording
� Sensor Recording
�Motion & Sensor Recording
�Motion & Pre-alarm Recording
�Sensor & Pre-alarm Recording
�Motion & Sensor & Pre-alarm Recording
No Display
Red REC
Orange REC
[Table 2-1. Available Recording Modes and Screen Display]
10
[Sequence]
•When full screen is selected, press the Auto key
to view all camera channels in sequence. The
system will also sequence between quad and 9
way displays. (see page 41 - OSD/Dwell Time
for details on changing Auto option).
[Figure 2-4. Full screen mode]
11
Surveillance Mode
2.1 Screen Layout
1. Guide
1. Guide
3. Menu Operation
3. Menu Operation
3. Menu Operation
3.2 Using menu on PAN/TILT mode
Menu Operation
Pop-up menu appears when you click right mouse button on surveillance, search or
This menu appears by selecting a full channel that supports P/T camera in surveillance
Pan/Tilt mode
mode.
1
2
4
3
5
[Figure 3-1. Pop-up menu operated by mouse on surveillance mode]
① [MENU]
• Main menu for system setup
• When using mouse, click on 'Menu' icon to
go to Setup.
• When using front panel, press 'MENU'
button on the front panel.
② [SEARCH]
• Click on "SEARCH" to go to Search mode.
• When using front panel, press "SEARCH"
button.
③ [CONTROL]
• Click on "CONTROL" to go to Control
menu.
• When using front panel, press "OK"
button.
④ [AUTO]
• To go to auto display mode, select single,
12
quad or 9 channel split screen.
• Press auto display icon to get auto rotation
screen. Click to view live image in single,
quad, 9ch, and 16ch modes. (See page 41 to
setup the dwell time as you wish)
⑤ [Multi Screen]
• You can get 4, 9 or 16(DW-716 only)
channel display screen with clicking the
icon by mouse or pressing the front panel
key.
☞ [Notice] Right mouse click
1
2
3
4
[Figure 3-2. Pop-up menu on Pan/Tilt mode
① [PTZ]
• Button to go to Pan/Tilt control mode.
• Select any channel that supports Pan/Tilt
camera. If you click right mouse button on
the image, it changes to full screen.
④ [FOCUS IN / OUT]
• Adjust focus of the camera lens.
(This function is not supported on any
auto focus cameras)
☞ [Notice] Right mouse click
② [Pan/Tilt]
• Controls the Pan/Tilt camera in Pan/Tilt
mode
�Use right mouse click to enter into or exit
from the Pop-up menu.
③ [ZOOM IN/OUT]
• Zoom in or out any supported Pan/Tilt or
Speed Dome type camera.
�Click right mouse button to activate or
deactivate pop-up menu in the surveill
ance mode.
�Clicking right mouse button anywhere in
the setup mode will return to sub-menu
screen.
13
Menu Operation
3.1 Using menu in live mode
1. Guide
1. Guide
3. Menu Operation
4. Pan/Tilt Camera
4. Pan/Tilt Camera
3.3 Using menu on playback mode
4.1 Switching to Pan/Tilt control mode
This menu appears only when you click right mouse button while playing back recorded images.
[Pan/Tilt Camera Control]
( See page 23 for how to playback of recorded images. )
• Select the camera channel connected to the
P/T/Z camera by using the mouse or
① Click this button to select time and date to
search.
camera number keys on the front panel. This
will display the channel in full screen mode.
• Once the channel is enlarged, press [Enter] to
② Click this button to start backup.
(Refer to page 24 for details of backup
procedure)
access [P/T/Z control mode]. Pan/Tilt
controls may differ depending on the
connected camera model.
1
[Figure 4-1. Enlarged P/T/Z channel]
2
③ [Playback button]
Menu Operation
backward / pause / play forward / Last
recorded image
(See page 23 Table for details)
[Exiting P/T/Z control mode]
• When you have finished with this screen,
④ [Direction Key]
click [OK] button by mouse or press MENU
• Using left and right arrow key, you can
on the front panel to return to Surveillance
play backward or forward on frame by
mode.
frame rate.
• Using up and down arrow key, you can
4
increase or decrease the size of playback
3
image.
[Figure 4-2. P/T/Z control mode]
[Figure 3-4. Mouse pop-up menu on single
channel playback screen]
14
15
Pan/TiltCamera
• (From the left) First recorded image / play
[Figure 3-3. Mouse pop-up menu on multiple
channel playback screen(DW-716)]
1. Guide
1. Guide
4. Pan/Tilt Camera
4. Pan/Tilt Camera
4.3 Supported Pan/Tilt Camera List
Pan/TiltCamera
In P/T/Z menu, you can switch the P/T/Z camera controls to manual control, as
well as changing Zoom, Focus, and Auto Pan settings.
④ [Z/F Speed]
• Use the jog/shuttle on the system to set the
camera zoom/focus rate.
• Z/F Speed only applies if you are using a
Speed Dome camera.
1
3
4
5
6
2
⑤ [Preset]
• If you have a Speed Dome camera
configured with presets, selection of a
numbered button will move the camera to
that preset position (see [Mode Select]
below).
• Preset selection only applies if you are
using a Speed Dome camera.
[Figure 4-3. P/T/Z menu]
① [P/T/Z Model]
• Displays the P/T/Z camera model.
② [P/T/Z function buttons]
• You can enable or disable P/T/Z camera
functions by selecting the options you wish
to use by using the mouse or the
[Directional] and [Enter] key on the front
panel.
•Some functions may differ depending on
the P/T/Z camera model you are using.
③ [P/T Speed]
• Use the directional keys on the system to
set the speed of the movement of the Speed
Dome camera when it is to be controlled
manually.
• P/T Speed only applies if you are using a
Speed Dome camera.
⑥ [Mode Select]
• Mode button is used to set the Speed Dome
camera to a preset position.
• Select the [Cursor Mode] button using the
[Directional] keys, then press [Enter] to
change to [P/T Mode].
• To set the position of the Speed Dome
camera to Preset buttons, change the
[Cursor Mode] to [P/T Mode], then move
the camera position using the directional
keys. Once the camera is in the designed
position, change the [P/T Mode] back into
[Cursor Mode].
No.
Manufacturer
Model Name
P/T
P/T
Speed
Zoom
Focus
Z/F
Speed
Preset
Manual
Control
and other
functions
IRIS
1
KODICOM
KRE-301 RX
YES
NO
YES
YES
NO
NO
YES
NO
2
UNIMO
KRX-3200 RX YES
NO
YES
YES
NO
NO
NO
NO
3
UNIMO
KRX-2101 RX YES
NO
YES
YES
NO
NO
YES
NO
4
NIKO
NK-97 SD
YES
YES
YES
YES
NO
YES
YES
NO
5
SAMSUNG
SPD-1600 SD YES
YES
YES
YES
YES
YES
YES
NO
6
SAMSUNG
SCC-641
YES
YES
YES
YES
NO
YES
YES
NO
7
PANASONIC
WV-CS854
YES
YES
YES
YES
YES
YES
YES
NO
8
DONG-YANG DRX-501A
YES
NO
YES
YES
NO
NO
YES
NO
9
SUNG-JIN
CCR-20G RX
YES
NO
YES
YES
NO
NO
YES
NO
10
PELCO
PELCO-D SD
YES
YES
YES
YES
NO
YES
YES
NO
11
PELCO
C1489M-D SD YES
YES
YES
YES
NO
YES
YES
NO
12
HONEYWELL GC-755
NO
NO
YES
YES
YES
YES
NO
NO
13
PHILIPS
LTC SD
YES
YES
YES
YES
YES
YES
NO
NO
14
ORION
KRE-303
YES
NO
YES
YES
NO
NO
YES
NO
15
TOA(CBC)
C-CC554 SD
YES
YES
YES
YES
YES
YES
YES
NO
16
ITA
ITA-MPC1
YES
YES
YES
NO
YES
YES
YES
NO
17
Vision
Vision360v1
YES
YES
YES
NO
NO
YES
YES
NO
18
HITRON
FASTRAX
YES
YES
YES
YES
NO
YES
YES
NO
19
SAMSUNG
SCC-93IT
NO
NO
YES
YES
YES
YES
YES
NO
20
DONG-YANG DSC-203
YES
YES
YES
YES
YES
YES
YES
NO
21
Sensormatic
Sensormatic
YES
NO
YES
YES
NO
YES
YES
NO
22
CTN
HD-0670
YES
YES
YES
YES
YES
YES
YES
NO
[Table 4-1. Supported Pan/Tilt camera list]
16
17
Note
Pan/TiltCamera
4.2 Pan/Tilt Camera Control
1. Guide
1. Guide
5. Search
5. Search
5.1 Accessing Search Mode
5.2.1 Graph color display
Search
�Recorded data shown on the time graph will
�Use the [number] keys to enter the correct 4digit password, then press [Enter] (The system
has no password under factory settings).
�If you forget your password, you will not be
able to access Search mode, or change your
password. We strongly recommend that you
either write down your password and keep it
safe or use a password that you are sure to
remember. (See page 34 for instructions on
how to change password).
�To return to Surveillance mode, press [Search]
button at anytime.
be displayed in different colour depending on
the recording type enabled (see Table 5-1
below).
[Figure 5-3. Graph color display]
[Figure 5-1. Password screen]
5.2 Search mode display
After you enter the correct password, the
Search mode display will appear as shown
below. You can select from the different
options by using the mouse or the
[directional] keys.
[Figure 5-2. Search mode display]
18
�In Search mode display, you can select the
time and date and the camera channels you
wish to view.
�To choose the date you wish to view, select the
[Date] button. This will display a calendar.
From there, select the day you wish to view
(see pages 20 for details).
�The recording for each camera will be
displayed in the time graph.
�If a camera is connected to an Audio input, the
system will replay both video and audio at the
same time.
�After selecting the time, date and camera
number, press [OK] button to view the
recording.
�When the system is replaying the recording,
you can enlarge any channel into full screen
mode (see page 23 for details).
�Press the [Up] and [Down] (
) arrow
button to select any channel to search.
Color
Description
• Purple
Continous Recording
• Blue
Motion-detection Recording
• Green
Pre-alarm Recording
• Orange
Sensor Recording
• Red
Audio Recording
Display
[Table 5-1. Graph color description]
19
Search
To access Search mode, press Search button on the system. You will then be asked to enter
password as shown below :
1. Guide
1. Guide
5. Search
5. Search
5.3 Selecting date and time
5.3.1 Selecting date
Example
�After selecting the date you wish to view,
Color
Description
• Orange
Date with Recorded Data
10
press the [OK] button to return to Search
• Red
Holidays/Weekends
10
mode display. The system will display the
• Black
Date without Data
10
selected date’s recording in the time graph.
• Yellow Box
Selected Date
10
• Blue Box
Cursor Location
10
[Table 5-2. Carlendar date colors]
5.3.2 Selecting cameras and changing search bar line
[Figure 5-4. Selecting [Date] button]
[Selecting cameras]
① [Changing Year/Month]
� Press the arrow buttons (
calendar to change year/month.
1
�Use the mouse or the directional keys to
) above the
select cameras from the graph. After
selection, if you press [OK] button the
system will display the selected cameras’
② [Selecting Date]
� Use the directional keys to select the date and
press Enter.
� Dates containing recorded data are displayed
in orange color (see table 5-2 for color
descriptions).
3
2
[Figure 5-5. Calendar display]
③ [Selecting Hour/Minute/Second]
�Use the shuttle Dial on the system or the
mouse wheel to change hour/minute/second.
recorded data.
[Changing graph bar line]
�To shift the search bar line, use the jog or
shuttle dial on the system or the mouse
[Figure 5-6. Selecting cameras and graph bar line]
wheel. This will shift the bar left or right.
Shifting the search bar line will change the
time of the recording you wish to view.
☞ [Note] Jog and Shuttle Dial
�Jog Dail: Changes hour/minute/second or any other setup value precisely.
�Shuttle Dail: Changes hour/minute/second or any other setup value quickly.
20
21
Search
Search
� To select the date you wish to view, use the
directional keys to select [Date] button, then
press Enter. This will display a calendar (refer
to page 3 for information on system keys).
1. Guide
1. Guide
5. Search
5. Search
5.3.4 Playback
[Audio]
Search
[Playback recorded data]
�After selecting the date, time, and the cameras,
press [OK] button to play the recording using
the mouse or the Enter key.
�The system can play the video with any
recorded sound, provided an audio recording
device is connected to that channel.
�To play the recording with sound, use the
mouse or the directional keys on the system to
select the [Audio] button, then press Enter.
Once selected, you will listen to any recorded
audio.
[Figure 5-7. Selecting audio]
[Figure 5-8. Search mode display]
☞ [Note]
�DW-709/716 support only one audio channel.
[Figure 5-9. Search mode playback(DW-716)]
[Full Screen]
�To enlarge a channel during playback, use the
number keys 1~16 on the system to select the
channel you wish to enlarge.
�When a channel is selected, use ▲▼ (zoom
in/zoom out) keys to increase or decrease the
screen size.
[Changing playback speed]
�To play the recording, press
or
button.
(Reverse Play) : Play the recording in
reverse. When pressed again, the recording
will play faster.
(Forward Play) : Play the recording
forward. When pressed again, the recording
will play faster.
(Pressing the play button during fast play or
reverse play will return the playback speed to
normal forward play.)
Move to the very beginning of the date’
srecording
Reverse Play
Stop
[Switching to Search mode display]
�To return to Search mode display, press the
Enter button at anytime.
Forward Play
[Caution]
Move to the very end of the date’
s recording.
�Recording frame rate might vary depending
on the number of installed camera or
system load.
[Table 5-3. Search mode playback buttons]
22
23
Search
5.3.3 Audio Output
1. Guide
1. Guide
6. Backup
6. Backup
Backup
�Press [OK] button to begin backup. You will
see the backup progress through the progress
bar.
�When no USB drive is connected, the system
will return to Search mode display.
�Once backup is complete, the system will
return to Search mode display.
From Search screen display, select [Backup] button to save a backup copy of the recording using
the system’s CD-RW, USB HDD, or a portable hard drive such as USB memory stick. The backup
files can be saved as AVI, BMP, JPEG, or KDB (Kaltech Data Base) formats.
�When the system is playing the recording,
press Pause to select the frame you wish to
save, then press Enter (see page 23 for
playback controls).
�As shown in Figure 6-1, press [Backup] button
to view backup options display (Figure 6-2).
6.1.1 Still Image backup
[Figure 6-3. Backup progress bar(DW-716)]
① [Backup mode – Still Image]
�To select BMP or JPEG backup mode, use the
mouse wheel or the directional keys to
highlight [Backup Mode] then use the jog/
shuttle to change the option.
② [Start Time] and [End Time]
�The time and date input function is
automatically disabled. The image saved will
be the image selected and paused on the
Search screen.
[Figure 6-1. Selecting [Backup] button]
③ [Select Media]
�Select the media used for saving backup.
�When Still Image mode is selected, it is
recommended to save to the Local USB drive.
1
2
3
4
④ [Camera]
�When Still Image mode is selected, only those
cameras that were selected in Search mode
will be saved. Camera channels that do not
contain any data will be disabled.
[Figure 6-2. Backup options display(DW-716)]
6.1.2 Video backup
1
2
3
4
[Figure 6-4. Backup options display(DW-716)]
☞ [Note]
�To play a backup file saved in AVI format, the latest
DivX Codec must be installed on the PC you are using.
If you do not have DivX Codec installed, please use the
Internet resources to download the required Codec.
�KDB(Kaltech Data Base) backup enables to backup of
the video with audio data. However, the other types of
backup such as AVI, BMP, JPG do not include audio.
�When the is archived to CD-RW in KDB format the
viewer software will be copied automatically to the CD.
(For more information on the viewer program please
refer to page 91.)
24
① [Backup mode – Video]
�To select KDB (Kaltech data base) or AVI
backup mode, use the mouse or the
directional keys on the system to highlight
[Backup mode], then use the mouse wheel or
the jog/shuttle to change the option.
② [Start Time] and [End Time]
�Select the starting time and ending time of the
recording you wish to save.
�To change the [Start Time] and [End Time],
use the mouse or the directional buttons to
highlight [Input] button, then click left mouse
button or press Enter (see page 26 for details).
③ [Select Media]
�Select the media used for saving backup.
�Press the [Select] button to choose different
media types (see page 26 for details on
selecting Local Drive backup).
④ [Camera]
�Select the camera number that contains the
recording you wish to save.
�When saving backup in KDB format, you can
select multiple camera channels.
�When saving backup in AVI format, you can
only select one camera channel.
�When saving backup in Video mode, you will
see
displayed on the corresponding
camera channels in Surveillance mode.
25
Backup
6.1 Saving backup to local drive
1. Guide
1. Guide
6. Backup
Backup
[Figure 6-5. Start Time]
[Figure 6-6. End Time]
[Start Time] and [End Time] setup
�To select [Start Time] and [End Time], use the mouse or the directional keys to select the time
and date, then use the mouse wheel or the shuttle to select the start and end times of the
recording you wish to copy.
�Press [Enter] button to apply the select times.
[Figure 6-7. Selecting Local Drive]
[Selecting Media]
�Use the mouse wheel or the jog/shuttle to
select Local USB, Local CD-RW, or Remote
Drive.
�To save backup using a local drive, select
Local USB or Local CD-RW (see page 28 for
remote backup).
�USB Hard Disk Drive and USB memory stick
can be connected to the USB port for back up.
When saving backup using Local USB, the
system will automatically scan for a connected
USB drive.
[Figure 6-8. Message on insufficient storage space]
[Storage space shortage]
�When the storage space for USB HDD or
memory, CD-RW is running short, a
warning message will be shown as left.
�A window will appear to ask whether to
change backup media or not.
�[Yes]
Backup will start when you click [Yes]
after changing the backup media.
�[No]
Backup will not progress when you click
[No] and will go to the previous menu.
☞ [Notice]
�Recording speed might be slower while the backup using
USB HDD, CD-RW, or remote backup is going on.
�Do not plug out the USB cable or turn off USB devices
during backup. It may cause a problem in the system.
☞ [Note] Supported USB versions
�DW-709/716 supports USB 1.1. USB 2.0 devices are also supported but at USB 1.1 speed.
�Recommended portable USB Hard Disk Drives include Iomega and Noble.
�It is possible to burn the image data onto CD-RW or CD-R media up to 100 times, but it varies
depending on the image size.
26
27
Backup
6. Backup
1. Guide
1. Guide
6. Backup
6. Backup
6.2 Saving backup using remote drive
① [Backup mode – Video]
�To select KDB (Kaltech data base) or AVI
backup mode, use the mouse or the directional
keys on the system to highlight [Backup
mode], then use the mouse wheel or the
jog/shuttle to select the option.
�You can only select Video mode when
backing up to a remote drive.
[Figure 6-9. Selecting [Backup] button]
② [Start Time] and [End Time]
�Select the start time and end time of the
recording you wish to back up.
�To change the [Start Time] and [End Time],
use the mouse or the directional buttons to
highlight [Input] button, then click left mouse
button or press Enter (see page 29 for details).
1
2
3
4
Backup
Backup
�From Search screen, select [Backup] button to
save a backup copy of the recording using a
remote drive. The backup files can be saved as
AVI, BMP, JPEG, or KDB (KODI COM data
base) formats.
[Figure 6-11. Start Time]
[Start Time] and [End Time] setup
�To select [Start Time] and [End Time], use the mouse or the directional keys to select the time
and date, then use the mouse wheel or the jog/shuttle to select the start time and end time of
the recording you wish to backup.
�Press [Enter] button to apply the selected times.
③ [Select Media]
�Select the media used for saving backup.
�Press the [Select] button to choose from
different media types (see page 29 for details
on selecting Remote Drive backup).
[Figure 6-10. Backup options display(DW-716)]
④ [Camera]
�Select the camera number that contains the
recording you wish to save.
�When saving backup in KDB format, you can
select multiple camera channels.
�When saving backup in AVI format, you can
only select one camera channel.
�When saving backup in Video mode, you will
see
displayed on the corresponding
camera channels in Surveillance mode.
☞ [Note]
�When saving a backup as a still image
(JPEG or BMP), you cannot select
Drive as backup.
28
[Figure 6-12. End Time]
[Figure 6-13. Remote Drive setup]
[Select Media – Remote Drive]
�Use the mouse wheel or the jog/shuttle to
select Remote Drive.
�If the system is connected through LAN or
Internet line, you can save a remote drive
backup by entering the correct IP address.
�When saving a remote drive backup, the
receiving PC or fileserver must have Center
Program installed with Backup Server
Program running.
�To save a remote drive backup, you will need
the IP address and the password of the
receiving PC or fileserver.
�To enter IP address and password, use the
directional keys to highlight [Input] button,
then press Enter.
29
1. Guide
1. Guide
6. Backup
6. Backup
Backup
�It is possible to print out the recorded image using the printer that supports PostScript. Choose
the camera to print out while playing back the recorded and press [OK].
If you click [Backup] button in the search screen below image will appear.
[Figure 6-14. Entering IP]
[Figure 6-15. Entering password]
[Network Drive IP] and [Network Password]
�To enter the Network Drive IP address and Network password, use the mouse or the
directional keys and Enter button to select the numbers and letters. Press [OK] button to apply
the selected IP address and password.
1
2
3
4
[Figure 6-17. Search Backup (DW-716)]
② [Start Time] and [End Time]
�Time of the paused image will be shown.
�When Still Image mode is selected, [Start
Time] and [End Time] will indicate the time
when the selected frame is recorded. [Input]
button will be disabled.
③ [Select Media]
�Use the mouse or the directional keys on the
system to print a still image and then click left
mouse button or press Enter
�Select Local Printer
[Connecting]
�Press the [Connect] button to connect the
system to the receiving PC or fileserver.
Once connected, you will be able to select
Network Drive path.
�Depending on the connection status, the
system will display either “Connect”,
“Disconnect”, or “Connect fail” message.
④ [Camera]
�Select the camera number that contains the
recording you wish to save.
�When printing out in BMP or JPEG only
selected cameras during playback will be
activated.
[Figure 6-16. Remote drive setup]
[Figure 6-18. Local Printer Selection]
30
① [Save image]
�Select BMP or JPEG to print out in still image.
�Backup method can be selected by moving
mouse pointer over backup mode menu and
rolling wheel or using directional keys in the
DVR.
[Local Drive-Local Printer]
�Use the mouse wheel or the jog/shuttle on
the system to select Local Printer and press
[OK] button.
31
Backup
6.3 Printing Still Image
1. Guide
1. Guide
7. System Setup
7. System Setup
7. System Setup
System Setup
To access Setup mode, press Setup button on the system. You will then be asked to enter
password as shown below:
�Use the number keys to enter the correct 4digit password, then press Enter (The
system has no password under factory
settings).
�If you forget your password, you will not be
able to access Setup mode, or change your
password. We strongly recommend that
you either write down your password and
keep it safe or use a password that you are
sure to remember.
�See page 34 for instructions on how to
change password.
�To return to Surveillance mode, press
MENU button again.
[Figure 7-1. Password screen]
7.2 Setup menu
After you enter the correct password the Setup menu will appear as shown. You can select
different options using the mouse or the directional keys.
�You can change various system functions in
Setup Mode to customize the system’s
recording settings.
�See page 33, Table 7-1 for brief outline of the
settings you can change.
�To return to Surveillance mode, press Menu
button or click right mouse button.
Main Menu
�System
Setup
�Recording
Setup
�Camera
Setup
Setting Options
Description
Password
Change and set system password.
Site Information
Change site code, date display type, and time.
Software Upgrade
Update system program
Log Information
Show recorded log information
OSD/Dwell Time
Turn OSD on/off, and set automatic channel rotation setting
System management
Change system hardware settings
System Shutdown
Shutdown or restart the system
Recording setup
Set brightness, frame rate, and audio recording.
Motion Detection
Set motion detection area and beep sound of each camera.
Recording Schedule
Select recording mode and set camera schedule.
Quality / Resolution
Set the recording channel size and resolution.
Camera Name
Change camera name.
P/T/Z Model
Select Pan/Tilt camera model.l
Sensor Setting
Set sensor connection to the system.
Sensor/Control link
Change sensor and control connection and options.
Sensor/Camera link
Change sensor and camera connection and options.
Network
Select network type.
ID/PASSWORD
Logging in ADSL require ID/PASSWORD.
Site IP
Enter IP address of the system.
�Communication Subnet Mask
Setup
Enter subnet mask address of the system.
Gateway
Enter gateway address of the system.
Center IP
Enter IP address of the Center PC.
Center Telephone Number Enter telephone number of the Center PC.((Not in Europe)
Transfer Time
Change the time the system transfers data when alarm sensors
are triggered.
[Figure 7-2. Setup menu]
�Backup Setup
Alarm Sensor
Select the alarm sensors.
Backup Schedule
Setup automatic backup schedule
[Table 7-1. Setup menu options]
32
33
System Setup
7.1 Accessing Setup mode
1. Guide
1. Guide
7. System Setup
7. System Setup
System Setup
7.3.1 Password
7.3.2 Site Information
�Select [Password] in system Setup menu to
change password.
�In [Site Information], you can change
the [Site Code], [Date Type], and [Time
Setup] options.
[Language]
�Select the language you wish to use.
[Figure 7-5. Site Information]
[Figure 7-3. Password Setup]
[Site Code]
�You can assign an ID code to the
system to make it recognizable when
multiple systems are connected
through network.
�To change password, enter the correct [Old
Password], then enter [New Password] and
[Confirm] by entering the new password
again. Then select [OK] button to apply the
new password.
�Only 4 digit numerical figure can be input
for password setting.
[Date Type]
�You can change the date display
format.
[Time Setup]
�You can change the date and time (see
page 36 for details).
[Figure 7-6. Site Information setup]
☞ [Note]
[Figure 7-4. Password setup]
�This system is equipped with high performance crystal clock and might have 20 ppm of time
difference. Therefore, it might have a little bit of time difference from the international standard
time. Please make sure to check correctness of the time. For detailed time adjustment, refer to
the manual.
34
35
System Setup
7.3 System Setup
1. Guide
1. Guide
7. System Setup
System Setup
7.3.3 Software Upgrade
[Site Code]
�You can assign an ID code to the system to
make it recognizable when multiple systems
are connected through network.
�The Site Code comprises 6 digits. When
entering Site Code, you can enter a
maximum of 6 digits. Default is "000001"
�Use the mouse or the directional keys to type
in the Site Code. Once you select [OK]
button, the new Site Code will apply
immediately.
�In [Software Upgrade] menu, you can
update your system program to new
software versions when they become
available.
[Figure 7-7. Side Code setup]
[Package Select]
�You can upgrade the system program
by using a portable storage device to be
recognized by DW-709/716. The
upgrade package must be in a folder
called "upgrade". Connect the storage
device containing an upgrade package
to the USB port, then press [Select]. The
system will display the number of
packages found.
[Figure 7-10. Software Upgrade]
[Date Type]
�You can change the date display format.
�Available date format is listed below:
yyyy/mm/dd, yyyy-mm-dd, yyyy.mm.dd
mm/dd/yyyy, mm-dd-yyyy, mm.dd.yyyy
dd/mm/yyyy, dd-mm-yyyy, dd.mm.yyyy
[Upgraded Version]
�After a portable storage device is
connected, you can select the [Upgrade
Version] using the mouse wheel or the
jog/shuttle on the system.
[Figure 7-8. Date Type setup]
[Time Setup]
�You can change the date and time.
�Check the time zone of your region, then use
the mouse wheel or the jog/shuttle to set the
[Time Zone].
�To change year/month/day and time, use
the mouse or the directional keys on the
system to highlight the option you wish to
change, then use the mouse wheel or the
jog/shuttle to change the option. If Daylight
Saving applies in your region, select the
[Daylight Saving] option.
[Figure 7-9. Date/Time setup]
36
[Figure 7-11. Software Upgrade menu]
[Current Version]
�You can view the current system
program version.
�Check to make sure the upgrade
package version is better than the
current version, then select [Start] to
begin the upgrade.
[Caution]
�When upgrading is in progress, do not
switch off the system or unplug the
portable storage device containing the
upgrade package until the upgrade is
complete. Otherwise, the system may
malfunction.
37
System Setup
7. System Setup
1. Guide
1. Guide
7. System Setup
System Setup
7.3.4 Log Information
[Time]
�Select [Time] to change time to view log
information recorded on different date/time.
�Change [Start Time] and [End Time] using
the mouse and mouse wheel or the
directional keys and the jog/shuttle, then
press [OK] button. The system will display
the log information recorded during this
period.
�In [Log Information] menu, you can view
the log information on Setup history,
Search history, network connection
history, and backup history.
[Time]
�Displays selected date and time.
[Setup]
�Displays log information on any changes
made to Setup menu.
[Figure 7-12. Log Information]
[Figure 7-14. Selecting Time]
[Setup]
�The system records the date and time
whenever the Setup mode was accessed and
changed.
�Select [Setup] button to view the log
information on Setup mode history. You will
see “SETUP START” when Setup mode was
accessed and “SETUP END” when Setup
mode was exited.
[Search]
�Displays log information on Search
history.
[Network]
�Displays log information on network
connection history.
[Backup]
�Displays log information on backup
history.
[Figure 7-15. Log Information – Setup history]
[Search]
�The system records the date and time
whenever Search mode was accessed for
viewing the recording.
�Select [Search] button to view the log
information on Search mode history. You
will see “SEARCH IN” when Search mode
was accessed and “SEARCH OUT” when
Search mode was exited.
[OK]
�Select [OK] button to return to Setup
menu.
[Figure 7-13. Log Information]
[Figure 7-16. Log Information – Search history]
38
39
System Setup
7. System Setup
1. Guide
1. Guide
7. System Setup
System Setup
7.3.5 OSD/Dwell Time
[Network]
�You can change the options on OSD-On
�Whenever the system is connected through
Screen Display-and sequence time
network by remote Center program, the
function.
system will record the IP address and the date
and time the connection is made.
�You can turn the display settings in
Surveillance mode on or off, such as
[Camera Name], [Recording], [Audio],
[P/T/Z], and [Date/Time] displays.
[Figure 7-17. Log Information – Network connection history]
[Backup]
�Select [OSD All] to turn all screen displays
[Figure 7-20. OSD/Dwell Time]
on or off.
�Whenever the system saves a backup, it
records the date, time, and the location of the
�You can set the channel sequence time
backup saved.
from 1 second to 60 seconds by changing
the value of [Dwell Time] by using the
mouse wheel or the jog/shuttle.
[Figure 7-18. Log Information – Backup history]
[OK]
�Select [OK] button to return to Setup menu.
[Figure 7-21. OSD/Dwell Time setup]
[Figure 7-19. Exiting Log Information menu]
40
41
System Setup
7. System Setup
1. Guide
1. Guide
7. System Setup
System Setup
7.3.6 System Management
�System Management allows you to check
�Select “Network Management” to check
network connection status, certify
the network status or to restart DDNS
Dynamic DNS (DDNS), Options, change
authentication and click [OK] button.
Video input Type, and format HDD.
[Figure 7-24. Selecting Network Management]
[Figure 7-22. System management]
[Assigned IP]
�Assigned IP displays the system’s IP
address used for remote backup and
remote monitoring.
�Use the mouse wheel or the jog/shuttle to
select [Network Management], [ DDNS
Authentication], [Video-In Type], and
[Connection Status]
�Connection Status indicates whether the
current assigned IP address can be used to
connect to the Internet. If it is possible, the
system will display “OK” in the progress
bar. Otherwise, the system will display
“Failed”.
[HDD Format] options.
�After selecting the option you wish
choose, press [OK] button.
[Figure 7-23. Selecting Network Management]
42
[DDNS Restart]
�Receive a new DDNS authentication
�DDNS authentication allows you to use
Internet using the IP address (ADSL,
DHCP).
[Figure 7-25. Network Management]
43
System Setup
7. System Setup
1. Guide
1. Guide
7. System Setup
System Setup
�Select “Options” to set a warning beep in case
of video loss or to set the watermark in video
data and click the [OK] button.
�To use the DDNS service, select “DDNS
Authentication” and click the [OK]
button.
[Figure 7-28. Selecting Options]
[Figure 7-26. Selecting DDNS Authentification]
[Video Loss Beep delay time]
�Sounds the beep and sets its delay time in case
of video loss.
[Authentication Number]
�Enter the DDNS authentication number.
[ID]
�Enter DDNS ID.
[Password]
�Enter DDNS password.
[Figure 7-29. Video Beep delay time]
[Figure 7-27. DDNS Authentification]
44
45
System Setup
7. System Setup
1. Guide
1. Guide
7. System Setup
System Setup
�To renew the HDD installed in the
�Select the vido-in type to check the type of
image input and click the [OK] button.
system, select “HDD Management” and
click the [OK] button.
[Figure 7-32. Selecting HDD Management]
[Figure 7-30. Selecting Video-In Type]
[Video Type]
�Select the video input type of the image
source.
�The table shows the system’s built-in
HDDs and their information. You can
install up to HDD into the system.
�From the table, you can select the HDD
you wish to format, then select [OK]
button. The system will display a
confirmation message shown in Figure 734
[Figure 7-33. HDD table]
[Figure 7-31. Video In Type]
46
47
System Setup
7. System Setup
1. Guide
1. Guide
7. System Setup
System Setup
�The system will display a warning message.
To confirm and proceed with formatting the
[Caution]
selected HDD, press [OK] button. To cancel
�Any newly installed HDD must be formatted.
�Formatting will erase all data stored in the selected HDD. Please make sure you have
saved all important data before proceeding with HDD format (see page 24 for details on
saving backup).
format and return to HDD table, select
[Cancel] button.
[Figure 7-34. Confirmation message]
�You can view the HDD format progress
through the progress bar.
�The system will restart once the format is
complete.
[Figure 7-35. HDD format prograss]
48
49
System Setup
7. System Setup
1. Guide
1. Guide
7. System Setup
System Setup
�To receive the international standard time
data from the NTP(Network Time
� NTP Server list
ISO
Protocol) server and to synchronize the
system, select “NTP Setup” and click on
[OK] button.
Area
pool.ntp.org
Asia
asia.pool.ntp.org
Europe
europe.pool.ntp.org
North America
South America
[Figure 7-36. Selecting NTP Setup]
[Connection Status]
�To check the connection status with the
NTP server in [Primary Address] or
[Secondary Address] field, click on [Test]
button.
�When communication is possible with the
NTP server, “Success” is displayed on the
prograss bar. Otherwise, “Fail” is
displayed.
[NTP Enable]
�The operator can decide whether to use
NTP feature or not. To use the NTP
feature, click on [NTP Enable] button.
[Figure 7-37. NTP Setup]
☞ [Note]
�The operator cannot change the time in the Setup menu but can only
set the Time Zone while the NTP feature is enabled.
�The NTP server and the system are synchronized every hour.
50
NTP Server Address
Worldwide
Oceania
[Primary Address] and [Secondary Address]
�To input the NTP Server address, click on
[Input] button and type in the address of
the NTP server.
System Setup
7. System Setup
north-america.pool.ntp.org
oceania.pool.ntp.org
south-america.pool.ntp.org
AT
Austria
at.pool.ntp.org
AU
Australia
au.pool.ntp.org
BE
Belgium
be.pool.ntp.org
CA
Canada
ca.pool.ntp.org
CH
Switzerland
ch.pool.ntp.org
CL
Chile
cl.pool.ntp.org
DE
Germany
de.pool.ntp.org
DK
Denmark
dk.pool.ntp.org
ES
Spain
es.pool.ntp.org
FI
Finand
fi.pool.ntp.org
FR
France
fr.pool.ntp.org
GT
IE
Guatemala
Ireland
gt.pool.ntp.org
ie.pool.ntp.org
IT
Italy
it.pool.ntp.org
JP
Japan
jp.pool.ntp.org
MX
Mexico
mx.pool.ntp.org
MY
Malaysia
my.pool.ntp.org
NL
Netherland
nl.pool.ntp.org
NO
Norway
no.pool.ntp.org
NZ
New Zealand
nz.pool.ntp.org
PH
Philippines
ph.pool.ntp.org
PL
Poland
pl.pool.ntp.org
PT
Portugal
pt.pool.ntp.org
RU
Russia
ru.pool.ntp.org
SE
Sweden
se.pool.ntp.org
US
USA
us.pool.ntp.org
51
1. Guide
1. Guide
7. System Setup
System Setup
7.3.7 System Shutdown
�In [System Shutdown] menu, you can
[Add schedule]
safely shutdown, restart or schedule a
�You can set the time and the system will
reboot of the system.
automatically restart.
�Use mouse wheel or the jog/shuttle to
�Use the mouse wheel or the jog/shuttle to
select [Shutdown], [Restart], or [Add
select [System Restart Period]. You can assign
Schedule], then press [OK] button.
the system to automatically restart [One time
only], [Daily], [Every 2 days], [Every 3 days],
[Weekly], [Every 2 weeks], [Every 3 weeks], or
[Figure 7-40. System restart schedule]
[Monthly].
�Restarting the system on regular basis may
[Figure 7-38. System Shutdown]
help to stabilize the system performance.
[Shut down]
�Shut down the system.
[Restart]
�Restart the system.
[Add schedule]
�Add automatic reboot schedule (see page
53 for details).
☞ [Note]
�Press and hold ENTER button at the
front panel for 3 seconds to restart the
system.
[Figure 7-39. System Shutdown menu]
52
53
System Setup
7. System Setup
1. Guide
1. Guide
7. System Setup
7. System Setup
System Setup
7.4.1 Recording Setup
�In [Recording] setup menu, you can
change the color, brightness, contrast, and
the frame rate for each cameras as well as
setting audio recording.
7.4.2 Motion Detection
[Setting Motion Detection]
�To set Motion Detection area, highlight a block of
the area of the channel screen by using the
directional keys, then press Enter key to select
the block.
�The channel screen is divided into 48 blocks. You
can select as many blocks as you wish up to 48.
[Color/Brightness/Contrast]
�You can set the color, brightness, and
contrast of the selected camera.
�Use the mouse wheel or the jog/shuttle to
set the value of each option between
0~255.
[Default]
�Select [Default] button to set the color,
brightness, and contrast to their default
value.
[Figure 7-41. Recording setup]
[Figure 7-43. Motion Detection]
[Figure 7-42. Recording setup]
☞ [Note]
�Recording frame rate may vary
depending on the number of installed
cameras or system load.
54
[Apply All]
�Click the [Apply All] button to apply the
current camera setting to all cameras.
[Camera]
�Use the jog/shuttle on the system to select
other cameras for set up.
[Sensitivity]
�You can set the motion-detection sensitivity of
each camera to “LOWEST”, “LOW”,
“NORMAL”, “HIGH”, or “HIGHEST”.
[Full Motion]
�To set the whole channel screen to motiondetection area, switch the [Full Motion] option to
“ON”. To cancel the whole screen from motiondetection area, switch the option to “OFF”.
[Frame]
�You can set the recording frame rate
between 1~30 fps(25fps in PAL) for each
camera using the jog/shuttle dial on the
system. The total recording frame rate can
not exceed 120 fps (100fps in PAL).
[Audio]
�To record sound with the selected camera,
switch the [Audio] option to “ON” using
the jog/shuttle on the system.
�Audio recording is supported for one
camera channel only. Setting the [Audio]
option to “ON” will automatically switch
all other channels to “OFF”.
�In [Motion Detection] menu, you can set motion
detection area, set motion sensitivity, and enable
or disable alert sound(beeping).
[Beep]
�To hear a ‘beep’ warning sound when the system
detects movement in motion-detection area, set
the [Beep] option to “ON”. To hear no warning
sound, set the option to “OFF”.
[Appply All]
�Click the [Apply All] button to apply the current
[Figure 7-44. Motion-detection setting]
camera setting to all cameras.
[Camera]
�Use the jog/shuttle on the system to select other
cameras for set up.
[OK]
�Press [OK] button to accept any changes made
and return to Setup menu
55
System Setup
7.4 Recording Setup
1. Guide
1. Guide
7. System Setup
System Setup
7.4.3 Motion Link Setting
7.4.4 Schedule
[Motion link setting]
�You can set a motion-link recording for each camera.
�When the camera detects movement in the motion-detection area, the linked camera will
begin recording as well, regardless of its recording schedule.
�To use Motion-link recording, the camera detecting the movement must be set to MotionDetection recording in the schedule. If the camera’s schedule is set to Continuous Recording,
Motion Link will be disabled.
�In Surveillance mode, when the camera detects movement in its motion-detection area, the
linked camera channel will flash ‘REC’ and begin recording.
�To access Motion Link setting, use the
mouse or the directional keys to select
[Setting]. The system will display Motion
link setup as shown in Figure 7-46.
�In [Schedule] menu, you can set
automatic schedule for each camera and
their recording mode.
[Camera]
�Use the mouse wheel or the jog/shuttle to
select the camera to change its schedule.
[Recording Mode]
�You can select a recording mode for the
selected camera by using the mouse or the
direction keys to highlight the time you
wish to set, then use the mouse wheel or
the jog/shuttle to change the recording
mode.
�Available recording modes are listed on
the table below. You can also set nonrecording period per camera if you wish
to.
[Figure 7-47. Schedule]
[Motion Camera]
�Select the camera that will detect the
movement in its motion-detection area by
using the mouse wheel or the jog/shuttle on
the system.
[Figure 7-45. Motion Link setting]
[Link Camera]
�Select the cameras that will be linked to the
[Motion Camera] by using the mouse or the
directional keys. You can link multiple
cameras to the [Motion Camera].
[Apply All]
�Click the [Apply All] button to apply the
current camera setting to all cameras.
[Figure 7-48. Schedule Setup]
Recording Mode
Available Recording Modes
Schedule Setup Display
�No Recording
�Continuous Recording
�C : Continuous Recording �Motion Recording
�Sensor Recording
�M : Motion Recording
�Motion & Sensor Recording
�S : Sensor Recording
�Motion & Pre-alarm Recording
�P : Pre-alarm Recording
�Sensor & Pre-alarm Recording
�Motion & Sensor & Pre-alarm Recording
[Figure 7-46. Motion Connection Setup Screen(DW-716)]
[Table 7-2. Recording modes]
56
57
NONE
C
M
S
M:S
M:P
S:P
M:S:P
Channel Display
None
Red REC
Orange REC
System Setup
7. System Setup
1. Guide
1. Guide
7. System Setup
7. System Setup
System Setup
7.4.5 Quality/Resolution
�In [Quality/Resolution] menu, you can
change the video quality and resolution
by using the mouse wheel or the
jog/shuttle.
�Any changes made to quality and
resolution will apply to all cameras.
�In [Camera] setup menu, you can setup Pan/Tilt mode and change the connection setting
between sensors and controls.
[Quality]
�You can change the video quality to
“LOWEST”, “LOW”, “NORMAL”,
“HIGH”, and “BEST”.
[Figure 7-49. Quality/Resolution]
[Resolution]
�You can change the video resolution to
352 X 240 or 740 X 240 (PAL : 352 X 288,
704 X 288)
[OK]
�Select [OK] button to accept any changes
made and return to Setup menu.
[Figure 7-50. Quality/Resolution setup]
58
[Figure 7-51. Camera Setup menu]
[Selecting channel]
�Select a camera channel you wish to
change its options on P/T/Z model type,
sensor settings, sensor/control link
settings, sensor/camera link settings and
camera name.
�Use the mouse wheel or the jog/shuttle on
the system to select a camera channel.
P/T/Z function.
�Use the mouse wheel or the jog/shuttle on
the system to select a Speed Dome or an
RX-Receiver model name.
[Camera Name]
�You can enter a name for the selected
camera (see page 60 for details).
[Sensor/Control Link]
�You can link the control devices to a sensor
(see page 62 for details).
[P/T/Z Model]
�You can select a P/T/Z model for a
camera, provided the camera supports
[Sensor/Camera Link]
�You can link the sensor to activate
camera(s) (see page 63 for details).
[Sensor setting]
�You can change the settings for each
sensor (see page 61 for details).
59
System Setup
7.5 Camera Setup
1. Guide
1. Guide
7. System Setup
System Setup
7.5.1 Camera name
7.5.2 Sensor setting
�Press [Input] button next to [Camera
name] option to give the selected camera
a name.
[Figure 7-52. Camera name option]
�In [Sensor setting] menu, you can select a
sensor type for any of 4 connected
sensors, and enable or disable alarm
sound.
[Figure 7-54. Sensor setting]
[Sensor]
�Use the mouse wheel or the jog/shuttle to
select a sensor.
[Sensor Type]
�Use the mouse wheel or the jog/shuttle to
select “Normally Open” or “Normally
Close” sensor types.
�Normally Close type = If the door/object
with the sensor installed is not closed, the
sensor will trigger.
�Normally Open type = If the door/object
with the sensor installed is not opened,
the sensor will trigger.
[Selecting camera name]
�Use the mouse or the directional keys and
Enter key to enter the camera name.
�You can only enter up to 8 characters.
�Press [OK] to accept camera name and
return to Camera setup menu.
[Figure 7-53. Selecting camera name]
[Figure 7-55. Sensor setting]
60
[Beep]
�When sensors are triggered, the system
will produce “beep” alarm sound
through its internal speakers. Select “ON”
to enable alarm, and select “OFF” to
disable it.
61
System Setup
7. System Setup
1. Guide
1. Guide
7. System Setup
System Setup
7.5.3 Sensor/Control link
7.5.4 Sensor/Camera Link
�In [Sensor/Control link] menu, you can
link a sensor with controls and set control
time.
[Figure 7-56. Sensor/Control link]
�In [Sensor/Camera Link] menu, you can
link cameras to Sensors.
[Figure 7-58. Sensor/Camera Link]
[Sensor]
�Select the sensor you wish to link by
using the mouse wheel or the jog/shuttle.
[Sensor]
�Use the mouse wheel or the jog/shuttle to
select a sensor.
[Camera]
�Select the cameras you wish to link with
the selected sensor by using the mouse or
the directional keys and Enter key.
�When the sensor is triggered, its linked
camera(s) will automatically begin
recording.
[Control]
�You can link a sensor with control
devices. When a sensor is triggered, the
linked control device(s) will automatically
activate.
[Control Time]
�You can set how long the control devices
will stay activated. The value can be
changed in 10 seconds segments up to
maximum of 300 seconds.
�Use the mouse wheel or the jog/shuttle to
change [Control Time].
[Figure 7-57. Sensor/Control link setup]
62
☞ [Note]
[Figure 7-59. Sensor/camera link setup(DW-716)]
�To have the cameras automatically
record when a sensor is triggered, the
schedule for the linked cameras must be
set to “S”, “S:P”, “M:S”, or “M:S:P” (see
page 55 for details on schedule setup).
63
System Setup
7. System Setup
1. Guide
1. Guide
7. System Setup
7. System Setup
System Setup
�In [Network] setup menu, you can set the system’s IP address in order to connect to the Center
Program, as well as setting up Center IP address and telephone number, recording transfer time,
and alarm sensor transfer.
[ID/Password setup]
�When using ADSL or VDSL network, you
must enter the ID and password of remote
page 66 for details).
back up server.
[Gateway]
�You can enter the system's gateway address
in order to communicate with the Center
using LAN.
[Center IP]
�Input the IP address of the Center PC in
order to transfer the recorded data to Center
through LAN (see page 66 for details).
[Figure 7-60. Network Setup Screen]
[Network]
�The system supports network connection
through LAN using IP address, as well as
DHCP, ADSL, and modem.(Modem set up
not available in Europe)
�Select the network option you wish to use by
using mouse or the jog/shuttle.
�LAN is the standard network connection for
DW-709/716.
[ID/PASSWORD]
�Logging in ADSL require ID/ PASSWORD.
[Site IP]
�Enter the system’s IP address for connecting
DW-709/716 to a remote Center via LAN (see
page 65 for details).
[Subnet Mask]
�You can enter the system’s subnet mask in
order to communicate with the Center
program when connected through LAN (see
64
�Use the mouse or the directional keys and
Enter key to enter the ID and password.
[Figure 7-61. ID/Password setup]
[Center Tel Number]
�You can enter the telephone number of the
computer with the Center Program installed
in order to transfer the recording to Center
through modem (see page 67 for details).
(Not in Europe)
[Transfer Time]
�Transfer Time determines how long the
system will transfer the recording to the
computer with the Center software installed
when connected via LAN.
�You can set the [Transfer Time] in 30
seconds segments up to maximum of 150
seconds by using the mouse wheel or the
jog/shuttle.
[Site IP address setup]
�When using LAN, you must enter the
system’s IP address or domain address.
�Use the mouse or the directional keys and
Enter key to enter the IP address.
[Figure 7-62. Site IP Address setup]
[Alarm Sensor]
�You can designate any sensors connected to
DW-709/716 into Alarm sensors by
selecting the sensor numbers on [Alarm
Sensor] option.
�When an Alarm sensor is triggered, the
system will automatically transfer the
recording data to the remote Center
connected to the system via the network.
65
System Setup
7.6 Network Setup
1. Guide
1. Guide
7. System Setup
System Setup
[Subnet mask/Gateway setup]
[Center Tel No. setup](Not in Europe)
�To use Subnet mask or Gateway, you must
�When using modem, you must enter the
enter the IP address.
telephone number of the computer installed
�The IP address must match with the Subnet
with the Center Program.
�Use the mouse or the directional keys and
mask and Gateway of the Center PC.
�Use the mouse or the directional keys to
Enter key to enter the telephone number.
enter IP address.
[Figure 7-63. Subnet Mask/Gateway setup]
[Figure 7-65. Center Tel No. setup]
[Center IP address setup]
�When using LAN, you must enter the IP
address of the computer installed with the
Center Program.
�Use the mouse or the directional keys and
Enter key to enter the IP address.
[Figure 7-64. Center IP address setup]
66
67
System Setup
7. System Setup
1. Guide
1. Guide
7. System Setup
7. System Setup
System Setup
7.7.1 Adding Backup schedule
�In [Backup Schedule] menu, you can set
�To add a backup schedule to the list, select
up a system backup schedule so that the
[Add] button.
system will automatically save backup
copies of specific recordings.
[Figure 7-66 Backup Schedule]
[Figure 7-68. Adding backup schedule]
�Backup Schedule programs the system to
save a backup copy of the recorded data to
�To add a backup schedule, you must set
a designated storage device set by the
the [Start Time] and [End Time], [Target
schedule.
Drive], and [Rotate] options.
�You can only schedule the system to save a
backup copy of the recording that will be
recorded in the future. You cannot
schedule the system to save a backup that
has been recorded before the current date.
[Figure 7-67. Backup schedule setup]
To do this, you must access the Search
[Figure 7-69. Adding backup schedule]
mode (see page 24 for saving backup).
68
69
System Setup
7.7 Backup Schedule
1. Guide
1. Guide
7. System Setup
System Setup
[Start Time / End Time]
�To select [Start Time] and [End Time], use
the mouse or the directional keys to select
the time and date, then use the mouse
wheel or the shuttle to select the time
period of the recording you wish to save.
�Select [OK] button to apply the selected
times.
[Figure 7-70. Start Time setup]
[Figure 7-73. Remote Drive setup]
[Target Drive]
�Select the target drive that will be used for
saving the backup of the recording
[Figure 7-71. End Time]
[Figure 7-74. Remote Drive IP Address]
�You can select remote Drive or local USB
for backup.
☞ [Note]
�Archiving images onto CD-RW is
supported only in playback mode.
[Figure 7-72. Selecting Target Drive]
70
[Figure 7-75. Remote Drive Password]
[Target Drive – Remote Drive]
�Use the mouse wheel or the jog/shuttle to
select Remote Drive.
�If the system is connected through LAN or
Internet line, you can save a remote drive
backup by entering the correct IP address.
�When saving a remote drive backup, the
receiving PC or fileserver must have the
Center Program installed with Backup
Server Program running.
�To save a remote drive backup, you will
need the IP address and the password of
the receiving PC or fileserver.
�To enter IP address and password, use the
directional keys to highlight [Input]
button, then press Enter.
[Saving Point – Remote Drive IP]
�To set the [Remote Drive], enter the IP
address of the remote place that is
connected to the network where the
center program and the remote backup
server are installed.
�Enter the IP address of the remote site by
pressing direction keys and Enter key on
the front part of the system
[Network Drive IP] and [Network
Password]
�To enter the Network Drive IP address
and Network password, use the mouse or
the directional keys and Enter button to
select the numbers and letters. Press [OK]
button to apply the selected IP address
and password.
71
System Setup
7. System Setup
1. Guide
1. Guide
7. System Setup
System Setup
[Connecting]
�Press the [Connect] button to connect the
system to the receiving PC or fileserver in
order to save a remote drive backup. Once
connected, you will be able to select
Network Drive path.
�Depending on the connection status, the
system will display either “Connect”,
“Disconnect”, or “Connect fail” message.
[Figure 7-76. Remote Drive setup]
[Backup Schedule List]
�You will see the added schedule on the
Backup Schedule list. Select [OK] button to
accept the schedule and return to Setup
menu.
[Figure 7-79. Backup Schedule list]
[OK]
�Once you have entered the [Network
Drive IP], [Network Password], and
[Network Drive Path], select [OK] button
to return to Backup Schedule list.
[Figure 7-77. Remote Drive Setup]
[Rotate]
�You can schedule the system to save a
backup of the selected time in daily,
weekly, monthly, or yearly basis. To do so,
use the mouse wheel or the jog/shuttle to
select a rotation cycle.
[OK]
�Once you have selected the [Start Time],
[End Time], [Target Drive], and [Rotate],
press [OK] button to add it to backup
schedule list.
[Figure 7-78. Remote Drive setup]
72
73
System Setup
7. System Setup
1. Guide
1. Guide
7. System Setup
8. Controls – Manual Control
8. Controls – Manual Control
8.1 Switching to Control Mode
�To delete a schedule from the list, select
the schedule you wish to delete by using
the directional keys and Enter key. Then
select [Del] button to delete the schedule.
If you wish to use the control devices manually, select the 16-splitscreen mode in Surveillance
mode, then press Enter key. You will then be able to select the control devices you wish to use
manually.
[Figure 7-80. Deleting backup schedule]
[Figure 8-1. 16-splitscreen mode(DW-716)]
�Select [OK] button to accept the schedule
and return to Setup menu.
[Control]
�Use the mouse or the directional keys and
Enter key to select the control device
numbers you wish to control manually.
[Exiting Control mode]
[Figure 7-81. Deleting backup schedule]
�Press [OK] button to return to Surveillance
mode.
[Figure 8-2. Control Screen]
74
75
Controls
System Setup
7.7.2 Deleting Backup Schedule
2. Installation
1. Pan/Tilt Connection
2. Connecting LAN/PSTN Communication
Lines
3. RX Receiver (KRE-303) Connection
Diagram (optional)
4. External Sensor Connection (Input)
5. Control Port Connection (Output)
6. Adding HDD
7. HDD Smart Check
2. DVR Installation
1. Pan/Tilt Connection
1. Pan/Tilt Connection
RS-422 Signal Cable Connection Port
(Used for connecting RX-Receiver)
[Caution]
�Please beware of (+ve) and (-ve) poles of the signal cable when connecting. A Wrong
connection may cause malfunction to the system.
�If you wish to use an RX-receiver not manufactured by Kaltech, please contact your
dealer beforehand.
79
Pan/TiltConnection
(DW-716)
2. DVR Installation
2. DVR Installation
2. Connecting LAN/PSTN Communication Lines
2. Connecting LAN/PSTN Communication Lines
2. Connecting LAN/PSTN Communication Lines
2.2 PSTN (telephone line) Connection (options) (Not available Europe)
2.1 LAN and Dedicated Line Connection
(DW-716)
(DW-716)
LAN
LAN/PSTN Communication
Center PC
LAN/PSTN Communication
(Use for connecting to DW-709/716 UTP port)
MODEM
(DW-709/716 RS-232 connection)
Router
DSU
(Dedicated Modem)
Internet Network
&
Local Internet Network
LAN
(Used for connecting UTP port of the LAN Card)
PSTN
(Telephone line)
Dedicated
Line
DSU
(Dedicated Modem)
Router
MODEM
80
81
CENTER PC
2. DVR Installation
2. DVR Installation
3.RX Receiver Connection Diagram
3.RX Receiver Connection Diagram
3. RX Receiver (KRE-303) Connection Diagram (optional)
3.1 Part Name and Description
1. Turns “ON” when polarity of data lines connected correctly.
2. Used for ON-OFF of the cross resistance according to the international standard, EIA-485.
3. DC±6V when it is LOW, DC ±12V when it is HIGH.
RX-RECEIVER Internal View
4. Used for reversing the polarity of ZOOM/FOCUS control output.
5. Used along side with MATRIX CARD, else it is "0"
6. Turns “ON” when summoned camera number from DVR or TX match.
7. Created from the left in order of “100/10/1”
8. Output of EXT is adjustable from DVR depending on the condition at site.
9. P/T control voltage output is classified into AC24V and input voltage. The default is AC24V.
10. Input voltage selection switch for AC 110V/220V. The default is AC220V.
RXReceiverConnectionDiagram
12. Can be replaced with National N75176-Japan or Maxim MAX485 IC-USA.
13. Used to check the condition of PAN/TILT and ON-OFF output.
14. Used to check the condition of MOTORIZED ZOOM LENS output.
15. Input power is 250V/10A when AC 110V is selected, and is 250V/5A when AC220V is
selected.
16. Main power switch capable of ON-OFF on 2 lines at the same time.
17. Data input terminal capable of receiving RS-485EIA signal; be cautious of polarity.
18. 3 lines per output, in order of ZOOM(1)/FOCUS(2)/COMMON(3)
19. Arranged in order of UP/DOWN/LEFT/RIGHT/AUTO PAN/COMMON (4,5,6,7,8,9
consecutive)
20. Power output related to camera and its housing; AC voltage output.
21. LIGHT/AUX 1,2/AUDIO - Maximum of 1KW of AC voltage output
22. AC power source used for installation/repair, usable by connecting to wall outlet.
23. Used in main power input terminal of AC 110V, or alternate power of 220V.
[Caution]
The voltage of the light controlling output port is the same as the AC input
voltage. The operating voltage of the camera lens is fixed to DC 12V.
82
83
RXReceiverConnectionDiagram
11. High end commercial usage only, PIC 16F74
2. DVR Installation
2. DVR Installation
4. External Sensor Connection (Input)
5. Control Port Connection (Output)
4. External Sensor Connection (Input)
5. Control Port Connection (Output)
(DW-716)
(DW-716)
ExternalSensorConnection
SENSOR
Alarm Light, Amplification Siren,
External Relay, Etc.
External Power ( DC12V )
�During automatic control of an external sensor, the control output port is “interworked”
(the value set in “Set Camera” menu) and “COM” port is connected.
Connect one of the two signal lines from the sensor (infrared sensor, magnetic) to COM
�In normal occasions, the control output is kept in “NO” status.
port, and connect the other signal line to the desired sensor number.
�When control is triggered, the control output changes to “NC” status.
(Set the sensor “NC, NO” type in “Set Camera” menu See Page 59 for details on Sensor
type setting)
[Caution]
[Caution]
Use a separate adapter to supply power to each sensor.
84
�The operating voltage should be maximum 12V, 300mA.
�When controlling lights and other devices operated by AC power, use a separate
external relay.
85
ControlPortConnection
CONTROL
2. DVR Installation
2. DVR Installation
6. Adding HDD
6. Adding HDD
6. Adding HDD
6.2 Checking HDD Database
�Turn the system off and install the new HDD
into the system.
�Turn the system back on and wait for the
HDD format message.
�The message will ask you to confirm HDD
format. HDD format is a necessary
procedure before using the newly installed
HDD.
�Press [Yes] button to being formatting the
new HDD. Pressing [No] button will cancel
HDD format and shutdown the system.
[Figure 6-1. HDD Format]
[Figure 6-3. HDD Table ]
�If the newly installed HDD database does not
correspond with the original HDD, the system
will display the HDD table.
�If the database of the HDDs do not correspond,
you must format either the system’s original
HDD or the newly installed HDD.
�From the table, you can select the HDD you wish
to format, then select [OK] button. The system will
display a confirmation message shown in Figure
6-4.
�Select [Cancel] button to exit HDD table screen.
[All Format]
�Press [All Format] button to format all existing
HDDs.
Adding HDD
�Once the system begins formatting the HDD,
you can view the progress through the
progress bar.
�Once HDD is complete, the system will
restart.
�The system will display a warning message. To
confirm and proceed with formatting the selected
HDD, press [OK] button. To cancel format and
return to HDD table, select [Cancel] button.
[Figure 6-4. HDD confirm message]
[Figure 6-2. HDD Format progress]
�You can view the HDD format progress through
the progress bar.
�The system will restart once the format is
complete.
[Caution]
[Caution]
�You are recommended to check both the original HDD and the new Hdd Interface jumper and
set the MASTER and SLAVE.
�Any newly installed HDD must be formatted
�Remember that formatting will erase any data stored on the new HDD. Please make sure you
have saved any important data before proceeding with HDD format.
86
�Any newly installed HDD must be formatted
�Remember that formatting will erase all data
stored on the selected HDD. Please make sure
you have saved all important data before
proceeding with HDD format (see page 24 for
details on saving backup).
[Figure 6-5. HDD Format progress]
87
Adding HDD
6.1 Installing new HDD
2. DVR Installation
7. HDD Smart Check
7. HDD Smart Check
7.1 HDD Smart Check
This is a function to notify the user possibilities of HDD crash in advance.
This, by advance warning, is to protect the HDD from losing data or crashing that may come from bad
sector or overheating.
A ppendix
1
1. Viewer for KDB data
2. Specification
HDD SmartCheck
3. FAQ
4. Product warranty
[Figure 7-1. Main surveillance screen]
① [HDD warning icon]
�When the installed HDD has a problem such as bad sector or overheated DVR will beep or this icon
will appear.
�It is strongly recommended to replace HDD when the HDD warning icon
appears or beeps.
�The beep will appear every 10 seconds.
[Caution]
�HDD smart check function works only when the HDD in use supports S.M.A.R.T
�Check whether the HDD installed supports S.M.A.R.T.
�Avoid using old HDD or low capacity HDD.
88
3. Appendix
1. Viewer for KDB data
1. Viewer for KDB data
1.1 How to run Viewer
① When you insert the CD containing KDB (Kaltech Data Base) data in CD-RW, it will start by
autorun. If you do not have autorun on your PC, you can access the viewer file by double
② The Viewer will work when you double-click “Viewer.exe”
91
Viewer for KDB data
clicking the Viewer folder.
3. Appendix
3. Appendix
1. Viewer for KDB data
1. Viewer for KDB data
1.2 Viewer Main screen
1
3
4 5
9 10 16
6
7
8
12 13 14
11
Viewer for KDB data
① [Scroll button for camera]
�Scroll up or down to show camera buttons.
�Move the line to the left or right to start
searching.
② [Camera]
�Select camera number(s) you wish to search.
⑥ [Split Screen setup]
�
When you click the button, split mode
from search screen will automatically change
according to the number of cameras you
choose in a form of 4, 9, or 16(DW-716) split
screen.
③[Time indication bar]
�It indicates time of stored data.
�To enlarge the time scale, click on the time
indication bar.
⑦ [SKIP]
�Move the slides to the right if you wish to
increase search speed.
�The number of images to be skipped are set by
an internal value of the DW-709/716 software.
The value is not the number of images to be
skipped.
④[Indication for stored amount]
�This function indicates recording type and
stored data in graphical colour form as below ;
Pink bar indicates 'Continuous Recording',
Blue bar indicates 'Motion Recording',
Dark Yellow bar indicates 'Sensor Recording',
Green bar indicates'Pre Alarm', and there will
be no graphic bar if nothing was recorded.
⑨ [Zoom]
Increases screen size by up to x4.
92
17
⑪ [Playback]
�Be sure to select the camera, time and date to
search.
�Adjust SKIP and SPEED ratio as you wish.
⑩ [Digital Zoom]
Go to first saved image for selected date
Reverse play frame by frame
Reverse playback
Stop
Forward playback
Forward play frame by frame
Go to last saved image for the selected date
[Zoom In]
Click right mouse button to increase the
selected part of the image by up to
x17(when recorded by high resolution)
[Zoom Out]
Click right mouse button to reduce zoom
ratio.
⑫ [Backup]
While you are searching recorded data,
select the image to backup and click
.
The “Backup” window will appear.
[Move]
Click right mouse button and drag to
“move around inside” the stored image.
⑬ [Print]
Print the selected image.
It is possible to print BMP or JPEG images.
⑧ [SPEED]
�Move the slides to the right to increase the
speed of replaying saved image.
⑤[Search Bar]
�This indicates time line for searching data.
15
93
Viewer for KDB data
2
3. Appendix
3. Appendix
1. Viewer for KDB data
2. Specification
2. Specification
• When you click the 'Audio Play' icon
, the audio play configuration
window appears as right.
• Check on "Enable" .
• Adjust the volume properly using 'Volume control'.
⑮ [Adjustment of playback image]
• Image quality, such as brightmess, contrast, colour, sharpness, ratate,
mirror, outline and twist function during playback can be adjusted.
Viewer for KDB data
� [Search Sheet]
• When you click the icon
for searching the backup data, a window as below will appear.
• Select DW-709 or DW-716 which contains backup data, then select the site you wish to
search and click ‘Search’ to start.
▶ System Specification
• HDD : Max. HDD x 4
• O/S : Embedded Linux
• LAN : Ethernet 10/100 MB
• Modem : 56Kbps. External-type modem is supported. (Optional, but not available in
Europe)
▶ Video Input
• 9Ch(DW-709) or 16Ch(DW-716)Composite Video (NTSC/PAL)
▶ Video Output
• General Monitor Spot Output (BNC)
• S-Video Output Port
• VGA Output Port
• Video Loop Through Port for Each Video Input
▶ Recording Frame
• DW-709 : NTSC( Max 117 Frame/Sec), PAL(Max 99 Frame/Sec)
• DW-716 : NTSC( Max 112 Frame/Sec), PAL (Max 96 Frame/Sec)
▶ Audio Recording
• 1Channel Audio Support
▶ Compression Method : Engine-X
▶ Display Mode
• x1, x4, and x9 Screen Division (DW-709 - NTSC : 270 Frame/Sec, 9Ch Multi-media Monitoring
PAL : 225 Frame/Sec, 9Ch Multi-media Monitoring
• x1, x4, x9, and x16 Screen Division (DW-716) - NTSC : 480 Frame/sec, 16Ch Multi-media Monitoring
PAL : 400 Frame/sec, 16Ch Multi-media Monitoring
▶ Auto Switching
• Automatic channel rotation in order of x1, x4, x9 and x16(DW-716) Screen Division
▶ Playback Display Mode
• Playing in split screen mode up to 16-splitscreen(DW-716) is possible
• Enlarging an image to full screen is possible
� [Quit]
• Exit the Viewer program.
▶ Sensor Input
• 4 channel input
▶ Alarm Output
• 4 alarm output
94
95
Viewer for KDB data
⑭ [Audio Play Configuration]
• When you want to playback audio, select the channel with recorded audio. (Audio
recording and replay is supported for only one channel)
3. Appendix
3. Appendix
2. Specification
3. FAQ
3. FAQ
1
▶ Camera/Sensor link - Yes
▶ Pan/Tilt/Zoom Control- Yes
▶ Backup
• Auto/Manual backup through USB portable storage device, CD-RW or remote
drive through network
2
▶ Power :
• The rated voltage might vary depending on the specification of the power supply.
Model
ENP-0812A
ENP-2320
Input Voltage
AC 100-127V/200-240v, 60/50Hz, 4A/2A
AC 115-230V, 60-50Hz, 4-2A
3
Specification
▶ Weight : 10.14Kg(HDD x 4)
▶Dimensions
• Body (mm): 400 (W) x 480 (L) x 105 (H)
400
4
5
480
6
105
96
The system power does not turn on.
☞ Check if the power cable is connected correctly.
☞ Check if the input voltage is correct.
☞ If the system power does not turn on when the power cable is connected correctly,
please contact the service center.
The system power is turned on, but no video data is displayed on the monitor.
☞ Check if the monitor power cable is connected properly
☞ Check to make sure the monitor is turned on.
☞ Check if the video output cable of DW-709/716 DVR is properly connected to the
monitor.
☞ Unplug the power cable and plug in again.
☞ For VGA monitor, it takes about a minute to boot. Be sure not to turn off the system until
booting is completed.
The camera numbers are displayed on the screen, but camera images are not displayed.
☞ Check if the camera video output is connected to DW-709/716 DVR system correctly.
☞ Check if the power cable on the camera is connected correctly.
☞ Check if the video cable connecting the camera to DW-709/716 DVR system has a
problem.
☞ This problem can occur because of weak video signal if the video data is transferred by
the video data distributor when the video is connected to multiple systems. Connect the
camera directly to DW-709/716 DVR.
☞ Turn off DW-709/716 system and turn it on again.
The camera video is shown on the screen, but the system doesn t record video.
☞ Check to make sure the recording mode in the recording setting mode is not set to “NONE”.
☞ Turn off the DW-709/716 DVR and turn it on again.
It is impossible to search through the recorded video.
☞ Check if there is a recorded video data at the time that you are trying to search on the
table.
☞ If there is no recorded video data, check to make sure the recording mode in the
recording setting mode is not set to“NONE”
.
Audio data recorded with video data is not playing.
☞ Check if the audio recording option is correctly set to the camera you wish to record
audio.
☞ Check if the audio play option in the Searching mode is selected.
☞ Check if the microphone and speaker port on the rear of DW-709/716 system are
connected correctly.
☞ Check if the connected microphone is working properly.
☞ Check if the connected speaker is working properly.
97
FAQ
▶ Motion Detection - Yes
3. Appendix
Warranty Guide
3. FAQ
The quality of this product is guaranteed by strict quality control processes and testing.
If the product becomes non operational the warranty may be in operation. The warranty period is
valid for1 year from the date of purchase.
Warranty Guide
7 Color of some camera videos are strange or videos are shown abnormally.
☞ Check if the camera connected to the system has a problem. Check to make sure the
camera is not damaged by trying another camera into a working video output.
☞ Check if the video system setting is the same with your camera system. Depending on
your region, the camera system can support either PAL, or NTSC. Depending on the
camera system, the video process can differ greatly, therefore it can be difficult to
recognize the video data if the video system setting is different from the camera system.
There are a lot of (screen) noise on the image.
8 ☞ Check if the video signal output from the camera has a problem.Check to make sure the
camera is not damaged by trying another camera into a working video output.
☞ Check if the video cable connecting the camera and DW-709/716 DVR is cut, cross-wired,
or shorted.
☞ Check if there is a high voltage wire around the video cable connecting the camera to
DW-709/716 DVR system. It can cause the noise problem to decrease video quality.
☞ Check if the video cable connecting the camera to DW-709/716 DVR system is the correct
video cable. When a normal power-supplying cable is used instead of the video cable,
screen noise can be generated.
FAQ
Sometimes the system restarts itself.
☞ The system can restart itself due to watchdog function when any problem occurs to DW9
709/716.
� Check the Product Warranty Sheet to make sure it is still in effect.
� Check the problem again and contact the dealer you purchased the unit from.
� About product repair, exchange, or refund, we follow the "compensation regulation for
customer's loss" announced by "the Economic Planning Board". (Korea only)
Warranty
� If the product becomes non operational the warranty may be in operation. The warranty
period is valid for 1 year(s) from the date of purchase.
� Service fee and replacement parts will be charged in below cases:
1. Damaged the user’s carelessness.
2. Damaged due to a natural disaster.
3. Damaged due to the user not following the instructions and cautions written in the user’s
guide.
4. Damaged due to incorrect power voltage, and/or frequency being used.
5. If the Product Warranty sheet is expired.
6. Damaged due to an engineer not employed by Kaltech modifying the system.
� If your system is damaged after the expiration of the warranty period, free repair service will
not be available. If you wish the system to be repaired, a service fee and replacement parts
will be charged on a time & materials.
Product Warranty
Product/ Model Name
The connected sensor is not operating.
☞ Check if the type of sensor in camera setting is the same with the connected sensor.
10 ☞ Check if the system is set to use the sensor in recording schedule window in the recording
setting menu.
☞ Check if the power cable of the sensor is properly connected.
☞ Check if the signal cable of the sensor is properly connected.
The connected control device is not operating.
☞ Check if the system is set to use the control device in the camera setting menu.
☞ Check if the power cable of the controller is properly connected.
11 ☞ Check if the signal cable of the controller is properly connected.
Serial Number
Purchasing Dealer
Purchasing Date
Warranty Period
Customer
Name
Address
The Product Warranty Sheet will not be issued again.
▶ The Product Warranty Sheet must be filled on the same day as the
product’s purchase.
▶ This document must be shown in order to receive the free repair service.
▶
■
■
98
1 year(s) from the purchasing date.
Tech Support : 886-446-3595
Fax : 813-888-9555
■ E-Mail : [email protected]
ver.1.0(0408)E