1
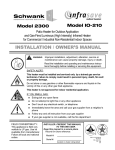
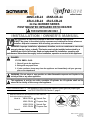
4BN6-CB-24 4BL6-CB-24 4SN5-CB-24 4SL5-CB-24 24 Vac BURNER SERIES POST MOUNTED INFRARED PATIO HEATER FOR OUTDOOR USE ONLY INSTALLATION / OWNER’S MANUAL This Operation & Instruction manual is not to be removed from the site. It MUST be given in its entirety to the consumer and retained for future reference. Installer: Acquaint consumer with all safety procedures in the manual WARNING: Improper installation, adjustment, alteration, service or maintenance can cause property damage, injury, or death. This heater must only be installed and serviced by a qualified gas service technician. Read and understand this installation, operating and maintenance instructions thoroughly before installation, operation or service to this appliance. DANGER IF YOU SMELL GAS: 1. Shut off gas to the appliance 2. Extinguish any open flame 3. If odor continues, keep away from the appliance and immediately call your gas supplier or fire department WARNING: Do not store or use gasoline or other flammable vapours and liquids in the vicinity of this or any other appliance. This appliance is not for use with a portable LP-cylinder. An LP-cylinder shall not be stored in the vicinity of this or any other appliance. FIELD CONVERTIBILITY: This appliance is field convertible between natural gas and propane gas - see GAS CONVERSION Section 5, page 8 Keep this manual in a secure place for future reference. Record the following information : Model #: 4BN6-CB-24 4BL6-CB-24 4SN5-CB-24 4SL5-CB-24 Natural Gas Propane Gas Natural Gas Propane Gas Serial #: (located on heater rating label) 4BN/L6-24,4SN/L5 -24 Manual IM100310 RD: MAR, 2010 RL: 1A - BA NOTICE: The Manufacturer reserves the right to make changes to equipment and specifications without obligation or notification. This publication, or parts thereof, may not be reproduced in any form, without prior written consent from the manufacturer. Unauthorized use or distribution of this publication is strictly prohibited. Schwank Group / InfraSave 5285 Bradco Boulevard Mississauga, Ontario, L4W 2A6 2 Schwank Way Waynesboro, Georgia, USA 30830 Customer & Technical Services Phone: 1-877-446-3727 Fax: 1-866-361-0523 e-mail: [email protected] www.schwankgroup.com e-mail: [email protected] www.infrasave.com 2 4BN/L6-24,4SN/L5 -24 Manual IM100310 RD: MAR, 2010 RL: 1A - BA 4BN6-CB-24 4SN5-CB-24 4BL6-CB-24 4SL5-CB-24 24 Vac BURNER SERIES POST MOUNTED INFRARED PATIO HEATER FOR OUTDOOR USE ONLY TABLE OF CONTENTS IMPORTANT INFORMATION - READ FIRST IMPORTANT SAFETY WARNINGS ........ 4, 5 NOTICE TO INSTALLERS ........................... 4 CLEARANCE TO COMBUSTIBLES ........... 4 TOPIC PAGE NUMBER TOPIC 1. 2. 3. 4. 5. 6. 7. 8. GENERAL .................................................. 6 INSTALLATION REQUIREMENTS ............ 6 SPECIFICATIONS ..................................... 6 GAS SUPPLY ............................................ 7 GAS CONVERSION .................................. 8 MAIN COMPONENTS & DIMENSIONS .... 9 ASSEMBLY INSTRUCTIONS .................. 10 GAS CONNECTION AND LEAK TESTING .................................... 12 9. SAFE LOCATION OF HEATER ............... 13 9.1 CLEARANCE TO COMBUSTIBLES....... 13 10. ELECTRICAL REQUIREMENTS. ............ 14 PAGE NUMBER 11. LIGHTING, OPERATION, AND SHUTDOWN INSTRUCTIONS............ 15 12. MAINTENANCE ..................................... 16 13. SEQUENCE OF OPERATION....... ....... .17 14. CONTROL WIRING DIAGRAM ............. 18 14.1 WIRING WITH REMOTE CONTROL .. 18 15. Optional Patio Control Panel .................. 19 16. Patio Control Panel Wiring Diagram..... 20 17. Optional Hand Held Remote .................. 21 18. TROUBLESHOOTING ........................... 27 19. REPLACEMENT PARTS EXPLODED VIEW ............................................................... 28 20. LIMITED WARRANTY .......... BACK PAGE 3 4BN/L6-24,4SN/L5 -24 Manual IM100310 RD: MAR, 2010 RL: 1A - BA IMPORTANT SAFETY NOTICES AND WARNINGS: Important Notice To Installer: Installation and repairs must be done by a trained gas service technician. This Operation & Instruction manual is not to be removed from the site. This manual MUST be given in its entirety to the consumer and retained for future reference. Acquaint the end user with Important Information throughout the manual. Warning Improper Installation, adjustment, alteration, service or maintenance can cause injury or property damage. READ the installation, operating and maintenance instructions thoroughly before installing or servicing this equipment. It is imperative that control compartment, burners and circulating air passageways be kept clean and unobstructed. Warning Clearance to Combustibles Do not use, store or locate flammable or explosive objects, liquids or vapors in proximity of the heater. Location of flammable or explosive objects, liquids or vapors close to the heater may cause fire or explosion and result in property damage, injury or death. The clearance to combustible material represents the minimum distance that must be maintained between the outer heater surface and a nearby surface. The stated clearance to combustibles represents a surface temperature of 90F° (50C°) above room temperature. It is the responsibility of the installer and end user to ensure that building materials with a low heat tolerance which may degrade at lower temperatures are protected to prevent degradation. Examples of low heat tolerance materials include vinyl siding, fabrics, canvas, plastics, filmy materials, tri-ply, etc. In addition to stored or stationary material, clearance consideration must also be given to moveable objects such as furnishings and vehicles, and structural objects such as electrical and gas lines, electrical fixtures, and sprinkler heads. Heaters must be located an appropriate distance from sprinkler heads. This distance may be greater than the certified clearance to combustibles. Check the temperature rating of the sprin4 4BN/L6-24,4SN/L5 -24 Manual IM100310 RD: MAR, 2010 RL: 1A - BA kler heads and locate heaters at a safe distance - in some instances the sprinkler heads may need to be replaced by higher temperature rated heads. Check with the local Fire Marshall and your insurance carrier. CLEARANCES TO COMBUSTIBLES MUST BE MAINTAINED OR EXCEEDED: Fig. 1 18” Maintain clearances to combustible materials as shown in Fig. 1: 24” Sides of Reflector: 24 inches Above Reflector: 18 inches Below Reflector: 24 inches 24” CLEARANCES TO COMBUSTIBLES WARNING: 24” CHILDREN AND ADULTS SHOULD BE ALERTED TO THE HAZARDS OF HIGH SURFACE TEMPERATURES AND SHOULD STAY AWAY TO AVOID BURNS OR CLOTHING IGNITION. YOUNG CHILDREN SHOULD BE CAREFULLY SUPERVISED WHEN IN THE AREA OF A HEATER. CLOTHING OR OTHER FLAMMABLE MATERIALS MUST NOT BE HUNG FROM, OR PLACED ON OR NEAR THE HEATER. INSTALLATION AND REPAIR SHOULD BE DONE BY A QUALIFIED SERVICE PERSON. THE HEATER SHOULD BE INSPECTED BEFORE USE AND AT LEAST ANNUALLY BY A QUALIFIED SERVICE PERSON. MORE FREQUENT CLEANING MAY BE REQUIRED AS NECESSARY. IT IS IMPERATIVE THAT CONTROL COMPARTMENT, BURNERS AND AIR CIRCULATING PASSAGEWAYS OF THE HEATER BE KEPT CLEAN. ANY GUARD OR OTHER PROTECTIVE DEVICE REMOVED FOR SERVICING THE HEATER MUST BE REPLACED PRIOR TO OPERATING THE HEATER Do not alter or modify this heater in any way It is beyond the scope of these instructions to consider all conditions that may be encountered. Consult local authorities such as the Fire Marshall, insurance carrier, or safety authorities if you are uncertain as to the safety or applicability of the proposed installation. Refer to Figure 1 and Table above for the certified clearances to combustibles. 5 4BN/L6-24,4SN/L5 -24 Manual IM100310 RD: MAR, 2010 RL: 1A - BA 1. GENERAL The installation must conform with local codes or, in the absence of local codes, with the National Fuel Gas Code ANSI Z223.1 / NFPA 54, Natural Gas and Propane Installation Code, CAN/CGAB149.1, or Propane Storage and Handling Code, B149.2. The heater, when installed, must be electrically grounded in accordance with local codes, or in the absence of local codes, with the National Electrical code, ANSI / NFPA 70, or the Canadian Electrical Code, CSA C22.1. 2. INSTALLATION REQUIREMENTS WARNING: Improper operation, installation, adjustment, alteration, servicing or mainte- nance can cause severe property damage, serious injury or death. Carefully read this User Guide before installing and setting up the heater. This heater must only be installed and serviced by a qualified gas service technician. Failure to comply could result in personal injury, death, fire and/or property damage. The series 4SN/L5-24 and 4BN/L6-24 heaters must always maintain the proper clearance to combustible materials. (Top 18” sides 24” below 24”). Do not use this heater in an explosive atmosphere or indoors. Keep heater away from areas where gasoline or other flammable liquids or vapors are stored. Maintain adequate clearance around air openings into the combustion chamber. This appliance is a gas-fired infrared fixed post patio heater for outdoor use only and shall be used in a well ventilated area, and shall not be used in a building, garage or any other enclosed area. This appliance may be installed with shelter no more inclusive than: With walls on all sides, but with no overhead cover Within a partial enclosure which includes an overhead cover (maintain clearance to combustibles above heater) and no more than two side walls. These side walls may be parallel, as in a breezeway, or at right angles to each other Within a partial enclosure which includes an overhead cover and three side walls, as long as 30 percent or more of the horizontal periphery of the enclosure is permanently open 4SN5 and 4BN6 3. SPECIFICATIONS: Fixed fuel piping system requirements: 4SL5 and 4BL6 Natural Gas Propane Gas Maximum Gas Supply Pressure 7” w.c. 14” w.c. Recommended Gas Supply Pressure 5” w.c. 11” w.c. 3.5” w.c. 10.5” w.c. 38,000 38,000 Manifold Pressure Operating Input Rating (Btuh) Fuel supply must be regulated (regulator field supplied) to provide proper gas supply pressure Electrical: 24Vac Effective radiant range: 8 to 20 foot circle (affected by wind and ambient temperature) Heater net weight: 60 lbs Certification: CSA International USA and Canada 6 4BN/L6-24,4SN/L5 -24 Manual IM100310 RD: MAR, 2010 RL: 1A - BA 4. GAS SUPPLY: NATURAL GAS or PROPANE The heater comes with a flexible hose assembly inside the post with 3/8” male flared fitting for hook-up to a minimum 5” w.c. Natural Gas supply (7” w.c. maximum), OR minimum 11” w.c. LP Gas (14” w.c. maximum). The combination gas control valve in the heater has an integral pressure regulator that reduces gas manifold pressure to the orifice and burner to 3.5” w.c. natural gas, or 10.5” w.c. propane. The gas valve is convertible between natural gas and LP gas, but must be supplied with the gas type that has been set for operation. See Section 5. below for conversion between gas types. Never connect an unregulated gas supply to the heater. Only use the gas type set for operation of the heater. Do not use LP gas if the gas valve and gas orifice are set for natural gas, or do not use natural gas if valve and orifice are set to operate on LP gas. Personal injury, death, and/or property damage can result from using the incorrect gas. Gas supply to this heater requires a gas pressure regulator (not supplied). Heaters may be connected to a regulator individually or in zones. Gas pressure regulators must be for the correct gas type, and properly sized for each particular installation. For your safety a complete gas tightness check of all connections and hoses must be performed at the installation site, prior to use. PRESSURE TESTING OF THE GAS SUPPLY PIPING This appliance and its individual shutoff valve must be disconnected from the gas supply piping system during any pressure test of that system at test pressures in excess of 1/2 psi (3.5 kPa) This appliance must be isolated from the gas supply piping system by closing its individual manual shutoff valve during during any pressure testing of the gas supply system at test pressures equal to or less than 1/2 psi (3.5 kPa) LEAK TEST MUST BE PERFORMED: refer to Leak Test procedures on page 12 Any repairs must be made by a trained and qualified gas service technician. PRECAUTIONS: Periodically, or if the smell of gas is detected, check the whole system for leaks Follow leak test procedures on page 12 Extinguish all open flames. Never smoke while leak testing. If you detect a leak, turn off the gas supply and call a qualified gas service technician, or your gas supplier. Only replacement parts by the manufacturer are to be used for repair. Substitution can create a safety issue and result in serious injury or death, and will void the warranty. Do not use the heater until all connections have been leak tested and are sound !!! 7 4BN/L6-24,4SN/L5 -24 Manual IM100310 RD: MAR, 2010 RL: 1A - BA 5. GAS CONVERSION: NATURAL GAS or LP GAS WARNING: Conversion from one fuel gas to another shall only be done by a trained and qualified gas service technician. Ensure all gas supply and heater components are correct for the type of fuel gas in use. Use only parts and components supplied by the manufacturer to accomplish conversion from one gas type to another. Incorrect or improper conversion can result in personal injury, death, fire, and/or property damage, and will void the product warranty. Conversion from natural gas to LP gas: Requires LP gas orifice (order JP-4009-OL-J from manufacturer), conversion of gas control valve to LP gas (see below), and an LP pressure regulator (field supplied) in the gas supply line Conversion from LP gas to natural gas : Requires natural gas orifice (order JP-4009-ON-J from manufacturer), conversion of gas control valve to natural gas (see below), and a natural gas pressure regulator (field supplied) in the gas supply line 1. Install the proper gas type orifice (see heater exploded view page 29) 2. Convert Gas valve: Conversion from NAT to LP (or vice-versa) is accomplished by inverting the position of the conversion screw in the gas valve body, and replacing the orifice The conversion screw is marked with “NAT ” on one end and “LP ’’ on the other end - the arrow “ ’’ indicates the end to be inserted into the valve Ensure that the gas selection nipple is seated firmly into the valve body for the correct gas type Conversion screw Gas type marked in conversion screw Manifold gas pressure test port 2. Check gas pressures: Ensure the gas supply pressure regulator matches the gas type 3/8” FNPT gas supply Check and set the gas supply pressure to ensure a minimum 5” w.c. natural gas (7” w.c. maximum) or minimum 11” w.c. LP gas (14” w.c. maximum) The heater manifold pressure can be checked at either of the side ports on the gas control valve Remove one of the threaded plugs at the side of the valve Install a hose barb, connect and read manifold pressure with manometer The valve is factory-adjusted to 3.5” w.c. natural gas and 10.5” w.c. LP gas Replace threaded plug after confirming manifold gas pressure - use sealant on threads 8 4BN/L6-24,4SN/L5 -24 Manual IM100310 RD: MAR, 2010 RL: 1A - BA 6. MAIN COMPONENTS AND DIMENSIONS Models 4SN/L5-24 include stainless post and base: N = natural gas, L = propane. Models 4BN/L6-24 has black powder coated post and base: N = natural gas, L = propane. Gas valve and orifice are specific to gas type, all other components are common for all models. Note: A gas pressure regulator(s) is required (not supplied ) to regulate gas supply pressure. The combination gas control valve in the heater has an integral pressure regulator that reduces manifold pressure to the gas orifice and burner to 3.5” w.c. or 10.5” w.c. propane. 32” 813 mm Radiant Heat Emitter Combustion Air Intakes 95” 2410 mm On / Off Switch Mounting Base 18” 457 mm 9 4BN/L6-24,4SN/L5 -24 Manual IM100310 RD: MAR, 2010 RL: 1A - BA 7. HEATER ASSEMBLY & INSTALLATION Tools Needed: (not supplied) Adjustable Wrench or wrench set, Slip Joint Pliers, Phillips Screwdriver-Medium Blade (#2 or #3 blade), Drill and Masonry Bit for lag anchors (if mounting on concrete patio), Plumbing Seal/Tape for Joints, Soapy Water: Spray Bottle or Paint Brush for leak testing. NOTE: The top surface of the heater base is 3 1/2” above patio deck. Ensure the gas supply pipe extends sufficient length above patio deck and heater base to allow installation of shut-off valve; allow minimum 18” of 24Vac power supply wire above deck for connection to heater wiring. Gas Supply 1. Locate the heater base with gas supply pipe up through hole in heater base (4.5” / 114 mm post center to gas supply hole) or adjacent to the heater base (9” / 228 mm from post center to outside edge of base). Feed 24Vac power supply wire up through the center post stub. 2. Install heater base to patio deck using appropriate hardware such as lag screws (qty 3 field supplied) through the holes in the heater base - OR use the supplied brackets (qty 3) as the fastening solution (anchor to deck hardware field supplied). Alternate fastening 3. Insert the 24 Vac power supply wire up into the heater post, and out through the oval port. Install post over the post stub, aligning the oval port in post with slot in post stub. Fasten post to heater base using sheet metal screws (qty 6) provided. 4. Connect gas hose to burner (flare connection) and tighten connection with wrenches. 5. Feed gas hose and 24V wire from burner down the post and out through the oval port at bottom of post. Temporarily secure the burner assembly to post with screws supplied. HAND TIGHTEN the burner fastening screws at this time. Once the heater is connected to the gas supply, the burner head will need to be lifted slightly to allow leak test of the hose connection to the burner. 10 4BN/L6-24,4SN/L5 -24 Manual IM100310 RD: MAR, 2010 RL: 1A - BA ASSEMBLY / INSTALLATION ..... CONTINUED 6. Make gas connection, installing a union and 1/8” NPT plugged tap for pressure testing (both field supplied) between gas supply and the gas hose 7. Connect 24Vac power supply to wires from burner - tuck wiring inside post 8. Install Reflector: Install a washer onto each wing bolt Align holes in reflector to those in the brackets at top of burner reflector to burner with wing bolts. 8. Secure Reflector Assembly to Burner: Check that the post and the burner assembly stand vertically plumb. Make sure all bolts and nuts are tightened. Ensure all gas connection is sound and the installation conforms to local and national codes. Perform leak testing of all gas connections (see page 12) Ensure electrical supply and connection to local and national codes. Setup is now complete. 11 4BN/L6-24,4SN/L5 -24 Manual IM100310 RD: MAR, 2010 RL: 1A - BA 8. GAS CONNECTION AND LEAK TESTING: Locate the gas hose and piping out of pathways where people may trip over them, or in areas where the hose/piping may be subject to accidental damage. NATURAL GAS CONNECTION: Connect the natural gas supply line to the flexible hose at the base of the post as per local or national gas code. The natural gas supply must be regulated, and piping sized accordingly to provide a minimum 5” w.c. (maximum 7” w.c.) gas pressure to each heater. PROPANE CONNECTION: This appliance is NOT for use with a portable LP-cylinder Connect the propane gas supply line to the flexible hose at the base of the pole as per local or national gas code. The LP gas supply must be regulated, and piping sized accordingly to provide a minimum 11” w.c. (maximum 14” w.c.) gas supply pressure to each heater. WARNING This heater must only be serviced by a trained and qualified gas service technician. Failure to comply could result in personal injury, death, fire and/or property damage. LEAK TEST: Prior to putting the assembled heater into service a leak test of all gas supply connections and hoses must be performed. Mix equal parts of water and soap, apply mixture liberally to all gas connections. 1. Ensure that the heater is inoperable - shut off electrical supply to heater. 2. Open the gas supply valve 3. Apply the soap solution generously to all connections and hoses. If bubbles are detected, there IS a leak. Close gas supply valve completely. Call a trained and qualified gas service technician to accomplish repairs. Tighten, repair or replace components at the leaking connection and repeat leak test procedure The heater cannot be put into service until ALL gas leaks have ceased, no matter how small. 12 4BN/L6-24,4SN/L5 -24 Manual IM100310 RD: MAR, 2010 RL: 1A - BA 9. SAFE LOCATION OF HEATER: CAUTION: THIS HEATER IS FOR OUTDOOR USE ONLY See also “Installation Requirements”, section 2, page 6 Locate the heater out of pathways where people may come into contact with it, or in areas where the heater may be subject to accidental damage. This heater can be used to provide radiant heat comfort outdoors, at poolside, spa areas, terraces, patios and work areas, etc. Not for indoor use. (refer to section 2, page 6) It is necessary to provide “wind breaks”, against wind and breezes to maximize comfort. If objects are left under a heater in operation, such objects will be subject to radiant heat. Always maintain at least the minimum certified clearances to combustibles from the heater to any adjacent combustible materials. Refer to Fig 12 below. Install heater on a level, solid and stable surface. Do not install in an explosive environment. Keep away from areas where gas vapours are present or inflammable liquids are stored or used. In case of high winds, completely shut-off the heater and gas valve. Remove reflector dome to secure storage if necessary 9.1 CLEARANCES TO COMBUSTIBLES MUST BE MAINTAINED: The clearances to combustibles represent a surface temperature of 90F° (50C°) above ambient temperature. It is the installer’s and end user’s responsibility to ensure that materials with a low heat tolerance which may degrade at lower temperatures are protected to prevent degradation. Fig. 12 18” 24” 24” 24” Examples of low heat tolerance materials include vinyl siding, fabrics, canvas, plastics, filmy materials, tri-ply, etc. Maintain clearances to combustible materials as shown in Fig. 12: CLEARANCES TO COMBUSTIBLES Sides of Reflector: 24 inches Above Reflector: 18 inches Below Reflector: 24 inches Children and Adults should be alerted to the hazards of high surface temperatures and should stay away to avoid burns or clothing ignition. Young children should be carefully supervised when in the area of a heater. Clothing or other flammable materials must not be hung from, or placed on or near the heater. 13 4BN/L6-24,4SN/L5 -24 Manual IM100310 RD: MAR, 2010 RL: 1A - BA 10. ELECTRICAL REQUIREMENTS The heater, when installed, must be electrically grounded in accordance with local codes or, in the absence of local codes with the National Electrical Code, ANSI/NFPA 70, or the Canadian Electrical Code, CSA C22.1. All wiring and electrical connection must conform to the requirements of the above codes. Single heater requires 24 Vac, 60 Hz electrical transformer sized at 40 VA. If multiple heaters are connected to a single transformer, the proper transformer is 24 Vac, 60 Hz, sized at 40 VA for the first heater, plus 20 VA for each subsequent heaters. For example, four heaters wired together (parallel), require a transformer of 100 VA. It is not recommended to install more than 12 heaters per zone. PROPER WIRING POLARITY MUST BE MAINTAINED, particularly when grouping the heaters in a zone. Total wiring distances of up to 200' must use minimum 16 gauge electrical wire, and wiring distances of over 200' must use minimum 14 gauge electrical wire. The heater when installed must be electrically grounded in accordance with the local codes or, in the absence of local codes, with the National Electrical Code, ANSI/NFPA 70. Malfunction of the heating system will result if the voltage varies by more than +10% or -10%. The heater can be controlled by: The “on / off” switch located in the control cover on the heater An optional radio frequency hand-held remote control Power to the heater or zone of heaters can be controlled / isolated by a switch or switching panel located in a secure central location Total load of all heaters must be considered in determining the required contact rating of the controlling switch. Keep any electrical supply cord or wiring away from any heated surfaces. 14 4BN/L6-24,4SN/L5 -24 Manual IM100310 RD: MAR, 2010 RL: 1A - BA 11. LIGHTING, OPERATION, AND SHUTDOWN INSTRUCTIONS LIGHTING: 1. A gas hose located inside the post supplies fuel to the burner. Prior to each use of the heater inspect any visible portion of the hose that is exposed. If there is any damage or wear to the exposed hose, call a qualified gas service technician to replace the damaged hose with one supplied from the manufacturer. 2. An “On / Off” toggle switch is located on the control cover below the burner. To turn the heater “On” (start ignition sequence) place the toggle switch up to the “On” position. 3. After completing a 3 second pre-purge cycle the direct spark ignition (DSI) control generates high voltage to the spark igniter, and 24 volts to energize the gas valve. 3. The Burner will light and establish a steady flame. 4. Once the flame sensor determines there is a steady flame established, the spark igniter is then de-energized. 5. If a flame is not established during the first 20 second Trial for Ignition (T.F.I.), the unit will perform an inter-purge and a second T.F.I. If a flame is not established during this attempt, another inter-purge and T.F.I. will be performed. If a flame is not established during the third (final) attempt, the unit will enter the soft lockout mode. The soft lockout mode is a 30 minute time-delay after which the unit will reset to try to ignite the gas again, as in normal operation, and will repeat the T.F.I. sequence. 6. If there is a loss of flame during the run mode, the unit will energize the spark within 0.8 seconds and perform a T.F.I., without the gas valve being closed first, this is called Spark Restoration. If a flame is not established during Spark Restoration the unit will repeat the process in step number 5 (above). 10. If a flame is present with the Gas Valve de-energized the unit will enter a hard lockout mode. If there is an internal fault detected within the control, this will also cause hard lockout. Any hard lockout will require service by a qualified service person. SHUTDOWN: 1. An “On / Off” toggle switch is located on the control cover below the burner. To turn the heater “Off” place the toggle switch down to the “Off” position. 2. If the heater will not be used for some longer time period, or requires service, shut off the electrical and gas supplies to isolate the heater. 15 4BN/L6-24,4SN/L5 -24 Manual IM100310 RD: MAR, 2010 RL: 1A - BA 12. MAINTENANCE 1. Prior to each use, inspect the heater for damage - a qualified gas service person must repair or replace any damaged or malfunctioning components as supplied by the manufacturer. 2. Periodically (monthly) perform a leak test of all visible gas connections to ensure safe operation - see page 12 for leak test procedures 3. Annually inspect the gas hose that is concealed inside the confines of the post. Refer to the assembly instructions (pages 10 -11) in reverse order to expose the hose for inspection. If there is evidence of excessive abrasion or wear, replace the gas hose or any worn or defective components only with replacement parts available from the manufacturer. 4. Reassemble the heater and leak test all connections as instructed on page 12. 5. Keep the appliance area clear and free form combustible materials, gasoline and other flammable vapors and liquids 6. Ensure that there is no obstruction to the flow of combustion and ventilation air 7. Visually inspect the burner flame performance. The burner area is likely to attract spiders, especially inside the orifice. Annually before the heater is put into service, the heater should be inspected by a qualified gas service technician for spider webs, insects, and debris around burner and orifice. A plugged injector or orifice will obstruct the gas flow to the burner. This will result in burner malfunction and possible damage. Dark zone at top Uniform ‘orange’ colored mantle Good Burner Performance: Uniform color and heat output Possible uneven yellow-tipped flame, small ‘popping’ sound Poor Burner Performance: Irregular color, dark top, and heat output at bottom A heater that is operating properly will produce a relatively uniform ‘orange glow’ over the surface of the emitting mantel. (Caution: Wind conditions can cool portions of the emitter surface below the temperature of the visual spectrum.) A poorly performing burner will exhibit uneven ‘orange glow’ at the bottom of the mantle, and the top portion of the mantle will be dark (below the visual spectrum temperature) Other indicators of poor burner performance are: A gas ‘smell’ combined with yellow tipped flames on burner Heater does not provide expected heat output capacity Burner makes small popping sounds while operating. Note: When heater is warming up or cooling down a pinging metallic noise is normal. A heater in this poor performance condition requires service by a qualified gas service (Continued on page 17) 16 4BN/L6-24,4SN/L5 -24 Manual IM100310 RD: MAR, 2010 RL: 1A - BA person Refer to trouble shooting guide page 28 8. Periodically clean the heater with a mild detergent solution and rinse with clear water, or use a commercially available specialty cleaner. In particular keep the surface clean and clear at the base of the burner where air is taken in for combustion. A complete replacement parts list is on page 29. Replacement parts are available from a local distributor in your area. Contact information for the manufacturer is available inside the front cover of this manual. 13. SEQUENCE OF OPERATION - GASLITER MICRO 50N IGNITION CONTROL The 4N/L-51/62-24, 44N/L-5/6-24 Patio Heater direct spark ignition, sequence is as follows : 1. 24 volts supplied to the DSI control initiates the 3 second pre-purge cycle. 2. After completing the 3 second pre-purge cycle the DSI control generates high voltage to the Spark Igniter, and 24 volts to energize the Gas Valve. 3. The Burner will light and establish a steady flame. 4. Once the flame sensor determines there is a steady flame established, the spark igniter is then de-energized. 5. If a flame is not established during the first 20 second Trial for Ignition (T.F.I.), the unit will perform an inter-purge and T.F.I. If a flame is not established during this attempt, another inter-purge and T.F.I. will be performed. If a flame is not established during the final attempt, the unit will enter the soft lockout mode. ) (The soft lockout mode is a 30 minute delay time after which the unit will reset to try to ignite the gas again as in NORMAL OPERATION 6. If there is a loss of flame during the run mode, the unit will energize the spark within 0.8 seconds and perform a T.F.I., without the gas valve being closed first, this is called Spark Restoration. If a flame is not established during Spark Restoration the unit will repeat the process in step number 5 (above). 7. If a flame is present with the Gas Valve de-energized the unit will enter a hard lockout mode. If there is an internal fault detected within the control, this will also cause hard lockout. A qualified gas service person is required to repair or replace defective components with parts from the manufacturer. 17 4BN/L6-24,4SN/L5 -24 Manual IM100310 RD: MAR, 2010 RL: 1A - BA 14. WIRING DIAGRAM: 14.1 WIRING DIAGRAM: WITH REMOTE CONTROL RECEIVER 18 4BN/L6-24,4SN/L5 -24 Manual IM100310 RD: MAR, 2010 RL: 1A - BA 15. OPTIONAL 24 Vac PATIO HEATER CONTROL PANEL For central control of patio heater installations: Patio heater control panels are available with switches for 4 zones (PCP-4), 8 zones (PCP-8), or 12 zones (PCP-12). At most, one switch can control maximum two heaters in a zone. The panel is designed to be surface mounted INDOORS only, and preferably located in a secure staff area, beyond the reach of patrons. WARNING Must be used for low voltage (24V) wiring only. To avoid system malfunction, PROPER WIRING POLARITY MUST BE MAINTAINED. PCP-8 shown This panel and all heaters in the system must be installed and grounded in accordance with all applicable local and national codes. Each panel is supplied with switches for 4, 8 or 12 zones (maximum two heaters per zone). Total wiring distances must be considered and low voltage wire correctly sized to suit the total VA rating of the transformer. All low voltage wire must be adequately sized for the total load - total wiring distances up to 200 feet must use minimum 16 gauge electrical wire, and wiring distances over 200 feet must use minimum 14 gauge electrical wire. Confirm the electrical wiring system capacity with ALL heaters ON under full load by taking voltage readings at the ignition module terminals of each heater . To avoid system malfunction, the voltage range must be within 21.6 volts to 26.4 volts (± 10%). Also ensure proper polarity. The patio panel allows for ‘On/Off’ control of up to 4, 8 or 12 individual heaters or zones of heaters (two heaters per zone max.). If a thermostat is to be incorporated in the system, it must be installed in the circuit between the panel and the heater(s). Total load of the heaters being controlled must be considered in determining the contact rating of the thermostat. If the installation provides an individual transformer for each heater, size each of the 24 Vac, 60Hz transformers at 40VA. A single transformer sized for a multiple heater installation, requires 40 VA for the first heater only, and 20 VA for each additional heater. Example: 5 heaters wired in parallel require a calculated 120 VA (40 + 20 + 20 + 20 +20) -> select the closest rated transformer HIGHER than the calculated 120 VA = 150 VA. The best mode of control for each individual heater is by “ON/OFF” switch. If a thermostat is to be incorporated into the system it must be installed downstream of the control panel. Part # Heater Zones Maximum # of Heaters PCP-4 JM-0204-NT Up to 4 Up to 8 PCP-8 JM-0208-NT Up to 8 Up to 16 PCP-12 JM-0212-NT Up to 12 Up to 24 19 Height Width Depth 4BN/L6-24,4SN/L5 -24 Manual IM100310 RD: MAR, 2010 RL: 1A - BA 16. OPTIONAL PATIO HEATER CONTROL PANEL WIRING 24 Vac 20 4BN/L6-24,4SN/L5 -24 Manual IM100310 RD: MAR, 2010 RL: 1A - BA 17. OPTIONAL REMOTE CONTROL - FEATURES AND SPECIFICATIONS Receiver - (Model CMR-1000-24V) Kit: JP-1234-RK Typically Factory Installed - order as optional accessory with the heater Can be ordered as a field installed Kit; Includes: receiver, wires, Velcro Fastener, instructions FEATURES: · ‘House Code’ setting allows unique system “address” - avoids interference with neighboring systems · Works with Hand Set Transmitter YCT-107 · Factory installed in heater CONNECTION: (Wiring Diagram: Section 14.1, Page 18) L N N · Connect 24V AC Line source to “ L ” · Connect 24V AC Neutral source to “ N ” IN IN · Connect heater 24V AC Load to “ ” OUT OUT · Connect heater 24V AC Neutral Load to “ N ” (ground) All wiring should be done by a qualified electrician. The heater, when installed, must be electrically grounded in accordance with local codes or, in the absence of local codes with the National Electrical Code, ANSI/NFPA 70, or the Canadian Electrical Code, CSA C22.1. All wiring and electrical connection must conform to the requirements of the above codes. See Section 10, page 14. NOTE: the ON/OFF switch may be removed from the heater for secure control of the heater using the remote control hand set only. A rubber insert is supplied with the heater to fill the hole in the control cover where the switch was mounted. Hand Set Transmitter - (Model YCT-107) JP-1234-HS OPERATION: 4 ‘Groups’ of 4 button sets = 16 On-Off functions House Code dial switch = 16 position - located on reverse side Battery: 12V (type 23A) one included SPECIFICATIONS: Receiver Hand Set Transmitter Frequency 433.92 MHz 433.92 MHz Power 12/24V +/- 10%; AC 50/60Hz.; or DC < 26μW Max. Rating: 7 Amps Battery: 12V (type 23A) One Battery: 12V (type 23A) is included with the Hand Set Transmitter. Replace the battery in the Hand Set each year at the start of the heating season . FCC ID: PUC YCT-107 IC: 4163A-YCT107 FCC ID: CMR-100 IC: 4163A-CMR1000 This device complies with part 15 of the FCC Rules. Operation is subject to the following conditions: This device may not cause harmful interference, and this device must accept any interference received including interference that may cause undesired operation. The manufacturer is not responsible for any radio or TV interference caused by unauthorized modification to this equipment. Such modifications could void the user’s authority to operate the equipment. This device complies with part 15 of the FCC Rules. Operation is subject to the following conditions: This device may not cause harmful interference, and this device must accept any interference received including interference that may cause undesired operation. The manufacturer is not responsible for any radio or TV interference caused by unauthorized modification to this equipment. Such modifications could void the user’s authority to operate the equipment. 21 4BN/L6-24,4SN/L5 -24 Manual IM100310 RD: MAR, 2010 RL: 1A - BA CAUTION: For safety, switch off main power before connecting, disconnecting or servicing. DO NOT OVERLOAD Do not place two receivers closer than 1 meter apart. Do not use near flammable liquids / vapours (solvents, thinners). OVERVIEW The remote control hand set is used to turn patio heaters ON and OFF from a distance of up to 25 feet. Heaters must have a 24V Direct Spark Ignition system designed for automatic control. One Transmitter Hand Set can control up to 16 individual heaters (receivers) or 16 zones of heaters. ¨ An ‘On-Off’ button must be pressed and held for 2 (two) seconds to activate the heaters/receivers. ¨ There is a ‘purge cycle’ time delay of up to 30 seconds before the heater will ignite. ¨ We recommend that any patio site have at least two Transmitter Hand Sets regardless of the number of heaters – one hand set is a secure back-up if the other is misplaced or malfunctions. PROGRAMMING / SET UP (Read this section prior to installation of receivers). CODE SWITCHES: Adjustable with ‘slot’ type screw driver · House Code: A to P: Allows interference-free programming unique from that of a neighboring system; allows use of separate transmitter hand sets to control different patio areas at the same site · Unit Code: 1 to 16: Unit Code matches to individual ’On-Off’ buttons and Group Selection switch on hand set transmitter; Individual code for each receiver (or zones of heaters / receivers) House Code Unit Code OPERATION: On-Off function with maximum loading of 7 Amps Follow the instructions below to set each receiver to the correct House & Unit Codes. Complete the “Patio Floor Plan sketch and Settings Table” on page 26 of this manual to assist you in the set up process. Refer to the wiring diagrams in this manual for electrical connection of the receiver to the heater ignition system. NOTE: THE LETTERS OR NUMERALS ON THE HOUSE CODE AND UNIT CODE ‘DIAL FACES’ INDICATE EVERY OTHER OR ‘ODD’ SETTING POSITIONS (A, C, E,…) & (1, 3, 5, …). THE ‘EVEN’ POSITIONS (B,D,F,..) & (2,4,6,…) ARE REPRESENTED BY A DOT . Setting the House Code – Adjust with slot screw driver Set the same “house code” on the transmitter and any/all receivers (heaters) that it is intended to control (16 codes available A to P). e.g.: If a hand set transmitter is set to house code “B”, all receivers set to house code “B” will be controlled by that transmitter. The ‘house Code’ ensures that there will be no interference with any neighboring remote controlled appliances. This includes the setting of unique House Codes on multiple Transmitter Hand Sets used to control different zones of heaters at one site. 22 4BN/L6-24,4SN/L5 -24 Manual IM100310 RD: MAR, 2010 RL: 1A - BA Setting the Unit Code – Adjust with slot screw driver CORRESPONDING SETTINGS RECEIVER The Transmitter Hand Set has a ‘Group Selection’ slide switch with 4 settings (I, II, III, IV) and 4 sets ‘On-Off’ buttons (1, 2, 3, 4). Hence there are four ‘On-Off’ buttons for each Group Setting and a total of 16 ‘On-Off’ functions on the Hand Set. see table —> Each receiver has 16 unique ‘Unit Codes’ (numerals 1 to 16). The “Corresponding Settings” table (to the right —>) indicates the receiver setting that corresponds to each combination of Group switch and On-Off button on the Transmitter Hand Set. Set a different ‘Unit Code’ on each receiver so that the Transmitter Hand Set can control up to individual 16 heaters. UNIT CODE TRANSMITTER GROUP SELECTION 1 2 3 4 5 6 7 8 9 10 11 12 13 14 15 16 I II III IV ON-OFF BUTTON 1 2 3 4 1 2 3 4 1 2 3 4 1 2 3 4 NOTE: Within any zone of a patio best comfort is provided by the operation of two (or more) opposing heaters. All receivers (heaters) located in in the same ‘comfort zone’ can be set to the same ‘Unit Code’. All heaters in a common ‘comfort zone’ are thereby activated simultaneously by one common ‘On-Off’ switch. (There is no limit to the number of receivers that can be set to the same Unit Code.) Also see next page for a description of setting codes in graphic format. Complete the “Patio Floor Plan sketch and Settings Table” on Page 26 of this manual to assist you in the set up process. 23 4BN/L6-24,4SN/L5 -24 Manual IM100310 RD: MAR, 2010 RL: 1A - BA SETTING UNIT CODES AND HOUSE CODES Unit Codes (16 Positions): On/Off Switch: Group I selects Channels Group II selects Channels Group III selects Channels Group IV selects Channels Transmitter Front 1 2 3 4 1 2 3 4 5 6 7 8 9 10 11 12 13 14 15 16 ON Select a unique unit code for each receiver or zone of receivers. The combination of Group & On-Off button selection matches to each unit code on each receiver. 1 ON 2 ON 3 ON 4 I House Code II III Unit Code Transmitter Back Adjust Code dial switches with a slot screwdriver Front of Transmitter House Codes (16 Positions): For each area you wish to control with a separate transmitter, select a unique code from A to P. This avoids interference with neighboring control systems. Set the same ‘House Code’ on all Receivers & Transmitter(s) located in the same area. A M E I House Code Back of Transmitter Unit Code As a secure storage option for the Hand Set Transmitter, a set of Velcro strips is provided to fasten the Transmitter in a convenient site location. One Battery: 12V (type 23A) is included with the Hand Set Transmitter. Replace the battery in the Hand Set each year at the start of the heating season . 24 4BN/L6-24,4SN/L5 -24 Manual IM100310 RD: MAR, 2010 RL: 1A - BA Sample Patio Set-up: Dining patio with 3 zones. Each zone has 2 opposing heaters that provide best comfort when operating simultaneously as a pair. The entire patio area will be controlled by one Hand Set Transmitter. Set all ‘House Codes’ to the same Letter Code on one Hand Set Transmitter and six receivers (one in each heater). Heaters H-1 & H-2: Set receiver Unit Codes to “1” - the hand set transmitter will activate both heaters in Zone 1 with Group I / Button 1. H-1 Similarly, set receivers in heaters H-3 & H-4 to “2” and H-5 & H-6 to “3”. Both Zone 2 heaters turn On/Off with button set “2” and both heaters in Zone 3 with button set “3”. H-3 H-5 ZONE 11 ZONE 22 ZONE 33 H-2 H-4 H-6 Alternately, for individual control of heaters, set each receiver Unit Code to a unique number (H-1 to “1”, H-2 to “2”, etc.). Heaters H-1 to H-4 will be controlled by hand set transmitter Group I - Buttons 1 to 4 and heaters H-5 and H-6 will be controlled by Group 2 - Buttons 1 and 2. Kits / Part Numbers for Remote Control systems: NOTE: Items are ordered separately JP-1234-RK REMOTE CONTROL RECEIVER – Typically Factory Installed - order as optional accessory Can be ordered as a field installed Kit; Includes: receiver, wires, Velcro Fastener, instructions JP-1234-HS REMOTE CONTROL HAND SET – Accessory; single item with Velcro fastener Refer to the wiring diagram Section 14.1, Page 18. All wiring should be done by a qualified electrician. The heater, when installed, must be electrically grounded in accordance with local codes or, in the absence of local codes with the National Electrical Code, ANSI/NFPA 70, or the Canadian Electrical Code, CSA C22.1. All wiring and electrical connection must conform to the requirements of the above codes. See Section 10, page 14. NOTE: the ON/OFF switch may be removed from the heater for secure control of the heater using the remote control hand set only. A rubber insert is supplied with the heater to fill the hole in the control cover where the switch was mounted. 25 4BN/L6-24,4SN/L5 -24 Manual IM100310 RD: MAR, 2010 RL: 1A - BA 26 4BN/L6-24,4SN/L5 -24 Manual IM100310 RD: MAR, 2010 RL: 1A - BA LEAVE A COPY OF THIS SHEET WITH THE END-USER Use this area to sketch a ‘Floor Plan’ of the patio and heater layout. Assign a number or letter ‘tag’ to each heater (or pair of heaters) to assist in the set up of receivers. HEATER ‘TAG’ 2 3 4 15 16 1 13 14 4 12 IV 3 11 1 9 2 4 8 10 3 7 III 2 1 5 6 4 4 II 3 3 1 2 I TRANSMITTER GROUP ON-OFF SELECTION BUTTON 2 1 RECEIVER SET UNIT CODE TO CORRESPONDING SETTINGS Complete this “Settings Table” to assist in the set up of receivers and assignment of Hand Set control buttons to heaters. NOTE: 1. Set the ‘House Code’ of any receiver to the same ‘House Code’ setting on the hand set that will control it. 2. It is recommended that any patio site have a spare or back-up Hand Set Transmitter that can be put into service if a first Hand set malfunctions or is misplaced. Set up any spare or back-up hand set(s) to the same ‘House Code’ as the first hand set. 18. TROUBLE SHOOTING PROCEDURES IN THIS SECTION IS FOR QUALIFIED GAS SERVICE PERSON ONLY WARNING: Improper installation, adjustment, alteration, service or maintenance can cause property damage, injury or death. This heater must be installed and serviced only by a qualified gas service technician. PROBLEM PROBABLE CAUSE SOLUTION Burner will not light Gas supply valve may be in OFF position Turn the gas valve ON No power to heater Turn on Power to 24Vac transformer Check for 24Vac at transformer . Check for 24Vac at heater connection. Check 24Vac to ignition control Check for loose wire or bad connection. Air in gas supply system. Purge air from lines. Orifice blocked Check for spider or obstruction in Orifice. Clean or replace orifice. No Ignition Igniter cracked, bent/or not in Visibly check Igniter for good spark. the correct position to ignite. Check if spark Igniter is shorting out from the porcelain to ground. Check Igniter gap setting is approx 3/16” . Burner will not stay lit Sensor cracked, bent/or out of Check burner flame is ‘covering’ Sensor. position. Repair or replace Sensor. Spark does not stop when Control is not sensing the flame Burner lights . Check grounding and all connections. Replace ignition control Low Burner flame Gas pressure is low Check gas pressures with manometer. Spider web or insect cocoon Check for restricted or plugged orifice. 27 4BN/L6-24,4SN/L5 -24 Manual IM100310 RD: MAR, 2010 RL: 1A - BA 19. REPLACEMENT PARTS EXPLODED VIEW 28 4BN/L6-24,4SN/L5 -24 Manual IM100310 RD: MAR, 2010 RL: 1A - BA LIMITED WARRANTY CERTIFICATE FOR GAS-FIRED INFRA-RED PATIO HEATERS : 4SN/L-5-CB-24, 4BN/L-6-CB-24 SERIES The Manufacturer warrants that this product is free from defects in material or workmanship under normal use and service subject to the terms of this document. COMPONENT PARTS - ONE YEAR WARRANTY Subject to the conditions and limitations stated herein, during the term of this limited warranty, we will repair or replace (at our option) any component part of the heater which the Manufacturer’s examination determines to be defective in workmanship or material for a period of one year (1 year) from the date of installation, unless otherwise specified below. This warranty applies to the heater’s original owner, and subsequent transferees and only if the unit is installed and operated in accordance with the printed instructions accompanying the unit and in compliance with all applicable installation, building codes and good trade practices. BURNER AND MANTLE - THREE YEAR WARRANTY The Manufacturer warrants the burner and mantle for a period of three years. (3 years) WHAT IS NOT COVERED This warranty does not cover heating products improperly installed, misused, exposed to or damaged by negligence, accident, corrosive or contaminating atmosphere, water, excessive thermal shock, impact, abrasion, alteration or operation contrary to the owner’s manual or if the serial number has been altered, defaced or removed. This warranty shall not apply if the input to the heating product exceeds by more than 2% of the rated input on the rating plate. The Manufacturer shall not be responsible for any expenses, including service, labor, diagnosis, analysis, material or transportation charges incurred during removal or reinstallation of this product, or any of its components or parts. All labor or service charges shall be paid by the owner. The Manufacturer shall not be liable for any default or delay in performance by its warranty caused by any contingency beyond its control, including war, government restrictions, or restraints, strikes, fire, flood, acts of God, or short or reduced supply of raw materials or products. WARRANTY PROCEDURE To establish the installation date for any purpose under this Limited Warranty, you must retain the original records that can establish the installation date of your unit. If you do not provide such documents, the start date of the term of this Limited Warranty will be based upon the date of unit manufacture, plus thirty (30) days. Failure to maintain the equipment through regular annual service maintenance by a qualified service technician shall void the warranty. LIMITATIONS AND EXCLUSIONS This document contains all warranties made by the Manufacturer and may not be varied, altered or extended by any person. There are no promises, or agreements extending from the Manufacture other than the statements contained herein. THIS WARRANTY IS IN LIEU OF ALL WARRANTIES EXPRESSED OR IMPLIED, TO THE EXTENT AUTHORIZED BY THE LAWS OF THE JURISDICTION, INCLUDING SPECIFICALLY THE WARRANTIES OR MERCHANTIBILITY OF FITNESS FOR A PARTICULAR PURPOSE. It is understood and agreed that the Manufacturer’s obligation hereunder is limited to repairing or replacing parts determined to be defective as stated above. In no event shall the Manufacturer be responsible for any alleged personal injuries or other special, incidental or consequential damages. As to property damages, contract, tort or other claim the Manufacturer’s responsibility shall not exceed the purchase priced paid for the product. All replacement parts will be warranted for the unused portion of the warranty coverage period remaining on the applicable unit. Some Authorities do not allow certain warranty exclusions or limitations on how long a warranty lasts or the exclusions or limitations of incidental or consequential damages. In such cases, the above limitations or exclusions may not apply to you and are not intended to do so where prohibited by law. This warranty gives you specific legal rights. You may also have other rights which vary by each jurisdiction. 5285 BRADCO BLVD. MISSISSAUGA, ON, L4W 2A6 2 SCHWANK WAY, WAYNESBORO, GEORGIA. 30830-8336 SCHWANK INC. INFRASAVE INC. Ph: 905-712-4766 Fax: 905-712-8336 Ph: 1-866– INFRASV (463 7278) Fax: 1-866-724 –9265 29 GP-M424-CX-01A 4BN/L6-24,4SN/L5 -24 Series WARRANTY APRIL, 2005 RL: 1A TM 4BN/L6-24,4SN/L5 -24 Manual IM100310 RD: MAR, 2010 RL: 1A - BA