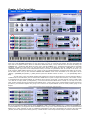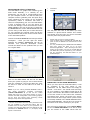
1
A Getting Started Guide: Theory of Operation for using the
Voice Editor & Multi-Part Editor
y
for the following products:
Motif-Rack
Motif-Rack ES
Motif ES
S90 ES
MO6/MO8
“Studio Connections is a joint project lead by Steinberg and Yamaha. There is now a situation which demands a closer
integration between software and hardware in a music production system. The aim of Studio Connections is quite simply
to offer a more convenient environment that will make using hardware and software easier.
There has always been the need for users to endure setting up parameters between the hardware and software
separately. But now, at last, with Studio Connections there is the ability for Total Recall, a seamless solution where setup
and recall issues are now a thing of the past, and where users can operate the hardware as if it were a plug-in within
their software.”
A lofty goal to say the least – but can it really be true? It does require a learning curve, as all things useful do. This article
will hopefully help you get your head around some of the tools, individually and then in concert with each other. Each
Editor has a HELP guide with which you should also familiarize yourself.
Software Versions at time of this article:
Windows XP: Studio Manager 2.1.7; Motif ES (Voice)/(Multi) v2.1.4; S90 ES (Voice)/(Multi) v.2.1.4; Motif-Rack ES (Voice)/(Multi) v.2.1.4; Motif-Rack
(Voice)/(Multi) v.2.1.4; MO6/MO8 (Voice)/(Multi) v.2.1.5;
Macintosh OSX: Studio Manager v2.1.8; Motif ES (Voice)/(Multi) v2.1.4; S90 ES (Voice)/(Multi) v.2.1.4; Motif-Rack ES (Voice)/(Multi) v.2.1.4; Motif-Rack
(Voice)/(Multi) v.2.1.4; MO6/MO8 (Voice)/(Multi) v.2.1.5;
Products covered: Motif-Rack, Motif ES, Motif-Rack ES, S90 ES, MO6/8
This article will start with getting you used to using the Voice Editor while in VOICE mode of your product. We
recommend that you take things in incremental steps. Learn to use the Voice Editor as a standalone with your product.
Then learn how the Multi Part Editor works by itself with your product to setup a multi-timbral/multi-MIDI channel mix.
Then we will attempt to use them together within the environment of your favorite software sequencer as part of the
Studio Manager suite. I think you will find it much easier to learn if you understand what is expected from each
component before you attempt to use them all together.
The Voice Editor works with the internal Voice data of your product – it is the VOICE mode brought to your computer:
Motif ES, MO6/8
- .w7e file (these two products share the same exact Voice Editor file format)
S90 ES
- .s9e file
Motif-Rack ES
- .w9e file
Motif-Rack
- .w6e file
You must understand that this VOICE EDITOR file contains all of your product’s native Voice data. This includes all the
User Voices: both Normal (063/008 ~ 063/010) and Drum banks (063/040). The Voice Editor also gives you access to all
the Preset Bank Voices: both Normal (063/000 ~ 063/005) and Drum Kit (063/032) for your product including the GM
Voices: Normal (000/000) and Drum Kit (127/000). The Preset Voices are provided and can be used as starting points –
you can edit them and store the results to a USER bank location – very often you are customizing Preset Voices rather
than creating Voices from scratch. Preset Voices are considered ROM (Read Only Memory); while User Voices are in RAM
(Random Access Memory). When you edit a Voice, it is copied to a temporary area of your product, called the Edit
Buffer, there you can make changes and use the COMPARE feature to “A/B” it with the original – when you are satisfied
you can store the newly edited Voice to a USER RAM location.
The VOICE EDITOR also gives you access to the Plug-in User Voice banks (063/024, 063/025 and 063/026) – if your
product has PLG slots (there are no PLG slots on the MO-series – so this does not apply to the MO series). These Plug-in
User Voices are Voices that utilize oscillators/waves that are resident on the PLG150-series board but have been
integrated into the effects and controller routing of your host product. Do not confuse these with native Board Voice data
– which are made with and exist totally on the PLG board – Board Voices are “raw” data from native board parameters
and are not yet integrated with the host product. Board Voice data can only be manipulated if the PLG150 board has its
own Editor. The following PLG150 Boards have their own Voice Editor: (PLG150-AN: AN Expert Editor, PLG150-DX: DX
Simulator, PLG150-DR: Plug-in Editor for PLG150-DR, PLG150-PC: Plug-in Editor for PLG150-PC and the PLG150-VL:
VL Visual Editor). The Native BOARD Voice banks are numbered as follows:
PLG150-PF: 032/000
PLG150-AP: 032/001
PLG150-VL: 033/000 – 033/003
PLG150-DX: 035/000 – 035/002 plus there are Voices scattered over 50 other banks
PLG150-AN: 036/000 – 036/002
PLG150-DR: 047/000
PLG150-PC: 047/001
Studio Connections is a work in progress. The concept is simple enough – bringing hardware and software together in a
convenient to use methodology. The PLG150-series Editors are not yet fully Studio Connection compliant – which means
you will have to manually restore the data to the Board. However, I think you will agree that this protocol is very useful
and hopefully you will find a way to make it work for you as it grows. Please feel free to experiment once you have the
basic concepts clear in your mind.
VOICE EDITOR TOOLBAR ICONS
1)
2)
3)
4)
5)
6)
7)
8)
9)
10)
11)
Open – select native format and/or compatible sister products Editor files
Save – save current Voice Editor setup to native format Voice Editor file
Setup – select MIDI Port assignment IN/OUT
Transmit – select a USER bank(s) to transmit to the hardware
Receive – send a bulk request to hardware to receive USER bank(s)
Show List – return to List view of current library
Import – open compatible files to import individual Voices to current library
Monitor – when you select a file name its data is sent to the unit so you can hear it
Edit – click here to open parameter view
Store – save the current Voice to the library
Compare – return to the currently stored (original) sound, pre your edits
2
Chapter 1: The Voice Editor
A view of the Voice Editor main screen (Normal Preset Voice: Ap: Full Grand) shows that COMMON parameters are in
plain view, while ELEMENT parameters are only seen when you click on a specific [EL] button, EL1-EL4 (their data will
open each in a separate window). When we talk about VOICE EDIT mode, we say that there are two levels of editing: the
COMMON level – parameters that affect the entire Voice; and the ELEMENT level – parameters that deal with an individual
waveform component of that Voice. On the physical front panel of the Motif ES; S90 ES; MO6/MO8 you have the
[COMMON] button (a/k/a the Drum Kits/Favorites button) to access the parameters that are overall to the Voice. You
must press the TRACK SELECT buttons [1]-[4] in order to see the individual Element components that make up the Voice.
On the Rack mount units you also have the COMMON and ELEMENT screen views accessible on the front panel via the
[SHIFT] + [COMMON] and [SHIFT] + [PART] buttons (when the SELECT function is active – i.e., the [MUTE/SEL] LED is
OFF).
You will notice in the Voice Editor graphic that logically the routing of each Element to the Dual Insertion Effect is
indicated next to each Element (the red arrows were added above to point out signal flow direction). This makes it easier
to understand how the Insertion Effects are intricately woven into the Voice itself –as each element can be routed to INS
‘A’ or INS ‘B’ or simply THRU (no assignment); in turn the Dual Insertion Effect above is AÆB, so it is easy to see how
each element travels through the Dual Insertion Effects block – before going to the System Effects (Reverb and Chorus
processors); All Elements together are going to be routed to the System Effects (thus the name) before going to the
Output.
--Close-up example of another Voice’s “Effect Routing” -follow the routing--
See if you can follow the above routing: Above ELEMENTS 1 and 3 are routed to EFFECT “A”; a 3-Band EQ. ELEMENT 2 is
routed to EFFECT “B”; the Symphonic effect. ELEMENT 4 does not go to the Insertion Effect block at all. The Dual Insertion
Effects are in “Para” (parallel) so each is completely independent of the other. All Elements are routed to the Large Hall
(Reverb) and the Tempo Control Delay (Chorus). A small amount of the Tempo Control Delay is routed to the Reverb.
3
VOICE EDITOR: Theory of Operation
•
The Voice Editor is a graphic user interface to the
Voice mode. Basically it is the parameters you can
edit in a Voice on your computer screen. The
online manual describes it:
The IN and OUT port must be active in order for
the Editor to be able to select them and
communicate. If you are uncertain of your MIDI
interface and the ports your unit is using – please
consult the documentation of your MIDI interface.
“Thanks to the easy-to-understand graphical interface,
you can edit virtually all of the voice parameters of [your
product] right from your computer — using the mouse
to adjust the virtual knobs, sliders, and buttons and
entering values from the computer keyboard.”
For example, if you are using the Yamaha USB
function of your product as your MIDI interface,
you would set the IN: “Yamaha USB In 0-1” and
the OUT: “Yamaha USB Out 0-1”.
You will find that your computer monitor
(probably color and quite large when compared to
the screen on any synthesizer) makes a wonderful
tool when it comes to sound design. And because
you have tons of disk space on your computer,
the Voice Editor is also a great Librarian tool. It
will allow you to create and store various
customized Voice library files. These include edits
you do to both internal User Voices (Normal and
Drum) and Plug-in User Voices (PLG150-series
Voice data)1.
•
Click on the MIDI PORTS tab and set the MIDI
Ports your system is going to use to
communicate with the synthesizer.
If, for example, you are using the mLAN16E on a
Motif ES or S90 ES you would set the “mLAN MIDI
In” and “mLAN MIDI Out” port(s) as necessary to
communicate with the synth.
Here your mileage will vary according to the
interface and according to your particular musical
setup. But a two-way handshake will be required.
Note: When you are running STUDIO
MANAGER inside a fully Studio Connections
compliant
environment
(i.e.,
Cubase
SX3/Nuendo 3) you will not see a “MIDI
PORTS” tab at the top of the Setup window. In
such a situation the Studio Manager will utilize
the MIDI configuration of the hosting program.
In other words, the MIDI In and Out ports will
be set in the software’s own “DEVICES >
Device Setup…” See special notes concerning
the Studio Manager setup within these
applications.
Launch the STUDIO MANAGER host application
and setup a Default Workspace – when you first
open the Studio Manager the “MODIFY
WORKSPACE” tab of the SETUP view will be
selected (shown below).
Your particular Workspace should include the
editors for the products that you will use in this
particular project. Let’s begin with the just the
VOICE EDITOR. Place your product (Motif ES, S90
ES, MO6/8, or Motif-Rack ES) in [VOICE] mode.
Once you have setup your Workspace…
SETUP… You want to [ADD ->] the “(VOICE)”
Editor to your Workspace. Highlight it and click
[ADD ->]
•
•
Click APPLY
Click OK
This will place the icons of the Editors you have
selected in a Quick Launch window. This window
will contain all of the icons you want to associate
with this particular project session.
•
1
PLG custom Board Voice data, however, must be edited
in the individual Board’s Editor. The Plug-in Voice data
mentioned here is applying the host product’s
parameters to the Board Voice.
•
4
If you right click (i.e., [Ctrl + click] on the
Macintosh) on the icon you can: set your Recall
preferences,
Remove
the
icon,
initialize
a
synchronization session or even Open the editor
(more on these details later)
Double click the icon to launch the Editor
•
•
Once the Editor opens click on SETUP and set the
MIDI IN and MIDI OUT ports so that the EDITOR
can communicate in both directions using the Ports
you made available in Studio Manager.
This is very important: There are two sets of PORT
setups. The previous Setup connected the Studio
Manager host to your MIDI interface. This second port
SETUP connects the VOICE EDITOR application to the
Studio Manager.
•
“Custom user RAM sample wave data” (Motif ES
only) must be backed up and restored separately
via SmartMedia card or USB drive directly to the
Motif ES DIMMs. The Voice Editor will remember
that your Voice used a USER Sample but it will not
store that particular waveform data – you must
ensure that that data is restored by loading your
sample RAM via SmartMedia card or from a USB
drive.
Also take note that on the SETUP page of the VOICE
EDITOR that you can set the MIDI CHANNEL for
communication – this will be important when we get
to using the Editor during Multi operation. The Voice
Editor can be directed to Edit any normal (nonDrum Kit) Voice in a Multi setup as long as you
direct it to the proper MIDI channel (more on this
powerful feature later in the article). For now you
can leave this MIDI channel set at the Basic channel
of your unit, MIDI CHANNEL 1, after all, we are still
in VOICE mode.
In a similar fashion any “custom user RAM PLG
Board Voice” data for the PLG150-AN, PLG150DX, PLG150-DR, PLG150-PC and PLG150-VL
must be backed up and restored separately via a
bulk file using one of the methods as follows:
•
•
•
From the PLG Voice Editor that created the data;
that is, AN Expert Editor, DX Simulator, VL Visual
Editor, or Plug-in Board Editor for PLG150DR/PC
From a special bulk file .w2b (Motif ES and S90 ES,)
via SmartMedia or USB drive directly to the RAM
bank of the PLG Board in question
From the “autoload” Flash ROM area (Motif-Rack
ES); or manually from the Flash ROM area (Motif
Rack)
Summary: In your hardware, all the host
product’s Voice parameters remain after power
down in non-volatile memory, what is volatile and
will disappear is the user RAM samples (Motif ES
only) and the user RAM PLG Board Voice
elements (discussed above). These must be
restored in separate operations. If you do not
restore the user RAM data, the Voice name and all
the host controlling parameters will appear but
the Voice’s target waveform will not be accessed
– and the sound will not be correct. If you do not
restore the custom Board Voice data to the
PLG150 RAM bank of you PLG, the sound will use
a default bank Voice instead (a “placeholder”
voice). Similarly, if you do not restore the user
sample to the DIMMs RAM in the case of a User
sampled Voice no wave data will be heard.
Once you have completed your MIDI Port setup, it
can be recalled each time you open this particular
file. The port setup is memorized in a file. You can
also set your workspace as your DEFAULT – if this
is how you want to work every time. If something
has changed in your MIDI setup (your hardware
connection to the computer, for example) you will
be offered an opportunity to “REMAP” your MIDI
port assignments and they will be shown as “N/A”
(not available). If “N/A” appears you must then
reconfigure your ports – this will only happen if
you have changed something in your basic system
configuration.
Clarification: What is NOT stored
You should make and keep on your computer
appropriate files in the “Voice Editor” format for all
of your Voice Libraries. This will store the Normal
User Voices, the Drum Kit User Voices, and the
PLG150 User Plugin Voices (PLG data not available
on the MO6/8). The Preset Voices are already preinstalled in the VOICE EDITOR. Each file gives you
access to the entire set of Voices currently in your
synth. The data that is not addressed in the file is
as follows:
•
Custom user RAM PLG Board Voice data (Motif ES,
S90 ES, Motif-Rack, and Motif-Rack ES only
w/PLG150 boards). Custom user PLG Board Voices
must be loaded in a separate operation.
Also not stored by either of the Editors is any MIX
VOICE data (bank 63/60 – found in the Motif ES,
and MO6/8 only). The MIX VOICE is a VOICE that
is local to the Motif ES and MO6/8 sequencer and
is not available in the general pool of Voice data.
Let’s Create a VOICE EDITOR file
If you keep your Voice Editor files neatly
organized on your computer you can simply open
them whenever you need them – opening them
takes seconds; while bulking (Import) them, as
we are getting ready to do now, will take several
minutes. However, once you have done this bulk
you will have them to refer to whenever you need
Custom user RAM sample data (Motif ES only). User
samples must be loaded in a separate operation
from a SmartMedia card or USB drive.
5
them. Use your computer’s ability to organize.
The Librarian function of the Editor means it is
easier to pull the book off the shelf when you
need it, then to have to recreate it each time you
want to refer to it. Archiving your Voices in this
manner will also help you when you are using the
Multi-Part Editor. The Multi-Part Editor can access
the Voice Editor files.
Select the Receive Type that is appropriate. If you have
no PLG Boards select “Normal User 1 +2 + Drum User”.
Shown above is the RECEIVE TYPE window for the Motif
ES, your product’s window may have a different set of
options based on the architecture of that product.
Once you have imported your Voices, SAVE this
file to a folder on your computer as
“FACTORY.WxE” (where ‘x’ is dependent on your
product).
As we will see later in this article: in order for the MultiPart Editor to show you the names of the USER Voices
that are currently in your synth, you will need to Import
the currently active Voice Editor file. This action will
allow the Multi-Part Editor to “know” every Voice that is
currently available at the time you did your session. The
Voice Editor and the Multi-Part Editor can be used
together while working within your DAW application.
This will make it very useful when you are constructing
and selecting sounds for your composition – unlike a
script file or instrument definition – it will always be
current. We will have more on this particular
combination function a little later in the article.
You can view the Voices either in
view, where the name, number and
shown, or you can view them in a
where you can see all the names of
the bank at once (shown below).
a “DETAILS”
Category are
“LIST” view,
the Voices in
IMPORT the VOICE EDITOR data
•
•
Click on the RECEIVE icon. (Alternatively you can
select SETUP > “Receive Voice Bulk” or press
[CTRL] + [R] on the PC and [Apple_Command] +
[R] on the Mac).
Select the RECEIVE TYPE and click OK. This will
initiate a bulk dump from the unit.
You change the view by right clicking in the
Library space and select the type you wish to see.
You should make a Voice Editor file for each
library you obtain – keep them organized on your
computer. The Voice Editor file format will allow
you to easily archive and access your custom
voice data. You can use the “Save as…” option so
that you can keep original files as you create any
new Voices. As you work on a project you might
want to keep the relevant Voice Editor file in the
same folder as the project data. The size of your
computer’s hard drive is hopefully large enough so
that the redundancy of keeping variations of files
is not an issue. Remember you will want to keep
the exact set that contains the Voice data you
used for each project. When working on a project
you are not limited to the 16 Voices you select at
the start, but will have access to every Voice in
your product for each session – even if they are
customized.
If you receive a “Receive Timed Out!” error
message it will most likely be due to the
following:
•
•
•
•
You do not have valid MIDI In and Out port
connections – double check your MIDI assignments.
Each system is likely to be different (depending on
what hardware interface you are using) but
remember you have two different Setup pages and
communication must be bi-directional (in and out).
There is an interruption during the transfer
operation.
If you get through about three quarters of the way
through the transfer and then receive a Timed Out
error, this is typically caused by not having the
PORT assignments set properly for the mode you
are in. If the product is in Voice mode, the PORT of
the PLG Boards should be the same as the host
product.
If you are using the Studio Manager application via
USB make sure you do not have the THRU ON/OFF
set to ON – check your MIDI-USB DRIVER setup, set
THRU = OFF.
•
Name and save the File to your computer
Beyond the Basic Concepts
When using the Voice Editor it is very much the
same as editing from the front panel of the
hardware in question. It basically works in an edit
buffer of the unit. Much like when you edit from
the front panel, where when you press [EDIT] the
Voice’s parameters are loaded (copied) into a
special area called the “edit buffer”. Here you can
make changes without destructively destroying
the stored original Voice. You can press the
6
[EDIT] button a second time to implement the
compare function – which reverts to letting you
hear the currently stored Voice. The Voice Editor
software also has a COMPARE function – again
because your edits are actually non-destructive.
Let’s learn about how this works in action with an
example from the Motif ES (if you own another
product it will be similar enough to follow along).
Say you want to edit a Preset Voice. Place the
product in Voice Mode (it will not matter what
Voice you have currently selected in the
hardware) and double click the name of the Voice
you wish to edit. Say we want to edit the Voice
“Dave’s B” Normal Preset 1: Number 1152. You
will see a “Transmitting Bulk Data…” message
indicating that the Voice parameters are being
bulked to the product’s edit buffer. This will allow
you to hear the Voice both from the keyboard icon
in the Editor and from the controlling keyboard
(provided the MIDI channel routing is proper).
Remember we have not overwritten the voice
location – this data is simply in the edit buffer
(typical of the Voice located at USER 1, 001).
The concept of the edit buffer is important to be
aware of because it will help you realize that
changes you make are not permanent until you
actually STORE them. This is going to be doubly
true with the Voice Editor.
The Voice Editor has a method for you to change
a sound and then you can select the COMPARE
option and it will let you hear the Voice as it was
before you edited it. This is very useful when
editing Voice data. This is a process called
“A/B’ing” the data.
(The Compare icon looks like a balance
scale.)
The communication (between software
and hardware) is bi-directional but changes are
not simultaneous. Here is what this statement
means: If you are editing in the Voice Editor – the
change is immediately reflected on the hardware
(the edit buffer of the device changes), however
the reverse is not true. If you make a change on
the front panel of the hardware synthesizer, the
software is not ‘aware’ of it immediately. The only
way the software can be updated is for you to
“store” the Voice to a User location in the
hardware and then “import” the bank (as we did
earlier) via a bulk transfer. This is an important
point to understand.
Let’s say our goal is to change the Dual Insertion
Effect assignment of EFFECT “A” from the “Amp
Simulator” to “Overdrive”.
This means you can make changes with the Voice
Editor and store them in the hardware (the
change is really in the edit buffer of the hardware)
but you cannot simply tweak the hardware and
assume the software “knows” you made that
change. To update the software you must
always “bulk” the stored data from the hardware
to the software or import the Voice Editor file that
represents your current internal Voice situation.
By clicking on the [DETAIL] button next to EFFECT
“A” (shown circled above), you will open a screen
that shows you everything about this effect. Next,
click on the “Amp Sim” effect name and a list of
Insertion Effects appears:
Therefore let’s make this a Rule: When you are editing,
make sure you make your changes in the software Voice
Editor. The Voice Editor will be used to update the
hardware. If you do editing on the hardware you must
update the software by importing, or “bulking”, the
stored data to the software Editor. Since bulking is a
rather long winded process you will find it convenient to
work in the software during your session and do the
housekeeping later. Therefore, during a typical session
you should edit completely via the software.
Using the VOICE EDITOR:
•
Go to [VOICE] Mode
2
The location of this Voice may be different if you are
using an S90 ES, MO6, Mo8 or Motif-Rack ES
7
Highlight the “Overdrive” effect type and click to
make the new assignment. This will return you to
the Effect Detail view. Now you can edit the
parameters of this effect type to your liking while
hearing the edits take place in real time. Once you
have edited this Voice to your satisfaction, you
need, of course, to STORE it. Say we want to
store it to Normal User 2, number 1 – and say you
rename it “OvrDrB3”.
1)
2)
Click on the icon that shows the
keyboard connected to the List by an
arrow (indicating a change in the synth
sound now being stored to the Editor.
Type in your new “Voice Name”, locate “Memory
Bank”: Normal USER 2 and highlight position 1.
Click “STORE”.
You can click the icon of the DISK (Save) and save
the
newly
edited
file
to
your
computer.
Alternatively, you can use the “SAVE AS…” option to
create an entirely separate Voice Editor file with a
different name (recommended when you do not
wish to alter the original file). Then bulk the Normal
User 2 bank to the Motif ES using the TRANSMIT
option.
You can click the icon of the DISK (Save) and save
the newly edited file (or use the “SAVE AS…”
option)… Then you can manually [STORE] the newly
edited “OvrdrvB3” to USER 2 on the front panel of
the Motif ES. (Recommended)
When you [STORE] a Voice by using the front
panel buttons, you can target any USER location
having the same Voice type …(Normal, Drum or
Plug-in). In other words, since we are editing a
Normal Preset Voice, you can store this to either
Normal User 1 or Normal User 2; or Normal
User 3 (Motif-Rack ES only). If you were editing a
Preset Drum Voice you would be able to store it to
User Drum Voice. If you were editing a Plug-in
Voice you would be able to store it to a Plug-in
User Voice location.
This is important: The data in the current Edit
Buffer is being stored to the Voice Editor list on
your computer. The key point is we have not
changed anything permanently in the synthesizer
hardware, yet. You may have figured this out and it is very important to understand: By using
STORE in the Editor we are storing our edit to the
software – we have not changed the hardware’s
memory – we will deal with the hardware in just a
moment. First, let’s deal with STORE and SAVE to
the VOICE EDITOR.
Power User Tip: This method of storing directly
from the product’s Edit Buffer is highly
recommended as a shortcut to ensure that your
hardware is up to date. I recommend this method
because it is faster. You do have to make sure you
target the same normal User bank location you
targeted in the Voice Editor – otherwise your
hardware and your stored file will disagree. It
takes 2 seconds to store from the front panel
compared to the time it takes to bulk an entire
bank.
A close look at the toolbar of the Voice Editor now
shows that we have a File that has been changed
but not saved. The Path to our Voice Editor file is
indicated on the toolbar to the right of the icons
and the heading “VOICE LIBRARY*” both have an
asterisk – this means the currently loaded file has
changed and has not yet been saved. That is, the
data in your open library now differs from what is
on your hard disk. STORE is to the currently open
File - SAVE backs up the File to your hard disk.
Do not continue without a clear understanding of
how the software and hardware relate to each
other. Also while you are learning, it is a good
idea to test out both methods mentioned above so
you can appreciate the time difference involved.
This also means that our hardware (Motif ES) and
our Voice Editor now disagree about the internal
sounds in the USER banks.
Summary points:
1)
2)
In other words, the Voice actually occupying
Normal USER 2, number 1 in the Motif ES is not
the “OvrdrvB3” that we just edited, it is still a
‘Factory’ provided USER Voice called “Vanilla”
from the original Factory Set. The Voice we
edited, however, is still in the edit buffer of the
Motif ES. Bringing the hardware and the software
back into synchronization requires the following:
3)
4)
Once you have STORED the data to a USER
location in the Voice Editor software:
8
Editing in the software Voice Editor program
manipulates the Edit Buffer of the hardware
product. Edits are non-destructive… “store” is
required to make a change permanent.
Storing a Voice in the Voice Editor software is a
separate operation from storing the data in the
hardware.
Storing a Voice edit is a separate operation from
saving it to disk – remember an asterisk indicates
you have made a change to the file you have
opened but you have not yet SAVED that edit to a
permanent file.
The Voice Editor sends a bulk dump to the Edit
Buffer of the product – you can then manually
STORE that Voice data to any compatible User
location within the product. You can bulk an entire
bank (takes minutes) or by double clicking an
individual Voice name you can send just the single
Voice you are working on at the time (takes
5)
In the screen shot above, a file named
“ALLSTOPS.w7e” is open and we are ready to
import any individual Voice, or group of selected
Voices, from it to our current list. I can highlight
and drag and drop a single or a contiguous group
of Voices from this file into our current List. In this
manner you can assemble your favorite Voices
from several different Voice Editor files.3 You can
actually have several IMPORT windows open
simultaneously. The concept is that you are
importing (going and getting) data from other
Libraries and bring them to the currently open
Library. Since this data is stored on your
computer (and in theory you should have plenty
of storage space), it is recommended that you
archive your data with care and use your
computer’s ability to help you organize it. Shown
below, you can have several IMPORT Library
boxes open simultaneously and can “drag and
drop” Voices into your current VOICE LIBRARY.
seconds). Sending a single Voice sends that data to
the Edit Buffer of the hardware.
A Voice in the Edit Buffer of the hardware can be
stored to any USER location matching that type of
Voice. (i.e., a normal Voice to a normal USER
location, a Drum Voice to a User Drum Voice
location, a PLG150 Voice to a PLG User location for
the particular board Slot in question, simply via the
products front panel buttons.
Assembling custom Voice Editor Libraries
Under the EDIT pull down of the Voice Editor you
will find the “Import…” option. This will allow you
to select, audition (Monitor box checked), and
drag and drop Voices from various Voice Editor
files stored on your computer. Eventually, you will
have several different Voice Libraries for your
product – we mentioned that the Voice Editor can
act like a Librarian. This means you can use it to
assemble Voices from several different files – you
do this by IMPORTING the Voice data to the
current open Library.
For example, you have several Voice libraries for
your particular product and you want to load
individual Voices to your current setup, the
IMPORT function will allow you to open and select
individual Voices or groups of Voices from any
compatible Voice Editor file. This is why it is so
important to store all your sound sets in the Voice
Editor format.
Remember the Voice Editor can often open more
than just its own native file format. For example,
the S90 ES (2005) Voice Editor can open files
from Motif-Rack ES (2004), Motif ES (2003),
Motif-Rack (2003), S90 (2002), and Motif (2001).
The Motif ES Voice Editor can open files from the
Motif-Rack Voice Editor, and the Motif Voice
Editor. The MO6/MO8 Synthesizers can open
Motif ES, Motif-Rack ES, Motif and Motif-Rack
Voice Editor files.
This “import” feature will be of particular interest
when we start using the Voice Editor in
conjunction with your DAW sequencer and the
Multi-Part Editor. You can assemble individual
voices from your various Library files making a
customized voice set for each composition. Rather
than being limited to the 128 or 256 or 384 User
locations for all your compositions – you will have
as many locations for each composition!
When using the Editor you will want to check the
“FILES OF TYPE” option when you select OPEN to
see what compatible products your unit will also
read. On the Macintosh this is referred to as
“ENABLE”.
Once you have the Voices Imported to your
current Library – you must then transmit this to
your product. Remember the hardware must be
updated with the new data.
Mastering your Synth and its Editor
“All the best learning is self-learning”… this was
told to me by one of my grade school teachers
and I find it is very important for users to discover
3
If your Voice data contains user sample data, the Voice
Editor does not manipulate this data. You will have to
ensure that this data is loaded and referenced manually.
9
from ROM, the PLG150 board will ‘point’ to a
complete Board Voice. This Board Voice will be
resident on the PLG150 board itself. See “Editing
a Plug-in Voice” below.)
relationships for themselves. They are often called
“Aha!” moments or “Eureka!” moments – times
when you discover for yourself the relationship
between functions. When you find a parameter in
the Voice Editor it is a good thing to go find that
parameter on the hardware synthesizer’s front
panel. This will help you in ‘visualizing’ the front
panel in your own mind and will take your
understanding of the product to the next level.
You cannot do it in one sitting but over time this
method can make mastering the synthesizer
possible. If you want to ‘just get back to playing
music’, you need to get yourself to a point where
the synth engine’s architecture is second nature…
(it is just like getting used to reading bass clef –
at first a big stumbling block for the studying
keyboard musician, but soon becomes second
nature through practice). You want to get to a
point where it ceases to be something you have to
scratch your head about but where it is a part of
your “toolkit”. After all, a guitarist cannot be
called an electric Guitarist and not know how to
setup their amplifier. You wouldn’t hire a guy you
told you he played electric guitar but didn’t know
how to get a sound out of his amplifier... likewise
you cannot consider yourself a synthesizer player
until you can master the interface of your
synthesizer. Start with relating functions in each –
software-to-hardware; hardware-to-software.
However, internal Voices always reference ROM
samples from the library of waveform data built-in
to the product. The Motif ES, Motif-Rack ES and
MO6/8 each have a library of 1,859 ROM
waveforms; the original Motif-Rack has 1,309
ROM waveforms; while the S90 ES has 1,935 ROM
waveforms. The OSC/WAVE page will point to one
waveform (multi-sample) for each active Element
within the Voice.
In the software this is shown by clicking on the ELEMENT
(EL1 – EL4) to launch the “details” of each Element (EL1
circled below)
Editing a Normal Voice
For example, let’s talk about a very important
screen in the synthesizer. We will use the Motif
ES as the example here… the Oscillator/Wave
page. This is where a Voice actually indicates what
waveform is used for this particular Element.
Voices are made from up to four separate
Elements.
The Voice Edit screens look exactly the same in the S90
ES, MO6 and MO8 hardware and in the S90 ES,
MO6/MO8 Voice Editors (with the exception that they
will not have any User Waves). User Waves are available
only in the Motif ES because it has a built in sampler.
The Oscillator/Wave screen for the Motif-Rack
and Motif-Rack ES is found by pressing [EDIT]
and navigating to the ELEMENT level. This is done
by turning the [MUTE/SEL] LED to OFF (which will
select the Element “Select” function), then using
the lower row of buttons to select Element 1-4
and the PAGE [<]/[>] buttons to select the “OSC”
screen... (shown below):
If you have been exploring your unit you can tell
from the screen shot above (from the Motif ES)
that we are in VOICE mode (indicated by the tab
in the upper left corner); we are in EDIT mode
(the inverse video “E” indicates values have
changed and have not yet been stored); we are
on the Element Edit level, looking at Element 1
(EL1);
Function
button
[F1]
is
pressed
(OSCILLATOR); Sub-Function [SF1] is pressed
(WAVEFORM);
This page will indicate the sample waveform,
either “preset” or “usr wav”, or in the case of a
PLG150-series Board it will indicate the native
Board Bank and native Board Voice that is
referenced. (Instead of accessing a sample wave
10
Mode to accomplish the same thing… (at least for
the AN, DR, DX, PC and VL boards). Although the
front panel screen is slightly different in the MotifRack and Motif-Rack ES – the theory is the same.
Start to make the associations between a
parameter in the software and where that
parameter is located in the hardware, and vice
versa. This exercise will cause associative wrinkles
to form in your brain and actually the process,
when done a little at a time, will bring many “Aha”
moments – that’s the wrinkles making an
associative connection in you brain. It does not
hurt – done a little at a time, trust me!
Editing a Drum Voice
The DRUM VOICE – often misunderstood, but the
Drum Voice is a kind of super Voice in that each
note is a different instrument by itself. Each note
has its own volume, pan, filter, envelope, etc.,
etc. Each note can house a velocity swap and
have its own routing to the effect processors.
Necessarily editing the Drum kit Voice is a bit
different from editing a Normal Voice or even a
Plug-in Voice. As we will learn there are some
limitations that go along with all the flexibility you
get when programming a drum kit… The trade off
for complete editing on a per note basis is that
you will not be able to edit a Drum Voice while
you are in a Multi-timbral setup.
Editing Plug-in Voices (not available on MO6/8)
While we are discussing this very important
screen (where the host product’s Voice accesses
the waveform) we should also mention that the
User Plug-in Voice works in a similar fashion.
A Normal instrument Voice will have Elements – if
it is an internal Preset or User sample-based Voice
it will recall up to four Element waveforms from
memory and if it is a PLG Voice the PLG sound is
treated as a single Element. However, a Drum Kit
will have a different EDIT page for each of 73
different KEYS.
Above you can see how a PLG150-AN Voice
accesses a Bank and Voice number located on the
PLG150 board. The screen above is the same in
the S90 ES. They treat the Plug-in Voice as single
Element Voice. Instead of pointing to a ROM
sample, the Plug-in Voice points to a BOARD Voice
on the PLG Board.
Shown above is the COMMON parameters – you press
the [KEY C0-C6] button to drop to the individual KEY
edit level. Use the keyboard icon to select the individual
Note you want to edit.
In the circle above you can see how a Plug-in User
Voice targets a specific PLG Board and how it
access a Board Bank and Voice number. In the
shot above the PLG150-AN is the selected Board,
and the Voice number is from bank 036/002
(which is the user RAM bank of the PLG150-AN
board). The Voice number will only be referred to
by its number; in this case: “001 USER 1” not by
its name. In order to determine what the name of
this particular PLG150-AN wave is you would need
to open the AN Expert Editor. There is a trade off
for all the custom Voice programming you can do
with the PLG board’s own editor – you will not be
able to edit a PLG-based Voice while you are in a
Multi-timbral setup from the host product’s MultiPart Editor. We will discuss a bit later how you can
use the PLG Board’s Editor while you are in Multi
11
Above a Drum Key screen; note C1 is selected.
You can see the various parameters associated
with this individual Key of the kit. You can select a
Key with the small keyboard icon at the top to
view each note in turn. Each key has an
oscillator/wave
selection,
Pitch,
Filter
and
Amplitude parameters, EQ, Level, pan parameters
and routing to either the Dual Insertion Effect or
the System Effects (reverb or chorus).
When working with Drum Kits from the Motif-Rack
or Motif-Rack ES you can update the current KEY
Edit Buffer by holding the [SHIFT] button and
then touching a note on your controller.
12
Chapter 2: Multi-Part Editor
A view of the Multi-Part Editor main screen shows the individual Parts as mixer channels; pressing the “DETAIL” button at
the bottom of each channel accesses the Part parameters. Quick Edit access is available on the main screen to Volume,
Pan, Mute, Solo, Reverb Send, Chorus Send, 3-band Part EQ and Voice Select/Bank Select. The COMMON edit parameters
that affect the entire Mix setup are accessed via the Master channel at the far right of the Mixer. Here quick access allows
you to control Master Volume, select Master Effect, select the System Effects (Reverb and Chorus) and access four of the
bands of the Master EQ. Clicking the “DETAIL” button on the Master Channel give you access to the parameters shared by
the entire Mix (Common): Arpeggio settings, details editing of the System Effects (Reverb and Chorus processors), Master
EQ parameters, Master Effects parameters, Insert Switch assignments and Control Number assignments.
The Multi Part Editor will be able to store not only the current multi-timbral Mix (internal sounds only) but it also will store
the portions of the Voice library that is currently in the host products. Here is what is meant by this: when you IMPORT
VOICE option (found by clicking FILE on the toolbar and selecting the option) you can import the Normal User and the
Drum User bank Voices from the VOICE EDITOR file currently in your synthesizer. You can restore these Voices when
necessary to the hardware using the SYNCHRONIZE function (Total Recall).
Right click on the icons in your Studio Manager Workspace to configure your personal Preferences. Remember it may not
always be necessary to use the Total Recall synchronization when you reopen a project. Knowing what voice data remains
in your product is important – only when data has been altered or new or other Voices have been loaded into your
hardware do you need to perform a SYNCHRONIZE function. You may have a USB drive or SmartMedia card routine setup
that will restore the Voice data to your hardware and the Total Recall function may only be a long term backup option.
It may seem frustrating that the Multi Part Editor does not address the PLG Parts. But ultimately the PLG150 engines are
really separate synthesizer engines and will be addressed from your computer via a separate MIDI Port entirely. We will
discuss methods for you to address this situation.
13
MULTI EDITOR: Theory of Operation
The Multi Editor is a graphic user interface to the
Multi mode. Basically, it is virtually all4 the
parameters you can edit in a Multi-timbral setup
on your computer screen. You will find that your
computer monitor (probably color and quite large
when compared to the screen on any keyboard
synthesizer) makes a wonderful tool when it
comes to manipulating your mix. The Multi Editor
is also a Librarian tool. It not only stores the
current mix settings, it also can house the current
USER VOICES in the unit at the time. It does this
by IMPORTING the current VOICE EDITOR file that
you are using. It will allow you to create and store
on your computer the internal Voices and all the
Part parameters that pertain to the internal Voices
of the associated product.
•
•
Click APPLY
Click OK
This will place the icons of the Editors you have
selected in a Quick Launch window. This window
will contain all of the icons you want to associate
with this particular project session.
Launch the STUDIO MANAGER and setup a Default
Workspace – when you first open the Studio
Manager the MODIFY WORKSPACE tab will be
selected. Your particular Workspace should
include the editors for the products that you use
on a regular basis.
•
•
•
Click on the MIDI PORTS tab and set the MIDI
Ports your system is going to use to communicate
with the synthesizer. The IN and OUT port must
be active in order for the Editor to be able to
select it.
Double click the icon to launch the Editor
Click on SETUP and set the MIDI IN and MIDI OUT
ports so that the EDITOR can communicate in both
directions.
For now, do not assign the REMOTE IN and REMOTE
OUT ports (these will allow you to do some
advanced applications – and is the subject of a later
section of this article). Just set the normal MIDI IN
and MIDI OUT ports as required by your interface.
We are connecting the Multi-Part Editor to your
Studio Manager.
IMPORT the current VOICE EDITOR file
When you first open the Multi-Part Editor, it will
be “unaware” of the User Voices in your
synthesizer. All the USER Voices will simply be
named “--Init Voice”. You should make and keep
on your computer, Voice Editor format files of all
of your Voice banks. We created a Voice Editor file
in the first section of this article that contained
the Normal User Voices, the Drum User Voices,
and the PLG150 User Plugin Voices (Preset Voices
are already installed in the VOICE EDITOR and the
MULTI-PART EDITOR). This will give you access to
the entire set of Voices currently in your synth.
Note: If you are running STUDIO MANAGER inside a
fully
Studio
Connections
compliant
environment
(Cubase SX3/Nuendo 3) you will not see a MIDI
PORTS tab at the top of the Setup window. In such a
situation the MIDI configuration of the hosting program
will be used. See special notes concerning Studio
Manager setup within these applications.
4
Like the Voice Editor there are some parameters that
are not available in the Multi-Part Editor that are
available from the front panel of your synthesizer. For
example, the Multi-Part Editor does not address the edit
parameters for external devices: i.e., AD Inputs, mLAN
Inputs or PLG boards.
You will need to Import the current Voice Editor
file for the Multi-Part Editor to be able to show
you the names of the USER Voices that are
14
currently in your synth. If you do not import the
Voice Editor, then the USER Voices will be
identified by their number and as “INIT VOICE”.
The IMPORT action will allow the Multi-Part Editor
to “know” every Voice that is currently available
at the time you do your session.
•
Click on the FILE option on the Multi Editor’s toolbar
and select “Import Voice…” or use the quick keys
[CTRL]+[I]
•
A navigation window opens. Find the folder where
you keep your Voice Editor files
Highlight and click OPEN
•
We recommend that you archive your Voice Editor
files and use the Import function, as it is always
much faster to Import the file than to request and
receive the bulk.
Tips and Tricks and Basic Concepts
When using the Multi Editor it is very much the
same as editing from the front panel of the Motif
ES / MO / S90 ES / Motif-Rack / Motif-Rack ES. It
basically works in an edit buffer of the product.
Much like when you edit from the front panel,
when you press [EDIT] the parameters are loaded
into a special area of the hardware called the edit
buffer – while the edit buffer is active you will see
an inverse video “E” on the top line of the
hardware. You can make changes without
destructively destroying the stored Voice’s
parameters, which are now hidden. Once you
have made a change to the mix (from its last
stored state) you will see an asterisk (*) next to
the name.
This concept is important to be aware of because
it will help you realize that changes you make are
not permanent …until you STORE them.
The communication is bi-directional but changes
are not simultaneous in both directions. Here is
what this statement means: If you are editing in
the Multi Editor – the change is immediately
reflected on the hardware (the edit buffer of the
device changes), however the reverse is not true.
If you make a change on the front panel of the
synthesizer, the software is not ‘aware’ of it.
This means you can make changes with the Multi
Editor and store them in the hardware (the
change is really in the edit buffer of the hardware)
but you cannot simply tweak the hardware and
assume the software knows you made that
change. To update the software you must always
bulk the stored data from the hardware to the
software by requesting the data via Receive Multi
Bulk – the icon looks like a MIDI cable with an
arrow going into it.
Once you have imported your Voice Editor file you
will able to see and select any Voice currently in
your product by name and location.
Alternatively, you could initiate a Bulk Dump
Request from the Multi-Part Editor. This will cause
the synth to dump the requested banks. To do
this click on the “SETUP” option and select
“Receive Voice Bulk”. This will allow you to select
the Receive Type as follows:
Receive Multi Bulk icon
Rule: If you are editing make sure you make your
changes in the software Editor. The Editor will be used
to update the hardware. If you do editing on the
hardware you must update the software by importing or
bulking the data to the software Editor after you have
stored the change in the hardware.
The [DETAIL] buttons located at the bottom of
each Mixer channel will launch the PART Edit
parameters (this is the same as pressing EDIT on
a Motif ES and then pressing a Track Select button
[1]-[16]). The [DETAIL] button on the main fader
15
will open the COMMON Edit parameters. Again
Editing is divided into COMMON (overall) and
individual (PART) parameters.
What about the PLG150 Boards and the
Audio Inputs, are they addressed in MPE?
The PLG boards are treated as external synthesizers
(and for all practical purposes, they are). The PLG150AN, PLG150-DR, PLG150-DX, PLG150-PC and PLG150-VL
each has its own VOICE EDITOR and are addressed
typically when using an external sequencer on a
separate MIDI port. All PLG150 Boards, by definition are
single Part Boards – this means the can only play a
single Part in a multi – and therefore can only occupy a
single MIDI channel5. When you set a PLG150 to PORT
2, all PLG150 Boards will change to PORT 2. Each needs
only one MIDI channel on Port 2 – therefore they all can
exist on the same port (and they must). The PLG150-AP
and PLG150-PF do not have their own separate
standalone editors.
REMOTE CONTROL SETUP
You will notice in setting up the MIDI ports for the
Multi-Part Editor that you have an option for
Remote Control Ports as well as your normal MIDI
IN and OUT Ports. The Remote Control option will
allow you to use another piece of hardware to
control the Multi-Part Editor – which in turn will
control the physical synthesizer. For example, in a
large network system you may have a Yamaha
digital mixer (like the Yamaha 01X) that has the
ability to work as hardware Remote Control. The
01X could be used to select Voices, control the
EQ, control send levels etc. In a scenario where
you are working with a Motif-Rack or Motif-Rack
ES you can use the Motif ES or S90 ES as a
Remote Control device – this means you never
have to lean over to the rack unit in order to
make a change you can setup the Remote Control
Ports so that the REMOTE layer of the Motif
ES/S90 ES allows you to manipulate the Multi of
the Rack unit. This is a real practical use for the
Remote Control function. However, if you are
simply working with a single keyboard Motif ES or
S90 ES it may not be that useful to navigate via a
separate edit layer. But in large multi-studio
facilities you can see the advantage of being able
to use hardware that might physically be located
in another room or simply located at the bottom
of the rack or across the room. Cool!
The only references you will see to the PLG boards in the
Multi-Part Editor are to the internal Insertion Effects that
they might be using within this particular Multi. The
Multi-Part Editor will address the product’s internal
sound engine on the basic MIDI Port (fixed as port 1).
The PLG150 boards will occupy their own MIDI Port and
be addressed by their own Editors, each on its own MIDI
channel.
The Audio Inputs, which include the AD (analog-todigital) inputs and the mLAN (digital-to-digital) inputs
(Motif ES/S90 ES only), are not addressed as a separate
PART in the Multi-Part Editor. They are external
devices. You can activate the Insertion Effect Switch to
the AD input but beyond that you will not see the AD or
mLAN AUDIO INPUT page represented in the Multi-Part
Editor. The External Instrument functions will be
addressed by another portion of the Studio Connections
protocol called AUDIO INTEGRATION. Audio Integration
allows you to use a Studio Manager Component
(software editors) as a VST instrument or a VST effect
by using the "External Instrument" function which is new
to CubaseSX3.1/Nuendo3.1. And will be the subject of a
separate Power User article. Audio Integration is Phase
II of the Studio Connections protocol and deals with
integrating your external hardware’s audio output, in
realtime, so you can use unique audio functions such as
‘mixdown’ and/or ‘freeze’.
The 01X digital mixer has a GENERAL REMOTE
mode (using MIDI PORT 5) that can be used to
manipulate Yamaha hardware like the Motif, MotifRack, Motif ES, Motif-Rack ES, S90 ES, MO6 and
MO8. When properly routed your control data
travels from the 01X General Remote layer to the
Multi-Part Editor and the Multi-Part Editor in turn
changes the hardware. So when you make a
change in the 01X screen by parameter it is
simultaneously reflected in the software (MPE)
and on the hardware’s front panel.
You can assign any of the internal Parts to the
assignable outputs: L&R, asL&R, or the 14 individual
assignable outputs and L&R associated with the mLAN
busing environment. This is handled in the Multi-Part
Editor by clicking the [DETAIL] button at the bottom of
an individual channel and the GENERAL tab > OUTPUT
SEL (Output Select). So your physical output
assignments will be memorized and recalled. What is not
memorized and recalled by MPE are any inputs from
external devices (analog or digital).
The Motif ES and S90 ES have a REMOTE mode
(using typically MIDI PORT 3; “General”) that can
be used to manipulate Yamaha hardware. When
properly routed your control data will travel from
the ES General Remote layer to the Multi-Part
Editor and the Multi-Part Editor in turn change the
hardware. So when you make a change in the
screen parameter it is simultaneously reflected in
the software (MPE) and on the controlled
hardware’s front panel.
If it becomes necessary for your project to store these
external devices and their particular settings you can do
so by storing and backing up the data as usual in an ALL
data file. Alternatively, the Motif ES/MO6/MO8 has
some 32 Mix Templates that are stored in battery-
NOTE: If you are not going to be using the REMOTE
mode – set the REMOTE IN and REMOTE OUT PORTS to
“Not Assigned”. Never duplicate the PORTS used for
normal MIDI operations – otherwise you will have
crossed messages, detuning, and other weird goings on.
5
If you are working with an external DAW (Digital Audio
Workstation) software package, you can always record
the PLG Parts as audio tracks. This has the advantage of
allowing you to reuse your hardware and build multiple
instances of the PLG in your project.
16
backed parameter RAM that can store settings for both
PLG board configuration and AD/mLAN Audio Input
settings. The S90 ES has 64 Multi setups that can be
backed up to an ALL data file and these remain in
memory after power down for storing AD/mLAN and PLG
settings. The Motif-Rack and Motif-Rack ES have 128
Multi Setups that remain in memory after power down
and will store your PLG configuration (The Rack unit
have no Audio Inputs to worry about).
MIX VOICES are local Voice locations to the on-board
sequencer of the Motif ES and MO6/8 and are not
available to the Multi-Part Editor. They are, in fact,
unnecessary when you are working with an external
sequencer. If you already have compositions that use
Mix Voice locations – you will want to copy these Voices
into the general population (USER banks) so that they
can be stored and accessed via the Voice and Multi-Part
Editors.
17
Chapter 3: STUDIO MANAGER
Using the Multi-Part Editor and the Voice Editor together during a Session
Studio Manager can be used along side your favorite software sequencer. And as mentioned earlier, it can run seamlessly
inside Cubase SX3 or Nuendo3. Yamaha and Steinberg have been working on this protocol to make the files generated
by Studio Manager an integrated part of your Cubase Project (.cpr) or Nuendo Project (.npr) file. Depending on your
particular software package and MIDI interface your setup may be slightly different.
(Note: the version is v2.1.7 on Windows XP; v2.1.8 on the Macintosh at the time of this article).
In an application like SQ01v2, the Studio Manager (host) is not necessary as this software is fully OPT compliant – this
means the Editors run and are stored automatically within the environment and no separate host is necessary to house
the editors. This makes sense, as the Editors were quite integrated into SQ01 even before the Studio Connections protocol
was developed.
If you are running any other DAW sequencer application, the Studio Manager can be run as a separate concurrent
program. You can save a separate .YSM (Yamaha Studio Manager) file and manually reinstate your session. Studio
Connections is not limited to just Yamaha products either, released in 2005 was the GTRC (Generic Total Recall
Component) – this development tool allows you to create a bulk manager for any existing gear (no matter the
manufacturer). If you own a product that does not have an existing Editor this does not mean it has to be excluded from
the total recall functions. You can setup a GTRC for that product and manage its settings. Being able to go to a specific file
and restore your session is what this whole thing is about… and it should not matter what company made the product. If it
can bulk dump its data, then you can create a GTRC for it, even create an icon for it and use it within STUDIO MANAGER.
MIDI Data is bulked to the various products and restores your programs. Synthesizers, Effectors, and Digital mixers are
apart of the “studio”. All the data is housed in a single integrated file. If you are using Cubase SX3 or Nuendo3 (or
SQ01v2), the data is seamlessly bundled with the Project when you save. If you are using any other software DAW – you
save a separate .YSM (Yamaha Studio Manager) file.
18
Hardware/Software Integration:
The Dream becomes Reality
It is possible to work with the two editors together
on any of the extended system products (Motif
ES, Motif-Rack ES, and S90 ES – including the
new MO6 and MO8). With some knowledge of how
they are integrated together you will be able to
edit ‘normal’ VOICE sounds in the context of the
multi-timbral setup. This function is not available
on the original Motif or original Motif-Rack.
When you want to edit a normal Voice within the
active mix you simply select that Part (via the
Track Select buttons) and press [F5] VCE ED – the
data for that Voice then is loaded to that Part’s
Edit Buffer. You can access virtually all of the
parameters of that Voice and store it. You could
store either to a special MIX VOICE location
(63/60 which is only local to the Motif
ES/MO6/MO8 sequencer) or to the external
sequencer accessible USER 1 (63/8) or USER 2
(63/9) bank.7
Let’s start our discussion of this with how the
hardware works – after all, the software is based
on what you can do in the hardware. In the Motif
ES, MO6 and MO8 when you are in the MIXING
mode you can reach several parameters
immediately via the quick access [F1]-[F6]
buttons. While working with your multitimbral/multi-MIDI-channel setup you can press
the [F5] VCE ED button and launch into the Voice
Edit mode for any normal Voice. (When we say a
‘normal’ Voice we specifically mean a non-drum
kit, non-Plug-in Voice).
For the S90 ES: when you are in MULTI mode of
the S90 ES you can access the Voice Edit function
via [F5] VCE ED; Here’s how:
•
Press the [MULTI/SEQ PLAY] button to
select MULTI mode _ tab in the upper left
corner indicates the Mode.
•
Press [F3] VOICE to view the quick access
screens; then press [F5] VCE ED
Again it gives access to editing parameters for any
normal Voice (i.e., non-drum, non-plug-in Voice)
This allows you to customize any normal preset or
user Voice for this particular mix. You are able to
take advantage of Voice Edit while you are in a
multi-timbral mix setting. This means you can edit
normal Voices while the sequencer is active –
without having to exit the Multi mode. Typically,
you might think you would have to leave MIXING
mode and return to VOICE mode in order to make
any changes to the Voice. But this access to Voice
Edit allows you to remain in the context of the
music you are working on (multi mode) and edit
the voice data. In the above screen shot any of
the Parts with the exception of Parts 02 and 03
can be edited by pressing [F5] VCE ED. Parts 02
and 03 are Drum kits6 (bank 63/32) and cannot
be edited in a mix environment.
Voice data from the following Banks are Voice Edit
capable from within an S90 ES MULTI setup:
Normal Preset 1-4:
Normal User 1-2:
Normal GM:
63/0 – 63/3
63/8 – 63/9
0/0
For the Motif-Rack ES: When in Multi mode you
can access the Voice Edit mode – press [MULTI] a
second time to view the quick access screen.
[SHIFT] + [EDIT] will drop you into full edit on
any Normal Voice (non-drum, non-Plug-in Voice).
Voice data from the following Banks are Voice Edit
capable from within a Motif ES, MO6 and MO8
MIXING setup:
Voice data from the following Banks are Voice Edit
capable from within a Motif-Rack ES MULTI setup:
Normal Preset 1-6:
Normal User 1-2:
Normal GM:
Normal Preset 1-6:
Normal User 1-3:
Normal GM:
63/0 – 63/5
63/8 – 63/9
0/0
6
Drum kits are special ‘super’ Voices with 73 separate
instruments each, one per key – the unit simply does
not
have
enough
available
working
RAM
to
simultaneously handle 16 Part edit buffers and 73
instrument edit buffers. Drum Kits must be edited in
VOICE mode.
7
63/0 – 63/5
63/8 – 63/10
0/0
You do not want to use the MIX VOICE (63/60)
location as it is only available to the internal Motif ES
sequencer. You will want to save your edits to a User
bank location (63/8 and 63/9) as these User banks are
accessible by the Voice Editor and the Multi-Part Editor.
Mix Voice banks are strictly saved to the Motif ES
sequencer files.
19
Note: this “VCE ED” feature is not available on the
original Motif and Motif-Rack.
In the computer software environment (using
Studio Connections) this same scenario is true
with a few small differences. You can leave the ES
hardware in MIXING/MULTI mode (while using the
Multi-Part Editor) and you can launch and use the
VOICE EDITOR to edit any normal Voice (i.e.,
non-drum, non-Plug-in Voice). In your STUDIO
MANAGER you would create a workspace that
included both the Multi-Part Editor and the Voice
Editor – with the Multi-Part Editor open you can
quick launch the Voice Editor.
•
•
Say you want to edit the Voice in PART 12 of a
Motif ES mix. In order to bring both the software
editor and the hardware to a point where the
communication is coordinated – you will need to
do the following:
Troubleshooting issues:
Typically, when working with an external DAW,
you would be working with Local Control OFF and
you would be transmitting on the active track
(using the echo/thru feature of the software) –
make sure you are set to transmit to the Voice
you are editing. The selection of PART 12 on the
front panel hardware has nothing to do with
transmitting, but this allows you to hear the edits
as you make them to Part 12; in Part 12’s edit
buffer, as it were. Selecting the PART you are
editing will also have the added benefit of allowing
you to update the hardware directly when you
complete your editing. (That is, store the edit
buffer directly to a USER bank location – via our
recommended shortcut). Remember if you have
the Motif ES or the MO you do not want to use the
MIX VOICE location – you want to use the
standard USER bank locations for your edits. Mix
Voices are not accessible via the Editors.
_Change the transmit channel of the Voice Editor to
match the Part you want to edit. This is logical as the
Editor communicates via MIDI.
_Change the Track Select on the hardware so that you
are loading and are in touch with the proper PART edit
buffer. This is also logical so that you can see and hear
what you are editing.
_Double click on the Voice in the Editor’s list to send it
to the hardware’s active edit buffer. This is also logical
as it bulks the current Voice to the active Edit Buffer.
Here’s how it works:
•
•
•
12 and then pressing [SHIFT] + EDIT]. This action
will actually enter the Motif Rack ES into the special
Voice Editor mode – this is necessary so that we can
use the software to actually send the Voice data to
this edit buffer and to play it from the controller.
In the VOICE EDITOR list locate the Voice name
you have placed or want to place in Part 12 and
double click its name. This will transmit the Voice to
the edit buffer of Part 12. Since the Voice Editor is a
record of the current sounds in the synthesizer you
can actually use this method to select the Voice for
the current Part. If you decide to try a different
Voice for this Part, you simply double click it and it
will automatically be sent to the hardware and to
this Part of you Multi/Mixing setup.
Edit the Voice to your liking. Pressing the keys in
the Voice Editor with your mouse will let you hear
the sound you are editing. Pressing the keys on the
hardware will also allow you to hear the Voice as
you edit it.
Launch the Voice Editor software
On the toolbar click on the “SETUP” icon
Set the MIDI channel to match that of Part 12
(channel 12 – shown below). This is equivalent to
accessing the [F5] VCE ED button on Part 12. It will
allow us send data to the edit buffer of Part 12.
(your MIDI IN/OUT Port assignments may differ from those shown below)
You can edit virtually all the parameters of a
normal Voice with this method (some will logically
not be available). Parameters like the Dual
Insertion Effects, for example, can be edited but
only if the INSERTION SWITCH is ON for the
PART in the Multi (Mixing) setup. If you wish to
change the Dual Insertion Effect for a PART in
your mix, you will first have to ensure that the
Insertion Effect is active at the time.8
In the Multi-Part Editor you can verify the Insertion
switches as follows:
•
•
•
•
On the front panel of the Motif ES/MO/S90 ES
select PART 12 (even though this does not affect
external transmitting signals it will allow you to
access the PART 12 edit buffer and it will allow you
to store the data directly from this edit buffer to
the internal hardware engine (shortcut).
On the Motif Rack ES you must actually enter VCE
ED mode – this is accomplished by selecting PART
8
Click on the “Detail” button on the master channel
(Common)
Click on the “INS EFF SW” tab
If the Part does not have an active INS SW you will not
be able to hear it (obviously because it is not active).
20
No Drum Voices
Drum Voices are not available for this “in-place”
editing. While this is true, the reason has to do
with the amount of data. Will it be rectified in an
update? …unlikely. As mentioned earlier, a drum
kit is a super Voice and contains 73 independent
instruments and this is simply too many to handle
practically via this type of interface. The flexibility
of a drum kit Voice should not be compromised for
the convenience of editing in context. In other
words, it is deemed to be more important to have
individual control over each drum key, then it
would be to have in-place, in context editing.
In the screen shot above the Parts 1-8 have the
INS EFF SW On. You can select any eight Parts to
recall their Dual Insertion Effects. Therefore, if
you are following our example, you cannot hear
yourself editing the Dual Insertion Effects of Part
12. It would be necessary to turn the INS EFF SW
Off for one of the Parts and activate it for Part 12
before you could effectively change the Dual
Insertion Effects of the VOICE in Part 12.
Drum Voices should always be edited in VOICE
mode. That said, if you require editing drum
sounds in context of your music, your options
include taking the individual drum sample(s) and
making a User Voice. For example, if you want to
customize a snare drum you can place the snare
in its own Voice and edit it as a User Voice. This is
not too far fetched and is actually not too difficult
to do. Remember, it is your music and how much
work you put into it is really up to you! Every
drum sample is available for access – nothing
prevents you from creating a separate Normal
USER Voice for your principal drum sounds.
When you have satisfactorily edited this Part 12
Voice, you can STORE it in the software using the
Editor’s STORE function and separately you can
store it in the hardware using the [MIXING] >
[F5] VCE ED function > [STORE].
Tip: The principal drums in any kit are typically
the kick (bass drum) and snare drum. I have on
occasion created a two element Voice where these
were my elements. I would do this only when it
was necessary to edit the principal sounds of the
kit in context of the composition. By selecting a
drum kit that was close to the sound I needed, I
simply looked up the OSC/WAVE that was used
and placed that individual sample as one of two
elements in an initialized User Voice. I then “note
limited” the kick to the note C1, and the snare to
D1. It is a simply matter in most sequencers to
extract the data for the kick and snare to a
separate track. Now the full power of a normal
USER Voice can be applied to each of these
principal drum sounds and I can edit them in
context because now they are in a “normal” Voice.
Important: You must take care to target the
same USER Voice location for both the software
and the hardware. That is, do not store this edit
to the MIX VOICE bank of the hardware – the Mix
Voice is only “local” to the internal sequencer of
the Motif ES/MO6/MO8 – it is not a part of what
the Voice Editor or Multi-Part Editor access – the
Editors only can access USER bank locations.
Target the USER 1 or USER 2 bank (or USER 3 if
you have a Motif-Rack ES).
We recommend that you store your edits in the
USER 2 bank, first. User 2 is a collection of Voices
that appear elsewhere in the Preset banks and
can be overwritten without danger of losing a
unique Voice. Because you will use the entire
Voice Editor for each project you needn’t worry
about running out of storage space… you can
think of it as having 128 unique locations per
project (if you need more… you need another
hobby)!!! Say you select USER 2, Voice number
001 in the Editor… you should also press the front
panel buttons of the synth and target the same
exact location User 2, Voice number 001. This is
so that you do not have to go the long route of
bulking the Voice Editor bank back to the
hardware (which will take a minute or more)…
taking this shortcut will save you time.
What about Plug-in Voices (Motif ES, Motif
Rack ES, Motif-Rack, S90 ES only)
Is anything typical about
Expansion boards? No.
using
the
PLG150
It is very important to recognize that these
expansion boards are very much separate
synthesizers, being addressed typically on their
own separate MIDI PORT and Channel – they just
happen to be piggy-backed on the audio, effects
and control system of the host product. They are
either legacy “pure” synthesizers (AN, DX, VL) or
sample based engines (AP, DR, PC, and PF).
21
to restore them on power up. The PLUG SAVE and
PLUG LOAD routine is found in the UTILITY mode
> Job Select area.
Of these the AN (analog modeling 1997), DX (FM
synthesis 1983), VL (acoustic physical modeling
1993), DR (drum) and PC (percussion) have their
own dedicated Voice Editors. The plug-in boards
when used with a multi-port MIDI interface can be
addressed on a separate discreet MIDI port. This
means that the 16 Parts of the internal host can
be used and the PLG150 Boards can be addressed
on a separate MIDI line with their own MIDI
channel. Thus expanding the number of total Parts
beyond the 16 Part limit. When you have multiple
PLG150 Boards in the slots, and are using either
USB or mLAN (both are multi-port systems), for
example, it is possible to address the internal 16
PARTS of the host on PORT 1 and the PLG150
Boards on PORT 2. All the PLG150 Boards are
single part boards so each will only occupy a
single MIDI channel – therefore they can all exist
on the same MIDI port. This is why when you
have multiple PLG150 boards they all change to
the same port when you attempt to adjust one of
them. In general, Slot 1 defaults to MIDI channel
1, Slot 2 to MIDI channel 2 and Slot 3 to MIDI
channel 3.
If you are able to address the PLG boards on a
discreet port, it becomes a simple matter to click
on the Voice you want to send to a PLG PART and
be ready to go. For example, in my setup I have
the following PLG Boards in the following
products:
Motif ES:
Slot 1: PLG150-DX
Slot 2: PLG150-VL
Slot 3: PLG150-AN
Motif-Rack ES:
Slot 1: PLG150-PC
Slot 2: PLG150-DR
In my particular rig, the Motif ES is on mLAN
PORT 9; the PLG boards are on mLAN PORT 10.
When I power up my Motif ES, my USB drive
autoload routine automatically sends my favorite
Voices, samples, and customer Board Voices to
the Motif ES and the DX, VL and AN board banks.
I set the Motif ES to power up on a blank SONG
Mix setup – where all the internal Parts 1-16 are
ready and the PLG Parts 1-3 are ready.
When you store a Multi-Part Editor file – it does
not include the Voice you placed in the PLG PART
(P1, P2 or P3). So how do we deal with this?
Currently, the individual Voice Editors for the
PLG150 boards that have editors are not Total
Recall compliant. Therefore, you will have to
manually restore the data to the PLG boards.
When I launch the Studio Manager, my Default
Setup has the Motif ES (Multi) Editor and MotifRack ES (Multi) Editor ready to go, I also have the
DX, VL and AN editors in the default setup.
Additionally, if you have created CUSTOM Board
Voices you should ensure that you return these
Voice Elements to their respective Board Banks
using either an “Autoload” routine or manually
from their respective editors.
•
•
•
•
•
If I need to send a specific DX Voice to the Motif
ES, I double click the DX Simulator icon and set
its MIDI Setup to communicate with the DX
Board. The MIDI Channel/Part No./Device No.
SETUP is as follows:
AN Expert Editor PLG150-AN communicates with
the Board Bank 036/002
DX Simulator Editor PLG150-DX communicates
with the Board Bank 035/000
VL Visual Editor PLG150-VL communicates with
the Board Bank 033/002
Plug-in Editor for PLG150-DR communicates with
the Board Bank 047/000
Plug-in Editor for PLG150-PC communicates with
Board Bank 047/001
MIDI
Channel
1
because the PLG150DX in Slot 1 defaults to
MIDI channel 1
PART No. 16 as this is
the designated SLOT 1
PART Number.9
Device No 1 as this is
only used when you have multiple boards of the
same type and wish to address them individually.
By setting the first board to Device #1 and the
second to #2 you can designate different bulks for
each and you can load them separately. If they
both are set to Device number 1 then both will
load the same data.
The Motif ES, MO6/8, and S90 ES can save and
restore Custom Board sounds via the .w2b (bulk)
file that can be saved to SmartMedia or a USB
drive device. This can be used to automatically
restore the Custom data to the Banks in question
when you create a file, literally, named
“autold1.w2b”, “autold2.w2b” or “autold3.w2b”
according to the slot containing the board.
9
This Plug-in PART parameter addresses the PLG as
follows:
Slot 1 = PART 16
Slot 2 = PART 15
Slot 3 = PART 14
The Motif-Rack ES can actually save the custom
Board sounds in Flash ROM and can be instructed
22
If I click on a Voice in the DX Simulator Editor it
will be sent to the PLG150-DX – of course I must
be sending to the correct MIDI PORT (in my case
it is “mLAN MIDI Out (10)”). It is ‘10’ and not
PORT 2 because my Motif ES is on mLAN MIDI
OUT (9)). Mostly I work with Voice data that I
have already integrated into Motif ES Plug-in
Voices. It is possible (although not likely) that you
will be editing PLG boards sound in context of
your music. If that is your requirement just think
it through you can open the individual Board
Editor and as long as you are set to communicate
with that Port and MIDI channel you will be able
to edit completely that PLG board… store that
sound to an Editor location, then even create a
Plug-in USER Voice with the host product’s Editor.
have IMPORTED the current Voice Editor file, is
now out of sync.
Remember a Plug-in Voice is one that has
already been integrated with Motif ES parameters
– versus a Board Voice which is directly from the
PLG150-DX. A Plug-in Voice has the host product’s
controller routing and effect processing already
assigned and is stored in the Plug-in USER bank.
The Multi-Part Editor is like a script file or
instrument definition that always stays current
(because you update it), and goes beyond just
memorizing the current Voice selection. It
memorizes the entire mix, and virtually every
parameter of that mix. Quickly you will find that
you no longer need to address your hardware with
the always out-of-date script/definition type
selection. Even if you are used to using the
script/definition to select your sounds, you can
continue to do this (until you are comfortable with
the Multi-Part Editor) – Here’s how that would
work:
You have just changed and stored a new User
Voice. You must SAVE the Voice Editor file, and
then re-IMPORT this new Voice Editor file to the
Multi-Part Editor. It is at that point that you will
see the new User Voice’s name show up in the
Multi-Part Editor.
It sounds complex but is very logical and is at the
core of making this system work for you. The
Voice Editor edits Voices – the Multi Part Editor
imports that Voice Editor file. If you change the
Voice Editor file you must re-Import that data to
the Multi-Part Editor to bring it up to date.
Slot 1 will always be 63/24
Slot 2 will always be 63/25
Slot 3 will always be 63/26*
*Motif ES and S90 ES feature three PLG slots. MotifRack and Rack ES have just two slots. The MO6 and
MO8 cannot use PLG-expansion boards.
_Select your Voices for your DAW via your favorite
selection method
_When you have everything setup like you want, simply
click on the RECEIVE MULTI BULK icon on the Multi-Part
Editor toolbar and capture the setup.
These Plug-in USER banks are the ones that are
accessible in the Motif ES (Voice) Editor. Using the
Motif ES (Voice) Editor I can send any of the Plugin Voices to the PLG PART in the same manner I
could with the internal Voices. Although you
cannot press [F5] VCE ED to edit PLG Voices but
you can use the VOICE EDITOR and the DX
SIMULATOR, in this case, to communicate with
the PLG150-DX.
The advantage is that all your settings will be
archived. The MO6/MO8 Multi-Part Editor are first
to include the very useful “CATEGORY SEARCH”
function to the Yamaha Editors – making
searching and selecting sounds much easier.
Say I want to send the PLG USER Voice number
001 to the PLG150-DX board in my Motif ES – I
would launch the Motif ES (VOICE) Editor and set
the Voice Editor setup to MIDI Out = mLAN MIDI
Out (10); set the MIDI channel to MIDI channel =
1; Double click on the Plug-in 1 User bank, Voice
001 and it will be sent to the PLG150-DX.
Finally, when you store your project you can store
a Yamaha Studio Manager file - which will store all
the data in your Workspace (all your synth
editors, digital mixer editors, effect processor
editor). If you are working with Cubase SX3 or
Nuendo3, simply save your project the Studio
Manager data is automatically incorporated into
the Cubase Project file (.cpr) or Nuendo Project
file (.npr). That is the difference between the fully
compliant software like SX3/Nuendo3 and others
– the compliant programs make a convenient
bundle of all your data so there is just one file to
open.
Final Notes and Housekeeping
When you make a change to a Voice Editor file
make sure you archive it on your computer and
make sure you import that updated Voice Editor
file into the Multi-Part Editor. This is important so
lets state that again so it sinks in…
The MULTI-PART EDITOR will store not only the
current mix but all the Voices currently in your
synthesizer (as long as you remember to IMPORT
them via the Voice Editor file). So even if you are
not using the Voice Editor to alter sounds, you
When you make a change to your Voice Editor file
– as we have just been discussing – you must
realize that the Multi Part Editor, which only
“knows” what sounds are current because you
23
should always make sure your MPE has the
current data from your synthesizer. All its Voices
will be saved with the Multi-Part Editor file.
The Future of Music:
Phase 1: Studio Connections Recall – hardware
functions of digital mixers, effect processors and
synthesizers are handled by Studio Manager of
restoration of all data from one convenient
location.
Phase 2: Studio Connections Audio Integration –
greatly
enhances
the
handling
of
audio
connectivity within the computer-based Digital
Audio Workstation software. Making the job of
connecting audio a breeze – ultimately will allow
your external hardware function with the ease of
VST integration within the DAW.
Phase 3: …Coming Soon…??? Standby…
Phil Clendeninn
Senior Product Specialist
Field Product Support Group
Pro Audio & Combo Division
Yamaha Corporation of America
24