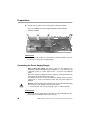
1
Inbetriebnahmeanleitung
Commissioning Instructions
VoIP-Systemtelefon und
Standard-VoIP-Telefon
VoIP System Telephone and
Standard VoIP Telephone
COMfortel쏐 3500
Inhaltsverzeichnis
Wichtige Informationen ...................................................................................................... 5
Sicherheitshinweise .............................................................................................................. 5
Verwendete Symbole und Signalwörter ................................................................................ 7
Bestimmungsgemäße Verwendung ...................................................................................... 7
Technische Daten ................................................................................................................. 9
Informationen zur Stromversorgung des Telefons .............................................................. 10
Mögliche Anzahl Telefone an Auerswald-TK-Anlagen........................................................ 10
Daten für den Anschluss eines Headsets ........................................................................... 11
Umwelthinweis .................................................................................................................... 11
Informationen zu den beiliegenden Anleitungen ................................................................. 12
Begriffserklärung/Glossar.................................................................................................... 12
Vorbereitung...................................................................................................................... 13
Gehäusefüße aufstecken und damit Höhe des Telefons einstellen.................................... 13
Tastenerweiterungsmodule montieren und anschließen .................................................... 14
Steckernetzteil(e) anschließen............................................................................................ 15
Hörer anschließen............................................................................................................... 17
Headset anschließen .......................................................................................................... 17
Telefon aufstellen................................................................................................................ 18
Inbetriebnahme ................................................................................................................. 20
Telefon in Betrieb nehmen .................................................................................................. 20
Netzwerkeinstellungen manuell vornehmen ....................................................................... 23
Automatisch angelegten Account als Standard-VoIP-Account für eine AuerswaldTK-Anlage einrichten........................................................................................................... 24
Standard-VoIP-Account für eine Auerswald-TK-Anlage manuell erstellen und einrichten.. 26
Account für VoIP-Anbieter erstellen und einrichten ............................................................ 28
Telefon an einen PC anschließen ....................................................................................... 29
Telefon über den Konfigurationsmanager einrichten .......................................................... 30
Anhang............................................................................................................................... 32
Firmware-Update über USB-Stick durchführen................................................................... 32
Beschriftungsschild einlegen............................................................................................... 33
Telefon reinigen .................................................................................................................. 33
Stichwortverzeichnis ........................................................................................................ 63
Beschriftungsschilder ...................................................................................................... 67
COMfortel 3500 - Firmwareversion 1.2B - Inbetriebnahmeanleitung 02 07/12
3
Table of Contents
Important Information....................................................................................................... 34
Safety Information ............................................................................................................... 34
Used Symbols and Signal Words........................................................................................ 36
Proper Use .......................................................................................................................... 36
Technical Data .................................................................................................................... 38
Information on the Power Supply for the Telephone........................................................... 39
Possible Number of System Telephones on Auerswald PBXs ........................................... 39
Data for Connecting a Headset........................................................................................... 39
Environmental Notice .......................................................................................................... 40
Information about the Accompanying Instructions .............................................................. 40
Definition of Terms/Glossary............................................................................................... 41
Preparation ........................................................................................................................ 42
Assembling the Feet of the Casing and Adjusting the Height of the Telephone ................. 42
Assembling and Connecting the Key Extension Modules................................................... 43
Connecting the Power Supply Plug(s) ................................................................................ 44
Connecting the Receiver..................................................................................................... 46
Connecting the Headset...................................................................................................... 46
Assembling the Telephone.................................................................................................. 47
Commissioning ................................................................................................................. 49
Commissioning the Telephone............................................................................................ 49
Configuring Network Settings Manually .............................................................................. 52
Configuring an Automatically Created Account as the Standard VoIP Account for an
Auerswald PBX ................................................................................................................... 53
Manually Creating and Configuring a Standard VoIP Account for an Auerswald PBX ....... 55
Creating and Configuring Accounts for VoIP Providers ...................................................... 57
Connecting the Telephone to a PC ..................................................................................... 58
Configuring the Telephone via the Configuration Manager................................................. 59
Appendix............................................................................................................................ 61
Performing a Firmware Update via USB Stick .................................................................... 61
Inserting the Lettering Label................................................................................................ 62
Cleaning the Telephone ...................................................................................................... 62
Index................................................................................................................................... 66
Lettering Labels ................................................................................................................ 69
4
COMfortel 3500 - Firmware Version 1.2B - Commissioning Instructions 02 07/12
Wichtige Informationen
Wichtige Informationen
Dieser Abschnitt enthält die für einen sicheren Betrieb notwendigen Informationen. Bevor Sie
das Telefon in Betrieb nehmen, lesen Sie unbedingt die hier aufgeführten Sicherheitshinweise und machen Sie sich mit der bestimmungsgemäßen Verwendung des Geräts sowie
den technischen Daten vertraut.
Sicherheitshinweise
Warnung: Unsachgemäße Verwendung oder Austauschen des Steckernetzteils kann zu einem lebensgefährlichen elektrischen Schlag oder zur
Beschädigung bzw. Zerstörung des Geräts führen.
씮 Verwenden Sie nur das Steckernetzteil mit der Typ-Nr. FW7577/EU/40.
씮 Achten Sie auf einen festen und sicheren Halt in der Steckdose. Wacklige Stecker oder Steckdosen bedeuten Brandgefahr.
씮 Ziehen Sie nicht am Kabel des Steckernetzteils. Möchten Sie die Stromversorgung trennen, ziehen Sie am Steckernetzteil selbst.
씮 Ist das Steckernetzteil beschädigt, lösen Sie zunächst die Sicherung
der Stromversorgung aus, bevor Sie das Steckernetzteil ziehen.
씮 Beachten Sie beim Umgang mit 230-V-Netzspannung und mit am Netz
betriebenen Geräten die einschlägigen Vorschriften.
Warnung: In das Gehäuse eindringende Flüssigkeiten können zu einem
lebensgefährlichen elektrischen Schlag führen und das Telefon beschädigen oder zerstören.
씮 Betreiben Sie das Telefon nur in geschlossenen, trockenen Räumen.
씮 Reinigen Sie das Gehäuse des Geräts nur mit einem leicht feuchten
Tuch oder einem Antistatiktuch.
Warnung: Beschädigte Anschlussleitungen sowie Beschädigungen am
Gehäuse und am Gerät selbst können zu einem lebensgefährlichen elektrischen Schlag führen.
씮 Schließen Sie die Anschlusskabel des Geräts nur an die dafür bestimmten Steckdosen an.
씮 Lassen Sie beschädigte Anschlussleitungen sofort auswechseln.
씮 Verwenden Sie ausschließlich Originalzubehör und Originalersatzteile.
씮 Lassen Sie Reparaturen sofort und nur vom Fachmann ausführen.
Wenden Sie sich an Ihre Elektrofachkraft oder direkt an den Hersteller.
씮 Berühren Sie die Steckkontakte nicht mit spitzen, metallischen und
feuchten Gegenständen.
씮 Tragen Sie das Gerät nicht an den Anschlusskabeln.
COMfortel 3500 - Firmwareversion 1.2B - Inbetriebnahmeanleitung 02 07/12
5
Wichtige Informationen
씮 Nutzen Sie die auf der Unterseite des Telefons zur Verfügung stehenden Kabelkanäle zur Zugentlastung.
Warnung: Überspannungen, wie sie bei Gewitter auftreten, können zu
einem lebensgefährlichen elektrischen Schlag führen und die Geräte
beschädigen oder zerstören.
씮 Verzichten Sie während eines Gewitters auf das Trennen und Anschließen von Leitungen.
씮 Lassen Sie von einer Elektrofachkraft alle Kabel innerhalb des Gebäudes verlegen.
씮 Schützen Sie die Geräte durch Installation eines Überspannungsschutzes.
Warnung: Bei Power-over-Ethernet-(PoE-)Schaltkreisen besteht u. U.
Stromschlaggefahr, wenn Verbindungen unter Verwendung nicht isolierter,
freiliegender Metallkontakte, Leiter oder Anschlussklemmen hergestellt
werden.
씮 Vermeiden Sie das Herstellen solcher Verbindungen, es sei denn, die
freiliegenden Metallteile befinden sich an Orten mit beschränktem
Zugang. Ein Ort mit beschränktem Zugang ist nur mit Hilfe eines speziellen Werkzeugs, Schloss und Schlüssels oder anderen Sicherheitseinrichtungen zugänglich. Außerdem sind die Personen, die Zugang dazu
haben, ausdrücklich über diese Gefahr informiert worden.
Warnung: Headsets, externe Lautsprecher oder Hörer, die nicht zugelassen sind, können zu Gehörschäden führen oder die Sprachverbindung stören.
씮 Benutzen Sie in Verbindung mit diesem Telefon nur zugelassenes
Zubehör mit CE-Zeichen.
Warnung: Der Telefonhörer erzeugt ein schwaches Magnetfeld, das kleine
magnetische Objekte wie Nadeln und Büroklammern anziehen kann.
씮 Legen Sie den Hörer nicht in die Nähe solcher Objekte, um eine Verletzungsgefahr auszuschließen.
Achtung: Unsachgemäße Reinigung und Bedienung können den Touchscreen beschädigen oder zerstören.
씮 Halten Sie den Touchscreen sauber. Verwenden Sie dazu das beiliegende Tuch.
씮 Verwenden Sie zur Bedienung des Telefons Ihre Finger oder Fingernägel. Verwenden Sie auf keinen Fall Kugelschreiber, Bleistifte oder
andere spitze Gegenstände auf dem Touchscreen.
씮 Drücken Sie nicht mit Gewalt auf den Touchscreen.
6
COMfortel 3500 - Firmwareversion 1.2B - Inbetriebnahmeanleitung 02 07/12
Wichtige Informationen
Wichtig: In Frankreich darf das Telefon nur Bluetooth-Funkstrecken innerhalb von Innenräumen aufbauen. In einigen Departements gibt es regionale Beschränkungen für den Bluetooth-Betrieb, die beachtet werden müssen.
Hinweis: In sensiblen Bereichen, in denen Bluetooth-Funk niemals eingeschaltet werden darf, ist es zusätzlich zum Ausschalten von Bluetooth möglich, den Bluetooth-Dongle des Telefons zu entfernen.
Verwendete Symbole und Signalwörter
Warnung:
Warnt vor Personenschäden, z. B. durch gefährliche elektrische Spannung.
Achtung:
Warnt vor Sachschäden.
Wichtig:
Weist auf mögliche Anwendungsfehler und Umstände hin, die z. B. zu Funktionseinschränkungen oder Störungen im Betrieb führen könnten.
Hinweis:
Kennzeichnet ergänzende Hinweise.
Bestimmungsgemäße Verwendung
Wichtig: Produkte von Auerswald sind nicht dafür ausgelegt und sollten
daher nicht für lebenserhaltende Systeme und/oder Anwendungen innerhalb nuklearer Einrichtungen eingesetzt werden. Einem Einsatz unserer
Produkte für solche Anwendungen muss zwingend eine auf den Einzelfall
zugeschnittene schriftliche Zustimmung/Erklärung von Auerswald vorausgehen.
Wichtig: Nicht bestimmungsgemäße Verwendung kann z. B. zu Funktionseinschränkungen oder Störungen, zur Zerstörung des Geräts oder
schlimmstenfalls zur Gefährdung von Personen führen.
씮 Wenn Sie sich über die bestimmungsgemäße Verwendung auch nach
dem Lesen des folgenden Kapitels nicht sicher sind, fragen Sie Ihren
Fachhändler.
COMfortel 3500 - Firmwareversion 1.2B - Inbetriebnahmeanleitung 02 07/12
7
Wichtige Informationen
Bei dem Gerät COMfortel 3500 handelt es sich um ein VoIP-Telefon, das in
einem lokalen Netzwerk (LAN) als Auerswald-VoIP-Systemtelefon und/oder als
Standard-VoIP-Telefon betrieben werden kann. Das Telefon kann bis zu 100
VoIP-Accounts verwalten, von denen ein einzelner als Systemtelefon-Account
genutzt werden kann.
Für den Betrieb als Auerswald-Systemtelefon wird eine der folgenden
Auerswald-TK-Anlagen benötigt:
쐽
COMmander 6000/R/RX
쐽
COMmander Basic.2 (19")
쐽
COMmander Business (19")
쐽
COMpact 5010 VoIP
쐽
COMpact 5020 VoIP
Wichtig: Zur Unterstützung des COMfortel 3500 benötigt die TK-Anlage
COMmander 6000/R/RX die Firmwareversion 5.4A oder höher. Die TKAnlagen COMmander Basic.2 (19"), COMmander Business (19"), COMpact 5010 VoIP und COMpact 5020 VoIP benötigen die Firmwareversion
4.2A oder höher. Die Firmwareversion 4.2A steht zu einem späteren Zeitpunkt zur Verfügung.
Das Telefon ist schnurgebunden und für den Betrieb in geschlossenen, trockenen Räumen vorgesehen.
Das Telefon verfügt über einen Touchscreen. Die Bedienung erfolgt auf Basis
des Betriebssystems Android 2.3. Alternativ kann das Telefon über Tasten
bedient werden.
Das Telefon ermöglicht das Telefonieren sowohl über den angeschlossenen
Hörer als auch über den integrierten Lautsprecher (Freisprechen). Optional
kann ein Headset (nicht im Lieferumfang) angeschlossen werden.
Das Telefon unterstützt sowohl den Betrieb von kabelgebundenen Headsets als
auch von schnurlosen Headsets (Headsets mit DHSG-Schnittstelle, z. B. von
Auerswald, Jabra oder Plantronics, sowie Bluetooth-Headsets).
Das Telefon ermöglicht die Bedienung der zahlreichen Funktionen nicht nur displaygesteuert sondern stellt außerdem 20 frei programmierbare Funktionstasten zur Verfügung (5 davon Touch-Funktionstasten am Display), mit denen die
Funktionen durch einfaches Drücken ausgeführt werden können.
Das Telefon kann mit bis zu drei Tastenerweiterungsmodulen COMfortel
Xtension300 (nicht im Lieferumfang) um frei programmierbare Funktionstasten
erweitert werden. Die Module werden rechts am Telefon montiert. Im Vollausbau stehen 110 frei programmierbare Funktionstasten (inkl. Touch-Funktionstasten) zur Verfügung.
8
COMfortel 3500 - Firmwareversion 1.2B - Inbetriebnahmeanleitung 02 07/12
Wichtige Informationen
Das Telefon kann auf drei verschiedenen Wegen eingerichtet werden: displaygesteuert am Telefon selbst, über den Konfigurationsmanager oder automatisiert von einem Provisioning-Server aus. Der Konfigurationsmanager ist über
den im Telefon integrierten Webserver erreichbar. Der dazu benötigte PC wird
entweder direkt mit einem Netzwerkport des Telefons verbunden oder muss
sich im selben Netzwerk befinden. Bei der Einrichtung von einem ProvisioningServer aus werden die Konfigurationsdaten vom Telefon direkt aus einer vorher
erstellten und über das Netzwerk verteilten Datei übernommen.
Hinweis: Zubehör und Serviceteile erhalten Sie im Fachhandel oder im
Internetshop distriCOM unter http://www.districom.de. (Die Belieferung
erfolgt nur innerhalb Deutschlands und nach Österreich.)
Technische Daten
Betriebsspannung
Versorgung über Steckernetzteil 230 V 쓒; 앧10%; 50-60 Hz;
170 mA oder über Ethernet-Port mittels PoE gemäß IEEE 802.3af
Steckernetzteil
Typ-Nr. FW7577/EU/40
Leistungsaufnahme
Netz
Min. 4 W, max. 14 W (ohne Tastenerweiterungsmodule
COMfortel Xtension300)
Leistungsaufnahme
PoE
Min. 3,3 W, max. 12 W (ohne Tastenerweiterungsmodule
COMfortel Xtension300)
Systemanschluss
10/100/1000Base Tx Ethernet
2. Ethernet-Port
10/100/1000Base Tx Ethernet
USB-Schnittstelle
2 x USB-Host ( 1x vorbelegt mit Bluetooth-Dongle)
Bluetooth
Bluetooth 2.1 + EDR
Speicher
SD-/SDHC-Karte, max. 32 GB (2 GB im Lieferumfang)
Headset
separate Schnittstelle für dynamische Headsets, auch mit DHSGUnterstützung
Anzeigen
19 LEDs, 16 davon mehrfarbig
5-Zoll-TFT-Farbdisplay, 800 x 480 Pixel, Hintergrundbeleuchtung
COMfortel Xtension300: 30 LEDs, mehrfarbig
Bedienelemente
Wähltastatur, 12 Festfunktionstasten, Farbdisplay mit Touch-Bedienung, Steuerkreuz, 20 programmierbare Funktionstasten (5 davon
Touch-Funktionstasten am Display)
COMfortel Xtension300: 30 programmierbare Funktionstasten
Hörer
Elektret-Mikrofon, dynamische Hörkapsel, hörgerätekompatibel
Lautsprecher
8 Ohm, Ø 52 mm
COMfortel 3500 - Firmwareversion 1.2B - Inbetriebnahmeanleitung 02 07/12
9
Wichtige Informationen
Gabelumschalter
Magnetischer Schaltkontakt
Gehäuse
Kunststoff
Farben
Weiß, schwarz
Abmessungen
(B x H x T)
Grundgerät: 275 mm x 148/170/190 mm x 210 mm
COMfortel Xtension300: 120 mm x 68/90/110 mm x 210 mm
Gewicht
Grundgerät: ca. 1200 g
COMfortel Xtension300: ca. 310 g
Umgebungstemperatur
0 bis 40 °C
Sicherheit
CE
VoIP-Codecs
G.711, G.722, iLBC
Informationen zur Stromversorgung des Telefons
Ein Steckernetzteil des Typs Nr. FW7577/EU/40 mit 40 V und 350 mA wird mitgeliefert. Beachten Sie folgende Besonderheiten zur Stromversorgung des
Telefons:
쐽
Das Telefon allein kann entweder über das mitgelieferte Steckernetzteil
oder – wenn Ihre aktive Netzwerkkomponente (Switch oder Router) dies
unterstützt – über Power over Ethernet (PoE) versorgt werden.
쐽
Das Telefon mit einem einzelnen Tastenerweiterungsmodul kann über
das mitgelieferte Steckernetzteil versorgt werden.
쐽
Bei zwei oder mehr Tastenerweiterungsmodulen werden entweder zwei
Steckernetzteile oder Power over Ethernet und ein Steckernetzteil benötigt.
Wichtig: Bei der Stromversorgung über Power over Ethernet darf der Brückenstecker nicht aus der mit
gekennzeichneten Buchse auf der
Unterseite des Telefons entfernt werden.
Mögliche Anzahl Telefone an Auerswald-TK-Anlagen
10
TK-Anlage
Max. Anzahl COMfortel 3500 bei Vollausbau der TKAnlage
COMpact 5010 VoIP
4
COMpact 5020 VoIP
8
COMmander Basic.2 (19")
24
COMfortel 3500 - Firmwareversion 1.2B - Inbetriebnahmeanleitung 02 07/12
Wichtige Informationen
TK-Anlage
Max. Anzahl COMfortel 3500 bei Vollausbau der TKAnlage
COMmander Business (19")
64
COMmander 6000/R
64 (112)*
COMmander 6000RX
112
* Mit Over Commitment mehr Teilnehmer pro VoIP-Kanal möglich
Daten für den Anschluss eines Headsets
Stromaufnahme Mikrofon
Max. 0,5 mA
Empfindlichkeit Mikrofon
45 dB
Impedanz Lautsprecher
150 Ohm
Empfindlichkeit Lautsprecher bei 1 kHz
19,5 앧3 dBPa/V
Schallpegelgrenze
24 dBPa
Belegung der Headsetbuchse
1
DHSG BUS_IN
2
DHSG GND
3
Mikrofon -
4
Lautsprecher -
5
Lautsprecher +
6
Mikrofon +
7
DHSG + 3,3 V
8
DHSG BUS_OUT
Umwelthinweis
Entsorgen Sie das Verpackungsmaterial im Interesse des Umweltschutzes ordnungsgemäß.
Erkundigen Sie sich bei der Stadt- oder Gemeindeverwaltung nach Möglichkeiten einer umwelt- und sachgerechten Entsorgung des Geräts.
Wenn Sie möchten, dass wir Ihnen die Entsorgung abnehmen, senden Sie das
Gerät an uns zurück.
Unfreie Sendungen können wir leider nicht annehmen.
COMfortel 3500 - Firmwareversion 1.2B - Inbetriebnahmeanleitung 02 07/12
11
Wichtige Informationen
Informationen zu den beiliegenden Anleitungen
Weitere Anleitungen
Bedienung und Einrichtung des Telefons sind ausführlich beschrieben in der
Bedienungs- und Konfigurationsanleitung. Beachten Sie zusätzlich die Informationen zu Garantie, Service, CE-Zeichen und Konformitätserklärung im Beileger
„Garantiebedingungen, Informationsservice“.
Aktuelles
Fehlt nach einer Funktionserweiterung durch ein Firmware-Update in den beiliegenden Anleitungen die Beschreibung der neuen Funktion, erhalten Sie aktuelle Anleitungen auf den Serviceseiten der Auerswald-Homepage (Internetadresse: www.auerswald.de).
Copyright und Marken
Weitergabe und Vervielfältigung dieser Anleitung, sowie Verwertung und Mitteilung des Inhalts, auch auszugsweise, ist nur mit unserer ausdrücklichen
Genehmigung gestattet. Zuwiderhandlung verpflichtet zu Schadenersatz. Alle
Rechte vorbehalten. 쏘 Auerswald GmbH & Co. KG, 38162 Cremlingen, 2012
Bluetooth ist eine eingetragene Marke von Bluetooth SIG, Inc.
Android ist eine Marke von Google, Inc.
Microsoft, Windows, Windows Vista und Internet Explorer sind eingetragene
Marken der Microsoft Corporation in den USA und/oder anderen Ländern.
Alle anderen genannten Marken sind Eigentum der jeweiligen Hersteller.
MPEG Layer-3 audio coding technology licensed from Fraunhofer IIS and
Thomson Licensing.
Begriffserklärung/Glossar
Firmware
Betriebssoftware des Telefons oder der TK-Anlage, die im Gerät selbst gespeichert ist. Ohne Firmware ist das Gerät nicht funktionsfähig.
Firmware-Update
Aktualisierung der Firmware zur Problembehebung und Integration neuer
Leistungsmerkmale. Das Gerät stellt dabei eine Verbindung mit einem Server
her, um sich von diesem die aktuelle Firmware übermitteln zu lassen (die Einstellungen des Geräts bleiben erhalten). Abgesehen von den Gebühren für die
nötige Internetverbindung ist das Update kostenlos.
12
COMfortel 3500 - Firmwareversion 1.2B - Inbetriebnahmeanleitung 02 07/12
Vorbereitung
Vorbereitung
Dieser Abschnitt beschreibt die vor der Inbetriebnahme des Geräts notwendigen Vorbereitungen. Dazu gehört das Einstellen der Höhe und der Anschluss der Tastenerweiterungsmodule (nicht im Lieferumfang) sowie des Hörers und/oder eines Headsets (nicht im Lieferumfang). Weiterhin gehört hierzu die Aufstellung des Telefons an einem geeigneten
Aufstellungsort.
Gehäusefüße aufstecken und damit Höhe des Telefons einstellen
Voraussetzungen
– Telefon und Tastenerweiterungsmodule voneinander getrennt
– Die dem Telefon und den Tastenerweiterungsmodulen beiliegenden
Gehäusefüße
Durchzuführende Schritte
1. Ziehen Sie ggf. die Gehäusefüße vom Telefon und von den Tastenerweiterungsmodulen ab.
Abb. 1: Gehäusefüße abziehen
2. Stecken Sie die Gehäusefüße in der gewünschten Stellung wieder auf.
Hinweis: Die Füße können in drei verschiedenen Stellungen innerhalb des
gekennzeichneten Bereichs aufgesteckt werden.
COMfortel 3500 - Firmwareversion 1.2B - Inbetriebnahmeanleitung 02 07/12
13
Vorbereitung
Tastenerweiterungsmodule montieren und anschließen
Voraussetzungen
– Bis zu drei Tastenerweiterungsmodule COMfortel Xtension300
– Das den Tastenerweiterungsmodulen beiliegende Befestigungsmaterial
(Spezialverbinder, Schrauben und Verbindungskabel)
– Einen Schraubendreher (Kreuzschlitz)
– Telefon ausgeschaltet (getrennt von der 230-V-Stromversorgung – sofern
vorhanden – und getrennt vom Netzwerk)
– Telefon und Tastenerweiterungsmodule auf die gewünschte Höhe eingestellt
Durchzuführende Schritte
1. Stellen Sie das Telefon und die Tastenerweiterungsmodule so nebeneinander auf den Tisch, wie sie zusammenmontiert werden sollen.
Hinweis: Die Tastenerweiterungsmodule (bis zu drei sind möglich) werden
an der rechten Seite des Telefons montiert.
2. Drehen Sie Telefon und Tastenerweiterungsmodule um, so dass Sie die
Unterseite vor sich haben.
3. Stecken Sie den schmaleren Stecker (RJ-10) des Verbindungskabels in die
mit
gekennzeichnete Buchse auf der Unterseite des Telefons.
4. Stecken Sie den breiteren Stecker (RJ-11) des Verbindungskabels in die
mit
gekennzeichnete Buchse auf der Unterseite des ersten Tastenerweiterungsmoduls.
5. Verlegen Sie das Verbindungskabel so in den angrenzenden Kabelkanälen, dass Sie den Spezialverbinder ungehindert aufstecken können.
6. Stecken Sie die Komponenten mithilfe des Spezialverbinders zusammen
und befestigen Sie den Spezialverbinder mit zwei Schrauben.
Hinweis: Ziehen Sie die Schrauben nur handfest an. Die Tastenerweiterungsmodule haben nach der Montage ein leichtes Spiel, um Unebenheiten
der Aufstellfläche auszugleichen.
7. Weitere Tastenerweiterungsmodule: Stecken Sie jeweils den schmaleren
Stecker (RJ-10) des Verbindungskabels in die mit
gekennzeichnete
Buchse auf der Unterseite des zuvor angeschlossenen Tastenerweiterungsmoduls.
14
COMfortel 3500 - Firmwareversion 1.2B - Inbetriebnahmeanleitung 02 07/12
Vorbereitung
8. Stecken Sie jeweils den breiteren Stecker (RJ-11) des Verbindungskabels
in die mit
gekennzeichnete Buchse auf der Unterseite des nächsten
Tastenerweiterungsmoduls.
9. Wiederholen Sie die Schritte 5. und 6. für die angeschlossenen Tastenerweiterungsmodule.
Abb. 2: Anschluss und Montage der Tastenerweiterungsmodule
COMfortel Xtension300
Weitere Schritte
쑱 Abhängig von der Anzahl der angeschlossenen Tastenerweiterungsmodule müssen ein oder zwei Steckernetzteil(e) angeschlossen werden.
Steckernetzteil(e) anschließen
Hinweise zur Stromversorgung: Das Telefon allein kann entweder über
das mitgelieferte Steckernetzteil oder – wenn Ihre aktive Netzwerkkomponente (Switch oder Router) dies unterstützt – über Power over Ethernet
(PoE) versorgt werden.
Das Telefon mit einem einzelnen Tastenerweiterungsmodul kann über das
mitgelieferte Steckernetzteil versorgt werden.
Bei zwei oder mehr Tastenerweiterungsmodulen werden entweder zwei
Steckernetzteile oder Power over Ethernet (PoE) und ein Steckernetzteil
benötigt.
Warnung: Die Verwendung des falschen Steckernetzteils kann zu einem
lebensgefährlichen elektrischen Schlag oder zur Beschädigung bzw. Zerstörung des Geräts führen:
씮 Verwenden Sie nur das Steckernetzteil mit der Typ-Nr. FW7577/EU/40.
COMfortel 3500 - Firmwareversion 1.2B - Inbetriebnahmeanleitung 02 07/12
15
Vorbereitung
Voraussetzungen
– Ein oder zwei Steckernetzteil(e) mit der Typ-Nr. FW7577/EU/40 (nur ein
Steckernetzteil im Lieferumfang)
Durchzuführende Schritte
1. Nur für Betrieb ohne Power over Ethernet: Entfernen Sie den Brückenstecker aus der mit
lefons.
gekennzeichneten Buchse auf der Unterseite des Te-
2. Nur für Betrieb ohne Power over Ethernet: Stecken Sie den RJ-45-Stecker
des Steckernetzteils in die mit
gekennzeichnete Buchse auf der Unterseite des Telefons.
Warten Sie mit der Verbindung zur 230-V-Netzversorgung bis zur endgültigen Inbetriebnahme.
3. Bei Betrieb mit zwei oder drei Tastenerweiterungsmodulen: Stecken Sie
den RJ-45-Stecker des Steckernetzteils in die mit
gekennzeichnete
Buchse auf der Unterseite eines der Tastenerweiterungsmodule.
Warten Sie mit der Verbindung zur 230-V-Netzversorgung bis zur endgültigen Inbetriebnahme.
Abb. 3: Anschluss der Steckernetzteile
16
COMfortel 3500 - Firmwareversion 1.2B - Inbetriebnahmeanleitung 02 07/12
Vorbereitung
Hörer anschließen
Durchzuführende Schritte
1. Stecken Sie den RJ-10-Stecker am längeren, glatten Ende des Spiralkabels in die mit
gekennzeichnete Buchse auf der Unterseite des Telefons.
2. Führen Sie das Kabel über den zugehörigen Kabelkanal nach außen (siehe
Abb. 4).
3. Stecken Sie den anderen RJ-10-Stecker des Spiralkabels in die Buchse am
Hörer.
Abb. 4: Anschluss des Hörers
Headset anschließen
Voraussetzungen
– Ein Headset, das den auf Seite 11 aufgeführten technischen Daten entspricht.
COMfortel 3500 - Firmwareversion 1.2B - Inbetriebnahmeanleitung 02 07/12
17
Vorbereitung
Hinweis: Das Telefon unterstützt sowohl den Betrieb von kabelgebundenen als auch von schnurlosen Headsets (Headsets mit DHSG-Schnittstelle,
z. B. von Auerswald, Jabra oder Plantronics).
– Zum Anschluss eines COMfortel Headsets von Auerswald oder anderer
kabelgebundener Headsets: ein Adapter
Hinweis: Der Adapter ist als Zubehör von Auerswald im Fachhandel erhältlich.
Durchzuführende Schritte
1. Stecken Sie den Anschlussstecker des Headsets in die mit
gekenn-
zeichnete Buchse auf der Unterseite des Telefons.
2. Führen Sie das Kabel über den zugehörigen Kabelkanal nach außen.
Weitere Schritte
쑱 Um Gespräche über das Headset führen zu können, muss der Headsetbetrieb im Anschluss an die Inbetriebnahme eingeschaltet werden (unter
Funktionen > Headset).
Telefon aufstellen
Voraussetzungen
– In unmittelbarer Nähe des Aufstellungsorts vorhandene Anschlüsse:
쐽
Ausgangsbuchse des DSL-Routers/Switches oder verfügbare Netzwerksteckdose
쐽
bei Stromversorgung über Steckernetzteil: 230-V-Netzsteckdose
Warnung: In das Gehäuse eindringende Flüssigkeiten können zu einem
lebensgefährlichen elektrischen Schlag führen und das Telefon beschädigen oder zerstören.
씮 Betreiben Sie das Telefon nur in geschlossenen, trockenen Räumen.
Achtung: Mechanische Belastungen und elektromagnetische Felder können zur Beschädigung bzw. Zerstörung des Geräts oder zur Beeinträchtigung der Funktion führen.
씮 Vermeiden Sie mechanische Belastungen (z. B. Vibrationen).
씮 Vermeiden Sie die Nähe von Geräten, die elektromagnetische Felder
ausstrahlen (z. B. Rundfunkempfangsgeräte, Betriebsfunkgeräte,
Amateurfunkanlagen, Handys, DECT-Anlagen, WLAN-Router, o. Ä.).
18
COMfortel 3500 - Firmwareversion 1.2B - Inbetriebnahmeanleitung 02 07/12
Vorbereitung
씮 Setzen Sie das Gerät keiner direkten Sonnenbestrahlung aus.
씮 Schützen Sie das Gerät vor Schmutz, übermäßigen Staub, Kondensation, aggressiven Flüssigkeiten und Dämpfen.
씮 Beachten Sie die in den technischen Daten angegebenen Werte für
Umgebungstemperatur und Luftfeuchtigkeit.
Durchzuführende Schritte
1. Stellen Sie das Telefon auf eine saubere und ebene Fläche.
Achtung: Manche in Möbeln vorhandenen Lacke oder Kunststoffe können
die Kunststofffüße des Geräts angreifen und aufweichen. Die so durch
Fremdstoffe veränderten Gerätefüße können unter Umständen auf der
Oberfläche der Möbel unerwünschte Spuren hinterlassen.
씮 Stellen Sie das Telefon auf eine rutschfeste Unterlage.
COMfortel 3500 - Firmwareversion 1.2B - Inbetriebnahmeanleitung 02 07/12
19
Inbetriebnahme
Inbetriebnahme
Dieser Abschnitt beschreibt Schritt für Schritt die Erstinbetriebnahme des Telefons. Nach
erfolgter Erstinbetriebnahme können Sie intern telefonieren. Mit der im Anschluss daran
beschriebenen Einrichtung per PC können Sie das Telefon an Ihre Bedürfnisse anpassen.
+
Telefon in Betrieb nehmen
Hinweis: Wenn Sie das Telefon in einem bestehenden Netzwerk integrieren möchten, wenden Sie sich an den zuständigen Systemadministrator.
Ein Eingriff in ein bestehendes Netzwerk kann zu erheblichen Funktionsstörungen führen.
Voraussetzungen
– Das dem Telefon beiliegende Patchkabel
Hinweis: Benötigen Sie ein längeres oder kürzeres Patchkabel, verwenden Sie eines ohne Rastnasenschutz, da es sonst evtl. nicht weit genug
eingesteckt werden kann.
– Für Betrieb mit Power over Ethernet: In der mit
gekennzeichneten
Buchse auf der Unterseite des Telefons steckender Brückenstecker
– Für Betrieb mit Steckernetzteil(en): Am Telefon angeschlossene(s) Steckernetzteil(e)
– Für Betrieb als Systemtelefon: TK-Anlage mit folgenden Merkmalen:
쐽
Eingeschaltet (an die 230-V-Stromversorgung angeschlossen)
쐽
COMmander 6000/R/RX: Firmwareversion 5.4A oder höher
쐽
COMpact 5010 VoIP, COMpact 5020 VoIP, COMmander Basic.2 und
COMmander Business: Firmwareversion 4.2A oder höher
Hinweis: Führen Sie ggf. ein Update der TK-Anlage durch (siehe Anleitung
der TK-Anlage). Die Firmwareversion 4.2A steht zu einem späteren Zeitpunkt zur Verfügung.
쐽
In der Konfiguration eingetragene interne Rufnummer mit zugehörigem
Passwort für das Telefon
– Für automatisierte Einrichtung von einem Provisioning-Server aus: Im Provisioning-Server hinterlegte und im DHCP-Server bekannte ProvisioningDatei
Durchzuführende Schritte
1. Stecken Sie einen Stecker des Patchkabels in die mit
gekennzeichnete
Buchse auf der Unterseite des Telefons.
20
COMfortel 3500 - Firmwareversion 1.2B - Inbetriebnahmeanleitung 02 07/12
Inbetriebnahme
Abb. 5: Anschluss des Patchkabels (hier bei Betrieb mit Power over Ethernet)
2. Stecken Sie den anderen Stecker des Patchkabels in eine Ausgangsbuchse des DSL-Routers/Switches oder in eine vorhandene Netzwerksteckdose.
3. Stecken Sie – sofern benötigt – das/die Steckernetzteil(e) in je eine frei zugängliche 230-V-Netzsteckdose.
Das Telefon fährt hoch. Währenddessen pumpt die LED oberhalb des
Displays rot und im Display wird das Auerswald-Firmenlogo eingeblendet.
Ist im lokalen Netzwerk ein DHCP-Server eingerichtet, bezieht das
Telefon seine IP-Adresse, Subnetzmaske sowie die Adressen von
Gateway und DNS-Server während einer DHCP-Anfrage automatisch
von diesem DHCP-Server.
Das Telefon sucht eine Auerswald-TK-Anlage im Netzwerk.
Der Einrichtungsassistent startet automatisch.
Der Dialog zur Auswahl der Sprache wird geöffnet (nur beim ersten
Start des Telefons).
4. Tippen Sie auf die gewünschte Sprache.
Hat das Telefon eine passende TK-Anlage gefunden, wird automatisch
ein Account (z. B. Account 001) für diese TK-Anlage angelegt und im
Einrichtungsassistent unter Inaktive oder unregistrierte Accounts
angezeigt.
Hinweise: Beachten Sie die folgenden Hinweise, wenn das Telefon ein
abweichendes oder unerwartetes Verhalten zeigt.
Wenn im Display die Meldung Falsche Netzwerkeinst. angezeigt wird,
deutet dies auf das Fehlen eines DHCP-Servers hin. Sie können das Telefon auch mit einer festen IP-Adresse betreiben. Fahren Sie dazu wie in
COMfortel 3500 - Firmwareversion 1.2B - Inbetriebnahmeanleitung 02 07/12
21
Inbetriebnahme
Netzwerkeinstellungen manuell vornehmen auf Seite 23 beschrieben fort
und kehren Sie anschließend hierher zurück.
Wenn der Einrichtungsassistent startet, aber kein Account angezeigt wird,
hat das Telefon keine Auerswald-TK-Anlage gefunden. Ist eine AuerswaldTK-Anlage vorhanden, überprüfen Sie z. B. ob die betreffende TK-Anlage
eingeschaltet ist und starten Sie die Suche erneut. Tippen Sie dazu auf
Nach TK-Anlagen suchen. Bleibt die Suche erfolglos oder ist keine TKAnlage vorhanden, können Sie einen Account und den zugehörigen VoIPAnbieter auch anhand von Profilen erstellen. Fahren Sie dazu wie in
Standard-VoIP-Account für eine Auerswald-TK-Anlage manuell erstellen
und einrichten auf Seite 26 oder Account für VoIP-Anbieter erstellen und
einrichten auf Seite 28 beschrieben fort. Möchten Sie nicht die vom Telefon
vorgegebenen Profile nutzen, können Sie VoIP-Anbieter und Accounts frei
im Telefon einrichten. Tippen Sie dazu auf Manuell einrichten.
Bei automatisierter Einrichtung von einem Provisioning-Server aus erfragt
das Telefon vom DHCP-Server die Adresse des Provisioning-Servers und
den Namen der Provisioning-Datei. Anschließend startet das Telefon
betriebsbereit mit der Startseite. Startet das Telefon stattdessen mit dem
Einrichtungsassistenten, können Sie die Adresse des Provisioning-Servers
am Telefon eingeben. Tippen Sie dazu auf Provisioning-Server angeben
und geben Sie anschließend die URL ein.
5. Tippen Sie auf den automatisch angelegten Account (z. B. Account 001).
6. Tippen Sie auf Systemtelefon-Account.
Hinweis: Möchten Sie diesen Account stattdessen als Standard-VoIPAccount einrichten, z. B. weil das Telefon an mehreren Auerswald-TKAnlagen betrieben werden soll, fahren Sie dazu wie in Automatisch angelegten Account als Standard-VoIP-Account für eine Auerswald-TK-Anlage
einrichten auf Seite 24 beschrieben fort.
Tipp: Durch Tippen auf die Schaltflächen links im Display gelangen Sie bei
Bedarf wieder zurück in einen der vorherigen Einrichtungsschritte.
7. Geben Sie im Eingabefeld Benutzername die zuvor in der TK-Anlage eingerichtete interne Rufnummer ein.
Tipp: Um Falscheingaben zu korrigieren, können Sie durch Tippen auf das
Eingabefeld die Android-Tastatur mit einer Löschen-Schaltfläche im Display einblenden. Durch Drücken der Zurück-Taste blenden Sie die AndroidTastatur wieder aus.
8. Tippen Sie auf OK.
9. Geben Sie im Eingabefeld Passwort das zur internen Rufnummer gehörige Passwort ein.
22
COMfortel 3500 - Firmwareversion 1.2B - Inbetriebnahmeanleitung 02 07/12
Inbetriebnahme
Tipp: Durch Tippen auf das Eingabefeld können Sie die Android-Tastatur
im Display einblenden. Durch Drücken der Zurück-Taste blenden Sie die
Android-Tastatur wieder aus.
10. Tippen Sie auf OK.
11. Tippen Sie auf Default-Account.
Hinweis: Bei in der TK-Anlage eingeschaltetem SIPS/SRTP wird ein Dialog zur Eingabe des Fingerprints geöffnet. Geben Sie den Fingerprint ein
und tippen Sie auf OK.
Das Telefon registriert sich an der TK-Anlage. War die Registrierung
erfolgreich, wird eine entsprechende Meldung angezeigt. Das Telefon
ist jetzt betriebsbereit.
12. Drücken Sie die Home-Taste, um den Einrichtungsassistenten zu verlassen.
Weitere Schritte
쑱 Richten Sie das Telefon nach Ihren Bedürfnissen ein. Sie können die Einrichtung sowohl displaygeführt am Telefon selbst (siehe Bedienungs- und
Konfigurationsanleitung) als auch über den integrierten Konfigurationsmanager durchführen (empfohlen; siehe Seite 30).
쑱 Führen Sie ggf. ein Firmware-Update durch, um das Telefon mit neu verfügbaren Funktionen zu erweitern (siehe Seite 32). Informationen über
Neuerungen erhalten Sie auf den Serviceseiten der Auerswald-Homepage
(Internetadresse: www.auerswald.de).
Netzwerkeinstellungen manuell vornehmen
Voraussetzungen
– Während der Inbetriebnahme im Display angezeigte Meldung Falsche
Netzwerkeinst.
Durchzuführende Schritte
1. Tippen Sie auf Falsche Netzwerkeinst..
Die Anwendung Einstellungen > Netzwerk wird geöffnet.
2. Tippen Sie auf DHCP.
DHCP wird ausgeschaltet.
COMfortel 3500 - Firmwareversion 1.2B - Inbetriebnahmeanleitung 02 07/12
23
Inbetriebnahme
3. Tippen Sie auf IP-Adresse.
4. Geben Sie eine feste IP-Adresse für das Telefon ein.
Tipp: Die Eingabe kann erfolgen über die Zifferntasten oder durch mehrmaliges Tippen oder Berühren und Halten der Schaltflächen + und -.
5. Tippen Sie auf OK.
6. Tippen Sie auf Subnetzmaske.
7. Geben Sie eine Subnetzmaske für das Telefon ein.
8. Tippen Sie auf OK.
9. Tippen Sie auf Gateway.
10. Geben Sie ein Gateway für das Telefon ein.
11. Tippen Sie auf OK.
12. Tippen Sie auf DNS-Server 1.
13. Geben Sie einen DNS-Server für das Telefon ein.
14. Tippen Sie auf OK.
15. Drücken Sie die Home-Taste, um zur Startseite zu gelangen.
Im Display wird die Meldung Kein Account vorhanden angezeigt.
16. Tippen Sie auf Kein Account vorhanden.
Der Einrichtungsassistent startet automatisch.
17. Fahren Sie mit Schritt 5. auf Seite 22 fort.
Automatisch angelegten Account als Standard-VoIP-Account
für eine Auerswald-TK-Anlage einrichten
Voraussetzungen
– Gestarteter Einrichtungsassistent (Anwendung auswählen > Einstellungen > Einrichtungsassistent)
– Unter Inaktive oder unregistrierte Accounts angezeigter Account (z. B.
Account 001)
24
COMfortel 3500 - Firmwareversion 1.2B - Inbetriebnahmeanleitung 02 07/12
Inbetriebnahme
Durchzuführende Schritte
1. Tippen Sie auf den unter Inaktive oder unregistrierte Accounts angezeigten Account (z. B. Account 001).
2. Tippen Sie auf Standard-VoIP-Account.
Tipp: Durch Tippen auf die Schaltflächen links im Display gelangen Sie bei
Bedarf wieder zurück in einen der vorherigen Einrichtungsschritte.
3. Geben Sie im Eingabefeld Benutzername die zuvor in der TK-Anlage eingerichtete interne Rufnummer ein.
Tipp: Durch Tippen auf das Eingabefeld können Sie die Android-Tastatur
im Display einblenden. Durch Drücken der Zurück-Taste blenden Sie die
Android-Tastatur wieder aus.
4. Tippen Sie auf das Eingabefeld Passwort.
5. Geben Sie im Eingabefeld Passwort das zur internen Rufnummer gehörige Passwort ein.
6. Tippen Sie auf OK.
7. Wählen Sie im Listenfeld die Landeskennung für den Standort des Telefons
aus.
8. Tippen Sie auf das Eingabefeld Ortsvorwahl.
9. Geben Sie im Eingabefeld Ortsvorwahl die Ortsvorwahl für den Standort
des Telefons ein.
10. Tippen Sie auf das Eingabefeld Rufnummer.
11. Geben Sie im Eingabefeld Rufnummer die zuvor in der TK-Anlage eingerichtete interne Rufnummer ein.
12. Tippen Sie auf OK.
13. Tippen Sie auf Default-Account.
Hinweis: Wurde bereits ein anderer Account (z. B. ein SystemtelefonAccount) als Default-Account ausgewählt, wählen Sie hier die Option Kein
Default-Account.
Das Telefon registriert sich an der TK-Anlage. War die Registrierung
erfolgreich, wird eine entsprechende Meldung angezeigt. Das Telefon
ist jetzt betriebsbereit.
14. Drücken Sie die Home-Taste, um zur Startseite zu gelangen.
COMfortel 3500 - Firmwareversion 1.2B - Inbetriebnahmeanleitung 02 07/12
25
Inbetriebnahme
Standard-VoIP-Account für eine Auerswald-TK-Anlage manuell
erstellen und einrichten
Voraussetzungen
– Auerswald-TK-Anlage COMmander 6000/R/RX, COMmander Business,
COMmander Basic.2, COMpact 3000 analog/ISDN/VoIP, COMpact 5010
VoIP oder COMpact 5020 VoIP mit den folgenden Merkmalen:
쐽
Verfügbare interne VoIP-Kanäle
쐽
Eingeschaltet (an die 230-V-Stromversorgung angeschlossen)
쐽
In der Konfiguration eingetragene interne Rufnummer mit PIN und Passwort (COMpact 3000 nur PIN) für das Telefon
Durchzuführende Schritte
1. Starten Sie die Anwendung „Einstellungen“ (Anwendung auswählen >
Einstellungen oder Manuell einrichten aus dem Einrichtungsassistent)
2. Tippen Sie auf Anbieter & TK-Anlagen.
3. Tippen Sie auf Anbieter/TK-Anlage erstellen.
4. Tippen Sie auf auerswald.xml.
5. Tippen Sie auf Domain.
6. Geben Sie die IP-Adresse der TK-Anlage ein.
Tipp: Durch Tippen auf das Eingabefeld können Sie die Android-Tastatur
im Display einblenden. Durch Drücken der Zurück-Taste blenden Sie die
Android-Tastatur wieder aus.
7. Tippen Sie auf OK.
8. Tippen Sie auf Registrar.
9. Tippen Sie auf Registrar-Adresse.
10. Geben Sie die IP-Adresse der TK-Anlage ein.
11. Tippen Sie auf OK.
12. Drücken Sie dreimal die Zurück-Taste, um die Einstellungen für Anbieter zu
verlassen.
13. Tippen Sie auf Accounts.
14. Tippen Sie auf Account erstellen.
15. Tippen Sie auf Anbieter & TK-Anlagen.
26
COMfortel 3500 - Firmwareversion 1.2B - Inbetriebnahmeanleitung 02 07/12
Inbetriebnahme
Unter Zurzeit konfigurierte Anbieter & TK-Anlagen wird der neu erstellte Anbieter angezeigt (z. B. Auerswald 0).
16. Tippen Sie auf den neu erstellten Anbieter (z. B. Auerswald 0).
17. Tippen Sie auf Benutzername.
18. Geben Sie im Eingabefeld Benutzername die zuvor in der TK-Anlage eingerichtete interne Rufnummer ein.
19. Tippen Sie auf OK.
20. Tippen Sie auf das Eingabefeld Passwort.
21. Geben Sie im Eingabefeld Passwort das zur internen Rufnummer gehörige Passwort ein.
22. Tippen Sie auf OK.
23. Tippen Sie auf Rufnummern.
24. Tippen Sie auf Neue Rufnummer.
25. Tippen Sie auf das Eingabefeld Rufnummer.
26. Geben Sie im Eingabefeld Rufnummer die zuvor in der TK-Anlage eingerichtete interne Rufnummer ein.
27. Tippen Sie auf OK.
28. Drücken Sie zweimal die Zurück-Taste.
29. Tippen Sie auf Landes- und Ortsvorwahl.
30. Tippen Sie auf Ortsvorwahl.
31. Geben Sie im Eingabefeld Ortsvorwahl die Ortsvorwahl für den Standort
des Telefons ein.
32. Tippen Sie auf Land.
33. Wählen Sie im Listenfeld die Landeskennung für den Standort des Telefons
aus.
34. Drücken Sie die Zurück-Taste.
35. Tippen Sie auf Nutzung.
Das Telefon registriert sich an der TK-Anlage. War die Registrierung
erfolgreich, wird eine entsprechende Meldung angezeigt. Das Telefon
ist jetzt betriebsbereit.
COMfortel 3500 - Firmwareversion 1.2B - Inbetriebnahmeanleitung 02 07/12
27
Inbetriebnahme
Account für VoIP-Anbieter erstellen und einrichten
Voraussetzungen
– Gestarteter Einrichtungsassistent (Anwendung auswählen > Einstellungen > Einrichtungsassistent)
– Bei einem VoIP-Anbieter eingerichteter Account und Kenntnis der
Zugangsdaten
Durchzuführende Schritte
1. Tippen Sie auf Account erstellen.
2. Tippen Sie auf das Profil des gewünschten VoIP-Anbieters (z. B.
sipgate.prov).
3. Geben Sie im Eingabefeld Benutzername den vom VoIP-Anbieter zur Verfügung gestellten Benutzernamen ein.
Tipp: Durch Tippen auf das Eingabefeld können Sie die Android-Tastatur
im Display einblenden. Durch Drücken der Zurück-Taste blenden Sie die
Android-Tastatur wieder aus.
4. Tippen Sie auf das Eingabefeld Authentifizierungs-ID.
5. Geben Sie im Eingabefeld Authentifizierungs-ID die vom VoIP-Anbieter
zur Verfügung gestellte Authentifizierungs-ID ein.
6. Tippen Sie auf OK.
Tipp: Durch Tippen auf die Schaltflächen links im Display gelangen Sie bei
Bedarf wieder zurück in einen der vorherigen Einrichtungsschritte.
7. Geben Sie im Eingabefeld Passwort das vom VoIP-Anbieter zur Verfügung gestellte Passwort ein.
8. Tippen Sie auf OK.
9. Wählen Sie im Listenfeld die Landeskennung für den Standort des
Accounts aus.
10. Tippen Sie auf das Eingabefeld Ortsvorwahl.
11. Geben Sie im Eingabefeld Ortsvorwahl die Ortsvorwahl für den Standort
des Accounts ein.
12. Tippen Sie auf das Eingabefeld Rufnummer.
13. Geben Sie im Eingabefeld Rufnummer die vom VoIP-Anbieter zur Verfügung gestellte Rufnummer ein.
28
COMfortel 3500 - Firmwareversion 1.2B - Inbetriebnahmeanleitung 02 07/12
Inbetriebnahme
14. Tippen Sie auf OK.
15. Tippen Sie auf Default-Account.
Hinweis: Wurde bereits ein anderer Account (z. B. ein SystemtelefonAccount) als Default-Account ausgewählt, wählen Sie hier die Option Kein
Default-Account.
Das Telefon registriert sich beim VoIP-Anbieter. War die Registrierung
erfolgreich, wird eine entsprechende Meldung angezeigt. Das Telefon
ist jetzt betriebsbereit.
16. Drücken Sie die Home-Taste, um zur Startseite zu gelangen.
Weitere Schritte
쑱 Für VoIP-Anbieter Vodafone: Ergänzen Sie anschließend noch die Ortsvorwahl für den Standort des Accounts in den Einstellungen Registrar und
Outbound-Proxy (siehe Bedienungs- und Konfigurationsanleitung des
Telefons).
Telefon an einen PC anschließen
Voraussetzungen
– Ein PC mit den folgenden Merkmalen:
쐽
Intel Pentium 1 GHz oder kompatiblem Prozessor
쐽
Windows XP (ab Service Pack 3), Windows Vista 32-/64-Bit (ab Service
Pack 2), Windows 7 32-/64-Bit, Mac OS X (ab 10.4), Linux (ab Kernel
2.6)
쐽
Arbeitsspeicher RAM: 256 MB, empfohlen 512 MB;
für Windows Vista/7: 1024 MB, bei 64-Bit 2048 MB
쐽
Browser für die Konfiguration: empfohlen Microsoft Internet Explorer ab
Version 7.0, Mozilla Firefox ab Version 3.0, Safari ab Version 5.0
쐽
Netzwerkkarte (der PC muss mit einer Netzwerkkarte ausgerüstet und
der dazugehörige Treiber installiert sein)
쐽
Internet-Protokoll TCP/IP (Transmission Control Protocol/Internet Protocol)
쐽
Maus oder kompatibles Zeigegerät
쐽
SVGA-Grafikkarte mit 1024 x 768 Auflösung, empfohlen 1280 x 1024
und 65536 Farben (16 Bit)
– PC und Telefon im selben Netzwerk
COMfortel 3500 - Firmwareversion 1.2B - Inbetriebnahmeanleitung 02 07/12
29
Inbetriebnahme
– In Betrieb genommenes Telefon
– Patchkabel
Durchzuführende Schritte
1. Schalten Sie den PC ein.
2. Stecken Sie einen Stecker (RJ-45) des Patchkabels in die mit
gekenn-
zeichnete Buchse auf der Unterseite des Telefons.
Wichtig: Der Anschluss eines PCs an die mit
des Telefons führt zu Störungen im Betrieb.
gekennzeichnete Buchse
씮 Beachten Sie die Kennzeichnungen der Buchsen.
3. Stecken Sie den anderen Stecker (RJ-45) des Patchkabels in einen Netzwerkanschluss Ihres PCs.
Telefon über den Konfigurationsmanager einrichten
Voraussetzungen
– Bestehende Netzwerkverbindung zwischen dem PC und dem Telefon
– Kenntnis der IP-Adresse des Telefons (abfragbar unter Anwendung auswählen > Einstellungen > Netzwerk)
– Für Betrieb als Systemtelefon: Kenntnis des Admin-Benutzernamens und
Admin-Passworts der Auerswald-TK-Anlage
Durchzuführende Schritte
1. Starten Sie einen Browser (z. B. den Mozilla Firefox oder den Microsoft
Internet Explorer).
2. Geben Sie im Adressfeld/in der Adressleiste des Browsers die IP-Adresse
des Telefons ein (z. B. http://192.168.178.4).
Der Anmeldedialog wird geöffnet.
Hinweis: Bei Betrieb als Standard-VoIP-Telefon: Wenn Sie den Konfigurationsmanager zum ersten Mal starten, wird zunächst ein Dialog zum Einstellen des Benutzernamens und Benutzer-Passworts geöffnet. Geben Sie
diese wie gewünscht ein.
3. Geben Sie unter Benutzername und Passwort Folgendes ein.
30
COMfortel 3500 - Firmwareversion 1.2B - Inbetriebnahmeanleitung 02 07/12
Inbetriebnahme
쐽
Bei Betrieb als Systemtelefon: den Admin-Benutzernamen und das
Admin-Passwort der TK-Anlage.
쐽
Bei Betrieb als Standard-VoIP-Telefon: den Benutzernamen und das
Benutzer-Passwort des Telefons.
4. Klicken Sie auf OK.
Der Konfigurationsmanager wird geöffnet.
5. Nehmen Sie nacheinander (Seite für Seite) die gewünschten Einstellungen
vor.
Weitere Schritte
쑱 Haben Sie alle Einstellungen vorgenommen, sichern Sie die Konfiguration
zunächst als Datei auf der Festplatte.
COMfortel 3500 - Firmwareversion 1.2B - Inbetriebnahmeanleitung 02 07/12
31
Anhang
Anhang
Haben Sie Ihr Telefon in Betrieb genommen und eingerichtet, finden Sie in diesem Abschnitt
über Bedienung und Einrichtung hinausgehende nützliche Informationen.
Firmware-Update über USB-Stick durchführen
Hinweise: Aktuelle Firmwaredateien erhalten Sie auf den Serviceseiten
der Auerswald-Homepage (Internetadresse: www.auerswald.de)
In der Bedienungs- und Konfigurationsanleitung des Telefons sind weitere
Varianten des Firmware-Updates beschrieben.
Voraussetzungen
– Auf einem USB-Speicherstick gespeicherte Firmwaredatei (*.rom)
– Am Steckplatz gesteckte SD-Karte (nicht schreibgeschützt)
Durchzuführende Schritte
1. Stecken Sie den USB-Speicherstick in die mit
gekennzeichnete
Buchse auf der Unterseite des Telefons.
2. Tippen Sie nacheinander auf Anwendung auswählen > Einstellungen >
Update & Provisioning.
Hat das Telefon eine passende Firmwaredatei auf dem USB-Speicherstick gefunden, wird diese unter Update vom USB-Stick angezeigt.
3. Tippen Sie auf den Namen der Firmwaredatei (z. B. comf3500_v12f.rom).
Das Telefon führt das Firmware-Update und anschließend einen Neustart durch.
Weitere Schritte
쑱 Fehlt nach einer Funktionserweiterung durch ein Firmware-Update in den
beiliegenden Anleitungen die Beschreibung der neuen Funktion, erhalten
Sie aktuelle Anleitungen auf den Serviceseiten der Auerswald-Homepage
(Internetadresse: www.auerswald.de).
쑱 Für die Nutzung neuer Leistungsmerkmale nach einem Firmware-Update
des Telefons ist oft auch eine Aktualisierung der Firmware der TK-Anlage
notwendig (siehe Anleitung der TK-Anlage).
32
COMfortel 3500 - Firmwareversion 1.2B - Inbetriebnahmeanleitung 02 07/12
Anhang
Beschriftungsschild einlegen
Voraussetzungen
– Beschriftungsschild. Auf Seite 67 dieser Anleitung finden Sie einige
Beschriftungsschilder zum Ausschneiden und Beschriften von Hand.
– Ein flaches Werkzeug (z. B. kleiner Schlitzschraubendreher)
Durchzuführende Schritte
1. Stecken Sie ein flaches Werkzeug (z. B. einen kleinen Schlitzschraubendreher) in eine der beiden Aussparungen der transparenten Abdeckung
und hebeln Sie die Abdeckung nach oben ab.
2. Legen Sie das Beschriftungsschild ein.
3. Setzen Sie die Abdeckung mit der matten Oberfläche nach oben wieder
ein.
Telefon reinigen
Durchzuführende Schritte
1. Reinigen Sie das Gehäuse mit einem leicht feuchten Tuch oder verwenden
Sie ein Antistatiktuch.
2. Reinigen Sie den Touchscreen nur trocken mit dem beiliegenden Tuch.
Warnung: In das Gehäuse eindringende Flüssigkeiten können zu einem
lebensgefährlichen elektrischen Schlag führen und das Telefon beschädigen oder zerstören.
씮 Reinigen Sie das Gehäuse des Geräts nur mit einem leicht feuchten
Tuch oder einem Antistatiktuch.
Achtung: Die Oberfläche kann durch Reinigungsmittel beschädigt werden.
씮 Verwenden Sie keine scharfen oder lösemittelhaltigen Reinigungsmittel.
Wichtig: Feuchtigkeit kann Fehlfunktionen des Touchscreens verursachen.
씮 Reinigen Sie den Touchscreen nur trocken mit dem beiliegenden Tuch.
COMfortel 3500 - Firmwareversion 1.2B - Inbetriebnahmeanleitung 02 07/12
33
Important Information
Important Information
This section contains necessary information to operate your equipment safely. Before you
put the telephone into operation, it is absolutely necessary for you to read the safety information described here and to make yourself familiar with the intended use of the device as well
as the technical data.
Safety Information
Warning: Inappropriate use or incorrect replacement of the power plug can
result in a life-threatening electric shock or can damage or destroy or the
device.
씮 For this reason, only use a wall-mounted power supply type no.
FW7577/EU/40.
씮 Make sure it is inserted firmly and securely into the power socket.
Wobbly connectors or mains outlets pose a fire risk.
씮 Do not remove the power plug by pulling on the cable. If you would like
to disconnect the power supply, pull the power plug itself.
씮 If the power plug is damaged, first unscrew the fuse for the power supply
before pulling out the power plug.
씮 When handling 230 V system voltage and devices attached to the mains
supply, be sure to adhere to the applicable regulations.
Warning: Liquid entering the casing can cause life-threatening electric
shocks and damage or destroy the telephone.
씮 Only operate the telephone in closed, dry rooms.
씮 Only clean the casing of the device with a slightly moist cloth or an antistatic cloth.
Warning: Damaged connection lines as well as damage to the casing and
to the device can cause life-threatening electrical shocks.
씮 Only connect the device connection cable with sockets that are
designed for that purpose.
씮 Have damaged connection lines replaced immediately.
씮 Use only original accessories and original replacements.
씮 Always have a professional carry out repairs immediately. Please
contact your electrician or the manufacturer directly.
씮 Do not touch the contact points with pointed, metallic or moist objects.
씮 Do not carry the device by the connection cables.
씮 Use the cable channels at the bottom of the telephone for strain relief.
Warning: Power surges, which can occur during electrical storms, can
cause life-threatening electric shocks or damage or destroy the devices.
34
COMfortel 3500 - Firmware Version 1.2B - Commissioning Instructions 02 07/12
Important Information
씮 Avoid disconnecting and connecting lines during an electrical storm.
씮 Have the cables installed within the building by a certified electrician.
씮 Protect the devices by installing overvoltage protection.
Warning: When using Power-over-Ethernet (PoE) electrical circuits, there
may be a hazard of electric shocks when setting up connections with noninsulated, openly assembled metal contacts, conductors, or terminal
clamps.
씮 Avoid setting up such connections, except if the openly assembled
metal contacts are installed in areas with restricted access. A restricted
access area can be accessed only through the use of a special tool, lock
and key, or other means of security. Moreover, persons who have been
granted access to these areas have been explicitly informed on these
hazards.
Warning: Headsets, external speakers, or receivers which are not admitted may cause hearing damage or interfere with the voice connection.
씮 Only used admitted accessories with the CE symbol in combination with
this telephone.
Warning: The telephone receiver creates a weak magnetic field, which
may attract small magnetic objects, such as needles and paper clips.
씮 Do not put down the receiver close to such objects in order to avoid injuries.
Attention: Inappropriate cleaning or operation can damage or destroy the
touchscreen.
씮 Keep the touchscreen clean. To do this, use the cloth included in the
product package.
씮 To operate the telephone, use your fingers or fingernails. Under no circumstance use ball-point pens, pencils, or other pointed objects on the
touchscreen.
씮 Never apply force or excessive pressure when touching the touchscreen.
Important: In France telephones are only permitted to establish Bluetooth
wireless connections within internal spaces. In some départements there
are regional restrictions on Bluetooth operation which must be complied
with.
Note: In sensitive areas, in which Bluetooth wireless operation is never
permitted, you can also remove the Bluetooth dongle from the telephone,
in addition to switching Bluetooth off.
COMfortel 3500 - Firmware Version 1.2B - Commissioning Instructions 02 07/12
35
Important Information
Used Symbols and Signal Words
Warning:
This symbol warns of personal injury, for example, caused by hazardous electrical voltage.
Caution:
Warns of material damage.
Important:
This symbol indicates possible application errors and conditions which, for
example, could cause function limitations or malfunctions during operation.
Note:
Marks complementary hints and notes.
Proper Use
Important: Auerswald products are not designed, manufactured, or
intended for use in environments requiring fail-safe performance, such as
in the operation of life-support systems and/or nuclear facilities. Use of our
products for these purposes is only allowed with prior written permission by
Auerswald for each individual incident.
Important: Improper use may cause, for example, functional restrictions or
interference, the destruction of the device or, in a worst case scenario, personal injury.
씮 If you are still not sure about the intended use of the product after reading the following chapter, please contact your specialized dealer.
The COMfortel 3500 is a VoIP telephone which can be operated in a Local Area
Network (LAN) as an Auerswald VoIP system telephone and/or standard VoIP
telephone. The telephone can administrate up to 100 VoIP accounts. One of
these accounts can be used as the system telephone account.
For the operation as an Auerswald system telephone, one of the following
Auerswald PBXs is required:
36
쐽
COMmander 6000/R/RX
쐽
COMmander Basic.2 (19")
쐽
COMmander Business (19")
쐽
COMpact 5010 VoIP
쐽
COMpact 5020 VoIP
COMfortel 3500 - Firmware Version 1.2B - Commissioning Instructions 02 07/12
Important Information
Important: To support the COMfortel 3500, the COMmander 6000/R/RX
PBX requires firmware version 5.4A or higher. The PBXs
COMmander Basic.2 (19"), COMmander Business (19"), COMpact 5010
VoIP and COMpact 5020 VoIP require firmware version 4.2A or higher. The
firmware version 4.2A will be available at a later time.
The telephone is corded and is intended for use in closed, dry rooms.
The telephone is equipped with a touchscreen. It is operated on the basis of the
operating system Android 2.3. Alternatively, the telephone can be operated by
means of keys.
The telephone allows you to make calls by using both the connected receiver
and the integrated loudspeakers (hands-free calling). Another option is to connect a headset (not included in the package).
The telephone supports the operation of cable-connected headsets as well as
cordless headsets (headsets with a DHSG interface, for example, from
Auerswald, Jabra, or Plantronics, as well as Bluetooth headsets).
The telephone permits the operation of numerous functions. This cannot only
be controlled via the display, but also via 20 freely programmable function keys
(5 of them touch function keys at the display). These can be used to execute
functions by simply pressing the corresponding function key.
Up to three COMfortel Xtension300 key extension modules (not included in the
delivery) can be attached to the telephone in order to add freely programmable
function keys. The modules are assembled at the right side of the telephone. A
completely extended system provides 110 freely programmable function keys
(including touch function keys).
The telephone can be configured in three different ways: in display-controlled
mode at the telephone itself, via the configuration manager, or in automated
mode from a provisioning server. The configuration manager is accessible via
the integrated Web server in the telephone. The required PC is connected either
directly to an network port on the telephone or must be located in the same network. When configuring the telephone from a provisioning server, the telephone
directly takes over the configuration data from a file, which is previously created
and distributed over the network.
Note: Accessories and service parts can be bought from specialized dealers or in the Internet shop distriCOM at http://www.districom-online.de.
(Delivery is provided only within Germany and Austria.)
COMfortel 3500 - Firmware Version 1.2B - Commissioning Instructions 02 07/12
37
Important Information
Technical Data
38
Power voltage
Supply via wall-mounted power supply 230 V 쓒; 앧10%; 50-60 Hz;
170 mA or via Ethernet port via PoE according to IEEE 802.3af
Wall-mounted power
supply plug
Type no. FW7577/EU/40
Power consumption
network
Min. 4 W, max. 14 W (without COMfortel Xtension300 key extension
modules)
Power consumption
PoE
Min. 3.3 W, max. 12 W (without COMfortel Xtension300 key
extension modules)
System connection
10/100/1000Base Tx Ethernet
2. Ethernet port
10/100/1000Base Tx Ethernet
USB interface
2 x USB host (1x preassigned to Bluetooth dongle)
Bluetooth
Bluetooth 2.1 + EDR
Memory
SD/SDH card, 2 GB in the scope of delivery
Headset
Separate interface for dynamic headsets, also with DHSG support
Displays
19 LEDs, 16 of them polychromatic
5-inch TFT colour display, 800 x 480 pixels, background illumination
COMfortel Xtension300: 30 LEDs, polychromatic
User elements
Keypad, 12 permanently assigned function keys, colour display with
touch operation, 5-way control element, 20 programmable function
keys (5 of them touch function keys at the display)
COMfortel Xtension300: 30 programmable function keys
Receiver
Electret microphone, dynamic receiver, hearing aid-compatible
Loudspeakers
8 Ohm, Ø 52 mm
Hook switch
Magnetic switch contact
Casing
Plastic material
Colours
White, black
Dimensions
(W x H x D)
Basic unit: 275 mm x 148/170/190 mm x 210 mm
COMfortel Xtension300: 120 mm x 68/90/110 mm x 210 mm
Weight
Basic unit: approx. 1200 g
COMfortel Xtension300: approx. 310 g
Ambient temperature
0° to 40°C
Safety
CE
VoIP codecs
G.711, G.722, iLBC
COMfortel 3500 - Firmware Version 1.2B - Commissioning Instructions 02 07/12
Important Information
Information on the Power Supply for the Telephone
A wall-mounted power supply type no. FW7577/EU/40 with 40 V and 350 mA is
contained in the scope of delivery. Please note the following special features
with regard to the power supply of the telephone:
쐽
The power supply for the telephone can either be provided via the delivered wall-mounted power supply or – if your active network component
(switch or router) supports this – via Power over Ethernet (PoE).
쐽
The power supply for telephones with a single key extension module can
be provided via the delivered wall-mounted power supply.
쐽
For telephones with two or more key extension modules, either two
power supply units or Power over Ethernet and one power supply are
required.
Important: If power is being supplied using Power over Ethernet, the
bridge plug must not be removed from the socket on the bottom of the
telephone, which is labelled with
.
Possible Number of System Telephones on Auerswald PBXs
PBX
Max. number of COMfortel 3500 if the PBX has been
fully extended
COMpact 5010 VoIP
4
COMpact 5020 VoIP
8
COMmander Basic.2 (19")
24
COMmander Business (19")
64
COMmander 6000/R/RX
64 (112)*
COMmander 6000/R/RX
112
* With over-commitment, more subscribers are possible per VoIP channel.
Data for Connecting a Headset
Microphone power consumption
Max. 0.5 mA
Microphone sensitivity
45 dB
Loudspeaker impedance
150 Ohm
COMfortel 3500 - Firmware Version 1.2B - Commissioning Instructions 02 07/12
39
Important Information
Loudspeaker sensitivity at 1 kHz
19.5 앧3 dBPa/V
Sound pressure limit
24 dBPa
Headset jack pin-out
1
DHSG BUS_IN
2
DHSG GND
3
Microphone -
4
Loudspeaker -
5
Loudspeaker +
6
Microphone +
7
DHSG + 3.3 V
8
DHSG BUS_OUT
Environmental Notice
For the sake of environmental protection, please make sure that packaging
materials are properly disposed of.
Please consult your municipal administration authorities for options of proper
and environmentally safe disposal of the device.
If you want us to take over the disposal, please send the device to us.
Shipment which is not prepaid cannot be accepted.
Information about the Accompanying Instructions
Additional Instructions
Operation and configuration of the telephone are described thoroughly in the
Operating and Configuration Manual. Also note the information about the warranty, service, CE symbol, and declaration of conformity in the insert "Warranty
Conditions, Information Service".
The Latest Information
If the description of the new function is missing after the installation of functional
extensions by means of a firmware update, you will be granted access to the
current instructions on the support pages on the Auerswald homepage (Internet
address: www.auerswald.de).
40
COMfortel 3500 - Firmware Version 1.2B - Commissioning Instructions 02 07/12
Important Information
Copyright and Trademarks
Disseminating and reproducing these instructions, as well as using and disclosing the contents, even in part, is permitted only with our express permission.
Offenders will be subject to claims for damages. All rights reserved.
쏘 Auerswald GmbH & Co. KG, 38162 Cremlingen, 2012
Bluetooth is a registered trademark of Bluetooth SIG, Inc.
Android is a trademark of Google, Inc.
Microsoft, Windows, Windows Vista, and Internet Explorer are registered trademarks of the Microsoft Corporation in the U.S.A. and/or other countries.
All other trademarks mentioned are the property of the corresponding manufacturer.
MPEG Layer-3 audio coding technology licensed from Fraunhofer IIS and
Thomson Licensing.
Definition of Terms/Glossary
Firmware
Operating software on the telephone or PBX that is stored in the device itself.
The device cannot function without firmware.
Firmware Update
The process of updating the firmware to resolve problems and integrate new
features. To do this, the device establishes a connection to a server in order to
download the most current firmware (the device settings remain intact). Except
for the charges for the required Internet connection, the update is free of charge.
COMfortel 3500 - Firmware Version 1.2B - Commissioning Instructions 02 07/12
41
Preparation
Preparation
This section describes the preparations required before commissioning the device. This
includes the setting of the height and the connecting of the key extension modules (not
included in the package) as well as the receiver and/or headset (not included in the package).
Furthermore, this includes installing the telephone in a suitable location.
Assembling the Feet of the Casing and Adjusting the Height of
the Telephone
Requirements
– Telephone and key extension modules separated from each other
– The feet of the casing delivered with the telephone and the key extension
modules
Steps to Take
1. If required, remove the feet of the casing from the telephone and key extension modules.
Fig. 6: Removing the feet of the casing
2. Reassemble the feet of the casing in the required position.
Note: The feet can be assembled in three different positions within the
marked area.
42
COMfortel 3500 - Firmware Version 1.2B - Commissioning Instructions 02 07/12
Preparation
Assembling and Connecting the Key Extension Modules
Requirements
– Up to three key extension modules COMfortel Xtension300
– The mounting hardware accompanying the key extension modules (special
fasteners, screws, and connection cable)
– A screw driver (cross slot)
– Telephone, switched off (disconnected from the 230 V power supply – if
available – and disconnected from the network)
– Telephone and key extension modules, adjusted to the required height
Steps to Take
1. Place the telephone and the key extension modules on the table in the position in which they are to be assembled.
Note: The key extension modules (up to three are possible) are assembled
at the right side of the telephone.
2. Rotate the telephone and key extension modules so that the lower side is
in front of you.
3. Insert the narrower connector (RJ-10) of the connection cable into the jack
labelled with
on the lower side of the telephone.
4. Insert the wider connector (RJ-11) of the connection cable into the jack labelled with
on the lower side of the first key extension module.
5. Install the connection cables in the neighboring cable channels in such a
way that you can assemble the special connector without obstructions.
6. Combine the components with the help of the special connector and fasten
the special connector with two screws.
Note: Only hand-tighten the screws. The key extension modules will be
slightly loose after mounting, to compensate for any unevenness in the
surface on which they are being installed.
7. Additional key extension modules: Insert the narrower connector (RJ-10) of
the connection cable into the jack labelled with
key extension module connected previously.
on the lower side of the
8. Insert the wider connector (RJ-11) of the connection cable into the jack labelled with
on the lower side of the next key extension module.
COMfortel 3500 - Firmware Version 1.2B - Commissioning Instructions 02 07/12
43
Preparation
9. Repeat steps 5. and 6. for the connected key extension modules.
Fig. 7: Assembling and connecting the COMfortel Xtension30 key
extension modules
Further Steps
쑱 Depending on the number of connected key extension modules, you have
to connect one or two power supply plug(s).
Connecting the Power Supply Plug(s)
Notes on the power supply: The power supply for the telephone can
either be provided via the delivered power supply or – if your active network
component (switch or router) supports this – via Power over Ethernet
(PoE).
The power supply for telephones with a single key extension module can
be provided via the delivered power supply.
For telephones with two or more key extension modules, either two power
supply units or Power over Ethernet (PoE) and one power supply are
required.
Warning: Using the wrong power supply plug can result in a life-threatening
electric shock or can damage or destroy or the device.
씮 For this reason, only use a power plug of type no. FW7577/EU/40.
Requirements
– One or two power supply plug(s) with type no. FW7577/EU/40 (only one
power plug is contained in the scope of delivery)
44
COMfortel 3500 - Firmware Version 1.2B - Commissioning Instructions 02 07/12
Preparation
Steps to Take
1. Only for the operation without Power over Ethernet: Remove the bridge
plug from the corresponding jack marked with
telephone.
on the lower side of the
2. Only for the operation without Power over Ethernet: Insert the RJ-45 connector of the power supply into the jack labelled with
on the lower side
of the telephone.
Do not set up the connection to the 230 V mains supply before the telephone is actually commissioned.
3. If operated with two or three key extension modules: Insert the RJ-45 connector of the power supply into the jack labelled with
on the lower side
of the key extension module.
Do not set up the connection to the 230 V mains supply before the telephone is actually commissioned.
Fig. 8: Connecting the power supply plugs
COMfortel 3500 - Firmware Version 1.2B - Commissioning Instructions 02 07/12
45
Preparation
Connecting the Receiver
Steps to Take
1. Insert the RJ-10 connector at the longer, plane end of the spiral cord into
the jack labelled with
on the lower side of the telephone.
2. Guide the cable to the outside using the corresponding cable channel (see
Fig. 9).
3. Insert the other RJ-10 connector of the spiral cord into the jack on the receiver.
Fig. 9: Connecting the receiver
Connecting the Headset
Requirements
– A headset corresponding to technical data listed on Page 11.
Note: The telephone supports the operation of cable-connected headsets
as well as cordless headsets (headsets with a DHSG interface, for example, from Auerswald, Jabra, or Plantronics).
46
COMfortel 3500 - Firmware Version 1.2B - Commissioning Instructions 02 07/12
Preparation
– To connect a COMfortel headset from Auerswald or another cable-connected headset, you require: an adapter.
Note: The adapter is available at specialized stores as an Auerswald
accessory.
Steps to Take
1. Insert the headset connector into the jack labelled with
on the lower
side of the telephone.
2. Guide the cable to the outside using the corresponding cable channel.
Further Steps
쑱 In order to use the headset for calls, headset operation must be enabled at
the end of commissioning (under Functions > Headset).
Assembling the Telephone
Requirements
– Existing connections in the immediate vicinity of where the telephone is
placed:
쐽
Output socket on the DSL router or an existing network mains outlet
쐽
For power supply via power plug: 230 V network mains outlet
Warning: Liquid entering the casing can cause life-threatening electric
shocks and damage or destroy the telephone.
씮 Only operate the telephone in closed, dry rooms.
Attention: Mechanical stress and electro-magnetic fields can result in the
damage or destruction of the device or impairment of its functions.
씮 Avoid mechanical loads (e.g. vibrations).
씮 Avoid the proximity of devices which radiate electro-magnetic fields (for
example, radio sets, professional radio equipment, amateur radio
equipment, mobile phones, DECT systems, WLAN routers, etc.).
씮 Do not expose the device to direct sunlight.
씮 Protect the device from dirt, excessive dust, condensation, caustic liquids, and steam.
씮 Note the values for ambient temperature and humidity given in the technical data.
COMfortel 3500 - Firmware Version 1.2B - Commissioning Instructions 02 07/12
47
Preparation
Steps to Take
1. Place the telephone on a clean, flat surface.
Attention: Some paints or plastics used on furniture may react chemically
with the plastic feet on the device and cause them to soften. Plastic chemically changed in this way on the feet of the device may cause damage to
the surface of your furniture.
씮 Place the telephone on a non-slip pad.
48
COMfortel 3500 - Firmware Version 1.2B - Commissioning Instructions 02 07/12
Commissioning
Commissioning
This section describes how to commission the telephone for the first time in a stepwise procedure. After a successful initial commissioning, you will be able to make internal calls. You
can customize your telephone using the computer configuration described at the end of this
section.
+
Commissioning the Telephone
Note: If you would like to integrate the telephone into an existing network,
please contact the system administrator responsible for this. Making
changes to an existing network may cause considerable malfunctions.
Requirements
– The patch cable delivered with the telephone
Note: If you require a longer or shorter patch cable, use one without snap
tab protection, because you may not be able to insert it far enough otherwise.
– For the operation with Power over Ethernet: Bridge plug which is inserted
into the jack labelled with
at the lower side of the telephone
– For the operation with power supply plug(s): Power supply plug(s) connected to the telephone
– For the operation as system telephone: PBX with the following features:
쐽
Switched on (connected to the 230 V mains supply)
쐽
COMmander 6000/R/RX: firmware version 5.4A or higher
쐽
COMpact 5010 VoIP, COMpact 5020 VoIP, COMmander Basic.2 and
COMmander Business: firmware version 4.2A or higher
Note: If required, make an update of the PBX (see the instructions for the
PBX). The firmware version 4.2A will be available at a later time.
쐽
Internal telephone number entered in the configuration with the corresponding password for the telephone
– For the automated configuration from a provisioning server: provisioning file
which is stored on the provisioning server and is known on the DHCP server
Steps to Take
1. Insert a plug of the patch cable into the jack labelled with
on the lower
side of the telephone.
COMfortel 3500 - Firmware Version 1.2B - Commissioning Instructions 02 07/12
49
Commissioning
Fig. 10: Connecting the patch cable (here for the operation with Power over
Ethernet)
2. Insert the other plug of the patch cable into the outgoing jack on the DSL
router/switch or into an existing network mains outlet.
3. If required, insert the power supply plug(s) into a freely accessible 230 V
network mains outlet.
The telephone starts up. In the meantime, the LED above the display
turns red and the Auerswald company icon is shown on the display.
If a DHCP server has been configured in the local network, the telephone automatically receives its IP address, subnet mask, as well as
the gateway and DNS server addresses from this DHCP server during
a DHCP request.
The telephone searches for an Auerswald PBX in the network.
The setup assistant is automatically started.
The dialogue box to select the language is opened (only during the initial start-up of the telephone).
4. Tap on the required language.
If the telephone has found an appropriate PBX, an account (e. g.
Account 001) will automatically be created for this PBX and will be displayed in the setup assistant under Inactive or unregistered accounts.
Note: Please observe the following notes if your telephone shows a differing or unexpected behaviour.
If the message Faulty network setup is shown on the display, this indicates that the DHCP server is missing. You can also operate the telephone
with a permanent IP address. To do this, proceed as described in
50
COMfortel 3500 - Firmware Version 1.2B - Commissioning Instructions 02 07/12
Commissioning
Configuring Network Settings Manually on page 52 and subsequently go
back to this point.
If the setup assistant is started, but no account is displayed, the telephone
has not found any Auerswald PBX. If an Auerswald PBX is available, check
whether the corresponding PBX is switched on and start the search again.
To do this, tap on Search for private exchange systems. If the search is
not successful or if no PBX is available, you can also create an account and
the corresponding VoIP provider with the help of profiles. To do this, proceed as described in Manually Creating and Configuring a Standard VoIP
Account for an Auerswald PBX on page 55 or Creating and Configuring
Accounts for VoIP Providers on page 57. If you do not want to use the profiles which are preconfigured by the telephone, you can also configure VoIP
providers and accounts independently in the telephone. To do this, tap on
Manual setup.
During the automated configuration from a provisioning server, the telephone requests the address of the provisioning server and the name of the
provisioning file from the DHCP server. Subsequently, the telephone starts
up, displays the start page, and is ready for operation. If the telephone
starts up with the setup assistant instead, you can enter the address of the
provisioning server into the telephone. To do this, tap on Specify provisioning server and subsequently enter the URL.
5. Tap on the automatically created account (e.g. Account 001).
6. Tap on System telephony account.
Note: If you wish to configure this account as a standard VoIP account
instead, for instance because the telephone has to be operated at several
Auerswald PBXs, proceed as described in Configuring an Automatically
Created Account as the Standard VoIP Account for an Auerswald PBX on
page 53.
Tip: Tap on the buttons to the left on the display to go back to one of the
previous configuration steps, if required.
7. In the User name entry field, enter the internal telephone number previously configured in the PBX.
Tip: To correct wrong entries, you can tap on the entry field and, thus, fade
in the Android keyboard with a delete button on the display. If you press the
Back key, the Android keyboard will be faded out, once more.
8. Tap on OK.
9. Enter the password corresponding to the internal telephone number in the
Password entry field.
COMfortel 3500 - Firmware Version 1.2B - Commissioning Instructions 02 07/12
51
Commissioning
Tip: By tapping the entry field, you can fade in the Android keyboard on the
display. If you press the Back key, the Android keyboard will be faded out,
once more.
10. Tap on OK.
11. Tap on Default account (standard).
Hinweis: If SIPS/SRTP is switched on in the PBX, the system opens a
dialogue in which you enter the fingerprint. Enter the fingerprint, and then
tap on OK.
The telephone logs on to the PBX. If the registration is performed successfully, a corresponding message will be displayed. The telephone is
now ready for use.
12. Press the Home key to leave the setup assistant.
Further Steps
쑱 Configure the telephone according to your requirements. You can carry out
the configuration either via the display on the telephone (see the configuration and operating manual) or via the integrated configuration manager
(recommended; see Page 59).
쑱 If necessary, carry out a firmware update in order to extend the telephone
with the newly available functions (see Page 32). Information about new
features is available on the support pages at the Auerswald website (Internet address: www.auerswald.de).
Configuring Network Settings Manually
Requirements
– Message Faulty network setup which is shown on the display during commissioning
Steps to Take
1. Tap on Faulty network setup.
The Settings > Network application will be opened.
2. Tap on DHCP.
DHCP is switched off.
52
COMfortel 3500 - Firmware Version 1.2B - Commissioning Instructions 02 07/12
Commissioning
3. Tap on IP address.
4. Enter a permanent IP address for the telephone.
Tip: The entry can be made either via the digit keys or by tapping several
times or by clicking and holding the + and - buttons.
5. Tap on OK.
6. Tap on Net mask.
7. Enter a subnet mask for the telephone.
8. Tap on OK.
9. Tap on Gateway.
10. Enter a gateway for the telephone.
11. Tap on OK.
12. Tap on DNS server 1.
13. Enter a DNS server for the telephone.
14. Tap on OK.
15. Press the Home key to get to the start page.
The message No account configured is shown on the display.
16. Tap on No account configured.
The setup assistant is automatically started.
17. Proceed with Step 5. on page 51.
Configuring an Automatically Created Account as the Standard
VoIP Account for an Auerswald PBX
Requirements
– Setup assistant started (All apps > Settings > Setup assistant)
– Account displayed under Inactive or unregistered accounts (e.g.
Account 001)
COMfortel 3500 - Firmware Version 1.2B - Commissioning Instructions 02 07/12
53
Commissioning
Steps to Take
1. Tap on the account displayed under Inactive or unregistered accounts
(e.g. Account 001).
2. Tap on Standard VoIP account.
Tip: Tap on the buttons to the left on the display to go back to one of the
previous configuration steps, if required.
3. In the User name entry field, enter the internal telephone number previously configured in the PBX.
Tip: By tapping the entry field, you can fade in the Android keyboard on the
display. If you press the Back key, the Android keyboard will be faded out,
once more.
4. Tap on the Password entry field.
5. Enter the password corresponding to the internal telephone number in the
Password entry field.
6. Tap on OK.
7. Select the country code for the location of the telephone in the list field.
8. Tap on the Area code entry field.
9. In the Area code entry field, enter the area code for the location of the telephone.
10. Tap on the Numbers entry field.
11. In the Numbers entry field, enter the internal telephone number previously
configured in the PBX.
12. Tap on OK.
13. Tap on Default account (standard).
Note: If another account (e.g. a system telephone account) has already
been selected as the default account, select the Not default account
option.
The telephone logs on to the PBX. If the registration is performed successfully, a corresponding message will be displayed. The telephone is
now ready for use.
14. Press the Home key to get to the start page.
54
COMfortel 3500 - Firmware Version 1.2B - Commissioning Instructions 02 07/12
Commissioning
Manually Creating and Configuring a Standard VoIP Account for
an Auerswald PBX
Requirements
– Auerswald PBX COMmander 6000/R/RX, COMmander Business, COMmander Basic.2, COMpact 3000 analog/ISDN/VoIP, COMpact 5010 VoIP,
or COMpact 5020 VoIP with the following features:
쐽
Available internal VoIP channels
쐽
Switched on (connected to the 230 V mains supply)
쐽
Internal telephone number entered in the configuration with PIN and
password (COMpact 3000 only PIN) for the telephone
Steps to Take
1. Start the “Settings” application (All apps > Settings or Manual setup from
the setup assistant).
2. Tap on Providers & exchange systems.
3. Tap on New provider/exchange system.
4. Tap on auerswald.xml.
5. Tap Domain.
6. Enter the IP address of the PBX.
Tip: By tapping the entry field, you can fade in the Android keyboard on the
display. If you press the Back key, the Android keyboard will be faded out,
once more.
7. Tap on OK.
8. Tap on Registrar.
9. Tap on Registrar address.
10. Enter the IP address of the PBX.
11. Tap on OK.
12. Press the Back key three times to leave the settings for providers.
13. Tap on Accounts.
14. Tap on New account.
15. Tap on Providers & exchange systems.
COMfortel 3500 - Firmware Version 1.2B - Commissioning Instructions 02 07/12
55
Commissioning
The new provider is displayed under Providers & exchange systems
currently configured (e.g. Auerswald 0).
16. Tap on the recently created provider (e.g. Auerswald 0).
17. Tap on the User name.
18. In the User name entry field, enter the internal telephone number previously configured in the PBX.
19. Tap on OK.
20. Tap on the Password entry field.
21. Enter the password corresponding to the internal telephone number in the
Password entry field.
22. Tap on OK.
23. Tap on Numbers.
24. Tap on New number.
25. Tap on the Numbers entry field.
26. In the Numbers entry field, enter the internal telephone number previously
configured in the PBX.
27. Tap on OK.
28. Press the Back key two times.
29. Tap on Country and area code.
30. Tap on Area code.
31. In the Area code entry field, enter the area code for the location of the telephone.
32. Tap on Country.
33. Select the country code for the location of the telephone in the list field.
34. Press the Back key.
35. Tap on Usage.
The telephone logs on to the PBX. If the registration is performed successfully, a corresponding message will be displayed. The telephone is
now ready for use.
56
COMfortel 3500 - Firmware Version 1.2B - Commissioning Instructions 02 07/12
Commissioning
Creating and Configuring Accounts for VoIP Providers
Requirements
– Setup assistant started (All apps > Settings > Setup assistant)
– Account configured at a VoIP provider and knowledge of the access data
Steps to Take
1. Tap on New account.
2. Tap on the profile of the required VoIP provider (e.g. sipgate.prov).
3. In the User name entry field, enter the user name specified by the VoIP provider.
Tip: By tapping the entry field, you can fade in the Android keyboard on the
display. If you press the Back key, the Android keyboard will be faded out,
once more.
4. Tap on the Authentication ID entry field.
5. Enter the authorization ID specified by the VoIP provider in the Authorization ID entry field.
6. Tap on OK.
Tip: Tap on the buttons to the left on the display to go back to one of the
previous configuration steps, if required.
7. In the Password entry field, enter the password specified by the VoIP provider.
8. Tap on OK.
9. Select the country code for the location of the account in the list field.
10. Tap on the Area code entry field.
11. In the Area code entry field, enter the area code for the location of the account.
12. Tap on the Numbers entry field.
13. In the Numbers entry field, enter the telephone number specified by the
VoIP provider.
14. Tap on OK.
15. Tap on Default account (standard).
COMfortel 3500 - Firmware Version 1.2B - Commissioning Instructions 02 07/12
57
Commissioning
NoteIf another account (e.g. a system telephone account) has already
been selected as the default account, select the Not default account
option.
The telephone logs on to the VoIP provider. If the registration is performed successfully, a corresponding message will be displayed. The
telephone is now ready for use.
16. Press the Home key to get to the start page.
Further Steps
쑱 For VoIP provider Vodafone: Subsequently, complete the local area code
entry for the location of the account in the Registrar and Outbound proxy
settings (see the operation and configuration manual of the telephone).
Connecting the Telephone to a PC
Requirements
– A PC with the following features:
쐽
Intel Pentium 1 GHz or compatible processor
쐽
Windows XP (Service Pack 3 or higher), Windows Vista 32-/64-bit (Service Pack 2 or higher), Windows 7 32-/64-bit, Mac OS X (10.4 or higher),
Linux (Kernel 2.6 or higher)
쐽
Memory (RAM: 256 MB, recommended 512 MB;
for Windows Vista/7: 1024 MB, 64-bit 2048 MB
쐽
Browser for the configuration: Recommended is Microsoft Internet
Explorer version 7.0 or higher, Mozilla Firefox version 3.0 or higher,
Safari version 5.0 or higher
쐽
Network card (the PC must be equipped with a network interface card
and the required driver has to be installed)
쐽
Internet protocol TCP/IP (Transmission Control Protocol/Internet Protocol)
쐽
Mouse or compatible pointing device
쐽
SVGA graphics card with a resolution of 1024 x 768, recommended
1280 x 1024, and 65536 colours (16 bit)
– PC and telephone in the same network
– A telephone, put into operation
– Patch cable
58
COMfortel 3500 - Firmware Version 1.2B - Commissioning Instructions 02 07/12
Commissioning
Steps to Take
1. Switch the PC on.
2. Insert a plug (RJ-45) of the patch cable into the jack labelled with
on the
lower side of the telephone.
Important: If you connect a PC to the socket on the bottom of the
telephone that is labelled with
, this will result in disruptions in operation.
씮 Take note of the socket labels.
3. Insert the other plug (RJ-45) of the patch cable into the network connection
port of your PC.
Configuring the Telephone via the Configuration Manager
Requirements
– Existing network connection between the PC and the telephone
– Knowledge of the IP address of the telephone (can be queried under All
apps > Settings > Ethernet)
– For the operation as system telephone: Knowledge of the admin user name
and of the admin password of the Auerswald PBX
Steps to Take
1. Start a browser (for example, Mozilla Firefox or Microsoft Internet Explorer).
2. Enter the IP address of the telephone in the address field/address bar of the
browser (for example, http://192.168.178.4).
The login window opens.
Note: If operated as standard VoIP telephone: If you start the configuration
manager for the first time, a dialogue box will be opened in a first step which
serves to set the user name and the user password. Enter these parameters as requested.
3. Under User name and Password, enter the following parameters.
쐽
If operated as a system telephone: the admin user name and the admin
password of the PBX.
쐽
If operated as standard VoIP telephone: the user name and the password for the telephone.
4. Click on OK.
COMfortel 3500 - Firmware Version 1.2B - Commissioning Instructions 02 07/12
59
Commissioning
The configuration manager opens.
5. Configure the desired settings in sequence (page by page).
Further Steps
쑱 Once you have configured all the settings, first save the configuration as a
file on the hard drive.
60
COMfortel 3500 - Firmware Version 1.2B - Commissioning Instructions 02 07/12
Appendix
Appendix
Once you have put your telephone into operation and configured it, check this section on
operation and configuration for additional useful information.
Performing a Firmware Update via USB Stick
Note: Up-to-date firmware files are available on the support pages on the
Auerswald homepage (Internet address: www.auerswald.de).
The operation and configuration instructions of the telephone also describe
further variants of the firmware update.
Requirements
– The firmware file (*.rom) which is saved on a USB stick
Steps to Take
1. Insert the USB memory stick in the jack labelled with
on the lower
side of the telephone.
2. Subsequently, tap on the elements All apps > Settings > Update & Provisioning.
If the telephone can find an appropriate firmware file on the USB memory stick, this file will be displayed under Update from USB stick angezeigt.
3. Tap on the name of the firmware file (e.g. comf3500_v12f.rom).
The telephone performs the firmware update and subsequently restarts.
Further Steps
쑱 If the description of the new function is missing after the installation of functional extensions by means of a firmware update, you will be granted
access to the current instructions on the support pages on the Auerswald
homepage (Internet address: www.auerswald.de).
쑱 In order to use the new features after a firmware update of the telephone,
an update of the PBX firmware is often necessary (see PBX operation
instructions).
COMfortel 3500 - Firmware Version 1.2B - Commissioning Instructions 02 07/12
61
Appendix
Inserting the Lettering Label
Requirements
– Lettering label. On Page 69 of these instructions, you will find lettering
labels that can be cut out and labelled manually.
– A flat tool (for example, a small flat-head screw driver)
Steps to Take
1. Insert a flat tool (for example a small flat-head screwdriver) in one of the two
recesses of the transparent cover and remove the cover in upward direction.
2. Insert the lettering label.
3. Reinsert the cover with the mat surface upwards.
Cleaning the Telephone
Steps to Take
1. Clean the casing with a slightly moist cloth or anti-static cloth.
2. Clean the touch screen only with the dry cloth included in the package.
Warning: Liquid entering the casing can cause life-threatening electric
shocks or damage or destroy the telephone.
씮 Only clean the casing of the device with a slightly moist cloth or an antistatic cloth.
Attention: Cleaning agents may damage the surface.
씮 Do not use caustic or solvent-containing cleaning agents.
Important: Humidity may cause malfunctions of the touchscreen.
씮 Clean the touch screen only with the dry cloth included in the package.
62
COMfortel 3500 - Firmware Version 1.2B - Commissioning Instructions 02 07/12
Stichwortverzeichnis
Stichwortverzeichnis
A
H
Account
für VoIP-Anbieter .................................28
Standard-VoIP-Account für eine
Auerswald-TK-Anlage, automatisch ........24
Standard-VoIP-Account für eine
Auerswald-TK-Anlage, manuell ..............26
Systemtelefon-Account für eine
Auerswald-TK-Anlage, automatisch ........20
Anschluss
Headset ..............................................17
Hörer ..................................................17
PC .....................................................29
Steckernetzteil(e) .................................15
Tastenerweiterungsmodule ...................14
Anzahl Telefone TK-Anlagen ....................10
Aufstellung des Telefons ..........................18
Headset
Anschluss ........................................... 17
Buchsenbelegung ................................ 11
Technische Daten ................................ 11
Hinweissymbole ........................................ 7
Höhe des Telefons einstellen .................... 13
Hörer ..................................................... 17
B
Beschreibung der Geräte ............................7
Beschriftungsschilder ...............................67
Beschriftungsschilder einlegen ..................33
Bestimmungsgemäße Verwendung .............7
I
Inbetriebnahme
Telefon ............................................... 20
Informationen zur Stromversorgung ........... 10
K
Konfiguration
per PC ................................................ 30
Konformitätserklärung ............... siehe Beileger
„Garantiebedingungen, Informationsservice“
M
Marken .................................................. 12
N
C
Netzwerkeinstellungen ............................. 23
CE-Zeichen .............. siehe Beileger „Garantiebedingungen, Informationsservice“
Copyright ................................................12
P
E
R
Einrichtung
per PC ................................................30
Reinigung des Telefons ........................... 33
F
Service siehe Beileger „Garantiebedingungen,
Informationsservice“
Sicherheitshinweise ................................... 5
Signalwörter ............................................. 7
Steckernetzteil(e) anschließen .................. 15
Stromversorgung .................................... 10
Symbole ................................................... 7
Firmware
Begriffserklärung ..................................12
Firmware-Update
Begriffserklärung ..................................12
durchführen .........................................32
G
Garantie ................... siehe Beileger „Garantiebedingungen, Informationsservice“
Gehäusefüße aufstecken ..........................13
PC anschließen ...................................... 29
S
T
Tastenerweiterungsmodule anschließen .... 14
Technische Daten ..................................... 9
COMfortel 3500 - Firmwareversion 1.2B - Inbetriebnahmeanleitung 02 07/12
63
Stichwortverzeichnis
U
Umwelthinweis ........................................11
Update Firmware .....................................32
V
Verwendung der Geräte .............................7
64
COMfortel 3500 - Firmwareversion 1.2B - Inbetriebnahmeanleitung 02 07/12
Stichwortverzeichnis
COMfortel 3500 - Firmwareversion 1.2B - Inbetriebnahmeanleitung 02 07/12
65
Index
A
H
account
for VoIP providers ................................57
standard VoIP account for an
Auerswald PBX, automatic ....................53
standard VoIP account for an
Auerswald PBX, manual .......................55
system telephone account for an
Auerswald PBX, automatic ....................49
headset
connection .......................................... 46
socket assignment ............................... 39
technical data ...................................... 39
height of the telephone, adjust .................. 42
C
K
CE symbol ... see the insert "Warranty Conditions, Information Service"
commissioning
telephone ............................................49
configuration
via PC ................................................59
connection
headset ..............................................46
key extension modules .........................43
PC .....................................................58
power supply plug(s) ............................44
receiver ..............................................46
key extension modules, connect ............... 43
copyright ................................................41
D
Declaration of conformity ........... see the insert
"Warranty Conditions, Information Service"
device, description ...................................36
device, use .............................................36
I
intended use ........................................... 36
L
lettering labels, insert ............................... 62
N
network settings ...................................... 52
note symbols .......................................... 36
number of telephones at PBX ................... 39
P
PC, connecting ....................................... 58
power supply .......................................... 39
power supply plug(s), connect .................. 44
power supply, information on .................... 39
R
receiver .................................................. 46
S
E
environmental notice ................................40
F
feet of casing, assemble ...........................42
firmware
definition of terms .................................41
firmware update
definition of terms .................................41
perform ...............................................61
firmware, update .....................................61
safety information .................................... 34
Service see insert "Warranty Conditions, Information Service"
signal words ........................................... 36
symbols ................................................. 36
T
technical data ......................................... 38
telephone, assemble ............................... 47
telephone, clean ..................................... 62
trademarks ............................................. 41
W
Warranty . see insert "Warranty Conditions, Information Service"
66
COMfortel 3500 - Firmware Version 1.2B - Commissioning Instructions 02 07/12
Beschriftungsschilder
Beschriftungsschilder
COMfortel 3500 - Firmwareversion 1.2B - Inbetriebnahmeanleitung 02 07/12
67
Beschriftungsschilder
68
COMfortel 3500 - Firmwareversion 1.2B - Inbetriebnahmeanleitung 02 07/12
Lettering Labels
Lettering Labels
COMfortel 3500 - Firmware Version 1.2B - Commissioning Instructions 02 07/12
69
Lettering Labels
70
COMfortel 3500 - Firmware Version 1.2B - Commissioning Instructions 02 07/12
884330
02 07/12