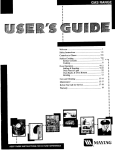
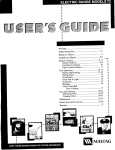
1
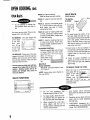
GAS RANGE WT-TO[
iii!:
i!i_i
_i
'_
iii_
_iiii
_ ii
i!_ii,
ii
ii i
IZ
!ii
.............................................................
Pages 1-3
i
;
Installer:
Pleaseleavethismanual
with
Consumer:
Pleasereadandkeepthis
manual
forfuturereference.
Keepsales
receipt
and/orcancelled
checkasproofof
:J_'CE_
purchase.ModelNumber
;;_
Number
Serial
:
COOKING .............................
Pages 4-6
Pages 7-9
COOKING
-&
CLEANING
......................
Pages 10-12
YOU
CALL
.................................
Page 13
Dateof Purchase
In ourcontinuing
effortto improvethe qualityand performanceofourcookingproducts,
it maybe necessary
to make
changesto the appliance
withoutrevising
thisguide.
Ifyouhavequestions,
call:
1-800-688-9900
U.S,A.
1-800-688-2002
Canada
1-800-688-2080
( U.S.TTYfor
hearing
or speech
impaired)
(Mon.-Fri.,
8am-8pmEastern
Time)
tnternet:http://www.maytag.com
Y ...................................................
Page 15
L'UTILISATEUR
.................
Page 16
DEL
USUARIO
.............................
Page 32
Forserviceinformation,
seepage15.
FormNo.A/02/01
PartNo.8113P296-60
.
•
h t t p :/ / w ww. m a y t a g. c o m
74005986
LithoU.S.A.
IMPORTAHT
SAFETY
INSTRUCTIONS
Readandfollowall instructionsbefore
using this appliance to prevent the
potential risk of fire, electric shock, personal injury or damageto the appliance
ance. Useapplianceon}yfor its intended
purposeas describedin this guide.
as a resultof improperusageof the appli-
IF THE INFORMATION IN THIS
> ALL RANGES ,_
CAUSE INJURIESTO PERSONS
CAN TIP AND
emergency.
_
ANTI-TIP
DEVICE PACKED
MANUAL
NOT
FOLLOWED
W,T.
RANGE
EXACTLY,,S
A FIRE
OR EXPLO>INSTALL
SION MAY RESULT CAUSING
PROPERTYDAMAGE,PERSONAL INJURYOR DEATH.
> DO NOT STOREOR USE GASOLINE OR OTHER FLAMMABLE
VAPORSAND LIQUIDS IN THE
VICINITY OF THIS OR ANY
APPLIANCE.
> IF YOU SMELL GAS"
- ance.
Do not try to light any appli- Do not touch any electrical
switch,
- Do not use any phone in your
building,
- Immediately call your gas
supplier from a neighbor's
phone. Follow the gas supplier's instructions,
- If you cannot reach your gas
supplier, call the fire department.
> INSTALLATION AND SERVICE
MUST BE PERFORMED BY A
QUALIFIED INSTALLER, SERVICE AGENCY ORTHE GAS SUPPLIER.
recommendedin this guide.All other
servicingshouldbereferredtoa qualified servicer.Havethe installershow
you the locationof the gas shut off
> FOLLOW ALL
IN STA LL ATION INSTRUCTIONS
Always
disconnect
power
to applivalve and
how to shut
it off
in an
ance beforeservicing.
TO
PREYENT
FIRE
OR
SMOKE
DAMAGE
Be sure all packingmaterialsare removedfrom the appliancebeforeoperatingit.
WARNING: TO REDUCE RISK
OF TIPPING OF THE APPLIANCE FROM ABNORMAL USAGE OR BY EXCESSIVE LOAD-
Keep area around appliance cleal
and free from combustiblematerials,
gasoline,and otherflammablevapors
and materials.
ING OF THE OVEN DOOR, THE
APPLIANCE MUST BE SECURED BY A PROPERLY INSTALLEDANTI-TIP DEVICE.
If applianceis installednear a window, proper precautionsshould bE
taken to preventcurtainsfrom blowing overburners.
NEVERleaveanyitemson the cooktop. The hot air from the vent may
Tocheckif deviceisproperlyinstalled, igniteflammableitems and may inremovestoragedrawerand look un- creasepressurein closedcontainers
derneathrange to makesure one of whichmaycausethemto burst.
the rear leveling legs is properly Many aerosol-typespray cans ar,
engagedin thebracketslot.The anti- EXPLOSIVEwhen exposed to hea
tipdevicesecuresthe rearlevelingleg and may be highlyflammable.Avoi_
to the floor when properly engaged, their use or storage near an appli
You should check this anytime the
ance.
rangehasbeenmoved.
Manyplasticsare vulnerableto heat
GENERAL
IHsTRU(TIOHs
Keepplasticsawayfrom
appliancethat
may becomewarm
partsof th,
o
To ensure proper and safe operation: Appliancemust be properly installed and grounded by a qualified
hot. Do not leaveplasticitemson th_
cooktopas they may melt or softeni
left too close to the vent or a lighte_
surfaceburner.
technician.Do not attempt to adjust,
repair,service,or replace any part of
your applianceunless it is specifically
To eliminatethe hazardof reachin!
over hot surface burners, cabine
storage should not be provide
directly
storageis
provided, itabovea
shouldunit.If
be limited
to items
whichare usedinfrequentlyandwhich
are safelystoredin an areasubjected
to heat from an appliance.Temperatures may be unsafefor someitems,
such as volatile Jiquids,cleaners or
aerosolsprays,
,,1_CASE OF FIRE
Turn off appliance and ventilating
hood to avoid spreadingthe flame,
Extinguishflame thenturn on hoodto
removesmokeand odor.
• Cooktop: Smotherfire or flamein a
panwith a lid or cookiesheet,
NEVERpick up or movea flaming
pan.
• Oven: Smother fire or flame by
closingthe ovendoor.
ABOUT
YOUR
APPLIANCEa,jus,
oe
.rner,,a
e
that itdoesnotsu,
extendbeyondthe
botNEVER use appliance as a space
heaterto heat or warm a roomto prevent potentialhazardto the user and
damageto the appliance.Also,do not
use the cooktopor oven as a storage
areafor food or cookingutensils,
Do not obstructtheflow ofcombustion
and ventilation air by blocking the
ovenvent or air intakes.Restrictionof
air flow to the burner preventsproper
performance and increases carbon
monoxideemissionto unsafelevels.
Avoidtouching oven vent area while
ovenis on and for severalminutesafter oven is turned off. Someparts of
the vent and surrounding area
become hot enoughto cause burns.
Afteroven is turnedoff, do not touch
the oven vent or surroundingareas
tom edge of the pan. An excessive
flame is hazardous,wastes energy
and may damagethe appliance,pan
or cabinetsabovethe appliance.
NEVERleavea surfacecookingoperatJonunattendedespeciallywhen using a high heat settingor when deep
fat frying. Boilovers cause smoking
and greasy spillovers may ignite.
Clean up greasy spills as soon as
possible. Do not use high heat for
extendedcookingoperations.
NEVERheat an unopenedcontainer
on the surface burner or in the oven.
Pressurebuild-upmaycausecontainer to burstresultingin seriouspersonal injuryor damageto the appliance.
Usedry,sturdypotholders.Damppotholdersmay causeburnsfrom steam.
13onot usewaterongreasefires. Use
bakingsoda,a dry chemicalor foamtype extinguisherto smotherfire or
flame,
until they have had sufficienttime to
cool.
Otherpotentiallyhot surfacesinclude
cooktop, areas facing the cooktop,
oven vent, surfaces near the vent
Dishtowelsor othersubstitutesshould
neverbe
usedas
potholdersbecause
they
cantrail
acrosshot
surfaceburners and ignite or get caughton applianceparts.
CHILD
SAFETY
opening,ovendoor,
areasaroundthe
ovendoorand
oven window,
Always
let quantities of hot fat used
for
deepfatfryingcoolbeforeattemptingto moveor handle.
NEVERleave childrenaloneor unsupervisednearthe appliancewhen it is
in useor is still hot.
NEVERallow childrento sit or stand
on any part of the applianceas they
couldbe injuredor burned.
Childrenmustbetaughtthat the applianceand utensilsin it can be hot. Let
hot utensilscoolin a safeplace,out of
reach of small children. Children
notSh°Ulda
toy.be
Childrentaught
thatshouldan
applianCenot
be al-JS
lowed to play with controlsor other
partsof the unit.
CAUTION:NEVERstore items of interestto childrenin cabinetsabovean
applianceor on backguardof a range,
Children climbing on the appliance
doorto reachitems couldbe seriously injured,
WARNING: NEVER use appliance
door,or drawer,if equipped,as a step
stoolor seat as this may resultJnpossibletippingof the appliance,damage
to the appliance,and seriousinjuries.
Do nottoucha hot ovenlightbulbwith
a dampclothas the bulb couldbreak,
Should the bulb break, disconnect
powerto the appliancebeforeremoving bulbto avoid electricalshock,
COOKING
SAFETY
Alwaysplacea panon a surfaceburner before turning it on. Be sure you
knowwhich knob controlswhich surface burner. Make sure the correct
burneris turnedon and that the burner has ignited.Whencookingis completed,turn burner off beforeremovingpan to preventexposureto burner
flame,
Do not let cooking grease or other
flammablematerialsaccumulatein or
nearthe appliance,hoodor vent fan.
Clean
hoodaccumulatingon
frequently to prevent
greasefrom
hoodor
filter. When flaming foods under the
hoodturn the fan on.
NEVERwear garmentsmadeof flaremablematerialor loosefitting
or longsleevedapparelwhile
cooking.Clothdles.ing
may ignite or catch utensi, hartAlways
place oven racks
incool.
the
desired positionswhile
oven is
Slide oven rack out to add or remove
food, using dry, sturdy potholders.
to add oravoid
Always
removefood.
reachinginto
If a rack
the must
oven
be moved while hot, use a dry
potholder.Alwaysturn the oven off at
the end of cooking.
IMPORTAFIT
SAFETY
INSTRUCTIONS,
CONT.
Use care when opening the oven
door. Let hot air or steam escape
beforemovingor replacingfood.
PREPAREDFOOD WARNING:Follow food manufacturer'sinstructions,
face burners.Alwaysturnpan handles
towardthe side or back of the appliance,not out intothe roomwherethey
are easilyhit or reachedby smallchildren.
If a plastic frozen food container
and/or its cover distorts,warps, or is
otherwise damaged during cooking,
immediatelydiscardthe
foodcontamiand its
container.Thefood couldbe
Neverlet apan boil dry as this could
damagethe utensiland the appliance.
Follow the manufacturer'sdirections
when usingoven cookingbags.
nated.
NEVER use aluminumfoil to cover
ovenracksor
ovenbottom.This
could
resultin risk of
electricshock,fire,
or
Only certaintypes of glass,glass/ceramic,ceramicor glazed utensilsare
suitable for cooktop or oven usage
without breaking due to the sudden
damagetothe appliance.Usefoil only
as directedin this guide,
changein temperature.Follow menufacturer's instructions when using
glass,
UTENSIL
SAFETY
Use pans with flat bottomsand hendies that are easily graspedand stay
cool. Avoid using unstable, warped,
easily tipped or loose-handledpans.
Also avoid using pans, especially
small pans, with heavy handles as
they could be unstableand easilytip.
Pans that are heavy to move when
filled with food may also be hatardous,
Be sure utensil is large enough to
properly contain food and avoid
This appliance has been tested for
safe performanceusing conventional
cookware.Do not useany devicesor
accessoriesthat are not specifically
recommendedin this guide. Do not
use eyelid covers for the surface
units, stovetop grills, or add-on oven
convectionsystems.Theuseof devices or accessories that are not
expresslyrecommendedin this menual can createserioussafety hazards,
result in performanceproblems,and
reduce the life of the componentsof
the appliance.
spongeor cloth is used to wipe spills
on a hot surface.Somecleanerscan
producenoxiousfumesif appliedto a
hot surface.
IMPOflTAHT
SAFETY
AND
WARNING
NOTI(E
The California Safe Drinking Water
and Toxic EnforcementAct of 1986
(Proposition65) requiresthe Governor of Californiato publish a list of
substancesknownto the Stateof California to cause cancer or reproduclive harm,and requiresbusinessesto
warn customers of potential exposuresto suchsubstances.
Users of this appliance are hereby
warnedthatthe burningof gascanresuit in low-levelexposureto some of
the listed substances,includingbenTune,formaldehydeand soot,due primarily to the incompletecombustion
of naturalgasor liquidpetroleum(LP)
fuels. Properlyadjusted burners will
minimizeincompletecombustion.Exposureto these substancescan also
be minimizedby propertyventingthe
burnersto the outdoors.
IMPORTANTNOTICE REGARDING
boilovers. Pan
is particularly
importantin
deepsize
fat frying.
Be sure
(LEANING
SAFETY
pan will accommodatethe volumeof
food that is to beaddedas wenasthe
bubbleactionof fat.
To minimizeburns,ignitionof flammablematerialsand spillagedue to chin-
Turnoff all controlsand wait for appliance parts to cool beforetouchingor
cleaningthem.Do not touchthe burner grates or surroundingareas until
they have had sufficienttime to cool.
tentional contactwith the utensil, do
not extendhandlesoveradjacentsur-
Clean appliance with caution. Use
care to avoid steam burns if a wet
PETkitchen
BIRDS:orNever
keep pet
birdsthe
in
the
in rooms
where
fumes from the kitchen could reach.
Birdshavea very sensitiverespiratory
system. Fumes released during an
oven self-cleaning cycle may be
harmful or fatal to birds. Fumes releaseddue to overheatedcookingoil,
fat, margarineand overheatednonstickcookwaremay be equallyharmful.
SAVE
THESE
INSTRU(TIONS
FOR
FUTURE
REFEREFI(E
SURfA([
(OOKING
CLOCK
AND
TIMER
CONTROL
More+
SetClock
Less,
NOTE:The displaywill flashwhen electricalpoweris firstsuppliedto the applianceor if there hasbeena powerfailure.
TO SETTHECLOCK:
TO SET THETIMER:
1.Pressthe Clock pad.
Thetimer canbe set from one minute
>A beep will sound when the
Clock pad is pressed.
(0:01)
up toNOTcontrol
12 hours (12:00).
The
timer does
the oven.
1.Pressthe Timer pad.
2.Pressor pressand hold the More +
or Less- pad untilthe correcttime
of dayappearsin the display,
> A beepwill soundwhen the Timer pad is pressed,
>Press to changethe time in one
minuteincrements.
>Press and hold to change the
time in 10 minuteincrements,
> 0:00will appearin the display.
2. Pressor pressand hold the More+
or Less- pad untilthe correcttime
appearsin the display.
To recall the time of day when the
timer is displayed,press the Clock
pad.
> Pressto changethe time in oneminuteincrements,
>-Press and hold to change the
time in 10 minuteincrements.
> Timerwill startautomaticallyafter
a few seconds. The flashing
colon indicatesthatthe timeris in
use.
> If the Clock pad is pressed,the
colonwill continueto flashto indicatethe timeris in use.
3.A beep will sound at one minute
(0:01).
4.At the end of the timer operation,
0:00 will appearin the displayand
three beepswill sound.
> One beep will sound every 10
secondsfor 10 minutesor until
the timeroperationis cancelled.
TO CANCELTHETIMER:
Pressthe Timer pad and the current
time of day will reappearin the display.
NOTE: When 0:00 is displayed,
pressing either the Timer or Clock
pad will also cancel the timer operation.
SURFACE
£OOKIH6,
co,[
SURFACECONTROL
KNOBS
>
If flameshouldgo out duringa
cooking operation, turn the
burneroff. If a stronggas odor
is detected, open a window
and wait five minutes before
relightingthe burner,
>- Besureall surfacecontrolsare
set in the OFF positionpriorto
supplyinggasto the range,
Never touch cooktop until it
hascooled.Expectsomeparts
of the cooktop, especially
aroundthe burners,to become
warm or hot during cooking.
Use potholdersto protectyour
hands.
SURf_,C[ CONTROLS
Graphicsnear the knob identify which
burnerthe knob controls. For example,
this graphicshowsthe right rear f-'-Q
burnerlocation.
_
3. Afterthe burnerlights,turnthe knob
SETTINGS
to the desiredflamesize.
_ Theignitorwill continueto spark
The size and type of cookwarewill afuntilthe knobls turnedpast the
fect the flamesetting. For information
LIGHTposition.
Setting
HIGH
_,
/_
_
If the surface burner does not light, %__
checkif ignitoris broken,soiledor wet.
If clogged,clean the small portbeneath
the ignitor using a straight pin or soft
bristlebrush,
LOW
I
,_,,To.
PORTBELOWIGNITOR
5
> A clicking (spark)sound will be
heard and the burner will light.
(All ignitorswill spark when any
surfaceburner knob is turnedto
the LIGHTposition.)
SUGGESTEDHEAT
PILOTLESSIGNITION
Po,Ts
1. Placea pan on the burnergrate.
Use to turn on the surfaceburners. An
> The burner flame may lift off or
infinite choice of heat settings is availappearseparatedfromthe portif
able from LOW to HIGH. At the HIGH
a pan is not placedonthe grate.
setting a detent or notch may be felt.
Theknobscanbeset onor betweenany 2. Push in and turn the knob counterof the settings,
clockwiseto the LIGHTsetting.
on cookwareand otherfactorsaffecting
flamesettings,referto
"CookingMade
Simple".
Pilotlessignitioneliminatesthe needfor
a constant standing pilot light. Each
sealedburnerhasa sparkignitor.When
cleaningaroundthe surfaceburner use
care. If cleaningclothshouldcatchthe
ignitor,it could be damagedpreventing
ignition,
SETTINGTHE CONTROLS
_4_,
Uses
OPERATINGDURING
A POWERFAILURE
1. Hold a lightedmatch to the desired
surfaceburner head.
Use to bringliquid to a boil, 2. Push in and turn the control knob
or reachpressurein a pressure cooker. Always reduce
slowlyto LIGHT.
settingto a lower heatwhen
liquidsbeginto boil or foods 3. Adjustthe flameto the desiredlevel.
beginto cook.
An intermediateflamesize is
used to continue cooking.
Foodwill not cook anyfaster
when a higher flame setting
is usedthan neededto maintain a gentleboil.Waterboils
at the same temperature
whetherboilinggentlyor vigorously.
Use to simmerfoods, keep
,-. foods warmand melt checolateor butter.
>
When lighting the surface burners, besureall of the controlsare
in the OFF position. Strike the
matchfirst and hold it in position
beforeturningthe knobto LIGHT.
(OOKTOP
HIGH PERFORMANCE
BURNER(12,000 BTU*)
(SelectModels)
TO PREVENTTHE
COOKTOPFROM
DISCOLORINGORSTAINING:
> Cleancooktopaftereach use.
> Wipe acidic or sugaryspills as
soonas the cooktophascooled
as thesespillsmay discolorthe
porcelain.
Unlike a range with
standard gas burners, this cooktop
does not lift-up nor
is it removable. Do
not attempt to lift
the cooktop for any reason,
_
POWER
This burner offers L_.__BOOST
higherspeedcookingthat canbe used
to quicklybringwaterto a boil and for
large-quantitycooking,
* BTU ratings will vary whenusing LP
gas.
BURNERGRATES
The grates must be properly positioned before cooking. Improperinstallationof the grates may result in
chippingof the cooktop,
....
SEALEDBURNERS
The sealedburnersof your range are
securedto the cooktopandare not designedto beremoved. Sincethe burners are sealed into the cooktop,
boiloversor spillswill not seep underneaththe cooktop.However,the burners shouldbe cleanedaftereach use.
(Seepage11for cleaningdirections.)
> A properlyadjusted burner with
clean portswill lightwithina few
seconds.If using naturalgas the
flame will be blue with a deeper
blue innercone.
If the burnerflameis yellowor is
noisythe air/gasmixturemay be
incorrect.Contacta servicetechnicianto adjust.(Adjustmentsare
notcoveredby the warranty.)
WithLPgas, someyellowtips on
the flames are acceptable.This
is normal and adjustmentis not
necessary.
Do not operate the
burnerswithouta pan
on the grate. The
grate's porcelain finish may chip without a
pan to absorbthe heat
from theburnerflame,
> If the controlknob is turnedvery
quicklyfrom HIGH to LOW, the
flame may go out, particularlyif
the burner is cold. If this occurs,
turn the knob to the Off position,
wait severalsecondsand relight
the burner.
Although the burner
grates are durable,they will gradually
losetheir shine and/ordiscolor,dueto
the high temperatures of the gas
flame,
> Withsometypes of gas, you may
heara "popping"soundwhenthe
surface burneris turned off. This
is a normal operating sound of
the burner.
_> The flame shouldbe adjustedso
it does not extend beyond the
edgeof the pan.
OV[N
COOKING
BAKING
ANDROAStiNG
SETTINGTHE
CONTROL
FORKNOB
BAKING
>_ You may find that the cooking
slightlyfromyourold oven.This
is normal. Every oven has its
owncharacteristics,
times and temperatures vary
>- During some extended oven
cooking operations, you may
hear a "popping"sound when
the oven burner cycles.This is
normal.
AND BOASTING
The OVEN TEMP
knoblocatedonthe _
I
used to select and
maintain the oven
t e m p e r a t u r e.
frontof
rangeis
Alwaysthe
turn
this _
knobjust TO the desiredtemperature.
Do not turn to a higher temperature
and then back.
1, Whencool,positionrack in oven.
TO REMOVE:
When cool,
re-_
move theovenLI._,,2T
racks.Slidethe_'
two catches,_j/
, ,_
_-,"_
rear corner of L_/_
....
the oven bettom,towardthe frontof the oven.
locatedat each IJ_/--,, t 3- ,l
Lift the rear edge of the oven bottom
slightly,then slideit back untilthe front
edge of the oven bottom clears the
ovenfrontframe.Removeovenbottom
from oven.
See roastingchart in "Cooking:: 2. Pushin and turnOVENTEMPknob
Made Simple" bookletfor rec-_:
to desiredtemperature.Allow 10-15 TO REPLACE:Fitthe frontedgeof the
ommended roasting tempera-ii
minutesfor preheating,
oven bottomintothe
Lowerthe
rear of the ovenfrontframe.
oven bottomand
turesandtimes and bakingand
3. Placefood in centerof oven.
slidethe two catchesback to lock the
roastingtips.
..............
.........................................................................................
4. Check food for doneness at mini- ovenbottomin place.
mumtime in recipe.Cook longer if
PILOTLESSIGNITION
Your range is equippedwith pilotless
ignition.Withthis type of ignitionsystern, the gas automaticallyshuts off
and the oven will not operate during
a power failure.
A lighted match will not light the
oven burner. No attempt should be
made to operate the oven during a
power failure,
necessary.
5. Remove food from the oven and
turnthe OVENTEMPknobto OFF.
When the oven is in use, never
block the vent opening.
The ovenvent is locatedat the base of
0VEH B0110M
the backguard.When the oven is in
use,this areamaybecomehot enough
Protectoven bottomagainstspillovers, to cause burns. Do not place plastics
especially acidic or sugary spills, as nearthe vent openingas heatfromthe
they may discolorthe porcelainenam- vent could distortor melt the plastic.
el. Use the correct pan size to avoid
spillovers
believers,the
Never
utensilsor and
foil directlyon
ovenplace
bottom.
The oven bottommay be removedfor
easiercleaning,
t
OV[N VENI
OVEN [IGflI
Push the switch on the
control panel to turn the
ovenlight on and off.
OVEN
LIGHT
BROILING
SETTINGTHEKNOB
CONTROLFORBROILING
Type of Meat
(LowerCompartment)
Hamburgers 3/4" thick
Beef Steaks 1"thick
Doneness
Lower Comp.
Broiling*
Total
Cook Time**
Well
Medium
Well
Middle
Middle
Middle
14-18 min.
14-20 min.
16-24 min.
Chicken
Pieces
Well
Bottom
LO Broil (450°)
30-45 min.
Fish Fillets
Steaks
1/2"thick
1" thick
Flaky
Flaky
Middle
Middle
8-12 min.
10-15 min.
Ham
1/2" thick
Precooked Slice
Warm
Middle
8-12 min.
1. Placethe broilerpan in the recommendedbroilingcompartmentposiPork Chops 1" thick
Well
Middle
18-25 rain.
tion shownin the chart.
...........................................................................................................................
*Upper
isthetopposition;
middle
isthelowerposition;
bottom
isthebottom
ofthe
2. Turn OVENTEMP knob to BROIL
broiler
compartment
(remove
therack).
or,for lowertemperaturebroiling,to
**Broiling
timesareapproximate
andmayvarydepending
onthemeat.
450°F.
>- Lower temperature broiling
avoids excessivebrowningof
longercookingfoods such as
poultry.
3. Followthe suggestedtimes in the
broiling chart. Meat should be
turnedonce abouthalfwaythrough
itscookingtime.
4. Check the donenessby cutting a
slit in the meat near the center to
checkthe color.
5. Afterbroiling,turnthe OVENTEMP
knob to OFF. Removethe broiler
panfromthe broilercompartment.
For best results, use a broiling pan.
Foradditionalbroilingtips, referto the
"Cooking MadeSimple" booklet.
OYEH
COOKIHG,
cons,
OVEH
RACKS
RACK
s.(highest
position):
Usedfor
sometwo-rackcooking.
HALF
RACK
(SelectModels)
RACK4: Usedfor mosttwo-rackbaking.
TO INSTALL
_--._Tabs
IN OVEN:
Support_
_" DO not attemptto changethe
rack position when the oven is
hot.
RACK3: Usedfor mostbakedgoods
on a cookiesheet or jelly roll pan,
layer cakes, fruit pies, or frozen
conveniencefoods,
Yourovenhastworacks.Theyaredesignedwith a lock-stopedge.
RACK2: Usedfor roastingsmallcuts
of meat, casseroles,bakingloaves
of bread,bundtcakes, custardpies
or two-rackbaking.
2. To install, grasp top center of the
half rack. Align the side arm sup-
RACK 1: Usedfor roastinglarge cuts
of meat and poultry, frozen pies,
portbetweenthe top fourthandfifth
oven rack guides. Insert the two
tabs on the backframe of the half
dessertsouffles,angelfoodcake,or
two-rackbaking,
ROASTINGPOSITION:
Usedfor roastingtallercuts of meat
or turkey. Place both oven racks,
rack into the slotson the upperleft
rear of the ovenwall.
3. Push firmly on the top surface of
the half rackuntilthe tabsslideinto
the slots andthe half rack sidearm
TO REMOVE: Pull rack straightout
until it stops
' _
at
the posilocki_.,,
stop
tion; lift up
on the front
of the rack
and pull out.
TO
REPLACE:Placerackonthe rack
supportintheoven;tiltthefrontendup
slightly;slide rack back until it clears
the lock-stopposition;lower front and
slide backintothe oven.
Do not cover an entire rack with aluminum foil or place foil on the oven
bottom. Baking results will be affected and damage may occur to
the oven bottom.
RACK
one
abovethe
_ [_ o
other,
on the__
raisedsidesof
the oven hottom.
.,
MULTIPLE
RACKCOOKING:
support
rests on the fourth oven
rackguide.
_
4. Check for proper installation by
placingyour hand on the top surface of the half rack and pressing
downfirmly.
J
--
Front
_.,_1]
/
Tworack: Userackpositions2 and
4, or 1 and 4.
NOTE: Never place pans directly on
the oven bottom,
POSITIONS
"
...........
1. A I w a y s
install half
rack when
oven
is
cool.
TO REMOVEFROMTHEOVEN:
When the oven is
cool, grasp the top
center of the half
rack and
pull
upward until the
back tabs on the
rack slideout of the
ovenbackslots.
4
i
Do not use cookware that
extends beyond edge of rack.
'
>
>
9
>
Use caution when removing
itemsfrom the half rack to avoid
For best results,allow two inches between the pan placed on >
the rack and the oven side wall.
burns.
Carefully remove items from the
lower rack to avoid disturbing
When opening the oven door,
allow steam and hot air to
escape before reaching into the
oven to removefood.
the half rack.
"HALFRACK" Accessory Kit is
availablewhen not includedwifl"
range. Call 1-800-688-8408.
>
(AR[
8,(EAHII G
CONTROLKNOBS
>
Be sure applianceis off and all
parts are cool beforehandlingor
cleaning.This isto avoiddamage
and possibleburns,
>- To prevent staining or discoloration,clean applianceaftereach
use.
> If a part is removed,be sure it is
correctlyreplaced.
BROILER
PAN & INSERT
Never cover insert with aluminumfoil
as thispreventsthe fatfromdrainingto
the pan below.
> Place soapy cloth over insert and
pan;let soakto loosensoil.
> Wash in warm soapy water. Use
soap filled scouringpad to remove
stubbornsoil.
> Broiler pan and insert can be
cleanedin dishwasher,
BURNERGRATES
> Washgrateswithwarm,soapywater
anda nonabrasive,plasticscrubbing
pad or in the dishwasher.Forstubborn soils,clean with a soap-filled,
nonabrasivepad or sponge and a
commercial Cooktop Cleaning
Creme.(Part#20000001.)**
> Forburnedonsoils, removegrates,
place on newspapersand carefully
spraywith commercialovencleaner,
(Donot spraysurroundingsurfaces.)
Place in plastic bags for several
hoursor overnight.Wearingrubber
gloves, remove from bags. Wash,
rinse,dry and replaceon cooktop,
CLOCK
AND CONTROL
PADAREA
> Wipewith a dampclothand dry.
Glass cleaners may be used if
sprayed on a cloth first. DO NOT
spray directly on control pad and
display area.
GLASS
> RemoveknobsintheOFF position OVEN
WINDOW
& DOOR
by pullingforward.
(SELECT MODELS)
> Wash, rinseand dry. Do not use
abrasivecleaningagentsas they
may scratchthe finish,
> Turnon each burnerto be surethe
knobs have been correctly replaced,
> Avoidusingexcessiveamountsof
water which may seep underor
behindglasscausingstaining.
> Wash with soap and water. Rinse
with clear water and dry. Glass
cleanercanbeused ifsprayedona
COOKTOP,BACKGUARD
& CONTROLKNOBAREA
clothfirst.
> Do not useabrasivematerialssuch
as scouring pads, steel wool or
powdered cleaners as they will
scratchglass.
Porcelain enamel is glass fused on
metaland may crack or chip withmisuse. It is acid resistant,not acid proof.
All spillovers,especiallyacidicor sugary spillovers, should be wiped up
immediatelywith a dry cloth.
>- Whencool,washwith soapywater,
rinseand dry.
> Neverwipe off a warm or hot surface with a damp cloth. This may
causecrackingor chipping,
>- Neveruseoven cleaners,abrasive
or causticcleaningagentson exteriorfinishof range.
METAL FINISHES
TRIMPARTS
> Washwith soap and water,a glass
cleaner,or mildliquiddetergent.
> To preventscratchingor dulling of
the finish, do not use mildly abrasive, abrasive, harsh or caustic
cleanerssuchas ovencleaners.
OVEN INTERIOR
> Clean frequently using mild abrasire and a plasticpad.
SIDE
PANEL,
BROILER
COMPARTMENT, _" DOnot use metallic scouringpads
OVEN
DOOR
& DOOR
HANDLES
becausethey will scratchthe surface.
> Whencool,wash with warmsoapy > When using commercial oven
water,rinse and dry. Never wipe a
cleanersfollow the manufacturer's
warm or hot surface with a damp
instructions.
cloth as this may damagethe sur- > Wipe up acidic spills (tomato or
face and maycause a steamburn.
milk basedfoods) as soon as pos>- For stubbornsoil, use mildlyabrasible with soap and water. If the
sive cleaningagentssuch as bakspillis not wipedup, it maydiscolor
ing sodapasteor DonAmi*. Do not
the porcelain.
use abrasive cleaners such as
NOTE: To make cleaning easier,
steel wool pads or oven cleaners.
These productswill scratchor per- removethe ovendoor,if desired.(See
Maintenancesection,page 11.)
manentlydamagethe surface.
NOTE: Use dry towelor cloth to wipe
up spills, especially acidic or sugary
spills. Surfacemay discolor or dull if
soil is not immediatelyremoved.This
is especiallyimportant for white surfaces.
ENAMEL(PAINTED)
CARE
&CLEAHIHG,
CONT.
OVEN
RACKS
Cleanwith soapywater.
Removestubbornsoil with cleansing powder or soap-filledscouring
pad. Rinseand dry.
PLASTIC FINISHES
TRIM& ENDCAPS
When cool, clean with soap and
water,rinseand dry.
Use a glass cleaner and a soft
cloth,
NOTE:Neveruseovencleaners,abrasive or caustic liquid or powdered
cleansers on plastic finishes. These
cleaningagentswill scratchor mar finish.
NOTE: Topreventstainingor discoloration, wipe up fat, greaseor acid (tomato, lemon,vinegar,milk, fruit juice,
marinade)immediatelywith a dry paper towel.
SEALEDGAS BURNERS
Allow burner to cool. Wash with
soapy waterand a plasticscouring
pad. For stubbornsoils, dean with
a soap-filled,nonabrasivepad.
Cleangasports,especiallythe port
belowthe ignitor,with a straightpin
or a soft bristlebrush,
Be careful not to get water into
burnerports.
Whencleaning,usecare to prevent
damageto the ignitor.If the ignitor
is soiled,wet or damaged,the surface burnerwill not light.
MAIN]'[NAN([
OVEN DOOR
seatappearcrooked.
door on
Door shouldnot
NOTE;Theoven doorona new range
may
"spongy"when
it is closed.
This feel
is normal
and will decreasewith
use.
>_ Do not place excessiveweight
on or stand on an open oven
door. This could cause the
range to tip over, break the
door,or injurethe user.
>_ Do not attemptto openor close
dooror operate oven until door
is properlyreplaced.
>_ Never place fingers between
hinge and front oven frame,
Hinge arms are spring mounted. If accidentallyhit, the hinge
will slam shut against oven
frame and could injureyourfingers.
OVEN
LIGHT
>- Disconnect power to range
beforereplacinglight bulb.
>_ Use a dry potholderto prevent
possible harm to hands when
replacingbulb.
>_ Be sure bulb is cool before
touchingbulb.
>_ Do not touch hot bulb with a
damp cloth as this may cause
the bulb to break.
_-------__/
TO REMOVE:
TO REPLACEOVENLIGHT BULB:
1. Whencool,
open the
oven door
to the first
stop position (openedaboutfour inches),
1. Removelightbulb.
2. Grasp door at each side. Do not
usethe doorhandleto liftdoor.
3. Lift up evenly until door clears
hingearms.
TO REPLACE:
2. Replace with a 40 watt appliance
bulb.
3. Reconnectpower to range. Reset
clock.
OVENWINDOW
(SelectModels)
1. Do not use abrasive cleaning
agentssuchas steelwool scouring
pads or powdered cleansers as
they may scratchthe glass.
1. Graspdoor at each side.
2. Align slots in the door with the
hingearmson the range.
3. Slidethe doordown ontothe hinge
arms until the door is completely
seatedon the hinges. Push down
on the top corners of the door to
11
comp,ete,yh,nges
2. Do not hit the glasswithpots, pans
furniture,toys or other objects.
3. Do not closethe dooruntilthe over
racks are in place.
Scratching,hitting,jarringor stressin!
the glass may weaken its structur_
causingan increasedrisk of breakage
at a later date.
LEVELINGLEGS
ELECTRICAL
CONNECTION
REMOVALOF
GAS APPLIANCE
> Be sure the anti-tip bracket securesone of the rearlevelinglegs
to the floor to preventthe range
fromaccidentallytipping,
Appliances which require electrical
power are equippedwith a threepronggroundingplugwhichmust be
plugged directly into a properly
groundedthree-hole120volt electrical
outlet,
Gas appliance connectors used to
connectthisapplianceto the gassupply are not designed for continuous
movement.Once installed, DO NOT
repeatedlymovethis gasappliancefor
cleaning or to relocate. If this appli-
The rangeshouldbe leveledwhen in-
__
ancehasto be movedand/orremoved
level,turn the plasticlev- _
nect power to
eling legs, located at J!l
appliance
stalled.
If
the
rangeis
not
Always
discon- _
each corner of the
_.!1
beforeservicing.
range,untilrangeis_
_;_
The three-prong grounding plug
level.
_
.-.. y
offersprotectionagainstshockhaz" _NTJ-TIPBRACKET
ards. Donot cut or removethe third
_'__EVELINGLEG
grounding prong from the power
cord plug.
If an ungrounded,two-hole or other
type electricaloutlet is encountered,it
is the personalresponsibility of the
appliance owner to have the outlet
replaced with a properly grounded
three-hole electrical outlet.
described in the installation instructions. For informationcontact Maytag
for
servicing, follow1-800-888-9900.
the procedure
CustomerServiceat
To prevent range from accidentlytipping,rangemustbesecuredto
sliding
the rear leveling leg into
floorby
the
anti-tip bracket.
BEFORE
YOU
CALL
FOR
SERVICE
CHECK
THESE
POINTS
IF...
PART OR ALL OF APPLIANCE
DOES NOT WORK.
Checkto be sureplugis securelyinsertedinto receptacle,
Check or re-set circuit breaker.
Checkor replacefuse.
>- Checkpowersupply.
>- Check if surface and/or oven controis have been properlyset. See
pages5 and 7.
BAKING
RESULTSOVEN.
DIFFER
FROMPREVIOUS
> Aluminum
foil
incorrectly
used. Never
linewas
the broiler
pan
insertwithfoil.
_- Temperaturesoften vary between
a new oven and an old one. As
OVEN SMOKES EXCESSIVEovensage, the oventemperature LY DURING BROILING.
often"drifts"and may becomehotter or cooler.
> Foodtoo closeto flame.See page
8for moreinformation.
BAKING RESULTS ARE NOT
> Broiler insert coveredwith alumiWHAT YOU EXPECTED.
hum foil
_ Check the oventemperatureselected. Make sure oven is preheated when recipe or directions
recommendpreheat.
>_ Excessfat not trimmedfrom meat
priorto broiling,
> A so(ledbroilerpanwas used.
_ Checkrackpositions. Seepage9.
>- Use correctpan, Darkpansproduce dark browning, Shiny pans
produce light browning. See
"Cooking Made Simple" booklet
for more informationon bakeware,
MOISTURE CONDENSATION
COLLECTS ON OVEN
WINDOW.
_ Checkthe use of foil in the oven,
Never use foil to cover an entire
oven rack. Placea small piece of
foil on the rack belowthe pan to
catchspillovers.
_ Check pan placement. Stagger
pans when using two racks.Allow
1-2 inches between pans and
ovenwalls,
_ Make surethe oven vent has not
> Excessive moisture was used
when cleaningthe window.
Burnerportsmay beclogged,
been blocked. See page 7 for
location.
and odor.
_- Excessivefood soils on the over
SURFACE BURNER FLAME
LIFTS OFF PORTS.
> Checkto makesurerangeis level,
SURFACE BURNER FAILS
TO LIGHT.
Check to be sure unit is properly
connectedto powersupply.
Checkfor a blowncircuit fuse or a
trippedmaincircuitbreaker.
Checkto be sure burnerportsor ignition ports are not clogged. See
page5.
_- Checkto be sure ignitoris dry and
clicking.Burnerwill not lightif ignitor
is damaged,soiledor wet. If ignitor
doesnot click,turncontrolknobOff.
THE FLAME IS UNEVEN,
Checkto besure a pan is sittingon
the grate above.
FOOD NOT BROILING
PROPERLY.
Checkoven setting. See page8.
_- Checkrack positions.Seepage9.
13
> This is normalwhen cookingfood
high in moisture.
STRONG ODOR OR LIGHT
SMOKEOCCURS
OVEN IS TURNED WHEN
ON.
_- This is normalfor a newrangeanc
will disappear after a few uses
Openinga windowor turning on
fan will help remove the smok_
bottom.
MAYTAG
flANWAflRANTY
WHAT
NOT
(OVERED
BY
THESE
RBMTIES:
FullOneYearWarranty
- PartsandLabor
Forone(1)yearfromtheoriginalretailpurchasedate,anypartwhichfailsin normal
homeusewillberepaired
or replaced
freeof
charge,
Limited
Warranties
- PartsOnly
SecondYear- Afterthefirstyearfromthe
original
purchase
date,partswhichfailinnormalhomeusewillbe repairedor replaced
freeof chargefor the partitself,withthe
ownerpayingallothercosts,including
labor,
mileage
andtransportation.
ThirdThrough
FifthYear- Fromtheoriginal
purchase
date,partslistedbelowwhichfailin
normal
homeusewillberepaired
or replaced
freeof chargefor thepartitself,withthe
ownerpayingallothercosts,including
labor,
mileage
andtransportation.
> Electronic
Controls
ThirdThrough
TenthYear- Fromtheorigihalpurchase
date,partslistedbelowwhich
failinnormal
homeusewillberepaired
orreplacedfreeofchargeforthepartitself,with
theownerpaying
all othercosts,including
labor,
mileage
andtransportation.
> SealedGasBurners
Canadian
Residents
Theabove
warranties
onlycoveranappliance
installed
inCanada
thathasbeencertified
or
listedbyappropriate
testagencies
forcompliancetoaNational
Standard
ofCanada
unless
theappliance
wasbrought
intoCanada
dueto
transfer
ofresidence
fromtheUnited
States
to
Canada.
S
1. Conditions
anddamages
resulting
fromanyofthefollowing:
a. Improper
installation,
delivery,
ormaintenance.
b.Anyrepair,
modification,
alteration,
oradjustment
notauthorized
bythe
manufacturer
or anauthorized
servicer.
c. Misuse,
abuse,
accidents,
orunreasonable
use.
d. Incorrect
electric
current,
voltage,
orsupply.
e. Improper
settingofanycontrol.
2. Warranties
arevoidiftheoriginal
serialnumbers
havebeenremoved,
altered,
orcannot
bereadilydetermined.
3. Lightbulbs.
4. Products
purchased
forcommercial
or industrial
use.
5. Thecostofservice
orservice
callto:
a.Correct
installation
errors.
b. instruct
theuserontheproper
useoftheproduct.
c.Transport
theappliance
totheservicer.
6. Consequential
orincidental
damages
sustained
byanyperson
asa resultof
anybreach
ofthesewarranties.
Somestatesdonotallowtheexclusion
orliraitationof consequential
or incidental
damages,
sotheaboveexclusion
may
notapply.
IF YOU NEED SERVILE
I Callthedealerfromwhomyourappliance
waspurchased
or callMaytag
Appliances
SalesCompany,
MaytagCustomer
Assistance
at 1-800-6889900,USAtolocateanauthorized
servicer.
I Besuretoretainproofofpurchase
tovedfywarranty
status.Referto WARRANTYforfurtherinformation
onowner's
responsibilities
forwarranty
service.
I Ifthedealerorservice
company
cannotresolve
theproblem,
writetoMaytag
Appliances
SalesCompany,
Attn:CAIR
®Center,
EO.Box2370,Cleveland,
TN37320-2370,
orcall1-800-688-9900
U.S.A,or 1-800-688-2002
Canada.
Limited
Warranty
Outside
theUnitedStates
andCanada
- PartsOnly
Fortwo(2)yearsfromthedateoforiginal
retailpurchase,
anypartwhichfailsin normal
homeusewillberepaired
or replaced
freeof
charge
forthepartitself,withtheownerpay-
U.S.customers
usingTTYfordeaf,hearing
impaired
orspeechimpaired,
call
1-800-688-2080.
NOTE:Whenwritingor callingabouta serviceproblem,
pleaseinclude
the
ingall othercosts,including
labor,mileage
andtransportation.
Thespecific
warranties
expressed
aboveare
theONLYwarranties
provided
bythemanufacturer.Thesewarranties
giveyouspecific
legalrights,andyou mayalsohaveother
rightswhichvaryfromstatetostate.
c.Nameandaddress
ofyourdealerorservicer;
d.Acleardescription
oftheproblem
youarehaving;
following
information:
a.Yourname,
address
andtelephone
number;
b.Modelnumber
andserialnumber;
e.Proofofpurchase
(salesreceipt).
I User'sguides,servicemanuals
andpartsinformation
are available
from
Maytag
Appliances
SalesCompany,
Maytag
Customer
Assistance.
MAYTAG • 403 West Fourth StreetNorth • P.O.Box 39 ° Newton, Iowa 50208