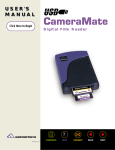
Download Zio CameraMate User`s guide
Transcript
CameraMate
Hi-Speed 10 in 1 Digital Media
Reader/Writer
User’s Guide
www.ziocorp.com
Copyright Zio Corporation. All rights reserved. Trademarks are used for informational purposes, and remain the property
of their owners.
CameraMate Hi-Speed Digital Media Reader/Writer
1
Table of Contents
What’s Included
……………………………………………………………………
Minimum System Requirements
3
…………………………………………………
3
Hardware Overview
……………………………………………………………….
4
Software Overview
……………………………………………………………….. 4
Hardware Installation on a PC
…………………………………………………...
Hardware Installation on a Macintosh
Digital Media Card Compatibility
5
………………………………………….
6
………………………………………………..
7
Inserting a Digital Media Card ……………………………………………………. 7
Accessing a Card on a PC
……………………………………………………….
9
Removing a Card on a PC
……………………………………………………….
9
Accessing a Card on a Macintosh
……………………………………………...
10
Removing a Card on a Macintosh
……………………………………………...
11
……………………………………………………..
12
Frequently Asked Questions
Technical Support
…………………………………………………………………. 13
CameraMate Hi-Speed Digital Media Reader/Writer
2
What’s Included
•
CameraMate 10 in 1 Media Reader/Writer
•
Software Installation CD
Requirements
To use the Hi-Speed Digital Media Reader/Writer, your computer system must
meet the following minimum requirements:
PC Requirements
•
200MHz or faster processor
•
USB Port
•
Windows® 98 SE, 2000, Me, or XP
•
64MB RAM minimum (128MB recommended)
•
1 MB free disk space
Macintosh Requirements
•
G3 processor or faster (iMac, iBook, PowerBook, PowerMac G3 and G4)
•
USB Port
•
Mac OS 9.x or higher
•
64MB RAM minimum (128MB recommended)
PC Requirements for CameraMate ProPix Software Suite
•
500MHz or faster processor
•
50MB free disk space
•
Windows® 98 SE, 2000, Me, or XP
•
64MB RAM minimum (128MB recommended)
•
PC must have sound card
•
CD Burner for VCD creation
•
DVD player must support Video CD format and either CD-R or CD-RW
media
CameraMate Hi-Speed Digital Media Reader/Writer
3
Hardware Overview
The Hi-Speed Digital Media Reader/Writer makes it easy to read files directly off
digital media cards. The Hi-Speed Digital Media Reader/Writer can read/write
CompactFlash Type l and ll, IBM Microdrive, Memory Stick, Memory Stick Pro,
Magic Gate Memory Stick, MultiMediaCard, Secure Digital, SmartMedia and xDPicture Card. You can connect your Hi-Speed Digital Media Reader/Writer to
computers with USB 1.1 or USB 2.0 ports. Hi-Speed Digital Media Reader/Writer
transfers data at the Full-Speed rate using USB 1.1 and at a Hi-Speed rate using
2.0.
Software Overview
Driver Software
The PC driver software is required for Windows 98SE and 2000 and Macintosh
9.x. It is not required for Windows Me, or XP or Macintosh 10.x. If you have
installed the service pack 2 for Windows 2000, you will need to install drivers.
Your can acquire the driver for Windows 98SE and 2000 via a web download.
Please visit www.ziocorp.com.
CameraMate ProPix Software Suite (PCs only)
CameraMate ProPix Software Suite consist of three different software
applications; ProPix Sound, ProPix OnTV, and ProPix Share.
With ProPix OnTV, you can take digital pictures, and turn them into digital photo
albums on a CD that can play in your DVD player! Simply select and arrange
your photos on the timeline and burn a CD. ProPix OnTV not only creates a slide
show that you can watch on your TV, but also a secure back up of your original
digital pictures. ProPix OnTV makes it easy to turn digital memories into home
entertainment
With ProPix Sound, you can add your own voice track to your digital pictures in
three easy steps. First select your picture, then record your commentary and
finally save the file. Then send the file to family and friends via email. Send
personal greetings; let them hear as well as see the kids. Make your pictures
come to life with sound.
ProPix Share is the perfect software allowing digital camera users the ability to
share pictures quick and easily. Select and organize digital pictures into
individual albums with one click. ProPix Share uses peer to peer technology,
allowing sharing picture to be 10 times faster than emails. ProPix Share is the
fastest and easiest way to share pictures with family and friends.
CameraMate Hi-Speed Digital Media Reader/Writer
4
Hardware Installation on a PC
You can connect your Hi-Speed Digital Media Reader/Writer to computers with
USB 1.1 or USB 2.0 ports.
After you install the Hi-Speed Digital Media Reader/Writer software (For
Windows 98SE only), you can install the hardware as follows. For Windows Me,
2000, and XP proceed to the steps below.
Connecting to a Computer’s USB Port
Connect the USB connector on the Reader/Writer to the USB port on your
computer. You can connect the reader directly into the PC or use the optional
extension cable as shown in the picture below.
Note: Be sure the cable is properly aligned before; do not force the connection.
Connecting to a USB Hub
1. Connect the USB hub (purchased separately) to your computer's USB port.
2. Connect the Hi-Speed Digital Media Reader/Writer USB cable to a port on the
USB hub.
Note: Be sure the cable ends are properly aligned; do not force the connection.
CameraMate Hi-Speed Digital Media Reader/Writer
5
Hardware Installation on a Macintosh
After you install the Hi-Speed Digital Media Reader/Writer software (For
Macintosh 9.x only), you can install the hardware as follows. For Macintosh 10.x
proceed to the steps below.
You can connect your Hi-Speed Digital Media Reader/Writer to computers with
USB 1.1 or USB 2.0 ports.
Connecting to a Macintosh USB Port
Connect the USB connector on the Reader/Writer to the USB port on your
Macintosh. You can connect the reader directly into the computer or use the
optional extension cable as shown in the picture below.
Note: Be sure the cable is properly aligned, and do not force the connection.
USB Port
USB Cable
Connecting to a USB Hub
1. Connect the USB hub (purchased separately) to your Macintosh USB port.
2. Connect the USB connector of the reader/writer to a port on the USB hub.
Note: Be sure the cable ends are properly aligned before connecting and do not
force the connection.
CameraMate Hi-Speed Digital Media Reader/Writer
6
Digital Media Card Compatibility
The Universal Reader/Writer is compatible with the following digital media cards:
•
•
•
•
•
SSFDC Smart Media cards (3.3 Volt only), in current capacities of up to
128MB
All current CompactFlash cards and cards in the CF I and CF II formats,
such as the IBM Microdrive
Most MultiMediaCards and Secure Digital formats
xD Picture Card
Memory Stick, MagicGate Memory Stick, and Memory Stick Pro media
Note: Secure mode of Sony MagicGate is not supported.
Inserting Digital Media
If you plan on writing to or deleting from your Digital Media Card, make sure the
card is not locked. To insert a Digital Media Card, follow these steps:
The CameraMate 10 in 1 reader has 4 slots for media. The Bottom row is for xDPicture Card, SmartMedia, Secure Digital, and MultiMediaCard.
•
•
•
To insert an xD-Picture Card, be sure the gold connectors are facing up,
To Insert a SmartMedia Card, be sure the gold connectors are facing up,
and the notch is on the right side
To Insert an SD, or MultiMediaCard, be sure the gold connectors are
facing up, and the notch is on the left side of the card.
CameraMate Hi-Speed Digital Media Reader/Writer
7
The Top row of the 10 in 1 CameraMate is for Compact Flash Type I & II, IBM
Microdrive, and Memory Stick, Memory Stick Pro, and Magic Gate Memory Stick.
•
•
To insert an a CompactFlash, or IBM Microdrive be sure the connector are
facing the reader, and the label is facing up
To Insert Memory Stick, be sure the label is facing up, and he notched
corner is on the Left.
Caution: Be careful not to insert the media card in the wrong direction. If it is
forced in, the reader/writer or the media card may be damaged, or data on the
card may be lost or corrupted. If the computer does not recognize the media, or if
it does not fit correctly, re-position the card and try reinserting it.
CameraMate Hi-Speed Digital Media Reader/Writer
8
Accessing a Card on a PC
When the Hi-Speed Digital Media Reader/Writer is connected to your PC, a
Removable Disk icon appears in My Computer (with a newly assigned drive
letter).
Note: The screen below may vary slightly from the window displayed on your
computer.
If you are running Windows XP and you insert a digital media card, a dialog box
appears that asks what you want to do with the files on the Removable Disk. You
can access the files by selecting from several options. This is a default feature of
Windows XP. For all other supported versions of Windows (including XP) you
can access a card as follows:
1. Double-click on the Removable Disk icon.
The contents of the media card appear. You can then access the data on the
card. Digital cameras usually create one or more folders on a digital media card,
which contains your digital images. To display a digital image, open the folder(s)
then double-click on the icon(s) representing the digital image(s) you want to
view.
Note: If a card is not inserted when you double-click a Removable Disk icon, a
message appears that says: Device not ready or Please insert a disk. If you see
this message, insert a card and try accessing the media again.
2. To transfer files between your computer and a card, use the basic
Windows file transfer functions. For example, drag and drop or copy and
paste files from your computer to a card or from a card to your computer.
Removing a Card on a PC
Before you remove a digital media card, be sure the read/write operations are
complete. Removing a card during read/write access causes lost or corrupted
data. To remove a card, grasp the end of the card with your thumb and index
fingers, and remove it from the slot.
CameraMate Hi-Speed Digital Media Reader/Writer
9
Mounting and Accessing a Card on a
Macintosh
After you insert a card on a Macintosh, a distinct icon appears on the Mac OS
desktop. This is the mounted state, which enables read and write operations for
the card. After inserting a card, the time required for mounting depends on the
type and brand of card. Usually, a card mounts on the desktop within a few
seconds.
You can access a mounted card just like a floppy or other type of removable disk.
Double-click the icon to open its respective file window. Double-clicking on the
media card. The images stored on the card can be copied, opened, edited, and
deleted.
Note: The desktop below differs slightly for Mac OS X, but the procedure for
accessing a card is the same.
IMPORTANT: If you are running Mac OS 9.x, be sure the Apple "File Exchange"
control panel is set to load in your system folder - you can activate it using the
Apple "Extensions Manager" control panel.
CameraMate Hi-Speed Digital Media Reader/Writer
10
Removing a Card on a Macintosh
Before you remove a digital media card, be sure the read/write operations are
complete. Removing a card during read/write access causes lost or corrupted
data.
1. To remove a card, drag the card icon and drop it onto the trash icon.
Note: The icons below and their desktop locations differ slightly for Mac OS X
and higher.
The card icon disappears from the desktop. A dialog box will appear letting you
know that it is safe to remove the device.
Note: The dialog box below does not appear in Mac 0S X and higher.
2. Click OK in the dialog box, then grasp the end of the card with your thumb
and index fingers, and remove it from the slot.
Caution: Do not remove a mounted card without first dragging the card icon to
the trash. Improper removal can corrupt the data stored on your card. If removed
improperly, a warning message may state that there is a problem with the media
and prompt you to check the disk for data loss.
CameraMate Hi-Speed Digital Media Reader/Writer
11
Frequently Asked Questions
If you experience difficulties with your Hi-Speed Digital Media Reader/Writer,
please check the troubleshooting section below for possible solutions. If the
problems persist, please www.ziocorp.com for additional information on how to
get technical support
During installation, my Hi-Speed Digital Media Reader/Writer is connected
to my computer’s USB port, but does not find the required drivers.
PC
Before connecting the Hi-Speed Digital Media Reader/Writer to your computer’s
USB port, you must install the reader/writer driver software for Windows 98SE
and 2000. Windows Me and XP do not require the driver installation. The driver
can be found at www.ziocorp.com
Mac
Before connecting the Hi-Speed Digital Media Reader/Writer to your computer’s
USB port, you must install the reader/writer driver software for Macintosh 9.x.
Macintosh 10.x does not require the driver installation. The driver can be found at
www.ziocorp.com
I installed the required driver software (where necessary) and the HiSpeed Digital Media Reader/Writer is connected to my computer’s USB
port, but nothing happens when I insert my digital media card.
PC
If you are running Windows XP, and you insert a digital media card, a dialog box
asks what you want to do with the files on the Removable Disk. You can select
from several options. This is a default feature of Windows XP.
When using Windows 98 SE, Me, or 2000 you must access a digital media card
through its Removable Disk icon. You do this by opening My Computer where a
Removable Disk icon appears that represents your Hi-Speed Digital Media
Reader/Writer. Double-click on the Removable Disk icon to display the contents
of the media inserted in your reader/writer. This is where your digital images or
data are located.
Digital cameras usually create one or more folders on a digital media card, which
contains your digital images. Depending on the digital camera you have, the
folder names can vary. Double-click on the respective folder name to access the
digital images located in the folder. You can display a preview by double-clicking
on one of the image icons.
Macintosh
After you insert a card on a Macintosh, a distinct icon appears on the Mac OS
desktop. This is the mounted state, which enables read and write operations for
CameraMate Hi-Speed Digital Media Reader/Writer
12
the media. Depending on the media used, the mounting time can vary. Opening
the media icon provides access to the images stored on the respective media
card. Digital cameras usually create one or more folders on a digital media card,
which contains your digital images. Depending on the digital camera you have,
the folder names can vary. Double-click on the respective folder name to access
the digital images located in the folder. You can display a preview by doubleclicking on one of the image icons.
When I insert a digital media card in my Hi-Speed Digital Media
Reader/Writer, I cannot access my data.
Try to reinsert the media card. Be sure that the card has been inserted correctly.
How do I copy a file from a digital media card to my computer?
PC
You can copy images and data from the Hi-Speed Digital Media Reader/Writer to
your computer using basic Windows file transfer functions. For example, you can
drag and drop or copy and paste files from the Hi-Speed Digital Media
Reader/Writer to your computer. For information regarding drag and drop, as well
as copy and paste, please refer to your Windows Help file, or Help and Support
in Windows XP. You can find the Windows Help file and Help and Support under
the Start button located in the lower left corner of your desktop. After you open
Windows Help, click on the Index tab to display the contents of Windows Help.
Then scroll down to, and double-click on copying files, folders. To access help
information in Help and Support on Windows XP, simply enter copy and paste in
the search box.
Macintosh
You can access a mounted card just like a floppy or other type of removable disk.
Double-click the card’s icon to open its respective file window. Then hold down
the option key and drag and drop the desired images from the card to the
location of your choice.
When I try to write to a Memory Stick, SD, or SM card, an error message
appears that says: The card is write protected or locked.
Make sure the card’s lock tab is not in the lock position. When this tab is in the
lock position, the card is locked and therefore write-protected. You cannot
write to or delete from a card until you move the tab to the unlocked position.
Technical Support
For additional technical support, please visit our web site at www.ziocorp.com
CameraMate Universal 10 in 1 Reader/Writer User’s Guide
7/04
13


