1
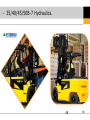
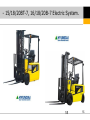
We build a better future
insert image here
- Service guide: Hyundai -7 AC range -
1
1
- Introduction Hyundai’s production plant (Ulsan).
2
2
- Table of contents.
- General AC machine’s introduction.
- New AC Battery models: - 15/18/20BT-7
- 16/18/20B-7
- 22/25/30/32B-7
- 22/25/30BHA-7
- 35/40/45/50B-7
3
3
General
machines
introductions
4
4
- 15/18/20BT-7, 16/18/20B-7 Model introduction.
-
ZAPI AC Dual AC2 drive controller (48V).
-
ZAPI AC 2 Flash inverter (Hydr.) (48V).
-
2 x Sauer Danfoss drive motor . (4,4Kw).
-
1 x Sauer Danfoss Hydr. motor. (15,8Kw)
-
ZF transmissions with integrated wet brake
-
Calibration through calibrator or display.
-
3 user modes selectable (H, N, E).
-
Travel speed 16 – 17 km/h.
-
Standard integrated mast profiles.
-
Fingertip control available as an option.
5
5
6
6
- 22/25/30/32B-7, 22/25/30BHA-7 Model intro.
-
ZAPI AC Dual AC2 drive controller (48/80V).
-
ZAPI AC 2 Flash inverter (Hydr.) (48/80V).
-
2 x Sauer Danfoss drive motor . (7,8Kw).
-
1 x Sauer Danfoss Hydr. motor. (18/20Kw)
-
MS Precision transmissions + wet brake
-
Calibration through calibrator or display.
-
3 user modes selectable (H, N, E).
-
Travel speed 17/18 – 18/19 km/h.
-
Standard integrated mast profiles.
-
Fingertip control available as option.
-
Battery side loading available on 22>32B-7
(option).
7
7
8
8
- 35/40/45/50B-7 Model introduction.
-
ZAPI AC Dual AC3 drive controller(80V).
-
ZAPI AC 3 Flash inverter (Hydr.)(80V).
-
2 x Sauer Danfoss drive motor(8,1Kw).
-
1 x Sauer Danfoss Hydr. motor(23,8Kw)
-
Pro-Mec transmissions + wet brake
-
Calibration through calibrator or display.
-
3 user modes selectable (H, N, E).
-
Travel speed 18 km/h.
9
9
10
10
Drive units and
intergrated
wet brake systems
11
11
- 15/18/20BT-7, 16/18/20B-7 Drive Unit.
12
12
- 15/18/20BT-7, 16/18/20B-7 Brake Structure.
1 Brake pedal & bracket assy.
2 Parking lever assy.
3 Reservoir tank assy.
4 Brake master cylinder.
0,35L ATF Dexron III
Replace every 2000h.
Drive unit must be in
assembling position!!!
13
13
- 15/18/20BT-7, 16/18/20B-7 Drive Unit + Brake.
1 Housing
2 Disc carrier
3 Internal gear
4 Planet gear
5 Shim
6 Fixing plate
7 Wheel bolt
8 Breather filter
9 Fey ring
10 Roller bearing
11 Gamma ring
12 Socket screw
13 Nilos ring
14 Magnet plug
(Oil level checkpoint)
15 Seal ring
16 Hexagon screw
17 Torax screw
18 Cylinder pin
19 Circlips
20 Needle ring
21 Taper roller bearing
22 Grooved ball bearing
23 Pressure spring
24 Housing cover
25 Brake lever complete
26 Outer clutch disc
27 Inner clutch disc
28 Axial bearing
29 Pressure disc
30 Pressure pin
31 Pressure disc
32 Cylinder pin
33 Shaft seal
34 Planet carrier assy.
34-1 Wheel shaft
34-2 Planet carrier
34-3 Slotted nut
34-4 Shaft seal
35 Pinion
36 Spur gear
14
14
For detailed disassembling, assembling and adjustment info: check service manual!!!
- 15/18/20BT-7, 16/18/20B-7 Brake Adjustment.
- Adjusting dimension "A" for the
brake lever is between 0.4 ~ 1.0mm.
-The adjusting dimension has to be checked
with a dial gauge.
- For this purpose position the feeler of the
dial gauge on the brake lever in the specified
measuring point range. Press the brake
lever against the cover and read the
deflection on the dial gauge.
- If the adjusting dimension should not be
within the specified range, it has to be
obtained and set with the pressure pin(5).
- Several pressure pins can be selected.
- If the pressure pin has to be replaced the brake
lever has to be removed again.
- Only then it is possible to replace the pressure
Check free play of
pin from the bore of the cover.
“A”
brake cylinder during
- When installing the pressure pin do not
every maintenance.
damage the radial shaft seal. First wet the
sealing lips of the radial shaft seal(6) slightly
If no play, check
with grease before installing the new pin.
handbrake or pedal
- After reinstallation the brake lever, recheck the
brake adjustment.
adjusting dimension according to the procedure
described above.
15
15
For detailed disassembling, assembling and adjustment info: check service manual!!!
- 22/25/30/32B-7, 22/25/30BHA-7 Drive Unit
16
16
22/25/30/32B-7, 22/25/30BHA-7 Brake Structure.
1 Brake pedal & bracket.
2 Parking lever assy.
3 Reservoir tank assy.
4 Brake master cylinder.
2,4L Mobilfluid 424
Replace every 2000h.
Drive unit has to be
in assemble position
17
17
- 22/25/30/32B-7, 22/25/30BHA-7 Drive Unit.
1
2
3
4
Brake housing.
Drive gear (electro motor input).
Parking brake lever (adjustable).
Brake port (brake pipe input).
5
6
7
8
Bleeding valve.
Air breather.
Drive unit housing.
Wheel hub.
18
18
- 22/25/30/32B-7, 22/25/30BHA-7 Drive Unit.
17 Planet gear
18 Needle bearing
20 Retaining ring
21 Lock nut
22 Retaining ring
23 Gear
24 Retaining ring
25 Ball bearing
31 Inner cover
37 Key
38 Sun pinion
8 Air breather
50 Support disk
9 Socket screw
55 Shim
10 Housing-LH
1 Wheel hub
56 Shim
11 Housing-RH
2 Hub bolt
57 Shim
12 Plug
3 Needle bearing
58 Shim
13 Magnetic plug
4 Gamma seal
59 Carrier pin
5 Taper roller bearing 14 Taper roller bearing 60 Retaining ring
15 Thrust washer
6 Spacer
64 Oil seal
7 Bolt
16 Planet carrier
65 O-ring
19
19
For detailed disassembling, assembling and adjustment info: check service manual!!!
-22/25/30/32B-7, 22/25/30BHA-7 Drive/Brake Unit
19
26
27
28
29
30
32
33
34
35
36
39
40
41
42
43
44
45
46
47
48
Bleeder fitting
49
Retaining ring
51
Needle cage
52
Input pinion
53
Outer cover-LH
54
Outer cover-RH
61
Socket screw
62
Ball bearing
63
Retaining ring
66
Key
67
Input shaft (motor) 68
Lever
Lever pin
Bleeding valve
20
Bleeding valve cap
O-ring (Seal)
Step seal
Piston
Elastic disk
Friction disk
Steel disk
Cone spring
Retaining ring
Parallel pin
Spring
Stud
Parallel pin
Set screw
Nut
Brake plug
O-ring
Socket screw
20
1. Assemble the lever and pin.
2. Assemble an adapter (pump) to
pressurized the brake system.
3. Put 2-5Bar into the system and
measure stroke with a dial gauge.
4. Set piston stoke (Play between
handbrake lever and piston head)
21
1.2mm and tighten nut
r evel ekar b dna H
22/25/30/32B-7, 22/25/30BHA-7 Brake adjustment
Non-Pressurized
Pressurized
21
22/25/30/32B-7, 22/25/30BHA-7 Brake adjustment
Handbrake released.
= Hydraulic pressure
By external pump or pushing the brake pedal.
22
22
- 35/40/45/50B-7 Drive Unit + Brake.
23
23
- 35/40/45/50B-7 Brake Structure.
1 Brake pedal & bracket assy.
2 Parking lever assy.
3 Reservoir tank assy.
4 Brake master cylinder.
1,5L Mobilfluid 424
Replace every 2000h.
Drive unit has to be in
assembling position
24
24
- 35/40/45/50B-7 Drive Unit + Brake.
1 Spacer
2 Wheel hub
3 Wheel fixing screw
4 Needle cage
5 Shaft seal
6 Taper roller bearing
7 Spacer
8 Breather plug
9 Cap screw
10 Cap screw
11 Cap screw
12 Housing
13 Screw plug
14 Magnetic screw plug
15 Locking pin
16 Needle cage
17 Taper roller bearing
25
18
19
20
21
22
23
24
25
26
27
28
29
30
31
32
33
34
Retaining ring
Ring gear disc
Ring gear
Stud
Washer
Hexagon nut
Planet carrier
Retaining ring
Planet gear
Roller bearing
Retaining ring
Lock nut
Retaining ring
Helix gear
Retaining ring
Ball bearing
Cover
25
For detailed disassembling, assembling and adjustment info: check service manual!!!
- 35/40/45/50B-7 Drive Unit + Brake.
35
36
37
38
39
40
41
42
43
44
45
46
47
48
49
Helix pinion
50
Ball bearing
51
Retaining ring
52
Retaining ring
53
Locking pin
54
Sun pinion
55
Feather key
56
Elastic pin
57
Lever
58
Pin
59
Cap screw
60
Screw plug
61
Washer
62
Connection
63
Bleeder nipple cap 64
26
Bleeder nipple
Brake housing
Seal
Piston seal
Piston
Step seal
Piston
Disk pusher
Friction disk
Steel disk
Support disk
Spring
Fixing screw
Locking pin
Spring
26
- 35/40/45/50B-7 Brake Adjustment.
-
-
-
A.
It’s recommendable checking every 2000
working hours if the stroke of the brake piston
(pos 54 on page 26) hasn’t increased above
3.5mm.
If so, it will be necessary to replace the brake
disk pack.
Follow next procedure in order to estimate the
wear of the discs:
Disconnect the hand brake rod (cable).
B.
Move the lever towards the brake piston
(until it touches the topside of the piston pos
54).
C.
Pull the lever strongly and measure the
stroke at the end of the parking brake lever.
D.
If the parking brake lever stroke is over
21mm the disc pack has to be replaced. 27
27
General Brake and Drive Unit’s Oil Quality Overview
28
28
Hydraulic
systems
29
29
- 15/18/20BT-7, 16/18/20B-7 Hydraulics.
30
30
- 15/18/20BT-7 Hydraulic Diagram (Non OPSS).
1 Hydraulic gear pump
2 Priority valve
3 Main control valve
4 Steering unit
5 Steering hydraulic
motor
6 Tilt cylinder
-
Steering: 80Bar
7 Lift cylinder
-
Main:
8 Suction strainer
80Bar
-
15BT-7=160Bar
18BT-7=180Bar
20BT-7=190Bar
Auxiliary: +/- 130Bar
9 Return filter
10 Down safety valve
11 Down control valve
3112 Hydro Tank.
31
- 15/18/20BT-7 Hydraulic Diagram (OPSS).
Holding valve
-
Steering: 80Bar
-
Main:
-
Auxiliary: +/- 130Bar
OPSS valve
15BT-7=160Bar
18BT-7=180Bar
20BT-7=190Bar
32
- 15/18/20BT-7 Hydraulic Diagram (OPSS+ fing).
33
- 16/18/20B-7 Hydraulic Diagram (Non OPSS).
1 Hydraulic gear pump
2 Priority valve
3 Main control valve
4 Steering unit
5 Steering cylinder
6 Tilt cylinder
7 Lift cylinder
100Bar
-
Steering: 100Bar
-
Main:
-
16B-7=160Bar
18B-7=180Bar
20B-7=190Bar
Auxiliary: +/- 130Bar
8 Suction strainer
9 Return filter
10 Down safety valve
11 Down control valve
12 Hydraulic oil tank
34
34
- 16/18/20B-7 Hydraulic Diagram (OPSS).
Holding valve
-
Steering: 100Bar
-
Main:
-
Auxiliary: +/- 130Bar
OPSS valve
35
16B-7=160Bar
18B-7=180Bar
20B-7=190Bar
- 15/18/20BT-7, 16/18/20B-7 MCV (OPSS).
36
36
- 15/18/20BT-7, 16/18/20B-7 Hydraulic MCV.
Priority valve
37
37
- 15/18/20BT-7 Hydraulic Steering.
1 Hydraulic gear pump
2 Priority valve
4 Steering unit
5 Steering hydraulic motor
8 Suction strainer
11 Hydraulic oil tank
38
38
- 16/18/20B-7 Hydraulic Steering.
1 Hydraulic gear pump
2 Priority valve
4 Steering unit
5 Steering cylinder
8 Suction strainer
12 Hydraulic tank
39
39
- 22/25/30/32B-7, 22/25/30BHA-7 Hydraulics
40
40
- 22/25/30/32B-7 Hydraulic Diagram.
130
Bar
Holding valve
OPSS valve
- Emergency
descending
valve.
-Unscrew max.
2 turns.
-
Steering: 100Bar
-
Main:
-
Auxiliary: +/- 130Bar
22B-7=160Bar
25B-7=185Bar
30B-7=180Bar
32B-7=190Bar
1 Gear pump + priority valve
2 Main control valve
3 Steering unit
4 Steering cylinder
5 Tilt cylinder
6 Lift cylinder
7 Suction strainer
8 Down control valve
9 Down safety valve
10 Return filter
11 Hydraulic
oil tank 41
41
- 22/25/30BHA-7 Hydraulic Diagram.
-
-
130
Bar
Holding valve
OPSS valve
- Emergency
descending
valve.
-Unscrew max.
2 turns.
-
Steering: 100Bar
Main:22BHA-7=160Bar
25BHA-7=185Bar
30BHA-7=180Bar
Auxiliary: +/- 130Bar
1 Hydraulic gear pump
2 Priority valve
3 Main control valve
4 Steering unit
5 Steering cylinder
6 Tilt cylinder
7 Lift cylinder
8 Suction strainer
9 Down control valve
10 Down safety valve
11 Return filter
12 Hydraulic oil tank
42
42
- 22/25/30/32B-7, 20/25/30BHA-7 MCV.
P
Lift
Holding
Holding
valve
valve
P
Lower position
Tilt forward position
43
43
Tilt backwards position
- 22/25/30/32B-7, 20/25/30BHA-7 MCV.
OPSS section
Emergency
descending
valve turn
counterclockwise
(10mm
spanner)
44
44
- 22/25/30/32B-7 Component location.
Priority valve installed on pumps
Steering pressure checkpoint
45
45
- 22/25/30/32B-7 Hydraulic Steering.
1 Gear pump with priority valve
3 Steering unit
4 Steering cylinder
7 Suction strainer
10 Return filter
11 Hydraulic oil tank
46
46
- 22/25/30BHA-7 Hydraulic Steering.
1 Hydraulic gear pump
2 Priority valve
3 Steering unit
4 Steering cylinder
7 Suction strainer
10 Return filter
11 Hydraulic oil tank
47
47
- 35/40/45/50B-7 Hydraulics.
48
48
- 35/40/45/50B-7 Hydraulic Diagram.
13
16
14
15
-
Steering:
120Bar
Main: 35B-7: 175Bar
40
B-7:
195Bar
45B-7: 210Bar
50B-7: 210Bar
-
-
Auxiliary:
150Bar
1 Hydraulic gear pump
2 Priority valve
3 Main control valve
4 Steering unit
5 Steering cylinder
6 Lift cylinder
7 Tilt cylinder
8 Down safety valve
9 Down flow regulator
10 Suction strainer
11 Return filter
12 Hydraulic oil tank
13 Holding valve
14 Lift lock valve (OPSS)
15 Hydrostat valve
16 Emergency descend
49
49
- 35/40/45/50B-7 Main Control Valve.
14
14
13
13
- When the lift control lever is pulled back, the
spool moves to the right and the neutral passage
is closed.
- Oil supplied from the pump pushes the load
check valve up and flows into the lift cylinder
port (1A).
- The pump pressure reaches proportionally the
cylinder. Fine control is possible by closing the
neutral passage.
- The return oil from cylinder flows into the tank.
Lift
- When the lift control lever is pushed
forward, the spool moves to the left and the
neutral passage is closed.
- The spool moves to the lift lower position,
opening up the neutral passage to tank and
(1A) > T.
- In lift lower position the fork drops due to its
own weight.
50
Lowering position
50
- 35/40/45/50B-7 Main Control Valve.
- When the tilt control lever is pushed forward, the
spool moves to the left and closes the neutral
passage.
Oil supplied from the pump pushes the load check
valve and oil flows into the tilt cylinder port(2B).
The pump pressure reaches proportionally the
cylinder. Fine control is possible by closing the
neutral passage.
Return oil coming from the cylinder port(2A) flows
into the tank through a hole inside the tilt lock
spool.
- When the tilt control lever is pulled back,
the spool moves to the right and closes the
neutral passage.
- Oil supplied from the pump pushes the
load check valve and oil flows into tilt
cylinder port(2A).
- The pump pressure reaches proportionally
the cylinder. Fine control is possible by
closing the neutral passage.
- Return oil from cylinder port(2B) flows
into the tank via the
51
51low pressure passage.
- 35/40/45/50B-7 MCV and Priority valve.
OPSS section
52
52
- 35/40/45/50B-7 Hydraulic Steering.
1 Hydraulic gear pump
2 Priority valve
4 Steering unit
5 Steering cylinder
10 Suction strainer
11 Return filter
12 Hydraulic oil tank
53
53
Electric
systems
54
54
- 15/18/20BT-7, 16/18/20B-7 Electric System.
55
55
-15/18/20BT-7, 16/18/20B-7 Component location.
1 Combination switch
11 Relay
2 Display
12 Flasher unit assy.
3 Working lamp switch (opt)
13 Fan assy.
4 Beacon switch (opt)
14 Contactor
5 DC-DC converter
15 High horn
6 Beacon lamp (opt)
16 Pump motor
7 Pump controller
17 Fuse box assy.
8 Back up alarm
18 Drive motor
9 Steering sensor
19 Accelerator assy.
10 Traction controller
20 Parking micro switch
56
56
- 15/18/20BT-7, 16/18/20B-7 Traction Motor.
Sauer Danfoss drive motor . (4,4Kw).
505 Wavy washer
506 O-ring
515 Cylinder screw
520 Temp sensor
523 Tube
524 Amp pin
700 Rotor
710 Circlip
717 Woodruff key
900 Plug
950 Amp pin
951 Amp plug
952 Wire seal
953 Amp seal
51 Stator
220 Terminal
222 Hexagon screw
223 Hexagon nut
224 Disk
225 Hexagon nut
226 Disk
300 Drive end cover
320 Ball bearing
330 Sealing ring
335 Circlip
345 O-ring
400 Plate
500 Sensor bearing
57
57
- 15/18/20BT-7, 16/18/20B-7 Pump Motor.
Sauer Danfoss pump motor. (15,8Kw)
51 Stator
220 Terminal
221 Cylinder screw
222 Hexagon screw
223 Hexagon nut
224 Disk
225 Hexagon nut
240 Terminal base
300 Drive end cover
320 Ball bearing
327 Shaft seal
400 End plate
500 Sensor bearing
505
506
515
520
523
524
700
900
950
951
952
953
58
Wavy washer
O-ring
Cylinder bolt
Temp sensor
Tube
Amp pin
Rotor
Plug
Amp pin
Keying plug
Wire seal
Interface seal
58
- 15/18/20BT-7, 16/18/20B-7 Electric Diagram.
59
59
- 15/18/20BT-7, 16/18/20B-7 DC System.
(Behind converter)
TN
+
60
R
60
- 15/18/20BT, 16/18/20B-7 AC System.
61
61
- 15/18/20BT-7, 16/18/20B-7 Traction Config.
62
62
-15/18/20BT-7, 16/18/20B-7 Pump Configuration.
63
63
- 22/25/30/32B-7, 22/25/30BHA-7 Electric system.
64
64
- 22/25/30/32B-7 Electric Component location.
1 Combination switch
2 Accelerator assy.
3 Parking micro switch
4 High horn
5 Drive motor
6 Pump motor
7 Fan assy.
8 Pump controller
9 Traction controller
10 Back up alarm
11 Contactor
12 Fuse box assy.
13 SBR switch assy.
14 Working lamp (opt)
15 Beacon lamp (opt)
16 Display
17 Work lamp switch (opt)
18 Beacon lamp switch (opt)
19 DC-DC converter
65
65
- 22/25/30/32B-7 Electric Diagram.
66
66
- 22/25/30/32B-7 DC System.
(Behind converter)
+
w.
67
67
- 22/25/30/32B-7 AC System.
68
68
- 22/25/30/32B-7 Traction Con. Configuration.
69
69
- 22/25/30/32B-7 Pump Con. Configuration.
70
70
- 22/25/30BHA-7 Electric Component location.
1 Combination switch
11 Contactor
2 Accelerator assy
12 Fuse box assy
3 Parking micro switch
13 Flasher unit assy
4 High horn
14 Working lamp (opt)
5 Drive motor
15 Beacon lamp (opt)
6 Pump motor
16 Display
7 Fan assy
17 Working lamp switch (opt)
8 Pump controller
18 Beacon lamp switch (opt)
9 Traction controller
19 DC-DC converter
10 Back up alarm
20 Relay
71
71
- 22/25/30BHA-7 Electric Diagram.
72
72
- 22/25/30BHA-7 Traction Con. Configuration.
73
73
- 22/25/30BHA-7 Pump Con. Configuration.
74
74
- 35/40/45/50B-7 Electric systems.
75
75
- 35/40/45/50B-7 Component location.
1 Combination switch
10 Back buzzer
2 Accelerator assy.
11 Traction controller
3 Drive motor
12 Pump controller
4 Pump motor
13 Rear work lamp (Opt)
5 High horn
14 Beacon lamp (Opt)
6 Relay
15 DC-DC converter
7 Flasher unit
16 Working lamp switch (Opt)
8 Fuse box assy
17 Beacon lamp switch (Opt)
9 Contactor
18 Display
76
76
- 35/40/45/50B-7 Electric Diagram.
77
77
- 35/40/45/50B-7 DC System.
(Behind converter)
78
78
- 35/40/45/50B-7 AC System.
79
79
- 35/40/45/50B-7 Traction Master Configuration.
80
80
- 35/40/45/50B-7 Traction Slave Configuration.
81
81
- 35/40/45/50B-7 Pump Con. Configuration.
82
82
ZAPI
controller
systems
83
83
- Some basics.
DC Motor
- DC motors consist of rotor-mounted windings (armature) and
stationary windings (field poles). In all DC motors, except permanent
magnet motors, current must be conducted to the armature windings
by passing current through carbon brushes that slide over a set of
copper surfaces called a commutator, which is mounted on the rotor.
The commutator bars are soldered to armature coils. The
brush/commutator combination makes a sliding switch that energizes
particular portions of the armature, based on the position of the rotor.
This process creates north and south magnetic poles on the rotor that
are attracted to or repelled by north and south poles on the stator,
which are formed by passing direct current through the field
windings. It's this magnetic attraction and repulsion that causes the
rotor to rotate.
AC Motor
A magnetic field is produced in an AC motor through the action of
the three- phase voltage that is applied. Each of the three phases
is 120° from the other phases. From one instant to the next, the
magnetic fields combine to produce a magnetic field whose
position shifts through a certain angle. At the end of one cycle of
alternating current, the magnetic field will have shifted through
360°, or one revolution.
Torque in an AC motor is developed through interactions with the
rotor and the rotating magnetic field. The rotating magnetic field
cuts the bars of the rotor and induces a current in them due to
generator action. This induced current will produce a magnetic
field around the conductors of the rotor, which will try to84
line up
-
84
with the magnetic field of the stator.
- Some basics.
DC controller system
AC controller system
- In a open loop speed control system NO
feedback signal from the motor returns to the
controller. Only a speed requirement signal
arrives at the controller.
- In a close loop speed control system a
feedback signal is returned from the motor to
the controller. If the speed doesn’t match the
requirements, the power output to the motor is
automatically adjusted until the proper speed is
reached.
85
85
- Zapi Dual AC2 inverter / AC2 and AC3 inverter.
Can drive (control) 2 traction motors.
-
-
Controllers control voltage and frequency.
-
-
Analog (potentiometer) and digital (encoders) inputs available.
-
-
Limited slip and current parameters.
Power (electro valves) and signal (Can bus) output available.
Protected against: Battery polarity inversion, I/O connection errors, Overheating,…..
86
86
- Entering the system by Console.
“Set Options”, Connect to possibilities
(Fingertips)
- Digital consoles used to communicate with AC
inverter controllers must be fitted with EPROM CK
ULTRA, minimum "Release number 3.02".
87
87
- Enter the system with calibrator / Set Model – Option menu.
88
88
- Enter the system with calibrator / Saving – Restoring settings.
89
89
- Enter the system with calibrator / Test – Alarm menu.
90
90
- Enter the system through the machines display.
1
2
3
4
5
6
7
-
Oil level warning lamp (option)
Wrench warning lamp
Thermometer warning lamp
Seat warning lamp
Seat belt warning lamp (option)
Handbrake warning lamp
Key 1 button
Button
Button
Button
Button
Button
Button
1
2
3
4
5
6
8 Key 2 button
9 Key 3 button
10 Key 4 button
11 Key 5 button
12 Key 6 button
13 LCD function
(7) Performs function of the ROLL UP key
(8) Performs function of the ROLL DOWN key
(9) Performs function of the SET DOWN key
(10) Performs function of the SET UP key
(11) Performs function of the OUT key
(12)Performs function of the ENTER key
- Graphic Smart Display present a software structure made by menus and submenus. It is possible to
have access to Graphic Smart Display menu structure by the six operator buttons integrated in a
membrane keyboard. At turn on the display shows the HYUNDAI logo for some seconds, then asks the starting password, to
have access to the main page (if "USER PASSWORD" option is ON), otherwise it shows directly the main page (if "USER
PASSWORD" option is OFF).
- The main page, if there aren't alarms, shows battery charge, truck speed (in km/h or mph, it
depends on "SPEED UNIT" parameter) and key/traction/pump hour meter (see "HOUR
COUNTER" option); if alarms are present, it will show alarm code, node initials in which alarm has
occurred and alarm description. From the main page it is possible to have access to the ALARM page (if alarms occur) and to
MENUS page. The CHANGE PASSWORD MENU is always accessible and visible, while the others ones are accessible and
showed, by entering service password. To enter this password its necessary to push the out button (button #5) of membrane
keyboard; this will show a entering password page. By using service password it's possible to enter in all menus (TRUCK,
CHANGE PASSWORD,MAINTENANCE). It follows flow chart diagram of menu structure.
91
91
- Program menus: Traction master and Slave.
Master
Slave
92
- Only through
the calibrator 92
- Program menus: Pump and Display
Pump
Display
- Only through
the calibrator -
93
93
- Important adjustments Accelerator pedal adjustment:
Lift poti adjustment:
1. Opening Zapi display.
1. Opening Zapi display.
2. Connect to the DUAL MASTER (03)
2. Connect to the AC2 or AC3 (05)
3. Press ENTER to go into the general menu.
3. Press ENTER to go into the general menu.
4. Press ROLL UP or ROLL DOWN button until
PROGRAM VACC. appear on the display.
4. Press ROLL UP or ROLL DOWN button until
PROGRAM VACC. appear on the display.
5. Press ENTER to go into the PROGRAM VACC.
5. Press ENTER to go into the PROGRAM VACC.
6. The display will show the minimum and
maximum values of potentiometer wiper output.
6. The display will show the minimum and
maximum values of potentiometer wiper output.
7. Press ENTER to clear these values.
7. Press ENTER to clear these values.
8. Select forward direction, close any interlock
switches that may be in the system.
8. Slowly pull the “lift” lever completely back.
9. Slowly depress the accelerator pedal to its max.
value.
10. The new minimum and maximum voltages will be
displayed on the console an arrow indicating the
direction, push OUT and YES.
11. Repeat from point 8 in reverse direction.
12. When finished, press OUT and ENTER to confirm.
9. The new minimum and maximum voltages will be
displayed on the console.
12. press OUT and ENTER (With the lever pulled) to
confirm.
94
94
- Important adjustments Steering pot. teach-in :
Entering the system through the display:
1. Opening Zapi display.
2. Connect to the DUAL MASTER (03)
3. Press ROLL UP and SET UP to enter CONFIG MENU
4. Press ROLL UP or ROLL DOWN buttons until
ADJUSTMENTS menu appears on the display.
5. Press ENTER to go into the ADJUSTMENTS menu.
6. Press ROLL UP or ROLL DOWN and select parameter
“SET STEER RIGHT”.
7. Press ENTER to clear these values.
8. Turn the steer wheel completely to the right.
9. The new value will appear on the display.
10. Press OUT and ENTER to save the new value.
11. Repeat from step 6 for SET STEER RIGHT and O-POS.
Display and test parameters are the same for all
models
95
95
- Important adjustments, through display -
96
96
- Important adjustments, through display -
the steering sensor
or controller
+ ENTER.
+ OUT and
YES.
+ ENTER.
+ OUT and
YES.+ ENTER.
97
97
- Important adjustments, through display -
+ OUT and
YES.
Repeat from (3)
and but
select reverse direction.
98
98
- Important adjustments, through display -
99
99
- Important adjustments, through display -
100
100
- 15/18/20BT-7, 16/18/20B-7 ZAPI Settings.
101
101
- 15/18/20BT-7, 16/18/20B-7 Traction Master (03) setup.
48V (Europe)
PARAMETER CHANGE
Code DESCRIPTION (Service
E mode
N mode
level)
0
ACCELER. DELAY
LEVEL = 7 LEVEL = 6
11
RELEASE BRAKING LEVEL = 2 LEVEL = 3
12
INVERS. BRAKING LEVEL = 1 LEVEL = 3
13
PEDAL BRAKING
16
28
SPEED LIMIT BRK.
BRAKE CUTBACK
MAX SPEED FORW
30
31
21
253
MAX SPEED BACK
CUTBACK SPEED 1
TURTLE SPEED
H mode
Parameter explanation.
LEVEL = 2 Determines the traction acceleration ramp-up. It's adjustable between 0 and 100Hz.
LEVEL = 4 Deceleration ramp when accelerator pedal is released. Adjustable form 0 to 100Hz.
LEVEL = 4 Brake force when direction switch is inverted during travel. Adjustable from 0 to 100 Hz
Brake force when travel request is released and brake pedal switch is closed. Adjustable from 100 to 0 Hz
LEVEL = 9
(Electrical brake support when mechanical brake is applied.
LEVEL = 4
LEVEL = 5
96
96
112
112
60%
131
131
Brake force when the accelerator pedal position is changed but not completely released.
Deceleration ramp when the speed reduce input becomes active and the motor slow down.
To set maximum speed in forward direction.
To set maximum speed in backward direction.
70Hz
% of max speed applied when the cutback switch is active. When set on 100% speed reduction is 0
% of max speed applied when "turtle" speed is active. When set to 100% the speed reduction is 0
% Percentage of max speed applied when the steer is fully turned right/left. No speed reduction is applied
when the steer angle is within the range [-8°;8°]. A linear reduction is applied in the middle.
29
CURVE CUTBACK
30%
245
63
FREQUENCY CREEP
MAXIMUM CURRENT
0.30
LEVEL = 8
241
ACC. SMOOTH
2.5
2.0
1.0
Difference form the acceleration curve in the frequency range 0 Hz to “Stop smooth” value (see Dual ac2
manual).
242
INV. SMOOTH
2.5
2.0
1.0
Different form to the acceleration curve after a direction inversion in
the frequency range 0 Hz to “Stop smooth” value (see also Dual ac2 manual).
243
248
242
STOP SMOOTH
15
10
2.0
10
To sets the level of frequency where the smooth effect on the acceleration ramp ends.
SEAT DELAY TIME
SEQUENCE DE.TIME
248
CHAT TIME
Min. speed when the forward or reverse switch is closed, with accelerator in its min. position.
This changes the maximum current of the inverter.
2
It determines the traction deactivation delay when the seat switch is opened.
Max. Delay time between the accelerator is pressed and a direction is selected (SRO)
10
After the CHAT TIME has passed and no travel/pump request has been activated the main contactor is
opened. Encoder signal is also monitored, To resume a travel/pump request is needed.
102
102
- 15/18/20BT-7, 16/18/20B-7 Traction Master (03) setup.
SET MODEL
(service level)
Values
CONNECTED TO
3
Code
SET OPTIONS
(Service level)
Values
125
HOUR COUNTER
KEY ON
121
BATTERY CHECK
ON
245
TRACTION CUTOUT
ON
244
LIFT CUTOUT
ON
Code
246
S. R. O.
251
HYDRO KEY ON
ON
OFF
Parameter explanation.
Code 3 = Connected with Master controller (selection which controller you want to con.)
Parameter explanation.
RUNNING: the counter registers travel time only. KEY ON: the counter registers when the "key" switch is
closed.
ON: the battery discharge level check is carried out; when the battery level reaches 10% the traction
maximum current is reduced to the half of the programmed value. Traction speed/current is also reduced
(optional) and lift function is disabled(optional). At key on if battery is below 10% lift function is allowed
for 10-20 seconds
OFF: the battery discharge level check is carried out but no alarm is signalled.
OFF ON : when the “Battery low” alarm appears, and this option is programmed "ON", the traction speed is
reduced to 60 Hz.
OFF ON : When the “Battery low” alarm appears, and this option is programmed "ON" the lift function is
disabled.
When S.R.O. option is set to "OFF" allowed sequences are:
Key -> direction lever -> pedal
Key-> pedal -> direction lever within the SEQUENCE DELAY TIME.
No sequence is requested on the seat switch.
When S.R.O. option is set to "ON" allowed sequences are:
Key -> seat -> direction lever -> pedal
seat -> key -> direction lever -> pedal
Key-> seat -> pedal -> direction lever within the SEQUENCE DELAY TIME.
seat -> Key-> pedal -> direction lever within the SEQUENCE DELAY TIME.
The SEQUENCE DELAY TIME is adjustable.
When pedal or direction levels are active at key on traction shows INCORRECT START.
When incorrect sequence is detected traction shows SEQUENCE FAULT.
ON : if this option is programmed "ON" the traction inverter
manages an external hydraulic steering function when the "key" is switched ON.
103
103
- 15/18/20BT-7, 16/18/20B-7 Traction Master (03) Setup.
Code
SET OPTIONS
(Service level)
Values
247
STOP ON RAMP
OFF
109
AUX INPUT #1
OPTION #1
Parameter explanation.
ON: the stop on ramp feature (truck electrically hold on a ramp) for 6 sec.
OFF: the stop on ramp feature is not performed.
EXCLUSIVE HYDRO: input C10 activates hydraulic steering function, output C31 is activated.
OPTION #1: input C10 is the input for an handbrake device, active low (open switch).
OPTION #2: input C10 is the input for a speed reduction device, active low (open switch)
251
PEDAL BRAKING
DIGITAL
ANALOG: the mechanical brake pedal has a switch and a potentiometer installed. When the accelerator is
released and the pedal brake is pushed the inverter performs an electrical braking whose intensity is
proportional to the brake pedal potentiometer. The minimum intensity is established by the "Release
braking" parameter, when the brake pedal is slightly pressed (brake switch close but brake potentiometer
at the minimum). The maximum intensity is established by the "Pedal braking" parameter when the brake
pedal is fully pressed (brake potentiometer at the maximum). In the middle positions, the electrical
braking intensity is a linear function between minimum and maximum intensity.
DIGITAL: the truck does not have a potentiometer installed on the mechanical brake pedal, but only a
microswitch; when the accelerator
pedal is released and the brake pedal is pushed (brake switch closed), the inverter performs an electrical
braking following "Pedal braking" parameter.
250
SET TEMPERATURE
ANALOG
DIGITAL: a digital (ON/OFF) motor thermal sensor is connected to C25 (C35) input.
ANALOG: an analog motor thermal sensor is connected to C25 (C35)
NONE: no motor thermal sensor switch is connected.
245
STEER TABLE
247
DISPLAY
ON
85
PEDAL TYPE
OPTION #1
28
PEDAL BRK STOP
OFF
OPTION #1: The 3 wheels geometry is considered
OPTION #1(3W) / OPTION #2(4W)
OPTION #2: The 4 wheels geometry is considered
if this option is programmed "ON" the communication with the Smart display is actived. If programmed to
"OFF" the communication with the display is disabled and the modes can be changed by console using the
MODE SELECT. Parameter.
option #1: The pedal indication on the display shows the accelerator voltage level
option #2: The pedal indication on the display shows the speed set-point level
If set to "on" the truck is stopped when the pedal brake is pressed. If set on "OFF" traction current will be
reduced tohalf of the max. Current.
104
104
- 15/18/20BT-7, 16/18/20B-7 Traction Master (03) Setup.
Code
ADJUSTMENTS (Service
level)
Values
245
SET POT BRK MIN
0.9 V
246
SET POT BRK MAX
9.0 V
145
SET BATTERY TYPE
140
ADJUST BATTERY
48 V
51.40 V
It records the minimum value of braking pedal potentiometer when the braking pedal switch is closed;
the procedure is similar to the "Program Vacc" function (see chapter 9.3 of the manual). This procedure
must be carried out only if the "Pedal braking" option is programmed as "Analog".
It records the maximum value of braking pedal potentiometer when the braking pedal is fully pressed;
the procedure is similar to the "Program Vacc" function (see chapter 9.3). This procedure must be carried
out only if the "Pedal braking" option is programmed as "Analog".
Nominal battery voltage.
Fine adjustment of the battery voltage measured by the controller (ZAPI production line adjusted).
249
MAX STEER RIGHT
4.4V
Steering poti output voltage when the wheels are fully turned right (maximum of the steering poti range).
243
MAX STEER LEFT
0.9V
Steering poti output voltage when the wheels are fully turned left (minimum of the steeringpoti range).
152
246
241
249
252
253
248
249
SET STEER 0-POS.
SET STEER RIGHT
SET STEER LEFT
THROTTLE 0 ZONE
THROTTLE X POINT
THROTTLE Y POINT
ADJUSTMENT#2 BDI
ADJUSTMENT#1 BDI
2.7V
90 ˚(3W) / 97 ˚(4W)
90 ˚(3W) / 75 ˚(4W)
5%
63%
25%
LEVEL = 3
LEVEL = 3
157
ADJUSTMENT#3
20%
251
252
MAIN CONT. VOLT.
AUX OUTPUT VOLT.
36V
36V
156
ADJUSTMENT#4
145 ˚
242
SPEED FACTOR
81
Parameter explanation.
Steering poti output voltage when the wheels are straight
This parameter sets the max steering angle in right direction.
This parameter sets the max steering angle in left direction.
Deadband in the accelerator input curve (see also curve in the dual ac2 manual).
This parameter changes the characteristic of the accelerator input curve.
This parameter changes the characteristic of the accelerator input curve.
It adjusts the lower level of the no-load battery discharge table. See also Dual ac2 manual
It adjusts the upper level of the no-load battery discharge table. See also Dual ac2 manual
At each key-off battery charge is stored. At each key on the battery voltage is read and the battery
charge is estimated. The battery charge is updated only if the new estimated battery charge differs from
the stored one by the ADJUSTMENT #3 set %.
This parameters adjusts the Line contactor coil voltage (PWM output C26).
This parameters adjusts the Electric brake coil voltage (PWM output C28).
This parameter determines the motor temperature level at which the “Motor temperature” alarm is
signalled. The range is from 0 °C to 200 °C with 1 °Csteps. This parameter must be adjusted only if the
“Set temperature” (menu“Set option”) parameter is programmed “Analog”.
Speed Factor = (88 * rr * p) / Ø Where: rr = total gearbox reduction ratio, p = number of pair pole of the
motor (2), Ø = traction wheel diameter expressed in centimeters (cm)
105
105
- 15/18/20BT-7, 16/18/20B-7 Traction Master (03) Test .
Test parameters
Values expressed in
Parameter explanation.
Motor Voltage
%
Voltage supplied to the motor by the controller expressed in % of full battery voltage.
Frequency
Hz
Frequency of the voltage and current supplied to the motor.
Encoder
Hz
The speed of the motor in Hz. This information comes from the motor Encoders
Slip Value
Hz
Current RMS
A
Difference in speed between the rotating field and the motor shaft (rotator).
Root Mean Square value of the motor current. (RMS Power or the Root Mean Square of
the Power is the average power in an AC circuit. It is like taking the average of the
absolute value of the AC Power).RMS = (1/SQR2).(Peak)
Temperature
°C
Temperature of the aluminum heat sink, holding the MOSFETS. (Controller)
Motor Temperature
°C
Temperature of the motor itself. #1: RH and #2: LH
Accelerator
V
Voltage coming from accelerator pedal ( LH side = Voltage / RH side = percentage).
Steer angle
°
This is the indication of the angular position of the steering wheel
Indication of speed reduction of the inner wheel during curving
Internal wheel cutback
%
Forw switch
ON / OFF (V)
Status of FW switch
Status of REV switch
Back switch
ON / OFF (V)
Enable switch
ON / OFF
Status of enable switch . This is the release switch inside accelerator pedal.
Seat switch
ON / OFF
Status of seat switch
Cutback switch
ON / OFF
Status of Speed Reduction Micro switch.
Brake switch
ON / OFF
Status of brake pedal micro switch
Exclusive hydro
ON / OFF
Status of exclusive hydro switch
Brake pedal poti
%
Hand brake
ON / OFF
Voltage booster
%
V
%
K m /h
Battery voltage
Battery charge
Speed value
Value of poti on the brake pedal. (NOT FOR HYUNDAI).
Status of hand brake switch
This is the boost of the voltage supplied to the motor in load conditions
Battery voltage measured at the key switch input.
Battery charge in %
Speed of the machine.
106
106
- 15/18/20BT-7, 16/18/20B-7 Pump (05) Parameter setup.
48V (Europe)
PARAMETER CHANGE
CODE
0
5
246
245
20
242
243
244
48
63
56
DESCRIPTION
(Service level)
ACCELER. DELAY
DECELER. DELAY
MAX SPEED UP
MIN SPEED UP
CUTBACK SPEED
TILT SPEED
SHIFT SPEED
AUX SPEED
HYD SPEED FINE
MAXIMUM CURRENT
IDLE TIME
E mode N mode H mode
81
LEVEL = 0
LEVEL = 0
92
108
18.00
100%
30
30
81
16
LEVEL = 9
1.9
Parameter explanation.
Determines the pump acceleration ramp-up. It's adjustable between 0 and 100Hz.
Determines the pump deceleration ramp. It's adjustable between 0 and 100Hz.
Maximum pump speed during lift function.
Minimum pump speed during lift function after lifting enable switch is closed.
It determines max. lift speed when the speed reduction cutback switch is (open) E13.
Tilt function speed, fine regulation.
Shift function speed, fine regulation.
Auxiliary function speed, fine regulation.
Hydro speed, fine regulation.(Hydraulic Steering)
The maximum current of the inverter.
Time delay when an hydraulic steering function request is switched off. (Steering del.)
SET MODEL
(Service level)
Values
Parameter explanation.
CONNECTED TO
5
Code 5 = Connected with pump controller (selection which controller you want to con.)
CODE
SET OPTIONS
(Service level)
Values
Parameter explanation.
125
HOUR COUNTER
141
SET TEMPERATURE
ANALOG
250
JOYSTICK
OFF
249
DIGITAL LIFT
OFF
CODE
KEY ON
RUNNING: the counter registers travel time only.
KEY ON: the counter registers when the "key" switch is closed.
DIGITAL: a digital (ON/OFF) motor thermal sensor is connected to F6 input.
ANALOG: an analog motor thermal sensor is connected between F6and F12
NONE: no motor thermal sensor switch is connected.
OFF: Truck with mechanical lever distributor. (std).
ON: Truck with electro-hydraulic distributor. (Finger Tips)
OFF: The lift speed is changed proportionally with the lift sensor analog input status.
ON: The lift speed is determined only by the lift digital input. When the input is closed
the pump run at full lift speed programmed.
107
107
- 15/18/20BT-7, 16/18/20B-7 Pump (05) Parameter setup.
CODE
ADJUSTMENTS
(service level)
Values
Parameter explanation.
145
140
254
252
253
SET BATTERY TYPE
ADJUST BATTERY
THROTTLE 0 ZONE
THROTTLE X POINT
THROTTLE Y POINT
48 V
51.7 V
5%
63%
36%
165
ADJUSTMENT #04
145?
253
254
PWM ON MAIN CONT
PWM ON AUX OUT.
OFF
OFF / ON (OPS)
251
MAX/AUX
60% / 25% (OPS)
252
MIN LIFT
0.8V
251
MAX LIFT
3.4V
250
MIN LOWER
0.5V
249
MAX LOWER
4.6V
To selects the nominal battery voltage.
Fine adjustment of the battery voltage measured by the controller.
It establishes a deadband in the accelerator input curve. See ac2 flash manual
Parameter changes the characteristic of the accelerator input curve. See ac2 manual
Parameter changes the characteristic of the accelerator input curve. See ac2 manual
This parameter determines the motor temperature level at which the “Motor
temperature” alarm is signaled. The range is from 70°C to 160°C with 10°C steps. This
parameter must be adjusted only if the “Set temperature” (menu“Set option”)
parameter is programmed “Analog”.
OFF: Battery voltage on main contactor coils. ON: Battery voltage reduced to 62%
OFF: Battery voltage on aux output coils. ON: Battery voltage reduced to 62%
Aux out sensor maximum voltage recording.
For the elctr-hyd distributor version it can be adjusted from console/display
Lift sensor minimum voltage recording. For the lever version it can be adjusted using
PROGRAM VACC function (see ac2 flash manual).
For the elctr-hyd distributor version it can be adjusted from console/display (press
enter).
Lift sensor maximum voltage recording. For the lever version it can be adjusted using
PROGRAM VACC function (see ac2 flash manual).
For the elctr-hyd distributor version it can be adjusted from console/display (press
enter).
Lowering sensor minimum voltage recording.For the elctr-hyd distributor version it can
be adjusted from console/display (press enter).
Lowering sensor maximum voltage recording.For the elctr-hyd distributor version it can
be adjusted from console/display (press enter).
108
108
- 15/18/20BT-7, 16/18/20B-7 Pump (05) Parameter Setup.
CODE
ADJUSTMENTS
(service level)
Values
248
MIN TILT UP
0.5V
247
MAX TILT UP
4.5V
246
MIN TILT DOWN
0.5V
245
MAX TILT DOWN
4.5V
244
MIN SHIFT RGT.
0.7V
243
MAX SHIFT RGT.
4.5V
242
MIN SHIFT LFT.
0.7V
241
MAX SHIFT LFT.
4.5V
254
MIN AUX IN
0.5V
253
MAX AUX IN
4.5V
252
MIN AUX OUT
0.5V
251
MAX AUX OUT
4.5V
Parameter explanation.
Tilt up sensor minimum voltage recording.For the elctr-hyd distributor version it can be
adjusted from console/display (press enter).
Tilt up sensor maximum voltage recording.For the elctr-hyd distributor version it can
be adjusted from console/display (press enter).
Tilt down sensor minimum voltage recording.For the elctr-hyd distributor version it can
be adjusted from console/display (press enter).
Tilt down sensor maximum voltage recording.For the elctr-hyd distributor version it
can be adjusted from console/display (press enter).
Shift right sensor minimum voltage recording.For the elctr-hyd distributor version it
can be adjusted from console/display (press enter).
Shift right sensor maximum voltage recording.For the elctr-hyd distributor version it
can be adjusted from console/display (press enter).
Shift left sensor minimum voltage recording.For the elctr-hyd distributor version it can
be adjusted from console/display (press enter).
Shift left sensor maximum voltage recording.For the elctr-hyd distributor version it can
be adjusted from console/display (press enter).
Aux in sensor minimum voltage recording.For the elctr-hyd distributor version it can be
adjusted from console/display (press enter).
Aux in sensor maximum voltage recording.For the elctr-hyd distributor version it can
be adjusted from console/display (press enter).
Aux out sensor minimum voltage recording.For the elctr-hyd distributor version it can
be adjusted from console/display (press enter).
Aux out sensor maximum voltage recording.For the elctr-hyd distributor version it can
be adjusted from console/display (press enter).
109
109
- 15/18/20BT-7, 16/18/20B-7 Pump (05) Test.
Test parameters
Values expressed in
Parameter explanation.
Motor Voltage
%
Voltage supplied to the motor by the controller expressed in % of full battery voltage.
Frequency
Hz
Frequency of the voltage and current supplied to the motor.
Encoder
Hz
The speed of the motor in Hz. This information comes from the motor Encoders
Slip Value
Hz
Current RMS
A
Difference in speed between the rotating field and the motor shaft (rotator).
Root Mean Square value of the motor current. (RMS Power or the Root Mean Square of
the Power is the average power in an AC circuit. It is like taking the average of the
absolute value of the AC Power).RMS = (1/SQR2).(Peak)
Temperature
°C
Temperature of the aluminum heat sink, holding the MOSFETS. (Controller)
Motor Temperature
°C
Temperature of the motor itself. #1: RH and #2: LH
Accelerator
V
Voltage comming from accelerator pedal ( LH side = Voltage / RH side = percentage).
Lifting Switch
ON / OFF
Status of lifting switch ON / OFF.
1st speed switch
ON / OFF
Status of first speed pump switch.
2de speed switch
ON / OFF
Status of 2de speed pump switch
3rd speed switch
ON / OFF
Status of 3rd speed pump switch.
4th speed switch
ON / OFF
Status of 4th speed pump switch.
Hydro speed req
ON / OFF
Status of hydro speed request.
Cutback switch
ON / OFF
Status of Speed Reduction Microswitch.
Voltage boost
%
The voltage boost supplied to the motor in load conditions expressed in % of full V.
Battery voltage
V
Battery voltage measured at the input to the key switch.
Battery charge
%
Battery charge in %.
110
110
15/18/20BT-7, 16/18/20B-7 Pump (05)(Fingertip option)
- Pump settings P A R A M E TE R C H A N G E
A C C E LE R . D E LA Y
D E C E LE R . D E LA Y
M AX SPEED U P
M IN S P E E D U P
C U TB A C K S P EED
T IL T S P E E D
S H IF T S P E E D
AU X SPEED
H Y D S P E E D F IN E
M A X IM U M C U R R E N T
ID L E T IM E
S E T O P TIO N
H O U R C O U N TE R
S E T TE M P E R A TU R E
JO Y S T IC K
S H IF T F U N C T IO N
A U X F U N C T IO N
D IG IT A L L IF T
SET M O D EL
C O N N E C TE D TO
A D JU S TM E N TS
S E T B A TTE R Y TYP E
A D JU S T B A T T E R Y
T H R O T T LE 0 Z O N E
T H R O T T L E X P O IN T
T H R O T T L E Y P O IN T
A D JU S T M E N T # 0 4
P W M O N M A IN C O N T
PW M O N A U X O U T.
M C /A U X P W M
M IN L IF T
M A X L IF T
M IN L O W E R
M A X LO W E R
M IN T IL T U P
M A X T IL T U P
M IN T IL T D O W N
M A X T IL T D O W N
M IN S H IF T R G T .
M A X S H IF T R G T .
M IN S H IF T L F T .
M A X S H IF T L F T .
M IN A U X IN
M A X A U X IN
M IN A U X O U T
M AX AU X O U T
E M ODE
81 H z
N M ODE
LE V E L = 0
LE V E L = 0
92 H z
1 8 .0 0 H z
100%
30 H z
30 H z
81 H z
16 H z
LE V E L = 9
1 ,5
K EYO N
A N A LO G
O N
O F F / 4 va lve s O N
O F F / 3 va lve s O N
O FF
PU M P
48V
4 9 .2 V
5%
63%
36%
145 ?
O FF
O N
25%
2 .4 V
0 .5 V
2 .4 V
4 .4 V
2 .4 V
0 .5 V
2 .4 V
4 .4 V
2 .4 V
0 .5 V
2 .4 V
4 .4 V
2 ,4 V
4 .5 V
2 .4 V
0 .5 V
- Mhyrio settings H M ODE
108 H z
P A R A M E TE R C H A N G E
M IN E V P
M A X EVP
M IN E V P 1
M A X EVP1
M IN E V P 2
M A X EVP2
M IN E V P 3
M A X EVP3
M IN E V P 4
M A X EVP4
M IN E V P 5
M A X EVP5
M IN E V P 6
M A X EVP6
M IN E V P 7
M A X EVP7
M IN E V P 8
M A X EVP8
E V P O P E N D E LA Y
E V P C LO S E D E LA Y
E V P 1 O P E N D E LA Y
E V P 1 C LO S E D E LA Y
E V P 2 O P E N D E LA Y
E V P 2 C LO S E D E LA Y
E V P 3 O P E N D E LA Y
E V P 3 C LO S E D E LA Y
E V P 4 O P E N D E LA Y
E V P 4 C LO S E D E LA Y
E V P 5 O P E N D E LA Y
E V P 5 C LO S E D E LA Y
E V P 6 O P E N D E LA Y
E V P 6 C LO S E D E LA Y
E V P 7 O P E N D E LA Y
E V P 7 C LO S E D E LA Y
E V P 8 O P E N D E LA Y
E V P 8 C LO S E D E LA Y
S E T O P TIO N
S E T B A TTE R Y TYP E
V V A L V E S C O IL
V A LV E S S U P P LY
E VP TYP E
E VP 1 TYP E
E VP 2 TYP E
E VP 3 TYP E
E VP 4 TYP E
E VP 5 TYP E
E VP 6 TYP E
E VP 7 TYP E
E VP 8 TYP E
SET M O D EL
C O N N E C T TO
A D JU S TM E N TS
A D JU S T B A T T E R Y
2 5 ,1 0 %
8 5 ,1 0 %
2 5 ,1 0 %
7 0 ,2 0 %
2 5 ,1 0 %
8 5 ,1 0 %
2 5 ,1 0 %
8 5 ,1 0 %
2 5 ,1 0 %
8 5 ,1 0 %
2 5 ,1 0 %
8 5 ,1 0 %
2 5 ,1 0 %
8 5 ,1 0 %
2 5 ,1 0 %
8 5 ,1 0 %
2 5 ,1 0 %
8 5 ,1 0 %
0 ,2
0 ,4
0 ,2
0 ,1
0 ,2
0 ,1
0 ,2
0 ,4
0 ,2
0 ,4
0 ,8
0 ,4
0 ,8
0 ,4
0 ,2
0 ,4
0 ,2
0 ,4
A
A
A
A
A
A
A
A
A
48V
24V
48V
N A LO
N A LO
N A LO
N A LO
N A LO
N A LO
N A LO
N A LO
N A LO
G
G
G
G
G
G
G
G
G
M H Y R IO
111
4 9 .2 V
15/18/20BT-7, 16/18/20B-7 Display (16) Parameter setup.
Parameters
Values expressed in
Parameter explanation.
Power selector
H/N/E
Trucks performances. Option 1:H / Option 2:N / Option 3:E
Hour counter
Option #1
Hours displayed on the display: Option 1: key / Option 2: traction / Option 3: pump
Aux output #1
Absent
Present: Load between PAUX and NAUX / Absent : no load between PAUX and NAUX
Aux voltage
36
100
Speed unit
Option #1
User password
OFF
Maintenance
Absent
Maintenance done
OFF
Seat Belt Status
Option #2
% of battery power supplied to AUX coil to close the Auxiliary electro valve.
option #2 = speed in mph
ON = after key-on a user password is asked to utilize the Graphic Smart Display.
Present: A maintenance hour counter is incremented with key ON. When the selected
hours are reached, the message "SERVICE REQUIRED" appears.
If "ON" at next key-on maintenance hours are updated with display hours and deletes
the "MAINTENANCE NEEDED" warning
Option #1: No "seat belt" diagnostic. Option #2: Seat belt not fastened = 3 flashes /
Option #3: Seat belt has to be fastened, if not LED on display on.
112
112
- 22/25/30/32B-7 Zapi settings.
113
113
- 22/25/30/32B-7 Traction Master (03) setup Code
0
11
12
13
16
28
30
31
21
253
29
245
63
241
242
243
248
242
248
PARAMETER CHANGE
A C C E LE R . D E LA Y
R E LE A S E B R A K IN G
IN V E R S . B R A K IN G
P E D A L B R A K IN G
S P E E D LIM IT B R K .
B R A K E C U TB A C K
M A X S P E E D FO R W
M AX SPEED BAC K
C U TB A C K S P E E D 1
T U R T LE S P E E D
C U R V E C U TB A C K
FR E Q U E N C Y C R E E P
M A X IM U M C U R R E N T
A C C .S M O O T H
IN V . S M O O T H
S TO P S M O O TH
S E A T D E LA Y T IM E
S E Q U E N C E D E .T IM E
C H A T T IM E
E MODE
N MODE
H MODE
LE V E L = 7
LE V E L = 2
LE V E L = 1
LE V E L = 9
LE V E L = 4
LE V E L = 5
115 H z
115 H z
60%
88 H z
30%
0.30 H z
LE V E L = 6
2,5
2,5
15 H z
2
2
LE V E L = 6
LE V E L = 3
LE V E L = 3
LE V E L = 9
LE V E L = 4
LE V E L = 5
138 H z
138 H z
60%
88 H z
30%
0.30 H z
LE V E L = 6
2
2
10 H z
2
2
LE V E L = 2
LE V E L = 4
LE V E L = 4
LE V E L = 9
LE V E L = 4
LE V E L = 5
160 H z
160 H z
60%
88 H z
30%
0.30 H z
LE V E L = 6
1
1
10 H z
2
2
10
10
10
114
114
- 22/25/30/32B-7 Traction Master (03) setup Code
SET OPTION
125
121
245
244
246
251
247
109
251
250
245
247
85
H O U R C O U N TE R
B A TTE R Y C H E C K
T R A C T IO N C U T O U T
LIF T C U T O U T
S .R .O .
H YD R O KEY O N
STO P O N R A M P
A U X IN P U T #1
P E D A L B R A K IN G
S E T TEM P E R ATU R E
S T E E R T A B LE
D IS P LA Y
P E D A L TY P E
247
P E D A L B R K S TO P
Code
250
SET MODEL
C O N N E C TE D TO
E MODE
N MODE
H MODE
KEYO N
ON
ON
ON
ON
O FF
O FF
O P T IO N #1
D IG IT A L
A N A LO G
O P T IO N #4
ON
O P T IO N #1
KEYO N
ON
ON
ON
ON
O FF
O FF
O P T IO N #1
D IG IT A L
A N A LO G
O P T IO N #4
ON
O P T IO N #1
KEYO N
ON
ON
ON
ON
O FF
O FF
O P T IO N #1
D IG IT A L
A N A LO G
O P T IO N #4
ON
O P T IO N #1
O FF
O FF
O FF
E MODE
N MODE
H MODE
3
3
3
115
115
- 22/25/30/32B-7 Traction Master (03) setup Code
ADJUSTMENTS
E MODE
N MODE
H MODE
245
246
145
140
249
243
152
246
241
249
252
253
248
249
157
251
252
156
S E T P O T B R K M IN
SET PO T BRK M AX
S E T B A TTE R Y TY P E
A D JU S T B A T T E R Y
M A X S T E E R R IG H T
M A X S T E E R LE F T
S E T S T E E R 0-P O S .
S E T S T E E R R IG H T
S E T S T E E R LE F T
T H R O T T LE 0 Z O N E
T H R O T T LE X P O IN T
T H R O T T LE Y P O IN T
A D JU S T M E N T #2 B D I
A D JU S T M E N T #1 B D I
A D JU S T M E N T #03
M A IN C O N T . V O LT .
A U X O U T P U T V O LT .
A D JU S T M E N T #04
1.0 V
9.0 V
48V
50.92 V
1.2 V
3.9 V
2.8 V
1.0 V
9.0 V
48V
50.59 V
1.2 V
3.9 V
2.8 V
1.0 V
9.0 V
48V
50.78 V
1.2 V
3.9 V
2.8 V
5%
63%
25%
LE V E L = 5
LE V E L = 6
20%
36 V
12 V
5%
63%
25%
LE V E L = 5
LE V E L = 6
20%
36 V
12 V
5%
63%
25%
LE V E L = 5
LE V E L = 6
20%
36 V
12 V
87
87
87
242
S P E E D FA C TO R
116
116
- 22/25/30/32B-7 Traction Slave (04) setup -
Code
PARAMETER CHANGE
E MODE
N MODE
H MODE
11
248
RELEASE BRAKING
SEAT DELAY TIME
LEVEL = 2
2
LEVEL = 3
2
LEVEL = 4
2
Code
SET MODEL
4
4
4
48V
50.59 V
48V
50.59 V
48V
50.83 V
12 V
12 V
12 V
250
CONNECTED TO
Code
ADJUSTMENTS
145
140
SET BATTERY TYPE
ADJUST BATTERY
242
AUX OUTPUT VOLT.
117
117
- 22/25/30/32B-7 Pump (05) setup Code
PARAMETER CHANGE
E MODE
N MODE
H MODE
0
5
246
245
20
242
243
244
48
63
ACCELER. DELAY
DECELER. DELAY
MAX SPEED UP
MIN SPEED UP
CUTBACK SPEED
TILT SPEED
SHIFT SPEED
AUX SPEED
HYD SPEED FINE
MAXIMUM CURRENT
LEVEL = 0
LEVEL = 0
72 Hz
16.50 Hz
100%
50 Hz
30 Hz
81 Hz
16 Hz
LEVEL = 8
LEVEL = 0
LEVEL = 0
81 Hz
16.50 Hz
100%
50 Hz
30 Hz
81 Hz
16 Hz
LEVEL = 8
LEVEL = 0
LEVEL = 0
90 Hz
16.50 Hz
100%
50 Hz
30 Hz
81 Hz
16 Hz
LEVEL = 8
1,5
1,5
1,5
E MODE
N MODE
H MODE
245
IDLE TIME
Code
SET OPTION
125
141
HOUR COUNTER
SET TEMPERATURE
249
DIGITAL LIFT
KEYON
ANALOG
OFF
KEYON
ANALOG
OFF
Hydraulic
Steering.
KEYON
ANALOG
118
OFF
118
- 22/25/30/32B-7 Pump (05) setup -
Code
242
Code
145
140
254
252
253
156
253
254
248
SET MODEL
CONNECTED TO
ADJUSTMENTS
SET BATTERY TYPE
ADJUST BATTERY
THROTTLE 0 ZONE
THROTTLE X POINT
THROTTLE Y POINT
ADJUSTMENT #04
PWM ON MAIN CONT
PWM ON AUX OUT.
MC/AUX PWM
E MODE
N MODE
H MODE
PUMP
PUMP
PUMP
E MODE
N MODE
H MODE
48V
50.6 V
5%
63%
36%
145
ON
OFF
48V
50.6 V
5%
63%
36%
145
ON
OFF
48V
50.6 V
5%
63%
36%
145
ON
OFF
75%
75%
75%
119
119
- 22/25/30BHA-7 Zapi settings.
120
- 22/25/30BHA-7 Traction Master (03) setup PARAMETER CHANGE
E MODE
N MODE
H MODE
ACCELER. DELAY
RELEASE BRAKING
INVERS. BRAKING
PEDAL BRAKING
SPEED LIMIT BRK.
BRAKE CUTBACK
MAX SPEED FORW
MAX SPEED BACK
CUTBACK SPEED 1
TURTLE SPEED
CURVE CUTBACK
FREQUENCY CREEP
MAXIMUM CURRENT
ACC. SMOOTH
INV. SMOOTH
STOP SMOOTH
SEAT DELAY TIME
SEQUENCE DE.TIME
CHAT TIME
LEVEL = 6
LEVEL = 2
LEVEL = 1
LEVEL = 9
LEVEL = 4
LEVEL = 5
109 Hz
109 Hz
60%
70 Hz
30%
0.30 Hz
LEVEL = 8
2,5
2,5
15 Hz
2
2
10
LEVEL = 6
LEVEL = 2
LEVEL = 1
LEVEL = 9
LEVEL = 4
LEVEL = 5
134 Hz
134 Hz
60%
70 Hz
30%
0.30 Hz
LEVEL = 8
2,5
2,5
15 Hz
2
2
10
LEVEL = 1
LEVEL = 4
LEVEL = 4
LEVEL = 9
LEVEL = 4
LEVEL = 5
158 Hz
158 Hz
60%
70 Hz
30%
0.30 Hz
LEVEL = 8
1
1
10 Hz
2
2
10
121
- 22/25/30BHA-7 Traction Master (03) setup SET OPTION
HOUR COUNTER
BATTERY CHECK
TRACTION CUTOUT
LIFT CUTOUT
S.R.O.
HYDRO KEY ON
STOP ON RAMP
AUX INPUT #1
PEDAL BRAKING
SET TEMPERATURE
STEER TABLE
DISPLAY
PEDAL TYPE
PEDAL BRK STOP
KEYON
ON
ON
ON
ON
OFF
OFF
OPTION #1
DIGITAL
ANALOG
OPTION #3
ON
OPTION #1
OFF
KEYON
ON
ON
ON
ON
OFF
OFF
OPTION #1
DIGITAL
ANALOG
OPTION #3
ON
OPTION #1
OFF
KEYON
ON
ON
ON
ON
OFF
OFF
OPTION #1
DIGITAL
ANALOG
OPTION #3
ON
OPTION #1
OFF
SET MODEL
CONNECTED TO
3
3
3
122
- 22/25/30BHA-7 Traction Master (03) setup ADJUSTMENTS
SET POT BRK MIN
SET POT BRK MAX
SET BATTERY TYPE
ADJUST BATTERY
MAX STEER RIGHT
MAX STEER LEFT
SET STEER 0-POS.
SET STEER RIGHT
SET STEER LEFT
THROTTLE 0 ZONE
THROTTLE X POINT
THROTTLE Y POINT
ADJUSTMENT#2 BDI
ADJUSTMENT#1 BDI
ADJUSTMENT #03
MAIN CONT. VOLT.
AUX OUTPUT VOLT.
ADJUSTMENT #04
SPEED FACTOR
1.0 V
9.0 V
80V
82.32 V
1.2 V
4.0 V
2.9 V
90 °
65 °
5%
63%
25%
LEVEL = 2
LEVEL = 3
20%
36 V
36 V
145 ℃
83
1.0 V
9.0 V
80V
82.08 V
1.2 V
4.0 V
2.9 V
90 °
65 °
5%
63%
25%
LEVEL = 2
LEVEL = 3
20%
36 V
36 V
145 ℃
83
1.0 V
9.0 V
80V
82.00 V
1.2 V
4.0 V
2.9 V
90 °
65 °
5%
63%
25%
LEVEL = 2
LEVEL = 3
20%
36 V
36 V
145 ℃
83
123
- 22/25/30BHA-7 Traction Slave (04) setup -
PARAMETER CHANGE
E MODE
N MODE
H MODE
RELEASE BRAKING
SEAT DELAY TIME
LEVEL = 2
2
LEVEL = 2
2
LEVEL = 4
2
4
4
4
80V
82.08 V
12 V
80V
82.08 V
12 V
80V
81.68 V
12 V
SET MODEL
CONNECTED TO
ADJUSTMENTS
SET BATTERY TYPE
ADJUST BATTERY
AUX OUTPUT VOLT.
124
- 22/25/30BHA-7 Pump (05) setup PARAMETER CHANGE
E MODE
N MODE
H MODE
ACCELER. DELAY
DECELER. DELAY
MAX SPEED UP
MIN SPEED UP
CUTBACK SPEED
TILT SPEED
SHIFT SPEED
AUX SPEED
HYD SPEED FINE
MAXIMUM CURRENT
IDLE TIME
LEVEL = 0
LEVEL = 0
74 Hz
18.00 Hz
100%
30 Hz
30 Hz
81 Hz
30 Hz
LEVEL = 9
1,5
LEVEL = 0
LEVEL = 0
84 Hz
18.00 Hz
100%
30 Hz
30 Hz
81 Hz
30 Hz
LEVEL = 9
1,5
LEVEL = 0
LEVEL = 0
93 Hz
18.00 Hz
100%
30 Hz
30 Hz
81 Hz
30 Hz
LEVEL = 9
1,5
SET OPTION
HOUR COUNTER
SET TEMPERATURE
JOYSTICK
DIGITAL LIFT
KEYON
ANALOG
OFF
OFF
KEYON
ANALOG
OFF
OFF
KEYON
ANALOG
OFF
OFF
PUMP
PUMP
PUMP
80V
82.5 V
5%
63%
36%
145 ℃
OFF
ON
15%
80V
82.1 V
5%
63%
36%
145 ℃
OFF
ON
15%
80V
82.5 V
5%
63%
36%
145 ℃
OFF
ON
15%
SET MODEL
CONNECTED TO
ADJUSTMENTS
SET BATTERY TYPE
ADJUST BATTERY
THROTTLE 0 ZONE
THROTTLE X POINT
THROTTLE Y POINT
ADJUSTMENT #04
PWM ON MAIN CONT
PWM ON AUX OUT.
MC/AUX PWM
125
- 22/25/30BHA-7 Pump (05) (Fingertip option)
- Pump settings PA R A M ETER C H A N G E
A C C E LE R . D E LA Y
D E C E LE R . D E LA Y
M AX SPEED U P
M IN S P E E D U P
C U TB A C K S P E ED
T IL T S P E E D
S H IF T S P E E D
AU X SPEED
H Y D S P E E D F IN E
M A X IM U M C U R R E N T
ID L E T IM E
SET O P TIO N
H O U R C O U N TE R
S E T TE M P E R A TU R E
JO Y S T IC K
S H IF T F U N C T IO N
A U X F U N C T IO N
D IG IT A L L IF T
SET M O D E L
C O N N E C TE D TO
A D JU S TM EN TS
S E T B A TTE R Y TYP E
A D JU S T B A T T E R Y
T H R O T T LE 0 Z O N E
T H R O T T L E X P O IN T
T H R O T T L E Y P O IN T
A D JU S T M E N T # 0 4
P W M O N M A IN C O N T
PW M O N A U X O U T.
M C /A U X P W M
M IN L IF T
M A X L IF T
M IN L O W E R
M A X LO W E R
M IN T IL T U P
M A X T IL T U P
M IN T IL T D O W N
M A X T IL T D O W N
M IN S H IF T R G T .
M A X S H IF T R G T .
M IN S H IF T L F T .
M A X S H IF T L F T .
M IN A U X IN
M A X A U X IN
M IN A U X O U T
M AX AU X O UT
E M ODE
74 H z
N M ODE
LE V E L = 0
LE V E L = 0
84 H z
1 8 .0 0 H z
100%
30 H z
30 H z
81 H z
30 H z
LE V E L = 9
1 ,5
K EYO N
A N A LO G
ON
O F F / 4 va lve s O N
O F F / 3 va lve s O N
O FF
PU M P
80V
8 2 .1 V
5%
63%
36%
145 ?
O FF
ON
15%
2 .4 V
0 .5 V
2 .4 V
4 .4 V
2 .4 V
0 .5 V
2 .4 V
4 .4 V
2 .4 V
0 .5 V
2 .4 V
4 .4 V
2 ,4 V
4 .5 V
2 .4 V
0 .5 V
- Mhyrio settings H M ODE
93 H z
PARAMETER CHANGE
MIN EVP
MAX EVP
MIN EVP1
MAX EVP1
MIN EVP2
MAX EVP2
MIN EVP3
MAX EVP3
MIN EVP4
MAX EVP4
MIN EVP5
MAX EVP5
MIN EVP6
MAX EVP6
MIN EVP7
MAX EVP7
MIN EVP8
MAX EVP8
EVP OPEN DELAY
EVP CLOSE DELAY
EVP1 OPEN DELAY
EVP1 CLOSE DELAY
EVP2 OPEN DELAY
EVP2 CLOSE DELAY
EVP3 OPEN DELAY
EVP3 CLOSE DELAY
EVP4 OPEN DELAY
EVP4 CLOSE DELAY
EVP5 OPEN DELAY
EVP5 CLOSE DELAY
EVP6 OPEN DELAY
EVP6 CLOSE DELAY
EVP7 OPEN DELAY
EVP7 CLOSE DELAY
EVP8 OPEN DELAY
EVP8 CLOSE DELAY
25,10%
85,10%
25,10%
70,20%
25,10%
85,10%
25,10%
85,10%
25,10%
85,10%
25,10%
85,10%
25,10%
85,10%
25,10%
85,10%
25,10%
85,10%
0,2
0,4
0,2
0,1
0,2
0,1
0,2
0,4
0,2
0,4
0,8
0,4
0,8
0,4
0,2
0,4
0,2
0,4
SET OPTION
SET BATTERY TYPE
V VALVES COIL
VALVES SUPPLY
EVP TYPE
EVP1 TYPE
EVP2 TYPE
EVP3 TYPE
EVP4 TYPE
EVP5 TYPE
EVP6 TYPE
EVP7 TYPE
EVP8 TYPE
80V
24V
80V
ANALOG
ANALOG
ANALOG
ANALOG
ANALOG
ANALOG
ANALOG
ANALOG
ANALOG
SET MODEL
CONNECT TO
MHYRIO
ADJUSTMENTS
126
ADJUST BATTERY
82.8 V
- 22/25/30BHA-7 Display (16) settings.
SET OPTION
POWER SELECTOR
HOUR COUNTER
AUX OUTPUT #1
AUX VOLTAGE #1
SPEED UNIT
USER PASSWORD
MAINTENANCE
MAINTENANCE DONE
SEATBELT STATUS
STEER ANGLE
E MODE
N MODE
H MODE
OPTION #3
OPTION #1
ABSENT
100%
OPTION #1
OFF
PRESENT
OFF
OPTION #2
ON
OPTION #2
OPTION #1
ABSENT
100%
OPTION #1
OFF
PRESENT
OFF
OPTION #2
ON
OPTION #1
OPTION #1
ABSENT
100%
OPTION #1
OFF
PRESENT
OFF
OPTION #2
ON
DISPLAY
DISPLAY
DISPLAY
SET MODEL
CONNECTED TO
ADJUSTMENTS
DELAY DISP. OFF
LEVEL = 0
LEVEL = 0
LEVEL = 0
127
- 35/40/45/50B-7 Zapi settings.
128
128
- 35/40/45/50B-7 Traction Master (03) setup Code
PARAMETER CHANGE
E MODE
N MODE
H MODE
0
11
12
13
16
28
30
31
20
251
29
245
63
241
242
243
241
242
ACCELER. DELAY
RELEASE BRAKING
INVERS. BRAKING
PEDAL BRAKING
SPEED LIMIT BRK.
BRAKE CUTBACK
MAX SPEED FORW
MAX SPEED BACK
CUTBACK SPEED
TURTLE SPEED
CURVE CUTBACK
FREQUENCY CREEP
MAXIMUM CURRENT
ACC. SMOOTH
INV. SMOOTH
STOP SMOOTH
SEAT DELAY TIME
SEQUENCE DE.TIME
LEVEL = 3
LEVEL = 2
LEVEL = 3
LEVEL = 7
LEVEL = 6
LEVEL = 5
98 Hz
98 Hz
100%
76 Hz
30%
0.30 Hz
LEVEL = 4
2
2
15 Hz
2
2
LEVEL = 2
LEVEL = 2
LEVEL = 5
LEVEL = 7
LEVEL = 6
LEVEL = 5
125 Hz
125 Hz
100%
76 Hz
30%
0.30 Hz
LEVEL = 4
2
2
10 Hz
2
2
LEVEL = 1
LEVEL = 1
LEVEL = 6
LEVEL = 7
LEVEL = 6
LEVEL = 5
145 Hz
145 Hz
100%
76 Hz
30%
0.30 Hz
LEVEL = 4
1,5
1,5
10 Hz
2
2
10
10
248
CHAT TIME
10
129
129
- 35/40/45/50B-7 Traction Master (03) setup Code
SET OPTION
125
121
246
245
251
247
109
13
141
245
247
243
85
244
HOUR COUNTER
BATTERY CHECK
TRACTION CUTOUT
LIFT CUTOUT
HYDRO KEY ON
STOP ON RAMP
AUX INPUT #1
PEDAL BRAKING
SET TEMPERATURE
STEER TABLE
DISPLAY
S.R.O.
PEDAL TYPE
PEDAL BRK STOP
119
AUX OUTPUT #1
Code
SET MODEL
250
CONNECTED TO
E MODE
N MODE
H MODE
KEYON
ON
ON
ON
OFF
OFF
OPTION #2
DIGITAL
ANALOG
OPTION #3
ON
ON
OPTION #1
OFF
KEYON
ON
ON
ON
OFF
OFF
OPTION #2
DIGITAL
ANALOG
OPTION #3
ON
ON
OPTION #1
OFF
KEYON
ON
ON
ON
OFF
OFF
OPTION #2
DIGITAL
ANALOG
OPTION #3
ON
ON
OPTION #1
OFF
BRAKE
BRAKE
BRAKE
E MODE
N MODE
H MODE
3
3
3
130
130
- 35/40/45/50B-7 Traction Master (03) setup Code
ADJUSTMENTS
E MODE
N MODE
H MODE
245
246
145
140
249
243
152
246
241
249
252
253
248
249
157
62
251
252
156
SET POT BRK MIN
SET POT BRK MAX
SET BATTERY TYPE
ADJUST BATTERY
MAX STEER RIGHT
MAX STEER LEFT
SET STEER 0-POS.
SET STEER RIGHT
SET STEER LEFT
THROTTLE 0 ZONE
THROTTLE X POINT
THROTTLE Y POINT
ADJUSTMENT#2 BDI
ADJUSTMENT#1 BDI
ADJUSTMENT #03
AUX TIME #1
PWM ON MAIN CONT
PWM ON AUX OUT.
ADJUSTMENT #04
0.5 V
4.5 V
80V
83.9 V
0.7 V
3.1 V
2.1 V
85
63
0%
63%
25%
LEVEL = 3
LEVEL = 3
20%
5
ON
OFF
145
0.5 V
4.5 V
80V
83.9 V
0.7 V
3.1 V
2.1 V
85
63
0%
63%
25%
LEVEL = 3
LEVEL = 3
20%
5
ON
OFF
145
0.5 V
4.5 V
80V
83.9 V
0.7 V
3.1 V
2.1 V
85
63
0%
63%
25%
LEVEL = 3
LEVEL = 3
20%
5
ON
OFF
145
247
SPEED FACTOR
75
75
75
131
131
- 35/40/45/50B-7 Traction Slave (04) setup CODE
PARAMETER CHANGE
E MODE
N MODE
H MODE
63
MAXIMUM CURRENT
LEVEL = 4
LEVEL = 4
LEVEL = 4
Code
SET OPTION
125
119
141
HOUR COUNTER
AUX OUTPUT #1
SET TEMPERATURE
Code
SET MODEL
250
CONNECTED TO
KEYON
BRAKE
ANALOG
KEYON
BRAKE
ANALOG
KEYON
BRAKE
ANALOG
4
4
4
Code
ADJUSTMENTS
145
140
247
SET BATTERY TYPE
ADJUST BATTERY
PWM ON AUX OUT.2
80V
82.5 V
12V
80V
82.5 V
12V
80V
82.5 V
12V
248
PWM ON AUX OUT.
OFF
OFF
OFF
132
132
- 35/40/45/50B-7 Pump (05) setup Code
PARAMETER CHANGE
E MODE
N MODE
H MODE
0
5
242
248
20
252
253
254
48
63
ACCELER. DELAY
DECELER. DELAY
MAX SPEED UP
MIN SPEED UP
CUTBACK SPEED
TILT SPEED
SHIFT SPEED
AUX SPEED
HYD SPEED FINE
MAXIMUM CURRENT
LEVEL = 0
LEVEL = 0
85 Hz
18.00 Hz
100%
40 Hz
35 Hz
40 Hz
18 Hz
LEVEL = 9
LEVEL = 0
LEVEL = 0
92 Hz
18.00 Hz
100%
40 Hz
35 Hz
40 Hz
18 Hz
LEVEL = 9
LEVEL = 0
LEVEL = 0
100 Hz
18.00 Hz
100%
40 Hz
35 Hz
40 Hz
18 Hz
LEVEL = 9
1,5
1,5
1,5
E MODE
N MODE
H MODE
246
IDLE TIME
Code
SET OPTION
125
141
247
HOUR COUNTER
SET TEMPERATURE
DISPLAY
249
DIGITAL LIFT
KEYON
ANALOG
ON
OFF
KEYON
ANALOG
ON
OFF
Hydraulic
Steering.
KEYON
ANALOG
ON
OFF
133
133
- 35/40/45/50B-7 Pump (05) setup -
Code
250
Code
SET MODEL
CONNECTED TO
ADJUSTMENTS
E MODE
N MODE
H MODE
5
5
5
E MODE
N MODE
H MODE
145
140
249
252
253
251
252
SET BATTERY TYPE
ADJUST BATTERY
THROTTLE 0 ZONE
THROTTLE X POINT
THROTTLE Y POINT
PWM ON MAIN CONT
PWM ON AUX OUT.
80V
83.4 V
9%
72%
15%
ON
OFF
80V
83.4 V
9%
72%
15%
ON
OFF
80V
83.4 V
9%
72%
15%
ON
OFF
156
ADJUSTMENT #04
145
145
145
134
134
- Parameter setting variables - Acceleration potentiometer setup -
THROTTLE 0 ZONE
It establishes a dead band in the accelerator input curve.
THROTTLE X POINT
This parameter changes the characteristic of the
accelerator input curve.
THROTTLE Y POINT
This parameter changes the characteristic of the
accelerator input curve.
- Battery discharge setup -
ADJUSTMENT#1 BDI
It adjusts the upper level of the battery discharge
table.
ADJUSTMENT#2 BDI
It adjusts the lower level of the battery discharge
table.
135
135
- Parameter setting variables - Smooth parameters setup -
ACC. SMOOTH
It gives a different form to the
acceleration curve in the frequency
range 0 Hz
to “Stop smooth” value (see the
figure below).
INV. SMOOTH
It gives a different form to the
acceleration curve after a direction
inversion in
the frequency range 0 Hz to “Stop
smooth” value (see the figure below).
STOP SMOOTH
It sets the level of frequency where
the smooth effect on the acceleration
ramp ends.
136
136
- Parameter setting variables The following table shows the different values at which the parameters can be set.
(*) The acceleration time shown is the
time from 0 Hz to 100 Hz. This is the
ideal ramp calculated by the software;
the real ramp could change as a
function of motor control parameter
setting and, obviously, as a function
of the load.
(**) The braking feature is based
upon deceleration ramps. The value
shown in the table is the time to
decrease the speed from 100 Hz to 0
Hz. This is the ideal ramps calculated
by the software; the real ramp could
change as a function of motor control
parameter setting and, obviously,
as a function of the load.
137
137
- Failure codes -
138
138
- Failure codes -
139
139
Maintenance
Recommendations
140
140
- Maintenance diagram.
141
141
- (15)16/18/20B(T)-7Maintenance diagram.
142
142
- 22/25/30/32B-7 Maintenance diagram.
143
143
- 22/25/30BHA-7 Maintenance diagram.
144
144
- 35/40/45/50B-7 Maintenance diagram.
145
145
- Questions or remarks.
146
146