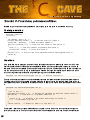
1
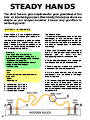
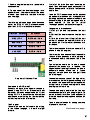
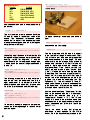
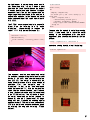
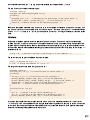
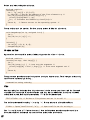
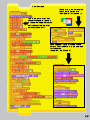
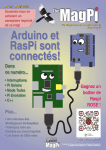
ISSUE 05 SEP 2012 A Magazine for Raspberry Pi Users Steady Hand Fun With The RaspberryPi Tutorial by Mike Cook Also in this issue Squeezy or Wheezy? DebianDistro'sExamined RaspberryPi Media Centre A Guide To OpenELEC and Raspbmc http://www.themagpi.com Raspberry Pi is a trademark of The Raspberry Pi Foundation. This page was created using a Raspberry Pi computer. Welcome to Issue 5, This month we have a collection of hardware projects for you, as well as our usual selection of programming articles and general operating tips. We are proud to present an article by none other than Mike Cook , who designed several projects for THE MICRO USER magazine. This magazine had a great influence on many of those who were fortunate to have access to a BBC microcomputer. Without the efforts of Mike and fellow authors, the young members of the Raspberry Pi foundation may never have thought of building the Raspberry Pi. We are still looking for volunteers to help with layout as well as authors of new and exciting projects. Contact [email protected]. Ash Stone Chief Editor of The Magpi Ash Stone Matt '0the0judge0' Jason 'Jaseman' Davies Mike Cook Tim 'Meltwater' Cox Duncan Rowland Chris 'tzj' Stagg Colin Deady Lix Bobby 'bredman' Redmond Chief Editor /Administrator /Header Writer /Website /Page Designs Writer /Photographer /Page Designs Writer /Photographer /Page Designs Page Designs /Graphics Administrator /Website Writer Writer Writer /Page Designs Writer /Page Designs Paisleyboy W.H. Bell & D Shepley Andrius Grigaliunas Colin Norris Page Designs /Graphics Photographer Writers Editor /Graphics (C Cave Header) Antiloquax Writer 2 Contents 04 STEADY HANDS Are your hands steady enough to beat the Pi? by Mike Cook 07 ENVIRONMENTAL MONITORING Track temperature fluctuations, by Duncan Rowland 1 0 WHAT'S ON GUIDE & COMPETITION Find out where Raspberry Jams' are happening and win a starter kit 1 2 XBMC: RASPBMC AND OPENELEC Get to grips with your media centre setup, by Colin Deady 1 6 SQUEEZE OR WHEEZY Improvements and changes, by Jaseman 1 8 COMMAND LINE CLINIC Learn how to backup important data, by Bobby (bredman) Redmond 20 C CAVE Functions, pointer and text file encryption, by W. H. Bell & D. Shepley 24 THE SCRATCH PATCH Program your own Simon says game, by Antiloquax 26 48HR RASPITHON Ben, Luke, Ryan and Edward recount their python challenge 27 THE PYTHON PIT Gradient fills, and using maths to plot points of a circle, by Jaseman 32 FEEDBACK & DISCLAIMER 3 STEADY HANDS You don't have to get complicated to get a great deal of fun from an interfacing project. Electrically this is just about as simple as you can get, however it has a very good fun to technology ratio. DIFFICULTY: INTERMEDIATE Steady hands is a very old game; however, with a Raspberry Pi we can give it a new twist. The idea is that you have to guide a wire loop along a bendy wire without letting the two touch. You can make this as complex or as easy as you like by having more bends in the wire or having the loop smaller. Materials -Bare single core wire (2mm Dia) e.g. metal coat hanger. If using wire it needs to be thick enough to hold its shape. -Stranded wire (insulated) -Block of wood (size depends on your design of 'bent coat hanger') -Electrical tape Tools -Drill -Drill bit (just smaller than the diameter of the wire) -Solder -Soldering iron A - Physical pin 7 GPIO pin 4 B - Physical pin 3 GPIO pin 0 C - Physical pin 5 GPIO pin 1 D - Physical pin 6 Ground 4 The Construction 1 . Drill holes in the wooden block for the 'bent coat hanger or wire' just smaller than the diameter of the coathanger/wire so that the wire will hold itself up. Make sure to space the two holes far enough apart to accomodate your design. 2. Make the wire loop and solder a length of wire to it. You might want to add a covering of insulation tape or, better still, self amalgamating tape over the end you hold. 3. Put the 'bent coat hanger / wire' through the wire loop and then into the wooden block. 4. Solder a length of stranded wire (insulated) to one end of the 'bent coathanger/wire'. 5. Drill two holes on either side of the 'bent coat hanger / wire', as shown in the image below for the rests. 6. Put two short lengths of coat hanger / wire, to act as rests, in these holes. These will detect when the game starts and when the wireloop reaches the end. Bend them so the loop will rest against them without shorting out on the bent wire. 7. Solder a length of normal wire (insulated) to each end stop. 8. On each end of the 'bent coat hanger / wire' and both rests, from where they hit the block of wood, tape them with insulated electrical tape 4 cm high. The following table and image show how each part of the 'STEADY HAND' attaches to each pin of the Pi GPIO via the 2.54mm header: STEADY HAND PI GPIO WIRE LOOP GROUND - PIN 6 BENT WIRE GPIO 1 - PIN 5 START REST GPIO 4 - PIN 7 END REST GPIO 0 - PIN 3 First of all the three lines must be set up as inputs. They boot up as inputs anyway but it is always good practice to initialise the lines you want to use. I used the GPIO numbers and not the physical pin numbers in the code as I strongly believe that using physical pin numbers is actually not a sensible thing to do, and not a good way to teach children. It's like the ITA (Initial Teaching Alphabet) mistake all over again. The game is in three phases: 1 ) Wait until the loop is placed on the start rest. 2) Wait until the loop is removed from the start rest. 3) Time the interval from lifting it off the start rest until it reaches the end rest. While it is in this phase the Pi will monitor the bendy wire for touches. This is then repeated forever, so a control C is needed to stop the program. This is just the bare bones of what is possible. I always think a good way to learn anything is to extend and modify from a base. This is your base. One extension would be to add a sound whenever the bendy wire is touched. The August issue of the MagPi showed you how to incorporate sound effects into a Python program, so take those bits and graft them into this program. Raspberry Pi Physical Pins How does the GPIO work? Basically we have three signal wires and a ground. Using GPIO 0 & 1 means that a pull up resistor is already connected on the Pi, just leaving GPIO 4 to have either an external pull up attached or activating the internal pull up resistor. I opted for the latter option. The Program The software was my first venture into writing in the Python language. It is quite straight forward. You could also keep track of the high scorer, or even have a table of high scores along with the names. You can make that permanent by writing it out to a file and reading the file when the program first starts up. You can add penalty points into the time, say 3 seconds per point to give a single figure. On a more practical level, see if you can abort a timed run when the loop is placed back on the start loop. There is plenty of scope for adding your own refinements. Have fun. Continued over page... 5 # python3 # Steady hands game import RPi.GPIO as GPIO import time # use BCM GPIO numbering use anything else and you are an idiot! GPIO.setmode(GPIO.BCM) # set up GPIO input pins # (pull_up_down be PUD_OFF, PUD_UP or PUD_DOWN, default PUD_OFF) GPIO.setup(4, GPIO.IN, pull_up_down=GPIO.PUD_UP) # GPIO 0 & 1 have hardware pull ups fitted in the Pi so don't enable them GPIO.setup(0, GPIO.IN, pull_up_down=GPIO.PUD_OFF) GPIO.setup(1, GPIO.IN, pull_up_down=GPIO.PUD_OFF) print("Hi from Python : Steady Hands game") delay = range(0,5000) dum = 0 start_rest = 4 end_rest = 0 wire = 1 while True: #wait until the wand is at the start print("Move the loop to the start rest") while GPIO.input(start_rest) != 0: time.sleep(0.8) #now we are at the start of the bendy wire print("Start when you are ready") #wait until the loop is lifted off the wire while GPIO.input(start_rest) == 0: time.sleep(0.1) print("Your off") #time the run to the other rest penalty = 0 run_time = time.clock() while GPIO.input(end_rest) != 0: if GPIO.input(wire) == 0: penalty = penalty + 1 print("Penalties total", penalty, " points") time.sleep(0.07) score = time.clock() run_time + (penalty * 0.07) print("The run time was", score, "seconds with", points") #finished a run so start again Hope you give it a go. Have fun! 6 penalty, "Penalty Article by Mike Cook DIFFICULTY: INTERMEDIATE This article builds on topics from previous issues of The MagPi and shows how to add a temperature sensor to your Pi together with a simple method to record and display the data on the web. The temperature sensor used is the ‘tmp1 02’ (http://www.ti.com/product/tmp1 02) and connects via the i2c bus (i.e. the same way Rob McDougall connected his accelerometer in last month's issue). The temperature sensor is readily available already mounted on a breakout board from sparkfun.com (http://www.sparkfun.com/products/941 8). With the addition of some header pins it can be pushed straight onto a breadboard for prototyping (see photos). As of build (201 2-07-1 5-wheezy-raspbian) Raspbian now already has the I 2C modules included and the firmware is ready to go too. Dr Duncan Rowland – University of Lincoln Starting with a fresh install, the instructions that follow do not require the graphical user interface, so you can boot your Pi and use a terminal window and keyboard or remotely login via ssh as you prefer. First we need to install the tools for talking to the I 2C bus: sudo aptget update sudo aptget install i2ctools There are a couple of modules we need to add (i2c-bcm2708 and i2c-dev). You can either include then manually by issuing the following ‘modprobe’ commands (in which case you will need to do this each time you reboot); or you can add them to the file ‘/etc/modules’ (in which case they will be loaded automatically when you reboot): sudo modprobe i2cbcm2708 sudo modprobe i2cdev Finally, so that you can read from the I 2C bus, you need to add the pi user to the i2c user group (after which you will need to logout and log back in for the change to take effect): sudo usermod –a –G i2c pi logout If you have correctly connected your tmp1 02 sensor (as shown in the photos) it should now be accessible to you on the I 2C bus when you log back in. 7 Wiring Connections: Tmp102 GND SCL SDA V+ ALT ADD0 Pi GPIO PIN 06 (Ground) PIN 05 (I2C0_SCL) PIN 03 (I2C0_SDA) PIN 01 (3V3 Power) leave disconnected GND awk '{printf("%.2f\n", (a=( \ "0x"substr($1,5,2)substr($1,3,1))*0.0625 \ )>1 28?a-256:a)}' Now you should be able to communicate with the device: i2cget y 0 0x48 0x00 w This will read the value in address (0x48) on I 2C bus (0) which is the current value of the sensor. The datasheet referenced above shows how to convert this hexadecimal value into degrees centigrade, and the following awk script performs this task: awk '{print( \ ("0x"substr($1,5,2)substr($1,3,1))*0.0625) \ }' Essentially what this does is to reorder the bits (using sub-strings) and appropriately scale the resulting value for degrees. It can be combined with the first command using a pipe ‘|’ which takes the result of i2cget and sends it to awk. i.e. i2cget y 0 0x48 0x00 w | \ awk '{print( \ ("0x"substr($1,5,2)substr($1,3,1))*0.0625) \ }' The following wraps this in a bash script so it can be run from the command line (with a slight adjustment to the output to force two decimal places and a newline). Make a new file called tmp1 02.sh and add the following: #!/bin/bash i2cget y 0 0x48 0x00 w | \ awk '{printf("%.2f\n", \ ("0x"substr($1,5,2)substr($1,3,1))*0.0625) \ }' To correctly calculate negative temperature values the following change to the awk script must be made: 8 To make the script executable you need to type: chmod +x tmp102.sh and you can run it by typing: ./tmp102.sh One fun thing to do with this data is to send it to the “Internet of Things” web service COSM. This will store your data and plot graphs that can be embedded in a web page. We can automatically run the process every minute or so and send the value to COSM. First you will need to login and create an account on http://cosm.com. Once you’re verified (via email) you can make a new “Device” (aka “Feed”). Click on the word “Adding” and then “Something Else” to create a feed for your Pi. Select “No, I will push data to COSM” and fill out the rest of the configuration as you’d like (a good title would be something like “My Raspberry Pi”. You will receive a “feed ID” which you will need in order to send updates. In the “update.sh” script below you should put this value where I have left XXXXX. Next we need to define a “Datastream” for this feed. In the console click on “+ Datastream” and enter the required data (e.g. ID = Temperature; Symbol = ° C). The ID you specify will need to be provided when you send updates. In the blank.json data template below, you should put this where I have the entry YYYYY. Finally, we need a key that gives us permission to post updates to the COSM server. Go to the Keys section (situated in the top-right corner in a drop-down menu next to your name) and click “+ Key”. Choose a label and leave the Feed Restrictions as the default “Use any public feed” and Access Privileges can be set to all. The key that is generated is a long string of characters and this is required to authenticate updates. In the “update.sh” script below you should put this value where I have left ZZZZZ. The COSM server expects data in a specific format. Save the following in a file called “blank.json” (remembering to replace the value YYYYY with your datastreams ID): { "version":"1.0.0", "datastreams":[ {"id":"YYYYY", "current_value":"T1"} ] } #!/bin/bash while true; do temp=$(./tmp102.sh) cat blank.json | sed 's/T1/'$temp'/g' > \ send.json curl request PUT \ databinary @send.json \ header "XApiKey: ZZZZZ" \ http://api.cosm.com/v2/feeds/XXXXX sleep 60 done You can stop the update.sh script by pressing Ctrl+C. If you would like to leave the script running in the background after you have logged out, then you can run the script like this instead: nohup ./update.sh > /dev/null & and when you log back in, stop it by typing: killall update.sh You can now create a new update.sh script file as below incorporating the values for your device ID (XXXXX) and your authentication key (ZZZZZ). The script is essentially the same as our previous efforts, with a couple of additions. First, the template data file “blank.json” is sent to the “sed” command which replaces the “T1 ” with the temperature value from the sensor. Second, “curl” is used to send the newly created data-file (send.json) to the COSM server. You will need to make the script executable as before (chmod +x update.sh) and run it (./update.sh). All things being well your Pi should be sending regular updates to your COSM data feed, you can ask COSM to plot this on as an embeddable graph by clicking the cog and selecting “Graph Builder”. 9 Want to keep up to date with all things Raspberry Pi in your area? Then this new section of The MagPi is for you! We aim to list Raspberry Jam events in your area, providing you with a Raspberry Pi calendar for the month ahead. Are you in charge of running a Raspberry Pi event? Want to publicise it? Email us at: [email protected] E-DAY @ GATESHEAD When: 29th September 201 2 Where: Gateshead Library Makerspace Newcastle will deliver a Raspberry Pi intro/workshop. Our aim is to encourage adults and children over 1 0 to find out more about, and engage with, technology. To this aim we also have other groups/people taking part such as: - Vector 76 Avatar workshop - Gateshead CLC iPad and LEGO robotics - Makerspace 3D printers - A local group who will be working with retro gaming Melbourne Australia Raspberry Jam When: 1 st Saturday of the month at 1 :30pm & Thursday of the third week of the month at 6:30pm Where: Details at http://www.meetup.com/Melbourne-Raspberry-Jam/ Still cranking up the regular meetings, but we have held a couple of ad hoc meetings already. Sheffield Raspberry Jam When: Where: Hosted by GISThub 10 Last Wednesday of the month at 6:30-8:30PM 1 st Floor, The Workstation, Grinders Hill / Brown Street, Sheffield, S1 2BX, UK SEPTEMBER COMPETITION This month The MagPi and PC Supplies Limited are proud to announce yet another chance to win some fantastic Raspberry Pi goodies! First prize will recieve the following: Limited Edition MagPi Case HDMI Cable Power Supply Audio Cable Video Cable GPIO Cable Network Cable 32GB SDHC Card with Raspbian With two runners up winning a MagPi engraved case! For a chance to take part in this month's competition visit http://www.pcslshop.com/info/magpi Closing date is 20th September 201 2. Winner will be notified in next month's magazine and by email. Good luck! Last Month's Winner ! Congratulations to last month's winner DAVID HARPER from DOVER. We will be emailing you soon with details of how to claim all of those fantastic goodies! 11 XBMC Media Center: OpenELEC and Raspbmc A low power Raspberry Pi media centre equipped with HDMI and capable of high definition 1080p output. As more people are looking to access their media catalogue via their computer or TV without the use of physical media, the freely available XBMC is an ideal solution. XBMC is known as a 1 0-foot GUI: you can comfortably sit on your sofa across the room and clearly view the user interface on your television. We will look at the two main XBMC distributions available for the Raspberry Pi covering installation, configuration, video playback, accessing YouTube, using CEC or an Android mobile phone as a remote controller and AirPlay. XBMC has a large feature set so only a subset will be covered in this article. To find out more point your browser at: http://xbmc.org. OpenELEC and Raspbmc OpenELEC (www.OpenELEC.tv) provides source and pre-built images and is built from scratch as a dedicated media centre appliance. The filesystem is readonly which increases robustness but means additional software must be installed from within XBMC, which is inline with OpenELEC's objective to be the most user friendly distribution available. OpenELEC is small, fast and optimised purely for running XBMC. Raspbmc (www.raspbmc.com) is based on Raspbian and developed by Sam Nazarko. What is especially impressive is that although Sam is only 1 8 he has already released XBMC for the AppleTV under the name Crystalbuntu. He is now working his magic on XBMC for the Raspberry Pi. Raspbmc's filesystem can be modified meaning that you can install additional software beyond XBMC. While this has definite advantages in some respects it does mean that potential exists to install too many services that slow down the operating system and XBMC, hence care needs to be exercised. Raspbmc is likewise available as both a pre-built distribution and souce, and 12 also runs XBMC quickly. The OpenELEC port of XBMC began on a Raspberry Pi alpha board and likewise Raspbmc has been under continuous development and improvement for several months. A seamless XBMC experience is provided to you for free by the considerable efforts of those involved and for this I take my hat off to the respective Developers and Beta Testers. What you will need To get XBMC up and running you will need to connect your Raspberry Pi to your TV over HDMI, optionally via an A/V receiver for 5.1 surround sound. A USB hard drive will act as your media source, although if you just want to watch online content such as YouTube this is not necessary. IMPORTANT: the USB drive should have its own power supply or be connected via a powered USB hub. The Raspberry Pi's USB ports are not suitable to power a portable USB hard drive. An additional computer is needed to install either OpenELEC or Raspbmc onto an SD card. Any reasonably specified computer running Linux can be used. Installation of Raspbmc via Windows or Mac OS X is also possible. Obtaining and installing XBMC OpenELEC provides compilable source and a downloadable pre-built image (see Useful Links at the end of this article). You will need to prepare and write the data to your SD card following the online instructions. As OpenELEC uncompresses and boots from a read-only filesystem each time it is not possible to change the root password after building the software (however disabling password logins and using ssh keys instead is reportedly possible). This also applies to the pre-compiled image. Building OpenELEC from source may well seem complex but it is worth attempting if you have not compiled and installed an operating system before as it is a great worked example that yields a genuinely useful result. Raspbmc installs from a downloadable Python program (see Useful Links) on Mac OS X and Linux. On Windows executing the installer.exe is the equivalent. A base image will quickly install to the SD card, sufficient to allow the full installation to complete upon first boot provided the Raspberry Pi is connected to the internet. The first boot of each distribution takes a few minutes (Raspbmc will be considerably longer while the operating system proper is downloaded and installed), but subsequent boots take under 30 seconds. Ready to run out of the box The great thing about XBMC is that it works straight away: it is a good example of what is known as a black box (http://en.wikipedia.org/wiki/Black_box). A black box is a great concept for a media centre appliance: just like your DVD or BluRay player you should not need to care about the internal workings to be able to use the inputs and outputs provided. After booting, XBMC will present a horizontal control strip of options that enable access to your media collection and other goodies (including live weather updates). Navigation by keyboard, mouse, various remote controls (including XBOX and XBOX360 controllers) or an Android phone (more on that later) is supported. For users of earlier builds of either OpenELEC or Raspbmc it is worth upgrading to ensure that you are taking advantage of recent performance improvements. Sam Nazarko of Raspbmc mentioned that using Raspbian with hard floating point operation support from build RC4 should make the Raspbmc XBMC experience more responsive and this is certainly the case. Gimli of XBMC and Stephan of OpenELEC fame confirm that they have been using their own highly optimised hard floating point build of Linux for about five months which incorporates various optimisations as a result of user feedback and testing leading to a steady increase in performance. This news prompted an immediate upgrade of both of my XBMC installations and I can confirm that XBMC on Raspberry Pi is quick. After booting you may notice that the edges of the screen fall off the edge of your TV. If this happens you need to adjust the overscan settings, which in layman's terms means adjusting the corners of the displayed image to ensure that all of the picture is visible. Overscan is changed under System settings / System / Video output / Video calibration by using the keyboard's cursor keys, Enter to move to the next option and Esc to save changes. On Raspbmc, once overscan is set you should change the default password (raspberry) for the pi user by selecting the power icon (bottom left) and then Exit. Quickly press Esc and you will be directed to the shell (note that the first time you log in via the shell you will be prompted to configure some localisation settings). At the command prompt enter: sudo passwd pi On Raspbmc the root user is disabled by default. If you need to execute a command with root privileges prefix it with the command sudo. To return to XBMC type exit to return to the login prompt and then quickly press Enter four times. Raspbmc and OpenELEC provide additional distribution-specific configuration options under the Programs menu to configure networking and automatic updates. This may be especially useful if your Raspberry Pi fails to obtain an IP address via DHCP. Setting the default time The Raspberry Pi automatically sets the date and time from the internet. However the timezone may be incorrect and the time may not take account of Daylight Savings Time (or British Summer Time). This can easily be fixed by selecting System settings / Appearance / International and changing the Timezone country from the default "Aaland Islands" to your local timezone. Add-ons for all Video Add-ons exist for a large variety of services including CNET Podcasts, Engadget, ESPN Video, Redbull.tv, TED Talks, YouTube and many others. The full list is available via the Videos menu / Add-ons / Get More option. Installing YouTube took only 1 5 seconds for example. Likewise Music and Pictures also provide Add-ons that are well worth exploring. Each creates an additional option under the relevant Add-ons section. Online video quality can vary, but having the enormous selection 13 that XBMC provides access to greatly increases the media centre's capabilites. Installing Raspbmc extra software on Installing additional software on Raspbmc outside XBMC is possible. As noted earlier care should be taken not to install too many resource hungry services that may impact on the performance of XBMC. Backup the SD card before installing extra software by using the dd command (instructions for this are easy to find with a Google search). To install extra software on Raspbmc exit to the command line and type: sudo aptget install <packagename> Whatever the weather XBMC provides weather information from the main menu. It attempts to determine your locality, but as this is derived from your internet address it is likely to be fairly inaccurate. Change location information by selecting Weather, pressing the left cursor key to slide out the options menu, selecting Settings / General / Settings. Up to three weather locations can be specified. You can toggle between these via the up and down icons at the top of the slide out options menu. Weather is a good example of lateral thinking for the XBMC development team: while its primary purpose is clearly that of a media centre, it is capable of undertaking other tasks as well. Video formats On August 24th the Raspberry Pi Foundation made both MPEG2 and VC-1 licenses available for purchase from the Raspberry Pi store. This functionality had previously been omitted from the hardware to keep production costs to a minimum. Without these licenses the Raspberry Pi will playback MPEG4 and H.264 video but not MPEG2 or VC-1 . With the licenses pre-existing media libraries that were encoded as MPEG2 or VC-1 will now play. This is a superb announcement from the Foundation (http://www.raspberrypi.org/archives/1 839). Naming your media files When the USB hard disk is connected XBMC will scan the contents looking for matches based on file name and year to present under Movies as noted below. For this reason it is 14 important to name files in a particular way. For example: \Movies\Transformers (2007).mkv Full details on naming conventions for Movies can be found on the XBMC Wiki at: http://wiki.xbmc.org/index.php?title=Add ing_videos_to_the_library/Naming_files/M ovies and for TV shows: http://wiki.xbmc.org/index.php?title=Add ing_videos_to_the_library/Naming_files/T V_shows IMDB.com likely contains the year information that you need. Organising your media XBMC can better organise films than the default Videos option provides: by genre, year, actor etc, and can download fan art, display film information and provide links to previews, all under a Movies option. To enable scan your videos as a new source: Select Videos / Files / Add Videos / Browse / Root filesystem and then the path /media/usb0 on Raspbmc or /media/<hard disk name> on OpenELEC. Press the left cursor key and select OK. Change "This directory contains" to Movies and finally OK to add the source. Select Refresh information for all content and your Movie library will gradually be scanned which can take a while. Fortunately you can carry on using XBMC while this process takes place. Once completed you will see a new option next to Videos, Movies which provides all of the added goodness. CEC and Android remote controls Both OpenELEC and Raspbmc now support CEC. This means that all of your HDMI equipment that also supports CEC can be controlled via a single remote. In XBMC you can navigate menus, browse your media, control playback and link power settings between devices with your TV remote controller. A good demonstration on this functionality is available on YouTube: http://www.youtube.com/watch?v=XPyOyJsn B1 o In addition to CEC support software such as XBMC Remote is available from the Android Play Store (other Android, WebOS and iPhone apps are available). This also provides navigation, browsing and playback options. Your Android smartphone needs to be connected to the network via WiFi where-as your Raspberry Pi can be connected via either wired or wireless ethernet meaning line of sight is not required unlike infrared. Configure as follows: - On the Raspberry Pi select Settings / Services / Remote control and enable the two "Allow programs" options. Under Settings / Services / Webserver select "Allow control of XBMC via HTTP" and set both a username and password. This will permit the smartphone to make the connection. - On the smartphone tap Menu / Settings / Manage XBMC Hosts / Menu / Add Host. Enter the details you configured on the Raspberry Pi. If using a DHCP IP address ensure the router is set to reserve it for the Raspberry Pi on each boot. Also ensure the port numbers match. You can determine the DHCP assigned address on the Raspberry Pi by selecting System info beneath the main System menu option. The advanced options under XBMC Remote Settings include Show incoming SMS and Show incoming calls that enable a small popup notification to appear on the TV when you receive a text message or phone call. This does of course require you to keep your smartphone constantly connected via WiFi to XBMC which can drain your smartphones battery somewhat, hence keep your phone on charge. AirPlay remote streaming XBMC supports streaming media content from iTunes and some third party applications via AirPlay. Enable it via System / Settings / Services / AirPlay. Although DRM protected content is not supported it is for example possible to stream non-DRM music directly to XBMC. With AirPlay enabled iTunes should automatically detect XBMC as a destination, selectable via an icon in the bottom right of iTunes. Select XBMC, and then click play to redirect mustic to your Raspberry Pi. Your firewall may block AirPlay on port UDP 5353. Other features XBMC also provides other features that are worth investigating: - Skins (changing the default theme of XBMC) - Python widget scripting (the ability to add new functionality to XBMC yourself) - Controlling XBMC through a web browser on a different computer or tablet - Communicating with MythTV, a digital video recorder As always, exploration, trial and error are often the best ways to learn new technology. In conclusion After using XBMC on the Raspberry Pi it is clear that each distribution is a success - there is something inherently "cool" as well as practical in being able to play media via the Raspberry Pi on your TV. The work that has gone into OpenELEC and Raspbmc is truly impressive. Each works exceptionally well and with continued active development it is clear that both have a bright future ahead of them. Each provides a straightforward installation process with automatic updates as well as compilable source if you need an extra level of initial configuration (or just want to learn how to). Both have a friendly, helpful community of people supporting the core efforts. Try them both. See which you prefer and go with it. You will not be disappointed in either case. Useful links Pre-built OpenELEC image: http://sources.openelec.tv/tmp/image/ope nelecrpi/ and associated instructions: http://wiki.openelec.tv/index.php?title= Installing_OpenELEC_on_Raspberry_Pi Build OpenELEC from source: http://wiki.openelec.tv/index.php?title= Building_and_Installing_OpenELEC_for_Ras pberry_Pi Raspbmc image download: http://www.raspbmc.com/download/ Raspbmc Windows installer: http://www.raspbmc.com/wiki/user/windows installation/ Build Raspbmc from source: http://www.raspbmc.com/wiki/technical Handbrake: http://www.handbrake.fr Acknowledgements Many thanks to Sam Nazarko and Stephan Raue for their help in providing technical information on Raspbmc and OpenELEC respectively. Also to Edgar (gimli) Hucek for technical information on XBMC. Article by Colin Deady 15 SQUEEZY OR WHEEZY? Debian Distro's Examined In this article I look at the differences between the Debian 6 (Squeeze) and Debian 7 (Wheezy) distributions. SQUEEZE (Debian 6) SPEED Things are very slow - particularly if you are attempting to run larger apps such as Scribus. STABILITY Squeeze would randomly freeze or completely lock up requiring a reboot. IMAGING AND PARTITIONING If you have imaged Squeeze onto a larger SD Card, you will most likely want to expand the size of the primary partition, to make use of the available space. This is not a very easy or fun task. The MagPi covered this procedure in Issue 2, but it required use of a Linux based PC or a Linux LiveCD, and a tricky set of instructions for the resize using the 'GParted' application. It's an annoyance that slows down the installation process. RANGE OF PACKAGES During the making of Issue 3, The MagPi tested and provided a long list of apps and games that work on the Pi under Squeeze. INTERNET Squeeze comes with a version of Midori which is rather limited. It struggles with many websites. I would recommend installing the chromium-browser which seems to work with more websites, however the downside is slowness - the browser is rather cumbersome compared with Midori. You can get by with Google's Gmail, IRC chat and Dropbox as well as many other websites. 16 MULTIMEDIA This is probably the one area where Squeeze currently has the edge. You can play mp3 and wma music as well as most video formats, providing you choose the right apps. OMXPlayer is a good all-rounder, but can sometimes be problematic with WMA files. 'avifile-player', however, seems to handle WMA music better, but is not good for video. Unfortunately development of 'avifile-player' seems to have been discontinued and it is not available for Wheezy. GEANY & PYTHON The programming text editor is great, but unfortunately you do have to make a small configuration change to get programs to execute from within the IDE (Integrated Development Environment). Python programs run reasonably well. WHEEZY (Debian 7) SPEED Everything runs MUCH quicker under Wheezy. STABILITY With Raspbian Wheezy the random freezing seemed to have been fixed. IMAGING AND PARTITIONING After imaging Wheezy onto the SD Card, the primary partition can be resized easily using an in-built tool that autoloads the first time you run the Operating System. You are confronted with a menu which allows you to easily configure a number of settings. There are many options, which might look daunting and confusing to beginners who might not necessarily know what settings they need. The menu has other useful features allowing you to have LXDE loaded on boot, avoiding the login password, etc. Personally I prefer to do this manually myself as described on pages 3 & 4 of The MagPi Issue 3. Even though those instructions were written for Squeeze, they work just as well on Wheezy. RANGE OF PACKAGES The MagPi have not yet tested all of the available Wheezy packages, but the list is certainly a lot shorter than the number of packages for Squeeze. It may be possible to extend availability by adding new package repositories to the sources.list file. Wheezy has its own repository, and hopefully the range of packages will improve over time. you can work around this by hitting the back button after each file download. This is just a minor annoyance, unless you are going to be downloading large numbers of files this way. MULTIMEDIA Wheezy scores badly on this one. The main problem seems to relate to audio buffer underrun. When playing music or video through the OMXPlayer, it will generally fall over after a minute or two. There are other apps which can handle wma and mp3 without issue, but I have yet to find a decent video player that runs on Wheezy. The problem didn't exist on Squeeze, and I suspect it has crept in during the recompiling of Wheezy packages. The OMXPlayer is the backbone of XMBC, so hopefully this will be addressed in future releases without requiring recompiling. GEANY & PYTHON Geany is a very useful programming text editor. Geany is no longer included by default, but can be installed using: sudo aptget install geany You get a newer version than the one that comes bundled with Squeeze. Wheezy seems to favour using IDLE for editing Python code. As with Squeeze, Python programs run well. Article by Jaseman INTERNET The version of Midori that is bundled with the Wheezy distro seems to be a huge improvement over the Squeeze version. Greater website compatibility means that you no longer need chromium-browser (which is good because chromium-browser isn't available on Wheezy anyway). I haven't spent too much time testing the browser, but it seems to work well and quick. There is a glitch when downloading from dropbox.com, you are presented with an error message, but 17 Linux commands can be joined together to create scripts. These scripts allow you to create programs which can be just as powerful as any other programs on the Raspberry Pi. Scripts can be very useful to hold commands that you need to type regularly. It can be very inconvenient to have to type the same command again and again, especially if the command is long and complex. Let's take an example of a useful command that you may need to enter regularly. We will use the example of a command to save a copy of all of your files in a safe place. Before we start writing the script, we need a safe place to put all of your files. Your files are normally in /home/pi (assuming that you are using the username "pi"), therefore the safe place must be somewhere else. We will create a special directory called "/backup" by using the commands: sudo mkdir /backup sudo chown pi /backup 18 What do these commands do? The mkdir command makes a new directory. By default, the user pi can only write to files in /home/pi, this is to prevent accidental damage to other users or to the system files. By adding sudo to the mkdir command, the user pi gains the authority to create a directory outside the normal working area. Creating the directory is not enough, to be able to completely control this directory, the chown command is used to change ownership of the directory. Now the user pi is in full control of this directory. Now we are ready to create the script. By using the nano editor, we can create a file named "backup": nano backup and we can add this (as one line) to the file: cp -r -v /home/pi/backup To save the file, press the CTRL and O keys together, followed by Enter. To exit the editor, press the CTRL and X keys. This script now contains the command to copy files from /home/pi to /backup. The "-r" option is "recursive" and means keep drilling down into directories to find files. The "-v" option is "verbose" and means we want to be told what is happening. Now we can try to run the script by entering: bash backup You should see a list containing each file in your directory with an arrow to the respective backup file. A script can contain more than one command, so we will add text messages at the beginning and end to inform us what is happening. Edit the file again and change the file to contain: echo "Starting backup" cp -r -v /home/pi/backup echo "Backup is finished" Try running the script again by entering the command: bash backup Remember, if the list of files is long, you can pipe the result through the "less" command: bash backup | less You can move through the list with the up/down arrow keys or Page Up/Page Down keys. Press the Q key to quit. The last step is to make this script an executable file. This will allow you to run the script without putting "bash" before the name. To make the file executable, enter the command: This turns on (+) the executable (x) permission for this file. To be correct (but not needed in this simple example) the first line of the script should contain: #!/bin/bash This tells the operating system which program should be used to launch this script. You can launch the script by typing the command: ./backup chmod +x backup A more complete example Here is a more complete version of the script. You may note that it is a lot more complex because some extras have been added. The names of the directories are now in variables so that they can be easily changed if you wish. The script uses an "if" statement to check if the backup directory already exists. The cp command uses the --update option to avoid copying files that have not changed recently. #!/bin/bash # Simple program to make a backup of files on the Raspberry Pi # Set the location of my files and the backup location mydirectory="/home/pi" safeplace="/backup" echo "Starting backup of files from $mydirectory to $safeplace" # Check if the backup directory exists if [ ! -d $safeplace ] then # Does not exist, need to make a new directory echo "Making new directory $safeplace" sudo mkdir $safeplace # Change owner of this directory to the user pi sudo chown pi $safeplace fi # Copy all the files in my directory # recursive means keep drilling down into directories to find files # update means only copy files that have been changed since the last backup # verbose means I want to be told what is happening cp --recursive --update --verbose $mydirectory $safeplace echo "Backup is finished" 19 A place of basic low-level programming Tutorial 3 - Functions, pointers and files. How did you get on with the challenge problem? Let us take a quick look at the solution before continuing . Challenge solution #include <stdio.h> int main() { int nterms, term = 0, i; printf("How many terms? "); /* Ask the user for input */ scanf("%d", &nterms); /* Read the whole number */ for(i=1;i<=nterms;i++) /* Loop over the terms in the series */ { term += i; /* Sum the counter to produce each term */ printf("%d ",term); /* Print this term */ } printf("\n"); /* Print a new line character before the program exits */ return 0; } Functions It is a good idea to write a program as a set of clearly defined functions which may be called once or more. This can improve the robustness of code as well as the readability. Before a function can be called in a program it has to be declared. This is true for standard functions as well as any other functions. The declaration can be within a header file or within the same source file, as long as the declaration is before the usage. For example, a simple function which returns an unsigned integer and has an unsigned integer argument, can be declared as, unsigned int factorial(unsigned int x); /* Declare function */ The name of the input variable is not strictly needed, but can help the reader remember what the variable relates to. The declaration of a function is needed to compile a program. However, for the final program to be linked to form an executable the function must be implemented in a source file or library. In this case, the implementation of the function is, unsigned int factorial(unsigned int x) { /* 0! is one. */ unsigned int result = 1; /* Declare an variable to hold the return value */ while(x>0) /* Loop while x is greater than zero */ { result *= x; /* multiply x by result and assign to result */ x--; /* Decrement x by one */ } return result; /* Return x! when x is not zero. */ } The variable x and the return type are defined as an unsigned int, since the function cannot compute the negative factorial of an input value. The function also uses another of the loop types, the while loop. The while loop executes 20 the compound statement within {} as long as the condition between the parentheses () is true. The new function can now be used in a program, #include <stdio.h> unsigned int factorial(unsigned int x); int main() { unsigned int i = 3; /* Declare an int and assign it the value three. */ printf("%d! = %d\n",i,factorial(i)); /* Print factorial of i */ return 0; /* Return success to the operating system. */ } When a simple variable is passed into a function the value of the variable is copied into a new memory location. This new memory location is not connected with the first memory location. Therefore, if the value of x is modified inside the function factorial, the value of i will remain three after the function call. To change this behaviour pointers can be used. Pointers Unlike simple variables, a pointer stores the address of a memory location. The memory location can be a simple variable, a function, or a structure of some sort. The type of the pointer normally has to be the same as the type of the variable, to which the pointer points. When implemented correctly within a program, using pointers can produce more efficient code. A pointer is declared by prepending a variable name with an asterix. For example, a pointer of type int can be declared via, int *p = 0; /* Declare a pointer p and assign it a null address. */ The pointer can then be given the address of another variable, int i; /* Declare an int i. */ p = &i; /* Assign the address of i to p. */ The assignment can also take place through a function call, #include <stdio.h> void fun(int, int *); /* A function with no return value. */ int main() { int np = 1, p = 1; /* Initialise two int variables */ printf("&np=%p, p=%p\n",&np, &p); /* Print the addresses. */ printf("Before fun(): np=%d, p=%d\n",np,p); /* Print the values. */ fun(np,&p); /* Pass the value of np and the address of p. */ return 0; /* Return success to the operating system. */ } void fun(int np, int *p) { np = 2; /* Assign 2 to the local variable np. */ *p = 2; /* Assign 2 to the memory of p defined in main. */ printf("&np=%p, p=%p\n",&np, p); /* Print the addresses. */ } In this example, the address of the variable p defined in the main function is passed to the pointer p in the function fun. The value in this memory address is then changed by dereferencing the pointer, by using an asterix in front of the pointer name. Notice that when a pointer is declared an asterix must be used. However, when a pointer is declared the pointer can be assigned an address rather than a value. 21 Pointers can also be used together with arrays, #include <stdio.h> int main() { int i, *p, arr[4] = {6,2,4,7}; p = &arr[0]; /* Assign the address of the first element to p */ for(i=0;i<(sizeof(arr)/sizeof(int));i++) { printf("arr[%d]=%d\n",i,*p); p++; /* Increment the address by sizeof(int) */ } return 0; /* Return success to the operating system. */ } The name of an array is also a pointer. Therefore, an array can be modified within a function via, void changeArray(int *p, unsigned int n) { int i; for(i=0;i<n;i++) p[i] = i; } int main() { int arr[4] = {0, 0, 0, 0}; changeArray(arr,4); Command line Arguments from the command line can be utilised by using another form of the main function, #include <stdio.h> int main(int argc, char *argv[]) { int i; for(i=0;i<argc;i++) { /* Loop over the arguments */ printf("argv[%d] = %s\n",i,argv[i]); /* Print each argument out */ } return 0; } The arguments are passed as an array of strings, where a string is a character array. Test this program out by running it with some command line arguments, e.g., ./commandLine oneArg otherArg Files Other than reading from the keyboard or writing to the screen, it is often necessary to write to or read from files stored on a hard drive or memory card. File accesses can be made using binary or ASCII mode. In this tutorial only ASCII mode will be discussed. Before a file can be opened a FILE pointer should be declared, FILE *filePtr = 0; /* Declare a file pointer and set it to null */ Then the file can be opened for reading "r", or writing "w". For example, to write a file called textFile.txt, filePtr = fopen("textFile.txt","w"); /* Open textFile.txt for writing */ If the fopen call fails, then a FILE pointer is set to null. Once the file has been opened, commands very similar to those used to read from the keyboard or write to the screen can be used to access the file, 22 fprintf(filePtr,"Writing out some important data...%d, %d, %d\n",2,3,4); When the file access has been completed it has to be closed, flushing any data in memory to the disk, fclose(filePtr); /* Close textFile.txt, flushing data to disk */ The final example program uses many of the concepts discussed so far to provide a simple encryption algorithm , #include <stdio.h> int main(int argc, char *argv[]) { int mask = 163; /* Declare an int and assign it with a value less than 256. */ char c; /* Declare a character (which is one byte, maximum value 255.) */ FILE *inputFile = 0, *outputFile = 0; /* declare two file pointers */ if(argc!=3) { /* Check the number of arguments */ printf(" Usage: %s <input file> <output file>\n",argv[0]); return 1; /* Report an error */ } inputFile = fopen(argv[1],"r"); /* Open the input file. */ if(!inputFile) return 2; /* If file pointer is null return an error. */ outputFile = fopen(argv[2],"w"); /* Open the output file. */ if(!outputFile) return 3; /* If the file pointer is null return an error */ c = fgetc(inputFile); /* Get the first character. */ while(c != EOF) { /* Loop until end-of-file is reached. */ c ^= mask; /* Exclusive-OR with the mask. */ fputc(c,outputFile); /* Write to the output file. */ c = fgetc(inputFile); /* Get another character. */ } fclose(inputFile); /* Close the input file. */ fclose(outputFile); /* Close the output file. */ } return 0; /* Return success to the operating system */ The program uses an exclusive-OR to encrypt and decrypt files. An exclusive-OR is true if either bit is set, and false if both or no bits are set. For example, 2 ^ 3 = 1 in decimal or in binary 10 ^ 11 = 01. Type in a text file with nano and then try to encode the file. Then run the program again to decode the file. Challenge problem Improve the encryption algorithm by using a simple random number generator, e.g., #include <stdlib.h> int newMask() { int mask = (double)rand()/RAND_MAX*254+1; /* Number between 1 and 255 */ return mask; } int main(){ srand(1234567); /* Set the seed once */ int mask = newMask(); /* Get a new mask each time it is used. */ return 0; } The solution to the problem will be given next time. Article by W. H. Bell & D. Shepley 23 Make a "Simon" Memory Game! This month we are going to use Scratch to make a memory game based on the classic toy: "Simon". If you've never heard of it, ask your parents (or grandparents! ). It's a simple game. Simon plays four notes and you have to repeat them in order. If you get it right, you get another sequence with more notes to remember - and it goes faster each time! The original "Simon". First, make four quarter-circle sprites. I did it by making a circle first and then selecting the bit I needed, discarding the rest. You'll need each one to have two "costumes": one a dark colour and one lighter (to look like a light is on! ) That's the hard bit done! Now we can write some scripts. It's easy to make a second costume. After you have made your sprite, you'll see a tab called "costumes" in the center panel. Click on it and make a new costume. 24 If you get stuck you can download the project from: http://scratch.mit.edu/projects/racypy/26 95321 The Scripts These scripts control a sprite that is just a button with "New Game?" written on it. This is the main script that controls the game! I gave it to the yellow segment sprite, but it doesn't really matter which sprite owns it. Each segment sprite will need these scripts. You'll need to vary the numbers for the notes. I used: 60, 62, 65 and 67. 25 RasPiThon 2012 The Story Behind The Marathon On Friday 20th July, four teenagers set out on a 48-hour coding marathon, learning Python as they wrote a game called 'Rasperroids', and raising money for the Raspberry Pi Foundation. Why did we do it? After watching Mario marathon 5 I decided that I would like to do a marathon for charity, but most computer games had been covered in previous marathons, and almost all of them donate to Child's Play. After receiving suggestions on Twitter, Ben suggested that we fundraise for the Raspberry Pi Foundation and it was set. The charity pays for the development of the Raspberry Pi, the future add-ons and they also support better IT education in schools! Preparation for the event I have to say that we rushed it. We planned about a month before it (and by planned I mean thought of the idea) and we were not fully prepared for the challenges that faced us. I knew the server load would be larger after experience with my map so I swapped to Nginx which handled the load a LOT better (harder to setup but is quicker at serving pages under a larger load). The main thing we didn't do before the event was learn Python (hence the chaos) so we noted that. We had only vague ideas for the game before which also didn't help. The event! The event was great! Even when we were all offline we had 50+ viewers. Despite a DoS attack and Luke feeling sick, we had peaks of 200 at the start and end. During the event we somehow recruited two people which helped out a lot and we loved the amount of interaction we had with people watching us as the game pretty much formed around what people wanted. And we did it! We made the game and it wasn't bad for 4 amateur coders who didn't know the language 26 and had a 48 hour limit! The game is reported to work with the RPi! Unfortunately during the event we had a DoS attack which took our site down (as I write this I just had another 2 attacks) and stopped donations being sent. In the end the total amount raised was over £500, which considering our site was down for half the time was not bad! Next year... Next year is already being thought about. We may do it on a different date as it was only possible to do it after I finished school, and the language may be changed (I'm hoping HTML5 will be a lot better soon as it is an pretty global language). We also had lots of IDE problems with the clients not syncing with each other. I hope we can involve the audience more next time by adding features like popups that display on the stream and vote for ideas. Finally You can find the game online by searching for Raspithon on github: https://github.com/ryanteck/raspithon And yes, port it to another language if you want and email us about it. Thanks again to everyone that watched the event and donated. Also a special thank you to The MagPi for letting me write an article about the event. We also had lots of support from the Raspberry Pi Foundation during the event. You can contact me on [email protected] and we hope to do it again next year! Thanks again to everyone who supported us Ryan Walmsley, Ben H, Edward J and Luke B. The Raspithon team. This month we show you a method of creating a gradient fill, to add depth to flat looking rectangles. We also show how to use transparency effects to change the shape of gradient filled surfaces, how to plot points of a circle, as well as some cool examples of why you would want to do so. # GRADIENT FILL # By Jaseman 8th August 2012 import os, pygame; from pygame.locals import * pygame.init(); clock = pygame.time.Clock() os.environ['SDL_VIDEO_WINDOW_POS'] = 'center' pygame.display.set_caption("Gradient Fill") screen=pygame.display.set_mode([600,382],0,32) # We know that color values are between 0255 so... # Lets give the sky surface 255 pixels height sky = pygame.Surface((600,255)) # Now we will draw rectangles down from the top of the sky surface # Each rectangle gets slightly higher color values so that the blue # gets lighter and lighter towards the horizon # We will define some variables and then create a loop to draw # rectangles r=0; g=64; b=128 # Start Red Green and Blue Values for l in range (0,255): pygame.draw.rect(sky,(r,g,b),(0,l1,600,l)) r=r+1;g=g+1;b=b+1 # Increase the Red Green and Blue Values if r>=255: r=255 # Max amount of red allowed if g>=255: g=255 # Max amount of green allowed if b>=255: b=255 # Max amount of blue allowed # Let's do a similar thing with the ground # For the ground let's have half as many pixels height # as available color values (256/2=128) ground = pygame.Surface((600,128)) r=192; g=255; b=192 # Start Red Green and Blue Values for l in range (0,128): pygame.draw.rect(ground,(r,g,b),(0,l2,600,l)) r=r2;g=g2;b=b2 # Decrease the Red Green and Blue Values if r<=0: r=0 # Min amount of red allowed if g<=0: g=0 # Min amount of green allowed if b<=0: b=0 # Min amount of blue allowed screen.blit(sky,(0,0)) # Paste the sky surface onto the screen screen.blit(ground,(0,255)) # Paste the ground surface onto the screen pygame.display.update() pygame.time.wait(10000) # A 10 second pause before the program ends 27 # MOUNTAINS # By Jaseman 18th August 2012 import os, pygame; from pygame.locals import * pygame.init(); clock = pygame.time.Clock() os.environ['SDL_VIDEO_WINDOW_POS'] = 'center' pygame.display.set_caption("Mountains") screen=pygame.display.set_mode([600,382],0,32) sky = pygame.Surface((600,255)) r=0; g=64; b=128 for l in range (0,255): pygame.draw.rect(sky,(r,g,b),(0,l1,600,l)) r=r+1;g=g+1;b=b+1 if r>=255: r=255 if g>=255: g=255 if b>=255: b=255 ground = pygame.Surface((600,128)) r=192; g=255; b=192 for l in range (0,128): pygame.draw.rect(ground,(r,g,b),(0,l2,600,l)) r=r2;g=g2;b=b2 if r<=0: r=0 if g<=0: g=0 if b<=0: b=0 # Add in an extra surface for the mountains mountain = pygame.Surface((600,128)) mountain.set_colorkey([0,0,0]) # Black is transparent r=96; g=64; b=255 for l in range (0,128): pygame.draw.rect(mountain,(r,g,b),(0,l2,600,l)) r=r+2;g=g+2;b=b+2 if r>=255: r=255 if g>=255: g=255 if b>=255: b=255 # Draw some black (Transparent) polygons to create mountain peaks # The screen is 600 wide so I've drawn 10 polygons at 60 pixels wide each pygame.draw.polygon(mountain,[0,0,0],[(0,0),(60,0),(60,10),(0,40)]) pygame.draw.polygon(mountain,[0,0,0],[(60,0),(120,0),(120,30),(60,10)]) pygame.draw.polygon(mountain,[0,0,0],[(120,0),(180,0),(180,20),(120,30)]) pygame.draw.polygon(mountain,[0,0,0],[(180,0),(240,0),(240,50),(180,20)]) pygame.draw.polygon(mountain,[0,0,0],[(240,0),(300,0),(300,40),(240,50)]) pygame.draw.polygon(mountain,[0,0,0],[(300,0),(360,0),(360,10),(300,40)]) pygame.draw.polygon(mountain,[0,0,0],[(360,0),(420,0),(420,35),(360,10)]) pygame.draw.polygon(mountain,[0,0,0],[(420,0),(480,0),(480,45),(420,35)]) pygame.draw.polygon(mountain,[0,0,0],[(480,0),(540,0),(540,42),(480,45)]) pygame.draw.polygon(mountain,[0,0,0],[(540,0),(600,0),(600,15),(540,42)]) screen.blit(sky,(0,0)) screen.blit(ground,(0,255)) screen.blit(mountain,(0,128)) pygame.display.update() pygame.time.wait(30000) Here we use transparent polygons to cut a zig-zag mountain range out of the top of a rectangular surface. 28 PYTHON VERSION: 2.7.3rc2 PYGAME VERSION: 1 .9.2a0 O.S.: Debian 7 # POINTS OF A CIRCLE # By Jaseman 21st August 2012 import os, pygame; from pygame.locals import * from math import sin, cos, pi pygame.init(); clock = pygame.time.Clock() os.environ['SDL_VIDEO_WINDOW_POS'] = 'center' pygame.display.set_caption("Points Of A Circle") screen=pygame.display.set_mode((600,600),0,32) background=pygame.Surface((600,600)) background.fill((0,0,192)) dot=pygame.Surface((8,8)) pygame.draw.circle(dot,(255,255,255),(4,4),4,0) dot.set_colorkey([0,0,0]) screen.blit(background,(0,0)) screen.blit(dot,(3004,3004)) # Paste a dot in the centre of the screen # 300=half screen width 4=half dot width radius = 200 points = 90 angleStep = pi *2 / points for a in range(0,points): x = sin(a*angleStep)*radius y = cos(a*angleStep)*radius screen.blit(dot,(x+3004,y+3004)) # Paste dots in a circle pygame.display.update() pygame.time.wait(30000) In this program, we make use of the maths functions 'sin', 'cos' and 'pi' to calculate the x and y coordinates for plotting points of a circle. Try changing the values of radius and points to see what happens. There are many reasons why we might wish to plot points of a circle. For example we might want to animate a graphic in a circular motion, or have the hands of a clock or needle of a dial rotate by drawing a line from the centre of the circle to one of the points of the circle. We can also generate basic geometric shapes by this method. For example, if you set the number of points to 3 and joined the dots, you would get a triangle. 4 points for square, 5 for pentagon, 6 for a hexagon, and so on. You could use those coordinates as the points of a filled polygon. You might even choose to plot several circles which have the same number of points, and then draw lines connecting the points of both circles. It is possible to create some 3D effects in this way. If the circles have different radius values, you could create a tunnel or perspective effect. You could also add a line into the 'for loop' to increase or decrease the radius during the loop, to produce a decaying circle or spiral. The possibilities are endless! 29 # CIRCLE DEMO # By Jaseman 22nd August 2012 import os, random, pygame; from pygame.locals import * from math import sin, cos, pi pygame.init(); clock = pygame.time.Clock() os.environ['SDL_VIDEO_WINDOW_POS'] = 'center' pygame.display.set_caption("Circle Demo") screen=pygame.display.set_mode((800,600),0,32) bk=pygame.Surface((800,600)); bk.fill((0,64,0)) dot=pygame.Surface((4,4)); dot.set_colorkey([0,0,0]) pygame.draw.circle(dot,(255,255,255),(2,2),2,0) smlradius = 60; bigradius = 120; points = 90 # Variable Arrays To Store X&Y points for a small and big circle smcx = []; smcy = []; bgcx = []; bgcy = [] # Calculate the X&Y points and put values into the array angleStep = pi *2 / points for a in range(0,points): smcx.append(sin(a * angleStep)*smlradius) smcy.append(cos(a * angleStep)*smlradius) bgcx.append(sin(a * angleStep)*bigradius) bgcy.append(cos(a * angleStep)*bigradius) a=0; b=0 # Points a & b will be moving points of the circles c=0; d=0 # Points for sine and cosine waves cx=800/2; cy=600/2 # Centre of the screen r=random.randint; pdl=pygame.draw.line # Abbreviations for commands run = 1 while run == 1: screen.blit(bk,(0,0)) # Draw the background surface screen.blit(dot,(cx2,cy2)) # Centrepoint # Draw the circle screen.blit(dot, (bgcx[a]+cx2,bgcy[a]+cy2)) screen.blit(dot, (smcx[a]+cx2,smcy[a]+cy2)) screen.blit(dot, (bgcx[b]+cx2,bgcy[b]+cy2)) screen.blit(dot, (smcx[b]+cx2,smcy[b]+cy2)) rcol=r(0,255); gcol=r(0,255); bcol=r(0,255) pdl(bk,[rcol,gcol,bcol],(bgcx[a]+cx2,bgcy[a]+cy2),(smcx[a]+cx 2,smcy[a]+cy2)) pdl(bk,[rcol,gcol,bcol],(bgcx[b]+cx2,bgcy[b]+cy2),(smcx[b]+cx 2,smcy[b]+cy2)) pdl(bk,[rcol,gcol,bcol],(smcx[a]+cx2,smcy[a]+cy2),(smcx[b]+cx 2,smcy[b]+cy2)) # Constrained points (Fixed X or Y) screen.blit(dot, (bgcx[a]+cx2,cybigradius14)) screen.blit(dot, (bgcx[b]+cx2,cy+bigradius+10)) screen.blit(dot, (smcx[a]+cx2,cybigradius34)) screen.blit(dot, (smcx[b]+cx2,cy+bigradius+30)) screen.blit(dot, (cxbigradius14,bgcy[a]+cy2)) screen.blit(dot, (cxbigradius34,smcy[a]+cy2)) screen.blit(dot, (cx+bigradius+14,bgcy[b]+cy2)) screen.blit(dot, (cx+bigradius+34,smcy[b]+cy2)) pdl(bk,[rcol,gcol,bcol],(bgcx[a]+cx2,cybigradius 14),(smcx[a]+cx2,cybigradius34)) 30 pdl(bk,[rcol,gcol,bcol],(bgcx[b]+cx 2,cy+bigradius+10),(smcx[b]+cx2,cy+bigradius+30)) pdl(bk,[rcol,gcol,bcol],(cxbigradius14,bgcy[a]+cy2),(cx bigradius34,smcy[a]+cy2)) pdl(bk,[rcol,gcol,bcol],(cx+bigradius+14,bgcy[b]+cy 2),(cx+bigradius+34,smcy[b]+cy2)) # Ellipse (Big and Small Radius points mixed) screen.blit(dot, (bgcx[a]+cx2+bigradius+160,smcy[a]+cy2)) screen.blit(dot, (smcx[a]+cx2bigradius160,bgcy[a]+cy2)) screen.blit(dot, (cx2+bigradius+160,cy2)) screen.blit(dot, (cx2bigradius160,cy2)) pdl(bk,[rcol,gcol,bcol],(cx2+bigradius+160,cy2),(bgcx[a]+cx 2+bigradius+160,smcy[a]+cy2)) pdl(bk,[rcol,gcol,bcol],(cx2bigradius160,cy2),(smcx[a]+cx2 bigradius160,bgcy[a]+cy2)) # Sine and Cosine Waves screen.blit(dot, (c,smcy[a]+cy2bigradius100)) c=c+1 if c>=800: c=0 screen.blit(dot, (smcx[a]+cx2bigradius100,d)) d=d+1 if d>=600: d=0 clock.tick(200); pygame.display.update(); a=a1; b=b+1 if b>=points: b=0 if a==1: a=points1 In this demo, the x and y coordinates of two sets of circle points are stored in variable arrays: smcx - small circle x coordinates, smcy - small circle y coordinates bgxy - big circle x coordinates, bgcy - big circle y coordinatess In the center you can see dots travelling around both circles in clockwise and anticlockwise directions. Randomly coloured lines are drawn between the big and small circle, and horizontal lines are drawn across the small circle, between point a and b (a and b are points that move either in clockwise or anticlockwise directions around the circles). Surrounding the circle are more dots that bob up and down and side to side. The side to side ones use the same x coord as the dots that move around the circle. The bobbing up and down dots use the same y coordinate as the dots which move around the circle. A set of ellipses are drawn by putting together the x coordinates of the small circle with the y coordinates of the large circle, and visa versa. You might notice two other dots - one weaving down the screen from top to bottom and another one moving left to right. Each has one constant direction (either x or y) and the other uses the circle points, making Sine and Cosine wave patterns. PYTHON VERSION: 2.7.3rc2 PYGAME VERSION: 1 .9.2a0 O.S.: Debian 7 31 Feedback Just wanted to say great mag. I read it page to page. I am aged 45 and think your mag is good for anyone. I went out and purchased a robot to follow the Skutter series. I was a bit disapointed not to see it in issue 4, but I hope it will be in the next one. Please keep up the good work - I look forward to the next issue. What a great magazine. This should be required reading for Pi owners. Adam I'd just like to say that I love it! Keep up the good work chaps. Scep I think it's great. I have had my Pi running for 4 days now and have used all of the Python tutorials, ordered some parts from Tandy so that I can try the GPIO, and read all of the articles. It's perfect for a noob like me and has taught me loads. J Andy I think your magazine is very well done; and it certainly reflects the enthusiasm that many of us have for the Pi. Your early articles seemed to have a definite tilt toward Windows computers (as contrasted with the OS on Macs). While you may have had very good reasons for this, I hope that whenever you may take us back to a desktop, you will maintain a good balance between those two systems. Great effort guys! The hardware and programming content takes me right back to my youth when Home Computers were just becoming 'common-place' and I was keen on electronics. SuperObsessiveMan Gene [email protected] Raspberry Pi is a trademark of the Raspberry Pi Foundation. The MagPi magazine is collaboratively produced by an independent group of Raspberry Pi owners, and is not affiliated in any way with the Raspberry Pi Foundation. The MagPi does not accept ownership or responsibility for the content or opinions expressed in any of the articles included in this issue. All articles are checked and tested before the release deadline is met but some faults may remain. The reader is responsible for all consequences, both to software and hardware, following the implementation of any of the advice or code printed. The MagPi does not claim to own any copyright licenses and all content of the articles are submitted with the responsibility lying with that of the article writer. This work is licensed under the Creative Commons Attribution-ShareAlike 3.0 Unported License. To view a copy of this license, visit: http://creativecommons.org/licenses/by-sa/3.0/ or send a letter to Creative Commons, 444 Castro Street, Suite 900, Mountain View, California, 94041 , USA. 32