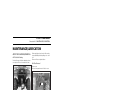
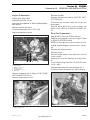
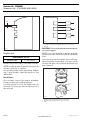
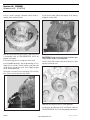
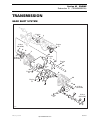
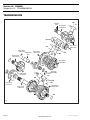
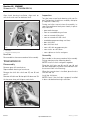
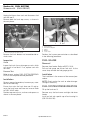
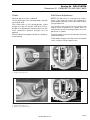
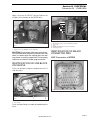
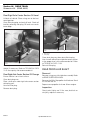
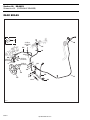
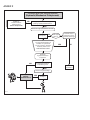
1
TABLE OF CONTENTS SECTION SUBSECTION PAGE SAFETY NOTICE ................................................................................................................................... III WHAT’S NEW ....................................................................................................................................... IV INTRODUCTION .................................................................................................................................. V 01 SERVICE TOOLS AND SERVICE PRODUCTS 01 – Table of contents...................................................................... 01-01-1 02 – Service tools............................................................................. 01-02-1 03 – Service products....................................................................... 01-03-1 02 MAINTENANCE 01 – Table of contents...................................................................... 02 – Maintenance chart.................................................................... 03 – Maintenance and lubrication .................................................... 04 – Storage and pre-season preparation......................................... 02-01-1 02-02-1 02-03-1 02-04-1 03 ENGINE 01 – Table of contents...................................................................... 02 – Removal and installation........................................................... 03 – Cooling system......................................................................... 04 – Rewind starter.......................................................................... 03-01-1 03-02-1 03-03-1 03-04-1 04 FUEL SYSTEM 01 – Table of contents...................................................................... 02 – Fuel circuit ................................................................................ 03 – Carburetor and fuel pump ........................................................ 04 – Air intake silencer ..................................................................... 04-01-1 04-02-1 04-03-1 04-04-1 05 ELECTRICAL 01 – Table of contents...................................................................... 02 – Overview .................................................................................. 03 – Charging system ...................................................................... 04 – Starting system ........................................................................ 05 – Ignition system......................................................................... 06 – Electric shift system................................................................. 07 – Instruments and accessories ................................................... 05-01-1 05-02-1 05-03-1 05-04-1 05-05-1 05-06-1 05-07-1 06 DRIVE TRAIN 01 – Table of contents...................................................................... 06-01-1 02 – Front differential ....................................................................... 06-02-1 03 – Rear axle................................................................................... 06-03-1 07 STEERING/CONTROL SYSTEM 01 – Table of contents...................................................................... 07-01-1 02 – Steering/control systems ......................................................... 07-02-1 08 SUSPENSION 01 – Table of contents...................................................................... 08-01-1 02 – Front suspension...................................................................... 08-02-1 03 – Rear suspension....................................................................... 08-03-1 09 BRAKES 01 – Table of contents...................................................................... 09-01-1 02 – Hydraulic brakes ....................................................................... 09-02-1 I TABLE OF CONTENTS II SECTION SUBSECTION PAGE 10 BODY/FRAME 01 – Table of contents ..................................................................... 10-01-1 02 – Body......................................................................................... 10-02-1 03 – Frame....................................................................................... 10-03-1 11 TECHNICAL DATA 01 – SI metric information guide...................................................... 11-01-1 02 – Engine and vehicle ................................................................... 11-02-1 12 WIRING DIAGRAM 01 – Wiring diagram......................................................................... 12-01-1 INTRODUCTION INTRODUCTION This Shop Manual covers the following Bombardier made 1999 ATV: VEHICLE AND ENGINE SERIAL NUMBER LOCATION Models 1 TRAXTER* (Canada) ................................ 7400 TRAXTER* (Canada) ................................ 7413 TRAXTER* (Canada) ................................ 7415 TRAXTER* (Canada) ................................ 7417 TRAXTER* (U.S.)...................................... 7401 TRAXTER* (U.S.)..................................... 7414 TRAXTER* (U.S.)..................................... 7416 TRAXTER* (U.S.)..................................... 7418 *Trademark of Bombardier Inc. 2 V01A16A 1. Engine 2. Vehicle 1 V01A17A 1. Model number V http://ReadManuals.com INTRODUCTION Serial Number Meaning SECTION 1 SECTION 2 1 2 3 4 5 6 7 8 SECTION 3 SECTION 4 9 10 11 12 13 14 15 16 17 SECTION 1 1 2 3 Class Make Manufacturer SECTION 2 4 5 6 7 8 Factory use Engine type II Engine type I Product line Type of drive SECTION 3 9 Check digit SECTION 4 10 11 12 13 14 15 16 17 Number sequentially assigned by the manufacturer in the production process Plant of manufacture Model year V01A0PS VI http://ReadManuals.com INTRODUCTION ARRANGEMENT OF THE MANUAL in inch in² square inch The manual is divided into 12 major sections: 01 SERVICE TOOLS AND SERVICE PRODUCTS 02 MAINTENANCE 03 ENGINE 04 FUEL SYSTEM 05 ELECTRICAL 06 DRIVE TRAIN 07 STEERING/CONTROL SYSTEMS 08 SUSPENSION 09 BRAKES 10 BODY/FRAME 11 TECHNICAL DATA 12 WIRING DIAGRAM Each section is divided in various subsections, and again, each subsection has one or more division. in³ cubic inch k kilo (thousand) kg kilogram km/h kilometer per hour kPa kilo pascal L liter lb pound lbf pound (force) lbf/in² pound per square inch LH left hand m meter MAG magneto Max. maximum Min. minimum LIST OF ABBREVIATIONS USED IN THIS MANUAL mL milliliter mm millimeter MPEM multi-purpose electronic module MPH mile per hour N newton N.A. not applicable no. number 00.0 continuity 0.L overload (open circuit) O.D. outside diameter OPT optional oz ounce P/N part number PSI pound per square inch PTO power take off RPM revolution per minute Sp. Gr. specific gravity TDC top dead center U.S. oz ounce (United States) V volt Vac volt (alternative current) A ampere amp ampere A•h ampere-hour AC alternate current BDC bottom dead center BTDC before top dead center °C degree Celsius cm centimeter cm² square centimeter cm³ cubic centimeter DC direct current °F degree Fahrenheit fl. oz fluid ounce ft foot GRD ground hal. halogen I.D. inside diameter IDI induction discharge ignition imp. oz imperial ounce VII http://ReadManuals.com INTRODUCTION This Shop Manual uses technical terms wich may be slightly different from the ones in the parts catalog. TYPICAL PAGE Page heading indicates section and subsection detailed. Subsection 02 Section 03 ENGINE (REMOVAL AND INSTALLATION) REMOVAL AND INSTALLATION 10 Nm (97 lbfin) 21 22 Therma Lube grease 5 9 21 14 21 10 1324 Nm (17 lbfft) 7 20 20 48 Nm 8 (35 lbfft) 3 3 17 18 20 Tightening torque nearby fastener. In this case, nut must be torqued to 48 Nm or 35 lbfft. 19 17 9 12 10 Nm 15 (97 lbfin) 16 24 Nm (17 lbfft) 7 Exploded view assists you in identifying parts and related positions. 4 11 Therma Lube grease Subsection title indicates beginning of the subsection. 31 10 7 48 Nm (35 lbfft) 8 10 12 9 Therma Lube grease 32 26 30 2 32 29 24 Nm (17 lbfft) 7 1 28 48 Nm (35 lbfft) 8 11 Bold face number indicates special procedure concerning this part. 27 10 24 25 25 23 6 25 24 Illustration number for publishing process. 25 V01C15S 03 02 1 CAUTION: Pay attention to torque specifications. Some of these are in lbfin instead of lbfft. Use appropriate torque wrench. Drop represents a liquid product to be applied to a surface. Page numbering system: 03: ENGINE section 02: REMOVAL AND INSTALLATION subsection 1: First page of this subsection V01A0QS VIII http://ReadManuals.com INTRODUCTION TYPICAL PAGE Section 03 ENGINE Subsection 02 (REMOVAL AND INSTALLATION) Title indicates main procedure to be carried out. ENGINE REMOVAL Vehicle Preparation 5 2 Place the vehicle on jackstands and place the shifter no. 1 on park position Remove front wheels Drain engine oil and engine coolant Remove seat, front and rear fenders, inner fenders, side panels, steering cover, shifter guide cover and skid plate Refer to the section 09-02 BODY Disconnect BLACK negative cable from battery, then RED positive cable m WARNING V01C0DA Call outs for above illustration. 1 2 3 4 5 6 4 3 1 Always disconnect battery or starter cables exactly in the specified order, BLACK negative cable first. It is recommended to disconnect electrical connections prior to disconnecting fuel lines. 6 Clutching and clutch modulator valves connector STPS (Sub Transmission Position Sensor) VSS (Vehicle Speed Sensor) Shifting engine rod Oil pressure sensor Engine coolant hose Front Part Preparation Remove fuel tank and fuel valve Refer to the section 03-02 FUEL CIRCUIT Disconnect the interlock cable no. 2 under shifter lever Remove seat pivot bar and unplug the clutching and clutch modulator valves connector Remove the STPS (Sub Transmission Position Sensor) Remove shifting rod no. 3 Refer to the SHIFTING ROD REMOVAL section Remove front propeller shaft Refer to the section 05-02 FRONT DIFFERENTIAL Unplug the VSS (Vehicle Speed Sensor), located under engine drive shaft 1 V01C0EA 1 2 3 4 4 Shifting valve GBPS (Gear Box Pos tion Sensor) Magneto/Trigger plug Engine coolant hose 3 2 Bold face number following part name refers to exploded view at beginning of subsection. Engine Preparation Unplug spark plug cables Unplug oil pressure sensor Remove exhaust pipe no. 5 Refer to the EXHAUST SYSTEM section Remove radiator inlet hose Remove breather` hose Unplug the temperature sensor 03 02 2 V01A0RS http://ReadManuals.com Reference to look up a certain section and subsection. In this case it concerns exhaust system. INTRODUCTION GENERAL INFORMATION The information and component/system descriptions contained in this manual are correct at time of publication. Bombardier Inc. however, maintains a policy of continuous improvement of its products without imposing upon itself any obligation to install them on products previously manufactured. Due to late changes, it may have some differences between the manufactured product and the description and/or specifications in this document. Bombardier Inc. reserves the right at any time to discontinue or change specifications, designs, features, models or equipment without incurring obligation. As many of the procedures in this manual are interrelated, we suggest, that before undertaking any task, you read and thoroughly understand the entire section or subsection in which the procedure is contained. A number of procedures throughout the book require the use of special tools. Before commencing any procedure, be sure that you have on hand all the tools required, or approved equivalents. The use of RIGHT and LEFT indications in the text, always refers to driving position (when sitting on vehicle). ILLUSTRATIONS AND PROCEDURES Illustrations and photos show the typical construction of the different assemblies and, in all cases, may not reproduce the full detail or exact shape of the parts shown, however, they represent parts which have the same or a similar function. CAUTION: Most components of those vehicles are built with parts dimensioned in the metric system. Most fasteners are metric and must not be replaced by customary fasteners or viceversa. Mismatched or incorrect fasteners could cause damage to the vehicle or possible personal injury. 1 V01L25A 1. Left 2. Right X http://ReadManuals.com 2 INTRODUCTION TIGHTENING TORQUES Tighten fasteners to torque mentioned in exploded views and text. When they are not specified refer to following table.The table also gives the metric conversion. N•m 1 2 3 4 5 6 7 8 9 10 11 12 13 14 15 16 17 18 19 FASTENER SIZE (8.8) M4 M5 M6 Lbf•in 9 18 27 35 44 53 62 71 80 89 97 106 115 124 133 142 150 159 168 N•m 20 21 22 23 24 25 26 27 28 29 30 31 32 33 34 35 36 37 38 39 40 41 42 43 44 45 46 47 48 49 50 51 52 53 54 55 56 57 58 59 60 61 62 63 64 FASTENER SIZE (8.8) M8 M10 Lbf•ft 15 15 16 17 18 18 19 20 21 21 22 23 24 24 25 26 27 27 28 29 30 30 31 32 32 33 34 35 35 36 37 38 38 39 40 41 41 42 43 44 44 45 46 46 47 XI http://ReadManuals.com INTRODUCTION N•m 65 66 67 68 69 70 71 72 73 74 75 76 77 78 79 80 81 82 83 84 85 86 87 88 89 90 91 92 93 94 95 96 97 98 99 100 101 102 103 104 105 106 107 108 FASTENER SIZE (8.8) M12 Lbf•ft 48 49 49 50 51 52 52 53 54 55 55 56 57 58 58 59 60 60 61 62 63 63 64 65 66 66 67 68 69 69 70 71 72 72 73 74 74 75 76 77 77 78 79 80 N•m 109 110 111 112 113 114 115 116 117 118 119 120 121 122 123 124 125 126 127 128 129 130 131 132 133 134 135 136 137 138 139 140 141 142 143 144 145 146 147 148 149 150 FASTENER SIZE (8.8) M14 Lbf•ft 80 81 82 83 83 84 85 86 86 87 88 89 89 90 91 91 92 93 94 94 95 96 97 97 98 99 100 100 101 102 103 103 104 105 105 106 107 108 108 109 110 111 TIGHTENING TORQUES FOR 8.8 GRADE BOLTS AND NUTS XII http://ReadManuals.com Section 01 SERVICE TOOLS AND SERVICE PRODUCTS Subsection 01 (TABLE OF CONTENTS) TABLE OF CONTENTS SERVICE TOOLS 01-02-1 ENGINE — MANDATORY SERVICE TOOLS ................................................................... 01-02-2 ENGINE — RECOMMENDED SERVICE TOOLS .............................................................. 01-02-3 ELECTRICAL — MANDATORY SERVICE TOOLS ........................................................... 01-02-5 ELECTRICAL — RECOMMENDED SERVICE TOOLS ...................................................... 01-02-6 SUSPENSION — MANDATORY SERVICE TOOLS ......................................................... 01-02-7 SUSPENSION — RECOMMENDED SERVICE TOOLS .................................................... 01-02-8 DRIVE — MANDATORY SERVICE TOOLS ...................................................................... 01-02-9 DRIVE — RECOMMENDED SERVICE TOOLS ................................................................. 01-02-10 VEHICLE — MANDATORY SERVICE TOOLS .................................................................. 01-02-11 VEHICLE — RECOMMENDED SERVICE TOOLS ............................................................. 01-02-12 SERVICE PRODUCTS ............................................................................................................ MANDATORY SERVICE PRODUCTS ............................................................................... RECOMMENDED SERVICE PRODUCTS ......................................................................... 01-03-1 01-03-1 01-03-2 01-01-1 http://ReadManuals.com Section 01 SERVICE TOOLS AND SERVICE PRODUCTS Subsection 02 (SERVICE TOOLS) SERVICE TOOLS This is a list of tools to properly service ATV vehicle. If you need to replace or add to your tool inventory these items can be ordered through the regular parts channel. NEW Following mention points out new tool: 01-02-1 http://ReadManuals.com Section 01 SERVICE TOOLS AND SERVICE PRODUCTS Subsection 02 (SERVICE TOOLS) ENGINE — MANDATORY SERVICE TOOLS Lifting bar (P/N 529 035 610) Magneto puller (P/N 529 035 547) Spanner tool for clutch basket (P/N 529 035 647) NEW NEW V01B094 V01B0B4 Small hose pincher (P/N 529 009 900) F01B294 Fuel and oil system leak tester kit (P/N 529 033 100) Crankshaft locking bolt (P/N 529 035 645) NEW A01B2I4 A01B5E4 Large hose pincher (P/N 529 032 500) V01B0C4 46 mm socket for crankshaft (P/N 529 035 648) NEW Crankshaft protector (P/N 290 876 557) NEW F01B234 V01B0A4 V01B0D4 01-02-2 http://ReadManuals.com Section 01 SERVICE TOOLS AND SERVICE PRODUCTS Subsection 02 (SERVICE TOOLS) ENGINE — RECOMMENDED SERVICE TOOLS Sub-transmission positioner (P/N 529 035 651) Ring compressor Not sold by Bombardier Handle for insertion jig (P/N 420 877 650) Snap-on NEW RCW60 V01B0E4 Oil pressure gauge (1 to 8 bar) (P/N 529 035 652) V01B0H4 NEW Carburetor tool kit (P/N 529 035 660) NEW A00C3V4 Exhaust spring installer/remover (P/N 529 035 400) V01B0K4 Lifting ring (P/N 529 035 644) NEW A00B2F4 Float level gauge (P/N 529 035 520) A01B584 Valve spring compressor Not sold by Bombardier Snap-on 3 4 CF811 Choke nut tool (P/N 529 035 660) 1 2 V01B0F4 A00B4N4 NEW Digital/induction type tachometer (P/N 529 014 500) V01B0I4 V01B0G4 F01B1G4 01-02-3 http://ReadManuals.com Section 01 SERVICE TOOLS AND SERVICE PRODUCTS Subsection 02 (SERVICE TOOLS) ENGINE — RECOMMENDED SERVICE TOOLS (continued) Engine stand (P/N 529 035 646) NEW V01B0J4 01-02-4 http://ReadManuals.com Section 01 SERVICE TOOLS AND SERVICE PRODUCTS Subsection 02 (SERVICE TOOLS) ELECTRICAL — MANDATORY SERVICE TOOLS Six-pin magneto harness (P/N 529 035 654) NEW F01B284 T-Harness for diagnoses of solenoids (P/N 529 035 653) NEW V01B0L4 Jumper for self-diagnoses (P/N 529 035 605) NEW V01B0M4 01-02-5 http://ReadManuals.com Section 01 SERVICE TOOLS AND SERVICE PRODUCTS Subsection 02 (SERVICE TOOLS) ELECTRICAL — RECOMMENDED SERVICE TOOLS Crimping tool (P/N 295 100 164) F00B0E4 Terminal remover Not sold by Bombardier Snap-on TT 600-4 F01B1J4 Multimeter (P/N 529 022 000) F01B1O4 01-02-6 http://ReadManuals.com Section 01 SERVICE TOOLS AND SERVICE PRODUCTS Subsection 02 (SERVICE TOOLS) SUSPENSION — MANDATORY SERVICE TOOLS Front suspension space bar (P/N 529 035 611) NEW V01B0N4 01-02-7 http://ReadManuals.com Section 01 SERVICE TOOLS AND SERVICE PRODUCTS Subsection 02 (SERVICE TOOLS) SUSPENSION — RECOMMENDED SERVICE TOOLS Shock spring removal kit (P/N 529 027 100) Replacement clevis pin: (P/N 414 528 400) A01B4O4 01-02-8 http://ReadManuals.com Section 01 SERVICE TOOLS AND SERVICE PRODUCTS Subsection 02 (SERVICE TOOLS) DRIVE — MANDATORY SERVICE TOOLS Pliers (P/N 295 000 069) Oetiker 1090 F01D184 Pliers (P/N 295 000 054) Caillau F01B1T4 Hub puller (P/N 529 035 612) NEW V01B0O4 01-02-9 http://ReadManuals.com Section 01 SERVICE TOOLS AND SERVICE PRODUCTS Subsection 02 (SERVICE TOOLS) DRIVE — RECOMMENDED SERVICE TOOLS Differential spanner socket (P/N 529 035 649) NEW V01B0S4 01-02-10 http://ReadManuals.com Section 01 SERVICE TOOLS AND SERVICE PRODUCTS Subsection 02 (SERVICE TOOLS) VEHICLE — MANDATORY SERVICE TOOLS 41 mm socket for swing arm nut (P/N 529 035 650) NEW V01B0T4 01-02-11 http://ReadManuals.com Section 01 SERVICE TOOLS AND SERVICE PRODUCTS Subsection 02 (SERVICE TOOLS) VEHICLE — RECOMMENDED SERVICE TOOLS Flexible spout for oil container (P/N 414 837 300) F04B044 01-02-12 http://ReadManuals.com Section 01 SERVICE TOOLS AND SERVICE PRODUCTS Subsection 03 (SERVICE PRODUCTS) SERVICE PRODUCTS MANDATORY SERVICE PRODUCTS Loctite® is a trademarks of Loctite Corporation. Permatex® is a trademark of Loctite™ Corporation. Dow Corning® is a trademarks of Dow Corning Corporation. Primer for gasket eliminator (P/N 293 800 041) Loctite 764 Medium strength threadlocker (P/N 293 800 060) The Right Stuff (sealant) (P/N 293 800 053) Permatex® (198 g) Loctite 243 (blue) (10 mL) A00B3N4 Gasket stripper (P/N 413 508 500) A00B324 (500 mL) Gasket/paint remover (P/N 413 708 500) Loctite® 79040 Chisel 510 g (18 oz) F00B0V4 High strength threadlocker (P/N 293 800 005) Loctite 271 (red) (10 mL) F01B1W4 Dielectric grease (P/N 293 550 004) A00B3L4 Dow Corning (150 g) A00B2U4 F01B164 01-03-1 http://ReadManuals.com Section 01 SERVICE TOOLS AND SERVICE PRODUCTS Subsection 03 (SERVICE PRODUCTS) RECOMMENDED SERVICE PRODUCTS Anti-seize lubricant (P/N 413 701 000) Degreaser (P/N 413 708 400) Fuel stabilizer (P/N 413 408 600) 236 mL (8 oz) Permatex® 48 TA 433 g (15 oz) Loctite anti-seize lubricant 454 g (16 oz) F01B174 Bombardier storage oil (P/N 413 711 600) (12 x 350 g) A00B3V4 A00B3K4 Plastic & vinyl cleaner (P/N 413 711 200) Paste gasket (P/N 413 702 700) Loctite® 515: (6 x 1 L) Gasket eliminator (50 mL) A00B2T4 BOMBARDIER LUBE (P/N 293 600 016) (12 x 14 oz) A02B054 Silicone compound (P/N 420 897 061) Dow Corning® MS4 A00B4V4 Stripped threads repair kit (P/N 413 708 600) Loctite 81668 A00B3R4 Form-A-thread 81668 A00A1J4 01-03-2 http://ReadManuals.com F01B0S4 Section 02 MAINTENANCE Subsection 01 (TABLE OF CONTENTS) TABLE OF CONTENTS MAINTENANCE CHART ........................................................................................................ NOISE EMISSION CONTROL SYSTEM REGULATION ................................................... TAMPERING WITH NOISE CONTROL SYSTEM PROHIBITED! ...................................... AMONG THOSE ACTS PRESUMED TO CONSTITUTE TAMPERING ARE THE ACTS LISTED BELOW: .............................................................................................. MAINTENANCE CHART .................................................................................................... 02-02-1 02-02-1 02-02-1 MAINTENANCE/LUBRICATION ........................................................................................... AIR FILTER CLEANING/DRAINING................................................................................... BOLTS, FASTENERS AND NUTS ..................................................................................... ENGINE OIL AND FILTER.................................................................................................. SPARK ARRESTER ............................................................................................................ TIRES AND WHEELS ......................................................................................................... ENGINE COMPARTMENT................................................................................................. 02-03-1 02-03-1 02-03-2 02-03-2 02-03-3 02-03-4 02-03-5 STORAGE/PRE-SEASON PREPARATION ........................................................................... STORAGE........................................................................................................................... FUEL STABILIZER .............................................................................................................. ENGINE LUBRICATION ..................................................................................................... RAGS IN AIR INTAKE AND EXHAUST SYSTEM............................................................. VEHICLE CLEANING AND PROTECTION......................................................................... COOLANT DENSITY .......................................................................................................... PRE-SEASON PREPARATION........................................................................................... 02-04-1 02-04-1 02-04-1 02-04-1 02-04-1 02-04-1 02-04-2 02-04-3 02-02-1 02-02-2 02-01-1 http://ReadManuals.com Section 02 MAINTENANCE Subsection 02 (MAINTENANCE CHART) MAINTENANCE CHART NOISE EMISSION CONTROL SYSTEM REGULATION TAMPERING WITH NOISE CONTROL SYSTEM PROHIBITED! U.S. Federal law and Canadian provincial laws may prohibit the following acts or the causing there of: 1. The removal or rendering inoperative by any person other than for purposes of maintenance, repair or replacement of any device or element of design incorporated into any new vehicle for the purpose of noise control prior to its sale or delivery to the ultimate purchaser or while it is in use or 2. The use of the vehicle after such device or element of design has been removed or rendered inoperative by any person. AMONG THOSE ACTS PRESUMED TO CONSTITUTE TAMPERING ARE THE ACTS LISTED BELOW: 1. Removal or alteration or the puncturing of the muffler or any engine component which conducts removal of engine exhaust gases. 2. Removal or alteration or the puncturing of any part of the intake system. 3. Replacing any moving parts of the vehicle or parts of the exhaust or intake system, with parts other than those specified by the manufacturer. 4. Lack of proper maintenance. 02-02-1 http://ReadManuals.com Section 02 MAINTENANCE Subsection 02 (MAINTENANCE CHART) ENGINE/ TRANSMISSION FUEL SYSTEM ELECTRICAL DRIVE TRAIN Engine/transmission oil level Engine/transmission oil and filter replacement Spark arrester (cleaning) Engine mount fasteners Exhaust system (leak) Condition of seals Coolant density Coolant level Coolant replacement Cooling system condition Radiator cap pressure test Radiator condition/cleanliness (air ducts) Rewind starter rope condition Clutch and transmission operation PCV valve (inspection) Air filter cleaning/draining Air filter and foam replacement Fuel lines and connections Fuel tank strainer replacement Carburetor adjustment Spark plug inspection/replacement Battery electrolyte level and vent condition Battery connections Wiring harness, cables and lines Condition of ignition switch and start/stop button Condition of lighting system (hi/lo intensity, brake light, etc.) Headlight beam aiming Drive shaft boot inspection and protector condition Front propeller shaft joint lubrication (grease fitting) Drive shaft joint inspection Wheel bearing condition Rear propeller shaft joint lubrication (grease fitting) Front differential and rear rigid axle oil level, seals and vent condition Front differential and rear rigid axle oil replacement 02-02-2 http://ReadManuals.com REFER TO THE SECTION 02-02 EVERY 200 HOURS OR 2 YEARS EVERY 100 HOURS OR ONCE A YEAR EVERY 50 HOURS LUBRICATION AND MAINTENANCE CHART EVERY 25 HOURS INITIAL 10 HOURS MAINTENANCE CHART 03-02 N.A. 02-04 03-03 03-04 05-06 04-04 02-02 04-02 04-03 05-05 05-04 05-07 06-02 06-03 06-02/ 06-03 STEERING/ CONTROL SYSTEMS SUSPENSION BRAKE BODY/FRAME Throttle condition Choke condition Handlebar fastener tightness Steering system mechanism Tie rod ends inspection Steering adjustment Tire pressure Wheel mount tightness and stud lubrication Wear and condition of tires Front wheel alignment Swing arm condition Shock absorber condition Brake fluid level front/rear Brake fluid replacement front/rear Brake cable condition Brake cable adjustment Brake system condition (discs, hoses, etc.) Brake pads condition Engine compartment Fastener condition/tightness Skid plate condition Hitch/trailer ball condition (if installed) Seat latch Frame inspection Vehicle cleaning and protection Storage cover latchs REFER TO THE SECTION EVERY 200 HOURS OR 2 YEARS EVERY 100 HOURS OR ONCE A YEAR EVERY 50 HOURS EVERY 25 HOURS LUBRICATION AND MAINTENANCE CHART INITIAL 10 HOURS Section 02 MAINTENANCE Subsection 02 (MAINTENANCE CHART) 04-03 07-02 02-02 N.A. 08-02/ 08-03 09-02 02-02 10-02 NOTE: Some riding conditions and hauling loads may result in requiring more frequent maintenance. Some items are part of the pre-operation checks and must always be performed prior to operating the vehicle. 02-02-3 http://ReadManuals.com Section 02 MAINTENANCE Subsection 03 (MAINTENANCE/LUBRICATION) MAINTENANCE/LUBRICATION AIR FILTER CLEANING/DRAINING Air Filter Box Draining Periodically inspect air filter box drain plugs for water or deposits. Refer to the maintenance chart. When water/deposits are found, air filter must be inspected/dried/replaced depending on its condition. Remove air filter as explained below. Air Filter Removal Remove seat. Release clamps and remove air filter box cover. 1 2 V01F05A 1. Release clamps 2. Lift to remove 1 Remove air baffles, air filter and foam. 3 1 2 V01F04A 1. Air filter box 2. Drain plugs 3. Clamp NOTE: If vehicle is used in dusty area, inspect more frequently than specified in maintenance chart. If water/deposits are found, squeeze the clamp and remove. Pull drain tube out. Proceed with each drain plug. CAUTION: Do not start engine when water is found in the drain tubes. V01F06A 1. Air baffle 02-03-1 http://ReadManuals.com Section 02 MAINTENANCE Subsection 03 (MAINTENANCE/LUBRICATION) Properly reinstall removed parts in the reverse order of their removal. 1 BOLTS, FASTENERS AND NUTS Check that all fasteners, bolts and nuts are tightened to the proper torque. ENGINE OIL AND FILTER Oil Viscosity SAE 10W40 is recommended for general use. Other viscosity should be used if the average temperature is outside the range of the recommended oil. See chart below. V01F07A 1. Air filter 1 °C °F 60 140 SAE 5W30 V01F08A 1. Foam Clean inside of air box. Wash air filter and foam with warm water and a mild detergent as necessary. Squeeze foam to remove excess water. Let dry air filter and foam thoroughly. If air filter element or foam is dirty, replace with a new one. CAUTION: Never remove or modify any component in the air box. Always use genuine parts when replacing air filter and foam. The engine carburation is calibrated to operate specifically with these components. Otherwise, engine performance degradation or damage can occur. NOTE: Slight dust may be cleaned using a lowpressure airgun. Blow compressed air backward of operating air flow. SAE 20W50 SAE 15W50 SAE 15W40 SAE 10W40 SAE 10W30 50 40 120 100 30 80 20 60 10 40 0 -10 -20 -30 20 0 -20 V01A0VA Oil and Oil Filter Change m WARNING The engine oil can be very hot. Wait until engine oil is warm. NOTE: Oil and filter are to be replaced at the same time. Oil change should be done with a warmed up engine. 02-03-2 http://ReadManuals.com Section 02 MAINTENANCE Subsection 03 (MAINTENANCE/LUBRICATION) Ensure vehicle is on a level surface. Clean the drain plug area. Remove dipstick. Place a drain pan under the engine drain plug area. Unscrew drain plug. NOTE: The same oil lubricates both engine and transmission. Don’t use synthetic oil, synthetic blend oil or special additives. As they could affect the clutching performance. Start engine and let idle for a few minutes. Ensure oil filter area and drain plug areas are not leaking. Stop engine. Wait a while to allow oil to flow down to crankcase then check oil level. Refill as necessary. Dispose oil as per your local environmental regulations. SPARK ARRESTER 1 The muffler must be periodically purged of accumulated carbon. Select a well-ventilated area and make sure the muffler is cool. Place transmission on park position. Remove the clean out plug. V01A0AB 1. Oil drain plug Wait a while to allow oil to flow out of oil filter (10 minutes approximately). Carefully unscrew oil filter and as soon as it can leave the engine, turn it upright. Discard filter. Be sure that the old filter O-ring is removed. CAUTION: Only use Bombardier high pressure filter. The Bombardier filter is specifically designed for this engine. This filter does not operate at the same pressure than other brands. Using a non-recommended filter may cause serious engine damage. Lubricate the O-ring on the filter with engine oil. Install the new filter then screw one full turn after O-ring contact. Wipe out any oil spillage on engine. Inspect gasket on drain plug and replace as necessary. Clean gasket area on engine and drain plug then reinstall plug. Refill engine at the proper level with the recommended oil. Refer to TECHNICAL DATA section 11 for capacity. Do not overfill. V01C05A 1 2 1. Clean out plug Block the end of muffler with a shop rag and start engine. Momentarily increase engine RPM several time to purge accumulated carbon out the muffler. Stop engine and allow muffler to cool. Remove shop rag and reinstall the clean out plug. 02-03-3 http://ReadManuals.com Section 02 MAINTENANCE Subsection 03 (MAINTENANCE/LUBRICATION) m WARNING TIRE PRESSURE Never run engine in an enclosed area. Never perform this operation immediately after the engine has been run because exhaust system is very hot. Make sure that there are no combustible materials in the area. Wear eye protector and gloves. Never stand behind the vehicle while purging exhaust system. Respect all applicable laws and regulations. RECOMMENDED FRONT 48 kPa (7 PSI) REAR 38 kPa (5.5 PSI) MINIMUM 45 kPa (6.5 PSI) 35 kPa (5 PSI) Tire/Wheel Condition Check tire for damage and wear. Measure thread height. It should be 4 mm (5/32 in) minimum. Replace if damaged or worn. Check the exhaust system for damage, crack or leak (exhaust pipe). Repair or change if necessary. A TIRES AND WHEELS Tire Pressure CAUTION: Underpressure may cause tire to deflate and rotate on wheel. Overpressure might burst the tire. Always follow recommended pressure. Since tires are low-pressure type, a manual pump should be used. Check pressure when tires are cold before using the vehicle. NOTE: Tire pressure changes with temperature and altitude. Recheck pressure if one of these conditions has changed. For your convenience, a pressure gauge is supplied in tool box. V01A05A A. 4 mm (5/32 in) NOTE: Do not make a tire rotation. The front and rear tires have a different size. Besides, these tires are directional and their rotation must be kept in a specific direction for proper operation. 02-03-4 http://ReadManuals.com Section 02 MAINTENANCE Subsection 03 (MAINTENANCE/LUBRICATION) Wheel Removal Untighten nuts then lift vehicle where needed. Place a support under vehicle. Remove nuts then withdraw wheel. At installation, it is recommended to apply antiseize lubricant on threads. Gently tighten nuts in a criss-cross sequence then apply a final torque of 75 N•m (55 lbf•ft). 1 V01A08A 1. Taper side of nut ENGINE COMPARTMENT Check in the engine compartment, for leak or other damage. Clean mud, leafs, etc. from engine compartment. 02-03-5 http://ReadManuals.com Section 02 MAINTENANCE Subsection 04 (STORAGE/PRE-SEASON PREPARATION) STORAGE/PRE-SEASON PREPARATION STORAGE If the ATV is to be stored for an extended period of time more than 1 month, be sure to thoroughly check the vehicle for needed repairs and have them performed. FUEL STABILIZER A fuel stabilizer (P/N 413 408 600) can be added in fuel tank to prevent fuel deterioration and avoid draining fuel system for storage. Follow manufacturer’s instructions for proper use. If above fuel stabilizer is not used, drain fuel system including fuel tank and carburetor. CAUTION: Fuel stabilizer should be added prior to engine lubrication to ensure carburetor protection against varnish deposit. ENGINE LUBRICATION Engine internal parts must be lubricated to protect them from possible rust formation during the storage period. Proceed as follows: – Place the vehicle on blocks to raise all four tires off the ground. – Start the engine and allow it to run at idle speed until the engine reaches its operating temperature. – Stop the engine. – Change engine oil and filter. Refer to MAINTENANCE/LUBRICATION 02-03. – Remove air box cover, air filter, foam and baffles to spray storage oil (P/N 413 711 600) into carburetor bore. – Restart engine and run at idle speed. – Inject storage oil until the engine stalls or until a sufficient quantity of oil has entered the engine (approximately a quarter of can). – Stop the engine and remove the battery. Store it in dry and cool place out of the sun, refer to BATTERY 05-04. Remove the spark plugs and spray storage oil into cylinder. – Crank slowly 2 or 3 revolutions to lubricate cylinder. – Turn the fuel valve to OFF and drain carburetor. – Reinstall the spark plugs, baffles, foam, air filter and air box cover. m WARNING This procedure must only be performed in a well-ventilated area. Do not run engine during storage period. RAGS IN AIR INTAKE AND EXHAUST SYSTEM At storage preparation, block air intake inlet and exhaust system outlet using clean rags. The air intake hole is located under steering cover. NOTE: Remove those rags at pre-season preparation. VEHICLE CLEANING AND PROTECTION Wash and dry the vehicle. Remove any dirt or rust. To clean the plastic parts, use only flannel clothes or Kimtowels® wipers no. 58-380 from KimberlyClark. CAUTION: It is necessary to use flannel cloths or Kimtowels wipers on plastic parts to avoid damaging further surfaces to clean. To clean the entire vehicle, including metallic parts with a thick coat of grease, use Endust® imported by Bristol Myers, available at hardware stores or supermarkets. CAUTION: Do not use Bombardier Cleaner on decals, plastic parts or vinyl. To clean the entire vehicle, including metallic parts with a thin coat of grease, use Simple Green® from Sunshine Makers Inc., available at hardware stores or at automotive parts retailer. 02-04-1 http://ReadManuals.com Section 02 MAINTENANCE Subsection 04 (STORAGE/PRE-SEASON PREPARATION) For vinyl and plastic parts, use Vinyl & Plastic Cleaner (P/N 413 711 200 (6 x 1 L)). CAUTION: Never clean plastic parts with strong detergent, degreasing agent, paint thinner, acetone, products containing chlorine, etc. Inspect the vehicle and repair any damage. Touch up all metal spots where paint has been scratched off. Spray all metal parts with BOMBARDIER LUBE (P/N 293 600 016). NOTE: Protect the vehicle with a cover to prevent dust accumulation during storage. CAUTION: The vehicle has to be stored in a cool and dry place and covered with an opaque tarpaulin. This will prevent sun rays and grime from affecting plastic components and vehicle finish. COOLANT DENSITY Test the density of the coolant using an antifreeze hydrometer. NOTE: Follow manufacturer’s instructions for proper use. A 60/40 mixture of antifreeze and distilled water will provide the optimum cooling, corrosion protection and antifreeze protection. Do not use tap water, straight antifreeze or straight water in the system. Tap water contains minerals and impurities which build up in the system. Straight water or antifreeze will cause the system to freeze. Change coolant if necessary. 02-04-2 http://ReadManuals.com Section 02 MAINTENANCE Subsection 04 (STORAGE/PRE-SEASON PREPARATION) PRE-SEASON PREPARATION SYSTEM ENGINE/ TRANSMISSION PRE-SEASON OPERATIONS Test Run Vehicle. Check Clutch and Transmission Operation Engine Oil and Filter Oil Replacement TO BE PERFORMED BY CUSTOMER Coolant Replacement and Pressurization of System Condition of Seals Spark Arrester Exhaust System Condition Rewind Starter, Rope Condition Rags Removal (Intake and Exhaust) FUEL SYSTEM Fuel Line and Connectors Condition Carburetor Adjustment Throttle and Choke Cable Inspection/Adjustment Air Filter Cleaning/Replacement ELECTRICAL Spark Plug Replacement Battery Condition/Charging and Installation Starter Connections and Routing Operation of Lighting System DRIVE TRAIN Drive Shaft Boot Inspection Front Propeller Shaft Lubrication Front Differential and Rigid Axle Oil Level and Vent Tube Condition STEERING/ CONTROL SYSTEM Steering System Inspection and Adjustment Handle Bar Fastener Tightness Wheel Tightness Tire Pressure Tire Condition SUSPENSION Suspension System Inspection Bearing Condition Swing Arm Condition BRAKES Brake Fluid Change Brake Condition Brake Cable Adjustment BODY/FRAME Frame and Skid Plate Condition Hitch/Trailer Ball Condition Front Cover Compartment Cover Latch Condition REFER TO DEALER N.A. Section 02-02 Section 03-04 N.A. Section 02-02 Section 03-02 Section 03-05 Section 02-03 Section 04-02 Section 04-03 Section 02-02 Section 05-05 Section 05-04 Section 05-07 Section 06-02 and 06-03 Section 07-02 Section 02-02 Section 08-02 and 08-03 Section 09-02 Section 10-02 and 10-03 Replace oil and filter only if it has not been previously performed at the storage. Remove rags in intake and exhaust that were installed at the storage. Before installing new spark plugs at pre-season preparation, it is suggested to burn excess storage oil by starting the engine with the old spark plugs. Only perform this operation in a well-ventilated area. 02-04-3 http://ReadManuals.com Subsection 01 Section 03 ENGINE (TABLE OF CONTENTS) TABLE OF CONTENTS REMOVAL AND INSTALLATION .......................................................................................... ENGINE REMOVAL ........................................................................................................... ENGINE INSTALLATION ................................................................................................... ANTI-VIBRATION SYSTEM............................................................................................... EXHAUST SYSTEM .......................................................................................................... SHIFTING SYSTEM............................................................................................................ 03-02-1 03-02-2 03-02-4 03-02-4 03-02-5 03-02-6 COOLING SYSTEM ............................................................................................................... COOLING SYSTEM LEAK TEST ....................................................................................... INSPECTION ...................................................................................................................... DRAINING THE SYSTEM .................................................................................................. COOLING SYSTEM REFILLING ........................................................................................ PRESSURE CAP ................................................................................................................. RADIATOR ......................................................................................................................... THERMOSTAT ................................................................................................................... COOLANT TANK ............................................................................................................... FAN AND OUTLET DEFLECTOR....................................................................................... TEMPERATURE SENDER.................................................................................................. 03-03-1 03-03-2 03-03-2 03-03-2 03-03-2 03-03-3 03-03-3 03-03-3 03-03-4 03-03-4 03-03-4 REWIND STARTER ................................................................................................................ REWIND STARTER ............................................................................................................ STARTING PULLEY ........................................................................................................... 03-04-1 03-04-2 03-04-4 MAGNETO SYSTEM ............................................................................................................. MAGNETO ......................................................................................................................... ROTOR ............................................................................................................................... SPARG CLUTCH ................................................................................................................ 03-05-1 03-05-2 03-05-2 03-05-3 CYLINDER AND HEAD .......................................................................................................... 1, CYLINDER HEAD ......................................................................................................... 2, PUSH ROD ................................................................................................................... 3, ROCKER ARM .............................................................................................................. 4, VALVE SPRING ............................................................................................................ 5, VALVE........................................................................................................................... 6, VALVE STEM SEAL ..................................................................................................... 7, CYLINDER .................................................................................................................... 8, LIFTER .......................................................................................................................... 9, PISTON......................................................................................................................... 10, PISTON RINGS ............................................................................................................ 03-06-1 03-06-2 03-06-2 03-06-2 03-06-3 03-06-4 03-06-4 03-06-5 03-06-6 03-06-6 03-06-7 03-01-1 VMR9932_03_01TOC.FM http://ReadManuals.com Section 03 ENGINE Subsection 01 (TABLE OF CONTENTS) CRANKSHAFT/BALANCER SHAFT ....................................................................................... 1, CAMSHAFT..................................................................................................................... 2, BALANCER SHAFT......................................................................................................... 3, CRANKSHAFT ................................................................................................................ 03-07-1 03-07-2 03-07-3 03-07-3 LUBRICATION SYSTEM......................................................................................................... TROUBLESHOOTING......................................................................................................... ENGINE PRESSURE TEST ................................................................................................. OIL CHANGE AND OIL FILTER REPLACEMENT .............................................................. OIL STRAINER .................................................................................................................... ENGINE OIL PRESSURE REGULATOR ............................................................................. OIL PUMP ........................................................................................................................... CLUTCH OIL PRESSURE REGULATOR ............................................................................ 03-08-1 03-08-2 03-08-2 03-08-2 03-08-3 03-08-3 03-08-4 03-08-4 CLUTCH .................................................................................................................................. 03-09-1 CLUTCH DRUM, CLUTCH WEIGHT AND SPRAG CLUTCH............................................. 03-09-2 FRICTION DRIVE PLATE, STEEL DRIVEN PLATE AND CLUTCH BASKET ..................... 03-09-3 TRANSMISSION .................................................................................................................... GEAR SHIFT SYSTEM........................................................................................................ TRANSMISSION................................................................................................................. GEAR SHIFT MECHANISM................................................................................................ TRANSMISSION................................................................................................................. 03-01-2 03-10-1 03-10-1 03-10-2 03-10-3 03-10-4 VMR9932_03_01TOC.FM http://ReadManuals.com Subsection 02 Section 03 ENGINE (REMOVAL AND INSTALLATION) REMOVAL AND INSTALLATION 10 Nm (97 lbfin) 21 22 Therma Lube grease 5 9 21 14 21 10 1324 Nm (17 lbfft) 7 20 20 48 Nm 8 (35 lbfft) 3 3 17 18 20 19 17 9 12 16 24 Nm (17 lbfft) 7 4 11 Therma Lube grease 10 Nm 15 (97 lbfin) 31 10 7 48 Nm (35 lbfft) 8 10 12 9 30 2 32 29 24 Nm (17 lbfft) 7 1 28 48 Nm (35 lbfft) 8 11 Therma Lube grease 32 26 27 10 24 25 25 23 6 25 24 25 V01C15S 03-02-1 VMR9932_03_02.FM http://ReadManuals.com Section 03 ENGINE Subsection 02 (REMOVAL AND INSTALLATION) ENGINE REMOVAL 5 2 1 2 V01C0DA 4 3 1 6 V01A0AC FRONT VIEW 1. Clutching and clutch modulator solenoids connector 2. STPS (Sub Transmission Position Sensor) 3. VSS (Vehicle Speed Sensor) 4. Shifting engine rod 5. Oil pressure sensor 6. Engine coolant hose UNDER ENGINE 1. Engine oil plug 2. Engine coolant plug Remove seat, front and rear fenders, inner fenders, side panels, shifter guide cover and skid plate. Refer to BODY 10-02. Disconnect BLACK negative cable from battery, then RED positive cable. 1 WARNING Always disconnect battery or starter cables exactly in the specified order, BLACK negative cable first. It is recommended to disconnect electrical connections prior to disconnecting fuel lines. Front Part Preparation V01C0EA 4 3 2 REAR VIEW 1. Shifting valve 2. GBPS (Gear Box Position Sensor) 3. Magneto/trigger plug 4. Engine coolant hose Vehicle Preparation Place the vehicle on jack stands and place the shifter no. 1 on park position. Remove front wheels. Drain engine oil and engine coolant by drain plug. Remove fuel tank and fuel valve. Refer to FUEL CIRCUIT 04-02. Remove seat pivot bar and unplug clutching and clutch modulator solenoids connector. Remove STPS (Sub Transmission Position Sensor). NOTE: Do not unplug only, remove sensor completely. Remove shifting rod no. 2. Refer to Shifting Rod Removal section. Remove front propeller shaft. Refer to FRONT DIFFERENTIAL 06-02. Unplug VSS (Vehicle Speed Sensor), located under engine drive shaft. 03-02-2 VMR9932_03_02.FM http://ReadManuals.com Subsection 02 Engine Preparation Unplug spark plug cables. Unplug oil pressure sensor. Remove exhaust pipe no. 4. Refer to Exhaust System section. Remove radiator inlet hose. Disconnect breather hose at PCV valve. Unplug temperature sensor. 3 4 V01C16A 1. 2. 3. 4. 5. 6. 5 6 1 Section 03 ENGINE (REMOVAL AND INSTALLATION) Remove fuse box. Remove shifting valve. Refer to ELECTRIC SHIFT SYSTEM 05-06. Disconnect the interlock cable no. 6 from rear brake pedal. Remove brake pedal, rear master cylinder and brake switch. Refer to HYDRAULIC BRAKES 0902. Rear Part Preparation Unplug GBPS (Gear Box Position Sensor). Separate rear propeller shaft from engine. Refer to REAR SUSPENSION 08-03. NOTE: Do not separate swing arm from rear axle. Unplug magneto/trigger wiring harness connector. Remove radiator outlet hose. Remove starter. Remove engine coolant hose (the hose with the starter clamp). Separate rear air intake tube from air intake silencer. Install engine lifting tool (P/N 529 035 610) then install a hoist. Remove engine bracket mounting bolts no. 7. Pull down engine lifting tool arm and lift engine. 2 Spark plug cables Exhaust pipe Radiator inlet hose Breather hose Temperature sensor PCV valve Remove carburetor no. 5. Refer to FUEL PUMP AND CARBURETOR 04-03. Remove engine impulse line. V01C0FA 1 V01C0HA 1. Engine impulse line 03-02-3 VMR9932_03_02.FM http://ReadManuals.com Section 03 ENGINE Subsection 02 (REMOVAL AND INSTALLATION) ENGINE INSTALLATION For installation, reverse the removal procedure, paying attention to the following details. NOTE: At the time of seat pivot bar installation, it is possible that the frame is too wide or too restricted. According to your needs, close or widen the frame slightly. Torque interlock cable lightly. For the adjustment from interlock, refer to HYDRAULIC BRAKES 09-02. Reattach cables, hoses, harness wiring, etc. Use punch to remove the other bushing. CAUTION: Do not use a screwdriver for antivibration bushing removal. LH Anti-Vibration System Insert a punch in hole of anti-vibration bushing no. 13 and push support bushing no. 14 and antivibration bushing out the housing. Use punch to remove the other bushing. Anti-Vibration System Installation Insert support bushing in engine support. Before insert support bushing, spray BOMBARDIER LUBE (P/N 293 600 016) in support. V01C0SA V01C17A Before to start the engine, remove spark plugs and ground them on engine or frame. Start vehicle about thirty seconds. This operation activated the oil pump. Reinstall spark plug and check if vehicle run correctly. Let the engine idle for one minute to ensure full charge of hydraulic valve lifter. Calibrate STPS and GBPS. Refer to ELECTRIC SHIFT SYSTEM 05-06. Install a new O-ring in anti-vibration bushing grooves. Apply grease on anti-vibration bushings and insert in engine support, one on each side. For installation, use a 152 mm (6 in) bolt for LH side and 102 mm (4 in) for RH side, three washers and a nut. Refer to the following illustration. 1 2 2 3 ANTI-VIBRATION SYSTEM Anti-Vibration System Removal Remove flanged bolt no. 8, elastic nut no. 9 and engine brackets no. 10. RH Anti-Vibration System Remove support bushing no. 11, push out with a punch. Insert a punch in hole of anti-vibration bushing no. 12 and push other anti-vibration bushing out housing. V01C0TA 1. Bolt 2. Washers (3) 3. Nut 03-02-4 VMR9932_03_02.FM http://ReadManuals.com Subsection 02 EXHAUST SYSTEM Section 03 ENGINE (REMOVAL AND INSTALLATION) Exhaust Pipe Removal Remove the exhaust pipe nuts no. 15. WARNING Never touch exhaust system components immediately after the engine has been run because these components are very hot. Heat Shield Removal Remove the rear fender. Refer to BODY 10-02. Remove screws no. 21 retaining heat shield no. 22. Heat Shield Installation For installation, reverse the removal procedure. Paying attention to the following details. In first, install bottom screw then rear screw, do not tighten yet. Install the screws on top of heat shield. Torque all screws to 10 N•m (89 lbf•in). V01C0JA Remove screw from exhaust pipe bracket no. 16. Remove springs no. 17 retaining exhaust pipe and muffler no. 18. 3 2 V01C18A Step 1 : Bottom screw Step 2 : Rear screw Step 3 : Screws on top 1 V01C19A 1 1. Retaining springs Pull exhaust pipe forward. 03-02-5 VMR9932_03_02.FM http://ReadManuals.com Section 03 ENGINE Subsection 02 (REMOVAL AND INSTALLATION) Exhaust Pipe Installation For installation, reverse the removal procedure, paying attention to the following details. Use a new exhaust pipe gasket no. 19 and make sure that it is properly installed. V01C1MA 2 1 1. Muffler 2. Retaining rod Muffler Installation For the installation, reverse the removal procedure. NOTE: Check rubber bushings no. 20 for cracks or other damages, change if necessary. SHIFTING SYSTEM V01C0LA NOTE: Always set the PARK position before remove any parts from shifting system. 1 1. Exhaust pipe gasket Shifter Tie-Rod Removal With muffler secured in its rubber mounts, fit exhaust pipe, securing it loosely at its flange and on engine. Tighten flange nuts, making sure exhaust pipe is properly aligned inside muffler ball socket then install retaining springs after pushing muffler forward in exhaust pipe. Tighten exhaust pipe support bolt. Remove fuel tank. Refer to FUEL CIRCUIT 04-02. NOTE: Separate fuel tank from frame only, do not remove tank completely. Do not remove fuel lines. Remove elastic nuts of shifter tie-rod no. 23, one on LH ball joint and one on RH ball joint. Muffler Removal Remove heat shield no. 22 and exhaust pipe no. 4. Pull muffler no. 18 forward, pull out retaining rod from supports and remove muffler. Shifter Tie-Rod Installation For installation, reverse the removal procedure, paying attention to the following details. Pre-adjust shifter tie-rod to 150 mm (5-29/32 in). NOTE: Shifter tie-rod must have 20 mm (25/32 in) maximum between center from ball joint and jam nut. See the following illustration. 03-02-6 VMR9932_03_02.FM http://ReadManuals.com Subsection 02 Section 03 ENGINE (REMOVAL AND INSTALLATION) Shifter Column Removal Remove shifter lever no. 1. Remove shifter tie-rod no. 23. A B Shifter Column Installation For installation, reverse the removal procedure. Shifting Rod Removal V01I0IA 1. 2. 3. A. B. 3 1 Remove fuel tank. Refer to FUEL CIRCUIT 04-02. NOTE: Separate fuel tank from frame, do not remove tank completely. Separate shifting rod no. 2 from shifting engine rod. Unscrew bolt no. 30 and pull shifting rod forward. 2 Shifter tie-rod Jam nut Ball joint Shifter tie-rod length 150 mm (5-29/32 in) Ball joint length 20 mm (25/32 in) maximum Install shifter tie-rod. Lever Removal Remove fuel tank. Refer to FUEL CIRCUIT 04-02. Remove upper and lower retaining clamps no. 24 and half rings no. 25. Unscrew lever button no. 26. Remove shifter lever no. 1 from shifter guide. Unscrew lever retaining bolt no. 27 and pull lever. 1 Lever Installation For installation, reverse the removal procedure, paying attention to the following details. Place nylon bushing no. 28 in shifter lever. Place lever spring no. 29 properly. V01I0KA 1. Shifting rod Unscrew elastic nuts from RH ball joint. Remove retaining clamp no. 31 and half rings no. 32. Shifting Rod Installation V01I0JA For installation, reverse the removal procedure. LEVER SPRING INSTALLATION 03-02-7 VMR9932_03_02.FM http://ReadManuals.com Section 03 ENGINE Subsection 03 (COOLING SYSTEM) COOLING SYSTEM 2 1 10 11 12 3 4 5 6 7 8 9 V01C1AS 03-03-1 VMR9933_03_03.FM http://ReadManuals.com Section 03 ENGINE Subsection 03 (COOLING SYSTEM) COOLING SYSTEM LEAK TEST Install special plug (radiator cap) (P/N 529 021 400) and hose pincher (P/N 529 009 900) on overflow hose no. 8. Pressurize all system through coolant reservoir to 103 kPa (15 PSI). Check all hoses, radiator and cylinder/base for coolant leaks. Spray a soap/water solution and look for air bubbles. 1 V01A0AA 1. Cooling plug COOLING SYSTEM REFILLING V01C09A NOTE: The rear fender removal is not necessary. INSPECTION Check general condition of hoses and clamp tightness. DRAINING THE SYSTEM WARNING Never drain or refill cooling system when engine is hot. Recommended Coolant Use a blend of 60% antifreeze with 40% water. Do not reinstall pressure cap. CAUTION: To prevent rust formation or freezing condition, always replenish the system with 60% antifreeze and 40% water. Pure antifreeze without water freezes. Always use ethylene glycol antifreeze containing corrosion inhibitors specifically recommended for aluminum engines. System Capacity To drain cooling system, unscrew plug under engine and remove pressure cap. Refer to TECHNICAL DATA 11-02. Refilling Procedure Use hose pincher on coolant hose at thermostat outlet. Unscrew bleeder on top of thermostat housing. With vehicle on a flat surface, engine cold, refill radiator no. 1 and coolant tank no. 9 up to cold level mark. Wait a few minutes then refill to mark. Install pressure cap. Run engine until thermostat opens then stop engine. Refill up to mark. Reinstall pressure cap. 03-03-2 VMR9933_03_03.FM http://ReadManuals.com Section 03 ENGINE Subsection 03 (COOLING SYSTEM) When engine has completely cooled down, recheck coolant level in radiator no. 1 and coolant tank no. 9 and top up if necessary. Check coolant concentration (freezing point) with proper tester. PRESSURE CAP Check if cap pressurizes the system. If not, install a new 90 kPa (13 PSI) cap (do not exceed this pressure). Installation For installation, reverse the removal procedure. Paying attention to the following detail. Install hose pincher on coolant hose at thermostat outlet. Unscrew bleeder on top of thermostat housing. Refill radiator and when coolant overflows by the thermostat cover hole, reinstall the screw. THERMOSTAT RADIATOR The thermostat is a single action type. Removal Removal Drain cooling system. Remove rear fender. Refer to BODY 10-02. Remove inlet no. 6 and outlet no. 7 hoses. The thermostat is located on the top of engine. Remove screws and pull thermostat cover with hose. 1 1 V01C0BA 1. Remove screws Remove gasket. Test V01C0AA 2 1. Radiator inlet hose 2. Radiator outlet hose Remove overflow hose no. 8. Remove mounting bolts no. 10 on the top. Unplug temperature sender no. 3. Inspection To check thermostat, put in water and heat water. Thermostat should open when water temperature reaches 75°C (167°F). Installation For installation, reverse the removal procedure, paying attention to the following details. Install thermostat with a new gasket. Check radiator air passage for clogging or damage. Remove insects, mud or other obstructions with compressed air or low pressure water. Check for any coolant leakage from radiator and hoses. 03-03-3 VMR9933_03_03.FM http://ReadManuals.com Section 03 ENGINE Subsection 03 (COOLING SYSTEM) COOLANT TANK 1 Overflow Coolant Tank The coolant expands as the temperature (up to 100 - 110°C (212 - 230°F)) and pressure rise in the system. If the limiting system working pressure cap is reached 90 kPa (13 PSI), the pressure relief valve in the pressure cap is lifted from its seat and allows coolant to flow through the overflow hose into the overflow coolant tank. Removal Remove overflow hose no. 8. Pull coolant tank no. 9 upward. Empty coolant tank. 1. Fan connector Installation Fan Installation The installation is the reverse of the removal procedure. FAN AND OUTLET DEFLECTOR For the installation, reverse the removal procedure. NOTE: When fan is reinstalled, use new selflocking bolts. Test Outlet Deflector Removal Refer to INSTRUMENTS AND ACCESSORIES 0507. Remove fan no. 5. Remove radiator. Pull outlet deflector upward no. 4. V01G0BA Fan Removal Remove rear fender. Refer to BODY 10-02. Remove bolts no. 12 and fan supports no. 11. Discard bolts. 1 2 1 Outlet Deflector Installation The installation is the reverse of the removal procedure. TEMPERATURE SENDER Test Refer to INSTRUMENTS AND ACCESSORIES 0507 for proper procedure. Removal Unplug temperature sender connectors. Unscrew temperature sender no. 3. Installation V01G0AA 1 1. Remove bolts 2. Fan support Unplug fan connector. 2 1 The installation is the reverse of the removal procedure, paying attention to the following detail. Check O-ring and change if necessary. CAUTION: Don’t apply any product on the threads or on the O-ring. 03-03-4 VMR9933_03_03.FM http://ReadManuals.com Section 03 ENGINE Subsection 04 (REWIND STARTER) REWIND STARTER 15 1 Loctite 242 Silicone compound grease 3 4 6 7 2 8 10 12 5 9 14 11 13 Loctite 242 V01C1BS 03-04-1 VMR9934_03_04A.FM http://ReadManuals.com Section 03 ENGINE Subsection 04 (REWIND STARTER) REWIND STARTER Removal 1 Remove fuel tank cover and skid plate. Refer to BODY 10-02. Remove seat pivot bar and unplug clutching and clutch modulator valve connector. Remove rewind mounting bolts no. 15 and pull rewing starter. Disassembly To remove rope from rewind starter mechanism: – First remove flat washer and screw no. 10 and 11, locking spring no. 9, locking spring washer no. 8, pawl lock no. 7 and pawl no. 6. – Remove sheave no. 3 from starter housing no. 1. – Disengage key no. 4 and pull out rope no. 5. V01C0WA TYPICAL 1. Outer end into guide notch NOTE: Due to dust accumulation, rewind starter must be periodically cleaned, inspected and relubricated. CAUTION: It is of the utmost importance that the rewind starter spring(s) be lubricated periodically using specific lubricants. Otherwise, rewind starter component life will be shortened and/or rewind starter will not operate properly under very cold temperatures. Lubricate spring assembly with silicone compound grease (P/N 420 897 061) and position into starter housing as illustrated. CAUTION: This lubricant must NOT be used on rewind starter locking spring as it does not stay on under vibration. 1 A01C12A TYPICAL — GENTLY TAP ON KEY Assembly At assembly, position spring no. 2 outer end into spring guide notch then wind the spring clockwise into guide. WARNING Since the spring is tightly wound inside the guide it may fly out when rewind is handled. Always handle with care. V01C0XA TYPICAL 1. Grease inside spring guide 03-04-2 VMR9934_03_04A.FM http://ReadManuals.com Section 03 ENGINE Subsection 04 (REWIND STARTER) CAUTION: The use of standard multi-purpose grease could result in rewind starter malfunction. To install a new rope no. 5, insert rope into sheave orifice and lock it with the key no. 4 as illustrated. V01C0ZA 1 1 TYPICAL 1. Spring coated with MOLYKOTE G-n paste Install locking ring. CAUTION: This lubricant must NOT be used on rewind springs as it does not stay on when dry. V01C10A TYPICAL 1. Push to lock To adjust rope tension: Wind rope on sheave and place rope sheave into starter housing making sure that the sheave hub notch engages in the rewind spring hook. Rotate the sheave counterclockwise until rope end is accessible through starter housing orifice. Pull the rope out of the starter housing and temporarily make a knot to hold it. One turn preload will give 7 turns of tension when fully extended. Installation Thread starter rope no. 5 through rope guide when applicable. Reinstall rewind starter assembly on engine. NOTE: Before torque mounting bolts no. 15, apply Loctite 242 on threads. Prior to installing starter grip on new rope, it is first necessary to fuse the rope end with a lit match. Pass rope through starter grip and tie a knot in the rope end. Fuse the knot with a lit match then insert rope end down and pull the starter grip over the knot. V01C0YA TYPICAL Position pawl no. 6, pawl lock no. 7 and locking spring washer no. 8. Install locking spring no. 9 and lubricate with MOLYKOTE G-n paste from Dow Corning® or equivalent. A01C18A TYPICAL 03-04-3 VMR9934_03_04A.FM http://ReadManuals.com Section 03 ENGINE Subsection 04 (REWIND STARTER) STARTING PULLEY Removal Remove rewind starter. Remove screw no. 12 and O-ring no. 13 retaining starting pulley no. 14 to crankshaft. Installation For installation, reverse the removal procedure. Paying attention to the following detail. Check O-ring for damage and change if necessary. Apply Loctite 242 on threads and torque the screw to 21 N•m (15 lbf•in). 03-04-4 VMR9934_03_04A.FM http://ReadManuals.com Section 03 ENGINE Subsection 05 (MAGNETO SYSTEM) MAGNETO SYSTEM 13 11 9 10 Loctite 243 Engine oil 12 7 Nm (62 lbfin) 8 4 9 Nm (80 lbfin) 5 6 7 1 Loctite 243 3 2 7 Nm (62 lbfin) V01C1NS 03-05-1 VMR9956_03-05A.FM http://ReadManuals.com Section 03 ENGINE Subsection 05 (MAGNETO SYSTEM) MAGNETO Removal Remove engine. Refer to REMOVAL AND INSTALLATION 03-02. Install engine on engine stand (P/N 529 035 646). Remove water pump. See the instructions as follow. Remove: – radiator outlet hose – water cooling hose – bolts – water pump housing and rubber ring – circlip on water pump shaft Unscrew water impeller, use the spaner for water pump impeller (P/N 529 035 659). Turn counterclockwise. Water pump removal is completed. Remove: – STPS (Sub-Transmission Position Sensor) no. 1 – all bolts retaining ignition cover – ignition cover no. 2 – gasket no. 3. NOTE: Clean all metal component in a non-ferrous metal cleaner. Use Bombardier gasket remover (P/N 413 708 500) or suitable equivalent. Remove all socket screws no. 4 retaining magneto no. 5 to ignition cover then pull magneto. Installation For installation, reverse the removal procedure. Paying attention to the following details. At the time of the socket screws installation retaining magneto, apply Loctite 243 on threads. Install a new gasket on ignition cover. Place hydraulic piston properly before install ignition cover. If it has a space between ignition cover and crankcase, remove ignition cover and replace the hydraulic piston. V01D0JA 1 1. Hydraulic piston Slide STPS inside sealing tube. Align STPS drive with shift drive shaft. ROTOR Removal Lock crankshaft with locking bolt (P/N 529 035 645). Refer to CRANKSHAFT/BALANCER SHAFT 03-07. Remove: – ignition cover no. 2 – pawl no. 6 and needle pin no. 7 Unscrew nut no. 8 retaining rotor no. 9. Remove serrated washer no. 10. Install magneto puller (P/N 529 035 547) and crankshaft protector (P/N 290 876 557) then remove rotor. Installation For installation, reverse the removal procedure. Paying attention to the following details. Insert ring gear in sparg clutch no. 11. Install nut on crankshaft end. Apply Loctite 243 on threads. Torque to 140 N•m (103 lbf•ft). 03-05-2 VMR9956_03-05A.FM http://ReadManuals.com Section 03 ENGINE Subsection 05 (MAGNETO SYSTEM) SPARG CLUTCH Removal Remove rotor no. 9. Unscrew all socket screws no. 12 retaining rotor and sparg clutch housing no. 13. Remove sparg clutch from sparg clutch housing. Installation For installation, reverse the removal procedure. NOTE: Apply engine oil on sparg clutch. Install sparg clutch with the arrow on the top. 03-05-3 VMR9956_03-05A.FM http://ReadManuals.com Subsection 06 Section 03 ENGINE (CYLINDER AND HEAD) CYLINDER AND HEAD 10 Nm (89 lbfin) 11 12 3 18 Multi-purpose grease 2 10 Nm (89 lbfin) 19 4 16 6 17 22 Nm (16 lbfft) 14 Engine oil 50 Nm (37 lbfft) 13 10 Nm (89 lbfin) 1 10 7 20 21 15 Engine oil 8 Engine oil 22 21 9 Engine oil 5 V01C1CS NOTE: For cylinder head, cylinder and piston removal, it is not necessary to remove engine from vehicle. 03-06-1 VMR9957_03-06A.FM http://ReadManuals.com Section 03 ENGINE Subsection 06 (CYLINDER AND HEAD) 1, CYLINDER HEAD Installation Removal Remove engine oil and coolant. Disconnect temperature sensor. Unplug radiator inlet hose. Remove screws retaining air box. Unscrew the clamp retaining carburetor adaptor to engine. Pull back the air box with carburetor assembly. Remove: – exhaust pipe (refer to REMOVAL AND INSTALLATION 03-02) – valve cover no. 11 and gasket no. 12 – flanged bolts no. 14 retaining cylinder head to cylinder base – flanged nuts no. 13 retaining cylinder head to the engine For installation, reverse the removal procedure. Install a new gasket no. 15 between cylinder head and cylinder base no. 7. Install the flanged nuts no. 13 in first then flanged bolts no. 14. 2, PUSH ROD Removal Remove cylinder head no. 1. Pull the push rods out of cylinder base no. 7. Inspection Check push rod end for wear or damage. Check push rod for bends by placing the rod on a flat metal plate. Rotate rod and measure the deflection with a dial indicator. If the rod is bent, it should be replaced. 1 PUSH ROD BEND SERVICE LIMIT 0.2 mm (0.008 in) Installation For installation, reverse the removal procedure. NOTE: Apply engine oil on push rod. 3, ROCKER ARM Removal V01C1DA Remove: – cylinder head no. 1 – holding strip no. 16 Extract rocker arm shaft no. 17 using a M8 x 53.5 screw. NOTE: Use a flanged bolt no. 14 retaining cylinder head to cylinder base. 1 1. Flanged nuts Pull up cylinder head. Inspection Check for crack between valve seats, if so, replace cylinder head. 03-06-2 VMR9957_03-06A.FM http://ReadManuals.com Subsection 06 Section 03 ENGINE (CYLINDER AND HEAD) Any area worn excessively will require part replacement. Installation For installation, reverse the removal procedure. NOTE: Apply engine oil on rocker arm shaft. 4, VALVE SPRING Removal 3 V01C1EA 1 2 1. Rocker arm shaft 2. Flanged bolt 3. Rocker arm Remove: – cylinder head no. 1 – rocker arm no. 3 Compress valve spring with an universal C-clamp spring compressor such a Snap-on CF811. Inspection 4 3 2 1 Rocker Arm Inspect each rocker arm for cracks and scored friction surfaces. If so, replace parts. Measure rocker bore diameter. If diameter is out of specification, change the rocker arm. A V01C1GA V01C1FA A. 13.76 mm (0.542 in) ROCKER ARM BORE DIAMETER SERVICE LIMIT 13.76 mm (0.542 in) Rocker Arm Shaft Check for scored friction surfaces, if so, replace parts. Insert shaft in rocker arm and check for excessive play. Measure of shaft diameter. 1. 2. 3. 4. Remove valve cotters no. 18. Remove spring compressor, valve spring retainer no. 19 and valve spring. Inspection Check valve spring for rust or corrosion, free length and squareness. ROCKER ARM SHAFT DIAMETER SERVICE LIMIT Valve spring Valve spring retainer Valve cotters C-clamp spring compressor 13.67 mm (0.538 in) VALVE SPRING FREE LENGTH SERVICE LIMIT 38 mm (1-1/2 in) VALVE SPRING MAXIMUM SQUARENESS SERVICE LIMIT 1.1 mm (0.043 in) 03-06-3 VMR9957_03-06A.FM http://ReadManuals.com Section 03 ENGINE Subsection 06 (CYLINDER AND HEAD) Installation Measure valve seat width, using a caliper. For installation, reverse the removal procedure. VALVE SEAT CONTACT WIDTH mm (in) 5, VALVE SERVICE LIMIT Removal Remove valve spring no. 4. Push the valve stem then pull valve out of valve guide. Inspection Valve Inspect valve surface, check for abnormal stem wear and bending. If so, replace by a new one. Exhaust 2 mm (0.078 in) Intake 1.8 mm (0.07 in) If valve seat contact width is too wide, too narrow or has spots, the seat must be ground or cylinder head replaced. A B Valve Stem and Valve Guide Clearance Check valve stem and valve guide for wear or friction surfaces, if so, replace parts. Measure valve stem and valve guide in three places, using a micrometer and a small hole gauge. NOTE: Clean valve guide to remove carbon deposits before measuring. VALVE STEM DIAMETER mm (in) SERVICE LIMIT V01C1HA A. Valve face contact width B. Valve seat contact width Exhaust 6.95 mm (0.274 in) Intake Installation For installation, reverse the removal procedure. NOTE: Apply engine oil on valve stem. VALVE GUIDE CLEARANCE mm (in) SERVICE LIMIT 6, VALVE STEM SEAL Exhaust 0.13 mm (0.005 in) Removal Intake Change valve if valve stem is out of specification. Valve Face and Seat Check valve face and seat for burning, pitting, and other signs of damage. Apply some lapping compound to valve face and work valve on its seat with a lapping tool. Measure valve face contact width. NOTE: The location of contact area should be in center of valve face. Remove valve. Remove circlip on the bottom of valve stem seal. 03-06-4 VMR9957_03-06A.FM http://ReadManuals.com Subsection 06 Section 03 ENGINE (CYLINDER AND HEAD) Cylinder Taper Measure cylinder diameter 16 mm (5/8 in) from top of cylinder then half-way through and finally at 13 mm (1/2 in) from bottom. 1 2 1 1 V01C1IA 1 V01C1JA 1. Circlip 2. Valve stem seal 1. Measure at three points Inspection Inspection of valve stem seals is not needed as new seals should always be installed whenever a cylinder head is diassembled. Installation For installation, reverse the removal procedure. Difference between measurements should not exceed 0.10 mm (0.004 in). If so, replace cylinder. Cylinder Out of Round Measure cylinder diameter in piston axis direction from top of cylinder. Take an other measurement 90° from first one and compare. Difference between measurements should not exceed 0.10 mm (0.004 in). If so, replace cylinder. 7, CYLINDER Removal Remove: – flanged bolts no. 23 retaining cylinder to crankcase housing – cylinder head no. 1 – water cooling hose from cylinder no. 20 – push rods no. 2 – all flanged screws retaining cylinder to the crankcase housing Pull cylinder. A B Inspection Cylinder Check cylinder for cracks, scoring, rust and wear ridges on the top and bottom of the cylinder. V01C1KA A. Perpendicular to crankshaft axis B. Parallel to crankshaft axis 03-06-5 VMR9957_03-06A.FM http://ReadManuals.com Section 03 ENGINE Subsection 06 (CYLINDER AND HEAD) 9, PISTON Installation For installation, reverse the removal procedure. Paying attention to the following details. Apply engine oil in cylinder bore. Using a ring compressor, slide piston into cylinder. Install bolts no. 23 in first, then flanged bolts no. 14, then flanged nuts no. 13. Remove cylinder no. 7. Remove both piston pin circlips no. 21 then push piston pin no. 22 out of piston. Detach piston from connecting rod. 8, LIFTER Inspection Removal Inspect piston for scoring, cracking or other damages. Using a micrometer, measure piston at 16 mm (5/8 in) perpendicularly (90°) to piston pin axis. Removal Remove cylinder no. 7. Pull lifter out of crankcase. Inspection Check for excessive clearance between lifter and its bore or straightness. A telescoping gauge and micrometer are used to check the lifter bore clearance. Subtract lifter diameter from lifter bore diameter to determine clearance. A LIFTER AND LIFTER BORE mm (in) SERVICE LIMIT Lifter 22.19 mm (0.874 in) Lifter bore 22.27 mm (0.876 in) 1 F01D0NA TYPICAL 1. Measuring perpendicularly (90°) to piston pin axis A. 16 mm (5/8 in) LIFTER BORE CLEARANCE SERVICE LIMIT The measured dimension should be as described in the previous table. If not, replace piston. 0.08 mm (0.003 in) If the clearance is out of specified tolerance change lifter and/or crankcase. Installation For installation, reverse the removal procedure. PISTON MEASUREMENT SERVICE LIMIT 88.9 mm (3.5 in) Piston/Cylinder Clearance PISTON/CYLINDER CLEARANCE SERVICE LIMIT 0.13 mm (0.005 in) NOTE: Make sure used piston is not worn. See PISTON MEASUREMENT TABLE above. Adjust and lock a micrometer to the piston dimension. 03-06-6 VMR9957_03-06A.FM http://ReadManuals.com Subsection 06 Section 03 ENGINE (CYLINDER AND HEAD) Position the dial bore gauge at 16 mm (5/8 in) below cylinder top edge, measuring perpendicularly (90°) to piston pin axis. Read the measurement on the cylinder bore gauge. The result is the exact piston/cylinder wall clearance. If clearance exceeds specified tolerance, replace cylinder or rebore. See previous table. NOTE: Make sure the cylinder bore gauge indicator is set exactly at the same position as with the micrometer, otherwise the reading will be false. 1 F00B08A Installation 1. Micrometer set to the piston dimension With the micrometer set to the dimension, adjust a cylinder bore gauge to the micrometer dimension and set the indicator to 0 (zero). 1 For installation, reverse the removal procedure. Paying attention to the following details. Apply engine oil on the piston pin. Insert piston pin into piston and connecting rod. Secure piston pin with both piston pin circlips. NOTE: Do not align the end gap of the piston pin circlips with the cutout in the piston bore. 10, PISTON RINGS 2 Inspection Ring/Piston Groove Clearance Using a feeler gauge measure each ring/piston groove clearance. If the clearance is too large, the piston should be replaced. F00B09A RING/PISTON CLEARANCE mm (in) 1. Use the micrometer to set the cylinder bore gauge 2. Dial bore gauge SERVICE LIMIT 0.15 mm (0.006 in) 1 F00B0AA TYPICAL 1. Indicator set to 0 (zero) 03-06-7 VMR9957_03-06A.FM http://ReadManuals.com Section 03 ENGINE Subsection 06 (CYLINDER AND HEAD) A 1 2 3 A31C2NA 1. Top ring (rectangular, black/gray color) 2. Second ring (scraper, chrome/stainless steel looking ring) 3. Oil ring V01C1LA A. Measure here Ring End Gap RING END GAP mm (in) SERVICE LIMIT 1.5 mm (0.06 in) Position ring 16 mm (5/8 in) from top of cylinder. NOTE: In order to correctly position the ring in the cylinder, use piston as a pusher. Using a feeler gauge, check ring end gap. Replace ring, if gap exceeds specified tolerance. See above table. CAUTION: Ensure that top and second rings are not interchanged. NOTE: Use a ring expander to prevent breakage during installation. The oil ring must be installed by hand. Check that rings rotate smoothly after installation. Space the piston ring end gaps 120° apart and do not align the gaps with the piston pin bore or the thrust side axis. A A A Installation For installation, reverse the removal procedure. Paying attention to the following details. Install the oil ring first, then the middle ring with the word TOP facing up, then the top ring with a dot facing up. 1 2 A31C2OA 1. DO NOT align ring gap with piston trust side axis 2. DO NOT align ring gap with piston pin bore axis A. 120° 03-06-8 VMR9957_03-06A.FM http://ReadManuals.com Subsection 07 Section 03 ENGINE (CRANKSHAFT/BALANCER SHAFT) CRANKSHAFT/BALANCER SHAFT 22 Nm (16 lbfft) 6 240 Nm (178 lbfft) 4 7 150 Nm (111 lbfft) 11 Loctite 243 Loctite 243 12 Molykote G-N 5 Engine oil 13 3 Loctite 243 14 8 10 Engine oil 15 Anti-seize lubricant 9 2 Molykote G-N 1 Molykote G-N Anti-seize lubricant Molykote G-N V01C1WS 03-07-1 VMR9958_03-07A.FM http://ReadManuals.com Section 03 ENGINE Subsection 07 (CRANKSHAFT/BALANCER SHAFT) 1, CAMSHAFT Removal Remove engine from vehicle (refer to INSTALLATION AND REMOVAL 03-02). Front Side Remove: – rewind starter (refer to REWIND STARTER 03-04) – clutch (refer to CLUTCH 03-09) – sub-transmission system (refer to TRANSMISSION 03-10) – cylinder head, cylinder and piston (refer to CYLINDER AND HEAD 03-06) – crankshaft gear nut no. 4, use 46 mm socket (P/N 529 035 648), then remove crankshaft gear no. 5 – bolt no. 6, lock washer no. 7 and washer no. 8 retaining cam shaft gear no. 9 with centrifugal weight no. 10 – nut no. 11 and lock washer no. 12 retaining control gear no. 13 and balancing shaft gear no. 14. Remove the both gears – oil pump gear – holding strip retaining oil pipe Rear Side Remove: – starter, water pump, magneto and ring gear (refer to MAGNETO SYSTEM 03-05) – shifting system (refer to TRANSMISSION 03-10) Separate crankcase housings. Remove camshaft. Inspection Check each lobe for scoring, scuffing, cracks, or other sign of wear. Measure each end of camshaft. CAMSHAFT ENDS mm (in) SERVICE LIMIT Clutch side 31.95 mm (1.258 in) Magneto side 17.96 mm (0.707 in) 1 1 V01C1ZA 1. Measure here Measure the camshaft bore in both housing. CAMSHAFT BORE mm (in) SERVICE LIMIT Clutch housing 32.036 mm (1.261 in) Magneto housing 18.035 mm (0.71 in) Subtract the camshaft end diameter from the proper bore diameter to find clearance. CAMSHAFT END CLEARANCE mm (in) V01C1XA 1. 2. 3. 4. 5. 6. 2 1 6 3 4 5 SERVICE LIMIT Crankshaft gear nut Crankshaft gear Cam shaft gear Control gear Balancing shaft gear Oil pump gear – all bolts and socket screws retaining crankcase Clutch side 0.086 mm (0.0034 in) Magneto side 0.075 mm (0.0029 in) If necessary, change camshaft and/or crankcase. 03-07-2 VMR9958_03-07A.FM http://ReadManuals.com Subsection 07 Installation Section 03 ENGINE (CRANKSHAFT/BALANCER SHAFT) 1 1 For installation reverse the removal procedure. NOTE: Always install a new crankcase gasket. 2, BALANCER SHAFT Removal Refer to CAMSHAFT REMOVAL section above. Use the same procedure. Remove balancer shaft. Inspection Check balancer shaft bearing in the front and rear housing for excessive play and smooth operation. Replace if necessary. Installation For installation, reverse the removal procedure. 3, CRANKSHAFT V01C21A 1. Measure here Connecting Rod Big End Axial Play Using a feeler gauge, measure distance between thrust washer and crankshaft counterweight. If the distance exceeds specified tolerance, replace the crankshaft. CONNECTING ROD BIG END mm (in) Removal SERVICE LIMIT Use the same removal procedure that camshaft and balancer shaft. Remove crankshaft and adjusting washer no. 15. Inspection Crankshaft Deflection Crankshaft deflection is measured with a dial indicator. Check crankshaft deflection on V-shaped blocks. If deflection exceeds the specified tolerance, change it. Axial play 1.3 mm (0.05 in) Connecting Rod/Piston Pin Clearance Measure piston pin. Compare to inside diameter of connecting rod. CONNECTING ROD SMALL END DIAMETER SERVICE LIMIT 22.05 mm (0.868 in) PISTON PIN DIAMETER SERVICE LIMIT CRANKSHAFT DEFLECTION mm (in) SERVICE LIMIT 21.99 mm (0.866 in) PISTON PIN BORE CLEARANCE Clutch side 0.08 mm (0.003 in) Magneto side 0.05 mm (0.002 in) SERVICE LIMIT 0.06 mm (0.002 in) Installation For installation, reverse the removal procedure. 03-07-3 VMR9958_03-07A.FM http://ReadManuals.com Subsection 08 Section 03 ENGINE (LUBRICATION SYSTEM) LUBRICATION SYSTEM 11 12 Engine oil 10 Nm (89 lbfin) 13 10 15 16 8 7 18 Nm (159 lbfin) 17 14 9 Engine oil 18 5 4 3 6 2 1 10 Nm 1 (89 lbfin) Loctite 243 22 21 Engine oil V01C1SS 20 23 19 21 Nm (15 lbfft) 03-08-1 VMR9959_03-08A.FM http://ReadManuals.com Section 03 ENGINE Subsection 08 (LUBRICATION SYSTEM) TROUBLESHOOTING When the hydraulic shifter is used, the engine pressure must increase up to about 810 kPa (118 PSI). If the engine pressure is out of specifications, check the points described in LOW OR NO OIL PRESSURE section above. Oil Level Low – – – – external oil leak worn or incorrect piston rings installation worn valve seal oil pump worm or damaged OIL CHANGE AND OIL FILTER REPLACEMENT Low or No Oil Pressure – – – – – Oil and filter are to be replaced at the same time. Oil change should be done with a warm engine. clogged oil orifice(s) incorrect oil being used defective oil pump leaking oil seal oil strainer WARNING The engine oil can be very hot. Wait until engine oil is warm. Ensure vehicle is on a level surface. Clean the drain plug area. Remove dipstick. Place a drain pan under the engine drain plug area. Unscrew drain plug. Oil Contamination (white appearance) – – – – coolant mixing with oil faulty water pump seal faulty head gasket water leak in crankcase ENGINE PRESSURE TEST NOTE: The engine pressure test should be done with a warm engine and the recommended oil. Remove the oil pressure switch under oil filter and install the oil pressure gauge (P/N 529 035 652). 1 1 2 V01A0AB 1. Oil drain plug V01C1TA 1. Oil pressure gauge 2. Oil filter The engine pressure should be between 101 kPa (14.7 PSI) and 608 kPa (88 PSI). Wait a while to allow oil to flow out of oil filter. Carefully unscrew oil filter and as soon as it can be removed from the engine, turn it upright. Discard filter. NOTE: Be sure that the old filter O-ring is removed. 03-08-2 VMR9959_03-08A.FM http://ReadManuals.com Subsection 08 Section 03 ENGINE (LUBRICATION SYSTEM) CAUTION: Only use Bombardier high pressure filter or suitable equivalent. The Bombardier filter is specifically designed for this engine. This filter does not operate at the same pressure as other brands. Using a non-recommended filter may cause serious engine/transmission damage. Lubricate the O-ring on the filter with engine oil. Install the new filter then screw one full turn after O-ring contact. Wipe out any oil spillage on engine. Change gasket on drain plug. Clean gasket area on engine and drain plug then reinstall plug. Refill engine at the proper level with the recommended oil. Refer to TECHNICAL DATA 11-02 for capacity. Start engine and let idle for a few minutes. Ensure oil filter area and drain plug areas are not leaking. Stop engine. Wait a while to allow oil to flow down to crankcase then check oil level. Refill as necessary. Dispose oil as per your local environmental regulations. ENGINE OIL PRESSURE REGULATOR OIL STRAINER Remove the plug screw no. 7, sealing ring no. 8, compression spring no. 9 and piston no. 10. Removal Inspection Ensure vehicle is on a level surface. Remove: – skid plate under vehicle – engine oil – screws no. 1 retaining oil strainer cover no. 2 – oil collector no. 3 and O-ring no. 4 – oil strainer no. 5 Inspect piston for scoring or other damages. Check compression spring for free length, squareness or other damage. The engine oil pressure regulator is located near exhaust pipe bracket. 1 V01C1UA 1. Engine oil pressure regulator Removal COMPRESION SPRING FREE LENGTH SERVICE LIMIT 42 mm (1.65 in) Installation Cleaning and Inspection Clean oil strainer with the parts cleaner then use an air gun to dry it. Inspect O-ring and oil strainer gasket no. 6 for damage. Change if necessary. For installation, reverse the removal procedure. NOTE: Always install a new sealing ring when the oil pressure regulator is removed. Installation For installation, reverse the removal procedure. 03-08-3 VMR9959_03-08A.FM http://ReadManuals.com Section 03 ENGINE Subsection 08 (LUBRICATION SYSTEM) OIL PUMP The oil pump is located on the clutch side of the crankcase housing. OIL PUMP ROTOR AND INNER ROTOR CLEARANCE mm (in) SERVICE LIMIT A Removal B Remove engine. Refer to REMOVAL AND INSTALLATION 03-02. Remove clutch cover and clutch housing. Refer to CLUTCH 03-09. Remove: – snap ring no. 11 – oil pump gear no. 12 – needle pin no. 13 – thrust washer no. 14 – oil pump cover no. 15 – oil pump shaft no. 16 – oil pump rotor no. 17 – inner rotor no. 18 Inspection Inspect oil pump for marks or other damages. Using a feeler gauge, measure the clearance between oil pump rotor and inner rotor. 2 1 0.25 mm (0.009 in) C Measure oil pump rotor thickness and oil pump rotor bore depth. Difference between measurements should not exceed 0.2 mm (0.007 in). If so, replace oil pump rotor. Installation For installation, reverse the removal procedure. CLUTCH OIL PRESSURE REGULATOR Removal Remove water pump and ignition cover. Refer to MAGNETO SYSTEM 03-06. Unscrew plug no. 19. Remove compression spring no. 20, valve piston no. 21 and valve seat sleeve no. 22. Inspection Inspect piston for scoring or other damages. Check O-ring no. 23 for damage. Change if necessary. Check compression spring for free length, squareness or other damage. A B C COMPRESION SPRING FREE LENGTH SERVICE LIMIT 59.5 mm (2.34 in) V01C1VA 1. Oil pump rotor 2. Inner rotor Installation For installation, reverse the removal procedure. 03-08-4 VMR9959_03-08A.FM http://ReadManuals.com Section 03 ENGINE Subsection 09 (CLUTCH) CLUTCH 150 Nm (111 lbfft) 1 4 5 2 Loctite 243 21 20 7 150 Nm (111 lbfft) 10 9 3 Engine oil 6 7 Nm (62 lbfin) 12 Engine oil 8 14 11 15 13 18 Engine oil 16 19 Engine oil 17 V01D01S 03-09-1 VMR9960_03-09A.FM http://ReadManuals.com Section 03 ENGINE Subsection 09 (CLUTCH) CLUTCH DRUM, CLUTCH WEIGHT AND SPRAG CLUTCH Inspect sparg clutch no. 5 for smooth operation and roller for excessive wear. Change sparg clutch if necessary. Disassembly Weight Lining Measure weight lining thickness. The weight lining thickness must have 2.0 mm (5/64 in). Remove: – engine oil and coolant – rewind starter – clutch cover Install the crankshaft locking bolt (P/N 529 035 645). A 1 V01D03A A. Weight lining V01D02A 1. Crankshaft locking bolt Unscrew nut no. 1 retaining clutch weight ass’y no. 2 to crankshaft. Pull clutch drum out of housing and remove thrust washer no. 4. Separate clutch weight ass’y from clutch drum. Weight Spring Remove E-clips, washer, clutch spring and washer. Remove clutch weights and weight springs from plate. Measure length of weight springs. If they are longer than 21.6 mm (0.85 in), change springs. A Inspection Clutch Drum Check inside of drum clutch for excessive wear or scratches.Change if necessary. Measure the inside diameter of clutch drum. If the I.D. is over to 140.4 mm (5-17/32 in) change clutch drum. Sparg Clutch Hold clutch drum and rotate clutch weight. The clutch weight should only turn counterclockwise. V01D0EA A. 21.6 mm (0.85 in) Check weight springs for wear or other damage. Replace if necessary. 03-09-2 VMR9960_03-09A.FM http://ReadManuals.com Section 03 ENGINE Subsection 09 (CLUTCH) Assembly 7 2 6 8 4 For installation, reverse the removal procedure. Paying attention to the following details. Install weight springs with the open ends down. Install sparg clutch in clutch drum with its OUT SIDE mark facing out. Apply engine oil on sprag clutch. V01D05A 9 10 5 3 1 1. Front output shaft 2. Collar sleeve 3. Helical spring 4. Parking locking lever 5. Shaft 6. Tension spring 7. Indicator shaft 8. Actuating lever 9. Circlip 10. Output gear Remove the clutch housing. Install the crankshaft locking bolt (P/N 529 035 645). V01D04A 1 1. Out side mark FRICTION DRIVE PLATE, STEEL DRIVEN PLATE AND CLUTCH BASKET Disassembly – – – – – – – – – – – – – engine oil and coolant rewind starter clutch cover front output shaft collar sleeve helical spring parking locking lever shaft tension spring indicator shaft actuating lever and thrust washer circlip output gear V01D06A 1 2 3 1. Crankshaft locking bolt 2. Clutch drum 3. Oil pump gear Remove clutch drum no. 3 and thrust washer no. 4. Remove clutch bolts no. 6, pressure plate no. 7 and clutch spring no. 8. Unlock the tab washer no. 9 then install spanner tool for clutch basket (P/N 529 035 647). Unscrew the clutch lock nut no. 10 then remove tab washer. 03-09-3 VMR9960_03-09A.FM http://ReadManuals.com Section 03 ENGINE Subsection 09 (CLUTCH) Remove: – clutch hub no. 11 – friction drive plates no. 12 – steel driven plates no. 13 – inner plate no. 14 – thrust washer no. 15 – clutch basket no. 16 – needle bearings no. 18 and no. 19 – large thrust washer no. 17 STEEL DRIVEN PLATE MAXIMUM WARPAGE 0.25 mm (0.01 in) Inspection Friction Drive Plate Measure each friction drive plate thickness. Friction drive plates must be replaced when lining is 2.7 mm (0.11 in) thick or less. FRICTION DRIVE PLATE MINIMUM THICKNESS 2.7 mm (0.11 in) V01D08A Clutch Basket Check slots of clutch basket for damage or wear caused by friction drive plates. Change if necessary. V01D07A V01D09A Steel Driven Plate Using a feeler gauge, check each steel driven plate for warpage on a plate surface. Change if the warpage is over to 0.25 mm (0.01 in) or if they show signs of discoloration. 03-09-4 VMR9960_03-09A.FM http://ReadManuals.com Section 03 ENGINE Subsection 09 (CLUTCH) Clutch Hub Check grooves of clutch hub for damage or wear caused by steel driven plates. Clutch Spring Measure each clutch springs free length. CLUTCH SPRING MINIMUM LENGTH 32.5 mm (1.28 in) V01D0AA V01D0CA Pressure Plate Bearing Check the pressure plate bearing no. 20. Turn the bearing with your finger. The bearing should turn smoothly and don’t have excessive play. Replace if necessary. Assembly Assemble friction drive plates, steel driven plates, inner plate and clutch hub in clutch basket. Apply engine oil on each friction drive plate. NOTE: Place the last friction drive plate in short slots of clutch basket. 2 1 3 V01D0DA V01D0BA 1 1. Last friction drive plate 2. Retaining plate 3. Clutch basket 1. Retaining plate bearing 03-09-5 VMR9960_03-09A.FM http://ReadManuals.com Section 03 ENGINE Subsection 09 (CLUTCH) Install 2 clutch springs. Remove clutch hub assembly from clutch basket. V01D0FA Install clutch hub. Move the output shaft slowly and push clutch hub. V01D0HA NOTE: Do not remove shift shaft. If the shift shaft is removed, refer to TRANSMISSION 03-10 for proper installation. Install the large thrust washer on main shaft. Install needle bearings, the large bearing in first, large thrust washer, clutch basket and then the small thrust washer on main shaft. Apply engine oil on needle bearings. Using the sub-transmission positioner (P/N 529 035 1 1. Output shaft CAUTION: Do not use clutch lock nut when you insert clutch hub in clutch basket. Install a new tab washer and clutch lock nut. Fold up tab washer on nut. 651), select an other position than PARK. V01D0IA V01D0GA 1 Replace the transmission in PARK position. At the time of indicator shaft installation, refer to TRANSMISSION 03-10 for the proper procedure. 1. Sub-transmission positioner 03-09-6 VMR9960_03-09A.FM http://ReadManuals.com Section 03 ENGINE Subsection 10 (TRANSMISSION) TRANSMISSION GEAR SHIFT SYSTEM Engine oil 10 Nm (89 lbfin) 4 5 1 Engine oil 6 7 22 2 10 Nm (89 lbfin) Engine oil 3 23 17 Engine oil 15 Engine 19 oil 16 Engine oil 8 12 Engine oil 21 18 11 20 10 9 10 Nm (89 lbfin) 13 Engine oil 14 10 Nm (89 lbfin) V01E0BS 03-10-1 VMR9961_03-10A.FM http://ReadManuals.com Section 03 ENGINE Subsection 10 (TRANSMISSION) TRANSMISSION Loctite 243 Anti-seize lubricant 18 17 19 Anti-seize lubricant 21 Anti-seize lubricant Molykote GN Anti-seize lubricant Anti-seize lubricant 20 16 Anti-seize lubricant 10 Nm (89 lbfin) Loctite 243 Anti-seize lubricant 22 Anti-seize lubricant 15 23 Anti-seize lubricant Anti-seize lubricant 24 V01E0CS 03-10-2 VMR9961_03-10A.FM http://ReadManuals.com Section 03 ENGINE Subsection 10 (TRANSMISSION) GEAR SHIFT MECHANISM Remove the tension spring no. 13 then pull shift shaft with pawl no. 14 out of housing. Disassembly 4 Front Side Remove: – engine from vehicle (refer to REMOVAL AND INSTALLATION 03-02) – rewind starter (refer to REWIND STARTER 03-04) – clutch (refer to CLUTCH 03-09) Remove the shift shaft no. 1. Unscrew socket screw no. 2 retaining index gear no. 3. Remove socket screw no. 4, washer no. 5, index lever no. 6 and index spring no. 7. V01E0DA 1. 2. 3. 4. 3 2 3 2 1 Shift drum gear Index lever Tension spring Shift shaft with pawl Assembly Front Side Reassemble in the reverse order of disassembly. Paying attention to the following detail. Align mark on index gear with mark on shift shaft. 1 1 V01C1RA 1. Shift shaft 2. Index gear 3. Index lever NOTE: Insert a flat screw driver in the index lever slot and twist the screw driver clockwise then pull index gear. Rear Side Remove water pump and magneto cover. Remove nut retaining shift drum gear no. 8. Remove socket screw no. 9, washer no. 10, index lever no. 11 and index spring no. 12. NOTE: Insert a flat screw driver in the index lever slot and twist the screw driver clockwise then pull index gear. V01E0EA 2 1. Index gear 2. Shift shaft 03-10-3 VMR9961_03-10A.FM http://ReadManuals.com Section 03 ENGINE Subsection 10 (TRANSMISSION) After clutch housing installation, align mark on shift shaft with mark on indicator shaft. 1 V01E0FA 2 3 1. Indicator shaft 2. Shift shaft 3. Transmission actuating lever Rear Side Reassemble in the reverse order of disassembly. Inspection Turn the inner race of each bearing with your finger. The bearings should turn smoothly and quietly. Replace if necessary. During and after transmission disassembly, inspect the condition of each parts closely. In particular, check for: – gear teeth damage – worn or scored bearing surfaces – worn or scored shifting fork – worn or scored shift fork shaft – rounded engagement dogs and slots – bent shift forks – bent shift fork shaft – worn shift fork engagement pins – worn tracks on shift drum – worn splines on shafts and gears Assembly TRANSMISSION Disassembly Remove gear shift mechanism. Separate both housing of crankcase. Remove the shift fork shafts no. 15, no. 16 and no. 17. Remove shift fork no. 18 then pull shift drum no. 19. At the same time, pull all gears and shafts. Reassemble in the reverse order of disassembly. Paying attention to the following details. NOTE: Install all shafts and gears together. Place the shift forks no. 20, no. 21, no. 22 and no. 23 in the proper shift drum tracks before install the transmission in half housing. When the transmission is installed, place the last shift fork no. 18. Install the shift drum. NOTE: Check if the shaft pin is properly installed in drum slot before housing installation. V01E0GA 03-10-4 VMR9961_03-10A.FM http://ReadManuals.com Section 03 ENGINE Subsection 10 (TRANSMISSION) 1 2 V01E0IA 1. Shaft pin 2. Shift drum Install the shift fork shafts. NOTE: Make sure all of the shift fork pins are aligned with the grooves in the shift drum. Install the index gear on end of shift drum. At the same time, turn the sub-transmission shaft no. 24 and the index gear no. 3. The transmission should turn smoothly. 03-10-5 VMR9961_03-10A.FM http://ReadManuals.com Section 04 FUEL SYSTEM Subsection 01 (TABLE OF CONTENTS) TABLE OF CONTENTS FUEL CIRCUIT........................................................................................................................ FUEL LINES........................................................................................................................ FUEL TANK STRAINER ..................................................................................................... FUEL VALVE ...................................................................................................................... FUEL TANK ........................................................................................................................ FUEL GAUGE..................................................................................................................... FUEL SYSTEM PRESSURIZATION ................................................................................... 04-02-1 04-02-2 04-02-2 04-02-3 04-02-3 04-02-4 04-02-4 CARBURETOR AND FUEL PUMP......................................................................................... CARBURETOR ................................................................................................................... REMOVAL .......................................................................................................................... CLEANING AND INSPECTION.......................................................................................... CARBURETOR FLOAT LEVEL ADJUSTMENT ................................................................. INSTALLATION.................................................................................................................. CARBURETOR ADJUSTMENTS ....................................................................................... FUEL PUMP ....................................................................................................................... REMOVAL .......................................................................................................................... VERIFICATION.................................................................................................................... CLEANING AND INSPECTION.......................................................................................... INSTALLATION.................................................................................................................. 04-03-1 04-03-1 04-03-1 04-03-2 04-03-2 04-03-3 04-03-4 04-03-7 04-03-7 04-03-7 04-03-7 04-03-7 AIR INTAKE SILENCER.......................................................................................................... AIR FILTER BOX ................................................................................................................ REAR AIR INTAKE TUBE................................................................................................... FRONT AIR INTAKE TUBE ................................................................................................ PCV VALVE ........................................................................................................................ 04-04-1 04-04-2 04-04-2 04-04-2 04-04-2 04-01-1 http://ReadManuals.com Section 04 FUEL SYSTEM Subsection 02 (FUEL CIRCUIT) FUEL CIRCUIT 5 4 6 3 8 9 10 8 11 10 Body 1 12 11 2 7 9 V01N0BS 04-02-1 http://ReadManuals.com Section 04 FUEL SYSTEM Subsection 02 (FUEL CIRCUIT) FUEL LINES m WARNING Whenever working on fuel system, always verify for water or dust infiltration in reservoir. Replace any damaged, leaking or deteriorated fuel lines. When replacing fuel lines, be sure to use hoses as available from Bombardier parts department. This will ensure continued proper and safe operation. m WARNING V01N02A Use of improper fuel lines could compromise fuel system integrity. USE SCREWDRIVER ONLY IF GROMMET IS TOO TIGHT Inspection m WARNING Ensure that fuel tank strainer no. 8 and fuel line are clean and not damaged, as per following photo. When draining a fuel tank or whenever a fuel line is disconnected, obstruct line with a hose pincher (P/N 295 000 076) or equivalent device. Fuel is flammable and explosive under certain conditions. Ensure work area is well ventilated. Do not smoke or allow open flames or sparks in the vicinity. 1 2 FUEL TANK STRAINER Removal Close fuel valve no. 1. Remove fuel tank cover. Refer to BODY10-02. Disconnect BLACK negative cable from battery. Drain fuel tank no. 3 by unplugging reserve fuel hose no. 9 on fuel valve (top hose). NOTE: To accelerate fuel tank draining and ensure complete draining, remove cap no. 6. Manually pull grommet no. 10 out of fuel tank, as shown in the next photo. NOTE: In the case that grommet is too tight, use a flat screwdriver and carefully pull out grommet, as shown in the next photo. A31I03A TYPICAL 1. Fuel tank strainer 2. Fuel line Installation NOTE: To ease grommet insertion, apply BOMBARDIER LUBE (P/N 293 600 016 (12 x 14 oz)). Position grommet on fuel line, as shown in the next photo then insert grommet in tank hole. 04-02-2 http://ReadManuals.com Section 04 FUEL SYSTEM Subsection 02 (FUEL CIRCUIT) Installation Reinstall fuel valve by positioning rubber washer inside and nut outside vehicle. See next photo. V01N03A 2 1 1. Grommet properly position for tank insertion 2. Fitting recess Once grommet is inserted in tank hole, push fitting until its recess properly sits in grommet. Refuel tank and ensure there are no leaks. 1 V01N05A 2 1. Rubber washer inside 2. Nut outside Replug all hoses according to the following table. FUEL VALVE Removal NOTE: To ease reinstallation, mark all hoses before removing fuel valve no. 1. From outside body, remove plastic cap from valve no. 1. Unscrew valve nut, as shown in the next photo. HOSE VALVE POSITION Fuel tank top hose ON To fuel pump OUT Fuel tank bottom hose RES FUEL TANK Removal V01N04A UNSCREW VALVE NUT Unplug all 3 hoses from fuel valve. Remove valve. Disconnect BLACK negative cable from battery. Drain fuel tank no. 3 by unplugging reserve fuel hose no. 9 on fuel valve (top hose). NOTE: To accelerate fuel tank draining and ensure complete draining, remove cap no. 6. Remove following items from body. Refer to BODY 10-02 for complete detailed procedure: – steering cover – shifter guide indicator – front inner fenders – seat – fuel tank cover – front bumper – front fender with rack 04-02-3 http://ReadManuals.com Section 04 FUEL SYSTEM Subsection 02 (FUEL CIRCUIT) Unplug fuel hoses from tank and disconnect fuel vent line no. 5. Remove both fuel tank top screws, as shown in the next photo. 2 V01N07A 1 3 4 5 6 1. Remove both top fuel tank screws 1. 2. 3. 4. 5. 6. Remove fuel tank bottom nut located beside rewind starter. Perform fuel system pressurization as described in the following procedure. Inspection FUEL GAUGE Visual Inspect fuel tank for any damage or cracks which may result in fuel leaks. If so, replace tank with new one. Removal V01N06A 1 Pressure Test Refer to next section FUEL SYSTEM PRESSURIZATION for complete detailed procedure. Installation Reverse removal procedure, however pay attention to the following: Ensure that main fuel tank hose no. 11 and reserve fuel tank hose no. 9 are not inverse. Refer to FUEL VALVE table. Position top screws/nuts, washers and spacers as shown in the next photo. Nut Frame bracket Fuel tank holding tab Spacer Washer Screw head Remove front fender. Refer to BODY 10-02. Pull out fuel gauge no. 4 from fuel tank. At the same time, remove the fuel gauge gasket. Installation The installation is the reverse of the removal procedure. NOTE: Check gasket for crack or other damage. Change if necessary. FUEL SYSTEM PRESSURIZATION Fill up fuel tank no. 3. Remove seat, fuel tank cover and right side inner fender. Install on fuel tank special cap of leak testing kit (P/N 529 033 100). 04-02-4 http://ReadManuals.com Section 04 FUEL SYSTEM Subsection 02 (FUEL CIRCUIT) Install hose pinchers (P/N 295 000 076) on fuel tank vent line and fuel pump outlet hose no. 2 at carburetor(s), as shown in the following photos. Using air pump from engine leak test kit (P/N 861 749 100) inject air into fuel tank. See next photo. V01N0AA V01N08A HOSE PINCHER INSTALLED ON FUEL TANK VENT LINE 1 2 1. Special cap on tank 2. Air pump Pressurize fuel system to 21 kPa (3 PSI). That pressure must not drop during 3 minutes. If pressure drops, locate fuel leak(s) and repair/ replace leaking component(s). To ease locating leak(s) at fuel tank vent fitting, fuel gauge or fuel cap spray soapy water on components, bubbles will indicate leak location(s). V01N09A HOSE PINCHER INSTALLED ON FUEL PUMP OUTLET 04-02-5 http://ReadManuals.com Subsection 03 Section 04 FUEL SYSTEM (CARBURETOR AND FUEL PUMP) CARBURETOR AND FUEL PUMP CARBURETOR CAUTION: Although some jets be replaced by other jets from other carburetors, such modifications shouldn’t be performed. They can greatly affect engine calibration and can cause severe damage to engine. Use only recommended jetting specific for this carburetor. REMOVAL Disconnect BLACK negative cable from battery. Remove seat. Unplug all fuel hoses from carburetor no. 7. NOTE: To ease reinstallation, mark all hoses before unplugging. Loosen both carburetor and air box clamps. Loosen air box bolts and move backward. Pull out carburetor. 1 V01B01A 1. Open key end here Pull choke cable to remove choke plunger from carburetor. Throttle Cable Removal Choke Cable Removal Put carburetor on a clean rag. Unscrew choke plastic nut from carburetor, as shown in the next photo. With carburetor on a clean rag, remove carburetor side cover. Using thumb, release tension on throttle lever. With long nose pliers, rotate cable end bushing so that cable aligns with throttle lever recess, then lift cable end. See next photo. V01F09A V01F0AA REMOVE CHOKE PLASTIC NUT NOTE: To ease choke plastic nut removal use an open key as shown in the next photo. This tool can be made with an existing 12 mm key. 2 3 1 1. Release tension on throttle lever 2. Cable end bushing 3. Throttle lever recess 04-03-1 http://ReadManuals.com Section 04 FUEL SYSTEM Subsection 03 (CARBURETOR AND FUEL PUMP) Separate cable end bushing from throttle cable end, as shown in the next photo. Keep bushing. Carburetor body and jets should be cleaned in a carburetor cleaner following manufacturer’s instructions. m WARNING Solvent with a low flash point such as gasoline, naphtha, benzol, etc., should not be used as they are flammable and explosive. CARBURETOR FLOAT LEVEL ADJUSTMENT V01F0BA REMOVE CABLE END BUSHING Loosen throttle cable nut, as shown in the next photo. 1 Correct fuel level in float chamber is vital toward maximum engine efficiency. To check for correct float level proceed as follows: – Remove float bowl and gasket from carburetor. – Make sure that float arm is symmetric-not distored. With carburetor chamber up side down: – Measure height H between bowl seat and the top edge of float arm. Use float level gauge (P/N 529 035 520). – Keep float level gauge perfectly vertical and in line with main jet hole. Ensure that both float level gauge tips are properly positioned on carburetor body and that “L” arm is leaning on float without compressing valve spring. Refer to following photos for proper float level gauge positioning. 2 2 V01F0CA 1. Loosen this nut 2. Side cover removed A Pull cable out from carburetor. CLEANING AND INSPECTION 1 The entire carburetor should be cleaned with a general solvent and dried with compressed air before disassembly. CAUTION: Heavy duty carburetor cleaner may be harmful to the float material and to the rubber parts, O-rings, etc. Therefore, it is recommended to remove those parts prior to cleaning. V01F0TA 1. Gauge tips 2. “L” arm A. Height H 04-03-2 http://ReadManuals.com Subsection 03 Section 04 FUEL SYSTEM (CARBURETOR AND FUEL PUMP) 90° V01F0EA GAUGE ALIGNED WITH MAIN JET 1 V01F0FA To adjust height H, bend the contact tab of float arm until the specified height is reached. CAUTION: When adjusting lever, do not pry it. This will apply pressure on needle and damage valve seat/needle. CARBURETOR SIDE — RUBBER FLANGE INSTALLATION 1. Flange recess aligned with carburetor notch Install rubber flange on air box side so that its recess aligns with air box notch, as shown in the next photo. INSTALLATION To install carburetor on engine, inverse removal procedure, as described: – Inspect throttle and choke cable housing prior to installation. – Reinstall and adjust throttle and choke cables, then side cover. Refer to next section CARBURETOR ADJUSTMENTS. – Reinstall carburetor on engine. When reinstalling carburetor on engine, pay attention to the following: CAUTION: The rubber flanges must be checked for cracks and/or damage. At assembly, the rubber flanges must be perfectly matched with the air box, carburetor and engine or severe engine damage will occur. Install clamps in a way that their tightening bolts are staggered — not aligned. V01F0GA 1 AIR BOX SIDE — RUBBER FLANGE INSTALLATION 1. Notch aligned with recess 04-03-3 http://ReadManuals.com Section 04 FUEL SYSTEM Subsection 03 (CARBURETOR AND FUEL PUMP) CARBURETOR ADJUSTMENTS 3 1 2 V01F0HA BOTTOM VIEW 1. Idle speed screw 2. Pilot screw 3. Drain plug and screw 1 Pilot Screw Preliminary Adjustment NOTE: The pilot screw is factory pre-set. Adjustment is not necessary unless the carburetor is overhauled or replaced. Completely close the pilot screw (until a slight seating resistance is felt) then back off as specified. Refer to TECHNICAL DATA 11-02 for specifications. Idle Speed Preliminary Adjustment Adjust throttle screw to 1-1/2 turn or so that throttle valve closes bypass hole by half, as shown in the next photo. V01F0WA 1. Bypass hole closes to halfway Idle Speed Adjustment Start engine and allow it to warm then adjust idle speed to specifications by turning idle speed screw clockwise to increase engine speed or counterclockwise to decrease it. NOTE: Use the digital induction tachometer (P/N 529 014 500). Turn tachometer wire around spark plug wire, about 4 or 5 turns, for the best measure. CAUTION: Do not attempt to set the idle speed by using the pilot screw. Refer to TECHNICAL DATA 11-02 for idle speed specifications. 04-03-4 http://ReadManuals.com Subsection 03 Section 04 FUEL SYSTEM (CARBURETOR AND FUEL PUMP) Choke Pilot Screw Adjustment Remove top cover from carburetor. Detach diaphragm from carburetor body, then pull out throttle slide. With choke lever at fully closed position, choke plunger must be fully closed. With lever halfway, plunger must be opened to specification and with lever completely opened, plunger must be opened. See next photos for proper choke lever and plunger positioning. NOTE: The pilot screw is factory pre-set. Adjustment is not necessary unless the carburetor is overhauled or replaced. Warm the engine to operating temperature. Turn the pilot screw clockwise until you hear the engine misses or decreases air speed, then turn counterclockwise until the engine again misses or decreases air speed. Center the pilot screw exactly between these too extreme positions. If idle speed changes after adjustment of the pilot screw, readjust the idle speed screw. 1 V01F0JS FULLY CLOSED POSITION 1. Plunger end must be here 1 A V01F0KT HALFWAY POSITION 1. Plunger end must be here A. Opening to specification value 04-03-5 http://ReadManuals.com Section 04 FUEL SYSTEM Subsection 03 (CARBURETOR AND FUEL PUMP) 1 V01F0LS FULLY OPENED POSITION 1. Plunger end must be here Plunger Adjustment Throttle If plunger needs to be adjusted use cable adjuster, as shown in the next photo. m WARNING Ensure the key is turned OFF, prior to performing the throttle cable adjustment. Before adjusting the throttle cable, adjust idle speed (preliminary adjustment) and choke. On the carburetor, loosen lock nut and adjust throttle cable. Make sure the throttle lever, at the full position, doesn’t lean against carburetor body. V01F0MA A 1 USE CABLE ADJUSTER TO ADJUST PLUNGER POSITION 1. Choke plunger NOTE: For the proper adjustment at halfway position, use a bit with diameter to opening specification. Diaphragm Installation Carefully replace diaphragm in its original position. Make sure spring is located properly in carburetor cover before screwing. NOTE: Check and place correctly the indexation lob. V01F0RA THROTTLE LEVER AT THE FULL POSITION A. 1 mm (1/32 in) Retorque lock nut. 04-03-6 http://ReadManuals.com Subsection 03 Section 04 FUEL SYSTEM (CARBURETOR AND FUEL PUMP) FUEL PUMP REMOVAL Close fuel valve. Lift coolant tank. Unplug fuel hose coming from fuel valve. NOTE: It may be easier to unplug fuel hose coming from fuel valve at fuel valve location. Unplug fuel hose going to carburetor. Disconnect impulse hose no. 12. 1 Check impulse diaphragm and gasket on highsupply fuel pump with twin outlets as follows: Connect a clean plastic tubing to the impulse nipple and plug vent hole on top cover. Either apply pressure or vacuum. The diaphragm/gasket must not leak. CLEANING AND INSPECTION The entire pump should be cleaned with general purpose solvent before disassembly. Fuel pump components should be cleaned in general purpose solvent and dried with compressed air. m WARNING Solvent with a low flash point such as gasoline, naphtha, benzol, etc., should not be used as each is flammable and explosive. Inspect diaphragm. The pumping area should be free of holes, tears or imperfections. Replace pump as needed. V01F0NA 2 3 INSTALLATION To install fuel pump, reverse removal procedure. However, pay attention to fuel hose position. Refer to arrows on fuel pump. 1. Fuel hose coming from fuel valve 2. Fuel hose going to carburetor 3. Impulse hose Remove fuel pump no. 2. VERIFICATION Connect a clean plastic tubing to the inlet nipple and alternately apply pressure and vacuum with pump of leak test kit. The inlet valve should release with pressure and hold under vacuum. Repeat the same procedure at the outlet nipple. This time the outlet valve should hold with pressure and release under vacuum. 04-03-7 http://ReadManuals.com Section 04 FUEL SYSTEM Subsection 04 (AIR INTAKE SILENCER) AIR INTAKE SILENCER 1 2 3 4 8 10 6 14 13 15 16 12 5 Engine Valve Cover 9 Engine 7 11 V01C13S 04-04-1 http://ReadManuals.com Section 04 FUEL SYSTEM Subsection 04 (AIR INTAKE SILENCER) AIR FILTER BOX Inspection Removal Inspect air intake tube for cracks, blisters or any other damage. Change if necessary. Remove: – seat – air filter box cover no. 1 – air baffle no. 2, air filter no. 3 and foam no. 4 Detach: – breather hose no. 6 – rear air intake tube no. 7 – intake adaptor no. 8 from carburetor Unfasten bolts no. 5 and remove drain tubes no. 9 under air filter box no. 10. Pull out the air filter box. Installation For installation, reverse the removal procedure. REAR AIR INTAKE TUBE Installation For installation, reverse the removal procedure. FRONT AIR INTAKE TUBE Removal Remove: – front fender – LH inner fender Refer to BODY 10-02 Disconnect front air intake tube no. 12 from the sleeve no. 11. NOTE: Before removing front air intake tube from vehicle, note tube routing for reinstallation. Remove front air intake tube from vehicle. Inspection Removal Remove: – front fender – LH inner fender – LH side panel NOTE: For all body parts removal, refer to BODY 10-02. Detach rear air intake tube no. 7 from air filter box no. 10. In front of vehicle, disconnect rear air intake tube from sleeve no. 11. Remove rear air intake tube from vehicle. NOTE: Before removing rear air intake tube from vehicle, note tube routing for reinstallation. Inspect air intake tube for cracks, blisters or any other damage. Change if necessary. Installation For installation, reverse the removal procedure. PCV VALVE The positive crankcase ventilation (PCV) valve is used to reduce the signal for pulsation coming from crankcase so that the pressure in the air intake circuit stays constant. Test If idle speed engine is not constant, remove the breather hose from PCV valve. When a finger is placed over PCV valve inlet, a strong vaccum should be felt immediately. If not, replace the PCV valve. 04-04-2 http://ReadManuals.com Section 04 FUEL SYSTEM Subsection 04 (AIR INTAKE SILENCER) Removal Remove and discard clamps no. 14 and no. 15. Separate PCV valve no. 13 from breather hose no. 6 and from connecting tube no. 16. 3 V01C14A 1. 2. 3. 4. 4 2 1 2 PCV valve Clamps Breather hose Connecting tube Installation For installation, reverse the removal procedure. NOTE: Install PCV valve with the new clamps. 04-04-3 http://ReadManuals.com Section 05 ELECTRICAL Subsection 01 (TABLE OF CONTENTS) TABLE OF CONTENTS OVERVIEW............................................................................................................................. 05-02-1 GENERAL OPERATION INFORMATION........................................................................... 05-02-1 MPEM (MULTI-PURPOSE ELECTRONIC MODULE)............................................................ 05-02-1 CHARGING SYSTEM......................................................................................................... 05-02-1 STARTING SYSTEM .......................................................................................................... 05-02-2 IGNITION SYSTEM............................................................................................................ 05-02-2 ELECTRIC SHIFT SYSTEM ................................................................................................ 05-02-3 GAUGES/ACCESSORIES .................................................................................................. 05-02-3 GENERAL TESTING/TROUBLESHOOTING INFORMATION .......................................... 05-02-4 SERVICING PACKARD CONNECTORS ............................................................................ 05-02-4 SERVICING DEUTSCH CONNECTORS ............................................................................ 05-02-5 SERVICING AMP CONNECTORS (26 PINS)..................................................................... 05-02-5 IDENTIFICATION OF FUSE BLOCK ON VEHICLE ............................................................ 05-02-9 IDENTIFICATION OF MAJOR CONNECTOR PINS .......................................................... 05-02-9 CHARGING SYSTEM............................................................................................................. TESTING PROCEDURE ..................................................................................................... 05-03-1 05-03-1 STARTING SYSTEM.............................................................................................................. BATTERY ............................................................................................................................ TROUBLESHOOTING ........................................................................................................ BATTERY TESTING ........................................................................................................... REMOVAL........................................................................................................................... CLEANING ......................................................................................................................... INSPECTION ...................................................................................................................... BATTERY STORAGE.......................................................................................................... ACTIVATION OF A NEW BATTERY................................................................................... TIPS FOR CHARGING A USED BATTERY ........................................................................ CHARGING 2 OR MORE BATTERIES AT A TIME ............................................................ INSTALLATION .................................................................................................................. STARTING SYSTEM TROUBLESHOOTING..................................................................... STARTING SYSTEM TESTS ............................................................................................. ELECTRIC STARTER.......................................................................................................... REMOVAL .......................................................................................................................... INSTALLATION.................................................................................................................. 05-04-1 05-04-1 05-04-1 05-04-1 05-04-2 05-04-2 05-04-2 05-04-2 05-04-3 05-04-4 05-04-5 05-04-5 05-04-6 05-04-7 05-04-9 05-04-9 05-04-9 05-01-1 http://ReadManuals.com Section 05 ELECTRICAL Subsection 01 (TABLE OF CONTENTS) IGNITION SYSTEM ................................................................................................................ IGNITION SYSTEM TESTING PROCEDURE..................................................................... GENERAL............................................................................................................................ IGNITION SYSTEM TEST .................................................................................................. OTHER IGNITION SYSTEM PROBLEMS .......................................................................... IGNITION TIMING .............................................................................................................. SPARK PLUG ...................................................................................................................... DISASSEMBLY ................................................................................................................... HEAT RANGE...................................................................................................................... FOULING............................................................................................................................. SPARK PLUG ANALYSIS ................................................................................................... SPARK PLUG INSTALLATION ........................................................................................... NGK SPARK PLUG SYMBOL EXPLANATION .................................................................. 05-05-1 05-05-1 05-05-1 05-05-1 05-05-4 05-05-4 05-05-5 05-05-5 05-05-5 05-05-5 05-05-5 05-05-6 05-05-7 ELECTRIC SHIFT SYSTEM ..................................................................................................... GENERAL............................................................................................................................ TROUBLESHOOTING ......................................................................................................... DIAGNOSTIC/CALIBRATION MODE ................................................................................ PREPARATION ................................................................................................................... TESTING ............................................................................................................................. VALVE REMOVAL/INSTALLATION.................................................................................. SHIFTING VALVE ............................................................................................................... CLUTCHING VALVE ........................................................................................................... CLUTCH MODULATOR VALVE ......................................................................................... SENSOR REMOVAL/INSTALLATION............................................................................... STPS (SUB-TRANSMISSION POSITION SENSOR) ......................................................... GBPS (GEAR BOX POSITION SENSOR)........................................................................... VSS (VEHICLE SPEED SENSOR) ....................................................................................... VALVES/SOLENOIDS TESTS............................................................................................ CLUTCHING VALVE AND CLUTCH MODULATOR VALVE TESTS ................................. UPSHIFT/DOWNSHIFT SOLENOIDS TESTS .................................................................... SENSOR TESTS ................................................................................................................. STPS (SUB-TRANSMISSION POSITION SENSOR) AND GBPS (GEAR BOX POSITION SENSOR) TESTS ..................................................... VSS (VEHICLE SPEED SENSOR) TESTS........................................................................... UPSHIFT/DOWNSHIFT SWITCH TESTS .......................................................................... UPSHIFT/DOWNSHIFT SWITCH ....................................................................................... 05-06-1 05-06-1 05-06-1 05-06-1 05-06-2 05-06-3 05-06-9 05-06-9 05-06-9 05-06-10 05-06-11 05-06-11 05-06-11 05-06-11 05-06-13 05-06-13 05-06-13 05-06-15 05-01-2 http://ReadManuals.com 05-06-15 05-06-15 05-06-16 05-06-16 Section 05 ELECTRICAL Subsection 01 (TABLE OF CONTENTS) INSTRUMENTS AND ACCESSORIES .................................................................................. REMOVAL AND INSTALLATION...................................................................................... 12-VOLT AUXILIARY POWER OUTLET............................................................................ 12-VOLT POWER OUTLET ................................................................................................ HEADLIGHT ....................................................................................................................... IGNITION SWITCH ............................................................................................................ INDICATOR LIGHTS .......................................................................................................... MPEM................................................................................................................................. SPEEDOMETER ................................................................................................................. TESTS................................................................................................................................. 12-VOLT AUXILIARY POWER OUTLET............................................................................ 12-VOLT POWER OUTLET ................................................................................................ COOLING FAN OPERATION TEST ................................................................................... HEADLIGHT ....................................................................................................................... HI-LO SWITCH ................................................................................................................... INDICATOR LIGHTS .......................................................................................................... SPEEDOMETER ................................................................................................................. 05-07-1 05-07-1 05-07-1 05-07-1 05-07-1 05-07-2 05-07-3 05-07-3 05-07-3 05-07-5 05-07-5 05-07-5 05-07-5 05-07-5 05-07-5 05-07-6 05-07-6 05-01-3 http://ReadManuals.com Section 05 ELECTRICAL Subsection 02 (OVERVIEW) OVERVIEW GENERAL OPERATION INFORMATION The electrical system consist of different subsystems where some are inter-related: • MPEM (Multi-Purpose Electronic Module) • Charging System • Starting System • Ignition System • Electric Shift System • Gauges and Accessories The following gives an outline of each components. MPEM (Multi-Purpose Electronic Module) The MPEM itself is not a system, it is rather part of other systems in the electrical system. Therefore, the MPEM functions will be described specifically in the system into which it belongs. See below in the specific system for more information. The MPEM includes a micro-controller. It is basically responsible for interpreting/computing information, distribution of information, as a timed/untimed power source, managing the starting system, ignition system, the engine RPM limiter, the vehicle speed limiter and the transmission shifting timing and clutch modulation. It reads information through many external sensors to then compute the output actions to the related systems. The MPEM stores engine RPM limiter parameters that are applied to all the 5 gears in EACH High, Lo and Reverse. It also limits the vehicle speed to 15 km/h (9 MPH) in reverse operation whatever the gear. The MPEM controls the indicator lights display. It uses many sensors to acquaint the different system condition and THEN turns on the proper light. Besides monitoring the shifting system sensors, it also monitors the engine oil pressure and the coolant temperature. When oil pressure is too low, the engine light turns onand remain on. When the engine overheats, the engine light flashes. The MPEM features a diagnostic/setting mode with coded light display to troubleshoot and set the shifting system. The MPEM is equipped with an automatic power shut-down. This feature prevents the battery from losing its charge if ignition switch is left turned ON when the engine is not running. The MPEM also controls the accessories such as the speedometer, the cluster display, headlight intensity dimming and taillight. The module doesn't contain fuses since it is not easily accessible to the user. The module includes an internal overload protection device to supply circuits. An external fuse (in the fuse block) is used to protect the module supply circuit. The module does not control the loads connected directly to the battery, such as the fan, the DC accessory outlet, brake light and the optional winch. CHARGING SYSTEM It is the source of electrical energy to charge the battery and keep it at a full state of charge. The magneto is coupled to the engine and it transforms magnetic field into electric current through a 3 phase, “Y” wound stator on 18 poles. The magneto supplies unregulated AC current (alternative current) to the voltage regulator/rectifier. 1 2 4 3 VO1G0IA 1. 2. 3. 4. Magneto flywheel Stator Voltage regulator/rectifier Battery 05-02-1 http://ReadManuals.com Section 05 ELECTRICAL Subsection 02 (OVERVIEW) Voltage Regulator/Rectifier IGNITION SYSTEM A 3-phase full-wave shunt-type voltage regulator/ rectifier receives the AC voltage and rectifies (converts) it into DC. The voltage is also regulated to a maximum of 14.5 volts (DC). An IDI (Induction Discharge Ignition) system is utilized. The ignition system is made up of the following components: Battery The battery supplies the entire vehicle and particularly the MPEM which then distributes the current to many components. Therefore, DC current only is used in the entire electrical system. 2 1 4 3 STARTING SYSTEM When ignition switch is turned on and start/stop switch is pressed, the MPEM sends a signal to the starting solenoid. The battery then supply the starter through the starting solenoid to start the engine. 6 7 V01G0KA TYPICAL 1. Battery 2. Ignition switch 3. Start/stop switch 4. MPEM 5. Magneto flywheel 6. Trigger coil 7. Ignition coil 8. Spark plugs 2 1 8 5 3 Battery/Ignition Switch 4 The ignition switch allows battery to supply the MPEM for the ignition system. 5 Start/Stop Switch Besides enabling the starting system, the start/stop switch enables/disables the ignition system through the MPEM. 6 V01G0JA MPEM (Multi-Purpose Electronic Module) TYPICAL 1. Battery 2. Ignition switch 3. Start/stop switch 4. MPEM 5. Solenoid 6. Electric starter Engine can be started in any gear (from 1 to 5). Transmission lever must be on PARK or NEUTRAL to allow engine starting. However, an override mode allows to start the engine with the transmission lever in any position when holding any brake lever while pressing the start button. The MPEM is fed by the battery but the ignition is activated by the ignition switch. The MPEM receives the signals from the start/stop switch as well as from the trigger coil and takes action to the ignition system. The MPEM feeds the ignition coil so that a spark is produced at the proper moment. The MPEM controls the spark advance according to different pre-defined parameters. 05-02-2 http://ReadManuals.com Section 05 ELECTRICAL Subsection 02 (OVERVIEW) Magneto Flywheel/Trigger Coil Upshift/Downshift Switch The magneto flywheel features six protrusions that are working with the trigger coil. The trigger coil sends the signals to the MPEM to be processed for the ignition system. The MPEM also uses these signals to accurately calculate the engine RPM and among other things, control the maximum engine RPM. When the upshift or downshift button is pressed, the MPEM activates the proper solenoid (up or down) that moves the shared hydraulic valve. Ignition Coil/Spark Plugs The ignition coil receives its signal from the MPEM. The ignition coil steps up the input voltage for the IDI system and the end result is firing of the spark plugs. It is a double coil that provides a separate spark to each spark plug. The double control circuit in the MPEM works separately on each part of the ignition coil so, one ignition coil still could work while the other might be defective. ELECTRIC SHIFT SYSTEM An electronically controlled hydraulic shift system is utilized. It is made up of the following components: Sensor Many sensors are used to assist the MPEM to acquire the conditions where the vehicle is operated to allow the MPEM to compute and select the proper parameters accordingly. The VSS (vehicle speed sensor) supplies the MPEM with the vehicle speed. The GBPS (gearbox position sensor) supplies the MPEM with the gear position (1, 2, 3, 4, 5). The STPS (sub-transmission sensor) supplies the MPEM with the sub-transmission position (P, R, N, H, L). The brake light switch is also used by the MPEM to allow engine starting in other position than PARK and NEUTRAL. Other sensors are utilized but they are not related to the shifting system. MPEM 3 1 The MPEM is responsible to properly engage/ disengage/modulate the clutch and to shift gears. Although the shift system is performed by hydraulic valves on mechanical components, it is electronically-controlled through the MPEM. The MPEM uses pre-defined parameters to change engine RPM, modify the engine timing curve, control the shift timing and modulation depending on the sensors reading to accomplish an accurate shifting adapted to each specific condition. 4 5 2 The solenoids/valves combo are the electro-hydraulic devices that actually activate the mechanical operations. Besides the shifting valve (upshift/downshift), there is a clutching valve that pushes an actuator to open and close the clutch and at last, a clutch modulator valve that regulates the oil pressure to control the speed at which the clutch is opened and released (modulation). The hydraulic system is enclosed in the engine/transmission case and the same oil as the engine is used for the hydraulic valves. 6 V01G0LA 1. 2. 3. 4. 5. 6. Solenoid/Valve Battery Ignition switch Upshift/downshift switch Sensor MPEM Solenoid/valve Battery/Ignition Switch The ignition switch allows battery to supply the MPEM. The MPEM then supplies the solenoids for the shifting system. GAUGES/ACCESSORIES The battery supplies the DC current to all accessories. Some are fed directly by the battery or through the fuse block and some are fed through the MPEM. 05-02-3 http://ReadManuals.com Section 05 ELECTRICAL Subsection 02 (OVERVIEW) GENERAL TESTING/TROUBLESHOOTING INFORMATION The following gives general electrical-related problems. For specific system-related problems, refer to proper system section. It is possible that a component seems to operate in static condition but in fact, it is defective. In this case, the best way to solve this problem is to remove the original part and replace it with one which is in good condition. IMPORTANT: When having to solve an electrical problem, the first thing to do is to check battery condition as well as its cables and connections. Never use a battery charger to replace temporarily the battery, as it may cause the MPEM to work erratically or not to work at all. Also ensure the ignition switch is turned on. Check related-circuit fuse condition with an ohmmeter — visual inspection could lead to false results — and solidity (close to battery). Also visually examine harness and connections. CAUTION: It is recommended to always disconnect the battery when replacing any electric or electronic parts. To perform verifications, a good quality multimeter such as Fluke 73 (P/N 529 022 000) should be used. Pay particular attention to ensure that pins are not out of their connectors or out of shape. The troubleshooting procedures cover problems not resulting from one of these causes. m WARNING Ensure all terminals are properly crimped on wires and connector housings are properly fastened. Before replacing a MPEM, always check electrical connections. Make sure that they are very tight and they make good contact and that they are corrosionfree. A “defective module” can be repaired simply by unplugging and replugging the MPEM. The voltage and current might be too weak to go through dirty wire pins. Check carefully if posts show signs of moisture, corrosion or if they look dull. Clean pins properly and then coat them with silicon-based dielectric grease or other appropriate lubricant (except if otherwise specified) when reassembling them. See connectors information below. It is recommended to always disconnect the battery when replacing the any electric or electronic part(s). IMPORTANT: In usual electric circuit, the battery supplies a switch which then supplies the electric consumer. Therefore the switch opens and closes the positive side of the circuit. However, in our electrical system, the battery supplies the electric consumer then the switch completes the circuit to the ground. So the switch opens and closes the negative side of the circuit. This is particularly true with the MPEM. The MPEM switches the ground to complete the electrical circuits it controls. Take this into account when troubleshooting the electrical system. Pay attention to grounding wires. Do not mix grounds. It may affect the MPEM operation. Checking for Shorts Between 2 Wires When checking continuity of a wire in a circuit, wires should be checked for short circuit as follows. Make sure to isolate circuit wires by unplugging connectors. Let’s suppose that the circuit to be checked has a RED and a BLACK wire. Using an ohmmeter, measure the resistance between the RED and the BLACK wire. The resistance should be infinite (0 L). Otherwise, there is a short circuit between both wires. We must therefore identify and correct the fault. SERVICING PACKARD CONNECTORS To remove terminal from Packard connector housing, use Snap-on TT600-4 tool. F01B1JA 05-02-4 http://ReadManuals.com Section 05 ELECTRICAL Subsection 02 (OVERVIEW) SERVICING DEUTSCH CONNECTORS – Insert a 4.8 mm (0.189 in) wide screwdriver blade inside the front of the contact cavity. – Pry back the retaining tab while gently pulling wire back until contact is removed. Waterproof Connector Housing Female and Male Connector Housing To remove: – Using a long nose pliers, pull out the lock. 1 V01G0QA 1 FEMALE CONNECTOR HOUSING 1. Retaining tab V01G0OA 1 FEMALE HOUSING 1. Female lock To install: – For insertion of signal contact, make sure the lock is removed. – Insert contact into appropriate circuit cavity and push as far as it will go. – Pull back on the contact wire to be sure the retention fingers are holding the contact. – After all required contacts have been inserted, the lock must be installed. CAUTION: Never apply dielectric grease on contacts in plug connector. The use of dielectric grease will make the seal swollen and move out of the connector. Do not lubricate. SERVICING AMP CONNECTORS (26 PINS) When servicing electrical system, special care must be taken when working with AMP plug connectors in order to prevent any malfunction of the system. V01G0PA 1 MALE HOUSING 1. Male lock NOTE: Before extraction, push wire forward to relieve pressure on retaining tab. 05-02-5 http://ReadManuals.com Section 05 ELECTRICAL Subsection 02 (OVERVIEW) Identification Each plug assembly is mechanically keyed to mate only with identical mechanical keyed header on the MPEM. Parts 5 9 1 2 4 7 3 F00H0WA 1. 2. 3. 4. 5. 6. 7. 8. 9. 6 8 Plug assembly Cover assembly Mating seal Wedge lock Header assembly Seal plug Power wire Signal wire Locking tabs Connectors Each connector is identified by a unique number from 2 to 3, number 2 being the upper connector. The number is found on the MPEM close to the connector. NOTE: There is no number 1. 2 1 V0IG0MA TYPICAL 1. AMP connectors 2. Identification numbers F00H12A 1 TYPICAL 1. Mechanically keyed To remove plug connector from the header assembly on the MPEM, press both tabs and pull plug. Wire Selection and Preparation The size of the wires must be 20 to 16 AWG with a wire insulation diameter having a minimum dimension of 1.7 mm (0.067 in) and a maximum dimension of 2.78 mm (0.106 in). The wire strip length shall be 5.1 mm (13/64 in). NOTE: When stripping wires, ensure conductor is not nicked, scrapped or cut. Wire stripping tool jaws may leave marks on the surface of the wire insulation. If these marks occur at the location of the wire seal, leakage may result. Insulation surface within 25 mm (1 in) from the tip of the contact must be smooth. 05-02-6 http://ReadManuals.com Section 05 ELECTRICAL Subsection 02 (OVERVIEW) Contact Crimping All contacts in AMP plug connectors must be crimped using the crimping tool (P/N 295 100 164). CAUTION: If contacts are not crimped using the proper crimping tool, the wire seal may be damaged. CAUTION: Do not pierce the diaphragm with a sharp point for electrical troubleshooting. The resulting pin holes in the insulation will allow moisture to penetrate the system and possibly result in system failure. Contact Removal Signal Contact Insert a screwdriver blade between the mating seal and the wedge lock tab. Release the plug locking tab and at the same time, pry open the wedge lock to the open position. CAUTION: The wedge lock should never be removed from the housing for insertion or removal of the signal wire contacts. 1 2 F00B0EA CRIMPING TOOL (P/N 295 100 164) All circuits are sealed by a diaphragm in the rubber wire seal. When installing wire contacts in plug connector, the diaphragm is pierced as the contact passes through it. If the diaphragm is pierced and the cavity is not used, install a seal plug, large end first, into circuit cavity as far as it will go. NOTE: It is suggested that all unused circuit cavities be sealed with a seal plug, even if they are not pierced. 1 F00H0OB 1. Wedge lock 2. Locking tab 1 F00H10A 1. Seal plug 2. Wire seal 2 F00H0PA 1. Wedge lock in open position 05-02-7 http://ReadManuals.com Section 05 ELECTRICAL Subsection 02 (OVERVIEW) While rotating the wire back and forth over a half turn (1/4 turn in each direction), gently pull the wire until the contact is removed. Insert a 4.8 mm (0.189 in) wide screwdriver blade inside the front of the contact cavity. 1 2 F00H0QA 1. Rotate wire back and forth 2. Pull wire Power Contact NOTE: The wedge lock must be removed to extract power contact. Pull both locking tabs and remove wedge lock from plug assembly. F00H0ZA Pry back the retaining tab while gently pulling wire back until contact is removed. 1 Contact Installation F00H0RA 1. Pull locking tab (both sides) Before extraction, push wire forward to relieve pressure on retaining tab. For insertion of signal contact, make sure the wedge lock is in the open position. NOTE: For insertion of power contact, the wedge lock may or may not be on the open position. Insert contact into appropriate circuit cavity and push as far as it will go. Pull back on the contact wire to be sure the retention fingers are holding the contact. After all required contacts have been inserted, the wedge lock must be closed to its locked position. CAUTION: Never apply dielectric grease on contacts in plug connector. The use of dielectric grease will create hydrolock and poor sealing. 05-02-8 http://ReadManuals.com Section 05 ELECTRICAL Subsection 02 (OVERVIEW) Apply a thin coat of DEOXIT contact lubricant to the pins of the header on the MPEM only. 1 4 2 5 3 6 V01G02A 1. 2. 3. 4. 5. 6. 1 F00H11A TYPICAL 1. Apply a thin coat of DEOXIT contact lubricant CAUTION: Do not apply lubricant excessively. Care must be taken so that the lubricant will not come in contact with the mating seal; the seal may loose its sealing capacities. Do not apply lubricant on contacts inside plug connector. Ignition system Accessories (power outlet and auxiliary supply) Solenoids Fan MPEM (Multi-Purpose Electronic Module) Charging system IDENTIFICATION OF MAJOR CONNECTOR PINS AMP Connectors of MPEM IDENTIFICATION OF FUSE BLOCK ON VEHICLE Fuses are located in engine compartment on LH side of battery. 28 25 24 23 16 15 9 8 1 F04H6FA V01G04A 1 2 1. Battery 2. Fuse holder Fuses are identified by a number located beside the fuses. 05-02-9 http://ReadManuals.com Section 05 ELECTRICAL Subsection 02 (OVERVIEW) AMP Connectors of Wiring Harness 9 F04H6GA 05-02-10 http://ReadManuals.com Section 05 ELECTRICAL Subsection 02 (OVERVIEW) Other Deutsch and Packard Connectors Pin-Out DEUTSCH B A A A C A B B B B C B 1 A B C D B C A B 1 2 C B A B A A D A B C A D 1 2 PACKARD A C B A C D V01G0ES B B FE D C 21 C B A C D 4 3 4 3 1 2 A 1 2 3 A 3 B C B 3 A B B A 2 1 B A B A C 1 2 A B B C 85 87 87a 86 30 A A C C A D A B B A 2 C A CB A B B D 6 5 4 1 2 3 A 1 2 3 4 5 6 FE 6 5 4 A CB 12 11 10 9 8 7 12 11 10 9 8 7 1 2 3 4 5 6 05-02-11 http://ReadManuals.com Section 05 ELECTRICAL Subsection 03 (CHARGING SYSTEM) CHARGING SYSTEM TESTING PROCEDURE NOTE: First, ensure that battery is in good condition prior to performing the following test using a current inductive ammeter such as Snap-on MT 110. If the battery is regularly discharged, check charging system fuse no. 6 condition. The voltage regulator/rectifier could be the culprit of a blown fuse. To check, simply disconnect the voltage regulator/rectifier from the circuit. If the fuse still burns, check for a defective wire. CAUTION: Do not use a higher rated fuse as this can cause severe damage. Voltage Regulator/Rectifier STATIC TEST: CONTINUITY 1. Due to internal circuitry, there is no static test available. DYNAMIC TEST NOTE: If it is continually necessary to add distilled water to the battery, this indicates an over voltage situation, requiring replacement of the voltage regulator/rectifier. If, on the other hand, the battery will not stay charged, the problem can be any of the charging circuit components. If these all check good, you would be accurate in assuming the problem to be in the voltage regulator/rectifier. If there is no charging at the battery with the preceding voltage test, the following test can also be performed. Voltage Regulator/Rectifier Output Test Remove the charging system fuse. Connect the negative probe on engine and the positive probe in the charging system fuse location where the value is 0 Vdc. The obtained value in the other location should be 12 Vdc. Place shifter lever on NEUTRAL position and start engine. The obtained value should be between 4 and 7 Vdc. Current Test Proceed as follows: – Start engine. – Lay an inductive ammeter on positive cable of battery. – Bring engine to approximately 3500 RPM. Depending on battery charge, current reading should be approximately 5 amperes. If not, check magneto output prior to concluding that voltage regulator/rectifier is faulty. Voltage Test Proceed as follows: – Start engine. – Connect a multimeter to battery posts. Set multimeter to Vdc scale. – Bring engine to approximately 5500 RPM. If multimeter reads over 15 volts, voltage regulator/ rectifier is defective. Replace it. NOTE: Whatever the voltmeter type used (peak voltage or RMS), the voltage must not exceed 15 V. A faulty voltage regulator/rectifier will allow voltage to exceed 15 V as engine speed is increased. V01G0SA NOTE: If the voltage regulator/rectifier is within the specification, the wiring harness between the voltage regulator/rectifier and battery is defective. If the voltage regulator/rectifier is out of specification and the stator test good, the voltage regulator/ rectifier is defective. 05-03-1 http://ReadManuals.com Section 05 ELECTRICAL Subsection 03 (CHARGING SYSTEM) Stator STATIC TEST: CONTINUITY 1. Disconnect the magneto wiring harness connector. Connect the 6-pin magneto test harness (P/N 295 000 136) on the engine con-nector. With a good multimeter (preferably a digital one), place the 2 meter test probes onto the stator wire leads AC-1 and AC-2 of the stator. The resistance should be 0.4 Ω ± 0.1. F01H4WA STATIC TEST: INSULATION With the stator leads disconnected, insert either meter test probe onto AC-1 and ground the other meter test probe to the engine or the stator iron core and note the reading. There should be no continuity (infinity) between the stator insulated coils and ground. If there is a reading, the stator coils and/or the wiring from the coils is grounded and needs to be replaced/repaired respectively. YL YL YL BK BK-YL YL-WH YL YL YL BK BK-YL YL-WH F01H4YA TYPICAL TYPICAL 2. Place either meter test probe into the remaining stator lead (AC-3) and note the resistance (same as step no. 1). If the readings are out of specification, the stator will need to be replaced. DYNAMIC TEST 1. Unplug magneto connector at engine. 2. Connect the 6-pin magneto test harness (P/N 295 000 136) between the unplugged connectors. 3. Connect test probes of the multimeter to two of the YELLOW wires of the 6-pin magneto harness adapter. 4. Set multimeter to Vac scale. 5. Start and rev engine. The obtained value should be between 10 and 12 Vac. 6. If the stator is out of specification, replace it. YL YL YL BK BK-YL YL-WH F01H4XA TYPICAL 05-03-2 http://ReadManuals.com Section 05 ELECTRICAL Subsection 04 (STARTING SYSTEM) STARTING SYSTEM BATTERY TROUBLESHOOTING SYMPTOM: DISCHARGED OR WEAK BATTERY CAUSE 1. Battery posts and/or cable terminal oxidized. Clean and coat with dielectric grease. 2. Loose or bad connections. Check wiring and connector cleanliness, damaged or short circuit. 3. Faulty battery (sulfated, doesn’t keep a full charge, damaged casing, loose rectifier). 1 REMEDY A17E0JA Replace. TYPICAL 1. Specific gravity 1.265 4. Charging system fuse burnt or faulty voltage regulator/rectifier.* First check charging system generator coil. If it is in good condition replace fuse or rectifier. 5. Faulty charging system generator coil.* Replace. * To test charging system, refer to CHARGING SYSTEM 05-03. A hydrometer measures the charge of a battery in terms of specific gravity of the electrolyte. Most hydrometers give a true reading at 21°C (70°F). In order to obtain correct readings, adjust the initial reading by adding .004 points to the hydrometer readings for each 5.5°C (10°F) above 21°C (70°F) and by subtracting .004 point for every 5.5°C (10°F) below 21°C (70°F). This chart will be useful to find the correct reading. BATTERY TESTING ELECTROLYTE TEMPERATURE There are 2 types of battery tests: unloaded and loaded. An unloaded test is made on a battery without discharging current. It is the simplest and commonly used. However, be aware that the voltage test can be good while the battery has not enough power to start the engine. A load test gives more accuracy of the battery condition. OPERATION TO PERFORM °C °F 38 100 32 90 27 80 .004 Unload Test 21 70 correct reading Check charge condition using either a hydrometer or a multimeter. With a multimeter, voltage readings appear instantly to show the state of charge. Always respect polarity. A fully charged battery will have a reading of 12.6 Vdc. A hydrometer more accurately measures the charge of a battery in terms of specific gravity of the electrolyte. A fully charged battery will have a specific gravity between 1.265 to 1.280. 16 60 .004 10 50 .012 add .008 .008 subtract 4 40 .012 -1 30 .016 to the reading from the reading EXAMPLE NO. 1 EXAMPLE NO. 2 Temperature below 21°C (70°F): Hydrometer reading: 1.250 Electrolyte temperature: - 1°C (30°F) Subtract .016 Sp. Gr. Corrected Sp. Gr. is 1.234 Temperature above 21°C (70°F): Hydrometer reading: 1.235 Electrolyte temperature: 38°C (100°F) Add .012 Sp. Gr. Corrected Sp. Gr. is 1.247 05-04-1 http://ReadManuals.com Section 05 ELECTRICAL Subsection 04 (STARTING SYSTEM) Load Test INSPECTION This is the best test of battery condition under a starting load. Use a load testing device that has an adjustable load. Apply a load of 3 times the ampere-hour rating of the battery. At 14 seconds into the test, check battery voltage; if battery is in good condition, it will have at least 10.5 Vdc. Visually inspect battery casing for cracks or other possible damage. If casing is damaged, replace battery and thoroughly clean battery rack with water and baking soda. REMOVAL Remove seat. Disconnect negative BLACK cable first then positive cable. m WARNING m WARNING Should the battery casing be damaged, wear a suitable pair of non-absorbent gloves when removing the battery by hand. Inspect battery rack mounting. Inspect battery posts for security of mounting. Inspect for cracked or damaged battery caps, replace defective caps. m WARNING Always respect this order for disassembly; disconnect BLACK negative cable first. Electrolyte or fuel vapors can be present in engine compartment and a spark may ignite them and possibly cause personal injuries. Battery caps do not have vent holes. Make sure that vent tube is not obstructed. Remove the holding straps. Pull out vent tube from frame. Remove battery from vehicle being careful not to tilt it so that electrolyte flows out of vent tube. m WARNING Electrolyte is poisonous and dangerous. Avoid contact with eyes, skin and clothing. Wear protective eyeglasses and a suitable pair of nonabsorbent gloves when removing the battery by hand. CAUTION: Should any electrolyte spillage occur, immediately wash off with a solution of baking soda and water. CLEANING m WARNING Electrolyte is poisonous, dangerous and explosive. It contains sulfuric acid and can cause severe burns. Avoid contact with eyes, skin and clothing. Clean the battery casing, caps, cables and battery posts using a solution of baking soda and water. Remove corrosion (if so) from battery cable terminals and battery posts using a firm wire brush. Rinse with clear water and dry well. BATTERY STORAGE Disconnect and remove battery from the vehicle (see above). Check electrolyte level in each cell, add distilled water up to upper level line. CAUTION: Do not overfill. The battery must always be stored in fully charged condition. If required, charge until specific gravity of 1.260 is obtained. CAUTION: Battery electrolyte temperature must not exceed 50°C (122°F). The casing should not feel hot. Clean battery terminals and cable connections using a wire brush. Apply a light coat of dielectric grease (P/N 413 701 700) or petroleum jelly on terminals. Clean battery casing and caps using a solution of baking soda and water. Do not allow cleaning solution to enter battery, otherwise it will destroy the electrolyte. Rinse battery with clear water and dry well using a clean cloth. Store battery on a wooden shelf in a cool dry place. Such conditions reduce self-discharging and keep fluid evaporation to a minimum. 05-04-2 http://ReadManuals.com Section 05 ELECTRICAL Subsection 04 (STARTING SYSTEM) During the storage period, recheck electrolyte level and specific gravity readings at least every 40 days. As necessary, keep the battery at its upper level line and near full charge as possible (trickle charge). 2. Remove caps and fill battery to UPPER LEVEL line with electrolyte (specific gravity: 1.260 at 20°C (68°F)). 3. Allow the battery to stand for 30 minutes MINIMUM so that electrolyte soaks through battery cells. 4. Allow gas bubbles to escape by lightly shaking battery by hand. ACTIVATION OF A NEW BATTERY m WARNING Never charge or boost battery while installed on vehicle. CAUTION: Prior to charging the battery, always remove it from the vehicle to prevent electrolyte spillage. A new battery is factory fresh dry charged. For storage purposes, it is fitted with a temporary sealing tube. Do not remove the sealing tube or loosen battery caps unless activation is desired. In case of accidental premature removal of caps or sealing tube, battery should be given a full charge. Perform the following operations anytime a new battery is to be installed. 1. Remove the sealing tube from the vent elbow. Install vent tube, included in the battery kit, to battery elbow. m WARNING A17E0HA 5. Readjust the electrolyte level to the UPPER LEVEL line. 6. Connect a 2 A battery charger for 10 to 20 hours. CAUTION: If charging rate raises higher than 2.4 A reduce it immediately. If cell temperature rises higher than 50°C (122°F) (if the casing feels hot) discontinue charging temporarily or reduce the charging rate. m WARNING Failure to remove the sealing tube could result in an explosion. Gases given off by a battery being charged are highly explosive. Always charge in a well ventilated area. Keep battery away from cigarettes or open flames. Always turn battery charger off prior to disconnecting cables. Otherwise a spark will occur and battery might explode. 1 A17E0FA 7. Disconnect battery charger. 8. Test battery state of charge. Use a hydrometer. 9. Let battery settle for 1 hour. 10. Allow gas bubbles to escape by lightly shaking battery. 11. Readjust electrolyte level. 12. Reinstall caps and clean any electrolyte spillage using a solution of baking soda and water. 1. Battery electrolyte 05-04-3 http://ReadManuals.com Section 05 ELECTRICAL Subsection 04 (STARTING SYSTEM) 1 A17E0LA 1. Baking soda CAUTION: Do not allow cleaning solution to enter battery interior since it will destroy the electrolyte. NOTE: It is recommended to verify the battery charge once a month. If necessary, fully charge battery. TIPS FOR CHARGING A USED BATTERY m WARNING Prior to charging the battery, always remove it from vehicle. For best results, battery should be charged when the electrolyte and the plates are at room temperature. A battery that is cold may not accept current for several hours after charging has begun. Do not charge a frozen battery. If the battery charge is very low, the battery may freeze. If it is suspected to be frozen, keep it in a heated area for about 2 hours before charging. m WARNING Do not place battery near open flame. The time required to charge a battery will vary depending on some factors such as: – Battery temperature: The charging time is increased as the temperature goes down. The current accepted by a cold battery will remain low. As the battery warms up, it will accept a higher rate of charge. – State of charge: Because the electrolyte is nearly pure water in a completely discharged battery, it cannot accept current as well as electrolyte. This is the reason the battery will not accept current when the charging cycle first begins. As the battery remains on the charger, the current from the charger causes the electrolytic acid content to rise which makes the electrolyte a better conductor and then, the battery will accept a higher charging rate. – Type of charger: Battery chargers vary in the amount of voltage and current that they can supply. Therefore, the time required for the battery to begin accepting measurable current will also vary. Charging a Very Flat or Completely Discharged Battery Unless this procedure is properly followed, a good battery may be needlessly replaced. – Measure the voltage at the battery posts with an accurate voltmeter. If it is below 10 volts, the battery will accept current at very low rate, in term of milliamperes, because electrolyte is nearly pure water as explained above. It could be some time before the charging rate increases. Such low current flow may not be detectable on some charger ammeters and the battery will seem not to accept any charge. – Exceptionally for this particular case, set the charger to a high rate. NOTE: Some chargers have a polarity protection feature which prevents charging unless the charger leads are connected to the correct battery terminals. A completely discharged battery may not have enough voltage to activate this circuitry, even though the leads are connected properly. This will make it appear that the battery will not accept a charge. Follow the charger manufacturer’s instruction on how to bypass or override this circuitry so that the charger will turn on and charge a low-voltage battery. – Since the battery chargers vary in the amount of voltage and current they provide, the time required for the battery to accept measurable charger current might be up to approximately 10 hours or more. – If the charging current is not up to a measurable amount at the end of about 10 hours, the battery should be replaced. 05-04-4 http://ReadManuals.com Section 05 ELECTRICAL Subsection 04 (STARTING SYSTEM) – If the charging current is measurable before the end or at the end of about 10 hours, the battery is good and charging should be completed in the normal manner. – It is recommended that any battery recharged by this procedure be load tested prior to returning it to service. CHARGING 2 OR MORE BATTERIES AT A TIME INSTALLATION Reinstall battery and fasten making sure to reinstall the vent tube. m WARNING Connect positive RED cable first then negative cable. Always connect RED positive cable first. NOTE: Place the positive RED cable between holding straps and battery. Connect all positive battery posts together and use a charger with a capacity (rated) equal to number of battery to be charged. 1 - + V01G05A A17E0PA - + 1 1. Cable between battery and strap TYPICAL 1. Two batteries connected in parallel 05-04-5 http://ReadManuals.com Section 05 ELECTRICAL Subsection 04 (STARTING SYSTEM) STARTING SYSTEM TROUBLESHOOTING SYMPTOM CAUSE REMEDY Starter does not turn. Ignition switch is in the OFF position. Turn switch in the ON position. Burnt fuse. Check solenoid fuse, MPEM fuse and wiring condition. Transmission is not set on the Park or Neutral. Set transmission either in Park or Neutral or use the override mode. Poor contact of battery terminal(s) or ground cable connections. Clean and tighten terminal(s). Weak battery. Recharge battery. Poor contact or open circuit of: start/stop button ignition switch or starting solenoid. Check and replace defective part. STPS (Sub Transmission Position Sensor) is defective. Check STPS and wiring condition. MPEM is defective. Check wiring. Change MPEM. Engine mechanical problem (ensure that other electric components are good). Communicate with the Service Representative. Poor contact of battery terminal(s). Clean and tighten terminal(s). Poor battery ground cable connection. Clean and tighten. Burnt or poor contact of solenoid switch contact disc. Replace starting solenoid. Poor contact of brush. Straighten commutator and brush or replace electric starter. Burnt commutator. Turn commutator in a lathe or replace electric starter. Worn commutator segments. Undercut mica or replace electric starter. Shorted armature. Replace electric starter. Weak brush spring tension. Replace electric starter. Weak magnet. Replace electric starter. Worn bushings. Replace electric starter. Weak battery. Recharge or replace battery. Worn clutch pinion gear. Replace electric starter. Defective clutch. Replace electric starter. Poor movement of clutch on splines. Replace electric starter. Worn clutch bushing. Replace electric starter. Worn ring gear. Recharge ring gear. Shorted starting solenoid switch winding. Replace starter solenoid. Melted solenoid contacts. Replace starter solenoid. Sticking or defective starter clutch. Lubricate or replace electric starter. Starter turns; but does not crank the engine. Starter turns, but overrunning clutch pinion does not mesh with ring gear. Starter motor keeps running. 05-04-6 http://ReadManuals.com Section 05 ELECTRICAL Subsection 04 (STARTING SYSTEM) STARTING SYSTEM TESTS GENERAL First ensure the problem is not related to engine mechanical components. Try cranking the engine with the rewind starter. If it does not turn, perform the necessary repair. Otherwise, test the starting system. Causes of troubles are not necessarily related to starter but may be due to a burnt fuse (solenoids or MPEM) faulty battery, start/stop switch, ignition switch, start/stop switch, STPS (Sub-Transmission Position Sensor), starting solenoid, electrical cables or connections or the MPEM. Check these components before removing starter. Consult also the Starting System Troubleshooting table above for a general view of possible problems. STPS (Sub-Transmission Position Sensor) Ensure the transmission lever is either in PARK or in NEUTRAL. To quickly check the STPS, temporarily bypass it by pressing any brake lever and try to start engine. If engine turned, the STPS can be suspected. Refer to ELECTRIC SHIFT SYSTEM, section 05-06. If it tests good, continue the other tests. Start/Stop Switch If engine does not turn when pressing the start/ stop button, test the switch as follows. Remove steering cover and unplug the multifunction switch connector. m WARNING 1 Short circuiting electric starter is always a danger, therefore disconnect the battery ground cable before carrying out any kind of maintenance on starting system. Do not place tools on battery. Fuses Make sure the solenoids fuse no. 3 (includes the starting system) and the MPEM fuse no. 5, in the fuse block, are in good condition. If they test good, continue the other tests. Battery V01G0TA 2 To check battery condition, refer to Battery above. If it tests good, continue the other tests. 1. Unplug connector 2. RED wiring harness Ignition Switch Using a multimeter, measure the resistance between the following wires. A quick test to validate it is working. If the lights turn on in the cluster display just after turning on the key, the ignition switch is good. Otherwise, refer to IGNITION SYSTEM, section 05-05 for testing procedure. If it tests good, continue the other tests. POSITION WIRE Switch released Switch depressed and held RESISTANCE Infinite (0.L) BLACK and YELLOW 0.4 Ω max. Replace switch if defective. If switch tests good, check wiring going to MPEM. If it tests good, continue the other tests. 05-04-7 http://ReadManuals.com Section 05 ELECTRICAL Subsection 04 (STARTING SYSTEM) Starting Solenoid NOTE: Solenoid is located on frame, behind fuse block. Ensure the solenoid receives electric current as follows. Using a multimeter, measure the voltage between the following wires when pressing the start/stop button with the ignition key turned on. WIRE COLOR WHITE/RED CONNECTOR Position B On wiring connecting to solenoid — Battery ground post (-) VOLTAGE Electrical Cables or Connections Check all connections, cables and wires. Tighten any loose cables. Replace any chafe wires/cables. If wiring and connectors are good, check the electric starter. See below. Electric Starter 12 Vdc BLACK If solenoid test good, check the electric starter. If starter test good, the MPEM can be suspected. See MPEM below. If solenoid does not properly receive current, the MPEM can be suspected. See MPEM below. If voltage is adequate, test the MPEM as follows. Using a 12 V test light, connect its positive wire to the positive post of the battery. Connect the negative wire of the test light to the YELLOW/RED wire connecting to the solenoid. When pressing the start/stop button with the ignition key turned on, the test light must turn on. Otherwise, it indicates a defective MPEM or wiring going to the MPEM. If solenoid receives current, test the solenoid as follows. Disconnect large cables from solenoid. Inspect connections and clean as necessary. Solenoid condition can be checked with an ohmmeter. Install test probes on large connectors of solenoid. Measure resistance when current is applied to small connectors; if it is more than a few ohms, replace solenoid. NOTE: Starter is located behind LH side panel. Remove LH side panel to give access to the starter. Refer to BODY/FRAME, section 10-02. Using boosting cables, carefully supply current from the battery directly to the starter. Connect the BLACK negative cable first. Then connect the remaining jump cable from the battery then to the starter. If starter now turns ensure the cables/connections from battery to solenoid and to starter are in good condition. If they test good, the MPEM can be suspected. See MPEM below. If starter does not turn, check for mechanical problems in the starter. MPEM When other components have been tested above and are good, the MPEM can be suspected. Ensure wiring and connectors are in good condition prior to replacing the MPEM. 05-04-8 http://ReadManuals.com Section 05 ELECTRICAL Subsection 04 (STARTING SYSTEM) ELECTRIC STARTER REMOVAL Turn OFF ignition switch. Disconnect BLACK cable ground connection from battery. m WARNING Always disconnect ground cable first and reconnect last. Disconnect RED cable connection from battery. Clean starter area. Remove LH side panel. Refer to BODY/FRAME 10-02. Remove starter mount screws. Pull starter out. INSTALLATION Installation is essentially the reverse of removal procedure. However, pay particular attention to the following. Make sure that starter and engine mating surfaces are free of debris. Serious trouble may arise if starter is not properly aligned. Properly torque starter screws. Connect the RED battery cable to the starter and torque nut to 6 N•m (53 lbf•in). Apply dielectric grease on terminal and nut. First connect RED cable to battery then connect the BLACK cable. m WARNING Always connect RED positive cable first then BLACK negative cable last. Whenever connecting the RED positive cable to the starter motor make sure the battery cables are disconnected to prevent electric shock. Test starter operation. 05-04-9 http://ReadManuals.com Section 05 ELECTRICAL Subsection 05 (IGNITION SYSTEM) IGNITION SYSTEM IGNITION SYSTEM TESTING PROCEDURE GENERAL IGNITION SYSTEM TEST Ignition Problems Safety Precautions When dealing with ignition problems, the following items should be checked in this order. After one item has been checked and it is found not to be the problem, continue with the next item. 1. Ignition and MPEM (Multi-Purpose Electronic Module) fuses condition. 2. Spark occurrence. 3. Battery condition. 4. Ignition switch. 5. Trigger coil. 6. Ignition coil. 7. MPEM. Intermittent Ignition Problems In dealing with intermittent problems there is no easy diagnosis. For example, problems that occur only at normal engine operating temperature have to be tested under similar conditions. In most cases of temperature and/or vibration failure, only parts replacement might solve the problem as most of these failures return to normal when engine is not running. Multiple Problems There is always the possibility of more than one faulty part. If after a component has been replaced, the problem still persists, carefully repeat the complete test procedure to find the other faulty part. m WARNING To prevent powerful electric shocks while cranking engine, neither touch any electronic ignition components (ignition coil, high tension wire, wire harness, etc.) nor tester lead clips. Also make sure that tester leads do not touch any metallic object. Ignition and MPEM Fuse Condition Check ignition fuse no. 1 and MPEM fuse no. 5 condition. Replace burnt fuse as necessary. Spark Occurrence Remove one spark plug and connect to its cable. While holding the spark plug against a metallic part of the engine, start the engine. Look for a spark at the spark plug tip. Proceed the same with the other spark plug. Replace defective spark plug. NOTE: If a spark plug is found defective, replace both spark plugs at the same time. Both spark plugs must be checked individually. If one works and the other isn’t, try another spark plug. Keep in mind that a spark plug might test good this way while not being able to work properly under combustion chamber mixture and pressure. If known good spark plug(s) do(does) not work, continue the other tests. NOTE: Spark occurrence can be checked with a tester such as Superex Canada Ltd P/N 15-785 or the equivalent. Battery Condition A battery must be present in the vehicle to allow the ignition system to work. Also, at least 8 V is required at the MPEM for proper operation. Check battery voltage. 05-05-1 http://ReadManuals.com Section 05 ELECTRICAL Subsection 05 (IGNITION SYSTEM) Ignition switch A quick test to validate it is working. If the lights turn on in the cluster display just after turning on the key, the ignition switch is good. Test Ensure the MPEM fuse no. 5 is in good condition. Disconnect ignition switch. Measure voltage between RED/GREEN supply wire and the battery ground. If voltage is lower than battery voltage, test the wiring. If voltage is good, test switch. V01G0VA Replace switch if defective. If switch is good, test wiring going to MPEM. If it tests good continue the other tests. Trigger Coil IMPORTANT: If wires of trigger coil are inverted, no spark will take place. Ensure BLACK/YELLOW wire is in cavity E of connector. The trigger coil is not adjustable. V01G0UA Use a multimeter and measure the resistance between the following wires. POSITION WIRE RESISTANCE OFF RED/GREEN and RED/YELLOW Infinite (0.L) OFF RED/GREEN and RED/VIOLET Infinite (0.L) ON (w/lights) RED/GREEN and RED/VIOLET 0.1 Ω max. ON (w/o lights) RED/GREEN and RED/YELLOW 0.1 Ω max. STATIC TEST: CONTINUITY Check resistance with a high-sensitivity ohmmeter. 1. Disconnect the Deutsch 6-pin connector at engine. 2. Install the 6-pin magneto harness adapter (P/N 295 000 136). F01B28A 3. Connect one of the multimeter leads to the WHITE/YELLOW wire of the 6-pin magneto harness adapter. 4. Connect the other multimeter lead to the BLACK wire of the 6-pin magneto harness adapter. 5. Measure resistance; it should be between 190 - 300 ohms. 05-05-2 http://ReadManuals.com Section 05 ELECTRICAL Subsection 05 (IGNITION SYSTEM) Ignition Coil 2 2 4 3 1 V01G0WA 1. 2. 3. 4. V01G0XA Multimeter 6-pin magneto harness adapter WHITE wire BLACK wire 1 IGNITION COIL 1. Primary side 2. Secondary side DYNAMIC TEST 1. Disconnect magneto wiring harness connector. 2. Install the 6-pin magneto harness adapter (P/N 295 000 136). 3. Connect one of the multimeter leads to the WHITE/YELLOW wire of the 6-pin magneto harness adapter. 4. Connect the other multimeter lead to the BLACK/ YELLOW wire of the 6-pin magneto harness adapter. 5. Remove the ignition fuse and press START/STOP button, note result. The obtained value should be between 0.4 and 0.7 Vac. 6. If the trigger coil is out of specification, replace it. If it tests good continue the other tests. Ignition Coil NOTE: An ignition coil with good resistance measurement can still be faulty. Voltage leak can occur at high voltage level which is not detectable with an ohmmeter. Replacing the ignition coil may be necessary as a test. Primary Winding Disconnect the wire connector on the primary side of the ignition coil. Using a multimeter, check the resistance between the terminals 1 and 2. Repeat a resistance test between terminals 2 and 3. The resistance should be between 0.4 and 0.9 Ω at 20°C (68°F). If not within specification, replace the ignition coil. If the ignition coil test good, check the power supply on the primary side. There should be 12 Vdc between the RED/ YELLOW and BLACK/GREEN wires or between the RED/ YELLOW and GREEN wires while starting the engine. If there is no voltage, either the MPEM or the wiring harness is defective. Secondary Winding Due to the integrated diode, it is not possible to take any resistance measurement. The output voltage should not be less than 12 kV (12 000 V). The ignition coil outlet caps and the spark plug caps include a resistance. They should be checked prior to replacing a suspected ignition coil. 05-05-3 http://ReadManuals.com Section 05 ELECTRICAL Subsection 05 (IGNITION SYSTEM) Measure resistance between ignition coil outlet caps and spark plug caps. The obtained value should be between 5.4 and 5.7 Ω. If resistance is good, continue check. If not, change spark plug wires. DYNAMIC TEST An ignition coil tester available from after-market tool/equipment suppliers can be used. CAUTION: Do NOT use coil tester on metal work bench. Follow manufacturer instructions. If the ignition coil is out of specification, replace it. If it tests good ensure the wiring and connectors are in good condition then continue the other tests. MPEM When every other components above have been tested and are good, the MPEM can be suspected. Ensure wiring and connectors are in good condition prior to replacing the MPEM. OTHER IGNITION SYSTEM PROBLEMS If engine does not stop when pressing the start/ stop button, refer to STARTING SYSTEM 05-04 for testing procedure. If switch is good, test wiring going to MPEM. If it tests good the MPEM may be suspected. Try another one. Refer to INSTRUMENTS AND ACCESSORIES 05-07. IGNITION TIMING It is impossible to check the ignition timing with a timing lamp because there is no access window or mark. The MPEM adjust the timing automatically and the mechanics can not verify and adjust the ignition timing. 05-05-4 http://ReadManuals.com Section 05 ELECTRICAL Subsection 05 (IGNITION SYSTEM) SPARK PLUG DISASSEMBLY First unscrew the spark plug one turn. Clean the spark plug and cylinder head with pressurized air then completely unscrew. HEAT RANGE The proper heat range of the spark plugs is determined by the spark plugs ability to dissipate the heat generated by combustion. The longer the heat path between the electrode tip to the plug shell, the hotter the spark plug operating temperature will be and inversely, the shorter the heat path, the colder the operating temperature will be. A “cold” type plug has a relatively short insulator nose and transfers heat very rapidly into the cylinder head. Such a plug is used in heavy duty or continuous high speed operation to avoid overheating. The “hot” type plug has a longer insulator nose and transfers heat more slowly away from its firing end. It runs hotter and burns off combustion deposits which might tend to foul the plug during prolonged idle or low speed operation. 1 A too “hot” plug will result in overheating preignition, etc. A too “cold” plug will result in fouling (shorting the spark plug) or may create carbon build up which can heat up red-hot and cause pre-ignition or detonation. FOULING Fouling of the spark plug is indicated by irregular running of the engine, decreased engine speed due to misfiring, reduced performance, and increased fuel consumption. This is due to a loss of compression. Other possible causes are: prolonged idling or low-speed riding, or running on a too rich mixture due to abuse of choke, a clogged air filter, a faulty carburetor adjustment, incorrect fuel, defective ignition system, incorrect ignition timing, incorrect spark plug gap, lubricating oil entering the combustion chamber, or too cold spark plug. The plug face of a fouled spark plug has either a wet black deposit or a black carbon fouling. Such coatings form a conductive connection between the center electrode and ground. SPARK PLUG ANALYSIS 2 A00E0AA 1 2 3 TYPICAL 1. Overheated (light grey, white) 2. Normal (light brown, brown) 3. Fouled (black, wet or dry, dark deposits, grey, melted coating) A00E09A TYPICAL 1. Cold 2. Hot CAUTION: Severe engine damage might occur or major plastic parts might melt if a wrong heat range plug is used. The plug face reveals the condition of the engine, operating condition, method of driving and fuel mixture. For this reason it is advisable to inspect the spark plug at regular intervals, examining the plug face (i.e. the part of the plug projecting into the combustion chamber). 05-05-5 http://ReadManuals.com Section 05 ELECTRICAL Subsection 05 (IGNITION SYSTEM) SPARK PLUG INSTALLATION Prior to installation make sure that contact surfaces of the cylinder head and spark plug are free of grime. 1. Using a wire feeler gauge, set electrode gap according to the following chart. 2. Apply anti-seize lubricant over the spark plug threads to prevent possible seizure. 3. Hand screw spark plug into cylinder head and tighten with a torque wrench and a proper socket. 1 2 A00E0BA 1. Proper socket 2. Improper socket 4. Torque spark plug to 22 N•m (16 lbf•ft). 05-05-6 http://ReadManuals.com Section 05 ELECTRICAL Subsection 05 (IGNITION SYSTEM) NGK SPARK PLUG SYMBOL EXPLANATION WIDE GAP SUFFIX PREFIX 15 B P 5 E S Thread diameter A: B: C: D: E: J: 18 mm 10 mm 12 mm x 19 mm Reach M: Compact Type P: Projected Insulator Type Z: Hot 4 12 mm 8 mm Resistor Type 5 6 E: 19 mm (3/4") A: Special Design F: Taper Seat B: Single Ground Special Alloy H: 12.7 mm (1/2") C: Dual Ground Special Alloy L: 11.2 mm (7/16") G: Racing Type Z: 21 mm (53/54") GV: 7 Blank 8 18 mm ø 12 mm (31/64") 9 14 mm ø 9.5 mm (3/8") Surface Discharge Inductive Suppressor Type Firing end construction Reach 14 mm Construction R: U: Heat rating numbers 2 10 10: 1.0 mm (.040") 11: 1.1 mm (.044") 13: 1.3 mm (.050") 14: 1.4 mm (.055") 15: 1.5 mm (.060") 20: 2.0 mm (.080") Racing Version of V Type L: Half Heat Range S: Standard Center Electrode V: Fine Wire Center Electrode X: Booster Gap Y: V Grooved Center Electrode Cold F02H08S CROSSCUTS AND GAP STYLES OF SPARK PLUGS A01E1PS Standard Type Projected Insulator Type Taper Seat Type V-Type Surface Discharge Type 05-05-7 http://ReadManuals.com Section 05 ELECTRICAL Subsection 06 (ELECTRIC SHIFT SYSTEM) ELECTRIC SHIFT SYSTEM GENERAL The electric shift system controls several valves/solenoids that control the shifting and also allow an adjustment to the clutch pressure to modify the gear change. It is possible to calibrate the clutch for the hardness or smoothness of shifting action. This calibration is to be used when the clutch is slippery or is too hard. If a new sensor or valve/solenoid is installed, the GBPS (Gear Box Position Sensor) and STPS (SubTransmission Position Sensor) calibration is necessary. The MPEM (Multi-Purpose Electronic Module) adjust values with the new specifications of new components installed. The diagnostic/calibration mode preserves in memory the previous problems. The reset option erases the codes registered in memory. Refer to the following text for specific procedures. TROUBLESHOOTING Problem with the shifting system, refer to the annexes 1 and 2. DIAGNOSTIC/CALIBRATION MODE The diagnostic/calibration mode of the MPEM is used to display light-coded signals to indicate problems mainly in the shifting system and in the MPEM. When in operation, the MPEM continuously monitors the system. When needed, we can enable the diagnostic/calibration mode to check the system condition. The MPEM can detect the following problems: – short circuits of external components – internal MPEM problems – electric current overload The diagnostic/calibration mode is also used to: – calibrate clutch pressure and clutch modulation – calibrate sensors when replacing components 05-06-1 http://ReadManuals.com Section 05 ELECTRICAL Subsection 06 (ELECTRIC SHIFT SYSTEM) PREPARATION Before going into the diagnostic/calibration mode, the ignition switch needs to be on position OFF, the transmission in FIRST gear and shifter lever on NEUTRAL position. V01A12S To set the MPEM into the diagnostic/calibration mode, the following sequence needs to be done: – Place a diagnostic jumper in the diagnostic connector. 1 2 V01A0WA 1. Diagnostic jumper 2. Diagnostic connector – Turn ignition switch to ON. Once the MPEM detects the diagnostic jumper in diagnostic connector, it sets itself into the diagnostic/ calibration mode. During the diagnostic/calibration mode, the engine is off, all the solenoids are not working, and the accessory output is off. NOTE: At any time, if the jumper is removed during the diagnostic/calibration mode, the MPEM is powered off automatically. 05-06-2 http://ReadManuals.com Section 05 ELECTRICAL Subsection 06 (ELECTRIC SHIFT SYSTEM) TESTING The following tasks are performed in this order by the MPEM in the diagnostic/calibration mode: – Task 1: Indicator lights test. – Task 2: Clutch modulator calibration. – Task 3: Sensors and solenoids verification. – Task 4: GBPS (Gear Box Position Sensor) calibration. – Task 5: STPS (Sub-Transmission Position Sensor) calibration. See below for detailed steps. Once each task has been completed, the MPEM goes to the next task if the proper button(s) is(are) not activated after 3 seconds. Task 1: Indicator Lights Test This validates all indicator lights are good to allow proper display of the diagnostic codes. All LEDS turn ON. The LED “5” blinks first, through “1” and after the LED “Check Engine” through the LED “Neutral”. If a LED is found defective, replace it prior to continuing the other tests. V01A0XS 05-06-3 http://ReadManuals.com Section 05 ELECTRICAL Subsection 06 (ELECTRIC SHIFT SYSTEM) Task 2: Clutch Modulator Calibration The LED “Check Engine” blinks for a maximum time of 5 seconds or until the user begins the calibration process or removes the jumper. V01A0YS The upshift/downshift button is used to change the calibration of the clutch modulator valve. When one of these buttons is activated, the LED “Check Engine” stops to blink and goes ON. The corresponding LEDS are turned ON according to the calibration (See table below). Table 1: Corresponding Clutch Modulation Calibration GEAR LED HARDNESS 1 1+2 2 2+3 SMOOTHNESS 3 3+4 4 4+5 5 If the upshift/downshift button is not activated during the time the LED “Check Engine” blinks, the MPEM goes to the next task. Run vehicle to verify if the calibration is OK. The jumper needs to be removed and the key turned OFF and back ON before running the vehicle with the new calibration. 05-06-4 http://ReadManuals.com Section 05 ELECTRICAL Subsection 06 (ELECTRIC SHIFT SYSTEM) Task 3: Sensors and Solenoids Verification The MPEM reads all sensors and solenoids and displays the information with the LED “Hi-Lo beam”. The LED “Reverse” is ON during all the time the MPEM is verifying the components. Each abnormal components is represented by a coded number (see table below) and each code number correspond to the number of blinks that the LED “Hi-Lo bean” is doing. When there are two or more abnormal items, the lowest coded numbered item is first indicated and a delay of 2 seconds separates each following code. When a problem happens, all leds blink in the dashboard to show that there is a problem and will do so until the key switch is turned off. The corresponding register is increased when a problem happen. BLINK ON V01A13S Table 2: Abnormality-Diagnosis Components CODE NO. DIAGNOSIS COMPONENT LED “REVERSE” LED “HI-LO BEAM” LED ON for 3 seconds only LED OFF 0 No abnormal components found 1 2 Starter solenoid Clutching valve LED ON LED ON LED blinks 1 time LED blinks 2 times 3 Clutch modulator valve LED ON LED blinks 3 times 4 5 Downshift solenoid Upshift solenoid LED ON LED ON LED blinks 4 times LED blinks 5 times 6 MPEM Memory LED ON LED blinks 6 times 7 8 Headlight supply Accessory supply LED ON LED ON LED blinks 7 times LED blinks 8 times 9 Reference supply output LED ON LED blinks 9 times 05-06-5 http://ReadManuals.com Section 05 ELECTRICAL Subsection 06 (ELECTRIC SHIFT SYSTEM) Table 3: Abnormality Conditions CODE ABNORMALITY CONDITION NO. ACTION 1 – Short circuit to battery is detected. – Operating current on the starter output has exceeded the overload threshold. 2 – Short circuit to battery is detected. Change clutching valve. Refer to VALVE – Operating current on the clutch solenoid output REMOVAL/INSTALLATION section. has exceeded the overload threshold. 3 4 5 6 7 8 9 – Short circuit to battery is detected. – Operating current on the clutch modulator valve output has exceeded the overload threshold. – Short circuit to battery is detected. – Operating current on the downshift solenoid output has exceeded the overload threshold. – Short circuit to battery is detected. – Operating current on the upshift solenoid output has exceeded the overload threshold. – Programmable parameters are corrupted. Refer to STARTING SYSTEM 05-04. Change clutch modulator valve. Refer to VALVE REMOVAL/INSTALLATION section. Change shifting valve. Refer to VALVE REMOVAL/INSTALLATION section. Change shifting valve. Refer to VALVE REMOVAL/INSTALLATION section. Install a new MPEM. Refer to INSTRUMENTS AND ACCESSORIES 05-07. Check: – Short circuit to ground is detected . – Wiring condition. – Operating current on the headlight supply output has exceeded the overload threshold. – Headlight. Refer to INSTRUMENTS AND ACCESSORIES 05-07. Check: – Short circuit to ground is detected. – Wiring condition. – Operating current on the accessory supply output has exceeded the overload threshold. – Speedometer. Refer to INSTRUMENTS AND ACCESSORIES 05-07. Check: – Wiring condition. – Short circuit to ground is detected. – STPS and GBPS sensors. Refer to SENSOR TESTS section. These abnormality conditions are not detected when the headlight supply output is in dimming mode. 05-06-6 http://ReadManuals.com Section 05 ELECTRICAL Subsection 06 (ELECTRIC SHIFT SYSTEM) Task 4: GBPS (Gear Box Position Sensor) Calibration The LEDS “1” and “Hi-Lo beam” are ON during a maximum of 5 seconds or until the user sets the calibration. This calibration mode sets the nominal position of sensor. The GBPS calibration is automatically set when the Start/Stop button and the Hi/Lo beam button are activated at the same time. V01A10S Task 5: STPS (Sub-Transmission Position Sensor) Calibration The LEDS “Neutral” and “Hi-Lo beam” are ON during a maximum of 5 seconds or until the user sets the calibration. This calibration mode sets the nominal position of sensor. The STPS calibration is automatically set when the Start/Stop button and the Hi/Lo beam button are activated at the same time. V01A11S The MPEM waits 3 seconds before exiting the diagnostic/calibration mode and switch off. The jumper needs to be removed and the ignition switch turned OFF and back ON before running the vehicle with the new calibration. 05-06-7 http://ReadManuals.com Section 05 ELECTRICAL Subsection 06 (ELECTRIC SHIFT SYSTEM) Resetting the Diagnostic Components Register Before resetting the diagnostic components registers, the MPEM needs to be in the diagnostic/calibration mode. The register is automatically reset when the following sequence is performed: – The jumper on the diagnostic connector is removed while the START/STOP button is activated. The MPEM will reset the register (See table ABNORMALITY-DIAGNOSIS COMPONENTS and table ABNORMALITY CONDITIONS) and after it will turn off itself. Table 4: Summary of all Tasks TASK LED OPERATION 1. INDICATOR LIGHTS TEST “5” blinks first, through “1” and after “Check Engine” through “Neutral”. This validates all indicator lights are good. 2. CLUTCH MODULATOR CALIBRATION “Check Engine” blinks. Press 3. SENSORS AND SOLENOIDS TEST “Reverse” is ON “Hi-Lo Beam” blinks. Do not press any button. Each code number correspond to the number of blinks that the “Hi-Lo Beam” is doing. 4. GBPS CALIBRATION “1” and “Hi-Lo Beam” are ON. Simultaneously, press and buttons. 5. STPS CALIBRATION “Neutral” and “Hi-Lo Beam” are ON. Simultaneously, press and buttons. button. Remove the jumper on the diagnostic connector and RESET REGISTERS N.A. press the 05-06-8 http://ReadManuals.com button simultaneously. Section 05 ELECTRICAL Subsection 06 (ELECTRIC SHIFT SYSTEM) VALVE REMOVAL/INSTALLATION CAUTION: It is recommended to always disconnect the battery when replacing any electric or electronic part(s). Installation SHIFTING VALVE The upshift/downshift solenoids are installed on shifting valve. This valve is located on the rear part of engine. 2 Remove screws on top of shifting valve. Pull shifting valve. 1 3 For the installation, reverse the removal procedure, paying attention to the following details: – Install a new gasket. – Apply Loctite 242 on threads and torque to 5 N•m (44 lbf•in). – Calibrate GBPS (Gear Box Position Sensor) and STPS (Sub-Transmission Position Sensor). Refer to DIAGNOSTIC/CALIBRATION MODE section, tasks 4 and 5. CLUTCHING VALVE The clutching valve is located on front of engine. 3 2 1 V01C0EB 1. Shifting valve 2. Upshift solenoid 3. Downshift solenoid Test Refer to VALVES/SOLENOIDS TESTS section. Removal Remove seat. Unplug connector. V01C0DB 1 1. Clutching valve 2. STPS (Sub-Transmission Position Sensor) 3. Cable clip Test Refer to TEST section. V01J03C 1. Upshift/downshift solenoid connector 05-06-9 http://ReadManuals.com Section 05 ELECTRICAL Subsection 06 (ELECTRIC SHIFT SYSTEM) Removal CLUTCH MODULATOR VALVE Remove fuel tank cover. Refer to BODY 10-02. Unplug connector on seat pivot bar. The clutch modulator valve is located in front of engine. 1 1 V01C0DC V01G0RA 1. Clutch modulator valve 1. Unplug this connector Remove seat pivot bar. Remove cable clip from oil duct cover. Separate wires from Deutsch connector. Unplug STPS (Sub-Transmission Position Sensor). Remove screw retaining clutching valve. Pull clutching valve. Use a pair of pliers and a flat screwdriver. Installation For the installation, reverse the removal procedure, paying attention to the following details: – Apply engine oil on O-rings. – Insert clutching valve in place. – Tap clutching valve gently with a rubber hammer. – Apply Loctite 242 on threads and torque screws to 3 N•m (27 lbf•in). – Calibrate GBPS (Gear Box Position Sensor) and STPS (Sub-Transmission Position Sensor). Refer to DIAGNOSTIC/CALIBRATION MODE section, tasks 4 and 5. Test Refer to VALVES/SOLENOIDS TESTS section. Removal Remove fuel tank cover. Refer to BODY 10-02. Unplug connector on seat pivot bar. Remove seat pivot bar. Remove cable clip from engine. Separate wires from Deutsch connector. Remove screw retaining clutch modulator valve. Pull clutch modulator valve. Use a pair of pliers and flat screwdriver. For the installation, reverse the removal procedure, paying attention to the following details: – Apply engine oil on O-rings. – Insert clutch modulator valve in place. – Tap clutch modulator valve gently with rubber hammer. – Apply Loctite 242 on threads and torque screws to 3 N•m (27 lbf•in). – Calibrate GBPS (Gear Box Position Sensor) and STPS (Sub-Transmission Position Sensor). Refer to DIAGNOSTIC/CALIBRATION MODE section, tasks 4 and 5. 05-06-10 http://ReadManuals.com Section 05 ELECTRICAL Subsection 06 (ELECTRIC SHIFT SYSTEM) SENSOR REMOVAL/INSTALLATION CAUTION: It is recommended to always disconnect the battery when replacing any electric or electronic part(s). STPS (Sub-Transmission Position Sensor) The STPS is located on front of engine. Test Refer to SENSORS TESTS section. Removal Remove fuel tank cover. Refer to BODY 10-02. Remove seat pivot bar. Unplug STPS. Remove screws and lock washers retaining STPS on engine. Pull STPS. Installation For installation, reverse the removal procedure. Pay attention to the following details: – Check O-ring and change if necessary. – Align interior of GBPS and engine shaft. – Place connector on top. Secure with screws and lock washers. Apply Loctite 242 on threads. – Torque screws to 3 N•m (27 lbf•in). – Calibrate GBPS. Refer to DIAGNOSTIC/CALIBRATION MODE section, task 4. VSS (Vehicle Speed Sensor) The VSS is located on front of engine. Test Refer to SENSORS TESTS section. Removal Installation For installation, reverse the removal procedure. Pay attention to the following details: – Check O-ring and change if necessary. – Align interior of the STPS and engine shaft. – Place connector on top. Secure with screws and lock washers. Apply Loctite 242 on threads. – Torque screws to 3 N•m (27 lbf•in). – Calibrate STPS. Refer to DIAGNOSTIC/CALIBRATION MODE section, task 5. Remove skid plate under vehicle. Refer to BODY 10-02. Remove engine oil. Refer to MAINTENANCE 02-02. Unplug VSS. Remove engine bolt under VSS. GBPS (Gear Box Position Sensor) The GBPS is located on rear of engine. Test Refer to SENSORS TESTS section. Removal Unplug GBPS. Remove screws and lock washers. Pull GBPS. V01C0DD 1 1. Remove this bolt in first Remove bolt retaining VSS. Pull VSS out of engine. 05-06-11 http://ReadManuals.com Section 05 ELECTRICAL Subsection 06 (ELECTRIC SHIFT SYSTEM) Installation For installation, reverse the removal procedure. Pay attention to the following detail: – Check O-ring and change if necessary. – Install VSS and secure with screw. Torque to 9 N•m (80 lbf•in). NOTE: Don’t apply Loctite on threads. – Install engine bolt. Torque to 9 N•m (80 lbf•in). – Refill engine with oil. Refer to MAINTENANCE/LUBRICATION 02-03. 05-06-12 http://ReadManuals.com Section 05 ELECTRICAL Subsection 06 (ELECTRIC SHIFT SYSTEM) VALVES/SOLENOIDS TESTS CLUTCHING VALVE AND CLUTCH MODULATOR VALVE TESTS CAUTION: It is recommended to always disconnect the battery when replacing any electric or electronic part(s). Always place the transmission on NEUTRAL position and select FIRST gear. m WARNING Apply parking device. Place vehicle on level surface. Install vehicle on jack stands to raise all four tires off the ground. Unplug clutching and clutch modulator valve connector. Plug tester (P/N 529 035 653). Start engine. Place transmission on HI or LO position and select SECOND or THIRD gear to permit upshift and downshift selection. Rev engine (about 2500 RPM) and push upshift button. If RED and BLUE indicator lights blink when button is pushed, clutching valve and clutch modulator valve are operational. If RED indicator light blinks when button is pushed, clutching valve is operational and clutch modulator valve can be defective. Check the following details: – Check wiring condition of clutch modulator valve. – Check upshift/downshift switch, refer to UPSHIFT/ DOWNSHIFT BUTTON TESTS section. – Install a new clutch modulator valve. Refer to VALVES REMOVAL/INSTALLATION section. – Check AMP connectors on MPEM. Refer to OVERVIEW 05-02. – Install a new MPEM. Refer to INSTRUMENTS AND ACCESSORIES 05-07. If BLUE indicator light blinks when button is pushed, clutch modulator valve is operational and clutching valve can be defective. Check the following details: – Check wiring condition from clutching valve. – Check upshift/downshift switch, refer to UPSHIFT/ DOWNSHIFT BUTTON TESTS section. – Install a new clutching valve. Refer to VALVES REMOVAL/INSTALLATION section. – Check AMP connectors on MPEM. Refer to OVERVIEW 05-02. – Install a new MPEM. Refer to INSTRUMENTS AND ACCESSORIES 05-07. If no indicator light blinks when button is pushed: – Check fuse. – Check wiring condition. – Check upshift/downshift switch, refer to UPSHIFT/ DOWNSHIFT BUTTON TESTS section. – Install a new clutching valve and a new clutch modulator valve. Refer to VALVES REMOVAL/ INSTALLATION section. – Check AMP connectors on MPEM. Refer to OVERVIEW 05-02. – Install a new MPEM. Refer to INSTRUMENTS AND ACCESSORIES 05-07. UPSHIFT/DOWNSHIFT SOLENOIDS TESTS Unplug shifting valve connector. Connect tester. Start engine. Place transmission on NEUTRAL position and select SECOND or THIRD gear. Push upshift/downshift button. If RED and BLUE indicator light blink when button is pushed, the solenoids are good. If RED or BLUE indicator light doesn’t blink when button is pushed: – Check wiring condition. – Check upshift/downshift switch, refer to UPSHIFT/ DOWNSHIFT BUTTON TESTS section. – Install a new shifting valve, refer to VALVES REMOVAL/INSTALLATION section. – Check AMP connectors on MPEM. Refer to OVERVIEW 05-02. – Install a new MPEM. Refer to INSTRUMENTS AND ACCESSORIES 05-07. If no indicator light blinks when button is pushed on upshift or downshift position: – Check fuse. 05-06-13 http://ReadManuals.com Section 05 ELECTRICAL Subsection 06 (ELECTRIC SHIFT SYSTEM) – Check wiring condition. – Check upshift/downshift switch, refer to UPSHIFT/ DOWNSHIFT BUTTON TESTS section. – Install a new shifting valve, refer to VALVES REMOVAL/INSTALLATION section. – Check AMP connectors on MPEM. Refer to OVERVIEW 05-02. – Install a new MPEM. Refer to INSTRUMENTS AND ACCESSORIES 05-07. 05-06-14 http://ReadManuals.com Section 05 ELECTRICAL Subsection 06 (ELECTRIC SHIFT SYSTEM) SENSOR TESTS STPS (Sub-Transmission Position Sensor) AND GBPS (Gear Box Position Sensor) TESTS NOTE: The reverse vehicle speed limiter doesn’t work when STPS is faulty. If STPS or GBPS sensor blink code is indicated. The sensor can be defective. Check the following details: SENSOR LED STPS R and N Blinks GBPS 1 to 5 (simultaneously) Blinks – Check wiring condition. – Remove sensor and turn inner parts with a finger: • If LEDS work properly, sensor is good. Continue check. • If LEDS don’t work when inner parts are turned, change sensor and calibrate the new sensor, see DIAGNOSTIC/CALIBRATION MODE section, task 4 or 5. – Check AMP connectors on MPEM. Refer to OVERVIEW 05-02. – Install a new MPEM. Refer to INSTRUMENTS AND ACCESSORIES 05-07. – If the problem persists, mechanical problem is probable. Call SERVICE REPRESENTATIVE. VSS (Vehicle Speed Sensor) TESTS If VSS is not working properly, the speedometer will not indicate vehicle speed. Check the following details: – Measure voltage between BLACK/BROWN and PINK wires on speedometer connector under steering cover. Place vehicle on NEUTRAL position, turn ignition switch ON and move vehicle very slowly. The obtained value vary between 0.5 and 8 Vdc. If voltage is good, continue check. If not, change VSS. – Check wiring condition. – Check AMP connectors from MPEM. Refer to OVERVIEW 05-02. – Install a new MPEM. Refer to INSTRUMENTS AND ACCESSORIES 05-07. 05-06-15 http://ReadManuals.com Section 05 ELECTRICAL Subsection 06 (ELECTRIC SHIFT SYSTEM) UPSHIFT/DOWNSHIFT SWITCH TESTS UPSHIFT/DOWNSHIFT SWITCH Open multi-function switch box. Using a multimeter, measure resistance between the following wires. POSITION WIRE RESISTANCE UPSHIFT Switch released Switch depressed and held Infinite (0.L) BLACK and RED 0.4 Ω max. DOWNSHIFT Switch released Switch depressed and held Infinite (0.L) BLACK and GREEN 0.4 Ω max. Replace switch if defective. 05-06-16 http://ReadManuals.com Subsection 07 Section 05 ELECTRICAL (INSTRUMENTS AND ACCESSORIES) INSTRUMENTS AND ACCESSORIES REMOVAL AND INSTALLATION CAUTION: It is recommended to always disconnect the battery when replacing any electric or electronic parts. 12-VOLT AUXILIARY POWER OUTLET The 12-volt auxiliary power outlet is located on the LH rear part of the rear extension frame. The connectors are protected by heat shrink tubing. The 12-volt auxiliary power outlet allows the installation of additional accessories. Test Refer to TESTS section. V01A02A 2 1 12-VOLT POWER OUTLET 1. Remove screws 2. Lift up the sealed beam cover Test Installation Refer to TESTS section. Properly reinstall removed parts in the reverse order of their removal. Removal Remove the steering cover. Refer to BODY 10-02. Unplug the connectors of the power outlet. Unscrew the retaining nut. Installation Adjustment Adjust beam aiming as follows: Turn knobs to adjust beam height and side orientation as explained below. Adjust both headlights evenly. Reverse the removal procedure. HEADLIGHT Removal Remove screw and lift up the sealed beam cover. V01A02B 3 1 2 1. Headlight 2. Beam height adjustment 3. Beam side adjustment 05-07-1 http://ReadManuals.com Section 05 ELECTRICAL Subsection 07 (INSTRUMENTS AND ACCESSORIES) HEADLIGHT BEAM AIMING 2 Select high intensity. Beam aiming is correct when center of high beam is 131 mm (5 in) below the headlight horizontal center line, scribed on a test surface, 5 m (17 ft) away. NOTE: Sit down the driver or place the same weight on the vehicle. Measure headlight center distance from ground. Scribe a line at this height on test surface (wall or screen). Light beam center should be 131 mm (5 in) below scribed line. 1 2 V01L0HA 1. Lens 2. Screws 90° IGNITION SWITCH 1 2 Test Refer to IGNITION SYSTEM 05-05. Removal 90° Lift the steering cover and unscrew the ignition switch nut. NOTE: Do not unplug connectors when steering cover is lifted. Unplug the switch connector. V01I0VA 1. Headlights center lines 2. Light beam center 1 90° A B 1 V01I0UA 1. Light beam center A. 5 m (17 ft) B. 131 mm (5 in) Taillight Bulb Replacement Unscrew lens screws to expose bulb. Push bulb in and hold while turning courterclockwise to release. Install the new bulb by first pushing in while turning clockwise. V01G0CA 1. Switch connector Installation For the installation, reverse the removal procedure. 05-07-2 http://ReadManuals.com Subsection 07 Section 05 ELECTRICAL (INSTRUMENTS AND ACCESSORIES) INDICATOR LIGHTS Installation Test For the installation, reverse the removal procedure. Refer to TESTS section. SPEEDOMETER Removal Remove the steering cover. Refer to BODY 10-02. NOTE: Do not unplugged all connectors. Lift up the steering cover and unplug the indicator lights connector(s) only. Press locking tabs on each side of the indicator lights and push the indicator lights outside. Installation Test Refer to TESTS section. Removal Remove the steering cover. Refer to BODY 10-02. Remove the two nuts under speedometer and unplug the connector. 1 For the installation, reverse the removal procedure. MPEM Test Refer to specific system (ignition system, etc.) for testing procedures. Removal Remove fuel tank. NOTE: It’s not necessary to remove fuel tank completely, lean toward engine only. Unplug AMP connectors. Remove the screws on the top of MPEM. Slide MPEM to right side. V01G06A 2 1. Remove the two nuts 2. Unplug the connector V01G0FA 05-07-3 http://ReadManuals.com Section 05 ELECTRICAL Subsection 07 (INSTRUMENTS AND ACCESSORIES) Speedometer Bulbs Replacement Each bulb can be replaced individually. Proceed as follows: Using a small screwdriver, pry cap out to expose bulb socket. V01I0EA 1 2 1. Speedometer 2. Insert a small screwdriver in socket slot and turn counterclockwise until stopped. Use small long nose pliers to pull bulb out or carefully pry out using a small screwdriver. 1 V01I0DA 1. Pull bulb out Reinstall new bulb using long nose pliers. Turn bulb socket clockwise to lock. Installation For the installation, reverse the removal procedure. 05-07-4 http://ReadManuals.com Subsection 07 Section 05 ELECTRICAL (INSTRUMENTS AND ACCESSORIES) TESTS 12-VOLT AUXILIARY POWER OUTLET Using a multimeter, measure the voltage between RED/BLACK and BLACK wires. The obtained value should be between 12 and 14.5 Vdc. – No voltage: • Check fuse no. 2 and wiring condition. – Voltage is good: • Check outer accessory. COOLING FAN OPERATION TEST Unplug the temperature sender connectors. Install a jumper wire end in each connector. Replace the fan if it does not work. 12-VOLT POWER OUTLET Remove the steering cover. Unplug the power outlet connectors. Using a multimeter, measure the voltage between RED/BLACK and BLACK wires. The obtained value should be between 12 and 14.5 Vdc. 1 V01G0DA HEADLIGHT 2 Using a multimeter, measure the voltage between GREEN/ORANGE and BLACK wires. Start the engine. The obtained value should be between 12 and 14.5 Vdc. NOTE: In diming mode, the obtained value should be between 7 and 10 Vdc. – No voltage: • Check wiring condition and HI-LO switch. – Voltage is good: • Change headlights. V01G0GB HI-LO SWITCH 1. 12-volts power outlet 2. Power outlet connectors – No voltage: • Check fuse and wiring condition. – Voltage is good: • Change power outlet. Open multi-function switch box. Using a multimeter, measure the resistance between the following wires. POSITION WIRE Switch released Switch depressed and held RESISTANCE Infinite (0.L) BLACK and BLUE 0.4 Ω max. Replace switch if defective. 05-07-5 http://ReadManuals.com Section 05 ELECTRICAL Subsection 07 (INSTRUMENTS AND ACCESSORIES) INDICATOR LIGHTS SPEEDOMETER Remove steering cover. If switch tests good, check wiring condition and MPEM. Unplug indicator light connector. Using a multimeter, measure the voltage between RED/GREY and BLACK/BROWN wires. Turn ignition switch to ON. The obtained value should be between 12 and 14.5 Vdc. V01G0GA 1 V01G0HA 1. Indicator lights connectors Test each LEDS with two 1.5 V battery (AA), connected in series. – LEDS are good • Check wiring condition. • Check AMP connectors. • Change MPEM. – LEDS are burned • Change indicator lights. – No voltage on speedometer: • Check VSS (Vehicle Speed Sensor), refer to ELECTRIC SHIFT SYSTEM 05-06. If VSS voltage is good, check fuse no. 3 and wiring condition. – No voltage on speedometer and VSS: • Check MPEM wiring condition and/or change MPEM. – Voltage on speedometer: • If VSS voltage is good, change speedometer. • No voltage on VSS. Check VSS. 05-07-6 http://ReadManuals.com Section 06 DRIVE TRAIN Subsection 01 (TABLE OF CONTENTS) TABLE OF CONTENTS FRONT DIFFERENTIAL.......................................................................................................... FRONT DRIVE SHAFT ....................................................................................................... FRONT DIFFERENTIAL...................................................................................................... FRONT PROPELLER SHAFT .............................................................................................. 06-02-1 06-02-2 06-02-3 06-02-4 REAR AXLE ............................................................................................................................ RIGID AXLE ........................................................................................................................ REAR PROPELLER SHAFT................................................................................................. 06-03-1 06-03-2 06-03-4 06-01-1 http://ReadManuals.com Section 06 DRIVE TRAIN Subsection 02 (FRONT DIFFERENTIAL) FRONT DIFFERENTIAL 13 12 10 21 9 8 16 11 140 Nm (103 lbfft) (MINIMUM) 15 7 6 20 5 4 19 17 18 42 Nm (31 lbfft) 14 22 1 8 2 9 3 45 Nm (33 lbfft) 21 12 13 10 11 140 Nm (103 lbfft) (MINIMUM) V01H0VS 06-02-1 http://ReadManuals.com Section 06 DRIVE TRAIN Subsection 02 (FRONT DIFFERENTIAL) FRONT DRIVE SHAFT Removal Raise the front of vehicle, support it securely on jack stands and remove front wheel(s). Remove wheel cap no. 13, cotter pin no. 12, castellated nut no. 11, flat washer no. 10 and O-ring no. 21. Separate knuckle no. 8, with hub and disk brake no. 9, from lower and upper suspension arms. Separate knuckle from the drive shaft no. 7 or no. 14. Pull drive shaft out of differential no. 1. NOTE: Pull drive shaft strongly. Inspection Inspect the condition of boots. If there is any damage or evidence of leaking lubricant, replace them. Refer to Drive Shaft Boot section. Installation Apply grease (P/N 293 550 019) to the splines and insert the end of drive shaft in differential and pull joint a little to make sure that the stop ring is locked in differential side gear groove. V01H0DA CHECK THE O-RING FOR DAMAGE, REPLACE IF NECESSARY Remove cotter pin and castellated nut from upper and lower suspension arms. V01H0FA 1 1. Stop ring 4 1 2 3 1 2 Insert the other end of drive shaft in the knuckle and install the knuckle, with hub and disk brake, to the lower and upper suspension arm. Torque the castellated nuts to 75 N•m (55 lbf•ft) and install a new cotter pin. Install the flat washer and torque the castellated nut on the drive shaft end to 140 N•m (103 lbf•ft) minimum. Install a new cotter pin and the wheel cap. Reinstall the front wheel(s) and torque the four nuts to 75 N•m (55 lbf•ft). V01H0EA 1. 2. 3. 4. Castellated nut Cotter pin Lower suspension arm Upper suspension arm 06-02-2 http://ReadManuals.com Section 06 DRIVE TRAIN Subsection 02 (FRONT DIFFERENTIAL) FRONT DIFFERENTIAL Drive Shaft Boot Removal Remove: – clamps from rubber boot using boot clamp pliers (P/N 295 000 069 and 295 000 054) – large end of the boot from plunging joint or CV joint Move apart circlip and pull out the shaft from bearing. Do not remove circlip. V01H0XA 2 1 Removal Raise front of vehicle, support it securely on jack stands and remove front wheels. Remove: – skid plate – winch protector – front bumper – inner fender Refer to BODY 10-02 for the proper instructions. On LH side, remove: – wheel cap no. 13 – cotter pin no. 12 – castellated nut no. 11 – flat washer no. 10 – O-ring no. 21 On front side, remove: – differential mounting bracket bolt – front mounting bolt no. 3 – rear mounting bolt no. 5 – differential bracket no. 22 – mounting bracket no. 2 3 1. Circlip 2. Shaft 1 Remove boot from drive shaft. Inspection Check bearing in plunging joint or CV joint. If bearing is hard to move, change plunging joint or CV joint. Check circlip for damage, change as necessary. Installation For installation, reverse the removal procedure. Paying attention to the following details. Insert boot, do not forget the small clamp. Insert shaft and push firmly. Pack bearing area with grease (including with the new boot kit). NOTE: Do not use an other grease. 2 4 V01H0GA 1. 2. 3. 4. Front mounting bolt M10 x 200 Differential mounting bracket bolts Bracket Rear mounting bolt M10 x 60 06-02-3 http://ReadManuals.com Section 06 DRIVE TRAIN Subsection 02 (FRONT DIFFERENTIAL) On RH side, remove drive shaft. Unscrew propeller shaft bolt no. 19. Differential side only. Remove vent tube no. 15 on the top from the front differential. Pull differential forward then separate propeller shaft from differential. Front Differential Oil Change Place vehicle on a level surface. Set transmission in park position. Lift LH side of vehicle. Clean drain plug area. Place a drain pan under differential drain plug area. Remove drain plug. Unscrew filler plug. V01H0WA V01H0IA 1 2 1. Drain plug 2. Filler plug Remove front differential by the RH side. Separate drive shaft no. 14 from differential. Inspection Turn front differential gear with a finger; it should turn smoothly. Replace if necessary. With drive shafts installed, check backlash and axial play. Clean drain plug area then reinstall plug. Lower vehicle. Use a funnel and refill front differential at the proper level with the recommended oil. Refer to TECHNICAL DATA 11-02. Reinstall filler plug. FRONT PROPELLER SHAFT Installation For installation, reverse the removal procedure. NOTE: Do not forget flat washer when rear mounting bolt no. 5 installation. Front Differential Oil Level Clean filler plug prior to check oil level. With vehicle on a level surface, check oil level by removing filler plug. Oil level must be reach the lower edge. Add oil if necessary. Refer to TECHNICAL DATA 11-02 for capacity and recommended oil. Removal Remove: – skid plate – winch protector – front bumper – inner fender Refer to BODY 10-02 for the proper instructions. Remove propeller shaft bolts and flat washers. One on engine side no. 17 and 18, one on differential side no. 19 and 20. Discard bolts. Remove vent tube no. 15 on the top from the front differential. 06-02-4 http://ReadManuals.com Section 06 DRIVE TRAIN Subsection 02 (FRONT DIFFERENTIAL) Pull differential forward then separate propeller shaft from differential and engine. Inspection Check propeller shaft for wear or damage, replace if necessary. Installation Installation is the reverse of removal procedure. V01H0YA 1 1. Snap ring V01H0JA 1 2 Support inner yoke in vice and drive other yoke down with a soft hammer. 1. Engine side 2. Differential side NOTE: Secure propeller shaft with new self-locking screws. Front Propeller Shaft Lubrication Place vehicle on a level surface. Set transmission in park position. Remove inner fender on front right side. Set transmission on neutral position and move vehicle back and forth to place grease fittings toward opening. Re-set transmission in park position. Grease rear and front U-joint. Use a grease gun with SHELL, Alvania EP-2 grease only. Reinstall inner fender. Front Propeller Shaft U-joint Removal Remove internal snap ring from bearing caps. V01H0ZA Support U-joint in vice and drive inner yoke down to remove remaining bearing caps. Remove U-joint cross. Installation Install new U-joint cross in inner yoke. Install new bearing cap by hand. NOTE: Carefully install U-joint cross with grease fitting properly positioned. 06-02-5 http://ReadManuals.com Section 06 DRIVE TRAIN Subsection 02 (FRONT DIFFERENTIAL) V01H10A Tighten vise to force bearing caps in. V01H11A Using a suitable arbor, fully seat bearing cap in one side. Continually, check for free movement of bearing cross as bearing caps are assembled. V01H12A Install snap ring. Repeat procedure for other sides. Grease U-joint, using a grease gun with SHELL, Alvania EP-2 grease only. 06-02-6 http://ReadManuals.com Section 06 DRIVE TRAIN Subsection 03 (REAR AXLE) REAR AXLE 8 11 1 6 33 Nm (24 lbfft) 7 43 Nm (32 lbfft) 3 10 9 43 Nm (32 lbfft) 4 50 Nm (37 lbfft) 5 27 Nm 4 (20 lbfft) 2 12 14 38 Nm (28 lbfft) 13 16 140 Nm (103 lbfft) minimum 17 15 20 18 19 14 12 21 V01H0US 140 Nm 13 (103 lbfft) minimum 06-03-1 http://ReadManuals.com Section 06 DRIVE TRAIN Subsection 03 (REAR AXLE) RIGID AXLE Remove the M10 x 25 socket screws no. 7 retaining rigid axle center section to swing arm. Removal Lift rear of the vehicle until rear shock absorbers are fully extended. Install jack stands under frame to support vehicle. Remove the rear wheels. Remove lower shock absorber bolts and elastic flanged nuts. 1 V01J05A 1. Remove M10 x 25 socket screws Remove the M10 x 25 flanged bolts no. 5 and elastic flanged nuts no. 6 retaining swing arm to rigid axle. V01J03B 1 1. Lower shock absorber bolts Remove rear brake caliper and detach brake hose from bracket on rigid axle no. 1. CAUTION: Don’t let caliper hang by the hose and don’t stretch or twist brake hose. Disconnect vent tube no. 8 on rigid axle. 2 V01J06A 1 1. Remove flanged bolts and elastic flanged nuts Detach rigid axle from swing arm. Installation V01J04A 1 1. Brake hose 2. Vent tube Remove the M8 x 10 flanged bolts no. 4 retaining protector no. 2 under rear rigid axle center section. Installation is essentially the reverse of removal procedure. Paying attention to the following details. Apply grease (P/N 293 550 019) on the spring to the end of the propeller shaft. Secure rear rigid axle center section to swing arm with socket screws. Apply sealant Right Stuff (P/N 293 800 053) between both parts. Do not tighten yet. 06-03-2 http://ReadManuals.com Section 06 DRIVE TRAIN Subsection 03 (REAR AXLE) Secure rear axle tube to swing arm with bolts. Do not tighten yet. When all bolts are installed, torque in a criss-cross sequence. 1 3 V01J05B RIGID AXLE CENTER SECTION 1 3 2 Inspection Check axle for wear or other damage, replace if necessary. Installation For installation, reverse the removal procedure. paying attention to the following details. Apply grease (P/N 293 550 019) on splines. Torque castellated nut no.13 to 140 N•m (103 lbf•ft) minimum. LH SIDE AXLE Remove: – wheel and wheel cap – cotter pin no. 12 – castellated nut no.13 – flat washer no. 14 and O-ring – rigid axle from vehicle Unfasten TORX head screws no. 20 retaining axle tube from rear rigid axle center section no. 17. Remove axle tube then pull out axle no. 21. 4 2 Unfasten TORX head screws no. 16 retaining axle housing from rear rigid axle center section no. 17. Remove axle housing then pull out axle no. 18. Inspection Check axle for wear or other damage, replace if necessary. 4 Installation For installation, reverse the removal procedure. paying attention to the following details. Apply grease (P/N 293 550 019) on splines. Torque castellated nut no.13 to 140 N•m (103 lbf•ft) minimum. V01J06B REAR AXLE TUBE Rear Axle Removal RH SIDE AXLE Remove: – wheel and wheel cap – cotter pin no. 12 – castellated nut no.13 – flat washer no. 14 and O-ring – caliper – rigid axle center section protector no. 2 – lower bolt retaining shock from axle housing no. 15 06-03-3 http://ReadManuals.com Section 06 DRIVE TRAIN Subsection 03 (REAR AXLE) Rear Rigid Axle Center Section Oil Level Lift back of vehicle. Place swing arm to the horizontal position. Clean filler plug prior to check oil level. Check oil level by removing filler plug. Oil level must reach lower edge. V01H0RA 2 1 1. Drain plug 2. Filler plug V01H0RB Clean drain plug area then reinstall drain plug. Use a funnel and refill rear rigid axle center section at the proper level with recommended oil. Refer to TECHNICAL DATA 11-02. Reinstall filler plug. 1 1. Filler plug Add oil if necessary. Refer to TECHNICAL DATA 11-02 for capacity and recommended oil. Rear Rigid Axle Center Section Oil Change Ensure vehicle is on a level surface. Clean drain plug area. Place a drain pan under rigid axle center section drain plug area. Unscrew filler plug. Remove drain plug. REAR PROPELLER SHAFT Removal Remove swing arm with rigid axle assembly. Refer to REAR SUSPENSION 08-03. Remove the M8 x 16 propeller shaft bolt no. 9 and flat washer no. 10. Separate rear propeller shaft no. 3 from engine. Inspection Check yoke U-joint no. 11 for wear, backlash or axial play, replace if necessary. 06-03-4 http://ReadManuals.com Section 06 DRIVE TRAIN Subsection 03 (REAR AXLE) Installation Installation is essentially the reverse of removal procedure. Apply grease (P/N 293 550 019) to spring and splines before insert the end of the propeller shaft into swing arm. Apply grease to splines from engine. Grease U-joint from rear propeller shaft. Use a grease gun with SHELL, Alvania EP-2 grease only. Rear Propeller Shaft U-Joint Refer to FRONT PROPELLER SHAFT U-JOINT 0602. 06-03-5 http://ReadManuals.com Section 07 STEERING/CONTROL SYSTEMS Subsection 01 (TABLE OF CONTENTS) TABLE OF CONTENTS STEERING/CONTROL SYSTEMS......................................................................................... HANDLE BAR..................................................................................................................... STEERING COLUMN ......................................................................................................... TIE-ROD.............................................................................................................................. STEERING COLUMN BEARING........................................................................................ MULTI-FUNCTION SWITCH ............................................................................................. THROTTLE HANDLE.......................................................................................................... LH HANDLE BRAKE........................................................................................................... RH HANDLE BRAKE .......................................................................................................... 07-02-1 07-02-2 07-02-2 07-02-2 07-02-3 07-02-3 07-02-4 07-02-4 07-02-5 07-01-1 http://ReadManuals.com Section 07 STEERING/CONTROL SYSTEMS Subsection 02 (STEERING/CONTROL SYSTEMS) STEERING/CONTROL SYSTEMS 1 3 26 7 2 24 Nm (18 lbfft) 5 17 16 15 22 21 22 14 24 Nm (18 lbfft) 20 19 21 75 Nm (55 lbfft) 22 19 Nm 23 (168 lbfin) 25 13 11 10 75 Nm (55 lbfft) 1 18 24 20 75 Nm 19 (55 lbfft) 18 2 12 16 75 Nm 19 18 (55 lbfft) 20 13 21 4 6 8 9 22 21 20 18 V01I0XS 19 75 Nm (55 lbfft) 07-02-1 http://ReadManuals.com Section 07 STEERING/CONTROL SYSTEMS Subsection 02 (STEERING/CONTROL SYSTEMS) HANDLE BAR Inspection Removal Inspect steering column for damage, cracks or bending, replace if any problems is detected. Remove: – steering cover (refer to BODY 10-02) – handle bar grips no. 1 (discard screws) – brake handles no. 2. (refer to HYDRAULIC BRAKES 09-02) – throttle handle no. 3 and multi-function switch no. 4 (refer to the specific section) – steering clamp mounting bolts no. 5 and steering clamp no. 6 – handle bar no. 7 Inspection Inspect the handle bar for damage, cracks or bending, replace if any problems is detected. Installation For the installation, reverse the removal procedure. NOTE: Replace screws retaining handle bar grip by a new self-locking screws. Installation For the installation, reverse the removal procedure. TIE-ROD Removal Place the vehicle on jack stands and remove front wheel(s). Remove front fender. Refer to BODY 10-02. Remove fuel tank. Refer to FUEL CIRCUIT 04-02. NOTE: Do not remove tank completely, separate fuel tank from frame. Do not remove fuel lines. Remove cotter pin no. 18, castellated nut no. 19, hardened washer no. 20 and flat washer no. 21. Inspection Inspect ball joint ends for wear or looseness, if excessive, replace. Installation STEERING COLUMN Removal Remove: – steering cover (refer to BODY 10-02) – steering clamp mounting bolts no. 5, steering clamp no. 6 and steering cover support no. 8 – fuel tank (refer to FUEL CIRCUIT 04-02) NOTE: Do not remove fuel tank completely, separate fuel tank from frame only. Do not remove fuel lines. – cotter pin no. 9, castellated nut no. 10 and flat washer no. 11 to bottom end of steering column no. 12 Separate steering column and tie-rods no. 13. Refer to TIE-ROD section. Remove half housing bolts no. 14, stopper plates no. 15, half housings no. 16 and housing bushings no. 17. Pull steering column. For the installation, reverse the removal procedure. Pay attention to the following details. At the time of the reinstallation or the new tierod(s) installation, screw threaded end of tie-rod into ball joint. The maximum length for tie-rod groove to ball joint end must be the value A in the following chart: B A V01I0YA A MODEL mm TRAXTER in A B 20 ± 5 311 ± 1 25/32 ± 0.197 12 1/4 ± 0.039 NOTE: Torque the ball joint lock nut no. 22 to 36 N•m (27 lbf•in). 07-02-2 http://ReadManuals.com Section 07 STEERING/CONTROL SYSTEMS Subsection 02 (STEERING/CONTROL SYSTEMS) Toe Adjustment Place vehicle on level surface. Check that handlebar is straight. Use a long rule and check if the rear and front wheels are aligned. Adjust alignment with tie-rod. Adjust toe to 0º ± 0.3º. STEERING COLUMN BEARING Removal Place vehicle on jack stands and remove front wheels. Remove front fender. Refer to BODY 10-02. Remove fuel tank. Refer to FUEL CIRCUIT 04-02. NOTE: Do not remove tank completely, separate fuel tank from frame. Do not remove fuel lines. Separate tie-rods no. 13 from steering column no. 12. Refer to TIE-ROD section. Remove cotter pin no. 9, castellated nut no. 10 and flat washer no. 11 to bottom end of steering column no. 12. Pull up steering column. Remove carriage bolts no. 23 and first bearing flange no. 24. Remove bearing no. 25. V01I0NA 1 2 1. Flanged collar 2. Bearing MULTI-FUNCTION SWITCH Test Refer to ELECTRIC SHIFT SYSTEM 05-06 for the START/STOP button and UPSHIFT/DOWNSHIFT button. Refer to INSTRUMENTS AND ACCESSORIES 05-07 for Hi-Lo Beam button. Removal Remove bolts. Installation For installation, reverse the removal procedure. Pay attention to the following detail. Place flanged collar toward outside. Install carriage bolts no. 23, apply Loctite 277 on threads. 1 V01I0OA 1. Remove the bolts 07-02-3 http://ReadManuals.com Section 07 STEERING/CONTROL SYSTEMS Subsection 02 (STEERING/CONTROL SYSTEMS) Separate multi-function switch no. 5 from handle bar no. 7. Remove steering cover. Refer to BODY 10-02. Unplug multi-function switch connector. The connector is located under steering cover. 2 1 1 V01I10A 1. Throttle handle housing 2. Throttle cable V01I0PA UNDER STEERING COVER 1. Unplug this connector Slide cable in clip slot and remove the end of the cable from clip. Installation Installation For installation, reverse the removal procedure. If replaced, the calibration is required. Refer to ELECTRIC SHIFT SYSTEM 05-06. For installation, reverse the removal procedure. Refer to CARBURATOR AND FUEL PUMP 04-03 for adjustment procedure. THROTTLE HANDLE LH HANDLE BRAKE Removal Removal Remove screws no. 26. Remove screws. 1 1 V01I0ZA V01I0SA 1. Remove screws 1. Remove the screws Separate throttle handle no. 3 from handle bar no. 7. Remove throttle cable from housing. Separate handle brake no. 2 from handle bar no. 7. If necessary, cut locking tie. 07-02-4 http://ReadManuals.com Section 07 STEERING/CONTROL SYSTEMS Subsection 02 (STEERING/CONTROL SYSTEMS) Cable Removal Refer to HYDRAULIC BRAKES 09-02 for specifics instructions. Installation For installation, reverse the removal procedure. RH HANDLE BRAKE Removal Remove screws. 1 V01I11A 1. Remove the screws Separate handle brake no. 2 from handle bar no. 7. If necessary, unplug connectors under steering cover and cut locking tie. Hose Removal Refer to HYDRAULIC BRAKES 09-02 for specifics instructions. Installation For installation, reverse the removal procedure. 07-02-5 http://ReadManuals.com Section 08 SUSPENSION Subsection 01 (TABLE OF CONTENTS) TABLE OF CONTENTS FRONT SUSPENSION .......................................................................................................... SHOCKS ASSEMBLY ........................................................................................................ UPPER A-ARM ................................................................................................................... LOWER A-ARM.................................................................................................................. KNUCKLE ........................................................................................................................... WHEEL BEARING CONDITION ......................................................................................... 08-02-1 08-02-2 08-02-3 08-02-4 08-02-5 08-02-6 REAR SUSPENSION............................................................................................................. REAR SHOCK..................................................................................................................... SWING ARM ...................................................................................................................... 08-03-1 08-03-2 08-03-3 08-01-1 http://ReadManuals.com Section 08 SUSPENSION Subsection 02 (FRONT SUSPENSION ) FRONT SUSPENSION 48 Nm (35 lbfft) 1 6 4 5 2 7 75 Nm (55 lbfft) 8 67 Nm (49 lbfft) 1 6 7 3 8 67 Nm (49 lbfft) 67 Nm (49 lbfft) 7 5 7 8 4 2 67 Nm (49 lbfft) 8 3 75 Nm (55 lbfft) V01J0BT 08-02-1 http://ReadManuals.com Section 08 SUSPENSION Subsection 02 (FRONT SUSPENSION ) SHOCKS ASSEMBLY Removal Loosen wheel nuts. Lift front of vehicle and install a jack stand under the frame to support the vehicle off the ground. NOTE: Lift up vehicle high enough to have the wheel off the ground and shock absorber no. 1 fully extended. Remove wheels. Remove lower bolt no. 5 then upper bolt no. 6 of shock. 1 2 3 A01B4LA TYPICAL 1. Clevis pin 2. Bar 3. Handle horizontal 1 Push down on the handle until it locks. Remove spring stopper then release handle. 2 Inspection V01J0IA 1. Remove bolts 2. Front shock assembly Disassembly For shock spring disassembly use shock spring remover (P/N 529 027 100) in a vise. Mount shock in it and turn shock so that spring coils matched spring compressor. Close and lock the bar. Adjust the handle horizontal position by changing the position of the clevis pin. Inspect the spring for damage. Replace if necessary. Inspect shock for oil leakage. Extend and compress the piston several times over its entire stroke. Check that it moves smoothly and with uniform resistance with its rod upwards. Any of the following conditions will denote a defective shock: – A skip or hang back when reversing stroke at mid travel. – Seizing or binding condition except at extreme end of either stroke. – A gurgling noise after completing one full compression and extension stroke. Replace shock if any of these conditions are found. 08-02-2 http://ReadManuals.com Section 08 SUSPENSION Subsection 02 (FRONT SUSPENSION ) Installation For assembly, reverse the disassembly and removal procedures. NOTE: Do not interchange left and right tires. Check direction of rotation mark on tires. Remove cotter pin and castellated nut from upper ball joint no. 4. V01J0DA 2 1 3 1. Remove cotter pin 2. Castellated nut 3. Upper ball joint V01J0KA DIRECTION OF ROTATION Torque wheel nuts to 75 N•m (55 lbf•ft) in a crisscross sequence. Use a suitable ball joint remover and detach upper A-arm from knuckle. Remove bolts no. 7 and nuts retaining upper Aarm to frame. UPPER A-ARM Removal NOTE: Both upper no. 2 and lower no. 3 A-arms can be removed without removing the tie rods. Remove bolt no. 5 retaining the shock absorber no. 1 to upper A-arm. Detach brake hose from upper A-arm. 2 3 V01J0EA 2 1 1. Upper A-arm 2. Remove nuts and bolts Remove upper A-arm from vehicle. V01J0CA 1. 2. 3. 4. 4 1 Upper A-arm Detach brake hose from tubing Brake hose Remove nut and bolt 08-02-3 http://ReadManuals.com Section 08 SUSPENSION Subsection 02 (FRONT SUSPENSION ) Inspection Check ball joint rubber on upper A-arm for crack or any other damage. Inspect ball joint end for damages. Ensure it is moving freely. Replace upper A-arm as an assembly if ball joint is damaged. Torque nuts to 67 N•m (49 lbf•ft). Attach upper A-arm to knuckle. Install castellated nut and torque to 75 N•m (55 lbf•ft). Install a new cotter pin. Secure brake hose to upper A-arm. NOTE: Do not interchange left and right tires. Check direction of rotation mark on tires. V01J0JA RH UPPER A-ARM ASSEMBLY Check upper A-arm for distortion or damage. Replace as required. Inspect pivot bushings for wear or damages. Replace A-arms if necessary. V01J0KA Installation DIRECTION OF ROTATION Position upper A-arm and install bolts and nuts. Do not torque yet. Install bolt and nut retaining shock absorber to upper A-arm. NOTE: Position the upper A-arm in order to have a distance of 311 mm (12 in) between shock absorber retaining bolts (center to center). Use special A-arm tool (P/N 529 035 611). Torque wheel nuts to 75 N•m (55 lbf•ft) in a crisscross sequence. LOWER A-ARM Removal Remove cotter pin and castellated nut retaining lower A-arm no. 3 to ball joint on the knuckle. A V01J0FA V01J0HA 1. Torque nuts to 65 N•m (48 lbf•ft) A. 311 mm (12 in) 1 1. 2. 3. 4. 4 Lower A-arm Castellated nut Lower ball joint Knuckle 08-02-4 http://ReadManuals.com 3 2 1 Section 08 SUSPENSION Subsection 02 (FRONT SUSPENSION ) Use a suitable ball joint remover and detach knuckle from the lower A-arm. Remove nuts and bolts no. 8 retaining lower A-arm to frame. V01J0KA DIRECTION OF ROTATION V01J0GA 1 2 1. Lower A-arm 2. Remove nuts and bolts Torque wheel nuts to 75 N•m (55 lbf•ft) in a crisscross sequence. KNUCKLE Remove lower A-arm from vehicle. Removal Inspection Check ball joint rubber on lower A-arm for crack or any other damage. Inspect ball joint end for damages. Ensure it’s moving freely. Replace lower Aarm assembly if ball joint is damaged. Check lower A-arm for distortion or damage. Inspect pivot bushings for wear or damages. Replace A-arms if necessary. Installation For assembly, reverse the disassembly procedure. However, pay attention to the following. Install lower A-arm to frame and torque nuts to 67 N•m (49 lbf•ft). Attach lower A-arm no. 2 to knuckle. Install castellated nut and new cotter pin. NOTE: Do not interchange left and right tires. Check direction of rotation mark on tires. Raise front of vehicle, support it securely on jack stands and remove front wheel(s). Remove wheel cap, cotter pin, castellated nut, flat washer and O-ring. NOTE: Check O-ring for damage, replace if necessary. Remove hub. Refer to HYDRAULIC BRAKES 0902. Remove cotter pin and castellated nut from upper and lower suspension A-arm. Detach upper and lower suspension A-arm from knuckle. Remove cotter pin and castellated nut from tie-rod and separate tie-rod from knuckle. Separate knuckle from drive shaft. Inspection Inspect knuckle for damage. If any damage is detected, change the knuckle. 08-02-5 http://ReadManuals.com Section 08 SUSPENSION Subsection 02 (FRONT SUSPENSION ) Installation For installation, reverse the removal procedure. Pay attention to the following details. For hub installation, refer to HYDRAULIC BRAKE 09-02. Reinstall front wheel(s) and torque nuts to 75 N•m (55 lbf•ft) in a criss-cross sequence. NOTE: Do not interchange left and right tires. Check direction of rotation mark on tires. WHEEL BEARING CONDITION Raise front of vehicle. Take tire by the top and the bottom. Check lateral play. If there is any play, change knuckle and hub assembly. NOTE: Be careful not to misjudge play in the suspension ball joint. Refer to STEERING/CONTROLS SYSTEMS 07-02 for inspection. 08-02-6 http://ReadManuals.com Section 08 SUSPENSION Subsection 03 (REAR SUSPENSION) REAR SUSPENSION 8 7 3 2 6 4 6 5 1 6 5 14 18 9 17 10 11 16 15 12 13 V01J01S 08-03-1 http://ReadManuals.com Section 08 SUSPENSION Subsection 03 (REAR SUSPENSION) REAR SHOCK Push down on handle until it locks. Remove spring stopper and cap then release handle. Removal Lift rear of vehicle until rear shock absorbers no. 1 are fully extended. Install a jack or a block under the frame to support the vehicle. Remove upper no. 4 and lower no. 5 bolts and nuts no. 6 retaining shock absorbers each side. 1 2 1 3 A01B4LA TYPICAL 1. Clevis pin 2. Bar 3. Handle horizontal At installation, cap opening no. 8 must be 180° from spring stopper opening no. 7. 3 2 V01J02A RIGHT SIDE SHOWN 1. Upper bolt and nut 2. Lower bolt and nut 3. Rear shock absorber RH 1 2 Disassembly Use shock spring remover (P/N 529 027 100) and put it in a vise. Mount shock in it and turn shock so that spring coils no. 3 match spring compressor. Close and lock bar. Adjust handle horizontal by changing position of clevis pin. A03F12A TYPICAL 1. Cap opening 2. Spring stopper opening 08-03-2 http://ReadManuals.com Section 08 SUSPENSION Subsection 03 (REAR SUSPENSION) Inspection 4 1 5 Secure the shock body end no. 2 in a vise with its rod upward. 1 A14F0BA TYPICAL 1. Clamp here CAUTION: Do not clamp directly on shock body. Examine each shock for leaks. Extend and compress the piston several times over its entire stroke. Check that it moves smoothly and with uniform resistance with its rod upward. Pay attention to the following conditions that will denote a defective shock: – A skip or a hang back when reversing stroke at mid travel. – Seizing or binding condition except at extreme end of either stroke. – Oil leakage. – A gurgling noise, after completing one full compression and extension stroke. Renew if any faults are present. V01J03A 1. 2. 3. 4. 5. 2 3 2 Rear brake caliper Remove bolts Brake hose Swing arm Vent tube Detach brake hose from brackets on rear axle tube and on swing arm. Disconnect vent tube. 2 SWING ARM Removal Lift rear of vehicle until rear shock absorbers no. 1 are fully extended. Install a jack or a block under the frame to support the vehicle. Remove lower nuts no. 6 and bolts no. 5 retaining shock to rear drive train each side. V01J04A 1 1. Brake hose 2. Vent tube 08-03-3 http://ReadManuals.com Section 08 SUSPENSION Subsection 03 (REAR SUSPENSION) Remove M8 flanged screws retaining master cylinder. CAUTION: Don’t let caliper hang by the hose and don’t stretch or twist brake hose. Unscrew and remove RH pivot bolt no. 14. 2 3 1 2 1 4 V01J07A 1. Swing arm bellows 2. Pivot bolt RH Pull back rear train assembly to detach swing arm assembly from the frame and disengage the propeller shaft. Remove the M10 x 25 socket screws retaining rear rigid axle center section to swing arm. V01K05A 1. 2. 3. 4. Remove bolts Master cylinder Remove spring Loosen clamp Loosen clamp no. 16 retaining swing arm bellows no. 15 to engine. Loosen jam nut no. 12. Unscrew and remove LH pivot bolt no. 13. V01J05A 1. Remove M10 x 25 socket screws V01J08A 2 3 1 1. Swing arm 2. Pivot bolt LH 3. Jam nut 08-03-4 http://ReadManuals.com 1 Section 08 SUSPENSION Subsection 03 (REAR SUSPENSION) Remove M10 nuts and bolts retaining swing arm to rear axle tube. Installation Installation is essentially the reverse of removal procedure. However, pay attention to the following details. Secure rear rigid axle center section to swing arm with socket screws. Apply sealant Right Stuff (P/N 293 800 053) between both parts. Do not tighten yet. Secure rear axle tube to swing arm with bolts. Do not tighten yet. When all bolts are installed, tighten in a criss-cross sequence. 1 V01J06A 1 3 1. Remove nuts and bolts Detach swing arm no. 9 from rear drive system assembly. Inspection Check condition of swing arm. Inspect for distortion or damage. Check swing arm bellows for cracks or damage. Check oil seals no. 11 for wear or damage. Replace swing arm if necessary. Check condition of bearings no. 10. Make sure they turn smoothly. Replace swing arm if necessary. Ensure outer race of bearing fits tightly inside swing arm pivot. 4 2 V01J05B RIGID AXLE CENTER SECTION 1 3 1 2 4 V01J06B REAR AXLE TUBE Install cone bearings into cavity. Pack bearing cavities with Therma Lube grease (P/N 293 550 018). V01J09A 3 2 1. Swing arm bellows 2. Oil seal 3. Cone bearing 08-03-5 http://ReadManuals.com Section 08 SUSPENSION Subsection 03 (REAR SUSPENSION) Apply grease (P/N 293 550 019) to spring and splines before insert the end of the propeller shaft into swing arm. Install LH pivot bolt. Move the swing arm up and down several times and tighten LH pivot bolt. Torque LH pivot bolt to 12 N•m (9 lbf•ft). Install jam nut and torque to 147 N•m (108 lbf•ft) while holding pivot bolt. m WARNING 1 The LH pivot bolt must have more than 2 threads out of jam nut. 2 V01H09A 1. Propeller shaft 2. Apply grease Push rear drive train assembly toward the engine to engage propeller shaft splines and position the swing arm in the frame. Line up cone bearing and install RH pivot bolt. Torque to 147 N•m (108 lbf•ft). 1 Attach swing arm bellows to engine and install clamp. Torque to 5 N•m (4 lbf•ft). Reinstall master cylinder. Check brake pedal adjustment. Refer to HYDRAULIC BRAKES 09-02 for complete adjustment procedure. Route brake hose and secure to the brackets. Connect vent hose. Reinstall shock absorbers. 2 V01J0AA 1. RH pivot bolt 2. Pivot bearing 08-03-6 http://ReadManuals.com Section 09 BRAKES Subsection 01 (TABLE OF CONTENTS) TABLE OF CONTENTS HYDRAULIC BRAKES............................................................................................................ 09-02-1 FRONT BRAKES ................................................................................................................ 09-02-1 REAR BRAKE ..................................................................................................................... 09-02-2 GENERAL ........................................................................................................................... 09-02-3 MASTER CYLINDER .......................................................................................................... 09-02-3 CALIPER ............................................................................................................................. 09-02-4 BRAKE PADS ..................................................................................................................... 09-02-5 BRAKE DISC....................................................................................................................... 09-02-6 BRAKE PEDAL ................................................................................................................... 09-02-7 BRAKE CABLE ................................................................................................................... 09-02-8 INTERLOCK CABLE ........................................................................................................... 09-02-8 BRAKE HOSES AND BRAKE TUBES................................................................................ 09-02-9 BRAKE SYSTEM BLEEDING ............................................................................................. 09-02-11 BRAKE LIGHT SWITCH ..................................................................................................... 09-02-12 09-01-1 http://ReadManuals.com Section 09 BRAKES Subsection 02 (HYDRAULIC BRAKES) HYDRAULIC BRAKES FRONT BRAKES 4 24 Nm (18 lbfft) 12 11 5 10 34 Nm (25 lbfft) 6 10 9 13 24 Nm (18 lbfft) 25 10 8 9 34 Nm (25 lbfft) 14 7 24 Nm 12 11 (18 lbfft) 2 3 24 Nm (18 lbfft) 25 11 1 12 3 13 V01K06T 09-02-1 http://ReadManuals.com Section 09 BRAKES Subsection 02 (HYDRAULIC BRAKES) REAR BRAKE 3 23 18 24 Nm (18 lbfft) 12 15 16 11 25 24 Nm (18 lbfft) 24 Nm 12(18 lbfft) 11 1 34 Nm (25 lbfft) 24 19 14 22 13 21 17 20 V01K07T 09-02-2 http://ReadManuals.com Section 09 BRAKES Subsection 02 (HYDRAULIC BRAKES) GENERAL 2 Hydraulic Brakes System The brake system consists of two separate circuits. Each system has its own master cylinder and reservoir. Both front and rear brakes are disc type. Parking Device The parking device operates the rear brake only. It is activated by a locking mechanism on LH brake lever. 2 V01K12A 1. 2. 3. 4. 3 1 4 Oil level mark Bolt Sealing washers Remove screws Rear Brake Remove seat to have access to master cylinder reservoir no. 15. Unscrew reservoir cover. 2 V01K0KA 1 1. LH Brake lever 2. Locking mechanism MASTER CYLINDER Removal Front Brakes Remove reservoir cover with diaphragm and drain brake fluid from master cylinder no. 4. CAUTION: Avoid spilling brake fluid on plastic, rubber or painted parts. Protect these parts with a rag when servicing brake system. Remove bolt no. 12 and sealing washers no. 11 retaining brake hose no. 5 to master cylinder. Remove screws from master cylinder holder and remove master cylinder from handlebar. V01K0HA 1 3 1. Brake fluid reservoir 2. Reservoir cover 3. Flexible hose Raise rear of vehicle and support it securely. Remove RH wheel to have access to rear brake master cylinder no. 19. Disconnect flexible hose no. 16 from reservoir and plug the end to avoid brake fluid spillage. 09-02-3 http://ReadManuals.com Section 09 BRAKES Subsection 02 (HYDRAULIC BRAKES) Remove bolt no. 12 and sealing washers no. 11 retaining brake hose no. 23 to master cylinder no. 19. Discard sealing washers. Unhook push rod from brake pedal no. 20. Remove bolt retaining master cylinder no. 19 to frame. 2 3 5 V01K0JA 1. 2. 3. 4. 5. 4 Installation For the installation, reverse the removal procedure, paying attention to the following details. Front Brakes Place the master cylinder no. 4 on the handlebar. Position cylinder holding bracket with the UP mark upward. Install bolts and tighten loosely. With the handlebar in straight ahead position, position cylinder reservoir parallel to the ground. Tighten upper bolt in first. 1 V01K13A Master cylinder Flexible hose Rear brake hose Push rod Remove bolts Connect brake hose to master cylinder with bolt and new sealing washers. Inspection and Lubrication Discard any remaining fluid inside reservoir. Clean reservoir thoroughly with clean brake fluid. If master cylinder is damaged or leaking, replace as an assembly. Before rear master cylinder installation, remove the pusher and boot. Apply grease (P/N 293 550 007), about 2 g, inside the boot then reinstall boot and pusher. Wipe out any grease spillage on boot. Rear Brake Install master cylinder to frame. Install rear brake hose to master cylinder using new sealing washers. Connect flexible hose from reservoir and secure with new locking tie. Fill up reservoir with clean brake fluid. CAUTION: Do not mix different types of brake fluid. Use only DOT 4 brake fluid. Bleed both front and rear brake systems. Check for leaks and make sure the brakes operate normally before driving. CALIPER Removal V01K16A 1 1. Rear master cylinder 2. Pusher 3. Boot 3 2 Loosen wheel nuts. Raise vehicle and support it securely. Remove wheels. 09-02-4 http://ReadManuals.com Section 09 BRAKES Subsection 02 (HYDRAULIC BRAKES) Disassembly 2 Only brake pads are available as spare parts. If caliper is damaged, replace as an assembly. Installation For the installation, reverse the removal procedure, paying attention to the following details. Use new sealing washers when installing bolt retaining brake hose to caliper. Install caliper to knuckle with the new self-locking bolts. If hose was disconnected, bleed the brakes. Check for leaks and make sure the brakes operate normally before driving. 1 V01K14A RH FRONT BRAKE 1. Caliper 2. Brake hose BRAKE PADS Remove bolt no. 12 with sealing washers no. 11 and detach brake hose from caliper. Catch spilled fluid with a rag. Attach the brake hose in a position to prevent the fluid from flowing out. Unscrew bolts no. 25 retaining caliper to knuckle and remove caliper. Discard bolts. 3 V01K15A 1 Removal Raise vehicle and support it securely. Remove wheels. Remove caliper from knuckle. Remove retaining clip. While holding spring, pull out pin retaining brake pads. 2 1. Remove bolt and washers 2. Unscrew bolts 3. Brake hose V01K0CA 09-02-5 http://ReadManuals.com Section 09 BRAKES Subsection 02 (HYDRAULIC BRAKES) Remove brake pads no. 3 from caliper. CAUTION: Don’t let the caliper hang by the hose and don’t stretch or twist the hose. Inspection BRAKE DISC Inspection 2 3 1 Brake discs no. 13 can be inspected without removing from the vehicle. Raise vehicle and support it securely. Remove wheels and visually inspect disc surfaces for scratches or grooves. Make sure to check both sides of disc. Measure thickness of the disc. Minimum thickness is 4.7 mm (0.18 in). Replace disc if not within specifications. CAUTION: Brake discs should never be machined. Turn the disc by hand and check run out. 4 V01K0FA 1. 2. 3. 4. Check for leaks and make sure the brakes operate normally before driving. Clip Pin Retaining spring Brake pads CAUTION: Do not clean brake pads in petroleum based solvent. Use brake system cleaner or clean brake fluid only. Soiled brake pads must be replaced by new ones. Measure brake pad thickness. Brake pads must be replaced when lining is 1 mm (1/32 in) thick or less. BRAKE PAD MINIMUM THICKNESS 1 mm (1/32 in) CAUTION: Brake pads must always be replaced in pairs. DISC MINIMUM THICKNESS 4.7 mm (0.18 in) DISC RUN OUT (MAX.) 0.25 mm (0.01 in) Removal Remove caliper as described previously. After removing the caliper, suspend it out of the way. CAUTION: Don’t let the caliper hang by the hose and don’t stretch or twist the hose. NOTE: Wheel hub has to be removed from vehicle to replace brake disc no. 13. Remove cotter pin and unscrew castellated nut. Remove O-ring. m WARNING Avoid getting oil or grease on brake pads. Contaminated brake pads can affect stopping capacities. Installation Push caliper pistons inward before installing brake pads. After the job is completed, firmly depress the brake lever a few times to bring the pads in contact with the disc. V01H0BA 1. Remove O-ring 09-02-6 http://ReadManuals.com 1 Section 09 BRAKES Subsection 02 (HYDRAULIC BRAKES) Using a suitable puller, pull out wheel hub with disc. 1 2 BRAKE PEDAL Removal Remove RH side panel with foot peg. Refer to section 10-02 BODY for removal procedure. Unhook the return spring no. 21. Unhook the brake cable no. 17, interlock cable and push rod from brake pedal. 3 4 2 6 5 1 V01K0AA 1. Knuckle 2. Wheel hub Remove screws no. 14 retaining brake disc no. 13 to wheel hub. Discard screws NOTE: Heat up disc around screws to facilitate removal. V01K0IA Installation Install brake disc on wheel hub and tighten in a criss-cross sequence. 1. 2. 3. 4. 5. 6. Brake light switch Interlock cable Master cylinder Return spring Brake cable Brake pedal Remove cotter pin and washer then remove pedal no. 20 from pivot. 1 Installation and Adjustment 3 4 2 V01K0BA Place a shim between brake pedal lever and switch nut. The tightness of the shim must be 2 mm (5/64 in). Adjust push rod to eliminate free play between brake pedal lever and master cylinder. When the light pressure is feeling, torque push rod nut to 4.5 N•m (39 lbf•in). Remove the shim and press the brake pedal lever. Check for the light play in the system. TORQUE TO 34 N•m (25 lbf•ft) Install new self-locking screws and torque screws no. 14 to 34 N•m (25 lbf•ft). 09-02-7 http://ReadManuals.com Section 09 BRAKES Subsection 02 (HYDRAULIC BRAKES) Brake Handle Unscrew the bolt retaining the parking lever lock from brake lever no. 18 and remove the lever. Release the tension on brake lever. Rotate cable end bushing so that cable aligns with the brake lever recess, then lift cable end. Inspection Inspect cable ends for wear or deterioration. Replace if necessary. Installation and Adjustment V01K0YA 1 2 1. Push rod jam nut 2. Brake pedal return spring BRAKE CABLE Removal NOTE: Before removing brake cable from vehicle, note cable routing for reinstallation. Brake Pedal Remove adjusting nut no. 24 and disconnect brake cable no. 17 from brake pedal. 1 Installation is the reverse of the removal procedure. NOTE: Adjust brake pedal prior to adjusting brake cable. If brake pedal is not correctly adjusted, the parking device will not function properly. While holding rod with locking pliers, turn the adjustment nut until stopper comes in contact with the brake pedal lever. Unscrew adjustment nut approximately 1/4 turn to make sure there is no tension on brake cable. 1 3 2 V01K0ZA 2 1. Adjustment nut 2. Stopper 3. Max. 1 mm (1/32 in) gap V01K0MA INTERLOCK CABLE 1. Adjusting nut 2. Brake cable It may be necessary to hold the rod with locking pliers to prevent it from turning. Release cable housing from frame bracket. Removal NOTE: Before removing interlock cable from vehicle, note cable routing for reinstallation. Remove the fuel tank. Refer to FUEL CIRCUIT 0402. 09-02-8 http://ReadManuals.com Section 09 BRAKES Subsection 02 (HYDRAULIC BRAKES) Remove the LH and RH side panels. Refer to BODY 10-02. Disconnect the interlock cable under shift lever. Unscrew the nut from interlock adjustment. Remove the interlock cable from interlock bracket. Adjust cable so that the pin end from interlock cable is flush with the shifter lever plate. Use the interlock cable adjustment. 2 3 1 V01E04A 1 2 1. Interlock pin end 2. Sifter lever plate Torque nut and jam nut. V01K10A BRAKE HOSES AND BRAKE TUBES 1. Interlock adjustment 2. Interlock bracket 3. Unscrew this nut completely Rotate cable end bushing so that cable align with the interlock fastener recess, then lift cable end. Inspection Inspect cable ends for wear or deterioration. Replace if necessary. Installation and Adjustment Installation is the reverse of the removal procedure. NOTE: Under shifter lever, torque interlock cable lightly. Removal Front Flexible Brake Hoses Remove front luggage rack and front fender assembly. Remove fuel tank cover. Refer to BODY 10-02 for complete procedure. Unscrew the brake tube no. 6 from the hose fitting no. 7. 09-02-9 http://ReadManuals.com Section 09 BRAKES Subsection 02 (HYDRAULIC BRAKES) 2 3 V01K0SA 1 2 LEFT HAND SIDE 1. Flexible hose 2. Tube clip V01K0NA Rear Flexible Brake Hose Remove bolt no. 12 retaining flexible hose no. 23 on top of rear master cylinder no. 19. 1. Vertical brake tube 2. Brake hose 3. Tube clip Be careful not to bend the brake tubes. Remove screw holding tube clip no. 10 and detach hoses from the frame or upper swing arm. Remove bolt no. 12 from caliper or master cylinder and discard sealing washers no. 11. 1 V01K0JA 1. Disconnect brake hose V01K0RA 1 1 2 RIGHT HAND SIDE 1. Flexible hose 2. Tube clip 09-02-10 http://ReadManuals.com Section 09 BRAKES Subsection 02 (HYDRAULIC BRAKES) Remove bolt no. 12 and washers no 11 retaining hose to rear caliper. 1 Inspection Periodically inspect flexible brake hoses for cracks, leaks, blisters and any other damage. If any sign of deterioration is found, replace the defective part with a new one. Installation Flexible Hoses To install hoses, attach it to the caliper first. Always use new washers on both sides of the fitting. Make sure brake hoses are properly secured and that they do not come in contact with moving parts. 2 Brake Tubes Connect the brake tubes to the hose fitting but don’t tighten yet. Install the tube clips no. 10 retaining the brake hose to the frame. Tighten the brake tube fitting, paying attention not to twist tubes. V01K0WA 1. Rear brake caliper 2. Flexible brake hose Detach hose no. 23 from swing arm and remove from vehicle. BRAKE SYSTEM BLEEDING Brake Tubes Disconnect the brake tubes no. 6 and no. 8 from fitting on flexible hoses no. 9. Remove tube clip no. 10 retaining left flexible hose to frame. If the brake hoses have been disconnected at the master cylinder, or if air has entered the system due to low fluid level, it will be necessary to bleed complete system. If a brake hose has been disconnected only at one wheel, only that caliper must be bled. Remove cover and fill reservoir with DOT 4 brake fluid. Check the fluid level often during the bleeding operation. Keep sufficient brake fluid in reservoir at all times. CAUTION: Do not mix different types of brake fluid. Use only DOT 4 brake fluid. Place caliper on the top of the disk brake. The bleeder must be as high as possible. Install a hose on left side bleeder. Route this hose to a container. Connect the plastic hose of the brake bleeder tool to the bleeder valve of the right side front caliper. NOTE: Use the air pump (P/N 529 021 800) and bottle included in engine leak tester (P/N 861 749 100). Use the pump in vacuum mode. Pump gauge lever and open bleeder valve. And check for air to escape. 5 1 V01K0TA 1. 2. 3. 4. 5. 4 Vertical tube Horizontal tube Left flexible hose Right flexible hose Unscrew tube fitting 2 3 09-02-11 http://ReadManuals.com Section 09 BRAKES Subsection 02 (HYDRAULIC BRAKES) NOTE: Check the fluid level often in the reservoir. Add brake fluid when level is low. Repeat procedure until no air appears in hose. Proceed the same way with the left side front caliper. NOTE: Front and rear brakes must be bled separately as they are separate systems. Refill the master cylinder to proper level at the end of the operation. BRAKE LIGHT SWITCH Removal Front Brake Light Switch The front brakes switch is located on the master cylinder and cannot be adjusted. Check that switch is securely installed. MAX MIN V01K0XA 1 1. Front brake light switch Rear Brake Light Switch The rear brake switch is located above brake pedal. Remove RH side panel with foot peg. Refer to BODY 10-02 for removal procedure. Disconnect wire harness. Unscrew jam nut and remove switch from bracket. V01K0UA REAR BRAKE MASTER CYLINDER 1 Inspection and Installation Check switch for dirt or corrosion. Make sure it is operating properly. Depress brake pedal and check for brake light to turn on. For installation, reverse the removal procedure. The rear brake light switch cannot be adjusted. V01K12B FRONT BRAKE MASTER CYLINDER 1. Indicator level Install cover on master cylinder. Check for leaks and make sure the brakes operate normally before driving. 09-02-12 http://ReadManuals.com Section 10 BODY/FRAME Subsection 01 (TABLE OF CONTENTS) TABLE OF CONTENTS BODY...................................................................................................................................... BODY PARTS ..................................................................................................................... SEAT................................................................................................................................... SEAT/ENGINE COVER....................................................................................................... STORAGE/STEERING/SHIFTER GUIDE COVER .............................................................. FRONT SKID PLATE/BUMPER/LUGGAGE RACK ............................................................ FRONT FENDER/MUDGUARD/FACIA .............................................................................. INNER FENDER.................................................................................................................. FUEL TANK COVER/SIDE PANEL ..................................................................................... REAR LUGGAGE RACK..................................................................................................... REAR FENDER/REAR FENDER COVER ............................................................................ REAR MUDGUARD/FACIA ................................................................................................ SKID PLATE ....................................................................................................................... ARM PROTECTOR ............................................................................................................. LATCH LEVER/LATCH BASE/SPRING .............................................................................. SEAT ADJUSTMENT ........................................................................................................ SEAT COVER REPLACEMENT .......................................................................................... STORAGE COVER LATCH................................................................................................. SEAT CLEANING ............................................................................................................... DECALS REPLACEMENT .................................................................................................. HITCH/TRAILER BALL ....................................................................................................... PLASTIC MAINTENANCE ................................................................................................. MAINTENANCE ................................................................................................................. PLASTIC REPAIR................................................................................................................ REPAIR................................................................................................................................ 10-02-1 10-02-1 10-02-3 10-02-4 10-02-5 10-02-5 10-02-6 10-02-8 10-02-8 10-02-9 10-02-10 10-02-11 10-02-12 10-02-12 10-02-12 10-02-13 10-02-13 10-02-13 10-02-14 10-02-14 10-02-14 10-02-15 10-02-15 10-02-16 10-02-16 FRAME ................................................................................................................................... 1, FOOTREST ..................................................................................................................... 2, REMOVABLE BRACE..................................................................................................... 3, REAR EXTENSION FRAME ........................................................................................... 4, WINCH PLATE ............................................................................................................... 5, FRAME ........................................................................................................................... 10-03-1 10-03-2 10-03-2 10-03-2 10-03-3 10-03-3 10-01-1 http://ReadManuals.com Section 10 BODY/FRAME Subsection 02 (BODY) BODY BODY PARTS 13 17 45 44 19 49 46 16 4 18 48 26 5 47 9 37 11 33 38 41 12 14 36 39 20 35 6 51 28 V01L2FS 28 52 15 Nm (133 lbfin) 50 10 34 10-02-1 http://ReadManuals.com Section 10 BODY/FRAME Subsection 02 (BODY) 15 Nm (133 lbfin) 32 8 31 15 24 Nm (17 lbfft) 30 15 Nm (133 lbfin) 42 43 15 Nm (133 lbfin) 7 24 Nm 29 (17 lbfft) 3 27 27 V01L2GS 10-02-2 http://ReadManuals.com Section 10 BODY/FRAME Subsection 02 (BODY) SEAT 58 1 21 53 25 2 54 23 22 24 Nm (17 lbfft) 55 24 56 57 V01L2HS 10-02-3 http://ReadManuals.com Section 10 BODY/FRAME Subsection 02 (BODY) SEAT/ENGINE COVER 2, Engine Cover Remove seat and screws no. 24. Removal 1, Seat Pull latch upward while gently lifting rear of seat. Continue lifting movement until you can release the front retaining devices, then, completely remove seat. V01L0GA On the inside, remove bolts no. 25. V01L0AA V01L1QA Installation Installation is the reverse order of removal. 10-02-4 http://ReadManuals.com Section 10 BODY/FRAME Subsection 02 (BODY) STORAGE/STEERING/SHIFTER GUIDE COVER Removal Inspection Check latches no. 27 from storage cover for cracks or other damages. Change if necessary. 3, Storage Cover Unlatch cover, lift then remove cover. Installation 4, Steering Cover Remove screws under handle bar. FRONT SKID PLATE/BUMPER/ LUGGAGE RACK Installation is the reverse order of removal. Removal 6, Front Skid Plate Remove bolts no. 28. V01L0WA Remove ignition switch and choke lever. NOTE: For the choke lever removal, remove the roll pin retaining the lever then unscrew the large plastic nut. Unplug all connectors. 5, Shifter Guide Cover Remove steering cover. Unfasten plastic screws no. 26. V01L0YA 7, Front Bumper Remove front skid plate. Remove bolts no. 29 and no. 30. V01L0XA 10-02-5 http://ReadManuals.com Section 10 BODY/FRAME Subsection 02 (BODY) Cut locking tie holding the cable of the sealed beam. NOTE: Install a new locking tie at the time of luggage rack installation. Pull upside. Installation Installation is in the reverse order of removal. FRONT FENDER/MUDGUARD/ FACIA Removal V01L0ZA 8, Front Luggage Rack Remove bolts no. 30, no. 31 and no. 32. NOTE: Remove sealed beam to reach nut. Refer to INSTRUMENTS AND ACCESSORIES 05-07. 9, Front Fender Remove front luggage rack and shifter guide cover. Remove screws no. 33 and no. 34 on each side. V01L13A Remove fuel cap. V01L12A 10-02-6 http://ReadManuals.com Section 10 BODY/FRAME Subsection 02 (BODY) 10, Front Mudguard Remove screws no. 34 and no. 35. Remove screw no. 36 near the front facia. V01L16A Remove bolts no. 28, no. 29 and no. 30. V01L1PA 11, Front Facia Remove sealed beams. Remove the screws no. 37 under facia. V01L0YB Pull front bumper forward. Installation Installation is the reverse order of removal. V01L15A Remove the screws no. 38 on the top of facia. 10-02-7 http://ReadManuals.com Section 10 BODY/FRAME Subsection 02 (BODY) INNER FENDER Removal 12, Inner Fender Remove front wheel. Remove screws no. 39, two on bottom side and one behind shock. V01L17A Installation Install in first, the upper screw; secondly, the lower front screw and then the lower rear screw. NOTE: Install all screws before torque. FUEL TANK COVER/SIDE PANEL V01L1AA Remove screw on the LH side and separate from dart on the RH side. Removal 1 13, Fuel Tank Cover Remove seat. Turn steering to the right side and remove screw retaining shifter guide cover and fuel tank cover. Turn steering to the left side and remove the other screw. V01L2KA 1. Screw 2. Dart 10-02-8 http://ReadManuals.com 2 Section 10 BODY/FRAME Subsection 02 (BODY) Remove latches no. 40. Three by side. V01L1DA V01L14A 14, Side Panel Remove seat. Remove footpeg. Remove plastic pin and screws retaining the side panel with front and rear fender. Installation Installation is the reverse order of removal. REAR LUGGAGE RACK Removal 15, Rear Luggage Rack Remove bolts no. 42 under rear facia. V01L1CA On front and rear mudguards, remove the three first screws no. 35 and screws no. 34 retaining side panel with mudguards. V01L1EA 10-02-9 http://ReadManuals.com Section 10 BODY/FRAME Subsection 02 (BODY) Under rear fender, remove bolts no. 43. One on each side. REAR FENDER/REAR FENDER COVER Removal 16, Rear Fender Remove seat and rear luggage rack. Remove screws no. 44 under rear facia and screws no. 45 on the top. V01L1FA Pivot the bottom of rear luggage rack toward inside of ATV. Pull the rear luggage rack toward back. 2 V01L1HA 1 Remove plastic pin of rear fender. Remove screws no. 33 and no. 34. V01L1GA Step 1 : Pivot botton of rear rack toward inside Step 2 : Pull rear rack toward back Installation Installation is the reverse order of removal. NOTE: Install all bolts before torque. V01L1IA Disconnect brake light. 10-02-10 http://ReadManuals.com Section 10 BODY/FRAME Subsection 02 (BODY) Rear Fender Cover Remove rear luggage rack. Remove screws no. 44 under rear facia. REAR MUDGUARD/FACIA Removal 18, Rear Mudguard Remove screws no. 47 retaining mudguard and rear fender. Remove screws retaining mudguard and side panel. V01L1HB Lift the rearward of the rear fender and remove the ten latches no. 46. V01L1IB Remove screw no. 48 near rear facia. 19, Rear Facia Remove rear luggage rack. Unfasten screws no. 44 and no. 49. V01L1MA V01L1LA Installation Installation is the reverse order of removal. 10-02-11 http://ReadManuals.com Section 10 BODY/FRAME Subsection 02 (BODY) Installation ARM PROTECTOR Installation is the reverse order of removal. However, pay attention to the following details. For the rear facia installation, install the flat washers between rear fender and rear facia with a needle nose pliers. Removal Remove the bolts. V01L1NA Instalation V01L1OA Installation is the reverse order of removal. SKID PLATE LATCH LEVER/LATCH BASE/ SPRING Inspection The skid plate protected the engine. Check for damage, crack or looseness. Change if skid plate is damaged or cracked. Torque all bolts at the regular interval. Removal Removal 21, Latch Lever Remove push nut no. 53 and rivet no. 54. Separate latch lever from spring no. 23. 22, Latch Base Remove bolts no. 55 and separate latch base from spring. 20, Skid Plate Under vehicle, remove bolts no. 50 and no. 51. Installation CAUTION: Be sure to install rubber spacer no. 52 between skid plate and engine. Installation is the reverse order of removal. NOTE: Install all bolts before torque. 23, Spring Remove latch base. Separate spring from latch base and latch lever. 10-02-12 http://ReadManuals.com Section 10 BODY/FRAME Subsection 02 (BODY) SEAT ADJUSTMENT For latch stud no. 56 adjustment, unscrew the latch stud nut no. 57 and screw or unscrew the latch stud to the best height. See the following illustration. 1 2 A 1 V01L1SA 1. Lock pin 2. Adjustment nut (apply Loctite 271) A. 38 ± 1 mm (1-1/2 ± 3/64 in) F01L3YA 2 TYPICAL 1. Piece of wood 2. ETN-50 (electric) or T-50 (manual) Torque the latch stud nut. SEAT COVER REPLACEMENT Remove the old seat cover no. 58. Check the foam and replace if necessary. Install staples with an electric tacker such as Arrow tacker no. ETN-50 or with a manual tacker such as Arrow tacker no. T-50. NOTE: For an easier installation, it’s highly recommended to use an electric tacker. Ensure that the seat rest firmly against a hard surface such as a piece of wood. This is done to get the staples completely pushed in place. After cover installation cut all around the excess of material. STORAGE COVER LATCH Inspection Inspect for crack or damage. Change if a any crack or damage are detected. Removal Under front fender, pull the storage cover latch. Installation Under front fender, insert the storage cover latch in the slot. Pull the latch by the top. 10-02-13 http://ReadManuals.com Section 10 BODY/FRAME Subsection 02 (BODY) SEAT CLEANING It is recommended to clean the seat with a solution of warm soapy water, using a soft clean cloth. CAUTION: Avoid use of harsh detergents such as strong soaps, degreasing solvents, abrasive cleaners, paint thinners, etc. that may cause damage to the seat cover. DECALS REPLACEMENT Removal Using a heat gun warm up one end of decal for a few seconds until decal can roll off when rubbing with your finger. Pull decal slowly and when necessary apply more heat to ease removal on the area that has to be peeled off. If decal tears while pulling off, it has to be heated for a few seconds longer. If decal tends to stretch while pulling off, stop heating and wait a few seconds to let it cool, then peel it off. Installation There are 2 types of decals used on ATV. One has a protective film on back side and the other has a protective film on both sides. They are used on 2 types of materials; plastic and metal. DECALS HAVING A PROTECTIVE FILM ON BACK SIDE ONLY These decals usually contain written information (ex.: warning) and are used on metal. Clean surface with a good solvent such as ACRYLICLEAN DX 330 from PPG or equivalent (refer to manufacturer instructions). Using a pencil and the decal as a template, mark the area where decal will be located. Remove half of the decal back protective film and align decal with marks. Start sticking it from center and remove the other half of the film to stick it completely. Carefully squeegee decal beginning at center and working outward using, firm, short, overlapping strokes. DECALS HAVING A PROTECTIVE FILM ON BOTH SIDES These decals usually contain graphics and are used on plastic. INSTALLATION ON PLASTIC Clean surface with isopropyl alcohol. Using a pencil and the decal as a template, mark the area where decal will be located. Apply an activator (P/N 293 530 036) to prepare the surface using a clean cloth. After a few seconds, when the activator evaporates, the surface is ready. CAUTION: Do not use soapy water to locate decal on plastic parts. Remove back protective film from decal and carefully align decal with marks. When well aligned squeegee decal beginning at center and working outward using firm, short, overlapping strokes. HITCH/TRAILER BALL Inspection The hitch/trailer ball is optional. If the vehicle is equipped with this option, often check the solidity of the installation. 10-02-14 http://ReadManuals.com Section 10 BODY/FRAME Subsection 02 (BODY) PLASTIC MAINTENANCE MAINTENANCE Clean the vehicle thoroughly, removing all dirt and grease accumulation. To clean use a soft clean cloth and either soapy water or isopropyl alcohol. To remove grease, oil or glue use isopropyl alcohol. CAUTION: Do not apply isopropyl alcohol or acetone directly on decals. CAUTION: The following products must not be used to clean or wax any of the plastic components used on the vehicles: – gasoline – brake fluid – kerosene – diesel fuel – lighter fluid – varsol – naphtha – acetone – strong detergents – abrasive cleaners – waxes containing an abrasive or a cleaning agent in their formula 10-02-15 http://ReadManuals.com Section 10 BODY/FRAME Subsection 02 (BODY) PLASTIC REPAIR REPAIR The very first step before repairing plastic materials is to find out exactly which type of material is involved. Refer to following chart. CAUTION: Consult the plastic maintenance chart carefully, some maintenance products are not compatible with certain plastics. IRREPARABLE PART HIGH MOLECULAR WEIGHT POLYETHYLENE HIGH DENSITY POLYETHYLENE Fuel tank cover Front and rear facia Front and rear fender Rear fender cover Side panel Steering cover Storage cover Front and rear mudguard Inner fender Front skid plate 10-02-16 http://ReadManuals.com LOW DENSITY POLYETHYLENE Section 10 BODY/FRAME Subsection 03 (FRAME) FRAME 3 48 Nm 11 (35 lbfft) 10 10 11 5 1 8 24 Nm (17 lbfft) 24 Nm (17 lbfft) 12 13 9 24 Nm (17 lbfft) 2 7 4 13 1 6 24 Nm (17 lbfft) V01L2IS 10-03-1 http://ReadManuals.com Section 10 BODY/FRAME Subsection 03 (FRAME) 1, FOOTREST 3, REAR EXTENSION FRAME Removal Removal Remove footpeg and side panel. Refer to BODY 10-02. Remove M8 x 20 mounting flanged bolts no. 6 and flanged nuts no. 7. Remove rear fender. Refer to BODY 10-02. Remove: – radiator, (refer to COOLING SYSTEM 03-03) – muffler, (refer to REMOVAL AND INSTALLATION 03-02) – voltage regulator, (refer to CHARGING SYSTEM 05-03) – ignition coil retaining bolt 1 2 3 V01L20A 1 1. M8 x 20 mounting flanged bolts Inspection Check for cracks or bent tube. Change or repair if necessary. Installation Installation is essentially the reverse of removal procedure. 2, REMOVABLE BRACE Removal Remove footpegs and side panel. Refer to BODY 10-02. Unscrew bolts no. 8 and no. 9. Inspection Check for crack or bent tube. Change if necessary. 4 V01L23A 1. 2. 3. 4. Radiator with ventilator Muffler Voltage regulator Ignition coil retaining bolt Installation For the installation, reverse the removal procedure. 10-03-2 http://ReadManuals.com Section 10 BODY/FRAME Subsection 03 (FRAME) Remove M10 x 55 mounting flanged bolts no. 10 and the flanged nuts no. 11. 1 1 V01L0YC 1. Remove M8 x 20 flanged bolts Inspection Check for crack or other damage. Change if necessary. Installation Installation is the reverse of removal procedure. 5, FRAME V01L2JA 1. Remove the M10 x 55 mounting flanged bolts Cleaning Inspection Check for crack, bent tube or other damage. Repair or change if necessary. Installation Installation is the reverse of removal procedure. 4, WINCH PLATE Removal Remove front skid plate and front bumper. Refer to BODY 10-02. Remove M8 x 20 flanged bolts no. 12 and flanged nut no. 13. Clean frame and frame extension with appropriate cleaners and rinse with high pressure hose. Touch up all metal spots where paint has been scratched off. Spray all bare metal parts of vehicle with metal protector. Welding Steel Frame: – electric welding – amperage: 70 - 110 A – voltage: 20 - 24 V – rod: E-7014 (3/32 in) 10-03-3 http://ReadManuals.com Section 10 BODY/FRAME Subsection 03 (FRAME) CAUTION: Before performing electrical welding anywhere on the vehicle, unplug the multiple connector at the MPEM. Also unplug the negative cable and the voltage regulator. This will protect the MPEM and battery against damage caused by flowing current when welding. NOTE: Install the ground as close as possible from the reparation area. CAUTION: If welding is to be done near plastic material, it is recommended to either remove the part from the area or to protect it with aluminum foil to prevent damage. 10-03-4 http://ReadManuals.com Subsection 01 Section 11 TECHNICAL DATA (SI METRIC INFORMATION GUIDE) TECHNICAL DATA SI* METRIC INFORMATION GUIDE BASE UNITS DESCRIPTION UNIT SYMBOL length .................................................................. mass .................................................................... force .................................................................... liquid .................................................................... temperature ........................................................ pressure .............................................................. torque .................................................................. speed .................................................................. meter ..................................................... kilogram ................................................. newton ................................................... liter ......................................................... Celsius ................................................... kilopascal ................................................ newton•meter ....................................... kilometer per hour .................................. m kg N L °C kPa N•m km/h PREFIXES PREFIX SYMBOL MEANING VALUE kilo ................................ centi ............................. milli ............................... micro ............................ k ............................... c ............................... m .............................. µ ............................... one thousand ......................................... one hundredth ........................................ one thousandth ...................................... one millionth .......................................... 1 000 0.01 0.001 0.000001 CONVERSION FACTORS TO CONVERT TO † MULTIPLY BY in ......................................................................... in ......................................................................... in2 ........................................................................ in3 ........................................................................ ft .......................................................................... oz ......................................................................... lb ......................................................................... lbf ........................................................................ lbf•in ................................................................... lbf•ft .................................................................... lbf•ft .................................................................... PSI (lbf/in2) .......................................................... imp. oz ................................................................. imp. oz ................................................................. imp. gal ................................................................ imp. gal ................................................................ U.S. oz ................................................................. U.S. gal ................................................................ MPH .................................................................... Fahrenheit ........................................................... Celsius ................................................................. mm ......................................................... cm .......................................................... cm2 ......................................................... cm3 ......................................................... m ............................................................ g ............................................................. kg ........................................................... N ............................................................ N•m ....................................................... N•m ....................................................... lbf•in ...................................................... kPa ......................................................... U.S. oz .................................................... mL .......................................................... U.S. gal ................................................... L ............................................................. mL .......................................................... L ............................................................. km/h ...................................................... Celsius ................................................... Fahrenheit .............................................. 25.4 2.54 6.45 16.39 0.3 28.35 0.45 4.4 0.11 1.36 12 6.89 0.96 28.41 1.2 4.55 29.57 3.79 1.61 (°F - 32) ÷ 1.8 (°C × 1.8) + 32 * The international system of units abbreviates SI in all languages. † To obtain the inverse sequence, divide by the given factor. To convert ’’mm’’ to ’’in’’, divide by 25.4. NOTE: Conversion factors are rounded off to 2 decimals for easier use. 11-01-1 http://ReadManuals.com Section 11 TECHNICAL DATA Subsection 02 (ENGINE AND VEHICLE) ENGINE AND VEHICLE VEHICLE MODEL 7400/7401 Engine type Electric and manual Number of cylinder(s) 1 Number of valves 2 valves with hydraulic lifters (no adjustment) ENGINE Decompressor type Automatic Standard Stroke Displacement mm (in) 89 (3.5) mm (in) 80 (3.15) cm3 (in3) 498 (30.4) Compression ratio 9:1 Maximum HP RPM ± 100 RPM 6000 Lubrication Wet sump with replaceable oil filter Oil filter BOMBARDIER-ROTAX Air filter type Exhaust system Cleanable synthetic panelette Type Nelson, stainless steel Spark arrester USDA approved Magneto/generator 400 W @ 6000 RPM Ignition system type ELECTRICAL Spark plug I.D.I. (Inductive Discharge Ignition) Make and type Gap NGK BR8EA mm (in) 0.65 (.026) Trigger coil Ω 190 – 300 Battery charging coil Ω 0.4 ± 01 Ω 0.4 to 0.9 @ 20°C (68°F) kΩ Not measurable Ignition coil Primary Secondary Engine RPM limiter 7500 Type Battery Electrolyte battery type Voltage 12 volts Nominal rating 19 A•h (21 optional) Power starter output Fuses 0.6 KW Ignition 15 A Accessories 15 A Solenoids 15 A Fan 15 A MPEM 20 A Charging system Carburetor 30 A Mikuni constant depressurant type with manual choke and ECS (Enricher Coating System) Type Model CARBURETION Fuel pump BST34-232 Type Mikuni Model External (vacuum-operated) Idle engine speed RPM 1050 ± 50 1100 ± 100 Needle jet 0-7M (850) Jet needle 5GBF61-2 Clip position number Choke plunger position ± 0.5 mm 2.5 2.5 ± .039 in 0.098 0.098 Variable choke 0.5 mm (0.02 in) Preliminary pilot screw turn Float level Fuel 1100 ± 100 Middle Opening Halfway Throttle cable Adjustment 7415/7416/7417/7418 BOMBARDIER-ROTAX 511, longitudinal mount, liquid cooled Starting system Bore 7413/7414 2.25 turn (see section 04-03 for setting procedure) ± 0.5 mm 10.6 ± 0.020 in 0.417 Type Octane no. Regular unleaded gasoline 87 (Ron + Mon)/2 11-02-1 http://ReadManuals.com Section 11 TECHNICAL DATA Subsection 02 (ENGINE AND VEHICLE) VEHICLE MODEL 7400/7401 COOLING Fan Fan thermostat Engine thermostat 96°C (205°F) Closing temperature 102°C (221°F) Opening temperature 85°C (185°F) Closing temperature 75°C (167°F) 90 kPa (13 PSI) Type DRIVE TRAIN Normal oil operating pressure of engine Dual range (HI-LO) with park, neutral and reverse Speeds 5 Model Electronically controlled hydraulic shift Minimum 101 kPa (14.7 PSi) Maximum 608 kPa (88 PSi) Operating pressure for shifting and clutching 810 kPa (118 PSi) Clutch type 1 centrifugal and 1 multi-disk hydraulically controlled Engagement RPM ± 100 RPM Front differential 1300 1600 1600 Shaft driven/single Auto-Lock differential (pump driven) Front differential ratio 3.6:1 Rear axle STEERING/ CONTROL 7415/7416/7417/7418 Thermostatic Opening temperature Radiator cap opening pressure Transmission 7413/7414 Shaft driven/solid axle Rear axle ratio 3.6:1 Turning radius 3.3 m (11 ft) Total toe (vehicle on ground) ± 0.3° 0° Camber angle 0° ± 5 mm Tie-rod maximum length unengaged 20 ± 0.197 in 0.787 FRONT Suspension type Independent suspension — double A-arm Suspension travel SUSPENSION Shock absorber 178 mm (7 in) Qty 2 Type oil Spring free length 270 mm (11 in) Spring color code Silver/Blue/Black Front preload adjustment N.A. REAR Suspension type Rigid swing arm Suspension travel Shock absorber 191 mm (8 in) Qty 2 Type Oil Spring free length 355 mm (14 in) Spring color code Blue/Black/Black Rear preload adjustment BRAKES Front brake Rear brake Parking brake N.A. Qty 2 Type Brembo hydraulic Qty 1 Type Brembo hydraulic Transmission brake and brake lever lock on LH brake lever Lining material Metallic Minimum pad thickness 1 mm (0.04 in) Minimum brake disk thighness 4.7 mm (0.18 in) Maximum brake disk warpage 0.25 mm (0.01 in) Fixed Caliper 11-02-2 http://ReadManuals.com Section 11 TECHNICAL DATA Subsection 02 (ENGINE AND VEHICLE) VEHICLE MODEL 7400/7401 7413/7414 7415/7416/7417/7418 TIRES AND WHEELS TIRE Front Pressure Rear Minimum Size 48 kPa (7 PSi) 45 kPa (6.5 PSi) Recommended 38 kPa (5.5 PSi) Minimum 34.5 kPa (5 PSi) Minimum tire thread depth 4 mm (0.16 in) Front 635 x 203 x 305 mm (25 x 8 x 12 in) Rear 635 x 254 x 305 mm (25 x 10 x 12 in) Front 305 x 165 mm (12 x 6.5 in) Rear 305 x 203 mm (12 x 8 in) WHEELS Size DIMENSION Recommended Overall length 2071 mm (81.5 in) Overall width 1194 mm (47 in) Overall height 1143 mm (45 in) Dry weight 340 kg (755 lb) Wheel base 1296 mm (51 in) Wheel track Front 992 mm (39 in) Rear 940 mm (37 in) Front and under engine ground clearance 244 mm (9.6 in) Rear rigid axle ground clearance 188 mm (7.4 in) LIQUID Fuel tank 20 L (5.7 U.S. gal) Fuel tank reserve Engine/transmission oil Differential oil 6 L (1.6 U.S. gal) Capacity 3 L (0.8 U.S. gal) Recommended Capacity SAE 10W40, a 4 stroke mineral based oil SH or SJ Front Rear Recommended CAPACITIES CV joint grease 300 mL (10 U.S. oz) Synthetic polyolester oil 75W90 (API GL5) TEXACO, HTBJ grease (M3014), ONLY Propeller shaft grease Hydraulics brakes 650 mL (22 U.S. oz) SHELL, Alvania EP-2, ONLY Capacity Recommended Cooling system 250 mL (8.5 U.S. oz) Brake fluid DOT 4, ONLY 2.5 L (0.7 U.S. gal) Ethylene-glycol concentration 60% BODY AND FRAME Weight distribution Front/rear Front storage tray Rack 49/51 10 kg (22 lb) Front 40 kg (90 lb) Rear (including tongue weight) 80 kg (175 lb) Total vehicle load allowed 220 kg (485 lb) Gross vehicle weight rating 540 kg (1200 lb) Towing 500 kg (1100 lb) 14 kg (30 lb) Tongue (included with rear rack weight) 11-02-3 http://ReadManuals.com Section 11 TECHNICAL DATA Subsection 02 (ENGINE AND VEHICLE) VEHICLE MODEL Frame Front/rear rack Front bumper MATERIAL Front/rear fender Fuel tank cover Steering cover Storage compartment cover Front/rear facia Side panel Mudguard Seat cover 7400/7401 7413/7414 7415/7416 Material Steel Color Black Material Color Steel Red Black Material Steel Color Material Color Material Color Material Color Material Color Material Color Material Color Material Color Material Color Silver High density polyethylene Red Green High density polyethylene Black High density polyethylene Black High density polyethylene Black High density polyethylene Black High density polyethylene Black Low density polyethylene Black Thermoformed vinyl Black ENGINE Engine support 24 N•m (17 lbf•ft) Engine mount 48 N•m (35 lbf•ft) Spark plug 22 N•m (16 lbf•ft) Rewind starter 10 N•m (89 lbf•in) Rear solenoid block 5 N•m (44 lbf•in) Magneto 9 N•m (80 lbf•in) Starter 10 N•m (89 lbf•in) Starter RED (+) cable 6 N•m (53 lbf•in) STPS (Sub-Transmission Position Sensor) 3 N•m (27 lbf•in) GBPS (Gear Box Position Sensor) 3 N•m (27 lbf•in) TORQUE COOLING Radiator mount screw/nut 10 N•m (89 lbf•in) Temperature sensor 17 N•m (151 lbf•in) Water pump 10 N•m (89 lbf•in) Fan mount screw/nut 4 N•m (35 lbf•in) Temperature sender 3 N•m (27 lbf•in) EXHAUST Exhaust nut 11 N•m (97 lbf•in) Heat shield screws 10 N•m (89 lbf•in) FUEL Carburetor mounting clamp 0.6 N•m (5.4 lbf•in) DRIVE TRAIN Front wheel hub nut 140 N•m (103 lbf•ft) (MINIMUM) Rear wheel hub nut Front differential 140 N•m (103 lbf•ft) (MINIMUM) Front 48 N•m (35 lbf•ft) Rear 48 N•m (35 lbf•ft) Rear differential socket screws Propeller shaft screw 48 N•m (35 lbf•ft) Engine side 32 N•m (24 lbf•ft) Differential side 42 N•m (31 lbf•ft) 11-02-4 http://ReadManuals.com 7417/7418 Section 11 TECHNICAL DATA Subsection 02 (ENGINE AND VEHICLE) VEHICLE MODEL 7400/7401 7413/7414 7415/7416 7417/7418 WHEEL Wheel nuts 75 N•m (55 lbf•ft) STEERING/CONTROL Upper/lower A-arm lock nut 75 N•m (55 lbf•ft) Tie rod ends 75 N•m (55 lbf•ft) Steering arm (castellated nut) 75 N•m (55 lbf•ft) Steering column support screws 24 N•m (17 lbf•ft) Handlebar screws 24 N•m (17 lbf•ft) Flanged bearing bolts 24 N•m (17 lbf•ft) SUSPENSION Shock absorber bolt 48 N•m (35 lbf•ft) Front upper swing arm 67 N•m (49 lbf•ft) Front lower swing arm 67 N•m (49 lbf•ft) TORQUE Rear swing arm RH pivot 147 N•m (108 lbf•ft) Rear swing arm LH pivot 11 N•m (97 lbf•in) Rear swing arm LH nut 147 N•m (108 lbf•ft) Rear swing arm hexagonal screws 48 N•m (35 lbf•ft) BRAKE Caliper brake screws 24 N•m (17 lbf•ft) Brake disk screws 34 N•m (25 lbf•ft) BODY/FRAME Front bumper Front rack Rear rack 24 N•m (17 lbf•ft) Front 24 N•m (17 lbf•ft) Rear 15 N•m (133 lbf•in) Upper 15 N•m (133 lbf•in) Lower 15 N•m (133 lbf•in) Rear extension frame 48 N•m (35 lbf•ft) Front differential support 24 N•m (17 lbf•ft) Seat pivot bar 24 N•m (17 lbf•ft) Winch plate support 24 N•m (17 lbf•ft) Footrest 24 N•m (17 lbf•ft) Removable brace 24 N•m (17 lbf•ft) Skid plate 15 N•m (133 lbf•in) Headlight adjustment 0.6 N•m (5.4 lbf•in) 11-02-5 http://ReadManuals.com Section 12 WIRING DIAGRAM Subsection 01 (WIRING DIAGRAM) WIRING DIAGRAM WIRING CONNECTORS CODING CONNECTOR HOUSING AREA m WARNING Ensure all terminals are properly crimped on the wires and all connector housings are properly fastened. XX/XX 1 XX/XX 1-02D A00I04C 1 2 3 4 THE SHADED PART INDICATES THE CONNECTOR HOUSING AREA 5 A00I04A 1. 2. 3. 4. 1 -02D Wire colors Connector housing area Housing number per area Wire connector location in housing WIRE COLORS 6 1 It identifies the color of a wire. When a 2-color scheme is used, the first color is the main color while the second color is the tracer color. AREA XX/XX 1-02D A00I04B THE SHADED PART INDICATES THE WIRE COLOR Example: YL/BK is a YELLOW wire with a BLACK stripe. COLOR CODE BK BL BR GN GY OR — — — — — — BLACK BLUE BROWN GREEN GREY ORANGE PK RD TA VI WH YL — — — — — — PINK RED TAN VIOLET WHITE YELLOW 7 3 8 V01L25B XX/XX 2 4 LOCATION 1 Front of engine compartment 2 RH side of engine compartment 3 LH side of engine compartment 4 Behind fuel tank 5 Under steering cover 6 Front of vehicle 7 Rear of vehicle 8 Near radiator hoses 12-01-1 http://ReadManuals.com Section 12 WIRING DIAGRAM Subsection 01 (WIRING DIAGRAM) CONNECTOR LOCATION IN HOUSING This is the wire position in the connector. The number or letter given refers to the physical identification stamped on the connector. XX/XX 1-02 D D A00I04D THE SHADED PART INDICATES THE CONNECTOR LOCATION IN HOUSING B A B A B A C C B A B B C A A D A D A A00E4WB C C B C B TYPICAL See connector housing illustration to OVERVIEW 0502. 12-01-2 ANNEX 1 Problem with the shifting system (Electric Components) REFER TO Prob em w th the sh ft ng system (Hydraulic/Mechanical Components) YES Is emergency sh fter shaft mov ng wh e press ng upsh ft/downsh ft button ? NO Check fuse(s) Is fuse burned ? Refer to DIAGNOSTIC/ CALIBRATION MODE sect on Task 1: Ind cator ghts test YES Task 3: Sensors and so eno ds test YES Is adjustment performed g ve sat sfactory resu ts ? Change nd cator ght(s) Change fuse Start the d agnost c/ ca brat on mode (see task 1 to 5 be ow) Task 2: C utch modu ator ca brat on NO Task 4 and 5: GBPS (Gear Box Pos t on Sensor) and STPS (Sub Transm ss on Pos t on Sensor) ca brat on NO Abnorma t (s) detected ? NO YES Try another sett ng Change component(s) Recheck e ectr c sh ft system Is the prob em pers st ng ? NO The e ectr c sh ft system s now good If a pos t ons are bad YES Refer to VALVES/SOLENOIDS TESTS sect on Recheck e ectr c sh ft system Is the prob em pers st ng ? NO YES Are ghts good ? YES Check va ve/ so eno d w th test ng too Are va ves/ so eno ds good ? NO NO Change va ves/ so eno ds Recheck e ectr c sh ft system Is the prob em pers st ng ? YES Check upsh ft/downsh ft sw tch Is sw tch good ? YES NO Change sw tch Recheck e ectr c sh ft system Is the prob em pers st ng ? YES Check AMP connectors and w r ng Are connectors and w r ng good ? YES Change MPEM Ca brate GBPS and STPS YES V01A15S Recheck e ectr c sh ft system Is the prob em pers st ng ? YES NO Repa r or change connector or w r ng YES Recheck e ectr c sh ft system Is the prob em pers st ng ? ANNEX 2 Problem with the shifting system (Hydraulic/Mechanical Components) REFER TO: Problem with the shifting system (Electric Components) NO Is emergency shifter shaft moving when pressing upshift/dowshift button ? YES Check the engine/transmision oil level. Is engine oil level good ? NO Refill engine with oil. Recheck electric shift system. Is the problem persisting ? YES The engine/transmission oil and filter oil replacement may be a solution. Change if necessary. Refer to the MAINTENANCE CHART. YES NO Check the engine/transmission oil pressure. NO Is engine/transmission oil pressure good ? YES Check for engine leakage. Call SERVICE REPRESENTATIVE. V01A14S YES Leakage ? NO The problem is resolved !