1
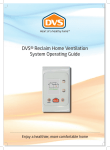
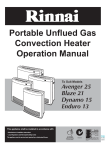
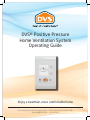
DVS® Positive Pressure
Home Ventilation System
Operating Guide
Enjoy a healthier, more comfortable home
76a Stoddard Road, Mt Roskill, Auckland 1041 | 285 Cashel Street, Christchurch 8011
Phone: 0800 387 387 | www.dvs.co.nz
How to operate your DVS® home ventilation
system
Introduction
Thank you for choosing a DVS home ventilation system for your home. A DVS ventilation
system is able to make a significant difference to you and your family - creating a drier,
fresher and healthier home, and improving your comfort and health. DVS has been supporting
New Zealand for over 17 years with quality appliances and we’re proud to have our products
used every day by many New Zealanders.
What’s in this guide?
Introduction
2
How it Works
2
The Main Screen
3
Basic functions
Turning your DVS system off or on
4
Adjusting your Set temperature
4
Fan Boost option
4
Advanced functions
5
Adjusting the fan speed
5
Adjusting the Heat Retention fan
6
Adjusting the Heat Recovery fan
6
Adjusting the Air warmer or Tempervent settings
9
Automatic summer ventilation
9
Air Transfer
All DVS ventilation systems are designed and made here in New Zealand to suit our unique
climatic conditions and the needs of New Zealand homeowners. DVS’ reputation for innovative
ventilation and health and comfort solutions has been built up over many years of research,
development and customer feedback.
Your standard DVS ventilation system features a state of the art fully automated control panel,
with advanced functions and options, a user-friendly interface, and a quality German-made
energy efficient fan. Optional extras such as automatic summer ventilation via an external
vent, air preheating options via an air-warmer, or the unique DVS Tempervent, DVS Integrated
Heat Transfer and full heat exchange ventilation are available as add-on extras.
These operating guidelines contain helpful instructions on how to operate and adjust your
system. Although your system has been configured, and the airflow and settings individually
calibrated to the size of your home to run automatically, you will be able to easily fine tune the
settings or adjust the “aggressiveness” of the system by adjusting the heat recovery and heat
retention settings.
How it Works
10
Other functions
Setting the clock
13
View temperature history graphs
13
Filter service
13
Diagnostics
13
DVS Filters
14
Filter Replacement Instructions
15
How to get the best from your DVS
16
Recommendations
18
Frequent Questions and Answers
20
DVS offer a wide range of products
22
Updated 9 April 2013
Page 2
The Main Screen
Basic Functions
The wall panel normally displays the Main Screen, which shows:
You can make the most common adjustments to your DVS system from the Main Screen. These
are described on this page.
• The current roof and house temperature (in the example below roof temperature is 25oC
and house is 25oC).
Turning your DVS system off or on
• Your “Set temperature” (see page 4 for details).
To turn the DVS system off or on, press and hold the Menu button for 5 seconds.
If the system is switched off, the screen will display “SYSTEM STANDBY” and the fan and all
accessories will be turned off.
Press and hold the Menu button for 5 seconds to turn the DVS system on again.
Current roof air
temperature
Current house
temperature
Your ‘set’
temperature
Adjusting your Set temperature
Up arrow
button
Down arrow
button
OK button
Menu / On / Off
button
The Set temperature (called “Set temp” on the screen) is the temperature
that the DVS system strives to achieve inside your house.
For example, the system can increase the airflow if the roof space is warmer
than the house and the house temperature is below the Set temperature.
If there is no heat in the roof space, the system will not be able to achieve
the Set temperature without additional heating.
Set temp
20.5o
To adjust the “Set temp” for your home:
• Press the up or down arrow. (The display will change to show the Set temp only, while
you’re adjusting it.)
• Use the up and down arrows to adjust your required temperature.
You can increase or decrease the Set temperature in half degree increments (e.g. 20o, 20.5o,
21o, 21.5o etc.).
Fan Boost option
Fan Boost
• The status of the Air warmer or Tempervent (if fitted).
Use the Fan Boost option if you want the fan to run at full speed for a period
of time.
This function is useful for clearing the house of extra moisture or smells, or to
temporarily recover maximum heat from the roof space for heating purposes.
Note that the fan may be noisier at this speed.
• The status of the Automatic summer ventilation functions (if fitted).
To set the length of time for Fan Boost, or to turn it off:
90min
• Whether the filter is due for replacement.
• Press and hold the up arrow for 3 seconds or more. This takes you to the
FAN BOOST screen.
• Use the down arrow to select the amount of time you want Fan Boost to run for (15, 30, 60
or 90 minutes), or to turn it OFF.
• Press OK.
• Press the Menu button repeatedly until you return to the Main Screen.
If they are in use, the Main Screen will also show:
Note: If the LCD display appears dim, press any button on the keypad to activate the backlight.
Page 3
OFF
15min
30min
60min
Page 4
Adjusting the Heat Recovery Function
Advanced Functions
More advanced functions of your DVS system are accessed via the Menu button. These include:
• Fan speed
• Heat Recovery mode
• Air warmer or Tempervent operation (if
• Automatic summer ventilation operation
fitted)
(if fitted)
• Heat Retention mode
• Air transfer operation (if fitted)
• Clock
• Temperature history
• Replace filter
• Diagnostics
Adjusting the fan speed
Your system has been configured so the airflow and settings are individually calibrated to the
size of your home and will run at these settings automatically. However, you are able to easily
fine tune the fan speed to optimise condensation or climate control to better suit your needs.
Fan speed tuning allows you to adjust the fan speed to a level higher or lower than the pre-set
calibrated level (represented by the ‘0%’ setting).
To adjust the fan speed:
•
•
•
•
•
•
Press the Menu button briefly.
Use the down arrow to select Fan settings and press OK.
Use the down arrow to select Fan speed and press OK.
Use the up or down arrow to change the fan speed (from -15% to +15%).
Press OK to confirm the fan speed.
Press the Menu button repeatedly until you return to the Main Screen.
Fan Speed
+15%
0%
-15%
Allows you to fine tune
the fan speed to your
house and climate
Adjusting the Heat Retention Function
You can adjust the way your DVS system responds to situations where the roof air is colder
than the house temperature (winter nights). Heat retention comes into play when the system
senses that the room is warmer than the roof space, and slowing the system down will keep
the room temperature closer to the desired Set temperature. In the Off position the Heat
retention function is off. At other levels of Heat retention the fan speed decreases in proportion
to the difference between the roof temperature and the Set temperature. Selecting a higher
setting decreases the fan speed more quickly to a low level.
Note: A high Heat retention setting may compromise the ability of the DVS system to control
condensation.
•
•
•
•
Press the Menu button briefly.
Use the down arrow to select Fan settings and press OK.
Use the down arrow to select Heat retention and press OK.
Use the up and down arrows to adjust the Heat retention tuning - from OFF
through to MAX.
• Note: The higher the setting (closer to MAX) the quicker the fan speed will
drop.
• Press OK to confirm your selection, then press the Menu button repeatedly
until you return to the Main Screen.
Page 5
You can adjust the way your DVS system responds to situations where the roof air is hotter
than the house temperature (autumn, summer and spring days). Heat recovery comes into play
when the system senses that heat is available in the roof space that can be used to get closer
to the desired Set temp more quickly if the system speeds up. In the OFF position the Heat
recovery function is off. At other levels of Heat recovery, the fan speed increases in proportion
to the difference between the roof temperature and the room temperature. Selecting a higher
setting increases the fan speed more quickly to a high level.
•
•
•
•
Press the Menu button briefly.
Use the down arrow to select Fan settings and press OK.
Use the down arrow to select Heat recovery and press OK.
Use the up and down arrows to adjust the Heat recovery tuning - from OFF
through to MAX.
• Note: The higher the setting (closer to MAX) the quicker the fan speed will
increase.
• Press OK to confirm your selection, then press the Menu button repeatedly until
you return to the Main Screen.
Heat Recovery
MAX
OFF
Increasing this setting
raises the fan speed
on sunny cooler days.
Adjusting the Air warmer or Tempervent settings
Note: The Air warmer or Tempervent(s) will not function if the room set temperature has
already been achieved or the roof temperature is equal to or warmer than the room set
temperature.
The Air warmer or Tempervent is designed to pre-warm the air in the system before bringing it
into the house. It is designed to take the chill off incoming air during the cooler months, not to
warm your home like a central heating system. It can be set to work manually or automatically.
Note: This feature will only activate in the control system if it has been installed as an optional
extra.
• In Manual mode, you can set the Air warmer or Tempervent to be on for a
specified period of time, or off.
• In Automatic mode you can set the Air warmer or Tempervent to come on:
• at certain times (timer), or
• when the air in the roof falls below a specified temperature, or
• a combination of both (i.e. you can set the Air warmer or Tempervent to
come on when the air in the roof falls below the temperature you specify,
during the “On” part of the timer’s cycle).
Air Warmer
Manual [0]
Roof Temp
Timer
Temp & timer
Select the desired
operating mode. Only
one mode can be used
at any one time.
Manual mode
Heat Retention
MAX
OFF
Increasing this setting
reduces the fan speed
during winter months.
To set the Air warmer or Tempervent to be on or off manually:
Manual Time Set
•
•
•
•
Press the Menu button briefly.
Use the down arrow to select Air warmer or Tempervent and press OK.
Use the down arrow to select Manual [0] and press OK.
Use the up and down arrows to select the amount of time you want the Air
warmer or Tempervent to run for (30, 60, 90 or 120 minutes), or to turn it OFF.
• Press OK to confirm your selection, then press the Menu button repeatedly until
you return to the Main Screen.
OFF
30min
60min
90min
120min
Air warmer runs for
one of the above times
and then turns off.
Automatic mode using the timer
Automatic mode using the roof temperature
To set the timer to switch the Air warmer or Tempervent on and off automatically at specified
times on specified days:
Timer Set Up
•
•
•
•
Press the Menu button briefly.
Use the down arrow to select Air warmer and press OK.
Use the down arrow to select Timer and press OK.
Use the up and down arrows to select the timer that you want to programme
(Timer 1, 2, 3 or 4) and press OK.
Timer 1 MTWTFSS
00:00 - 00:00
Timer 2 MTWTFSS
00:00 - 00:00
Timer 3 MTWTFSS
00:00 - 00:00
Timer 4 MTWTFSS
00:00 - 00:00
Note: Timers are organised so that “On” times have priority over “Off times”. For
example, if Timer 1 is set to be “Off” when Timer 3 is set to be “On”, then Timer 3 will override
Timer 1 and the Air warmer or Tempervent will be on.
As timers are set by day as well as time no timer will work if its off time is set past 11:45 pm. Ie
to have the timer on from 5pm till 7 am the next morning set timer one from 17:00 – 23:45 and
timer two set from 00:00 – 07:00. The heater will turn off from 231:45 till midnight and then
turn back on until 7:00am
To do this:
• Use the down arrow to highlight the required day, and press OK to
change it to “On” (pressing OK again changes it back to “Off”), and
• repeat until you have selected all the days you want this timer to apply to.
• Press the Menu button to return to the “Set timer #” screen.
• Use the down arrow to select “On time” and press OK. You will be taken to the
“SET TIME” screen.
Mon
Tue
Wed
Thu
Fri
Sat
Sun
On
Off
Off
Off
Off
Off
Off
Set timer 1
Days = MTWTFSS
On time
Off time
•
•
•
•
Press the Menu button briefly.
Use the down arrow to select Air warmer or Tempervent and press OK.
Use the down arrow to select Roof temp and press OK.
Use the up and down arrows to set the temperature (range is 0oC to 25oC.
Factory default is 15oC) and press OK.
• If the temperature of the air in the roof falls below this temperature, the Air
warmer or Tempervent will switch on automatically.
• Press the Menu button repeatedly until you return to the Main Screen.
Roof temp set
15.0o
Air warmer turns on
anytime the roof is
colder than this temp
Automatic mode using both timer and roof air temperature
Select days
• Use the down arrow to select Days = and press OK.
• This takes you to the “Select days” screen.
• Select the days that you want this timer to apply to.
To set the Air warmer or Tempervent so that it switches on automatically when the air in the
roof drops below a specified temperature:
To set the Air warmer or Tempervent so that it switches on automatically when the air in the
roof drops below a specified temperature, and also switches on and off at the times you have
specified:
•
•
•
•
•
•
Firstly, set the timer(s) as described on page 7 and return to the main screen.
From the Main Screen, press the Menu button briefly.
Use the down arrow to select Air warmer or Tempervent and press OK.
Use the down arrow to select Temp & timer and press OK.
Set the roof air temperature (as described above) and press OK.
Press the Menu button repeatedly until you return to the Main Screen.
Note: If you select Temp & timer, the Air warmer or Tempervent will only come on if:
• the air temperature in the roof falls below the temperature you have set, and
• it is during the “ON” part of the timer’s cycle.
00:00
00:00
• Use the up and down arrows to select the hour when you would like the timer
to switch the Air warmer or Tempervent ON, and press OK. (Note: Timers use 24
hour clock.)
• Use the up and down arrows to select the number of minutes past the hour (15,
30 or 45) when you would like the timer to switch the Air warmer or Tempervent ON, and
press OK. You will return to the “Set timer #” screen.
• Use the down arrow to select “Off time” and press OK. You will be taken to the “SET TIME”
screen.
Set Time
• Use the up and down arrows to select the hour when you would like the timer to
switch the Air warmer or Tempervent OFF, and press OK.
• Use the up and down arrows to select the number of minutes past the hour
Adjust hours:
(15, 30 or 45) when you would like the timer to switch the Air warmer or
01:00
Tempervent OFF, and press OK. You will return to the “Set timer #” screen.
• Press the Menu button to return to the “Timer setup” screen. From here you can
set further timers if required.
• When you are finished, press the Menu button repeatedly until you return to the
Main Screen.
Page 7
Page 8
Automatic summer ventilation (if fitted)
Air Transfer (if fitted)
The purpose of Automatic summer ventilation is to deliver a continuous supply of fresh filtered
air from outside the roof space by automatically changing the air source to draw from the
external vent when the roof space air becomes too warm. This means you can ventilate your
home throughout the summer months without the need to leave windows open during the day
or night (thus reducing pollen, dust and insects in your home).
The purpose of air transfer is to deliver a supply of warm air from the warm room and delivering
this to the colder part of the house by automatically changing the air source to draw from the
warm room with excess heat (eg. The living room with a wood burner). In air transfer mode
the system will not ventilate, but will merely redistribute existing air around the house. This
function lets you set when and at what temperature the Air transfer mode will switch on. If
you have this option installed then you will also have a separate temperature sensor near your
home’s main heat source.
In some weather conditions the outside air is too warm to ventilate the home. In this instance
the system will behave normally and reduce delivery to an ‘idle’ so as not to warm the home.
The Air Transfer function is reactive to the room set temperature and the actual room
temperature. This is regardless of the ‘mode’ selected. So; if the room temperature at the
control panel is equal to or warmer than the set temperature (this is the main system set
temperature, not the automatic mode temperature for air transfer, see page 12) then little or
no air will be transferred.
The Automatic summer ventilation function can be set to work manually or automatically.
Note: This is an optional extra and will not appear on the control panel unless installed.
• In Manual mode you can set the Automatic summer ventilation function to be on for a fixed
time, from 30 minutes to 2 hours. After this time the Automatic summer ventilation will
automatically switch off.
• In Auto mode you can set the Automatic summer ventilation function to switch on
automatically if the temperature in your home rises above your “Set temperature”.
The Air transfer function can be set to work manually or automatically.
• In Manual mode you can set the Air transfer function to be on for a fixed time,
from 30 minutes to 2 hours. After this time the Air transfer will automatically
switch off.
Manual mode
• In Automatic mode you can set the Air transfer function to come on:
To switch the Automatic summer ventilation function on or off manually:
Press the Menu button briefly.
Use the down arrow to select Summer vent and press OK.
Use the down arrow to select Manual [0] and press OK.
Use the up and down arrows to select the amount of time you want the Automatic summer
ventilation function to run for (30, 60, 90 or 120 minutes), or to turn it OFF.
• Press OK to confirm your selection, then press the Menu button repeatedly until you return
to the Main Screen.
To switch the Air transfer function on or off manually:
To set the Automatic summer ventilation function so that it switches on automatically if the
temperature in your home rises above your Set temperature:
Auto temp set
Page 9
20.5
Select the desired air
transfer mode.
Only one mode can be
used at any one time.
Manual mode
Automatic mode
Press the Menu button briefly.
Use the down arrow to select Summer vent and press OK.
Use the down arrow to select Auto and press OK twice.
The automatic summer ventilation function will now work based on the “Set
temperature” set from the Main Screen.
• Press the Menu button repeatedly until you return to the Main Screen.
Manual [0]
Temperature
Timer
Temp & timer
• at certain times (timer), or
• above a certain temperature (according to the sensor), or
• a combination of both (i.e. you can set the Air transfer to come on above a certain
temperature during the “On” part of the timer’s cycle).
•
•
•
•
•
•
•
•
Air Transfer
o
•
•
•
•
Press the Menu button briefly.
Use the down arrow to select Air transfer and press OK.
Use the down arrow to select Manual [0] and press OK.
Use the up and down arrows to select the amount of time you want the Air
transfer to run for (30, 60, 90 or 120 minutes), or to turn it OFF.
• Press OK to confirm your selection, then press the Menu button repeatedly
until you return to the Main Screen.
Manual time set
OFF
30min.
60min.
90min.
120 min.
Air transfer runs for one
of the above times and
then turns off.
Summer ventilation will
switch on above the
set temperature
Page 10
Automatic mode using the timer
To set the timer to switch the Air transfer function on and off automatically at
specified times on specified days:
•
•
•
•
Press the Menu button briefly.
Use the down arrow to select Air transfer and press OK.
Use the down arrow to select Timer and press OK.
Use the up and down arrows to select the timer that you want to programme
(Timer 1, 2, 3 or 4) and press OK.
Automatic mode using the source air temperature
Timer Set Up
Timer 1 MTWTFSS
Timer 2 MTWTFSS
Timer 3 MTWTFSS
Timer 4 MTWTFSS
Note: Timers are organised so that “On” times have priority over “Off times”. For example, if
Timer 1 is set to be “Off” when Timer 3 is set to be “On”, then Timer 3 will override Timer 1 and
the Air transfer will be on.
• Use the down arrow to select Days = and press OK. This takes you to the
“Select days” screen.
• Select the days that you want this timer to apply to. To do this:
• use the down arrow to highlight the required day, and press OK to change
it to “On” (pressing OK again changes it back to “Off”), and
• repeat until you have selected all the days you want this timer to apply
to.
• Press the Menu button to return to the “Set timer #” screen.
• Use the down arrow to select “On time” and press OK. You will be taken to
the “SET TIME” screen.
• Use the up and down arrows to select the hour when you would like the
timer to switch the Air transfer on, and press OK. (Note: Timers use 24 hour
clock.)
• Use the up and down arrows to select the number of minutes past the hour
(15, 30 or 45) when you would like the timer to switch the Air transfer on,
and press OK. You will return to the “Set timer #” screen.
• Use the down arrow to select “Off time” and press OK. You will be taken to
the “SET TIME” screen.
• Use the up and down arrows to select the hour when you would like the
timer to switch the Air transfer off, and press OK.
• Use the up and down arrows to select the number of minutes past the hour
(15, 30 or 45) when you would like the timer to switch the Air transfer off,
and press OK. You will return to the “Set timer #” screen.
• Press the Menu button to return to the “Timer setup” screen. From here you
can set further timers if required. When you are finished, press the Menu
button repeatedly until you return to the Main Screen.
Page 11
On
Off
Off
Off
Off
Off
Off
Set timer 1
Days = MTWTFSS
On time
Off time
•
•
•
•
Press the Menu button briefly.
Use the down arrow to select Air transfer and press OK.
Use the down arrow to select Temperature and press OK.
Use the up and down arrows to set the temperature (range is 0oC to 25oC. Factory default
is 15oC) and press OK.
If the temperature of the air near the main heat source rises above this temperature the Air
transfer function will switch on automatically.
Select days
Mon
Tue
Wed
Thu
Fri
Sat
Sun
To set Air transfer function so that it switches on automatically when the air near the main
heat source rises above a specified temperature:
00:00
00:00
• Press the Menu button repeatedly until you return to the Main Screen.
Automatic mode using both timer and source air temp
To set Air transfer function so that it switches on automatically when the air near the main
heat source rises above a specified temperature, and also switches on and off at the times
you have specified:
•
•
•
•
•
•
Firstly set the timer(s) as described in the previous pages.
Then, from the Main Screen, press the Menu button briefly.
Use the down arrow to select Air transfer and press OK.
Use the down arrow to select Temp & timer and press OK.
Set the source air temperature (as described above) and press OK.
Press the Menu button repeatedly until you return to the Main Screen.
Note: If you select Temp & timer, the Air transfer will only come on if:
• the air temperature near the main heat source rises above the temperature you have set,
and
• it is during the “ON” part of the timer’s cycle.
Set Time
Adjust hours:
01:00
Page 12
DVS Filters
Setting the clock
To set the clock to the correct time on the DVS system:
•
•
•
•
Press the Menu button briefly.
Use the down arrow to select Utilities and press OK.
Use the down arrow to select Set clock and press OK.
Use the up and down arrows to select the correct day of the week, and press
OK.
• Use the up and down arrows to select the correct hour (uses 24 hour clock),
and press OK.
• Use the up and down arrows to select the correct minutes, and press OK.
Set Clock
Adjust hours:
Wed 12:16
We recommend that you replace the air filter(s) on your DVS system approximately every 12
months. A blocked air filter can cause poor performance from your DVS, and may result in
equipment damage or failure, and shorten the life of your DVS system. We supply replacement
filters, which can be fitted by yourself, or can be fitted by our service technicians in conjunction
with a service check of your DVS system.
Please contact DVS on 0800 387 387 to organise a service technician to do this for you.
Alternatively follow the instructions provided to change the filters yourself.
FOR YOUR SAFETY
Please take special care when climbing into your roof space, and while in the roof space
walk only on load-bearing roof beams or trusses. We suggest you ensure another person
is in the house or tell a neighbour you are climbing into your roof space so that you can
get assistance quickly if you slip or have an accident.
View temperature history graphs
You can display a graph showing the past day’s and week’s temperatures for your house and
the roof. To access these graphs:
•
•
•
•
•
•
Switch your DVS SYSTEM OFF at the control panel.
Press the Menu button briefly.
Use the down arrow to select Utilities and press OK.
Use the down arrow to select Temp. graphs and press OK.
“Temp graph 1” will display on the screen (showing the previous 24 hours).
Press OK again to display “Temp graph 2”, which shows the previous 7 days.
Press the Menu button
Disconnect the DVS Air Handling Unit from the house supply by unplugging the 3-pin
plug before servicing or changing the air filter. Use only a dry cloth when cleaning
the unit. Do NOT remove, open or attempt to service any DVS equipment while it is
connected to the house power supply.
Filter service
The DVS range of affordable air filters meet international air quality ratings and remove dust,
pollen, plant spores and other airborne material from your air supply prior to delivering this into
your home.
The filter reminder will appear on the Main Screen when the filter service timer
has counted down to 0 days.
This is a reminder that your filter should be changed or serviced. Please call DVS
on 0800 387387 to arrange for a filter service or replacement filter.
To reset the filter reminder press the up arrow, then OK.
25o
28o
Set temp 22.5o
Replace air filter
Note: It is recommended that the filter is changed every 12 months in order to
ensure proper operation of the fan and in order to prevent build up of dust, pollen
and bacteria which could be harmful to your health.
Diagnostics
The diagnostic screen (available under the Utilities menu) displays any errors or faults with
your DVS system, as well as current fan speed and RPM (revolutions per minute).
Page 13
For more information
contact DVS on 0800 387 387
or visit www.dvs.co.nz
Standard Filter
Commonly used in domestic and commercial ventilation systems eliminating at least 80% and
up to 95% visible airborne pollen and dust particles.
High Grade F6 Filter
Commonly used in hospitals, dairy and food processing factories, eliminating at least 99% of
visible airborne pollen and dust particles.
IMPORTANT INFORMATION
You need to replace your filter every 12 months with a genuine DVS® branded filter to
maintain correct operation of the system. The 5 Year Parts and Labour Warranty on your
DVS® system is dependant on you doing so during its period of validity.
Page 14
Filter Replacement Instructions
How to get the Best from Your DVS System.
Before you start:
Your DVS Home Ventilation System has been configured, installed and calibrated to best meet
your family’s needs and the size and layout of your home. However, in order to get the best
results it is important that you, the homeowner, follow these General Guidelines.
Switch your DVS off at the control panel by holding down the Menu On/Off key. This will put the
system into standby.
• Before going into the roof space to change your DVS filter ensure
that you have the required filter and a second filter if the optional
Summer ventilation or Integrated heat transfer is fitted. You also
need a clean dry cloth, and a good torch or safety lamp.
• With a pair of strong scissors (recommended) or sharp utility knife,
carefully cut the plastic tie holding the used filter to the black
plastic ring of the DVS Air Handling Unit or loosen the pull cord,
which ever is applicable. Pull away the used filter.
• Use the dry cloth to wipe any fine dust from the Air Handling Unit impellor and inside of the
inlet flange.
• Pull the new filter over the inlet flange, tighten the new filter around the inlet flange using
the pull cord and toggle.
• Repeat for each filter.
•
•
Please note that in the vast majority of cases, dust around the ceiling diffuser is the result of
dust already inside the home being attracted by tiny electrostatic charges that build up on the
surface of the ceiling or diffuser as the incoming air brushes past these surfaces.
Turn on your DVS control panel
•
•
•
•
•
•
Press Menu
Use the down arrow to select Utilities, press Ok
Use the down arrow to select Replace Filter, press Ok
Press Up to reset and OK
Press menu repeatedly to return to the main screen.
Utilities
Set Clock
Temp. graphs
Replace filter
Diagnostics
Contact us:
0800 387 387
Maintain adequate home heating to balance
cooler airflows during colder seasons,
particularly in colder regions of New Zealand.
According to research by the Building
Research Association of New Zealand
(BRANZ), both adequate heating and
continuous ventilation are needed to prevent
excess moisture, condensation, mould and
mildew occurring in New Zealand homes.
If indoor temperatures are not maintained
at reasonable levels, even small amounts
of moisture inside the home can cause
condensation, even in homes which may
otherwise be well ventilated by the DVS
system. We advise a minimum of 16oC
in the occupied rooms for the purpose of
condensation control. All air contains water
vapour, but it can only hold a limited amount
without becoming saturated. The higher the
temperature the more it can contain.
Some customers may need to use additional
heating to balance the flow of cooler
drier air required to adequately control
their condensation and dampness. Most
customers have found that additional heating
in colder months is balanced by less heating
required during other times of the year, due
to solar heat gain from the roof space on
warmer days, and a drier home being easier
to heat and requiring less energy than a
damp home.
Don’t be afraid to adjust and customise your
settings to achieve a good balance between
condensation control and airflow, especially
in colder seasons.
Your DVS ventilation system has been
individually configured and calibrated to your
home. But we also recognise that every
home, location and family are different, so
we have designed the DVS system so you
can easily customise and adjust the settings
Page 15
to best meet your needs, and changes in the
seasons, family circumstances and weather.
Don’t be afraid to ‘experiment’ with your DVS
system by increasing or decreasing the airflow
to achieve the best results. In general, the
greater the airflow the greater the level of
condensation control.
But remember, too much air may cool your home
unnecessarily in winter, while too little airflow
will not be effective in controlling condensation.
Experiment with your controller to find the right
balance for your home, and remember to use
additional heating if needed to ensure both a
dry and comfortable home.
You might wish to increase the airflow of
your DVS system if …
You have friends or family staying. More
showers, cooking and breathing may
cause condensation or misting due to
higher levels of moisture generated in
the home.
You may experience some temporary
‘misting’ or minor condensation during
very cold weather.
You might wish to decrease the airflow
of your DVS system if …
You are concerned about too much cooler
air entering your home during colder
seasons. Try reducing the airflow a little
at a time until you get to the point where
misting or condensation starts to appear.
The lower the airflow the lower the DVS
systems ability to control condensation,
so if you turn the system down too far,
condensation will occur more frequently.
Page 16
Recommendations
Keep external doors and windows closed
during colder weather to enable the DVS
system to gently pressurise and ventilate
your whole home.
The DVS system gently pressurises your
home, pushing fresher, drier air into every
room. The incoming air forces damp, stale air
out through normal gaps and cracks around
doors and windows and other parts of the
home. When external doors and windows are
open, air from the DVS system will channel
out of your home through the open space
following the path of least resistance.
During colder seasons when condensation
is a problem, we recommend keeping your
external doors and windows closed as much
as possible, otherwise the DVS system will
be much less effective. You may open doors
and windows on warm days if you wish to
do so, without noticeably affecting the DVS
systems operation.
When using a clothes dryer, showering,
bathing or cooking, we suggest you open a
window in the relevant room so the DVS can
push the moist air outside. Close the window
again after you have finished. Ideally,
installing a vented extract fan in these ‘high
moisture’ rooms will assist the DVS system to
keep your home drier and healthier.
occupants can cause condensation if doors
are left closed.
Installing additional ceiling outlets in the
affected rooms is an easy way to ensure
privacy and solve condensation problems in
rooms where people prefer to close doors at
night.
To discuss this option, please call us on 0800
387 387.
If necessary, slightly open drapes or blinds, or
create a gap between the drapes and window
frame at night to ensure adequate airflow
can reach window surfaces.
In some homes tight fitting roman blinds,
shutters, heavy floor-to-ceiling curtains
or window pelmets can sometimes make
it difficult for the drier air from the DVS to
reach window surfaces.
When windows are ‘sealed off’ condensation
can sometimes occur, particularly during
colder weather. The DVS system is
usually able to clear any misting or minor
condensation once blinds and curtains are
opened.
If you believe that your blinds or curtains are
causing a problem here are some tips:
• In living areas - open curtains at least a
metre wide when you go to bed at night,
Keep internal doors open, not just slightly
ajar, to allow air to flow into all the
rooms, especially bedrooms, for effective
condensation control.
Closing internal doors prevents air from the
DVS system from ventilating those areas,
often resulting in continuing condensation
problems in those rooms. Doors should
therefore be kept open, or at least half open
- not just slightly ajar. This is especially true
in bedrooms where breathing from sleeping
• In bedrooms – pull curtains or blinds
slightly out from the wall if possible to
create a small gap so as to allow some
air to reach the windows or leave a small
gap between the curtains / drapes. Blinds
can also be ‘split’ so as to allow airflow
whilst retaining privacy.
Home Heating and your DVS system
The DVS system is not a home heating
system, although a drier home will improve
the effectiveness of whatever heating is
used in your home.
Some DVS ventilation system owners take
the opportunity when their DVS system is
installed to invest in some additional home
heating. For example, the optional DVS AirWarmer or Tempervents can be installed to
pre-warm incoming air from your roof space
on cold days or nights and prevent any slight
cooling of your home, while ensuring proper
ventilation to reduce condensation. Also DVS
can provide advice on heating requirements
and provide cost effective heater options to
compliment your DVS system.
Your consultant may have covered some of
the options available from us here at DVS or
suggested some proven methods of home
heating which are very compatible with the
DVS system. Please call us if you would like
more information.
Even when no additional heating is installed,
many DVS system owners comment that their
homes feel warmer with the DVS system
installed, with heating costs remaining the
same or even decreasing over a full year
of operation. This is not because the DVS
system is directly heating incoming air, but is
due to some or all of the following:
• Solar heat gain within the roof space, i.e.
free solar heated air being pushed into
the home on warm or sunny days
• Approximately 20% of heat is lost
through a properly insulated ceiling, and
42% through a non-insulated ceiling.
Your DVS system can recover some of this
lost heat
• More efficient use of warmth trapped
below the ceiling, above head height
• More even spreading of existing heat
Page 17
throughout the whole home
• Drier air requiring less energy to heat
than moist air to maintain the same
temperature
While the DVS system may have an overall
positive impact on home heating over a full
year, some DVS system owners may find that
their homes are cooler during winter months
than before the DVS was installed. This is
because, in order to control condensation,
mould, mildew and dampness problems
during colder seasons, the DVS system must
continue to bring air from your roof cavity
into your home, even when the air is cool.
To offset these possible lower temperatures
in your home during colder weather, you may
need to use a little more heat, or change
the times of day you heat your home. As
noted earlier in this section, it is essential to
adequately heat and ventilate your home in
order to control condensation, and maintain
an acceptable comfort level.
Alternatively, you could experiment by
reducing the airflow from your DVS system
(see page 6). However, reducing the airflow
may reduce the DVS systems ability to
control your condensation – you will need to
find the balance that is right for you.
Un-flued and Bottled Gas Heating
Un-flued and bottled gas heaters generate
large volumes of water vapour, often
doubling or trebling the total amount of
moisture produced in the average home.
Continued use of un-flued or bottled gas
heaters may prevent the DVS system from
being able to solve your condensation and
other damp problems, although you should
notice some improvement. The impact
will vary from home to home and between
different regions of New Zealand, and
will depend on the weather and seasonal
temperatures, and the extent to which unflued heaters are used.
Page 18
If you are using un-flued gas heaters
and continue to have a problem with
condensation you may wish to investigate
using other forms of heating. Un-flued gas
heaters are not a recommended source of
heating as they release polluting gases
directly into the room, excessive water
vapour and have high running costs.
If you find the smell too unpleasant we can
supply an Activated Carbon Filter which fits
outside your main air filter, and will reduce
odours to a more acceptable level. Call us on
0800 DVS DVS (0800 387 387) if you would
like more information about our Activated
Carbon Filters.
Extract Fans
Odours
In a small number of homes it may be
possible to notice a smell during the first
few weeks after installation of the DVS
system and/or during hot weather. This is
typically due to either the roof space not
being properly ventilated before the DVS was
installed, or building paper used in the roof
getting hot, especially in newer homes or
newly installed roofs. Don’t worry - the smell
will eventually stop.
In some areas you may also notice smells
from coal or wood fires during colder seasons.
If extract fans are vented into the roof space
they may reduce the effectiveness of the
DVS. We recommend that all extract fans be
externally vented, as is now mandatory for all
new homes under the Building Code.
In addition to installing the DVS system we
also recommend either fitting vented extract
fans in rooms generating significant amounts
of moisture (e.g. kitchens and/or bathrooms),
or alternatively, opening windows to enable
the DVS® system to push excess moisture
directly outside the house.
Frequent Questions and Answers
Why is there no air coming out of the ceiling
diffuser – even though my DVS system is
switched on at the control panel?
There could be several reasons for this. The
most likely reason is that the DVS system has
automatically reduced speed due to the roof
space temperature exceeding pre-set levels
or being very cold. If this is the case your
DVS system will automatically increase speed
once the roof-space temperature is more
desirable.
If your DVS system is still not working, listen
for the Air Handling Unit or check in the roof
space to see whether the Air Handling Unit
is operating or not. If the Air Handling Unit
is working, check the filter in the roof space
as it may be clogged, preventing the DVS
system from delivering sufficient air through
the ceiling outlets.
If the filter is not clogged and the DVS
system is still not working, please call us on
0800 DVS DVS (0800 387 387).
Why do I continue to get some misting or
condensation in some rooms of the house?
This could be related to a variety of reasons:
• Lack of heating in the rooms affected
• Lack of air supply in the rooms affected
• Curtains, blinds or pelmets could be
preventing airflow over the windows.
You never want to completely dry out a home
as timber and woodwork can shrink causing
floors to creak and gaps in staircases to be
created etc.
I no longer have any condensation, but why
does my house seem cooler during colder
weather?
You may need to use more home heating
during colder months to offset the cooler and
drier air from the roof space needed to
Page 19
control condensation. You may also be able to
turn your DVS system down slightly to reduce
the airflow when the roof space is cooler
than the house.
Why is there dust on the ceiling outlet or on
the ceiling near the outlet?
This sometimes happens, usually as a result
of dust already in the home being attracted
by static electricity due to the drier air from
the DVS system brushing against the outlet
or ceiling surfaces, and by the flow of air
within the region of the diffuser. Clean the
surfaces with a clean dry cloth or use a dry
brush.
If the problem persists, check your air filter
to ensure it hasn’t become clogged and
check the ducting in your roof space for
any damage. Occasionally tradespersons or
other people working in your roof cavity can
accidentally damage the ducting, allowing
some dust from the roof cavity to enter your
home, although this is not common.
Why are smells coming from the roof space
through the ceiling outlets?
Roof smells can occur temporarily when
the DVS system is first installed, or with a
new roof. The problem should clear in time.
However, if the problem persists, ask us
about our Activated Charcoal Filters which
can reduce smoke and odour smells to
acceptable levels.
Why do we sometimes get the smell of smoke
from wood or coal fires coming into the house
via the roof space?
This can occur, particularly on still nights,
when smoke from domestic fires sits around
ground level and is drawn into your roof
space. If the problem persists, ask us about
our Activated Charcoal Filters which can
reduce smoke and odour smells.
Page 20
Why am I continuing to get condensation
even though my system is on full?
There are two ways of controlling
condensation. Ventilation and heating.
Ensure that you have enough heating so that
the air temperature is at a level that allows it
to hold more moisture.
operating during the day when the system is
in heat recovery mode. If the DVS system is
making ‘clunking’ or ‘clicking’ noises or is very
noisy it may indicate that the Air Handling
Unit is damaged or worn. Please contact us
on 0800 DVS DVS (0800 387 387).
Why do I seem to be getting cooking and
other smells coming back into the house?
Why can I hear noises from the DVS system
Air Handling Unit during the day and / or
night?
It is possible that in the dead of night you
may be able to hear a very faint ‘hum’ from
your DVS system from certain rooms in your
house. It is also possible that you may hear it
Check whether any extract fans are vented
into the roof cavity. If they are please arrange
for a local tradesperson to vent any extract
fans outside the roof space. Or call us - we
may be able to do it for you, or recommend
someone in your area who is experienced at
doing this job.
DVS® offer a wide range of products
Ventilation
Heat Pumps
DVS, is the oldest established ventilation
company in the country. A wide range of
systems are available to remove the stale,
moisture-laden air from your home and
replace it with fresh, filtered air. As a result
your home is warmer, drier and healthier.
A Heat Pump from DVS is today’s safe, easy
and economical way to keep individual rooms
or your whole home comfortable all year
round. You’ll be warm and cosy in winter, and
cool and refreshed in summer.
The DVS system has been tested and
proven to reduce the mould and fungal
spores that can be triggers for people with
Asthma. In addition, DVS air filters can
virtually eliminate the pollens and other
airborne particles and irritants that can be
so devastating for people who suffer from
respiratory illnesses.
Insulation
The award winning Fujitsu heat pumps also
have Asthma NZ approval for a special filter
developed to collect allergens such as minute
dust particles, pollen, pet fur, mite carcasses
and even mould spores from the air.
Heaters
DVS offer a top quality range of
electronically controlled wall mounted
heaters. Ideal for bedrooms, hallways,
studies and other living areas.
We sell Pink® Batts® insulation to help
reduce heat loss in winter and heat gain in
summer. PinkFit® is the preferred installer of
Pink® Batts® and will guarantee the Pink®
Batts® insulation has been properly installed.
Pink® Batts® is accepted by the Asthma and
Respiratory Foundation of New Zealand’s
Sensitive Choice programme and is therefore
the perfect solution if you or your family
members suffer from Asthma or respiratory
illnesses.
Page 21
For more information, contact us on 0800 387 387
or visit our website www.dvs.co.nz
76a Stoddard Road, Mt Roskill, Auckland 1041 | 285 Cashel Street, Christchurch 8011
Phone: 0800 387 387 | www.dvs.co.nz