Download Dedicated Micros Digital Sprite Lite Setup guide

Transcript
Networking Guide
Contents
Network Configuration of the Digital Sprite 2
4
Web Page Icons
4
Accessing the Configuration Web Pages
5
Main Menu
5
Simple Configuration
7
How to Configure Global Parameters
7
How to Enable System Features
9
How to Configure Video Inputs and Standard Record Settings
21
Advanced Setup
17
Configuring the Network Settings of the Digital Sprite 2
19
How to Select and Enable Coaxial Telemetry
Telemetry Setup Page
22
23
How to Enable Serial Telemetry
Telemetry Setup Page
24
26
How to Configure Matrix Control
26
Advanced Configuration
30
How to Configure Variable Recording
30
How to Enable Audio Recording
33
How to Configure the Video Inputs for VMD
Walk Test
34
43
How to Enable and Configure Alarms
43
How to Configure Alarm Presets
51
How to Configure the Relay Connections
53
How to Configure Connect/Dial, FTP, SMS and Email on Alarm
How to Configure Connect/Dial on Alarm
How to Configure FTP Settings for Archiving Images
How to Configure SMS Text Messaging
How to Configure Email Settings
54
54
60
63
68
How to Protect or Un-Protect Images
70
How to Configure the Alarm Database
72
How to Configure Alarm Schedule
73
How to Configure Text in Image Functionality
76
Dedicated Micros
Page 1
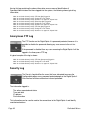
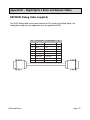
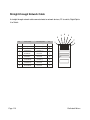
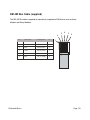
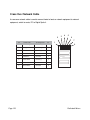
How to Configure the Onboard Firewall
IP Address Range and Subnet
78
82
How to Enable System Logs
83
How to Configure Watermarking
84
How to Configure the Webcam Functionality
86
Digital Sprite 2 Tools
90
Video Scope
90
Audio Trace
91
Relay Test Page
92
Watermarking
93
System Variables
93
Reset
94
Reviewing the Digital Sprite 2 Logs
95
Connection Log
95
Anonymous FTP Log
96
Security Log
96
Email Log
97
Sent Message Log
98
FTP Download Log
98
Logfile
98
Logfile Backup
99
Archive
100
Appendix A - Resetting the Digital Sprite 2 Using Telnet
101
Appendix B - Digital Sprite 2 .ini Files
102
Editing the .ini Files Using FTP Client Application
102
Structure of Files
104
Editing .ini Files Using the DM Backup Utility
111
Appendix C - Port Assignment on the Digital Sprite 2
Port Allocation
Page 2
115
115
Dedicated Micros
Appendix D - Digital Sprite 2 Serial and Network Cables
117
DM RS 232 Debug Cable
117
Straight-through Network Cable
118
DM485 Bus Cable
119
Cross-over Network Cable
120
DM RS232 Null Modem Cable
124
Nokia 30 Cable
Appendix E - IP Address Range and Subnets
122
123
IP Address and Subnet Masks
123
Classes of Networks
124
Calculating IP Address Range
126
Appendix F - SMS Message Format
128
Command Format
128
SMS Command
128
SMS Reports
129
Appendix G - Advanced Configuration Via OSD
Remote Reporting
Report Settings
Email Settings
Report Settings
SMS Settings
132
132
134
135
136
137
Report Settings
139
Advanced Settings
140
Web Cam Settings
140
Firewall Options
143
Upload Settings
System Logs
Additional Information
Command Reference List
Dedicated Micros
142
145
148
148
Page 3
Network Configuration of the Digital Sprite 2
This manual covers the advanced configuration of the Digital Sprite 2 via the on-board web
pages plus the OSD menus that cover network functionality.
To assist you with the configuration of the Digital Sprite 2, this section is constructed in a tutorial
manner and will make use of typical scenarios describing how to …….. allocate an IP address,
set up VMD, etc. Select the sections that are relevant to the functionality required for your
application and follow the step by step instructions. In some of the sections the web interface
and the OSD menus will be displayed, these are the more advanced network settings where
configuration via the web pages is more appropriate.
As with the Installation of the unit this section will be divided into:
Simple Configuration – required to get the unit up and running
Advanced Configuration – project specific requirements
Note: It is presumed that the main configuration steps detailed in the Digital Sprite 2
Setup Guide have been followed and therefore the cameras inputs have been
enabled and the standard record rate has been set, although these features are also
detailed within this section.
Web Page Icons
Each of the Digital Sprite 2 configuration web pages has the following buttons:
Reset to Defaults – this will return the associated page to factory defaults.
Display Help – this will display the Help pages for the associated configuration page.
This is a good starting point if you are having problems or do not understand the
configuration parameters.
Save Settings – this will save a changes that has been made to the configuration page remember to save the changes selecting a new page before saving the changes will
result in all changes will be lost!
Reset – this will be displayed on the configuration pages for functionality that requires
the unit to be reset to initiate the function, always save the settings before resetting the
unit.
For each How to…. section the Tab name and Function name will be shown allowing you to
easily locate the correct configuration page.
Page 4
Dedicated Micros
Accessing the Configuration Web Pages
The configuration of the Digital Sprite 2 is achieved via on the on-board web pages, to access
these:
Note: It is assumed that the Digital Sprite 2 has been configured with an IP address
via the serial port or the OSD menus and has been connected to an Ethernet
network.
1. Launch Internet Explorer (or Netscape Navigator).
2. Type the IP address of the Digital Sprite 2 into the address bar.
3. You will be presented with the Main Menu page.
4. Select Configuration Options, you will be prompted for a username and password, if these
have not been previously changed in the .ini file the default settings are dm and web
respectively.
Note: The user name and password are case sensitive; it is recommended that you
change the default username and password. Please keep this information as mislaid
usernames and passwords could result in the unit being returned to Dedicated
Micros.
Main Menu
The Digital Sprite 2 Main Menu allows the Operator access to:
Live viewing of any of the connected cameras.
Configuration web pages for the unit.
Downloads which include the software applications and the product documentation.
Demo pages that demonstrate how viewing applications can be designed for varying system
requirements.
Dedicated Micros
Page 5
Page 6
Dedicated Micros
Simple Configuration
How to Configure Global Parameters
There are some parameters that can be set that will affect the overall system;
video standard for the video inputs, browser format for the web interface,
language that the menus will be displayed in and the DST (daylight saving time)
settings.
To configure these parameters:
1. Select Home -> Main Set-up.
2. Select the video standard from the drop down list; this will be the standard for all the video
inputs on the Digital Sprite 2.
Note: If the video format is changed it is necessary to carry out a system reset
before saving the settings. This allows the unit to activate the change.
3. Select the date format from the drop down list.
4. The Digital Sprite 2 web pages can be viewed in two formats; Active X (default) or Java,
select the relevant option from the drop down list.
5. The web configuration pages for the Digital Sprite 2 can be displayed in a selection of
languages, select the language which is most appropriate to your installation from the drop
down list.
Note: Ensure the PC being used for the configuration is set to the correct time zone
and that DST is enabled before continuing.
6. Select the DST for region where the unit is installed from the drop down list.
7. If the settings are incorrect reset the Digital sprite 2 by selecting the reset button.
8. If the Digital Sprite 2 time is to be synchronised to the PC that is being used to configure the
system then select sync unit time from PC. Note this only synchronises the time when the
button is selected this will not maintain synchronisation permanently.
9. Remember to save the configuration by selecting Save Settings!
Dedicated Micros
Page 7
Function
Description
Video Standard
This is a global setting for all the video inputs on the Digital Sprite 2. The
video format can be configured as PAL or NTSC.
When the video standard is changed the Digital Sprite 2 must be reset.
Click on the Reset button.
Date Format
It is possible to identify the format in which the date will be displayed; the
default setting is Day Day, Month Month, Year Year.
Browser Settings
The browser interface on the Digital Sprite 2 supports Active X or Java,
the most appropriate for your application can be selected from a drop
down list. Again this is a global settings and therefore any user
connecting to the system will be presented with the same interface.
Language
The Digital Sprite 2 web configuration pages can be displayed in the
language that is most suitable to the country of installation.
The currently languages supported are; English, Spanish, French,
Czech, Italian, Russian, Dutch, Portuguese, German, Turkish, Croatian,
Danish, Finnish, Norwegian, Hungarian, Swedish, Polish, Arabic,
Chinese
DST (Daylight
Saving Time)
This reflects the local time zone for the area where the Digital Sprite 2 is
installed.
Reset
This will reset the Digital Sprite 2.
Sync Unit time
from PC
The Digital Sprite 2 can be synchronised with the PC that is being used
to configure the unit. If the PC is synchronised with the network clock
then this time will be reflected in the Digital Sprite 2.
The synchronisation is not persistent and will only synchronise the Digital
Sprite 2 and the PC at the time the button is pressed.
Page 8
Dedicated Micros
How to Enable System Features
There are a number of features supported on the Digital Sprite 2 that can be
enabled or disabled depending on your system requirements.
When these features are enabled, the relevant configuration web pages will be
displayed; if these are disabled then these pages will be omitted.
1. To enable the features select the System -> Advanced Features.
2. By default the Live options are enabled, to enable the other features tick the box next to the
feature.
3. Remember to select Save Settings!
4. You will now need to select Reload Webpages for the relevant configuration pages for the
enabled features to be displayed.
5. Some of the features require a system reset select the Reset button to reset the unit and reload the web pages.
Section
Feature
Home
Register
Dedicated Micros
Description
Note: Configuration and registration of the Digital Sprite
2 is carried out at the factory, therefore this screen is
for fault diagnostics only and it is recommended that
the page is not enabled unless advised by Dedicated
Micros Technical Support.
Page 9
Section
Feature
Description
Cameras
Text in image
It is possible to integrate the Digital Sprite 2 into an
application where receipt of specific text can be used to
trigger an alarm. This will enable the configuration page to
be included in the Cameras tab.
Alarms
Alarm image
protection
It is possible to configure the Digital Sprite 2 to protect
images within parameters set by the operator (time and
date, etc). This will enable the configuration page to be
included in the Alarms/VMD tab.
Alarms
Database
configuration
The database can be set to have a maximum number of
entries to ensure efficient management of the information.
This will enable the configuration page to be included in
the Alarms/VMD tab.
Alarms
Alarm/VMD
reporting
It is possible for the Digital Sprite 2 to send information to
a remote monitoring station under certain conditions
(camera fail, alarm, etc). This will enable the configuration
page to be included in the Alarms/VMD tab.
Network
Automatic FTP
download
The Digital Sprite 2 can be configured to automatically
download information using FTP, This will enable the
configuration page to be included in the Network tab.
Network
SMS reporting
The Digital Sprite 2 can be configured to send data to an
SMS server This will enable the configuration page to be
included in the Network tab.
Network
E-mail
reporting
The Digital Sprite 2 supports e-mail of data under certain
conditions (alarm, start up, etc). This will enable the
configuration page to be included in the Network tab.
Network
Webcam
support
The Digital Sprite 2 can make any of the video inputs
available to a web server for use within a web page. This
function uses FTP to upload the images to the web server.
This will enable the configuration page to be included in
the Network tab.
Network
Firewall
configuration
Page 10
The Digital Sprite 2 supports an on board firewall to
ensure no unauthorised users can access the unit. This
will enable the configuration page to be included in the
Network tab.
Dedicated Micros
Section
Feature
Description
Tools
Scope, Audio
Trace, Relays,
Variables
There are a number of tools that can be used to obtain
information on the system performance, enabling this
options will display the relevant pages in the Tools tab.
Live options
Telemetry
controls
This option allows the live pages to be tailored to the
Operators requirements, disabling the option will remove
all telemetry controls from the Live viewing pages.
Live options
Event controls
The Digital Sprite 2 supports an event database which can
be accessed from the Live page, disabling this option will
remove all event controls and will not allow the Operator
to analyse the event database.
Live options
Playback
controls
It is possible from the Live page to review any recorded
images stored on the Digital Sprite, disabling this option
will remove all playback controls from the Live viewing
page.
Dedicated Micros
Page 11
How to Configure Video Inputs and Standard Record Settings
Each video input can be individually configured. How to enable each input and
set the standard record settings has been briefly described in the Quick Start
Guide, this section will detail the full configuration process; camera resolution
and file size, camera titles, termination, video colour and camera fail notification,
standard recording settings.
This section is divided into:
Enabling and configure the camera inputs settings
Configuring the standard record settings
To enable/configure camera input settings:
1. Select Cameras -> Camera Set-up
2. It is possible to identify the global camera resolution (common to all video input) the current
option sets the resolution to 720 x 256.
3. Within the viewing applications it is possible to select High, Medium or Low resolution images,
enter the maximum file size for the High, Medium and Low options.
Note: It is possible to select the viewing resolution of the images from the Digital
Sprite, however the unit always records at the high resolution settings for optimum
quality on recorded images.
4. All connected cameras will be automatically enabled, use this screen to check the enabled
inputs are correct.
5. In the corresponding title box enter the camera name for the video source connected to that
input.
6. Enable the cameras that are to be available for recording in Day, Night and Weekend
operation mode.
Note: The Day, Night and Weekend mode are displayed when the Schedule Record
Rate is enabled in the Schedule menu (this is enabled by default).
7. Disable any camera that is not to be available for viewing, e.g. covert cameras.
8. If the final destination that the video source is to be connected is the Digital Sprite 2 then this
input must be terminated, however if the loop through connections on the unit are to be used
then the corresponding input must be un-terminated. To select termination place a tick in the box
adjacent to the video input. To un-terminate remove the tick from the box.
9. By default the Digital Sprite 2 presumes all enabled inputs are colour video sources. If you
are connecting a monochrome signal to the unit, it is recommended that the input be set for
mono. Place a tick in the corresponding video input.
Page 12
Dedicated Micros
10. If the video input is connected to a matrix, PTZ or dome camera select the required
protocol from the drop down list for the corresponding camera input.
11. To enable the Digital sprite 2 to send notification that the video input does not detect a 1V
peak to peak signal place a tick in the box adjacent to the video input. This will give a camera
fail alarm.
12. Save the configuration by select Save Settings!
To configure the standard record settings:
13. The record duration and standard record rate are inter-connected; changing one of these
settings will automatically update the other.
Note: The alarm record rate is not taken into account.
14. Enter the required settings in either the record duration or standard record rate, these
are global settings.
15. Enter the alarm record rate for when the Digital Sprite 2 is in an alarm situation, this is a
global setting.
16. Select the alarm recording mode to reflect the recording requirements on receipt of an
alarm
17. Enter the video expiry period in days.
The Digital Sprite 2 supports day, night and weekend operation, if this has been enabled within
the Cameras>Schedule function then it is possible to identify the alarm record rate for all
operation modes.
An example of dual mode operation is; a system can be in a ‘set’ or ‘unset’ mode or in an ‘Night’
or ‘Day’ mode. Cameras are individually selected in either or both modes to be available for
alarm recording.
The Night mode could be identified as out of hours and Day would be the time during normal
working hours. This will ensure cameras (such as internal cameras) can be disabled when
necessary so false triggers do not occur. Then these cameras would be re-enabled during nonworking hours so the whole site is fully monitored.
18. Enter the record rate for the Day, Night and Weekend modes, these settings will be applied
to all cameras enabled within these modes.
19. Save the configuration by select Save Settings!
Dedicated Micros
Page 13
Function
Description
Pictures Per Second (pps) /
milliseconds (ms)
This allows the record settings to be configured as either
Pictures Per Second or Milliseconds.
Live/Record Resolution
This is the resolution of the live and recorded images that will
be transmitted from the Digital Sprite 2 and recorded to hard
disk, the current setting is 720 x 256.
High KB Image Size
This is the maximum file size for the images when high quality
video has been selected to be recorded or viewed.
The Digital Sprite 2 records the images at the High image size
settings only.
Medium KB Image Size
This is the maximum file size for the images when medium
quality video has been selected to be viewed.
Low KB Image Size
This is the maximum file size for the images when low quality
video has been selected to be viewed.
Note: Reducing the file size will allow more data to be transmitted across the
network, it is important to remember reducing the file size will require the
compression applied to be increased and this will affect the quality of the image.
Advanced Setup
This option gives access to the configuration page to allow
alias configuration for the MPEG4 option, refer to the
Advanced Setup section below.
Video Expiry Period
This indicates the maximum time any images can be stored on
the hard disk, if the record duration is less than the video
expiry period the images will automatically be overwritten.
Telemetry Setup
This will only be active when one of the video inputs on the
Digital Sprite 2 has been configured for telemetry and allows
access to the telemetry setup page where camera specific
functions can be configured
Page 14
Dedicated Micros
Function
Description
Connected
The Digital Sprite 2 can automatically detect if a camera source is
present, the corresponding input will be enabled in this menu for
connected cameras.
Camera Title
It is possible to allocate an ASCII camera title to each of the enabled
inputs, this along with the camera number will be displayed on the
screen to identify the camera selected.
Recording Day /
Night / Weekend
Each camera can be individually enabled to be available for recording
when the unit is in the Day, night or weekend operation mode.
Viewable
Cameras can be selected or deselected from being available to be
viewed, e.g. covert cameras. This setting does not affect the recorded
video it is for viewing only.
Terminated
As the Digital Sprite 2 supports loop through it is necessary to remove
the termination of any inputs that are ‘looped’, by default all inputs are
terminated at 75 ohms.
Mono
If the video input on the Digital Sprite 2 has a black and white
(monochrome) source connected then enable the corresponding
camera.
The Digital Sprite 2 will try and compress the colour contents of the
image if this box is not enabled, ticking this box will remove unnecessary
overhead on the compression process.
Telemetry
The Digital Sprite 2 supports a number of coaxial and serial protocols,
this option allows one of these to be selected from the list and allocated
to the corresponding camera input. The coaxial telemetry protocols are
Dennard, Pelco and BBV. Refer to How to Enable Serial Telemetry for
RS232/RS422/RS485 telemetry.
Camera Fail
Reporting
If the video input on the Digital Sprite 2 does not identify a 1V peak-topeak signal then the unit can transmit an alarm notification for camera
failure on the corresponding video input.
Record Duration
The total record time available in (DD) Days and (HH) Hours. This
indicates the storage capacity of the system without any alarm
recording.
It is estimated from size of video storage, the standard record rate and
the requested target size of the recorded images.
Note: Changing the Record Duration will automatically update the
Standard Record Rate. Changing the Standard Record Rate will likewise
update the Record Rate. This should be configured for day, night and
weekend operation modes.
Dedicated Micros
Page 15
Function
Standard Record
Rate
Description
This is global setting and identifies the ‘common pictures per second’ for all
enabled video inputs on the unit in the mode of operation that is being
configured. This will remain unless otherwise actioned (Alarm or Variable Record
Rate).
This can be set in milliseconds or the number of pictures per second.
The delay between consecutive images from any one camera is the Standard
Record Rate multiplied by the number of cameras being recorded. Changing the
Standard Record Rate will automatically update the Record Duration. Changing
the Record Duration will likewise change the Standard Record Rate.
Example Record Rates
20ms = 50/60 pictures per second
33ms = 30PPS
40ms = 25pps
50ms = 20pps
100ms =10 pps
125ms = 8pps
200ms = 5 pps
500ms = 2pps
1000ms = 1pps
WARNING: When running the unit at maximum Record Rate (50pps or 20ms in
Standard Record Settings), this will affect viewing and network transmission, as
the video codecs will be running close to capacity - the unit’s priority is to record
the footage to the internal HDD, so transmission performance will be reduced.
This is exhibited by slow connection to the html pages and reduced viewing
frame rates. Multi-user viewing will also be affected. It is not recommended to
set the Standard Record rate to 20ms for everyday usage, but rather only for
specific situations where this rate is necessary.
Alarm Record Rate This identifies the global alarm recording rate, for the mode of operation
being configured (i.e. Day, Night and Weekend mode), which will be
activated if an alarm is triggered on the unit. For example, the unit may
be configured to increase the recording rate when a door contact is
triggered.
Alarm Record
Mode
This option allows exclusive or interleave recording to be selected within any of
the operating modes (Day, Night, Weekend) to adjust the record sequence when
an alarm is received. The options for event recording are:
Unchanged – This sets the record sequence to remain the same whether an
alarm is present or not.
Exclusive – The unit will only record the alarm cameras.
Interleaved – This will set the unit to record the alarm cameras more frequently
than non-alarm cameras, by interleaving the two i.e. if camera 1 is in alarm the
interleave recording would be 1213141516…
Click here to see
thumbnail images
This will display a thumbnail view of video connected to the unit. Place
the cursor in the camera title box to view the corresponding video input.
Page 16
Dedicated Micros
Advanced Setup
The Digital Sprite 2 supports MJPEG and MPEG4 compression. the Advanced Setup option
allows the JPEG settings to be aliased for MPEG4 mode so that the User Interface allows
dynamic switching between viewing MJPEG or MPEG4 images.
To configure the Advanced Setup:
1. Select Cameras -> Camera Setup -> Advanced Setup.
2. Enter the JPEG file sizes in Kbytes for the various image resolutions; 2CIFHI, 2CIFMED,
2CIFLO, CIF, QCIF.
3. Enter the bit rate for the equivalent MPEG4 images for the same image resolution.
4. Enter the number of pictures per second required for MPEG4 compression.
5. Remember to save the configuration, select Save Settings!
Function
Description
System Resolution
This is a read only section and identifies the resolution as configured in
the Camera Setup page.
Resolution Codes
There are a number of resolution codes that identify the size of the
image that will be transmitted when the corresponding resolution button
is selected in the User Interface.
Note: These figures are automatically calculated by the unit are are
dependent on the Resolution setting selected in the Camera Setup
JPEG (Kbytes)
This is the maximum JPEG file size for each of the resolution options,
enter the values in Kbytes.
MPEG4 Bitrates
and Frame rates
This is the maximum bit rate and required framerate when the unit is in
MPEG4 mode for each of the resolution options, enter the value in
kbits/second and pictures per second (respectively).
Dedicated Micros
Page 17
Note: The Digital Sprite 2 records MJPEG images while simultaneously supporting
the option to transmit MJPEG and MPEG4 images for viewing.
6. As the Record and High resolution are interconnected, select the High resolution option
from the drop down list, this option will then be automatically reflected in the Record resolution
when the save settings button is pressed.
Note: Trying to change the Record resolution to be different than the high resolution
is not possible, the unit will automatically default the Record resolution when the save
settings button is pressed
7. Select the resolution of the images that will be transmitted when the Medium resolution
option is selected in the viewing application.
8. Select the resolution of the images that will be transmitted when the Low resolution option
is selected in the viewing application.
9. Remember to save the configuration, select Save Settings!
Function
Description
Resolution alias
This identifies the functions that are supported on the Digital Sprite 2
that can be selected within a viewing application as well as the record
resolution of the MJPEG images.
Resolution codes
This drop down list displays all the previously configured resolutions and
allows any of these to be selected for the associated function. The
illustration shows that the record resolution and the resolution when the
HIgh option is selected in the viewing application has been set to
2CIFHI, while the MEDium resolution is set for 2CIFMED and LOw is set
for 2CIFLO.
Page 18
Dedicated Micros
Configuring the Network Settings of the Digital Sprite 2
The Digital Sprite 2 can be allocated an IP address and associated settings via
the serial port or OSD menus, this web page allows these settings to be
checked and changed if required.
To check / configure the network information:
1. Select Network -> Network Settings.
2. If the IP address, subnet mask and default gateway that has already been configured via
the serial port or OSD menus these will be displayed on this page, these can be changed by
entering the new information in the relevant areas.
3. The Digital Sprite 2 supports Domain Name Server allowing the Digital Sprite 2 to reference
other hosts by their name rather than their IP address, enter the IP address of the primary DNS
and secondary DNS server.
4. The default system name for the Digital Sprite 2 is DS2, this can be changed to a more
appropriate name by entering the information in this section.
5. As the Digital Sprite 2 can be connected to a LAN or WAN network it is possible to identify the
maximum bit rate for the network connection. There are default settings for LAN, WAN and
ISDN if these defaults are accept select the corresponding button for your network link, the Max
trans rate, transmit image buffers and Ethernet MTU values will be automatically configured, if
these default settings are not as require enter the new information in the sections.
6. Enter the TCP Re-transmit Time in milliseconds, this settings should be discussed with the
Network Manager.
6. The secondary webserver port is system specific and allows a port to be allocated for
webserving if the network is already utilising the default port.
8. Remember to save the configuration by selecting Save Settings!
Dedicated Micros
Page 19
Function
Description
IP Address, Subnet These are the settings that have already been configured via the Serial
Mask, Default
port or OSD menus. This is the static IP address and subnet mask, and
Gateway
if applicable default gateway.
Primary DNS
This is the primary DNS server IP address for applications that are
utilising domain names.
Secondary DNS
This is the IP address of the secondary DNS server in case of failure of
the primary server.
Unit Name
This is the name that is allocated to the Digital Sprite 2, this will be used
when transmitting alarm information to a Remote Monitoring Station.
PPP IP
This is the IP address that will be allocated if the unit is to dial (in and
out) on alarm using PPP. This is independent to the units IP address.
DHCP IP
If the Digital Sprite is to be installed in a DHCP network, this option
would display the IP address that was automatically allocated to the unit
from the DHCP Server.
DHCP Subnet
If the Digital Sprite is to be installed in a DHCP network, this option
would display the subnet that was automatically allocated to the unit
from the DHCP Server.
Page 20
Dedicated Micros
Function
Description
DHCP Gateway
If the Digital Sprite is to be installed in a DHCP network, this option
would display the gateway that was automatically allocated to the unit
from the DHCP Server.
DHCP Name
This would be the name of the Digital Sprite 2 that is automatically
allocated by the DHCP server.
Serial Number
This a read only section and is generated by the unit hardware
identifying the serial number of the Digital Sprite 2.
LAN, WAN, ISDN
This option ensures the speed of the data from the Digital Sprite 2
matches the speed of the network the data is being transmitted across.
These are default settings and are configured as:
LAN – 10000 Kilobits/second
WAN – 256 Kilobits/second
ISDN – 64 Kilobits/second
Force 10BaseT
operation
The Digital Sprite 2 supports 10 or 100BaseT half duplex transmission,
this will force the unit to operate at a 10BaseT connection.
Transmit Image
Buffers
This is used in order to improve the picture delivery over Ethernet when
using a slow connection, i.e. 256Kbps. Options available are 1, 2 or 3
buffers.
Ethernet MTU
This is the maximum transmit unit for the Ethernet packet. The MTU is
the largest physical packet size measured in bytes, that the network can
transmit. By default this figure is set to 1500bytes.
TCP Re-Transmit
Timeout
This is the time the Digital Sprite 2 will wait to re-send a packet if an
acknowledgement is not received.
When making a connection across a WAN link this figure should be
increased and should match the timeout figure for the router.
PPP Idle Line
Timeout
This is the time the Digital Sprite 2 will wait before dropping the PPP link
if data has not been transmitted or received.
PPP Link Down
Timer
If for any reason the PPP connection is lost then this is the time period
before the Digital Sprite 2 will be forced to drop the PPP connection.
Packet Size
This is the maximum packet size that will be transmitted from the Digital
Sprite 2. This figure is identified in Bytes.
Dedicated Micros
Page 21
Function
Description
Secondary Web
Server Port
If the default port setting for web serving has already been allocated it is
possible to configure a second port number.
Eg. If the secondary web port is set for 8000 because the default (80)
web port is blocked by the network or firewall. To obtain images from the
Digital Sprite 2 enter the IP address plus the secondary web port in the
address section of Internet Explorer or in the Viewer;
http://172.16.1.2:8000 (<IP address><:><secondary port number.>
How to Select and Enable Coaxial Telemetry
The Digital Sprite 2 supports numerous coaxial telemetry protocols allowing
these cameras to be connected directly to the unit and controlled using their
native control protocol.
Simple selection of manufacturer/model within the configuration pages and
these cameras can be controlled. Common telemetry operations such as pan,
tilt, zoom, presets can be controlled via the Live page of the web interface or
via the Viewer software.
Note: Priorities are not allocated to the PTZ control; this works on the initial
connection and request having the control. Any subsequent connections will allow
viewing but no control until the initial connection is relinquished or after a set period
(5 seconds) where control commands have not been issued to the PTZ/dome
camera.
Any of the video inputs on the Digital sprite 2 can be configured for coaxial telemetry; this is
achieved in the Camera Set-up page.
1. Select Cameras -> Camera Set-up to configure the individual cameras.
2. The coaxial protocols currently supported on the Digital Sprite 2 are:
BBV (BBV-C)
Pelco (Pelco-C)
Dennard (Dennard-C)
3. Select Cameras -> Camera Inputs and select the telemetry protocol from the telemetry list
for the corresponding camera.
4. Remember to save the changes you have made by selecting Save Settings!
Once you have selected the telemetry protocol it is possible to; review the image from the video
input, test the control, configure the features of the camera that are required for you application
(such as presets), and access the dome/PTZ camera menus to configure the more enhanced
features supported on the dome, refer to the manufactures manual for the camera for these
features.
Page 22
Dedicated Micros
Function
Description
Telemetry Setup
If any of the inputs have been set coaxial telemetry this option will be
active and will allow the telemetry functions to be configured (see below
for more detailed information).
Connected
If the camera input has a video source connected then the input must be
enabled.
Camera Title
It is possible to allocate a camera title to each of the enabled inputs, this
along with the camera number will be displayed on the screen to identify
the camera selected.
Recording Day /
Night / Weekend
Each camera can be individually enabled to be available for recording
when the unit is in the Day, night or weekend operation mode.
Viewable
Cameras can be selected or deselected from being available to be
viewed, e.g. covert cameras. This setting does not affect the recorded
video it is for viewing only.
Terminated
As the Digital Sprite 2 supports loop through by default all inputs are
terminated at 75 ohms. If any of the inputs are looped the termination
must be removed, un-tick the corresponding termination box.
Mono
If the video input on the Digital Sprite 2 is a black and white
(monochrome) source then tick the corresponding camera. The Digital
Sprite 2 will try and compress the colour contents of the image if this box
is not enabled, ticking this box will remove unnecessary overhead on the
compression process.
Telemetry
The Digital Sprite 2 supports numerous protocols for telemetry cameras,
this allows the corresponding video input to be configured for the
relevant protocol (see below for more information)
Telemetry Setup Page
1. To access the set up parameters of the camera select the Telemetry Setup button on the
Camera Set-up page.
Note: When you select the Telemetry Setup button, it may take a few seconds for
the page and video to be downloaded, during this time do not press any buttons as
this will slow the process down.
2. The telemetry control buttons for configuration will be displayed along with camera selection,
display options and resolution selection.
Dedicated Micros
Page 23
This web page allows the Operator to view any of the enabled inputs on the Digital Sprite 2,
control the telemetry connected to the system and set up any features that are required for their
application (such as presets). It is also possible to access the dome/PTZ camera menus for
configuration of the supported parameters that are only programmable from the camera menu.
Note: Review the relevant documentation for the camera to see how you navigate the
camera menus. Remember to save any configuration settings in the dome menu!
How to Enable Serial Telemetry
The Digital Sprite 2 supports numerous serial telemetry protocols, any of the
video inputs on the Digital Sprite 2 can be configured as a functional camera.
Serial 3 (Bus A) and Serial 4 (Bus B) can be used for connecting serial
telemetry.
Common telemetry operations such as pan, tilt, zoom, presets can be
controlled via the Live page of the web interface or via the Viewer software.
The current 485 serial protocols supported on the Digital sprite 2 are:
BBV-RS485
JVC
Pelco-P
Ultrack
DM-Serial
Kalatel
Philips
Vantage
Dennard
Mark Mercer
Samsung
VCL
Ernitec
Panasonic
Sensormatic
Vista
1. Connect the camera and cables to the Digital Sprite 2 before configuring the unit:
2. Select System -> Serial Ports & Telemetry.
3. Using the drop down list on the associated Communication port (Serial 3 (Bus A) or Serial 4
(Bus B)) select RS232/485 Telemetry.
4. Select the relevant telemetry type from the list of supported protocols.
Page 24
Dedicated Micros
5. Enter the dome/PTZ standard settings for:
- Baud rate
- Parity
- Data bits
- Stop bits
- Flow control
6. Ensure the address of the dome/PTZ camera is the same as the video input number on the
Digital Sprite 2, e.g. Video input 15 would equate to the dome/PTZ camera being address 15.
7. Remember to save the changes you have made by selecting Save Settings!
8. Select Cameras -> Camera Setup and select the telemetry protocol from the telemetry list for
the corresponding camera.
Once you have selected the telemetry protocol and addressed the dome/PTZ camera it is
possible to; review the image from the video input, test the control, configure the features of the
camera that are required for you application (such as presets) and access the dome/PTZ
camera menus to configure the more enhanced features supported on the dome, refer to the
manufactures manual for the camera for these features.
Function
Description
Serial 1 &
Serial 2
Serial ports 1 & 2 are RS-232 ports and can have the following port
usage assigned; off, debug, general purpose, PPP, text in image and
RS232 telemetry.
Modem/TA
When the serial port has been configured for PPP it is necessary to
select from one of the supported modems to identify the device
connected to the unit, refer to table below for supported modems/TA’s.
Serial 3 & 4
(Bus A and Bus B)
Serial ports 3 & 4 are RS-232, RS-422 and RS-485 ports and can have
the following port usage assigned; off, debug, general purpose, text in
image, RS232/485 telemetry.
Telemetry type
This is the list of serial telemetry protocols that are supported on the
Digital Sprite 2.
Dedicated Micros
Page 25
Function
Description
Baud rate, parity,
data bits, stop bits,
flow control
This allows the communication settings to be configured, note when
telemetry is selected these will not be active and will default to
predetermined settings.
Telemetry Setup Page
1. To access the set up parameters of the camera select the Telemetry Setup button on the
Camera Set-up page.
Note: When you select the Telemetry Setup button, it may take a few seconds for the
page and video to be downloaded, during this time do not continually press any
buttons as this will slow the process down.
2. The telemetry control buttons for configuration will be displayed along with camera selection,
display options and resolution selection.
This web page allows the Operator to view any of the enabled inputs on the Digital Sprite 2,
control the telemetry connected to the system and set up any features that are required for their
application (such as presets). It is also possible to access the dome/PTZ camera menus for
configuration of the supported parameters that are only programmable from the camera menu.
Note: Review the relevant documentation for the camera to see how you navigate the
camera menus. Remember to save any configuration settings in the dome menu!
How to Configure Matrix Control
The Digital Sprite 2 can be incorporated into an existing analogue matrix
installation and offers control of the matrix via the Live web page or the Viewer
software.
This ensures that any existing equipment does not need to be removed from
the installation to allow control over a network, simply integrate the Digital Sprite
2 into the system a network output.
Page 26
Dedicated Micros
The Digital Sprite 2 supports connectivity to the matrix on any of the Serial Ports. The following
matrix protocols are currently integrated into the unit’s software:
American Dynamics (AD) RS232 Matrix
AD168 RS232 Matrix
BBV TX1000, TX1500 and BBus-Interface Matrices
VCL/Ademco Maxcom Matrix
Connectivity
All video inputs from the matrix must be connected to the Digital Sprite 2 (loop through) as
shown below, when installed carry out the following configuration process:
Matrix
Serial
Data
Loop through
LAN/WAN
Digital Sprite 2
Record cameras 1 - 16
Control of cameras 1 - 16
1. Select System -> Serial Ports & Telemetry.
2. Using the drop down list on the associated Communication port (Serial 3 (Bus A) or Serial 4
(Bus B)) select RS232/485 Telemetry.
3. Select the relevant matrix from the list of supported protocols.
The serial standard settings for the selected matrix will automatically be allocated, however if
this is incorrect you can change these for:
- Baud rate, Parity, Data bits, Stop bits, Flow control.
4. Enter the Matrix Monitor number of the matrix that the Digital Sprite 2 is connected to and
that you will be controlling.
5. Enter the Matrix Offset address.
6. Save the configuration by selecting the Save Settings!
7. Select Cameras -> Camera Inputs and select the matrix protocol from the telemetry list for
the corresponding camera.
Dedicated Micros
Page 27
Function
Description
Serial1 & Serial2
Serial ports 1 & 2 are RS-232 ports and can have the following port
usage assigned; off, debug, general purpose, PPP and text in image,
RS232 telemetry.
Serial 3 & 4
(Bus A and Bus B)
Serial ports 3 & 4 are RS-232, RS-422 and RS-485 ports and can have
the following port usage assigned; off, debug, general purpose, text in
image, RS232/485 telemetry.
Telemetry type
This is the list of serial telemetry protocols that are supported on the
Digital Sprite 2.
Telemetry Matrix
Monitor
Matrices support many monitor outputs, this is the monitor output that
has been allocated for connection to the Digital Sprite 2.
Telemetry Matrix
Offset
Baud rate, parity,
data bits, stop bits,
flow control
Page 28
This is the matrix offset to allow any camera input on the matrix to be set
as input 1 for the Digital Sprite 2. An example of this is in large systems
where multiple operators are allocated groups of cameras, for ease of
use each camera can be configured to start at camera 1. However they
could actually be connected to any input on the matrix but we would
select camera 1 which could be controlling input 32 on the matrix.
This allows the communication settings to be configured, note when
telemetry is selected these will not be active and will default to
predetermined settings.
Dedicated Micros
This completes the Simple Configuration of the Digital Sprite 2. The unit can operate at the basic
level and the remaining configuration would include functionality that is specific to the customer
requirements.
The following parameters have been configured:
Global settings
Video inputs
Cameras parameters
Record rates
Remote connectivity
Dedicated Micros
Page 29
Advanced Configuration
How to Configure Variable Recording
The Digital Sprite 2 by default will record all connected cameras. This section
goes into full details on how to configure variable record. The Quick Start Guide
detailed how the remaining camera inputs on the Digital Sprite 2 can be
enabled and configured to record (Standard Record Rate).
Standard recording sets a record rate that is evenly distributed across all the
enabled inputs. Alternatively it is possible to identify individual record rates for
each of the video inputs; this will allow you to have cameras with higher
importance recorded at a higher frame rate.
The following details how the Variable Record Rate can be set for; normal recording, in the
event of an alarm and when VMD has been identified on an input. These setting would be used
in an alarm situation where an increased frame rate may be required.
Note: Remember that although each video input can be individually configured the
Digital Sprite 2 supports up to 50pps (PAL)/60pps (NTSC) across all inputs, do not
exceed this quantity.
To set up Variable Recording on the Digital Sprite 2:
1. Select Cameras -> Variable Rate Recording to configure individual cameras.
2. Select between Pictures Per Second (PPS) or Milliseconds (ms).
3. By default the cameras are disabled, to enable the relevant cameras tick the box associated
with that camera for the operation mode (Day, Night and/or weekend).
4. There are three record rate settings that can be configured within this page; Variable Record
Rate, Alarm/VMD Record Rate, Pre-alarm Record Rate. In addition you can also identify the
number of pre-alarm pictures that you want to be stored along with the alarm recording.
Enter the record rate in the relevant setting alongside the camera input for each operation
mode (day, night and/or weekend).
If the record rates you enter exceed the total record rate that the Digital Sprite 2 supports the
following prompt will be displayed.
Page 30
Dedicated Micros
7. Remember to save the configuration you have entered by selecting Save Settings!
Function
Description
Pictures Per
Second Milliseconds
The variable record rate can be configured as pps or ms.
Variable record
Day / Night /
Weekend
By default all the video inputs are disabled, this allows you to enable all
or select individual inputs in any of the day, night and weekend operation
modes.
Variable record
rate Day / Night /
Weekend
This is the number of pictures per second or milliseconds that the unit
will record in normal operation.
Note: If the camera is only to be recording in an alarm situation leave
the setting at 0.
The settings can be entered for day, night and weekend operation mode.
Alarm/VMD record
rate Day / Night /
Weekend
This is the number of pictures per second or milliseconds that the unit
will record when the corresponding video input has identified VMD or
has been triggered by an external alarm.
This can be configured for day, night and weekend operation modes.
Dedicated Micros
Ensure the information entered is in the correct format.
Page 31
Function
Description
Pre-alarm record
rate Day / Night /
Weekend
This is the number pre-alarm pictures per second or milliseconds that
will be recorded along with the alarm images. These can be set for day,
night and weekend operation modes.
Number or prealarm pictures Day
/ Night / Weekend
When the pre-alarm record rate has been set it is necessary to identify
the number of pre-alarm pictures, these can be set for day, night and
weekend operation modes.
RAMDisk
This indicates how much RAMDisk is available for pre-alarm images. This allows the operator to
monitor the RAMDisk allocation and ensure as you configure your variable record settings you
have sufficient RAMDisk to accommodate the number of images required on alarm; i.e. variable
record rate, alarm/VMD record rate, pre-alarm record rate and number of pre-alarm cameras.
The screen shows the settings for camera 1 and camera 2 and how much of the RAMDisk
would be required for these settings.
Function
Description
RAMdisk
requirement Day
/Night / Weekend
These are read only section and are automatically calculated from; the
[number of cameras with pre-alarm recording selected] and the
[requested record size]. These show how much of the allocated
RAMdisk is required for storing the information for the settings
configured, these can be for day, night and weekend operation mode.
Page 32
Dedicated Micros
Function
Description
RAMdisk available
This identifies the overall size of the RAMDisk that is available on the
unit, again this is a read only sections.
RAMDISK (A)
This area is user definable and allows a portion of the RAMDisk to be
allocated for alarm recording, the range is between 16KB and 2048KB.
How to Enable Audio Recording
The Digital Sprite 2 supports two audio inputs which can allow for external
audio equipment to be connected to the Digital Sprite 2. This allows the
Operator to communicate via the Viewer software across the network to the
camera location.
The audio is independent of the video inputs which means any camera can have associated
audio equipment, e.g. Intercom system. The audio can also be recorded along side the video to
allow review of both simultaneously.
To configure and enable the audio to be recorded:
1. Select System -> Audio Recording.
2. Enter the title for the Audio Channel 1.
3. Tick the box adjacent to the Channel 1 option to enable audio recording. This is the audio
coming in to the server.
4. Enter the title of the Audio Channel 2.
5. Tick the box adjacent to the Channel 2 option to enable audio recording of the output audio,
i.e. the audio being transmitted from the Operator application.
6. Make sure you save the information by selecting Save Settings!
7. Reset the unit for the settings to be actioned.
Dedicated Micros
Page 33
Note: Audio is available in Live monitoring at all times, the audio will only start
recording after the Record Audio option has been enabled.
Function
Description
Audio Channel 1
This is the local audio in on the Digital Sprite 2; peripheral audio
equipment can be connected to the unit (such as intercom systems,
microphones and help points) for complete integration. Allocate a title to
the channel which will be saved with the recording.
Audio Channel 2
This is the audio from the network, i.e. from an Operator viewing
application, peripheral audio equipment can be connected to the Digital
Sprite 2 (such as speakers), for audio integration. Allocate a title to the
channel which will be saved with the recording.
Record Audio
Both the Line in and Line out channels can be enabled for recording this
means that any communication across the audio link can be recorded
alongside the associated video.
How to Configure the Video Inputs for VMD
The Digital Sprite 2 supports VMD (Video Motion Detection) on all video inputs
and allows cameras to automatically detect if there is any movement/changes
within the video scene.
This can then trigger a number of operations such as FTP alarm notification and
increase camera recording rate for the corresponding video input.
Note: It is recommended that you utilise the Walk test function to ensure the settings
are correct for each input enabled, if the settings are to low this will mean VMD will
not be identified to high and false alarms will occur.
Page 34
Dedicated Micros
Configuration of VMD will be separated into three sections:
Enabling video inputs and display options
Configuring action on notification of VMD
Setting up the VMD area
To enable individual video inputs on the Digital Sprite 2:
1. Select Alarms/VMD -> VMD.
2. Enable the video inputs that will identify movement by placing a tick next to the
corresponding input.
3. The pulse extension ensures that the unit does not have double triggers by extending the
alarm time. If a second alarm is received after the first alarm is complete but still within this time
period the unit will not enter a new event in the database, this setting is set in seconds.
4. Enter the pre-alarm time settings in seconds, this is the time prior to the VMD trigger that is
to be saved and protected from being overwritten along with the actual incident.
5. The alarm duration is the minimum time period in seconds from the start of the alarm that
will be protected from being overwritten, it includes the alarm recording, the pulse extension and
post alarm recording (if applicable).
6. If VMD actions are to be saved and protected it is possible to allocate the time period
these are to be maintained or select indefinitely. Enter the time period in days for protecting the
files or tick indefinitely.
7. It is possible to monitor the video from the Live and DuoView web pages on the server, if you
want to view VMD triggers on these page enable the function by placing a tick in the box.
8. Remember to save the configuration by selecting Save Settings!
Dedicated Micros
Page 35
Function
Description
VMD Camera
Enable
This option will display all the video inputs on the Digital Sprite 2. Each
input can be individually enabled for VMD. Tick the box that corresponds
to the input that is to be set for VMD monitoring.
VMD pulse
extension
The pulse extension extends the trigger to avoid double triggers of VMD
from occurring, i.e. if a second incident of VMD is received on the same
input, after the first alarm is finished, but still within the pulse extension
period the unit will treat this as a single trigger and not create a new
event.
VMD protect prealarm time
This is the time period prior to the VMD trigger where the images will be
saved along with the VMD recording, these images will be available for
archive and will be protected from being overwritten.
VMD protect alarm
duration
This is the minimum time period in seconds from the start of the VMD
trigger that will be protected from being overwritten. This time will include
the VMD recording, the pulse extension and any post alarm recording
but will not include the pre-alarm images.
VMD protect period Any VMD entry in the database can be protected from being overwritten,
this is the period of time the files will be saved and protected. After this
time the files will be automatically overwritten unless specified.
Protect VMD
images indefinitely
It is possible to protect VMD images indefinitely to ensure any incidents
are saved and protected for review at a later date. These files will
remain protected until specified differently.
Live & DuoView
Display
It is possible to utilise the web interface to monitor live and recorded
video, if the Live or DuoView are to be used it is possible to identify
when VMD has been triggered, squares will appear over the area where
there is movement.
To configuring the alarm action on identification of VMD:
9. In the Alarms/VMD -> VMD web page there are a number of system actions that can be
automatically initiated when VMD has been triggered, each camera can be individually
configured. Place a tick in the boxes of the VMD action under the corresponding camera input.
10. If an e-mail is to be sent on identification of an alarm it is possible to configure what
information will be contained in the e-mail, using the drop down box select the resolution of the
image to be sent.
11. Don’t forget to save the configuration of the alarm actions by selecting Save Settings!
Page 36
Dedicated Micros
Function
Create Database
Entry
Change Standard
Record Rate
Description
This will record an event in the database using the VMD Zone number
(refer to Alarm Zone below for more information).
This will set the alarm record rate across ALL cameras that are enabled
in the record sequence.
Change Variable
Record Rate
This will change the record rate of the corresponding camera ONLY,
make sure the camera is enabled in the Camera Input page (Refer to
the Quick Start Guide for enabling video inputs).
Report on VMD
Activity
This will automatically send a telnet alarm message to an allocated
Viewer, when the PC receives and accepts the alarm video is then
requested, refer to Alarm/VMD Reporting below for more detailed
information.
Day Operation
This will enable the VMD zone when the unit is in Day operation mode
only.
Night Operation
This will enable the VMD zone when the unit is in Night operation mode
only.
Weekend
Operation
This will enable the VMD zone when the unit is in Weekend operation
mode only.
Dedicated Micros
Page 37
Function
Description
24 Hour Alarm
This will ensure that VMD is permanently enabled on the corresponding
input (24/7).
Record Still Image
This will record (and mark the image by stating the word ‘ALARM’ in the
title) a still of the corresponding video input alongside the recording of
the event, access to the still is via the Live Page.
Protect VMD
Images
This will protect the whole recorded 50 Mbyte block of video regardless
of which camera(s) are recorded.
Create Zone Input
This turns the VMD camera into an alarm input when used with the
Alarm Zones page, Select VMD1 instead of an alarm input to trigger the
event.
Archive Event
This will mark the VMD event for automatic download to the FTP Server
identified or to the Archive list.
Email Image
This will automatically e-mail a snapshot of the VMD incident to the
SMTP server identified. refer to Email configuration page for more
information.
Email Image
Resolution
This is a system setting, the selected resolution will affect any option
where snapshot images are possible, i.e. alarms, VMD, etc.
The setting identifies the resolution of the image that will be attached to
the e-mail as a result of an event.
To set up each camera with a VMD grid:
12. in the Alarms/VMD -> VMD web page click on Click here to VMD applet option to display
the video image and VMD grid, by default video input 1 will be displayed and the grid is divided
into 16 zones.
13. Select the video input you are configuring from the drop down menu.
14. Select zone you are configuring from the drop down box.
Page 38
Dedicated Micros
Note: Any configuration carried out at this stage is for the selected video input and
zone, you will need to save the settings and then select another zone to configure the
whole area.
15. Alternatively if the default zones are not positioned over the areas you intend assign for
detecting motion detection there is an option to clear all cells, you will be presented with a
prompt to check you want them cells deleting, select Yes.
16. To set a zone click at the edge of the area where you want to place the zone, move to the
opposite corner where the zone will sit and click again, a zone area will be displayed over the
area.
17. It is possible to have a grid overlay displayed on the image to assist in placing the zone
areas, select graticule on to display the grid.
18. Select the next zone from the drop down box to create another zone area and follow Step
16.
Note: If this is incorrect then you can click again and the zone will move to the new
area.
Dedicated Micros
Page 39
19. If you want to use the default zone settings you can select the default grid option, this will
place 16 zones over the image. You will be presented with a prompt, select Yes.
20. Select the zone mode from the drop down box that will apply to the zone you have selected
see below for description of zone modes.
21. Set the pixel count (%) by selecting from the drop down box the range is between 2 and
100%.
22. Set the pixel change (%) by selecting a value from the drop down box the range is between
2 and 100%,
An example of VMD operation:
Select the ‘zone area’ that will be configured and set the ‘pixel count’ to 20%, this determines
the percentage of pixels, in the selected zone, that must change for VMD to be triggered. Set
the ‘pixel change’ to 10%, this is the percentage value of the overall change required in the
greyscale.
23. To check you have covered the areas that you want to monitor for motion you can select to
view the zone areas only, select zone display only and you will be presented with the areas
you have highlighted.
24. Selecting full display will show the whole image.
25. Remember to save the configuration by select Save Settings!
Page 40
Dedicated Micros
Function
Description
Camera
This is a drop down list of the video inputs on the Digital Sprite 2,
selecting one of the inputs will display the corresponding video source.
Zone
There are 16 advanced VMD zones that can be individually configured,
select the zone from the drop down list.
Mode
The zone mode identifies when the reference image is taken for
triggering VMD. The options are:
Normal - the reference image is updated approx. 1/second so this will
only allow small changes in the scene without triggering
Last trigger - the reference image is only updated when the VMD is
triggered and would be used under controlled lighting, i.e. so there are
no false triggers due to ambient light changes
Static - the reference image is collected on startup and is never
updated. This would be used in ‘sterile’ areas where there are no
changes expected
Zone disabled - this will disable the zone mode.
Pixel Count (%)
This value is set as a percentage and equates to the percentage of
pixels in the selected zone that must change for the VMD event to be
triggered.
Pixel Change (%)
This setting is a percentage value of the overall change required in the
greyscale to be included in the pixel count. The percentage change is
defined over the complete range of black to white, a 100% pixel change
would be from black to peak white.
Clear Cells
Removes all defined zones from the image.
Dedicated Micros
Page 41
Function
Description
Default Grid
Displays the default grid of 16 VMD zones over the whole image.
Graticule On
Displays a grid to assist in identifying and creating zone areas.
Zone Display Only
This will display the areas of the image that are covered by a zone only
and will assist you in ensuring the necessary areas are covered.
Resolution
This is the resolution of the reference VMD image being displayed.
Refresh
This will update the reference image to the latest view during set up.
Note: Ensure that the display VMD in image option is checked before continuing.
Note: VMD 0 refers to Activity Detect which is setup via the OSD menus, refer to the
Setup Guide.
Page 42
Dedicated Micros
Walk Test
This is part of the configuration process and will provide you with a
low resolution image to check that the settings made for VMD
activity cover the required area(s).
A thumbnail will be displayed and any triggers will be displayed on
this screen this will enable you to add zones if all areas are not
covered increase or decrease the sensitivity, etc.
Using the Walk test will ensure that you are satisfied with the
configuration and remove the need to revisit the site.
Note: A VMD Zone can be used to trigger an Alarm Zone, refer to How to Enable and
Configure Alarms for more information.
How to Enable and Configure Alarms
The Digital Sprite 2 supports 17 alarm inputs which can be individually
configured.
This section will be divided into:
Enabling and configuring the alarm inputs
Enabling and configuring the alarm actions
By default the 16 alarm inputs are disabled, these need to be enabled so that external alarm
devices can be connected to the Digital Sprite 2.
1. Select Alarms/VMD -> Alarm Inputs
2. Place a tick in the box under the Enabled option to select all the alarm inputs or individually
tick the required alarm(s).
Note: There are 16 alarm inputs on board the unit and the option for an additional 16
alarm inputs (17 to 32) by connecting a DM alarm module to the Digital Sprite 2.
Ensure the additional alarm module is connected to the Digital Sprite 2 before
powering up the unit.
3. Select the input that the alarm will be triggered on from the drop down menu, select the
contact number.
4. Select whether the input is Normally Open or Normally Closed by default.
Dedicated Micros
Page 43
4. Set the pulse extension for the relevant alarm input (if applicable).
5. Remember to save the configuration by selecting Save Settings!
Once the alarm inputs have been enabled it is necessary to configure what actions will be taken
when an alarm is triggered.
Function
Description
Input
This identifies which input is being configured. The Digital Sprite 2
supports 16 on-board alarms and 16 virtual alarms plus the unit can also
have an additional alarm modules connected each supporting 16 alarm
inputs.
Enabled
Each input must be enabled for it to be functional; if the input is not
enabled and an alarm is received the Digital Sprite 2 will not
acknowledge the alarm.
By default none of the alarm inputs are enabled.
Module
This identifies whether the alarm is from the onboard alarms or one of
the additional alarm modules. The options are Aux, Direct, Module 1 to
16.
Contact
Identify the contact that is associated with the selected module. This
option allows you to select from contact 1 to 20 for Aux, Contact 1 for
Direct and Contact 1 to 16 for additional modules.
Normally Closed
Contact
This applies to both the on-board alarms and the additional alarm
module, that can be connected to the Digital Sprite 2 via the 485-bus.
When an input is enabled then by default it will be normally closed,
removing the tick in the normally closed box makes the corresponding
input normally open going closed for alarm.
Pulse extension
The pulse extension extends the trigger to avoid double triggers from
occurring, i.e. if a second alarm is received, after the first alarm is
finished but still within this time period, the unit will not create a new
event.
Page 44
Dedicated Micros
Actions can be allocated to each alarm zone; This menu allows a single alarm
trigger to carry out any action such as increase record cameras 1-4, send
notification via FTP, etc.
It is possible to allocate up to 32 alarm zones to carry out a combination of
actions.
Note: There are some pre-defined alarm zones; Zone 30 Disk Low, Zone 31 Disk
Full, Zone 32 Panic Alarm.
This section is separated into:
Enabling and configuring the alarm zone
Allocating alarm actions
To enable and configure the alarm zone:
1. Select Alarms/VMD -> Alarm Zone.
2. Alarm recordings can be protected from being overwritten for a set period of time or
indefinitely. Enter the time period in days that the alarms are to be protected or place a tick in
the box alongside indefinitely.
3. Select the alarm zone to be configured from the drop down option (Zone 1 to Zone 32).
4. Enter an appropriate title to the alarm zone, this will be stored in the database (if enabled), it
is also possible to use the camera title for identification.
5. Enter the time period prior to the alarm that you wish to save along with the incident for
review with the incident, this time is in seconds.
6. Enter alarm duration in seconds; this is the time period where associated video will be
protected from being overwritten.
7. The zone alarm input can be an of the external alarms (direct or 485), any of the configured
VMD zones or any of the preset settings, select the appropriate alarm input from the drop down
list.
8. The Zone OR input allows you to configure a situation where an alarm received on either of
the zone alarm input or the zone OR input will force the Digital Sprite 2 go into alarm mode
and initiate pre-defined alarm actions, select the appropriate option from the drop down list.
9. The zone AND input allows you to configure a situation where an alarm must be received on
both the zone alarm input and the zone AND input to force the Digital Sprite 2 to go into alarm
mode, select the appropriate option from the drop down list.
Dedicated Micros
Page 45
10. The zone NOT input allows you to configure a situation where if an alarm is received on the
zone alarm input then an alarm must not be received on the zone NOT input to force the
Digital Sprite 2 into alarm mode which will initiate the alarm actions configured, select the
appropriate option from the drop down list.
11. Remember to save the configuration by selecting Save Settings!
Function
Description
Alarm image
protect period
This is the time period in days that the alarm images will be protected
from being overwritten, when this time period elapses the images will be
automatically overwritten.
Note: When protecting an image it is important to remember that the
Digital Sprite 2 saves files in 50 Megabyte blocks, the whole block that
contains the image will be protected. If the image overlaps into another
block the all associated blocks will be protected this can start to reduce
the hard disk capacity available for storing images. To unprotect images
refer to System -> Protect/Unprotect Images.
Protect alarm
images indefinitely
Select Alarm Zone
Zone Title
Page 46
Protecting the alarm images indefinitely will ensure the alarm images are
never overwritten .
Note: This section must be used in conjunction with System ->
Protect/Unprotect Images.
An alarm zone logically groups alarms and initiates actions when an
alarm is activated, there are 32 zones that can be configured.
Note: There are a number of zones which have been pre-configured;
Zone 30 Disk Low, Zone 31 Disk Full, Zone 32 Panic alarm.
This information is stored along with the images in the database, ensure
this has relevance to the alarm trigger. There is an option to use the
camera title.
Dedicated Micros
Function
Description
Pre-Alarm Time
This is the period of time prior to the alarm start that will be included
along with the alarm recording for archive and these images will also be
protected from being overwritten.
Alarm Duration
This is the minimum time period in seconds from the start of the alarm
that will be protected from being overwritten. This time will include the
alarm trigger, the pulse extension and any post alarm recording, it will
not include the pre-alarm images.
Rate
PPS
Alarm Duration (Min Protection)
Event Duration
Event Pre-Alarm
(Protected)
Regular
Recording
Enhanced
Pre Alarm
Pulse Extension
Event
Recording
Regular
Recording
Time
Alarm Starts
Alarm Ends
Zone Alarm Input
This determines which input or system function will trigger the zone
alarm, the options are; Contacts 1 to 32, VMD 1 to 16, Presets 1 to 16,
Disk low, Disk full, Panic and no contact.
Zone OR Input
The Zone OR Input identifies an alternative input that can also be used
to trigger the zone alarm. This means an alarm trigger can be received
on the Zone Alarm Input or the Zone OR Input for the trigger to be
activated, the options available are the same as the Zone Alarm Input.
Zone AND Input
The Zone AND Input identifies that an alarm trigger needs to be received
on both the Zone Alarm Input and the Zone AND Input for the trigger to
be activated and the alarm action to the automatically initiated. The
options available are the same as the Zone Alarm Input.
Zone NOT Input
The Digital Sprite 2 will only issue the alarm actions if the trigger is
received on the zone alarm input and not on the Zone NOT input. The
allocated alarm triggers available are the same as the Zone Alarm Input.
Dedicated Micros
Page 47
To allocate the cameras and actions that will be carried out when an alarm is received:
13. Select the cameras from the select zone camera list which are to be included in the zone
being configured. To select a camera click the mouse over the cameras these will then be
highlighted. At least one camera must be highlighted at all times.
14. All of the alarm zone actions can be allocated to each of the zones, to select all actions,
place a tick in the select all box.
15. To select individual actions place a tick alongside the relevant action, see the table below
for more information on the actions listed.
16. If multiple cameras have been selected a primary camera must be allocated to the zone,
select the corresponding camera from the drop down list. The primary camera is the camera
that a still image will be taken from for e-mailing on alarm and will be the first camera displayed
on the Operator monitor.
17. It is possible to send a camera to a preset position on receipt of an alarm, identify the
preset number and the corresponding camera that is to be switched.
18. It is possible to automatically close a relay output when an alarm zone is triggered, the
relay can be connected to an external device; door entry system, loudspeaker announcement
system which means the system can function automatically without user intervention. Select the
relay that is to be actioned on receipt of an alarm.
19. An e-mail can be sent to an e-mail server on alarm, enable this option and identify the
resolution of the image that will be attached to the e-mail.
20. Save the information configured by selecting Save Settings!
Page 48
Dedicated Micros
Function
Description
Select Zone
Cameras
This allows you to select one or more cameras that will be associated
with the Alarm Zone being configured. Each camera will become part of
the ‘alarm sequence’ when this alarm zone is triggered.
Alarm Zone
Actions (select all)
There are numerous actions that can be included in any of the zones
being configured, this option will enable all actions.
Text Only Alarm
This is not currently supported.
Switch System into
NIGHT operation
mode
This will switch the unit to night operation mode and assign the night
operation settings to the recorded video.
Switch System into
WEEKEND
operation mode
This will switch the unit to weekend operation mode and assign the
weekend operation settings to the recorded video.
Create Database
Entry
An alarm entry will be added to the database, the zone title will be used
as part of the entry information.
Dedicated Micros
Page 49
Function
Description
Change Standard
Record Rate
This will change the record rate of the cameras that have been identified
in the Standard Record Rate page (refer to Camera Set-up for
information on how to configure standard record rate). The cameras will
switch to the alarm record rate specified.
Note: Changing the zone cameras has no effect on which cameras have
their standard record rate changed.
Change Variable
Record Rate
This changes the record rate of the cameras that are selected in the
alarm zone to the variable record rate previously specified (refer to How
to Configure Variable Record Rate in this section of the manual). Each
of the cameras must have an alarm record rate specified.
Connect/Dial on
Alarm
The Digital Sprite 2 will automatically connect to the remote alarm
monitoring station defined.
Note: You need to enable the dial on alarm system feature for this
function to work.
Alarm Enabled in
Day operation
mode
Each alarm can be configured to be active when the unit is in a specific
operation mode, enable this for the alarm to be active in Day operation
mode.
Alarm Enabled in
Night operation
mode
Each alarm can be configured to be active when the unit is in a specific
operation mode, enable this for the alarm to be active in Night operation
mode.
Alarm Enabled in
Each alarm can be configured to be active when the unit is in a specific
Weekend operation operation mode, enable this for the alarm to be active in Weekend
mode
operation mode.
24 Hour Alarm
This option would be enabled for alarms that do not want to change at
any time and will remain as programmed, i.e. Panic Alarm. When this is
selected the day, night and weekend options are not available.
Record still image
This will record a still image of the trigger along with the standard
recording. Still images are accessible through the Live page of the web
interface. This will also add the word ‘alarm’ to the title header.
Protect alarm
Images
Archive Alarms
Page 50
Alarm images can be automatically protected from being overwritten.
This will force the Digital Sprite 2 to automatically download alarm
images via FTP to an FTP server or directly to the local CD writer.
Dedicated Micros
Function
Description
Primary Camera
The primary camera is the camera that the unit will take a still image
from for e-mailing on alarm, added to the event database and this will be
the camera that will be the first to be displayed on the Operator monitor.
Goto Preset
It is possible to action a camera, to be automatically sent to a preset
position when an alarm zone is triggered, identify the camera and the
preset number.
Close Relay
Any of the onboard or external relays can be configured to automatically
close on receipt of an alarm, the options are onboard relays 1 to 6 (if
relays 1 to 3 are not pre-defined within the System -> Relay Set-up
page) and Module 1 Relays 1 to 16.
Email Image
When e-mail on alarm is enabled it is possible to attach an image to the
e-mail, the resolution of the image must be defined. It is important to
consider the speed of the link between the Digital Sprite 2 and the
SMTP Server that the e-mail will be sent to. The resolution options
available are; thumbnail, high resolution, medium resolution and low
resolution, the resolution setting is a system settings and will have an
affect on all options that include e-mail attachments.
How to Configure Alarm Presets
The Digital Sprite 2 supports the ability to automatically send a camera to a
preset position on the receipt of an alarm.
Within this web page it also possible to identify if the alarm is to be available as
a trigger for an alarm zone. To enable and configure alarm presets:
1. Select Alarms/VMD -> Alarm Presets
2. Select the camera that will be sent to the preset position from the drop down list.
3. Enter the pulse extension in seconds.
4. Select Aux or the Module number from the drop down list that the input will be triggered
from.
5. Select the contact number for the Aux input or the Module.
6. Identify if the input is normally open (not ticked) or normally closed (ticked).
7. Enter the preset position that the camera is to move to when the alarm is triggered.
8. Select whether the alarm is to be available as a zone trigger.
9. Remember to save the configuration by selecting Save Settings!
Dedicated Micros
Page 51
Function
Description
Select Camera
Select the camera that is to be configured.
Pulse extension
The pulse extension extends the trigger to avoid double triggers of
alarms from occurring, i.e. if a second incident is received, after the first
alarm has finished but within this time period, the unit will not create a
new event.
Module Number
This identifies the alarm input that will be the trigger for the camera
being configured, the options available are the Auxiliary input and
Module 1 to 16 for the additional alarm modules that can be connected
to the Digital Sprite 2.
Contact Number
The Auxiliary input and the additional alarm modules support sixteen
input contacts any of these can be allocated as the alarm input trigger.
Normally Closed
Contact
The alarm trigger can be configured as normally open (default) or
normally closed.
Preset
The preset position is the position the camera will move to when the
alarm is triggered.
Zone Trigger
It is possible for a camera specific alarm to also trigger an alarm zone. If
the input is to trigger a zone as well as send a camera to a preset
position this option must be enabled.
Page 52
Dedicated Micros
How to Configure the Relay Connections
The Digital Sprite 2 supports a number of onboard relay connections and can
also integrate additional relay modules via the 485 bus connection.
These relays can be triggered under specific conditions; on receipt of an alarm,
notification of VMD, etc or they can be permanently allocated for set functions.
This section details how to enable the default actions for a number of the on-board relays.
Note: If the defaults are not set this allows the onboard relays to be available to be
automatically triggered on alarm, this is configured within the Alarm/VMD -> Alarm
Zone option.
Relays 1 to 3 can have pre-configurable global options enabled.
To enable the default relay settings.
1. Select System -> Relay Setup. There are three default settings that can be enabled which
are directly linked to a relay.
2. Relay 1 can be configured to trigger when any of the alarm zones that have been configured
are triggered. Tick the corresponding box.
3. Relay 2 can be configured to be triggered when VMD has been activated on any of the video
inputs that are enabled in the VMD page. Tick the corresponding box.
4. Relay 3 can be configured to trigger when any of the enabled video inputs does not detect a
1 volt peak to peak video signal and therefore detects camera fail. Tick the corresponding box.
5. Save the configuration by selecting Save Settings!
Note: If any relays are enabled for the default settings the corresponding relay test
option will be removed from the Close Relay list in the Alarm Zone page, refer to the
previous section for more information.
Dedicated Micros
Page 53
Function
Description
Global Alarm
It is possible to configure Relay 1 default as the global alarm relay, this
means that the relay will close when an alarm is received on any of the
alarm inputs.
Global VMD
It is possible to configure Relay 2 default as the global VMD relay, this
means that the relay will close when VMD is identified on any of the
camera inputs.
Global Camera Fail It is possible to configure Relay 3 default as the global camera fail relay,
this means that the relay will close when there is notification on the
system that any of the enabled video inputs has camera failure (no 1V
pk-to-ok signal).
How to Configure Connect/ Dial, FTP, SMS and Email on Alarm
As described in the Alarm Zone section above there are a number of actions that can be
initiated when the Digital Sprite 2 is in receipt of an alarm trigger.
For these actions to operate correctly there are additional configuration requirements; FTP
server address, SMS / GSM settings and SMTP Server address. Without this information the
Digital Sprite 2 would not have a route to transmit images on receipt of an alarm or notification of
VMD. This section will be separated into the configuration processes required to enable these
functions to operate.
How to Configure Connect/Dial on Alarm
It is possible to force the Digital Sprite 2 to transmit a message to an allocated
Viewer on receipt of an alarm. This connection can be via the Ethernet port of
the unit or via a dial up connection on the serial port of the unit.
The message will be transmitted to the remote station to notify them of an alarm
on the system. The operator can then make a connection to the unit to verify
and action the alarm response.
Page 54
Dedicated Micros
There are two modes of configuration depending on the route of the alarm message. For
Ethernet the system can be configured wholly using the web interface pages, when using the
modem link, also referred to as PPP (Point to Point Protocol) then it is necessary to edit the
‘profile’ file within the \etc directory of the Digital Sprite 2.
At this stage it is presumed that the Digital Sprite 2; is installed with a modem connected to a
serial port and/or is connected to the Ethernet network and has been allocated an IP address
but the serial port has not been enabled for PPP.
This section will be separated into:
Enabling PPP for dialling into the Digital Sprite 2
Enabling PPP and identifying specific modems for dial up
Configuring Alarm/VMD Reporting via the web and editing the profile.ini file
How to Enable and Configure PPP via Serial Port
The Digital Sprite 2 supports PPP via serial connectivity and also over the
network connection. The following identifies the parameters that require
configuration to allow a PPP connection to be made via the serial interface.
To enable PPP and allocate a modem:
1. Select System -> Serial Ports & Telemetry.
2. Using the drop down list on the associated Communication port (Serial 1 or 2) select PPP.
Note: PPP Link 1 is allocated to Serial 1 for dial out on alarm and PPP Link 2 is
allocated to Serial 2 for dial in.
3. Select the relevant modem from the Modem/TA drop down list, if your modem is not
supported select generic.
Note: Auto detect will only auto detect the modems the Digital Sprite 2 recognises.
Supported Modems
Generic AT Modem
3ComImpact II
KTX 33600 – Modem
PSL - ISDN TA
Nokia30 HSCSD V.110
SHIVA LanRover
Spider 4 CDPD Modem
Dedicated Micros
3Com US Robotics 56K Modem
Falcom GSM Phone / Modem
PLANET Smart IP
Nokia30 GSM
Nokia30 HSCSD V.120
Siemens TC35GPS / MC35 GPRS
Zyxel Omni-net.D - ISDN TA
Page 55
4. The serial standard settings for the selected modem will automatically be allocated,
however if this is incorrect you can change these for:
- Baud rate, Parity, Data bits, Stop bits, Flow control
115200, 0, 8, 1, HARDWARE
5. Remember to save the configuration by selecting Save Settings!
6. Reset the Digital Sprite 2 for the unit to initialise the modem.
How to Configure the Remote Alarm Host Information
When an alarm is triggered the Digital Sprite 2 will send a message via the serial port or over
the network using PPP.
This section identifies the details of the receiving station and the route the message will take.
When using the Ethernet network to transmit the alarm message all configuration for the remote
receiving station can be carried out using the web interface, to enable PPP via a modem the
‘profiles’ (\etc\profiles) file will need to be edited.
To configure the ’profiles’ file:
1. Using an FTP client application connect to the Digital Sprite 2.
2. Locate the \etc directory and expand.
3. Locate the profiles file.
4. Select open/view/edit (depending on the application) to open the file for editing.
5. The profile information will be displayed, enter the information regarding the modem link;
Username (& Profile Label), Password, Port, Phone No, IP Address Range, Subnet Mask.
The port options available are:
PPP_Link2 = Serial 2
PPP_Link2 = Serial 1
Ether = Ethernet
Note: The port option is case sensitive, entering the information incorrectly will result
in the function not operating. It is recommended that Serial 2 be used for PPP for the
serial options as Serial 1 is by default set as Debug and this would still enable serial
communication with the unit.
Page 56
Dedicated Micros
An example of the profiles file is shown below:
#
—————————-
#
Profiles Table List
#
—————————<Username>
<Password>
<Port>
<Phone No>
<IP Address Range>
<Subnet Mask>
dm
password
PPP_Link2
1234567890
10.0.0.1
255.255.255.0
username
password
PPP_Link2
1234567890
10.0.0.1
255.255.255.0
test
password
PPP_Link2
1234
10.0.0.1
255.255.255.0
The username will also be the profile information that will be entered in the web interface page.
Note: The username and password must be unique and they will both be case
sensitive.
6. Save the file and upload back onto the Digital Sprite 2. You will now need to add this
information to the Alarm/VMD Reporting page via the web interface.
7. Reset the Digital Sprite 2.
Note: It is possible to identify the host information, as displayed on the web page,
within the hosts file in the \etc directory.
To configure the remote alarm station information using the web interface:
1. Select Alarms/VMD -> Alarm/VMD Reporting.
2. Enter the IP address of the primary remote host, this is required for connections via the
network and via the serial ports.
3. When making a connection via the Ethernet network enter Ethernet to identify the medium by
which the connection will be made. Alternatively for dial up connections via the modem enter the
username previously configured in the ‘profiles’ file, the example above would result in the
profile entry being dm.
4. Enter the IP address of the secondary host; this is in case the primary host can not be
contacted.
Dedicated Micros
Page 57
5. Enter the medium how the Digital Sprite 2 will connect to the host; Ethernet or the username
as identified in the ‘profiles’ file.
6. When using NAT enter the IP address that will be used for the public address.
7. Enter the video server port number when port forwarding is required.
8. Identify the Unit Alarm name; this is the name that will be presented to the remote alarm
station and must match the name that has been allocated in their site tree.
9. For the system to dial on alarm, system startup and camera fail these functions must be
enabled, place a tick in the box associated with the function.
10. Enter the time delay between the Digital Sprite 2 trying to connect to the remote monitoring
station after a failed connection.
11. Enter the number of times the Digital Sprite 2 is to re-try to connect to the remote monitoring
station, a value of 0 means no limit is set and therefore the unit will continue to re-try until a
connection is made, this should be taken into account when using a dial up connection.
12. This telnet server port is the port that the receiving station will have allocated to list for
alarm message from the Digital Sprite 2, if these port addresses do not match the function will
not operate.
13. Save the configuration by selecting Save Settings!
Note: It is necessary to have a separate ‘telserver’ application enabled when using
NetVu ObserVer or have the telserver function on the DV-IP Viewer software enabled,
of the PC that will be utilised for remote alarm monitoring, refer to the Viewer
manuals for more detailed information.
Note: For configuration via the OSD refer to Appendix G where all menu options are
described.
14. It is necessary to configure the PPP settings on the unit, select Network -> Network
Settings, enter the PPP IP address.
Note: The PPP IP address must be in the same network range as the Alarm
Receiving Centre.
15. Enter the PPP Idles Line Timeout and the PPP Link Down Timer to determine how the
Digital Sprite 2 will transmit information via PPP, these settings should be discussed with the
Network Manager.
Page 58
Dedicated Micros
Function
Description
Primary Host
This is the IP address or name of the initial host that the Digital Sprite 2
will transmit an alarm message to.
Secondary Host
If the Digital Sprite 2 is unable to contact the primary host then it is
possible to identify an alternative route and a secondary host.
If there is only one alarm receiving IP address, you must enter the
details in both the primary and secondary connection settings.
Profile
This is the medium that the Digital Sprite 2 will use to make the
connection to the primary or secondary host.
Note: If the connection is via the serial port the profile will be the
username configured in the ‘profiles’ file in the \etc directory on the
Digital Sprite 2.
Public (NAT) IP
Address
This is public IP (or domain name) for a unit connected to the Internet
via a NAT Router or Firewall. This field should be left blank if NAT is not
used e.g. on a private network.
Video Server Port
(port forwarding)
This field allows the ARC to connect to the unit through a router that is
using port forwarding e.g. if the video server does not appear on port 80
(HTTP) to the external network.
Dedicated Micros
Page 59
Function
Description
Unit Alarm Name
This is the name that will be presented to the remote alarm viewing
application and therefore should have some significance to the Operator.
This name must match the defined folder name in the Viewer PC folder
tree.
Report Alarm
Reporting
This must be enabled for the Digital Sprite 2 is to automatically connect
on alarm, it must also be enabled in the Alarm Zone option.
Report Camfail
Reporting
If the Digital Sprite 2 identifies camera failure on any of the inputs,
enabling this option will force the unit to connect to the remote alarm
station.
Report Startup
Reporting
This will send an alarm report when the Digital Sprite 2 starts up, this will
identify any system resets.
Dial Retry Time
If the initial connection attempt fails then the Digital Sprite 2 will wait for
the specified time period before attempting to re-connect.
Dial Limit
This identifies the number of times the Digital Sprite 2 will attempt to
connect to the remote alarm monitoring station after a failed attempt. A
setting of 0 identifies no limit and the Digital Sprite 2 will continue to try
and connect until it is successful.
Alarm Telnet
Server Port
This specifies the network port number to use for reporting to the alarm
server. This is normally left at the default value.
How to Configure FTP Settings for Archiving Images
The Digital Sprite 2 can archive images to a central FTP server or to the internal
CD writer; this can be on receipt of an alarm or VMD using a scheduled time to
backup the video.
When using FTP in a multi-unit application this ensures that all files are stored
in one central location for each of the Digital Sprite 2s, offering efficient file
management and easier review capabilities.
Note: It is also possible to archive images directly to the internal CD, refer to the
Setup Guide for full details on how to select download to CD for archiving.
To configure the FTP information:
1. Select Network -> FTP Events Download.
Page 60
Dedicated Micros
2. Enter the information on the FTP Server; this can be an IP address, full URL or name of the
server.
3. It is possible to identify the FTP control port, the default for networks is usually port 21
however if this port number is not supported on the network, then this option allows you allocate
an unused port number.
4. Enter the directory information where the images are to be stored, this should be a name
associated with the Digital Sprite 2 name for ease of retrieval.
5. For files to be saved to the FTP Server it is necessary to go through an authentication
process to gain access to the server, enter the username and password.
6. It is possible to enable the Digital Sprite 2 to start an FTP download when an active
Ethernet connection is detected.
Note: As the Digital Sprite 2 always has a permanent network connection the Active
Ethernet option means when the Network port identifies a change in state of the
Ethernet link (down to up), for example when the Digital Sprite 2 is reset or the
network cable is unplugged then re-connected.
7. If the FTP download is to happen automatically at a set time each day, enter the required
time in the scheduled time option.
8. It is possible to enable an FTP download and more regular intervals by enabling the polled
option, once enabled identify the time period between the end of one FTP download to the start
of the next.
9. If the FTP download is only to be initiated by the Operator then enable the manual
download option. The FTP download will only commence when the Start Download button is
selected.
10. To automatically remove the image protection from files that are downloaded then enable
the clear video protection after download option. If this is not enabled the images would
require un-protecting manually via the Alarm Image Protect/Un-Protect page.
11. It is possible to allocate a watermark for each video partition; this watermark information is
logged in the log file. Enable this function by selecting watermark each partition download
option.
12. The server directory is a fixed directory structure, all FTP downloads will be saved in the
directory name you have identified under this main directory. This a read only section.
13. Remember to save the configuration by selecting Save Settings!
Dedicated Micros
Page 61
Function
Description
FTP Server
This is the IP address, URL or name of the FTP server the Digital Sprite
2 will connect to for FTP download of images.
FTP Control Port
The default port for FTP is port 21, if this port has already been
allocated on the network it is possible to identify and alternative port
number.
This is the directory where the images are to be stored, it is
recommended that a name associated with the unit name be used for
ease of retrieval.
FTP Root
Drive/Directory
Username
To access an FTP Server it is necessary to go through an authentication
process, this is the username for you to gain access to the FTP Server.
Password
To access an FTP Server it is necessary to go through an authentication
process, this is the password for you to gain access to the FTP Server.
On Connection
This will automatically start the Archive download when the unit detects
the archive destination is present (CD/DVD or network).
Scheduled and
Schedule time
It is possible to force the Digital Sprite 2 to archive images at a
scheduled time, the time entered will be the time each day that this
function will be activated.
Polled and Poll
time
This will set the unit to activate archive download at regular intervals, the
time period is in minutes and is the time between the end of one archive
download to the start of the next.
Page 62
Dedicated Micros
Function
Description
Manual only
The archive process will commence when the User initiates the action
by pressing the ‘Start Download’ button.
Clear video
protection after
download
This automatically clears the image protect from the images that are
successfully downloaded.
Watermark each
partition after
download
This enables a watermark to be generated and stored in a text file
downloaded with the video to the FTP server for each image partition,
this watermark is logged in the log file.
Server Directory
This is the main directory on the FTP server where the images will be
stored. The Root Drive/Directory will be created under this main
directory. This is read only.
Start Download
This allows the user to manually start the download process.
How to Configure SMS Text messaging
The Digital Sprite 2 supports the function to send an SMS text message to a
mobile phone.
This gives the ability to automatically or manually action the Digital Sprite 2 to
send a text to inform a Guard of incident when they are away from the
monitoring station, i.e. Security check of the site, mobile security units, making
sure the site is monitored 24/7 whether the Guard is at the site or mobile.
Note: Delivery of an SMS message can not be guaranteed. This is a limitation of the
communications network providers not with the Dedicated Micros Digital Sprite 2.
The typical process for SMS messaging is:
The Digital Sprite 2 will send a message to the mobile phone. This can be on receipt of an
alarm or manually initiated.
The operator then has the option to send a message back to the Digital Sprite 2 or log onto
the unit using the web interface or Viewer software.
Dedicated Micros
Page 63
If the Operator is remote they can send a message back to the Digital Sprite 2 to action the
Server to send an alarm message to a remote viewing application. The Digital Sprite 2 will
send a message to the remote monitoring station which includes the information in the text
it has received.
The remote station can then access the Digital Sprite 2 to acknowledge and action the
alarm.
To enable the serial port for the SMS feature:
1. Select System -> Serial Ports & Telemetry.
2. Using the drop down list on the associated Communication port (Serial 1 if dial on alarm is
enabled) select PPP.
3. Select the relevant modem from the Modem/TA drop down list, if your modem is not
supported then you will need to add the modem to the modem.ini file.
4. The serial standard settings for the selected modem will automatically be allocated,
however if this is incorrect you can change these for:
- Baud rate, Parity, Data bits, Stop bits, Flow control.
5. Remember to save the configuration by selecting Save Settings!
To edit the modem.ini file for modems which are not identified in the drop down list of
supported modems:
1. Using an FTP client application connect to the Digital Sprite 2.
2. Locate the \etc directory and expand.
3. Locate the modem.ini file.
4. Highlight and press the right mouse button, select edit.
5. Enter the information for the GSM Modem being used, an example of the information is
shown below:
[N30HSCSD]
name=Nokia30HSCSD
reset=AT&F
init=ATE0&C1&D2S0=1+CMGF=1;+CBST=16,0,1
save=AT&W
negate_dtr=0
Page 64
Dedicated Micros
To configure the SMS information to allow a text message to be transmitted on receipt of an
alarm:
1. Select Network -> SMS-Setup.
2. Enter the GSM destination number of the mobile phone, this should be entered in
international format including the country code.
3. It is possible to make the Digital Sprite 2 into an SMS Server by enabling the SMS Server
option. If this has been enabled then you need to enter the destination URL or IP address of
the Digital Sprite 2. This will allow the message to be sent from a Digital Sprite 2 to a Digital
Sprite 2.
4. Enable the operations that are applicable to your application; Report startup, alarm, camera
fail, and VMD activation.
5. Verbose messages must be enabled to ensure the text message is in a human readable
format. Tick the box adjacent to the relevant function.
6. Enter the callback profile in 0 and 1, this is the route the text message from the Operator will
take when sending a message back to the Digital Sprite 2.
7. Enter the password to enable SMS commands to be initiated. This password will be
included in the text message from the Operator.
8. Select the advanced setup button to enter details on the GSM module that will be used in
the system.
9. Enter the service centre number, this is the network service centre number of the mobile
phone, this information can usually be found on the phone in Messages -> Message Settings > Profile -> Message Centre Number based on a Nokia phone menu.
10. Enter the pin number for the SIM card (if applicable).
Note: If a pin has been set the number must be entered each time changes are
made to this page and is submitted (Save Settings).
11. Enter the GSM/SMS port number that will be used for this function to operate on.
12. Remember to save the configuration by selecting Save Settings!
Note: For configuration via the OSD refer to Appendix G where all menu options are
described.
Dedicated Micros
Page 65
Function
Description
Destination
Number
This is the GSM number for the mobile to receive the message. The
format should be entered in international format including the country
code and local area code.
Destination URL
This can be the URL or the IP address of the SMS Server when utilising
SMS over TCP/IP. The messages will be sent over an Ethernet link if
present, alternatively it will be sent over the GSM network.
SMS Server
This will enable the Digital Sprite 2 to accept and log SMS messages.
Note: The Verbose option must not be enabled when this option is
selected.
Report startup
This will enable the Digital Sprite 2 to transmit a message on power up
of the unit.
Report alarms
Sends a text message on receipt of an alarm via the onboard or
additional alarm inputs.
Report camera fail
If any of the enabled video inputs on the Digital Sprite 2 does not detect
a 1 volt peak-to-peak signal then the unit will send a SMS message.
Report VMD
activation
If VMD is identified on any of the enabled video inputs the unit will send
a SMS message.
Page 66
Dedicated Micros
Function
Description
Verbose messages
This will send a SMS message in a readable format to a mobile devices
(e.g. mobile phone).
Note: This format is not supported in standard SMS Servers.
Callback profile
This identifies the route the return message, from the Operator mobile
device, will take. The return message must contain the SMS command
password, callback IP address (IP address of the remote PC with the
Viewer application) and the command to action the Digital Sprite 2 to call
the remote station.
SMS command
password
This is the password to enable the SMS commands to be initiated and
will be included in the return text from the Operator.
Last signal
strength
This is a read only section and identifies the signal strength of the GSM
module.
Last bit error rate
This is a read only section and will detail the error rate of the GSM
module.
Function
Description
Service Centre
Number
This page is specific to the GSM module connected to the Digital Sprite
2, this is the number for the service centre that will be responsible for
the SMS message.
GSM PIN Number
GSM/SMS Port
Dedicated Micros
This is the pin code for the SIM card in the mobile device that will
receive the SMS message. If any changes are made to this page the Pin
number must be re-entered each time.
This is the port address that will be used for the SMS message to be
transmitted/received, the options are Serial 1 or Serial 2.
Page 67
SMS Message Format
There is a specific format for the text message that is returned to the Digital Sprite 2, the format
is detailed within this section. It is important that the message format be strictly adhered to for
this function to operate. Further message formats can be found in Appendix F along with
information that can be obtained from the Digital Sprite 2.
CALLBACK?<password>&<destination>&<profile>&<text>
password
This is the SMS password that has been identified in the SMS Set-up page
and enables the command to be executed.
destination
This is the IP address or DNS name of the Viewing application that has
telserver/Viewer (Telnet listener) enabled to receive the message.
profile
This can be a number or name that has been configured on the SMS Setup page, this will be via the serial port or Ethernet connection.
text
This is the text message that will be sent to the remote viewer informing
the Operator of an incident and therefore should be meaningful.
How to Configure Email Settings
The Digital Sprite 2 can automatically transmit and e-mail to an SMTP Server
under numerous conditions; on start up of the Digital Sprite 2, on receipt of an
alarm, camera failure and notification of VMD.
This allows the Digital Sprite 2 to be installed in unmanned applications where a
Remote Monitoring Station (or Manager, etc) would be notified, by e-mail, if any
of the above conditions occur.
To configure the settings to allow e-mails to be transmitted:
1. Select Network -> Email.
2. Enter the connection profile; this can be Ethernet if the e-mail is to be transmitted over the
LAN or WAN or named profile if using a dial up connection.
3. Enter the IP address or the DNS name of the SMTP Server the e-mail will be sent to.
4. Enter the e-mail address that the SMTP server should forward the e-mail to.
5. If applicable enter the display name for the e-mail address.
6. Enter the e-mail address that the recipient is to reply to, this is only applicable if a reply is
required and must be filled in for this to happen.
7. If applicable enter the display name of the reply e-mail address.
Page 68
Dedicated Micros
8. It is possible to identify where the e-mail has be sent from, this is optional if this are is left
empty the video server will use the system name & DNS name to create a sender name.
Note: The Digital Sprite 2 can not receive e-mail replies but this must be a valid email address for an SMTP Server.
9. The Digital Sprite 2 can be forced to send an e-mail under numerous conditions; start up of
the Digital Sprite 2, on alarm (this must also be enabled in Alarm Zone page), camera failure
and VMD activation (this must also be enabled in the Alarms/VMD page). Place a tick against
the actions that are applicable to your systems functional requirements.
10. Place a tick in the e-mail log box to ensure ever e-mail transaction is added to the system
logs.
11. Save your configuration by selecting Save Settings!
Note: For configuration via the OSD refer to Appendix G where all menu options are
described.
Function
Description
Connection Profile
It is possible for the e-mail to be transmitted via the Ethernet network or
dial up connection. This setting presumes that a modem has been
connected or configured and the Digital Sprite 2 is connected to a LAN
or WAN and allocated a valid IP address.
Mail Server
Recipient
Dedicated Micros
This is the IP address or DNS name of the SMTP Server that the e-mail
from the Digital Sprite 2 will be sent to. The SMTP server will then
forward this onto the recipient.
Note: You must ensure the DNS Server address in the Network Settings
is correctly configured to be able to use DNS instead of the IP address.
This is the e-mail address and display name of the intended recipient of
the e-mailed image.
Page 69
Function
Description
Reply to
This field must be configured if the recipient is to reply to an e-mail. The
Digital Sprite 2 does not accept e-mails so this must be a valid e-mail
address.
Sender
These optional fields indicate the source of the e-mail notification. If the
fields are left blank the Digital Sprite 2 will use the system name & DNS
name to create a sender name.
Email reports
These are the conditions under which the Digital Sprite 2 will transmit
and e-mail; when the Digital Sprite 2 has been reset, when an alarm
zone has been triggered, if any of the video inputs has detected camera
failure, if VMD has been identified on any of the enabled video inputs.
Email Logging
A log can be created for every e-mail transaction that the Digital Sprite 2
issues.
How to Protect or Un-protect Images
Images stored on receipt of an alarm can be automatically protected within the
corresponding alarm configuration page.
In addition it is possible to protect images that are stored on the hard disk and
have not been protected, or increase the time period allocated for protecting the
image.
Alternatively it is also possible to highlighted protected recordings and un-protect these so they
can be overwritten.
To protect existing recorded images:
1. Select Alarms/VMD – Alarm Image Protect/Unprotect, If there are any existing protected
images these will be displayed within the protect image partition summary.
2. Enter the start and end time and date and select Protect Images to display the
corresponding recordings.
3. Highlight the recorded file in the protect image partition summary.
4. Enter the time period that images are to be protected in the protect image option or select
protect images indefinitely for these never to be overwritten.
Page 70
Dedicated Micros
To unprotect existing protected images:
1. Select Alarms/VMD – Alarm Image Protect/Unprotect.
2. Highlight the recorded file in the protect image partition summary.
3. Select un-protect images, this will remove the protection from the files, release the hard disk
space these files where stored in and the files will now be overwritten.
Function
Description
Start Date and time This allows you to enter the start time and date for the period you wish
to search for recorded images.
End Date and time
This allows you to enter the end time and date for the period you wish to
search for recorded images.
Protect Image
Partition Summary
The recorded files will be displayed within this area. These are then
selected to either unprotect or protect.
Unprotect Images
Any images that have been previously protected and are selected in the
protect image partition summary section will be unprotected, these files
will then be overwritten.
Dedicated Micros
Page 71
Function
Description
Protect Images
Any images that have not been protected or require the protect period
extending can be selected in the protect image partition summary and
then the time the images are to be protected can be identified in days.
Protect Images
Indefinitely
If images are never to be overwritten the they can be protected
indefinitely.
How to Configure the Alarm Database
The Digital Sprite 2 supports numerous logs which will store information on the
actions and processes the Digital Sprite 2 carries out.
As we have identified the alarms and enabled these to function it is necessary
to ensure the database can support and register all the configured alarms.
To configure the database parameters:
1. Select Alarms/VMD -> Database Configuration.
2. The last database reset time will be displayed; this is a read only section.
3. The current number of entries in the database will be displayed; this is a read only section.
4. Enter the maximum number of entries for the database file, once this figure has been
reached the database will ‘wrap round’ and start entering over the top of entry 1.
5. To reset the database select Save Settings, you will then be prompted to reset the
database, select OK to reset or cancel.
Function
Description
Last database
reset time
This is a read only section and is generated by the Digital Sprite 2, it
identifies the last time that the database was reset.
Current number of
entries
This is a read only section and is generate by the Digital Sprite 2, it
identifies the current number of entries in the database.
Maximum number
of entries
This is the maximum number of events that will be logged in the
database. When this figure is reached the database will start overwriting
the entries starting at entry 1.
Page 72
Dedicated Micros
How to Configure an Alarm Schedule
It’s possible to utilise the onboard schedule function of the Digital Sprite 2 to
enable and disable alarm triggers and VMD activation and to determine when
specific record rates will be enabled. This can reduce unnecessary alarm
triggers, e.g. during office hours it would be unnecessary to have VMD active
and ensure the correct record rates are set during night, day and weekend time
periods.
To Set the Schedule function we will use a typical example,
Monday to Friday – Alarms/VMD are not active from 08:30
Monday to Friday – Alarms/VMD become active from 18:30
Weekend – Alarms/VMD are active all weekend
1. Enter 24:00 in the Day box adjacent to Sunday and Saturday.
2. Enter 24:00 in the Night box adjacent to Sunday and Saturday.
3. Enter 18:30 in the Night box adjacent to Monday, Tuesday, Wednesday, Thursday and
Friday.
4. Enter 08:30 in the Day box adjacent to Monday, Tuesday, Wednesday, Thursday and
Friday.
5. Save the information configured by selecting Save Settings!
The example on the menu page shows how the schedule option can be configured.
Note: 24:00 -24:00 = Schedule 24 hour enabled, 00:00 – 00:00 = Schedule disabled.
Dedicated Micros
Page 73
Function
Description
Schedule
This is a seven day schedule that allows alarms and VMD to be enabled
or disabled at times during the day.
DAYTime
This identifies the time when the Digital Sprite 2 will switch to Day
operation mode.
NIGHTTime
This identifies the time when the Digital Sprite 2 will switch to Night
operation mode.
6. If Weekend operation is to be active, enable the option and configure the start and end
times, weekend settings will be applied to the recorded video during this time period.
Function
Description
Weekend Enabled
Enabling this option will switch the unit to weekend mode settings at the
time and date selected.
Weekend Start /
End
This identifies the time period when the unit will be in weekend operation
mode and weekend settings will be applied.
7. Select the schedule type from the drop down list.
8. Disabling the record schedule rates would result in the day, night and weekend record
settings being replaced by a single ‘Rate’ record setting.
9. Configure the Operation mode titles, defaults are Day, Night and Weekend.
10. If the keyswitch is to be functional, enable the option.
11. Select the input that will be used to trigger the keyswitch.
12. Select whether the keyswitch is normally open (default) or normally closed.
11. Save the configuration by selecting Save Settings!
Page 74
Dedicated Micros
It is possible to use a combination of the keyswitch and the schedule option. If an operator
forgets to unset the alarms when the keyswitch is disabled the schedule will override the
keyswitch at the next set time.
Function
Description
Schedule Type
This identifies the how the schedule will operate, the options
available are:
Timed - allows settings to be configured for set times during the day,
night and weekend operation modes.
Zone Control - This enables or disables Night Zone or Weekend
Zone settings.
Schedule Record
Rates
If this option is disabled then the record settings for day, night and
weekend operation mode will be replaced by a single Rate option in
the Standard record menus.
Operation Mode 1 Title
This title identifies the mode of operation for Mode 1 (DAY default).
Operation Mode 2 Title
This title identifies the mode of operation for Mode 2 (NIGHT
default).
Operation Mode 3 Title
This title identifies the mode of operation for Mode 3 (WEEKEND
default).
Keyswitch Enable
When the keyswitch option is enabled it is necessary to identify the
input that will be used to trigger the keyswitch, the options are
Direct, Aux and Module 1 to 16.
Keyswitch – Normally
closed
The keyswitch by default will be configured as normally open,
however it is possible to change this to normally closed operation.
Dedicated Micros
Page 75
How to Configure Text in Image Functionality
It is possible to integrate the Digital Sprite 2 into a system where text
information can be stored with the relevant images for review at a later date,
e.g. Retail, Finance.
The Digital Sprite 2 can be configured to search for specific text information,
allowing for fast retrieval and review of images. This section is divided into:
Enable text in image on the serial port.
Configuring the paths.ini file to specify the communication port and text information.
Enabling and configuring the function using the web pages.
To enable the serial port for text in image.
1. Select System -> Serial Ports & Telemetry.
2. Using the drop down list associated with the serial port that will be connected to the
peripheral equipment select TEXT in Image.
3. The serial parameters will switch to defaults for text in image, however these (Baud rate,
Parity, Data bits, Stop bits, Flow control) can be changed as required.
4. Save configuration by selecting Save Settings!
5. Reset the unit for the settings to be applied.
Default Settings
Camera
Camera
Camera
Camera
1
2
3
4
–
–
–
–
COM1
COM2
COM3
COM4
(Serial
(Serial
(Serial
(Serial
1)
2)
3 (Bus A))
4 (Bus B))
To configure the communication port.
1. Using an FTP client application connect to the Digital Sprite 2.
2. Locate the \etc directory and expand.
3. Locate the paths.ini file.
4. Highlight and press the right mouse button, select edit/open.
Page 76
Dedicated Micros
5. Enter the text information in the .ini file, the example details how the file is configured and
shows an typical configuration for COM1:
# COM1 = tty
# COM2 = term
# COM3 = aux1 or if input_path set to pic0 GPS stored on Port 3
# COM4 = aux2
# TEXT00 = camera 1
# TEXT01 = camera 2
# TEXT15 = camera 16
# input_path - the ports COM1 to COM4 that will receive text
# output_path - the command that will associate text to a camera
# buffer_size - the total number of character stored per line
# prefix
- this strips off leading characters received from EPOS
# ===========================================
# COM1 will store text with Camera-1
# ===========================================
[PATH0]
input_path=\tty
output_path=\pipe\TEXT00
buffer_size=80
# prefix=J
This shows that the ‘text in image’ function is enabled and configured for COM1 which means
text will be associated with Camera 1 using 80 characters per line with no text filtering.
6. Save the configuration and upload to the Digital Sprite 2.
7. Reset the unit for the settings to be applied.
To enable and configure text in image feature via the web page:
1. Select Camera -> Text –in-Images.
2. Identify the number of lines in the image that will be stored with the image.
3. Identify the length (in characters) of these lines of information; 80 lines in generally full
screen width and is the default setting.
4. It is also possible to view the text as well as storing this information. Enter the information on
the number of lines that will be displayed below the image in the live page, this will determine
the area that the text will be displayed.
5. Remember to save the configuration information by selecting Save Settings!
6. Reset the unit for the settings to be applied.
Note: Reference to COM1 - 4 is Serial 1, Serial 2, Serial 2(Bus A) and Serial 4 (Bus
B) respectively.
Dedicated Micros
Page 77
Function
Description
Number of lines in
Image
This is the number of lines that will be displayed in live and replay
(via the web pages) along with the relevant images. The default
setting is 10 lines.
Line length
This identifies the length of the lines that will be stored with the
image. The default setting is 80 characters which is generally the full
screen.
Number of visible lines
To enable the text information to be viewed in the Live page it is
necessary to identify the number of visible lines.
Note: When viewing video in Live view (Active X only) it is possible to left mouse
click over the image and the text information is superimposed over the image.
How to Configure the Onboard Firewall
The Digital Sprite 2 supports an on-board Firewall to add to the security of the
unit. The Firewall can be enabled and work in conjunction with the security
applications that are already present in the network.
This feature ensures that unauthorised users can not gain access to the Digital
Sprite 2 and therefore have any affect of the operation of the system. With IP
address and port filtering the firewall has been designed to let the authorised
people access and keep everyone else out.
Note: The Firewall function is always enabled on the Digital Sprite 2.
To configure the firewall functionality:
1. If the web Firewall page is not already enabled, enable the Firewall function within System ->
Advanced Features and Reset the unit for the settings to take affect.
2. Select Network -> Firewall.
Page 78
Dedicated Micros
3. Enable the PING response option by placing a tick in the adjacent box. Disabling this feature
will make the Digital Sprite 2 less visible on the network.
4. Enter the IP addresses that can have access to the unit, these can be a range of addresses
or a single IP address.
If there is a range of address then enter the first IP address in the sequence followed by
/nn where nn is the last IP address in the range. Refer to IP Address and Subnet
Calculation below.
5. Enter the subnet of the network, if a subnet has been specified in the IP address then that
will take precedence over this subnet.
6. Identify the TCP ports that are enabled and available on the Digital Sprite 2, enter the same
number in the To and From values if a single port is required.
Note: If you attempt to use a port that is not in the list, even if you have a valid IP
address you will not gain access to the unit.
7. Enter the UDP ports on the system that are available, enter the same number in the To and
From values if a single port is require.
Note: If you attempt to use a port that is not in the list, even if you have a valid IP
address you will not gain access to the unit.
8. Save the configuration by selecting Save Settings!
Note: For configuration via the OSD refer to Appendix G where all menu options are
described.
Dedicated Micros
Page 79
Function
Description
Enable PING response
from server
By default this option is enabled and allows the Digital Sprite 2 to be
pinged. Disabling this option will make the unit less visible on the
network.
Allowed IP address
These are the IP addresses and subnets that the server will allow
connections from, i.e. the IP address of the host PC’s that will
connect to the Digital Sprite 2 to; review video, download
information.
Note: If you enable this function ensure the IP address of the PC you are using to configure
the system is also in the list. If the address is not added then you will be unable to
communicate with the Digital Sprite 2 via the network, it is important to take this feature into
account when the unit is on a DHCP network, where IP addresses are allocated automatically.
If no IP addresses are specified than any IP address can connect to the Digital Sprite 2.
Open TCP ports
This list identifies the TCP ports that are on the system and
available. If a host tries to communicate with the Digital Sprite 2
using a TCP port that is not in the list, even with a valid IP address,
the host will not gain access to the unit.
The enabled ports can be a range or single port address, if a single
port is needed then enter the same port number in the to and from
section.
Page 80
Dedicated Micros
Function
Description
Open UDP ports
This is the list of UDP ports that are available on the Digital Sprite 2.
If a host tries to communicate with the unit using a UDP port that is
not specified in the list, even with a valid IP address, the host will not
gain access.
The enabled ports can be a range or single port address, if a single
port is needed then enter the same port number in the to and from
section.
Port, Type, Application,
Use
This identifies the default ports and their functionality that is
supported on the unit.
The following are the default port settings supported on the Digital Sprite 2; this is shown on the
Firewall page menu.
Alternatively it is possible to identify the supported ports and also determine who is connected to
the Digital Sprite 2 via a telnet session.
At the prompt enter:
TCP Ports
The following is an example of the information that is displayed.
Dedicated Micros
Page 81
IP Address Range and Subnet
When entering a range of IP addresses in the Firewall it is necessary to calculate the relevant
subnet that does not mask out the first IP address to the last IP address in the range. The
following shows the figures that are entered in the IP address field and/or the subnet mask.
Note: For details on how these figures are calculated please refer to Appendix E.
The address can be written in two ways:
IP address/number of bits no subnet mask – 192.168.3.1/24
IP address and subnet mask – 192.168.3.1 255.255.255.0
If you wanted to add an address range to include IP address 1 to 12, then you would need to
find the nearest IP address and subnet that would encompasses this requirement, use the table
below to assist you with configuring this function.
The table shows the address range including the number of bits allocated to the network
address, the equivalent subnet mask for this range of addresses and the IP address that will be
included in the range, (we will use the IP address of 192.168.3.1 for the example).
IP address
Network address
Included IP Address Range
192.168.3.1/24
255.255.255.0
0 - 255
192.168.3.1/25
255.255.255.128
0 - 127
192.168.3.1/26
255.255.255.192
0 - 63
192.168.3.1/27
255.255.255.224
0 – 31
192.168.3.1/28
255.255.255.240
0 – 15
192.168.3.1/29
255.255.255.248
0–7
192.168.3.1/30
255.255.255.252
0–3
192.168.3.1/31
255.255.255.254
0-1
Important Note: A host cannot be allocated an IP address of 0 or 255, which means
there are really only up to 254 host addresses available in the example.
Page 82
Dedicated Micros
How to Enable System Logs
There are numerous actions that the Digital Sprite 2 can be configured to
automatically carry out on receipt of; an alarm, VMD activation, Schedule
function, etc. When these triggers are received and the actions initiated then it
is possible to log this information within the Digital Sprite 2 System Logs.
By default the Digital Sprite 2 will log illegal file access and telnet/FTP users, to enable the other
functions:
1. Select Logs -> System Logs Set-up.
2. If connect/dial using PPP has been configured within the alarm and VMD pages enabling this
option will log all the PPP actions.
3. If the Digital Sprite 2 has been configured to transmit file to an FTP server enabling this
function will log all FTP transactions.
4. Save the configuration by selecting Save Settings!
Note: For configuration via the OSD refer to Appendix G where all menu options are
described.
Function
Description
Log PPP connections
This enabled logging of WAN connections using the PPP ports and
records the IP address, the profile used and the local time of the
attempted connection.
Port, Type, Application,
Use
This identifies the default ports and their functionality that is
supported on the unit.
Log anonymous FTP
connections
This identifies when an unauthorised user tries to access the Digital
Sprite 2 by entering anonymous in the username or password.
Log illegal file access
Any web access to a CGI protected directory or non-existent file will
be logged with an IP address, time and type of action.
Log Telnet/FTP users
This will log users that are trying to gain access to the Digital Sprite
2 using an FTP or telnet session.
Dedicated Micros
Page 83
How to Configure Watermarking
The Digital Sprite 2 supports the facility to watermark recorded images. It is also
possible to produce a watermark certificate which proves that an image has not
been altered or tampered with; this is achieved with the allocation of a unique
MD5 signature which will change if the image files are changed.
This process can assist with the audit trail process for digital recorded video. The MD5 signature
is a unique signature that is automatically allocated by the Digital Sprite 2 by using file
information and generating the unique signature.
To configure and produce a watermark certificate it is presumed that the Tools option has been
enabled in the Advanced Features menu:
1. Select Tools -> Watermark.
2. Enter the start time and date for the period that is to be reviewed.
3. Enter the finish time and date for the period that is to be reviewed.
4. Select partition information button, the recorded files within the specified time period will be
displayed within the partition information summary.
5. Highlight the files (partition) that you intend to allocate a watermark to.
6. It is possible to view the index information by selecting the get index info button, the video
index information will be displayed.
7. If the Operator that is generating the watermark certificates is to be logged, enter the report
author information, this will be added to the certificate.
8. Enter the step size information; this identifies the ‘skip’ distance between bytes used in the
watermark calculations, default 256 bytes.
Page 84
Dedicated Micros
9. To generate the watermark codes that will be linked to the partition selected press the
watermark button.
Note: The smaller the step size the longer the calculation process. Do not press any
buttons while the Digital Sprite 2 is calculating. The progress of the process is
displayed in the status bar.
10. When the watermark codes have been generated a certificate must be created by pressing
the create certificate button, this certificate should then be printed and archived. This should
form part of the customer security procedure regarding incidents.
Function
Description
Start Date and time
This is the start time and date for the time period of interest.
End Date and time
This is the end time and date for the time period of interest.
Report author
This will identify the Operator or Administrator responsible for
generating the watermark certificate and can be used as part of the
audit trail.
Watermark step size
This is the step size in bytes used when calculating the watermark, if
the step size is set to 1 then every byte in the in the video partition
will be part of the watermark calculation.
Note: The smaller the step size the more information that is to be
processed. The process time will increase, this is displayed in the
status bar.
Partition Information
Summary
This is the area when the partition information within the set time
and date will be displayed. Each partition can be selected by
highlighting the file.
Partition Info
This button is selected for the Digital Sprite 2 to search for the
partition information within the set time and date. The partitions are
then displayed in the partition information summary area.
Dedicated Micros
Page 85
Function
Description
Get Index info
This allows you to obtain the index information of the selecting
partition.
Watermark
This will generate the unique MD5 signature for the selected
partition. This watermark can be used as part of the audit trail to
identify that the images have not been changed or tampered with.
Create Certificate
Once the watermark has been generated this allows a certificate
with all the information on the watermark to be created, it is possible
to print this certificate.
How to Configure the Webcam functionality
Any of the video inputs on the Digital Sprite 2 can be made available to be
transmitted to a webserver via FTP. These images can then be incorporated
into a web page and accessed via a standard web browser.
This function gives users the opportunity to incorporate video images into their
Corporate web site.
Examples of where this can be incorporated are:
Company that utilise the Digital Sprite 2 for their building security but also route some
strategically placed cameras to their intranet allowing employees access to the video,
possible to view the car park.
Theme Parks that again use the Digital Sprite 2 for their site security but link some of the
cameras to the Internet site to allow potential visitors to gauge how busy the Park is and
when they should visit.
This section has been divided into:
Enabling the feature, identifying server information and enabling the cameras
Configuring the FTP session details.
To enable and configure the webcam feature:
1. Select Network -> Webcam Set-up.
2. Enter the FTP Server details; this can be the IP address, URL or domain name of the Server
that will forward the images to the web pages. This link is usually provided by the Internet
Service Provider (ISP).
3. Enter the root directory on the FTP server where the files will be saved.
4. Enter the image directory information; this is the path within the root drive that will store the
images that are being FTP’d to the Server.
Page 86
Dedicated Micros
5. Enter the prefix information that will precede the image file when uploaded to the FTP Server,
an example is ‘cam_’ which would create a file name of cam_01.jpg.
6. Enter the username and password to allow the files to be uploaded to the FTP Server, this
will be given to you by the Network Administrator.
7. Enter the update interval in seconds, this identifies the time between updated files being
transmitted from the Digital Sprite 2 to the FTP Server. The speed and cost of the network
connection being used should be taken into account when setting this time period.
8. Enable the video input(s) that are to be made available for webcam functionality. Images
from these inputs will be transmitted to the FTP Server for integration into web pages.
9. Save the configuration information by selecting Save Settings!
Note: For configuration via the OSD refer to Appendix G where all menu options are
described.
Function
Description
FTP Server
This is the IP address, URL or Domain Name of the FTP Server.
Images will be uploaded from the Digital Sprite 2 to this FTP server
as time intervals specified.
FTP Root
Drive/Directory
This is the main/root directory on the FTP server where the image
directory will be located.
FTP Image Directory
This directory will be created when the initial image is uploaded to
the FTP Server, it is the directory where all images will be saved on
the server.
Image Filename Prefix
This is an identifier for images sent from this Digital Sprite 2 and will
be stored as a prefix to the file name.
Dedicated Micros
Page 87
Function
Description
Username
To gain access to the FTP server it is necessary to go through an
authentication process this is the username that will allow the
images from the Digital Sprite 2 to be uploaded to the FTP Server.
Password
To gain access to the FTP server it is necessary to go through an
authentication process this is the password that will allow the images
from the Digital Sprite 2 to be uploaded to the FTP Server.
Update interval
This is the minimum update interval between each image that is
transmitted from the Digital Sprite 2.
Camera selection
This allows you to enable the video inputs that will be accessible for
upload to the FTP Server.
To enable the webcam connection information:
1. Enable the single FTP session so the FTP link from the Digital Sprite 2 to the FTP server is
permanently up. If this is not enabled then an FTP session will need to be established every
time the Digital Sprite 2 needs to transmit images.
2. Enable batch transfer and images will be transmitted to the FTP Server in a ‘batch’, e.g. the
Digital Sprite 2 will take ‘snap shots’ from video inputs 1, 2, 4 and send these in a single batch to
the FTP Server. If this is disabled then the Digital Sprite 2 will transmit files individually.
The delay between batch files being transmitted is the update interval, e.g. every 10 seconds
the Digital Sprite 2 will send images from video inputs 1, 2, 3.
If batch is disabled then the update interval is the time between the Digital Sprite 2 sampling an
image from one input to the next, e.g. the Digital Sprite 2 will transmit an image from input 1, 10
seconds later it will transmit and image from input 2, etc.
3. Select the resolution of the image that will be transmitted to the FTP Server, the files sizes
that are applicable to this resolution are displayed. The file size should be taken into account
with reference to the speed and type of network link.
4. Enable the Webcam functionality for this feature to operate, tick the box which is appropriate
to your application; disabled, enabled when system SET, enabled when system UNSET or
always enabled.
5. Remember to save the configuration by selecting Save Settings!
Note: When Developers are utilising the JPEG images that are provide from the
webcam mode, the destination web page must have a video window with a 4:3
aspect ration to allow the video image to be displayed correctly.
Page 88
Dedicated Micros
Function
Description
Single FTP session
This avoids login/logout procedure for each image that is transmitted
to the FTP Server. The Digital Sprite 2 will remain connected and
logged in to the ISP until the connection is disabled.
Batch transfer
This will transfer all camera images in one batch. If this is selected
then the update interval is the delay between all images being
updated.
Webcam Resolution
This is the resolution of the images, defined in the Camera Setup
Page, that are transferred to the FTP Server. Take into account the
speed and type of network connection being used when selecting
the resolution.
Webcam Enabled
The webcam functionality can be enabled at specific times (DAY,
NIGHT or WEEKEND mode), always enabled or disabled. If the
webcam functionality is to be disabled it is recommended that the
option also be disabled in the Advanced Features option, refer to
How to Enabled System Features above.
Dedicated Micros
Page 89
Digital Sprite 2 Tools
There are a number of tools that are supported on-board the Digital Sprite 2 itself. These can be
accessed through the web interface and are available for testing system parameters and
obtaining information for fault finding.
To access the Tools option:
1. Select the Configuration option on the web interface.
2. Enter the username and password (default setting dm and web).
3. Select the Tools tab, the tools available are:
Video Scope
Audio Trace
Relay Test Page
Watermarking
System Variables
Reset
Video Scope
The Video Scope page shows a trace of the video content (RGB) of the overall
image. It will give the RGB values of the selected image.
It is possible to select any of the video inputs on the Digital Sprite 2 to view the
video contents. It is also possible to select the resolution of the image and
compare the RGB levels.
Clicking within the video image will select a line of video and identify the value for that line rather
than the overall image.
Page 90
Dedicated Micros
Function
Description
Video Input
This is a drop down list of the available video inputs on the Digital
Sprite 2.
Resolution
This is a drop down list allowing selection of the resolution being
viewed/traced (high, medium and low).
Input Path
This is a drop down list allowing selection between free use or
preselector 1 – 4.
V and H Position
When a line of video is selected this identifies the vertical and
horizontal position. For the overall image these values will be 0.
Show Trace
This allows the R, G, B trace to be enabled or disabled.
RGB
These are the calculated values for the RGB contents within the
whole image or the selected line.
Audio Trace
It is possible to use the audio trace option to identify if audio is being
transmitted or received by the Digital Sprite 2.
To view the audio select the line in or line out buttons, the corresponding audio signal will be
traced.
Function
Description
Audio Line Out
This will produce a trace of the audio out line on the Digital Sprite 2. This
is represented by a red line.
Audio Line In
This will produce a trace of the audio in line on the Digital Sprite 2. This is
represented by a blue line.
Dedicated Micros
Page 91
Relay Test Page
The relay test page allows you to test the onboard relays and the additional
relay modules. The Digital Sprite 2 supports three onboard relays and up to two
additional relay modules, these modules have sixteen relay connections each.
To test the relay select the tick box adjacent to the relay number, save the configuration. Press
the OK button and this will trigger the corresponding relay.
Note: If the onboard relays have been configured to have the default settings it will
not be possible to test these, the corresponding text box will be disabled.
Function
Description
Global Alarm – R1
This identifies if the unit has relay 1 enabled for global alarm
functionality, the relay will also be disabled for test.
Global VMD – R2
This identifies if the unit has relay 2 enabled for global VMD
functionality, the relay will also be disabled for test.
Global Camera Fail –
R3
This identifies if the unit has relay 3 enabled for global camera fail
functionality, the relay will also be disabled for test.
Page 92
Dedicated Micros
Function
Description
Onboard Relays
There are six onboard relays, enabling the corresponding relay will
close the output.
Module 1
If an additional relay module has been connected to the 485 bus,
this allows the relevant relays to be tested.
Note: The relay will only be initiated when the Save option has been
selected.
If a second additional relay module has been connected to the 485
bus, this allows the relevant relays to be tested.
Module 2
Note: The relay will only be initiated when the Save option has been
selected.
Watermarking
This option has already been covered in the Configuration section of this
manual; please refer to How to Enable and Configure Watermarking for details
of this option.
System Variable
This page can be used for system diagnostics as it provides a readable
overview of the configuration parameters of the Digital Sprite 2. Any information
that has been configured and stored on the Digital Sprite 2 will be shown on the
file. Typical information is; camera titles, alarm title. It identifies the Value,
Variable Name and the Description.
Note: This information may be useful when contacting Dedicated Micros for system
analysis.
Dedicated Micros
Page 93
Reset
This will reset the unit. Remember to save all configuration settings before
resetting the unit as information not saved will be lost.
Page 94
Dedicated Micros
Reviewing the Digital Sprite 2 Logs
The Digital Sprite 2 can be configured to produce a number of log files, these are for:
PPP connections
Anonymous FTP connections
Illegal file access attempts
FTP and telnet users
Configuration of these logs is detailed in the Configuration section of this
manual. The logs that are generated can be viewed via the web interface on
the Digital Sprite 2.
To access the logs:
1. Select Logs, to enable the logs select System Log Set-up enable the logs that are required
and select Save.
2. The logs can now be accessed these are:
Connection Log
Anonymous FTP Log
Security Log
e-mail Log
Sent Message Log
FTP Download Log
Logfile
Logfile Backup
Archive
3. To review the files select the corresponding option, the information will be displayed on
screen.
Connection Log
This log details all FTP and telnet connections made to the Digital Sprite 2.
Telnet and FTP can be allocated a username and password by enabling and
configuring the option within the USER.ini file, this file registers all the
information on the User name, IP address of the remote PC, time of
transaction.
Dedicated Micros
Page 95
Having this log containing the above information ensures ease of identification of
Operators/Administrators that have logged into the system, the following shows typical log
information;
Wed
Wed
Wed
Wed
Wed
Wed
Wed
Wed
Wed
Jun
Jun
Jun
Jun
Jun
Jun
Jun
Jun
Jun
02
02
02
02
02
02
02
02
02
10:49:16
10:49:16
10:49:16
10:53:20
10:53:20
10:53:20
10:53:53
10:53:53
10:53:53
2004
2004
2004
2004
2004
2004
2004
2004
2004
(+0100):
(+0100):
(+0100):
(+0100):
(+0100):
(+0100):
(+0100):
(+0100):
(+0100):
FTP User [dm1] logged in
Foreign IP 172.16.100.65
Socket no 15, myport 21, hisport 1083
Telnet User [dm1] logged in
Foreign IP 172.16.100.65
Socket no 24, myport 23, hisport 1199
FTP User [dm1] logged in
Foreign IP 172.16.100.65
Socket no 18, myport 21, hisport 1235
Anonymous FTP Log
The FTP function on the Digital Sprite 2 is password protected, however it is
possible to disable the password allowing any user access to the unit via
FTP.
If the password is disabled then any user accessing the Digital Sprite 2 will be
logged in the Anonymous FTP log.
A typical example of the log is shown:
Wed Jun 02 10:56:45 2004 (+0100): FTP User [anonymous] logged in
Wed Jun 02 10:56:45 2004 (+0100): Foreign IP 173.16.85.25
Wed Jun 02 10:56:45 2004 (+0100): Socket no 18, myport 21, hisport 1235
Security Log
The Security Log identifies the users that have attempted to access the
Configuration pages or any password protected page on the Digital Sprite 2
Web interface and have entered an incorrect password.
The information logged is:
The action requested and status
Time and date
IP address
Port information
This information can be used to monitor the connections to the Digital Sprite 2 and identify
unauthorised actions.
Page 96
Dedicated Micros
The following shows typical log information;
Attempt to access to frmpages\index.html at Tue Jun 08 12:43:04 2004 +0100, action GET Authentication fail
Foreign IP 172.16.50.60
Socket no 22, myport 80, hisport 12226
Attempt to access to scripts\root.exe at Tue Jun 08 13:50:35 2004 +0100, action GET file does not exist
Foreign IP 172.16.50.60
Socket no 23, myport 80, hisport 1049
E-mail Log
This log holds information on the e-mails sent from the Digital Sprite 2 on
receipt of an alarm.
It follows the complete transaction from receipt of alarm to acknowledgement
that the e-mail has been sent and the SMTP link has been dropped.
The following shows a typical e-mail log, it contains the sending address, the recipient address,
the mail server information (IP address or name) and the reason for the mail, in this example
Camera 3 has failed:
Sending message to [email protected] at Wed Jun 30 14:21:26 2004 +0200
220 heron.jbloggs ESMTP Server (Microsoft Exchange Internet Mail Service 5.7.2653.13) ready
HELO DS2
250 OK
MAIL FROM:<DS2@DS2>
250 OK - mail from <DS2@DS2>
RCPT TO: <[email protected]>
250 OK - Recipient <[email protected]>
DATA
354 Send data. End with CRLF.CRLF
Date: Wed, 30 Jun 2004 14:21:32 +0200
X-Mailer: ADH SendMail V1.0
MIME-Version: 1.0
To: [email protected] (John Smith)
From: DS2@DS2
Subject: System Exception
Content-Type: text/html; charset=us-ascii;
Content-Transfer-Encoding: 7bit
<!doctype html public “-//w3c//dtd html 4.0 transitional//en”>
<html>
Site-Id: DS2<br>
System-Exception: Camera fail 3 at Wed Jun 30 14:21:26 2004 +0200<br>
</html>
250 OK
QUIT 221 closing connection
Dedicated Micros
Page 97
Sent Message Log
This logs all the SMS message information. There are various options that can
be configured to allow an SMS message to be sent; start up, alarms, etc.
The Sent Message Log, logs the information on the message sent including;
the time and date, sender and receiver details and the message that was sent.
The following shows a typical SMS message log for when the system starts up after power down
or reset.
Fri Mar 12 12:05:26 2004 +0000
SMS to:
07970972823
SMS message: STARTUP, TVDEMO, Fri Mar 12 11:15:06 2004 +0000, 0.0.0.0
SMS response: STARTUP, TVDEMO, FRI MAR 12 11:15:06 2004 +0000, 0.0.0.0
FTP Download Log
The Digital Sprite 2 can be configured to manual or automatically trigger and
FTP download of images. These downloads are logged and stored with the FTP
Download Log for future analysis.
Logfile
The Logfile stores all information on every action that is carried out by the
Digital Sprite 2; when alarms are received and actioned, resets, failed outward
bound alarm connections, etc.
This is the current file and will continue to store data until it reaches its
maximum size limit (typically 1Mb). This file then writes over the top of the
Logfile Backup and becomes the backup file and a new logfile is created.
This ensures current and recent information is always available.
The information detailed is; Time and date, Reset Code and Reason, Connection-status, Site
and ARC ID.
Page 98
Dedicated Micros
The following is typical log information:
#
System-Start : at 15:11:39 on 24-06-2004 UTC
System-Halt : at 15:11:28 on 24-06-2004 UTC
Restart code : 100
Restart reason : Controlled user RESET from Telnet or the webpages
Alarm-Log : Alarm initiated : Zone 1 at 15:11:59 on 24-06-2004 +0100
Connection-Status: request connection for Alarm Reporting at 15:11:59 on 24-06-2004 +0100
Connection-Status : Connection to 172.16.100.12\Ethernet at 15:11:59 on 24-06-2004 +0100
Site-Id: DS250
Arc-ID: DS2-50
System-Status:
Local-IP: 172.16.89.50
Activating-Channel: 3
Response-Images: 1
Response-Area: Zone 1
Response-Level: GREEN
Alarm-Time: 15:11:59 on 24-06-2004
Rec-Index: 14:11:59 on 24-06-2004
Connection-Status : Connection closed at 15:11:59 on 24-06-2004 +0100
#
Logfile Backup
This file is updated every time the Logfile reaches its maximum capacity. The
Logfile will automatically write over the top of the existing Logfile Backup to
create a file containing information that occurred recently.
Along with the Logfile this ensures the current information and most recent
information is available for analysis.
The following is a typical example of the information held within the Logfile Backup.
System-Start : at 15:47:41 on 04-06-2004 UTC
System-Halt : at 15:47:30 on 04-06-2004 UTC
Restart code : 100
Restart reason : Controlled user RESET from Telnet or the webpages
System-Status : Standard UNSET recording selected by timer at 15:47:42
System-Status : Standard UNSET recording selected by timer at 15:47:43
Dedicated Micros
on
on
on
on
on
on
04-06-2004
04-06-2004
04-06-2004
04-06-2004
04-06-2004
04-06-2004
+0100
+0100
+0100
+0100
+0100
+0100
Page 99
This is an example of the details that are contained in the logs; this shows an unauthorised user
trying to access the Digital Sprite 2 using an FTP connection.
Sat Apr
Sat Apr
Sat Apr
Sat Apr
Sat Apr
Sat Apr
Sat Apr
Sat Apr
Sat Apr
Sat Apr
Sat Apr
Sat Apr
24
24
24
24
24
24
24
24
24
24
24
24
05:53:50
05:53:50
05:53:50
05:53:50
05:53:50
05:53:50
05:53:50
05:53:50
05:53:50
05:53:50
05:53:50
05:53:50
2004
2004
2004
2004
2004
2004
2004
2004
2004
2004
2004
2004
(+0100):
(+0100):
(+0100):
(+0100):
(+0100):
(+0100):
(+0100):
(+0100):
(+0100):
(+0100):
(+0100):
(+0100):
FTP FAILED LOGIN User: [test] Password:
Foreign IP 62.214.19.65
Socket no 82, myport 21, hisport 4953
FTP FAILED LOGIN User: [test] Password:
Foreign IP 62.214.19.65
Socket no 83, myport 21, hisport 4999
FTP FAILED LOGIN User: [test] Password:
Foreign IP 62.214.19.65
Socket no 84, myport 21, hisport 1049
FTP FAILED LOGIN User: [test] Password:
Foreign IP 62.214.19.65
Socket no 85, myport 21, hisport 1071
[test]
[test12]
[test123]
[123]
Archive
The archive log shows the following information.
Page 100
Dedicated Micros
Appendix A
Reset using Telnet
An alternative option for resetting the Digital Sprite 2 is to connect to the unit using telnet.
1. Go to Start -> Run.
2. Enter <telnet <IP address of Server>>.
3. You will be prompted for a username and password (default dm and telnet) and press
return.
Note: Echo is enabled on the Digital Sprite 2 for telnet.
4. Type <reset>, the Digital Sprite 2 will reset itself and will not be available for a few minutes.
Dedicated Micros
Page 101
Appendix B – Digital Sprite 2 .ini Files
Editing the ini Files using FTP Client Application
There are a number of parameters that can be configured within the ini files on the Digital Sprite
2. This section details the files, their function and how these are configured.
To edit and configure these files on the Digital Sprite 2 you will require:
FTP communication to be enabled on the Digital Sprite 2
Valid FTP username and password
FTP Client software application
Connection via the Ethernet network to the Digital Sprite 2
The following steps give an example of how to create an FTP session with the Digital Sprite 2 to
configure these files, take note this may differ from the process of the FTP software you are
utilising.
1. Launch the FTP client software.
2. You will need to create a site for the FTP link, enter the IP address of the Digital Sprite 2,
enter the FTP username and password.
3. Select the Connect button to make the connection.
Page 102
Dedicated Micros
4. If the connection is successful you will be issued a connection prompt.
5. Click OK.
6. You will be presented with the directory structure on the Digital Sprite 2, locate and select the
etc directory in the root drive.
7. The following files are all stored in the etc directory.
Dedicated Micros
Page 103
8. There are two ways of opening and editing these files, depending on the file that is selected.
hosts and profiles
Highlight the file, click the right mouse key and select View.
The file will be opened and you can edit the information.
modems.ini, USER.ini, Vidcfg.ini, WEBUSER.ini
Highlight the file, click the right mouse key and select Edit.
The file will be opened and you can edit the information.
9. Once you have completed the configuration Save the file.
10. When you close the file you will be prompted to upload the file to the Digital Sprite 2, select
Upload.
Note: If you are not prompted ensure you upload the file to the Digital Sprite 2 for the
configuration to take affect.
Structure of the Files
Each of the following files usually has an explanation at the beginning of the file describing what
the feature command set is and how they can be edit.
If any of the configuration commands have a comment (#) at the beginning of the line then this
has been disabled, remove the comment (#) enables the feature and allows you to configure the
settings.
Headings will be included when more that one feature can be configured within the file to identify
the command string within that section, e.g. [unlock], [watermarking].
Page 104
Dedicated Micros
hosts
This file contains the IP address of the remote monitoring PC that is the point of contact when
an alarm is received on the Digital Sprite 2.
The file allows you to identify the name and IP address of the PC.
Note: There is a corresponding web page that is the usual interface for configuring
this information; however this file has also be supplied.
An example of the information contained in this file is shown.
# DS2 Hosts Table 23-January-2004
# The Host is the IP address of the PC the DS2 connects to on alarm.
# <Label/Remote PC Description><IP Address of Alarm Receiving PC>
# The label is used as the description in the Alarm Connection Page on the DS2.
# i.e. the label location1 would be entered in the primary & secondary host name.
# Note:- You must fill in both the primary & secondary host options in the
# Alarm Connection Settings page.
# The Host label/username & password listed in the Hosts Table are “Case Sensitive”.
# Hosts Table List
# ————————
# <Label/PC Description><IP Address of remote PC>
JohnSmith 10.0.0.50
ARC1
10.0.0.51
Location1 192.168.2.3
NULL
0.0.0.0
modems.ini
The Digital Sprite 2 supports a number of modems that can be configured in the Serial Port &
Telemetry web page, however if a modem is not supported then the configuration and
operational information for the modem can be added to the modems.ini file.
An example of the information stored in this .ini file is shown:
#
#
#
#
#
#
#
#
#
#
#
#
#
#
#
#
modem description file
These modem strings will be installed prior to the fixed strings and can therefore be
used to update the initialisation strings
format:
[code]
name=descriptive text name
reset=string to reset device to factory defaults
init=initialisation string
save=string to save current settings
negate_dtr=0 assert DTR line during modem initialisation
negate_dtr=1 negate DTR line during modem initialisation
type=0,1,2 type of PPP device
0 - modem / terminal adaptor (default)
1 – router
2 - always on eg GPRS, CDPD
code is the product code as returned by ATI (if appropriate)
Dedicated Micros
Page 105
# name is the descriptive text name (including spaces if required)
# initialisation string is the complete AT string sent to the TA/modem on detection of DTR
# The negate_dtr line allows control over DTR during initialisation. Some modems will
# not respond if DTR is negated whilst others will answer calls unless DTR is negated
# Initialisation requirements - brackets indicate usual settings
# echo off (E0), DCD follows carrier (&C1), DTR causes hangup (&D2)
# useful settings - hardware handshaking, autobaud
[FALCOM_A2]
name=Falcom GSM Phone/Modem
reset=AT&F
init=ATE0&C1&D2&S0S0=1
save=AT&W
negate_dtr=0
[ENFORA]
name=Spider 4 CDPD Modem
reset=AT&F
init=ATE0&C1&D2+WS45=4
save=AT&W
negate_dtr=0
type=2
paths.ini
This file is part of the Text in Image configuration and identifies the communication port on the
Digital Sprite 2 that will be connected to the peripheral equipment and also the text information.
Once the associated serial port has been enabled for text in image (refer to the Configuration
Section of this manual) it is necessary to enter the relevant information in the paths.ini file so the
Digital Sprite 2 is aware or the route (path) of the text information that will be stored with the
associated image.
This is an example of the information that is stored within the paths.ini file.
# DS2 17-07-03
# ———————————————————————————————————# Example ini file to add text for COM1 to COM4
# COM1 = tty
# COM2 = term
# COM3 = aux1 or if input_path set to pic0 GPS stored on Port 3
# COM4 = aux2
# TEXT00 = camera 1
# TEXT01 = camera 2
# TEXT15 = camera 16
# input_path - the ports COM1 to COM4 that will receive text
# output_path - the command that will associate text to a camera
# buffer_size - the total number of character stored per line
# prefix
- this strips off leading characters received from EPOS
# ===========================================
# COM1 will store text with Camera-1
# ===========================================
[PATH0]
input_path=\tty
output_path=\pipe\TEXT00
buffer_size=80
Page 106
Dedicated Micros
# prefix=J
# ===========================================
# COM2 will store text with Camera-2
# ===========================================
[PATH1]
input_path=\term
output_path=\pipe\TEXT01
buffer_size=80
# prefix=J
profiles
When utilising the Connect/Dial on alarm function of the Digital Sprite 2, it is necessary to
identify the receiving station information – profile – so the Digital Sprite 2 is aware of the route
the alarm is to take. For Ethernet connectivity this can be carried out using the web interface, for
connection via a serial port it is necessary to enter the information in the ‘profiles’ file.
Note: Ethernet profiles can also be entered in the profiles file instead of using the
web interface page.
#
#
#
#
#
#
#
#
#
#
#
#
#
#
DS2 Profiles Table 23-January-2004
Profile list
PPP_Link1 = COM2 - Default alarm dial communication port.
PPP_Link2 = COM1 - Default dial in communication port.
Ether1 = Alarm connection across an Ethernet Port (Entering Ethernet as the Profile
will connect over Ethernet)
Rules
1) The IP address range is that of the remote network the DS2 is connecting to.
2) IF you set the IP range to 10.0.0.50 with a subnet of 255.255.255.0, the HOST PC
IP address range will be 10.0.0.51 to 10.0.0.254
3) If you only wish to dialling into the DS2, the Phone No.
4) The first field <Username & Profile Label> is the description you will use in the
Alarm Connection Page as the Profile description for the primary & secondary call.
The Profile label/username & password listed in the Profiles Table are “Case
Sensitive”.
# —————————# Profiles Table List
# —————————#<Username>
<Password>
<Port>
<Phone No>
<Address Range>
<Subnet Mask>
Dm
password
PPP_Link2
1234567890
10.0.0.1
255.255.255.0
username
password
PPP_Link1
1234567890
10.0.0.1
255.255.255.0
Test
password
PPP_Link1
1234
10.0.0.1
255.255.255.0
Dedicated Micros
Page 107
USER.ini
A number of features on the Digital Sprite 2 are password protected; these have default
usernames and passwords. The features that can be enabled for authentication are FTP, telnet
and serial communication.
The user.ini file contains the username and password information for these features and is also
the interface to enable or disable password protection.
The example shows the default usernames and passwords and which of these features are
enabled on the Digital Sprite 2 when shipped from the factory.
[FTP]
dm=ftp
[Telnet]
dm=telnet
[Serial]
# dm=serial
# serial=password
vidcfg.ini
The Digital Sprite 2 can support up to 600Gb of internal storage, however in applications that
require large storage capacities it is possible to integrate the Dedicated Micros RAID or JBOD
storage units into the application.
As the Digital Sprite 2 automatically detects external storage, this file is dynamically updated by
the system, the example below shows a typical file configuration.
#
#
#
#
#
#
#
#
#
#
#
#
#
#
#
#
#
#
================
DS2 03-03-2004
================
Entries are as follows
[Partition name]
path = <pathname>
file_size = <file_size>
max_blocks = <max_blocks>
disk_offset = <day_mask>
write_type =
The meanings of the parameters are as follows
Partition Name: Any ascii name for this partition. Does not perform any other function
path :The effective MSDOS style root path of the partition directory structure
default 3.5” = c:\video
file_size :The size in bytes of each partition file - default = 50Mbyte (52428800)
max_blocks : The number of files in this partition. A value of -1 makes the system use the maximum available
space on the disk specified in path
default = -1
Page 108
Dedicated Micros
# disk_offset : The offset into the disk for the WebPages, Application, Form Files etc; start making video partitions
# specified in 64 KiloBytes blocks default=3200 (Equal to 200 MegaBytes)
# write_type : unbuffered - writes data straight to the hard disk drive. Useful to speed up height images sizes
# written at fast to the HDD.
#
NOTE:- This can be wasteful when writing images to HDD i.e. 256 bytes per image on average. buffered #
Default setting - Buffers data to a fixed 20 KiloByte
# buffer prior to a HDD write. More efficient when writing
# images to the HDD.
# ———————————# Drive Definitions A – Z
# ———————————# Drive a = 4096 KB Ram
# Drive b = 16 KB RAM
# Drive c = MASTER 3.5”
# Drive d = SLAVE 3.5”
# Drive e = Master 3.5”
# Drive f = Slave 3.5”
# Drive g = Flash Drive
# Drive h to K not used
# Drive l to Z = SCSI Drive ID-0 to 7 LUN-0 to LUN-7
# DS2 will support up to Drive letter Z
# Note:- If multiple logical unit numbers (LUN) are used within the SCSI ID, the DS2 will automatically offset the
logical drives between drive letters L to Z.
# e.g. SCSI ID-0 LUN-o = Drive L
# SCSI ID-0 LUN-1 = DRive M
# SCSI ID-0 LUN-2 = DRive N
# SCSI ID-1 LUN-0 = DRive O
# SCSI ID-1 LUN-1 = DRive P
# SCSI ID-2 LUN-0 = DRive Q
# ———————————# Drive Partition Options
# ———————————# 10 MegaByte Partition - 10485760 - For hard disk sizes 160 GB or less
# 50 MegaByte Partition - 52428800 - Default in Bootloader & upto 600 GB
# 100 MegaByte Partition - 104857600 - For hard disk blocks larger that 600 GB
# 200 MegaByte Partition - 209715200 - For hard disk blocks larger than 2000 GB
# ———————————————————————————————————————————————# Use the following settings to format Addresses 0 to 6 for drives l: to r: external SCSI drives.
# ———————————————————————————————————————————————# [Partition 5]
# path=l:\video
# max_blocks=-1
# file_size=104857600
# disk_offset=3200
# [Partition 6]
# path=m:\video
# max_blocks=-1
# file_size=104857600
Dedicated Micros
Page 109
WEBUSER.ini
The WEBUSER.ini file contains the username and passwords for accessing the web
configuration pages on the Digital Sprite 2.
It also contains the username and password for the Viewer software and the ability to identify
which mode of operation can be accessed by a user (live or replay) and which cameras the user
can access.
The first example shows the default username and password for accessing the web
configuration pages on the Digital Sprite 2.
##################################################################
#
#
# DS2 Webuser.ini Version 18th May 2004
#
#
#
##################################################################
# ——————————————————————————————————
# Note: This file requires a blank line at the end of this file.
# Note: Line with #— are comments. i.e. #— Username(s) Password(s)
# ——————————————————————————————————
[WebPage Configuration]
# — Username(s) Password(s) —
dm=web
This example shows the command string for enabling John Smith to have access to cameras 1
to 16 in live mode, cameras 1 to 8 in replay and the username and password for this Operator
when logging in using the Viewer software.
###################################################################
#
#
# Provides access for cameras 1 to 16 in live and cameras 1 to 8 in playback
#
# for John Smith
#
#
#
##################################################################
# object=cgi
live_cams=1-16
replay_cams=1-8
#— Username(s) Password(s) —
john=smith
Page 110
Dedicated Micros
Editing .ini Files using Backup Utility
The configuration of the files stored on the Digital Sprite 2 has detailed the configuration and
editing process using an FTP Client application. If you do not have an FTP Client application the
following describes how the Backup Utility can be used to download, edit and upload these files.
1. Launch the DM Backup utility that was installed with the Viewer application, select Start->
Programs and find the folder where the software was installed (e.g. Start -> DVIP Viewer).
2. You need to add the site (Digital Sprite 2) to the site list, select Edit Sites highlight Sites
option in the tree display and right mouse click and select New Site Folder.
3. Enter the unit name, which will become the folder name and select OK.
4. Select the new folder in the folder site tree, the Connections Option page will be displayed.
Enter the name, IP address, Site ID of the Digital Sprite 2. The Site ID must be the same as the
Name of the Digital Sprite 2. If used with alarms the name and SITE ID must match the name in
the alarm connection page.
5. Select Save, this will save all the configuration information.
6. Select the FTP/Backup tab, enter the username and password for FTP (default is dm=ftp).
Save the settings.
Dedicated Micros
Page 111
7. Exit the utility.
8. Select the Backup program, the folder that has been created will be displayed. Highlight the
folder. Disable the Application and webpages option.
9. Select OK, the files from the Digital Sprite 2 will be downloaded to the local drive of your PC.
10. When the files are downloaded select Done.
11. Using a text editing package such as Notepad open the relevant file for editing. The files
are located in C:\Program Files\DV-IP\Backups, a folder would have been automatically
generated for the downloaded files, this will be made up of :
<Unit name>_<day/month/year>_<hour/minute/seconds>
Page 112
Dedicated Micros
The files are within the app_drive\etc folder within this folder.
12. Edit the file as described in the Configuration section of this manual and Save the changes.
These files must now be uploaded back onto the Digital Sprite 2.
13. Select Restore, the folder that was created earlier in this process will be displayed,
highlight and select OK.
14. The files will be automatically uploaded to the Digital Sprite 2, when the process has
finished select Done.
Note: If only a small number of the files have been edited it is possible to delete all
the other files in the directory and upload the changes files only. This will speed up
the process.
Dedicated Micros
Page 113
You now need to reset the unit,
15. Select Start -> Run on your PC.
16. Type <telnet IP Address> (where the IP address is the IP address of the unit you are
configuring).
17. Enter the username and password (default dm=telnet) to open a telnet session with the
unit, and type <reset> to reset the unit and initialise the edited files.
Note: Echo is enabled on the Digital Sprite 2.
Page 114
Dedicated Micros
Appendix C – Port Assignment on the Digital Sprite 2
Port Allocation
It is possible to identify specific ports that will be used for functionality supported on the Digital
Sprite 2.
These functions are:
FTP
Telnet
HTTP
Telemetry Control
Audio
Debug
Some of these ports have default settings that will link to the default settings of a standard
network infrastructure, e.g. port 21 default port for FTP, port 80 default port for HTTP.
However if these default port numbers have already been allocated to other devices on the
network then it is possible to identify alternative port numbers.
Important Note: It’s important to ensure all devices that are part of the system
configuration are all allocated the same port number otherwise communication
between the devices will not be successful.
To view the ports that have been enabled and configured on the Digital Sprite 2, select Network
-> Firewall Options. This details the port numbers, type of connection, application and use.
Dedicated Micros
Page 115
The screen shot shows the default settings for each of the features that utilises a port number
as part of its communication path.
It is possible to redefine the port allocation for FTP, telnet and HTTP, how this is achieved is
detailed in the Configuration section of this manual.
The telemetry control, audio port and engineering debug are default settings and are not
configurable; these port numbers must be given to the Network Manager to ensure there are no
other devices on the network using these ports.
Using a telnet session it is possible to telnet to a specific port to obtain debug information, for
example at the prompt enter:
Telnet <IP address or Digital Sprite 2> 5201
This will download debug information on the Engineering port, the following is an example of the
information obtained:
Page 116
Dedicated Micros
Appendix D – Digital Sprite 2 Serial and Network Cables
DM RS232 Debug Cable (supplied)
The RS232 Debug cable can be used to connect the PC serially to the Digital Sprite 2 for
configuration using a terminal application (such as HyperTerminalTM).
Pin
Dedicated Micros
Pin Assignment
Pin
1
Colour Code
Not used
Not used
1
2
Red
TX
3
3
Blue
RX
2
4
Not used
Not used
4
5
Green
Ground
5
6
Not used
Not used
6
7
Not used
Not used
7
8
Not used
Not used
8
9
Not used
Not used
9
Page 117
Straight-through Network Cable
A straight through network cable connects hosts to network devices; PC to switch, Digital Sprite
2 to Switch.
3
2
4
5
6
7
Pin
Page 118
Colour Code
Pin Assignment
Pin
1
White/Orange
Transmit (+)
1
2
Orange/White
Transmit (-)
2
3
White/Green
Receive (+)
3
4
Blue/White
Not used
4
5
White/Blue
Not used
5
6
Green/White
Receive (-)
6
7
White/Brown
Not used
7
8
Brown/White
Not used
8
1
8
Dedicated Micros
DM 485 Bus Cable (supplied)
The DM 485 Bus cable is supplied for connectivity to peripheral DM devices such as Alarm
Modules and Relay Modules.
3
2
Pin
Colour Code
Pin Assignment
Pin
1
White
Not used
1
2
Black
Ground
2
3
Red
485 bus data A
3
4
Green
485 bus data B
4
5
Yellow
Ground
5
6
Blue
+8V d.c. Supply
6
Dedicated Micros
4
5
6
1
Page 119
Cross Over Network Cable
A cross over network cable is used to connect hosts to hosts or network equipment to network
equipment, switch to router, PC to Digital Sprite 2.
3
2
4
5
6
7
Page 120
Pin
Colour Code
Pin Assignment
Pin
1
White/Orange
Transmit (+)
3
2
Orange/White
Transmit (-)
6
3
White/Green
Receive (+)
1
4
Blue/White
Not used
4
5
White/Blue
Not used
5
6
Green/White
Receive (-)
2
7
White/Brown
Not used
7
8
Brown/White
Not used
8
1
8
Dedicated Micros
DM RS232 Null Modem Cable
The null modem cable can be used to connect ancillary devices that require ‘handshaking’ such
as modems, GSM, etc.
Pin
Dedicated Micros
Colour Code
Pin Assignment
Pin
1
N/A
Not used
TX
3
N/A
RX
3
4
N/A
4
5
N/A
Not used
Ground
6
N/A
Not used
6
7
N/A
Not used
7
8
N/A
Not used
8
9
N/A
Not used
9
1
N/A
2
2
5
Page 121
Nokia 30 Cable
This cable is for use from the Digital Sprite 2 to the modem only.
DV-IP Server Pin
Nokia 30 Pin
1
1
2
2
3
3
4
4
5
5
7
7
8
8
6
Page 122
Dedicated Micros
Appendix E – IP Address Range and Subnets
It is possible to set a range of IP address within the Firewall that will have access to the Digital
Sprite 2. The following details how the address range and subsequent subnet is calculated and
can be used in conjunction with the Configuration section of this manual.
IP Address and Subnet Masks
An IP address is a 32 bit address that is read by the network devices (switches, hubs, routers) in
a binary format, however to make life simpler for Network Administrator, IP addresses are
displayed in a decimal format.
The same applies to subnet masks, these to are 32 bit addresses and are identified by the
network devices in binary format, but for written in a decimal format.
The 32 bits are grouped in to four 8 bits (an Octet) to give us the IP address format we are used
to:
Binary Format
Decimal Equivalent
11000000.10101000.00000011.00000001
192.168.3.1
11111111.11111111.11111111.00000000
255.255.255.0
The binary format of the IP address uses 1’s and 0’s and within an octet it is possible to identify
256 decimal numbers from 0 to 255.
128
1
64
1
32
1
16
1
8
1
4
1
2
1
1
1
Decimal
255
0
0
0
0
0
0
0
0
0
An IP address along with its subnet mask is made up of two parts; Network ID and Host ID. If
we use our example IP address, 192.168.3.1 we can see the network ID and the host ID;
IP Address
Network ID
Host ID
192.168.3.1
192.168.3
.1
255.255.255.0
255.255.255
.0
Wherever the subnet gives a value of 255 (all 1’s) it ‘masks’ out the IP address octet and
therefore represent the Network part of the overall IP address. Hence the reason the above
example takes the first three octets as the network ID and the last octet as the host ID.
Dedicated Micros
Page 123
Classes of Networks
There are three ‘available’ classes of networks. There other classes of networks that are
reserved and therefore are not ‘available’ to the general public.
Class A
The Class A network allocates the first octet to the Network ID and the remaining three octets
are the Host ID’s. There is also an address range that has been defined for a Class A network.
As we use the first octet as the Network ID, we can see from the subnet mask that a Class A
subnet ‘masks’ out the network portion of the address.
Class A Address Range
Subnet Mask
Alternative Format
0.x.x.x
255.0.0.0
0.x.x.x/8
126.x.x.x
255.0.0.0
126.x.x.x/8
Class A Address Range
This identifies the range of network address that are within the Class A address range; 0 – 126.
Subnet Mask
This shows that the first octet masked by the subnet which identifies the Network ID and the
remaining 3 octets are the Host ID’s. Which means that we can have 127 (0 to 126) networks
each with up to 16,777,216 hosts.
Alternative Format
There are two ways an IP address can be written;
10.1.1.23 255.0.0.0.
10.1.1.23/8 - which identifies that the first 8 bits (octet) is the Network ID.
Both addresses are the same they are just written in a different format.
Class B
A Class B network can be seen as being a medium sized network offering more network ID’s
than a Class A but less host ID’s, we can see that the subnet ‘masks’ out the network portion of
the IP address.
Page 124
Dedicated Micros
Class B Address Range
Subnet Mask
Alternative Format
128.1.x.x
255.255.0.0
128.1.x.x/16
191.255.x.x
255.255.0.0
191.255.x.x/16
Class B Address Range
This identifies the range of network address that are within the Class B address range; 128.1 –
191.255.
Subnet Mask
This shows that the first two octets are masked by the subnet which identifies the Network ID
and the remaining 2 octets are the Host ID’s.
Alternative Format
There are two ways an IP address can be written;
132.1.1.23 255.255.0.0.
132.1.1.23/16 - which identifies that the first 16 bits (2 octets) are the Network ID.
Both addresses are the same they are just written in a different format.
Class C
A Class C network is the most commonly used class, and is available for small to medium sized
business. The allocated network portion is the first three octets, with the remaining octet being
the host address.
Class C Address Range
Subnet Mask
Alternative Format
192.0.1.x
255.255.255.0
192.0.1.x/24
255.255.255.0
223.255.255.x/24
223.255.255.x
Class C Address Range
This identifies the range of network address that are within the Class C address range; 192.0.0
– 223.255.255.
Subnet Mask
This shows that the first three octets are masked by the subnet which identifies the Network ID
and the remaining octet is the Host ID’s.
Dedicated Micros
Page 125
Alternative Format
There are two ways an IP address can be written;
192.168.3.55 255.255.255.0.
192.168.3.55/24 - which identifies that the first 24 bits (3 octets) are the Network ID.
Both addresses are the same they are just written in a different format.
Calculating IP Address Range
If we are to include an address range within the Firewall option, it is necessary to:
Identify the IP address range.
Calculate the subnet mask.
The following tables show the format for each Class (A, B, C), they include the IP address and
number of bits allocated to the network address, equivalent subnet mask, IP address range and
number of hosts.
Use these tables to assist you in entering the correct information.
Class A table
The table below shows the address ranges for a Class A network. To identify the correct
information, locate the Host address that best fits your requirements and enter the IP address
and subnet or the IP address and number of bits in the Firewall option (10.1.1.1/10).
Example IP address
Equivalent Network address
Host Addresses
10.1.1.1/8
255.0.0.0
10.1.1.0 – 10.255.255.255
10.1.1.1/9
255.128.0.0
10.1.1.0 – 10.127.255.255
10.1.1.1/10
255.192.0.0
10.1.1.0 – 10.63.255.255
10.1.1.1/11
255.224.0.0
10.1.1.0 – 10.31.255.255
10.1.1.1/12
255.240.0.0
10.1.1.0 – 10.15.255.255
10.1.1.1/13
255.248.0.0
10.1.1.0 – 10.7.255.255
10.1.1.1/14
255.252.0.0
10.1.1.0 – 10.3.255.255
10.1.1.1/15
255.254.0.0
10.1.1.0 – 10.1.255.255
Page 126
Dedicated Micros
Class B table
The table below shows the address ranges for a Class B network. To identify the correct
information, locate the Host address that best fits your requirements and enter the IP address
and subnet or the IP address and number of bits in the Firewall option (128.1.1.1/15).
Example IP address
Equivalent Network address
Host Addresses
128.1.1.1/8
255.255.0.0
128.1.1.0 – 128.1.255.255
128.1.1.1/9
255.255.128.0
128.1.1.0 – 128.1.127.255
128.1.1.1/10
255.255.192.0
128.1.1.0 – 128.1.63.255
128.1.1.1/11
255.255.224.0
128.1.1.0 – 128.1.31.255
128.1.1.1/12
255.255.240.0
128.1.1.0 – 128.1.15.255
128.1.1.1/13
255.255.248.0
128.1.1.0 – 128.1.7.255
128.1.1.1/14
255.255.252.0
128.1.1.0 – 128.1.3.255
128.1.1.1/15
255.255.254.0
128.1.1.0 – 128.1.1.255
Class C table
The table below shows the address ranges for a Class C network. To identify the correct
information, locate the Host address that best fits your requirements and enter the IP address
and subnet or the IP address and number of bits in the Firewall option (192.168.3.1/27).
Example IP address
Equivalent Network address
Host Addresses
192.168.3.1/24
255.255.255.0
192.168.3.0 – 192.168.3.255
192.168.3.1/25
255.255.255.128
192.168.3.0 – 192.168.3.127
192.168.3.1/26
255.255.255.192
192.168.3.0 – 192.168.3.63
192.168.3.1/27
255.255.255.224
192.168.3.0 – 192.168.3.31
192.168.3.1/28
255.255.255.240
192.168.3.0 – 192.168.3.15
192.168.3.1/29
255.255.255.248
192.168.3.0 – 192.168.3.7
192.168.3.1/30
255.255.255.252
192.168.3.0 – 192.168.3.3
192.168.3.1/31
255.255.255.254
192.168.3.0 – 192.168.3.1
Dedicated Micros
Page 127
Appendix F – SMS Message Format
The Digital Sprite 2 supports GSM communications and SMS messaging. This allows the Digital
Sprite 2 to report events via SMS and to receive SMS messages in order to create events on the
system.
Command Format
The commands consist of a descriptor followed by a variable parameter list. The order in which
the parameters appear must follow the format detailed below.
SMS Commands
These are messages that are sent to the Digital Sprite 2 to force an event to be triggered on the
unit. These messages can be sent from a mobile phone or an Internet Service Provider (ISP)
supporting SMS messaging.
Callback
This command is used to force the Digital Sprite 2 to make a connection to an Alarm Receiving
Centre where the telnet listener (telserve) application is running.
CALLBACK?<password>&<destination>&<profile>&<text>
password
This is the SMS password that has been identified in the SMS Set-up
page and enables the command to be executed.
destination
This is the IP address or DNS name of the Viewing application that
has telserver (Telnet listener) enabled to receive the message.
profile
This can be a number or name that has been configured on the SMS
Set-up page, this will be via the serial port or Ethernet connection.
This is the text message that will be sent to the remote viewer
informing the Operator of an incident and therefore should be
meaningful.
text
Page 128
Dedicated Micros
SMS Reports
These are messages sent from the Digital Sprite 2 to a pre-defined SMS Server when an event
occurs. The ‘events’ that will initiate this function are configured within the Digital Sprite 2
configuration web pages.
Startup
An SMS message will be sent from the Digital Sprite 2 to the receiving station when the Digital
Sprite 2 ‘starts up’.
STARTUP?<name>&<time>&<IP address>&<latitude>&<longitude>&<zone>
name
This is the system name configured on the Digital Sprite 2.
time
This is the local julian time of the message. The julian time is the
number of seconds since 00:00:01 hour on January 1st 1970. If the
Verbose message option has been enabled on the Digital Sprite 2 this
message will be in a human readable format.
IP address
This is the Ethernet IP address of the Digital Sprite 2.
latitude
This parameter is not relevant to the Digital Sprite 2 and included to
support other Dedicated Micros platforms.
longitude
This parameter is not relevant to the Digital Sprite 2 and included to
support other Dedicated Micros platforms.
zone
This parameter is not relevant to the Digital Sprite 2 and included to
support other Dedicated Micros platforms.
Alarm
This report is generated when an alarm is received on the Digital Sprite 2.
ALARM?<name>&<time>&<lat>&<long>&<speed>&<course>&<zone>&<camera>&<title>
name
This is the system name configured on the Digital Sprite 2.
time
This is the local julian time of the message. The julian time is the
number of seconds since 00:00:01 hour on January 1st 1970. If the
Verbose message option has been enabled on the Digital Sprite 2 this
message will be in a human readable format.
lat
This parameter is not relevant to the Digital Sprite 2 and included to
support other Dedicated Micros platforms.
Dedicated Micros
Page 129
long
This parameter is not relevant to the Digital Sprite 2 and included to
support other Dedicated Micros platforms.
Speed
This parameter is not relevant to the Digital Sprite 2 and included to
support other Dedicated Micros platforms.
course
This parameter is not relevant to the Digital Sprite 2 and included to
support other Dedicated Micros platforms.
zone
This parameter is not relevant to the Digital Sprite 2 and included to
support other Dedicated Micros platforms.
camera
This is the video input number that is directly associated with the
alarm on the Digital Sprite 2.
title
This is the alarm title allocated to the alarm that forced the SMS
message.
VMD
This report is generated when activity has been identified on the Digital Sprite 2.
VMD?<name>&<time>&<lat>&<long>&<speed>&<course>&<zone>&<camera>&<vmd
zone>
name
This is the system name configured on the Digital Sprite 2.
time
This is the local julian time of the message. The julian time is the
number of seconds since 00:00:01 hour on January 1st 1970. If the
Verbose message option has been enabled on the Digital Sprite 2 this
message will be in a human readable format.
lat
This parameter is not relevant to the Digital Sprite 2 and included to
support other Dedicated Micros platforms.
long
This parameter is not relevant to the Digital Sprite 2 and included to
support other Dedicated Micros platforms.
speed
This parameter is not relevant to the Digital Sprite 2 and included to
support other Dedicated Micros platforms.
course
This parameter is not relevant to the Digital Sprite 2 and included to
support other Dedicated Micros platforms.
zone
This parameter is not relevant to the Digital Sprite 2 and included to
support other Dedicated Micros platforms.
Page 130
Dedicated Micros
camera
This is the video input number that is directly associated with the
alarm on the Digital Sprite 2.
vmd zone
VMD zones are configured on the Digital Sprite 2, this identifies the
zone that has been activated to initiate the SMS message.
Camfail
This report will be generated if the Digital Sprite 2 identifies that any of the video inputs does not
have a 1V peak-to-peak signal.
CAMFAIL?<name>&<time>&<lat>&<long>&<speed>&<course>&<zone>&<upper>&
<lower>
name
This is the system name configured on the Digital Sprite 2.
time
This is the local julian time of the message. The julian time is the
number of seconds since 00:00:01 hour on January 1st 1970. If the
Verbose message option has been enabled on the Digital Sprite 2 this
message will be in a human readable format.
lat
This parameter is not relevant to the Digital Sprite 2 and included to
support other Dedicated Micros platforms.
long
This parameter is not relevant to the Digital Sprite 2 and included to
support other Dedicated Micros platforms.
speed
This parameter is not relevant to the Digital Sprite 2 and included to
support other Dedicated Micros platforms.
course
This parameter is not relevant to the Digital Sprite 2 and included to
support other Dedicated Micros platforms.
zone
This parameter is not relevant to the Digital Sprite 2 and included to
support other Dedicated Micros platforms.
upper
This identifies the bitmask of failed cameras 33 – 64.
lower
This identifies the bitmask of failed cameras 1 - 32.
Dedicated Micros
Page 131
Appendix G - Advanced Configuration via OSD
This section details the option to configure Network options via the Digital Sprite 2 On Screen
Display (OSD) menus.
The menu structure along with a detailed explanation will be shown.
Remote Reporting
The Digital Sprite 2 supports remote alarm monitoring and can configured to automatically carry
out actions to notify the remote station of events. This menu configures the remote reporting
details for these features.
Remote Reporting
15 characters
Primary host
<None>
Primary profile
Define
Secondary host
<None>
Secondary profile
Define
Unit alarm name
<None>
Public (NAT) IP address
<None>
Video Server Port
0000
Report Settings
Edit
Dial retry time/limit
01 mins/00
00/00 - 99/99
Alm telnet server port
00023
0000 - 9999
<None>
Ethernet, 10 characters
15 characters
<None>
Ethernet, 10 characters
15 characters
Function
Description
Primary Host
This is the IP address or name of the initial host that the Digital
Sprite 2 will transmit an alarm message to.
The option allows 15 characters to be entered, if DNS is enabled
enter the DNS name of the primary server or enter the IP address.
Primary Profiles
This is the medium that the Digital Sprite 2 will use to make the
connection to the primary host.
The option allows you to define (10 characters) the medium or select
Ethernet.
Page 132
Dedicated Micros
Function
Description
Secondary Host
If the Digital Sprite 2 is unable to contact the primary host then it is
possible to identify an alternative route and a secondary host.
The option allows 15 characters to be entered, if DNS is enabled
enter the DNS name of the secondary server or enter the IP
address.
Secondary Profile
This is the medium that the Digital Sprite 2 will use to make the
connection to the secondary host.
The option allows you to define (10 characters) the medium or select
Ethernet.
Unit Alarm Name
This is the name that will be presented to the remote alarm viewing
application and therefore should have some significance to the
Operator.
Public (NAT) IP
address
This is public IP (or domain name) for a unit connected to the
Internet via a NAT Router or Firewall. This field should be left blank
if NAT is not used e.g. on a private network.
Video Server Port
This field allows the ARC to connect to the unit through a router that
is using port forwarding e.g. if the video server does not appear on
port 80 (HTTP) to the external network.
Report Settings
This allows access to a sub menu for configuration of when the unit
will send a report.
Dial / Retry Timeout
If for any reason the initial connection attempt between the Digital
Sprite 2 and the remote station fails then the Digital Sprite 2 will wait
for the specified time period before attempting to re-connect.
This allows the time period to be defined in minutes and seconds.
Alarm Telnet Server
Port
This identifies the port number that will be used for remote
monitoring station allowing them to ‘listen’ for alarm messages from
the Digital Sprite 2.
The default setting is 0023, however if this port is already being
used on the network it is possible to define a different port number.
Note: The port number configured must also be reflected in the viewing application.
Dedicated Micros
Page 133
Report Settings
This submenu determines when the unit will create a report.
Report settings
Alarm reporting
Disabled
Disabled, Enabled
Camfail reporting
Disabled
Disabled, Enabled
Startup reporting
Disabled
Disabled, Enabled
Function
Description
Alarm Reporting
This must be enabled for the Digital Sprite 2 to automatically
connect and report on alarm, it must also be enabled in the Alarm
Zone menu.
Camfail Reporting
Enabling this option will force the Digital Sprite 2 to automatically
connect and report when it has identified camera failure on any of
the enabled video inputs.
Startup Reporting
When enabled the Digital Sprite 2 will be forced to transmit an alarm
report to the central monitoring station when the Digital Sprite 2
starts up, this will identify any system resets.
Page 134
Dedicated Micros
Email Settings
If the Digital Sprite 2 has been configured to transmit e-mails on alarm, camera fail, etc it is
necessary to configure the e-mail settings.
Email Settings
Connection profile
<None>
15 characters
Mail server
<None>
15 characters
Recipient address
<None>
15 characters
Recipient display name
<None>
15 characters
Reply-to address
<None>
15 characters
Reply-to display name
<None>
15 characters
Sender address
<None>
15 characters
Sender display name
<None>
15 characters
Report settings
Edit
Email logging
Enabled
Enabled, Disabled
Function
Description
Connection Profile
It is possible for the e-mail to be transmitted via the Ethernet
network or dial up connection. Use the
or
to scroll through the
available characters to identify the route the e-mail will take.
Note: It is necessary to have either a modem connected and configured (dial up) or
the Digital Sprite 2 connected to a LAN or WAN and has been allocated a valid IP
address.
Mail Server
Dedicated Micros
This is the IP address or DNS name of the SMTP Server that the email from the Digital Sprite 2 will be sent to.
The SMTP server will then forward this onto the allocated recipient.
Page 135
Function
Description
Recipient Address and
Display Name
Enter the e-mail address of the recipient that the SMTP Server is to
forward the e-mail on to.
The Display Name is the name that will be shown, it is
recommended that an name associated with the Digital Sprite 2 is
used for ease of identification.
Reply-to-Address and
Display Name
These fields must be configured if the recipient is to reply to an email.
The reply will be to a valid e-mail address to inform an Operator that
an incident has occurred.
Enter the e-mail address to allow a reply to be received.
Note: The Digital Sprite 2 does not accept incoming e-mails.
Sender Address and
Display Name
These optional fields indicate the source of the e-mail notification.
If the fields are left blank the Digital Sprite 2 will use the system
name & DNS name to create a sender name.
Report Settings
This identifies the system conditions under which the Digital Sprite 2
will automatically transmit and e-mail.
E-mail Logging
When enabled an entry will be generated in the system log to
identify when and why each e-mail transaction was transmitted from
the Digital Sprite 2.
Report Settings
This is a submenu of Email Settings
Report Settings
Page 136
Report startup
Disabled
Disabled, Enabled
Report alarms
Disabled
Disabled, Enabled
Report camera fail
Disabled
Disabled, Enabled
Report VMD activation
Disabled
Disabled, Enabled
Dedicated Micros
Function
Description
Report startup
If for any reason the Digital Sprite 2 has reset an e-mail will be
transmitted to identify system startup.
Report alarms
When an alarm is triggered on any of the alarm inputs an e-mail can
be transmitted to identify the input and any associated information.
Report camera fail
The video signals on the Digital Sprite 2 must be 1 Volt pk-to-pk, if
any of the signals drop below this level and e-mail will be
transmitted identifying the video input.
Report VMD activation
If VMD is enabled on the Digital Sprite 2 any identification of
movement will cause the unit to send an e-mail containing
information on the video input number.
SMS Settings
The Digital Sprite 2 can be configured to send SMS messages under specific circumstances;
alarm, system startup, etc.
This menu allows the SMS settings to be configured to allow the messages to be transferred to
the SMS Server.
SMS Settings
Dedicated Micros
Destination number
<None>
15 characters (Name or IP address)
Destination URL
<None>
15 characters
SMS Server
Disabled
Disabled, Enabled
Report Settings
Edit
Callback profile 0
ETHER
ETHER, 15 characters
Callback profile 1
ETHER/
ETHER, 15 characters
SMS command password
Edit
Advanced settings
Edit
Page 137
Function
Description
Destination Number
Enter the GSM number for the SMS server. The number should be
entered in international format including the country code and local
area code.
Destination URL
If the SMS message is to be sent over TCP/IP, enter the URL or the
IP address of the SMS Server.
Note: The SMS messages will be sent over an Ethernet link if present, alternatively it
will be sent over the GSM network.
SMS Server
It is possible to enable the Digital Sprite 2 to become an SMS Server
to receive and log SMS message, highlight the option and press to
switch between enabled / disabled.
Note: The Verbose option must not be enabled on the client DVR’s when this option
is selected.
Report Settings
Callback Profile 0
Callback Profile 1
SMS Command
Password
Advanced Settings
Page 138
An SMS message can be automatically transmitted when the unit
identifies specific events.
This identifies the route the return message, from the Operator
mobile device, will take.
The return message must contain the SMS command password,
callback IP address (IP address of the remote PC with the Viewing
application) and the command to action the Digital Sprite 2 to
automatically call the remote station.
This allows an alternative profile to be configured to work as a backup or alternative route for the return message from the Operators
mobile device.
The options are to configure the setting use the and
keys to
scroll through the available options or the default settings is
Ethernet.
This is the password to enable the SMS commands to be initiated
and transmitted from the Digital Sprite 2 to the mobile device.
This password will be included in the return text from the Operator.
Use the
and
keys to scroll through the available characters.
When the password had been configured highlight OK and press the
MENU key to return to the SMS Setting menu.
These settings are specific to the GSM module connected to the
Digital Sprite 2.
Dedicated Micros
Report Settings
This is a submenu of SMS Settings.
Report Settings
Report startup
Disabled
Disabled, Enabled
Report alarms
Disabled
Disabled, Enabled
Report camera fail
Disabled
Disabled, Enabled
Report VMD activation
Disabled
Disabled, Enabled
Verbose message
Disabled
Disabled, Enabled
Function
Description
Report startup
If for any reason the unit is reset an SMS message will be sent.
Report alarms
The Digital Sprite 2 will send a message on receipt of an alarm.
Report camera fail
If the Digital Sprite 2 detects any of the video inputs has dropped
below the 1 volt pk-to-pk an SMS message will be sent.
Report VMD activation
If any of the inputs on the Digital Sprite 2 triggers VMD an SMS
message will be transmitted.
Verbose Message
The verbose message option ensures that any text messages
transmitted from the Digital Sprite 2 is in a readable format to the
mobile device.
Note: This format is not supported in standard SMS Servers
Dedicated Micros
Page 139
Advanced Settings
This is a submenu of SMS Settings.
Advanced Settings
Service centre number
<None>
15 characters
GSM PIN number
<None>
4 characters
GSM / SMS port
No port
01, 02
Function
Description
Service Centre
Number
Enter the number of the Service Centre that will be responsible for
handling the SMS message.
Use the
or
keys to scroll through the available characters.
GSM Pin number
If a pin code has been set on the mobile device this must be entered
in the menu so that the message can be received by the mobile
device.
Important Note: If any changes are made within this menu the Pin number must be
re-entered each time.
GSM / SMS Port
Identify the port number for the network that the SMS message will
be transmitted on.
Web Cam Settings
Any of the video inputs on the Digital Sprite 2 can be made available and transmitted via FTP to
a web serving device. These images can then be incorporated into a web page and accessed
via a standard web browser.
Page 140
Dedicated Micros
Webcam Settings
Upload settings
Edit
Batch transfer
Disabled
Disabled, Enabled
Single FTP session
Disabled
Disabled, Enabled
Webcam Resolution
High res
High re, Medium res, Low res
Webcam enabled
Edit
Select cameras
Selected Cameras
All cameras
Function
Description
Upload Settings
As the images are transmitted via FTP, this option allows the FTP
Server information to be configured.
Batch Transfer
Enable batch transfer and images will be transmitted to the FTP
Server in a ‘batch’, e.g. the Digital Sprite 2 will take ‘snap shots’ from
video inputs 1, 2, 4 and send these in a single batch to the FTP
Server.
If this is disabled then the Digital Sprite 2 will transmit files
individually. The delay between batch files being transmitted is the
update interval, e.g. every 10 seconds the Digital Sprite 2 will send
images from video inputs 1, 2, 3.
If batch is enabled then the update interval is the time between the
Digital Sprite 2 sampling an image from one input to the next, e.g.
the Digital Sprite 2 will transmit an image from input 1, 10 seconds
later it will transmit and image from input 2, etc.
Single FTP Session
Webcam Resolution
Enabling Single FTP Session will result in avoiding the need to carry
out the login/logout process for each image that is transmitted to the
FTP Server, the Digital Sprite 2 will remain connected and logged in
to the ISP until the connection is manually disabled.
Identify the resolution of the images, defined in the Camera Setup
menu, that are to be transferred to the FTP Server.
Note: Take into account the speed and type of network connection being used when
selecting the resolution.
Dedicated Micros
Page 141
Function
Description
Webcam Enabled
This gives access to a sub menu for when the webcam is enabled.
Select Cameras
Cameras can be individually selected to be part of the webcam
functionality. Press the corresponding camera key to enable /
disable the camera.
If all cameras are to be included in the function, select the All
Cameras option.
Upload Settings
This is a submenu of Web Cam Settings.
Upload Settings
FTP Server
<None>
15 characters
FTP root drive / directory
<None>
15 characters
FTP image directory
<None>
15 characters
Image filename prefix
<None>
15 characters
Username
<None>
15 characters
Password
Edit
Update intervals
010 secs
000 - 999 seconds
Function
Description
FTP Server
This identifies the IP address (or name) of the FTP server that will
receive the images from the Digital Sprite 2.
FTP Root Drive /
Directory
Identify the directory where the downloaded images are to be
stored, this settings can accommodate 15 characters.
Note: It is recommended that a name associated with the unit name be used for ease
of retrieval.
FTP Image Directory
Page 142
This directory will be created when the initial image is uploaded to
the FTP Server, it is the directory where all images will be saved on
the server.
Enter the name of the directory to be created, it is recommended
that a name associated with the Digital Sprite 2 for ease or retrieval.
Dedicated Micros
Function
Description
Image Filename Prefix
This is an identifier for images sent from this Digital Sprite 2 and will
be stored as a prefix to the file name.
Username and
Password
To gain access to the FTP server it is necessary to go through an
authentication process this is the username and password that will
allow the images from the Digital Sprite 2 to be uploaded to the FTP
Server.
Note: The Password can be obtained from the Network Administrator.
Update Interval
This is the minimum update interval between each images being
transmitted from the Digital Sprite 2 to the FTP Server.
Note: It is important to take into account the speed of the route the FTP images will
take when configuring the update interval, i.e. the lower the update interval the more
images transmitted which will result in higher quantities of data being sent.
Webcam Activation
This identifies when the webcam function is enabled on the unit
Webcam Activation
Day
Night
Weekend
Active
Function
Description
Active
The webcam function can be selected to be active when the unit is
in any of the Day, Night or Weekend modes (or all)
Firewall Options
The Digital Sprite 2 supports enhanced network features, the firewall option adds security to the
system. It ensures allows authorised users gain access to the Digital Sprite 2 by utilising IP
address and port filtering.
Note: It is recommended that the Firewall Options feature be configured via the Web
interface.
Dedicated Micros
Page 143
Firewall options
Ping response
Enabled
Enabled, Disabled
Allowed IP address
01
01 - 32
IP entry 01 address
000.000.000.000
IP entry 01 subnet
255.255.255.255
Open TCP ports
01
01 - 32
TCP entry 01 from Port
0000
0000 - 9999
TCP entry 01 to Port
0000
0000 - 9999
Open UDP Ports
01
01 - 32
UDP entry 01 from Port
0000
0000 - 9999
UDP entry 01 to Port
0000
0000 - 9999
Function
Description
Ping Response
By default this option is enabled and therefore allows the Digital
Sprite 2 to be pinged on the network. Disabling this option will make
the Digital Sprite 2 less visible on the network.
Allowed IP address
It is possible to have 32 individual entries in the allowed IP address
database, use the
or
keys to select the entry number.
IP Entry XX Address
and Subnet
These are the IP addresses and Subnet mask that the Digital Sprite
2 will allow connections from, i.e. the IP address of the host PC’s
that will connect to the Digital Sprite 2 to; review video, download
information.
Note: If you enable this function ensure the IP address of the PC you are using to
configure the system is also in the list. If the address is not added then you will be
unable to communicate with the Digital Sprite 2 via the network.
Important Note: It is very important to take this feature into account when the Digital
Sprite 2 is installed in a DHCP network environment where IP addresses are
allocated automatically and can change on reset.
Page 144
Dedicated Micros
Function
Description
Open TCP Port, Entry
XX From Port, Entry
XX To Port
This identifies the TCP ports that are supported on the system and
available. If a host tries to communicate with the Digital Sprite 2
using a TCP port that is not in the list, even with a valid IP address,
the host will not gain access to the unit.
Enter the port range that are to be supported in the From and To
settings.
Note: The TCP ports entered in this section must also be enabled on the network,
check with the Network Administrator.
Open UDP Port, Entry
XX From Port, Entry
XX To Port
This identifies the UDP ports that are supported on the system and
available. If a host tries to communicate with the Digital Sprite 2
using a UDP port that is not in the list, even with a valid IP address,
the host will not gain access to the unit.
Enter the port range that are to be supported in the From and To
settings.
Note: The UDP ports entered in this section must also be enabled on the network,
check with the Network Administrator.
System Logs
There are a number of system logs supported on the Digital Sprite 2, these logs can be viewed
and used for Administration purpose.
Each log requires enabling to ensure entries are created by the Digital Sprite 2.
System Logs
Dedicated Micros
PPP connections
Disabled
Disabled, Enabled View
Anonymous FTP connections
Disabled
Disabled, Enabled View
Illegal file access
Disabled
Disabled, Enabled View
Telnet / FTP users
Disabled
Disabled, Enabled View
Archive
View
Logfile
View
Email log
View
Sent message log
View
Page 145
Function
Description
PPP Connections
The PPP Connections log contains detailed information on each
PPP connection made. The data includes the time, date, username
and password.
Anonymous FTP
The FTP function on the Digital Sprite 2 is password protected,
however it is possible to disable the password allowing any user
access to the unit via FTP.
If the password is disabled then any user accessing the Digital
Sprite 2 will be logged in the Anonymous FTP log. The entry in the
log will contain the time and date, IP address and port information of
the user.
Illegal File Access
If a user tries to access a CGI protected directory or attempts to
locate a non-existent file this will be logged as an illegal file access.
It will log the time and date as well as the IP address, and type of
action.
Telnet / FTP users
The Telnet / FTP log details all FTP and telnet connections made to
the Digital Sprite 2.
Both these functions can be password protected by enabling and
configuring the option this log will register all the information on the
User name, IP address of the remote PC, time of transaction when
ever and FTP or Telnet connection is made.
Having this log contain the above information ensures ease of
identification of Operators/Administrators that have logged into the
system.
When this option is enabled it is possible to select View to review
the log.
Archive
The Digital Sprite 2 can be configured to manual or automatically
trigger and FTP download of images. These downloads are logged
and stored within the Archive Log for future analysis.
This option allows the log to be reviewed on-screen.
Logfile
The Logfile stores all information on every action that is carried out
by the Digital Sprite 2; such as when alarms are received and
actioned, resets, failed outward bound alarm connections, etc.
This is an active file and will be continually updated with the system
transactions. The data will be stored until the log reaches its
maximum size limit (typically 1Mb). The Logfile then writes over the
top of the Logfile Backup and becomes the backup file and a new
logfile is created.
This ensures current and ‘recent’ information is always available.
This option allows the log to be reviewed.
Page 146
Dedicated Micros
Function
Description
Email Log
This log holds information on the e-mails sent from the Digital
Sprite 2 on receipt of an alarm.
It follows the complete transaction from receipt of alarm to
acknowledgement that the e-mail has been sent and the SMTP link
has been dropped.
Sent Message Log
This logs all the SMS message information. There are various
options that can be configured to allow an SMS message to be sent;
start up, alarms, etc.
The Sent Message Log, logs the information on the message sent
including; the time and date, sender and receiver details and the
message that was sent.
Dedicated Micros
Page 147
Additional Information
Command Reference List
Command line
Command
Description
<ESC> m\Ether_IP\xxx.xxx.xxx.xxx
Set IP address of the Digital Sprite 2.
<ESC> m\subnet\xxx.xxx.xxx.xxx
Set subnet of the Digital Sprite 2.
<ESC> m\gateway\xxx.xxx.xxx.xxx
Set gateway of the Digital Sprite 2.
<ESC> m\status
Displays the status information or the Digital Sprite 2;
drive information, comm. Ports information, enabled
telemetry, etc.
<ESC> m\serial_mode\comx\disabled
Debug
PPP
Text
Telem
This command will allow any of the serial ports to be
set for a specific function.
<ESC> m\security\Eng\Open
Off
Pass
Allows the security password for debug mode to be
enabled (pass)or disable (off) on the Digital Sprite 2.
<ESC> m\security\debug\Open
Off
Pass
Allows the security password for debug mode to be
enabled (pass)or disable (off) on the Digital Sprite 2.
ipcfg
Shows the IP address, subnet mask and gateway set
on the Digital Sprite 2.
TCP Ports
Displays the active TCP ports supported on the
Digital Sprite 2.
Page 148
Replace the x with the port number and select from
the list the option available (refer to the serial port
section of this manual for allocated functionality for
each port).
Dedicated Micros
Dedicated Micros Ltd.
Dedicated Micros France
Dedicated Micros Benelux
11 Oak Street, Swinton,
Manchester. M27 4FL,
United Kingdom
Tel: +44 (0) 161 727 3200
Fax: +44 (0) 161 727 3300
9-13 rue du Moulinet
75013 Paris
France
Tel : +33 (0) 1 45 81 99 99
Fax : +33 (0) 1 45 81 99 89
Joseph Chantraineplantsoen 1
3070 Kortenberg, Belgium
Tel: +32 2751 3480
Fax: +32 2751 3481
Dedicated Micros Europe
Dedicated Micros Slovenia
Dedicated Micros USA.
Neckarstraße 15,
41836 Hückelhoven, Germany
Tel: +49 2433 5258-0
Fax: +49 2433 5258-10
Delavska cesta 26
4208 Sencur
Slovenia
Tel: +386 4279 1890
Fax: +386 4279 1891
14434 Albemarle Point Place, Suite
100,
Chantilly, Virginia 20151 USA
Freephone: 800 864 7539 Tel: +1 703
904 7738
Fax: +1 703 904 7743
Dedicated Micros USA.
Dedicated Micros, Asia PTY
Dedicated Micros (PMalta) Ltd.
23456 Hawthorne Blvd. Suite 100,
Torrance, CA 90505, USA
Tel: +1 310 791-8666
Fax: +1 310 791-9877
16 New Industrial Road,
#03-03 Hudson Techno Centre,
Singapore 536204
Tel: +65 62858982
Fax: +65 62858646
UB2 San Gwann Industrial Estate,
San Gwann SGN 09 Malta
Tel: +356 21483 673
Fax: +356 21449 170
Dedicated Micros, Australia PTY.
Dedicated Micros Middle East
5/3 Packard Avenue, Castle Hill,
NSW 2154
Australia
Tel: +612 9634 4211
Fax: +612 9634 4811
Building 12, Suite 302,
P.O. Box 500291, Dubai Internet City,
Dubai, United Arab Emirates
Tel: +971 (4) 390 1015
Fax: +971 (4) 390 8655
MI-N-DS2AD/E1-2