1
EN
R
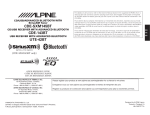
CD/USB RECEIVER WITH ADVANCED BLUETOOTH
CDE-154BT
FR
ES
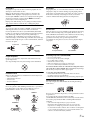
Work s With
Alpine Tunelt App
• OWNER’S MANUAL
Please read before using this equipment.
• MODE D’EMPLOI
Veuillez lire avant d’utiliser cet appareil.
• MANUAL DE OPERACIÓN
Léalo antes de utilizar este equipo.
Thank you for purchasing this Alpine product. Please take a moment to protect your purchase by
registering your product now at the following address: www.alpine-usa.com/registration.
You will be informed of product and software updates (if applicable), special promotions, news
about Alpine, and entered for a chance to win prizes.
Merci d’avoir acheté ce produit Alpine. Nous vous invitons à consacrer un moment à la protection
de votre achat en enregistrant votre produit dès maintenant à l’adresse suivante :
www.alpine-usa.com/registration.
Vous serez tenu informé des mises à jour des produits et des logiciels (le cas échéant), des
promotions spéciales, de l’actualité d’Alpine, et vous aurez une chance de remporter des prix.
Gracias por adquirir este producto Alpine. Con solo unos pocos pasos podrá proteger su producto,
registrándolo a través de la siguiente dirección: www.alpine-usa.com/registration.
Recibirá información sobre nuevos productos y software, promociones especiales, novedades sobre
Alpine y participará en el sorteo de premios.
ALPINE ELECTRONICS OF AMERICA, INC.
19145 Gramercy Place, Torrance,
California 90501, U.S.A.
Phone 1-800-ALPINE-1 (1-800-257-4631)
Designed by ALPINE Japan
68-24567Z52-A
ALPINE ELECTRONICS MARKETING, INC.
1-7, Yukigaya-Otsukamachi, Ota-ku,
Tokyo 145-0067, JAPAN
Phone: 03-5499-4531
ALPINE ELECTRONICS OF AUSTRALIA PTY. LTD.
161-165 Princes Highway, Hallam
Victoria 3803, Australia
Phone 03-8787-1200
ALPINE ITALIA S.p.A.
Viale C. Colombo 8, 20090 Trezzano
Sul Naviglio (MI), Italy
Phone 02-484781
ALPINE ELECTRONICS FRANCE S.A.R.L.
(RCS PONTOISE B 338 101 280)
98, Rue de la Belle Etoile, Z.I. Paris Nord Il,
B.P. 50016, 95945 Roissy Charles de Gaulle
Cedex, France
Phone 01-48638989
ALPINE ELECTRONICS GmbH
Wilhelm-Wagenfeld-Str. 1-3, 80807 München, Germany
Phone 089-32 42 640
ALPINE ELECTRONICS DE ESPAÑA, S.A.
Portal de Gamarra 36, Pabellón, 32
01013 Vitoria (Alava)-APDO 133, Spain
Phone 945-283588
ALPINE ELECTRONICS OF U.K. LTD.
Alpine House
Fletchamstead Highway, Coventry CV4 9TW, U.K.
Phone 0870-33 33 763
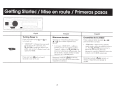
Contents
Operating Instructions
WARNING
WARNING ....................................................... 6
CAUTION ........................................................ 6
PRECAUTIONS ............................................... 6
Getting Started
Accessory List ...............................................................9
Turning Power On and Off.......................................9
Demonstration Function..........................................9
Source Selection..........................................................9
Detaching and Attaching the Front Panel .........9
Detaching ..................................................................9
Attaching ...................................................................9
Initial System Start-Up............................................ 10
Adjusting Volume .................................................... 10
Setting Time............................................................... 10
Radio
Listening to Radio.................................................... 11
Presetting Stations Manually............................... 11
Presetting Stations Automatically...................... 11
Tuning to Preset Stations ...................................... 11
Frequency Search Function.................................. 11
CD/MP3/WMA
Playback ...................................................................... 12
Repeat and Random Play ..................................... 12
Searching for CD Text ............................................. 12
Folder/File Name Search
(concerning MP3/WMA) ........................................ 12
Folder Name Search mode ............................... 12
File Name Search mode..................................... 13
Search Position Memory ....................................... 13
About MP3/WMA ..................................................... 13
Terminology........................................................... 14
Sound Setting
Adjusting Subwoofer Level/Bass Level/
Treble Level/Balance (Between Left and Right)/
Fader (Between Front and Rear)/Defeat .......... 15
Sound Setting............................................................ 15
Equalizer Presets .................................................. 15
Setting BASS ENGINE SQ ON/OFF.................. 16
Displaying the BASS ENGINE SQ
PARAMETER............................................................ 16
ENGLISH
Adjusting the Parametric Equalizer Curve
(9BAND P-EQ).........................................................16
Adjusting the Frequency (CENTER FRQ) ............16
Setting the Bandwidth (WIDTH (Q)) ....................16
Adjusting the Level....................................................16
Setting the Source Volume Level....................16
Adjusting the High Pass Filter ..........................16
Turning Subwoofer ON/OFF.............................16
Adjusting the Low Pass Filter ...........................17
Setting the Subwoofer Phase...........................17
Setting the Subwoofer System ........................17
External Device......................................................17
Connecting to an External Amplifier
(POWER IC)....................................................................17
Setting the Media Xpander mode..................17
BASS ENGINE SQ Function.....................................18
Switching BASS ENGINE SQ mode .................18
Adjusting BASS ENGINE SQ Level ...................18
Other Functions
Displaying the Text...................................................18
About “Text” ...........................................................19
Using the Front AUX Input Terminal..................19
Option Menu Setting ..............................................19
Applying TuneIt.........................................................20
Adjusting the sound via the Smartphone ...20
Facebook Notification Function......................20
Receiving Notification ..............................................20
Displaying Notification List.....................................20
SETUP
Setting ..........................................................................21
General Setting .....................................................21
Setting the Clock Display (CLOCK MODE) .........21
Setting the AUX SETUP mode................................21
Setting the AUX NAME mode ................................21
Turning Mute Mode On/Off (INT MUTE) ............21
Playing MP3/WMA Data (PLAY MODE) ...............22
Setting the stay on mode........................................22
Demonstration ............................................................22
Display Setting ......................................................22
Changing Lighting Color .........................................22
Setting the Spectrum analyzer..............................22
Dimmer Control ..........................................................22
Scroll Setting (TEXTSCROLL) ..................................23
Scroll Type Setting .....................................................23
Tuner Setting..........................................................23
Setting the TUNER (FM) frequency step
(TUNER FREQ) ..............................................................23
Setting the TUNER (FM) tone quality
(FM SET) .........................................................................23
iPod Setting ...........................................................23
iPod/iPhone Search Mode Setting.......................23
3-EN
Contents
Application Setting (APP) ................................. 23
Setting the communication mode with a
Smartphone (ALPINE APP)......................................23
Setting the TTS (Text To Speech) volume..........23
BT Hands Free Calling
Setup Before Using.................................................. 24
About BLUETOOTH.............................................. 24
Before Using BLUETOOTH Function .............. 24
How to connect to a BLUETOOTH compatible
device (Pairing) ..................................................... 24
For BLUETOOTH compatible device with SSP
(Secure Simple Pairing) ............................................24
For BLUETOOTH compatible device without SSP
(Secure Simple Pairing) ............................................24
Auto pairing with an iPod/iPhone........................24
BLUETOOTH SETUP.................................................. 25
Setting the BLUETOOTH Connection
(BT IN) ....................................................................... 25
Setting the Auto Pairing with
iPod/iPhone ........................................................... 25
Setting the BLUETOOTH Device ..................... 25
Setting the Visible Mode ................................... 25
Setting the BLUETOOTH sound quality........ 26
Adjusting the volume (SOURCE VOL) .................26
Sound Auto setting (TYPE SET).............................26
Setting the caller information display
ON/OFF.................................................................... 26
Setting the Phone Book Update..................... 26
Setting the Phone Book Auto Update ON/OFF
(AUTO) ............................................................................26
Setting the Phone Book Manual Update ON/OFF
(MANUAL)......................................................................26
Changing the Phone book List Order........... 26
Setting the Received Calls automatically
(Auto Answer)........................................................ 26
Selecting the output speaker .......................... 27
Displaying the firmware version..................... 27
Updating the firmware ...................................... 27
Hands-Free Phone Control ................................... 27
About the Hands-Free Phone.......................... 27
Answering a Call................................................... 27
Hanging up the Telephone .............................. 27
Calling ...................................................................... 27
Redialing a Number In Outgoing History..........28
Dialing a Number In Incoming History...............28
Dialing a Number In Incoming Missed Call
History ............................................................................28
Dialing a Number In The Phone Book ................28
Phone book Alphabet Search Function .............28
4-EN
ENGLISH
Voice Control Operation ....................................28
Call waiting function ...........................................28
Preset a number in the Phone Menu
(Shortcut dial) ........................................................29
Dialing the preset number................................29
Adjusting the volume when receiving a
Call .............................................................................29
Muting the microphone input quickly
(Voice Mute) ...........................................................29
Call Switching Operation...................................29
BLUETOOTH Audio Operation..............................29
Recalling the BLUETOOTH Audio Mode .......29
Selecting the desired Song ..............................29
Pausing.....................................................................29
Selecting the desired Group.............................29
Searching for a desired song............................30
Flash Memory (optional)
Playback MP3/WMA Files from Flash Memory
(optional) .....................................................................30
About MP3/WMA File of Flash Memory ...........30
iPod/iPhone (optional)
Connecting an iPod/iPhone..................................31
Setting the iPod Control.........................................31
Playback .......................................................................31
Searching for a desired Song ...............................32
Direct Search Function ...........................................32
Select Playlist/Artist/Album/Genre/Composer/
Episode.........................................................................33
Alphabet Search Function.....................................33
Search Position Memory ........................................33
Random Play Shuffle (M.I.X.).................................33
Repeat Play .................................................................33
Displaying the Text...................................................34
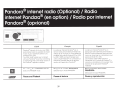
Pandora® internet radio (Optional)
Listening to Pandora®.............................................34
“Thumbs” Feedback.................................................35
Searching for a Desired Station ...........................35
QuickMix ......................................................................35
Bookmarking a Desired Song or Artist .............35
Creating a New Station...........................................36
Search Position Memory ........................................36
Changing the Display..............................................36
Contents
SiriusXM Satellite Radio Operation
Receiving Channels with the SiriusXM
Tuner............................................................................. 36
SiriusXM Setting ....................................................... 36
Managing Artist and Song Alerts................... 37
Setting the Favorite Sports Team Alerts ...... 37
Setting the Parental Control ............................ 37
Confirming the strength of the SiriusXM
signal ........................................................................ 38
Setting Tune Start ................................................ 38
Checking the SiriusXM Radio ID Number........ 38
Storing Channel Presets ........................................ 38
Tuning Channels using Presets ........................... 38
Tune Scan Function................................................. 38
Tune Start Function................................................. 39
Storing the desired Artist and Song Alerts ..... 39
Receiving and Tuning to an Alert....................... 39
Search Function........................................................ 39
Searching by Channel ........................................ 39
Searching by My Music ...................................... 39
Searching by My Games.................................... 40
Searching by Featured Favorites .................... 40
Using Jump Memory and Jump Recall
function ....................................................................... 40
Replay Function........................................................ 40
Parental Lock Function........................................... 41
Storing iTunes Tagging information ................. 41
Changing the Display ............................................. 41
ENGLISH
Installation and Connections
WARNING .................................................... 46
CAUTION...................................................... 46
PRECAUTIONS ............................................. 46
Installation ..................................................................47
Removal ...................................................................47
iPod/iPhone Connection
(sold separately)....................................................48
Remove the iPod/iPhone.........................................48
Flash Memory Connection
(sold separately)....................................................48
Connect Flash Memory ............................................48
Remove Flash Memory.............................................48
Mounting the Microphone....................................48
Connections ...............................................................49
LIMITED WARRANTY
Information
In Case of Difficulty.................................................. 42
Basic.......................................................................... 42
Radio......................................................................... 42
CD .............................................................................. 42
MP3/WMA............................................................... 42
Audio ........................................................................ 42
iPod ........................................................................... 42
Indication for CD Player..................................... 42
Indication for Flash Memory............................ 43
Indication for iPod Mode................................... 43
BLUETOOTH mode............................................... 44
SiriusXM Advisory Messages ........................... 44
Indication for Pandora® Mode........................ 44
Specifications ............................................................ 45
5-EN
Operating Instructions
WARNING
WARNING
This symbol means important instructions. Failure
to heed them can result in serious injury or death.
DO NOT OPERATE ANY FUNCTION THAT TAKES YOUR ATTENTION AWAY
FROM SAFELY DRIVING YOUR VEHICLE.
Any function that requires your prolonged attention should only be
performed after coming to a complete stop. Always stop the vehicle
in a safe location before performing these functions. Failure to do so
may result in an accident.
KEEP THE VOLUME AT A LEVEL WHERE YOU CAN STILL HEAR OUTSIDE
NOISES WHILE DRIVING.
Excessive volume levels that obscure sounds such as emergency
vehicle sirens or road warning signals (train crossings, etc.) can be
dangerous and may result in an accident. LISTENING AT LOUD
VOLUME LEVELS IN A CAR MAY ALSO CAUSE HEARING
DAMAGE.
CAUTION
This symbol means important instructions. Failure
to heed them can result in injury or material
property damage.
HALT USE IMMEDIATELY IF A PROBLEM APPEARS.
Failure to do so may cause personal injury or damage to the
product. Return it to your authorized Alpine dealer or the nearest
Alpine Service Center for repairing.
PRECAUTIONS
Product Cleaning
Use a soft dry cloth for periodic cleaning of the product. For more
severe stains, please dampen the cloth with water only. Anything
else has the chance of dissolving the paint or damaging the plastic.
Temperature
Be sure the temperature inside the vehicle is between +60°C
(+140°F) and −10°C (+14°F) before turning your unit on.
Moisture Condensation
Viewing the display may distract the driver from looking ahead of
the vehicle and cause an accident.
You may notice the CD playback sound wavering due to
condensation. If this happens, remove the disc from the player and
wait about an hour for the moisture to evaporate.
DO NOT DISASSEMBLE OR ALTER.
Damaged Disc
Doing so may result in an accident, fire or electric shock.
Do not attempt to play cracked, warped, or damaged discs. Playing
a bad disc could severely damage the playback mechanism.
MINIMIZE DISPLAY VIEWING WHILE DRIVING.
USE ONLY IN CARS WITH A 12 VOLT NEGATIVE GROUND.
(Check with your dealer if you are not sure.) Failure to do so may
result in fire, etc.
KEEP SMALL OBJECTS SUCH AS BATTERIES OUT OF THE REACH OF
CHILDREN.
Swallowing them may result in serious injury. If swallowed, consult
a physician immediately.
USE THE CORRECT AMPERE RATING WHEN REPLACING FUSES.
Failure to do so may result in fire or electric shock.
DO NOT BLOCK VENTS OR RADIATOR PANELS.
Doing so may cause heat to build up inside and may result in fire.
USE THIS PRODUCT FOR MOBILE 12V APPLICATIONS.
Use for other than its designed application may result in fire,
electric shock or other injury.
DO NOT PLACE HANDS, FINGERS OR FOREIGN OBJECTS IN INSERTION
SLOTS OR GAPS.
Doing so may result in personal injury or damage to the product.
6-EN
Maintenance
If you have problems, do not attempt to repair the unit yourself.
Return it to your Alpine dealer or the nearest Alpine Service Station
for servicing.
Never Attempt the Following
Do not grip or pull out the disc while it is being pulled back into the
player by the automatic reloading mechanism.
Do not attempt to insert a disc into the unit when the unit power is
off.
Inserting Discs
Disc Cleaning
Your player accepts only one disc at a time for playback. Do not
attempt to load more than one disc.
Make sure the label side is facing up when you insert the disc.
“ERROR” will be displayed on your player if you insert a disc
incorrectly. If “ERROR” continues to be displayed even though the
disc has been inserted correctly, push the RESET switch with a
pointed object such as a ballpoint pen.
Playing a disc while driving on a very bumpy road may result in
skips, but this will not scratch the disc or damage the player.
Fingerprints, dust, or soil on the surface of the disc could cause the
CD player to skip. For routine cleaning, wipe the playing surface
with a clean, soft cloth from the center of the disc to the outer edge.
If the surface is heavily soiled, dampen a clean, soft cloth in a
solution of mild neutral detergent before cleaning the disc.
New Discs
To prevent the CD from jamming, “ERROR” is displayed if discs
with irregular surfaces are inserted or if discs are inserted
incorrectly. When a new disc is ejected immediately after initial
loading, use your finger to feel around the inside of the center hole
and outside edge of the disc. If you feel any small bumps or
irregularities, this could inhibit proper loading of the disc. To
remove the bumps, rub the inside edge of the hole and outside edge
of the disc with a ballpoint pen or other such instrument, and then
insert the disc again.
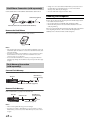
Center Hole
Bumps
Disc Accessories
There are various accessories available on the market for protecting
the disc surface and improving sound quality. However, most of
them will influence the thickness and/or diameter of the disc. Using
such accessories can cause the disc to be out of standard
specifications and may create operational problems. We
recommend not using these accessories on discs played in Alpine
CD players.
Center Hole
New Disc
Outside
(Bumps)
Transparent Sheet
Disc Stabilizer
On handling Compact Discs (CD/CD-R/CD-RW)
Irregular Shaped Discs
Be sure to use round discs only for this unit and never use any
special shaped discs.
Use of special shape discs may cause damage to the mechanism.
•
•
•
•
•
•
Do not touch the surface.
Do not expose the disc to direct sunlight.
Do not affix stickers or labels.
Clean the disc when it is dusty.
Make sure that there are no bumps around the disc.
Do not use commercially available disc accessories.
Do not leave the disc in the car or the unit for a long time. Never
expose the disc to direct sunlight. Heat and humidity may damage
the CD and you may not be able to play it again.
Installation Location
Make sure this unit will not be installed in a location subjected to:
•
•
•
•
Direct sun and heat
High humidity and water
Excessive dust
Excessive vibrations
To customers using CD-R/CD-RW
• If a CD-R/CD-RW cannot be played back, make sure the last
recording session was closed (finalized).
• Finalize the CD-R/CD-RW if necessary, and attempt playback again.
About media that can be played
Use only compact discs with the label side showing the CD logo
marks below.
Correct Handling
Do not drop the disc while handling. Hold the disc so you will not
leave fingerprints on the surface. Do not affix tape, paper, or
gummed labels to the disc. Do not write on the disc.
INCORRECT
CORRECT
If you use non-standard compact discs, correct performance cannot
be guaranteed.
You can play CD-Rs (CD-Recordables)/CD-RWs
(CD-ReWritables) which have been recorded only on audio devices.
You can also play CD-Rs/CD-RWs containing MP3 formatted
audio files.
CORRECT
• Some of the following CDs may not play on this unit:
Flawed CDs, CDs with fingerprints, CDs exposed to extreme
temperatures or sunlight (e.g., left in the car or this unit), CDs
recorded under unstable conditions, CDs on which a recording failed
or a re-recording was attempted, copy-protected CDs which do not
conform to the audio CD industry standard.
7-EN
• Use discs with compressed audio files written in a format compatible
with this unit. For details, refer to “About MP3/WMA” on page 13.
• Data files, other than audio, on the disc are ignored and are not
played back.
Protecting the USB Port
• Only USB Flash Memory devices or iPod/iPhone can be connected to
the USB port on this unit. Correct performance using other USB
products cannot be guaranteed. A USB hub is not supported.
• If the USB connector is used, be sure to use a USB extension cable
(supplied).
• Depending on the connected Flash Memory device, the unit may not
function or some functions may not be performed.
• The audio file format that can be played back on the unit is MP3/
WMA.
• Artist/song name, etc., can be displayed, however some characters
may not be correctly displayed.
On Handling USB Flash Memory
CAUTION
Alpine accepts no responsibility for lost data, etc., even if data,
etc., is lost while using this product.
• To prevent malfunction or damage, note the following points.
Read the Flash Memory Owner’s Manual thoroughly.
• Fix the Flash Memory in a location where driver operation will not be
hindered.
• Flash Memory may not function correctly at high or low temperature.
• Use only certified USB Flash Memory Devices. Please pay attention
that even certified Flash Memory, may not function correctly
depending on its type or state.
• Flash Memory function is not guaranteed. Use Flash Memory
according to the terms of agreement.
• Depending on the settings of the Flash Memory type, memory state
or encoding software, the unit may not play back or display properly.
• A file that is copy-protected (copyright protection) cannot be played
back.
• Flash Memory may take time to start playback. If there is a particular
file other than audio in the Flash Memory, it may take considerable
time before the file is played back or searched.
• The unit can play back “mp3” or “wma” file extensions.
• Do not add the above extensions to a file other than audio data. This
non-audio data will not be recognized. The resulting playback may
contain noise that can damage speakers and/or amplifiers.
• It is recommended to back up important data on a personal
computer.
• Do not remove the USB device while playback is in progress. Change
SOURCE to something other than USB, and then remove the USB
device to prevent possible damage to its memory.
8-EN
• Windows Media and the Windows logo are trademarks, or
registered trademarks of Microsoft Corporation in the United States
and/or other countries.
• iPhone, iPod, iPod classic, iPod nano, iPod touch and iTunes are
trademarks of Apple Inc., registered in the U.S. and other countries.
• “Made for iPod,” and “Made for iPhone,” mean that an electronic
accessory has been designed to connect specifically to iPod, or
iPhone, respectively, and has been certified by the developer to meet
Apple performance standards. Apple is not responsible for the
operation of this device or its compliance with safety and regulatory
standards. Please note that the use of this accessory with iPod, or
iPhone may affect wireless performance.
• The BLUETOOTH® word mark and logos are registered
trademarks owned by the Bluetooth SIG, Inc. and any use of such
marks by Alpine Electronics, Inc. is under licence. Other trademarks
and trade names are those of their respective owners.
• MPEG Layer-3 audio coding technology licensed from Fraunhofer
IIS and Thomson. Supply of this product only conveys a licence for
private, non-commercial use and does not convey a licence nor
imply any right to use this product in any commercial (i.e.
revenue-generation) real time broadcasting (terrestrial, satellite,
cable and/or any other media), broadcasting/streaming via internet,
intranets and/or other networks or in other electronic content
distribution systems, such as pay-audio or audio-on-demand
applications. An independent licence for such use is required. For
details, please visit http://www.mp3licensing.com
• Pandora, the Pandora logo, and the Pandora trade dress are
trademarks or registered trademarks of Pandora Media, Inc., used
with permission. Pandora is currently available in the U.S.,
Australia and New Zealand.
• Sirius, XM and all related marks and logos are trademarks of Sirius
XM Radio Inc. All rights reserved.
• Android is a trademark of Google Inc.
Getting Started
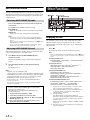
Source Selection
Press VSOURCE to change the source.
AUDIO/SETUP
Rotary encoder
/ENTER
e
*1
*2
*3
*4
Displayed only when a SiriusXM Tuner is connected.
Displayed only when no iPod/iPhone is connected.
Displayed only when the iPod/iPhone is connected.
Displayed only when BT IN is set to ON, refer to “Setting the
BLUETOOTH Connection (BT IN)” on page 25.
*5 Not displayed when ALPINE APP is set to OFF, refer to “Setting
the communication mode with a Smartphone (ALPINE APP)”
on page 23.
*6 Refer to “Using the Front AUX Input Terminal” on page 19.
/
/SOURCE
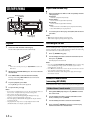
Accessory List
•
•
•
•
•
•
•
•
•
TUNER SIRIUSXM*1 DISC USB AUDIO*2/iPod*3
BT AUDIO*4 PANDORA*5 AUXILIARY*6 TUNER
Detaching and Attaching the Front Panel
Detaching
Head Unit ..................................................................................1
Power Cable ..............................................................................1
USB extension cable.................................................................1
Microphone ..............................................................................1
Mounting Sleeve ......................................................................1
Carrying Case............................................................................1
Bracket Key ...............................................................................2
Screw (M5 × 8) ..........................................................................4
Owner’s Manual..................................................................1 set
Turning Power On and Off
Press t to turn on the unit.
Note
• The unit can be turned on by pressing any other button except and
e (Release).
Press and hold t for at least 2 seconds to turn off the
unit.
Notes
• The front panel may become hot in normal usage (especially the
connector terminals on the back of the front panel). This is not a
malfunction.
• To protect the front panel, place it in the supplied carrying case.
• When detaching the front panel, do not apply excessive force as it may
result in malfunction.
Attaching
Note
• The first time power is turned on, the volume will start from level 12.
Demonstration Function
This unit has a demonstration feature for display. When Demo mode is
set to ON (initial setting), the unit starts the demonstration if there is no
operation for 30 seconds.
When installing this unit in a car for the first time, the DEMO OFF
screen will be displayed for 30 seconds after turning on the unit.
Press ENTER within 30 seconds to turn off the
Demonstration mode*.
Otherwise, the Demo mode remains ON and the unit starts the
demonstration if there is no operation for 30 seconds.
Notes
• Before attaching the front panel, make sure that there is no dirt or dust
on the connector terminals and no foreign object between the front
panel and the main unit.
• Attach the front panel carefully, holding the sides of the front panel to
avoid pushing buttons by mistake.
* The operation is the same as setting DEMO MODE to OFF in the
Setup menu. However, if the unit is disconnected from the vehicle’s
battery, DEMO MODE will be switched to ON automatically
when the unit is used next time. If you want to completely close the
Demo mode, set DEMO MODE to QUITE OFF. For details,
please refer to “Demonstration” on page 22.
9-EN
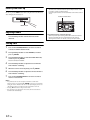
Initial System Start-Up
Be sure to press the RESET switch when using the unit for the first time,
after changing the car battery, etc.
Controllable with Remote Control
This unit can be controlled with an optional Alpine remote control.
For details, consult your Alpine dealer.
Point the optional remote control transmitter at the remote control
sensor.
Remote control sensor
RESET switch
Adjusting Volume
Turn the Rotary encoder until the desired sound is
obtained.
Setting Time
1
2
3
Press and hold AUDIOSETUP for at least 2 seconds to
activate the SETUP selection mode.
Turn the Rotary encoder to select GENERAL, and then
press ENTER.
Turn the Rotary encoder to select the CLOCK ADJ mode,
and then press ENTER.
The time indication will blink.
4
5
6
7
Turn the Rotary encoder to adjust the hours while the
time indication is blinking.
When the hour has been adjusted, press ENTER.
Turn the Rotary encoder to adjust the minutes while the
time indication is blinking.
Press and hold AUDIOSETUP for at least 2 seconds to
return to normal mode.
Notes
• To synchronize the clock to another clock/watch or radio time
announcement, press and hold ENTER for at least 2 seconds after
setting the “hour”. Minutes will reset to “00”. If the display shows over
“30” minutes when you do this, the time will advance one hour.
• Pressing t will return to the previous mode.
• If no operation is performed for 60 seconds, the unit will return to
normal mode automatically.
10-EN
Connectable to Remote Control Interface Box
With an optional Alpine Steering Wheel Remote Control Interface
Box (not included), this unit is controllable from the vehicles
steering wheel controls. For details, contact your Alpine dealer.
Presetting Stations Automatically
Radio
1
/SOURCE
Rotary encoder
/ENTER
2
Press BAND repeatedly until the desired radio band is
displayed.
Press and hold TUNEA.ME for at least 2 seconds.
The frequency on the display continues to change while the
automatic memory is in progress. The tuner will automatically
seek and store 6 strong stations in the selected band. They will
be stored into preset buttons 1 to 6 in order of signal strength.
When the automatic memory has been completed, the tuner
goes to the station stored in preset location No.1.
Note
BAND
• If no stations are stored, the tuner will return to the original station you
were listening to before the auto memory procedure began.
TUNE/A.ME
Preset buttons
(1 through 6)
Tuning to Preset Stations
Listening to Radio
1
2
Press VSOURCE to select TUNER mode.
The display shows the band, preset number and frequency of
the station selected.
Press BAND repeatedly until the desired radio band is
displayed.
FM1 FM2 AM FM1
3
Select the band, and then press any one of the station
preset buttons (1 through 6) that has your desired radio
station in memory.
Frequency Search Function
Press TUNEA.ME to select the tuning mode.
DX SEEK (Distance mode) LOCAL SEEK (Local mode)
MANUAL (Manual mode) DX SEEK
Note
You can search for a radio station by its frequency.
1
• The initial mode is Distance mode.
Distance mode:
Both strong and weak stations will be automatically tuned in
(Automatic Seek Tuning).
Local mode:
Only strong stations will be automatically tuned in (Automatic
Seek Tuning).
Manual mode:
The frequency is manually tuned in steps (Manual tuning).
4
2
3
Press ENTER in Radio mode to activate Frequency
search mode.
Turn the Rotary encoder to select the desired frequency.
Press ENTER to receive the selected frequency.
Note
• Press t in the search mode to cancel. Or, the search mode will be
canceled if no operation is performed for 60 seconds.
Press or to tune in the desired station.
Holding down or will change the frequency
continuously.
Presetting Stations Manually
While receiving the station that you want to store, press
and hold, for at least 2 seconds, any one of the preset
buttons (1 through 6) into which you wish to store the
station.
The display shows the band, preset number and station
frequency memorized.
Notes
• A total of 18 stations can be stored in the preset memory (6 stations for
each band; FM1, FM2 and AM).
• If you store a station in a preset memory which already has a station,
the current station will be cleared and replaced with the new station.
11-EN
Repeat and Random Play
CD/MP3/WMA
1
/SOURCE
Rotary encoder
/ENTER
During playback, Press z 4 or x 5 repeatedly until the
setting appears.
REPEAT ONE:
Track/file is played back repeatedly.
REPEAT FOLDER*:
Files in a folder are played back repeatedly.
MIX FOLDER*:
Files in a folder are played back randomly.
MIX ALL:
All files in the disc or Flash Memory are played back randomly.
* When MP3/WMA files are played back.
/ II
5
4
Preset buttons
(1 through 6)
Playback
1
Insert a disc with the label side facing up.
The disc will be pulled into the unit automatically.
2
To cancel repeat or M.I.X. play, select (OFF) with the above
procedure.
Notes
• a indicator lights up during repeat play mode.
• s indicator lights up during random play mode.
Searching for CD Text
On discs utilizing CD Text, songs can be searched and played by using
their recorded titles. For discs without CD Text, searches are made using
the track numbers associated with each song.
1
2
Press ENTER during play.
Turn the Rotary encoder to select the desired track, and
then press ENTER.
This will play the selected track.
Notes
Note
• When a disc is already inserted, press VSOURCE to switch to the
DISC mode.
2
3
While playing back MP3/WMA, press or to select the
desired folder.
Press or to select the desired track (file).
Pressing and holding or will fast backward/fast
forward track continuously.
4
To pause playback, press .
Pressing again will resume playback.
5
• Press any of the preset buttons (1 through 6) during a search to skip
over a calculated percentage of tracks. For details, refer to “Direct
Search Function” on page 32.
• Press t in the search mode to cancel. Or, the search mode is canceled
if no operation is performed for 60 seconds.
• When CD Text Search is made during M.I.X. play, the M.I.X. play
mode will be canceled.
Folder/File Name Search
(concerning MP3/WMA)
Folder and file names may be searched and displayed during playback.
To eject the disc, press .
Notes
• Do not remove a CD during its eject cycle. Do not load more than one
disc at a time. A malfunction may result from doing either.
• Three-inch (8 cm) CDs cannot be used.
• Any file protected by DRM (Digital Rights Management) copy
protection, cannot be played back on this unit.
• The track display for MP3/WMA data playback is the file numbers
recorded on the disc.
• The playback time may not be correctly displayed when a VBR
(Variable Bit Rate) recorded file is played back.
12-EN
Folder Name Search mode
1
2
3
4
During MP3/WMA playback, press ENTER to activate
the search mode.
Turn the Rotary encoder to select Folder Name Search
mode, and then press ENTER.
Turn the Rotary encoder to select the desired folder.
Press and hold ENTER for at least 2 seconds to play
back the first file in the selected folder.
Notes
• Press any of the preset buttons (1 through 6) during a Folder Name
search to skip over a calculated percentage of folders. For details, refer to
“Direct Search Function” on page 32.
• Press t in the search mode to return to the previous mode.
Or, the search mode is canceled if no operation is performed for
60 seconds.
• To search for files in the Folder Name Search mode, press ENTER.
Files in the folder may be searched.
• The root folder is displayed as “\ROOT”.
• When Folder Name Search is made during M.I.X. play, the M.I.X. play
mode will be canceled.
File Name Search mode
1
2
3
4
During MP3/WMA playback, press ENTER to activate
the search mode.
Turn the Rotary encoder to select File Name Search mode,
and then press ENTER.
Select the desired file by turning the Rotary encoder.
Press ENTER to play back the selected file.
Notes
• Press any of the preset buttons (1 through 6) during a File name
search to skip over a calculated percentage of files. For details, refer to
“Direct Search Function” on page 32.
• Press t in the search mode to return to the previous mode.
Or, the search mode is canceled if no operation is performed for
60 seconds.
• When File Name Search is made during M.I.X. play, the M.I.X. play
mode will be canceled.
About MP3/WMA
CAUTION
Except for private use, duplicating audio data (including MP3/
WMA data) or distributing, transferring, or copying it, whether
for free or for a fee, without permission of the copyright holder is
strictly prohibited by the Copyright Act and by international
treaty.
What is MP3?
MP3, whose official name is “MPEG Audio Layer 3,” is a compression
standard prescribed by the ISO, the International Standardization
Organization and MPEG which is a joint activity institution of the IEC.
MP3 files contain compressed audio data. MP3 encoding is capable of
compressing audio data at extremely high ratios, reducing the size of
music files to as much as one-tenth their original size. This is achieved
while still maintaining near CD quality. The MP3 format realizes such
high compression ratios by eliminating the sounds that are either
inaudible to the human ear or masked by other sounds.
What is WMA?
WMA, or “Windows Media™ Audio,” is compressed audio data.
WMA is similar to MP3 audio data.
Method for creating MP3/WMA files
Audio data is compressed using software with MP3/WMA codecs. For
details on creating MP3/WMA files, refer to the user’s manual for that
software.
MP3/WMA files that are playable on this device have the file extensions
“mp3” / “wma”. Files with no extension cannot be played back (WMA
ver. 7.1, 8 and 9 are supported). Protected files are not supported.
Confirm that the software being used conforms to the acceptable
formats listed above. It’s possible that the format may be unplayable
even though the extension is valid.
Supported playback sampling rates and bit rates
Search Position Memory
During playback, you can quickly return to the last-selected hierarchy
level in the search mode.
Press t.
The hierarchy you selected last in the search mode is displayed.
MP3
Sampling rates:
Bit rates:
48 kHz, 44.1 kHz, 32 kHz, 24 kHz, 22.05 kHz, 16 kHz,
12 kHz, 11.025 kHz, 8 kHz
8 - 320 kbps
WMA
Sampling rates:
Bit rates:
48 kHz, 44.1 kHz, 32 kHz
32 - 192 kbps
This device may not play back correctly depending on sampling rates.
ID3 tags/WMA tags
This device supports ID3 tag v1 and v2, and WMA tag.
If tag data is in an MP3/WMA file, this device can display the title (track
title), artist name, and album name ID3 tag/WMA tag data.
This device can only display single-byte alphanumeric characters (up to
30 for ID3 tags and up to 15 for WMA tags) and the underscore. For
non-supported characters, “NO SUPPORT” is displayed or the character
is displayed as space.
If information contains characters other than ID3 tag information, the
audio file may not be played back.
The tag information may not be correctly displayed, depending on the
contents.
13-EN
Producing MP3/WMA discs
MP3/WMA files are prepared, then written to a CD-R or CD-RW using
CD-R writing software. A disc can hold up to 509 files/255 folders.
Playback may not be performed if a disc exceeds the limitations
described above.
Media supported
The media that this device can play back are CD-ROMs, CD-Rs, and
CD-RWs.
Corresponding File Systems
This device supports discs formatted with ISO9660 Level 1 or Level 2.
Under the ISO9660 standard, there are some restrictions to remember.
The maximum nested folder depth is 8 (including the root directory).
The number of characters for a folder/file name is limited.
Valid characters for folder/file names are letters A-Z (all caps), numbers
0-9, and ‘_’ (underscore).
This device also can play back discs in Joliet, Romeo, etc., and other
standards that conform to ISO9660. However, sometimes the file
names, folder names, etc., are not displayed correctly.
Formats supported
This device supports CD-ROM XA, Mixed Mode CD, Enhanced CD
(CD-Extra) and Multi-Session.
This device cannot correctly play back discs recorded with Track At
Once or packet writing.
Order of files
Files are played back in the order that the writing software writes them
to the disc. Therefore, the playback order may not be what is expected.
Verify the writing order in the software’s documentation. The playback
order of the folders and files is as follows.
Root folder
Folder
MP3/WMA File
* The folder No./ folder Name will not be displayed if no readable file is
contained in the folder.
14-EN
Terminology
Bit rate
This is the “sound” compression rate specified for encoding. The higher
the bit rate, the higher the sound quality, but also the larger the files.
Sampling rate
This value shows how many times per second the data is sampled
(recorded). For example, music CDs use a sampling rate of 44.1 kHz, so
the sound is sampled (recorded) 44,100 times per second. The higher
the sampling rate, the higher the sound quality, but also the larger the
volume of data.
Encoding
Converting music CDs, WAVE (AIFF) files, and other sound files into the
specified audio compression format.
Tag
Song information such as track titles, artist names, album names, etc.,
written into MP3/WMA files.
Root folder
The root folder (or root directory) is found at the top of the file system.
The root folder contains all folders and files. It is created automatically
for all burned discs.
Sound Setting
Sound Setting
You can flexibly customize the unit to suit your own preference and
usage. From the AUDIO SETUP menu, Audio Setting can be modified.
AUDIO/SETUP
Rotary encoder
BASS
/ENTER
Use steps 1 to 5 to select the category you wish to modify. For
details on how to change each setting, see the following
sections below.
1
2
3
Each press changes the mode as follows:
SUBWOOFER*1/*2 BASS LEVEL*2/*3 TRE LEVEL*2/*3 BALANCE
FADER DEFEAT VOLUME SUBWOOFER
*1 When the subwoofer mode is set to OFF, its level cannot be
adjusted, refer to “Turning Subwoofer ON/OFF” on page 16.
*2 Not displayed when BASS ENGINE SQ mode is selected. Refer
to “Switching BASS ENGINE SQ mode” on page 18.
*3 Adjustable only when DEFEAT is OFF.
+0 ~ +15
Bass level
−7 ~ +7
Treble level
−7 ~ +7
Balance
L15 ~ R15
Fader
R15 ~ F15
Defeat
ON/OFF
Volume
0 ~ 35
Note
• If no operation is performed for 5 seconds, the unit automatically
returns to normal mode.
2
Turn the Rotary encoder until the desired sound is
obtained in each mode.
By setting DEFEAT ON, previously adjusted level settings of BASS
and TREBLE will return to the factory defaults.
Turn the Rotary encoder to select the desired sound
setting menu, and then press ENTER.
*1 Adjustment cannot be performed when DEFEAT is set to ON.
*2 Any changes made to either EQ PRESETS or 9BAND P-EQ are
reflected in the others’ settings.
*3 These items are not adjustable in BASS ENGINE SQ mode. If
you want to adjust these items separately, follow the confirm
message and select “YES” to exit BASS ENGINE SQ mode, then
make the setting.
*4 Not displayed when the Audio Setup mode is activated by
pressing BASS.
*5 Not displayed when BASS ENGIN is set to OFF.
*6 In step 3, after selecting a Band (BAND1 to BAND9) from
9BAND P-EQ adjustment mode. Turn the Rotary encoder to
select the desired item, and then press ENTER to continue to
step 4.
*7 This item is also related to BASS ENGINE SQ mode when you
adjust sound settings via the TuneIt App on a Smartphone.
Refer to “Adjusting the sound via the Smartphone” on page 20.
*8 These functions are inoperable when Subwoofer is set to OFF.
*9 Not displayed when SUBW LPF is set to OFF.
Press AUDIO repeatedly to choose the desired mode.
Subwoofer
Turn the Rotary encoder to select AUDIO, and then press
ENTER.
EQ PRESETS*1/*2/*3 BASS ENGIN*4 PARAMETER*5
9BAND P-EQ*1/*3/*6 SOURCE VOL HPF*1/*3
SUBWOOFER*7 SUBW LPF*1/*3/*8 SUBW PHASE*1/*8/*9
SUBW SYS*3/*8 POWER IC MX SETTING*1/*3 EQ PRESETS
Adjusting Subwoofer Level/Bass Level/
Treble Level/Balance (Between Left and
Right)/Fader (Between Front and Rear)/
Defeat
1
Press and hold AUDIOSETUP for at least 2 seconds to
activate the SETUP mode.
4
Turn the Rotary encoder to change the setting, and then
press ENTER.
(e.g. Select SUBWOOFER ON or SUBWOOFER OFF)
5
Press and hold AUDIOSETUP for at least 2 seconds to
return to normal mode.
Notes
• Adjustment cannot be performed during a call.
• Pressing t returns to the previous Sound menu mode.
• If no operation is performed for 60 seconds, Sound menu mode is
canceled.
• You can access the Sound menu mode directly by pressing BASS when
BASS ENGIN is set to OFF. Refer to “Setting BASS ENGINE SQ ON/
OFF” on page 16.
Equalizer Presets
10 typical equalizer settings are preset at the factory for a variety of
musical source material. USER settings are created in the 9BAND P-EQ
mode.
USER FLAT (Initial setting) POPS ROCK NEWS JAZZ
ELEC DANCE HIP HOP EASY LIS COUNTRY
CLASSICAL
Note
• The 9-Band, Parametric EQ is used to create the EQ PRESETS settings.
15-EN
Setting BASS ENGINE SQ ON/OFF
This function provides a short cut for BASS ENGINE SQ setting.
EQ PRESETS, 9BAND P-EQ, etc., will no longer be adjustable when ON
is set.
Setting item: BASS ENGIN
Setting contents:
OFF (Initial setting) / ON
OFF (MANUAL SET mode):
Adjust each audio effect setting separately.
ON (BASS ENGINE SQ mode):
Adjust BASS ENGINE SQ via a short cut.
Note
• You can also set BASS ENGINE SQ ON/OFF directly by pressing and
holding BASS. Refer to “Switching BASS ENGINE SQ mode” on
page 18.
Displaying the BASS ENGINE SQ
PARAMETER
After setting BASS ENGIN to ON, you can display the current BASS
ENGINE SQ Parameter.
Setting item: PARAMETER
Displaying contents:
The name of the parameter currently selected is displayed.
(INITIAL / TUNEIT A ~ TUNEIT E)
Adjusting the Parametric Equalizer Curve
(9BAND P-EQ)
You can modify the Equalizer settings to create a response curve more
appealing to your personal taste.
1
After selecting a BAND (BAND1 ~ BAND9) from the 9BAND
P-EQ adjustment mode, turn the Rotary encoder to select
the desired setting item, and then press ENTER.
CENTER FRQ WIDTH (Q) LEVEL CENTER FRQ
2
3
Turn the Rotary encoder to select the desired setting
value, and then press ENTER.
Press t to return to the previous step.
Adjusting the Frequency (CENTER FRQ)
Adjustable frequency bands: 20 Hz to 20 kHz
Band1
Band2
Band3
Band4
Band5
Band6
Band7
Band8
Band9
16-EN
20 Hz ~ 100 Hz (63 Hz)
63 Hz ~ 315 Hz (125 Hz)
125 Hz ~ 500 Hz (250 Hz)
250 Hz ~ 1 kHz (500 Hz)
500 Hz ~ 2 kHz (1 kHz)
1 kHz ~ 4 kHz (2 kHz)
2 kHz ~ 7.2 kHz (4 kHz)
5.8 kHz ~ 12 kHz (8 kHz)
9 kHz ~ 20 kHz (16 kHz)
Setting the Bandwidth (WIDTH (Q))
Setting contents:
3.0 (Initial setting) / 4.0 / 5.0
Adjusting the Level
Setting contents:
−7 to +7 (Initial setting: 0)
Notes
• BAND2 and BAND8 are the same as the Bass and Treble controls.
Their Level adjustment can also be controlled by pressing AUDIO and
selecting Bass Level or Treble Level. Refer to “Adjusting Subwoofer
Level/Bass Level/Treble Level/Balance (Between Left and Right)/Fader
(Between Front and Rear)/Defeat” on page 15.
• Settings exceeding the frequency of adjacent bands are not available.
• While adjusting the 9BAND P-EQ, you should consider the frequency
response of the connected speakers.
• The 9-Band, Parametric EQ is used to create the EQ PRESETS settings.
Setting the Source Volume Level
The output level of each source is individually adjustable. For example, if
the TUNER level sounds lower than CD, its output can be adjusted
without affecting the other sources.
Setting item: SOURCE VOL
Further setting items: TUNER / SIRIUSXM / DISC / USB / IPOD
/ BT AUDIO / PANDORA / AUX
Setting contents:
−14 dB ~ +14 dB
Adjusting the High Pass Filter
The High Pass Filter on this unit can be adjusted to suit your personal
taste.
Setting item: HPF
Setting contents:
OFF (Initial setting) / 60 (Hz) / 80 (Hz) / 120 (Hz) / 160 (Hz)
All frequencies above the selected cutoff are output.
Turning Subwoofer ON/OFF
When the subwoofer is on, you can adjust the subwoofer output level
(refer to “Adjusting Subwoofer Level/Bass Level/Treble Level/Balance
(Between Left and Right)/Fader (Between Front and Rear)/Defeat” on
page 15).
Setting item: SUBWOOFER
Setting contents:
OFF / ON (Initial setting)
OFF:
No subwoofer signal is output from the Subwoofer RCA
Connectors (refer to “Connections” on page 49).
ON:
The subwoofer signal is output from the Subwoofer RCA
Connectors (refer to “Connections” on page 49).
ON:
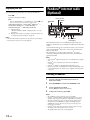
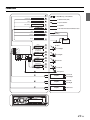
Adjusting the Low Pass Filter
Speakers
The Low Pass Filter on this unit can be adjusted to suit your personal
taste.
SPEAKER
RIGHT FRONT
Setting item: SUBW LPF
Setting contents:
OFF (Initial setting) / 60 (Hz) / 80 (Hz) / 120 (Hz) / 160 (Hz)
SPEAKER
RIGHT REAR
All frequencies lower than the selected cutoff are output.
Front
Right
Rear
Right
Setting the Subwoofer Phase
The subwoofer output phase is toggled between SUBWOOFER
NORMAL (0°) or SUBWOOFER REVERSE (180°). Depending on the
installation location of your subwoofer, one of these settings may sound
better than the other.
SPEAKER
LEFT REAR
Setting item: SUBW PHASE
SPEAKER
LEFT FRONT
Setting contents:
NORMAL (Initial setting) / REVERSE
Rear
Left
Front
Left
Note
Setting the Subwoofer System
• No sound is produced by the system when the power output is set to
OFF.
When the subwoofer is on, you can select either SYSTEM 1 or SYSTEM
2 for the desired subwoofer effect.
Setting item: SUBW SYS
Setting the Media Xpander mode
MX (Media Xpander) makes vocals or instruments sound distinct
regardless of the music source. The CD and iPod, etc. will be able to
reproduce the music clearly even in cars with a lot of road noise.
Setting contents:
SYSTEM 1 / SYSTEM 2 (Initial setting)
SYSTEM 1:
Subwoofer level changes according to the main volume setting.
SYSTEM 2:
Subwoofer level change is different from the main volume setting.
For example, even at low volume settings, the subwoofer is still
audible.
Setting item: MX SETTING
1
Turn the Rotary encoder to select the source to which you
want to apply Media Xpander, and then press ENTER.
FM SIRIUSXM CD CMPM* USB IPOD BT AUDIO
PANDORA AUX FM
External Device
* Be applied for MP3/WMA files in disc.
Connecting to an External Amplifier (POWER IC)
When an external amplifier is connected, sound quality can be
improved by stopping the power supply of the built-in amplifier.
2
Turn the Rotary encoder to select the Media Xpander
level, and then press ENTER.
OFF LEVEL 1 LEVEL 2 LEVEL 3
Note
Setting item: POWER IC
• There is no MX mode for AM radio.
Setting contents:
OFF / ON (Initial setting)
OFF:
Use this mode when the line output of this unit is used to drive an
external amplifier. In this setting, the head unit’s internal amplifier
is turned OFF and cannot drive speakers.
ON:
The speakers are driven by the built-in amplifier.
OFF:
Amplifier
Front
Left
Front
Right
Rear
Left
Amplifier
Rear
Right
17-EN
BASS ENGINE SQ Function
With the BASS ENGINE SQ function on this unit, several parameters
affecting Bass performance are adjusted simultaneously. The Bass Level
adjustment varies these parameters uniformly for optimum Bass effect
at different levels.
Other Functions
/SOURCE
Rotary encoder
/ENTER/OPTION
Switching BASS ENGINE SQ mode
Press and hold BASS for at least 2 seconds to switch the
sound mode.
BASS ENGINE SQ MANUAL SET (Initial setting)
BASS ENGINE SQ:
Adjust the relevant Bass parameters uniformly and automatically.
BAND
/ II
MANUAL SET:
Adjust each audio effect setting separately and manually.
Notes
• This operation can also be performed by selecting BASS ENGIN in
Audio Setup mode. Refer to “Setting BASS ENGINE SQ ON/OFF” on
page 16.
• You can access the Sound menu mode directly by pressing BASS when
BASS ENGIN is set to OFF.
• You can set this item via the TuneIt App on a Smartphone. Refer to
“Adjusting the sound via the Smartphone” on page 20.
Adjusting BASS ENGINE SQ Level
With BASS ENGINE SQ ON, adjusting the Bass Level uniformly effects
various sound parameters for optimum Bass effect.
1
Press BASS to display the BASS ENGINE SQ Level
adjustment screen.
The unit’s back lighting changes to white amber during this
period.
2
Turn the Rotary encoder to select the desired level
(0 - +6).
The initial level is +3.
Notes
• Adjustable only when DEFEAT is OFF.
• The Bass parameters affected contain EQ PRESETS, 9BAND EQ, HPF,
SUBWOOFER (when set this item via TuneIt App), SUBW LPF, SUBW
SYS and MX SETTING. These items are set automatically in BASS
ENGINE SQ mode and cannot be adjusted separately.
• From Level 0 to Level 6, the effect of BASS ENGINE SQ Enhance
increases level by level.
• If no operation is performed for 5 seconds, the unit automatically
returns to normal mode.
About Setup when the external power amplifier is connected.
In order to optimize the BASS ENGINE SQ, we recommend the
following power amplifier setup.
After setting up, you can adjust the BASS ENGINE SQ Level
according to the music.
1 Set gain of the power amplifier to “MIN”.
2 Set the Crossover Mode Sector switch to “OFF”.
3 Set the BASS ENGINE SQ of this unit to “ON”, and the BASS
ENGINE SQ Level to “+3”.
4 Play a song of the genre you frequently listen to, and
adjust gain of the power amplifier.
18-EN
Displaying the Text
Text information, such as the disc name and the track name, will be
displayed if playing a CD text compatible disc. It is also possible to
display the folder name, the file name and the tag, etc., while playing
MP3/WMA files.
Press k.
The display will change every time the button is pressed.
Note
• When the TEXTSCROLL is set to MANUAL, press and hold k for at
least 2 seconds, the current text will be scrolled one time (except Radio
mode).
The display in Radio mode:
BAND/FREQUENCY BAND/CLOCK SPECTRUM ANALYZER*1
BAND/FREQUENCY
The display in CD mode:
TRACK NO./ELAPSED TIME DISC TEXT*2/TRACK TEXT*2
TRACK NO./CLOCK SPECTRUM ANALYZER*1
TRACK NO./ELAPSED TIME
The display in MP3/WMA mode:
FOLDER NO./FILE NO./ELAPSED TIME
FOLDER NAME/FILE NAME ARTIST NAME*3/SONG NAME*3
ALBUM NAME*3/SONG NAME*3
FOLDER NO./FILE NO./CLOCK SPECTRUM ANALYZER*1
FOLDER NO./FILE NO./ELAPSED TIME
The display in BLUETOOTH Audio mode:
BT AUDIO/ELAPSED TIME*4 ARTIST NAME*3/SONG NAME*3
ALBUM NAME*3/SONG NAME*3 BT AUDIO/CLOCK
SPECTRUM ANALYZER*1 BT AUDIO/ELAPSED TIME
*1 Displays various patterns according to setting. For details,
refer to “Setting the Spectrum analyzer” on page 22.
*2 Displayed during playback of a disc with CD text. If there is
no Text (Disc Name or Track Name), “DISC TEXT”/
“TRACK TEXT” is displayed.
*3 ID3 tag/WMA tag
If an MP3/WMA file contains ID3 tag/WMA tag
information, the ID3 tag/WMA tag information is displayed
(e.g., song name, artist name, and album name). All other
tag data is ignored.
If there is no tag information, “ARTIST”/“ALBUM”/“SONG”
is displayed.
*4 Depending on the connected Smartphone, the elapsed time
may not be displayed.
About “Text”
Text compatible CDs contain text information such as the disc name and
track name. Such text information is referred to as “text”.
Notes
SiriusXM mode:
TUNE SCAN*4 ALERT MEMO*5 SXM SET*6 SOURCE VOL*2
MX SETTING*3 TUNE SCAN
DISC mode:
CD SET*7 SOURCE VOL*2 MX SETTING*3 CD SET
USB mode:
SOURCE VOL*2 MX SETTING*3 SOURCE VOL
• Some characters may not be displayed correctly with this device,
depending on the character type.
• “NO SUPPORT” is displayed when the desired text information cannot
be displayed on this unit.
• The text or tag information may not be correctly displayed, depending
on the contents.
iPod mode:
APP DIRECT*8 IPOD SET*9 SOURCE VOL*2 MX SETTING*3
APP DIRECT
Using the Front AUX Input Terminal
Pandora mode:
SOURCE VOL*2 MX SETTING*3 SOURCE VOL
Connect a portable music player, etc. by simply connecting it to the
input on the front panel. An optional adapter cable is required (standard
RCA to 3.5ø mini-phono plug or 3.5ø to 3.5ø mini-phono plug).
Press VSOURCE, and select the AUXILIARY mode to
listen to the portable device.
Portable player, etc.
Main unit
or
Optional adapter cable (RCA pin
plugs [red, white] 3.5ø miniplugs)
or (3.5ø miniplugs).
Note
• This function is available only when AUX SETUP is set to ON. For
details, refer to “Setting the AUX SETUP mode” on page 21.
Option Menu Setting
You can quickly adjust the setting items relevant to the current SOURCE
by using Option Menu.
1
Press and hold ENTER/OPTION for at least 2 seconds
to activate the Option menu of the current source.
Note
• The option menu varies depending on the source.
2
3
Turn the Rotary encoder to select the desired setting
item, and then press ENTER.
Turn the Rotary encoder to change the setting, and then
press ENTER.
After the setting, the display will return to the current source
automatically.
Setting item:
TUNER mode:
TUNER SET*1 SOURCE VOL*2 MX SETTING*3 TUNER SET
AUX mode:
AUX SET*10 SOURCE VOL*2 MX SETTING*3 AUX SET
BT AUDIO mode:
BT SET*11 SOURCE VOL*2 MX SETTING*3 BT SET
Phone mode (Non-calling mode):
PHONE SET*12 SOURCE VOL*13 PHONE SET
Phone mode (Calling mode):
MIC GAIN*14 CALL SOUND*14 SPK SWITCH*15
VOICE MUTE*16 CALL WAIT*17 END CALL*18
SOURCE VOL*13 MIC GAIN
*1 The setting items are the same as TUNER setting in SETUP
mode. For details, refer to “SETUP” on page 21.
*2 You can individually emphasize or weaken the volume level
of the current source to create your own tonal preference. The
setting values in Option mode and in SETUP mode are
linked. Refer to “Setting the Source Volume Level” on page 16.
*3 Refer to “Setting the Media Xpander mode” on page 17.
*4 Displayed only when SiriusXM Tuner-SXV200 is connected.
For details, refer to “Tune Scan Function” on page 38.
*5 Refer to “Storing the desired Artist and Song Alerts” on
page 39.
*6 ALERTSETUP, GAME ALERT, P-LOCK, SIGNAL IND and
TUNE START can be selected in this mode. For details about
these settings, refer to “SiriusXM Setting” on page 36.
*7 PLAY MODE can be selected in this mode. For details, refer
to “Playing MP3/WMA Data (PLAY MODE)” on page 22.
*8 Refer to “Setting the iPod Control” on page 31.
*9 The setting items are the same as iPod setting in SETUP
mode. For details, refer to “iPod/iPhone Search Mode
Setting” on page 23.
*10 AUX NAME can be selected in this mode. For details, refer to
“Setting the AUX NAME mode” on page 21.
*11 FW VERSION can be selected in this mode. You can see the
current firmware version about BLUETOOTH by using this
setting.
*12 CALL SOUND, CALLER ID, PB UPDATE, PB ORDER,
AUTO ANS, SPEAKER SL and FW VERSION can be
selected in this mode. For details about these settings, refer to
“BLUETOOTH SETUP” on page 25.
*13 The Hands free phone talk level, ring tone level and
microphone gain level can be adjusted by using this setting.
The setting values in Option mode and in SETUP mode are
linked. Refer to “Adjusting the volume (SOURCE VOL)” on
page 26.
*14 Refer to “Setting the BLUETOOTH sound quality” on
page 26.
*15 While calling, the call sound can be switched between the
unit and Smartphone by using this setting.
This operation can also be done by pressing BAND. Refer to
“Call Switching Operation” on page 29.
*16 While calling, and the Voice Mute is activated, the
microphone input will mute instantly and “VOICE MUTE”
will blink. This operation can also be done by pressing .
Refer to “Muting the microphone input quickly (Voice Mute)”
on page 29.
19-EN
*17 If there is a waiting call, select this item to display the caller’s
Name and waiting number (1 or 2). Press k and the
display will switch.
*18 Select this item to hang up the call.
Facebook Notification Function
Some functions may be available in a future version of TuneIt.
Notes
Note
• Press r to return to the previous mode.
• If no operation is performed for 60 seconds, the unit will return to
normal mode automatically.
• Depending on the paired Smartphone, the following functions may not
be available even though the TuneIt version is updated.
Receiving Notification
Applying TuneIt
This unit’s sound tuning is programmable from a connected
Smartphone. It is also possible to download specific parameters for
certain vehicles from Alpine’s TuneIt database stored in the Cloud. Using
the TuneIt App, customized parameters can also be uploaded for others
to share and rate.
Through this unit, it is also possible to receive and respond to
information from Alpine’s Social Network Service (SNS) available
through the connected Smartphone.
The installed TuneIt App should be launched on the Smartphone before
connection to the head unit.
TuneIt, is downloadable from Apple’s App Store; the Android user can
download it from Google Play. For details, consult your Alpine dealer.
Before these operations, set ALPINE APP to USB or BT depending on
the connected Smartphone. For details, refer to “Setting the
communication mode with a Smartphone (ALPINE APP)” on page 23.
When the Smartphone connected to this unit receives notification from
Facebook, the unit’s back lighting and the V indicator blinks
(depending on the TuneIt settings on the phone). At the same time, the
user’s name is shown in the display (20 characters maximum). Play back
the notification via TTS (Text To Speech) by the following procedure.
1
While receiving Notification from Facebook, press
VSOURCE button.
Notification Menu screen is displayed.
2
Turn the Rotary encoder to select the desired mode, and
then press ENTER.
LIKE*1 REPLAY NEXT PREVIOUS TTS VOLUME*2
*1 Not displayed when the received Notification is Message type.
*2 It can also be set in SETUP section. For details, refer to “Setting
the TTS (Text To Speech) volume” on page 23.
LIKE:
Notes
• The application program and related specifications and data may be
deleted or terminated without notice.
• Some TuneIt functions may not be available if the Smartphone is not in
a service area or receives no signal.
REPLAY:
NEXT:
PREVIOUS:
TTS VOLUME:
Adjusting the sound via the Smartphone
The Smartphone feedbacks to Facebook with “Like”,
and meanwhile, the received Wall Posts or
Comments are played back by TTS (Text To Speech).
To play back Notification by TTS (Text To Speech)
again.
To select the next Notification.
To select the previous Notification.
To adjust the playback volume of TTS (Text To Speech).
After setting the above procedure, the indicator lights up, and then
you can adjust the unit’s sound function on the Smartphone.
Notes
1
2
• Press t to return to the previous mode.
• A new received Notification prompt will last for 30 seconds. If there is
no operation within 30 seconds, the unit will return to normal mode.
• In some situations, such as the unit is powered off or during a call etc.,
Notification of the Smartphone will not be prompted by this unit.
Make sure the unit is powered on.
Launch the TuneIt App on the Smartphone. Adjust the
unit’s sound accordingly on the Smartphone.
During sound setting, the
indicator may blink.
Notes
• Volume level cannot be adjusted via the Smartphone.
• The setting cannot be done on both the Smartphone and this unit at the
same time. While the sound function of this unit is set via the
Smartphone, sound function settings on CDE-154BT will be displayed
as “APPCONNECT”.
• In some situations, such as the unit is powered off, during a call etc.,
sound setting cannot be done via the Smartphone.
• This function may not be available depending on the paired
Smartphone.
• Please obey all local traffic laws while using this function.
Displaying Notification List
You can view the received Notification from Facebook in the connected
Smartphone via this unit.
1
Press and hold VSOURCE for at least 2 seconds.
The received Notification will be displayed according to when it
was posted.
2
3
Turn the Rotary encoder to select the desired Notification,
and then press ENTER.
Then go to step 2 of “Receiving Notification”.
Notes
• When there is no Notification, “NO NOTIF” will be displayed.
• The displayable amount of the Notification list depends on the
connected Smartphone.
• If no operation is performed for 60 seconds, the unit will return to
normal mode automatically.
20-EN
5
SETUP
Press and hold AUDIOSETUP for at least 2 seconds to
return to normal mode.
Notes
• Press t to return to the previous mode.
• If no operation is performed for 60 seconds, the unit will return to
normal mode automatically.
Rotary encoder
/ENTER
AUDIO/SETUP
General Setting
GENERAL is selected on the setup main menu in step 2.
Setting the Clock Display (CLOCK MODE)
You can select the clock display type, 12-hour or 24-hour, depending on
your preference.
/SOURCE
6
Setting item: CLOCK MODE
Setting contents:
12H (Initial setting) / 24H
Setting
You can flexibly customize the unit to suit your own preferences and
usage. From the SETUP menu, GENERAL Setting, DISPLAY Setting,
etc., can be modified.
Use steps 1 to 5 to select one of the SETUP modes to modify.
See the applicable section below for details about the selected SETUP item.
1
2
Press and hold AUDIOSETUP for at least 2 seconds to
activate the SETUP mode.
Turn the Rotary encoder to select the desired item, and
then press ENTER.
AUDIO*1 GENERAL DISPLAY TUNER SIRIUSXM*2
IPOD APP BLUETOOTH*3 AUDIO
(e.g. Select GENERAL)
GENERAL:
CLOCK MODE CLOCK ADJ*4 AUX SETUP AUX NAME*5
INT MUTE PLAY MODE STAY ON DEMO MODE
CLOCK MODE
DISPLAY:
ILLUMINATI ANALYZER DIMMER TEXTSCROLL
SCROLLTYPE ILLUMINATI
TUNER:
TUNER FREQ FM SET TUNER FREQ
IPOD:
IPOD LIST
APP:
ALPINE APP TTS VOLUME ALPINE APP
*1
*2
*3
*4
*5
3
Refer to “Sound Setting” on page 15.
Refer to “SiriusXM Setting” on page 36.
Refer to “BLUETOOTH SETUP” on page 25.
Refer to “Setting Time” on page 10.
Displayed only when AUX SETUP is set to ON.
Select an Item with the Rotary encoder, and then press
ENTER.
(e.g. Select AUX SETUP)
4
Setting the AUX SETUP mode
You can input the audio of an external device, (such as a Portable audio
player) to the AUX connector of this unit.
Setting item: AUX SETUP
Setting contents:
OFF / ON (Initial setting)
OFF:
When set to OFF, AUX source cannot be selected.
ON:
Set to ON when a portable device is connected. If VSOURCE is
pressed and AUX is selected, the sound of the portable device is
input to the unit.
Setting the AUX NAME mode
You can change the AUX NAME display in the SETUP mode.
Setting item: AUX NAME
Setting contents:
AUXILIARY (Initial setting) / TV / DVD / PORTABLE / GAME
Turning Mute Mode On/Off (INT MUTE)
If a device having the interrupt feature is connected, audio will be
automatically muted whenever the interrupt signal is received from the
device.
Make sure the Audio Interrupt In Lead (Pink/Black) is connected to the
terminal where the voltage becomes 0 V (GND) when a sound from
External Unit is input into AUX. Otherwise, this function may not
operate. For details, refer to “Connections” on page 49.
Setting item: INT MUTE
Setting contents:
OFF AUX (Initial setting) / ON
OFF AUX:
When the interrupt signal is received from device, the AUX source
volume will be output from the unit.
ON:
When the interrupt signal is received from device, no sound will
be output.
Turn the Rotary encoder to change the setting, and then
press ENTER.
(e.g. Select ON or OFF)
21-EN
Playing MP3/WMA Data (PLAY MODE)
This unit can play back CDs containing both CD and MP3/WMA data
(created in Enhanced CD (CD Extra) format). However, in some
situations, playback of an enhanced CD may be difficult. In this case,
you can choose to play back the CD data session only. When a disc
contains both CD and MP3/WMA data, playback starts from the CD
data portion of the disc.
Setting item: PLAY MODE
Display Setting
DISPLAY is selected on the setup main menu in step 2.
Changing Lighting Color
You can change the lighting color of the unit’s buttons/display.
Setting item: ILLUMINATI
Setting contents:
OPTION / CUSTOMIZE
Setting contents:
CD-DA / CDDA/MP3 (Initial setting)
CD-DA:
Only the CD data in Session 1 can be played back.
OPTION:
A total of 30 colors can be selected.
CDDA/MP3:
CD data, MP3/WMA files in mixed mode, and multi-session discs
can be played back.
CUSTOMIZE:
If there is no color you prefer in OPTION, you can customize the
color as follows.
Note
1
• Perform this setting before inserting a disc. If a disc has already been
inserted, remove it first.
Setting the stay on mode
You can set the delay in turning OFF the unit’s power after the vehicle’s
ignition is turned off (ACC OFF). When you select a mode other than
OFF, the music will be paused after you turn the ignition key off (ACC
OFF). At the same time, the prompt “PRESS PRESET 6 TO STAY ON”
will scroll once. Press 6 within 15 seconds to continue enjoying music
for the selected period. If 6 is not pressed, the unit will power off within
15 seconds. During this period, you can only receive a call by operating a
paired Smartphone.
Setting item: STAY ON
Setting contents:
OFF (Initial setting) / 5 MIN / 15 MIN / 30 MIN
Note
• Note that there is a possibility that the battery may be drained if
already weak, during this period.
Demonstration
2
After entering CUSTOMIZE, turn the Rotary encoder to
select a color (RED, GREEN, BLUE) you want to adjust, and
then press ENTER.
The adjusted color will blink, turn the Rotary encoder to
select a value (0-60).
R is red, G is green and B is blue.
3
4
Press ENTER or t to finish the color setting.
Repeat steps 1 to 3 to set another color.
Notes
• In step 2, you can switch to another color setting mode by pressing
or .
• The setting values in OPTION mode and CUSTOMIZE mode are
linked, when the setting value in CUSTOMIZE is different from the one
in OPTION, “USER” will be displayed in OPTION mode.
• During CUSTOMIZE setting, at least one setting value should be
greater than 20.
Setting the Spectrum analyzer
This unit has a demonstration feature for the display.
Adjust the display style on the left of the screen according to personal
preference. When a song is played, etc., the spectrum will be displayed
on the left side of the screen.
Setting item: DEMO MODE
Setting item: ANALYZER
Setting contents:
ON (Initial setting) / OFF / QUITE OFF
ON:
The unit starts the demonstration if there is no operation for 30
seconds.
OFF:
Quit the demonstration mode. Note that if this unit is
disconnected from the vehicle’s battery, the next time you use this
unit the DEMO mode will be ON.
QUITE OFF:
Quit the demonstration mode completely.
Setting contents:
TYPE A (Initial setting) / TYPE B / TYPE C
TYPE A:
Longitudinal Wave
TYPE B:
Block
TYPE C:
Radial
Dimmer Control
Set the Dimmer control to AUTO to decrease the illumination
brightness of the unit with the head lights of the vehicle ON. This mode
is useful if you feel the unit’s backlighting is too bright at night.
Setting item: DIMMER
Setting contents:
MANUAL / AUTO (Initial setting)
22-EN
Scroll Setting (TEXTSCROLL)
This CD player can scroll the disc and track names recorded on
CD-TEXT discs, as well as the text information of MP3/WMA files,
folder names and tags.
Setting item: TEXTSCROLL
Setting contents:
MANUAL (Initial setting) / AUTO
MANUAL:
The display is scrolled when a disc is loaded or when a track is
changed, etc.
AUTO:
The current text information of CD, folder, tag, etc. is scrolled
automatically.
Note
• The unit scrolls CD text names, folder names, file names or tag display.
iPod Setting
“IPOD” is selected on the setup main menu in step 2.
iPod/iPhone Search Mode Setting
The unit allows you to search the iPod/iPhone using nine different
search modes.
Setting item: IPOD LIST
Further setting items: PLAYLISTS / ARTISTS /ALBUMS /
AUDIOBOOKS / PODCASTS / GENRES / COMPOSERS / SONGS /
GENIUS MIX
Setting contents:
OFF / ON
Notes
Scroll Type Setting
Choose from two scrolling methods. Select the type you prefer.
Setting item: SCROLLTYPE
Setting contents:
TYPE1 / TYPE2 (Initial setting)
• The search mode for Playlists/Artists/Albums/Podcasts/Genres/ Songs/
Genius Mix is initially set to On. The search mode for Audiobooks/
Composers is initially set to Off.
• For search mode details, refer to “Searching for a desired Song” on
page 32.
Application Setting (APP)
TYPE1:
The characters scroll from right to left, a single character at a time.
APP is selected on the setup main menu in step 2.
TYPE2:
Words are built up from left to right, a single character at a time.
When the display is filled, it is cleared and the remaining words are
displayed the same way until all words of the title have been
shown.
Setting the communication mode with a
Smartphone (ALPINE APP)
Tuner Setting
TUNER is selected on the setup main menu in step 2.
Setting the TUNER (FM) frequency step
(TUNER FREQ)
During manual tuning, you can select the frequency step for FM analog
radio station searching.
Setting item: TUNER FREQ
Setting contents:
200KHZ (Initial setting) / 100KHZ
Setting the TUNER (FM) tone quality (FM SET)
This unit can set your preferred tonal quality for the FM analog radio
stations.
Setting item: FM SET
Setting contents:
HI-FI / NORMAL (Initial setting) / STABLE
Set ALPINE APP to USB when an iPhone is connected, or set to BT
when an Android Smartphone is paired.
Setting item: ALPINE APP
Setting contents:
USB (Initial setting) / BT / OFF
USB:
When an iPhone is connected to CDE-154BT’s USB port, you can
enjoy Pandora, program the unit’s sound tuning parameters, or
communicate with SNS.
BT:
Set this when an Android Smartphone is paired with this unit via
BLUETOOTH technology. At this time, you can enjoy Pandora,
program the unit’s sound tuning parameters, or communicate
with SNS.
OFF:
No Smartphone is connected.
Notes
• It takes a few seconds to validate this function.
• For this function to work properly, specific applications must be
installed on your Smartphone before connection. Consult your Alpine
dealer or the Alpine website for details.
• Only the iPhone and certain Android Smartphones support this
function.
HI-FI:
High-quality setting
Setting the TTS (Text To Speech) volume
NORMAL:
Standard setting
This function allows for readout of comments, etc., on a Smartphone,
and outputs sound from the speakers of the unit.
STABLE:
Control noise
Setting item: TTS VOLUME
Note
• Noise may be more noticeable when HI-FI is set, depending on the
reception status. In this case, the Normal setting is recommended.
Setting contents:
0 ~ 35
Note
• The initial volume level is 12.
23-EN
How to connect to a BLUETOOTH
compatible device (Pairing)
BT Hands Free Calling
Rotary encoder
/ENTER
AUDIO/SETUP
/VOICE CTRL.
/SOURCE
For details on the control from a BLUETOOTH compatible device, refer
to the Owner’s Manual of the BLUETOOTH compatible device.
1
Using your BLUETOOTH compatible device, select the
“CDE-154Series” for pairing.
For BLUETOOTH compatible device with SSP
(Secure Simple Pairing)
2-1 Turn the Rotary encoder to change the head unit display
from “PAIR NO” to “PAIR YES”, and then press ENTER.
/ II
BAND
ABC SEARCH
1
If “PAIR NO” is selected, the connection will be canceled.
2
Preset buttons
(1 through 6)
Setup Before Using
For BLUETOOTH compatible device without SSP
(Secure Simple Pairing)
2-2 Input the PIN code (“0000”) in a BLUETOOTH compatible
device.
Note
About BLUETOOTH
• The PIN code is fixed as “0000”.
3
If the pairing was successful, “CONNECTED” is displayed
for a few seconds. The head unit then returns to its
previous state.
BLUETOOTH is a wireless technology allowing communication
between a mobile device or personal computer over short distances.
This enables a hands-free call or data transmission between
BLUETOOTH compatible devices. BLUETOOTH transmission is
available in the unlicensed 2.4 GHz spectrum if the distance between
devices is within 10 meters. For details, refer to the BLUETOOTH
Home page (http://www.bluetooth.com).
Auto pairing with an iPod/iPhone
Notes
1
• Depending on the BLUETOOTH version, a BLUETOOTH compatible
device may not be able to communicate with this unit.
• Proper function of this unit with all BLUETOOTH compatible devices
is not guaranteed. For handling of the BT compatible device, consult
your ALPINE dealer or ALPINE website.
• Depending on the surroundings, BLUETOOTH wireless connection
may be unstable.
• When you place a call, or perform setup operations, be sure to stop your
car in a safe place.
• Depending on the connected BLUETOOTH compatible device(s), the
function may differ. Also refer to the Owner’s Manual of the connected
device(s).
• When you search for this unit using the BLUETOOTH compatible
phone, the unit name is displayed as “CDE-154Series”.
Before Using BLUETOOTH Function
When an iPod/iPhone is connected to the USB port, the unit will
automatically pair with it.
2
3
Make sure USB PAIR is set to ON. Refer to “Setting the Auto
Pairing with iPod/iPhone” on page 25.
Connect an iPod/iPhone to this unit’s USB port.
Turn the Rotary encoder to select “PAIR YES”, and then
press ENTER.*
If “PAIR NO” is selected, the connection will be canceled.
* Depending on the iOS version, you may need to turn on the
Bluetooth function manually on the iPod/iPhone side, then
perform this step.
4
If pairing is successful, “CONNECTED” is displayed for a
few seconds. The head unit then returns to its previous
state.
Notes
Before using the BLUETOOTH function, the following settings need to
be made.
Set BT IN to ON when you want to use Hands-Free phone
or BT Audio function. Refer to “Setting the BLUETOOTH
Connection (BT IN)” on page 25.
Note
• Before using BLUETOOTH function, it must be paired with this unit.
Refer to “How to connect to a BLUETOOTH compatible device
(Pairing)” on page 24.
24-EN
• If the device has been paired with this unit previously, it will not USB
Pair automatically.
• If the connection is unsuccessful, “FAILED” is displayed.
• After a successful pairing, the two devices should connect automatically
whenever the vehicle’s ignition is turned ON. If the auto reconnect fails,
try to connection manually.
• Set “VISIBLE M” to ON to enable this unit to be recognized by a
BLUETOOTH compatible device, refer to “Setting the Visible Mode” on
page 25.
Setting the Auto Pairing with iPod/iPhone
BLUETOOTH SETUP
The following steps 1 to 5 are common to the various BLUETOOTH
functions. For details, refer to each individual function.
By setting this item to ON, the unit will auto pair when an iPod/iPhone
is connected to this unit via the USB port.
Setting item: USB PAIR
Note
Setting contents:
OFF / ON (Initial setting)
• Set BT IN to ON, and then perform BLUETOOTH SETUP operation.
Refer to “Setting the BLUETOOTH Connection (BT IN)” on page 25.
1
2
OFF:
Turn off the auto pair function.
Press and hold AUDIOSETUP for at least 2 seconds to
activate the SETUP mode.
ON:
Auto pair when an iPod/iPhone is connected to this unit via the
USB port.
Turn the Rotary encoder to select “BLUETOOTH”, and then
press ENTER.
Note
• USB Auto-Pairing cannot take place if either device has been paired
previously. Make sure the device name of both has been deleted
from each device.
The BLUETOOTH setup mode is activated.
3
Turn the Rotary encoder to select the desired items, and
then press ENTER.
BLUETOOTH:
BT IN*1 USB PAIR PAIRED DEV VISIBLE M
CALL SOUND CALLER ID PB UPDATE*1 PB ORDER
AUTO ANS SPEAKER SL FW VERSION
FW UPDATE*1 BT IN
*1 The items are not displayed during a phone call.
4
5
Setting the BLUETOOTH Device
Select one of 5 connected BLUETOOTH compatible devices that you
previously registered.
Setting item: PAIRED DEV
1
Turn the Rotary encoder to change the settings.
Press and hold AUDIOSETUP for at least 2 seconds.
The SETUP mode is canceled.
Notes
• Press t to return to the previous mode.
• If no operation is performed for 60 seconds, the unit will return to
normal mode automatically.
Setting the BLUETOOTH Connection
(BT IN)
With BLUETOOTH technology, you can place a hands-free call by a
BLUETOOTH-equipped Smartphone.
Audio information of a BLUETOOTH compatible Smartphone, a
portable audio player, etc., is controllable/playable wirelessly from this
unit.
Setting item: BT IN
Setting contents:
OFF / ON (Initial setting)
OFF:
Hands-Free Phone function and BLUETOOTH Audio function are
not used.
ON:
Select when you want to pair your BLUETOOTH compatible phone
with this unit or use BLUETOOTH Audio function.
Note
• When BT IN is set to OFF, the indicators related to Hands-free phone
(C battery charge and i signal strength) will not be displayed.
2
Turn the Rotary encoder to select a BLUETOOTH
compatible device you want to use (you want to change
connection), and then press ENTER.
Turn the Rotary encoder to select “CONNECT” to connect
the selected device.
The connected device is marked with “l”. Select “DISCONNECT”
to disconnect this device. Select “CLEAR” when you want to clear
the device from the device list.
Notes
• If the connection is successfully changed, “CONNECTED” is displayed
for 2 seconds and the indicator lights up, then the display returns to
the SETUP screen.
• If a Smartphone is connected to this unit successfully, the C indicator
lights up to show the battery charge of the connected Smartphone. The
X indicator lights up when the battery charge is about 50%, the Z
indicator lights up when the battery charge is not enough, and it blinks
as a low level warning. The Z indicator goes out when the battery is
drained. At this time, the BLUETOOTH function is unavailable due to
the Smartphone powered off.
• Indicator i (Signal Strength):
The indicator will display the current signal strength of your service
provider. The I indicator blinks when the signal of the connected
Smartphone is very weak. The I indicator goes out when the
Smartphone is not in service area or receives no signal.
• Depending on the connected Smartphone, the C (battery charge),
and i (signal strength) indicators may not be displayed.
• A total of 5 devices can be registered. If a 6th device is registered, the
earliest registered device will be deleted automatically.
Setting the Visible Mode
You can set whether this unit can be recognized or not from a
BLUETOOTH compatible device. Normally set this to VISIBLE M ON.
Setting item: VISIBLE M
Setting contents:
OFF / ON (Initial setting)
OFF:
Disable recognition of this unit from the BLUETOOTH compatible
device.
25-EN
ON:
Enable recognition of this unit from the BLUETOOTH compatible
device.
Setting the Phone Book Update
You can update the phone book automatically or manually.
Setting the BLUETOOTH sound quality
Change these settings to improve the quality of the outgoing or
incoming call.
Setting item: CALL SOUND
Further setting items: SOURCE VOL / TYPE SET
Adjusting the volume (SOURCE VOL)
You can emphasize or weaken the volume level of the Phone call, the
ring tone and the microphone input to fit your own preferences.
Setting contents:
PHONE TALK:
−5 dB ~ +5 dB
RING TONE:
−5 dB ~ +5 dB
MIC GAIN:
−5 dB ~ +5 dB
Sound Auto setting (TYPE SET)
Depending on your calling environment, choose one of the settings
below which gives the best sound quality.
Setting contents:
TYPE1 (Initial setting) / TYPE2 / TYPE3 / TYPE4 / TYPE5
TYPE1:
Standard Mode (recommended)
TYPE2:
Enhances the noise reduction
TYPE3:
Enhances the echo-cancel
TYPE4:
Enhances both noise reduction and echo-cancel
TYPE5:
Weakens both noise reduction and echo-cancel
Setting item: PB UPDATE
Further Setting contents: AUTO/MANUAL
Setting the Phone Book Auto Update ON/OFF
(AUTO)
When you select AUTO ON in this step, whenever the vehicle’s ignition
is turned ON or after the phone is connected with this unit, the phone
book will be updated automatically.
Setting contents:
AUTO OFF / AUTO ON (Initial setting)
Note
• “UPDATING” will be displayed during the phone book update.
Setting the Phone Book Manual Update ON/OFF
(MANUAL)
When you select MANUAL YES in this step, the phone book will be
updated immediately regardless if the Auto update function is on or off.
Setting contents:
MANUAL NO (Initial setting) / MANUAL YES
Note
• “UPDATING” will be displayed during the phone book update.
Changing the Phone book List Order
The phone book is listed alphabetically by the first letter of FIRST or
LAST NAME.
Listing by FIRST NAME is the default but LAST NAME can be selected.
Setting item: PB ORDER
Setting contents:
FIRST NAME (Initial setting) / LAST NAME
Note
Note
• The functions below are designed to improve the sound quality of the
outgoing call.
Noise reduction: This function can reduce the road noise, but excessive
enhancement may affect the sound quality of the call.
Echo-cancel: This function can reduce the echo, but excessive
enhancement may affect the sound quality of the call.
• “WAITING” will be displayed while the Phone book order is switching.
You can quit the “WAITING” screen to perform other operations by
pressing t when the ordering is still in progress. At this time, the
phone book is not accessible. In addition, the ordering may affect the
playback of BT AUDIO.
Setting the caller information display
ON/OFF
You can choose whether to use this function according to the following
setting.
Setting the Received Calls automatically
(Auto Answer)
When a call is received, you can set whether to receive it automatically
or not.
Setting item: AUTO ANS
Setting item: CALLER ID
Setting contents:
OFF / ON (Initial setting)
If you want to keep the ID information of the caller from others, set this
item to OFF. Depending on the stored ID information, while you are
dialing a number, only the telephone number will be displayed; During a
call, “NO NAME” will be displayed; Or while a call is dialing in, only the
telephone number will be displayed.
Setting contents:
OFF (Initial setting) / ON
OFF:
When a call is received, it is not answered automatically. Press f
to receive the call.
ON:
When a call is received, it is answered automatically after about 5
seconds.
Note
• If the received call setting on the Smartphone is on, the call will be
answered automatically even though this setting is set to OFF.
26-EN
Selecting the output speaker
Choose the speaker in your vehicle from which you want to hear the call.
Answering a Call
Incoming calls are announced by the received call ring tone and a
displayed message (PHONE).
Setting item: SPEAKER SL
Press f or ENTER.
Setting contents:
ALL (Initial setting) / FRONT-L / FRONT-R / FRONT-LR
ALL:
The sound be output from all of speakers in car.
FRONT-L:
The sound only be output from the front left speaker.
FRONT-R:
The sound only be output from the front right speaker.
The call starts.
Notes
• When “AUTO ANS” is set to ON, you can receive a call automatically.
Refer to “Setting the Received Calls automatically (Auto Answer)” on
page 26.
• While calling, the source sound on the unit is muted. After calling,
playback will resume.
FRONT-LR:
The sound be output from the front left and front right speaker.
Hanging up the Telephone
Displaying the firmware version
Press f or t.
The call finishes.
The current firmware version will be displayed.
Calling
Setting item: FW VERSION
Updating the firmware
Future BLUETOOTH firmware updates may become available for
phone interoperability.
For information to update your BLUETOOTH firmware, please visit
your local Alpine website or choose your country from Alpine home
page (http://www.alpine-usa.com).
Call History is recorded for the last dialed/received/missed calls (20
records for each). There are various ways of making calls based on the
“Calling”. The following steps 1 to 5 are common to the various ways of
making these calls. For details, refer to each individual category for
making calls.
1
Press f.
The outgoing method list is displayed.
Setting item: FW UPDATE
Setting contents:
NO (Initial setting) / YES
2
Turn the Rotary encoder to select the outgoing mode.
Setting contents:
DIALED / RECEIVED / MISSED / PHONE BOOK
DIALED:
Dialed history
Hands-Free Phone Control
RECEIVED:
Received history
MISSED:
Missed incoming history
About the Hands-Free Phone
PHONE BOOK:
Smartphone phone book
Hands-free calls are possible when using a HSP (Head Set Profile) and
HFP (Hands-Free Profile) compatible Smartphone with this unit.
Notes
• Avoid performing a hands-free call in heavy traffic or on narrow or
winding streets.
• Close the windows while calling to reduce background noise.
• If both calling parties are using hands-free devices, or the call is made in
a noisy location, difficulty hearing the other person’s voice is normal.
• Depending on telephone line conditions or certain mobile devices used,
voices may sound unnatural.
• When using a microphone, speak as directly as you can into the
microphone to pick up the best sound quality.
• Certain Smartphone features are dependent on the capabilities and
settings of your service provider’s network. Additionally, certain features
may not be activated by your service provider, and/or the provider’s
network settings may limit the feature’s functionality.
Always contact your service provider about feature availability and
functionality.
All features, functionality, and other product specifications, as well as
the information contained in the Owner’s Manual are based upon the
latest available information and are believed to be accurate at the time
of printing.
Alpine reserves the right to change or modify any information or
specifications without notice or obligation.
3
Press ENTER.
The outgoing mode is activated, and each mode list is displayed.
Note
• It may take some time for the list to be displayed after connection. This
list may not always update, depending on the connected device.
4
Turn the Rotary encoder to select a name or a telephone
number from the list.
Note
• You can use Phone book alphabet search function to search a name or
number from Phone Book. For details, refer to “Phone book Alphabet
Search Function” on page 28.
5
Press ENTER.
The selected telephone number will be called.
If one name has several numbers registered in the telephone
book, press ENTER after selecting the name*, and then turn
the Rotary encoder to choose the desired number and press
ENTER, the telephone will be called.
* If the name cannot be recognized, “NO NAME” will be displayed.
27-EN
Notes
2
• Press t to return to the previous mode.
• If no operation is performed for 60 seconds, the unit will return to
normal mode automatically.
3
Redialing a Number In Outgoing History
Previously dialed telephone numbers (maximum number of call record
is 20) are stored in dialed calls history. You can redial a number by
searching from dialed calls history.
Setting item: DIALED
Dialing a Number In Incoming History
Telephone numbers from received calls (maximum number of call
record is 20) are stored in the Received List. You can redial these
numbers by searching here.
Setting item: RECEIVED
Dialing a Number In Incoming Missed Call
History
Telephone numbers for received calls (maximum number of call record
is 20) that are missed, are stored in the Missed List. You can redial these
numbers by searching here.
Setting item: MISSED
Dialing a Number In The Phone Book
Up to 1,000 names (at most 5 telephone numbers for each name) are
downloadable from a Smartphone. Dial a call by selecting a person from
the phone book list.
Setting item: PHONE BOOK
Notes
• The order of the list display depends on the setting of “PB ORDER”
(refer to “Changing the Phone book List Order” on page 26).
• If the call history or phone book of the Smartphone is added or deleted
while it is connected to the unit, the list displayed on the unit may not
be brought up to date. If it is not updated, you cannot correctly place a
call.
• You can display the information of a number stored in phone book by
pressing k. Each press changes the display as Name Telephone
label*/Telephone NO. Name
If the information cannot be obtained, “NO NAME”, “NO LABEL” or
“NO NUMBER” will be displayed.
* The telephone label of a number depends on the number information
stored in Phone book of the Smartphone, which includes 4
types-MOBILE, HOME, OFFICE and OTHER.
Phone book Alphabet Search Function
You can select the first three letters to search for a desired name in
phone book list by using the Phone book alphabet search function.
For example:
Searching a name “Michael James”
The following example explains how the search is performed.
Depending on the setting in PB ORDER (refer to “Changing the Phone
book List Order” on page 26), the phone book is listed in first name or
last name order. Please search for the first name or last name according
to the setting.
1
Press BAND/ABC SEARCH while in the phone book list, the
phone book alphabet search mode is activated.
The letter selection screen is displayed.
28-EN
4
Turn the Rotary encoder to select the first letter (e.g. M),
and then press .
Turn the Rotary encoder to select the second letter (e.g. I),
and then press .
Turn the Rotary encoder to select the third letter (e.g. C),
and then press ENTER.
The names stored in phone book which begin with “MIC” are
searched.
5
Turn the Rotary encoder to select the desired name (e.g.
Michael James), and then press ENTER to make the
call.
Notes
• The Alphabet Search Function is only applicable to English alphabet
characters.
• If the selected name has more than one number registered in the phone
book, you need to turn the Rotary encoder to select the desired
number, and then press ENTER.
• Press in step 3 or 4 to delete the current entry and return to the
previous step.
• You can search for a name by its first letter, first two letters or first three
letters. Press ENTER after entering the desired number of letters. A
list displays the names beginning with the entered letter(s).
Voice Control Operation
When a Smartphone equipped with voice recognition function is paired
with this unit, the Smartphone can be controlled by Voice Control via
this unit.
Press and hold VOICE CTRL. for at least 2 seconds to
activate the Voice Recognition mode.
After the Voice Recognition mode is activated and “SPEAK” is
displayed, you can make a phone call, play a song, etc., via this
unit by inputting voice control commands*.
* Please refer to your Smartphone manual for other voice control
commands.
Notes
• You can perform this operation only when a Voice recognition
compatible Smartphone is connected. If the Smartphone is not
compatible with the Voice recognition, “NO SUPPORT” is displayed for
2 seconds.
• The Voice recognition performance depends on the Smartphone and
mounting location of the microphone. Please pay attention when the
microphone is mounted.
• Voice recognition operation depends on the function of the Smartphone.
For details, refer to the Owner’s Manual of the Smartphone.
• If the person you are calling is not found, “NO CALL” is displayed for 2
seconds.
• Please obey all local traffic laws while using this function.
Call waiting function
If a second call is received during a current call, you can have the first
caller wait momentarily while you take the second call. When you are
finished with one call, you can switch to the other one.
If a second call is received during the current call (call1),
the information of second caller (call2) is displayed
instead of the current caller’s name. Press 2, the call
waiting mode is activated.
In this case, call1 is on hold, while you take call2.
Notes
• In the call waiting mode, press 1 or 2 to switch between the current call
and the person on hold.
• In the call waiting mode, press and hold 1 or 2 for at least 2 seconds to
hang up call1 or call2, and the other call will be answered
automatically. (The action depends on the paired device.)
• In the call waiting mode, you can press k to change the display
between waiting number (1or 2) and caller name.
Preset a number in the Phone Menu
(Shortcut dial)
Assign numbers that you dial frequently to presets for quick recall. You
can assign up to six frequently called phone numbers to number presets.
Select a number you want to preset from the Phone Menu
list (PHONE BOOK, DIALED, etc.). Press and hold any one of
the preset buttons (1 through 6) as the one that you wish
to store the number for at least 2 seconds.
The phone number you selected is stored in presets.
Notes
• If the name has several numbers registered in the phone book, press
ENTER after selecting the name. Turn the Rotary encoder to
choose the desired number. Press and hold any one of the preset
buttons (1 through 6) for at least 2 seconds. The selected number is
stored as a preset number.
• A total of 30 phone numbers can be stored in the preset memory ( 6
numbers for each Smartphone in the paired device list). If a
Smartphone is deleted from the paired device list, the stored preset
numbers of this Smartphone are deleted, even when it is paired again.
• If you store a phone number in a preset with a previously stored
number, the current number will be cleared and replaced by the new
one.
Dialing the preset number
1
Press any one of the preset buttons (1 through 6) that has
had a number stored in the phone mode.
The information (name/number) stored in the preset station is
displayed.
2
Press ENTER or f.
The stored preset number is dialed directly.
Adjusting the volume when receiving a
Call
While calling, you can adjust the volume.
Turn the Rotary encoder to adjust the volume.
Note
• You may need to increase volume from your regular audio listening
source level. However, increasing the volume excessively may result in
feedback. Feedback is directly related to the volume. Turning down the
volume as low as acceptable, will reduce it. Positioning the microphone
in a direction away from the main car speakers (e.g. clipped on sun
visor) may also reduce feedback at high volume.
Muting the microphone input quickly
(Voice Mute)
During a call, activating the Voice Mute function will instantly mute the
microphone input. Your voice will not be heard by the caller.
During a call, press to mute the microphone input.
Press again to bring the microphone input back to its
previous volume level.
Call Switching Operation
During a call, this function allows you to initiate the transfer of the
audio between the Smartphone and the speakers in the car.
During a call, press BAND or press and hold for at
least 2 seconds to switch the call sound between the unit
and Smartphone.
Note
• Depending on the Smartphone, this operation may not be possible.
BLUETOOTH Audio Operation
With a Bluetooth compatible Smartphone or music player, it’s possible to
play and control music playback wirelessly*.
* To play back audio, a Smartphone or a portable player conforming to
A2DP (Advanced Audio Distribution Profile) and AVRCP (Audio/
Video Remote Control Profile) is required.
Not all functions work with all devices.
Notes
• Set BT IN to ON when you want to use BLUETOOTH Audio function.
Refer to “Setting the BLUETOOTH Connection (BT IN)” on page 25.
• During a call, sound on the BLUETOOTH audio source is muted.
• If you operate the Hands-free phone (e.g. searching in the phone book)
while using the BLUETOOTH Audio function, BLUETOOTH Audio
playback may be affected.
Recalling the BLUETOOTH Audio Mode
Press V/SOURCE to select the BT AUDIO mode.
Selecting the desired Song
Press or to select the desired Song.
Pressing and holding or will fast backward/fast
forward track continuously.
Note
• The action depends on the paired device.
Pausing
Press .
A playback stops. Pressing again will resume a playback.
Selecting the desired Group
Press or to select the desired Group.
Note
• This function is not available on all paired devices.
29-EN
Searching for a desired song
Flash Memory (optional)
Artist name, album name, etc., may be searched and displayed during
playback or pause.
1
2
3
4
/SOURCE
Press ENTER to activate the search mode.
Turn the Rotary encoder to select the desired Group
(Folder), and then press ENTER.
Turn the Rotary encoder to select the desired album,
folder, etc., within the selected Group (Folder), and then
press ENTER.
/ II
Repeat step 3 if necessary until the desired song is found.
Notes
• Search mode may differ depending on the paired device.
• The pause mode may be canceled after the search.
• This function may not available depending on the paired device.
Playback MP3/WMA Files from Flash Memory
(optional)
If a Flash Memory device is connected to the unit, MP3/WMA files can
be searched and played back.
1
2
Press VSOURCE to select the USB AUDIO mode.
To pause playback, press .
Pressing again will resume playback.
Notes
• This unit plays back files in Flash Memory with the same controls and
modes used for playback of CDs containing MP3/WMA. For details,
refer to “CD/MP3/WMA” on page 12.
• The root folder is displayed as “\ROOT”.
• Before disconnecting Flash Memory, be sure to change to another source
or set to pause.
• The playback time may not be correctly displayed when a VBR
(Variable Bit Rate) recorded file is played back.
About MP3/WMA File of Flash Memory
Playing back MP3/WMA
MP3/WMA files are prepared, then stored to a Flash Memory Device.
This unit can recognize at most 255 folders and 255 files per folder
stored in Flash Memory. Playback may not be performed if a Flash
Memory Device exceeds the limitations described above.
Do not make a file’s playback time more than 1 hour.
Media supported
This device can play back files stored on Flash Memory devices
designed for USB connection.
Corresponding File Systems
This device supports FAT 12/16/32 for Flash Memory devices.
30-EN
iPod/iPhone (optional)
• This unit does not support video playback from iPod/iPhone, even
using a video-compatible cable.
Setting the iPod Control
/SOURCE
Rotary encoder
/ENTER/OPTION
When an iPod/iPhone is connected, operate it from its own controls or
from the head unit.
1
Press and hold /ENTER/OPTION for at least 2 seconds
during iPod source.
The Option menu for iPod mode is activated.
2
/ II
BAND
ABC SEARCH
5
4
Preset buttons
(1 through 6)
The iPod control mode will be switched between iPod MODE
and HU MODE.
HU (HEAD UNIT) MODE:
Operate the iPod/iPhone via this unit.
This mode allows you to use M.I.X. play, repeat and music search in
an iPod/iPhone from the head unit.
Note
Connecting an iPod/iPhone
An iPod/iPhone can be connected to this unit by using the Interface
cable for iPod (included with iPod/iPhone). When an iPod/iPhone is
connected to this unit, you can choose to control the iPod/iPhone using
its own controls or by the head unit controls. For details, refer to “Setting
the iPod Control” on page 31.
Notes
• Internet and telephone functions of the iPod touch or iPhone, etc., can
also be used when connecting to this unit. However, using these
functions will stop or pause the currently playing songs. At this time do
not operate the unit to avoid a malfunction.
• If you connect an iPhone to this unit, it can be used as an iPod. If you
use iPhone as a hands-free phone, use the unit in which the
BLUETOOTH function is built.
• Do not leave an iPod/iPhone in a car, as its mechanism is sensitive to
high temperature and humidity conditions, and damage may result.
About iPod/iPhone models usable with this unit
• Confirmed devices regarding Made for iPod. Correct function of
earlier versions cannot be guaranteed.
iPod nano (7th generation): Ver.1.0.2
iPod touch (5th generation): Ver.6.1.3
iPod touch (4th generation): Ver.6.1.3
iPod nano (6th generation): Ver.1.2
iPod touch (3rd generation): Ver.5.1.1
iPod nano (5th generation): Ver.1.0.2
iPod classic (160 GB) (Late 2009): Ver.2.0.4
iPod touch (2nd generation): Ver.4.2.1
iPod nano (4th generation): Ver.1.0.4
iPod classic (120 GB): Ver.2.0.1
iPod touch (1st generation): Ver.3.1.3
iPod nano (3rd generation): Ver.1.1.3
iPod classic (80 GB, 160 GB): Ver.1.1.2
• Confirmed devices regarding Made for iPhone. Correct function of
earlier versions cannot be guaranteed.
iPhone 5: Ver.6.1.3
iPhone 4S: Ver.6.1.3
iPhone 4: Ver.6.1.3
iPhone 3GS: Ver.6.1.3
iPhone 3G: Ver.4.2.1
iPhone: Ver.3.1.3
• For clarity in identifying your model of iPod, please see Apple’s own
document “Identifying iPod models” at
http://support.apple.com/kb/HT1353
Turn the Rotary encoder to select APP DIRECT, and then
press ENTER.
• In HU MODE, if you operate from an iPod/iPhone, the head unit’s
display and operations may not correspond with those of the iPod/
iPhone.
iPod MODE:
Operate the iPod/iPhone using its own controls. When iPod MODE
is selected, some functions will not be operable via the head unit.
Notes
• During HU MODE, you can switch to iPod MODE directly by pressing
BAND.
• Once the control mode is changed, the iPod/iPhone is paused. Press
to continue.
Playback
1
2
Press VSOURCE to switch to the iPod source.
Press or to select the desired song.
Pressing and holding or will fast backward/fast
forward the current track.
3
To pause playback, press .
Pressing again will resume playback.
Notes
• A song playing on the iPod/iPhone while it is connected to this unit will
continue to play from where it was paused after disconnection.
• If you listen to an episode from a selected Podcast or Audiobook, the
episode can be changed by pressing or .
• An episode may have several chapters. The chapter can be changed by
pressing or .
31-EN
Searching for a desired Song
An iPod/iPhone can contain hundreds of songs. Use one of the search
modes listed below, that you deem most effective in finding a desired
song.
Each music category has its own individual hierarchy. Use the Playlist/
Artist/Album/Song/Podcast/Genre/Composer/Audiobook/Genius Mix
List search mode to narrow searches based on the table below.
Hierarchy 1
Hierarchy 2
Hierarchy 3
Hierarchy 4
Playlist
Song
—
—
Artist*
Album*
Song
—
Album*
Song
—
—
Song
—
—
—
Podcast
Episode
—
—
Genre*
Artist*
Album*
Song
Composer*
Album*
Song
—
Audiobook
—
—
—
Genius Mix List
—
—
—
For example:
Searching by Artist name
The following example explains how an ARTIST search is performed.
Another search mode can be used for the same operation, although the
hierarchy differs.
1
2
Press ENTER to activate the search selection mode.
Turn the Rotary encoder to select the ARTIST search
mode, and then press ENTER.
SHUFFLEALL*1 PLAYLIST ARTIST ALBUM SONG
PODCAST GENRE COMPOSER AUDIOBOOK
GENIUS MIX*2/*3 SHUFFLEALL
*1 Refer to “Random Play Shuffle (M.I.X.)” on page 33.
*2 Depending on the connected iPod/iPhone, Genius Mix function
may not be supported.
*3 When an iPod/iPhone with Genius Mix List created by iTunes is
connected to this unit, GENIUS MIX search mode can be used
to search a Genius Mix List.
• When search is made during M.I.X. play, the M.I.X. play mode will be
canceled.
• When search is made during song downloading on iPhone,
“UPDATING” will be displayed for a few second and the search mode
will be canceled.
• “NO SONG” will be displayed if there are no songs in the selected
playlist in the PLAYLIST search mode.
• “NO PODCAST” will be displayed if there is no podcast data in the
iPod/iPhone in the PODCAST search mode.
• “NO AUDIOBOOK” will be displayed if there is no audiobook data in
the iPod/iPhone in AUDIOBOOK search mode.
• “NO GENIUS” will be displayed if there is no genius mix list data in the
GENIUS MIX search mode.
• If “iPod name” stored in the iPod/iPhone is selected in the Playlist
search mode, and ENTER is pressed, you can search for all songs in
the iPod/iPhone. Also, if you press and hold ENTER for at least 2
seconds, all songs in the iPod/iPhone are played back.
• Depending on the iPod/iPhone, podcast search is not supported.
• Press any of the preset buttons (1 through 6) during a search to skip
over a calculated percentage of songs. For details, refer to “Direct Search
Function” on page 32.
• During search mode, a search can be made quickly by Alphabet search
function to find the desired artist or song, etc. For details, refer to
“Alphabet Search Function” on page 33.
Direct Search Function
The unit’s direct search function can be used to search for an album,
song, etc., more efficiently. In PLAYLIST/ARTIST/ALBUM/SONG/
PODCAST/GENRE/COMPOSER/AUDIOBOOK mode, you can
quickly target any song.
In the search mode, press any one of the preset buttons (1
through 6) to quickly skip over a designated percent of
your song content.
Song search example:
If there are 100 songs in your iPod/iPhone, they are divided into 6
groups using percentages (shown below). These groups are
assigned to the preset buttons (1 through 6).
Example 1:
Suppose the song you are searching for is located at around the
middle (50%) of your library: press button 4 to jump to the 50th
song and turn the Rotary encoder to find the desired song.
Note
• The display of search mode list varies depending on the setting of iPod
LIST. For details, refer to “iPod/iPhone Search Mode Setting” on
page 23.
3
4
5
Example 2:
Suppose the song you are searching for is located near the end
(83%) of your library: press button 6 to jump to the 83rd song
and turn the Rotary encoder to find the desired song.
Turn the Rotary encoder to select the desired Artist, and
then press ENTER.
All 100 songs (100%)
Turn the Rotary encoder to select the desired Album, and
then press ENTER.
Turn the Rotary encoder to select the desired Song, and
then press ENTER.
0%
17%
33%
50%
67%
83%
Preset
buttons
1
2
3
4
5
6
Songs
1st
song
17th
song
33rd
song
50th
song
67th
song
83rd
song
Notes
• This function is unavailable when iPod MODE is selected in “Setting
the iPod Control” (refer to “Setting the iPod Control” on page 31). And
“iPod CONTROL” will be displayed.
• After pressing and holding ENTER for at least 2 seconds while in
each hierarchy (except SONG, AUDIOBOOK and GENIUS MIX List
hierarchy), all songs of the selected hierarchy are played back.
• Playback [ALL] is only applicable for those categories marked with“*”,
press and hold ENTER for at least 2 seconds to play back all songs
in the iPod/iPhone or selected search mode.
• If no operation is performed for 60 seconds, the search mode is canceled.
• In the search mode, pressing t will return to the previous mode.
32-EN
Notes
• This function is inactive during Alphabet Search mode.
• This function is also applicable to CD/MP3/WMA search.
Select Playlist/Artist/Album/Genre/
Composer/Episode
Random Play Shuffle (M.I.X.)
Playlist/Artist/Album/Genre/Composer/Episode can be easily changed.
For example, if you listen to a song from a selected album, the album can
be changed.
Shuffle Albums:
The songs on each album are played back in the order they were
recorded. Upon completion of all the songs on the album, the next
album is selected randomly. This continues until all albums have
been played.
Press or to select the desired Playlist/Artist/Album/
Genre/Composer/Episode.
Notes
• If the song search mode was used to select a song, this function is
inactive.
• If an album is selected during an artist search, other albums by that
artist are searchable.
• This function is inactive during shuffle (M.I.X.) playback.
The Shuffle function of the iPod/iPhone is displayed as s on this unit.
Shuffle Songs:
Song shuffle randomly plays back songs within a selected category
(playlist, album, etc.). The songs within the category are played just
once until all songs have been played.
1
The songs are played back in random sequence.
MIX ALBUM*1 MIX SONG*2 MIX OFF MIX ALBUM
*1 Shuffle Albums.
*2 Shuffle Songs.
Alphabet Search Function
Quickly find an artist, album, etc. by the first letter in its title or name.
1
2
A list which begins with the selected initial letter is searched.
3
2
Turn the Rotary encoder to select the desired item (which
begins with initial letter “M”), and then press ENTER.
The item is selected.
• If a song is selected in the album search mode before selecting M.I.X.
play, the songs will not play back randomly even when Shuffle Albums
is selected.
Shuffle ALL:
Shuffle ALL plays all songs in the iPod/iPhone randomly. Any one
song does not play back again until all songs have been played back.
1
2
Notes
• The Alphabet Search Function is only applicable to English alphabetic
characters.
• While in Alphabet search mode, pressing t will return to the previous
mode.
• If the PLAYLIST search mode is used to search for a song, the Alphabet
search function is inactive in the song search hierarchy.
• This function is unavailable when GENIUS MIX is selected.
Search Position Memory
During iPod/iPhone playback, you can quickly return to the
last-selected hierarchy level in the search mode.
Press t.
The hierarchy you selected last in the search mode is displayed.
To cancel M.I.X. play, select (MIX OFF) with the above
procedure.
Note
During search mode, press BAND/ABC SEARCH to activate
Alphabet Search function.
Turn the Rotary encoder to select the desired initial letter
(e.g. select “M”), and then press ENTER.
Press x 5.
Press ENTER to activate the search selection mode.
Turn the Rotary encoder to select SHUFFLEALL, and then
press ENTER.
To cancel M.I.X. play, press x 5 to select OFF.
Notes
• If Shuffle ALL is selected, the selected songs being played back in the
search mode are canceled.
• This function is unavailable when iPod MODE is selected in “Setting
the iPod Control” (refer to “Setting the iPod Control” on page 31).
Repeat Play
Only Repeat One is available for the iPod/iPhone.
Repeat One:
A single song is repeatedly played back.
1
Press z 4.
The song is played back repeatedly.
REPEAT ONE* REPEAT OFF REPEAT ONE
Note
• This function is unavailable when iPod MODE is selected in “Setting
the iPod Control” (refer to “Setting the iPod Control” on page 31).
* Repeat One.
2
To cancel repeat play, select (REPEAT OFF) with the above
procedure.
Note
• Depending on the connected iPod, track up/down may be not available
during Repeat play.
33-EN
Pandora® internet radio
(Optional)
Displaying the Text
You can display the tag information of a song in the iPod/iPhone.
Press k.
Each press changes the display.
Note
• When the TEXTSCROLL is set to MANUAL, press and hold k for at
least 2 seconds, the current text will be scrolled one time.
TRACK NO./ELAPSED TIME ARTIST NAME*1/SONG TITLE*1
ALBUM NAME*1/SONG TITLE*1 TRACK NO./CLOCK
SPECTRUM ANALYZER*2 TRACK NO./ELAPSED TIME
/SOURCE
Rotary encoder
/ENTER
*1 TAG information
“ARTIST”/“ALBUM”/“SONG” is displayed if there is no tag
information.
*2 Displays various patterns according to setting. For details, refer
to “Setting the Spectrum analyzer” on page 22.
/ II
Notes
• The maximum number of characters for the head unit is 70 (70 byte).
• Some characters may not be correctly displayed.
3
4
Preset buttons
(1 through 6)
Pandora® internet radio is your own FREE personalized radio now
available to stream music on your Smartphone (which runs Android OS
or iOS).
Just start with the name of one of your favorite artists, songs or classical
composers and Pandora® will create a “station” that plays their music
and more music like it.
The unit enables you to interact with your Pandora® account by
connecting a Smartphone that has the latest version of the Pandora®
application installed.
Notes
• Some Pandora® application functions are not available when using this
unit.
• Pandora® is also controllable from an iPod touch with Wi-Fi
connection.
• Pandora® is available on iOS and Android OS with this unit.
• Before this operation, set ALPINE APP to USB or BT depending on the
connected Smartphone. For details, refer to “Application Setting (APP)”
on page 23.
Listening to Pandora®
1
2
3
Connect a Smartphone with the latest version of
Pandora® installed.
Press VSOURCE to switch to the PANDORA mode.
To pause playback, press .
Pressing again will resume playback.
4
To skip to the next song, press .
Notes
• The operation to replay a previous song is not available.
• Pandora® limits the number of skips allowed on their service. If you
attempt to skip songs beyond the limit, “SKIP LIMIT” is displayed.
• The unit remembers the source just before turning off the power. If
Pandora® is the last SOURCE to be played, it will appear as the
SOURCE the next time the unit is power up even if the app is not
launched on your iPhone.
• Pandora® audio could drop out in areas with poor phone coverage.
• The display content varies when ads are received.
• The playback time may not be correctly displayed.
34-EN
“Thumbs” Feedback
QuickMix
You can personalize your stations with “THUMBS UP” or “THUMBS
DOWN” feedback, which the system takes into account for future music
selections.
Use QuickMix to create a playlist based on two or more of your
Pandora® stations. Edit your QuickMix station selections on the
Pandora® Compatible Application for iPhone when it is not connected
to this unit.
During playback, press u or d for thumbs up or thumbs
down.
u:
The “u” icon appears in the display. Pandora® will add
similar music to your station.
d:
The “d” icon is displayed. Pandora® will ban that song
from your station, and the current song is skipped. If the
number of skips allowed has reached its limit, the current
song continues to play back.
1
2
3
• The songs from the created stations are played back in random
sequence.
• Select another station during search mode to cancel QuickMix.
• During search list mode, the x icon will be displayed when the
current station belongs to QUICKMIX.
Searching for a Desired Station
1
2
Press ENTER to activate the Search mode.
Turn the Rotary encoder to select “A-Z”, and then press
ENTER.
The “A-Z” search mode is activated and the station names are
listed alphabetically.
3
Turn the Rotary encoder to select the desired station, and
then press ENTER.
Pandora® will play that station.
Search by Date Added:
1
2
Press ENTER to activate the Search mode.
Press ENTER while selecting “QUICKMIX”.
Notes
• In some situations, “THUMBS” feedback may not be available.
Alphabet Search:
Turn the Rotary encoder to select “A-Z” or “BY DATE”, and
then press ENTER.
The “A-Z” or “BY DATE” search mode is activated and the station
name is displayed.
Note
You can display your station list and select stations directly from this
unit.
Press ENTER to activate the Search mode.
Bookmarking a Desired Song or Artist
The currently playing track or artist can be bookmarked and saved to
your Pandora® account.
1
During playback, press 3 b (Bookmarks).
The Pandora® Bookmark screen is displayed.
2
Turn the Rotary encoder to select “TRACK (Bookmark)” or
“ARTIST (Bookmark)”, and then press ENTER.
The current track or artist is bookmarked. “BOOKMARK TRACK”
or “BOOKMARK ARTIST” is displayed.
Notes
• Your bookmarks can be viewed on your “Profile” page at
www.pandora.com.
• In some situations, bookmarks may not be available.
• When Bookmark operation is failed, BOOKMARK N/A will be
displayed.
Turn the Rotary encoder to select “BY DATE”, and then
press ENTER.
The “BY DATE” search mode is activated and the station names
are listed by the date they were added to the account.
3
Turn the Rotary encoder to select the desired station, and
then press ENTER.
Pandora® will play that station.
Notes
• The shared station is marked with “*” in search list.
• If any one of the preset buttons (1 through 6) is pressed in the
search mode, a search can be made quickly by skipping the specified
number of channels. For details, refer to “Direct Search Function” on
page 32.
35-EN
Creating a New Station
SiriusXM Satellite Radio
Operation
Based on currently playing track or artist, you can create a new station
and save to your Pandora® account.
1
During playback, press n 4 (New Station).
The Pandora® New Station screen is displayed.
2
/SOURCE
Rotary encoder
/ENTER/OPTION
AUDIO/SETUP
Turn the Rotary encoder to select “TRACK” or “ARTIST”,
and then press ENTER.
A “NEW TRACK” or “NEW ARTIST” pop-up screen.
A New Station based on current track or artist is created.
Notes
• Your New Station can be viewed on your “Profile” page at
www.pandora.com.
• In some situations, creating a new station function may not be
available.
• If this operation fails, N/A will be displayed.
• When the Smartphone is not connected to this unit, you can create
personalized Pandora® stations using the Pandora® Application on
your Smartphone. You can also create stations on the web at
www.pandora.com.
/ II
BAND
/Tag
Preset buttons
(1 through 6)
SiriusXM Tuner operation:
When a SiriusXM Tuner is connected to this unit, the following
operations may be performed.
Search Position Memory
During playback, you can quickly return to the last-selected hierarchy
level in the search mode.
Press t.
The hierarchy you selected last in the search mode is displayed.
Changing the Display
Press k.
Receiving Channels with the SiriusXM Tuner
About SiriusXM Satellite Radio
Everything worth listening to is on SiriusXM. Get over 130 channels,
including the most commercial-free music, plus the best sports, news,
talk and entertainment. A SiriusXM Tuner and Subscription are required.
For more information, visit www.siriusxm.com/activatenow, or call
1-866-635-2349.
To activate SiriusXM Canada service go www.xmradio.ca and click on
“ACTIVATE RADIO” in the top right corner, or call 1-877-438-9677.
Note
• The SiriusXM Satellite Radio controls on this unit are available only
when a SiriusXM Tuner is connected.
Station Name*1
Artist Name*1
Elapsed Time
Song Title*1
2
Album Name*1
*1
Song Title
1
Clock
Press or to select the desired channel.
Holding down or will rapidly browse through the
channels.
Alternatively, you can enter the number of the desired channel
using the numeric keypad on an optional remote control.
Station Name*1
SPECTRUM ANALYZER*2
Press VSOURCE to activate the Satellite Radio
(SIRIUSXM) mode.
Elapsed Time
SiriusXM Setting
*1 TAG information
If there is no text information, nothing will be displayed.
*2 Displays various patterns according to setting. For details, refer
to “Setting the Spectrum analyzer” on page 22.
Note
The following steps 1 to 5 are common to the various SiriusXM
functions. For details, refer to each individual function.
1
• Some characters may not be correctly displayed.
2
Press and hold AUDIOSETUP for at least 2 seconds to
activate the SETUP mode.
Turn the Rotary encoder to select “SIRIUSXM”, and then
press ENTER.
The SiriusXM setup mode is activated.
36-EN
3
Turn the Rotary encoder to select the desired items and
then press ENTER.
SiriusXM:
ALERTSETUP GAME ALERT P-LOCK SIGNAL IND
TUNE START* ALERTSETUP
Setting the Favorite Sports Team Alerts
This menu option allows you to select your favorite teams, organized by
leagues, so that you will be alerted later when your favorite teams are
playing on other channels.
* Displayed only when the SiriusXM Tuner-SXV200 is connected.
4
5
Setting item: GAME ALERT
Turn the Rotary encoder to change the settings.
After selecting GAME ALERT, a sports league list will be displayed.
1 Turn the Rotary encoder to select the desired league, and
then press ENTER.
2 Turn the Rotary encoder to select a team you want to store,
and then press ENTER.
“TEAM SAVED” and “XX U(sed)/YY E(mpty)” are displayed.
XX is the total number of Artist/Song/Game alert items stored
in memory, and YY is the total number of memory slots still
available for storage.
Note
• Select “NONE” on the team list if you do not want to store in
memory.
Press and hold AUDIOSETUP for at least 2 seconds.
The SETUP mode is canceled.
Notes
• Press r to return to the previous mode.
• If no operation is performed for 60 seconds, the unit will return to
normal mode automatically.
Managing Artist and Song Alerts
The following operations can be performed to change the Alert settings.
The Artist and Song Alerts feature allows you to mark Artists and Songs
from the current channel and then the unit alerts you later when the
marked Artists or Songs are playing on other channels.
Setting item: ALERTSETUP
Setting contents:
ALERT LIST / ALERT / A S ALERT / DELETE ALL
ALERT LIST
This menu option allows you to enable the Artist/Song alert for
individual Artist/Songs (ALERT ON or OFF) or to delete individual
stored Artist/Song alerts (DELETE).
1 Turn the Rotary encoder to select ALERT LIST, and then press
ENTER.
2 Turn the Rotary encoder to select a stored Artist or Song,
and then press ENTER.
3 Turn the Rotary encoder to ALERT to enable (ALERT ON) or
disable (ALERT OFF) the alert for the selected Artist/Song or
turn the Rotary encoder to select DELETE to delete the
selected Artist/Song from memory.
ALERT
This menu option allows you to temporarily disable the Artist/
Song Alerts for all Artists/Songs. When the Alerts are re-enabled,
individual Artist/Song Alert disabled in the ALERT LIST menu
setting remain disabled.
Turn the Rotary encoder to select ALERT ON or OFF, and
then press ENTER.
If ON is set, the alert for all stored Artists/Songs is enabled.
If OFF is set, the alerts for all stored Artists/Songs are disabled.
A S ALERT
This menu option allows you to enable the alerts of all sources.
Turn the Rotary encoder to select ON or OFF, and then press
ENTER.
If ON is set, the alert of all source is enabled.
If OFF is set, only the alert of SIRIUSXM source is enabled.
DELETE ALL
This operation will delete all alerts (artists, songs and team) stored
in memory.
After selecting this item,
Turn the Rotary encoder to select DELETE ALL YES, and then
press ENTER.
Setting the Parental Control
You can lock out channels with passcode protection. Channels that are
locked cannot be accessed without entering the passcode. You can
unlock a channel or change the passcode using this menu option.
Setting item: P-LOCK
Setting contents:
CLEAR ALL / LOCKED CH / EDIT CODE
How to input passcode?
1
2
After select P-LOCK, a passcode input screen will be
displayed.
Input the passcode using the Rotary encoder.
The initial default 4-digit passcode is set to 0000.
The passcode is entered one digit at a time with the Rotary
encoder.
For example, by turning to clockwise 2 steps, the number 1 is
selected.
After entering the digit, it is displayed as “l” (asterisk).
3
4
Press , and then input the next digit of the passcode
as described in step 2.
Repeat steps 2 to 3 until the 4 digits of the passcode are
entered, and then press ENTER.
After the correct passcode is entered, the LOCKED CH/CLEAR
ALL/EDIT CODE items can be adjusted.
CLEAR ALL:
Unlock all locked channels.
Turn the Rotary encoder to select CLEAR ALL YES, and then
press ENTER.
LOCKED CH:
After selecting this item, turn the Rotary encoder to select a
channel from channel list, press ENTER to select to lock or
unlock the channel. Locked channels cannot be tuned without
entering the passcode.
The locked channel will be displayed with “L” before channel No.
EDIT CODE:
Change the passcode.
1 Input the old passcode as steps 1 to 4 in “How to input
passcode?”.
After the old passcode is entered, the new passcode input
screen will be displayed.
37-EN
2 Input the new passcode as steps 1 to 4 in “How to input
passcode?”.
A confirm screen (CONFIRM) will be displayed and the new
passcode must be entered again for confirmation.
When the passcode is changed successfully, the unit will
display CODE SAVED.
Note
• Keep a note of the numbers somewhere safe in case you should
forget it.
Confirming the strength of the SiriusXM
signal
Storing Channel Presets
1
There are 3 Satellite Radio Preset bands.
Each press of BAND changes the band: SXM1 SXM2 SXM3
SXM1
2
You can check the signal strength through this setting item.
SIGNAL IND:
This menu item displays the SiriusXM signal strength as STRONG,
GOOD, WEAK or NO SIGNAL.
Note
• If the Signal Indicator reports Weak or No Signal and your vehicle is
parked outside with no obstructions to the southern sky, then your
SiriusXM antenna may not be properly installed or may have become
damaged.
Setting Tune Start
Tuning to a Preset that is a music channel will start a song from the
beginning.
3
Repeat the procedure to store up to 5 other channels onto
the same band.
Notes
• A total of 18 channels can be stored in the preset memory, 6 Channels
for each band (SXM1, SXM2 and SXM3).
• If you store a new channel into a preset which already has a channel
assigned, the current channel will be cleared and replaced with the new
one.
Tuning Channels using Presets
1
Setting item: TUNE START
Setting contents:
OFF / ON (Initial setting)
Tune to the desired channel, and then press and hold (for
at least 2 seconds) one of the preset buttons (1 through 6)
to store the channel.
The display then shows the stored Band and preset number (for
example, SXM1-3 is shown when preset 3 of BAND1 is selected).
Setting item: SIGNAL IND
Setting content:
SIGNAL IND
Press BAND to select the desired band you want to store
the preset in.
2
Press BAND to select the desired band of Presets you wish
to access.
Press the preset buttons (1 through 6) that has your
desired Satellite Radio channel stored in memory.
OFF:
When set to OFF, Tune Start mode is unavailable.
ON:
When ON, selecting a preset station will automatically reset the
currently playing song from its beginning. Pressing r will return
to live satellite radio.
Note
• Displayed only when SiriusXM Tuner-SXV200 is connected.
Tune Scan Function
While listening to SiriusXM Satellite Radio, you can scan through all the
songs you missed from your current band of preset channels.
1
Checking the SiriusXM Radio ID Number
To subscribe to the SiriusXM Satellite Radio service, it is necessary to
locate and identify the Radio ID of your SiriusXM Tuner. The Radio ID
contains 8 characters and can be found on the bottom of your SiriusXM
Tuner or can be displayed on when selecting Channel 0 by following the
steps below:
1
While in the Satellite Radio Mode, press or to
select channel “0”.
The unit displays “RADIO ID” and ID number at the same time.
Note
• The Radio ID does not include the letters I, O, S or F.
2
To cancel the ID number display, select a channel other
than “0”.
38-EN
Press and hold /ENTER/OPTION for at least 2 seconds
when you want to scan the preset music.
The Option mode is activated.
2
Turn the Rotary encoder to select TUNE SCAN, and then
press /ENTER.
The “
” indicator lights up during TUNE SCAN mode.
Press /ENTER during scan playback, tune scan mode will be
canceled and the selected track will be played back normally, at
the same time the “
” indicator disappears.
Press r during scan playback to cancel Tune Scan mode. The
tuner returns to the channel before Tune Scan was initiated and
“SCAN STOP” will be displayed.
Notes
• This function is available when SiriusXM SXV200 Vehicle Tuner is
connected.
• If no operation is performed during the scanning process, when
scanning finishes, the next mode depends on the SiriusXM Tuner.
• The SiriusXM Tune scans through the songs from the preset music
channels on the current band only, scanning from oldest to newest.
Tune Start Function
Receiving and Tuning to an Alert
Use TUNE START to play music content from its beginning on
programmed preset stations. The user can, therefore, enjoy the full track
(i.e. song) rather than hearing what's left from its current live playback
position. TUNE START can be turned OFF. For details, refer to “Setting
Tune Start” on page 38.
Whenever a stored sports team, artist, or song is playing on another
channel, an interruption ALERT appears on the unit display. To tune to
the game, artist or song identified by the alert, follow the steps below:
1
Note
• Preset stations that play other than music-type content will start playing
the channel from the current live play point when selected.
2
Turn the Rotary encoder to select the desired game, artist
or song from the list of active alerts.
Press ENTER.
Notes
Storing the desired Artist and Song Alerts
While listening to SiriusXM Satellite Radio, you can be alerted when
your favorite songs or artists are playing on other channels. An
interruption ALERT will be displayed when a matching artist or song is
found on another channel. For receiving interruption ALERT
information, refer to “Receiving and Tuning to an Alert” on page 39.
1
Press and hold ENTER/OPTION for at least 2 seconds
when a Song or the song of an Artist you want to store is
playing.
The Option mode is activated.
2
3
Turn the Rotary encoder to select ALERT MEMO, and then
press ENTER.
Turn the Rotary encoder to choose SAVE ART? or SAVE
SNG? (when available), and then press ENTER.
• If no operation is performed for 5 seconds, the unit returns to normal
mode.
• Sports teams/Artist name and Song title which you have stored and
which are currently playing will be displayed in a category called “MY
GAMES”/“MY MUSIC” in search mode. For details, refer to “Search
Function” on page 39.
• When an artist or song alert occurs, you may press k to change the
information as below.
Artist name*/Song name* Channel number/Channel name
Artist name/Song name
* Depending on the alert type, the display order for Artist name or Song
name will be reversed.
Search Function
You can search for SiriusXM programming content by Category or by
Channel.
1
Note
• If the artist name or song title is not available to save, NO ARTIST or
NO SONG will be displayed.
4
2
The new alert was stored in memory.
“ART/SONG SAVED” and “XX U(sed)/YY E(mpty)” are displayed.
XX is the total number of song titles or artist names stored in
memory, and YY is the total number of memory locations still
available for storage.
Notes
• If you try to store when the memory is full, “MEM FULL” is displayed
followed by “REPLACE/CANCEL”. If you want to replace an existing
alert item, select “REPLACE” by turning Rotary encoder, and then
press ENTER, the existing alert list stored in memory is displayed.
Select one of the stored alerts using the Rotary encoder. To replace the
selected alert, press ENTER and “ART/SONG SAVED” and
“XX U(sed)/YY E(mpty)” are displayed.
• You can manage the stored Alert memory setting on Setup mode, for
details, refer to “Managing Artist and Song Alerts” on page 37.
• If no operation is performed for 60 seconds, the setting mode is
canceled.
3
Enter SEARCH mode by pressing ENTER in the
SiriusXM mode.
Turn the Rotary encoder to select the desired Category,
and then press ENTER.
Turn the Rotary encoder to select the desired Channel
Name, and then press ENTER.
Searching by Channel
1
Enter Search mode and turn the Rotary encoder to select
ALL CHANS. Press ENTER.
All Channels will be displayed in a list.
2
Turn the Rotary encoder to select the desired channel,
and then press ENTER to confirm.
Note
• Press k, the information of the broadcasting channels will be
displayed. You can choose the desired channel from the artist name list
or song name list.
Each time you press k, the display changes as below.
Channel number Channel name Artist name
Song name Channel number
• During channel search, pressing or to select another Category.
Searching by My Music
1
Enter Search mode and turn the Rotary encoder to select
MY MUSIC*. Press ENTER.
The artist names and song names that you have stored and are
currently playing will be displayed in a list.
* Displayed only when the stored song or artist is broadcasting.
39-EN
2
Turn the Rotary encoder to select the desired artist/song,
and then press ENTER to confirm.
The channel of the selected artist/song being broadcast is
received.
Note
• Press k, the information of the broadcasting channels will be
displayed. You can choose the desired channel from the artist name list
or song name list.
Each time you press k, the display changes as below.
Artist name*/Song name* Channel number/Channel name
Artist name/Song name
* Depending on the alert type, the display order for Artist name or
Song name will be reversed.
Using Jump Memory and Jump Recall
function
1
2
While in SiriusXM mode, select your favorite SiriusXM
Channel.
Press and hold for at least 2 seconds.
The channel you selected is stored as the Jump Source.
3
Press and hold BAND for at least 2 seconds to recall, and
then tune to the saved Jump Source channel.
Notes
Searching by My Games
1
• Pressing and holding BAND again for at least 2 seconds will jump back
to the previous mode or SiriusXM channel.
• During saved Jump Source channel playing, search function, channel
up/down, etc. are not available.
Enter Search mode and turn the Rotary encoder to select
MY GAMES*. Press ENTER.
The sport teams that you have stored and the game is currently
broadcasting will be displayed in a list.
Replay Function
* Displayed only when the game of stored team is broadcasting.
2
Turn the Rotary encoder to select the desired team, and
then press ENTER to confirm.
The channel of the selected game being broadcast is received.
In SiriusXM mode, you can pause, rewind and replay of live SiriusXM
Satellite Radio.
1
Note
The display will show “PAUSED” while in this mode.
The “R” indicator lights up.
• Press k, the information of the broadcasting channels will be
displayed.
Each time you press k, the display changes as below.
Team name/League name channel number/channel name
Team name/League name
2
During REPLAY playback:
• Fast rewind:
Press and hold .
• Fast forward:
Press and hold .
• Returning to the beginning of the current song:
Press .
• Advancing to the beginning of the next song:
Press .
Featured Favorites are a collection of channels that are created by the
SiriusXM programming team that are updated several times throughout
the year.
Enter Search mode and turn the Rotary encoder to select
FEATURED*. Press /ENTER.
The Category that SXM recommends will be displayed in a list.
* Only display when connected with SiriusXM Tuner-SXV200.
2
3
Note
Turn the Rotary encoder to select the desired Category,
and then press /ENTER.
Turn the Rotary encoder to select the desired channel,
and then press /ENTER to confirm.
Notes
• Press k, the information of the selected channels will be displayed.
You can choose the desired channel from the artist name list or song
name list.
Each time you press k, the display changes as below.
Channel Number Channel Name Artist Name Song Name
Channel Number
• When the selected Featured Favorites station is not broadcasting, the
channel will tune to channel 000 automatically.
• When an unsubscribed Channel is selected, the channel number is
marked with “*”.
• Press r to return to the previous mode.
• If no operation is performed for 60 seconds, the unit will return to
normal mode automatically.
40-EN
Press again to resume playback of the stored audio
from the point at which it was paused.
During playback, the SiriusXM Tuner will continue to store the
channel audio until you exit the Replay mode.
Searching by Featured Favorites
1
While listening to a SiriusXM channel, press to enter
the Replay mode, which mutes the audio.
• If you continue to press Fast forward until the end, the Replay mode is
canceled, and the unit will change to live SiriusXM radio mode.
3
Press r to cancel the REPLAY mode.
The unit returns to live SiriusXM radio mode.
Parental Lock Function
Changing the Display
This function can help restrict the listening of channels to children of
appropriate age levels only. For information on setting the Parental
Control passcode, refer to “Setting the Parental Control” on page 37.
When a locked channel is selected, “CH LOCKED” is displayed, then
press ENTER or turn Rotary encoder, “LOCK CODE?” will be
displayed.
Text information, such as the channel name, artist name/feature and
song/program title, is available with each SiriusXM channel. The unit
can display this text information as explained below.
Input the 4-digit passcode you set in, and then press
ENTER, refer to “Setting the Parental Control” on
page 37.
Turn the Rotary encoder to select the number from 0-9, and
then use or to adjust the digit.
The initial number is 0000.
Notes
In SiriusXM mode, press k.
Each time you press this button, the display changes as shown
below.
Band/Channel Number/Channel Name*1
Artist Name*1/Song Title*1 Content info.*1/Category Name*1
Clock SPECTRUM ANALYZER*2
Band/Channel Number/Channel Name
*1 If there is no text information, nothing will be displayed.
*2 Displays various patterns according to setting. For details, refer
to “Setting the Spectrum analyzer” on page 22.
• If you input a wrong passcode, “CODE ERROR” is displayed.
• After entering the correct passcode, you can access all locked channels
without entering the passcode again until the unit is powered off and
then back on.
Storing iTunes Tagging information
iTunes Tagging lets you tag songs heard on SiriusXM channels. Use this
unit in conjunction with an optional SiriusXM Tuner and a Tagging
compatible iPod/iPhone to tag the music that you listen to. This tag
information is automatically transferred to your iPod/iPhone. Later,
when your iPod/iPhone is connected to iTunes, you can preview, buy
and download your tagged songs. For details, refer to the Owner’s
Manual of the Tagging compatible iPod/iPhone.
The m indicator will light when a song playing on a SiriusXM
channel has tag information available.
Press and hold k/Tag for at least 2 seconds to save its
tag information.
During tagging, the m indicator blinks.
If no iPod/iPhone is connected, “TAG COUNTX” is displayed (X is
the total amount of the tag information stored in this unit).
Notes
• During tagging, the iPod/iPhone takes priority to save the tag
information. If no iPod/iPhone is connected, the tag information is
saved to this unit.
• When the memory of iPod/iPhone is full, “iPod FULL” and “TAG
COUNTX” are displayed. The tag information will be stored to the unit.
• If the operation is failed, “CANNOT TAG” is displayed.
• This unit can store up to 50 tagged songs. When the memory of the unit
is full, “TAGCOUNT50” and “MEMORY FULL” are displayed.
• When an iPod that doesn’t support the tagging function is connected,
“NON-TAGGING IPOD” is displayed.
• When the iPod/iPhone is disconnected from the unit during tagging, its
tag information will be stored in the unit.
• If there is stored tag information on the unit, when an iPod/iPhone
supporting the tag function is connected, the stored tag information will
be transferred to the iPod/iPhone automatically. When the iPod/iPhone
memory becomes full, “iPod FULL” will be displayed, and any
remaining tag information on the unit will not be transferred to the
iPod/iPhone.
• If tag information already exists, “ALREADY TAGGED” will be
displayed when you try to tag information again.
41-EN
Information
In Case of Difficulty
If you encounter a problem, please turn the power off, then on again. If
the unit is still not functioning normally, please review the items in the
following checklist. This guide will help you isolate the problem if the
unit is at fault. Otherwise, make sure the rest of your system is properly
connected or consult your authorized Alpine dealer.
Basic
No function or display.
• Vehicle’s ignition is off.
– If connected following instructions, the unit will not operate with
the vehicle’s ignition off.
• Improper power lead (Red) and battery lead (Yellow) connections.
– Check power lead and battery lead connections.
• Blown fuse.
– Check the fuse of the unit; replace with the proper value if
necessary.
• Internal micro-computer malfunctioned due to interference noise
etc.
– Press the RESET switch with a ballpoint pen or other pointed
article.
Radio
Unable to receive stations.
• No antenna or open connection in cable.
– Make sure the antenna is properly connected;
replace the antenna or cable if necessary.
Unable to tune stations in the seek mode.
• You are in a weak signal area.
– Make sure the tuner is in the DX mode.
• If the area you are in is a primary signal area, the antenna may not be
grounded and connected properly.
– Check your antenna connections; make sure the antenna is
properly grounded at its mounting location.
• The antenna may not be the proper length.
– Make sure the antenna is fully extended; if broken, replace the
antenna with a new one.
Broadcast is noisy.
• The antenna is not the proper length.
– Extend the antenna fully; replace it if it is broken.
• The antenna is poorly grounded.
– Make sure the antenna is grounded properly at its mounting
location.
CD
CD Player not functioning.
• Out of operating temperature range +50°C (+120°F) for CD.
– Allow the vehicle’s interior (or trunk) temperature to cool.
CD playback sound is wavering.
• Moisture condensation in the CD Module.
– Allow enough time for the condensation to evaporate (about
1 hour).
CD insertion not possible.
• A CD is already in the CD player.
– Eject the CD and remove it.
42-EN
• The CD is being improperly inserted.
– Make sure the CD is being inserted following instructions in the
CD Player Operation section.
Unable to fast forward or backward the CD.
• The CD has been damaged.
– Eject the CD and discard it; using a damaged CD in your unit can
cause damage to the mechanism.
CD playback sound skips due to vibration.
• Improper mounting of the unit.
– Securely re-mount the unit.
• The disc is very dirty.
– Clean the disc.
• The disc has scratches.
– Change the disc.
• The pick-up lens is dirty.
– Do not use a commercially available lens cleaner disc. Consult
your nearest Alpine dealer.
CD playback sound skips without vibration.
• The disc is dirty or scratched.
– Clean the disc; damaged disc should be replaced.
Error displays (built-in CD player only).
• Mechanical error
– Press . After the error indication disappears, insert the disc
again. If the above-mentioned solution does not solve the problem,
consult your nearest Alpine dealer.
CD-R/CD-RW playback not possible.
• Close session (finalization) has not been performed.
– Perform finalization and attempt playback again.
MP3/WMA
MP3 or WMA is not played back.
• Writing error occurred. The MP3/WMA format is not compatible.
– Make sure the MP3/WMA has been written in a supported format.
Refer to “About MP3/WMA” on page 13, then rewrite in the
format supported by this device.
Audio
The sound is not output from the speakers.
• Unit has no output signal of the internal amplifier.
– POWER IC is switched to “ON”, refer to “Connecting to an
External Amplifier (POWER IC)” on page 17.
iPod
iPod does not play and no sound is output.
• The iPod has not been recognized.
– Reset this unit and the iPod. Refer to “Initial System Start-Up” on
page 10. To reset the iPod, refer to the Owner’s Manual of the iPod.
Indication for CD Player
• No CD is inserted.
– Insert a CD.
• Although a disc is inserted, “NO DISC” is displayed and the unit does
not start to play or eject the disc.
– Remove the disc by following these steps:
Press the button again for at least 2 seconds.
If the disc still does not eject, consult your Alpine dealer.
• Mechanism error.
1 Press the button and eject the CD.
If not ejecting, consult your Alpine dealer.
2 When the error indication remains after ejecting, press the
button again.
If the error indication still does not turn off after pressing the
button for a few times, consult your Alpine dealer.
• When “ERROR” is displayed:
If the disc cannot be ejected by pressing , press the RESET switch
(refer to “Initial System Start-Up” on page 10) and press again.
If the disc still cannot be ejected, consult your Alpine dealer.
• A sampling rate/bit rate not supported by the unit is used.
– Use a sampling rate/bit rate that is supported by the unit.
• A copy-protected WMA file was played back.
– You can only play back non-copy-protected files.
NO SUPPORT
• Text information that is not recognizable by the unit is being used.
– Change the text information to text that is supported by the unit.
• A copy-protected WMA file was played back.
– You can only play back non-copy-protected files.
DEVICE ERROR
• An unsupported USB device is connected.
– Change other Flash Memory.
• A sampling rate/bit rate not supported by the unit is used.
– Use a sampling rate/bit rate that is supported by the unit.
Indication for iPod Mode
NO SUPPORT
• An AAC format disc is inserted.
– Change to a disc of a supported format.
• There are no songs in the iPod/iPhone.
– Download songs to the iPod/iPhone.
Indication for Flash Memory
• Communication error or boot error, etc.
– You can solve the problem by switching the source, turning power
off/on, or turning ACC off/on.
• Communication error or other error.
– You can solve the problem by switching the source, turning ACC
off/on, or turning power off/on.
• The iPod/iPhone version is too low.
– Update the iPod/iPhone version.
• Communication error.
– You can solve the problem by switching the source, turning ACC
off/on, or turning power off/on.
• The iPod/iPhone is not verified.
– You can solve the problem by resetting the iPod/iPhone.
• Abnormal current is run to the USB Flash Memory device.
– You can solve the problem by turning ACC off/on, or turning
power off/on.
• Abnormal current is run to the iPod/iPhone.
– You can solve the problem by reconnecting the iPod/iPhone,
turning ACC off/on, or turning power off/on.
NO USB DEVICE
• A Flash Memory is not connected.
– Make sure the Flash Memory device is correctly connected.
NO FILE
NO USB DEVICE
• The iPod/iPhone is not connected.
– Make sure the iPod/iPhone is correctly connected and the cable is
not bent excessively.
• No song (file) is stored in the Flash Memory.
– Connect the Flash Memory device after storing songs (files).
43-EN
UPDATING
• The search mode is activated during song downloading.
– No necessary operation.
SUBSCRIP
UPDATED -
ANY KEY TO
CONTINUE
• Your subscription has been updated.
– Press any button to clear this message.
BLUETOOTH mode
CH LOCKED
• The BLUETOOTH device is not connected.
– Connect the BLUETOOTH device.
SiriusXM Advisory Messages
The following messages may be displayed while operating the unit in
SiriusXM mode.
CHK TUNER
• The SiriusXM Tuner is disconnected or the unit is having trouble
communicating with the Tuner.
– Connect the Tuner or check the Tuner connection to the back of
the unit.
• When a locked channel is selected, “CH LOCKED” is displayed, then
press ENTER or turn Rotary encoder, “LOCK CODE?” will be
displayed.
A locked channel is selected.
– Input the passcode. On how to input passcode, refer to “Setting the
Parental Control” on page 37.
Note
• If wrong passcode is input, “CODE ERROR” will be displayed and the
unit will revert to the previous selected channel.
• Buffer for Replay will full within 11 seconds.
CHK ANT
• Buffer for Replay is full.
• The SiriusXM Satellite Radio antenna or cable is either damaged or
not connected correctly to the SiriusXM Tuner.
– Check that the SiriusXM antenna cable is connected to the
SiriusXM Tuner and check that the antenna cable is not kinked or
otherwise damaged. Replace the antenna if necessary.
Indication for Pandora® Mode
NO PANDORA
• A Smartphone is not connected.
– Make sure a Smartphone is correctly connected.
• The SiriusXM satellite signal is too weak at the current location.
– Move the vehicle to a location with a clear view of the southern
sky.
– Make sure the Satellite Radio antenna is properly mounted and not
obstructed by metal objects.
NO STATION
• You have not created any personalized Pandora® Stations.
– When you are not driving, use the Pandora® Compatible
Application on the Smartphone to create your Pandora® station(s).
CH UNSUB
• The active channel has become unsubscribed or the requested
channel is not available in your subscription package.
Note
• The unit will revert to the previous selected channel or to channel 1
automatically.
SEE DEVICE
• The music cannot be played because the Pandora® Compatible
Application on the Smartphone requires the user’s attention.
– When you are not driving, please see the Pandora® Compatible
Application on the Smartphone.
– Visit www.siriusxm.com for information on subscribing to this
channel.
NO SERVICE
• The active channel is no longer in the SiriusXM channel lineup or the
user has entered an invalid channel number.
Note
• The unit will revert to the previous channel or to channel 1
automatically.
– Visit www.siriusxm.com for information on the current channel
lineup.
44-EN
• You switched CDE-154BT to Pandora® mode by pressing
VSOURCE with a Smartphone connected, without launching or
installing the Pandora® Application.
– Launch the Pandora® Application on the Smartphone.
– Select a source other than Pandora® by pressing VSOURCE.
Specifications
FM TUNER SECTION
Tuning Range
Mono Usable Sensitivity
50 dB Quieting Sensitivity
Alternate Channel Selectivity
Signal-to-Noise Ratio
Stereo Separation
Capture Ratio
87.7 ~ 107.9 MHz
9.3 dBf (0.8 μV/75 ohms)
13.5 dBf (1.3 μV/75 ohms)
80 dB
65 dB
35 dB
2.0 dB
AM TUNER SECTION
Tuning Range
Sensitivity (IEC Standard)
530 ~ 1,710 kHz
22.5 μV/27 dB
CD PLAYER SECTION
Frequency Response
Wow & Flutter (% WRMS)
Total Harmonic Distortion
Dynamic Range
Signal-to-Noise Ratio
Channel Separation
5 ~ 20,000 Hz (±1 dB)
Below measurable limits
0.008% (at 1 kHz)
95 dB (at 1 kHz)
105 dB
85 dB (at 1 kHz)
PICKUP
Wave length
Laser power
795 nm
CLASS I
USB SECTION
USB requirements
Max. Power Consumption
USB Class
File System
MP3 Decoding
WMA Decoding
USB 1.1/2.0
Smartphone charge-capable
Mass Storage
FAT 12/16/32
MPEG AUDIO Layer-3
Windows Media™ Audio
BLUETOOTH SECTION
BLUETOOTH Specification
Output Power
Profile
GENERAL
Power Requirement
Power Output
CHASSIS SIZE
Width
Height
Depth
178 mm (7")
50 mm (2")
161.5 mm (6–3/8")
NOSEPIECE SIZE
Width
Height
Depth
170 mm (6–3/4")
46 mm (1–13/16")
24 mm (15/16")
Note
• Due to continuous product improvement, specifications and design are
subject to change without notice.
Bluetooth v2.1 + EDR
+4 dBm Max. (Power class 2)
HFP (Hands-Free Profile)
HSP (Head Set Profile)
A2DP (Advanced Audio
Distribution Profile)
AVRCP (Audio/Video Remote
Control Profile)
14.4 V DC
(11 ~ 16 V allowable)
18 W RMS × 4*
* Primary amplifier ratings per CEA-2006 Standard
• Power output: measured at 4 Ohms and ≤ 1% THD+N
• S/N: 80 dBA (reference: 1 W into 4 Ohms)
Maximum Pre-Output Voltage
Bass
Treble
Weight
4 V/10 k ohms
±9.1 dB at 100 Hz
±9.1 dB at 10 kHz
1.4 kg (3 lbs. 1 oz)
45-EN
Installation and Connections
Before installing or connecting the unit, please read the following
and refer to “Operating Instructions” on page 6 for proper use.
CAUTION
WARNING
HAVE THE WIRING AND INSTALLATION DONE BY EXPERTS.
MAKE THE CORRECT CONNECTIONS.
The wiring and installation of this unit requires special technical
skill and experience. To ensure safety, always contact the dealer
where you purchased this product to have the work done.
Failure to make the proper connections may result in fire or
product damage.
USE SPECIFIED ACCESSORY PARTS AND INSTALL THEM SECURELY.
(Check with your dealer if you are not sure.) Failure to do so may
result in fire, etc.
Be sure to use only the specified accessory parts. Use of other than
designated parts may damage this unit internally or may not
securely install the unit in place. This may cause parts to become
loose resulting in hazards or product failure.
BEFORE WIRING, DISCONNECT THE CABLE FROM THE NEGATIVE BATTERY
TERMINAL.
ARRANGE THE WIRING SO IT IS NOT CRIMPED OR PINCHED BY A SHARP
METAL EDGE.
Failure to do so may result in electric shock or injury due to
electrical shorts.
Route the cables and wiring away from moving parts (like the seat
rails) or sharp or pointed edges. This will prevent crimping and
damage to the wiring. If wiring passes through a hole in metal, use a
rubber grommet to prevent the wire’s insulation from being cut by
the metal edge of the hole.
USE ONLY IN CARS WITH A 12 VOLT NEGATIVE GROUND.
DO NOT SPLICE INTO ELECTRICAL CABLES.
Never cut away cable insulation to supply power to other
equipment. Doing so will exceed the current carrying capacity of
the wire and result in fire or electric shock.
DO NOT DAMAGE PIPE OR WIRING WHEN DRILLING HOLES.
When drilling holes in the chassis for installation, take precautions
so as not to contact, damage or obstruct pipes, fuel lines, tanks or
electrical wiring. Failure to take such precautions may result in fire.
DO NOT USE BOLTS OR NUTS IN THE BRAKE OR STEERING SYSTEMS TO
MAKE GROUND CONNECTIONS.
Bolts or nuts used for the brake or steering systems (or any other
safety-related system), or tanks should NEVER be used for
installations or ground connections. Using such parts could disable
control of the vehicle and cause fire etc.
KEEP SMALL OBJECTS SUCH AS BATTERIES OUT OF THE REACH OF
CHILDREN.
Swallowing them may result in serious injury. If swallowed, consult
a physician immediately.
DO NOT INSTALL IN LOCATIONS WHICH MIGHT HINDER VEHICLE
OPERATION, SUCH AS THE STEERING WHEEL OR GEARSHIFT.
Doing so may obstruct forward vision or hamper movement etc.
and results in serious accident.
DO NOT INSTALL IN LOCATIONS WITH HIGH MOISTURE OR DUST.
Avoid installing the unit in locations with high incidence of
moisture or dust. Moisture or dust that penetrates into this unit may
result in product failure.
PRECAUTIONS
• Be sure to disconnect the cable from the (−) battery post before
installing your CDE-154BT. This will reduce any chance of damage to
the unit in case of a short-circuit.
• Be sure to connect the color coded leads according to the diagram.
Incorrect connections may cause the unit to malfunction or damage
to the vehicle’s electrical system.
• When making connections to the vehicle’s electrical system, be aware
of the factory installed components (e.g. on-board computer). Do not
tap into these leads to provide power for this unit. When connecting
the CDE-154BT to the fuse box, make sure the fuse for the intended
circuit of the CDE-154BT has the appropriate amperage. Failure to do
so may result in damage to the unit and/or the vehicle. When in
doubt, consult your Alpine dealer.
• The CDE-154BT uses female RCA-type jacks for connection to other
units (e.g. amplifier) having RCA connectors. You may need an
adaptor to connect other units. If so, please contact your authorized
Alpine dealer for assistance.
• Be sure to connect the speaker (−) leads to the speaker (−) terminal.
Never connect left and right channel speaker cables to each other or
to the vehicle body.
IMPORTANT
Please record the serial number of your unit in the space provided
below and keep it as a permanent record. The serial number or the
engraved serial number is located on the bottom of the unit.
SERIAL NUMBER: [
]
INSTALLATION DATE: [
]
INSTALLATION TECHNICIAN: [
]
PLACE OF PURCHASE: [
]
46-EN
Installation
Screw
Hex Nut (M5)
*
Bolt Stud
To prevent external noise from entering the audio system.
• Locate the unit and route the leads at least 10 cm away from the
car harness.
• Keep the battery power leads as far away from other leads as
possible.
• Connect the ground lead securely to a bare metal spot (remove
any paint, dirt or grease if necessary) of the car chassis.
• If you add an optional noise suppressor, connect it as far away
from the unit as possible. Your Alpine dealer carries various
noise suppressors, contact them for further information.
• Your Alpine dealer knows best about noise prevention
measures so consult your dealer for further information.
Metal
Mounting
Strap
This unit
Note
• For the screw marked “*”, use an appropriate screw for the chosen
mounting location.
3
CAUTION
When you install this unit in your car, do not remove the
detachable front panel.
If the detachable front panel is removed during installation, you
might press too hard and warp the metal plate that holds it in
place.
The main unit must be mounted within 35 degrees of the
horizontal plane, back to front.
Slide the CDE-154BT into the dashboard until it clicks. This
ensures that the unit is properly locked and will not
accidentally come out from the dashboard. Install the
detachable front panel.
Removal
1
2
Less than 35°
Remove the detachable front panel.
Insert the bracket keys into the unit, along the guides on
either side. The unit can now be removed from the
mounting sleeve.
This unit
1
Remove the mounting sleeve from the main unit (refer to
“Removal” on page 47).
Bracket keys
(Included)
Mounting Sleeve (Included)
Dashboard
3
Pull the unit out, keeping it unlocked as you do so.
JAPANESE CAR
Pressure Plates*
This unit
Front Frame
* If the installed mounting sleeve is loose in the dashboard, the
pressure plates may be bent slightly to remedy the problem.
2
Reinforce the head unit with the metal mounting strap
(not supplied). Secure the ground lead of the unit to a
clean metal spot.
Connect each input lead coming from an amplifier to the
corresponding output lead coming from the left rear of the
CDE-154BT. Connect all other leads of the CDE-154BT according
to details described in the CONNECTIONS section.
This unit
Screw (M5 × 8)
(Included)
Mounting
Bracket
47-EN
iPod/iPhone Connection (sold separately)
Connect USB cable to an iPod/iPhone with Interface cable for iPod.
USB cable (Supplied)
Interface cable for iPod (included with iPod/iPhone)
Remove the iPod/iPhone
Remove the iPod/iPhone from Interface cable for iPod.
Notes
• After changing the unit to a source other than the USB iPod, remove the
iPod/iPhone. If the iPod/iPhone is removed in the USB iPod mode, data
may cause damage.
• If sound is not output or the iPod/iPhone is not recognized even when
the iPod/iPhone is connected, remove the iPod/iPhone once, then
connect it again, or reset the iPod.
• Do not leave the iPod/iPhone in a vehicle for a long time. Heat and
humidity may damage the iPod/iPhone and you may not be able to play
it again.
Flash Memory Connection
(sold separately)
Connect Flash Memory
Connect the USB cable to the USB connector of the unit.
Flash Memory
(sold separately)
This unit
USB Connector
USB Cable (Supplied)
Remove Flash Memory
Pull out Flash Memory squarely from the USB cable.
This unit
USB Connector
Flash Memory
(sold separately)
USB Cable (Supplied)
Notes
• When removing Flash Memory, pull it out straight.
• If sound is not output or Flash Memory is not recognized even when
Flash Memory is connected, remove Flash Memory once, then connect
it again.
48-EN
• Change to a source other than the Flash Memory mode, then remove
the Flash Memory. If the Flash Memory is removed in the Flash
Memory mode, data may be damaged.
• Route the USB cable away from another cables.
Mounting the Microphone
For the sake of safety, mount the microphone in the following location.
• In a stable and secure location.
• In a location that does not inhibit safely driving the vehicle.
• Mount the microphone in a location where the driver’s voice can
easily be picked up.
Choose a location for the microphone that can easily pick up the drivers
voice. Requiring the driver to move towards the microphone for
audibility causes a distraction that could be dangerous.
Connections
To Flash Memory or iPod/iPhone
(Pink/Black)
AUDIO INTERRUPT IN
(Blue)
POWER ANT
To External Unit (AUX)
To power antenna
REMOTE TURN-ON
(Blue/White)
To amplifier
(Orange)
ILLUMINATION
(Red)
IGNITION
(Yellow)
BATTERY
(Black)
To the instrument cluster illumination lead
Ignition Key
GND
Battery
(Gray)
SPEAKER
RIGHT FRONT
Speakers
Front Right
(Gray/Black)
(Violet/Black)
SPEAKER
RIGHT REAR
(Violet)
Rear Right
(Green)
SPEAKER
LEFT REAR
Rear Left
(Green/Black)
(White/Black)
SPEAKER
LEFT FRONT
(White)
Front Left
Microphone
Front Left
Amplifier
Front Right
Rear Left
Amplifier
Amplifier
Rear Right
Subwoofers
49-EN
Rear USB Terminal
Connect this to a Flash Memory or an iPod/iPhone (sold separately).
Audio Interrupt In Lead (Pink/Black)
Connect this lead to the Audio Interrupt Out terminal (0 V) of your
External Unit (AUX).
Power Antenna Lead (Blue)
Connect this lead to the +B terminal of your power antenna, if
applicable.
Note
• This lead should be used only for controlling the vehicle’s power
antenna. Do not use this lead to turn on an amplifier or a signal
processor, etc.
Remote Turn-On Lead (Blue/White)
Connect this lead to the remote turn-on lead of your amplifier or
signal processor.
Illumination Lead (Orange)
This lead may be connected to the vehicle’s instrument cluster
illumination lead. This will allow the backlighting of this unit to dim
whenever the vehicle’s lights are turned on.
Switched Power Lead (Ignition) (Red)
Connect this lead to an open terminal on the vehicle’s fuse box or
another unused power source which provides (+) 12V only when the
ignition is turned on or in the accessory position.
Battery Lead (Yellow)
Connect this lead to the positive (+) post of the vehicle’s battery.
Ground Lead (Black)
Connect this lead to a good chassis ground on the vehicle. Make sure
the connection is made to bare metal and is securely fastened using
the sheet metal screw provided.
Right Front (+) Speaker Output Lead (Gray)
Right Front (−) Speaker Output Lead (Gray/Black)
Right Rear (−) Speaker Output Lead (Violet/Black)
Right Rear (+) Speaker Output Lead (Violet)
Left Rear (+) Speaker Output Lead (Green)
Left Rear (−) Speaker Output Lead (Green/Black)
Left Front (−) Speaker Output Lead (White/Black)
Left Front (+) Speaker Output Lead (White)
Antenna Receptacle
Front Output RCA Connectors
RED is right and WHITE is left.
Rear Output RCA Connectors
RED is right and WHITE is left.
Subwoofer Output RCA Connectors
RED is right and WHITE is left.
SiriusXM Tuner connector
Connect to SiriusXM Tuner.
Steering Remote Control Interface Connector
To steering remote control interface box.
You can operate this unit from the vehicle’s control unit when an
Alpine Steering Remote Control Interface Box (optional) is
connected. For details, contact your Alpine dealer.
MIC Input Connector
To Microphone.
Fuse Holder (10A)
Power Supply Connector
Microphone (Supplied)
RCA Extension Cable (sold separately)
Front AUX Input Terminal
This terminal allows for input of audio from an external device (such
as a portable player), using a commercially-available converter cable.
50-EN
LIMITED WARRANTY
ALPINE ELECTRONICS OF AMERICA, INC. (“Alpine”), is dedicated to quality craftsmanship and is pleased to offer this Warranty. We suggest that you
read it thoroughly. Should you have any questions, please contact your Dealer or contact Alpine at one of the telephone numbers listed below.
This Warranty covers Car Audio Products and Related Accessories (“the
product”). Products purchased in the Canada are covered only in the
Canada. Products purchased in the U.S.A. are covered only in the U.S.A.
You must supply proof of your purchase of the product.
You must package the product securely to avoid damage during
shipment. To prevent lost packages it is recommended to use a
carrier that provides a tracking service.
LENGTH OF WARRANTY:
HOW WE LIMIT IMPLIED WARRANTIES:
This Warranty is in effect for one year from the date of the first
consumer purchase.
ANY IMPLIED WARRANTIES INCLUDING FITNESS FOR USE AND
MERCHANTABILITY ARE LIMITED IN DURATION TO THE PERIOD OF THE
EXPRESS WARRANTY SET FORTH ABOVE AND NO PERSON IS
AUTHORIZED TO ASSUME FOR ALPINE ANY OTHER LIABILITY IN
CONNECTION WITH THE SALE OF THE PRODUCT.
PRODUCTS COVERED:
WHO IS COVERED:
This Warranty only covers the original purchaser of the product, who
must reside in the United States, Puerto Rico or Canada.
HOW WE EXCLUDE CERTAIN DAMAGES:
WHAT IS COVERED:
This Warranty covers defects in materials or workmanship (parts and
labor) in the product.
WHAT IS NOT COVERED:
This Warranty does not cover the following:
Damage occurring during shipment of the product to Alpine for
repair (claims must be presented to the carrier).
Damage caused by accident or abuse, including burned voice coils
caused by over-driving the speaker (amplifier level is turned up
and driven into distortion or clipping). Speaker mechanical failure
(e.g. punctures, tears or rips). Cracked or damaged LCD panels.
Dropped or damaged hard drives.
Damage caused by negligence, misuse, improper operation or
failure to follow instructions contained in the Owner’s manual.
Damage caused by act of God, including without limitation,
earthquake, fire, flood, storms or other acts of nature.
Any cost or expense related to the removal or reinstallation of the
product.
Service performed by an unauthorized person, company or
association.
Any product which has the serial number defaced, altered or
removed.
Any product which has been adjusted, altered or modified without
Alpine’s consent.
Any product not distributed by Alpine within the United States,
Puerto Rico or Canada.
Any product not purchased from an Authorized Alpine Dealer.
ALPINE EXPRESSLY DISCLAIMS LIABILITY FOR INCIDENTAL AND
CONSEQUENTIAL DAMAGES CAUSED BY THE PRODUCT. THE TERM
“INCIDENTAL DAMAGES” REFERS TO EXPENSES OF TRANSPORTING
THE PRODUCT TO THE ALPINE SERVICE CENTER, LOSS OF THE
ORIGINAL PURCHASER’S TIME, LOSS OF THE USE OF THE PRODUCT,
BUS FARES, CAR RENTALS OR OTHERS COSTS RELATING TO THE CARE
AND CUSTODY OF THE PRODUCT. THE TERM “CONSEQUENTIAL
DAMAGES” REFERS TO THE COST OF REPAIRING OR REPLACING OTHER
PROPERTY WHICH IS DAMAGED WHEN THIS PRODUCT DOES NOT
WORK PROPERLY. THE REMEDIES PROVIDED UNDER THIS WARRANTY
ARE EXCLUSIVE AND IN LIEU OF ALL OTHERS.
HOW STATE/PROVINCIAL LAW RELATES TO THE
WARRANTY:
This Warranty gives you specific legal rights, and you may also have
other rights which vary from state to state and province to province. In
addition, some states/provinces do not allow limitations on how long
an implied warranty lasts, and some do not allow the exclusion or
limitation of incidental or consequential damages. Accordingly,
limitations as to these matters contained herein may not apply to you.
IN CANADA ONLY:
This Warranty is not valid unless your Alpine car audio product has
been installed in your vehicle by an Authorized Installation Center, and
this warranty stamped upon installation by the installation center.
HOW TO CONTACT CUSTOMER SERVICE:
Should the product require service, please call the following number
for your nearest Authorized Alpine Service Center.
HOW TO OBTAIN WARRANTY SERVICE:
CAR AUDIO
1-800-ALPINE-1 (1-800-257-4631)
You are responsible for delivery of the product to an Authorized
Alpine Service Center or Alpine for repair and for payment of any
initial shipping charges. Alpine will, at its option, repair or replace
the product with a new or reconditioned product without charge.
If the repairs are covered by the warranty, and if the product was
shipped to an Authorized Alpine Service Center or Alpine, Alpine
will pay the return shipping charges.
You should provide a detailed description of the problem(s) for
which service is required.
NAVIGATION
1-888-NAV-HELP (1-888-628-4357)
Or visit our website at; http://www.alpine-usa.com
ALPINE ELECTRONICS OF AMERICA, INC., 19145 Gramercy Place, Torrance, California 90501, U.S.A.
Do not send products to this address.
Call the toll free telephone number or visit the website to locate a service center.
About the Rules of Bluetooth Electromagnetic Radiation Regulation
USA/Canada
FCC CAUTION
Changes or modifications not expressly approved by the party responsible for compliance could void the user’s
authority to operate the equipment.
This equipment complies with FCC/IC radiation exposure limits set forth for an uncontrolled environment and
meets the FCC radio frequency (RF) Exposure Guidelines in Supplement C to OET65 and RSS-102 of the IC radio
frequency (RF) Exposure rules. This equipment has very low levels of RF energy that it deemed to comply without
maximum permissive exposure evaluation (MPE). But it is desirable that it should be installed and operated keeping
the radiator at least 20cm or more away from person’s body (excluding extremities: hands, wrists, feet and ankles).
Cet équipement est conforme aux limites d’exposition aux rayonnements énoncées pour un environnement non
contrôlé et respecte les règles les radioélectriques (RF) de la FCC lignes directrices d'exposition dans le Supplément
C à OET65 et d’exposition aux fréquences radioélectriques (RF) CNR-102 de l’IC. Cet équipement émet une énergie
RF très faible qui est considérée conforme sans évaluation de l’exposition maximale autorisée. Cependant, cet
équipement doit être installé et utilisé en gardant une distance de 20 cm ou plus entre le dispositif rayonnant et le
corps (à l’exception des extrémités : mains, poignets, pieds et chevilles).
México
La operación de este equipo está sujeta a las siguientes dos condiciones: (1) es posible que este equipo o dispositivo
no cause interferencia perjudicial y (2) este equipo o dispositivo debe aceptar cualquier interferencia, incluyendo la
que pueda causar su operación no deseada.
Este produto contém a placa 13BTPWB código de homologação Anatel 2718-12-4557
Este equipamento opera em caráter secundário, isto é, não tem direito a proteção
contra interferência prejudicial, mesmo de estações do mesmo tipo, e não pode causar
interferência a sistemas operando em caráter primário.
Este equipamento está homologado pela ANATEL de acordo com os procedimentos
regulamentados pela Resolucão 242/2000 e atende aos requisites técnicos aplicados.
Don’t forget to take a moment to protect your purchase by registering your product now at the following
address: www.alpine-usa.com/registration.
N’oubliez pas de consacrer un moment à la protection de votre achat en enregistrant votre produit dès
maintenant à l’adresse suivante : www.alpine-usa.com/registration.
Recuerde que con solo unos pocos pasos podrá proteger su producto, registrándolo a través de la siguiente
dirección: www.alpine-usa.com/registration.
##MLP INE
CD/USB RECEIVER WITH ADVANCED
BLUETOOTH
CDE-154BT
1
~ iPod
DiPhone
aASSENGINE
~sQ.
~~
Pour obtenir de plus am pies informations sur !'ensemble des tonctions , reportez-vous au mode
d'emploi tourni sur le CD-ROM. (Etant donne qu'il s'agit d 'un CD de donnees, ce CD ne peut pas
etre utilise pour lire des tichiers audio ou image sur le lecteur.) Si vous le souhaitez, demandez
votre revendeur ALPINE de vous tournir Ia version papier du mode d'emploi contenu dans le
CD-ROM .
a
Para obtener informacion detallada de todas las funciones , consu lte el manual del propietario
contenido en el CD-ROM que se suministra. (AI ser un CD de datos, el CD nose puede utilizar
para reproducir musica o imagenes en el reproductor.) Si es necesario , un distribuidor de
ALPINE podra tacilitarle una copia impresa del manual del propietario incluido en el CD-ROM .
,,,,,,,/!.
Made for
For details on all functions , refer to the Owner's Manual stored in the supp lied CD-ROM. (As it is
data CD , the CD cannot be used tor playing back music and images on the player.) It required ,
an ALPINE dealer will readily provide you with a print out of the Owner's Manual contained in the
CD-ROM.
Alpine Tune It App
Works With
PANDORA®
Variable
RGB Illumination
compatible
QUICK REFERENCE GUIDE
GUIDE DE REFERENCE RAPIDE
GUIA DE REFERENCIA RAPIDA
ALPINE ELECTRONICS OF AMERICA, INC.
19145 Gramercy Place, Torrance,
California 90501, U.S.A.
Phone 1-800-ALPINE-1 (1-800-257-4631)
Please register your product at www.alpine-usa.com/registration for a chance to win prizes.
Enregistrez-vous sur www.alpine-usa.com/registration et tentez de remporter des prix.
Registre su producto en Ia direcci6n www.alpine-usa.com/registration para optar a excelentes premios.
YAMAGATA (THAILAND) Co., Ltd.
324 Moo 4, Bangpoo Industrial Estate Soi6 , Sukhumvit Road T.Phraeksa,
A.Muang Samutprakarn, Samutprakarn 10280, Thailand
Designed by ALPINE Japan
Printed in Thailand (Y)
68-24567253-A
,
Contents I Contenu /lndice
IMPORTANT
Please record the serial number of your unit in the space provided below and
keep it as a permanent record.
WARNING I A VERTISSEMENT I ADVERTENCIA ....... 3
CAUTION I ATTENTION I PRUDEN CIA ........................ 5
Getting Started I Mise en route I Primeros pasos ................. 6
BASS ENGINE SQ Function I Fonction BASS ENGINE
SQ I Funci6n BASS ENGINE SQ ....................................... 8
Applying Tune It I Utilisation de 1'application Tunelt I
Aplicaci6n de Tune It .......................................................... 10
Radio .................................................................................. 14
CDIMP31WMA .................................................................. 15
Flash memory (Optional) I Cle USB (en option) I Memoria
USB ( opcional) .................................................................. 17
·~
BLUETOOTH\tY
................................................................. 19
iPodliPhone (Optional) I iPodliPhone (en option) I iPodl
iPhone ( opcional) ............................................................... 24
Pandora® internet radio (Optional) I Radio internet
Pandora® (en option) I Radio por internet Pandora®
( opcional) ........................................................................... 30
SiriusXM Satellite Radio Operation (Optional) I Utilisation
de I a radio par satellite SiriusXM (en option) I
Funcionamiento de la radio por satelite SiriusXM
( opcional) ........................................................................... 34
Setting the Time I Reglage de 1'heure I
Ajuste de la hora ................................................................ 36
Specifications I Specifications I Especificaciones ............. 38
Installation I Installation I Instalaci6n ................................ 41
Connections I Raccordements I Conexi ones ...................... 43
SERIAL N U M B E R : - - - - - - - - - - - - - - - INSTALLATION DATE: - - - - - - - - - - - - - - INSTALLATION T E C H N I C I A N : - - - - - - - - - - - PLACE OF P U R C H A S E : - - - - - - - - - - - - - -
IMPORTANT
Notez le numero de serie de 1' appareil dans l ' espace prevu ci-dessous et
conservez-le en lieu sur.
NUMERO DE SERlE : _ _ _ _ _ _ _ _ _ _ _ _ _ __
DATE D'INSTALLATION: - - - - - - - - - - - - - INSTALLATEUR: - - - - - - - - - - - - - - - LIEU D'ACHAT : _ _ _ _ _ _ _ _ _ _ _ _ _ _ __
IMPORTANTE
Anote el numero de serie de Ia unidad en el espacio proporcionado a
continuaci6n y conservelo como registro permanente.
NUMERO DE S E R l E : - - - - - - - - - - - - - - FECHA DE INSTALACION: - - - - - - - - - - - - - INSTALADOR: _ _ _ _ _ _ _ _ _ _ _ _ _ _ _ __
LUGAR DE ADQUISICION: - - - - - - - - - - - - -
2
~WARNING
~AVERTISSEMENT
This symbol means important instructions.
Failure to heed them can result in serious
injury or death.
Ce symbole designe des instructions
importantes. Le non-respect de ces
instructions peut entrainer de graves
blessures, voire Ia mort.
DO NOT OPERATE ANY FUNCTION THAT TAKES YOUR
ATTENTION AWAY FROM SAFELY DRIVING YOUR VEHICLE.
Any function that requires your prolonged attention should only be
performed after coming to a complete stop. Always stop the vehicle in
a safe location before performing these functions. Failure to do so may
result in an accident.
KEEP THE VOLUME AT A LEVEL WHERE YOU CAN STILL HEAR
OUTSIDE NOISES WHILE DRIVING.
Excessive volume levels that obscure sounds such as emergency
vehicle sirens or road warning signals (train crossings, etc.) can be
dangerous and may result in an accident. LISTENING AT LOUD
VOLUME LEVELS IN A CAR MAY ALSO CAUSE HEARING
DAMAGE.
MINIMIZE DISPLAY VIEWING WHILE DRIVING.
Viewing the display may distract the driver from looking ahead of
the vehicle and cause an accident.
DO NOT DISASSEMBLE OR ALTER.
Doing so may result in an accident, fire or electric shock.
USE ONLY IN CARS WITH A 12 VOLT NEGATIVE GROUND.
(Check with your dealer if you are not sure.) Failure to do so may
result in fire, etc.
KEEP SMALL OBJECTS SUCH AS BATTERIES OUT OF THE REACH
OF CHILDREN.
Swallowing them may result in serious injury. If swallowed, consult a
physician immediately.
USE THE CORRECT AMPERE RATING WHEN REPLACING FUSES.
Failure to do so may result in fire or electric shock.
~ADVERTENCIA
Este sfmbolo indica que las instrucciones
son importantes. De no tenerse en cuenta,
podrfa ocasionarse heridas graves o muerte.
N'ACTIVER AUCUNE FONCTION SUSCEPTIBLE DE DETOURNER
VOTRE ATTENTION DE LA CONDUITE DU VEHICULE.
NO REALICE NINGUNA OPERACillN QUE PUEDA DISTRAER SU
ATENCUJN Y COMPROMETER LA SEGURIDAD DURANTE LA
CONDUCCION DEL VEHICULO.
Les fonctions requerant une attention prolongee ne doivent etre
exploitees qu'a I' arret complet du vehicule. Toujours an·eter le
vehicule a un endroit sur avant d'activer ces fonctions. II y a risque de
provoquer un accident.
Las operaciones que requieren su atencion durante mas tiempo solo
deben realizarse despues de detener completamente el vehfculo.
Estacione el vehfculo en un Iugar seguro antes de realizar dichas
operaciones. De lo contrario, podrfa ocasionar un accidente.
GARDEA LE VOLUME AFAIBLE NIVEAU DE MANIERE APOUVOIR
ENTENDRE LES BRUITS EXTERIEURS PENDANT LA CONDUITE.
MANTENGA EL VOLUMEN A UN NIVEL QUE NO LE IMPIDA
ESCUCHAR LOS SONIDOS DEL EXTERIOR MIENTRAS CONDUCE.
Des niveaux de volume excessifs qui couvrent les sirenes des
ambulances ou les signaux routiers (passages a niveau. etc.) peuvent
etre dangereux et provoquer un accident. UN NIVEAU DE VOLUME
TROP ELEVE A L'INTERIEUR DU VEHICULE PEUT
EGALEMENT AVOIR DES EFFETS IRREVERSIBLES SUR
VOTRE AUDITION.
Los niveles de volumen demasiado altos que reducen la percepcion de
otros sonidos como las sirenas de emergencia o posibles sefiales
acusticas de advertencia en carretera (cruces de trenes, etc.) podrfan ser
peligrosos y provocar un accidente. LOS NIVELES DE VOLUMEN
ALTOS EN EL VEHICULO TAMBIEN PUEDEN DANAR EL
SISTEMA AUDITIVO DE LOS PASAJEROS.
MINIMISER L'AFFICHAGE EN COURS DE CONDUITE.
REDUZCA AL MAXIMO LA VISUALIZACION DE LA PANTALLA
MIENTRAS CONDUCE.
La visualisation de I' aftichage peut distraire le conducteur de Ia
conduite du vehicule et. partant, de provoquer un accident.
NE PAS DESASSEMBLER Nl MODIFIER L'APPAREIL.
II y a risque d' accident, d' incendie ou de choc electrique.
A UTILISER UNIQUEMENT SUR DES VOITURES A MASSE
NEGATIVE DE 12 VOLTS.
(V erifiez au pres de votre concessionnaire si vous n' en etes pas certain.)
II y a risque d'incendie, etc.
GARDEA LES PETITS OBJETS COMME LES PILES HORS DE
PORTEE DES ENFANTS.
El conductor puede distraer su atencion de Ia carretera mientras mira Ia
pantalla y ocasionar un accidente.
NO DESMONTE Nl ALTERE LA UNlOAD.
Si lo hace. podra ocasionar un accidente, un incendio o una descarga
electric a.
UTILICE LA UNlOAD SOLAMENTE EN VEHICULOS QUE TENGAN
12 VOLTIOS CON NEGATIVO AMASA.
(Consulte a su distribuidor en caso de duda.) De no ser asf, podrfa
ocasionar un incendio. etc.
L'ingestion de tels objets peut entralner de graves blessures. En cas
d'ingestion, consulter immediatement un medecin.
MANTENGA LOS OBJETOS PEQUENOS, COMO LAS PILAS,
FUERA DEL ALCANCE DE LOS NINOS.
UTILISER DES FUSIBLES DE L'AMPERAGE APPROPRIE.
La ingestion de estos objetos puede provocar lesiones graves. Si esto
ocurre. consulte con un medico inmediatamente.
II y a risque d' incendie ou de decharge electrique.
UTI LICE EL AMPERAJE CORRECTO CUANDO CAMBIE FUSIBLES.
De lo contrario, puede producirse un incendio o una descarga electrica.
3
DO NOT BLOCK VENTS OR RADIATOR PANELS.
Doing so may cause heat to build up inside and may result in tire.
USE THIS PRODUCT FOR MOBILE 12V APPLICATIONS.
Use for other than its designed application may result in tire. electric
shock or other injury.
DO NOT PLACE HANDS, FINGERS OR FOREIGN OBJECTS IN
INSERTION SLOTS OR GAPS.
Doing so may result in personal injury or damage to the product.
MAKE THE CORRECT CONNECTIONS.
Failure to make the proper connections may result in fire or product
damage.
BEFORE WIRING, DISCONNECT THE CABLE FROM THE
NEGATIVE BATTERY TERMINAL.
NE PAS OBSTRUER LES SORTIES D'AIR NILES PANNEAUX DU
RADIATEUR.
NO OBSTRUYA LOS ORIFICIOS DE VENTILACillN 0 LOS PANELES
DEL RADIADOR.
Une surchauffe interne peut se produire et provoquer un incendie.
Si los bloquea, el calor podrfa acumularse en el interior y producir un
incendio.
UTILISER CET APPAREIL POUR DES APPLICATIONS MOBILES DE
12 V.
UTILICE ESTE PRODUCTO CON APLICACIONES MOVILES DE 12 V.
Toute utilisation autre que !'application designee comporte un risque
d' incendie, de choc electrique ou de blessure.
Si se emplea para otra aplicacion distinta de Ia prevista, podrfa
producirse un incendio. una descarga electrica u otras lesiones.
NE PAS INTRODUIRE LES MAINS, LES DOIGTS Nl DE CORPS
ETRANGERS DANS LES FENTES ET LES INTERSTICES.
NO INTRODUZCA LAS MANOS, LOS DEDOS Nl OTROS OBJETOS
EXTRANOS EN LAS RANURAS DE INSERCION 0 EN LAS
ABERTURAS.
II y a risque de blessures ou de dommages
a I' appareil.
Si lo hiciera, podrfa sufrir heridas u ocasionar danos al equipo.
EFFECTUER CORRECTEMENT LES CONNEXIONS.
II y a risque de blessures ou de dommages
aI' appareil.
REALICE LAS CONEXIONES CORRECTAMENTE.
Una conexion incorrecta puede producir un incendio o danar el equipo.
AVANT TOUTE CONNEXION, DEBRANCHER LE CABLE DE LA
BORNE NEGATIVE DE LA BATTERIE.
II y a risque de choc electrique ou de blessure par courts-circuits.
ANTES DE EFECTUAR EL CABLEADO, DESCONECTE EL CABLE
DEL TERMINAL NEGATIVO DE LA BATERiA.
DO NOT SPLICE INTO ELECTRICAL CABLES.
NE PAS DENUDER LES CABLES ELECTRIQUES.
De no hacerlo asf. podrfa ocasionar una descarga electrica o heridas
debido a cortocircuitos electricos.
Never cut away cable insulation to supply power to other equipment.
Doing so will exceed the current carrying capacity of the wire and
result in tire or electric shock.
Ne jamais enlever Ia gaine isolante pour alimenter un autre appareil. II
y a risque de depassement de Ia capacite de courant et, partant,
d'incendie ou de choc electrique.
NO EMPALME CABLES Eli~CTRICOS.
DO NOT DAMAGE PIPE OR WIRING WHEN DRILLING HOLES.
NE PAS ENDOMMAGER DE CONDUITES Nl DE CABLES LORS DU
FORAGE DES TROUS.
Failure to do so may result in electric shock or injury due to electrical
shorts.
When drilling holes in the chassis for installation, take precautions so
as not to contact, damage or obstruct pipes, fuel lines, tanks or
electrical wiring. Failure to take such precautions may result in fire.
DO NOT USE BOLTS OR NUTS IN THE BRAKE OR STEERING
SYSTEMS TO MAKE GROUND CONNECTIONS.
Bolts or nuts used for the brake or steering systems (or any other
safety-related system), or tanks should NEVER be used for
installations or ground connections. Using such parts could disable
control of the vehicle and cause fire etc.
DO NOT INSTALL IN LOCATIONS WHICH MIGHT HINDER VEHICLE
OPERATION, SUCH AS THE STEERING WHEEL OR GEARSHIFT.
Doing so may obstruct forward vision or hamper movement etc. and
results in serious accident.
Lors du forage de trous dans le chassis en vue de !'installation. veiller a
ne pas entrer en contact, endommager ni obstruer de conduites, de
tuyaux a carburant ou de fils electriques. Le non-respect de cette
precaution peut entrainer un incendie.
NE PAS UTILISER DES ECROUS Nl DES BOULONS DU CIRCUIT
DE FREINAGE OU DE DIRECTION POUR LES CONNEXIONS DE
MASSE.
Les boulons et les ecrous utilises pour les circuits de freinage et de
direction (ou de tout autre systeme de securite) ou les reservoirs ne
peuvent JAMAIS etre utilises pour I' installation ou Ia liaison a Ia
masse. L'utilisation de ces organes peut desactiver le systeme de
contr6le du vehicule et causer un incendie, etc.
NE PAS INSTALLER A DES ENDROITS SUSCEPTIBLES
D'ENTRAVER LA CONDUITE DU VEHICULE, COMME LE VOLANT
OU LE LEVIER DE VITESSES.
La vue vers I' avant pourrait etre obstruee ou les mouvements genes.
etc., et provoquer un accident grave.
4
Nunca corte el aislamiento de un cable para suministrar energfa a otro
equipo. Esto hace que Ia capacidad portadora del cable se supere y
puede ser Ia causa de incendios o descargas electricas.
EVITE DANAR LOS TUBOS Y EL CABLEADO CUANDO TALADRE
AGUJEROS.
Si taladra agujeros en el chasis durante Ia instalacion, tome las
precauciones necesarias para no rozar. danar u obstruir los tubos. las
tuberfas de combustible, los depositos o el cableado electrico. De lo
contrario, podrfa provocar un incendio.
NO UTILICE TUERCAS 0 PERNOS EN EL SISTEMA DE FRENOS 0
DE DIRECCION PARA REALIZAR LAS CONEXIONES AMASA.
Los pernos o tuercas empleados en los sistemas de freno o de direccion
(o en cualquier otro sistema relacionado con Ia seguridad del vehfculo),
o los depositos. NUNCA deben utilizarse para instalaciones de
cableado o conexion amasa. Si utiliza tales partes podra incapacitar el
control del vehfculo y provocar un incendio, etc.
NO INSTALE EL EQUIPO EN LUGARES QUE PUEDAN INTERFERIR
CON LA OPERACION DEL VEHiCULO, COMO EL VOLANTE DE
DIRECCION 0 LA CAJA DE CAMBIOS DE VELOCIDAD.
Esto podrfa obstaculizar Ia visibilidad y diticultar el movimiento. etc. y
provocar accidentes graves.
LtcAUTION
LtATTENTION
LtPRUDENCIA
This symbol means important instructions. Failure to heed them can result in injury or
material property damage.
Ce symbole designe des instructions
importantes. Le non-respect de ces
instructions peut entrainer des blessures ou
des degats materiels.
Este slmbolo indica que las instrucciones
son importantes. De no tenerse en cuenta,
podrla ocasionarse heridas graves o danos
materiales.
HALT USE IMMEDIATELY IF A PROBLEM APPEARS.
Failure to do so may cause personal injury or damage to the product.
Return it to your authorized Alpine dealer or the nearest Alpine Service
Center for repairing_
HAVE THE WIRING AND INSTALLATION DONE BY EXPERTS.
The wiring and installation of this unit requires special technical skill
and experience. To ensure safety. always contact the dealer where you
purchased thi s product to have the work done.
USE SPECIFIED ACCESSORY PARTS AND INSTALL THEM
SECURELY.
Be sure to use only the specified accessory parts. Use of other than
designated parts may damage this unit internally or may not securely
install the unit in place. This may cause parts to become loose resulting
in hazards or product failure.
ARRANGE THE WIRING SO IT IS NOT CRIMPED OR PINCHED BY
A SHARP METAL EDGE.
Route the cables and wiring away from moving parts (like the seat
rails) or sharp or pointed edges. This will prevent crimping and damage
to the wiring. If wiring passes through a hole in metal, use a rubber
grommet to prevent the wire's insulation from being cut by the metal
edge of the hole.
DO NOT INSTALL IN LOCATIONS WITH HIGH MOISTURE OR
DUST.
Avoid installing the unit in locations with high incidence of moisture or
dust. Moisture or dust that penetrates into this unit may result in
product failure.
INTERROMPRE TOUTE UTILISATION EN CAS DE PROBLEME.
Le non-respect de cette precaution peut entrainer des blessures ou
endommager l'appareil. Retourner rappareil aupres du distributeur
Alpine agree ou un centre de service apres-vente Alpine en vue de Ia
reparation.
FAIRE INSTALLER LE CABLAGE ET L'APPAREIL PAR DES
EXPERTS.
Le cablage et )'installation de cet appareil requiert des competences
techniques et de I' experience. Pour garantir Ia securite, faire proceder a
I' installation de cet appareil par le distributeur qui vous I' a vendu.
UTILISER LES ACCESSOIRES SPECIFIES ET LES INSTALLER
CORRECTEMENT.
Utiliser uniquement les accessoires specifies. L'utilisation d ' autres
composants que les composants specifies peut causer des dommages
internes a cet appareil ou son installation risque de ne pas etre effectuee
con·ectement. Les pieces utilisees risquent de se desserrer et de
provoquer des dommages ou une defaillance de l'appareil.
FAIRE CHEMINER LE CABLAGE DE MANIERE A NE PAS LE
COINCER CONTRE UNE ARETE METALLIQUE.
Faire cheminer Ies cables a l'ecart des pieces mobiles (comme les rails
d'un siege) et des aretes acerees Oll pointues. Cela evitera ainsi de
coincer et d'endommager les cables. Si un cable passe dans un orifice
metallique. utiliser un passe-cloison en caoutchouc pour eviter que Ia
gaine isolante du cable ne soit endommagee par le rebord metallique de
I' orifice.
NE PAS INSTALLER A DES ENDROITS TRES HUMIDES OU
POUSSIEREUX.
Eviter d'installer l'appareil a des endroits soumis a une forte humidite
ou a de Ia poussiere en exces. La penetration d'humidite ou de
poussiere a r interieur de cet appareil risque de provoquer une
defaillance.
5
DEJE DE USAR LA UNlOAD INMEDIATAMENTE Sl APARECE
ALGUN PROBLEMA.
Su uso en estas condiciones podrfa ocasionar lesiones personales o
dai'ios al producto. Lleve Ia unidad a un distribuidor Alpine autorizado
o al Centro de servicio Alpine mas proximo para repararla.
CONFIE EL CABLEADO Y LA INSTALACION A PROFESIONALES.
El cableado y Ia instalaci6n de este equipo requieren una competencia
y experiencia tecnica contirmada. Para garantizar Ia seguridad,
p6ngase siempre en contacto con el distribuidor al que ha comprado el
equipo para contiarle estas tareas.
UTILICE LOS ACCESORIOS ESPECIFICADOS E INSTALELOS
CORRECTAMENTE.
Asegurese de utilizar los accesorios especiticados solamente. La
utilizaci6n de otras piezas no designadas puede ser Ia causa de daf\os
en el interior de Ia unidad ode una instalaci6n incorrecta. Las piezas
pueden atlojarse, lo que, ademas de ser peligroso, puede provocar
averfas .
DISPONGA EL CABLEADO DE FORMA QUE LOS CABLES NO SE
DOBLEN, NOSE CONTRAIGAN Nl ROCEN UN BORDE METALICO
AFILADO.
Aleje los cables y el cableado de piezas m6viles (como los rafles de los
asientos) o de bordes puntiagudos o afilados. De esta forma evitara
dobleces y dafios en el cableado. Si los cables se introducen por un
orificio de metal, utilice una arandela de goma para evitar que el borde
metalico del oriticio corte el aislamiento del cable.
NO INSTALE LA UNlOAD EN LUGARES MUY HUMEDOS 0 LLENOS
DE POLVO.
Evite instalar la unidad en Iugares con altos Indices de humedad o
polvo. Si entra polvo o humedad, el equipo puede averiarse .
Getting Started I Mise en route I Primeros pasos
English
Franrais
Turning Power On
Press any button (except ~ and
turn power on.
•
.! ) to
"DEMO OFF" rvill prompt when you install
and use the unit for the first time, press
~/ENTER to turn qff demo function. For
details, refer to Owner's Manual stored in the
supplied CD-ROM.
Press and hold ~/<.!) for at least 2
seconds to turn off the unit.
Espaiiol
Mise sous tension
Encendido de Ia unidad
Appuyez sur n'importe quel bouton (sauf
~ et !,) pour mettre l'appareil sous
tension.
Pulse cualquier bot6n (excepto ~ y
para encender Ia unidad.
•
• Le message« DEMO OFF » s'a.ffiche Ia
premiere fois que vous installez et utilisez
l'appareil; appuyez sur ~/ENTER pour
desactiver fa fonction de dbnonstration. Pour
plus de details, consultez le Mode d'emploi
enregistre sur le CD-ROMfourni.
Maintenez Ia touche ~/<.!) enfoncee
pendant 2 secondes au moins pour mettre
l'appareil hors tension.
6
.! )
"DEMO OFF" aparecera en Ia pantalla
cuando instale y utilice La unidad por primera
vez. Pulse ~/ENTER para desactivar Ia
funci6n de demostraci6n. Para mas
i1~{ormaci6n, consulte el Manual de operacic5n
incluido en el CD-ROM suministrado.
Mantenga pulsado ~/<.!) durante, al
menos, 2 segundos para apagar Ia
unidad.
Changing the Source
Changement de source
1
TUNER~ SIRIUSXM* ~ DISC~
3
2
USB AUDIO/iPod* ~ BT AUDI0* ~
5 ~TUNER
PANDORA~~ AUXILIARY*
TUNER~ SIRIUSXM*' ~ DISC-)
3
2
USB AUDIO/iPod* ~ BT AUDI0* - )
5 - ) TUNER
PANDORA~~ AUXILIARY*
*1 Displa.ved only when a SiriusXM Tuner is
*1 S'affiche uniquement lors du raccordemen.t
connected.
*2 Displayed onl.v 'rvhen the iPodliPhone is
connected.
Displayed only when BT IN is set to ON.
* Not displayed when ALPINE APP is set to
OFF.
*5 Displayed onl.v when the AUX SETUP is set to
ON.
*J
4
<0>-Tag
,;, 2
*3
4
*
*5
d'un. tuner SiriusXM.
S'affiche uniquement lorsqu'un iPod/iPhone
est connecte.
S 'qffiche uniquement lorsque BT IN est regie
sur ON.
Ne s 'a.ffiche pas lorsque ALPINE APP est regie
sur OFF.
S'affiche uniquement lorsque AUX SETUP est
regie sur ON.
Cambio de Ia fuente
TUNER ~ SIRIUSXM *1 - )
DISC -)
3
USB AUDIO/iPod*2 -) BT AUDI0* ~
5 - ) TUNER
PANDORA~~ AUXILIARY*
*I
'!'
2
3
*
*4
*5
Solo aparece si ha.v conectado w1 sintoniz.ador
SiriusXM.
Aparece solo si hay wz iPodliPhone conectado.
Aparece solo cuando BT IN esta ajustado en
ON.
No aparece cuando ALPINE APP estci
ajustado en OFF.
Aparece solo cuando AUX SETUP esta
c~justado en ON.
Adjusting Volume
Reglage du volume
Ajuste del volumen
Displaying the Text
Affichage du texte
Visualizaci6n de texto
The display will change every time the
button is pressed.
L'affichage change chaque fois que vous
appuyez sur cette touche.
El visualizador cambiara cada vez que
pulse el bot6n.
7
BASS ENGINE SQ Function I Fonction BASS ENGINE
SQ I Funci6n BASS ENGINE SQ
English
Espaiiol
With the BASS ENGINE SO function on
this unit , several parameters affecting
Bass performance are adjusted
simultaneously. The BASS ENGINE SO
Level adjustment varies these parameters
uniformly for optimum Bass effect at
different levels .
Grace a Ia fonction BASS ENGINE SO de
cet appareil , il est possible de regler
simultanem ent plusieurs parametres lies
aux performances des graves. Le reglage
du niveau du mode BASS ENGINE SO
permet de varier ces parametres
uniformement pour un effet de graves
optimal a different niveaux.
Con Ia funci6n BASS ENGINE SO de esta
unidad, varios parametros que afectan al
rendimiento de graves se ajustan
simultaneamente. El ajuste del nivel de
BASS ENGINE SO varia estos parametros
para obtener el mejor efecto de graves en
los distintos niveles .
About Setup when the external power
amplifier is connected.
In order to optimize the BASS ENGINE
SO , we recommend the following power
amplifier setup.
After setting up , you can adjust the BASS
ENGINE SO Level according to the music .
A. propos de Ia configuration lorsque
Acerca de Ia configuraci6n con el
amplificador de potencia externo
conectado.
Para optimizar el BASS ENGINE SO,
recomendamos configurar el amplificador
de potencia de Ia forma siguiente .
Despues de Ia configuraci6n, puede
ajustar el nivel de BASS ENGINE SO en
funci6n del tipo de musica.
1 Set gain of the power amplifier to
"MIN".
l'amplificateur de puissance externe est
raccorde.
Pour optimiser le BASS ENGINE SO , nous
recommandons Ia configuration
d 'amplificateur de puissance suivante.
Apres Ia configuration, vous pouvez regler
le niveau de BASS ENGINE SO en
fonction de Ia musique.
2 Set the Crossover Mode Sector
switch to "OFF".
1 Reglez le gain de l'amplificateur de
puissance sur« MIN».
3 Set the BASS ENG IN of this unit to
"ON", and the BASS ENGINE Sa
Level to "+3".
2 Reglez le selecteur du mode de
transfertsur « OFF ».
4 Play a song of the genre you
frequently listen to, and adjust gain
of the power amplifier.
3 Reglez le BASS ENGIN de cet
appareil sur « ON », puis le niveau de
BASS ENGINE Sa sur « +3 ».
4 Lisez un morceau du genre que vous
ecoutez frequemment, puis reglez le
gain de l'amplificateur de puissance.
8
1 Ajuste Ia ganancia del amplificador de
potencia en "MIN".
2 Ajuste el interruptor selector de modo
de cruce en "OFF".
3 Ajuste el BASS ENGIN de esta unidad
en "ON" y el nivel de BASS ENGINE
sa en "+3".
4 Reproduzca una canci6n del genero
que escuche mas a menudo y ajuste
Ia ganancia del amplificador de
potencia.
Franrais
English
Espaiiol
Activate BASS ENGINE sa
mode.
Activez le mode BASS
ENGINE Sa.
Active el modo BASS ENGINE
sa.
Press and hold to switch to BASS
ENGINE sa mode.
BASS ENGINE SO H
MANUAL SET (Initial setting)
Maintenez cette touche enfoncee pour
passer au mode BASS ENGINE sa.
BASS ENGINE SO H
MANUAL SET (reglage initial)
Pulse sin soltar para cambiar al modo
BASS ENGINE sa.
BASS ENGINE SO H
MANUAL SET (Ajuste inicial)
Adjusting
BASS
ENGINE Sa
level.
Display the BASS
ENGINE SO Level
adjustment screen.
Reglage du
niveau du
mode BASS
ENGINE sa.
Affichez l'ecran de
reglage du niveau
du mode BASS
ENGINE SO .
Selectionnez le
niveau de votre
choi x (0 - +6) .
(Reglage initial :
+3)
Select the desired
level (0- +6) .
(Initial setting : +3)
Ajuste del
nivel de
BASS
ENGINE sa.
Muestra Ia
pantalla de ajuste
del nivel de BASS
ENGINE SO .
Seleccione el
nivel que desee
(0 - +6) . (Ajuste
inicial : +3)
Enter.
Entree.
Pulse lntro para confirmar.
• From Level 0 to Level 6, th e effect of BASS
ENGINE SQ in creases level by level.
• Du niveau 0 au niveau 6, l 'effet du mode BASS
ENGINE SQ augmente prog ressivement.
• Entre Ni vel 0 y Ni vel 6, el efecto de BASS
ENGINE SQ aumenta de un nivel en un nivel.
9
Applying Tunelt I Utilisation de l'application Tunelt I
Aplicaci6n de Tunelt
English
This unit's sound tuning is programmable
from a connected Smartphone.
Through this unit. it is also possible to
receive and respond to information from
Alpine's Social Network Service (SNS)
available through the connected
Smartphone.
The installed Tune It App should be
launched on the Smartphone before
connection to the head unit.
For details, refer to Owner's Manual stored
in supplied CD-ROM.
Franfais
Espaiiol
Le reglage du son de cet appareil est
programmable depuis un smartphone
connecte .
La sintonizacion del sonido de esta unidad
puede programarse desde un smartphone
conectado.
Grace a cet appareil, il est egalement
possible de recevoir et de repondre aux
informations du Service de reseau social
(SNS) d'Aipine disponible via le
smartphone connecte.
A traves de esta unidad , tambien es
posible recibir y responder a informacion
del servicio Social Network Service (SNS)
de Alpine, disponible a traves del
smartphone conectado.
L'application Tunelt installee doit etre
lancee sur le smartphone avant Ia
connexion a l'appareil principal.
Es necesario ejecutar Ia app instalada
Tunelt en el smartphone antes de
establecer Ia conexion con Ia unidad
principal.
Pour plus de details, reportez-vous au
Mode d'emploi figurant sur le CD-ROM
fourni.
10
Para obtener mas informacion, consulte el
Manual del propietario del CD-ROM
suministrado.
Adjusting the sound via the Smartphone I Reglage du son via le smartphone I
Ajuste del sonido a traves del smartphone
English
Franrais
Espaiiol
Make sure the unit is powered
on.
Verifiez si l'appareil est sous
tension.
Asegurese de que Ia unidad
este encendida.
Launch the Tunelt App on the
Smartphone. Adjust the unit's
sound accordingly on the
Smartphone.
Lancez l'application Tunelt sur
le smartphone. Reglez le son
de l'appareil en consequence
sur le smartphone.
Ejecute Ia app Tunelt en el
smartphone. Ajuste el sonido
de Ia unidad en el smartphone.
Volume level cannot be adjusted via the
Smartphone.
• The setting cannot be done on both the
Smartphone and this unit at the same time.
• Please obey a// local trc~fjic la1--vs while using
thisfimction.
• II est impossible de regler le volume via le
smartphone.
• I! est impossible de proceder au reg/age
simultanhnent sur le snwrtphone et cet
appareil.
• Veuille~ respecter toutes fes lois locales
relatives ella circulation routiere lorsque vous
utilise~ cette fonction.
•
11
• El nivel de volumen no puede ajustarse a traves
del smartphone.
• Noes posible reali::_ar el ajuste en el
snwrtphone yen esta unidad almismo tiempo.
• Respete siempre los c6digos de circulacic5n
mientras uti/ice esta fimcir5n.
Receiving Notification I Reception de notifications I Recepcion de notificaciones
English
Espaiiol
Display the Notification Menu
while receiving Notification
from Facebook.
Affichez le Menu des
notifications tout en recevant
des notifications de Facebook.
Aparece el menu de
notificaci6n cuando se recibe
una notificaci6n de Facebook.
Select a desired mode from
LIKE* I REPLAY I NEXT I
PREVIOUS I TIS VOLUME.
Selectionnez le mode de votre
choix parmi LIKE* I REPLAY I
NEXT I PREVIOUS I TTS
VOLUME.
Seleccione el modo que desee
entre las opciones LIKE* I
REPLAY I NEXT I PREVIOUS I
TTS VOLUME.
*
*
*
Not displayed
Message type.
Enter.
~vhen
the received NotUication is
Ne s 'a.ffiche pas lorsqu e Ia
un message.
Entree.
12
not~fication
rerue est
No aparece si Ia notUicach5n recibida es un
mensa) e.
Pulse lntro para confirmar.
Display Notification List I Affichage de Ia liste des notifications I Visualizacion de Ia lista de notificaciones
Franrais
Espaiiol
Press and hold for at least
2 seconds to display the
Notification List.
Maintenez enfonce pendant au
moins 2 secondes pour
afficher Ia Liste des
notification s.
Mantenga pulsada esta opci6n
durante por lo menos 2
segundos para mostrar Ia lista
de notificacion es.
Select a desired notification .
Selectionne z Ia notification de
votre choix.
Seleccione Ia notificaci6n que
de see.
Enter.
Entree.
Pulse lntro para confirmar.
Then go to step 2 of "Receiving
Notification ".
Passez ensuite a l'etape 2 de Ia
section « Reception de
notification s ».
A continuaci6 n, vaya al paso 2
de "Recepcion de
notificacion es".
English
13
Radio
·--·
--
~ -_-,-.. , .............:.. • =------ -~-~ --~- - - ~ <--=-- - ~
--=--~
~- -,.=---,,..., ~ ~--
....
- --~ - ~'""""""'=--
English
Espaiiol
Recalling the TUNER Mode
Rappel du mode TUNER
Select the TUNER mode .
Selectionnez le mode TUNER .
Recuperaci 6n del modo
TUNER
Seleccione el modo TUNER .
Changing the Band
FM1
~
FM2
~AM~
FM1
Changemen t de frequence
FM1
~ FM2~ AM~
FM1
Cambio de Ia banda
FM1
~
FM2
~AM~
FM1
Presetting Stations
Automatica lly
Prereglage automatiqu e des
stations
Almacenam iento automatico
de emisoras
Press and hold for at least 2 seconds.
The tuner will automatically seek and store
6 strong stations in the selected band .
Maintenez cette touche enfoncee
pendant au moins 2 secondes.
Le tuner recherche et memorise
automatiquement les 6 stations les plus
puissantes sur Ia gamme selectionnee .
Pulse y mantenga presionado durante al
menos 2 segundos.
El sintonizador buscara y almacenara
automaticamente 6 emisoras de senal
intensa en Ia banda seleccionada .
Tuning to Preset Stations
Accord d'une station prereglee
Sinton fa de emisoras
memorizad as
14
CD/MP3/WMA
Espaiiol
English
Pause and Playback
Pause et lecture
Pausa y reproducci6n
Selecting the desired song
Selection du morceau de votre
choix
Selecci6n de Ia canci6n
deseada
Appuyez sur Ia touche~ ou ~ , puis
relachez-la pour aller au debut du
marceau actuel ou du marceau precedent.
Pulse y suelte ~ o ~ para omitir el
principia de Ia canci6n actual o de Ia
siguiente .
Press and hold ~ or ~ to fast
backward or fast forward.
Maintenez Ia touche ~ ou ~
enfoncee pour effectuer une recherche
rapide vers l'arriere ou vers l'avant.
Pulse y mantenga presionado ~ o
~ para el avance o el retroceso rapido .
Selecting the desired folder
(MP3/WMA)
Selection du dossier de votre
choix (MP3/WMA)
Selecci6n de Ia carpeta
deseada (MP3/WMA)
Press and release the ~ or ~ to
skip to the beginning of the current song or
the next song.
15
M.I.X. (Random Play)
M.I.X. (Lecture
MIX FOLDER : Only files in a folder are
played back in random
sequence. (MP3/WMA)
MIX FOLDER : Seuls Les fichiers d 'un
doss ier sont Ius dans un
ordre aleatoire . (MP3/
WMA)
The tracks are played
back in random
sequence .
MIX FOLDER : Solo se reproducen en
secuencia aleatoria los
archivos incluidos en una
carpeta. (MP3/WMA)
MIX ALL
Les pistes sont lues dans
un ordre aleatoire .
MIX ALL
Las pistas se reproducen
en secuencia aleatoria .
Cancel
MIX OFF
Annulation
MIX OFF
Cancelar
MIX ALL
MIX OFF
ah~atoire)
M.I.X. (Reproducci6n aleatoria)
Repeat Play
Lecture repetee
Repetici6n de reproducci6n
REPEAT ONE : Only a track/file is
repeatedly played back .
REPEAT ONE : Une seule piste/fichier est
lue d 'une maniere
repetee .
REPEAT ONE: Solo se reproduce varias
veces una pista/archivo .
REPEAT FOLDER :
Only files in a folder are
repeatedly played back .
(MP3/WMA)
REPEAT OFF: Cancel
REPEAT FOLDER :
Seuls les fichiers d'un
dossier sont Ius d 'une
maniere repetee . (MP3/
WMA)
REPEAT FOLDER:
Solo se reproducen varias
veces los archivos
incluidos en una carpeta .
(MP3/WMA)
REPEAT OFF : Cancelar
REPEAT OFF : Annulation
Eject
Ejection
16
Expulsar
Fran~ a is
English
Espaiiol
Pause and Playback
Pause et lecture
Pausa y reproducci6n
Selecting the desired song
Selection du morceau de votre choix
Press and release the ~ or ~ to
skip to the beginning of the current song or
the next song.
Appuyez sur Ia touche~ ou ~, puis
relachez-la pour aller au debut du
marceau actuel ou du marceau precedent.
Selecci6n de Ia canci6n
deseada
Press and hold ~ or ~ to fast
backward or fast forward.
Maintenez Ia touche ~ ou ~
enfoncee pour effectuer une recherche
rapide vers l'arriere ou vers !'avant.
17
Pulse y suelte ~ o ~ para omitir el
principia de Ia canci6n actual o de Ia
siguiente .
Pulse y mantenga presionado ~ o
~ para el avance o el retroceso rapido .
~
ah~atoire)
M.I.X. (Random Play)
M.I.X. (Lecture
MIX FOLDER: All songs in the current
folder are played back in
random sequence .
MIX FOLDER: Tous les morceaux du
dossier actuel sont Ius
dans un ordre aleatoire .
MIX ALL
All songs in the Flash
Memory are played back
in random sequence .
MIX ALL
Tous les morceaux de Ia
cle USB sont Ius dans un
ordre aleatoire .
MIX OFF
Cancel
MIX OFF
Annulation
M.I.X. (Reproducci6n aleatoria)
MIX FOLDER: Todas las canciones de Ia
carpeta actual se
reproducen de forma
aleatoria.
MIX ALL
Todas las canciones de Ia
memoria USB se
reproducen de forma
aleatoria.
MIX OFF
Cancelar
Repeat Play
Lecture repetee
Repetici6n de reproducci6n
REPEAT ONE: Only a file is repeatedly
played back .
REPEAT ONE : Un seul fichier est lu d'une
maniere repetee.
REPEAT ONE: Solo se reproduce varias
veces un archivo .
REPEAT FOLDER:
Only files in a folder are
repeatedly played back .
REPEAT FOLDER :
Seuls les fichiers d'un
dossier sont Ius d 'une
maniere repetee.
REPEAT FOLDER:
Solo se reproducen varias
veces los archivos
incluidos en una carpeta .
REPEAT OFF:
Cancel
REPEAT OFF : Annulation
18
REPEAT OFF : Cancelar
BLUETOOTH®
~~-=-~~:;_-~~: ~=- ~---==-- ~~ - - _ :___ ·;::~ -: : ==-------== ~--:_~- ---
_
.:-: ~_:--~~-====-==-; _:----==:..~:-_ ·_~ - ,
-·-
-
- - -~
,_, [1
~
~============~
.
'
~-~~-~~ =~-f---=,,-;z="==~~~=-~: _1': -~~-----] ,<~ Espaiiol
Franfais
English
About BLUETOOTH
A propos de BLUETOOTH
Acerca de BLUETOOTH
BLUETOOTH is a wireless technology
allowing communication between a mobile
device or personal computer over short
distances. This enables a hands-free call
or data transmission between
BLUETOOTH compatible devices.
BLUETOOTH est une technologie sans fil
qui permet a un appareil mobile et a un
ordinateur de communiquer entre eux sur
de courtes distances. Elle permet d'etablir
des communications mains libres et de
transmettre des donnees entre des
appareils compatibles BLUETOOTH.
BLUETOOTH es una tecnologia
inalambrica que permite comunicarse
entre un dispositivo m6vil o un ordenador
personal en distancias cortas. De este
modo pueden realizarse llamadas manos
libres o transmitir datos entre dispositivos
compatibles con BLUETOOTH.
Pairing with a BLUETOOTH compatible device I Association d'un appareil compatible BLUETOOTH I
Sincronizacion con un dispositivo compatible con BLUETOOTH
Espaiiol
English
Use your BLUETOOTH
compatible device to search and
select "CDE-154Series".
Recherchez puis selectionnez
« CDE-154Series » depuis votre
appareil compatible
BLUETOOTH.
For iPod/iPhone, connect it to this
unit via USB port.
Raccordez I' iPod/i Phone
appareil via le port USB.
19
a cet
Utilice su dispositivo compatible
con BLUETOOTH para detectar
y seleccionar "CDE-154Series" .
En el caso de iPod/iPhone,
conectelos a esta unidad a
traves del puerto USB.
<For devices with Secure
Simple Pairing (SSP) or iPod/
iPhone>
<Pour les appareils
compatibles Secure Simple
Pairing (SSP) ou l'iPod/iPhone>
<Para dispositivos con
Sintonizaci6n segura simple
(SSP) o iPod/iPhone>
The head unit will ask to "PAIR".
Use the Rotary encoder to
select "YES" and press
(\/ENTER.
L'autoradio affichera le message
«PAIR». Tournez le Bouton
rotatif pour selectionner « YES »,
puis appuyez sur (\/ENTER.
La unidad principal mostrara Ia
solicitud "PAIR". Gire el
Codificador giratorio para
seleccionar "YES" y, a
continuaci6n, pulse (\/ENTER.
<For all other devices>
<Pour tous les autres
appareils>
<Para todos los demas
dispositivos>
Lorsque l'autoradio le demande,
entrez le code PIN « 0000 » sur
votre appareil compatible
BLUETOOTH.
Cuando Ia unidad principal lo
solicite, introduzca el c6digo PIN
"0000" en el dispositivo
compatible con BLUETOOTH.
Lorsque !'association est reussie,
le message « CONNECTED »
s'affiche sur l'autoradio.
Cuando se complete con exito Ia
sincronizaci6n, Ia unidad
principal mostrara en pantalla
"CONNECTED" .
When prompted by the head unit,
input the PIN code "0000" on the
BLUETOOTH compatible device.
When pairing is successful,
"CONNECTED" will be
displayed on the head unit.
20
Calling I Appel I Llamadas
English
Franrais
Espaiiol
Press to activate the outgoing
method list selection mode.
Appuyez sur cette touche pour
activer le mode de selection de
Ia liste des modes d'emission
d'appel.
Pulse para activar el modo de
selecci6n de Ia lista de
llamadas salientes.
Select a desired outgoing
mode from DIALED/RECEIVED/
MISSED/PHONE BOOK.
Choisissez le mode de sortie
desire parmi DIALED/
RECEIVED/MISSED/PHONE
BOOK.
Seleccione el modo de
llamadas salientes deseado
entre DIALED/RECEIVED/
MISSED/PHONE BOOK.
Enter.
Entree.
Pulse lntro para confirmar.
Select the desired name or
telephone number.
Selectionnez le nom ou le
numero de telephone souhaite.
Seleccione el nombre o el
numero de telefono que desee.
Enter.
Entree.
Pulse lntro para confirmar.
The selected telephone will be called.
Le telephone selectionne est appele.
El telefono llamara al numero
seleccionado.
21
Answering the Incoming Call I Repondre
aun appel entrant I Como responder a una llamada entrante
English
Franrais
a l'appel.
Espaiiol
Answer the call.
Repondez
The call starts.
L'appel commence.
La llamada se iniciara.
•
• Lorsque «AUTO ANS » est regie sur ON,
l'appel est automatiquement pris apres environ
5 secondes.
• Si el pardmetro "AUTO ANS" se cm~figura
como ON, Ia llamada se responde
automdticamente tras 5 segundos
aproximadamente.
When "AUTO ANS" is set to ON, the call is
an.nvered automaticall_v qfter about 5 seconds.
Responda a Ia llamada.
Hanging up the Telephone I Raccrocher le telephone I Como col gar el telefono
English
End the call.
Franrais
Terminez l'appel.
22
Espaiiol
Ponga fin a Ia llamada.
Voice Control Operation I Fonction de controle vocal I Operaciones de control por voz
Franrais
Espaiiol
Press and hold for at least 2
seconds to activate the Voice
Recognition mode.
Appuyezsurcetletouche
pendant au moins 2 secondes
pour activer le mode de
reconnaissance vocale.
Pulselo sin soltarlo durante al
menos 2 segundos para activar
el modo de reconocimiento de
voz.
After the Voice Recognition
mode is activated and
"SPEAK" is displayed, you can
make a phone call, play a song,
etc., via this unit by inputting
voice control commands*.
Une fois le mode de
reconnaissance vocale active et
l'indication « SPEAK » affichee,
vous pouvez passer un appel,
lire un morceau, etc., via cet
appareil en creant des
commandes de controle vocal*.
*
*
Una vez activado el modo de
reconocimiento de voz y
cuando aparezca "SPEAK",
puede realizar una llamada de
telefono, reproducir una
canci6n, etc., a traves de esta
unidad mediante 6rdenes de
control por voz*.
English
•
•
•
•
•
Please refer to your Smartphone manual for
other voice control commands.
You can peiform this operation only vvhen a
VcJice recognition compatible Smartphone is
connected. If the Smartphone is not compatible
with the Voice recognition, "NO SUPPORT" is
displayed for 2 seconds.
The Voice recognition performance depends on
the Smartphone and mounting location of the
microphone. Please pay attention when the
microphone is mounted.
VcJice recognition operation depends on the
function of the Smartphone. For details, refer to
the Owner's Manual of the Smartphone.
If a called person that you sa_v is not found,
"NO CALL" is displayedfor 2 seconds.
Please obe_v all local traffic /cn1;•s while using
this function.
•
•
•
•
•
Reportez.-vous a Ia documentation de \'Otre
Smartphone pour connaltre les mares
conunandes de contrO!e vocal.
La reconnaissance vocate est disponible
uniquement lorsque vous connectez. un
Smartphone compatible avec cettefonction. Si
votre Smartphone n 'est pas compatible avec
Ia fonction de reconnaissance \'Ocate,
I 'indication « NO SUPPORT » s 'ajjiche
pendant 2 secondes.
Les performances de Ia reconnaissance vocale
dependent du smartphone et de /'emplacement
de montage du microphone. So_vez. attentif lors
de I 'installation du microphone.
La reconnaissance vocate depend des
fonctionnalites du Smartphone. Pour obtenir
de plus amples informations, reportez.-vous au
mode d'emploi du Smartphone.
Si le nom de Ia personne que vmts prononcez.
est introuvahfe, /'indication« NO CALL »
s 'aftlche pendant 2 secondes.
Veiflez. a respecter Ia legislation en matiere de
circulation routiere lorsque vous utilisez. cette
fonction.
23
* Consulte el manual de su tel¢fono inteligente para
saber nuis sobre las drdenes de control por voz..
• Puede realiz.ar esta operacidn unicamente si ha
conectado un Tel¢fono inteligente compatible con
reconocimiento de voz.. Si el Telefono inteligente
noes compatible con reconocimiento de vo.::,
aparecerd "NO SUPPORT' en fa pantct!la
durante 2 segundos.
• Elfuncionamiento del reconocimiento de voz.
depende del smartphone y del sitio donde este
ubicado el micr(Yono. Se debe tener en cuenta Ia
posicion de montaje delmicr6fono.
• Elfuncionamiento de reconocimiento de voz.
depende de Ia funcionafidad del Tel¢fono
inteligente. Para obtener nuis iJ~f'ormaci6n al
respecto, consulte el Manual de operacic5n del
Telefono inteligente.
• Si el nombre de Ia persona a Ia que quiere /lamar
nose encuentra, aparecerd "NO CALL·· en la
pantczlla durante 2 segundos.
• Siga todas las normativas locales de trd.fico
cuando uti/ice esta .fimch5n.
iPodliPhone (Optional) I iPodliPhone (en option) I
iPodliPhone (Opcional)
I
.
~~·-,--~~:==~~~~----~·~~ --t~~
:
--~----
English
An iPod/iPhone can be connected to this
unit by using the Interface cable for iPod
(included with iPod/iPhone).
Espaiiol
Un iPod/iPhone peut etre connecte a cet
appareil a l'aide d'un cable d 'interface
pour iPod (inclus avec l'iPod/iPhone).
Es posible conectar un iPod/iPhone a esta
unidad mediante el cable de interfaz para
iPod (suministrado con el iPod/iPhone) .
Recalling the iPod Mode
Rappel du mode iPod
Recuperaci6n de Ia fuente iPod
Select the iPod mode.
Selectionnez le mode iPod .
Seleccione Ia fuente iPod.
Pause and Playback
Pause et lecture
Pausa y reproducci6n
24
Selecting the desired song
Press and release the ~ or ~ to
skip to the beginning of the current song or
the next song.
Selection du marceau de votre
choix
Appuyez sur Ia touche ~ ou ~, puis
relachez-la pour aller au debut du
marceau actuel ou du marceau precedent.
Selecci6n de Ia canci6n deseada
Pulse y suelte ~ o ~ para omitir el
principia de Ia canci6n actual o de Ia
siguiente.
Press and hold ~ or ~ to fast
backward or fast forward through the
current song.
Maintenez Ia touche ~ ou ~
enfoncee pour une recherche rapide vers
l'arriere ou vers l'avant au sein du marceau
actuel.
Pulse y mantenga presionado ~ o
~ para avanzar o retroceder rapido en
Ia canci6n actual.
Random Play Shuffle (M.I.X.)
Lecture aleatoire (M.I.X.)
Reproducci6n aleatoria (M.I.X.)
MIX ALBUM (Shuffle Albums):
Album shuffle playback plays
back all songs in order, then
randomly selects the next
album.
MIX ALBUM (Lecture aleatoire des
albums):
La lecture aleatoire de l'album
lit tous les morceaux dans
l'ordre, puis selectionne au
hasard l'album suivant.
MIX ALBUM (Reproducir albumes de
forma aleatoria):
La reproducci6n aleatoria de
albumes reproduce todas las
canciones en orden y, a
continuaci6n, selecciona el
siguiente album de forma
aleatoria.
MIX SONG (Shuffle Songs):
Song shuffle randomly plays
back songs within a selected
category (playlist, album ,
etc.).
MIX OFF
: Cancel
MIX SONG (Lecture aleatoire des
morceaux):
Cette fonction lit de maniere
aleatoire les morceaux d'une
categorie choisie (liste
d'ecoute, album, etc.).
MIX OFF
Annulation
MIX SONG (Reproducir canciones de
forma aleatoria):
La reproducci6n aleatoria de
canciones reproduce las
canciones de una categorfa
seleccionada (lista de
reproducci6n , album, etc.) .
MIX OFF
25
: Cancelar
Random Play Shuffle All
Lecture aleatoire All
1. Press ~/ENTER to activate the
search selection mode.
2. Turn the Rotary encoder to select
SHUFFLEALL, and then press
1. Appuyez sur ~/ENTER pour
activer le mode de selection par
recherche.
2. Tournez le Bouton rotatif pour
selectionner SHUFFLEALL, puis
appuyez sur ~/ENTER.
~/ENTER.
SHUFFLEALL: Shuffle ALL plays all
songs in the iPod/iPhone
randomly. Any one song
does not play back again
until all songs have been
played back .
• To cancel the Shuffle ALL mode, press ::::"'/.! 5 to
select MIX OFF.
SHUFFLEALL: l_a lecture aleatoire ALL lit
tous les morceaux de
l'iPod/iPhone de maniere
aleatoire . Aucune musique
n'est lue nouveau avant
qu 'elles n'aient d 'abord
toutes ete lues.
Reproducci6n aleatoria
Reproducir todo de forma
aleatoria
1 Pulse ~/ENTER para activar el
modo de selecci6n de busqueda.
2 Gire el Codificador giratorio para
seleccionar SHUFFLEALL y, a
continuaci6n, pulse ~/ENTER.
SHUFFLEALL :
a
• Pour annuler le mode de lecture alecztoire ALL,
appuye::, sur ::::"'/.! 5 pour selectionnez. MIX OFF
Reproduce todas las
canciones del iPod/
iPhone de forma
aleatoria. No se repite
ninguna canci6n hasta
que no se hayan
reproducido todas .
• Para cancelar el modo Sht~ff/e ALL, pulse ::::"'/.! 5
para seleccionar MIX OFF
Repeat Play
Lecture repetee
Repetici6n de reproducci6n
REPEAT ONE : Only a song is repeatedly
played back .
REPEAT ONE: Un seu l morceau est lu
d 'une maniere repetee.
REPEAT ONE :
REPEAT OFF : Cancel
REPEAT OFF : Annulation
Solo se reproduce
varias veces una
canci6n.
REPEAT OFF :
Cancelar
26
Searching for a desired Song (iPodliPhone) I Recherche d'un morceau souhaite (iPodliPhone) I
Busqueda de Ia cancion deseada (iPodliPhone)
Playlist/Liste de lecture/Lista de
reproducci6n
Song/Morceau/Canci6n
Genius Mix list/Liste Genius Mix/
Lista Genius Mix
Espaiiol
English
Activate the search selection
mode.
Activez le mode de selection
de recherche.
27
Active el modo de selecci6n de
busqueda.
Select the desired search
mode.
Selectionnez le mode de
recherche de votre choix.
Seleccione el modo de
busqueda deseado.
PLAYLIST/ARTIST/ALBUM/SONG/
PLAYLIST/ARTIST/ALBUM/SONG/
PODCAST/GENRE/COMPOSER/
AUDIOBOOKIGENIUS MIX
PLAYLIST/ARTIST/ALBUM/SONG/
PODCAST/GENRE/COMPOSER/
AUDIOBOOK/GENIUS MIX
• L'a.ffichage de Ia liste du mode de recherche
depend du parametre d¢fini dans iPod LIST.
•
Enter.
Entree.
Pulse lntro para confirmar.
Select the desired title.
Selectionnez le titre de votre
choix.
Seleccione el titulo deseado.
Enter.
Entree.
Pulse lntro
para
confirmar.
PODCASVGENR8COMPOSE~
AUDIOBOOKIGENIUS MIX
•
The display of search mode list varies depending
on the setting of iPod LIST.
Song/Audiobookl
Genius Mix
Search mode:
The selected
song/audiobook/
genius mix list is
played back.
Others Search
mode:
Proceeds to the
next hierarchy
level. Search for a
title by performing
steps 4 and 5
repeatedly.
Mode de
recherche par
marceau/livre
audio/mix Genius:
La lecture du
marceau/livre
audio/mix Genius
selectionne
commence.
Autres modes de
recherche:
Passez au niveau
de hierarchie
suivant.
Recherchez un
titre en suivant
plusieurs fois les
eta pes 4 et 5.
28
La lista de modos de busqueda disponibles
variara en funci6n del ajuste seleccionado para
iPod LIST.
Modo de
busqueda
Canci6n/
Audiolibro/Genius
Mix:
Se reproduce Ia
lista de canci6n/
audiolibro/genius
mix seleccionada.
Modo de
busqueda de
otros:
Prosigue hasta el
siguiente nivel
jerarquico.
Busque un titulo
realizando los
pasos 4 y 5
repetidamente.
• After pressing and holding ~/ENTER for at
least 2 seconds while in each hierarchy (except
Song, Audiobook and Genius Mix list
hierarchy), all songs of the selected hierarchy
are played back.
When search is made during M.l.X. play, the
M.l.X. play mode will be canceled.
• Apres a voir appuye sur ~!ENTER pendant 2
secondes au moins au sein d'une hierarchie
(sauf fes hierarchies Song, Audiobook et Genius
Mix), tousles morceaux de Ia hierarchie
selectionnee sont Ius.
• Lorsque la recherche est effectuee pendant Ia
lecture M.I.X., le mode de lecture M.I.X. est
annuli.
29
• Tras mantener pulsado ~!ENTER por lo
menos 2 segundos en cadajerarqufa ( excepto Ia
jerarqufa de lista de cancic5n, audiolibro y
Genius Mix), todas las canciones de la
jerarqufa seleccionada se reproduciran.
• Si se realiza Ia busqueda durante la
reproducci6n M.I.X., el modo de reproduccic5n
M.I.X. se cancelard.
Pandora® internet radio (Optiona l) I Radio
internet Pandora® (en option) I Radio por internet
Pandora® (opciona l)
I]
English
Franrais
Espaiiol
Pandora® internet radio is your own FREE
personalized radio now available to stream
music on your smartphone (which runs
Android OS or iOS) .
The CDE-154BT enables you to interact
with your Pandora® account by connecting
a smartphone that has the latest version of
the Pandora® application installed .
La radio par Internet Pandora® est un
service radio personnalise permettant de
diffuser de Ia musique sur votre telephone
portable (qui execute Android OS ou iOS) .
Le CDE-154BT permet d 'interagir avec
votre compte Pandora® en connectant un
telephone portable dote de Ia derniere
version de !'application Pandora®.
La radio por Internet Pandora® es un
servicio de radio totalmente personalizable y
GRATUITA ahora disponible para escuchar
musica en streaming en el smartphone (que
ejecute Android OS o iOS).
Los modelos CDE-154BT permiten
interactuar con Ia cuenta de Pandora® si
conecta un smartphone con Ia version mas
reciente de Ia aplicaci6n Pandora®
instalada.
Recalling the PANDORA Mode
Rappel du mode PANDORA
Select the PANDORA mode .
Selectionnez le mode PANDORA.
Recuperaci6n del modo
PANDORA
Seleccione el modo PANDORA.
Pause and Playback
Pause et lecture
30
Pausa y reproducci6n
Selecting the desired track
Selection de Ia piste souhaitee
Selecci6n de Ia pista deseada
~.
Pour passer au morceau suivant, appuyez
Para saltar a Ia pista siguiente , pulse
sur~.
~·
Indications visuelles
personnalisees.
Opiniones gestuales.
Pulse • o ' para activar el
pulgar hacia arriba o el pulgar
hacia abajo .
To skip to the next track, press
"Thumbs" Feedback.
Press • or ' for thumbs up or
thumbs down.
• : Thumbs up .
'
: Thumbs down.
Appuyez sur • ou ' pour
selectionner le pouce leve ou le
pouce baisse.
• : Pouce vers le haut (approuve).
• : Pulgar hacia arriba (aprobaci6n) .
' : Pulgar hacia abajo ( desaprobaci 6n) .
' : Pouce vers le bas (desapprobation).
Bookmarking a desired Song or Artist I Mise en signet d'un morceau ou d'un artiste I
Agregar a favoritos una cancion o artista que desee
Franrais
English
Espaiiol
Activate the Bookmark mode.
Activez le mode Marquage.
Active el modo de busqueda.
Select the "TRACK
(Bookmark)" or "ARTIST
(Bookmark)".
Selectionnez « TRACK (Signet) »
ou « ARTIST (Signet) ».
Seleccione "TRACK (Favorite)"
o "ARTIST (Favorite)".
Enter.
Entree.
Pulse lntro para confirmar.
The current track or artist is bookmarked.
Le morceau ou !'artiste en cours est mis en
signet.
La pista o artista actual se agrega a
favoritos .
31
Creating a New Station I Creation d'une station I Creacion de una nueva emisora
English
Franrais
Espaiiol
Activate New Station Creating
mode.
Activez le mode de creation
d'une nouvelle station.
Active el modo de creaci6n de
una nueva emisora.
Select "TRACK" or "ARTIST".
Selectionnez « TRACK » ou
« ARTIST».
Seleccione "TRACK" o
"ARTIST".
Enter.
Entree.
Pulse lntro para confirmar.
A New Station based on current track or
artist is created.
Une nouvelle station de radio basee sur le
marceau ou !'artiste en cours est creee .
Se creara una nueva emisora a partir de Ia
pista o el artista actual .
32
Searching for a desired Station I Recherche d'une station I Busqueda de una emisora deseada
English
Espaiiol
Activate the search selection
mode.
Activez le mode de selection
de recherche.
Active el modo de selecci6n de
busqueda.
Select the desired search
mode.
Selectionnez le mode de
recherche de votre choix.
Seleccione el modo de
busqueda deseado.
A-Z (Alphabet Search) I BY DATE (Search
by Date Added)
A-Z (Recherche alphabetique) I BY DATE
(Recherche par date ajoutee)
A-Z (Busqueda alfabetica) 1 BY DATE
(Busqueda por fecha de agregaci6n)
Enter.
Entree.
Pulse lntro para confirmar.
Select the desired station.
Selectionnez Ia station de votre
choix.
Seleccione Ia emisora
deseada.
Enter.
Entree.
Pulse lntro para confirmar.
Pandora® will play that station.
Pandora® diffuse cette station .
Pandora® reproducira dicha emisora .
33
SiriusXM Satellite Radio Operatio n (Optiona l) I
Utilisation de Ia radio par satellite SiriusXM (en
option) I Funciona miento de Ia radio por sat91ite
SiriusXM (opciona l)
I]
- - ~-_ _ · ---·---•---___ _ IIJ
_____•_ __ __III
_ _ ___I'/IIIIU
~"·~-~~-----~-,~. .,. . .,J
English
Franrais
Espaiiol
SiriusXM Tuner operation:
when a SiriusXM Tuner is connected to this
unit, the following operations may be
performed.
Utilisation du tuner SiriusXM :
Lars du raccordement d'un tuner SiriusXM
a cet appareil, les operations suivantes
sont disponibles.
Funcionamiento del sintonizador SiriusXM :
Si hay conectado un sintonizador SiriusXM
a esta unidad , podra hacer lo siguiente .
Recall the Satellite Radio
(SIRIUSXM) mode.
Rappelez le mode Radio par
satellite (SIRIUSXM).
Recupere el modo de radio por
satelite (SIRIUSXM).
34
Select the desired channel.
Selectionnez le canal de votre
choix.
Seleccione el canal que desee.
Select the desired band.
Selectionnez Ia bande de votre
choix.
Seleccione Ia banda que desee.
SXM1
~
SXM2
~
SXM3
~
SXM1
SXM1
Storing Channel Presets
Press and hold one of the preset buttons
(1 through 6), for at least 2 seconds, to
store the channel.
Tuning Channels using Presets
Press the preset buttons (1 through 6)
that has your desired Satellite Radio
channel stored in memory.
~
SXM2
~
SXM3
~
Memorisation des prereglages
de canaux
Maintenez enfoncee l'une des touches de
prereglage (1 a 6) pendant au moins 2
secondes pour memoriser le canal.
Syntonisation de canaux via
les touches de prereglage
Appuyez sur Ia touche de prereglage
(1 a 6) sous laquelle vous avez memorise
le canal de radio par satellite souhaite .
35
SXM1
~
SXM2
~
SXM3
~
SXM1
SXM1
Memorizaci6n de canales
Pulse y mantenga presionado uno de los
botones de memorizaci6n (1 al 6)
durante al menos 2 segundos para
guardar el canal.
Sintonizaci6n de canales
mediante numeros de
memorizaci6n
Pulse el bot6n de memorizaci6n (1 al 6)
que tenga su canal deseado de radio por
satelite guardado en Ia memoria.
Setting the Time I R9gla ge de l'heure I
Ajuste de Ia hora
Espaiiol
English
Activate the SETUP mode.
Activez le mode SETUP.
Active el modo SETUP.
Press and hold for at least 2 seconds .
Maintenez cette touche enfoncee pendant
au mains 2 secondes .
Pulselo sin soltarlo durante al menos 2
segundos .
Select GENERAL mode.
Selectionnez le mode
GENERAL.
Seleccione el modo GENERAL.
Enter.
Entree.
Pulse lntro para confirmar.
36
Select CLOCK ADJ mode.
Selectionnez le mode CLOCK
ADJ.
Seleccione el modo CLOCK
ADJ.
Enter.
Entree.
Pulse lntro para confirmar.
Adjust the hours.
Reglez les heures.
Ajuste Ia hora.
Enter.
Entree.
Pulse lntro para confirmar.
Repeat 6 and 7 to adjust minutes.
Repetez les etapes 6 et 7 pour regler les
minutes.
Repita el paso 6 y 7 para ajustar los
minutos.
Return to normal mode.
Revenez au mode normal.
Vuelva al modo normal.
Press and hold for at least 2 seconds.
Maintenez cette touche enfoncee pendant
au moins 2 secondes.
Pulselo sin soltarlo durante al menos 2
segundos.
37
Specifications I Specifications I Especificaciones
FM TUNER SECTION
Tuning Range
SECTION DU TUNER FM
87.7-107.9 MHz
AM TUNER SECTION
Tuning Range
87,7-107,9 MHz
SECTION DU TUNER AM
5 30-1 ) 10 kHz
GENERAL
Plage de syntonisation
14.4 V DC
( 11-16 V allowable)
Power Output
18 W RMS x 4*
* Primary amplifier ratings per CEA-2006
Standard
• Power output: measured at 4 Ohms and
~ 1% THD+N
• S/N: 80 dBA (reference: 1 W into 4 Ohms)
1.4 kg (3 lbs. 1 oz)
Width
178 mm (7")
Height
50 mm (2")
Depth
161.5 mm (6-3/8")
87,7-107,9 MHz
530-1 710kHz
Gama de sintonizaci6n
530-1.710 kHz
GENERAL
Alimentation
14,4 v cc
(1I-I6 V admissibles)
Puissance de sortie
18 W RMS x 4*
* Valeurs nominales de I' amplificateur principal
selon la norme CEA-2006
• Puissance de sortie : mesuree
~I% THD+N
a4 ohms et
• Rapport signal-bruit : 80 dBA
(reference : 1 W dans 4 ohms)
Po ids
CHASSIS SIZE
Gama de sintonizaci6n
SECCION DEL SINTONIZADOR AM
GENERALITES
Power Requirement
Weight
Plage de syntonisation
SECCION DEL SINTONIZADOR FM
1,4 kg (3 lbs. I oz)
DIMENSIONS DU CHASSIS
Requisito de alimentaci6n 14,4 V CC
(II- I6 V margen
permisible)
Salida de alimentaci6n
I8WRMSx4*
* Niveles de amplificador principal segun
estandar CEA-2006
• Potencia de salida: medida a 4 ohmios y
~ 1% THD+N
• Sefial!Ruido: 80 dBA
(referencia: I Wen 4 ohmios)
Peso
I ,4 kg
TAMANO DEL CHASIS
Largeur
I78 mm (7")
Hauteur
50 mm (2")
Anchura
178 mm
Profondeur
161,5 mm (6-3/8")
Altura
50mm
Profundidad
161,5 mm
38
BLUETOOTH SECTION
SECTION DE LA CLE BLUETOOTH
SECCION BLUETOOTH
BLUE TOOTH
Specification
Bluetooth V2.1 + EDR
Specification
BLUETOOTH
Bluetooth V2.1 + EDR
Especificaci6n de
BLUE TOOTH
Bluetooth V2.1 + EDR
Output Power
+4 dBm Max. (Power
class 2)
Puissance de sortie
Potencia de salida
+4 dBm max.
(Clase 2)
Profile
HFP (Hands-Free
Profile)
Profil
+4 dBm max.
(puissance de classe 2)
HFP (profil mains
libres)
Perfil
HFP (Perfil manos
libres)
HSP (Perfil de
auriculares)
A2D P (Perfi I de
distribuci6n de audio
avanzada)
AVRCP (Perfil del
control remoto de
audio/vfdeo)
HSP (Head Set
Profile)
HSP (profil casque)
A2D P (profil de
distribution audio
avance)
A2DP (Advanced
Audio Distribution
Profile)
AVRCP (profil de
audio/
video)
telt~commande
AVRCP (Audio/Video
Remote Control
Profile)
39
Windows Media and the Windows logo are trademarks, or
registered trademarks of Microsoft Corporation in the
United States and/or other countries.
• iPhone, iPod, iPod classic, iPod nano, iPod touch and
iTunes are trademarks of Apple Inc., registered in the U.S.
and other countries.
"Made for iPod," and "Made for iPhone," mean that an
electronic accessory has been designed to connect
specifically to iPod, or iPhone, respectively, and has been
certified by the developer to meet Apple performance
standards. Apple is not responsible for the operation of
this device or its compliance with safety and regulatory
standards. Please note that the use of this accessory with
iPod, or iPhone may affect wireless performance.
The BLUETOOTI-f® word mark and logos are registered
trademarks mvned by the Bluetooth SIC, Inc. and any use
of such marks by Alpine Electronics, Inc. is under licence.
Other trademarks and trade names are those of their
respective owners.
• MPEC Layer-3 audio coding technology licensedfrom
Fraunhofer /IS and Thomson. Supply of this product only
conveys a licence for private, non-commercial use and
does not convey a licence nor imply any right to use this
product in any commercial (i.e. revenue-generation) real
time broadcasting (terrestrial, satellite, cable and/or any
other media), broadcasting/streaming via internet,
intranets and/or other networks or in other electronic
content distribution systems, such as pay-audio or audioon-demand applications. An independent licence for such
use is required. For details, please visit
http://www.mp3licensing.com
Pandora, the Pandora logo, and the Pandora trade dress
are trademarks or registered trademarks of Pandora
Media, Inc., used with permission. Pandora is currently
available in the U.S., Australia and New Zealand.
Sirius, XM and all related marks and logos are
trademarks of Sirius XM Radio Inc. All rights reserved.
• Android is a trademark of Coogle Inc.
•
•
•
•
Windows Media et le logo Windows sont des marques
deposees ou des marques deposees enregistrees chez
Microsoft Corporation aux Etats-Unis et/ou dans d'autres
pays.
iPhone, iPod, iPod classic, iPod nano et iPod touch sont des
marques deposees d'Apple Inc. enregistrees aux Etats-Unis et
dans d'autres pays.
"Made for iPod," et "Made for iPhone," indiquent que
l 'accessoire electronique a ete specialement conru pour se
connecter specifiquement a un iPod, un iPhone et que les
peifomwnces des standard Apple sont garanties par les
concepteurs. Apple n 'est pas responsable quant au
fonctionnement de ce systeme ou bien du respect de celui-ci,
de la legislation ou des normes de securite en vigueur.
Veuillez noter que l 'utilisation de cet accessoire avec un iPod
ou iPhone peut affecter les pe~formances de communication
sans fil.
La marque et les logos BLUETOOTJ-ffD sont des marques de
commerce appartenant a Bluetooth SIC, Inc. Ces marques
sont utilisees par Alpine Electronics, Inc. sous licence. Les
autres marques deposees et appellations commerciales sont
celles de leurs proprietaires respectif'l.
Technologie de codage audio MPEG Layer-3 sous licence de
Fraunhofer /IS et Thomson. Lafoumiture de ce produit ne
corifere qu 'une licence pour une utilisation privee de nature
non commerciale, mais ne con.fere aucune licence et
n 'implique aucun droit d'utiliser ce produit pour une
diffusion commerciale (c 'est-a-dire gene rant des recettes) en
temps reel (par voie terrestre, satellite, clible et/ou tout autre
support), une d{ffusion/lecture en transit via Internet, des
intranets et/ou aut res reseaux, ou sur tout autre systeme de
distribution de contenu electronique tel que les applications
audio a peage ou ala demande. Une licence independante est
requise pour ce type d'utilisation. Pour obtenir de plus
amples informations, consultez le site
http://www.mp3licensing.com
Pandora, le logo Pandora et le nom commercial Pandora sont
des marques de commerce ou des marques deposees de
Pandora Media, Inc. utilisees sous autorisation. Pandora est
actuellement disponible aux Etats-Unis, en Australie et en
Nouvelle-lilande.
Sirius, XM et toutes les marques et logos associes sont des
marques de commerce de Sirius XM Radio Inc. Tous droits
reserves.
Android est une marque de Coogle Inc.
40
Windows Media y ellogotipo Windows son marcas
comerciales o marcas registradas de Micros(~ft Corporation
en Estados Unidos ylo en otros paises.
iPhone, iPod, iPod classic, iPod nano v iPod touch son
marcels comerciales de Apple Inc. reg['ltradas en los
Estados Unidos yen otros paises.
"Made for iPod," }' "Made for iPhone," signUican que un
dispositivo electr6nico se ha diseiiado pensando
especificamente en su conexi6n a un iPod o iPhone,
respectivamente, y que el fabricante garantiz.a su
conformidad con los requisitos de rendimiento de Apple.
Apple nose hace responsable delfuncionamiento de este
dispositivo ode su cumplimiento de las normas de
seguridad o legales. Tenga en cuenta que el uso de este
accesorio con iPod o iPhone puede afectar al rendimiento
inalamb rico.
• Lamarca de la palabra BLUETOOTJ-fW }'sus logotipos
son marcas comerciales registradas propiedad de
Bluetooth SIC, Inc. Todo uso que Alpine Electronics, Inc.
!wee de dichas marcas es bajo licencia. El resto de
marcas y nombres comerciales son propiedad de sus
respectivos propietarios.
Tecnologia de cod(ficaci6n de audio MPEC Layer-3 con
licencia de Fraunhofer liS y Thomson. El suministro de
este producto solo cubre Ia licencia para uso privado y no
comercial, y no implica una licencia ni ningttn derecho de
uso de este producta en ninguna d(fusic5n comercial (es
decir, que genere ingresos) en tiempo real (terrestre, por
satelite, por cable ylu otros medias), la d(fitsi6n/
reproduccic5n mediante Internet, intranets ylu otras redes
o mediante otros sistemas de distribucidn de contenido
electr6nico, como aplicaciones de audio de pago o previa
peticidn. Es necesaria una licencia independiente para
dicho uso. Side sea obtener mas informacion, vi site
http://wwH'.mp3licensing.com
Pandora, ellogotipo de Pandora y la imagen de marca de
Pandora son marcas comerciales o marcas comerciales
registradas de Pandora Media, Inc., usadas con permiso.
En Ia actualidad, Pandora esta disponible exclusivamente
con permiso. Pandora estd actualmente disponible en
Estados Unidos, Australia y Nueva Zelanda.
• Sirius, XM y todas las marcas y logotipos relacionados
son marcas comerciales de Sirius XM Radio Inc. Todos
los derechos reservados.
• Android es una marca comercial de Coogle Inc.
Installation /Installation /lnsta laci6n
When making connections to the vehicle's electrical
system, be a'l-vare (~{the factory installed components (e.g.
on-board computer). Do not tap into these leads to
provide power for this unit. When connecting the
CDE-154BT to the fuse box, make sure the fuse for the
intended circuit r~fthe CDE-154BT has the appropriate
amperage. Failure to do so may result in damage to the
unit and/or the vehicle. When in doubt, consult your
Alpine dealer.
The main unit must be mounted within 35 degrees of the
horiz.ontal plane, back to front.
Less than 35°
• Lors de La connexion des cables au systeme electrique du
vehicule, ilfaut etre conscient des composants installes en
usine (tel qu 'un ordinateur debord). Veillez. a ne pas vous
raccorder acesjils pour alimenter l'appareil. Lorsque
vous raccordez. le CDE-154BT au boltier afusible,
assurez-vous que le fusible du circuit designe pour le
CDE-154BT possede !'amperage approprie. Sinon, vous
risquez d'endommager l'appareil et/ou le vehicule. En
cas de doute, consultez. votre revendeur Alpine.
• L'unite principale doit etre fixee a moins de 35 degres du
plan horizontal, de I 'arriere vers !'avant.
• Cuando haga las conexiones a! sistema electrico del
vehfculo, tenga en cuenta los componentes que vienen
instalados de fdbrica (como un computador incorporado,
por ejemplo ). No conecte a estos conductores para
proporcionar alimentaci6n a esta unidad. Al conectar el
CDE-154BT ala caja de fusibles, asegurese de que el
fusible designado para el circuito del CDE-154BT sea del
amperaje adecuado. De lo contrario, fa unidad _vlo el
vehiculo podrcin sufrir daFios. Cuando tenga dudas,
consulte a su distribuidor Alpine.
• Monte la unidad principal en un cingula de 35 grados en
relaci6n con el plano horizontal, desde atrds hacia
adelante.
Moins de 35°
Menos de 35°
01
1
1
Mounting Sleeve
(Included)
Gaine de montage
(fournie)
Dashboard
1
Tableau de bord
Funda de montaje
(incluida)
Salpicadero
Plaques de
compression*
Pressure Plates*
Cet appareil
This unit
Placas de presion *
*
If the installed mounting sleeve is loose in the dashboard,
the pressure plates may be bent slightly to remedy the
problem.
*
Si Ia gaine de montage installee n 'epouse pas bien fa
forme du tableau debord, les plaques de compression
peuvent etre legerement pliees pour remedier au
problbne.
41
Esta unidad
*
Si el manguito de montaje instalado en el salpicadero
estaflojo, las placas de presion pueden doblarse un poco
para solventar el problema.
2
2
2
Brida metalica de montaje
Attache de montage en metal
Metal Mounting Strap
Tornillo
Vis
Screw
Pasador
Filetage de boulon
Bolt Stud
Tuerca hexagonal
(M5)
Ecrou hexagonal
(M5)
Hex Nut (M5)
Esta unidad
Cet appareil
This unit
Fije el cable de tierra de Ia unidad en un punto
metalico limpio.
Secure the ground lead of the unit to a clean metal
spot.
Raccordez le fil de terre de l'appareil a un point
metallique propre.
• For the screw marked "* ", use an appropriate scre-vvfor
the chosen mounting location.
• Pour Ia vis « * », utilisez une vis appropriee
!'emplacement de montage choisi.
3
3
3
Slide the CDE-154BT into the dashboard until it
clicks. This ensures that the unit is properly locked
and will not accidentally come out from the
dashboard.
Glissez le CDE-154BT dans le tableau debord
jusqu'a ce qu'il emette un declic. De cette fagon,
l'appareil sera convenablement fixe et il ne risquera
pas de tomber accidentellement du tableau de
bord.
Deslice el CDE-154BT hacia el interior del
salpicadero hasta que escuche un chasquido. Eso
permite asegurarse de que Ia unidad queda
correctamente fijada y no se salga accidental mente
del salpicadero.
42
a
•
Pa ra el tornillo con Ia marc a "* ", uti lice un tornillo
adecuado para Ia ubicaci6n de montaje elegida.
Connections I Raccordements I Conexiones
To Flash memory or iPodliPhone I Au peripherique
de memoire flash ou l'iPodliPhone I A Ia llave de
memoria Flash o iPodliPhone
To External Unit (AUX) I Appareil externe (AUX) I
Unidad externa (AUX)
c::>-- To power antenna IVers l'antenne electrique I A Ia
antena electrica
- - - To amplifier IVers l'amplificateur I AI amplificador
To the instrument cluster illumination lead IVers le til
- - - d'eclairage du combine d'instruments I AI cable de
iluminaci6n del conjunto de instrumentos
a
(Pink/Black) I (Rose/Noir) I (Rosa/Negro)
AUDIO INTERRUPT IN
(Blue) I (Bieu) I (Azul)
POWER ANT
(Blue/White) I (Bieu/Bianc) I (Azul/Blanco)
REMOTE TURN-ON
(Orange) I (Orange) I (Naranja)
ILLUMINATION
(Red) I (Rouge) I (Rojo)
IGNITION
(Yellow) I (Jaune) I (Amarillo)
BATTERY
(Black) I (Nair) I (Negro)
GND
Ignition Key
(Gray) I (Gris) I (Gris)
Speakers
SPEAKER RIGHT FRONT
(Gray/ Black) I (Gris/ Noir) I (Gris/Negro)
(Violet/Black) I (Violet/Nair) I (Violeta/Negro)
SPEAKER RIGHT REAR
8
SPEAKER LEFT REAR
;~
Antenna Receptacle
b
Front Right
~
RearRight
~
RearLeft
~
(Violet) I (Violet) I (Violeta)
Green) I (Vert) I (Verde)
FUSE10A
~
(Green/Black) I (Vert/ Nair) I (Verde/Negro)
(White/Black) I (Blanc/Nair) I (Blanco/Negro)
8
SPEAKER LEFT FRONT
8
(White) I (Blanc) I (Blanco)
I
t~~---------------------------------~
Microphone I Microphone I Micr6fono
Speakers
43
Amplifier
Front
Amplifier
Rear
Amplifier
Subwoofers
About the Rules of Bluetooth Electromagnetic Radiation Regulation
FCC CAUTION
Changes or modifications not expressly approved by the party responsible for compliance could void the user's authority to operate
the equipment.
This equipment complies with FCC/IC radiation exposure limits set forth for an uncontrolled environment and meets the FCC radio
frequency (RF) Exposure Guidelines in Supplement C to OET65 and RSS-1 02 of the IC radio frequency (RF) Exposure rules . This
equipment has very low levels of RF energy that it deemed to comply without maximum permissive exposure evaluation (MPE). But
it is desirable that it should be installed and operated keeping the radiator at least 20cm or more away from person 's body
(excluding extremities: hands, wrists , feet and ankles).
Cet equipement est conforme aux limites d 'exposition aux rayonnements enoncees pour un environnemen t non contr61e et respecte
les regles les radioelectrique s (RF) de Ia FCC !ignes directrices d'exposition dans le Supplement C a OET65 et d'exposition aux
frequences radioelectrique s (RF) CNR-1 02 de I'IC . Cet equipement emet une energie RF tres faible qui est consideree conforme
sans evaluation de !'exposition maximale autorisee . Cependant, cet equipement doit etre installe et utilise en gardant une distance
de 20 em ou plus entre le dispositif rayonnant et le corps (a !'exception des extremites : mains, poignets, pieds et chevilles).
USA/Canada
La operaci6n de este equipo esta sujeta a las siguientes dos condiciones : (1) es posible que este equipo o dispositivo no cause
interferencia perjudicial y (2) este equipo o dispositivo debe aceptar cualquier interferencia, incluyendo Ia que pueda causar su
operaci6n no deseada.
Mexico
MODELO: 13BTPWB
2718-12-4557
ANA TEL
I II IIIII
(01)078989365 09116
Este produto contem a placa 13BTPWB c6digo de homologac;ao Anatel 2718-12-4557
Este equipamento opera em carater secundario, isto e, nao tem direito a protec;ao
contra interferencia prejudicial, mesmo de estac;6es do mesmo tipo, e nao pode
causar interferencia a sistemas operando em carater prima rio.
Este equipamento esta homologado pela ANA TEL de acordo com os procedimentos
regulamentado s pela Resolucao 242/2000 e atende aos requisites tecnicos aplicados.
,
GARANTIE LIMITEE
Fidele a son engagement de ne fournir que des produits de qualite, ALPINE ELECTRONICS OF AMERICA, INC. ( « Alpine ») est heureuse de vous offrir cette
garantie. Nous vous suggerons de le lire attentivement et en entier. Si vous avez Ia moindre question, veuillez contacter l'un de nos concessionnaires ou appeler
directement Alpine aux numeros listes ci-dessous.
e PRODUITS COUVERTS PAR LA GARANTIE
Cette garantie couvre les produits audio de voiture et les accessoires connexes
( (( le produit » ). Elle ne couvre les produits que dans le pays ou ils ont ete
achetes.
e DUREE DE LA GARANTIE
Cette garantie est en vigueur pendant un an a partir de Ia date du premier achat
du client.
e PERSONNES PROTEGEES PAR LA GARANTIE
Seul l'acheteur original du produit, s'il resisde aux Etats-Unis, a Porto Rico ou
au Canada, peut se prevaloir de Ia garantie.
e CE QUI EST COUVERT
Cette garantie couvre tous les defauts de materiaux et de fabrication (pieces et
main d'csuvre) du produit.
e CE QUI N'EST PAS COUVERT
Cette garantie ne couvre pas ce qui suit:
G) Les dommages survenus durant le transport des produits renvoyes a Alpine
®
pour etre repares (les reclamations doivent etre adressees au transporteur);
Les degats provoques par un accident ou une mauvaise utilisation, y
compris des bobines acoustiques grillees suite a une surexcitation des
enceintes (augmentation du niveau de l'amplificateur jusqu'a atteindre un
effet de distorsion ou d'ecretage), une defaillance mecanique des enceintes
(perforations, dechirures ou fentes), panneaux LCD fissures ou
endommages, disques durs endommages ou ayant subi une chute.
@ Tout degat provoque par negligence, usage inapproprie, mauvaise
utilisation ou par le non-respect des instructions indiquees dans le manuel
de l'utilisateur.
@ Les dommages dus a Ia force majeure, notamment aux tremblements de
terre, au feu, aux inondations, aux tempetes ou aux autres cataclysmes
naturals;
Les frais ou les depenses relatifs a l'enlevement ou a Ia reinstallation du
produit;
® Les services rendus par une personne, physique ou morale non autorisee;
® Les produits dent le numero de serie a ete efface, modifie ou retire;
0 Les produits qui ont ete adaptes ou modifies sans le consentement d'Aipine;
® Les produits qui ne sont pas distribues par Alpine aux Etats-Unis, a Porto
Rico ou au Canada;
® Les produits qui n'ont pas ete achetes par l'entremise d'un concessionnaire
Alpine autorise;
e COMMENT SE PREVALOIR DE LA GARANTIE
CD
II vous faut remettre le produit necessitant des reparations a un centre de
service autorise Alpine ou a Alpine meme et en assumer les frais de
transport. Alpine a le choix entre reparer le produit ou le remplacer par un
produit neuf ou revise, le tout sans frais pour vous. Si les reparations sont
couvertes par Ia garantie et si le produit a ete envoye un centre de service
Alpine ou a Alpine, le paiement des frais de reexpedition du produit incombe
Alpine.
® Vous devez donner une description detail lee des problemes qui sont
l'origine de votre demande de reparation.
@ Vous devez joindre Ia preuve de votre achat du produit.
@ Vous devez emballer soigneusement le produit pour eviter tout dommage
durant son transport. Pour eviter Ia perte de I' envoi, il est conseille de choisir
un transporteur qui propose un service de suivi des envois.
a
a
e LIMITATION DES GARANTIES TACITES
LA DUREE DE TOUTES LES GARANTIES TACITES, Y COMPRIS LA
GARANTIE D'ADAPTATION A ~UTILISATION ET LA GARANTIE DE QUALITE
LOYALE ET MARCHANDE, EST LIMITEE ACELLE DE LA GARANTIE
EXPRESSE DETERMINEE CI-DESSUS. PERSONNE N'EST AUTORISE A
ENGAGER AUTREMENT LA RESPONSABILITE D'ALPINE EN VERTU DE LA
VENTE D'UN PRODUIT.
LES DOMMAGES INDIRECTS SONT LES FRAIS DE REPARATION OU DE
REMPLACEMENT D'AUTRES BIENS ENDOMMAGES SUITE AU MAUVAIS
FONCTIONNEMENT DU PRODUIT.
LES RECOURS PREVUS PAR LES PRESENTES EXCLUENT ET
REMPLACENT TOUTE AUTRE FORME DE RECOURS.
e LIEN ENTRE LA GARANTIE ET LA LOI
La garantie vous donne des droits specifiques, mais vous pouvez aussi jouir
d'autres droits, qui varient d'un etat ou d'une province a l'autre. En outre,
certains etats et certaines provinces interdisent de limiter Ia duree des
garanties tacites ou d'exclure les dommages accessoires ou indirects. Dans ce
cas, les limites et les exclusions de Ia garantie peuvent ne pas s'appliquer
vous.
a
e CLAUSE APPLICABLE AU CANADA SEULEMENT
Pour que Ia garantie soit valable, il faut qu'un centre d'installation autorise ait
installe le systeme audio pour I' auto dans votre vehicule et qu'il ait ensuite
appose son cachet sur Ia garantie.
e NUMEROS D'APPEL DU SERVICE ALA CLIENTELE
Si vous avez besoin de nos services, veuillez appeler Alpine aux numeros cidessous pour le centre de service autorise Alpine le plus proche.
e EXCLUSIONS DE LA GARANTIE
AUDIO DE VOITURE
1-800-ALPINE-1 (1-800-257-4631)
ALPINE STIPULE EXPRESSEMENT QU'ELLE N'EST PAS RESPONSABLE
DES DOMMAGES-INTERETS ET DOMMAGES INDIRECTS PROVOQUES
PARLE PRODUIT. LES DOMMAGES-INTERETS SONT LES FRAIS DE
TRANSPORT DU PRODUIT VERS UN CENTRE DE SERVICE ALPINE, LA
PEATE DE TEMPS DE ~ACHETEUR ORIGINAL, LA PEATE D'UTILISATION
DU PRODUIT, LES BILLETS D'AUTOBUS, LA LOCATION DE VOITURES ET
TOUS LES AUTRES FRAIS LIES ALA GARDE DU PRODUIT.
NAVIGATION
1-888-NAV-HELP (1-888-628-4357)
Ou visitez notre site Web
a l'adresse http://www.alpine-usa.com
ALPINE ELECTRON IQUE DE L' AMERIQUE, INC., 19145 Gramercy Place, Torrance, California 90501, U.S.A.
N'envoyez pas de produits a cette adresse.
Appelez notre numero gratuit ou visitez notre site Web si vous recherchez un centre de service.
LIMITED WARRANTY
ALPINE ELECTRONICS OF AMERICA, INC. ("Alpine"), is dedicated to quality craftsmanship and is pleased to offer this Warranty. We suggest that you read it
thoroughly. Should you have any questions, please contact your Dealer or contact Alpine at one of the telephone numbers listed below.
e
PRODUCTS COVERED:
This Warranty covers Car Audio Products and Related Accessories ("the
product"). Products purchased in the Canada are covered only in the Canada.
Products purchased in the U.S.A. are covered only in the U.S.A.
@) Damage caused by act of God, including without limitation, earthquake, fire,
This Warranty only covers the original purchaser of the product, who must
reside in the United States, Puerto Rico or Canada.
flood, storms or other acts of nature.
Any cost or expense related to the removal or reinstallation of the product.
® Service performed by an unauthorized person, company or association.
® Any product which has the serial number defaced, altered or removed.
(j) Any product which has been adjusted, altered or modified without Alpine's
consent.
® Any product not distributed by Alpine within the United States, Puerto Rico
or Canada.
® Any product not purchased from an Authorized Alpine Dealer.
e WHAT IS COVERED:
e
e
LENGTH OF WARRANTY:
This Warranty is in effect for one year from the date of the first consumer
purchase.
e WHO IS COVERED:
This Warranty covers defects in materials or workmanship (parts and labor) in
the product.
e WHAT IS NOT COVERED:
This Warranty does not cover the following:
Damage occurring during shipment of the product to Alpine for repair
(claims must be presented to the carrier).
® Damage caused by accident or abuse, including burned voice coils caused
by over-driving the speaker (amplifier level is turned up and driven into
distortion or clipping). Speaker mechanical failure (e.g. punctures, tears or
rips). Cracked or damaged LCD panels. Dropped or damaged hard drives.
@ Damage caused by negligence, misuse, improper operation or failure to
follow instructions contained in the Owner's manual.
CD
CD
HOW TO OBTAIN WARRANTY SERVICE:
You are responsible for delivery of the product to an Authorized Alpine
Service Center or Alpine for repair and for payment of any initial shipping
charges. Alpine will, at its option, repair or replace the product with a new or
reconditioned product without charge. If the repairs are covered by the
warranty, and if the product was shipped to an Authorized Alpine Service
Center or Alpine, Alpine will pay the return shipping charges.
® You should provide a detailed description of the problem(s) for which service
is required.
@ You must supply proof of your purchase of the product.
@) You must package the product securely to avoid damage during shipment.
To prevent lost packages it is recommended to use a carrier that provides a
tracking service.
e HOW WE LIMIT IMPLIED WARRANTIES:
e HOW TO CONTACT CUSTOMER SERVICE:
ANY IMPLIED WARRANTIES INCLUDING FITNESS FOR USE AND
MERCHANTABILITY ARE LIMITED IN DURATION TO THE PERIOD OF THE
EXPRESS WARRANTY SET FORTH ABOVE AND NO PERSON IS
AUTHORIZED TO ASSUME FOR ALPINE ANY OTHER LIABILITY IN
CONNECTION WITH THE SALE OF THE PRODUCT.
Should the product require service, please call the following number for your
nearest Authorized Alpine Service Center.
e HOW WE EXCLUDE CERTAIN DAMAGES:
Or visit our website at; http://www.alpine-usa.com
ALPINE EXPRESSLY DISCLAIMS LIABILITY FOR INCIDENTAL AND
CONSEQUENTIAL DAMAGES CAUSED BY THE PRODUCT. THE TERM
"INCIDENTAL DAMAGES" REFERS TO EXPENSES OF TRANSPORTING
THE PRODUCT TO THE ALPINE SERVICE CENTER, LOSS OF THE
ORIGINAL PURCHASER 'S TIME, LOSS OF THE USE OF THE PRODUCT,
BUS FARES, CAR RENTALS OR OTHERS COSTS RELATING TO THE CARE
AND CUSTODY OF THE PRODUCT. THE TERM "CONSEQUENTIAL
DAMAGES" REFERS TO THE COST OF REPAIRING OR REPLACING
OTHER PROPERTY WHICH IS DAMAGED WHEN THIS PRODUCT DOES
NOT WORK PROPERLY. THE REMEDIES PROVIDED UNDER THIS
WARRANTY ARE EXCLUSIVE AND IN LIEU OF ALL OTHERS.
e HOW STATE/PROVINCIAL LAW RELATES TO THE WARRANTY:
This Warranty gives you specific legal rights, and you may also have other
rights which vary from state to state and province to province. In addition, some
states/provinces do not allow limitations on how long an implied warranty lasts,
and some do not allow the exclusion or limitation of incidental or consequential
damages. Accordingly, limitations as to these matters contained herein may not
apply to you.
CAR AUDIO
1-800-ALPINE-1 (1-800-257-4631)
NAVIGATION
1-888-NAV-HELP (1-888-628-4357)
Take a moment to protect your purchase by registering your product now at
www.alpine-usa.com/registration. You will also be updated on product
information, special promotions, Alpine news and may be eligible to win
prizes.
Prenez le temps de proteger votre achat en enregistrant votre produit sur
www.alpine-usa.com/registration. Vous recevrez en outre des mises a jours
sur des informations de produits, des offres promotionnelles, des nouvelles
concernant Alpine et pourrez recevoir des recompenses.
Le recomendamos que proteja su adquisici6n registrando su producto lo
antes posible en Ia direcci6n www.alpine-usa.com/registration. Asimismo,
recibira actualizaciones de informacion del producto, promociones
especiales, noticias sabre Alpine y podra optar a excelentes premios.
eiN CANADA ONLY:
This Warranty is not valid unless your Alpine car audio product has been
installed in your vehicle by an Authorized Installation Center, and this warranty
stamped upon installation by the installation center.
ALPINE ELECTRONICS OF AMERICA, INC., 19145 Gramercy Place, Torrance, California 90501, U.S.A.
Do not send products to this address.
Call the toll free telephone number or visit the website to locate a service center.
ffff//ILP INE.
To customers/A l'attention de l'utilisateur/
lnformacionpara los clientes
English
In SiriusXM, in order to change the channel of Tune Start
or Tune Scan, continuous band changing may not
available.
If you change the band continually, wait for about 5
seconds before changing to the next band.
Dans SiriusXM, pour changer le canal de Tune Start ou
Tune Scan, le changement de bande en continu peut
s'averer indisponible.
Si vous changez de bande en continu, attendez environ
5 secondes avant de passer a Ia bande suivante.
Espaiiol
En SiriusXM, para cambiar el canal de inicio ode barrido
de Ia sintonizaci6n, es posible que el cambia continuo
de banda no este disponible.
Si cambia Ia banda de forma continua, espere
aproximadamente 5 segundos antes de pasar a Ia
siguiente banda.
68-24567Z58-A (Y)
~LPINE,
Owner's Manual
Mode d'emploi
MADE IN THAILAND
DESIGNED BY ALPINE JAPAN
FABRIQUE EN THAILANOE
CONCU PAR ALPINE JAPON
ALPINE ELECTRONICS, INC.
• System Requirements
The C O ca n t)e use d on th e followinq ope ratin g systems
Micr os oft . Wir:cJ ows . q:'J/98/Me/N T/2000/XP /V ISTA/7 or
Apple Mac OS X 10 ,~ ; 10 ~/ 10 fi In o rciE'r to use th e C O
Ac rob at Reader ,1 0 (or above) rs requr red
• How to Use the CD
Ins ert the CO open it then clic k twi ce tt1e fil e for the mo d el
purch<i Seci
• Caution on Handling the CD
Never try to play the CO on any oth er au d io C O pl aye r
Re sultant loud vo lum e may c ause hearrng d ama ge or
cJarna q e to th e sp eak e r
• About Use of Software License
Con c cmrr1g pro vid e d CD. yo u are requ rred to use the CD in
ag reement/c ornp lyi rH:J w ith t11e fo ll owrrllJ p rovi si on s
If you ci o r1ot 0g ree the CO c a nnot be useci
• Terms of Use
Alp ir1e Elec: trc)l1rcs lr lcorpo r<lti on (fo llowing Alp ine) re se rve s
ni l co pyr r\Jilts or1 the rr1form<:1tion provrc)ecJ on thr s CD The
c ont er1ts of t hE~ CO carmot IJe use ci to r co pyinq without
pprn>rss ro rl of its owr1ers. Intern et tra ns fe r. puhlr c show rr 1g. or
c on Hn cr c iill rt: r1t. lf: as c . et c
• Configuration systeme
Ce CO peu t etr e utili se so us les sys temt:s cfex p loit ati or1
sur van ts Microsoft"''. Wind ows'"'. 9~/98/ M e/ NT/2000/X P/
VISTA/7 ou Apple Mac OS X 104/ 10 5/ 10 6 Po ur po uvoir
utilise r le CD . vous devez rn stal le r Ac robat Rcacier 4 0 (uu
ulteri eur)
• Commen t utiliser le CD
lnsere z le C D . ouvrez -le . pu is cl iquez deu x fois sur lc fic l1ier
du model e que vou s avez ac hete.
• Precautions lors de Ia manipulation du CD
N'essaycz pas de lire le C D sur un autre lec teur CO
Le c as echeant, le nrve au ci e volume e leve pourrart
t:n d omrna ger le hnu t-parleur ou p rovoq uer de s troub les
au cJrtr fs
• A propos de !'utilisation de Ia licence du
logiciel
Vous dcvez util is cr le CO fourni conforrnem ent aux conci rtrons
survantes
Si vous n'<occeptf]Z pas le contra\ de lrcence . vous ne pou vez
pds utrl is er ce CD
• Conditions d'utilisation
Aip rnc d oes no t CJli <:HClrl tee corr ect ope rati or1of any comp uter
c um pon c r1t wlw r1 used wrtl1 til e C O A lprn c al so has no
responsrt)lirty. cirrcct nr rndirect. fo r dam<1qe res tiltincJ lrorn
usc of t1 1rs C D. ;md r1o c or-r1pen sa tr on c<1rl he of fered
Alp1r1e El ec troni cs Incor po ration (A ip rne) d e tr ent tmrs les
clro rt s cl auteur relatifs au x informati on s fourn re s d an s ce CD
Le contenu de ce COne peu t done en auc un cas et re copie
cJrv ul gu c: par In te rn et. utilise po ur une p roJec t1or1 put)liqu e
une loc at icm corn m erc ia le ou une ccm cession. etc . sans
auto ri sat 1on t: xpresse cJu p ropr iet aire
AI ! ;Jroc fuc: ts
• Limitation de responsabilite
• Limitation of Liability
lrdci f~ rnarks
tJrand r1 arncs descr1hcci <JIJ ov e me
ur rccJr stcrecl rn <-lrk s 1.!! t1 1e1 r rus pc:c trv c owners
i HlcJ
Alprr1e ne qar antr t p<Js le bon fon c ti onnernen t d es
co m posant s ci e l'orcJ inz1t eur lor sque vous utilise/ cc: CD
Alp ine ci f~cl1ne O~Jal e m en t toutc res ponsat)ilite . direc tc ou
rnci rrec tc . en cas d e cJorn ma ge lors cJ e 1\rt il isatio n dt: ce CD .
etr1 offre aucur1 e c on lp f) nsatr o rl ec on omique
r ous les procJuit s et nom s cJe marqu e c ites c1 cJossus sont c]ns
rnarq ut:s comrnercia les ou cies marques deposee:_; cie leurs
d8tcntcurs rcspectrfs
YAMAGATA (THAILAND) Co., Ltd.
324 Moo 4. Bangpoo Industrial Estate Soi6, Sukhumvit Road T.Phraeksa,
A.Muang Samutprakarn. Samutprakarn 10280, Thailand
Printed in Thailand (Y)
68-24567Z26-A
Thank you for choosing Alpine for your car audio equipment needs. Our goal is to
produce the best audio/video/navigation products in the world and hope your
expectations are met.
Please take a moment to protect your purchase by registering your product now at
the following address: www.alpine-usa.com/registratiorr. You will be informed of
product and software updates (if applicable), special promotions , and news about
Alpine. Also, by registering your product, you will automatically be entered for a
chance to win various prizes such as gift cards, Alpine products, and/or a complete
system.
We look forward to continue serving you in the future.
Sincerely,
The Alpine Team
.
Sp~nish
French
Nous vous remercions d'avoir porte votre choix sur un
equipement audio automobile Alpin e. Notre principal
objectif est de fabriqu er les meilleurs produits audio.
vid eo et de navigation au monde afin de repondre aux
exigences de nos clients.
Gracias por elegir Alpine para las necesidades de
equipamiento de audio de su vehfculo. Nuestro
objetivo es fabricar los mejores productos de audio/
video/navegaci6n del mundo y esperamos poder
cumplir sus expectativas.
Veuillez prendre quelques instants pour securiser
votre achat en enregistrant votre produ it a l'adresse
suivante : 'liWW. a l pJn~- US?_.{:_Qm/regi ~trC!Jion. Vous
serez tenu informe des nouveaux produ its, des mises
a JOUr IOQICielles (le cas echeant), des promotions
speciales et des informations concernant Alpine.
L'enregistrement de votre produit vous donne par
ai lleurs Ia possibilite de gagner des dizai nes de
cadeaux, tels que cheques-cadeaux et articles Alpine,
ainsi qu'un systeme complet.
Oedique unos momentos a proteger su compra :
registre ahora su producto en Ia siguiente direcci6n:
www.alpine-usa.com/registration. Recibi ra
informacion de novedades sobre el producto y
actualizaciones de software (si se producen),
promociones especiales y noticias de ultima hora de
Alpine. Asimismo , si reg istra su producto, entrara
automaticamente en el sorteo de diversos premios,
como tarjetas de regalo , productos de Al pine y/o un
sistema completo.
Nous esperons que nos produits vous donneront
entierement sati sfaction.
Esperamos poder seguir ofreciendole el mejor
servicio en el futuro.
Cord ialement,
Atentamente.
L'equipe Alpine
El equipo de Alpine
PART NO. 68-2 1627Z02-A