1
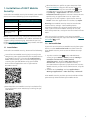
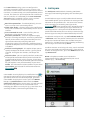
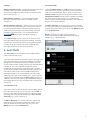
ESET MOBILE SECURITY
FOR ANDROID
Installation Manual and User Guide
Click here to download the most recent version of this document
Contents
1. Installation
.....................................................3
of ESET Mobile Security
1.1
Installation.........................................................................3
1.2
Uninstallation
.........................................................................3
2. Product
.....................................................4
activation
3. Antivirus
.....................................................4
4. Antispam
.....................................................6
5. Anti-Theft
.....................................................7
6. Security
.....................................................8
Audit
7. Update
.....................................................9
8. Password
.....................................................9
9. Troubleshooting
.....................................................10
and support
ESET MOBILE SECURITY
Copyright ©2012 by ESET, spol. s r.o.
ESET Mobile Security was developed by ESET, spol. s r.o.
For more information visit www.eset.com.
All rights reserved. No part of this documentation may be
reproduced, stored in a retrieval system or transmitted in any
form or by any means, electronic, mechanical, photocopying,
recording, scanning, or otherwise without permission in writing
from the author.
ESET, spol. s r.o. reserves the right to change any of the described
application software without prior notice.
Customer Care: www.eset.com/support
REV. 25. 4. 2012
9.1
Troubleshooting
.........................................................................10
9.2
Technical support
.........................................................................10
1. Installation of ESET Mobile
Security
To install ESET Mobile Security for Android, your mobile
device must meet following system requirements:
Minimum system requirements
Operating system Android 2.0/2.1 (Éclair) and
later
CPU
600 MHz
RAM
256 MB
Internal storage
free space
5 MB
NOTE: Some features (e.g. Antispam and Anti-Theft)
are not available on Android 3.0 / tablets which do not
support calling and messaging. More details you can
find in this knowledgebase article (may not be available
in your language).
1.1 Installation
To install ESET Mobile Security, do one of the following:
search for ESET Mobile Security (or just Eset) in the
Google Play Store application on your Android device.
ESET Mobile Security is listed under Applications >
Tools. Alternatively, you can install the program by
scanning the QR code below using your mobile
device and an application such as QR Droid or
Barcode Scanner:
download the ems.apk file on your computer from
the ESET website. Copy the file to your device via
Bluetooth or USB. Tap the Launcher icon
on the
Android home screen (or go to Home > Menu) and
tap Settings > Applications and make sure the
Unknown sources option is selected. Locate the ems.
apk file using an application such as ASTRO File
Manager or ES File Explorer. Open the file and tap
Install. Once the application is installed, tap Open.
Warning: ESET Mobile Security must be installed on
internal device storage. Some mobile phones
mistakenly allow users to install applications on SD
card. If you install ESET Mobile Security on SD card,
Real-time protection, Antispam and Anti-Theft will not
work.
After successful installation, activate ESET Mobile
Security by following the steps described in the Product
activation 4 section.
1.2 Uninstallation
If you wish to uninstall ESET Mobile Security from your
device, use the Uninstall wizard accessible from the
ESET Mobile Security main screen or follow the steps
below:
1. Tap the Launcher icon
on the Android home
screen (or go to Home > Menu) and tap Settings >
Location and security > Select device
administrators, deselect ESET Security and tap
Deactivate. Enter your ESET Mobile Security
password when requested. (If you have not set ESET
Mobile Security as the Device administrator, skip this
step.)
2. Go back to the Settings and tap Applications >
Manage applications > ESET Security > Uninstall.
ESET Mobile Security and the quarantine folder will be
permanently removed from your mobile device.
download the ESET Mobile Security installation file (
ems.apk) from the ESET website by scanning the QR
code below:
3
2. Product activation
After a successful installation, ESET Mobile Security
must be activated. Tap Activate now in the ESET
Mobile Security main screen.
Activation methods vary depending on whether you
downloaded ESET Mobile Security from ESET website
or Google Play.
Activate trial - select this option if you do not have a
license and would like to evaluate ESET Mobile
Security before making a purchase. Fill in your Email
address to activate ESET Mobile Security for a limited
time. You will receive a confirmation email after
successfully activating the product. Trial license can
only be activated once per mobile device.
Activate using an Activation key - (this option is
not available if you installed ESET Mobile Security
from Google Play) if you acquired program with a
new device (or as a boxed product), you received an
Activation key with your purchase. Enter the
information you received in the Activation key field
and your current contact address in the Email field.
Your new authentication data (Username and
Password) will automatically replace the Activation
key and will be sent to the email address you
specified.
Activate using username and password - (this
option is not available if you installed ESET Mobile
Security from Google Play) if you purchased your
product from a distributor, you received a username
and password with your purchase. Enter the
information you received in the Username and
Password fields. Enter your current contact address
in the Email field.
Renew license - select this option if your current
license is soon to expire. Enter your Username and
Password (data provided at the time of purchasing
current license) in the appropriate fields.
Load license data - (this option is not available if you
downloaded ESET Mobile Security from ESET
website) use this option if you already purchased the
program with this account. ESET Mobile Security will
be activated by loading your license data from ESET
server.
Buy now - select this option if you do not have a
license and would like to buy one.
Each activation is valid for a fixed period of time. After
the activation expires, you will be asked to renew the
program license (the program will notify you about this
in advance).
NOTE: During activation, the device must be connected
to the Internet. A small amount of data will be
downloaded.
4
By default, ESET Mobile Security is installed in the
language which is set on your phone as a system locale
(in Language and keyboard settings). If you wish to
change the language of whole application user
interface, tap Language from the ESET Mobile Security
main screen and select the language of your choice.
3. Antivirus
Scan Device
The Scan Device option can be used to check your
mobile device for infiltrations.
Certain predefined file types are scanned by default.
A complete device scan checks the memory, running
processes, their dependent dynamic link libraries and
files that are part of internal and removable storage.
A brief summary of the scan will display after the scan is
completed (i.e. number of infected files, number of
scanned files, duration of the scan etc.).
If you wish to abort a scan in progress, tap Cancel.
Scan Folder
To scan particular folders on your device, tap Scan
Folder. Find the folders you wish to scan, tap their
check boxes in the right column and tap Scan.
Threat detected by ESET Mobile Security
Scan Logs
Settings
The Scan Logs section contains logs providing
comprehensive data about completed scan tasks. Logs
are created after each manually triggered (On-demand)
scan or when an infiltration is detected by the Realtime scan.
The On-demand settings allow you to modify scanning
parameters of a manually triggered (On-demand) scan.
The Show alert dialog option displays threat alert
notifications every time a new threat is detected by the
On-demand scanner.
Each log contains:
date and time of the event,
number of scanned files,
number of infected files,
full path name of infected files,
duration of the scan,
actions performed or errors encountered during the
scan.
Quarantine
The main task of the quarantine is to safely store
infected files. Files should be quarantined if they cannot
be cleaned, if it is not safe or advisable to delete them
or if they are being falsely detected by ESET Mobile
Security.
Files stored in the quarantine can be viewed in a log
that displays the name and original location of the
infected file, date and time of quarantine.
If you wish to restore a quarantined file to its original
location, tap the file and select Restore. This option is
not recommended.
To permanently remove a quarantined file from your
device, tap the file and select Delete. To remove all files
stored in the quarantine, press the MENU button and
tap Delete All.
If you wish to scan all applications (.apk files) installed
on your device, select the Scan applications option.
Proactive protection is an algorithm-based detection
method that analyzes code and searches for typical
virus behavior. Its main advantage is the ability to
identify malicious software not yet recognized in the
current virus signature database. Additional time will
be required to complete the scan if Proactive protection
is enabled.
The Archive scanning depth option allows you to
specify the depth of nested archives (.zip files) to be
scanned. The higher the number, the deeper the scan.
The Stored logs option allows you to define the
maximum number of logs to be stored in the Scan Logs
5 section.
You can specify a Default action that will be performed
automatically when infected files are detected. You can
choose from the following options:
Ignore - no action will be performed on the infected
file (this option is not recommended),
Delete - the infected file will be removed,
Quarantine - (default) the infected file will be moved
to the Quarantine 5 .
The Extensions settings show the most common file
types exposed to infiltrations on the Android platform.
Select the file types you wish to scan or deselect the
extensions to exclude them from scanning. These
settings apply to both On-demand and Real-time scan:
Extension sensitive - if you deselect this option, all
file types will be scanned. Files will also be checked if
they were not masqueraded as another file type. This
results in longer scan time.
DEX (applications code file) - executable file format
that contains compiled code written for the Android
OS,
SO (libraries) - shared libraries saved to designated
places in the file system and linked by programs that
require their functions,
Archives (zipped files) - files compressed using the
Zip compression,
Others - other known file types.
5
In the Real-time settings, you can configure the
scanning parameters of the On-access scanner. The
On-access scanner checks files that you interact with in
real time. It automatically scans Download folder on the
SD card, files from the .apk installation files and files on
the SD card after it is mounted (if the Scan mounted
SD card option is enabled). The On-access scanner
launches automatically at system startup.
Real-time protection - if enabled (default), the Onaccess scanner runs in the background.
Show alert dialog - displays threat alert notifications
every time a new threat is detected by the On-access
scanner.
Scan mounted SD card - scans the files prior to
opening or saving them to the SD card.
Proactive protection - select this option to apply
heuristic scanning techniques. Heuristics proactively
identify new malware not yet detected by the virus
signature database by analyzing code and
recognizing typical virus behavior. Additional time is
required to complete the scan if Proactive protection
is enabled.
Archive scanning depth - this option allows you to
specify the depth of nested archives (.zip files) to be
scanned. The higher the number, the deeper the
scan.
Default action - you can specify a default action that
will be performed automatically when infected files
are detected by the On-access scanner. If you select
Ignore, no action will be performed upon the infected
file (this option is not recommended). If you select
Delete, the infected file will be removed. If you select
Quarantine, the infected file will be moved to the
Quarantine 5 .
4. Antispam
The Antispam module blocks incoming SMS/MMS
messages and incoming/outgoing calls based on your
rules.
Unsolicited messages usually include advertisements
from mobile phone service providers or messages from
unknown or unspecified users. The term block contacts
refers to moving an incoming message to the
Spam Logs 7 section automatically. No notification is
displayed when an incoming message is blocked. The
advantage of this is that you will not be bothered by
unsolicited information, but can always check the logs
for messages that may have been blocked by mistake.
To add new Antispam rule, tap Call and SMS Rule List
> Add New. Enter the phone number you wish to block
or tap the + button to choose the number from your
contact list. Customize the rule by allowing or blocking
the messages and calls and tap Done.
To edit or remove an existing rule entry, touch and hold
the entry and choose the desired action. If you wish to
remove all antispam rules, press the MENU button and
tap Remove All.
NOTE: The phone number must include the
international dialing code followed by the actual
number (e.g., +1610100100).
ESET Mobile Security displays its notification icon
in
the top left corner of the screen (Android status bar). If
you do not wish this icon to be displayed, go to the
ESET Mobile Security main screen, press the MENU
button, tap Notifications and deselect the Show
notification icon option. Please note, this will not turn
off a red warning icon with an exclamation mark
notifying you about a security risk (e.g. Real-time virus
scanning disabled, SIM matching disabled etc.).
Antispam Rule List
6
Settings
Trusted Friends
Block anonymous calls – enable this option if you wish
to block callers that have their phone number
intentionally hidden via the Calling Line Identification
Restriction (CLIR).
In the Trusted Friends list, Add the phone numbers
that will receive an Alert SMS after an untrusted SIM
card is inserted into your device. Enter a name in the
Friend's name field and his/her phone number in the
Telephone number field or tap the + button to choose
the contact from your contact list. If the contact
contains more than one phone number, Alert SMS will
be sent to all these numbers.
Block known contacts – use this option to block
messages and calls for contacts included in your
contact list.
Block unknown contacts – blocks messages and calls
for contacts not included in your contact list. You can
use this option to block unwelcome phone calls (e.g.
"cold calls") or to prevent kids from dialing unknown
numbers. (To prevent this, it is recommended to
password 9 protect your Antispam settings.)
In the Spam Logs section, you can see the calls and
messages blocked by the Antispam module. Each log
contains the name of the event, corresponding phone
number, date and time of the event. Blocked SMS
messages also contain the message body.
To Edit or Remove an existing entry, touch and hold
the entry and choose the desired action. If you wish to
remove all entries from the list, press the MENU button
and tap Remove All.
NOTE: The phone number must include the
international dialing code followed by the actual
number (e.g., +1610100100).
5. Anti-Theft
The Anti-Theft feature protects your mobile phone
from unauthorized access.
If you lose your phone or someone steals it and replaces
your SIM card with a new (untrusted) one, the phone
will be locked automatically by ESET Mobile Security.
An Alert SMS will be secretly sent to user-defined phone
number(s). This message will include the phone
number of the currently inserted SIM card, the IMSI
(International Mobile Subscriber Identity) number and
the phone's IMEI (International Mobile Equipment
Identity) number. The unauthorized user will not be
aware that this message has been sent, since it will be
automatically deleted from the Messaging threads. In
addition, you can also request GPS coordinates of your
lost mobile phone or erase remotely all data stored on
the device.
Trusted Friends list
Trusted SIM cards
If the SIM card currently inserted in your mobile phone
is the one you wish to save as trusted, tap the Add. If
you are using more than one SIM card, you may want
to distinguish each one by modifying its Alias for the
SIM card (e.g., Office, Home etc.).
To Edit or Remove an existing SIM entry, touch and
hold the entry and choose the desired action. If you
wish to remove all entries from the list, press the
MENU button and tap Remove All.
7
Settings
If you have a device without a SIM card (e.g. tablet or
CDMA phone), select the Ignore SIM matching option.
This will turn off red Security Risk! warnings (SIM
matching is disabled and No trusted SIM defined) from the
ESET Mobile Security main screen. (Please note that
Ignore SIM matching option will be greyed out on
CDMA-based devices.)
To enable automatic checking of the inserted SIM card
(and Alert SMS sending), select the Enable SIM
matching option.
In the Alert SMS Text field, you can modify the text
message that will be sent to the predefined phone
number(s) after an untrusted SIM card is inserted in
your device. If you purchased ESET Mobile Security
from Google Play, an email address from your Google
account is inserted automatically. You can also enter
another email or alternative contact number.
contacts, messages and the SD card content will be
erased.
NOTE: The password is case sensitive. Please make
sure to enter the password exactly as you defined it in
the Password section.
6. Security Audit
The Security audit checks the phone's status regarding
battery level, bluetooth status, free disk space, etc.
To run a Security audit manually, tap Audit. A detailed
report will be displayed.
SMS Commands
Remote SMS commands (wipe, lock and find) will only
work if the Enable SMS commands option is selected.
The Enable SMS reset password option allows you to
reset your security password by sending an SMS from
the mobile saved in your Trusted Friends to your
mobile number. This SMS must be in the following
form:
eset remote reset
If you lose your phone and would like to lock it, send a
Remote lock SMS from any mobile device to your phone
number in the following form:
eset lock password
Replace password with your own password set in the
Password 9 section. An unauthorized user will not be
able to use your phone as entering your password will
be required.
If you wish to request the GPS coordinates of your
mobile device, send a Remote find SMS to your mobile
number or the unauthorized user's mobile number
(depends on if the SIM card was already replaced):
eset find password
You will recieve an SMS with GPS coordinates and a link
to the Google maps showing the exact location of your
mobile device. Please note that in order to receive the
GPS coordinates, the GPS module on your phone has to
be activated in advance.
If you wish to erase all data stored on your device and
all currently inserted removable media, send a Remote
wipe SMS:
eset wipe password
All contacts, messages, emails, installed applications,
your Google account and the SD card content will be
permanently erased from your device. If ESET Mobile
Security is not set as the Device administrator, only the
8
Security Audit Results
A green check next to each item indicates that the
value is above the threshold or that the item does not
represent a security risk.
A yellow icon means that at least one of the items is
below the threshold or that the item could represent a
potential security risk. Tap the item to see detailed
results.
A red exclamation mark indicates that the item is
below the threshold or that the item represents
a security risk and should be fixed.
If you wish to fix the status of the item highlighted in
red, tap the item and confirm by tapping Yes.
Settings
Security audit is scheduled to run periodically every 24
hours by default. If you wish to turn off periodic audit,
deselect the Audit periodically option.
If the Fix automatically option is enabled, ESET Mobile
Security will automatically attempt to fix the items at
risk (e.g. bluetooth status) without user interaction.
This option only applies to a periodic (scheduled) audit.
The Stored logs option allows you to define the
maximum number of logs to be stored in the Audit
Logs section.
The Audit period option allows you to define how
often the periodic (scheduled) audit will be performed.
To adjust the threshold value at which the Free disk
space and Battery level will be considered as low, use
the Free disk space threshold and Battery level
threshold options.
In the Items to audit tab, select the items to be
checked during the periodic (scheduled) audit.
The Audit Logs section contains logs providing
comprehensive data about performed periodic and
manually-triggered audits. Each log contains the date
and time of the event and detailed results of each item.
The Task Manager provides you with an overview of all
processes, services and tasks running on your device.
ESET Mobile Security allows you to stop the processes,
services and tasks not run by the system. These are
indicated by a red icon (x).
8. Password
Your security password protects your settings from
unauthorized changes. Password is required when:
accessing password protected features of ESET
Mobile Security (Antivirus, Antispam, Anti-Theft and
Security audit),
accessing your phone in case it was locked,
sending SMS commands to your device,
uninstalling ESET Mobile Security.
NOTE: Uninstall protection is available only on Android
2.2 and later.
To set a new security password, type it in the Password
and Re-type Password fields. The Reminder Phrase
option (if set) displays a hint in case you do not
remember your password.
IMPORTANT: Please choose your password carefully as
this will be required when unlocking your device or
uninstalling ESET Mobile Security.
In the Apply To tab, you can specify which modules will
be protected by the password.
If you forget your password, you can send an SMS from
the mobile number saved in your Trusted Friends list
to your mobile number. This SMS must be in the
following form:
eset remote reset
Your password will be reset.
7. Update
By default, ESET Mobile Security is installed with an
update task to ensure that the program is updated
regularly. To run the update manually, tap Update
Now.
Settings
The Auto update option allows you to set the time
interval for the automatic download of the virus
database updates.
NOTE: To prevent unnecessary bandwidth usage,
updates are issued as needed, when a new threat is
added. While the updates are free with your active
license, you may be charged by your mobile service
provider for data transfers.
9
9. Troubleshooting and support
9.1 Troubleshooting
ESET Mobile Security provides advanced logging
functionality which helps diagnose potential technical
issues. Before contacting ESET Customer Care, we
strongly recommend searching for a possible solution
on ESET Knowledgebase. If you still need to contact
ESET Customer Care, follow the steps below:
1. Go to the ESET Mobile Security main screen, press
the MENU button and tap Logging Settings.
2. Select an appropriate program component the
problem is related to.
3. Replicate the issue. Information will be written into
an application log file.
4. Go to the ESET Mobile Security main screen, press
the MENU button and tap Customer Care.
5. If you did not find a solution on our Knowledgebase,
tap Continue.
6. Fill in all the details and tap Submit at the bottom of
the screen. Make sure the Application log option is
selected (default).
9.2 Technical support
For administrative assistance or technical support
related to ESET Mobile Security or any other ESET
security product, our Customer Care specialists are
available to help.
To find answers to the most frequently asked
questions, access the ESET Knowledgebase at:
http://kb.eset.com/android
The Knowledgebase contains an abundance of useful
information for resolving the most common issues,
easily accessed by categories or an advanced search
tool.
To contact ESET Customer Care, use the support
request form available at:
http://eset.com/support/contact
To send a support request directly from your mobile
phone, go to the ESET Mobile Security main screen,
press the MENU button and tap Customer Care. Fill in
all the required fields. To include a complete
Application log, follow the steps described in the
Troubleshooting 10 section.
10