1
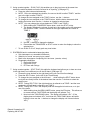
Exploring the HP-203
Roland Corporation US
1.
IT’S A PIANO by ‘default’ (every time you turn it on).
a. Touch
i. Modeled from grand piano (not vertical)
ii. Gravity based system with NO springs
iii. Progressively weighted (as a fine, well-regulated grand)
b. Tone – from the world’s most widely used concert grand
c. Importance of adjusting:
i. Volume control (LEFT on Panel) [OM page 18]
ii. Brilliance control (LEFT on Panel) [OM page 18]
2. INCREDIBLY USEFUL FEATURES
a. No tuning maintenance required offers two outstanding benefits:
i. It’s ALWAYS in tune.
ii. It requires NO periodic maintenance. (NO maintenance cost)
b. Transposition – You play a piece in any key, and hear it any key you select
c. Transpose button is on the LEFT end of the panel. [OM page 30]
3. CHOOSING TONES (voices, sounds) [OM page 25]
a. The importance of exploring the tonal resources
b. Push a tone group button (located just to LEFT of the display).
c. You may use the -/+ buttons to the RIGHT of the display to ‘scroll’ through the sounds.
Each tone is identified by a number, the display shows the number of the currently
selected tone.
d. A complete list of tones begins on page 88 of the owner’s manual.
e. For those interested, Drum ‘MAPS’ begin on page 92 of the owner’s manual.
4. TWIN PIANO MODE – This exciting preset mode allows you to divide the keyboard into left and
right keyboards, each with middle ‘C’ in the center. This allows two students to work
simultaneously at one piano. [OM page 31]
a. To activate TWIN PIANO MODE, simply touch the TWIN PIANO button.
b. The grand piano sound is assigned to both the left and right areas of the keyboard.
c. The right pedal is the damper pedal for the right keyboard, and the left pedal is the
damper for the left keyboard.
d. You can change the way the TWIN PIANO sound is heard by holding the TWIN PIANO
button and while holding the button down use the -/+ buttons to choose in the display:
i. 1. The sound ‘pans’ normally from left to right and would be used if the
instrument is being played through its internal speakers.
ii. 2. Notes played on the left area of the keyboard are only heard from the left
speaker, and notes on the right . . . only from the right speaker. This is the mode
to choose (#2) when using TWIN PIANO mode with the RCS848 classroom
controller.
Roland Corporation US
Contemporary Keyboard Division
page 1
Exploring the HP-203
5. Using sounds together – DUAL PLAY (this enables you to play two tones at the same time
across the entire keyboard and is also referred to as ‘layering’.) [OM page 33]
a. Press two tone buttons simultaneously.
b. NOTE: Of the two selected tone buttons, the one on the left is called ‘TONE 1’ and the
one to the right is called ‘TONE 2’.
c. To change the tone assigned to the TONE 1 button, use the -/+ buttons.
d. To change the tone assigned to the TONE 2 button, hold the button down and while
holding the button down use the -/+ buttons to change its selected tone.
e. NOTE: You may change the volume balance of TONE 1 and TONE 2.
i. While holding the TRANSPOSE button down, touch the SPLIT button.
ii. The display will show the volume of each tone, the number on the left represents
the volume of TONE 1 and the number on the right represents the volume of
TONE 2.
f.
iii. Use the -/+ buttons to change the balance.
iv. Press either the TRANSPOSE or SPLIT button to return the display to show the
selected tone.
To turn DUAL PLAY off, simply push any tone button.
6. DIVERSION back to orchestration/arranging class
a. Solo instruments vs. ensemble instruments
b. What kind of ‘mood’ are we trying to create?
c. Back to the importance of exploring ALL the tones. (sounds, voices)
d. Suggested possibilities
i. Piano with Strings
ii. Piano with Choir
iii. EP Piano with Strings
7. Using sounds together – SPLIT PLAY (this splits the keyboard and allows you to have one tone
in the right hand, and a different tone in the left hand.) [OM page 35]
a. Choose the tone desired for the right hand (using our new-found knowledge)
b. Press the SPLIT button. (to the left of the Tone buttons)
c. To change the tone assigned to the left hand . . . while holding the SPLIT button down
touch the tone family button of the desired tone then use the -/+ buttons to select the
specific tone.
d. NOTE: During SPLIT PLAY the right hand tone is referred to as TONE 1 and the tone
assigned to the left hand is referred to as TONE 2.
e. NOTE: During SPLIT PLAY the damper pedal can be applied to both tones, or to just
one of the tones.
i. While holding down the BRILLIANCE button, press the 3D button. This allows us
to access various FUNCTIONS and the display will indicate “Fnc”.
ii. Now touch the TWIN PIANO button. The display will indicate “dPr”. (If the
display does not indicate “dPr”, hold down the TWIN PIANO button and while
holding it down use the -/+ buttons to change the display until it does indicate
“dPr”)
Roland Corporation US
Exploring the HP-203
page 2
iii. While the display indiciates “dPr” you may use the -/+ buttons to change the
setting.
8. Can we change the ‘SPLIT POINT’?? ([OM page 36]
a. To change the keyboard’s SPLIT POINT simply hold down the SPLIT button and while
continuing to hold the SPLIT button down touch the key where the split point is desired.
b. NOTE: The default SPLIT POINT is at the F# just below middle C.
9. DIVERSION back to orchestration/arranging class
a. Think Solo vs. Ensemble instruments
b. Suggested possibilities
i. Piano in LH – Flute in RH
ii. Bass in LH – Vibraphone in RH
10. Performing with the METRONOME – [OM page 37]
a. To activate the METRONOME, push the METRONOME button. You will hear the
metronome and the light in the metronome button will flash red on the downbeat..
b. To change the TEMPO:
i. Press the TEMPO/BEAT button to make the TEMPO indicator light.
ii. The current tempo will be indicated in the display.
iii. To adjust the tempo use the -/+ buttons.
c. To change the BEAT:
i. Press the TEMPO/BEAT button to make the BEAT indicator light.
ii. The current beat will be indicated in the display.
iii. To adjust the beat use the -/+ buttons.
d. To change the metronome VOLUME, hold the Metronome button down and while
continuing to hold the metronome button down use the -/+ to adjust the volume.
Roland Corporation US
Exploring the HP-203
page 3
11. RECORDING – (How to clone yourself!)
NOTE: The following controls are used to control recording and playback on the HP203
REWIND/RESET
FAST FORWARD
a. Basic recording (Single track)
i. Press the INT SONG/EXT SONG button. It will display
If it does not display USr, push the INT SONG/EXT SONG button until it does.
ii. Push RECORD.
iii. Play the piece.
iv. Push STOP.
v. Push RESET
vi. To hear your recording, push the PLAY/STOP button
b. Advanced (multiple part) recording
i. Press the INT SONG/EXT SONG button. It will display
If it does not display USr, push the INT SONG/EXT SONG button until it does.
ii. Push RECORD. Turn off the tracks to which you do NOT want to record by
touching the buttons. (For instance to record to the RIGHT TRACK, leave its
light illuminated, and turn off the lights for LEFT and ACCOMPANIMENT.
iii. If you are going to use a different tone, choose the new tone.
iv. Play the piece.
v. Push STOP
vi. Push RESET
vii. Push RECORD
viii. Press the button of the track that you want to record, that will illuminate the light
for that button and the light will be flashing. (For instance if you recorded the first
track as the RIGHT track part, you might now touch the LEFT TRACK button to
record to that track.)
ix. Begin playing the next part . . . the HP-203 will begin playback of your first part
as soon as you touch a key.
x. At the end, push STOP.
xi. Push RESET to send the song back to the beginning.
xii. Touch PLAY to hear both parts.
c. For the next part repeat steps vi through x above. The next part would make use of the
ACCOMP TRACK button.
d. You can record up to 3 parts, or tracks, for each song.
e. Record capacity on the HP-203 is approximately 30,000 notes.
Roland Corporation US
Exploring the HP-203
page 4
12. NOTES REGARDING “SAVING YOUR SONG”
a. A recorded song is currently in the USER MEMORY. This memory area is identified in
the display as USr. A song in the USER MEMORY will be lost if you turn off power to
the HP203 without first saving the song to INTERNAL MEMORY or an EXTERNAL
MEMORY DEVICE (USB memory or a floppy diskette).
b. The INTERNAL MEMORY can hold up to 99 songs (actual number of songs will vary
depending on the number of notes contained within each song).
c. Songs recorded on the HP203 are saved as MIDI files, Type 0.
d. A USB-Floppy Disk Drive (optional) may be attached to the USB port under the right end
of the keyboard. This would allow saving the recording to a floppy diskette.
e. USB Memory is often called USB Flash Drives, or USB Thumb Drives, etc. A USBMemory device (optional) can be plugged in to the USB port under the right end of the
keyboard. This will allow the file to be saved directly to the USB Memory device.
13. SAVING YOUR SONG [OM page 60]
a. Determine where you will save the song . . . to the INTERNAL MEMORY or to
EXTERNAL MEMORY (either a USB Memory Device or a floppy diskette).
b. If saving to a USB memory device, connect the USB memory device to the external
memory connector. [OM page 21]
c. If saving to a floppy disk, connect the floppy disk drive to the external memory connector
and place a floppy diskette into the drive.
d. Hold down the BRILLIANCE button, and while continuing to hold it down touch the 3D
button. The display will indicate “Fnc” for FUNCTION MODE.
e. Hold down the INT SONG/EXT SONG button, and while continuing to hold it down use
the -/+ buttons to make the display indicate “SAv” (SAVE).
f. Release the INT SONG/EXT SONG button.
g. Use the -/+ buttons to choose between INTERNAL MEMORY to save the song to one of
the HP203s ninety-nine (99) song locations, or
EXTERNAL MEMORY to save to a floppy diskette
or USB memory device.
h. Press the PLAY/STOP button.
A screen in which you can select the save-destination number will appear. Note that the
presence of the letter “U: in the far left position in
the display indicates INTERNAL MEMORY, if the
letter “U” is not present in that position the display
is indicating it will save to EXTERNAL MEMORY.
Which screen appears was determined by you in the previous step (g).
i. Use the -/+ buttons to determine the save-destination number. Please note that a small
dot will appear in the FAR RIGHT position in the
display if the save-destination location you have
chosen already contains a song.
j. Press the PLAY/STOP button. The display will indicate “Sur” (Are you sure?), and the
STOP/PLAY and RECORD buttons will blink.
k. To complete the process and save the song,
press the RECORD button. If you have decided
to NOT save the song, press PLAY/STOP to CANCEL.
Roland Corporation US
Exploring the HP-203
page 5
14. NOTES REGARDING “PLAYING BACK SONGS”
a. The HP-203 can play back songs:
b. From its INTERNAL PRESET SONG list. (These songs are MIDI files)
c. From its INTERNAL MEMORY (provided you have saved songs to this area)
d. From an EXTERNAL USB MEMORY DEVICE. (Audio files or MIDI files)
e. From an EXTERNAL FLOPPY DISKETTE (MIDI files only)
f. From an EXTERNAL CD DRIVE (Audio CDs, or CDs containing MIDI files)
g. The HP-203 can read and play standard MIDI files of both Type O and Type 1.
15. PLAYING SONG FILES (SMF or AUDIO (WAV) files)[OM page 40]
a. Insert the USB memory device (or floppy diskette) if necessary.
b. Press the INT SONG/EXT SONG button. It will change the display and the
corresponding song source each time you press the button as shown here:
c. After choosing the appropriate song source, use the -/+ buttons to select the desired
song.
d. Press the PLAY/STOP button to begin playback..
e. You can change the ‘speed’ of SMF playback with the TEMPO buttons (+ and -) located
to the left of the window. (You cannot change the tempo of audio file playback.)
[OM page 46]
f. You can TRANSPOSE playback of a MIDI file or an AUDIO FILE by touching the
TRANSPOSE button, and using the -/+ buttons to raise or lower playback in half steps.
[OM page 47]
g. You can change the VOLUME at which the MIDI or AUDIO file is playing by holding the
STOP/PLAY button down, and while holding it down use the -/+ buttons to change the
volume. (The default volume is 127 for MIDI files, the default volume is 64 for AUDIO
files). [OM page 45]
h. You can minimize the volume of the “CENTER SOUNDS” in the playback of AUDIO
files. This will typically minimize (or eliminate) the lead vocal or instrument. During
playback of the audio file simply press the RIGHT TRACK button. [OM page 48]
Roland Corporation US
Exploring the HP-203
page 6
16. CHANGING OTHER PLAYBACK PARAMETERS – You may have interest in manipulating other
aspects of a song during playback. Here is a list of some items that may be of interest, with the
corresponding page of the owner’s manual:
a. The HP-203 can create a two measure “COUNT IN” for MIDI song files that have no
introduction. [OM page 39]
b. You can set the HP-203 to playback ALL SONGS rather than a single song.
[OM page 43]
c. When muting a part, the part normally is not heard. The HP-203 allows you to set the
muted part to playback at a reduced volume so you could use that part as a “guide” for
playing. [OM page 45]
d. More advance MIDI files often contain “Tempo Mapping” to create a more musical
performance. When using this advanced files the HP-203 can ignore those tempo
changes if you desire. This is called TEMPO MUTE. [OM page 46]
e. You can TRANSPOSE the playback of an AUDIO or MIDI file independently of the
keyboard. [OM page 66]
f. You can set the center or left pedal to operate as the PLAY/STOP button. [OM page 67]
g. You can change the sound of the metronome. In addition to the traditional ‘click’ sound
the HP-203 has a variety of other sounds including voice. [OM page 71]
h. When you push the ACCOMP button to cancel the accompaniment tracks, you can
determine which parts will be muted . . . the accompaniment parts, the rhythm part, or
both. [OM page 72]
17. Other FUN things to know . . .
a. When you record on the HP-203 and save the song file to disk it is saved as a Standard
MIDI File (SMF – type 0) which can be opened in all popular notation and/or sequencing
programs (Finale, Sibelius, etc.) Make certain when you open the file in the computer
that you choose MIDI file from the drop-down dialogue box . . . by default the program
you are using is looking for its own file type. (SMFs end in .MID)
b. Conversely, song files you create on the computer can be saved as a SMF and played
on the HP-203).
c. The HP-203 has 306 tones (sounds, voices) from which to choose.
d. The HP-203 may be easily tuned to ‘non-standard’ pitch.
e. The HP-203 has a number of historical tuning schemes.
f. The HP-203 CAN be connected directly to a PC or Apple computer.
g. Other devices (like an iPod) may be directly plugged into the HP-203.
18. SUPPORT When you have questions, we have ans wers. We offer Customer Support:.
a. on-line at www.rolandus.com/support (including a searchable Knowledge Base).
b. support by email is also available through the above web address.
c. live by telephone at 323-890-3740 available Monday through Friday from 7:30 AM to
6:00 PM Pacific Time. Other than the cost of the telephone call there is NO CHARGE
for live support.
19. Questions?
Roland Corporation US
Exploring the HP-203
page 7