1
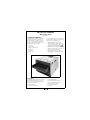
I
Office: (800) 683-7248
Technical Support: (702) 651-3444
E-Mail: [email protected]
Web-Site:
FAX: (702) 651-0214
www.jcm-american.com
Bill Acceptor Series
EBA-03 Bill
Validator
Operation and Maintenance Manual
(Revision 2)
JCM Part No. 960-000058R_Rev. 2
© 2008, JCM-American Corporation
JCM is a registered trademark of JCM American Corporation. All other product names mentioned herein may be
registered trademarks or trademarks of their respective companies. Furthermore, ™, ® and © are not always mentioned
in each case throughout this publication.
EBA-03 Bill Validator
Table of Contents
TOC
Page
1 GENERAL INFORMATION......................................................................................1
Introduction..................................................................................................................... 1
Specifications ................................................................................................................. 2
Primary Component Parts ............................................................................................. 2
Precautions ..................................................................................................................... 3
Dimensions ..................................................................................................................... 3
2 INSTALLATION / OPERATION ...............................................................................7
Connections.................................................................................................................... 7
Pin Assignments ............................................................................................................ 8
DIP Switch Settings...................................................................................................................... 9
Preventive Maintenance............................................................................................................. 10
3 DISASSEMBLY / REASSEMBLY..........................................................................11
Disassembly Procedure................................................................................................11
Reassembly Procedure .............................................................................................................. 12
4 CALIBRATION ......................................................................................................13
Connecting a PC for Calibration................................................................................................. 13
VM-450 and EBA-03 DIP Switch Settings ................................................................... 13
Installing the Calibration Software.............................................................................. 13
Using the Calibration Software ................................................................................... 14
Sensor Names and Locations ..................................................................................... 14
5 EXPLODED VIEW AND PARTS LIST ...................................................................17
EBA-03 Exploded View ................................................................................................ 17
EBA-03 Parts List ......................................................................................................... 18
6 INDEX.....................................................................................................................19
A TROUBLESHOOTING ...........................................................................................21
Removing a Jammed Bill............................................................................................................ 21
Performance Tests........................................................................................................ 21
Troubleshooting Using VM-450 Tests......................................................................................... 21
Test No. 1 Transport Motor Forward Rotation Test..................................................................................22
Test No. 2 Transport Motor Reverse Rotation Test .................................................................................22
Test No. 3 Acceptor Sensor Test .............................................................................................................22
Test No. 4 Acceptor I/F Test ....................................................................................................................23
Test No. 5 Acceptor Function Test...........................................................................................................23
Test No. 6 Bill Acceptor Test....................................................................................................................23
Error Codes................................................................................................................... 24
B GLOSSARY............................................................................................................25
JCM Part No. 960-000058R_Rev. 2
i
© 2008, JCM American, Corporation
EBA-03 Bill Validator Table of Contents
THIS PAGE INTENTIONALLY LEFT BLANK
JCM Part No. 960-000058R_Rev. 2
ii
© 2008, JCM American, Corporation
EBA-03 Bill Validator
List of Figures
LOF
Page
Figure 1-1 EBA-03 Bill Validator ...................................................................................1
Figure 1-2 EBA-03 Primary Component Parts..............................................................2
Figure 1-3 Precautionary Symbols ...............................................................................3
Figure 1-4 EBA-03 Bill Validator Dimensions ...............................................................3
Figure 2-1 Typical EBA-03 System Connections..........................................................7
Figure 2-2 Various DIP Switch Locations .....................................................................9
Figure 2-3 DIP Switch 2 (DS-2) Settings ....................................................................10
Figure 2-4 EBA Bill Path Cleaning..............................................................................10
Figure 3-1 Screw, Collar and Cover Removal ............................................................11
Figure 3-2 Frame Removal.........................................................................................11
Figure 3-3 CPU Board Cover Removal ......................................................................11
Figure 3-4 Rod Removal.............................................................................................11
Figure 3-5 Freeing the CPU Board .............................................................................11
Figure 3-6 CPU Board Removal .................................................................................12
Figure 3-7 Sensor Cover Screw Removal ..................................................................12
Figure 3-8 Freeing the Lower Sensor Board ..............................................................12
Figure 3-9 Lower Sensor Board Cover Removal........................................................12
Figure 3-10 Motor Cover Removal...............................................................................12
Figure 3-11 Motor Removal .........................................................................................12
Figure 4-1 EBA-03 Test Setup....................................................................................13
Figure 4-2 EBA-03 Test Tool Requirements...............................................................13
Figure 4-3 VM-450 and EBA-03 DIP Switches ...........................................................13
Figure 4-4 Initial Software Install Screen ....................................................................13
Figure 4-5 Second Software Install Screen ................................................................14
Figure 4-6 Third Software Install Screen ....................................................................14
Figure 4-7 Initial Adjustment Software Screen ...........................................................14
Figure 4-8 Final Adjustment Software Screen ............................................................14
Figure 4-9 Sensor Locations.......................................................................................15
Figure 5-1 EBA-03 Exploded View .............................................................................17
Figure A-1 Opening the EBA Bill Path ........................................................................21
Figure A-2 Connecting the Ribbon Cable ...................................................................21
Figure A-3 VM-450 & EBA-03 DIP Switch Settings ....................................................21
Figure A-4 Transport Motor Forward Rotation Test DIP Switch Settings....................22
Figure A-5 EBA Test #1 & 2 LED Indications..............................................................22
Figure A-6 Transport Motor Reverse Rotation Test DIP Switch Settings ...................22
Figure A-7 Sensor “F” Detection Lit LED ....................................................................22
Figure A-8 Acceptor Sensor Test DIP Switch Settings ...............................................22
Figure A-9 EBA Test #3 Lit LED Indications ...............................................................23
JCM Part No. 960-000058R_Rev. 2
iii
© 2008, JCM American, Corporation
EBA-03 Bill Validator
List of Figures
Continued
Page
Figure A-10 Acceptor I/F Test DIP Switch Settings .....................................................23
Figure A-11 EBA Test #4 Lit LED Indications ..............................................................23
Figure A-12 Acceptor Function Test DIP Switch Settings ............................................23
Figure A-13 Bill Acceptance Test DIP Switch Settings ................................................23
JCM Part No. 960-000058R_Rev. 2
iv
© 2008, JCM American, Corporation
EBA-03 Bill Validator
List of Tables
Page
LOT
Table 1-1
Table 1-1
Table 2-1
Table 2-2
Table 2-3
Table 2-4
Table 2-5
Table 4-1
Table 5-1
Table A-1
Table A-2
Table A-3
General Specifications ..................................................................................2
Country Code Listings...................................................................................4
Serial I/F (ID-044C) Pins Assignments .........................................................8
Pulse I/F (ID-044C) Pins Assignments..........................................................8
Bi-directional Serial I/F (ID-003) Pin Assignments ........................................8
Pulse I/F (ID-003) Pin Assignments ..............................................................9
DIP Switch 1 (DS-1) Settings ........................................................................9
Error Codes.................................................................................................14
EBA-03 Parts List........................................................................................18
EBA DS-1 DIP Switch Tests .......................................................................21
Red LED Error Codes.................................................................................24
Green LED Rejection Codes ......................................................................24
JCM Part No. 960-000058R_Rev. 2
v
© 2008, JCM American, Corporation
EBA-03 Bill Validator List of Tables
THIS PAGE INTENTIONALLY LEFT BLANK
JCM Part No. 960-000058R_Rev. 2
vi
© 2008, JCM American, Corporation
EBA-03 Bill Validator
Bill Acceptor Series
Section 1
1 GENERAL INFORMATION
This manual provides a general overview of the
advantages and options of the European Bill
Acceptor Validation Unit (EBA-03) pictured in
Figure 1-1. This first section is designed to help
you navigate through the manual with ease and
provides the following information:
•
•
•
•
•
•
In order to make operation of this device and make
navigation within this manual easier, the following
illustrations were used within the text:
• Safety instructions, which need to be
observed in order to protect the operators and
equipment, have been written in bold text and
Introduction
Specifications
Primary Component Parts
Precautions
Dimensions
Country Codes.
have been given the pictographs:
• Special Notes, which effect the use of the Bill
Validator, have been written in italic text and
have been given the pictograph:
• Steps, requiring the operator to perform
specific actions are given sequential numbers
(1., 2., 3., etc.).
Figure 1-1 EBA-03 Bill Validator
Introduction
•
•
•
•
•
•
The JCM EBA-03 Bill Validator head is designed
for international platforms that accept currency
62mm to 72mm in width and allows lengthwise
insertion in all four directions.
The EBA-03 contains:
• Custom Sensor Technology
JCM Part No. 960-000058R_Rev. 2
1
2 Mb of EPROM Memory
Denomination DIP Switch Selections
Pulse or Serial Interface Capabilities
Two Second Validation Speed
Easy Access Serviceability
CE Approval.
© 2008, JCM-American Corporation
Section 1
EBA-03 Bill Validator
General Information
Specifications
Table 1-1 lists the EBA-03 General Specifications.
Table 1-1 General Specifications
Condition
Function
Acceptable denominations:
DIP Switch selectable
Insertion direction:
Four-way
Acceptance rate:
90+% in normal acceptance mode.
(Exclusions would include bills containing contamination, having
excessive wear, wet, or torn, and those with their corners or ends
folded, dimensions altered or print significantly different than reference
note.
Validation time:
Approximately two (2) seconds
Power:
DC +12V (± 5%)
Power consumption:
In standby: 2.5 VA
In Operation: 6.0 VA (Max. 10 VA)
Operating environment:
Operating temperature:
5°C - 50°C (41°F - 122°F)
Storage temperature:
-20°C - 60°C (4°F - 140°F)
(Time from insertion to output of credit pulse or storage verification)
Humidity:
30% - 85% RH (non-condensing)
Light sensitivity:
Must not be exposed to direct sunlight
Installation:
Dimensions:
Indoors only
See dimension drawings on Page 4 for further detail
Weight:
Installation:
approximately 0.6 Kg (1.32 lb.)
Horizontal
Primary Component Parts
Figure 1-2 illustrate the Primary Component Part names for the EBA-03.
Figure 1-2 EBA-03 Primary Component Parts
JCM Part No. 960-000058R_Rev. 2
2
© 2008, JCM-American Corporation
General Information
EBA-03 Bill Validator
Precautions
Type 1
Section 1
2. (Type 2) Do not expose the unit to water.
The unit contains several precision electronic devices which can be damaged if
water or any liquid is sprayed or spilled into
the unit.
Type 2
3. (Type 3) Do not install the unit into a dusty
environment. Dust may affect the sensor’s
performance.
Type 3
Figure 1-3 Precautionary Symbols
Dimensions
The Figure 1-3 symbols are defined as follows:
Figure 1-4 illustrates the typical EBA-03 external
dimensions in millimeters.
1. (Type 1) Do not insert a torn, folded, or wet
bill, as this action may cause a bill jam inside
the unit.
All Dimensions are in Millimeters
Figure 1-4 EBA-03 Bill Validator Dimensions
JCM Part No. 960-000058R_Rev. 2
3
© 2008, JCM-American Corporation
Section 1
EBA-03 Bill Validator
Country Codes
Table 1-1: Country Code Listings (Continued)
Table 1-1: Country Code Listings
Country
General Information
Country
Country Code
Country Code
Iceland
ISL
Antilles
ANT
India
IND
Argentine
ARG
Israel
ISR
Australia
AUS
Italy
ITA
Austria
AUT
Italy
ITA8
Austria
AUT4
Italy
ITA9
Barbados
BRB
Japan
JPN
Belgium
BEL
Kazakhstan
KAZ
Botswana
BWA
Kazakhstan
KAZ1
Brazil
BRA
Latvia
LVA
Bulgaria
BGR
Lithuania
LTU
Canada
CAN
Malaysia
MYS
Canada
CAN
Malaysia
MYS1
Chile
CHL
Malta
MLT
China
CHN
Mauritius
MUS
Colombia
COL
Mexico
MEX
Costa Rica
CRI
Moldova
MDA
Croatia
HRV
Morocco
MAR
Cyprus
CYP
Namibia
NAM
Czech Republic
CZE
Netherlands
NLD
Denmark
DNK
Netherlands
NLD-B
Estonia
ESTE
New Zealand
NZL
Estonia
EST2
New Zealand
NZL1
European Union
EUR
New Zealand
NZL-B
Finland
FIN
North Ireland
NIRL
France
FRA
Norway
NOR
Germany
DEU
Norway
NOR1
Germany
DEU1
Peru
PER
Germany
DEU2
Peru
PER1
Germany/Sweden
Great Britain (England)
DEU/SWE
Philippines
PHL
GBR
Philippines
PHL1
Great Britain (England)
GBR-B
Poland
POL
Great Britain/Gibraltar
GBR/GBI
Poland
POL1
Great Britain/Isle Of Man
GBR/MAN
Poland
POL1-B
Greece
GRC
Greece
GRC-B
Portugal
PRT
Qatar
QAT
Guatemala
MGT
Republic Of Ireland
IRL
Honduras
HND
Republic Of Korea
KOR
Hong Kong
HKG
Republic Of Korea
KOR-B
Hungary
HUN
Romania
JCM Part No. 960-000058R_Rev. 2
4
ROM
© 2008, JCM-American Corporation
General Information
EBA-03 Bill Validator
Section 1
Table 1-1: Country Code Listings (Continued)
Country
Country Code
Russia
RUS
Russia
RUS-B
Saudi Arabia
SAU
Singapore
SGP
Singapore
SGP-B
Slovakia
SVK
Slovenia
SVN
South Africa
ZAF
Spain
ESP
Sri Lanka
LKA
Sweden
SWE
Switzerland
CHE
Switzerland
CHE3
Switzerland
CHE-B
Taiwan (Republic Of China)
TWN
Tanzania
TZA
Thailand
THA
Trinidad & Tobago
TTO
Ukraine
UKR
Ukraine
UKR1
United Arab Emirates
ARE
United States
USA
Uruguay
URY
Uruguay
URY1
Venezuela
VEN
Venezuela
VEN1
Venezuela
VEN2
Venezuela
VEN-B
These Country Codes conform to the ISO 3166
Country Code list definitions.
JCM Part No. 960-000058R_Rev. 2
5
© 2008, JCM-American Corporation
EBA-03 Bill Validator
THIS PAGE INTENTIONALLY LEFT BLANK
JCM Part No. 960-000058R_Rev. 2
6
© 2008, JCM-American Corporation
EBA-03 Bill Validator
Bill Acceptor Series
Section 2
2 INSTALLATION / OPERATION
• DIP Switch Settings
• Preventive Maintenance.
This section provides installation and operation
instructions for the EBA-03 Bill Validator. The
information within contains the following features:
Figure 2-1 illustrates a typical EBA-03 system
connection.
• Pin Assignments
Connections
Figure 2-1 Typical EBA-03 System Connections
JCM Part No. 960-000058R_Rev. 2
7
© 2008, JCM-American Corporation
Section 2
EBA-03 Bill Validator
Installation / Operation
Pin Assignments
Table 2-1 Serial I/F (ID-044C) Pins Assignments
Pin Signal
No.
Signal Name
1
Vdd
I/O
Active
Description
Power supply 12V (±5%)
2
Vss
3
DATA
Output
Low
4
CTS
Input
Low
5
Vss
The output terminal for communications data
The transmission authorization signal for communication data
GND
Output
Low
The output signal indicating the validator is functional
The signal for disabling (High) and enabling (Low) the
registering of bills
The signal for confirming the commencement of
communications data
6
Vcc
7
BUSY
GND
Power supply 5V (±5%) MAX 20mA
8
DISABLE/
ENABLE
Input
Low
9
RTS
Output
Low
10
NC
Table 2-2 Pulse I/F (ID-044C) Pins Assignments
Pin No.
Signal Name
1
2
Vdd
Vss
3
4
VEND
NC
5
6
Vss
Vcc
7
8
BUSY
DISABLE/
ENABLE
9
NC
10
NC
I/O
Active
Description
Power supply 12V (±5%)
GND
Output
Low
Registered bill type signal (pulse signal)
GND
Power supply 5V (±5%) MAX 20mA
Output
Low
Input
Low
The output signal indicating the validator is functional
The signal for disabling (High) and enabling (Low) the
registering of bills
Table 2-3 Bi-directional Serial I/F (ID-003) Pin Assignments
CPU Board
9
1
10
2
CN1
Pin No.
Signal Name
1
Vdd
2
3
Vss
TXD
4
5
RXD
Vss
Output
Output signal line from controller
GND
6
Vcc
Output
Power supply 5V (±5%) MAX 20mA
7
NC
Leave unconnected
8
NC
Leave unconnected
9
NC
Leave unconnected
10
NC
Leave unconnected
JCM Part No. 960-000058R_Rev. 2
I/O
Active
Description
Power supply 12V (±5%)
Input
GND
Output signal line from acceptor
8
© 2008, JCM-American Corporation
Installation / Operation
EBA-03 Bill Validator
Section2
Table 2-4 Pulse I/F (ID-003) Pin Assignments
CPU Board
9
1
10
2
Pin No.
Signal Name
I/O
1
Vdd
Input
2
Vss
3
4
VEND
NC
5
6
Vss
Vcc
Output
Active
Description
Power supply 12V (±5%)
GND
Output
Low
Bill acceptance denomination signal
Leave unconnected
GND
Power supply 5V (±5%) MAX 20mA
7
BUSY
Output
High
Output signal when validator is functional
8
INH
Input
High
Bill acceptance inhibition signal*
9
ABN
Input
High
10
NC
Output signal when validator is abnormal
Leave unconnected
*. When an INH signal is not connected, the acceptor is in a bill acceptance inhibition mode.
When an INH signal is not used, connect pin 8 to Vss.
DIP Switch Settings
DIP Switch Block 1 (DS-1) is used to accept or
inhibit denominations. DIP Switch Block 2 (DS-2)
is used to select the interface (I/F) and set details of
the interface signals.
The EBA-03 has two sets of DIP Switches. One is
located on the right side of the acceptor
(See Figure 2-2 a), designated DIP Switch Block 1
(DS-1), the other is inside the EPROM cover
(See Figure 2-2 b), designated DIP Switch Block 2
(DS-2).
DS-2 can be accessed by removing the EPROM
cover. These DIP Switches are used to set serial or
pulse interface, and establish signal parameters if
the Pulse Interface is used.
DS-1 Switch Location
Caution: Make all DIP Switch settings
with the power to the EBA-03 turned
OFF!
a
Table 2-5 DIP Switch 1 (DS-1) Settings
NOTE: Turn DS-1, Switch #1
ON to enter the test mode.
DIP Switch
No.
b
Position
ON
Denomination
OFF
(see NOTE below)*
X
1
X
2
X
2
Accept
X
3
X
3
X
4
X
5
7
X
6
Figure 2-2 Various DIP Switch Locations
JCM Part No. 960-000058R_Rev. 2
9
Reject
Accept
X
DS-2 Switch Location
Reject
Accept
X
6
Reject
Accept
X
5
Reject
Accept
X
4
Accept/
Reject
Reject
Accept
Reject
© 2008, JCM-American Corporation
Section 2
EBA-03 Bill Validator
Preventive Maintenance
Table 2-5 DIP Switch 1 (DS-1) Settings
It is important to keep the bill path, rollers, and
belts clean. The sensor lenses are transparent
surfaces, and are made of a polymer material.
Handle them with extreme care.
NOTE: Turn DS-1, Switch #1
ON to enter the test mode.
DIP Switch
No.
Position
ON
Denomination
OFF
(see NOTE below)*
X
7
X
8
Installation / Operation
Accept/
Reject
To clean the lenses, use a lint-free cloth and mild
non-abrasive detergent such as liquid dish soap
mixed with water (See Figure 2-4).
Accept
Reject
*.NOTE: Numbers 1-7 indicate different denominations in any currency.
Figure 2-3 illustrates the internal DS-2 DIP Switch
settings when the Serial Interface (I/F), or the Pulse
Interface is configured.
WARNING: Do not use alcohol or paint
thinner for cleaning surfaces!
When serial I/F is used, set DS-2,
Switch #1 to ON.
When pulse I/F is used, set DS-2, Switch
#1 to OFF
DS-2 Switches #2 and #3 determine the
pulse width
DS-2 Switch #4 selects the pulse option
DS-2 Switch #5 controls the exit sensor:
ON = Disabled,
OFF = Enabled (Normal operation)
DS-2 Switch #6 controls the INHIBIT
signal:
OFF = high active,
ON = low active
DS-2 Switch #7 controls the ABN signal:
OFF = high active,
ON = low active
DS-2 Switch #8 controls the ACCEPTANCE rate:
ON = high acceptance,
OFF = low acceptance
Figure 2-4 EBA Bill Path Cleaning
NOTE: These settings vary according to the
software version
Figure 2-3 DIP Switch 2 (DS-2) Settings
JCM Part No. 960-000058R_Rev. 2
10
© 2008, JCM-American Corporation
EBA-03 Bill Validator
Bill Acceptor Series
Section 3
3 DISASSEMBLY / REASSEMBLY
Remove
Four Cover
Securing
Screws
Lift Cover Off
This section provides disassembly and reassembly
instructions for the EBA-03 Bill Validator. The
information within contains the following features:
• Disassembly Procedure
• Reassembly Procedure
Disassembly Procedure
To correctly disassemble an EBA-03 unit, perform
the following steps:
1. Remove the screws and collars from the
hinge openings on both sides of the unit
(See Figure 3-1 a), then
Figure 3-3 CPU Board Cover Removal
5. Remove Connector CN3 that connects to a
Transistor mounted on the CPU Board
Cover.
2. Remove the body cover retaining screw from
each side of the unit, and detach each body
cover (See Figure 3-1 b).
6. .Release the two springs securing the horizontal rod in place, and slide the rod out
(See Figure 3-4).
a
Remove Springs
&
Slide Rod
Out
b
Figure 3-4 Rod Removal
Figure 3-1 Screw, Collar and Cover Removal
7. Disconnect the 30-pin CPU Board connector
(See Figure 3-5 a), then
3. Lift the body out of the frame
(See Figure 3-2).
8. Remove the three (3) circuit board mounting
screws indicated in the Figure 3-5 b photo.
a Remove CPU Communications Connector
b Remove
CPU
Board
Mounting
Screws
Lift From
Frame
Figure 3-2 Frame Removal
Figure 3-5 Freeing the CPU Board
4. Remove the four screws securing the CPU
Cover, and remove the cover
(See Figure 3-3).
JCM Part No. 960-000058R_Rev. 2
9. Lift the upper circuit board up and out of the
frame (See Figure 3-6).
11
© 2008, JCM-American Corporation
Section 3
EBA-03 Bill Validator
Disassembly / Reassembly
Lift the Board
Up and Off
the Frame
a
Figure 3-6 CPU Board Removal
Figure 3-9 Lower Sensor Board Cover Removal
14. Remove the two screws securing the motor
cover from the lower assembly and remove
the motor, gears and drive belts from the
assembly (See Figure 3-10 a).
a
Figure 3-7 Sensor Cover Screw Removal
10. Remove the Sensor Cover by removing the
two retaining screws shown in Figure 3-7 a.
a
11. .Remove the Lower Sensor Board by disconnecting the 30-pin board connector
(See Figure 3-8 a), and the 2-pin connector
coming from the motor (See Figure 3-8 b).
Figure 3-10 Motor Cover Removal
15. Lift the motor up and out of the frame
(See Figure 3-11).
12. Remove the two (2) screws shown in Figure
3-8 c.
CAUTION: There is a small, white ball
bearing located in a cup at the end of the
drive shaft that could fall out when the
motor is removed. Carefully remove it,
and store it in a safe place for reassembly.
a
b
c
Lift up
and Out
Figure 3-11 Motor Removal
Figure 3-8 Freeing the Lower Sensor Board
Reassembly Procedure
13. Remove the Lower Sensor Board Cover by
by removing four (4) circuit board retaining
screws (See Figure 3-9 a).
JCM Part No. 960-000058R_Rev. 2
To reassemble, reverse the preceding procedure.
12
© 2008, JCM-American Corporation
EBA-03 Bill Validator
Bill Acceptor Series
Section 4
4 CALIBRATION
Connecting a PC for Calibration
Figure 4-1 illustrates the required equipment inter-connection necessary to properly calibrate the EBA-03
unit.
Figure 4-1 EBA-03 Test Setup
Figure 4-2 illustrates the required tools necessary to properly calibrate the EBA-03 unit.
Figure 4-2 EBA-03 Test Tool Requirements
Installing the Calibration Software
VM-450 and EBA-03 DIP Switch
Settings
1. Place the EBA-03 calibration software CD
into your CD drive. Wait a few seconds, and
the first screen shown in Figure 4-4 will
appear.
Figure 4-3 illustrates the VM-450 and the EBA-03
proper test DIP Switch settings.
2. Once the files are copied, the second screen
shown in Figure 4-5 will appear.
Figure 4-3 VM-450 and EBA-03 DIP Switches
When power is applied to the VM-450, the Red
and Green LEDs on the EBA-03 will light. This
means the unit is in Standby Mode. Tests and
adjustments are performed in this mode.
If the LEDs fail to light, recheck the DIP Switch
settings. Turn power to the VM-450 OFF, then turn
it back ON. If the LEDs still do not light, check the
ROM and CPU Board’s integrity.
JCM Part No. 960-000058R_Rev. 2
Figure 4-4 Initial Software Install Screen
13
© 2008, JCM-American Corporation
Section 4
EBA-03 Bill Validator
Calibration
Figure 4-5 Second Software Install Screen
Figure 4-8 Final Adjustment Software Screen
3. Click the
Screen Button to continue the installation.
3. Then click on the
Screen
Button. When that test is finished, replace
the White Reference Paper with the Black
Reference Paper (Part No. 074542).
4. To complete the software installation on
your hard drive, click the large icon shown in
Figure 4-6 and follow the screen prompts.
NOTE: This test only takes a second.
Remove the Black Reference Paper
and click “Next” again.
If there is a calibration problem, an ERROR
message will appear in Figure 4-8 indicating
where the possible problem location could
be.
Sensor Names and Locations
If an error does occur during the previous tests, use
the error information listed in Table 4-1 and the
location information shown in Figure 4-9 to determine which sensor may be at fault and where that
particular sensor is located.
Figure 4-6 Third Software Install Screen
Using the Calibration Software
With the cabling attached as shown in the Figure 41 illustration, begin the tests by:
Table 4-1 Error Codes
1. Double-click on the EBA-03 icon. The opening screen shown in Figure 4-7 will appear.
Click
and follow the onscreen instructions.
Error Name
Figure 4-7 Initial Adjustment Software Screen
2. Once the motor speed test is finished, open
the top of the Acceptor and insert the White
Reference Paper (Part No. 074541) into the
insertion slot.
JCM Part No. 960-000058R_Rev. 2
14
Sensor Name
l3t_ir
l3t_gn
L3DI/L3PT
L3UG/PTL3
l3d_ir
l3d_rd
L3DI
L3DR
l3u_ir
l3u_gn
L3UI
L3UG
c0t_ir
c0t_rd
C0DI/C0PT
C0UR/PTC0
C0D_IR
C0DI
c0d_rd
C0DR
c0u_ir
c0u_rd
C0UI
C0UR
r3t_ir
r3t_rd
R3DI/R3PT
R3UR/PTR3
r3d_ir
r3d_gn
R3DI
R3DG
© 2008, JCM-American Corporation
Calibration
EBA-03 Bill Validator
Section 4
Table 4-1 Error Codes (Continued)
Error Name
Sensor Name
r3u_ir
R3UI
r3u_rd
R3UR
l1t_rd
L1UR/PTL1
r1t_rd
l2t_gn
R1DR/R1PT
L2DG/L2PT
r2t_gn
R2UG/PTR2
b0t_ir
BIR/BPT
f0t_ir
e0t_ir
FIR/FPT
EIR/PTE
s0t_ir
SIR/SPT
Figure 4-9 Sensor Locations
Refer to Appendix A for additional sensor troubleshooting procedures.
JCM Part No. 960-000058R_Rev. 2
15
© 2008, JCM-American Corporation
EBA-03 Bill Validator
THIS PAGE INTENTIONALLY LEFT BLANK
JCM Part No. 960-000058R_Rev. 2
16
© 2008, JCM-American Corporation
EBA-03 Bill Validator
Bill Acceptor Series
Section 5
5 EXPLODED VIEW AND PARTS LIST
This section provides exploded view and associated parts lists for the EBA-03 Bill Validator.
EBA-03 Exploded View
Figure 5-1 EBA-03 Exploded View
JCM Part No. 960-000058R_Rev. 2
17
© 2008, JCM-American Corporation
Section 5
EBA-03 Bill Validator
Exploded View and Parts List
EBA-03 Parts List
Table 5-1 EBA-03 Parts List
No.
EDP No.
Part No.
1
067383
659-3110-06-01B-02
CPU Board Assy.
1
2
3
067382
067412
659-3110-06-02B-01
659-3110-05-01A-01
Sensor Board Assy.
Regulator Module Assy.
1
1
4
5
067416
067489
659-3110-05-02A-01
3110-05-03B
DC Motor Module Assy.
Relay Harness
1
1
6
7
067478
067479
0659PT0101
0659PT0102
Frame Lower
Frame Upper
1
1
8
9
067480
067481
0659PT0103
0659PT0104
Plate Spring
Mirror
2
1
10
11
069760
069761
0659RE0101
0659RE0102
Bill Guide Lower
Bill Guide Upper
1
1
12
067464
0659RE0103
Square Prism
1
13
067467
0659RE0104
Window Cover A
2
14
15
067468
067469
0659RE0105
0659RE0106
Window Cover B
Prism Wall
4
2
16
17
067470
067471
0659RE0107
0659RE0108
Motor Cover
Worm Wheel G7
1
1
18
19
067472
067473
0659RE0109
0659RE0110
Worm Gear G7
Pulley GT2
1
4
20
067474
0659RE0111
Drive Roller
4
21
067465
0659RE0112
ROM Cover Wide
1
22
23
067476
067477
0659RE0113
0659RE0114
Open Button
Sensor Spacer A
1
1
24
25
069492
069491
0659RE0115
0659RE0116
Sensor B Spacer
Square Prism 2
1
1
26
27
069493
067482
0659RE0117
0659BE0101
Window Cover C
Pulley Beam
2
2
28
29
067483
067484
0659C00101
0659SH0101
Fulcrum Collar
Open Shaft
2
1
30
067485
0659SH0102
Roller Shaft
2
31
067486
0659TS0101
Open Spring
2
32
33
067487
069519
166-2GT-3RF
Φ5
Timing Belt
Nylon Ball
2
1
34
35
069762
005846
M2.3 x 4
M2.6 x 5
SEMS
Flat-head Screw
1
2
36
37
062887
061502
Nominal 2 x 10
Nominal 2.6 x 10
P-tight Pot Screw
P-tight Bind Screw
6
13
38
047547
Nominal 4
CA Snap Ring for Shaft
2
JCM Part No. 960-000058R_Rev. 2
Description
18
Qty.
Remarks
© 2008, JCM-American Corporation
EBA-03 Bill Validator
Bill Acceptor Series
Section 6
6 INDEX
T
B
Test
of acceptor functions… A-23
of acceptor interface… A-23
of bill acceptance… A-23
Bill Acceptor
general information concerning the… 1-1
Bill jam
Tests
BSY
Troubleshooting
motor rotation… A-22
removing a… A-21
instructions for… A-21
VM-450 Tests for… A-21
busy LED… A-21
C
W
Caution
Warning
against currency note testing… A-22
small ball
against use of solvents… 2-10
regarding cleaning solution types… 2-10
… 3-12
possible loss of
wiring harness damage… A-21
Cleaning
parts requiring… 2-10
D
DIP Switch
Dual Inline Package switch… A-21
E
EBA
acronym for European Bill Acceptor… 1-1
Error Codes
table listing of… A-24
F
forward/reverse… A-22
G
General information
bulleted listing of… 1-1
N
Navigation
within manual
… 1-1
procedure for
P
Precautions
symbols indicating… 1-3
3 types defined… 1-3
S
Safety
pictographs indicating… 1-1
Special Notes
italic text highlighted… 1-1
Steps
sequential numbering of… 1-1
STKF
acronym for stack, front… A-21
JCM Part No. 960-000058R_Rev. 2
19
© 2008, JCM-American Corporation
Section 6
EBA-03 Bill Validator
INDEX
THIS PAGE INTENTIONALLY LEFT BLANK
JCM Part No. 960-000058R_Rev. 2
20
© 2008, JCM American, Corporation
EBA-03 Bill Validator
Bill Acceptor Series
Section A
A TROUBLESHOOTING
This section provides troubleshooting instructions
for the EBA-03 Bill Validator. The information
within contains the following features:
•
•
•
•
•
Removing a Jammed Bill
Performance Tests
Test DIP Switch Settings
Troubleshooting Using VM-450 Tests
Error Codes
Figure A-2 Connecting the Ribbon Cable
2. Connect the AC Power Cord supplied in the
kit to the VM-450 to a suitable power
source.
3. Position the VM-450 and EBA-03 DS-1
DIP Switches as shown in Figure A-3.
Removing a Jammed Bill
To remove a jammed bill:
1. Push the Open/Close Button located on the
upper scanning unit forward and lift the unit
up (See Figure A-1)
CAUTION: Do not raise the upper
scanning unit up too high. Doing so
could damage the wiring harness.
Figure A-3 VM-450 & EBA-03 DIP Switch Settings
4. Apply power to the VM-450. The STKF and
BSY LEDs on the VM-450 and the EBA-03
Red and Green LED’s will all light.
Troubleshooting Using VM-450 Tests
The tests listed in Table A-1 are performed using
DS-1, DIP Switches #2 through #8 located on the
right side of the EBA-03. DIP Switch #1 is used to
toggle the test on and off.
NOTE: OFF starts a test; ON stops the
test and puts the unit into standby mode
awaiting the start of the next test.
Table A-1 EBA DS-1 DIP Switch Tests
DIP Switch
12345678
Test Item
Forward motor
rotation
Figure A-1 Opening the EBA Bill Path
2. Remove the jammed bill.
Description
Checks motor speed in a
forward rotation
Reverse motor
rotation
Checks motor speed in a
reverse rotation
Sensor ON/OFF
Checks sensor status*
Performance Tests
Acceptor I/F test Checks input/output signal
line status
Perform the following steps to initiate an EBA performance test:
Performance
test
1. Connect the EBA-03 to the VM-450 with
short ribbon cable Part No. 074744
(See Figure A-2).
JCM Part No. 960-000058R_Rev. 2
Checks acceptor operation*
Bill acceptance* Checks bill identification
and acceptance*
*. NOTE: This test is effective only after performing a full EBA-03
calibration procedure (See “Calibration” on page 4-1 of Section 4).
21
© 2008, JCM-American Corporation
Section A
EBA-03 Bill Validator
TEST NO. 1 TRANSPORT MOTOR FORWARD
ROTATION TEST
The first test is the motor speed test in a
forward direction.
described lights on the VM-450 will indicate
the motor speed rate (Review Figure A-5).
TEST NO. 3 ACCEPTOR SENSOR TEST
This test checks the acceptor head sensors status.
1. Set the initial DIP Switches according to the
Figure A-4 illustration.
2. With the power turned off to the VM-450, set
DS-1, Switch #1 to the ON position.
CAUTION: Do not attempt this test
using a currency note! It is
recommended that the test be
performed with the special White Paper
normally used to calibrate the sensors.
Set the initial DIP Switches according to the Figure
A-7 illustration.
Figure A-4 Transport Motor Forward Rotation
Test DIP Switch Settings
3. Turn on the VM-450 power. The BSY and
STKF lights will come on.
4. Put DS-1, Switch #1 in the OFF position.
The BSY light will go out. The motor will
rotate in a forward direction. One of three
lights on the VM-450 will indicate the motor
speed (See Figure A-5).
Figure A-7 Acceptor Sensor Test DIP Switch
Settings
1. Turn off power to the VM-450.
2. Turn DS-1, Switches #1 and #3 to ON.
3. Turn the power to the VM-450 ON.
4. Turn DS-1, Switch # 1 OFF to begin running the tests.
5. Slowly slide the White Test Paper into the
Acceptor while following the steps listed in
Figure A-8.
ABN LED ON
Indicates a
Fast Motor Speed
BSY LED ON
Indicates a
Correct Motor Speed
Sensors CR and CL
have detected the
White paper
VEND 1 LED ON
Indicates a
Slow Motor Speed
Push the ACK
button to test the R,
C, & L Sensors
Figure A-5 EBA Test #1 & 2 LED Indications
TEST NO. 2 TRANSPORT MOTOR REVERSE
ROTATION TEST
The next test is the motor speed test in a reverse
direction.
Sensors E and B
have detected the
White paper
1. With the VM-450 power turned OFF, set
DS-1 Switch #1 ON and apply power.
2. Set DS-1, Switch #2 to the ON position as
shown in Figure A-6.
NOTE: Move the Enable/Disable Toggle Switch to the
“ENABLE” Postion to test Sensors E and B.
Figure A-8 EBA Test #3 Lit LED Indications
NOTE: The Red STKF light will be lit (ON)
during the tests.
When the White Paper is inserted into the bill
insertion slot, the ”F” Sensor shown in Figure A-9
is the first to detect it. This detection will turn the
VEND 1 LED ON. As the White Paper is inserted
farther into the Acceptor Head, the remaining
sensors will also detect its travel, and the appropriate LEDs on the VM-450 will sequentially light
(See Figure A-9).
Figure A-6 Transport Motor Reverse Rotation
Test DIP Switch Settings
3. Turn DS-1, Switch # 1 OFF. The BSY light
will go out, and the motor will rotate in the
reverse direction. One of the three previously
JCM Part No. 960-000058R_Rev. 2
22
© 2008, JCM-American Corporation
EBA-03 Bill Validator
SectionA
1. Set the initial DIP Switches according to the
Figure A-12 illustration.
Figure A-12 Acceptor Function Test DIP
Switch Settings
2. Turn off power to the VM-450.
3. Set DS-1, Switches #1, #2, #3, and #4 ON.
4. Turn on power to the VM-450 and change
DS-1, Switch #1 to OFF to begin running the
tests.
If an error occurs during the test operation, the
ABN LED on the VM-450 will light and the test
operation will stop.
Figure A-9 Sensor “F” Detection Lit LED
TEST NO. 4 ACCEPTOR I/F TEST
This test checks the Acceptor’s Input/Output signal
line status. Use the ACK, REJ, and ENABLE buttons on the VM-450 to make sure the signal line is
working as follows:
The Red LED on the CPU board will begin blinking in flashing sets. The cause of the problem can
be determined by counting the number of flashes
between each pause. (See “Error Codes” on
page A-24).
1. Set the initial DIP Switches according the
Figure A-10 illustration.
TEST NO. 6 BILL ACCEPTOR TEST
This test performs a bill acceptance test of the systems sensors.
Figure A-10 Acceptor I/F Test DIP Switch
Settings
1. Set the initial DIP Switches according to the
Figure A-13 illustration.
2. Turn off power to the VM-450.
3. Set DS-1, Switches #1, #2, and #3 to ON.
4. Turn power to the VM-450 ON, and change
DS-1, Switch #1 to OFF to begin running the
tests listed in the Figure A-11 procedure.
Figure A-13 Bill Acceptance Test DIP Switch
Settings
2. Turn off power to the VM-450.
3. Set DS-1, Switch #1, #2, and #5 ON.
4. Turn on power to the VM-450 and change
DS-1, Switch #1 to OFF to begin running the
tests.
The VEND 1 LED
Lights when the ACK
(OK) Button is Pushed.
Move the Enable/
Disable Toggle Switch
to “ENABLE” and the
BSY LED will Light
NOTE: When performing this test, the
Acceptor will not return to the test standby
mode if you turn DS-1, Switch#1 to ON
again. It is necessary to power off the
unit, place DS-1, Switch #1 in the ON
position, and then reapply power.
Push the REJ Button
when the ABN LED
Lights
When a Bill is accepted the VM-450 and Vend 1
LED will blink rapidly three (3) times.
If a Bill is not accepted or rejected, refer to the
Red and Green LEDs located on the EBA-03 for
the Error Code generated as listed in Table A-2 and
Table A-3 on this page.
Figure A-11 EBA Test #4 Lit LED Indications
TEST NO. 5 ACCEPTOR FUNCTION TEST
This test performs a continuous unit cycling until
an error occurs.
JCM Part No. 960-000058R_Rev. 2
23
© 2008, JCM-American Corporation
Section A
EBA-03 Bill Validator
If the Acceptor does not accept a bill, count how
many times the Red LED flashes to determine the
possible malfunctions requiring correction
(See Table A-2 in Error Codes on this page).
Table A-3 Green LED Rejection Codes
No. of Green
LED Flashes
Error Description
1
Crooked Bill Insertion
If the Acceptor rejects a bill, count how many
times the Green LED flashes to determine the
possible malfunctions requiring correction
(See Table A-3 in Error Codes on this page).
2
Reserved
3
Bill Jam
4
Optical sensor error 1(Bill size error)
5
Bill feed error
Error Codes
6
Identification error 1(Near error)
If the EBA-03 does not operate properly during the
various tests, the Red and Green LED’s on the
CPU board will flash. Count the number of Red
flashes and refer to the Error Code listing in Table
A-2 to determine the possible cause of the problem, or count the number of Green flashes and
refer to the Rejection Code listing in Table A-3 to
determine the possible cause of the problem.
7
Optical sensor error 2 (Pattern error)
Table A-2 Red LED Error Codes
No. of Red
LED Flashes
Error Description
1
Reserved
2
Reserved
3
Reserved
4
A bill has stopped in the bill path
5
Acceptor motor speed error
Acceptor Sensor out of adjustment
6
Acceptor motor does not rotate
Acceptor Sensor malfunction
No signal from the Encoder Sensor
7
Reserved
8
Reserved
9
Reserved
10
Reserved
11
Reserved
12
Timing error (Tampering)
JCM Part No. 960-000058R_Rev. 2
24
8
Optical sensor error 3 (Photo level
error)
9
Unacceptable bill returned (Inhibit error)
10
Reject signal input
11
Reserved
12
Back sensor error
13
Bill length error
14
Optical sensor error 4 (Infrared error)
15
Optical sensor error 5 (Unrecognizable
bill)
© 2008, JCM-American Corporation
EBA-03 Bill Validator
Bill Acceptor Series
Appendix B
B GLOSSARY
A
1
2
ABN – acronym for Abnormal.
Acceptor – a term used in Communications Section 3 referencing functions sent to, and
received from the Coin Acceptor by software commands.
C
3
4
5
6
ACK – abbreviation for Acknowledge.
Country Codes – specific codes given to a country to identify its currency type.
CPU – acronym for Central Processing Unit.
CPU Board – a printed circuit board located at the top of the EBA’s transport section.
D
7
DIP Switch Block – Dual Inline Package Switch Block – a printed circuit board
mountable two-position slide switch package containing up to 16
individual switches.
8
9
EBA – acronym for European Bill Acceptor.
EPROM – acronym for Electrically Programmable Read Only Memory.
E
L
10 LEDs – acronym for Light Emitting Diodes.
N
11 Non-abrasive Detergent – a cleaning agent that contains no abrasive components and is
as mild as common liquid dish soap.
P
12 Pictographs – small internationally recognized safety and attention symbols placed to the
left of Notes, Cautions and Warnings throughout the manual.
13 Polymer Material – a soft plastic used to cover the sensor lenses.
R
14 REJ – abbreviation for Reject.
S
15 Sensor – a photo sensitive device and LED combination designed to detect timing and
movement events.
16 STKF – acronym for Stack, Front
JCM Part No. 960-000058R_Rev. 2
25
© 2008, JCM-American Corporation
Appendix B
EBA-03 Bill Validator
S
THIS PAGE INTENTIONALLY LEFT BLANK
JCM Part No. 960-000058R_Rev. 2
26
© 2008, JCM American, Corporation
EBA-03 Bill Validator
JCM Part No. 960-000058R_Rev. 2
© 2008, JCM-American Corporation
EBA-03 Bill Validator
925 Pilot Road, Las Vegas, Nevada 89119
Office: (800) 683-7248, Tech. Support: (702) 651-3444, FAX: (702) 651-0214
E-mail: [email protected]
http://www.jcm-american.com
JCM Part No. 960-000058R_Rev. 2
© 2008, JCM-American, Corporation