1
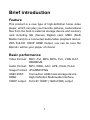
MICRO2+ USER MANUAL Wintal MICRO2+ USER MANUAL Contents BRIEF INTRODUCTION .................................................... 1 FEATURE .................................................................................. 1 BASIC PERFORMANCE ........................................................... 1 PRODUCT DETAILS ......................................................... 2 PACKING LIST .......................................................................... 2 FRONT VIEW ............................................................................ 2 BACK VIEW ............................................................................... 3 REMOTE CONTROL ................................................................. 4 BASIC OPERATION .......................................................... 7 USAGE PREPARING ................................................................ 7 OPERATION OF PRODUCT USAGE ............................... 9 SETUP MENU ......................................................................... 11 PICTURE VIEW MODE ........................................................... 13 MUSIC PLAY MODE ................................................................ 14 MOVIE PLAY MODE ................................................................ 15 SUBTITLE ................................................................................ 16 MAINTENANCE NOTICE ................................................ 19 FAQ .................................................................................. 20 OTHERS .......................................................................... 22 Brief introduction Feature This product is a new type of high-definition home video player, which can play your favorite pictures, audio/videos files from the built-in external storage device and memory card including SD (Secure Digital) card, MMC (Multi Media Card) to a connected audio/video playback device. With Full-HD 1080P HDMI Output, you can be sure the Micro2+ will be your player of choice! Basic performance Video Format: MKV, AVI, MP4, MPG, FLV, VOB, DAT, RM/RMVB Audio Format: MP3, WMA, AAC, APE, OGG, FLAC Image Format: JPG/BMP/PNG USB HOST: Connection USB mass storage device HDMI: High Definition Multimedia Interface 1080P output: Full-HD 1080P (1920x1080) output 1 Product details Packing list Check the accessories. If there are some missing, please contact your supplier immediately Item Quantity Media player 1 Power adaptor 1 Remote control 1 AV cable 1 Batteries 2 User’s Manual 1 Front view Element Definition Element Remark 1 USB supports multiple external USB HOST storage devices 2 LED Light LED light display 2 3 4 IR Infrared sensor 2-in-1card Supports SD, MMC reader How to use memory cards: The Product has an integrated multimedia card reader supporting memory cards including SD, and MMC. Gently insert the memory card into the reader with the arrow side upward until there is a “click” sound. Back View Element Definition Element 1 AV 2 3 HDMI Digital Coax DC IN 4 Remark Outputs composite video Outputs digital signal via HDMI port Output option “SPDIF”/”RAW” audio via coax port Inputs power 3 Remote control 4 BUTTON POWER MUTE HOME FUNCTION Turn on and off in the stand by mode Turn on or shut audio output Switch to the main menu. AUDIO Switch the audio format output Zoom in/out. Press to switch between NTSC, PAL, 480P, 576P, 720P 50HZ, 720P 60HZ, TV SYSTEM 1080I 50HZ and 1080I 60HZ, 1080P 24HZ , 1080P 50HZ,1080P 60HZ. ZOOM SUBTITLE PLAY STOP PAUSE/STEP RETURN Press to set the type, colour, the text encoding format ,size of subtitle, when playing the video Press to play media file and to auto play the picture End the playback of a media file Press to pause the playback. Press continuously for step by step playback Return to the previous menu VOL- Press to decrease the volume VOL+ Press to increase the volume REPEAT Press to set repeat option: sequence, random, only once, rotate one, rotate all. 5 Press to return to previous file Press to go to next file Press shortly to move cursor left Press shortly to move cursor right Press shortly to move cursor up Press shortly to move cursor down OK Press this button confirms a selection and starts the playback of a media file. Press to fast rewind from current play and again to select the speed SETUP Press to fast forward from current play and again to select the speed In any mode, press to enter to corresponding setting menu GOTO Jump to the appointed time/page when playing video DISPLAY Press to display time, title, information of chapter when play video and photo 0-9 Press to input digital ALL Press this button, the list of all documents in storage media will display. MUSIC Press this button, the list of music documents in storage media will display. 6 PHOTO Press this button, the list of photo documents in storage media will display. MOVIES Press this button, the list of film documents in storage media will display. Basic operation Usage preparing 1. Power connection Take out power adapter from the package and connect 2. Connection of TV audio and video output The product is designed with multiple outputs, including composite (AV), digital coax and HDMI. Individuals can select different interfaces according to their needs. The product can detect video output automatically, making the operation friendly and convenient. Please refer to the following instructions for connection to avoid any problem. Composite output connection (AV) Plug the yellow connector into the AV output of product and AV input of TV, and plug the red and white 7 connector into the audio input of TV or HIFI. Turn on the TV and select the correct AV mode. Turn on the product and TV will display the initiation screen of the Micro2+. Note: You must select to the “PAL/NTSC” output, if not there is no video output by AV. Coaxial output connection Coaxial output: Connect the Coaxial connector of the media player with the coaxial connector of other video or audio device by Coaxial cable. Then enter the product's audio output format interface, select the Digital Output option “RAW”. It is available to enjoy 5.1 high quality sounds through a multi channel decoder/amplifier with coaxial input. Note: when output format selected is “normal”, there is no audio output by coaxial output, and when output format selected is “SPDIF” / “RAW”, the HDMI and AV outputs will have no audio output. 8 HDMI output mode HDMI is an output with best audio and video quality which outputs digital video and audio. Connect HDMI cable to output of product and display device with HDMI input. Select the correct HDMI input on the TV until it displays the initiation screen of the Micro2+. Note: When output is set to “HDMI”, there is no video output by AV. When output is set to “PAL/NTSC” output, there is no video output by HDMI. The usage of USB HOST interface The USB HOST port can read external mobile hard disk, FLASH drive, digital cameras, card readers and other data storage devices to directly play a variety of high-definition formats high-fidelity audio and video files. Operation of product usage When connecting the power supply for the first time, press the “Power” key on the remote control and the device will power on automatically and appear at the main menu. 9 Please read the following instructions carefully to understand the function of each option. Main menu: There will be three function options on the main menu. You can enter this main menu by press “HOME” key on the remote control. Under the main interface, you may select the USB Device, Smart Card, or Setup icon by press and key on the remote control, then press “OK” key to browse or play the corresponding files stored in the external USB, card and the card reader. In addition to, you can go to the setup menu directly and set up the “Language”, “Video”, “Audio”, “Photo” settings and so on according to your needs. 10 Setup Menu Select “Setup” option to enter the setup menu. Then select any option you want by pressing and on the remote controller, and press OK to confirm or press “Return” to exit. System Setup Language: Select to choose the OSD (On Screen Display) language. Press and to select the language. Press OK to confirm. Screen: Turns the screensaver function on or off. Press the navigation keys to select. Screen saver mode will automatically start after 2, 5 or 10 minutes of non activity. AutoPlay: when AutoPlay is set to on, the Micro2+ will begin to play media in the AUTOPLAY folder created in the root directory of the media that is inserted. Power on, 11 the media player auto repeat play the video within the folder, and it can plug and auto play. Restore Default: restore the factory’s default settings System Info: View software version information Audio Setup Select to choose the audio output: Normal: Digital signal is directly outputted through product SPDIF LPCM: The digital audio signal which is decoded by the product outputs through coaxial SPDIF RAW: The raw digital signal of multimedia data directly outputs through coaxial, at this time the remote control has no function of adjusting the volume. Video Setup Video Output: Select to adjust TV system: NTSC, PAL, 480P, 576P, 720P 50HZ, 720P 60HZ, 1080i 50HZ, 1080i 60HZ, 1080P 24HZ, 1080P 50HZ, 1080P 60HZ Resume Play: On/Off. When a movie is paused, the device will record the position that the movie is paused and the next user can choose “Resume Play” to continue from the last pause point. Auto Detect: On/Off Turns the Auto Detect function on or off. 12 Photo Setup Slide Show Timing: Set time interval of slide show. 3/5/10/20s Transition Effect: Select picture transition effects, there are eight different effects to choose. Background Music: There are two options to choose: “Folder” and “Play List”. If you choose the option of “Folder”, the music must be in the same folder as your photos, and you can choose background music’s position by the navigation. If you choose “Play List”, Every time you startup the media player you must choose a folder as the background music folder, and play a song in it. When you play pictures the music within this folder will become background music. Picture view mode Enter a storage device, and the files under the current and to select the directory will be listed. Press folder containing your photo files. 13 Enter the folder press and to select the photo you want to view and press “OK”, the photo is displayed full screen. When you browse the photo, press the and key to view the previous or next photo. If you want to playback some music during the slideshow, simply make sure that you copy your music file(s) in the same directory as the pictures. Music play mode Enter a storage device and the files under the current directory will be listed. Press folder containing your audio files. 14 and to select the A thumbnail strip appears at the bottom of the screen, and to select along with song information. Press the file you want to play and press OK to play. This browsing music function supports MP3, WMA, AAC APE, OGG, FLAC format Playback. Movie play mode Enter a storage device, and the files under the current directory will be set out. Press and to select the folder containing your video files. 15 Enter the folder press and to select the movie you want to view and press OK the movie is played full screen. The Product supports multiple video formats, including RM, RMVB, AVI, MPG, VOB, DAT and so on. In addition, the Product also supports breakpoint movie play. Next time you play the movie, there will be a prompt: “is play from the breakpoint”. If you choose to “YES”, the movie will start from where it stops last time. Subtitle The media player supports subtitle file formats including SSA, SUB, SRT. Make sure the subtitle file and the video file are in the same folder and the same name. When playing the file, press SUBTITLE button to show / hide the subtitle setup menu and realize subtitles settings. If using external subtitles in a movie, press the arrow keys on the 16 remote control to select the option to adjust and press OK to confirm. Then we can set the encode format , font size, font colour of the subtitle and subtitle selection by pressing UP/DOWN arrow key on remote control. For example, to change the colour of subtitle, firstly select the colour option by pressing right arrow keys, then press OK key to enter, finally press up/down arrow key to select the option you need and press OK key to confirm the setting. Specification USB host Video output Support multiple USB storage Composite video /HDMI Audio output Stereo/digital HDMI/ Coaxial Audio Video MP3, WMA, AAC, APE, OGG, FLAC MKV, AVI, MP4, MPG, FLV, VOB, DAT, RM/RMVB SSA, SRT,SUB JPG/BMP/PNG AC input: 100V~240V,50/60HZ DC output: 5V/2A Subtitle Picture Power adapter Dimension Weight 133 x 80 x 18 mm 340g Supported video, audio and picture formats as follows 17 DECODE FORMARTS MPEG-1 MPEG-2 VIDEO MPEG-4, XVID RM/RMVB 720×576 VOB 720×576 MPG 1920×1080P AVI 1920×1080P MP4 1920×1080P MKV 1920×1080P 1920×1080P MP3 PICTURE 320×240 MPG RM/RVMB H.264 AUDIO RESOLUTION DAT AVI 1920×1080P MP4 1920×1080P MOV 1920×1080P MKV 1920×1080P Support WMA Support AAC Support APE Support OGG Support FLAC Support JPG/JPEG Support BMP Support PNG Support Note: File format support can be changed or upgraded without notice. 18 Maintenance notice To protect the normal use of all accessories, please kindly make sure to understand and pay attention to following points. Power input AC100~240V, output DC 5V/2A. Under normal working status, power adapter will keep warming, but body temperature of 60 degree or under is normal. Please be sure of aeration under normal working status, do not put the device in bed, sofa, or similar area where cooling effect is no good. Please do not teardown personally, but send it back to the pointed service agent, or there will be danger of electronic shock. Please pull out the cable and shut the device immediately when cable broken or liquid in, and send to pointed agent for repair. We advise to use the product in the environment of room temperature. The range of environment temperature is 0~40°C. 19 FAQ This chapter gives you information on how to solve some problems that may occur with your player. Q: I have connected the Player to my television. Why is no picture showing on my television or no sound coming from my television? A: This problem may have several causes. Please check the following items: 1) Please ensure that you have selected the correct AV source on your television set. 2) Please check that you have connected the correct cable for the output of the video and audio signals. Information on the correct connection of the Player to your home entertainment system can be found in the “Connection of TV audio and video output” chapter in the basic operation instructions. 3) The output signal of the player does not match the signal source of the TV. Press “Video” on the remote control to switch video output until there is image. Repeat this procedure until the picture is correctly displayed on your television. Q: My Player does not play any sound. A: The volume is too low / Mute is active. Please check if the volume for your Player and your television or your home entertainment system is set to an 20 adequate volume and that the sound is not switched off via the “Mute” button. Otherwise, please select the correct digital output mode in the Setup Menu. You can also refer to the Audio Settings. Q: Why must I NOT disconnect the player from the mains supply without having switched if off beforehand? A: The loading or saving of the current system settings takes approx. 10 seconds when the Player is turned on or off. If the player is disconnected from the mains supply without having been switched off beforehand, settings and data may be lost. Please always switch off the Player by pressing the power button on the device or on the remote control and wait until the power button on the Player lights up red. Q: The language of the user interface has been changed. How do I change the language? A: In order to change the selected language, enter the “Setting” menu. Select the language you want and press the OK button on your remote control to confirm. The selected languages are displayed. 21 Q: I have adjusted the settings of the Player under “Settings” and would like to restore the factory defaults. A: execute the setting menu item “Restore defaults”. The Player will be reset to the factory defaults. The saved files are not deleted when you do this. Q: During power on, why the TV will have a short flash, blue screen or screensaver? A: This is normal, when the system initialize, it will setup the corresponding parameters so it can output the correct video signal to the TV, during the initializing time, the TV will receive incorrect signals or the signals will not be stable and will cause the TV screen to flash, some TV will treat it as no signal, and will display a blue screen or screensaver Others The accessories of products may be different, for this series products are various according to different series and models. Please refer to packing list or contact your agent for information. Also understand no advance notice for further product improvement, outlook design and specification update. The illustration may be a little different from the real product. 22