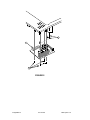
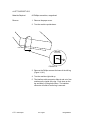
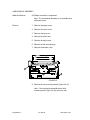
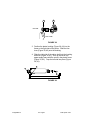
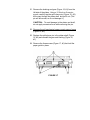
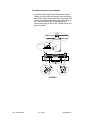
1
Apple Technical Procedures ImageWriter II Section 1 – Basics o CONTENTS 1.2 1.2 1.3 1.4 1.4 1.4 1.5 1.6 1.7 1.8 1.9 1.11 1.13 1.14 1.14 1.14 1.14 ImageWriter II Introduction New Features Changed Features Setup Power On and Off Load Paper Remove Paper Load the Ribbon Cartridge Remove the Ribbon Cartridge Self-Test Configuration DIP Switches Periodic Maintenance Maintenance Schedule Theory of Operation Introduction Before You Begin Flow of Information rev. Aug 87 Basics / 1.1 o INTRODUCTION The ImageWriter ® II printer is an improved version of the ImageWriter. The following two lists discuss the new features of the ImageWriter II and its differences from the original ImageWriter. New Features ImageWriter II Multiple Fonts Draft—240 characters per second Standard—180 characters per second Near Letter Quality—25 characters per second Auto Paper Load Automatically loads paper when the form-feed button is pressed. Color Capability Provides color-option printing with a four-color ribbon. Sheet Feeder Accepts a single-bin sheet feeder. Option Card Will accept one of the two option cards available—the AppleTalk card or the Expanded Buffer card. MouseText The character set contains 32 special characters for use on Apple II computers. Self-Identification The printer automatically determines its operational mode by checking to see if there is a color ribbon, a sheet feeder, or an option card installed. New DIP Switches The Option Card Enable function is switch 2-4. The Perforation Skip is switch 1-5. 1.2 / Basics rev. Aug 87 ImageWriter II Changed Features ImageWriter ImageWriter II Interface Port RS-232 RS-422/423 7/8 Bit Protocol Hardware selection. DIP switch 1-5. Software control only. No DIP switch control. Head Dot Diameter Wire diameter is .35 mm. Wire diameter is .30 mm. Placement of dots is 50% more accurate. Speed Print mode is 120 characters per second. Print mode is 180 characters per second. Deselect Action The entire buffer is printed before stopping. printer stops. At the most, 2 more lines are printed before the Tractor Feed Disengagement Paper must be removed from tractors. If you select the frictionfeed mode, tractors are automatically disengaged. Paper Bail Must be pulled away from the platen to load paper. Automatically loads paper. Printing Area Requires a 3-line top margin. Entire length of paper. Vertical Paper Feeds paper at 1.67 inches per second. Feeds paper at 4.0 inches per second. ImageWriter II rev. Aug 87 Basics / 1.3 o SETUP Power On and Off 1. Connect the power cord to the printer. 2. Plug the power cord into an electrical outlet. 3. Press the power switch on. 4. Check the switch panel. Make sure the power light comes on. 5. Press the power switch off. Load Paper 1. Make sure the power is off. 1 2 FIGURE 1 2. Pull the paper release lever forward (Figure 1, #1). 3. Lift up and remove the tractor cover (Figure 1, #2). 1.4 / Basics rev. Aug 87 ImageWriter II ILLUSTRATION NOT AVAILABLE FIGURE 2 4. Lift up the clamps on both forms tractors (Figure 2, #1). 5. Make sure that the left forms tractor is positioned all the way to the left. (To move the forms tractor, pull the tractor release lever [Figure 2, #2] forward.) Lock the forms tractor in place by pushing back the tractor release lever. 6. Place the paper over the forms tractor pins. If the paper doesn't line up with the pins, move the right forms tractor until it does. Lock the right forms tractor in place. 7. Push down the clamps on both of the forms tractors. 8. Turn the platen knob until the paper comes through. 9. Put the back cover on. Remove Paper 1. Make sure the power is off. 2. Check to be sure the release lever is set to tractor feed. 3. Turn the platen knob and back the paper out. ImageWriter II rev. Aug 87 Basics / 1.5 Load the Ribbon Cartridge 1. Make sure the power is off. 1 FIGURE 3 2. Lift up and remove the paper cover (Figure 3, #1). 3. Get a ribbon cartridge. 4. Place the cartridge on the ribbon plate. 1 2 FIGURE 4 5. Push down on the cartridge until it snaps into place (see Figure 4, #2). 1.6 / Basics rev. Aug 87 ImageWriter II 1 FIGURE 5 6. On the cartridge, turn the knob (see Figure 5, #1) clockwise until you hear it "click" and the ribbon is taut. 7. Replace the paper cover. Note: Be sure to replace the paper cover before attempting to operate the printer. The printer will not print without the paper cover in place. Remove the Ribbon Cartridge 1. Make sure the power is off. 2. Lift up and remove the paper cover (Figure 3, #1). 3. While pushing down on the cartridge latch arms (Figure 4, #1), lift up the cartridge (Figure 4, #2). ImageWriter II rev. Aug 87 Basics / 1.7 o SELF-TEST 1. Make sure the power is off. 2. Load the paper. 3. Hold down the form-feed button while you press the on/off button; then release both buttons. The first part of the printout shows the ROM revision number, the DIP switch settings, and whether an option card is installed. Then the printer prints the character set continuously. (If you are using a colored ribbon, the printer alternates the color of each line.) If you want to test the printer in all print quality modes (draft, normal, and NLQ) continue with the following steps. If not, skip to step 7. 4. While the printer is printing the character set, press the line feed button to stop the printing. 5. Use the print quality button to select the desired print quality mode (if necessary, refer to the owner's manual for complete instructions). 6. Press the select button to resume printing the character set. The printer continues printing in the previous print quality mode for another two or three lines and then changes to the newly selected print quality mode. 7. To end the self-test, turn the power off. Note: If you press the select button during power-up, the ImageWriter prints a hexadecimal dump. If this occurs, power the ImageWriter off and then back on. The printer will power up in the proper mode. 1.8 / Basics rev. May 91 ImageWriter II o CONFIGURATION DIP SWITCHES Configuration DIP switches provide variations in the ways the printer may be operated. For additional information on switch settings, refer to the Peripheral Interface Guide . Materials Required Jeweler's flatblade screwdriver Setting the Switches 1. Make sure the power is off. 2. Remove the paper cover. 2 1 FIGURE 6 3. Slide the carrier all the way to the right (Figure 6, #1). 4. Locate switches SW 1 and SW 2 (Figure 6, #2). Note: SW 2-5 and SW 2-6 are used only when performing the firing hammer adjustment (refer to Section 4, Adjustments). ImageWriter II rev. Aug 87 Basics / 1.9 5. Use a small screwdriver to move the switch handles as desired. 6. Replace the paper cover. 7. Run the self-test. 1.10 / Basics rev. Aug 87 ImageWriter II o PERIODIC MAINTENANCE Clean the printer as often as required. Lubricate it once a year, or more often if it is being used heavily. To perform maintenance tasks: 1. Make sure the power is off. 2. Remove the tractor cover and the paper cover. 3. Remove the paper and ribbon cartridge. Note: For the next two steps, refer to Section 3, Take Apart, for complete instructions on removing the carrier assembly and carrier shaft. 4. Using gauze or absorbent cotton, wipe the dirt off of the carrier shaft. 5. Apply four drops of tellus lubrication oil to each of the felt wipers, which are located under the carrier assembly. 2 1 TOP COVER OPERATION PANEL FIGURE 7 6. Find the detector plate. It is on the right side of the printer, hidden just below the on/off switch (Figure 7, #1). 7. Use a brush to remove any paper dust (Figure 7, #2). ImageWriter II rev. Aug 87 Basics / 1.11 1 FIGURE 8 8. Clean the dot head (Figure 8, #1) with a lint-free cloth and a low-residue cleaner such as isopropyl alcohol or Freon. 9. Replace the ribbon cartridge. 10. Perform the self-test to verify optimum printing performance. 1.12 / Basics rev. Aug 87 ImageWriter II Maintenance Schedule ImageWriter II The following table summarizes the manufacturer's recommended maintenance intervals: rev. Aug 87 Basics / 1.13 o THEORY OF OPERATION Introduction Troubleshooting can be approached in different ways; Apple usually recommends both module swapping and logical troubleshooting. But random module swapping is impractical for printers because they have so many parts. So, to troubleshoot the ImageWriter II, you will usually want to use the logical troubleshooting method. A description and diagram of the flow of information in the ImageWriter II are given below as aids to this method. Before You Begin Before you begin to troubleshoot the ImageWriter II, attempt to run the self-test before you connect the printer to a computer. Then, if the self-test does not run correctly, you can observe where it stops working. Knowing the flow of information, you will be able to isolate the problem to the faulty module. Flow of Information Figure 9 is a block diagram of an ImageWriter II printer. The numbers on the diagram indicate the order in which the self-test takes place and correspond to the following descriptions. 1. The AC power cord is plugged into a wall socket and into the power inlet on the right support leg. 2. The power switch on the operation panel is turned on and the form feed switch is held down. The AC voltage and current are passed through the filter to reduce radio frequency interference (RFI) to FCC standards. The 120 volts are sent to the transformer, where they are reduced to 40 volts. 3. The 40 volts are sent to the drive PCB. Here the voltage is broken down and sent to the various parts that need it. The drive PCB contains the power supply and all of the motor and print head drive circuitry. The drive circuitry controls the firing of the hammer and limits the current to the print head. 1.14 / Basics rev. Aug 87 ImageWriter II 4. The necessary voltages are sent to the logic board, and the startup sequence (stored in ROM on the logic board) is accessed. The logic board sends startup instructions to the drive PCB. 5. The drive PCB accesses the carrier motor. The carrier motor centers the carrier assembly and moves it back and forth when printing. 6. The form-feed switch is released, notifying the main CPU board that the self-test is to be performed. 7. The main CPU board notifies the drive PCB that the self-test is to be performed. The drive PCB notifies the carrier motor. 8. The drive PCB takes the self-test information and sends it to the print head PCB mounted underneath the carrier assembly. 9. The print head PCB activates the print head and the self-test is performed. The printer will continue to run the self-test until powered off. ILLUSTRATION NOT AVAILABLE FIGURE 9 ImageWriter II rev. Aug 87 Basics / 1.15 Apple Technical Procedures ImageWriter II Section 2 – Take-Apart o CONTENTS 2.2 2.4 2.6 2.8 2.10 2.12 2.14 2.18 2.20 2.22 2.24 2.26 2.31 2.32 2.33 2.34 2.36 2.38 2.40 2.46 2.52 2.54 2.56 2.58 Top Cover Operation Panel Option Card Main CPU PCB Print Head Color Ribbon Assembly Ribbon Wire and Ribbon Assembly Flexible Ribbon Cable Ribbon Motor Assembly Left Support Leg Right Support Leg Bottom Cover Fuses Transformer Drive PCB Mechanical Assembly Noise Filter PCB Assembly Carrier Motor and Carrier Belt Carrier Block Assembly and Print Head PCB Platen and Platen Assembly Paper-Feed Motor Paper Guide Paper-Out Sensor Tractor Assembly Note: To keep track of where cables and connectors go during a take-apart procedure, label them using numbered adhesive dots. WARNING: For all take-apart procedures, the printer should be off and the AC power cord should be disconnected. ImageWriter II rev. Nov 88 Take-Apart / 2.1 o TOP COVER Materials Required #2 Phillips screwdriver Remove 1. Remove the paper cover and ribbon cartridge. 2. Push the carrier assembly to the far left. 1 1 2 3 FIGURE 1 3. Loosen the two screws (Figure 1, #1) as far as they will go. 4. Place your fingers over the edge designated by Figure 1, #2, and place your thumbs at the location designated by Figure 1, #3. Gently pull the cover up and toward you until it snaps free. Do not yet remove the cover. 5. Lift the right side of the cover to gain access to the connector. 2.2 / Take-Apart rev. Aug 87 ImageWriter II 6. Unplug the connector that runs from the control panel board to the main CPU PC board. Remove the connector from the main CPU PC board. 7. Remove the top cover. Replace 1. Push the carrier assembly to the left. 2. Lay the cover in place and lift the right side. Plug in the connector to the main CPU PC board. 3. Tilt the cover toward you till the front edge is in place. 4. Push down the cover. You will hear a "snap" as it goes into place. 5. Tighten the two screws (Figure 1, #1). 6. Replace the ribbon cartridge and the paper cover. 7. Perform the self-test. ImageWriter II rev. Nov 88 Take-Apart / 2.3 o OPERATION PANEL Materials Required #2 Phillips screwdriver Small Phillips screwdriver Remove 1. Remove the paper cover. 2. Remove the top cover. 3. Remove the four screws holding the operation panel (Figure 2, #1). 4. Lift the operation panel from the top cover. Remove the power button and spring (Figure 2, #2). 5. Unplug the cable from the switch assembly panel (Figure 2, #3). 2.4 / Take-Apart rev. Aug 87 ImageWriter II 2 3 1 FIGURE 2 ImageWriter II rev. Nov 88 Take-Apart / 2.5 Replace 1. Place the top cover upside down. 2. Connect the power button and spring (Figure 2, #2) by placing the coiled half of the spring over the outer-corner screw mount, and over the button in the top opening on the cover. 3. Plug the cable into the operation panel (Figure 2, #3). 4. Line up the screw mounts with the holes on the panel, switch side down. 5. Replace the four screws (Figure 2, #1). 6. Replace the top cover. 7. Replace the paper cover. 8. Perform the self-test. 2.6 / Take-Apart rev. Aug 87 ImageWriter II o OPTION CARD Materials Required Small pair of curved needlenose pliers Remove 1. Remove the paper cover. 2. Remove the top cover. 3. Squeeze the plastic retainers (see Figure 3) together one at a time with the pliers, and gently lift the corners of the option card. 4. Lift out the option card. RETAINERS OPTION CARD BOTTOM VIEW OF OPTION CARD MAIN CPU PCB FIGURE 3 ImageWriter II rev. Nov 88 Take-Apart / 2.7 Replace 1. Position the option card above the plastic retainers, and line up the connector from the option board with the one on the main CPU PCB (see Figure 3). 2. Push down the option card. It will snap into place. 3. Replace the top cover. 4. Replace the paper cover. 5. Perform the self-test. 2.8 / Take-Apart rev. Aug 87 ImageWriter II o MAIN CPU PCB There are two main CPU PCBs available for the ImageWriter II. For information on identification and compatibility, refer to Section 5, Additional Procedures. Materials Required Magnetized, #2 Phillips screwdriver Remove 1. Remove the paper cover. 2. Remove the top cover. 3. Remove option card, if installed. 4 1 2 5 4 3 FIGURE 4 4. Remove the three connectors. (Figure 4, #1 is a two pin; #2 is an 8-pin; and #3 is a 50-pin ribbon cable.) a) The 50-pin connector is difficult to remove. Use a small screwdriver and gently pry it loose from one side; then gently rock the connector back and forth until it comes free. b) On new main CPU boards, the connector with the tabs is used to make it easier to remove. ImageWriter II rev. Nov 88 Take-Apart / 2.9 5. Remove the five screws (Figure 4, #4). 6. Remove the sixth screw, which holds the grounding strap (Figure 4, #5). 7. Tilt the front half of the board up. Lift the board out of the printer. Replace 1. Tilt the front half of the board up. Lower the board onto the screw mounts. 2. Install the five screws (Figure 4, #4). 3. Install the sixth screw, which holds the grounding strap (Figure 4, #5). 4. Plug in the three connectors (Figure 4, #1, #2, and #3). 5. Install the option card, if included. 6. Replace the top cover. 7. Replace the paper cover. 8. Perform the self-test. 2.10 / Take-Apart rev. Aug 87 ImageWriter II o PRINT HEAD Remove 1. Remove paper cover. 2. Remove ribbon cartridge. 3. Locate the print head (Figure 5, #1). 4. Gently push aside the white clamp (Figure 5, #2). Grasp the print head and slowly lift it straight up and out of the connector. 1 5 2 4 3 FIGURE 5 ImageWriter II rev. Nov 88 Take-Apart / 2.11 Replace 1. Line up the metal connector "fingers" of the print head with the connector (Figure 5, #3). 2. Align the front oblong portion so that it goes between the clear plastic card holder covering the platen (Figure 5, #4) and the print-head clamp (Figure 5, #2). The print-head clamp goes over the indentations on the print head (Figure 5, #5). 3. Gently push the print head down until it is firmly seated. 4. Replace the ribbon cartridge. 5. Replace the paper cover. 6. Perform the self-test. 2.12 / Take-Apart rev. Aug 87 ImageWriter II o COLOR RIBBON ASSEMBLY Materials Required Small needlenose pliers Remove 1. Remove the paper cover. 2. Remove the top cover. 1 4 2 5 SPRING IS LOCATED UNDER RIBBON CAM 3 FIGURE 6 3. Remove the lock nut (Figure 6, #1). 4. Remove the retaining clip (Figure 6, #2) with a pair of small needlenose pliers, and take off the two washers. 5. Lift off the ribbon cam (Figure 6, #3), turning it until it is free from the ribbon plate. 6. Remove the adjustment nut (Figure 6, #4). 7. Remove the spring (Figure 6, #5). Replace ImageWriter II 1. Replace the spring (Figure 6, #5). rev. Nov 88 Take-Apart / 2.13 2. Replace the adjustment nut (Figure 6, #4). 3. Slide on the ribbon cam (Figure 6, #3) so that the ridge on the cam is between the two tabs on the ribbon plate. Improper positioning of the cam can cause poor-quality printing or no printout. WARNING: Verify that the two tabs are riding on the ridge. Improper positioning of the cam can cause poor quality or no printout. 4. Replace the two washers and the retaining clip (Figure 6, #2). 5. Replace the lock nut (Figure 6, #1). 6. Perform the color printing adjustment. Refer to Section 4, Adjustments. 2.14 / Take-Apart rev. Aug 87 ImageWriter II o RIBBON WIRE AND RIBBON ASSEMBLY Materials Required #3 jeweler's flathead screwdrivers Remove 1. Remove paper cover. 2. Remove top cover. 3. Remove ribbon cartridge. RIGHT END IS MIRROR IMAGE OF LEFT SIDE 5 SIDE 3 2 1 LEFT END, SIDE VIEW LEFT END, FRONT VIEW LEFT END, FRONT VIEW FIGURE 7 4. Locate the holes on the sides of the carrier assembly (Figure 7, #1). 5. Gently insert a jeweler's flathead screwdriver into the hole (Figure 7, #1). The black catch will come out (Figure 7, #2). Gently pry the catch upward at a slight angle with another jeweler's flathead screwdriver. IMPORTANT: Do not use force when removing the black plastic catches or you will break them. ImageWriter II rev. Nov 88 Take-Apart / 2.15 6. Move the small catch to the top (Figure 7, #3). Gently pull the plastic piece straight out. 7. Repeat for the right side. The catches are not interchangeable. 8. Remove the color ribbon selector wires from the plastic clamp (Figure 8, #1) by gently prying the clamp away from the carrier assembly. 9. Using a jeweler's flathead screwdriver, push the tabs toward the center of the ribbon plate (Figure 8, #2). 10. Slowly lift the entire plate up. If the ribbon wire (Figure 7, #5) comes with it, repeat step 9. The gears are located under the plate. Not Available FIGURE 8 11. Lay the ribbon plate upside down to remove the color ribbon detect switch (Figure 8, #3). Do not remove the switch unless replacing the ribbon plate. 12. Insert a jeweler's flathead screwdriver under the tab on each side of the detect switch (Figure 8, #4). 13. Gently push the switch down with a third jeweler's flathead screwdriver. 14. Remove the wires from the retainers on the front of the ribbon plate. 2.16 / Take-Apart rev. Aug 87 ImageWriter II 15. Put the ribbon plate aside. 16. Disconnect and remove the ribbon wire (Figure 9, #1). 1 FIGURE 9 Replace 1. Rewrap the ribbon wire as shown in Figure 9. Be sure the wire crosses at the front of the gear. Verify that the spring under the spindle gear is in position before you continue. SIDE VIEW 3 4 1 5 2 FIGURE 10 2. Gently position and push the ribbon-detect switch into the top of the ribbon plate (Figure 10, #3). 3. Reinstall the wires under the retainers and the bracket (Figure 10, #1). ImageWriter II rev. Nov 88 Take-Apart / 2.17 4. Position the ribbon plate so that the front two tabs on the side have the ridge of the color ribbon assembly between them. Line up the tabs on the gear plate with the top of the ribbon plate (Figure 10, #2), and push the ribbon plate down. It will click into position. WARNING: Verify that the two tabs are riding on the ridge of the color ribbon assembly. If they are not, you may get poor print quality or no printout at all. 5. Replace the two small plastic pieces with the catches on them. Slide the piece for the left side (Figure 10, #4) over the left side of the ribbon plate and carrier assembly. Rotate the piece until the black catch pops into the hole on the carrier assembly (Figure 10, #5). Repeat this step for the other piece on the right side. 6. Replace the ribbon cartridge. 7. Replace the top cover. 8. Replace the paper cover. 9. Perform the self-test. 2.18 / Take-Apart rev. Aug 87 ImageWriter II o FLEXIBLE RIBBON CABLE Materials Required 1/8-inch flathead screwdriver Remove 1. Remove the ribbon wire and ribbon assembly. There are two kinds of ribbon retainers: a) One is held in position by a screw (Figure 12, #1). b) The other is held by a metal tab that is part of the frame (Figure 12, #3). The following procedures refer to screw-fastened retainers. If you are working with the tab-fastened kind, ignore references to the screw. (The tab fastened retainer can simply be pulled free and removed.) 2. Insert the flathead screwdriver into the notch on the flexible cable connector (Figure 11, #1). Gently turn the screwdriver, and the connector will pop out about 1/4 inch. CAUTION: Do not force the flexible cable to come loose or you will damage the cable. 3. Remove the flexible cable from the connector. 4. Push the carriage assembly to the far left. Remove the screw that holds the ribbon retainer in place (Figure 12, #1). 5. Insert the flathead screwdriver in the notch on the connector on the drive PCB (Figure 12, #2). Gently turn the screwdriver, and the connector will pop out about 1/4 inch. 6. Remove the flexible cable from the connector and set it aside. 2. 18 / Take-Apart rev. Aug 87 ImageWriter II CARRIAGE ASSEMBLY WITH RIBBON WIRE AND ASSEMBLY REMOVED DRIVE BELT ` 1 FIGURE 11 2 1 1 FIGURE 12 Replace 1. Insert the flexible cable in the connector on the drive PCB (Figure 12, #2). Push the connector in. 2. Replace the ribbon retainer and the screw that holds down the retainer for the flexible cable (Figure 12, #1). 3. Push the carriage assembly to the middle. Insert the other end of the flexible cable in the connector (Figure 11, #1). Push the connector in. 4. Replace the ribbon wire and the ribbon assembly. 5. Perform the self-test. ImageWriter II rev. Aug 87 Take-Apart / 2.19 o RIBBON MOTOR ASSEMBLY Materials Required Jeweler's flathead screwdriver #2 Phillips screwdriver, magnetized Remove 1. Remove the ribbon wire and the ribbon assembly. 1 2 MOTOR RIBBON DETECT SWITCH FIGURE 13 FIGURE 13 2. Remove the two screws that hold the motor in place (Figure 13, #1). 2. 20 / Take-Apart rev. Aug 87 ImageWriter II 3. Position the jeweler's flathead screwdriver behind the small black plastic extension as shown in Figure 13, #2. Gently pry the motor out. Note the position of the connector and the wires on the ribbon motor assembly. Replace 1. Slide the ribbon motor into position (Figure 13). 2. Replace the two screws that hold the motor in place (Figure 13, #1). 3. Replace the ribbon wire and the ribbon assembly. 4. Perform the self-test. ImageWriter II rev. Aug 87 Take-Apart / 2.21 o LEFT SUPPORT LEG Materials Required #2 Phillips screwdriver, magnetized Remove 1. Remove the paper cover. 2. Turn the machine upside down. LEFT LEG UNDERSIDE OF LEFT LEG 1 FIGURE 14 3. Remove the Phillips screw at the base of the left leg (Figure 14, #1). 4. Turn the machine right side up. 5. The interface cable connector slides in and out of two notches on the inside of the leg. Push down on the leg and slide it off the plastic frame. The interface connector will slide off as the leg is removed. 2. 22 / Take-Apart rev. Aug 87 ImageWriter II Replace 1. With the machine right side up, slide the interface connector into the notches on the inside of the leg. 2. Push the leg into position. 3. Pull upward on the leg to lock it in place. 4. Turn the printer upside down and replace the Phillips screw (Figure 14, #1). 5. Replace the paper cover. 6. Perform the self-test. ImageWriter II rev. Aug 87 Take-Apart / 2.23 o RIGHT SUPPORT LEG Materials Required #2 Phillips screwdriver, magnetized Remove 1. Remove the paper cover. 2. Turn the machine upside down. 3. Remove the Phillips screw at the base of the right leg (Figure 15, #1). 4. Turn the machine right side up. Grasp the platen knob and gently pull it off (Figure 15, #2). 5. Slide the paper release lever off (Figure 15, #3). 6. The AC power inlet connector is located inside and is not physically mounted to this leg. Push down and slide the right leg off the plastic frame. PAPER RELEASE PLATEN KNOB 3 2 RIGHT LEG UNDERSIDE OF RIGHT LEG 1 FIGURE 15 2. 24 / Take-Apart rev. Aug 87 ImageWriter II Replace 1. With the printer right side up, slide the AC connector into the notches. The wires on the AC connector are short: be careful not to break them off. 2. Push the leg into position. 3. Pull upward on the leg to lock it in place. 4. Slide the paper release lever on (Figure 15, #3). 5. Line up the platen knob and push it into position (Figure 15, #2). 6. Turn the machine upside down and replace the Phillips screw (Figure 15, #1). 7. Replace the paper cover. 8. Perform the self-test. ImageWriter II rev. Aug 87 Take-Apart / 2.25 o BOTTOM COVER Materials Required #2 Phillips screwdriver, magnetized Small Phillips screwdriver, magnetized Flathead screwdriver Remove 1. Remove the paper cover. 2. Remove the tractor cover. 3. Remove the left and right legs. 1 AC CONNECTOR 2 3 FILTER PCB FIGURE 16 4. Remove the two screws located under the tractor cover (Figure 16, #1). 5. Remove the grounding connector from the spade on the drive PCB (Figure 16, #2). 6. Remove the two grounding screws, which hold three grounding wires, located in the right support leg (Figure 16, #3). 7. Push the carriage assembly to the far left. Remove the flexible cable from the drive PCB. 8. Turn the printer upside down and loosen the four screws as far as they will go (Figure 17, #1). 2. 26 / Take-Apart rev. Aug 87 ImageWriter II IMPORTANT: The power supply assembly has four cable connectors and one plug connector, all of which must be disconnected before you remove the bottom cover. 1 .. FIGURE 17 9. Using a small flathead screwdriver, gently pry up the left side of the bottom cover. Disconnect the three connectors (Figure 18, #1) in one of two ways: a) Some cables are long enough to allow you to lift the left side of the access cover about 3 inches— until you can reach the three connectors located on that side of the board and disconnect them. b) Using a pair of curved needlenose pliers, access the connectors through the left support leg and gently disconnect them. 10. Lift the front half of the bottom cover, and disconnect the 50-pin ribbon cable. (Figure 18, #2). The 50-pin connector is difficult to remove. Use a small screwdriver to gently pry it loose from one side; then gently rock the connector back and forth until it comes free. ImageWriter II rev. Aug 87 Take-Apart / 2.27 TRANSFORMER 1 DRIVE PCB 2 FIGURE 18 2. 28 / Take-Apart rev. Aug 87 ImageWriter II 11. Carefully lift the bottom cover from the back and flip the bottom cover toward the front. 12. Disconnect the plug cable running from the right leg to the transformer on the bottom cover (Figure 19, #2). 13. Remove the bottom cover. TRANSFORMER DRIVE PCB 3 2 1 4 FIGURE 19 Replace 1. Place the bottom cover face up on the bottom of the printer. 2. Connect the plug cable running from the right leg to the bottom cover (Figure 19, #2). 3. Lift the rear portion of the bottom cover, and connect the 50-pin ribbon cable (Figure 19, #4). 4. Route the grounding strap from the transformer into the right support leg. 5. Tilt the bottom cover toward you and lower it into place. Check all the wires and cables: be sure they are not crimped and are correctly routed. ImageWriter II rev. Aug 87 Take-Apart / 2.29 6. Connect the three cables on the left side (Figure 19, #3). There are two ways to connect the three cables: a) Some cables are long enough to allow you to lift the left side of the access cover about 3 inches— until you can reach the three connectors located on that side of the board and connect them. b) Using a pair of curved needlenose pliers, access the three connectors through the left support leg, and then gently connect them with the pliers. 1 FIGURE 20 7. Replace the four screws that hold the bottom cover in place (Figure 20, #1). 8. Turn the printer right side up. 9. Connect the grounding connector to the spade on the corner of the drive PCB (Figure 19, #1). 2. 30 / Take-Apart rev. Aug 87 ImageWriter II 10. Replace the two screws (Figure 21, #1). 11. Reconnect the three grounding straps and two screws into the right support leg (Figure 21, #2). 12. Push the carrier assembly to the far left and connect the flexible cable to the drive PCB. 13. Replace the left and right support legs. 14. Replace the tractor cover. 15. Replace the paper cover and run the self-test. 1 AC CONNECTOR 2 FILTER PCB FIGURE 21 ImageWriter II rev. Aug 87 Take-Apart / 2.31 o FUSES Materials Required Fuse puller Digital multimeter There are two fuses on the drive board on the bottom cover. Check the fuses to verify that they are good. If a fuse is bad, replace it. Remove 1. Remove the bottom cover. 2. Examine the fuses for burn marks. If possible, check them with a multimeter (refer to Section 3, Troubleshooting). Fuse 1 (Figure 22, #1) is a 1-amp fuse. Fuse 2 (Figure 22, #2) is a 5-amp fuse. 1 TRANSFORMER 2 DRIVE PCB FIGURE 22 Replace 1. Replace any defective fuses. 2. Replace the bottom cover. 2. 32 / Take-Apart rev. Aug 87 ImageWriter II o TRANSFORMER Materials Required #2 Phillips screwdriver Remove 1. Remove the bottom cover. 2. Disconnect the cable to the drive PCB (Figure 23, #1). 3. Remove the three screws (Figure 23, #2). 4. Lift out the transformer. TRANSFORMER DRIVE PCB 1 2 FIGURE 23 Replace 1. Place the transformer on the bottom cover so that the screw holes line up. 2. Replace the three screws (Figure 23, #2). 3. Connect the cable to the drive PCB (Figure 23, #1). 4. Replace the bottom cover. 5. Perform the self-test. ImageWriter II rev. Aug 87 Take-Apart / 2.33 o DRIVE PCB Material Required #2 Phillips screwdriver Remove 1. Remove the bottom cover. 2. Disconnect the cable from the transformer (Figure 24, #1). 3. Remove the three screws from the drive PCB (Figure 24, #2). 4. Lift out the drive PCB. TRANSFORMER 2 DRIVE PCB 1 FIGURE 24 Replace 1. Place the drive PCB on the bottom cover so the screw holes line up. 2. Replace the three screws (Figure 24, #2). 3. Connect the cable from the transformer (Figure 24, #1). 4. Replace the bottom cover. 5. Perform the self-test. 2. 34 / Take-Apart rev. Aug 87 ImageWriter II o MECHANICAL ASSEMBLY Materials Required #2 Phillips screwdriver, magnetized Note: The mechanical assembly is not available as a replacement part. Remove 1. Remove the paper cover. 2. Remove the tractor cover. 3. Remove the top cover. 4. Remove the print head. 5. Remove the logic board. 6. Remove the left and right legs. 7. Remove the bottom cover. 3 2 1 FIGURE 25 8. Remove the two mounting screws (Figure 25, #1). Note: If the mechanical assembly has a third mounting screw (Figure 25, #3), remove it also. ImageWriter II rev. Mar 88 Take-Apart / 2.35 9. Lift the right side of the mechanical assembly, and disconnect the two plug connectors (Figure 25, #2). 10. Lift the entire mechanical assembly from the plastic case. Replace 1. Position the 50-pin cable on the bottom of the plastic case. Place the noise filter PCB in the right support leg. Verify that the PCB is lying flat in the bottom of the leg. 2. Tilt the mechanical assembly into the plastic case. Keep the right side lifted and connect the two plug connectors (Figure 25, #2). Make sure the assembly sits under the three white plastic tabs on the rear of the case. Make sure all wires and cables are routed correctly. Check for any crimped wires or cables. Slide the mechanical assembly into the plastic case. Line up the screw holders. IMPORTANT: On new models of the printer, the plug connector is located in the right support leg. Be sure you connect the top two cables from the power-on switch to the noise PCB and the bottom two cables to the transformer. Failure to make these connections will cause all lights on the operation panel to remain lit. 3. Replace the two screws (Figure 25, #1). 4. Replace the bottom cover. 5. Replace the left and right legs. 6. Replace the logic board. 7. Replace the top cover. 8. Replace the print head. 9. Replace the tractor cover. 10. Replace the paper cover. 2.36 / Take-Apart rev. Aug 87 ImageWriter II o NOISE FILTER PCB ASSEMBLY Remove 1. Remove the mechanical assembly. 2. Locate the noise filter PCB in the right support leg (Figure 26, #1). 1 2 FRONT OF PRINTER CASE FIGURE 26 3. Lift the tab (Figure 26, #2) and lift out the noise filter PCB assembly (Figure 27). 4. Check the fuse on the noise filter PCB (Figure 27, #1) with a multimeter. Refer to Section 3, Troubleshooting, for more information. 1 FIGURE 27 ImageWriter II rev. Feb 89 Take-Apart / 2.37 Replace 1. Lift the tab (Figure 26, #2) and slide the noise filter PCB assembly into place. 2. Replace the mechanical assembly. 3. Perform the self-test. 2.38 / Take-Apart rev. Aug 87 ImageWriter II o CARRIER MOTOR AND CARRIER BELT Materials Required #2 Phillips screwdriver Remove 1. Remove the mechanical assembly . 2. Remove the ribbon plate . (It is not necessary to remove the entire ribbon wire assembly.) 3. Remove the screw that holds the black plastic carrier belt guide (Figure 28, #1). Some guides are glued to the belt: Do not pry the guide off the assembly unless you are replacing the carrier belt. 4. Loosen the carrier belt adjustment screw (Figure 28, #2). 5. Gently push in on the metal plate under the screw, and remove the drive belt from the right carrier motor pulley. Lift the carrier belt from the machine (Figure 28, #3). 6. Disconnect the three screws holding the carrier motor in place (Figure 28, #4). The motor will drop out. 1 2 4 3 FIGURE 28 2.38 / Take-Apart rev. Aug 87 ImageWriter II Replace 1. Position the carrier motor with the connector and wires toward the rear of the machine, and replace the three screws (Figure 28, #4). 2. Replace the carrier belt on the left pulley and align it (Figure 28, #3). Push in on the metal plate of the carrier adjustment (Figure 28, #2), and replace the carrier belt on the right pulley. 3. Place the plastic carrier belt guide in position and replace the screw (Figure 28, #1). 4. Tighten the carrier belt adjustment screw. 5. Replace the ribbon assembly . 6. Replace the mechanical assembly . 7. Perform the self-test. ImageWriter II rev. Aug 87 Take-Apart / 2.39 o CARRIER BLOCK ASSEMBLY AND PRINT HEAD PCB Materials Required #2 Phillips screwdriver Jeweler's flathead screwdriver Remove 1. Remove the mechanical assembly . 2. Remove the ribbon wire and ribbon assembly . 3. Remove the color ribbon assembly . 4. Remove the ribbon motor assembly . 5. Remove the carrier drive belt . 1 4 LEFT SIDE FRONT VIEW 5 CARRIER SHAFT 2 6 RIGHT SIDE METAL FRAME FRONT VIEW SIDE VIEW IMPRESSION LEVER CARRIER SHAFT METAL TAB PLASTIC TAB METAL FRAME 3 FIGURE 29 2.40 / Take-Apart rev. Aug 87 ImageWriter II 6. Remove the two screws holding the clear plastic paper guide (Figure 29, #1). 7. Look at Figure 29, #2, for the connection of the right side of the carrier shaft to the frame. Pry forward the metal tab that is part of the frame. 8. Gently insert a jeweler's flathead screwdriver into the hole in the frame containing the tab (Figure 29, #3). Gently push the tab backward and lift the right side of the carrier shaft free. 9. Look at Figure 29, #4, to see where to connect the left side of the carrier shaft to the frame. 10. Gently push back the metal tab (Figure 29, #5), and slide the carrier shaft to the right until it is free. 11. Pull the back of the carrier assembly (Figure 29, #6) toward the front of the machine to release the tabs holding the assembly in position, and lift up the carrier assembly and the carrier shaft. 12. Remove the carrier cam (shaped like a washer) from the left side of the carrier shaft. 13. Turn the carrier assembly and the carrier shaft over. Slide the carrier shaft free of the carrier assembly. There are two felt wipers (for lubrication purposes) where the carrier shaft slides through the carrier assembly. Remove them (Figure 30, #1). CARRIER ASSEMBLY CARRIER SHAFT 1 FIGURE 30 ImageWriter II rev. Aug 87 Take-Apart / 2.41 14. Locate the black plastic clamp on the carrier assembly holding the small connector in place (Figure 31, #1). Pry the two tabs (Figure 31, #2) loose and gently pull the clamp up and off. 15. Remove the two screws holding the print head PCB in place (Figure 31, #3). 16. Gently lift the side of the board (Figure 31, #4). Slide it out from the tabs and remove it from the carrier assembly. 17. Slide out the small three-pin connector (Figure 31, #5) mounted on the carrier assembly. 2 1 3 5 4 SIDE VIEW OF BRACKET FIGURE 31 2.42 / Take-Apart rev. Aug 87 ImageWriter II Replace 1. Slide the small three-pin connector, which is wired to the print head PCB, onto the mount provided on the carrier assembly (Figure 31, #5). 2. Position the print head PCB on the carrier assembly. 3. Replace the two screws (Figure 31, #3). 4. Position the bracket as shown in Figure 31, #1, and snap it into place. 5. Slide the carrier shaft through one end of the carrier assembly, replace the two felt wipers, and slide the carrier shaft through the other side of the carrier assembly (Figure 32, #1). CARRIER ASSEMBLY CARRIER SHAFT 1 FIGURE 32 ImageWriter II rev. Aug 87 Take-Apart / 2.43 ILLUSTRATION NOT AVAILABLE FIGURE 33 6. Place the carrier cam on the left side of the carrier shaft. Be sure to position it as shown in Figure 33, #7, with the smaller section as the top of the cam. The wrong position will produce uneven printing. IMPORTANT : To be sure you get even printing intensity, be sure to position the carrier cam with the smaller section as the top of the cam. 7. Position the carrier assembly so the tabs underneath the assembly (Figure 33, #1) are in place. 8. Push back the tab (Figure 33, #2), and slide the left side of the carrier shaft into place while making sure the right side is lined up. 9. Slide the right side of the carrier shaft into position, making sure that the tab is in the hole in the metal frame and that the impression lever is in position (Figure 33, #3). 2.44 / Take-Apart rev. Aug 87 ImageWriter II 10. Push the metal tab back toward the rear of the machine (Figure 33, #4). 11. Verify that the impression lever is pushed forward all the way. Position the clear plastic paper guide and replace the two screws (Figure 33, #5). (Refer to Section 4, Adjustments, if you need more information.) 12. Replace the carrier drive belt . 13. Replace the ribbon motor assembly . 14. Replace the color ribbon assembly . 15. Replace the ribbon wire and ribbon assembly . 16. Replace the mechanical assembl y. 17. Perform the self-test. ImageWriter II rev. Aug 87 Take-Apart / 2.45 o PLATEN AND PLATEN ASSEMBLY Materials Required Pin punch (1/16 inch) Soldering iron, solder sucker, and solder Remove 1. Remove the tractor cover. 2. Remove the top cover . 3. Remove the print head . 4. Remove left and right support legs . 5. Remove the paper bail assembly screws (Figure 34, #1). 6. Remove the two screws (Figure 34, #2) that hold the paper guide in place. Lift the paper guide out of the machine. 1 6 2 4 3 5 B A 7 FIGURE 34 2.46 / Take-Apart rev. Aug 87 ImageWriter II 7. From the right side of the printer, remove the screw (Figure 34, #3) that holds the metal plate in place. Set the metal plate and screw aside. 8. From the left side, remove the screw (Figure 34, #4) that holds the grounding strap in place. 9. From the left side, remove the two screws that hold the metal plate in place (Figure 34, #5). Set the metal plate and two screws aside. 10. Locate the metal plate attached to the platen (Figure 34, #6). The plate has a small black grounding wire either soldered to it or attached with a screw: either unsolder the wire or remove the screw. 11. Lift the platen left side first from the machine, and slide the shaft free from the right side. 12. On the right side of the machine are two plastic pieces, the platen bushing and the free lever. The platen shaft slides into the bushing (Figure 34, #7). Use a flathead screwdriver to gently snap the outer piece free. Remove both pieces. 13. Locate the two pins on the platen (Figure 35, #1). Remove both pins using a pin punch; then remove all the black plastic pieces from the platen. 1 FIGURE 35 ImageWriter II rev. Aug 87 Take-Apart / 2.47 Note: There is no paper-empty frame (Figure 36, #1) when an optical paper-out sensor is installed. 3 2 1 4 LEFT SIDE FIGURE 36 Replace 1. Assemble the left side of the platen (Figure 36). Slide the paper-empty frame (Figure 36, #1) into place and insert the pin (Figure 36, #2). Slide the platen gear and then the platen bushing into place (Figure 36, #3 and #4). Note: There is no paper-empty frame (Figure 36, #1) when an optical paper-out sensor is installed. 2. Assemble the right side of the platen (Figure 37). Slide the drive gear (Figure 37, #1) into position and insert the pin (Figure 37, #2). Slide the platen spring into position (Figure 37, #3). 2 1 3 RIGHT SIDE FIGURE 37 2.48 / Take-Apart rev. Aug 87 ImageWriter II 2 1 RIGHT SIDE METAL FRAME FIGURE 38 3. Position the platen bushing (Figure 38, #1) into the frame on the right side of the printer. Slide the free lever (Figure 38, #2) onto the bushing. 4. Slide the right side of the platen shaft into the bushing and lever (Figure 39, #1). Line up the tab on the paper-empty frame with the notch in the plastic frame (Figure 39, #2). Drop the left side into place (Figure 39, #3). 2 3 1 METAL FRAME METAL FRAME FIGURE 39 ImageWriter II rev. Aug 87 Take-Apart / 2.49 6 4 5 3 1 A 2 B FIGURE 40 5. Position the metal plate on the right side of the platen and replace the screw that holds it (Figure 40, #1). 6. Position the metal plate on the left side of the platen and replace the two screws that hold it (Figure 40, #2). Note: The plate has an elongated hole in it. Be sure to press the plate down as you tighten it; otherwise the printer will have form feed problems on the left side. 7. Position the grounding strap and replace the screw that holds it (Figure 40, #3). 2.50 / Take-Apart rev. Aug 87 ImageWriter II 8. Locate the small black grounding wire. Solder the wire to the metal plate on the paper empty frame, or replace the screw (Figure 40, #4). 9. Position the paper guide and replace the two screws that hold it (Figure 40, #5). 10. Replace the paper bail assembly (Figure 40, #6). 11. Replace the left and right support legs . 12. Replace the print head . 13. Replace the top cover . 14. Replace the tractor cover. 15. Perform the self-test . ImageWriter II rev. Aug 87 Take-Apart / 2.51 o PAPER-FEED MOTOR Materials Required #2 Phillips screwdriver, magnetized Note: It is not necessary to remove the logic board from the mechanical assembly for this procedure. Remove 1. Remove the mechanical assembly . 1 2 LEFT FIGURE 41 2.52 / Take-Apart rev. Aug 87 ImageWriter II 2. Locate the paper-feed motor (Figure 41, #1). 3. Remove the two screws that hold the motor in place (Figure 41, #2). 4. Gently pull the motor off the mechanical assembly. Replace 1. Slide the paper-feed motor onto the mechanical assembly. 2. Replace the two screws that hold the motor in place (Figure 41, #2). 3. Replace the mechanical assembly . ImageWriter II rev. Aug 87 Take-Apart / 2.53 o PAPER GUIDE Materials Required #2 Phillips screwdriver, magnetized Small flat-blade screwdriver Remove 1. Remove the mechanical assembly . 2. Remove the platen and platen assembly . ILLUSTRATION NOT AVAILABLE FIGURE 42 3. Remove the three screws that hold the paper guide in place (Figure 42, #1). 4. Push the carrier to the left; then gently unhook each of the three tabs (Figure 42, #2) with a small flat-blade screwdriver. 5. Push the carrier to the right; then gently unhook each of the remaining two tabs (Figure 42, #3) with a small flat-blade screwdriver. 6. Lift off the paper guide. 7. Lift the two pinch-rollers and pinch-roller spring plates off the paper guide and set them aside. 2.54 / Take-Apart rev. Aug 87 ImageWriter II Replace 1. Position the two pinch-roller spring plates (Figure 43, #1) on the paper guide. ILLUSTRATION NOT AVAILABLE FIGURE 43 2. Position the paper guide so that the tabs line up with the assembly. Gently press the paper guide into position. 3. Place the pinch-rollers (Figure 43, #2) on the paper guide and replace the three screws. 4. Replace the platen and the platen assembly . 5. Replace the mechanical assembly . ImageWriter II rev. Aug 87 Take-Apart / 2.55 o PAPER-OUT SENSOR Materials Required #2 Phillips screwdriver Small flat-blade screwdriver Remove There are two paper sensors: one is a mechanical paper-out sensor (Figure 44, #1), and one is an optical paper-out sensor (Figure 45, #1). For information on the compatibility of these sensors with the main CPU PCBs, refer to Section 4, Additional Procedures. 1. Remove the paper guide. Pay special attention to how the sensor wires are routed to the front of the machine. 2. Turn the paper guide upside down. a) For the mechanical sensor: Insert a small flat-blade screwdriver into the notch that holds the sensor in place (Figure 44, #2). ILLUSTRATION NOT AVAILABLE FIGURE 44 2.56 / Take-Apart rev. Aug 87 ImageWriter II b) For the optical sensor: Gently push the sensor from the top of the paper guide until it pops out. ILLUSTRATION NOT AVAILABLE FIGURE 45 3. Remove the paper sensor. Replace 1. Put the paper-out sensor in place. a) For the mechanical sensor: route the wires as shown in Figure 44, #3. b) For the optical sensor: route the black-and-yellow wire (shown in Figure 45, #3) and route the single wire (shown in Figure 45, #2). 2. Replace the paper guide . ImageWriter II rev. Aug 87 Take-Apart / 2.57 o TRACTOR ASSEMBLY Materials Required #2 Phillips screwdriver, magnetized Small Phillips screwdriver, magnetized Small flat-blade screwdriver Remove Two versions of the tractor assembly exist: one version is fastened in place with screws, the other version has a snap-to-fit assembly (no screws). To remove the tractor assembly, follow the directions below for the correct assembly. Assemblies with Screws 1. Remove the paper cover and the tractor cover. 2. Remove the left and right support legs . 3. Remove the top cover . 4. Remove the bottom cover . Note: The bottom cover procedure mentioned here takes apart the rear metal portion of the bottom cover. Sections of the bottom cover are shown on the Illustrated Parts List. The plastic portion of the bottom cover will be removed in step 8. 5. If you have a late-model printer, disconnect the cable that goes from inside the right leg to the power switch assembly (attached to the frame). Note: If you have an early model, the cable runs from inside the right leg along the right side of the frame and is joined by the extension from another cable that connects to the transformer. (Both of these cables on earlier models disconnect at the right front of the printer, and will be disconnected in step 8.) 6. Turn the printer upright. Carefully move the carrier assembly slightly left of center to give access to the two large screws (Figure 46, #1) that hold the frame to the remainder of the plastic bottom cover. Remove the screws. 2.58 / Take-Apart rev. Aug 91 ImageWriter II 2 1 FIGURE 46 7. If there is a screw (Figure 46, #2) between the stepper motor and carrier motor housing, remove it. Note: On earlier ImageWriter II models, this screw does not exist. ImageWriter II rev. Aug 91 Take-Apart / 2.59 1 FIGURE 47 8. On later models, lift up the front of the frame and pull it toward you until it is completely out of the plastic portion of the bottom cover. If the frame does not clear the top rear of the bottom cover, push slightly at the top of the back edge above each of the three molded plastic frame holders (Figure 47, #1) of the bottom cover. Note: On earlier models, before you can remove the frame from the plastic portion of the bottom cover, you must disconnect the two cables mentioned in step 5 (the cables run along the right side of the frame and disconnect at the right front of the printer). ILLUSTRATION NOT AVAILABLE FIGURE 48 2.60 / Take-Apart rev. Aug 91 ImageWriter II 9. Turn the printer so the rear is facing you and remove the two small screws (Figure 48, #1) from the SheetFeeder connector bracket. 10. Remove the SheetFeeder connector and the metal bracket that holds the connector in place. 1 2 Stepper Motor Left Side Right Side 3 FIGURE 49 11. Turn the printer so the stepper motor is facing you and remove the screw (Figure 49, #1) that holds the tractor assembly to the metal frame. 12. Turn the printer to the right side and remove the screw (Figure 49, #2) that holds the tractor assembly to the frame. 13. Turn the printer so the rear is facing you. Hold the round rod and plastic end pieces (Figure 49, #3) of the tractor assembly and carefully pull straight toward you until the tractor assembly is free from the frame. Assemblies without Screws ImageWriter II 1. Remove the mechanical assembly . 2. Remove the paper bail assembly . rev. Aug 91 Take-Apart / 2.61 3. Remove the cut-sheet feeder connector (Figure 50, #1) and bracket (Figure 50, #2). 1 2 Stepper Motor Left Side Right Side FIGURE 50 4. Using a small flat-blade screwdriver, pry back the black plastic tab inside the hole on the right-rear side of the frame (Figure 50, #3), and gently pull back on the tractor assembly about 1/4 of an inch. 5. Repeat step 4 to release the left side of the assembly. 6. When both sides have been released from the indents on the metal frame, pull the tractor assembly straight out the rear of the mechanical assembly (Figure 51). 2.62 / Take-Apart rev. Aug 91 ImageWriter II 1 2 3 FIGURE 51 ImageWriter II rev. Aug 91 Take-Apart / 2.63 Replace 1. Hold the plastic end pieces on each end of the tractor assembly and slide the tractor assembly into the frame slot until the black tabs snap into the indents on the frame (Figure 51). 2. Place the connector bracket on top of the cut-sheet feeder connector so that the extension of the connector bracket (Figure 52, #2) faces the wide side of the connector and extends up into the printer and then down. 3. Place the cut-sheet connector onto the frame support at the rear of the printer. Be sure the narrow edge of the connector (Figure 52, #1) is facing away from the printer head. 4. Replace the two screws through the bracket and cut sheet connector (Figure 52, #3). 2 1 FIGURE 52 2.64 / Take-Apart rev. Aug 91 ImageWriter II 5. Place the frame into the plastic portion of the bottom cover, being careful to feed the cables between the left side of the frame and the left side of the bottom cover. The cables attached to the bottom right side of the frame, those that come from the SheetFeeder connector, and the large gray ribbon cable should be fed straight back into the opening for the metal portion of the bottom cover (yet to be replaced). Note: If you have an early-model printer, connect at this time, at the right front of the printer, the cable that runs to the inside of the right leg and the extension cable that connects to the cable that comes from the transformer. ILLUSTRATION NOT AVAILABLE FIGURE 53 6. Replace the two large screws (Figure 53, #1) that hold the frame to the plastic portion of the bottom cover. 7. If the screw exists (it doesn't on earlier models), replace the frame screw (Figure 53, #2) between the stepper motor and carrier motor housing. ImageWriter II rev. Aug 91 Take-Apart / 2.65 Apple Technical Procedures ImageWriter II Section 3 – Troubleshooting o CONTENTS 3.2 3.2 3.2 3.4 3.6 3.10 3.10 3.12 3.14 3.16 3.18 3.20 3.22 ImageWriter II Introduction Before You Start How to Use the Symptom Charts Things to Check Symptom Table ImageWriter II Flow Charts Power Light Not Lit Power Light On, No Printing No Paper Feed Ribbon Color Selection Fails Print Quality Problems Option Card Malfunctioning Final Test rev. Aug 87 Troubleshooting / 3. 1 o INTRODUCTION Before You Start Read the section entitled "Things to Check" before you begin troubleshooting. You need the information in that section to troubleshoot the ImageWriter II effectively. If the suggestions in "Things to Check" do not correct a problem, run the self-test (see Section 1, Basics). How to Use the Symptom Charts First find the symptom that most nearly describes the problem; then perform the first corrective action on the solution list. If that corrective action does not fix the problem, go to the next one. If you replace a module and find that the problem remains, reinstall the original module before you go on to the next action. If the symptoms displayed by the ImageWriter II are not listed in the symptom charts, or if the system is not displaying a clearly defined problem, use the "Flow Chart" section. 3.2 / Troubleshooting rev. Aug 87 ImageWriter II How to Use the Flow Charts Examine the printer for the symptoms listed below, and then turn to on of th seven troubleshooting flow charts for instructions. If the flow chart asks you to make a replacement or an adjustment, you can look up the procedure in the table of contents. Examine the printer for the symptoms listed below, and turn to the appropriate flow chart for instructions. Step by-step instructions for recommended replacements and adjustments can be found by consulting the table of contents of the appropriate sections. Note: Some of the flow charts have you use a multimeter to check resistance and continuity on some replaceable parts and modules. If you do not know how to use the multimeter, you will have to exchange the part in question to verify that the customer's part is bad. Indication Flow Chart Power Light Not Lit 1 Power Light On, No Printing 2 No Paper Feed 3 Ribbon Color Selection Fails 4 Print Quality Problems 5 Option Card Malfunctioning 6 Final Test 7 On the page facing each of the flow charts, there are notes with additional instructions and references. Starting at the top of a flow chart, answer the questions and proceed down the chart. When you arrive at a rectangular box containing a list of actions, perform the actions in the sequence listed. On completion, return to the preceding diamond box. If the problem remains, reinstall the original module before you go on to the next action. ImageWriter II rev. Aug 87 Troubleshooting / 3. 3 o THINGS TO CHECK There are many problems that have simple corrections listed on the following chart. It will save you time in the long run if you try these remedies before you begin troubleshooting. Note: If an option card is installed, remove it before you begin. Then verify that the dip switch, SW2-4, is open/off. Symptom Check • Error light blinks 1. Carrier cover securely in place. 2. Carrier cover magnet in place. 3. Left margin error occurs while printing. This error may be a software problem: try other software. 4. Option card dip switch is open/off with no card installed. • Select light off, error light on – No paper or improperly inserted paper. • No printing or garbled printing 1. The interface cable between the printer and the computer is loose or disconnected. 2. DIP switches (switches 2-1 through 2-4) are improperly set. • Software-specific problem – Try a known-good piece of software. • Prints ok for a while, then garbage – Set DIP switch 2-3 to the correct serial protocol. 3.4 / Troubleshooting rev. Mar 88 ImageWriter II Symptom Check • Overprinting – Check that the program being used is set for the correct line spacing and line length. • Light printing 1. Change ribbon cartridge. 2. Adjust the impression lever (see Section 4, Adjustments). • Erratic carrier motion, loud hum – Remove black tube-shaped shipping protection from the carrier shaft. • Printing has squashed lines, misregistration problems when using pin feed paper 1. For the best print quality, instruct the customer to place the stack of paper behind the printer. The paper should have a clear, unobstructed entry and exit path. 2. Be sure that the power cord or printer cable does not obstruct the paper path. 3. Check whether the manual paper sensor is exerting too much pressure on the paper. 4. Check whether the paper guide is exerting too much pressure on the paper. 5. Verify that the tractor assembly is not allowing paper to slip. 6. Check that the printhead gap is correct (see "Shims" in Section 5, Additional Procedures). 7. Check whether the paper bail is exerting too much pressure on the paper. 8. Avoid printing in the top and bottom one inch of the paper (the areas where the squashed line and misregistration problems will be the most apparent). 9. Try using 20-pound paper. ImageWriter II rev. May 91 Troubleshooting / 3. 5 o SYMPTOM TABLE Print Quality Problems Solutions • Compressed first or second line when printing – Replace CPU PCB. • Print is darker or lighter on one side – Refer to Section 5, Additional Procedures, for removing and installing shims. • Top row of dots missing on printout – Perform Ribbon Adjustment (refer to Section 4, Adjustments). • When printing from a – Verify that the ImageWriter II driver software Macintosh, characters is the most current version. If it is not, run the sometimes appear run the most current Install program and smudged, or the top of select the ImageWriter as the print driver. form gradually creeps down the page in oneline increments • Power light on, no printing 1. Verify that the ribbon frame assembly is riding on the spiral ridge on the color ribbon cam (see Section 4, Adjustments). 2. Remove the dot head, and verify that the pins in the connector on the dot head PCB are not bent. 3. Go to Troubleshooting Table 2. • Missing dots 1. Verify that the flexible cable is connected properly. 2. Remove the dot head, and verify that the pins in the connector on the dot head PCB are not bent. 3. Go to Troubleshooting Table 5. 3.6 / Troubleshooting rev. May 91 ImageWriter II Carriage Movement Problems Solutions • Carriage doesn't move; LEDs are not lit 1. Replace the drive PCB. 2. Replace the transformer. 3. Replace the filter assembly. • Carriage doesn't move; LEDs are lit 1. Replace the CPU PCB. 2. Replace the drive PCB. • Carriage assembly moves to the left and does not return to center 1. Check the switch on the print head PCB. If the switch is frozen, replace the print head PCB. 2. Replace the CPU PCB. 3. Replace the print head PCB. 4. Replace the flexible ribbon cable. 5. Replace the drive PCB. • Carriage moves to the left and hums very loudly 1. Ensure that the flexible ribbon cable is properly connected to the drive PCB and to its connector under the carriage assembly. 2. Replace the flexible ribbon cable. 3. Replace the print head PCB. • Self-test after take-apart produces no carrier movement (panel lights on) 1. Remove the bottom cover to ensure that the wires to the carrier motor are not pinched. If wires to the carrier motor are worn, replace the carrier motor. 2. Replace the fuse on the drive PCB. 3. Replace the drive PCB. • Carriage assembly grinds or is hard to move 1. Remove the bottom cover to ensure that the wires to the carrier motor are not pinched. If wires to the carrier motor are worn, replace them. 2. Replace the fuse on the drive PCB. 3. Replace the drive PCB. ImageWriter II rev. Jul 91 Troubleshooting / 3. 7 Paper Feed Problems Solutions • Grinding during paper feed 2. 1. Remove the platen knob to verify that there are no obstructions in the gearing beneath the knob. Adjust the paper guide (refer to Section 4, Adjustments). 3. Replace the paper feed motor. 4. Replace the drive PCB. • Paper-out sensor is – Bend the mechanical paper sensor slightly interfering with paper lower into the platen cradle. path; left side of paper fits "tighter" under the platen than does the right side 3.8 / Troubleshooting rev. Apr 88 ImageWriter II Miscellaneous Problems Solutions • Hexadecimal data is printed – Power the printer off then on. • IC3 on Drive PCB is visibly blown – Replace linefeed motor, drive PCB, and CPU PCB. WARNING : Check IC3 on the Drive PCB. If it is visibly blown, replace the linefeed motor, drive PCB, and CPU PCB. Failure to replace all three modules may result in additional blown modules. • Power supply keeps going bad ImageWriter II – Verify that the cut sheet feeder wires are not pinched. If the wires are pinched, lift the chassis and reposition them. rev. Aug 87 Troubleshooting / 3. 9 o IMAGEWRITER II FLOW CHARTS Power Light Not Lit 1. To check the fuses (printer should be off): IMPORTANT : Remove the mechanical assembly from the printer before you check the fuse on the noise filter PCB assembly. a) Set the digital multimeter to measure 200 ohms resistance. b) Remove and check the fuses on the drive PCB one at a time. c) All fuses should measure 0.00 (indicating continuity). 2. To check the power switch before removal (printer should be off): a) Disconnect the plug-in connectors running from the power switch to the right support leg. b) Set the digital multimeter to measure 200 ohms resistance. c) Insert the probes into the connectors, making sure you test white wire with white wire, and black wire with black wire. When the switch is up or in the off position, you should get a reading of 1, indicating there is no connection. When the switch is down or in the on position you should get a reading of 0 for continuity. d) Insert the probes into the connectors, checking black wire with white wire. A reading of 1, regardless of the position of the switch, should be displayed. 3.10 / Troubleshooting rev. Jul 88 ImageWriter II TABLE 1 CARRIER MOVEMENT PRESENT NO CARRIER MOVEMENT IS THE AC POWER CORD CONNECTED? REPLACE OPERATION PANEL. NO CONNECT THE POWER CORD. YES POWER LIGHT ON? NO REMOVE AND CHECK 5A AND 1A FUSES ON THE DRIVE PCB (SEE TABLE 1 NOTES, #1). NO POWER LIGHT ON? YES GO TO TABLE 2. YES GO TO TABLE 2. FUSES OK? NO REPLACE FUSES. YES REPLACE TRANSFORMER. NO POWER LIGHT ON? YES GO TO TABLE 2. YES POWER LIGHT ON? GO TO TABLE 2. NO REPLACE DRIVE PCB. GO TO TABLE 2. YES POWER LIGHT ON? NO REPLACE FILTER BOARD. REMOVE AND CHECK 2A FUSE. SEE TABLE 1 NOTES, #1. GO TO TABLE 2. YES POWER LIGHT ON? NO REPLACE POWER SWITCH. (SEE TABLE 1 NOTES, #2). GO TO TABLE 2. ImageWriter II YES POWER LIGHT ON? rev. Aug 87 NO RETURN TO BEGINNING OF TABLE 1. Troubleshooting / 3. 11 Power Light On, No Printing 1. To check the Form Feed switch on the operation panel (printer should be off): a) Set the multimeter to measure 200 ohms resistance. b) Place the probes on pin 12 and pin 13 of the operation panel connector. The reading should show no connection (1). c) Depress the Form Feed switch. The reading should show continuity (0.00). 2. To check the flexible cable and the Head PCB: a) Detach the flexible cable from the drive board. b) Locate the home position switch (under the left side of the ribbon carrier on the Head PCB). c) Set the digital multimeter to measure 200 ohms resistance. d) Place the probes on pin 10 and pin 12 on the flexible cable. e) Push the home position switch on the Head PCB. The reading should be 0.00 when the switch is depressed. When the switch is released, the reading should be 1. 3. Manually move the carrier back and forth. If it will not move, inspect the following: a) Check the ribbon cartridge to be sure the ribbon is wound when the knob is turned in the direction of the arrow. b) Check the carrier shaft and carrier belt for damage and foreign materials. c) Check the ribbon wire for dislocation and damage. d) Perform carrier shaft maintenance (see Section 1, Basics ). 4. To check for correct jumper position on the PCB board, see "Paper Sensor and Logic Board Compatibility" in Section 5, Additional Procedures. 3.12 / Troubleshooting rev. Jul 88 ImageWriter II TABLE 2 Power Light On No Printing RUN SELF-TEST. CHECK FORM FEED SWITCH ON OPERATION PANEL. (SEE TABLE 2 NOTES, #1.) NO PRINTS SELF-TEST? NOTE IF SELF-TEST SHOWS POOR QUALITY PRINT, GO TO TABLE 5 AS INSTRUCTED. YES YES SWITCH OK? GO TO TABLE 5. NO REPLACE OPERATION PANEL. PRINTS SELF-TEST? NO CHECK FLEXIBLE CABLE CABLE AND HEAD PCB (SEE TABLE 2 NOTES, #2.) YES FLEXIBLE CABLE AND HEAD PCB OK GO TO TABLE 5. YES PRINTS SELF-TEST? YES NO GO TO TABLE 5. REPLACE FLEXIBLE CABLE AND HEAD PCB. GO TO TABLE 6. YES NO PRINTS SELF-TEST? NO YES PRINTS SELF-TEST? GO TO TABLE 6. REPLACE MAIN CPU PCB. NO CHECK CARRIER (SEE TABLE 2 NOTES, #3.) CHECK / CORRECT PCB JUMPERS (SEE TABLE 2 NOTES, #4.) YES GO TO TABLE 7. PRINTS SELF-TEST? NO CARRIER MECHANISM NORMAL? YES REPLACE DRIVE PCB. NO PRINTS SELF-TEST? REPLACE ANY DEFECTIVE PARTS. PRINTS SELF-TEST? YES YES NO NO REPLACE CARRIER MOTOR. PRINTS SELF-TEST? GO TO TABLE 5. YES GO TO TABLE 5. NO GO TO TABLE 3. ImageWriter II rev. Jul 88 Troubleshooting / 3. 13 No Paper Feed 1. To check the paper feed mechanism, insert paper and turn the platen knob. Make sure the gears to the left of the platen mesh properly. 2. To check the form-feed and line-feed switches on the operation panel (printer should be off): a) Set the digital multimeter to measure 200 ohms resistance. b) Place the probes on pin 12 and pin 13 of the operation panel connector. The reading should show no connection (1). c) Depress the form feed switch. The reading should show continuity (0.00). d) Place the probes on pin 11 and pin 13 of the operation panel connector. The reading should show no connection (1). e) Depress the line-feed switch. The reading should show continuity (0.00). 3. To check the paper feed motor (printer should be off): a) Set the digital multimeter to measure 200 ohms resistance. b) At the cable connector end (disconnected from the drive PCB), check the resistance values between pins 6 and 4, 6 and 2, 5 and 1, and 5 and 3 (pin 1 is the black wire). The value for each reading should be approximately 22 ohms. c) Check the resistance values between pins 3 and 1, and 2 and 4. The value for each reading should be approximately 44 ohms. 3.14 / Troubleshooting rev. Apr 87 ImageWriter II TABLE 3 NOTE NO PAPER FEED (POWER LIGHT LIT) IF SELF TEST SHOWS POOR QUALITY PRINT GO TO TABLE 5 AS INSTRUCTED. CHECK PAPER FEED MECHANISM. (SEE TABLE 3 NOTES, #1). PAPER FEED MECHANISM OK? NO YES SWITCHES OK? REPLACE DEFECTIVE PARTS. NO PRINTS SELF TEST? CHECK LINE FEED AND FORM FEED SWITCHES ON OPERATION PANEL. SEE (TABLE 3 NOTES, #2). NO REPLACE OPERATION PANEL. NO PRINTS SELF TEST? YES REPLACE DRIVE PCB. YES PRINTS SELF TEST? YES GO TO TABLE 5. YES GO TO TABLE 5 NO CHECK PAPER FEED MOTOR (SEE TABLE 3 NOTES, #3). PAPER FEED MOTOR OK? GO TO TABLE 5. YES NO REPLACE PAPER FEED MOTOR. PRINTS SELF TEST? NO REPLACE MAIN CPU PCB. YES PRINTS SELF TEST? NO GO TO TABLE 2. GO TO TABLE 5. YES GO TO TABLE 5. ImageWriter II rev. Jul 88 Troubleshooting / 3. 15 Ribbon Color Selection Fails 1. Examine the color ribbon assembly (printer should be off). Verify that the black tabs on the ribbon plate ride on the spiral ridge of the ribbon cam. Verify that the ribbon cam is tight. Also check the copper tab mounted behind and below the ribbon cam. When the cam is all the way up, the vertical ridge on the cam should hit the tab. If the color ribbon assembly is loose, the ribbon cam is misaligned. For color printing adjustment procedures, turn to Section 4, Adjustments. 2. Check the flexible cable and the ribbon motor (printer should be off): a) Detach the flexible cable from the drive PCB. b) Set the digital multimeter to measure 200 ohms resistance. Detach the flexible cable from the drive PCB. c) On the flexible cable, check the resistance between pins 3 and 7, 5 and 7, 4 and 8, and 6 and 8. Each should read approximately 120 ohms. d) Check the resistance values between pins 3 and 5 and pins 4 and 6. Each should read approximately 240 ohms. If the readings are not approximately 240 ohms, the carrier ribbon will drive down but not up. Replace the flexible cable. 3.16 / Troubleshooting rev. Apr 91 ImageWriter II TABLE 4 RIBBON COLOR SELECTION FAILS NOTE IF SELF TEST HAS POOR QUALITY PRINT GO TO TABLE 5 AS INSTRUCTED CHECK THE RIBBON SHIFT CAM POSITION (SEE TABLE 4 NOTES, #1). RIBBON SHAFT CAM POSITION NORMAL? NO ADJUST THE RIBBON SHIFT MECHANISM. YES PRINTS SELF TEST? NO REPLACE DRIVE PCB. PRINTS SELF TEST? YES YES GO TO TABLE 5. GO TO TABLE 5. NO CHECK FLEXIBLE CABLE AND RIBBON MOTOR (SEE TABLE 4 NOTES, #2). FLEXIBLE CABLE AND RIBBON MOTOR OK? REPLACE MAIN CPU PCB YES PRINTS SELF TEST? YES NO NO RETURN TO BEGINNING OF TABLE 4. REPLACE THE FLEXIBLE CABLE PRINTS SELF TEST? YES GO TO TABLE 5. NO REPLACE RIBBON MOTOR. PRINTS SELF TEST? NO YES GO TO TABLE 5. ImageWriter II rev. Jul 88 Troubleshooting / 3. 17 GO TO TABLE 5. Print Quality Problems 1. Check the shims (see Section 5, Additional Procedures). 2. Check the paper guide positioning (refer to Section 4, Adjustments). 3. Perform the ribbon adjustment (refer to Section 4, Adjustments). 4. To check the flexible cable (printer should be off): a) Detach the flexible cable from the drive PCB and remove the print head. b) Set the digital multimeter to measure 200 ohms resistance. c) Check for continuity between the pins shown below: HEAD CONNECTOR B2 B3 B4 B5 B6 B7 B8 B9 B10 A2 A3 A4 A5 A6 A7 A8 A9 A10 FLEXIBLE CABLE 27 26 19 18 22 23 15 30 14 25 28 17 20 24 21 13 29 16 PIN 1 FLEXIBLE CABLE PIN 30 10 9 8 7 6 5 4 3 2 1 B 10 9 8 7 6 5 4 3 2 1 A HEAD CONNECTOR TOP VIEW 5. To check the print head: a) Set the digital multimeter to measure 200 ohms resistance. b) Remove the print head and place it PCB-side down with the edge connectors facing you. Place one probe of the multimeter on each side of the far right metal finger of the print head. The resistance should be approximately 3 ohms. 3.18 / Troubleshooting rev. Aug 91 ImageWriter II TABLE 5 PRINT QUALITY PROBLEMS (POOR QUALITY, NO PRINT, OR DOTS MISSING) NO IS PRINTOUT NOTICEABLY LIGHTER OR DARKER ON ONE SIDE? NO DOTS ARE MISSING FROM CHARACTERS? YES YES CHECK SHIMS (SEE TABLE 5 NOTES, #1A). NO PROBLEM CORRECTED? PERFORM RIBBON ADJUSTMENT (SEE TABLE 5 NOTES, #1C). PROBLEM CORRECTED? YES ALIGN PAPER GUIDE (SEE TABLE 5 NOTES, #1B). GO TO TABLE 6. NO PAPER GUIDE ALIGNED? NO YES CHECK FLEXIBLE CABLE (SEE TABLE 5 NOTES, #2). FLEXIBLE CABLE OK? YES NO REPLACE FLEXIBLE CABLE. PRINT QUALITY OK? CHECK PRINT HEAD (SEE TABLE 5 NOTES, #3). NO YES GO TO TABLE 6. PRINT HEAD OK? YES REPLACE DRIVE PCB. NO PRINT QUALITY OK? REPLACE PRINT HEAD. YES GO TO TABLE 6. NO PRINT QUALITY OK? NO REPLACE MAIN CPU. YES GO TO TABLE 6. PRINT QUALITY OK? YES GO TO TABLE 6. NO RETURN TO BEGINNING OF TABLE 5. Option Card Malfunctioning 1. ImageWriter II switch 2-4 must be in the closed/on position when an Option Card is installed. 2. If the Memory Option Card is installed and switch 2-4 is set correctly, a RAM verification test is performed ImageWriter II rev. Aug 87 Troubleshooting / 3. 19 when the printer is turned on. If the printer comes ready, the RAM on the Memory Option Card is good. 3. If you do not know how to use NodeCheck, see the AppleTalk Cables and Connectors Technical Procedures , Diagnostics Section. 3.20 / Troubleshooting rev. Aug 87 ImageWriter II TABLE 6 OPTION CARD MALFUNCTIONING NOTE: ONLY ONE OPTION CARD MAY BE INSTALLED AT ANY GIVEN TIME MEMORY CARD OPTION INSTALLED. CHECK DIP SWITCHES. SEE TABLE 6 NOTES, #2. EXCHANGE MEMORY OPTION CARD. TURN PRINTER ON. SELF-CHECK IS PERFORMED. SEE TABLE 6 NOTES, #2. APPLETALK OPTION CARD INSTALLED. YES CHECK DIP SWITCHES. SEE TABLE 6 NOTES, #1. DOES ERROR LIGHT FLASH? NO PERFORM SELF-TEST. CONNECT THE PRINTER TO A COMPUTER. CARD RECOGNIZED IN PRINTOUT? NO REPLACE: 1. APPLETALK CARD 2. MAIN CPU PCB PRINTS 3 PAGE DOCUMENT & ALLOWS YOU TO KEEP WORKING? END YES NO CONNECT PRINTER TO NODECHECK. REPLACE MEMORY OPTION CARD. BOOT NODECHECK ON NETWORK. SEE TABLE 6 NOTES, #3. PRINTER CAN BE SEEN? NO GO TO APPLETALK NETWORK TROUBLESHOOTING REPLACE MAIN CPU PCB. PRINT TO PRINTER USING NODECHECK. NO GO TO APPLETALK NETWORK TROUBLESHOOTING PRINTS 3 PAGE DOCUMENT & ALLOWS YOU TO KEEP WORKING? END NO YES GO TO BEGINNING OF TABLE 6. END ImageWriter II END NO YES PRINTS? PRINTS 3 PAGE DOCUMENT & ALLOWS YOU TO KEEP WORKING? rev. Aug 87 Troubleshooting / 3. 21 Final Test 1. Refer to the Technical Procedures Peripheral Interface Guide for directions on setting the printer switches correctly. 2. Check the ImageWriter II Owner's Manual for more information on the correct cable to use. 3.22 / Troubleshooting rev. Aug 87 ImageWriter II TABLE 7 FINAL TESTING SELF TEST OK? YES CONNECT THE PRINTER TO A COMPUTER (SEE TABLE 7 NOTES, #1). PRINTS FROM THE COMPUTER? YES END NO RECHECK CONNECTIONS AND SETTINGS (SEE TABLE 7, #1). CONNECTIONS AND SETTINGS OKAY? YES NO CABLE OK? FIX CONNECTIONS AND SETTINGS PRINTS FROM THE COMPUTER? CHECK INTERFACE CABLE (SEE TABLE 7 NOTES, #2). YES REPLACE MAIN CPU PCB. NO NO REPLACE PRINTER INTERNAL CONNECTOR CABLE. PRINTS FROM THE COMPUTER? YES END NO YES PRINTS FROM THE COMPUTER? NO TRY DIFFERENT COMPUTER. END YES PRINTS FROM THE COMPUTER? END NO RETURN TO BEGINNING OF TABLE 7. YES END ImageWriter II rev. Aug 87 Troubleshooting / 3. 23 8. Turn the printer upside down. 9. On later models, connect the two-wire cable that comes from the power switch assembly to the cable that comes from inside the right leg. 10. Replace the bottom cover (metal portion). 11. Replace the left and right support legs , if necessary. 12. Replace the top cover . 13. Replace the tractor cover and the paper cover. 14. Perform the self-test. 2.66 / Take-Apart rev. Aug 91 ImageWriter II Apple Technical Procedures ImageWriter II Section 4 – Adjustments o CONTENTS 4.3 4.4. 4.6 4.7 4.8 4.9 4.10 4.11 ImageWriter II Ribbon Assembly New Assembly Old Assembly Firing Hammer Impression Lever Carrier Belt Paper Guide Apple II Peripherals Diskette rev. May 89 Adjustments / 4.1 4.2 / Adjustments rev. Sep 88 ImageWriter II o RIBBON ASSEMBLY This adjustment should be performed when • The color print function fails • The color ribbon assembly has been replaced • Dots are missing or no printout is seen when using a black ribbon There are three possible versions of the ribbon assembly currently in circulation: two newer assemblies and one older assembly. If you have an ImageWriter II with a serial number of 244451 or above, you have one of the newer assemblies and will have the color ribbon assembly shown in Figure 1. One of the assemblies is adjustable; the other isn't. To find out which assembly you have, try following the "New Assembly" procedure. If you cannot turn the top of the assembly (do not force it or the red locking ring), then you have a nonadjustable version of the assembly and you must install a new assembly. If the top assembly turns, then follow the rest of the procedure for the new assembly. The older version is shown in Figure 2. For this version, follow the "Old Assembly" procedure. Before you begin either procedure, perform the steps below: 1. Run the self-test and examine the colors printed. The colors should be black, yellow, red, blue, orange, green, and purple. You should see no overlapping. The self-test should produce one line of each color and then repeat the same sequence of colors until stopped. If the test doesn't perform as described, or if the colors overlap, continue with step 2. 2. Switch off the printer and remove the paper cover. ImageWriter II rev. May 89 Adjustments / 4.3 New Assembly 2 If you have the new version of the color ribbon assembly (serial number ------- or above), perform the following steps: 1. Remove the ribbon (access to the ribbon adjustment is easier with the ribbon removed, although it is not absolutely necessary). 2. Locate the color ribbon assembly (Figure 1, #1). 3. In this step you are going to push and turn the red spring–loaded assembly (Figure 2, #1) to make the adjustment. a) First, to determine which way to turn the top assembly, examine the self-test printout. (If the adjustment is correct, the first line is black.) If the bottom half of the letters are missing in the first (black) line, push and turn the red spring – loaded assembly clockwise. If the first line is printed with the top half of the letters missing (or half blue), turn the red spring – loaded assembly counterclockwise. ? Note: Before you begin the adjustment, push down the red locking ring (Figure 1, #2), and then hold it while making the adjustment. The locking ring prevents the adjustment from changing once it is set. b) Grasp the red spring–loaded assembly and turn it in the correct direction in eighth turn increments to rectify the condition. 4.4 / Adjustments rev. Sep 88 ImageWriter II New Assembly 2 If you have the new version of the color ribbon assembly (serial number 244451 or above), perform the following steps: 1. Remove the ribbon (access to the ribbon adjustment is easier with the ribbon removed, although it is not absolutely necessary). 2. Locate the color ribbon assembly (Figure 1, #1). 3. In this step you are going to turn the top assembly to make the adjustment. a) First, to determine which way to turn the top assembly, examine the self-test printout. (If the adjustment is correct, the first line is black.) If the bottom half of the letters are missing in the first (black) line, turn the top assembly clockwise. If the first line is printed with the top half of the letters missing (or half blue), turn the top assembly counterclockwise. Note: Before you begin the adjustment, push down the red locking ring (Figure 1, #2), and then hold it while making the adjustment. The locking ring prevents the adjustment from changing once it is set. b) Grasp the top of the assembly—the part that has the arrow imprinted on it (Figure 1, #3)—and turn the top in the correct direction two full turns. (Two turns are recommended to start with; it is possible that more or fewer than two turns will be needed to rectify the condition.) ImageWriter II rev. May 89 Adjustments / 4.5 3 1 2 FIGURE 1 4. Reinstall the ribbon and the top cover, and rerun the test. 5. Check the print results to see if the condition has improved, deteriorated, or has stayed the same. 6. Repeat steps 3 and 4 until all the colors are solid, without any overlapping—or, if using a black ribbon only, until no dots are missing. 4.6 / Adjustments rev. Sep 88 ImageWriter II Old Assembly If you have an older version of the color ribbon assembly, perform the following steps: 1. Locate the color ribbon assembly (Figure 2, #1). 2 3 1 FIGURE 2 2. Loosen the lock nut (Figure 2, #2), and turn the adjustment nut (Figure 2, #3) one-half turn. To determine which way to turn the adjustment nut, examine the self-test printout. The first line should be black. If the bottom half of the letters are missing in the first (black) line, turn the adjustment nut clockwise. If the first line is printed with the top half of the letters missing (or half blue), turn the adjustment nut counterclockwise. 3. Tighten the lock nut. Run the self-test and examine the printout. Repeat step 2 if the self-test is overlapping. This self-test may need to be repeated several times. 4. When the colors are printed correctly with no overlapping, the adjustment is complete. ImageWriter II rev. May 89 Adjustments / 4.7 o FIRING HAMMER The firing hammer adjustment should only be done when the carrier belt, carrier shaft, carrier motor, or PC board is replaced. 1. Connect the printer to a computer. 2. Power on the printer and the computer. 3. Print a few lines of the capital letter "H." Check the printed letters for any misalignment. See Figure 3 for an example of alignment. ALIGNED HHHHH HHHHH MISALIGNED HHHHH HHHHH FIGURE 3 4. If the letters are misaligned , remove the carrier cover and change the settings of DIP switches 2-5 and 2-6. Change only one switch at a time. 5. Perform step 3 again. Repeat the procedure until the lines of the capital letter "H" are aligned. 4.8 / Adjustments rev. Sep 88 ImageWriter II o IMPRESSION LEVER The impression lever is located under the carrier cover, to the extreme right (see Section 3, Take-Apart, for more information). This lever (Figure 4, #1) moves the dot head away from or closer to the platen. Adjust the position of the lever if the print quality is too light or too dark. FIGURE 4 If the print is still too light or too dark after you have moved the impression lever, adjust the lever using the adjustment screw (Figure 4, #2). ImageWriter II rev. May 89 Adjustments / 4.9 o CARRIER BELT The adjustment screw, which increases or decreases the amount of tension on the carrier belt, is located under the carrier cover, to the right (Figure 5, #1). 1 2 FIGURE 5 To adjust the carrier belt, loosen the adjustment screw and push the metal plate (Figure 5, #2) below the screw to the left until the tension on the carrier belt is as loose as you want it. 4.10 / Adjustments rev. Sep 88 ImageWriter II o PAPER GUIDE To adjust the paper guide, loosen the two screws (Figure 6, #1) and slide the paper guide either forward or backward until the gap is the correct width; then tighten the screws. ILLUSTRATION NOT AVAILABLE FIGURE 6 To verify that the paper guide is adjusted correctly, the impression lever should be all the way forward. When it is correctly positioned, the paper guide will move approximately .0005 inches when you press it toward the platen at the center. Verify this by rolling two sheets of copy paper under the platen. The paper guide should then be snug with little or no movement toward the platen. ImageWriter II rev. May 89 Adjustments / 4.11 o APPLE II PERIPHERALS DISKETTE The Apple II Peripherals Diskette will perform the following tests: • • • • • • • Character Set Alternate Sets Custom Character Graphic Images Margins/Tabs Registration (Firing Hammer) Color The two tests used for adjustment purposes are the Registration (Firing Hammer) and the Color tests. If you do not have the diskette, use the procedures in this section to make the necessary adjustments. 4.12 / Adjustments rev. Sep 88 ImageWriter II Apple T echnical Procedures ImageWriter II Section 5 – Additional Procedures • CONTENTS 5.2 Shims 5.2 Materials Required 5.3 Check the Gap 5.4 Install 5.5 Remove 5.6 Paper Sensor and Logic Board Compatibility 5.6 Identification 5.6 Logic Boards 5.8 Optical Sensor Kit Assembly 5.8 Materials Required 5.8 Disassembly 5.18 Reassembly–Part 1 Optical Assembly 5.20 Reassembly–Part 2 Logic Board Modification 5.23 Reassembly–Part 3 Remaining Printer Parts Note: If a step is underlined, detailed instructions for that step can be found in T ake-Apart. • SHIMS A shim is a small 3-sided metal piece with two holes on one side (Figure 1). The shim is used to correct the distance between the print head and the platen. FIGURE 1 IMPORTANT: Before performing this procedure, check the cam washer on the left side of the carrier shaft to be sure it is in position (Figure 2). The narrower part of the hole in the cam should be in the top position when placing the cam on the carrier shaft. Refer to Section 2, T ake-Apart, "Carrier Block Assembly and Print Head PCB," for complete instructions. FIGURE 2 Materials Required Shims (.002 inches, .004 inches, and .008 inches) Feeler gauge Phillips screwdriver Small needlenose pliers Check the Gap 1. Remove the paper cover and ribbon cartridge. 2. Gently pull the impression lever up, so that the dot head is in the closest position. Note: The recommended gap for the following readings should be approximately .013 inches plus or minus .002 inches (0.33 mm). FIGURE 3 3. Push the carrier assembly to the far right. Then, using a feeler gauge, measure the gap between the front ofthe printhead and the metal shield on the paper guide (Figure 3, #1). Record the measurement. 4. Push the carrier assembly to the far left. Then use the feeler gauge to measure the gap between the front of the printhead and the metal shield on the paper guide. Record the measurement. 5. Subtract the right-side gap (measured in step 3) from the left-side gap (measured in step 4). Install • If the difference is a positive number , go to "Install." • If the difference is a negative number , go to "Remove." To install a shim: 1. Select a shim whose thickness is closest to the difference calculated. a) .002 inches (0.05 mm) b) .004 inches (0.1 mm) c) .008 inches (0.2 mm) FIGURE 4 2. Push the carrier shaft toward the rear of the machine. Using needlenose pliers, install the shim on the left side of the carrier bar by inserting the two protruding tabs into the holes on the shim (Figure 4, #1). Slide the shim into position. Release the carrier shaft. 3. Verify that the gap is now correct. 4. Replace the ribbon cartridge and the paper cover . 5. Perform the self-test. Remove To remove a shim: 1. Look at the left side of the carrier shaft. (Figure 4, #1). • If there is a shim installed, remove it with needlenose pliers. • If there is no shim installed, be sure the cam washer on the left side is positioned correctly . 2. Verify that the gap is now correct. 3. Replace the ribbon cartridge and the paper cover . 4. Perform the self-test. • PAPER SENSOR AND LOGIC BOARD COMP ATIBILITY In February 1987 a new logic board, paper sensor , and paper-empty guide were implemented in the ImageWriter II. The following information explains how to identify these new components and how to resolve the compatibility issues. Identification There are two ways to identify the paper sensor: 1. Look at the left side of the platen assembly . • If there is a paper-empty plate (Figure 5, #1), the mechanical paper sensor is installed. • If there is no paper-empty plate, the optical sensor is installed. FIGURE 5 2. Examine the logic board. • Logic Boards If it is an old version, it is a mechanical paper sensor If it is a new logic board, check the selector switch setting and the connector (CN9 or CN1 1) as explained below. There are two versions of the main CPU PCB. The type of paper sensor in the machine reflects which version may be installed. . The new logic board supports both paper sensors and has: • A selector switch that allows this board to be used with both the mechanical and the optical paper sensor (Figure 6, #1). If a mechanical paper sensor is installed, the jumper should be on pins 1 and 2. If an optical paper sensor is installed, the jumper should be on pins 2 and 3. An extra connector , CN11, that is used for the optical paper sensor (Figure 6, #2). Connector CN9 is used for the mechanical paper sensor (Figure 6, #3). • A new ROM version that supports both paper sensors. FIGURE 6 The old logic board only supports the mechanical paper sensor unless it is modified. See the Optical Sensor Kit Assembly procedure, which follows. • OPTICAL SENSOR KIT ASSEMBL Y The optical sensor works with either the new CPU PCB or the old one. For the optical sensor to work with the old logic board, you must modify the logic board by adding the daughter board from the optical sensor kit. WARNING: his installation involves soldering a jumper wire onto a four-layer board. If you are not an experienced solder technician, do not attempt this procedure. Procedures for steps that are underlined can be found in Section 2, T ake-Apart. Materials Required ImageWriter II printer ESD-safe workstation #2 Phillips screwdriver #1 Phillips screwdriver #2 flathead screwdriver Double-ended scribe 1/16-inch or 2-mm pin punch Soldering iron Disassembly 1. Before beginning: a) Set up an ESD–Safe workstation and use ESD safety measures throughout the following procedure. (Refer to You Oughta Know T echnical Procedures. b) Verify printer functions by running self-test and repair any fault conditions before continuing. 2. Remove the power cord from the printer . 3. Remove the paper, the ribbon, and the tractor covers. 4. Remove the ribbon cartridge and the print head. FIGURE 7 5. Remove the platen knob (Figure 8, #1) and the paper release lever (Figure 8, #2) FIGURE 8 6. Push the carriage assembly all the way to the left side of the printer . 7. Loosen the two screws (Figure 9, #1) that secure the front cover , and remove the cover . 8. Be sure to detach the control panel cable from its connector (Figure 9, #2) on the right side of the main logic board. FIGURE 9 9. Remove the two screws (Figure 10, #1) that hold the paper guide in place, and remove the paper guide. FIGURE 10 10. Turn the printer up so that it rests on its front side and the screws holding the right and left support legs face you. Remove the two screws and the support legs by pulling the legs toward you and then out. Slide the AC socket out of the right leg and the pin socket from the left leg. Bring the printer back down to its operating position. 11. Release the connectors at locations CN3 and CN9 (Figure 1 1, #1 and #2) from the left side of the main logic board. Release the gray ribbon connector (Figure 1 1, #3). FIGURE 1 1 12. Remove the old mechanical paper–sensor ground screw (Figure 12, #1) from the left platen bushing plate and discard the screw . FIGURE 12 13. Remove the two screws (Figure 13, #1) that secure the upper mechanical assembly frame to the printer case. FIGURE 13 14. Remove the sheetfeeder option plug screws and bracket (Figure 13, #2) at the back of the printer . Gently push this connector to the rear of the printer off its mount. This step is important when separating the mechanical assembly from the printer case. IMPORTANT: Failure to release the sheet feeder option plug from its mount will prevent the separation of the mechanical assembly and the printer case. 15. Remove the two shock mount screws (Figure 13, #3) located in the bottom of the printer below the carriage. After removing the screws, move the carriage assembly all the way to the right. 16. Locate the three plastic locking tabs (Figure 14, #1) on the inside of the printer case above the mechanical assembly and below the tractor assembly . Carefully push back on the rear of the printer case, releasing the tabs that help secure the mechanical assembly to the printer case. As you push back on these tabs, gently lift the mechanical assembly by pulling up on the tractor assembly. Make certain the sheetfeeder option plug is pushed off its mount. FIGURE 14 17. Pull off the black plastic friction/tractor adjustment piece (Figure 14, #2) from the right side of the platen and place it between the frame and the printer case just above the transformer (Figure 14, #3). This piecewill act as a wedge and will support the mechanical assembly at the height necessary to perform the remaining steps of this procedure. The long leg that fits down into the paper friction gears will rest on the back side of the plastic case. (This step shortens the amount of time required to take the printer apart and allows you access to all the parts you need to install the optical sensor kit.) 18. Remove the screws holding the left and right platen bushing plates (the silver plates at each end of the platen—see Figure 15, #2 and #3) and remove the bushing plates. (Y ou removed the grounding screw (Figure 15, #4) in a preceding step. 19. Using the needlenose pliers, remove the paper bail roller arm retention springs (Figure 15, #1) and lift the paper bail all the way up and back. 20. Remove the platen and place it on a smooth flat surface. FIGURE 15 FIGURE 16 21. Remove the bushing and gear (Figure 16, #1) from the left side of the platen. Using a 1/16-inch or 2-mm pin punch, carefully tap the split–sleeve pin (Figure 16, #2) all the way through the platen shaft and pull it out. (This pin will be reused, so do not damage it.) CAUTION: To avoid damage to the platen end shaft, do not apply excessive force while removing the pin. 22. Remove the old mechanical paper–empty sensor frame (Figure 16, #3). 23. Replace the split sleeve pin in the platen shaft (Figure 16, #2) and reinstall the gear and bushing (Figure 16, #1). 24. Remove the three screws (Figure 17, #1) that hold the paper guide in place. FIGURE 17 25. Push the carrier to the left; then gently unhook each of the three tabs (Figure 17, #2) with a small flatbladescrewdriver . Push the carrier to the right; then gentlyunhook each of the remaining two tabs (Figure 17, #3) with a small flatblade screwdriver . 26. Lift off and remove the two pinch rollers (Figure 18, #1) and metal plates (Figure 18, #2). FIGURE 18 Reassembly – Part 1 Optical Assembly 1. Take the new paper guide assembly and optical sensor from the Optical Sensor Kit and hold it as you would if you were placing it in the printer . On the left side of the paper guide assembly there will be an opening for the optical sensor . 2. Turn the paper guide upside down so that the three screw holes are closest to you. Insert the optical sensor (Figure 19, #1) into the opening so that the wires come toward you. CAUTION: The sensor wires must be routed correctly; otherwise, they could catch underneath the paper guide assembly on the pinch roller . FIGURE 19 3. Hold the wires against the underside of the paper guide and route all of the wires through Slot A (Figure 19, #2) while continuing to press the wires down against the bottom of the paper guide. Direct any two of the wires through Slot B (Figure 19, #3) and the third wire through Slot C (Figure 19, #4). 4. Turn the paper guide assembly over . 5. Replace the pinch rollers (Figure 20, #2) and metal plates (Figure 20, #1) in the openings on the new paper guide. Make sure that the rollers sit flat in the opening. FIGURE 20 6. Pass the three wires beneath the carriage at the opening on the left of the carriage, and then thread them through the rear carriage assembly toward the side of the printer . Route the optical sensor wires along the line feed motor and down the left side of the printer , making sure the wires are seated as far as possible into the groove along the side of the printer case. Y ou can use the silver ground wire to help secure these wires. Make sure that the wires do not end up under the carriage assembly . Bring the connector from these wires to the front of the printer so that it can be plugged into the logic board. 7. The next step is to reseat the paper guide, but before you do that, make sure the left tractor guide is pushed all the way to the left side. Then snap the paper guide into place. 8. Replace the three screws that hold the paper guide assembly in place. Reassembly – Part 2 Logic Board Modification Before you connect the sensor to the logic board, you must determine which logic board (old or new) you have. To do this, look at the left side of the logic board and see if you have three connectors CN3, CN9, and CN1 1. If you do, then you have the new logic board and you can use the procedure below . If you do not have the three connectors, then you have the old logic board and you should skip to the procedure titled "Old Logic Board." New Logic Board If you have a new logic board (see Figure 21), pass the optical sensor wires through the groove at the lower left of the carriage and mount their 3-pin plug into the connector at location CN1 1 (Figure 21, #1) on the main logic board. Connector CN9 (Figure 21, #2) will remain unused. Be sure the jumper switch (Figure 21, #3) at the top middle of the board is on pins 2 and 3. When this is done, skip the "Old Logic Board" procedure and proceed to the reassembly of the printer . FIGURE 21 Old Logic Board To modify an old logic board (one that does not have the 3pin CN11 connector on its left side): 1. Remove the tension spring from above the upper right corner of the logic board and unscrew the six screws holding the board in place. Remove the board. 2. Find the one–inch jumper wire packaged with the daughter board installation bracket in the Optical Sensor Assembly Kit. You must solder this wire to the underside of the main logic board between pin 4 of connector CN3 (Figure 22, #1) and the positive terminal of capacitor C1 (Figure 22, #2). FIGURE 22 The cutaway view of connector CN3 (see Figure 23) displays what could possibly happen to pin number 4 when heat is applied while soldering the jumper wire to the main CPU board. If pin #4 is damaged, straighten the pin before inserting the connector into the socket; otherwise the single wire that is later installed into connector CN3 could be dislodged. FIGURE 23 3. Before attaching the daughter board and bracket from the kit (Figure 24, #1), plug the yellow wire (Figure 24, #2) from the daughter board into the open slot at position 4 of female connector CN3 (Figure 24, #3). Be sure the connector from this wire enters the slot with its two tiny metal flanges facing away from the board. FIGURE 24 4. Install the 2-pin connector (Figure 24, #4) from the daughter board into the main logic board at location CN9 (Figure 24, #5). 5. Screw the bracket onto the main logic board, being careful not to bend or twist the capacitor at C16 on the main logic board. 6. Match the screw holes (Figure 24, #6) on the daughter board with the holes on the installation bracket, and mount the board onto the bracket. 7. Replace the main logic board, its connectors, and the tension spring. Be sure to screw in the ground lead at the lower left corner of the board. 8. Pass the optical sensor wires through the groove at the lower left of the carriage and mount the three-pin connector from the sensor into connector CN1 on the daughter board. Reassembly – Part 3 Remaining Printer Parts 1. Replace the platen. Be sure to remount the gears and bushings properly , and remember that the left side of the platen contains the split sleeve pin. 2. Gently push the paper guide against the platen and tighten the two screws. 3. Bring the paper bail assembly back down over the platen and reinstall the springs (Figure 25, #1). FIGURE 25 4. Replace the left and right platen bushing plates. The left bushing requires two screws (Figure 25, #3) and needs to be held tightly in place against the metal frame while seating the small tab on the very end of the paper bail onto the small groove in the bushing. Also replace the ground wire (Figure 25, #4). The right bushing (Figure 25, #2) is somewhat similar but needs only one screw . On the bushing itself is a notch that must sit in a cut-out in the frame. Once these bushings are installed, the tabs on each end of the paper bail, when it is lifted up, should rest on the grooves in the bushings. 5. Remove the black plastic friction adjustment piece (Figure 26, #2) that has been supporting the frame at the right rear of the printer (Figure 26, #3) and put it back on the platen shaft, making sure that the teeth engage the gear properly . Also make sure that the sheet feeder sensor plug is exposed and its wires are securely underneath the frame and not being crushed. FIGURE 26 6. Reseat the frame in the printer by gently pushing back on the rear of the printer case and lowering the metal frame down under the three tabs of the case (Figure 26, #1). The frame is seated properly when the two white plastic plus-sign-(+)-shaped flanges, next to the shock mount screws (Figure 27, #3) on the bottom are fully exposed and no part of the frame is resting on them. FIGURE 27 7. Replace the two black shock mount screws at the bottom of the frame (Figure 27, #3). (The shorter screw mounts on the right side. 8. Replace the sheet feeder sensor plug and its connector plate (Figure 27, #2). 9. Replace the two screws (Figure 27, #1) located above the tractor assembly that secure the upper mechanical assembly frame to the printer case. 10. Tip the printer so that it rests on the front part of the case. Reinstall the legs, making sure that the tabs of the power plug are in the grooves on the right leg and that the pin connector is lodged properly on the left. Verify that no wires are exposed. Screw the legs on. 11. Reinstall the paper lever (Figure 28, #2) and knob (Figure 28, #1) on the right leg. FIGURE 28 12. Carefully reinstall the print head (Figure 29, #1). V erify that the print head is entering its slot smoothly and that none of the metal fingers in the slot are being bent. FIGURE 29 13. Slide the carriage assembly all the way to the left. Plug the control panel cable from the top cover into its connector on the logic board, and secure the cover . 14. Replace the paper and tractor covers. 15. Power on the printer and test it thoroughly . Apple Technical Procedures ImageWriter II Section 6 – SheetFeeder o CONTENTS 6.2 6.2 6.3 6.3 6.4 Introduction Things to Remember Testing the SheetFeeder Troubleshooting the SheetFeeder Materials Required Take-Apart 6.5 Housing and Paper Tray 6.9 Frame Assembly 6.11 PCB Assembly and Housing Assembly 6.13 Paper Tray Assembly Note: If a step is underlined, detailed instructions for that step can be found in the Take-Apart section. ImageWriter II rev. Aug 87 SheetFeeder / 6. 1 o INTRODUCTION The SheetFeeder allows you to use letterhead or other single-sheet paper in an ImageWriter II. For detailed instructions on installation, use, and care, see the ImageWriter II SheetFeeder Installation Manual. For more information about a specific part, refer to the SheetFeeder Illustrated Parts at the end of this tab. Things to Remember 1. Make sure that the SheetFeeder is seated properly and that its edges align properly with ImageWriter II. 2. Put the paper release lever in the friction-feed position. 3. Make sure that the paper is pressed against the feeder rollers. If it is not, the paper will not feed properly. 6.2 / SheetFeeder rev. Aug 87 ImageWriter II o TROUBLESHOOTING THE SHEETFEEDER Symptom The only problem the SheetFeeder can have is partial or no paper feeding. When it has this problem, the error light will be lit on the ImageWriter II. Procedure To correct the paper-feeding problem, perform the steps below in the order given. Test the SheetFeeder after each step, and do all testing with a known-good ImageWriter II. 1. Using a cotton swab dipped in alcohol, clean the black-rubber feed rollers mounted on the two roller shafts on the SheetFeeder. 2. Replace the PCB assembly in the SheetFeeder. 3. Replace the frame assembly in the SheetFeeder. Testing To test the SheetFeeder: 1. Turn on the ImageWriter II. Make sure the select light is off. 2. Press the form-feed button. A single sheet of paper will load under the print mechanism. The select light should now be on. 3. Power off the printer. 4. Run the ImageWriter II self-test (see Section 1, Basics). ImageWriter II rev. Aug 87 SheetFeeder / 6. 3 o TAKE-APART Materials Required Medium Phillips screwdriver Small Phillips screwdriver Small flathead screwdriver Long, thin needlenose pliers Set of jeweler's screwdrivers Housing and Paper Tray To separate the housing and the paper tray: 1. Remove the two plasticized wire paper-support rods (one from the SheetFeeder and one from the paper tray) by pulling the rods straight out of their holes. (For the location of the rods, refer to the SheetFeeder Illustrated Parts List.) Keep the customer's rods to put on the replacement housing and/or paper tray. 2. Unplug the connector (Figure 1, #1). 3. Remove the two screws (Figure 1, #2) that hold the connector plate and mounting springs. 4. Remove the two screws (Figure 1, #3) from the metal clamps that hold the rear housing. Remove the rear housing. 5. Remove the paper guide springs (Figure 1, #4). 6. Remove the paper guide (Figure 1, #5). 7. Remove the two pivot pins. One is on the left and one is on the right side of the SheetFeeder (Figure 1, #6, shows the left side). 8. Use a small flathead screwdriver to gently pry the two pivot shafts out. One is on the left and one is on the right side of the SheetFeeder (Figure 1, #6, shows the left side). 9. Lift the plastic paper tray hinge (Figure 1, #6) away from both sides. Do not attempt to separate the housing from the paper tray until after the next step. 10. Lay the SheetFeeder right-side down. Locate and remove the spring (Figure 1, #7) on the left side of the SheetFeeder. 11. Slide up the paper tray detent plate (Figure 1, #8) to free it from the frame. Gently pry the plate loose. 12. Separate the housing and the paper tray assembly. 6.4 / SheetFeeder rev. Mar 88 ImageWriter II To connect the housing and paper tray: 1. Position the paper tray on the housing. Put the paper tray detent plate (Figure 1, #8) into the circular opening in the frame. Slide the plate down into position. 2. Replace the spring (Figure 1, #7) on the left side of the SheetFeeder. 2 5 3 1 4 6 7 MAIN FRAME PIVOT SHAFT PIVOT PIN PAPER TRAY HINGE FREE 8 8 7 FIGURE 1 ImageWriter II rev. Aug 87 SheetFeeder / 6. 5 3. Line up the plastic hinges on both sides. Slide them into position. (Figure 2, #1 shows the left side.) 4. Use a pair of long, thin needlenose pliers to replace the pivot shaft (Figure 2, #1) on the left side. Slide the pivot pin onto the shaft (Figure 2, #1). Repeat this step for the right side. 5. Replace the paper guide (Figure 2, #2). 6. Replace the paper guide springs (Figure 2, #3). 7. Position the rear housing and the metal clamps (Figure 2, #4), and replace the two screws. Be sure the connector cable is in position. 8. Position the connector plate with the two springs underneath, and replace the two screws (Figure 2, #5). 9. Plug in the connector (Figure 2, #6). 10. Replace the customer's two plasticized wire paper support rods by sliding them into their holes on the SheetFeeder housing and on the paper tray assembly. (For correct orientation of the rods, refer to the SheetFeeder Illustrated Parts List.) 5 2 4 6 3 1 MAIN FRAME PIVOT SHAFT PIVOT PIN PAPER TRAY HINGE FIGURE 2 6.6 / SheetFeeder rev. Mar 88 ImageWriter II Frame Assembly To remove the frame assembly: 1. Separate the housing assembly and the paper tray assembly. 2. Remove the two screws (Figure 3, #1) that hold the frame assembly together. 3. Remove the grounding screw (Figure 3, #2) attached to the frame assembly. 4. Remove the lever lock (Figure 3, #3) attached to the spring. 5. Remove the connector (Figure 3, #4) that runs from the PCB to the stepper motor. 3 4 2 5 1 FIGURE 3 ImageWriter II rev. Aug 87 SheetFeeder / 6. 7 6. Remove the paper guide (Figure 4, #5), which is snapped into place. 7. Lift the entire metal frame assembly off of the plastic housing (see shaded area in Figure 4, #5). 3 4 2 5 1 ROLLER SHAFT WITH RUBBER ROLLERS PAPER GUIDE FIGURE 4 6.8 / SheetFeeder rev. Aug 87 ImageWriter II To replace the frame assembly: 1. Position the metal frame assembly on the plastic housing. Line up the screw holes, and be sure the paper release button is inserted in the back of the plastic housing. Replace the two screws (Figure 4, #1). 2. Position the paper guide (Figure 4, #5) and snap it into position. 3. Plug in the connector (Figure 4, #4). 4. Replace the lever lock and attach the armed end to the spring (Figure 4, #3). 5. Replace the grounding strap and screw #2). (Figure 4, 6. Reconnect the housing assembly and paper tray assembly. ImageWriter II rev. Aug 87 SheetFeeder / 6. 9 PCB Assembly and Housing Assembly To remove the PCB assembly and housing assembly: 1. Separate the paper tray assembly and the housing assembly, and remove the frame assembly . 2. Remove the metal spring plate, which holds the sheet adjuster in place, by squeezing the three tabs (Figure 5, #1) together with a pair of needlenose pliers. 3. Disconnect the spring (Figure 5, #2) that holds the paper stopper in place. 4. Remove the e-ring (Figure 5, #3) from the pointed end of the spring plate shaft. 3 1 2 FIGURE 5 5. Set the housing assembly on its side, squeeze the three tabs again (Figure 5, #1), and push them through the openings in the housing. Turn the housing over and remove the plastic spring plate with the attached pieces (Figure 6). SPRING PLATE PAPER STOPPER SHEET ADJUSTER FIGURE 6 6.10 / SheetFeeder rev. Aug 87 ImageWriter II 6. Note the position of the PCB assembly. Then remove it by gently prying back the two retaining tabs (Figure 7, #1). 1 FIGURE 7 To replace the PCB and housing assemblies: 1. Position the PCB assembly and snap it under the two retaining tabs (Figure 7, #1). 2. Position the plastic spring plate and the attached pieces so that the tabs line up (Figure 5, #1). Snap the plate into position and hold it there. 3. Insert the pointed end of the spring plate shaft through the housing, and attach the e-ring (Figure 5, #3). 4. Position the metal spring plate and snap it into place over the tabs (Figure 5, #1). 5. Connect the spring (Figure 5, #2) that holds the paper stopper in place. 6. Replace the frame assembly and connect the paper tray assembly and the housing assembly. ImageWriter II rev. Aug 87 SheetFeeder / 6. 11 Paper Tray Assembly The purpose of this procedure is to remove the customer's paper tray assembly and then to remove from it the parts that are not included in the exchange assembly. IMPORTANT : Do not discard the parts you remove from the paper tray assembly. They will be needed for the paper tray assembly exchange module. NOISE PLATE SPRING PAPER TRAY DETENT SHAFT PAPER TRAY DETENT PLATE 2 1 3 ROLLER GEAR TAB 1 4 TAB 1 ROLLER SPRING TAB 2 IDLER GEAR ROLLER SPRING TAB 2 LEFT ROLLER HOLDER RIGHT ROLLER HOLDER FIGURE 8 6.12 / SheetFeeder rev. Aug 87 ImageWriter II To remove the paper tray assembly: 1. Separate the paper tray assembly from the housing assembly. 2. Position the paper tray as shown in Figure 8, the main drawing. Pry off the paper tray locks (Figure 8, #1). Using a small flathead screwdriver, pry off the upper paper tray (the hinges are part of the upper paper tray). The tray snaps onto the tabs. Some of the tabs may break off as you remove it. 3. Locate the paper tray detent plate on the left side (Figure 8, #2). Remove the paper tray detent shaft. Lift the paper tray detent plate off the lower paper tray. Set the parts aside for later use. 4. Gently pull the idler gear, on the left side of the tray, toward you to release tab 1. At the same time, insert a jeweler's screwdriver under tab 2, and slide the left roller holder free of the tabs (Figure 8, #3). 5. Using a jeweler's screwdriver, gently pry loose tab 1 on the right side of the tray. Pry loose tab 2 and lift the right roller holder free (Figure 8, #4). 6. Remove the entire assembly from the lower paper tray. 7. Remove the roller springs (Figure 8, #3 and #4) from both sides of the assembly. The springs hold the roller shaft and the eject shaft in place. 8. For later use, set aside the left and right roller holders, and the one roller shaft still connected to the small gear. ImageWriter II rev. Aug 87 SheetFeeder / 6. 13 To replace the paper tray assembly: 1. Locate the left and right roller holder and roller shaft. Position the roller shaft with the eject roller so that the black rubber feeder on the customer's roller shaft lines up with the middle section of the eject roller (Figure 9, #1). Place one side in the left roller holder and connect the spring (Figure 9, #2). Repeat this on the right roller holder. ROLLER SHAFT ROLLER SHAFT WITH EJECT SHAFT NOISE PLATE SPRING PAPER TRAY DETENT SHAFT PAPER TRAY DETENT PLATE 1 4 3 2 6 5 LEFT ROLLER HOLDER TAB 1 TAB 1 ROLLER SPRING TAB 2 ROLLER SPRING TAB 2 RIGHT ROLLER HOLDER FIGURE 9 6.14 / SheetFeeder rev. Aug 87 ImageWriter II 2. Position the lower paper tray so it is facing you. Place the roller assembly into position (the white eject shaft should be on the bottom). Snap the roller assembly into position by lining up the four tabs (two on each side) and snap it into position (Figure 9, #2 and #3). 3. Locate the paper tray detent plate. Position the plate on the left side (Figure 9, #4). Insert the paper tray detent shaft. 4. Position the upper paper tray on the lower paper tray. Be sure the two tabs located at the front slide into the lower half (Figure 9, #5). Snap the tray into position. 5. Reconnect the paper tray locks (Figure 9, #6). 6. Connect the paper tray assembly to the housing assembly. ImageWriter II rev. Aug 87 SheetFeeder / 6. 15