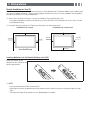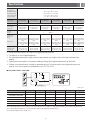
1
LED TV
quick start guide
1. Accessories and Cables
Accessories
The following accessories are included with your TV:
• Remote Control (AA59-00600A) & Batteries (AAA x 2)
• Warranty Card / Safety Guide
• Owner’s Guide
• Quick Start Guide
• Wire-Holder Stand (BN61-05491A)
• Power Cord
Input Cables (Sold Separately)
You will need one or more of theses cables to connect your TV to your antenna or cable outlet and your peripheral
devices (Blu-ray players, DVD players, etc.)
• Audio
• Component
• HDMI
• Composite (AV)
• HDMI-DVI
• Coaxial (RF)
✎ Make sure you have the correct cable before plugging it in. Illustrations of common plugs and jacks are below.
Cable Plugs
Ports/Jacks
HDMI
USB
Optical
Do not plug a cable in upside down.
Make sure the orientation of the plug is correct before plugging it in.
BN68-04502A-00
2. Getting Started
Provide Ventilation for Your TV
When you install your TV, maintain a distance of at least 4 inches between the TV and other objects (walls, cabinet sides,
etc.) to ensure proper ventilation. Failing to maintain proper ventilation may result in a fire or a problem with the product
caused by an increase in its internal temperature.
✎ When using a stand or wall-mount, use parts provided by Samsung Electronics only.
x Using parts provided by another manufacturer may cause difficulties with the product or result in injury caused
by the product falling.
✎ Be careful when you contact the TV because some parts can be somewhat hot.
Installation with a stand.
Installation with a wall-mount.
4inches
4inches
4inches
4inches
4inches
4inches
4inches
Installing Batteries into the Remote (Battery size: AAA)
Match the polarity of the
batteries to the symbols in the
batter compartment
✎ NOTE
x Use the remote control within 23 feet of the TV.
x Bright light may affect the performance of the remote control. Avoid use when near fluorescent lights or neon
signs.
x The color and shape of the remote may vary depending on the model.
3. Making Connections
Connect your TV to an antenna or cable connection, and then connect your peripherals. When done, connect the
power cord to the TV, and then connect the power cord to an AC wall outlet. If you are connecting your TV to a cable
or satellite box using HDMI, Component, or Composite connections, you do not need to connect the ANT IN jack to an
antenna or a cable connection.
y For the best picture and audio quality, connect digital devices
using an HDMI cable.
y PC/DVI AUDIO IN input is not supported.
y For an HDMI to DVI cable connection, you must use the HDMI
IN 1(DVI) jack.
y If you connect an external device to the TV that uses an older
version of HDMI, the video and audio may not work. If this
occurs, ask the manufacturer of the device about the HDMI
version and, if it is out of date, request an upgrade.
y For PCs with DVI video out jacks, use an HDMI to DVI cable to
connect the DVI out on the PC to the HDMI IN 1 jack on the TV.
Use the PC's speakers for audio.
y Be sure to purchase a certified HDMI cable. Otherwise, the
picture may not display or a connection error may occur.
y EX-LINK: Connector for service only.
AV Device (1)
Using an HDMI Cable
(up to 1080p)
y The side panel may differ depending on the model.
+'0,287
Blu-ray player / DVD /
cable box / sat box
TV Side Panel
Power Input
'9,287
TV Rear Panel
+'0,287
Audio Device (1)
Using an Audio (Analog) Cable
5
$8',2,1
:
PC
5$8',2/
DVD / Home Theater
PC
Using an HDMI Cable or an
HDMI to DVI Cable. Use the
PC speakers for audio.
5
:
5
<
5
:
<
AV Device (2)
Using Audio/Video
Cables
$8',2287
9,'(2287
5$8',2/
5
5
:
:
5
5
%
or
*
5
%
AV Device (3)
Using a Component
Cable (up to 1080p)
$8',2287
5$8',2/
&20321(17287
35
3%
$17287
Cable
*
5
Media Play
Using a USB Drive
VHF/UHF Antenna
Audio Device (2)
Using an Optical (Digital) Cable
237,&$/
<
Digital Audio System
VCR
Blu-ray player
4. The Remote Control
Learn where the function buttons are on your remote. Especially note POWER, SOURCE, VOL, CH, MENU, TOOLS,
ENTER, CH LIST, RETURN and EXIT.
Displays and selects the available video
sources.
Turns the remote control light on or
off. When on, the buttons become
illuminated for a moment when
pressed. (Using the remote control with
this button set to On will reduce the
battery usage time.)
Turns the TV on and off.
Press to access channels directly.
Press to select additional digital
channels being broadcasted by the
same station. For example, to select
channel ‘54-3’, press ‘54’, then press
‘-’ and ‘3’.
Returns to the previous channel.
Cuts off the sound temporarily.
Changes channels.
Adjusts the volume.
Displays the channel list on the
screen.
Displays Media Play.
Quickly select frequently used
functions.
Displays the main on-screen menu.
MEDIA.P
SLEEP
Automatically shuts off the TV at a
preset time.
Displays information on the TV screen.
ENTER and Direction buttons.
Select the on-screen menu items and
change the values seen on the menu.
Returns to the previous menu.
P.SIZE: Lets you choose the picture
size.
MTS: Press to choose stereo, mono
or Separate Audio Program (SAP
broadcast).
Exit the menu.
Use these buttons according to the
directions on screen.
Use these buttons in a specific feature.
CC: Controls the caption decoder.
✎ This remote control has Braille points on the Power, Channel, and Volume buttons and can be used by visually
impaired persons.
5. Configuring the Basic Settings with Plug & Play
When you turn the TV on for the first time, a sequence of prompts and screens will assist you in configuring basic
settings. Before you begin, make sure you have connected the TV to an antenna or a cable connection and that the TV
is plugged in. See "Connections" for instructions. To begin Plug and Play, press the POWER button on your remote.
✎ Plug & Play is available only when the Input source is set to TV. See "Changing the Input Source".
1. Start Screen ĺSelect a Language
After you press the POWER button, the Start Screen appears. Press the
ENTER button on your remote to continue.
Plug & Play
Select Language of the OSD.
English
Language
Español
Français
=
=
=
On the Language screen, press the ENTER button. Use the
Ÿ/źbuttons to select a language, and then press ENTER again.
& Move
=Enter
È
Plug & Play
Select ‘Home Use’ when installing this TV in your home.
2. Select the Home Use Mode
On the Home Use screen, press ENTER to select the Home Use
mode.
✎ Store Demo mode is for retail environments only.
Store Demo
=
=
Home Use
=
Move
=Enter
È
3. Select the Antenna Source
On the Antenna Source screen, select the source of your TV signal.
Plug & Play
Select the Antenna source to memorize.
Air
Air
Start
Cable
Start
Auto
Start
=
=
& Move
=Enter
3=Skip
If your TV is connected to an antenna Choose Air, and then press
ENTER. The TV will automatically start memorizing channels. When it
is done, go to "Set the Clock Mode".
Cable
If your TV is connected to a cable outlet, choose Cable, and then press
ENTER. Go to "Select the Cable Type".
Auto
✎ If you have connected a cable or
If you choose Auto, and then press ENTER, the TV will automatically
satellite box to an HDMI, Component,
select the correct Antenna source. Go to "Select the Cable Type"
Composite, or Antenna input, and you
will use the box to select channels, press
the Menu (3) button on your remote to
skip this step.
È
Auto Program
Select the cable system.
Analog
STD
HRC
IRC
Digital
STD
HRC
IRC
START
=
=
& Move
4. Select the Cable Type
On the Cable Type screen, use the ŻŹŸź buttons to select the type
of digital and analog cable systems you have: STD, HRC, or IRC. Most
systems are STD (Standard). When done, select Start, and then press
ENTER. The TV will start memorizing channels.
✎ Channel memorization can take up to 45 minutes, depending on
your cable system.
✎ Memorized channels are added to the Added Channel list. These are
=Enter
$=Return
the channels you will see when you use the Channel buttons on your
remote.
Æ
5. Set the Clock Mode
Press ENTER and select Auto or Manual, and then press ENTER
again.
Plug & Play
Set the Clock Mode.
If you selected Auto:
Clock Mode
=
: Auto
=
=
=Enter
The TV will automatically download the correct time from a digital channel.
3 Skip
The DST (Daylight Savings Time) screen will appear. Press ENTER.
Select On if you want to turn the DST adjustment on and off manually.
Select Off to turn off the DST adjustment. Select Auto if you want the TV
to adjust to DST automatically. Press ENTER when done.
The Time Zone screen will appear. Use theŸź button to select your
Time Zone, and then press ENTER.
If you selected Manual:
The Clock Set screen appears. Use the Ÿź buttons to change the
values in each field or use the number buttons to enter the values directly.
Use the ŻŹ buttons to move from field to field. When done with all the
fields, press ENTER.
È
6. View the HD Connection Guide
See the best way to connect a cable or satellite box for the highest quality HD pictures. Press the ENTER button to
close the guide.
È
7. Enjoy your TV.
Press the ENTER button.
✎ To set or unset Store Demo mode outside of Plug & Play, press and release the Controller when the power is
on. The Function menu screen appears. Push the Controller to the left (to MENU (3)) and hold for more than 5
seconds. The Store Demo mode is set. To cancel Store Demo, bring up the Function menu using the Controller,
)) and hold for more than 5 seconds.
push the Controller to the right (to Source(
6. Changing the Input Source
Source List
When you are watching TV and you want to watch a movie on your DVD player or Blu-ray player or switch to your cable
box or STB satellite receiver, you need to change the Source.
1. Press the SOURCE button on your remote.
2. Use the Ÿź buttons to select an external input source.
■=TV / AV / Component / HDMI1/DVI / HDMI2
✎ You can only choose external devices that are connected to the TV. In the Source List, connected inputs are
highlighted.
How to Use Edit Name
Edit Name lets you associate a device name to an input source. To access Edit Name, press the TOOLS button when
the Source List is displayed The following selections appear under Edit Name:
■=VCR / DVD / Cable STB / Satellite STB / PVR STB / AV Receiver / Game / Camcorder / PC / DVI PC / DVI / TV /
IPTV / Blu-ray / HD DVD / DMA: Select the name of the device connected to specific input jacks to make your input
source selection easier.
✎ If you connect a PC to the HDMI IN 1 (DVI) port with an HDMI cable, assign PC to HDMI 1 in Edit Name.
✎ If you connect a PC to the HDMI IN 1 (DVI) port with an HDMI to DVI cable, assign DVI PC to HDMI 1 in Edit
Name.
✎ If you connect an AV device to the HDMI IN 1 (DVI) port with an HDMI to DVI cable, assign DVI to HDMI 1 in Edit
Name.
7. Accessing and Using the Main Menu
Your TV's Main menu contains functions that let you control many of the TV's features. For example, in the Main menu
you can change the size and configuration of the picture, its brightness, its contrast and so on. There are also functions
that let you control the TV's sound, channel configuration, energy use, and a host of other features. To access the main,
on-screen menu, press the MENU (3) button on your remote.
To use the Main menu, press the Ÿźbuttons to move between the main option categories: Picture, Sound, Channel,
etc. Each time you press a Ÿźbutton, the main category name on the left side of the menu changes.
To select a menu option in one of the categories, press the Ź button or the ENTER button. Press it again or press
ENTER to see the values or choices associated with that option. Usually, you would then press ENTER to select
a value or choice. Press the RETURN button or the Ż button to return to a previous screen or selection.
8. Using the TV's Controller (Panel Key)
The TV's Controller, a small joy stick like button on the bottom right side of the TV, lets you control the TV without the
remote control.
Function menu
MEDIA.P
P
5
V
3
Return
TV Controller
Remote control sensor
Power on
Turn the TV on by pressing the Controller when the TV is in standby mode.
Adjusting the
volume
Adjust the volume by moving the Controller from side to side when the power is on.
Selecting a
channel
Select a channel by moving the Controller backwards and forwards when the power is on.
Using the
Function menu
To view and use the Function menu, press and release the Controller when the power is on. To
close the Function menu, press and release the Controller again.
Selecting
Media Play
With the Function menu visible, select MEDIA.P by moving the Controller backwards. The
Media Play main screen appears. Select a media source by moving the Controller back
and forth, and then pressing the Controller.
Selecting the
MENU (3)
With the Function menu visible, select the MENU (3) by moving the Controller to the left. The
OSD (On Screen Display) Menu appears. Select an option by moving the Controller to the right.
Move the Controller to the right or left, or backwards and forwards to make additional selections.
To change a parameter, select it, and then press the Controller.
Selecting a
Source (V)
With the Function menu visible, open the Source List (V) by pushing the Controller to the
right. The Source List screen appears. To select a source, move the Controller back and forth.
When the source you want is highlighted, press the Controller.
Power Off (#)
With the Function menu visible, select Power Off (#) by pulling the Controller forwards, and
then press the Controller.
✎ To close the Menu, Media Play List, or Source List, press the Controller for more than 1 second.
✎ When selecting the function by moving the controller to the up/down/left/right directions, be sure not to press the
controller. If you press it first, you cannot operate it to move the up/down/left/right directions.
9. Important Safety Information
Caution: Pulling, pushing, or climbing onto the TV may cause the TV to fall. In particular, ensure that your
children do not hang over or destabilize the TV. Doing so may cause the TV to tip over, resulting in serious
injuries or death. Follow all safety precautions provided on the included Safety Flyer.
10. Questions? Comments?
Contact SAMSUNG WORLDWIDE
If you have any questions or comments about your Samsung TV, please contact the SAMSUNG customer care center.
Country
CANADA
U.S.A
Samsung Electronics Canada Inc.,
Samsung Electronics America, Inc.
Customer Service
Address
85 Challenger Road
55 Standish Court Mississauga
Ridgefield Park, NJ 07660-2112
Ontario L5R 4B2 Canada
Customer Care
Center
1-800-SAMSUNG (726-7864)
Web Site
www.samsung.com
LED TV
user manual
Figures and illustrations in this User Manual are provided for reference
only and may differ from actual product appearance. Product design and
specifications may be changed without notice.
Important Warranty Information Regarding
Television Format Viewing
✎ See the warranty card for more information on warranty
terms.
Wide screen format LED Displays (16:9, the aspect ratio of the
screen width to height) are primarily designed to view wide screen
format full-motion video. The images displayed on them should
primarily be in the wide screen 16:9 ratio format, or expanded to
fill the screen if your model offers this feature and the images are
constantly moving. Displaying stationary graphics and images on
screen, such as the dark sidebars on non- expanded standard
format television video and programming, should be limited to no
more than 5% of the total television viewing per week. Additionally,
viewing other stationary images and text such as stock market
reports, video game displays, station logos, web sites or computer
graphics and patterns, should be limited as described above for
all televisions. Displaying stationary images that exceed the above
guidelines can cause uneven aging of LED Displays that leave
subtle, but permanent burned-in ghost images in the LED picture.
To avoid this, vary the programming and images, and primarily
display full screen moving images, not stationary patterns or dark
bars. On LED models that offer picture sizing features, use these
controls to view different formats as a full screen picture. Be careful
in the selection and duration of television formats you use for
viewing. Uneven LED aging as a result of format selection and use,
as well as burned-in images, are not covered by your Samsung
limited warranty.
t4".46/(&-&$530/*$4/035)".&3*$"/-*.*5&%
WARRANTY STATEMENT
Subject to the requirements, conditions, exclusions and limitations
of the original Limited Warranty supplied with Samsung Electronics
(SAMSUNG) products, and the requirements, conditions, exclusions
and limitations contained herein, SAMSUNG will additionally
provide Warranty Repair Service in the United States on SAMSUNG
products purchased in Canada, and in Canada on SAMSUNG
products purchased in the United States, for the warranty period
originally specified, and to the Original Purchaser only.
The above described warranty repairs must be performed by a
SAMSUNG Authorized Service Center. Along with this Statement,
the Original Limited Warranty Statement and a dated Bill of Sale
as Proof of Purchase must be presented to the Service Center.
Transportation to and from the Service Center is the responsibility of
the purchaser. Conditions covered are limited only to manufacturing
defects in material or workmanship, and only those encountered
in normal use of the product. Excluded, but not limited to, are
any originally specified provisions for, in-home or on-site services,
minimum or maximum repair times, exchanges or replacements,
accessories, options, upgrades, or consumables.
For the location of a SAMSUNG Authorized Service Center, please
call toll-free:
–– In the United States : 1-800-SAMSUNG (1-800-726-7864)
–– In Canada : 1-800-SAMSUNG
Still image warning
Avoid displaying still images (such as jpeg picture files) or still
image elements (such as TV channel logos, TV shows or movies
in panorama or 4:3 format, stock or news scroll bars, etc.) on the
screen. The constant display of still pictures can cause ghosting or
image burn-in (image retention) on the LED screen, which will affect
image quality. To reduce the risk of this effect, please follow the
recommendations below:
tAvoid displaying the same TV channel for long periods.
tAlways try to display any image in full screen mode. Use the TV's
Picture Options menu to select the optimal screen size.
tReduce brightness and contrast values to the minimum required
to achieve the desired picture quality. Values that exceed the
minimum may speed up the burn-in process.
tFrequently use all TV features designed to reduce image retention
and screen burn-in. Refer to proper user manual section for
details.
Contact SAMSUNG WORLDWIDE
If you have any questions or comments relating to Samsung products,
please contact the SAMSUNG customer care center.
Country
CANADA
U.S.A.
Address
Samsung Electronics
Canada Inc., Customer
Service 55 Standish Court
Mississauga, Ontario L5R
4B2 Canada
Samsung Electronics
America, Inc.
85 Challenger Road
Ridgefield Park, NJ
07660-2112
Customer Care
Center 1-800-SAMSUNG(726-7864)
Web Site
www.samsung.com
© 2012 Samsung Electronics Co., Ltd. All rights reserved.
BN68-04572A-00
-1-
The On Screen Menus
Advanced Settings
Available in Standard and Movie mode only.
Your TV has two kinds of menus, the Main menu and the various
Compared to previous models, new Samsung TVs offer a more
Tools menus. The Main menu gives you access to most or all of
precise picture with more precise controls.
the menu options available on your TV. The Tools menus display
✎
When your TV is connected to a PC, you can only make
a selected number of frequently used menu options that change
changes to Gamma and White Balance.
depending on the screen you are viewing. A Tools menu symbol
■
Color
Space (Auto / Native): Auto automatically matches the
(T) in the lower right side of the screen indicates that a Tools menu
range of colors available to create pictures to the color range of
is available.
the video source. Native provides a color range wider than the
The Main menu has seven primary categories:
color range of the video source.
■
White Balance: Adjusts the color temperature of the picture so
y Picture
y Input
that white objects look white (instead of, for example, slightly
y Sound
y Application
pink or slightly yellow) and the overall color of the picture looks
natural.
y Channel
y Support
R-Offset / G-Offset / B-Offset: Adjusts each color’s (red,
y Setup
green, blue) darkness.
R-Gain / G-Gain / B-Gain: Adjusts each color’s (red, green,
To view the Main menu, press the MENU button on your remote. To
blue) brightness.
view a Tools menu, press the TOOLS button on your remote.
Reset: Resets the White Balance to it’s default settings.
✎ The menu options that appear in the Main menu depend
■
Gamma:
Adjusts the primary color intensity.
on the Source you have selected. For example, if you have
■
Dynamic
Contrast (Off / Low / Medium / High): Adjusts the
selected the HDMI source, the Channel category will not
screen contrast.
appear. To see the Channel category, you must first select TV
■ Black Tone (Off / Dark / Darker / Darkest): Selects the black
in the Source List.
level to adjust the screen depth. Darker settings make blacks
The Menu options are presented below, arranged by Main menu
look darker.
t
) next to an option
categories. A Tools button symbol (
■
Flesh Tone: Adjusts the amount of red in skin tones.
name indicates the option is also available in one of the Tools
■
Motion Lighting (Off / On): When on, the TV automatically
menus.
adjusts the brightness of the screen in response to the
brightness of the room. In bright light, the screen brightens. In
dim light, the screen dims.
✎ Available in Standard mode only.
Picture Menu
Mode t
Select your preferred picture mode.
✎
When your TV is connected to a PC, you can only select
Entertain and Standard.
Picture Options
✎ When the TV is connected to a PC, you can only make
changes to the Color Tone, Size and HDMI Black Level.
■ Color Tone (Cool / Standard / Warm1 / Warm2): Cool makes
the picture bluer (cooler). Warm 1 and Warm 2 make the picture
redder (warmer).
✎ Warm1 and Warm2 are deactivated when the picture
mode is set to Dynamic.
■ Size: Set the size and aspect ratio of the picture on the screen.
Your cable box or satellite receiver may have its own set of
screen sizes as well. However, we highly recommend you use
Backlight / Contrast / Brightness / Sharpness /
the TVs 16:9 mode most of the time.
16:9: Sets the picture to the 16:9 wide screen format.
Color / Tint (G/R)
Zoom1: Provides moderate magnification of the picture. Sides,
■ Backlight: Adjusts the brightness of the screen by adjusting the
top, and bottom are cut off.
brightness of the individual pixels.
Zoom2: Provides larger magnification of the picture. Sides, top,
■ Contrast: Increases or decreases the contrast between dark and
and bottom are cut off.
light areas of the picture.
Wide Fit: Enlarges the aspect ratio of the picture so the picture
■ Brightness: Adjusts the brightness of the screen. Not as
fits the entire screen.
effective as Backlight.
4:3: Sets the picture to the old, 4:3 format and puts black or gray
■ Sharpness: Sharpens or dulls the edges of objects.
borders on the right and left of the picture.
■ Color: Adjusts the color saturation. The higher the Color setting,
✎
Do not watch your TV in the 4:3 format for a long time.
the more intense the color. Low settings remove color and the
Traces of borders displayed on the left, right and center of
picture becomes black, white and gray.
the screen may cause image retention (screen burn) which
■ Tint: Adjusts the amount of green and red in the picture. As you
is not covered by the warranty.
increase the amount of green, the amount of red decreases and
Screen
Fit: Displays the full image without any cut-off when
vice versa.
your
TV
is inputting HDMI (720p / 1080i / 1080p) or Component
✎ When the TV is connected to a PC, you can only make
(1080i
/
1080p)
HD signals.
changes to Backlight, Contrast, Brightness, and
✎ HD (High Definition) has a 16:9 aspect ratio and 1080i/1080p
Sharpness.
(1920x1080) or 720p (1280x720) resolution.
■ Dynamic: Brightens the screen. Suitable for a bright room.
■ Standard: Suitable for a normal.
■ Movie: Darkens the screen, making it less glary. Suitable for
watching movies in a darkened room.
■ Entertain: Sharpens the picture. Suitable for games.
✎ Only available when the TV is connected to a PC.
✎
-2-
You can adjust and store settings for each external device you
have connected to an input on the TV. Picture Sizes available
by Input Source are listed below:
Input Source
Picture Size
ATV, AV, Component (480i, 480p)
16:9, Zoom1, Zoom2,
4:3
DTV (1080i, 1080p), Component (1080i,
1080p), HDMI (720p, 1080i, 1080p)
16:9, Wide Fit, 4:3,
Screen Fit
Preferred Language
Digital channels only.
Digital-TV broadcasts can transmit many audio tracks
simultaneously (for example, simultaneous translations of a program
into foreign languages).
✎
■ Digital Noise Filter (Off / Low / Medium / High / Auto) : If the
broadcast signal received by your TV is weak, you can activate
the Digital Noise Filter feature to reduce any static and ghosting
that may appear on the screen.
✎ When the signal is weak, try all the Digital Noise Filter
options until the TV displays the best picture.
■ HDMI Black Level (Normal / Low) : For HDMI signals, select
the black level to adjust the screen depth. Low make blacks look
darker.
✎ Available only in HDMI mode (RGB signals).
■ Film Mode (Off / Auto) : Sets the TV to automatically sense and
process film signals from all sources and adjusts the picture for
optimum quality.
✎ Available in ATV, DTV (interlace), AV, COMPONENT (480i /
1080i) and HDMI (480i / 1080i).
■ Auto Motion Plus (Off / Clear / Standard / Smooth / Custom /
Demo): Enhances motion in fast moving scenes.
✎ The info screen on your TV displays the resolution and
frequency of the incoming video signal (60Hz). This
displayed frequency is not what the TV is displaying by
using the Auto Motion Plus function.
■ LED Motion Plus (Off / On): Removes drag from fast scenes
with a lot of movement to provide a clear picture.
Picture Reset
■ Picture Reset (Reset Picture Mode/Cancel): Resets the
picture settings to their factory defaults.
Sound Menu
Mode t
■ Standard: Selects the normal sound mode.
■ Music: Emphasizes music over voices.
■ Movie: Provides the best sound for movies.
■ Clear Voice: Emphasizes voices over other sounds.
■ Amplify: Increase the intensity of high-frequency sounds to allow
a better listening experience for the hearing impaired.
Equalizer
Available in Standard sound mode only.
■ Balance L/R: Adjusts the balance between the right and left
speaker.
■ 100Hz / 300Hz / 1KHz / 3KHz / 10KHz (Bandwidth
Adjustment): Adjusts the loudness of specific bandwidth
frequencies.
■ Reset: Resets the equalizer to its default settings.
SRS TruSurround HD
Available in Standard sound mode only.
SRS TruSurround HD is a patented SRS technology that solves
the problem of playing 5.1 multichannel content through two
speakers. TruSurround delivers a compelling, virtual surround
sound experience through any two-speaker playback system,
including internal television speakers. It is fully compatible with all
multichannel formats.
You can only select a language from among the ones being
broadcast.
Multi-Track Sound (MTS)
Analog channels only.
■ Mono: Select for channels that are broadcasting in mono or if
you are having difficulty receiving a stereo signal.
■ Stereo: Select for channels that are broadcasting in stereo.
■ SAP: Select to listen to the Separate Audio Program, which is
usually a foreign-language translation.
✎ Depending on the program being broadcast, you can listen to
Mono, Stereo or SAP.
Auto Volume
Because each station has its own broadcasting conditions, the
volume may fluctuate each time you change the channel. This
feature automatically adjusts the volume of a channel by lowering
the sound output when the modulation signal is high or by raising
the sound output when the modulation signal is low.
SPDIF Output
The SPDIF (Sony Philips Digital InterFace) outputs an
uncompressed digital audio signal when you connect the digital
audio jack on the back of the TV to a digital audio in jack on a
receiver or home theater.
■ Audio Format (PCM/Dolby Digital): You can select the Digital
Audio output (SPDIF) format. The available Digital Audio output
format may differ depending on the input source.
✎ By connecting the TV to a receiver or home theater with
Dolby Digital and 5.1ch speakers and selecting Dolby
Digital, you can maximize your interactive 3D sound
experience.
■ Audio Delay: Lets you correct timing mismatches between the
audio track and the video when you are watching the TV and
listening to digital audio output from the TV through an external
device such as an AV receiver. When you select Audio Delay, a
slider appears. Use the left and right arrow buttons to adjust the
slider. Press ENTERE when done (0ms ~ 250ms).
Speaker Settings
■ Speaker Select (External Speaker / TV Speaker)
If you are listening to the sound track of a broadcast or movie
through an external receiver, you may hear a sound echo caused
by the difference in decoding speed between the TV’s speakers
and the speakers attached to your audio receiver. If this occurs,
set the TV to External Speaker.
✎ When you set Speaker Select to External Speaker, the
TV’s speakers are turned off. You will hear sound through
the external speakers only. When you set Speaker Select
to TV Speaker both the TV’s speakers and the external
speakers are on. You will hear sound through both.
✎ When Speaker Select is set to External Speaker, the
VOLUME and MUTE buttons will not operate and the
sound settings will be limited.
✎ If there is no video signal, both the TV’s speakers and the
external speakers will be mute.
Sound Reset
■ Reset All: Resets all sound settings to the factory defaults.
-3-
T Managing Channels
Channel Menu
Channel List
T Memorizing Channels
See your list of Added channels, Favorite channels, or channels
you've scheduled for viewing. Add or delete Favorite channels, add
or delete channels from the Added Channels list, schedule channels
or programs for viewing. Watch a channel by selecting the channel
in the All Channels, Added Channels, or Favorite screen, pressing
the Ÿ / ź buttons, and then pressing the ENTERE button.
When you first set up your TV using Plug & Play, the TV memorized
the channels that were available over the air or through your cable
system and added them to the Channel List. The Antenna and
Auto program functions described below let you re-run the channel
memorization function without having to re-run the Plug & Play
procedure.
Added Channels
Antenna (Air / Cable)
Before your television can memorize the available channels, you
must select your TV's signal source, Air (using an antenna) or Cable.
Select Menu >Channel > Antenna > Air or Cable. After you have
selected the signal source, go on to the Auto Program function.
✎
Selecting the signal source using the Antenna function also
determines the signal source the TV is tuned to. For example,
if you receive your TV signal over the air, and you select Cable,
you will see only snow. You must select Air to see a picture.
Air
1. Push MENUm ĺ Channel ĺ Auto Program ĺ ENTERE on
your remote. The Antenna Source screen appears.
2. On the Antenna Source screen, select the source of your TV
signal.
✎
Air
If your TV is connected to an antenna choose Air, and then press
ENTERE. The TV will automatically start memorizing channels.
x Green (Zoom): Enlarges or shrinks a channel number.
x Yellow (Select): Move the cursor to a channel. Press the Yellow
x
If your TV is connected to a cable outlet, choose Cable, and then
press ENTERE. Go to Step 3.
Icons
3. On the Cable Type screen, use the ŻŹŸź buttons to select
the type of digital and analog cable systems you have: STD, HRC,
or IRC. Most systems are STD (Standard). When done, select
Start, and then press ENTERE. The TV will start memorizing
channels.
✎
button to select the channel. A c mark appears. Repeat to select
additional channels. Then, open the Tools menu and apply a
function to the channels you selected.
T (Tools): Displays the Channel List Tools menu. (The Tools
menus may differ depending on the situation.)
Display Icons Used in the Channel List Screens
Auto
If you choose Auto, and then press ENTERE, the TV will
automatically select the correct Antenna source. Go to
Step 3.
✎
8
Air
9
Air
Ɔ79
10
Air
Ɔ79
Ɔ79
' Zoom ' Select T7RROVŹ1H[W3URJUDP
Remote control buttons active on the Channel List screen.
Cable
Channel memorization can take up to 45 minutes, depending
on your cable system.
Memorized channels are added to the Added Channels
list. These are the channels you will see when you use the
Channel buttons on your remote.
This function filters out scrambled channels after Auto Program is
completed. This process may take up to 20~30 minutes.
Ɔ79
All Channels: Shows all currently available channels including
those you deleted from the Added Channels
list.
■
Added Channels: Shows all Added Channels. These are the
channels that appear when you press the CH button.
■ * Favorite: Shows all favorite channels.
■ Programmed: Shows all channels and programs currently
scheduled using Timer Viewing.
To start Auto Program, follow these steps:
Clear Scrambled Channel
■
The Auto Program function memorizes all channels that are
available over the air or through your cable system and adds them to
the Channel List.
✎
Air
Ɔ79
Channel List Screens icons are listed on the left side. Select an
icon using the Ÿź buttons to view each list.
Auto Program
✎
6
Meaning
c
A selected channel.
*
A Favorite channel.
)
A reserved program.
(
A program currently being broadcast.
T The Channel List Tools Menu t
The Channel List Tools menu contains most of the functions you
can use on the All Channel, Added Channels, and Favorite List
screens. To view, select a list screen, select a channel, and then
press the TOOLS button.
■ Add / Delete: Delete a channel from or add a channel to the
Added Channels list.
To delete channels from the Added Channels list, follow these steps:
Press the ENTERE button to stop the Clear Scrambled
Channel.
1. Select one or more channels in the Added Channels list using
the Ÿź buttons and the Yellow Select button on your remote.
This function is only available in Cable mode.
2. Press the TOOLS button on your remote. The Tools menu
appears.
3. Select Delete in the Tools menu, and then press the ENTERE
button.
-4-
✎
To add channels to the Added Channels list, follow these steps:
1. Select one or more channels in the All Channels list using the
Ÿź buttons and the Yellow Select button on your remote.
2. Press the TOOLS button on your remote. The Tools menu
appears.
3. Select Add in the Tools menu, and then press the ENTERE
button.
✎
✎
All deleted channels will be shown on the All Channels list.
You add channels back to the Added Channels list on the
All Channels list.
5. Press the ENTERE button on your remote when done.
✎
✎
A gray-colored channel indicates the channel has been
deleted from the Added Channels list.
✎ The Add menu option only appears for deleted channels.
■ Add to Favorite/Delete from Favorite: Lets you add channels
to and delete channels from your Favorites list.
To add channels to the Favorites list, follow these steps:
1. Select one or more channels in the All Channels list using the
Ÿź buttons and the Yellow Select button on your remote.
2. Press the TOOLS button on your remote. The Tools menu
appears.
3. Select Add to Favorite in the Tools menu, and then press the
ENTERE button.
To delete channels from the Favorites list, follow these steps:
1. Select one or more channels in the Favorite Channels list
using the Ÿź buttons and the Yellow Select button on your
remote.
2. Press the TOOLS button on your remote. The Tools menu
appears.
3. Select Delete from Favorite in the Tools menu, and then
press the ENTERE button.
■ Timer Viewing: You can schedule a channel to be displayed
automatically at a set time, even when you are watching another
channel. You must set the current time first in the Time > Clock
function to use Time Viewing.
To schedule a channel, follow these steps:
If you select Everyday or Every Week, the date you
select in the Date field becomes the start date for your
scheduled viewing. For Everyday, the TV will turn on
every day, at the time you selected, starting from that
date. For Everyweek, the TV will turn on every week,
on the same day of the week as the start date you
selected, at the time you selected, from that day on. If
you select Once, the TV will turn on once, on the date
and time you selected.
Only Added Channels can be scheduled.
Scheduled programs and channels are displayed in the
Programmed List.
✎
When you select a digital channel, press the Ź button to
view the digital program list. If you highlight a program in
the list, and then press the ENTERE(Schedule) button,
you set Timer Viewing for that program directly.
■ Select All: Select all the channels in the displayed channel list.
■ Deselect All: Deselect all the selected displayed channels.
✎ You can only select Deselect All when one or more
channels are selected.
■ Channel Name Edit: Analog channels only. Lets you assign a
name of up to five characters to an analog channel. For example,
Hist, Food, Golf, etc. This makes it easier to find and select a
channel .
■ Auto Program: See Auto Program under Memorizing Channels.
Programmed List (on the Channel List Screen)
The Programmed list displays the channels and programs you
have scheduled for viewing using the Time Viewing function. You
can view, modify, or delete a show you have scheduled using the
functions on the Programmed List screen Tools menu.
Programmed List Screen Tools Menu t
■ Change Info: Change the scheduling information for a show or
channel you have scheduled.
To change the information, follow these steps:
1. Select the Programmed List icon on the left side of the
Channel List screen, and then press the ENTERE button.
1. Select a channel in the Added Channels list using the Ÿź
buttons and the Yellow Select button on your remote.
2. Press the TOOLS button on your remote. The Tools menu
appears.
2. On the Programmed List screen, select the show or channel
entry you want to change, and then press the TOOLS button.
The Tools Menu appears.
3. Select Time Viewing in the Tools menu, and then press the
ENTERE button. The Time Viewing screen appears.
3. Select Change Info, and then press the ENTERE button.
The Time Viewing screen appears.
4. Use the ŻŹ buttons to move from entry field to entry field
and the Ÿź buttons to change the entries. Where numbers
are displayed, you can also enter numbers directly using the
number keypad on your remote.
Timer Viewing
Antenna
Channel
Repeat
6-1
Once
Ÿ
DTV Air
ź
Date
01-01-2012
L Move
5. Press the ENTERE button when done.
Start Time
U Adjust
12 : 01 am
E Enter
R Return
■ Cancel Schedules: Cancel a show or channel you have
scheduled.
To cancel a scheduled show or channel, follow these steps:
4. Use the ŻŹ buttons to move from entry field to entry field
and the Ÿź buttons to change the entries. Where numbers
are displayed, you can also enter numbers directly using the
number keypad on your remote.
1. Select the Programmed List icon on the left side of the
Channel List screen, and then press the ENTERE button.
2. On the Programmed List screen, select the show or channel
entry you want to cancel, and then press the TOOLS button.
The Tools Menu appears.
3. Select Cancel Schedules, and then press the ENTERE
button. The Cancel Schedule screen appears.
4. Select OK, and then press the ENTERE button.
-5-
■ Information: Display the information for a show or channel you
have scheduled. You can also change the schedule Information.
1. Select the Programmed List icon on the left side of the
Channel List screen, and then press the ENTERE button.
To set the clock, follow these steps:
1. Select Setup >Time > Clock.
2. Press ENTERE and select Auto or Manual, and then press
ENTERE again.
2. On the Programmed List screen, select the show or channel
entry you want information for, and then press the TOOLS
button. The Tools Menu appears.
If you selected Auto:
The TV will automatically download the correct time from a
digital channel.
3. Select Information, and then press the ENTERE button.
The Time Viewing Information screen appears.
t Select Time Zone, and then press the ENTERE button.
Use theŸź buttons to select your Time Zone, and then
press ENTERE.
4. Select Change Info and press the ENTERE button
to change information, or select Close and press the
ENTERE button to close the Information screen.
t Select DST (Daylight Savings Time), and then press
ENTERE. Select On if you want to turn the DST
adjustment on and off manually. Select Off to turn off the
DST adjustment. Select Auto if you want the TV to adjust
to DST automatically. Press ENTERE when done.
■ Select All / Deselect All: You can select or deselect all
channels in the channel list.
T Other Channel Menu Functions
✎
Channel Mode (Added Channels/Favorite
Channels)
DST and Time Zone function are only available when
the Clock Mode is set to Auto.
If you selected Manual:
The Clock Set screen appears. Use the Ÿź buttons to
change the values in each field or use the number buttons to
enter the values directly. Use the ŻŹ buttons to move from
field to field. When done with all the fields, press ENTERE.
Lets you select the channel list displayed when you press the
<CH> (Channel) button on your remote. For example, if you
select Favorite Channels, you will only see Favorite channels when
you press the <CH> button.
✎
Available only when Clock Mode is set to Manual.
■ Sleep Timer t
Fine Tune
Analog channels only.
Automatically shuts off the TV after a preset period of time. (30,
60, 90, 120, 150 and 180 minutes).
If the reception is clear, you do not have to fine tune the channel,
as this is done automatically during the search and store
operation. If the signal is weak or distorted, fine tune the channel
manually.
✎ To cancel the Sleep Timer, select Off.
Timer 1 / Timer 2 / Timer 3
✎
✎
Turns the TV on and off automatically at times and days you
select. You can set three different on/off timer settings.
Select the channel, and then select Fine Tune.
Fine tuned channels that have been saved are marked with
an asterisk “*” on the right-hand side of the channel number
in the channel banner.
✎
■ On Time / Off Time: Set the hour, minute, am/pm, and
Activate/Inactivate fields for the On Time and Off Time. Use the
ŻŹ buttons to move from field to field. Use the Ÿź buttons
to change the values in each field. To activate the timer with
the setting you have chosen, set the Activate/Inactivate field to
Activate.
■ Volume: Set the desired loudness.
■ Contents: To select what will be turned on when the timer
setting is activated. You can set the TV to turn on a specific
channel or play back contents such as photo or audio files.
Use the ŻŹ buttons to move to move to the Contents field,
and then press the ENTERE button. The Contents screen
appears. Use the ŻŹ buttons to move from field to field. Use
the Ÿź buttons to change the values in each field.
✎ To reset fine-tuning, select the channel, select Fine Tune, and
then select Reset on the Fine Tune screen.
Setup Menu
Plug & Play
Lets you re-run the Plug & Play initial setup procedure. For
instructions, see your Quick Start Guide.
Language
Set the menu language.
✎
You must set the clock first.
Choose between English, Español, and Français.
- TV/USB: Select TV or USB. The USB device must be
connected to your TV before you can select USB.
T Setting the Time
- Antenna: Displays the current antenna source, Air or Cable.
Time
✎ The time you set will appear when you press the INFO
- Channel: If you have selected TV, select the desired channel.
- Music/Photo: If you have selected USB, follow these steps to
select a folder containing MP3 (Music) or JPEG (Photo) files on
the USB device:
✎ The maximum displayed number of files, including sub
folders, in one folder of USB storage device is 2000.
✎ The media may not be playing smoothly when using the
device lower than USB 2.0.
1. Use the ŻŹ buttons to move to the field under Music
or the field under Photo, and then press the ENTERE
button. The TV displays a single folder (the Root folder)
and the type or name of the device.
button.
■ Clock: Set the clock so you can use the various timer features
of the TV.
✎ If you disconnect the power cord, you have to set the
clock again.
-6-
Locking/Blocking Programs or Movies
2. Press the ENTERE button. A list of folders on the device
appears.
✎
You lock or block programs and/or movies in essentially the same
way for each option. Each option displays a grid or table. All the
tables have ratings listed on the left. The TV Parental Guidelines
option also has kinds of content listed across the top: ALL: Lock all
TV ratings. / FV: Fantasy violence / V: Violence / S: Sexual situation
/ L: Adult Language / D: Sexually Suggestive Dialog.
If there are no folders on your device, press the
Yellow select button to select the Root folder, and
then press the RETURN button. The Timer screen
re-appears.
3. Use the Ÿź buttons to highlight a folder that contains
music or photos, and then press the Yellow select button
to select the folder.
4. Press the RETURN button. The Timer screen re-appears.
■ Repeat: Select Once, Everyday, Mon~Fri, Mon~Sat, Sat~Sun
or Manual. If you select Manual, you can select the days you
want to activate the timer by using the ŻŹbuttons to highlight
the day, and then pressing the ENTERE button. To unselect a
day, highlight it, and then press the ENTERE button.
When you finished making all your selections on the Timer screen,
press either the ENTERE or RETURN button.
T Other Features
Program Rating Lock
✎
■ Change PIN: The Change PIN screen will appear. Choose any
4 digits for your PIN and enter them in Enter New PIN fields.
Re-enter the same 4 digits in Confirm New PIN fields. When the
Change PIN screen disappears, press the OK button. The TV
has memorized your new PIN.
✎ If you forget the PIN, press the remote-control buttons in
the following sequence, which resets the pin to “0-0-0-0” :
POWER (off) ĺ MUTE ĺ 8 ĺ 2 ĺ 4 ĺ POWER (on)
Game Mode (On/Off)
The Program Rating Lock feature lets you block programs
you've determined are inappropriate for your children based on
the program's ratings. To access the Program Rating Lock
feature and make any changes, you must enter a PIN (personal
identification number). To watch a blocked program, you must also
enter the same PIN.
✎
To lock/block movies or shows with certain ratings and/or kinds of
content, click the square next to the rating and/or under the kind of
content. A lock appears. To unlock/unblock, click the square again.
When you click a low rating, all the ratings above it will also display
locks. You can also Allow All or Lock All. When done, press the
RETURN button on your remote.
When you connect a game console such as a PlayStation™
or Xbox™ to your TV, you can enjoy a more realistic gaming
experience by turning on the Game Mode function.
✎
Precautions and limitations for game mode:
x Before you disconnect the game console and connect another
external device, set Game Mode to Off in the setup menu.
Program Rating Lock is not available in HDMI or
Component mode.
x If you display the TV menu in Game Mode, the screen shakes
The default PIN number of a new TV set is “0-0-0-0”. You can
set your own PIN using the Change PIN function.
✎
slightly.
Game Mode is not available when the input source is set to
TV.
How It Works
✎
When you access the Program Rating Lock Menu functions for
the first time, the PIN input screen appears. Enter 0-0-0-0. The PIN
screen closes and the Program Rating Lock Menu appears. Every
time you access the Program Rating Lock functions, the PIN
screen will appear and you must enter a PIN.
Caption
When the Rating Lock screen appears, select Program Rating
Lock, and then press ENTERE. Select On, and then press the
ENTERE key again. Depending on what type of programs or
movies you want to block, select one of the options on the screen,
and then press the ENTERE button. The options are listed below:
■ TV Parental Guidelines: You can block TV programs based
on their ratings. This function allows you to control what your
children are watching.
■ MPAA Rating: You can block movies based on their MPAA
ratings. The Motion Picture Association of America (MPAA) has
implemented a rating system that provides parents or guardians
with advanced information on which films are appropriate for
children.
■ Canadian English: You can block TV programs based on their
Anglophone Canadian ratings.
■ Canadian French: You can block TV programs based on their
French Canadian ratings.
■ Downloadable U.S. Rating: Parental restriction information can
be used while watching DTV channels.
After connecting the game console, set Game Mode to On.
You may notice slightly reduced picture quality.
(On-Screen Text Dialogue)
■ Caption: You can switch the caption function on or off. If
captions are not available, they will not be displayed on the
screen.
✎
The Caption feature does not work in Component or
HDMI mode.
■ Caption Mode: You can select the desired caption mode.
Default / CC1~CC4 / Text1~Text4: (analog channels only) The
Analog Caption function operates in either analog TV channel
mode or when a signal is supplied from an external device to the
TV. (Depending on the broadcasting signal, the Analog Caption
function may or may not work with digital channels.)
Default / Service1~Service6 / CC1~CC4 / Text1~Text4:
(Digital channels only) The Digital Captions function works with
digital channels.
✎ Service1~6 may not be available in digital caption mode
depending on the broadcast.
■ Digital Caption Options: (Digital channels only)
Size: Options include Default, Small, Standard and Large. The
default is Standard.
Font Style: Options include Default and Styles 0 to 7. The
default is Style 0.
Foreground Color: Options include Default, White, Black, Red,
Green, Blue, Yellow, Magenta and Cyan. You can change the
color of the letters. The default is White.
-7-
Background Color: Options include Default, White, Black, Red,
Green, Blue, Yellow, Magenta and Cyan. You can change the
background color of the captions. The default is Black.
Foreground Opacity: This adjusts the opacity of text. Options
include Default, Transparent, Translucent, Solid and Flashing.
Background Opacity: This adjusts the opacity of the caption
background. Options include Default, Transparent, Translucent,
Solid and Flashing.
Return to Default: This option sets each Size, Font Style,
Foreground Color, Background Color, Foreground Opacity and
Background Opacity to its default.
✎ Digital Caption Options are available only when you can
select Default and Service1 ~ Service6 in Caption Mode.
✎ The Foreground and Background cannot be set to the
same color.
Melody
Lets you control whether a melody plays when the TV is turned on
or off.
✎
■ Reset: Reset all settings to the factory defaults.
✎ The PIN input screen appears before the setup screen.
✎ Enter your 4-digit PIN. Change the PIN using the Change
PIN option.
Software Upgrade
Software Upgrade can be performed by downloading the latest
firmware from samsung.com to a USB memory device.
HD Connection Guide
Refer to this information when connecting external devices to the
TV.
Contact Samsung
View this information when your TV does not work properly or
when you want to upgrade the software. You can find information
regarding our call centers and how to download products and
software.
Media Play
The Melody does not play:
x When no sound is output from the TV because the MUTE
button has been pressed.
x When no sound is output from the TV because the volume
has been reduced to minimum with the VOL – button.
x When the TV is turned off by the Sleep Timer function.
Enjoy photos, music and/or movie files saved on a
USB Mass Storage Class (MSC) device.
Auto Protection Time
MEDIA.P
T Connecting a USB Device
■ Auto Protection Time (Off / 10 min / 20 min / 40 min / 1 hour):
1. Turn on your TV.
If the screen remains idle with a still image for a certain period
2. Connect a USB device containing photo, music, and/or movie
of time you define, the screen saver is activated to prevent the
files to the USB jack on the back of the TV. A pop up window
formation of ghost images on the screen.
appears.
Eco Solution
3. Press the MEDIA.P button on your remote. The Media Play
menu appears.
■ Energy Saving (Off / Low / Medium / High / Picture Off) :
This adjust the brightness of the TV in order to reduce power
consumption. If you select Picture Off, the screen is turned
off, but the sound remains on. Press any button except volume
button to turn on the screen.
■ Eco Sensor (Off / On): To enhance your power savings; the
picture settings will automatically adapt to the light in the room.
✎ If you adjust the Backlight, the Eco Sensor will be set to
Off.
Min. Backlight: When Eco Sensor is On, the minimum screen
brightness can be adjusted manually.
✎ If Eco Sensor is On, the display brightness may change
(become slightly darker in most cases) depending on the
surrounding light intensity.
■ No Signal Power Off (Off / 15 min. / 30 min. / 60 min.): Sets
how quickly the TV switches to standby mode, if no picture is
being received.
✎ Disabled when the PC is in power saving mode.
■ Auto Power Off (Off / On): The TV will be automatically turned
off when no user operation is received for 4 hours.
T Using the Media Play Menu
0HGLD3OD\
9LGHRV
SUM
Ŷ &KDQJH'HYLFH
E Enter R Return
To open Media Play in the Menu, follow these steps:
1. Press the MENU button. Then, press the Ÿ or ź button to
select Application on the left, and then press the ENTERE
button.
2. Press the Ÿ or źbutton to select Media Play (USB), and then
press the ENTERE button.
3. Press the Ż or Ź button to select an icon (Videos, Music,
Photos, Settings), and then press the ENTERE button.
✎ Media Play might not work properly with unlicensed
multimedia files.
Support Menu
✎
Self Diagnosis
■ Picture Test: Use to check for picture problems. If the problem
appears in the test picture, select Yes and follow the directions
on the screen.
■ Sound Test: Use the built-in melody sound to check for sound
problems. If the problem occurs during the test, select Yes and
follow the directions on the screen.
■ Signal Strength: (Digital channels only) An HD channel’s
reception quality is either perfect or the channels are unavailable.
Adjust your antenna to increase signal strength.
-8-
Need-to-Know List before using Media Play (USB)
x The file system supports FAT16, FAT32 and NTFS.
x Certain types of USB Digital camera and audio devices may not
be compatible with this TV.
x Media Play only supports USB Mass Storage Class (MSC)
devices. MSC is a Mass Storage Class Bulk-Only Transport
device. Examples of MSC are Thumb drives and Flash Card
Readers. Devices should be connected directly to the TV’s USB
port. USB HDD is not supported.
x Before connecting your device to the TV, please back up your
x
x
x
x
x
x
x
x
x
x
x
x
x
x
x
x
x
y Supported Subtitle Formats
files to prevent them from damage or loss of data. SAMSUNG is
- External
not responsible for any data file damage or data loss.
Name
File extension
A USB device that requires high power (more than 0.5A) may not
be supported.
MPEG-4 timed text
.ttxt
Do not disconnect the USB device while it is loading.
SAMI
.smi
The higher the resolution of the image, the longer it takes to
SubRip
.srt
display on the screen.
SubViewer
.sub
If a file is corrupted or the TV does not support the file type, the
Micro DVD
.sub or .txt
“Not Supported File Format” message appears.
SubStation Alpha
.ssa
The TV cannot play MP3 files with DRM that have been
downloaded from a for-pay site. Digital Rights Management
Advanced SubStation Alpha
.ass
(DRM) is a technology that supports the creation, distribution,
and management of digital content in an integrated and
- Internal
comprehensive way, including protecting the rights and interests
Name
Container
Format
of content providers, preventing illegal copying of contents, and
Xsub
AVI
Picture Format
managing billing and settlements.
SubStation Alpha
MKV
Text Format
PTP devices are not supported.
If an over-power warning message is displayed while you are
Advanced SubStation Alpha
MKV
Text Format
connecting or using a USB device, the device may not be
SubRip
MKV
Text Format
recognized or may malfunction.
MPEG-4 Timed text
MP4
Text Format
If the TV has no input during the time period set in Auto
Protection Time, the Screensaver will run.
y Supported Video Formats
The power-saving mode of some external hard disk drives may
File
Frame
Bit
Audio
be released automatically when your connect them to the TV.
Resolution
Extension Container Video Codec
rate(fps)
rate(Mbps)
Codec
If you use a USB extension cable, the TV may not recognize the
DivX
USB device or may not be able to read the files on the device.
3.11/4.x/5.1
1920x1080
6~30
30Mbps
If a USB device connected to the TV is not recognized, the list of
/6.0
MP3 /
files on the device is corrupted, or a file in the list is not played,
ADPCM /
*.mp4
MP4
H264
1920x1080
6~30
30Mbps
connect the USB device to a PC, format the device, and check
AAC
AVC
1920x1080
6~30
30Mbps
the connection.
MJPEG
640x480
6~30
10Mbps
If a file you deleted from the PC is still found when you run Media
Play, use the “Empty the Recycle Bin” function on the PC to
DivX
permanently delete the file.
3.11/4.x/5.1
1920x1080
6~30
30Mbps
MP3 /
/6.0
Photos only supports the sequential jpeg format.
AC3 /
LPCM /
*.avi
AVI,
MPEG4 SP
The Videos option does not support the scene search and
1920x1080
6~30
30Mbps
*.mkv
MKV
ADPCM
/ ASP
thumbnail functions.
/ DTS
H264
1920x1080
6~30
30Mbps
If the number of files and folders saved on a USB storage device is
Core
over approximately 4000, the files and folders may not appear and
MJPEG
640x480
6~30
10Mbps
some folders may not open.
DivX 3.11
MP3 /
The maximum displayed number of files, including sub folders, in
/ 4.x /5.1
1920x1080
6~30
30Mbps
AC3 /
one folder of USB storage device is 2000.
/ 6.0
LPCM /
*.asf
ASF
ADPCM
The media may not be playing smoothly when using the device
MPEG4 SP
*.wmv
1920x1080
6~30
30Mbps
/ WMA
lower than USB 2.0.
/ ASP
/ WMA
Videos
Movie 01.avi
SUM
►
00:04:03 / 00:07:38
*.ts
*.trp
*.tp
*.m2ts
1/1
E3DXVHL Jump T7RROVR Return
1. In the Media Play menu, press the Ż or Ź button to select
Videos, and then press the ENTERE button.
3. Press the ENTERE button or O (Play) button.
- The file name is displayed on the top of the screen with the
playing time.
-
If video time information is unknown, playing time and the
progress bar are not displayed.
-
During video playback, you can search using the Ż and
Ź buttons.
✎
*.dat
*.mpg
*.mpeg
*.vob
PS
*.3gp
3GPP
*.flv
*.swf
2. Press the ŻŹŸź buttons to select a video in the file list.
In this mode, you can play movie clips contained in a game,
but you cannot play the game itself.
-9-
TS
flash
formats
H.264
1920x1080
6~30
30Mbps
Pro
MPEG2
1920x1080
6~30
30Mbps
H. 264 BP
/ MP / HP
1920x1080
6~30
30Mbps
AC3 /
AAC /
MP3 /
DD+ /
HE-AAC
MPEG1
1920x1080
24/25/30
30Mbps
MPEG2
1920x1080
24/25/30
30Mbps
H. 264 BP
/ MP / HP
1920x1080
6~30
30Mbps
MPEG4 SP
/ ASP
1920x1080
6~30
30Mbps
H.264
1920x1080
6~30
30Mbps
H.264
1920x1080
6~30
30Mbps
Sorenson
H.263
1920x1080
6~30
30Mbps
AC3 /
MPEG /
LPCM /
AAC
MP3
MP3
Other Restrictions
Photos
y Video content will not play, or not play correctly, if there is an error
in the content or the container.
1RUPDO
Image1024.jpg
1024x768
2010/2/1
3/15
y Sound or video may not work if the contents have a standard
bit rate/ frame rate above the compatible Frame/sec listed in the
Supported Video Formats table.
y If the Index Table erroneous, the Seek (Jump) function is not
supported.
y The menu may take longer to appear if the video’s bit rate
exceeds 10Mbps.
E3DXVHL3UHYLRXV1H[WT7RROVR Return
y Video content can not be played if there are many contents in
one file.
1. In the Media Play menu, press the Ż or Ź button to select
Photos, then press the ENTERE button.
2. Press the Ż/Ź/Ÿ/ź buttons to select a photo in the file list.
Video Decoder
Supports up to H.264, Level 4.1
3. Press the ENTERE button or O (Play) button.
NOTE
✎
H.264 FMO / ASO / RS, VC1 SP / MP / AP L4 and AVCHD are
not supported.
x While a photo list is displayed, press the O (Play) / ENTERE
button on the remote control to start a slide show.
MPEG4 SP, ASP :
x All files in the file list section will be displayed in the slide show.
x During the slide show, files are displayed in order.
x During the slide show, you can adjust the slide show speed
– Below 1280 x 720: 60 frame max
– Above 1280 x 720: 30 frame max
using (ƭ) (REW) or (μ) (FF) button.
H.263 is not supported.
GMC is not support.
✎
Audio Decoder
x You can move to other files using Ż or Ź button.
Media Play can play Music files automatically during a Slide
Show if Background Music is set to On.
Supports up to WMA7, 8, 9 STD, 9 PRO, 10 PRO
✎
WMA 9 PRO and WMA 10 PRO support 5.1 channel. (LBR
mode of WMA Pro is not supported)
y Supported Photo Formats
WMA Lossless is not supported.
Image
Music
JPEG
Playlist
I Love You
Jhon
1st Album
Pop
2010
4.2MB
3/15
Music 1
Resolution
Base-line
15360 x 8704
Progressive
1024 x 768
y CMYK, YCCK Color space JPEG are not supported.
No Singer
Music 2
No Singer
Playing Multiple Files
No Singer
Music 4
■ Playing selected video/music/photo files
No Singer
Music 5
No Singer
1. On the File List screen, highlight a file, and then press the Yellow
button on your remote.
E3DXVHL Jump T7RROVR Return
2. Repeat Step 1 to select multiple files.
✎ NOTE
1. In the Media Play menu, press the Ż or Ź button to select
Music, and then press the ENTERE button.
x A c mark appears to the left of the selected files.
x To cancel a selection, press the Yellow button again.
x To deselect all selected files, press the TOOLS button, select
2. Press the Ż/Ź/Ÿ/ź buttons to select the desired Music in the
file list.
3. Press the ENTERE button or O (Play) button.
✎ During music playback, you can search using the Ż and
Ź button.
✎ R=(REW) and μ (FF) buttons do not function during
play.
✎ Media Play only displays files with MP3 and PCM file
extension. Other file extensions are not displayed, even if they
are saved on the same USB device.
✎
Photo
Other Restrictions
I Love you
Jhon
Music 3
01:10 / 04:02
SUM
You cannot change the Mode in Background Music until the
Background Music file has finished loading.
If the sound is abnormal when playing MP3 files, adjust the
Equalizer in the Sound menu. (An over-modulated MP3 file
may cause a sound problem.)
Deselect All, and then the ENTERE button.
3. Press the TOOLS button, select Play Selected Contents, and
then press the ENTERE button.
■ Playing a video/music/photo folder
1. With the folders on your USB device displayed, use the
Ż/Ź/Ÿ/ź buttons to highlight a folder.
2. Press the TOOLS button, select Play Folder, and then press the
ENTERE button.
- 10 -
✎
Media Play - Additional Functions
■ Videos/Music/Photos Play Option menus
When playing a file, press the TOOLS button.
Category
Operation
Videos
You can select another video file
to play directly.
c
Repeat Mode
You can play movie and music
files repeatedly.
c
Picture Size
You can adjust the picture size to
your preference.
c
Title
NOTE
x Standard dimensions for wall mount kits are shown in the table
below.
x When purchasing our wall mount kit, a detailed installation
Music
manual and all parts necessary for assembly are provided.
Photos
x Do not use screws that do not comply with the VESA standard
screw specifications.
x Do not use screws that are longer than the standard dimension
c
x
c
or do not comply with the VESA standard screw specifications.
Screws that are too long may cause damage to the inside of the
TV set.
For wall mounts that do not comply with the VESA standard
screw specifications, the length of the screws may differ
depending on the wall mount specifications.
Do not fasten the screws too firmly. This may damage the
product or cause the product to fall, leading to personal injury.
Samsung is not liable for these kinds of accidents.
Samsung is not liable for product damage or personal injury
when a non-VESA or non-specified wall mount is used or the
consumer fails to follow the product installation instructions.
Do not mount the TV at more than a 15 degree tilt.
Always have two people mount the TV on a wall.
Picture Mode You can adjust the picture setting.
c
Auto Motion
Plus
You can enhance motion in fast
moving scenes.
c
Sound Mode
You can adjust the sound setting.
c
Subtitle
Setting
You can play the video with
Subtitles. This function only works
if the subtitles have the same file
name as the video.
c
Audio Format
You can select the digital audio
output format.
c
x
x
Audio
Language
You can change the audio
language if the video has more
than one language.
c
Product
Family
Stop Slide
Show /
Start Slide
Show
You can start or stop a Slide
Show.
Slide Show
Speed
You can select the slide show
speed during the slide show.
c
Background
Music
You can set and select
background music when
watching a Slide Show.
c
Zoom
You can zoom into images in full
screen mode.
c
Rotate
You can rotate images in full
screen mode.
c
Information
You can see detailed information
about the played file.
x
c
c
x
VESA screw hole specs
(A * B) in millimeters
Standard
Screw
19~22
75 X 75
26
100 X 100
32~40
200 X 200
M6
46~60
400 X 400
M8
4
LED-TV
c
c
c
Do not install your Wall Mount Kit while
your TV is turned on. It may result in
personal injury due to electric shock.
Securing the TV to the Wall
Caution: Pulling, pushing, or climbing onto the TV may cause
the TV to fall. In particular, ensure that your children do not
hang over or destabilize the TV; doing so may cause the TV
to tip over, resulting in serious injuries or death. Follow all
safety precautions provided on the included Safety Flyer. For
added stability, install the anti-fall device for safety purposes,
as follows.
Using the Setup Menu
■ DivX® Video On Demand : Shows the registration code
authorized for the TV. If you connect to the DivX web site and
register with the 10-digit registration code, you can download
the VOD activation file. Once you play it using Media Play, the
registration is completed.
✎ For more information on DivX® VOD, visit “http://vod.divx.
com”.
■ Information: Select to view information about the connected
USB device.
Other Information
Installing the Wall Mount Kit
The wall mount kit (sold separately) allows you to mount the TV on
the wall.
For detailed information about installing the wall mount, see
the instructions provided with the wall mount items. Contact a
technician for assistance when installing the wall mount bracket.
Samsung Electronics is not responsible for any damage to the
product or injury to yourself or others if you elect to install the wall
mount on your own.
Wall Mount Kit Specifications (VESA)
The wall mount kit is not supplied, but sold separately.
Install your wall mount on a solid wall perpendicular to the floor.
When attaching to other building materials, please contact your
nearest dealer. If you install the TV on a ceiling or slanted wall, it
may fall and result in severe personal injury.
Quantity
M4
c
Settings
✎
TV size in
inches
To prevent the TV from falling
✎
Since the necessary brackets, screws, and string or cable are
not supplied, please purchase these separately.
1. Insert the screws into the wall brackets and firmly fasten them to
the wall. Make sure the screws are firmly fixed to the wall.
✎ We strongly recommend you drive the screws into a stud.
2. Using screws, insert the screws through the TV brackets, and
then fasten the screws to the top VESA screw holes on the back
of the TV.
3. Connect the brackets on the TV and the brackets on the wall
with a strong string or cable, and then tie the string or cable
tightly to the brackets.
✎ Verify all connections are properly secured. Periodically check
the connections for any sign of fatigue or failure. If you have
any doubt about the security of your connections, contact a
professional installer.
✎ Install the TV close to the wall so that it does not fall.
✎ Connect the string or cable so that the brackets on the wall
are at the same height or lower than the brackets on the TV.
Untie the string or cable before moving the TV.
✎ To purcase a TV Holder kit, contact Samsung customer care.
- 11 -
Kensington Lock
Display Modes (HDMI/DVI Input)
The Kensington Lock is not supplied by Samsung. It is a device
used to physically fix the system when using it in a public place.
Refer to the manual provided with the Kensington Lock for additional
information on proper use.
Optimal resolution is 1920 x 1080@60Hz.
✎
✎
Mode
IBM
Please find a “K” icon on the rear of the TV. The Kensington
slot is beside the “K” icon.
MAC
The position and color may differ depending on the model.
Assembling the Wire Holder stand
VESA DMT
Resolution
640 x 350
720 x 400
640 x 480
832 x 624
1152 x 870
640 x 480
640 x 480
640 x 480
800 x 600
800 x 600
800 x 600
1024 x 768
1024 x 768
1024 x 768
1152 x 864
1280 x 720
1280 x 800
1280 x 1024
1280 x 1024
1366 x 768
1440 x 900
1600 x 900RB
1680 x 1050
1920 x 1080
Horizontal
Frequency (KHz)
31.469
31.469
35.000
49.726
68.681
31.469
37.861
37.500
37.879
48.077
46.875
48.363
56.476
60.023
67.500
45.000
49.702
63.981
79.976
47.712
55.935
60.000
65.290
67.500
Vertical
Frequency (Hz)
70.086
70.087
66.667
74.551
75.062
59.940
72.809
75.000
60.317
72.188
75.000
60.004
70.069
75.029
75.000
60.000
59.810
60.020
75.025
59.790
59.887
60.000
59.954
60.000
Pixel Clock
Frequency (MHz)
25.175
28.322
30.240
57.284
100.000
25.175
31.500
31.500
40.000
50.000
49.500
65.000
75.000
78.750
108.000
74.250
83.500
108.000
135.000
85.500
106.500
108.000
146.250
148.500
Sync Polarity
(H / V)
+/-/+
-/-/-/-/-/-/+/+
+/+
+/+
-/-/+/+
+/+
+/+
-/+
+/+
+/+
+/+
-/+
+/+
-/+
+/+
Troubleshooting
If the TV seems to have a problem, first review this list of possible problems and solution. If none of these troubleshooting tips apply, visit
samsung.com, then click on Support, or call Samsung customer service at 1-800-SAMSUNG.
Problem
Possible Solution
Flickering and Dimming
If your Samsung Television is flickering or dimming sporadically, you may need to disable some of its energy efficient
features like the Eco Sensor or the Energy Saving feature. Follow the steps below with your remote to turn these
features off or on.
y Energy saving : Menu ĺ Setup ĺ Eco Solution ĺEnergy Saving ĺ6HOHFW6HWWLQJV
y Eco Sensor : Menu ĺ Setup ĺ Eco Solution ĺ Eco Sensor ĺ6HOHFW6HWWLQJV
Component Connections /
Screen Color
If you find that the color on your Samsung television’s screen is not correct or black and white, first run a Self
Diagnosis Test on the TV to make sure there are no device issues.
y Self Diagnosis : User Menu ĺ Support ĺ Self Diagnosis ĺ Picture Test
y If the test is ok, try making sure ;
y Your connections are all consistent. For example, if you’ve used the AV In jack on your TV, make sure you have
used the AV Out jack on your video source.
y Try making sure you have connected to the correct jacks. For example, if you use the Component jacks, labeled
Pb, Pr, and Y, to connect your TV and video source, make sure you have connected the blue Pb jack on the
video source to the blue Pb jack on the TV, the red Pr jack on the source to the red Pr jack on the TV.
Screen Brightness
If you find that the colors on your Samsung TV are correct but just a little too dark or bright, there are some settings
you should check before calling for a repair.
y Backlight, Contrast, Brightness, Sharpness, Color, Tint and so on. Go to “Picture” in the Menu, and then try
adjusting these options.
Unwanted Powering off
If your Samsung TV appears to turn off by itself, there may be an issue with either your Timer settings or your Eco
friendly No Signal Power Off feature.
First make sure the Sleep Timer is not accidentally set. The Sleep Timer lets you fall asleep with the TV still on
knowing that it will turn off after a certain period of time and not waste energy.
y Sleep Timer : User Menu ĺ Setup ĺ Time ĺ Sleep Timer
If the Sleep Timer is not activated, you may have engaged the No Signal Power Off or Auto Power Off feature.
y No Signal Power Off : User Menu ĺ Setup ĺ Eco Solution ĺ No Signal Power
y Auto Power Off : User Menu ĺ Setup ĺ Eco Solution ĺ Auto Power Off
- 12 -
Trouble Powering On
Before you turn the TV on, find the red light on the right or left bottom of your TV. Press the power on button
on the TV or remote and the light should blink about 5 times before the TV turns on.
If you find that you are having trouble powering on your Samsung television, there are a number of things to check it
before making a call to the service department.
y If you happen to be using the TV as a monitor and the stand-by light only blinks for a few seconds when you
press the power button, your PC is in sleep mode. To take your PC out of sleep mode, press a key on your
keyboard or move the mouse. Then try turning your TV on.
If you’re sure your power cord, remote control, and PC are functioning properly, you may be having a cable issue. If
you have a cable or satellite box, your TV may appear to be off because the cable or satellite box is not outputting a
signal. To test the signal output of your cable or satellite box, press the guide or info button on the cable or satellite
box remote control. If the screen displays the guide or info data, the problem is caused by the box.
Stand Assembly
t If you have any trouble assembling the stand, refer to “Install the Stand” in the Start Up or Stand Installation Guide.
Cannot find a channel
t Re-run Plug & Play or run Auto Program. (go to MENU - Channel - Auto Program)
Poor Picture
First, perform the Picture Test and to see if your TV is displaying the test image properly.
Go to MENU - Support - Self Diagnosis - Picture Test
If the test image is properly displayed, the poor picture may be caused by the source or signal.
The TV image does not look as good as
it did in the store.
t If you have an analog cable/satellite box, upgrade to a digital set top box. Use HDMI or Component cables to
deliver HD (high definition) picture quality.
t Cable/Satellite subscribers: Try HD channels from the channel line up.
t Air/Cable Antenna connection: Try HD channels after running Auto Program.
✎ Many HD channels broadcast up scaled SD (Standard Definition) content. The picture quality of up
scaled SD content is low.
t Adjust the Cable/Set top box video output resolution to 1080i or 720p.
The picture is distorted: macroblock
error, small block, dots, pixelization.
t Compression of video contents may cause picture distortion, especially on fast moving pictures such as those in
sports and action movies.
t A weak signal can cause picture distortion. This is not a TV problem.
t Mobile phones used close to the TV (within 3.3ft) may cause noise in the picture on analog and digital channels.
Color is wrong or missing.
t If you’re using a component connection, make sure the component cables are connected to the correct jacks.
Incorrect or loose connections may cause color problems or a blank screen.
There is poor color or brightness.
t Adjust the Picture options in the TV menu. (go to Picture Mode / Color / Brightness / Sharpness)
t Adjust the Energy Saving option in the TV menu. (go to MENU - Setup - Eco Solution - Energy Saving )
t Try resetting the picture to the default picture settings. (go to MENU - Picture - Picture Reset)
There is a dotted line on the edge of
the screen.
t If the picture size is set to Screen Fit, change it to 16:9.
t Change the cable/satellite box resolution.
The picture is black and white.
t If you are using an AV composite input, connect the video cable (yellow) to the Green jack of Component Input 1
on the TV.
When changing channels, the picture
freezes or is distorted or delayed.
t If connected to a cable box, please try to reset it. (Reconnect the AC cord and wait until the cable box reboots. It
may take up to 20 minutes)
t Set the output resolution of the cable box to 1080i or 720p.
Sound Problems
Perform the Sound Test to confirm that your TV audio is properly operating.
(go to MENU - Support - Self Diagnosis - Sound Test)
If the audio is OK, the sound problem may be caused by the source or signal.
There is no sound or the sound is too
low at maximum volume.
t Check the volume of the device (Cable/Sat Box, DVD, Blu-ray, etc.) connected to your TV.
The picture is good, but there is no
sound.
t If you are using an external device, check the device’s audio output option Ex. you may need to change your
cable box’s audio option to HDMI if the box is connected to your TV using an HDMI cable.
t Reboot the connected device by reconnecting the device’s power cable.
The speakers are making an
inappropriate noise.
t Check the cable connections. Make sure a video cable is not connected to an audio input.
t For Antenna or Cable connections, check the signal information. A weak signal may cause sound distortion.
t Perform the Sound Test as explained above.
No Picture, No Video
The TV will not turn on.
t Make sure the AC power cord is securely plugged into the wall outlet and the TV.
t Make sure the wall outlet is working.
t Try pressing the POWER button on the TV to make sure the problem is not the remote.
If the TV turns on, refer to ‘Remote control does not work’ below.
The TV turns off automatically.
t Ensure the Sleep Timer is set to Off in the Time menu.
t If your PC is connected to the TV, check your PC power settings.
t Make sure the AC power cord is plugged securely into the wall outlet and the TV.
t When you are watching TV connected to an antenna or cable connection, the TV will turn off after 10 - 15 minutes
if there is no signal.
- 13 -
There is no picture/video.
t Check the cable connections. (Remove and reconnect all cables connected to the TV and external devices).
t Set your external device’s (Cable/Sat Box, DVD, Blu-ray etc) video outputs to match the connections to the TV
input. For example, if an external device’s output is HDMI, it should be connected to an HDMI input on the TV.
t Make sure your connected devices are powered on.
t Be sure to select the correct input source by pressing the SOURCE button on the remote control.
t Reboot the connected device by reconnecting the device’s power cable.
RF (Cable/Antenna) Connection
The TV is not receiving all channels.
t Make sure the coaxial cable is connected securely.
t Run Auto Program to add available channels to the channel list.
go to MENU - Channel - Auto program then select Auto and make sure the correct Cable TV signal type is set
in the menu. There are 3 options. (STD, HRC and IRC)
t Verify the antenna is positioned correctly.
No Caption on digital channels.
t Check the Caption Setup menu. Try changing Caption Mode Service 1 to CC1.
t Some channels may not have caption data.
The picture is distorted: macroblock,
error, small block, dots, pixelization.
t Compression of video contents may cause picture distortion, especially on fast moving pictures such as those in
sports and action movies.
t A weak signal can cause picture distortion. This is not a TV problem.
Others
Purple/green rolling horizontal bars and
buzzing noise from the TV speakers with
Component cable connection.
t Remove the left and right audio connections from the set-top-box. If the buzzing stops, this indicates that the settop-box has a grounding issue. Replace the Component video cables with an HDMI connection.
The picture will not display in full screen.
t HD channels will have black bars on either side of the screen when displaying up scaled SD (4:3) contents.
t Black bars on the top and bottom appear when movies that have aspect ratios different from your TV play on the
TV.
t Adjust the picture size option on your external device or change the TV to full screen.
The remote control does not work.
t Replace the remote control's batteries. Make sure you insert them with the polarity (+/–) correct .
t Clean the transmission window located on the top of the remote control.
t Try pointing the remote directly at the TV from 5~6 feet away.
The cable/set top box remote control
does not turn the TV on or off, or adjust
the volume.
t Program the Cable/Set top box remote control to operate the TV. Refer to the Cable/Set top box user manual for
the SAMSUNG TV code.
A “Mode Not Supported” message
appears.
t Check the supported resolution of the TV and adjust the external device’s output resolution accordingly. Refer to
resolution settings in this manual.
Caption on the TV menu is greyed out.
t You cannot select Caption in the TV menu when watching content from a device connected via HDMI or
Component.
t Caption must be activated on the external device.
There is a plastic smell from the TV.
t This smell is normal and will dissipate in a few days.
TV Signal Strength is unavailable in the
Self Diagnosis Test menu.
t This function is only available for digital channels received through an Antenna / RF/Coax connection.
TV is tilted to the right or left side.
t Remove the stand base from the TV and reassemble it.
The Channel menu is grey out
(unavailable).
t The Channel menu is only available when you select the TV source.
Your settings are lost after 30 minutes or
every time the TV is turned off.
t If TV is in the Store Demo mode, it will reset audio and picture settings every 30 minutes. Please change from
Store Demo mode to Home Use mode using the Plug & Play procedure. Press the SOURCE button to select
TV mode, go to MENU ĺ Setup ĺ Plug & Play ĺENTERE.
You have intermittent loss of audio or
video.
t Check the cable connections and reconnect them.
t Loss of audio or video can be caused by using overly rigid or thick cables. Make sure the cables are flexible
enough for long term use. If mounting the TV to the wall, we recommend using cables with 90 degree
connectors.
You see small particles when you look
closely at the edge of the frame of
the TV.
t This is part of the product’s design and is not a defect.
POP (TV’s internal banner ad) appears
on the screen.
t Select Home Use under Plug & Play mode. For details, refer to Plug & Play (Initial Setup).
✎
✎
✎
✎
This TFT LED panel uses a panel consisting of sub pixels which require sophisticated technology to produce. However, there may
be a few bright or dark pixels on the screen. These pixels will have no impact on the performance of the product.
Watch these troubleshooting on video at www.samsung.com/spsn.
Some functions and pictures shown in this manual are available on specific models only.
You can keep your TV in optimum condition by upgrading it with the latest firmware from the Samsung web site (samsung.com
ĺ Support ĺ Downloads). To upgrade, download the firmware to your computer, copy the firmware file to a USB memory stick,
insert the USB memory stick into the TV's USB slot, and then select Support > Software Upgrade in the TV's menu.
- 14-
Storage and Maintenance
✎
✎
If a sticker was attached to the TV screen, some debris can remain after you remove the sticker. Please clean it before watching
the TV.
The exterior and screen of the product can get scratched during cleaning. Be sure to wipe the exterior and screen carefully using
a soft cloth to prevent scratches.
Clean the product with a soft cloth
dampened with in a small amount of
water. Do not use a flammable liquid
(e.g. benzene, thinners) or a cleaning
agent.
Do not spray water directly onto the
product. Any liquid that goes into the
product may cause a failure, fire, or
electric shock.
License
TheaterSound, SRS and the symbol are
trademarks of SRS Labs, Inc.
TheaterSound technology is incorporated under
licence from SRS Labs, Inc.
SRS TheaterSound™ provides the most immersive
surround sound experience from the TV's built-in
speakers, while maintaining steady volume and
delivering rich bass and clear dialog.
DivX Certified® to play DivX® video up to HD 1080p, including premium content.
ABOUT DIVX VIDEO: DivX® is a digital video format created by DivX, LLC, a subsidiary of Rovi Corporation. This is an official DivX
Certified® device that plays DivX video. Visit divx. com for more information and software tools to convert your files into DivX videos.
ABOUT DIVX VIDEO-ON-DEMAND: This DivX Certified® device must be registered in order to play purchased DivX Video-onDemand (VOD) movies. To obtain your registration code, locate the DivX VOD section in your device setup menu. Go to vod. divx.
com for more information on how to complete your registration. Covered by one or more of the following U.S. patents : 7,295,673;
7,460,668; 7,515,710; 7,519,274 DivX®, DivX Certified® and associated logos are trademarks of Rovi Corporation or its subsidiaries
and are used under license.
Manufactured under license from Dolby Laboratories. Dolby and the double-D symbol are trademarks of
Dolby Laboratories.
Manufactured under license under U.S. Patent Nos: 5,956,674; 5,974,380; 6,487,535 & other U.S. and
worldwide patents issued & pending. DTS, the Symbol, & DTS and the Symbol together are registered
trademarks & DTS 2.0+Digital Out is a trademark of DTS, Inc. Product includes software. © DTS, Inc. All
Rights Reserved.
The terms HDMI and HDMI High-Definition Multimedia Interface, and the HDMI Logo are trademarks or
registered trademarks of HDMI Licensing LLC in the United States and other countries.
Open Source License Notice
Open Source used in this product can be found on the following webpage. (http://opensource.samsung.com) Open Source License
Notice is written only English.
To send inquiries and requests for questions regarding open sources, contact Samsung via Email ([email protected]).
■ This product uses some software programs which are distributed under the Independent JPEG Group.
ICU License - ICU 1.8.1 and later
COPYRIGHT AND PERMISSION NOTICE
Copyright (c) 1995-2008 International Business Machines Corporation and others All rights reserved.
Permission is hereby granted, free of charge, to any person obtaining a copy of this software and associated documentation files (the "Software"), to deal in the Software
without restriction, including without limitation the rights to use, copy, modify, merge, publish, distribute, and/or sell copies of the Software, and to permit persons to
whom the Software is furnished to do so, provided that the above copyright notice(s) and this permission notice appear in all copies of the Software and that both the
above copyright notice(s) and this permission notice appear in supporting documentation.
THE SOFTWARE IS PROVIDED "AS IS", WITHOUT WARRANTY OF ANY KIND, EXPRESS OR IMPLIED, INCLUDING BUT NOT LIMITED TO THE WARRANTIES
OF MERCHANTABILITY, FITNESS FOR A PARTICULAR PURPOSE AND NONINFRINGEMENT OF THIRD PARTY RIGHTS. IN NO EVENT SHALL THE COPYRIGHT
HOLDER OR HOLDERS INCLUDED IN THIS NOTICE BE LIABLE FOR ANY CLAIM, OR ANY SPECIAL INDIRECT OR CONSEQUENTIAL DAMAGES, OR ANY
DAMAGES WHATSOEVER RESULTING FROM LOSS OF USE, DATA OR PROFITS, WHETHER IN AN ACTION OF CONTRACT, NEGLIGENCE OR OTHER TORTIOUS
ACTION, ARISING OUT OF OR IN CONNECTION WITH THE USE OR PERFORMANCE OF THIS SOFTWARE.
Except as contained in this notice, the name of a copyright holder shall not be used in advertising or otherwise to promote the sale, use or other dealings in this Software
without prior written authorization of the copyright holder.
All trademarks and registered trademarks mentioned herein are the property of their respective owners.
- 15 -
Specifications
Environmental
Considerations
Operating Temperature
Operating Humidity
Storage Temperature
Storage Humidity
50°F to 104°F (10°C to 40°C)
10% to 80%, non-condensing
-4°F to 113°F (-20°C to 45°C )
5% to 95%, non-condensing
UN40EH6000
UN40EH6050
UN46EH6000
UN46EH6050
UN50EH6000
UN50EH6050
40" Class
(40.0" measured
diagonally)
46" Class
(45.9" measured
diagonally)
50" Class
(49.5" measured
diagonally)
Model Name
Display Resolution
Screen Size
(Diagonal)
UN55EH6000
UN55EH6050
UN60EH6000
UN60EH6050
UN65EH6000
UN65EH6050
60" Class
(60.0" measured
diagonally)
65" Class
(64.5" measured
diagonally)
1920 x 1080
Sound
Output
55" Class
(54.6" measured
diagonally)
10W x 2
Dimensions
(W x D x H)
Body
With stand
Weight
Without Stand
With Stand
36.5 X 3.6 X 21.8 inches 41.7 X 3.7 X 24.7 inches 44.7 X 3.7 X 26.5 inches 49.2 X 3.7 X 28.9 inches 54.0 X 3.7 X 31.7 inches
(927.6 X 93.3 X 555.5
(1059.8 X 94.3 X 629.4 (1137.6 X 94.5 X 673.4 (1250.6 X 94.3 X 735.7 (1374.1 X 94.3 X 807.0
(mm))
(mm))
(mm))
(mm))
(mm))
36.5 X 8.9 X 23.8 inches 41.7 X 8.9 X 26.7 inches 44.7 X 8.9 X 28.5 inches 49.2 X 8.9 X 31.0 inches 54.0 X 12.9 X 33.8 inches
(927.6 X 227.6 X 606.5 (1059.8 X 227.6 X 680.3 (1137.6 X 227.6 X 725.0 (1250.6 X 227.6 X 789.2 (1374.1 X 329.8 X 859.0
(mm))
(mm))
(mm))
(mm))
(mm))
20.2 Ibs (9.2 kg)
24.6 Ibs (11.2 kg)
26.4 Ibs (12.0 kg)
30.8 Ibs (14.0 kg)
34.3 Ibs (15.6 kg)
40.1 Ibs (18.2 kg)
45.6 Ibs (20.7 kg)
51.3 Ibs (23.3 kg)
54.6 Ibs (24.8 kg)
60.4 Ibs (27.4 kg)
58.4 X 3.8 X 34.4 inches
(1484.5 X 96.3 X 873.8
(mm))
58.4 X 12.9 X 36.4 inches
(1484.5 X 329.8 X 926.5
(mm))
62.3 Ibs (28.3 kg)
71.6 Ibs (32.5 kg)
✎ Design and specifications are subject to change without prior notice.
✎ This device is a Class B digital apparatus.
✎ For information about power supply, and more about power consumption, refer to the label attached to the
product.
✎ Typical power consumption is measured according to Energy Star Program requirements for Televisions.
✎ Dispose unwanted electronics through an approved recycler. To find the nearest recycling location, go to our
website: www.samsung.com/recyclingdirect or call, (877) 278-0799.
■ JACK PANEL DETAIL / REAR VIEW
5
1
6
4
2
3
(Unit: inches)
Model name
1
2
3
4
5
6
UN40EH6000 / UN40EH6050
9.6
5.8
5.8
24.1
7.8
7.8
UN46EH6000 / UN46EH6050
11.6
5.2
7.3
29.8
15.7
15.7
UN50EH6000 / UN50EH6050
12.5
6.8
8.1
31.3
15.7
15.7
UN55EH6000 / UN55EH6050
15.5
6.1
7.6
36.4
15.7
15.7
UN60EH6000 / UN60EH6050
16.7
8.6
8.8
38.5
15.7
15.7
UN65EH6000 / UN65EH6050
19.0
10.7
9.5
41.8
15.7
15.7
NOTE: All drawings are not necessarily to scale. Some dimensions are subject to change without prior notice. Refer to the dimensions
prior to performing installation of your TV. Not responsible for typographical or printed errors.
© 2012 Samsung Electronics America, Inc
- 16 -
•
Ill
•
Assemble Stand before removing TV from shipping box
Installing the TV Stand
• Components
1 EA
II
'-···When installing the stand, use the provided components and parts.
Stand (depending on the model)
1 EA
~
Guide Stand
•
~
x8(M4XL12)
Screws
4
_:·~--!
lJ ,.-::-! aJ
!
a:ce:::::::::=:===~\\
•
I_ - -
_ - -
- - -
- -
-
-I
Top View
lllt-x4
:~:
(M4 X L12)
I
I
I
• •',,' : ®ATT@)ENTION~· :
'..,:• ... t
-
""
I
;
I
I
I
:
00 NOT USE DO NOT USE DO NOT USE
:
1
CHEMICALS
I
1
I
GREASE
OIL
~
~
Place a soft cloth over the table to protect the TV, and then
place the TV on the cloth screen side down.
Insert the Stand Guide into the slot of TV bottom side.
BN68-04027A-00
1111111111111111111111111111111111111111111
BN68-04027A-00
Fo,:/!,~"Y problem
'
t
•
d
J
Search helpful video
samsung.com/spsn
~~~
~:.: .........
~*- . .._--...~
-~
Chat
samsung.com/support
DO NOT RETURN
TO STORE
..
Scan this with your
smartphone
Call Samsung Support
1-888-899-7604
I 111111111 IIIII II
BN68-03608A-08
Top 5 Troubleshooting Tips
TV 5 Problemas Principales
1. Can't Connect with Network or Apps (For internet supported
model only)
• Make sure there is a network connection
(Menu~ Network~ Network status)
• Contact your service provider
1. No se puede conectar con Ia Red o Apps (Solo para modelos que
soporten conexi6n a internet)
• Asegurese que el equipo este conectado a una red
(Menu ~ Red ~ Estado de Red)
• Contactar a su proveedor de Internet
2. No Picture/Sound or Distorted Picture/Sound with an External Device
• Make sure your connection to the device is correct.
• Perform a TV Self Diagnosis to identify the problem
(Menu ~ Support ~Self Diagnosis ~ Sound or Picture Test)
• Change the picture size (Use "P. Size" button on your remote)
2. No hay lmagen/sonido o Distorsi6n
de lmagen/sonido con un dispositivo externo
• Asegure que Ia conexion ffsica del dispositivo sea correcta
• Para identificar el problema, realice un Auto diagnostico en Ia TV
(Menu ~ Soporte de Tecnico ~ Autodiagnostico
~ Prueba de Imagen o Sonido)
• Cambie el tamano de Ia imagen (Use el baton "P. Size" del control remota)
3. Poor Picture Quality
• Verify your signal is High Definition or Standard Definition
(Contact your service provider)
4. Your Settings are Lost after 30 Minutes
• Change to Home Mode
("Tools" on your remote ~Store Demo Off)
5. "Weak or No Signal" Displayed in TV Mode I Cannot Find Channel
• Press Source button on your remote
• Run Auto Program and search for channels
(Menu ~ System ~ Plug &Play ~ Enter)
Scan the QR code
to view our helpful
How-to Videos
Escanear el Codigo QR para ver nuestros
videos demostrativos de Video Guia
3. Mala Calidad de Imagen
• Verificar si su senal es Alta Definicion o Definicion Regular
(Contactar a su proveedor de Servicios)
4. Su configuraci6n se pierde despues de 30 minutos
• Cambiar a Usa Domiciliario
(Use el baton "Tools" del control remota ~Demo Comercio Desac.)
5. "Senales Debiles o lnexistentes" Mensaje desplegado en
TV Mode I No puede encontrar canales
• Presione el baton "Source" en su control remota
• Carra Auto Program e inicie busqueda de canales
(Menu ~ Sistema ~ Plug &Play ~ Enter)
This symbol indicates that high voltage is present
inside. It is dangerous to make any kind of contact
with any internal part of this product.
CAUTION: TO REDUCE THE RISK OF ELECTRIC SHOCK. DO NOT
REMOVE COVER (OR BACK). THERE ARE NO USER SERVICEABLE
PARTS INSIDE. REFER ALL SERVICING TO QUALIFIED PERSONNEL.
This symbol alerts you that important literature
concerning operation and maintenance has been
included with this product.
• The slots and openings in the cabinet and in the back or bottom are provided for necessary ventilation. To ensure reliable operation of this
apparatus, and to protect it from overheating, these slots and openings must never be blocked or covered.
- Do not cover the slots and openings with a cloth or other materials.
- Do not block the slots and openings by placing this apparatus on a bed, sofa, rug or other similar surface.
- Do not place this apparatus in a confined space, such as a bookcase, or built-in cabinet, unless proper ventilation is provided.
- Install the product keeping the specified distance from the wall (see the information below.)
* DLP TVs, Direct View Type TVs, and Projectors~ 1Ocm
* Products with 32" or larger displays~ Scm
*Other products~ 4cm
• Do not place this apparatus near or over a radiator or heat resistor, or where it is exposed to direct sunlight.
• Do not place a water containing vessel (vases etc.) on this apparatus, as this can result in a risk of fire or electric shock.
• Do not expose this apparatus to rain or place it near water( near a bathtub, washbowl, kitchen sink, or laundry tub, in a wet basement, or
near a swimming pool etc.). If this appratus accidentally gets wet, unplug it and contact an authorized dealer immediately.
Make sure to pull out the power cord from the outlet before cleaning.
• This appratus use batteries. In your community there might be regulations that require you to dispose of these batteries properly under
environmental considerations. Please contact your local authorities for disposal or recycling information.
• Do not overload wall outlets, extension cords or adaptors beyond their capacity, since this can result in tire or electric shock.
• Power-supply cords should be routed so that they are not likely to be walked on or pinched by items placed upon or against them, paying
particular attention to cords at plug end, adaptors and the point where they exit from the appliance.
• To protect this apparatus from a lightning storm, or when it is left unattended and unused for long periods of time, unplug it from the wall
outlet and disconnect the antenna or cable system. This will prevent damage to the set due to lightning and power line surges.
• Before connecting the AC power cord to the DC adaptor outlet, make sure the voltage designation of the DC adaptor corrsponds to the
local electrical supply.
• Never insert anything metallic into the open parts of this apparatus. Doing so many create a danger of electric shock.
• To avoid electric shock, never touch the inside of this apparatus. Only a qualified technician should open this apparatus.
• Make sure to plug the power cord in until it is firmly inserted. When removing the power cord, make sure to hold the power plug when
pulling the plug from the outlet. Do not touch the power cord with wet hands.
• If this appratus does not operate normally- in particular, if there are any unusual sounds or smells coming from it
- unplug it immediately and contact an authorized dealer or service center.
• Be sure to pull the power plug out of the outlet if the TV is to remain unused or if you are to leave the house for an extended period of
time (especially when children, elderly or disabled people will be left alone in the house).
- Accumulated dust can cause an electric shock, an electric leakage or a fire by causing the power cord to generate sparks and heat or the
insulation to deteriorate.
• Be sure to contact an authorized service center, when installing your set in a location with heavy dust, high or low temperatures, high
humidity, chemical substances and where it operates for 24 hours such as the airport, the train station etc.
Failure to do so may cause serious damage to your set.
• Use only a properly grounded plug and receptacle.
- An improper ground may cause electric shock or equipment damage. (Class I Equipment only.)
• To disconnect the apparatus from the mains, the plug must be pulled out from the mains socket, therefore the mains plug shall be readily
operable.
• Do not allow children to hang onto the product.
• Store the accessories (battery, etc.) in a location safely out of the reach of children.
• Do not install the product in an unstable location such as a shaky self, a slanted tloor or a location exposed to vibration.
• Do not drop or impart any shock to the product. If the product is damaged, disconnect the power cord and contact a service center.
• Unplug the power cord from the power outlet and wipe the product using a soft, dry cloth. Do not use any chemicals such as wax, benzene,
alcohol, thinners, insecticide, air freshener, lubricant or detergent. This may damage the appearance or erase the printing on the product.
• Apparatus shall not be exposed to dripping or splashing.
• Do not dispose of batteries in a fire.
• Do not short circuit, disassemble or overheat the batteries.
• Danger of explosion if battery is incorrectly replaced. Replace only with the same or equivalent type.
®
• WARNING- TO PREVENT THE SPREAD OF FIRE, KEEP CANDLES OR OTHER OPEN FLAMES AWAY
FROM THIS PRODUCT AT ALL TIMES.
-English-
.
PRECAUCION
Este simbolo mdica Ia pn:"encia de alto \o!taje en
d interior. Es pcligroso cntrar en contacto con
cualquier rieza interior de L'stc producto
I'REC.\LICION: PARA RCDUCIR EL PELIURO DE DESCARG·\
ll ECTRIC•\. NO RETIRE LA CURIERTA. NO Hi\Y PIEZAS Et-; Fl
A.. I I"E\'TIUI\: POLR RU)L'IRI·. I.LS RIS()LI S I)'IJXCTROCUI'KlR Nl
RETIRF7 PAS LE C'\POT (Nl 1.1· PAN\JJ:.'\l- ARRICIU:J. A L"l\.1 I I:RIITR I) I
l:APP.\REIL. A\JCU\Jl PllCE \JL !'LUI L: I RL RFPARFr: P.\R L'LITILIS,\[ LL'R.
POLIR TO!J I DFP.'I.NN-\GF. i\DRF'iSF7- VOLI~ :\ I :N <;;p~·crt\1 1'\TF
1'-:lTRIOR
I CO~SLJ
• Les fcntes et les ouvertures mCnagCes dans le boitier ainsi qu'a J'arriere et au-dessous de l'appareil assurent Ia ventilution de ce dernier.
Afin de garantir lc bon fonctionncment de l'apparcil et Cvitcr lcs risques de surchaull'c. ccs fentes et ouvertures ne doivent etre ni obstruees
ni couvertes.
- Ne couvrcz pas les fenres et les ouvertures avec un morceau de tissu ou tout autre objet
- Ne les ohstruez pas non plus en playant l'appareil sur unlit un canape. un tapis L1U toute autre surt:1ce apparentCe.
- Ne placez pas \'apparcil dans un environncmcnt clos tel qu·unc bibliothCquc ou une armoire encastrCc. saufsi une ventilation adequate
est prevue.
- Installcz lc produit en maintcnant une distance conecte avec lemur (voir infonnations ci-dessous).
* TC!Cviseurs DLP. tCICviscurs de type Direct Vie\V et projccteurs------> 10 em
* Appareils dotCs d'un Ccran 32" ou plus------. 5 em
* Autrcs produits------> 4 em
• T\e p!acez pas l"appareil a proximitC ou au-dessus d'un radiatcur ou d'une houche d'air clwud. de meme que dans un endroit expose a Ia
lumiere direete du solei!.
• Ne placeL aucun rCcipicnt (vases etc.) d'eau sur l'appareil car cela reprCsente un risque d'inccndic ou de dtcharge Clcctrique.
• N 'exposcz pas l'appareil a Ia pluie ct ne le placez pas a proximite d'une source d'eau. par exemple une baignoire, un lavabo, un Cvier. un
bac de lavage, un sous-sol hum ide, une piscine. etc. Si l'app areil vient <1 Ctre mouillC par accident. debranchCL:-le et contactez
immtdiatement un revendcur agree. Assurcz-vous que le corulm d'alimentation est dCbranchC avant de ncttoycr lc procluit.
• Cct appareil peut fonctionner sur piles. Dans un souci de preservation de l'environnement. Ia rCglcmcntation locale prCvoit pcut-Ctrc des
mesures sptcifiqucs de recuperation des piles usagees.Veuillez done contacter les auwritCs compCtentes afin d'obtenir des informations sur
Ia mise au rebut ou le recyclagc des piles.
• Evitez de surcharger les priscs murales, les rallonges et les priscs mult iplcs car ccla entraine Llll risque d'inccndic ou de dCcharge Clectrique.
• Les cordons d'alimentation doivent 2trc dt-rou!Cs de sortc qu'aucun objet place sur ou contrc cux nc les chevauche ou lcs pi nee.
Accordez une attention particulitrc aux cordons au niveau des fiches, des prise~ et de Ia sortie de l'appareil.
• En cas d'orage, ou bien lorsque vous vous absentez ou n'utilisez pa~ votre <~ppareil pendant une longue pCriode, dCbranche7 celui-ci de la
prise murale et debranchcz Cgalement lc c5ble d"antenne ou lc cordon de conncxion au rCseau dible.
Ces precautions Cviteront que I'appareil ne so it endommagC par Ia foudrc ou par des surtensions.
• Avant de raccorder le cordon d'alimentation CA a Ia prise de l'adaptateur CT, vCrif'ieL que Ia tension indiquCe sur ce dcrnicr correspond
bien a Ia tension dC!ivree p<1r le rCseau Clectrique local.
• N'insCrez aucun objet mCtallique dans lcs ouvertures de l'appareil. vous risqueriez de recevoir unt dCcharge dectrique.
·A fin d'Cviter tout risque d'Ciectrocution, nc mettezjamais les doigts i l'intCricur de l'appareil.
Seul un tcchnicien qualitie est habilitC a ouvrir lc boitier de l'appareil.
• Assurez-vous de bien brancher lc cordon d'alimentation. Assure;t-vous de bien tenir Ia prise en main lorsque vous Ia dCbranchez.
Nc touchez en aucune circonstance le cordon d'alimentation avec les mains mouilltes.
• Si l'appareil ne fonction nc pas normalcment. en p<lrticulier s'il Cmet des odcurs oudcs sons anormaux, dtbranchcz-le immCdiatement et
contactez un revendeur ou un centre de dCpannagc agrCC.
• Vcillez a bien dCbrancher le cordon d1nlimcntation si Ia tC\Cvision doit rcstee inutilisCe, ou lorsquc vous quittcz Yotre domicile, pendant unc
pCriodc assez longue (et plus specialement sides cnl~mts, des pcrsonnes dgCes ou des majeurs incapables doivent rester scul il votrc domicile)
- L1accumulation de poussieres peut provoqucr unc Clectrocution. unc pertc d'Cncrgic. ou un incendie induit par le cordon d'alimentntion,
dU a des variations de tension, unc surchauffe ou une deteriorntion de !'isolation
• Veillez 3 contacter un centre de services homologue lorsque vous instJllez votre tClCviscur dans un endroit trCs poussi0rcux. hum ide,
expose 3 des temperatures elevCes ou l~tibles ou a des produits chimiques, ou s'il fonctionne sans interruption, par cxemplc dans lcs
aCroports, les garcs, etc. Si vous ne Jc faites pas, vous risquez d'endommllger gravement votrc tC!Cviseur
• Utiliser uniquement des pri~cs correctemcnt reliees a Ia terre.
-Ln sol inadapte peut causer un choc electrique ou un ineendic. (Appareils deCLASSE 1 uniquement.)
• Pour deconnecter l'appareil du sccteur, Ia prise doit Ctrc dCbrunchCe de Ia prise l·lectriquc du secteur. Par consequent, \;J prise du secteur doit
Ctre en Ctat de marehe.
• Utiliscr uniquement des pri~cs corrcctemcnt re!iCes 3 Ia tene.
• Rangez les accessoires (batterie, etc.) dJns un endroit sUr. hors de Ia portCe des enfants.
• N'installez pas le produit sur une surface instable telle qu'unc 0tllgCre chancel ante, un sol non horizontal ou un endroit soumis c\ des vibrations.
• Ne faites ni tomber, ni subir de choc au produit. Si le produit est cndommagC, dCconnecte;: lc cordon d'alimcntation et contactez un centre
de services.
• LJCbranchez le cordon d'alimentation de Ia prise secteur et essuycz le produit a \'aide d'un chitTon doux et sec. T\'utilisez pas de produit
chimique, tels que de Ia eire, du benzene. de l'alcool. du diluant. de \'insecticide. du dCsodorisant, du lubritiant ou du dCtcrgcnt.
Cela peut endommager ]'aspect Ull emlcer ]'impression sur l'appareil.
• L'appareil ne doit pas Ctrc expose a l'humiditC ni aux Cclaboussures.
• Ne jetez pas les batteries au tCu.
• Ne court-circuitez pas nine dCsassemblez lcs batteries et ne les soumettez pas il unc chaleur cxees~ive.
• Un risque d'explosion survicnt si la battcric est replacCe de maniCrc incorrecte. Ne Ia remplacez qu'ayec une battcrie du
mCmc tvpe.
®
• AVF.RTISSEMENT- POUR EVITER TOLT RISQUF. D'I:\CENIJIE, VEILLEZ ,\ GARUER CE PROUUIT LOI!'i DE
BOUGIES OU D'AUTRES SOI:RCES DE FEU.
- Frangais-
.
if.
Este simbolo lc alcrta de que con c"tc producto sc
PUED.o\ RFPARAR E1 USUARIO
PERSONAL CAI.Ifi(AIJ() DE SfRVICIO TEC'\ICO
ineluye documentaeiOn importantc eorresrondicntc a!
runcionamiento )' manknimiento.
• Las ram1ras y aberturas existentcs en Ia unidad yen Ia parte trascra o inferior se facilitan para proporcionar !a ventilaci6n necesaria. Para
garantizar el funcionamiento tiable de cstc aparato. y para protegcrln frcnte a sobrecalentamiento, csta~ ranuras} abertura~ nunca deben
bloquearse ni cubrirse.
- '\o cubra Ins ranuras y abcrturas con un pafio o con cualquier otro material.
-No bloquee las ranums ni ahcrturas colocando cste aparato sobre la cama, sofa. alfombra o superficie similar.
-No coloque este aparato en un espacio ccrrado. como una libreria, o un armaria empotrado, a menos que se proporcione una ventilaci6n
correcta.
- lnstale el producto con~ervando Ia distancia cspecificada respecto a Ia pared (vea Ia informaciOn siguiente).
* Televisores DLP. televisorcs tipo visualizaci()n directa y pro.yectores------. 10 em
* Aparatos con una pantallu de 32" o mayor-----+ S em
* Otros productos ------> 4 em
• No coloquc este aparato cerca o sabre un radiador o una rejilla de aire caliente, o en lugares expuestos a luz solar directa.
• No coloquc recipientes con agua sobre este aparato Uarros. etc.). ~.:a que podria representar riesgo de inccndio o descJrga electrica.
• No exponga este aparato a Ia lluvia ni lo coloque cerca de agua (cerca de una bafiera, lavabo, fregadero o lavadero, en un s6tllno hllmedo
ni cerca de una piscina o similar). Si este aparato aceidentalmente se moja. desenchUfelo y p6ngase en contacto inmediatamcnte con un
tCcnico uutorizado. Antes de !impiar el producto desconecte el cable de alimentaciOn de Ia toma de corricnte.
• Estc aparato utiliza bateriJs. En su comunidad puede que existan nonnativas que requieran Ia disposici6n de estas baterias de fonna
adccuadu bajo considcraciones am bien tales.
P6ngase en contacto con las autoridades locales para obtener infonnaci6n sabre desccho y rcciclaje.
• No sobrccargue las lomas murales, los alargadores ni los receptriculos corrcspondientes par encirna de su capacidad, ya que esto puede
generar incendios o descargas electricas.
• Los cables de alimentaci6n y protecci6n deben colocarsc de forma que no puedan pisarse ni quedar atrapados por objctos cncima o contra elias,
poniendo especial atenciOn en los cables cerea del enchufc, los receptilculos de los electrodomesticos y el punto en el que salen del aparato.
• Para proteger este aparato durante una tormenta eltctrica o cuando no lo uti lice durante largos periodos de tiempo, descnchUfelo de Ia toma
de Ia pared y desconecte Ia antena o el cable del sistema. Esto evitani que cl equipo se dafie por rayos o picas de tensiOn de Ia linea e!ectrica.
·Antes de concctar cl cable de alimcntaciOn de CA a Ia toma del adaptador de CC. ascgl1rcsc de que Ia designuciOn del voltaje del
adaptador de CC corresponde a Ia fuente elCctrica locnl.
• Nu1u.:a inserte nada mctftlico en las aberturas del aparato. IIaccrlo asi puede crear peligros de descarga ciCctrica.
• Para evitar descarga electrica, no toque nunca c1 interior de cste apJrato. S6lo un tCcnico caliticado debe abrir el a!ojamicnto del aparato.
• Cuando conecte el cable de alimentaci6n compruebc que el enchufc cstC tirmemcnte insertado. Para dcscnchufar cl cable de alimentaci6n, sujCtelo
por d enchufe y tire de estc para sacarlo de Ia toma de corricnte. Nunca toque cl cable de alimcntaci6n con las manos mojadas.
• Si este aparato no funcionn normalmcnte, en concreto. si cmitc sonidos extrai'ios o desprende olores desde el interior, desenchUJelo
inmediatamente y p6ngase en contacto con el distribuidor autorizado o el centro de ~ervicio tCcnico.
• AscgUrcse de desconectar cl cnchufe de alimentaciOn de Ia toma de corrientc si Ia TV ha dejado de utilizarse, o de~ea salir de casa. durante
un lnrgo pcriodo de tiempo (especialmente cuando seu nccesario dejar solos en casa a nifios, ancianos o personus incapacitadas).
- El polvo acumulado puedc provocar una descarga e!Cctrica. un conocircuito o un fuego, haciendo que el cable elCctrico gcnere ehispas y
calor, o detcriorando Ia funda protectora.
• P6ngase en contacto con un centro de servicio tCcnico autorizado cuando instale cl aparato en un lugar cxpuesto a gran cantidad de polvo.
temperaturas extremas. alto nivel de humedad y productos quimicos, yen lugares dondc se vaya a utilizar las 24 horas del dia. como
aeropuertos, estaciones. etc. El incumplirniento de estas indicaciones pucde causar scrios desperfectos en el aparato.
• Cuando instale el equipo. procure guardar una distancia de m:is de 10 em desde Ia pared para facilitar Ia ventilaci6n.
• lJse sO\amente conectores y receptilculos apropiados para hacer b conexi{.lll a tierra.
-Lna conexi6n a tierra inapropiada podria causar una descarga electrica o una averia en el equipo. (Sillo equipo de Clase 1.)
• Para desconectar el aparato de Ia corriente. debe desenchufar el cable de lu toma principal. par lo que e\ enchufe principal debe cstar
siempre t3cilmente accesible.
• No perm ita que los nifios jucguen con el producto.
• Guardc los llccesorios (pi las. etc.) en un Iugar seguro lUera del alcancc de los nifios.
• No coloquc el producto en un Iugar incstablc, inclinado o expue~lo a vibraciones.
• Nolo dcje cacr ni le de golpes. Si cl producto se cstropea. desenchufe cl cable de alimentaci6n y pbngasc en contacto con un
centro de servicio.
• Desconecte cl cable de alimentaci6n de Ia toma de corriente y seque el aparato con un pafio suJve y scco. No uti lice ningUn producto
quimico como cera, benzol, alcohol, disolventes, insecticida. ambientador de a ire, lubricante o detergcnte. Se pucdc dai'iar el aspecto o
borrar las estampaciones del produeto.
• Evite que cualquier liquido sal pique el aparato o gotec sobre Cl.
• T\o tire las pi las al fuego.
• 1\o cortocircuite, desmontc ni sobrecaliente las pi las.
• Si Ia pila no sc eoloca conectamente se corre cl riesgo de una explosit'm. Reemplace Ia pila sOlo por una igual ode
especificaciones equivJlentes.
®
• ADVERTENCIA- PARA IMPEDIR QUE EL FUEGO SE PROPAGLE, MAI\TENGA LAS VEI.AS U OTRAS
LLAMAS EXPUESTAS SIEMPRE ALEJADAS IJE ESTE PRODUCTO.
- Espaiiol-
.
Regulatory Compliance Statements
btl' simholo int\mna-o de
inclui litl'ra1ur<limpnr1ante
funcionamenlo ~ manutew,:<lo.
rrodu1o
o respec\1\0
L':-,h;
• As ranhuras e abertura~ na caixa e na parte pmterior ou inferior permitem a ventila~ao necess<lria. Para garantir o funcionamcnto correcto
do aparelho c para o protcger do sobrcaquecimento. nunca dcvc bloquear ou tap<:~r cstus ranhurus c uherturus.
- Nfio tape as ranhuras e aberturas com panos ou outros materia is.
- Ni.io bloqueic as ranhuras c ahcrturas colocando o aparelho numa cama. sofii. tapetc: ou outra superfkie semelhante.
- I\"i:io coloque este aparelho num espa~o fcchado, como uma esti.lnte ou um arm3rio embutido, a menos que tcnha ventila~ao
adequada.
- Instale o produto. mantendo a dist3ncia da parcdc cspccificada (consultc as informa~Ocs ahaixo.)
* Tclcvisores DLP, Televisorcs do Tipo Direct View e Projectorcs 10 em
* Produtos com vi sores de 32 polegadas ou maiorcs 5 em
* Outros produtos 4 em
• Niio coloquc cste aparelho perto ou por cima de um radiador, sistema de aquecimento ou num local em que esteja exposto a incidencia
directa dos raios solare~.
• Ni.io coloque recipientes com <lgua em cimu do aparelho (jarras etc.). porque pode provocar um incCndio ou choque elCctrico.
• Nao cxponha o aparelho achuva nern coloque em locais perto de {Jgua (pcrto de uma banheira, lavatOrio. lava-loi~a. tubo da maquina de
lavar a loiya, piscina ou numa cave com humidade). Se molhar acidcntalmcntc o aparelho, dcsliguc-o da ficha e contacte de imediato o
revcndcdor autorizado. Retire scmpre o cabo de alimcntayao da tomada antes de limpar o produto.
• Este aparelho tcm pilhas. Dcitc fora as pilhas adequadamentc de acordo com as considera~Ocs ambicntais cx.istentcs no scu pais.
Contactc as autoridadcs locais para obter informa~Oes sabre a destruiyao ou reciclagcm de pilhas.
• Niio sobrccarregue tomadas de parcdc, extens6es nem recept<lculos. porque pode provocar um incendio ou choque elCctrico.
• Deve colocar os cabos de alimentayao de forma a nao serem pisados nem entalados por objcctos, tendo em especial aten~ao os cabos
ligados a fichas, a receptftculos e ao ponto de onde os cabos sacm do aparelho.
• Para proteger o aparelho de trovoadas, ou quando niio for utilinl-lo durante longos perlodos de tempo, desligue o aparelho da tomada de
parcde e desliguc a antcna ou o sistema de Leicvisao pur cabo.
Oeste modo. o aparelho nao sofre eventuais danos provocados por rains e descargas em <.:abos de alta tensfio.
• Antes de ligar o cabo de alimcntw;:ao de CA a tomada do transfonnador de CC, certillque-se de que a designa~i'io de tcnsao do
transformador de CC corresponde a alimenta~ao electrica local.
• Nunca introduza objectos met3licos nas aberturas do aparelho. Se o fizer, pode provocar choques eiCctricos.
• Para evitar choques e!ectricos, nunca toque no interior do aparelho. A caixa do aparelho sO deve ser aberta por tecnicos qualificados.
• Introduza o cabo de alimentay3o completamente atC ao fim. Quando retirar o cabo de alimcntayao, ccrtifique-se de que o segura pela ficha
quando puxar a mesrna da tomada. Nao toque no cabo de alimcntayi'io com as milos molhadas.
• Se o aparelho nao funcionar nonnalmcnte- em particular, se o aparelho emitir ruidos ou cheiros invulgares- desliguc o aparclho de
imediato c contacte o revendcdor autorizado ou centro de assistencia tecnica.
• Certifique-se de que retira a ficha de alimentayao da tomada se o aparelho de televisi'io nao for utilizado ou sc u utilizador nao estiver em casa
durante urn periodo de tempo Iongo (especialmente quando criant;as. idosos ou pessoas com deficiencias forem deixadas sozinhas em cas a).
- Poeira acumulada pode provocar um choque eh~ctrico. uma fuga electrica ou um incCndio, fazendo com que o tio de alimcntayao
produza fafscas e aqucca ou deteriore o isolamcnto.
• Contacte um centro autorizado de assistencia tecnica quando instalar o produto em locais sujeitos a poeiras excessivas, locais sujeitos a
ternpcraturas altas ou baixas, locais com rnuita humidade, locais onde se utilizem subst{mcias qui micas e locais onde o monitor esteja a
funcionar 24 horas por dia como em acroportos. esta~Oes de comboio. etc. Sc nao o tizer. pode provocar sCrios danos no produto.
·Utilize uma ficha e uma tornada devidamente ligadas aterra.
-Uma ligayiio de terra deficiente podc causar choque clCctrico ou danos no cquipamento. (SO equipamento declasse 1.)
• Deve puxar a ficha da tomada para desligar o aparelho da corrente, de forma a dcixar a ficha pronta a scr utilizada.
• Niio deixe as crianyas mexer no produto.
• (fuarde os acessOrios (bateria. etc.) num local seguro fOra do akance das crian~as.
• Niio instalc o produto num local inst8.vel, como uma prateleira inclinada. um chilo desnivelado ou um local exposto a vibra~ao.
• Nao dcixc cair ou provoque qualquer em bate no produto. Se o produto estiver danificado, desligue o cabo de alimentayao e contacte urn
centro de assistencia.
• Desligue o cabo de alimentayJo da tomada e utilize um pano scco e macio para limpar o produto. Nao utilize quaisquer produtos quimicos
como cera, henzina. 3.lcoo\, dilucntes, insecticida, ambientador, lubrificante ou detergentc. Tal pode danificar o aspecto do produto ou
eliminar a impressao do mesmo.
• Nao deixc cair gotas ou salpicos em cima do aparelhu.
• Ni'io destrua as pilhas atraves de fogo.
• Nao provoque curto-circuito. nem desfaya ou sobreaque~a as pilhas.
• Existc perigo de explosao sea pilha for substituida incorrcctamcnte. Substitua-a apenas pelo mesmo tipo de pilha ou por
(\)
uma cquivalente.
• AVISO- PARA EVITAR 0 ALASTRAR DE UM INCE:"'DIO, MANTENHA SEMPRE AS VELAS OU OUTRO TIPO
DE CHAMA LONGE DESTE PRODUTO.
.
---j.
---j.
---j.
- Portugues-
-Federal Communications Commission (FCC)- USA
- Industry Canada Equipment Standard for Digital Equipment ( ICES-OOJ) - Canada
-Voluntary Control Council for Interference (VCCI)- Japan
-Bureau of Standards Metrology and Inspection (BSl\11)- Taiwan
-Korea Communications Commis~ion (KCC)- Rcpuhlic of Korea
-Italian Post Ministry· (llomologation)- ltaly
FCC Class A Notice
This device complies with part 15 of the FCC Rules. Operation is subject to the fallowing two conditions:
1. This device may not cause harmful interference, and
2. This device must accept any interference received, including interference that may cause undesired operation.
NOTE:
This equipment has been tested and found to comply with the limits for a Class A digital device. pursuant to Part 15 of the FCC
Rules. These limits are designed to provide reasonable protection against harmful interference when the equipment is operated
in a commercial environment. This equipment generates, uses, and can radiate radio frequency energy and, if not installed and
used in accordance with the instruction manual, may cause harmful interference to radio communications.
Operation of this equipment in a residential area is likely to cause harmful interference in which case the user will be required to
correct the interference at his own expense.
FCC Class B Notice
This device complies with part 15 of the FCC Rules. Operation is subject to the following two conditions:
1. This device may not cause harmful interference, and
2. This device must accept any interference received, including interference that may cause undesired operation.
NOTE:
This equipment has been tested and found to comply with the limits for a Class B dig1tal device. pursuant to Part 15 of the FCC
Rules. These limits are designed to provide reasonable protection against harmful interference in a residential installation. This
equipment generates, uses and can radiate radio frequency energy and, if not installed and used in accordance with the
instructions, may cause harmful interference to radio communications. However, there is no guarantee that interference will not
occur in a particular installation. If this equipment does cause harmful interference to radio or television reception, which can be
determined by turning the equipment off and on, the user is encouraged to try to correct the interference by one or more of the
following measures:
--Reorient or relocate the receiving antenna.
--Increase the separation between the equipment and receiver.
-- Connect the equipment into an outlet on a circuit different from that to which the receiver is connected.
-- Consult the dealer or an experienced radio/TV technician for help
User Information
Changes or modifications not expressly approved by the party responsible for compliance could void the user's authority to
operate the equipment. If necessary, consult with your dealer or an experienced radio/television technician for additiona
suggestions. You may find the booklet called How to Identify and Resolve Radio/TV Interference Problems helpful.
This booklet was prepared by the Federal Communications Commission. It is available from the U.S. Government Printing Office.
Washington. DC 20402, Stock Number 004-000-00345-4
The
SAMSUNG ELECTRONICS CO , LTO.
America QA Lab of Samsung
3351 Michelson Drive
Suite #290, Irvine, CA92612 USA
User must use shielded signal interface cables to maintain FCC compliance for the product.
Provided with this monitor is a detachable power supply cord with IEC320 style terminations.
It may be suitable for connection to any UL Listed personal computer with similar configuration.
Before making the connection, make sure the voltage rating of the computer convenience outlet is the same as the monitor and
that the ampere rating of the computer convenience outlet is equal or exceeds the monitor voltage rating.
For 120 Volt applications, use only UL Listed detachable power cord with NEMA configuration 5-15P type (parallel blades) plug
cap. For 240 Volt applications use only UL Listed detachable power supply cord with NEMA configuration 6-15P type
(tandem blades) plug cap
This television receiver provides display of television closed captioning in accordance with Section 15.119 of the FCC rules.
(TV broadcast receivers with picture screens 13 inches or larger in diameter models only)
-5-
Important Safety Instructions (UL Only)
ICES-003 Class A Notice· Avis NMB-003, C/asse A
This Class A digital apparatus complies with Canadian ICES-003.
Cet appareil numerique de Ia classe A est conforms a Ia norme NMB-003 du Canada.
ICES-003 Class B Notice· Avis NMB-003, Classe B
This Class B digital apparatus complies with Canadian ICES-003.
Cet appareil numerique de Ia classe B est conforms Ia norme NMB-003 du Canada.
a
VCCI Class A Notice
<
~ 0)~~1;1:, 't!U&:9!l!li!.t;]['\'HI[;JJ<~~ 13 ~~J!ilitltfJ.ili (VGG I) 0)£*1::£-:i '7 7- .AA!\UIHHf.i~ii:""C"t,
~O)~mi:Hi<II!JI~"'(~,E!l"t .Q l:'oli!l<M"~HI ~ill:~ "t ~ 1: tJI® L) ;l;:"t 0
~O)fi~I::I;I:~,E!l1\ffJI~i;JJt.,:~i*i:~i!49'7.JJ:: ?~J!<~:tl,.Q~ I:IJI'® L) ;l;:"t,
VCCI Class B Notice
~ O)~JII;I:, tU&:9!lll!li!i~~itiJl<llt~ 13 :HJ!ilitltfJ.ili (VGGI)
~O)~iif[l;l:, ~/I!JI~"'(~,E!l"t.Q ~
0)£*1::£-:i <'7 7- .ABffl~j!{if,j~iifo'""C"t o
1: ~§Jltil: 1..- H';l;:"tfJI,
~m~n7.>1:, $ltf~~~BI ~ill:~ -t ~ ctJ<® •J *"t,
Jfl(t&ma.!lel::tt-:>-c:IE 1..-~ 'IIX 'H&~ '~ 1..- <::1' ~ ~ ',
~O)!li!i;][IJI7~:;t'\'>7- vt::~ 3 :..-$ltf~!Jl!l::i!iJiVC
CCC Class A notice • China
~~A~F~.~~~~~~.~F~~~~~~~~~Ttt,
a~~ffl~l'.~~~~mFn~Ttt*Jfl(W~~rr~m~,
BSMI Class A Notice
The following statement is applicable to products shipped to Taiwan and marked as Class A on the product
compliance label.
'l'i!rf!Jll-t':
I) Read these instructions.
2) Keep these instructions.
3) Heed all warnings.
4) Follow all instructions.
5) Do not use this apparatus near water.
6) Clean only with dry cloth.
7) Do not block any ventilation openings, Install in accordance with the
manufacturer's instructions.
8) Do not install near any heat sources such as radiators, heat registers, stoves,
or other apparatus (including amplifiers) that produce heat.
9) Do not defeat the safety purpose of the polarized or grounding-type plug. A polarized plug has two
blades with one wider than the other. A grounding type plug has two blades and a third grounding prong.
The wide blade or the third prong are provided for your safety. If the provided plug does not fit into your outlet,
consult an electrician for replacement of the obsolete outlet.
10) Protect the power cord from being walked on or pinched particularly at plugs, convenience receptacles, and the
point where they exit from the apparatus.
I I) Only use attachments/accessories specified by the manufacturer.
12) Use only with cart, stand, tripod, bracket, or table specified by the manufacturer, or sold with the apparatus.
When a cart is used, use caution when moving the cart/apparatus combination to avoid injury from tip-over.
13) Unplug this apparatus during lightning storms or when unused for long periods of time.
14) Refer all servicing to qualified service personnel. Servicing is required when the apparatus has been damaged in
any way, such as power-supply cord or plug is damaged, liquid has been spilled or objects have fallen into the
apparatus, the apparatus has been exposed to rain or moisture, does not operate normally, or has been dropped.
~"'l'fllii'iYURlii'i~~, tt~f1ll:ll~~l!l~, ~~glit~~lt!IJI~ll, ~~ll'tit)}l.l',
~l!l~-~~*~Jfl(~~~=~~~,
L:
( ~
European Notice(Europe Only)
Products with the CE marking comply with the EMC Directive(2004/108/EC) and the Low Voltage
Directive(2006/95/EC) issued by the Commission of the European Community.
Compliance with these directives implies conformity to the following European Norms:
- EN55022: Radio Frequency Interference
- EN55024: Electromagnetic Immunity of Information Technology Equipment
- EN61 000-3-2: Power Line Harmonics
- EN61 000-3-3: Voltage Fluctuations
- EN55013: Radio disturbance characteristics of broadcast receivers and associated equipments
- EN55020: Electromagnetic immunity of broadcast receivers and associated equipments
• Ventilation
Do not place the apparatus in a rack or bookcase. Ensure that there is adequate ventilation and that you've
followed that manufacturer's instructions for mounting and installation.
European Class A Warning
(If the user manual declares the product as Class A, following statement applies.)
This is a class A product. In a domestic environment this product may cause radio interference in which case the
user may be required to take adequate measures.
~ '2,~7/7/ Ai"P/7/ (ICC CBss A /lk:it;e)
01717~ ~8)2.£ ~1Afll~~~
7J7IOI2.LI
AI§-0!-E- ~~~ ~~1q.
v
~As
an
.·or ~Qdum lllCld!il~
meets the !NERG¥ STAR'g'U1!:161iRH for energyeffieieRey, .
JO.l!liJAf '£~ .A.f§J;f2 OJ ~-9'9.1of.A.I71 Clf2.illj, 7Fcj£19.1 J;IQ10li.A.i
7fM§ '2,~7/7/ Bg7/7/ (ICC CBss B /lk:it;e)
Ol 717~ 7~}2£ :g<;fl!f>'-.jgj'~~ 7l7iS'Ai -'?£ 7FcJOII.A.i .A.~f2 ~~~ <5illj, 2.-E AI~OII.A.i .A.f§~ 4' ~'BLICf.
v
Contains Mercury, Dispose According to Local, State or Federal Laws
Italian Homologation Notice
Questa apparecchio e fabbricato in conformita al D.M.28.08.95 n.548
ed in particolare a quanta specificato nell Art.2, comma 1.
Questa apparecchio e fabbricato nella U.E. in conformita al D.M.28.08.95 n.548
Art.2, comma 1 ed al D.M.26.03.92 Art.1
-. For products produced in countries except European Community
Questa apparecchio e fabbricato in conformita al D.M.28.08.95 n.548
ed in particolare a quanta specificato nell Art.2, comma 1.
For products produced in European Community
Questa apparecchio e fabbricato nella U.E. in conform ita al D.M.28.08.95 n.548
Art.2, comma 1 ed al D.M.26.03.92 Art.1
-6-
-7-
1111111111111111111111111111111111111111111
AA68-03242L-07
SAMSUNG BRAND PRODUCTS
LIMITED WARRANTY TO ORIGINAL PURCHASER
This SAMSUNG brand product, as supplied and distributed by SAMSUNG and delivered new, in the original carton to the original
consumer purchaser, is warranted by SAMSUNG against manufacturing defects in materials and workmanship for a limited warranty
period of: (90 Days Parts and Labor for Commercial Use)
Categories
Parts
LCD/LED TV
I Year
Plasma Display
Projector (Excluding Lamp **)
I Year
2Year
PICO & LED Pocket Projector
I Year
I Year
2Year
Size
40" and Larger
37" and Smaller
All
All
Service
Carry-In or In Home
Carry-In
Carry-In or In Home
Carry-In or Pick up
I Year
All
Carry-In or Pick up
Labor
.
I Year
** 180 Days after Purchasing and 600 Hours of Use Lamp on Projector
This limited warranty begins on the original date of purchase, and is valid only on products purchased and used in the United States. To
receive warranty service, the purchaser must contact SAMSUNG for problem determination and service procedures. Warranty service can
only be performed by a SAMSUNG authorized service center. The original dated bill of sale must be presented upon request as proof of
purchase to SAMSUNG or SAMSUNG's authorized service center.
SAMSUNG will repair or replace this product, at our option and at no charge as stipulated herein, with new or reconditioned parts or
products if found to be defective during the limited warranty period specified above. All replaced parts and products become the property
ofSAMSUNG and must be returned to SAMSUNG. Replacement parts and products assume the remaining original warranty, or ninety (90)
days, whichever is longer.
Certain products are eligible for In-home service at Samsung's discretion. To receive in-home service, the product must be unobstructed
and accessible to service personnel. If during in-home service repair can not be completed, it may be necessary to remove, repair and
return the product. If in-home service is unavailable, SAMSUNG may elect, at our option, to provide for transportation of our choice
to and from a SAMSUNG authorized service center. Otherwise, and for 37" and smaller LCD/LED TV, transportation to and from the
SAMSUNG authorized service center is the responsibility of the purchaser.
·
This limited warranty covers manufacturing defects in materials and workmanship encountered in normal, and except to the extent
otherwise expressly provided for in this statement, noncommercial use of this product, and shall not apply to the following, including, but
not limited to: damage which occurs in shipment; delivery and installation; applications and uses for which this product was not intended;
altered product or serial numbers; cosmetic damage or exterior finish; accidents, abuse, neglect, fire, water, lightning or other acts of
nature; use of products, equipment, systems, utilities, services, parts, supplies, accessories, applications, installations, repairs, external
wiring or connectors not supplied or authorized by SAMSUNG which damage this product or result in service problems; incorrect
electrical line voltage, fluctuations and surges; custome~ adjustments and failure to follow operating instructions, cleaning, maintenance
and environmental instructions that are covered and prescribed in the instruction book; reception problems and distortion related to
noise, echo, interference or other signal transmission and delivery problems; brightness related to normal aging, or burned-in images.
SAMSUNG does not warrant uninterrupted or error-free operation of the product.
THERE ARE NO EXPRESS WARRANTIES OTHER THAN THOSE LISTED AND DESCRIBED ABOVE, AND
NO WARRANTIES WHETHER EXPRESS OR IMPLIED, INCLUDING, BUT NOT LIMITED TO, ANY IMPLIED
WARRANTIES OF MERCHANTABILITY OR FITNEss· FOR A PARTICULAR PURPOSE, SHALL APPLY AFTER
THE EXPRESS WARRANTY PERIODS STATED ABOVE, AND NO OTHER EXPRESS WARRANTY OR GUARANTY
GIVEN BY ANY PERSON, FIRM OR CORPORATION WITH RESPECT TO- THIS PRODUCT SHALL BE BINDING ON
SAMSUNG. SAMSUNG SHALL NOT BE LIABLE FOR LOSS OF REVENUE OR PROFITS, FAILURE TO REALIZE
SAVINGS OR OTHER BENEFITS, OR ANY OTHER SPECIAL, INCIDENTAL OR CONSEQUENTIAL DAMAGES
CAUSED BY THE USE, MISUSE OR INABILITY TO USE THIS PRODUCT, REGARDLESS OF THE LEGAL THEORY
ON WHICH THE CLAIM IS BASED, AND EVEN IF SAMSUNG HAS BEEN ADVISED OF THE POSSIBILITY OF
SUCH DAMAGES. NOR SHALL RECOVERY OF ANY KIND AGAINST SAMSUNG BE GREATER IN AMOUNT
THAN THE PURCHASE PRICE OF THE PRODUCT SOLD BY SAMSUNG AND CAUSING THE ALLEGED DAMAGE.
WITHOUT LIMITING THE FOREGOING, PURCHASER ASSUMES ALL RISK AND LIABILITY FOR LOSS,
DAMAGE OR INJURY TO PURCHASER AND PURCHASER'S PROPERTY AND TO OTHERS AND THEIR PROPERTY
ARISING OUT OF THE USE, MISUSE OR INABILITY TO USE THIS PRODUCT SOLD BY SAMSUNG NOT CAUSED
DIRECTLY BY THE NEGLIGENCE OF SAMSUNG. THIS LIMITED WARRANTY SHALL NOT EXTEND TO ANYONE OTHER
THAN THE ORIGINAL PURCHASER OF THIS PRODUCT, IS NONTRANSFERABLE AND STATES YOUR EXCLUSIVE
REMEDY.
Some states do not allow limitations on how long an implied warranty lasts, or the exclusion or limitation of incidental or consequential
damages, so the above limitations or exclusions may not apply to you. This warranty gives you specific legal rights, and you may also
have other rights which vary from state to state.
To obtain warranty service, please contact SAMSUNG at:
Samsung Electronics America, Inc.
85 Challenger RoacJ
Ridgefield Park, NJ 07660-2112
1-800-SAMSUNG (7267864) - www.samsung.com
1-800-749-0260: Only Projector
IMPORTANT WARRANTY INFORMATION REGARDING TELEVISION FORMAT VIEWING
Standard screen format televRons (4:3, the aspect ratio of the screen width to height) are primarily designed to view standard fonnat full..moUon video.
The images displayed oo them should primarily be in the standard 4:3 rntio foonat and comtantly moving. Displaying stationmy graphics and images on screen, such ·
~the daik tq> and bottoollt1terlx>x 1ms (wire screen pictures), should be limited to no moce than 15% ofthe total television viewing per week.
Wide screen fonnat televBons (16:9, the aspect ratio of the screen width to height) are primarily designed to view wide screen format full.motion video.
The images displayed on them should primarily be in the wide screen 16:9 rntio fonnat, or eXJE1dOO to fill the screen ifyour !IlOOOl offers this feature, and constantly
moving. Displaying stationmy graphics and images on screen, such as the daik siOO-OOrs on non-expnxhi standard format television video and progrnmming, should
be limited to no moce than 15% ofthe total televisioo viewing per week.
Mlitiooally, viewing other stationmy images and text such as stock marlret repOOs, vi<h> game displays, statim logoi, web site; oc computer graphics and }llttems,
should be limitOO ~ OOu!bed above foc all televisioos. Displaying any statiooazy images that excaxl the above gui~lines can cause uneven aging of Plasma Display
Panels that leave subtle, 00t pennanent bmned-in gOO;t images in the televisioo picture. To avoid this, vacy the progrnmming and images, and primarily display full
screen moving images, not stationmy }lltterns oc daik lms. On televisioo !IlOOOls that offer picture sizing features, use these controls to view the different fonnats as a
full screen picture.
Be careful in the selection and duration of televBon formats used for viewing. Uneven Plasma Dfiplay Pantt; aging as a result of fonnat selection and me,
as well as oCher bunlftHn images, is not covered by your Samsung limited warranty.
I 1111111111111111111111111
BP68-00263E-03