1
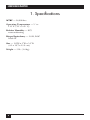
NOVEMBER 1996
FX155A
Lineshare Master
ter
are Mas
LineSh
CUSTOMER
SUPPORT
INFORMATION
ON
Order toll-free in the U.S. 24 hours, 7 A.M. Monday to midnight Friday: 877-877-BBOX
FREE technical support, 24 hours a day, 7 days a week: Call 724-746-5500 or fax 724-746-0746
Mail order: Black Box Corporation, 1000 Park Drive, Lawrence, PA 15055-1018
Web site: www.blackbox.com • E-mail: [email protected]
FCC STATEMENT
FEDERAL COMMUNICATIONS COMMISSION
RADIO FREQUENCY INTERFERENCE STATEMENT
Class B Digital Device. This equipment has been tested and found to comply with the
limits for a Class B computing device pursuant to Part 15 of the FCC Rules. These
limits are designed to provide reasonable protection against harmful interference in a
residential installation. However, there is no guarantee that interference will not occur
in a particular installation. This equipment generates, uses, and can radiate radio
frequency energy, and, if not installed and used in accordance with the instructions,
may cause harmful interference to radio communications. If this equipment does
cause harmful interference to radio or telephone reception, which can be determined
by turning the equipment off and on, the user is encouraged to try to correct the
interference by one of the following measures:
• Reorient or relocate the receiving antenna.
• Increase the separation between the equipment and receiver.
• Connect the equipment into an outlet on a circuit different from that to which
the receiver is connected.
• Consult an experienced radio/TV technician for help.
Caution:
Changes or modifications not expressly approved by the party
responsible for compliance could void the user’s authority to operate the
equipment.
To meet FCC requirements, shielded cables and power cords are required to connect
this device to a personal computer or other Class B certified device.
3
LINESHARE MASTER
NORMAS OFICIALES MEXICANAS (NOM)
ELECTRICAL SAFETY STATEMENT
INSTRUCCIONES DE SEGURIDAD
1. Todas las instrucciones de seguridad y operación deberán ser leídas antes
de que el aparato eléctrico sea operado.
2. Las instrucciones de seguridad y operación deberán ser guardadas para
referencia futura.
3. Todas las advertencias en el aparato eléctrico y en sus instrucciones de
operación deben ser respetadas.
4. Todas las instrucciones de operación y uso deben ser seguidas.
5. El aparato eléctrico no deberá ser usado cerca del agua—por ejemplo,
cerca de la tina de baño, lavabo, sótano mojado o cerca de una alberca,
etc..
6. El aparato eléctrico debe ser usado únicamente con carritos o pedestales
que sean recomendados por el fabricante.
7. El aparato eléctrico debe ser montado a la pared o al techo sólo como
sea recomendado por el fabricante.
8. Servicio—El usuario no debe intentar dar servicio al equipo eléctrico más
allá a lo descrito en las instrucciones de operación. Todo otro servicio
deberá ser referido a personal de servicio calificado.
9. El aparato eléctrico debe ser situado de tal manera que su posición no
interfiera su uso. La colocación del aparato eléctrico sobre una cama,
sofá, alfombra o superficie similar puede bloquea la ventilación, no se
debe colocar en libreros o gabinetes que impidan el flujo de aire por los
orificios de ventilación.
10. El equipo eléctrico deber ser situado fuera del alcance de fuentes de
calor como radiadores, registros de calor, estufas u otros aparatos
(incluyendo amplificadores) que producen calor.
4
NOM STATEMENT
11. El aparato eléctrico deberá ser connectado a una fuente de poder sólo
del tipo descrito en el instructivo de operación, o como se indique en el
aparato.
12. Precaución debe ser tomada de tal manera que la tierra fisica y la
polarización del equipo no sea eliminada.
13. Los cables de la fuente de poder deben ser guiados de tal manera que no
sean pisados ni pellizcados por objetos colocados sobre o contra ellos,
poniendo particular atención a los contactos y receptáculos donde salen
del aparato.
14. El equipo eléctrico debe ser limpiado únicamente de acuerdo a las
recomendaciones del fabricante.
15. En caso de existir, una antena externa deberá ser localizada lejos de las
lineas de energia.
16. El cable de corriente deberá ser desconectado del cuando el equipo no
sea usado por un largo periodo de tiempo.
17. Cuidado debe ser tomado de tal manera que objectos liquidos no sean
derramados sobre la cubierta u orificios de ventilación.
18. Servicio por personal calificado deberá ser provisto cuando:
A: El cable de poder o el contacto ha sido dañado; u
B: Objectos han caído o líquido ha sido derramado dentro del
aparato; o
C: El aparato ha sido expuesto a la lluvia; o
D: El aparato parece no operar normalmente o muestra un cambio en
su desempeño; o
E: El aparato ha sido tirado o su cubierta ha sido dañada.
5
LINESHARE MASTER
TRADEMARKS
All applied-for and registered trademarks are the property of their respective
owners.
6
TABLE OF CONTENTS
CONTENTS
1. Specifications ...................................................................................8
2. Introduction.....................................................................................9
2.1 Before You Begin.....................................................................9
2.2 About the Lineshare Master ...................................................9
3. Installation .......................................................................................11
3.1 Ports on the Lineshare Master................................................11
3.2 Installing the Lineshare Master ..............................................12
3.2.1 Installing the Lineshare Master on a Dedicated
Phone Line ....................................................................13
3.2.2 Installing the Lineshare Master with a Line
Sharing Device ..............................................................15
3.3.3 Installing the Lineshare Master without a Line
Sharing Device ..............................................................17
4. Using the Lineshare Master ............................................................18
5. Using the Lineshare Master Custom Functions.............................21
5.1 Entering the Programming Mode ..........................................21
5.2 Changing Functions ................................................................23
[1] Tone Time.........................................................................23
[2] Silence Time.....................................................................23
[3] Time Before First Tone ...................................................24
[4] Number of Tones.............................................................24
[6] Call Hold Function ..........................................................25
[9][9][9] Reset to Factory Settings .......................................26
6. Calculating the Timing Parameters................................................27
7
LINESHARE MASTER
1. Specifications
MTBF — 56,200 hrs.
Operating Temperature — 5° to
113° F (-15° to 45° C)
Relative Humidity — 85%
noncondensing
Ringer Equivalency — 1.0 B, DOC
load=30
Size — 1.8"H x 5"W x 5.5"D
(4.5 x 12.7 x 13.9 cm)
Weight — 3 lb. (1.4 kg)
8
LINESHARE MASTER
2. Introduction
2.1 Before You Begin
2.2 About the Lineshare Master
This guide is designed to introduce
you to the various installation and
operational procedures for using the
Lineshare Master.
The Lineshare Master is a state-ofthe-art device that produces a variety
of routing tones on outbound phone
calls. It is designed to work in
conjunction with a modem, fax, or
any type of automatic or manual-dial
telephone device. The Lineshare
Master lets any fax or modem device
automatically route calls through
line-sharing devices that detect fax
CalliNG (CNG) or Reverse Modem
Tones.
The Lineshare Master works
best when installed between the
telephone company’s line and a fax
or modem device. When a device
accesses the telephone line through
the Lineshare Master, the Lineshare
Master pauses until dialing is
complete. It then places the calling
device on hold and transmits a series
of user-selectable calling tones.
Please read through this guide and
select the installation procedures
appropriate for your specific
application before attempting to
connect or operate the Lineshare
Master.
NOTES
We recommend surge
protection for all telecommunications devices.
Use surge suppressors
and/or line conditioning on
the input power supply, as
well as the connected
telephone line.
When used in conjunction with a
Lineshare Pro (A/C, part number
FX150A, or D/C, part number
FX150A-D48), the Lineshare Master
can access multiple modem-type
devices on a single phone line.
9
LINESHARE MASTER
NOTE
The Lineshare Pro is a fourport line sharing device
designed to identify and
route any specified tone
produced by the Lineshare
Master.
Please read through the rest of
this guide to learn how to properly
operate the Lineshare Master.
10
LINESHARE MASTER
3. Installation
NOTE
CAUTION
Before
installing
the
Lineshare
Master,
we
recommend that you install
the fax or modem and
connect it to the telephone
line.
Do
not
connect
all
telephones in a home or
office through the Lineshare
Master. During power failure,
the unit will not pass the
telephone line through to the
phones.
Install the Lineshare Master on a
dedicated line with a fax or modem
device. When a fax or modem device
is not on a dedicated line, you need
to isolate the Lineshare Master from
other tone-dialing devices so they do
not interfere with its operation.
Placing the Lineshare Master on the
FAX port or MODEM port of a line
sharing device (such as the
Lineshare Pro) will isolate the unit
from other tone dialing devices on
the same phone line.
3.1 Ports on the Lineshare Master
The rear panel of the Lineshare
Master has four modular ports and a
power input port as shown in Figure
3-1. Only two of the four ports are
active; therefore, you must complete
installation procedures as stated for
proper operation.
If you are not using a line-sharing
device or you cannot connect the
system to a dedicated line, you can
disable the Lineshare Master by
using a tone command during any
phone call. (See Chapter 4.)
11
LINESHARE MASTER
LINE IN
PRIMARY
AUX 1
AUX 2
12V AC
Figure 3-1. Modular Ports and Power Input Port on the Lineshare
Master.
Connect the telephone equipment
to the modular ports on the
Lineshare Master as follows:
LINE IN
PRIMARY
12
Use this port to
connect a single
telephone line from a
wall jack to the
Lineshare Master.
Use this port to
connect a computer
modem, fax/modem,
or fax/modem card
to the Lineshare
Master.
NOTE
The AUX 1 and AUX 2 ports
are reserved for future use,
and are currently inactive.
LINESHARE MASTER
3.2 Installing the Lineshare Master
This section explains how to install
the Lineshare Master in most home
or office phone configurations. You
can install the Lineshare Master into
any one of the following phone
configurations:
• a dedicated phone line with
a line sharing device
• a dedicated phone line without
a line-sharing device
Installation procedures for each of
these configurations are provided in
the following sections.
To perform the installation
procedures in the next sections, you
may need the following equipment:
• one telephone cable—provided
with the Lineshare Master.
• additional telephone cables—
typically supplied with
equipment by the manufacturer.
You need additional telephone
cables for as many pieces of
equipment as you intend to
connect to the Lineshare Master.
If the equipment manufacturer
does not provide the required
cables, you can purchase them
from your dealer (part # EL04M04).
• extension cables—required if the
connecting equipment is not
located near the Lineshare
Master.
3.2.1 INSTALLING THE LINESHARE
MASTER ON A DEDICATED PHONE LINE
Figure 3-2 shows the Lineshare
Master on a dedicated phone line.
To install the Lineshare Master on
a dedicated phone line, follow these
steps:
1. Unplug the fax or modem
device telephone cable from the
wall jack, and plug it into the
PRIMARY port on the Lineshare
Master.
2. Plug one end of the telephone
cable provided into the LINE-IN
port on the Lineshare Master.
Plug the other end of the cable
into the wall jack where the fax
or modem was connected.
3. Plug the small end of the AC
power cord provided into the
power input port labeled “12
VAC” on the Lineshare Master.
Plug the AC adapter into a
standard 110-volt outlet.
The Lineshare Master begins a
self-check immediately after power
is applied. The green ON indicator
(LED) lights and remains lit.
NOTE
The line must be installed for
the unit to pass the self-test
and show proper indication
of the green ON LED.
13
LINESHARE MASTER
Telephone
Wall Jack
110 Volt
Outlet
LINE IN
PRIMARY
AUX 1
AUX 2
12V AC
Figure 3-2. The Lineshare Master Installed on a Dedicated Phone Line.
14
LINESHARE MASTER
3.2.2 INSTALLING THE LINESHARE
MASTER WITH A LINE-SHARING DEVICE
If you are using other telephone
equipment (multiple phones, fax,
modem, or answering device) that
connects to the same telephone line
as the Lineshare Master, we
recommend that you purchase a
line sharing device (part number
FX150A or FX150A-D48). This
ensures that each device is isolated
from other equipment on the same
line.
NOTE
Install your line-sharing
device before performing the
following
installation
procedures.
Figure 3-3 shows the Lineshare
Master installed on a single phone
line with a line-sharing device.
To connect the Lineshare Master
to a line-sharing device, follow these
steps:
1. Unplug the telephone cable
from the line-sharing device
connected to the fax or modem
device and plug it into the
PRIMARY port on the Lineshare
Master.
2. Plug one end of the telephone
cable provided into the LINE-IN
port on the Lineshare Master.
Plug the other end of the cable
into the line-sharing device port
where the fax or modem was
connected.
3. Plug the small end of the AC
power cord provided into the
power input port labeled “12
VAC” on the Lineshare Master.
Plug the AC adapter into a
standard 110-volt outlet.
The Lineshare Master begins a
self-check immediately after power
is applied. The green ON indicator
(LED) lights and remains lit.
15
LINESHARE MASTER
Telephone
Wall Jack
To telephones
Line-Sharing
Device
LINE IN
PRIMARY
AUX 1
110 Volt
Outlet
AUX 2
12V AC
110 Volt
Outlet
Lineshare Master
LINE IN
PRIMARY
AUX 1
AUX 2
12V AC
Figure 3-3. The Lineshare Master Installed with a Line Sharing Device.
16
LINESHARE MASTER
3.3.3 INSTALLING THE LINESHARE
MASTER WITHOUT A LINE-SHARING
DEVICE
If you install the Lineshare Master
on a phone line with other
telephone devices and do not use a
line sharing device, we recommend
that you read the following section.
The installation procedures for
this installation remain the same as
in Section 3.2.1, but there will be
telephones on the line that are not
connected to the Lineshare Master.
These phones will have complete
access to the phone line connected
to the Lineshare Master.
CAUTION
Do
not
connect
all
telephones in a home or
office through the Lineshare
Master. If the power fails, the
unit will not pass the
telephone line through to the
phones.
The Lineshare Master can detect
tone dialing from a device on the
same phone line, even if the device
is not directly connected to the
Lineshare Master. If this device uses
tones to dial a phone number, the
Lineshare Master begins its timing
procedures and transmits the calling
tones simultaneously with the call.
If this happens, press # # on the
keypad of the phone to trigger the
Lineshare Master to stop
transmitting its tones.
NOTE
When the Lineshare Master
is deactivated with the ##, it
continues to monitor the
phone line for tone activity,
but does not transmit a tone.
The Lineshare Master remains
inactive until you turn it ON by
pressing # *. We recommend that
you turn the Lineshare Master ON
at the end of a dialing string during
the next data transmission.
If the equipment connected to
the Lineshare Master is used
infrequently or has no phones
connected to it, unplug the
Lineshare Master from the
telephone wall port or the power
outlet. When you need to place a call
from the equipment, simply restore
power to the Lineshare Master and
place the call.
17
LINESHARE MASTER
4. Using the Lineshare Master
When a device dials a tone phone
number through the Lineshare
Master, the unit starts a two second
timer each time it detects a tone.
This continues until the two second
timer expires without detecting a
tone. The Lineshare Master then
places the calling device connected
to the PRIMARY port on hold. It
then begins to transmit a series of
calling tones (the frequency of the
tone depends on user settings). If
the Lineshare Master detects an
answer carrier from a fax or modem,
it immediately stops transmitting the
calling tones, and releases the line to
the calling device.
You can turn the Lineshare Master
ON or OFF using tone commands.
To turn the Lineshare Master ON,
press # *. Once you enter the # *
command, the Lineshare Master’s
timing registers are activated. To
turn the Lineshare Master OFF,
press # #.
You can also use tone commands
in the following ways:
• to enter the programming mode
• to set calling tones
• to set timing registers
• to use the Call Hold function
• to reset factory settings
18
Setting the Calling Tones
By dialing the * key and one of the
eight (8) allowable digits at the end
of a dialing string, you can set the
Lineshare Master to produce the
following calling tones:
0 = 1000hz tone
1 = 1100hz tone (typically fax
CNG tone)
2 = 1200hz tone
3 = 1300hz tone
4 = 1400hz tone
5 = 1500hz tone
6 = 1600hz tone
7 = 2225hz tone (typically
Reverse Modem tone)
The factory setting is 2225hz with
the unit turned ON.
If all calls from this system are to
transmit the same calling tone, it is
not necessary to enter the * after
each telephone number. The
Lineshare Master retains the
previous command in memory and
will send the same tone on every call.
If power fails, the Lineshare Master
will maintain the previous settings
once power is restored.
LINESHARE MASTER
NOTE
All of the other tones
supplied with the Lineshare
Master can also be used on
an outbound call for routing
purposes. However, they
work best when used in
conjunction
with
the
Lineshare Pro A/C or D/C
(part number FX150A or
FX150A-D48), which is a
four-port device that can
route to all of its ports from
any specified tone produced
by the Lineshare Master.
To set the tone frequency for the
Lineshare Master transmissions,
enter the * and a single digit 0
through 6 at the end of a phone
number. The digit you enter sets the
tone frequency.
For example, pressing * 1 at the
end of a phone number (5551234*1) will send a fax (CNG) tone.
This allows the Lineshare Master
to produce CNG tones for a fax
machine that cannot produce the
tone. With the help of the Lineshare
Master, your fax machine can
automatically access other fax
machines that use a Line Sharing
Device to detect and route according
to the CNG tone.
In the same way, pressing * 9 at
the end of a phone number will send
a series of 2225hz reverse modem
tones. This allows the Lineshare
Master to produce reverse modem
tones for modems that cannot
produce the tones. With the help of
the Lineshare Master, your modem
can automatically access other
modems that use a line-sharing
device to detect and route according
to the reverse modem tone.
To route through a line-sharing
device using the reverse modem
tone, perform the following steps:
1. Set each modem to send and
receive calls normally. Do not
set either of the modems in the
Reverse Modem mode.
2. Turn ON the reverse modem
detection feature in the linesharing device that is receiving
the call from the
modem/Lineshare Master
combination.
3. At the end of the dialing string
(phone number) in the
modem’s communication
software, enter the * 9
command.
4. Place the call using the modem’s
communication software.
19
LINESHARE MASTER
The calling modem then accesses
the phone line through the
Lineshare Master and dials the
number of the receiving modem.
The Lineshare Master detects the * 9
and sets the tone emulation register
to transmit the 2225hz tone. Three
seconds after the last digit (9) is
dialed, the Lineshare Master begins
transmitting a series of 2225hz tones.
20
When the Line Sharing Device
answers the call, it detects the
Reverse Modem Tone from the
Lineshare Master and routes the call
to the receiving modem. When the
receiving modem answers the call,
the Lineshare Master detects its
carrier signal and releases the line to
the calling modem. The two systems
then establish their communications
link.
LINESHARE MASTER
5. Using the Lineshare Master’s
Custom Functions
The Lineshare Master includes many
options that enable you to customize
its operation to meet specific
application needs. The
programmable functions offered by
the Lineshare Master allow you to
change the length of its tones, time
between tones, time before the first
tone, number of tones to transmit,
as well as the call hold feature.
To change the features and
functions, we recommend using
the following steps:
The Lineshare Master functions
are factory preset, and it is unlikely
that you will need to make many
changes. However, if you desire, you
can alter any program by using a
tone phone connected to the
PRIMARY port. The Lineshare
Master cannot be programmed
with a rotary/pulse dialing phone.
The following section explains
how to enter the programming
mode and change the functions.
NOTE
Before
attempting
to
program any function, we
recommend that you first
thoroughly
read
the
programming procedures.
Then read Section 5.2,
“Changing functions” and
decide if you want to make
changes.
• Using Tables 1 and 2, write
down the sequence of changes
• enter the programming mode
• change the functions
5.1 Entering the Programming Mode
1. Make sure that the telephone
line from the phone company is
connected to the LINE-IN port
on the Lineshare Master.
2. Plug a tone-type phone into the
PRIMARY port of the Lineshare
Master.
3. Pick up the receiver of the
phone, and you should hear
the dial tone.
4. Within five seconds, press and
release the * key and then the #
key on the telephone keypad.
5. The Lineshare Master is now
ready to accept programming
changes.
21
LINESHARE MASTER
Upon entering the programming
mode, you will hear a busy tone or a
repeating message from the
intercept operator. Ignore the
activity on the phone line and
continue with your changes. If the
phone company resets your line and
you receive a busy tone, re-enter * #,
or hang up the phone for 10
seconds, re-enter programming, and
continue with your changes. If a
reset occurs in the middle of a
command (before receiving
confirmation tones), re-enter that
command only. Any previous entries
have been saved.
After completing your changes,
press the # key. The Lineshare
Master will produce three quick
beeps and exit the programming
mode.
If you adjust any of the timing
registers, be sure to properly
calculate the amount of time before
the Lineshare Master drops the line
(about five seconds before the
calling device connects to it). See
Chapter 6 for more information.
Table 5-1. The Lineshare Master’s Custom Functions.
Function
Number
Function
Factory Setting
Options Available
1
Tone Time
0.5
0.1 - 9.9
2
Silence Time
1.5
0.5 - 9.9
3
Time Before First Tone
1.5
0.5 - 9.9
4
Number of Tones to Send 10
01 - 99
6
Call Hold Function
1=ON
0=OFF
999
Reset to Factory Settings
*
Exit programming mode
22
1
LINESHARE MASTER
The following sections contain
specific information about each
function and how to change the
setting.
5.2 Changing Functions
In the previous section, Table 5-1
lists the functions that can be altered
to customize the operation of the
Lineshare Master.
The functions are numbered [1]
through [9] [9] [9]. In this section
you will find a description of each
function and instructions for
customizing the function.
[1] Tone Time
This function sets the length of each
tone that the Lineshare Master
transmits. A tone length of 0.5
seconds is factory-preset, but you can
select a tone length from 0.1 seconds
up to 9.9 seconds.
The first digit you enter is equal to
seconds, and the second digit equals
tenths of a second. For example, an
entry of 1 2 changes the tone length
to 1.2 seconds. An entry of 0 5
changes the tone length to 0.5
seconds.
Example: To set a tone length to 1.5
seconds, enter the programming
mode and press the following on
your tone phone:
1 Tone Time
1 Tone length in seconds
5 Tone length in tenths
of a second
(3 beeps indicate correct entry)
(optional entries for additional
changes)
# Save changes and exit
programming
[2] Silence Time
This function sets the length of time
between each tone that the
Lineshare Master transmits. A
Silence Time of 1.5 seconds is
factory preset, but you can select a
Silence Time from 0.5 seconds up to
9.9 seconds.
The first digit you enter is equal to
seconds, and the second digit equals
tenths of a second. For example, an
entry of 1 2 changes the Silence
Time to 1.2 seconds. An entry of 0 5
changes the Silence Time to 0.5
seconds. If an entry is less than 0.5
seconds, the Lineshare Master
defaults to 0.5 seconds.
Example: To set a Silence Time to 2.0
seconds, enter the programming
mode and press the following on
your tone phone:
2 Silence Time
2 Silence Time in seconds
0 Silence Time in tenths
of a second
(3 beeps indicate correct entry)
(optional entries for additional
changes)
# Save changes and exit
programming
23
LINESHARE MASTER
[3] Time Before First Tone
[4] Number of Tones
This function sets the amount
of time (waiting period) that the
Lineshare Master waits before
transmitting the first tone. A time
of 1.5 seconds is factory preset, but
you can select a time from 0.5
seconds up to 9.9 seconds.
This function sets the Number of
Tones that the Lineshare Master
transmits. The Number of Tones
is factory preset to 10, but you can
select any number of tones from
1 to 99.
The first digit you enter is equal to
seconds, and the second digit equals
tenths of a second. For example, an
entry of 1 2 changes the waiting
period to 1.2 seconds. An entry of
0 5 changes the waiting period to
0.5 seconds. If an entry is less than
0.5 seconds, the Lineshare Master
defaults to 0.5 seconds.
Example: To set a waiting period to
2.0 seconds, enter the programming
mode and press the following on
your tone phone:
3 Time Before First Tone
You must enter two digits per
entry. If the entry is less than 10,
enter a [0] in front of the single
digit. An entry of 0 9 sets the
Number of Tones to 9. An entry of
4 8 sets the Number of Tones to 48.
Example: To set the Number of
Tones to 20, enter the programming
mode and press the following on
your tone phone:
4 Number of Tones
2 Number multiplied by 10
0 Number multiplied by 1
2 Waiting period in seconds
(3 beeps indicate correct entry)
0 Waiting period in tenths of a
second
(optional entries for additional
changes)
(3 beeps indicate correct entry)
(optional entries for additional
changes)
# Save changes and exit
programming
24
# Save changes and exit
programming
LINESHARE MASTER
[6] Call Hold Function
This function is an ON/OFF setting,
and it affects the PRIMARY port
only. For best performance from the
system, we recommend leaving this
function ON. When ON, the unit
acts in the following manner:
The device connected to the
PRIMARY port accesses the phone
line and dials a phone number. Two
(2) seconds after the last tone is
dialed, the Time Before First Tone
register (see the previous page)
activates its timer. When this timer
expires, the Lineshare Master puts
the device on hold and transmits its
programmed tones. The calling
device will not be able to access the
phone line or produce any dialing
tones during this period.
Between each tone the Lineshare
Master transmits, it listens for a
response signal from the called
device. If the Lineshare Master
detects this carrier tone, it stops
transmitting the tones, releases the
device on hold, and takes itself offline.
If the Lineshare Master does not
detect the answer carrier from the
called device, it completes its tone
cycle and then releases the line to
the connected device.
If the Call Hold Function is turned
OFF, the device connected to the
PRIMARY port is able to detect the
activity on line. In this mode, the
dialing device can produce tones
after the phone number is dialed.
However, if the device receives a
busy tone and drops the line, the
Lineshare Master will continue with
its tone cycle until complete. This
can cause a timing problem if the
connected device attempts to redial
while the Lineshare Master is
transmitting tones.
If the calling device can detect a
busy tone, it is also likely that it will
abort the call and reset for another
call. If so, the Lineshare Master
should have the Call Hold Function
turned ON. Then, if a call is placed
to a phone number that is busy, the
Lineshare Master will not allow the
calling device to detect the busy tone
until the end of its time-out period.
This is necessary to maintain the
proper timing sequence between the
Lineshare Master and the calling
device on a redial attempt.
For example, the Lineshare
Master will not detect a modem
disconnecting 15 seconds into
the call due to a busy signal. The
Lineshare Master will maintain the
connection with the telephone line
until its timing programs have
completed. Meanwhile, the modem
would continue attempting to access
the line and could not because the
Lineshare Master is holding it open,
resulting in a non-polled number.
25
LINESHARE MASTER
The Call Hold Function is factory
preset ON. If you want to turn this
function OFF, enter the
programming mode and press the
following on your tone phone:
[9] [9] [9] Reset to Factory Settings
To reset all functions to their
original factory settings, enter the
programming mode and press the
following on your tone phone:
6 Call Hold Function
0 OFF
(3 beeps indicate correct entry)
(optional entries for additional
changes)
# Save changes and exit
programming
26
9 9 9 Reset to Factory Settings
(3 beeps indicate correct entry)
(Optional entries for additional
changes)
# Save changes and exit
programming
LINESHARE MASTER
6. Calculating the Timing Parameters
For the best performance from the
system, set the Lineshare Master to
stop sending tones and drop the line
five seconds before the fax or
modem time-out period expires.
If a modem dials a phone number
through the Lineshare Master and
the modem stays on-line about 45
seconds, the Lineshare Master
should stay on-line for 40 seconds of
the call. This allows the Lineshare
Master to have the best chance of
routing a call to the proper device.
If adjustment to any of the timing
registers is necessary, it is important
to have the proper calculation to
ensure that the Lineshare Master
drops the line about five seconds
before the calling device. To
calculate the timing parameters,
perform the following steps:
The total of these calculations is
equal to the length of time that the
Lineshare Master stays on line after
a phone number is dialed.
In the above example, the
Lineshare Master will drop the line
about 35 seconds (34.5) after the
phone number was dialed. If the
modem is on line for 40 seconds
after dialing, the two systems will
function properly.
If you are on an extension phone
and the Lineshare Master is active, at
the end of a phone number you can
enter the # # command to turn the
unit OFF. When you are ready for
the Lineshare Master to transmit the
tones again, enter # * at the end of a
phone number. This reactivates the
Lineshare Master to start
transmitting the tones.
1. Multiply the Tone Time (TT)
and the Number of Tones (NT):
0.5 seconds x 8 tones=
4 seconds
2. Multiply the Silence Time (ST)
and the Number of Tones (NT):
3.5 seconds x 8 tones= 28
seconds
3. Add these two totals together:
4 + 28 = 32 seconds
4. Add the total from #3 to the
Time Before First Tone (TBFT)
and two seconds for the tone
detection timer:
32 seconds + 0.5 seconds (TBFT)
+ 2.0 seconds= 34.5 seconds
27
© Copyright 1996. Black Box Corporation. All rights reserved.
1000 Park Drive • Lawrence, PA 15055-1018 • 724-746-5500 • Fax 724-746-0746