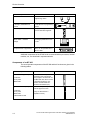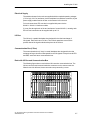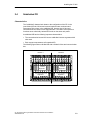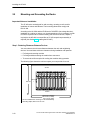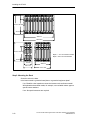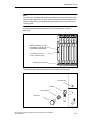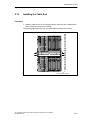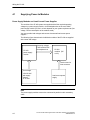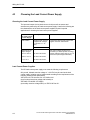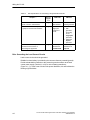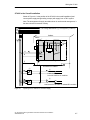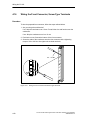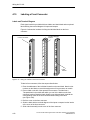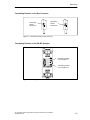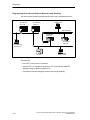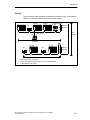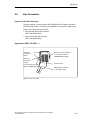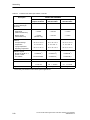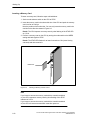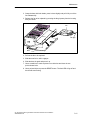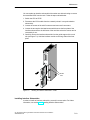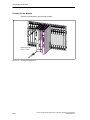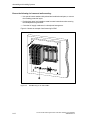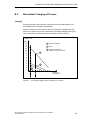
1
Preface, Contents SIMATIC Product Overview Installing the S7-400 S7-400 and M7-400 Programmable Controllers Hardware and Installation Installation Manual Addressing the S7-400 Wiring the S7-400 Networking Starting Up Maintenance Assembling the M7-400 1 2 3 4 5 6 7 8 Appendices Assembling and Installing Systems A Guidelines for Handling Electrostatically-Sensitive Devices (ESD) B Glossary, Index This manual is part of the documentation package with the order number 6ES7498-8AA03-8BA0 Edition 12/2002 A5E00069481-04 Safety Guidelines This manual contains notices intended to ensure personal safety, as well as to protect the products and connected equipment against damage. These notices are highlighted by the symbols shown below and graded according to severity by the following texts: ! ! ! Danger indicates that death, severe personal injury or substantial property damage will result if proper precautions are not taken. Warning indicates that death, severe personal injury or substantial property damage can result if proper precautions are not taken. Caution indicates that minor personal injury can result if proper precautions are not taken. Caution indicates that property damage can result if proper precautions are not taken. Notice draws your attention to particularly important information on the product, handling the product, or to a particular part of the documentation. Qualified Personnel Only qualified personnel should be allowed to install and work on this equipment. Qualified persons are defined as persons who are authorized to commission, to ground and to tag circuits, equipment, and systems in accordance with established safety practices and standards. Correct Usage Note the following: ! Warning This device and its components may only be used for the applications described in the catalog or the technical description, and only in connection with devices or components from other manufacturers which have been approved or recommended by Siemens. This product can only function correctly and safely if it is transported, stored, set up, and installed correctly, and operated and maintained as recommended. Trademarks SIMATIC, SIMATIC HMI and SIMATIC NET are registered trademarks of SIEMENS AG. Third parties using for their own purposes any other names in this document which refer to trademarks might infringe upon the rights of the trademark owners. Copyright W Siemens AG 1999-2002 All rights reserved Disclaim of Liability The reproduction, transmission or use of this document or its contents is not permitted without express written authority. Offenders will be liable for damages. All rights, including rights created by patent grant or registration of a utility model or design, are reserved. We have checked the contents of this manual for agreement with the hardware and software described. Since deviations cannot be precluded entirely, we cannot guarantee full agreement. However, the data in this manual are reviewed regularly and any necessary corrections included in subsequent editions. Suggestions for improvement are welcomed. Siemens AG Bereich Automation and Drives Siemens AG 1999– 2002 Geschaeftsgebiet Industrial Automation Systems Technical data subject to change. Postfach 4848, D- 90327 Nuernberg S7-400 and M7-400 Programmable Controllers Hardware and Installation A5E00069480-02 Index-2 Siemens Aktiengesellschaft A5E00069481-04 Preface Purpose of the Manual The information given in this manual makes it possible for you to: • install and wire an S7-400 memory programmable controller • configure an M7-400 automation computer for mechanical and electrical installation A description of the functions and technical specifications of the signal modules, power supply modules and interface modules can be found in the reference manual Module Specifications. Required Basic Knowledge General knowledge of the field of automation engineering is required in order to understand the manual. Target Group This manual is aimed at people with the required qualifications to commission, operate and maintain the products described. Where is this Manual valid? The manual is valid for the S7-400 and M7-400 programmable controllers. Changes compared to the previous version Section 2.5 and Appendix A have been updated since the previous edition of the “Hardware and Installation” manual. Note: You can recognize the previous edition of this ”Hardware and Installation” manual by the number that appears in the footer: A5E00069480-03. The number of the current edition is: A5E00069480-04. S7-400 and M7-400 Programmable Controllers Hardware and Installation A5E00069481-04 iii Preface Certification The SIMATIC S7-400 product range has the following certificates and approvals: • Underwriters Laboratories, Inc.: UL 508 (Industrial Control Equipment) • Canadian Standards Association: CSA C22.2 Nummer 142, tested (Process Control Equipment) • Factory Mutual Research: Approval Standard Class Number 3611. You can find details on the certificates and approvals in the “Module Specifications” manual. CE Labeling The SIMATIC S7-400 product range complies with the requirements and protection objectives of the following EU directives: • EC low voltage directive 73/23/EEC • EC electromagnetic compatibility directive 89/336/EEC C-Tick Mark The SIMATIC S7-400 product range complies with the requirements of the AS/NZS 2064 standard (Australia and New Zealand). Standards The SIMATIC S7-400 product range complies with the requirements and criteria of the IEC 61131-2. Place of this Documentation in the Information Environment This manual is part of the documentation package for S7-400, M7-400. System S7-400/M7-400 Documentation Packages • S7-400, M7-400 Programmable Controller; Hardware and Installation • S7-400, M7-400 Programmable Controllers; Module Specifications • S7-400 Instruction List • S7 400, CPU Data Programmable Controller iv S7-400 and M7-400 Programmable Controllers Hardware and Installation A5E00069481-04 Preface Finding Your Way The manual offers the following access aids to make it easy for you to find specific information quickly: • At the beginning of the manual you will find a complete table of contents and lists of the figures and tables contained in the manual. • In each chapter you will find information in the left-hand margin on each page that gives you an overview of the contents of the relevant section. • After the appendices you will find a glossary containing definitions of important terms and concepts that are used in the manual. • At the end of the manual you will find a detailed index, allowing you to quickly find the information you are looking for. Specific Information for S7-400 You require the following manuals and manual packages in order to program and commission an S7-400: Manual/ Manual Package Standard Software for S7 and M7 Contents • Installing and starting up STEP 7 on a programming device / PC • Working with STEP 7 with the following contents: STEP 7 Basic Information Managing projects and files Configuring and assigning parameters to the S7-400 configuration Assigning symbolic names for user programs Creating and testing a user program in STL/LAD Creating data blocks Configuring the communication between two or more CPUs Loading, storing and deleting user programs in the CPU / programming device Monitoring and controlling user programs Monitoring and controlling the CPU • Guide for efficiently implementing the programming task with the programming device / PC and STEP 7 • How the CPUs work (for example, memory concept, access to inputs and outputs, addressing, blocks, data management) • • • • • Description of STEP 7 data management Using data types of STEP 7 Using linear and structured programming Using block call instructions Using the debug and diagnostic functions of the CPUs in the user program (for example, error OBs, status word) S7-400 and M7-400 Programmable Controllers Hardware and Installation A5E00069481-04 v Preface Manual/ Manual Package Contents STEP 7 Reference Information • Basic procedure for working with STL, LAD, or FBD (for example, structure of Statement List (STL) for S7-300 and S7-400 • • • • • • Ladder Logic (LAD) for S7-300 and S7-400 Function Block Diagram (FBD) for S7-300 and S7-400 STL, LAD, or FBD, number formats, syntax) Description of all instructions in STEP 7 (with program examples) Description of the various addressing methods in STEP 7 (with examples) Description of all functions integrated in the CPUs Description of the internal registers in the CPU Description of all system functions integrated in the CPUs Description of all organization blocks integrated in the CPUs System and Standard Functions Manual PG 7xx vi • Description of the programming device hardware • Connecting a programming device to various devices • Starting up a programming device S7-400 and M7-400 Programmable Controllers Hardware and Installation A5E00069481-04 Preface Specific Information for M7-400 This documentation package describes the hardware of the M7-400. You will need the following additional documentation for programming and starting up an M7-400: Documentation Contents System Software for M7-300/400 Program Design Programming Manual Designing, writing and testing a C program for M7 CPU/FM modules with the M7 SYS programming package, using the M7 SYS functions System Software for M7-300/400 System and Standard Functions Reference Manual Detailed description of the M7 SYS functions and data structures, listing of messages types System Software for M7-300/400 Installation and Operation User Manual Installing and configuring the operating system and system software Order No. 6ES7802-0FA14-0BA0 Recycling and Disposal The S7-400 is environmentally friendly and can thus recyclable. Consult a certified disposal agency for electronics junk to recycle and dispose of your old equipment in an environmentally friendly manner. Further Support If you have any technical questions, please get in touch with your Siemens representative or agent responsible. http://www.siemens.de/partner Training Centers Siemens offers a number of training courses to familiarize you with the SIMATIC S7 automation system. Please contact your regional training center or our central training center in D-90327 Nuremberg, Germany for details: Telephone: +49 (911) 895-3200. Internet: http://www.sitrain.com S7-400 and M7-400 Programmable Controllers Hardware and Installation A5E00069481-04 vii Preface A&D Technical Support Worldwide, available 24 hours a day: Nuernberg Johnson City Beijing Technical Support Worldwide (Nuernberg) Technical Support 24 hours a day, 365 days a year Phone: +49 (0) 180 5050-222 Fax: +49 (0) 180 5050-223 E-Mail: adsupport@ siemens.com GMT: +1:00 Europe / Africa (Nuernberg) United States (Johnson City) Asia / Australia (Beijing) Authorization Technical Support and Authorization Technical Support and Authorization Local time: Mon.-Fri. 8:00 to 17:00 Local time: Mon.-Fri. 8:00 to 17:00 Local time: Mon.-Fri. 8:00 to 17:00 Phone: Fax: +49 (0) 180 5050–222 +49 (0) 180 5050-223 Phone: +1 (0) 423 262 2522 Phone: +86 10 64 75 75 75 Fax: +1 (0) 423 262 2289 Fax: +86 10 64 74 74 74 adsupport@ siemens.com +1:00 E-Mail: simatic.hotline@ sea.siemens.com E-Mail: GMT: –5:00 GMT: adsupport.asia@ siemens.com +8:00 E-Mail: GMT: The languages of the SIMATIC Hotlines and the authorization hotline are generally German and English. viii S7-400 and M7-400 Programmable Controllers Hardware and Installation A5E00069481-04 Preface Service & Support on the Internet In addition to our documentation, we offer our Know-how online on the internet at: http://www.siemens.com/automation/service&support where you will find the following: • The newsletter, which constantly provides you with up–to–date information on your products. • The right documents via our Search function in Service & Support. • A forum, where users and experts from all over the world exchange their experiences. • Your local representative for Automation & Drives via our representatives database. • Information on field service, repairs, spare parts and more under “Services”. S7-400 and M7-400 Programmable Controllers Hardware and Installation A5E00069481-04 ix Preface x S7-400 and M7-400 Programmable Controllers Hardware and Installation A5E00069481-04 Contents 1 Product Overview . . . . . . . . . . . . . . . . . . . . . . . . . . . . . . . . . . . . . . . . . . . . . . . . . . . . . . . 1-1 2 Installing the S7-400 . . . . . . . . . . . . . . . . . . . . . . . . . . . . . . . . . . . . . . . . . . . . . . . . . . . . 2-1 2.1 Assembling an S7-400 . . . . . . . . . . . . . . . . . . . . . . . . . . . . . . . . . . . . . . . . . . . 2-2 2.2 Assembling the Central Rack (CR) and Expansion Rack (ER) . . . . . . . . . 2-6 2.3 Segmented CR . . . . . . . . . . . . . . . . . . . . . . . . . . . . . . . . . . . . . . . . . . . . . . . . . 2-8 2.4 Subdivided CR . . . . . . . . . . . . . . . . . . . . . . . . . . . . . . . . . . . . . . . . . . . . . . . . . . 2-9 2.5 Mounting and Grounding the Racks . . . . . . . . . . . . . . . . . . . . . . . . . . . . . . . . 2-10 2.6 Chassis Terminal Connection in the Non-Isolated Configuration . . . . . . . . 2-16 2.7 Methods of Ventilation . . . . . . . . . . . . . . . . . . . . . . . . . . . . . . . . . . . . . . . . . . . . 2-19 2.8 Changing the Ventilation with the Cable Duct and Fan Subassembly . . . . 2-21 2.9 Installing the Fan Subassembly . . . . . . . . . . . . . . . . . . . . . . . . . . . . . . . . . . . . 2-23 2.10 Installing the Cable Duct . . . . . . . . . . . . . . . . . . . . . . . . . . . . . . . . . . . . . . . . . . 2-25 2.11 Choosing and Setting up Cabinets with the S7-400 . . . . . . . . . . . . . . . . . . . 2-26 2.12 Rules for the Arrangement of Modules . . . . . . . . . . . . . . . . . . . . . . . . . . . . . . 2-30 2.13 Fitting Memory Cards in the CPU . . . . . . . . . . . . . . . . . . . . . . . . . . . . . . . . . . 2-31 2.14 Installing Modules in a Rack . . . . . . . . . . . . . . . . . . . . . . . . . . . . . . . . . . . . . . 2-33 2.15 Marking the Modules with Slot Labels . . . . . . . . . . . . . . . . . . . . . . . . . . . . . . 2-37 2.16 Methods of Expansion and Networking . . . . . . . . . . . . . . . . . . . . . . . . . . . . . 2-38 2.17 Accessories . . . . . . . . . . . . . . . . . . . . . . . . . . . . . . . . . . . . . . . . . . . . . . . . . . . . 2-39 Addressing the S7-400 . . . . . . . . . . . . . . . . . . . . . . . . . . . . . . . . . . . . . . . . . . . . . . . . . . 3-1 3.1 Geographical and Logical Addresses . . . . . . . . . . . . . . . . . . . . . . . . . . . . . . . 3-2 3.2 How to Determine the Default Address of a Module . . . . . . . . . . . . . . . . . . 3-4 3.3 How to Determine the Default Address of a Channel . . . . . . . . . . . . . . . . . . 3-6 3 S7-400 and M7-400 Programmable Controllers Hardware and Installation A5E00069481-04 xi Contents 4 xii Wiring the S7-400 . . . . . . . . . . . . . . . . . . . . . . . . . . . . . . . . . . . . . . . . . . . . . . . . . . . . . . . 4-1 4.1 Supplying Power to Modules . . . . . . . . . . . . . . . . . . . . . . . . . . . . . . . . . . . . . . 4-2 4.2 Choosing the Power Supply Module . . . . . . . . . . . . . . . . . . . . . . . . . . . . . . . . 4-3 4.3 Choosing the Load Current Power Supply . . . . . . . . . . . . . . . . . . . . . . . . . . . 4-4 4.4 Assembling an S7-400 with Process I/Os . . . . . . . . . . . . . . . . . . . . . . . . . . . 4-5 4.5 Assembling an S7-400 with Grounded Reference Potential (M) . . . . . . . . 4-7 4.6 Assembling an S7-400 with Ungrounded Reference Potential (Ungrounded Configuration) . . . . . . . . . . . . . . . . . . . . . . . . . . . . . . . . . . . . . . 4-8 4.7 Assembling an S7-400 with Isolated Modules . . . . . . . . . . . . . . . . . . . . . . . . 4-10 4.8 Parallel Wiring of Digital S7-400 Outputs . . . . . . . . . . . . . . . . . . . . . . . . . . . . 4-12 4.9 Grounding . . . . . . . . . . . . . . . . . . . . . . . . . . . . . . . . . . . . . . . . . . . . . . . . . . . . . . 4-13 4.10 Interference-Free Configuration for Local and Remote Connections . . . . 4-15 4.11 Wiring Rules . . . . . . . . . . . . . . . . . . . . . . . . . . . . . . . . . . . . . . . . . . . . . . . . . . . . 4-17 4.12 Setting the VAC Power Supply Module to the Line Voltage . . . . . . . . . . . . . 4-18 4.13 Wiring the Power Supply Module . . . . . . . . . . . . . . . . . . . . . . . . . . . . . . . . . . 4-20 4.14 Wiring the Signal Modules . . . . . . . . . . . . . . . . . . . . . . . . . . . . . . . . . . . . . . . . 4-24 4.15 Wiring the Front Connector, Crimp Snap-On Terminals . . . . . . . . . . . . . . . . 4-26 4.16 Wiring the Front Connector, Screw-Type Terminals . . . . . . . . . . . . . . . . . . . 4-27 4.17 Wiring the Front Connector, Spring-Type Terminals . . . . . . . . . . . . . . . . . . . 4-28 4.18 Fitting the Strain Relief . . . . . . . . . . . . . . . . . . . . . . . . . . . . . . . . . . . . . . . . . . . 4-30 4.19 Labeling a Front Connector . . . . . . . . . . . . . . . . . . . . . . . . . . . . . . . . . . . . . . . 4-31 4.20 Fitting the Front Connector . . . . . . . . . . . . . . . . . . . . . . . . . . . . . . . . . . . . . . . 4-35 4.21 Interconnecting the CR and ER(s) . . . . . . . . . . . . . . . . . . . . . . . . . . . . . . . . . 4-38 4.22 Setting the Fan Subassembly to the Line Voltage and Wiring It . . . . . . . . . 4-40 4.23 Routing Cables Using Cable Ducts or Fan Subassemblies . . . . . . . . . . . . 4-42 4.24 Routing Cables Using Fiber-Optic Cables . . . . . . . . . . . . . . . . . . . . . . . . . . . 4-42 S7-400 and M7-400 Programmable Controllers Hardware and Installation A5E00069481-04 Contents 5 6 7 Networking . . . . . . . . . . . . . . . . . . . . . . . . . . . . . . . . . . . . . . . . . . . . . . . . . . . . . . . . . . . . . 5-1 5.1 Configuring a Network . . . . . . . . . . . . . . . . . . . . . . . . . . . . . . . . . . . . . . . . . . . 5-2 5.2 Fundamentals . . . . . . . . . . . . . . . . . . . . . . . . . . . . . . . . . . . . . . . . . . . . . . . . . . 5-3 5.3 Rules for Configuring a Network . . . . . . . . . . . . . . . . . . . . . . . . . . . . . . . . . . . 5-7 5.4 Cable Lengths . . . . . . . . . . . . . . . . . . . . . . . . . . . . . . . . . . . . . . . . . . . . . . . . . . 5-15 5.5 PROFIBUS-DP Bus Cables . . . . . . . . . . . . . . . . . . . . . . . . . . . . . . . . . . . . . . . 5-18 5.6 Bus Connectors . . . . . . . . . . . . . . . . . . . . . . . . . . . . . . . . . . . . . . . . . . . . . . . . . 5-19 5.7 RS 485 Repeater . . . . . . . . . . . . . . . . . . . . . . . . . . . . . . . . . . . . . . . . . . . . . . . . 5-23 5.8 5.8.1 5.8.2 5.8.3 PROFIBUS-DP Network with Fiber-Optic Cables . . . . . . . . . . . . . . . . . . . . . Fiber-Optic Cables . . . . . . . . . . . . . . . . . . . . . . . . . . . . . . . . . . . . . . . . . . . . . . Simplex Connectors and Connector Adapter . . . . . . . . . . . . . . . . . . . . . . . . Connecting a Fiber-Optic Cable to the PROFIBUS Device . . . . . . . . . . . . . 5-25 5-27 5-29 5-31 Starting Up . . . . . . . . . . . . . . . . . . . . . . . . . . . . . . . . . . . . . . . . . . . . . . . . . . . . . . . . . . . . . 6-1 6.1 Recommended Procedure for First Startup . . . . . . . . . . . . . . . . . . . . . . . . . . 6-2 6.2 Checks Prior to Switching On for the First Time . . . . . . . . . . . . . . . . . . . . . . 6-3 6.3 Connecting a Programming Device (PG) to an S7-400 . . . . . . . . . . . . . . . . 6-5 6.4 Switching On an S7-400 for the First Time . . . . . . . . . . . . . . . . . . . . . . . . . . 6-6 6.5 Resetting the CPU with the Mode Selector Switch . . . . . . . . . . . . . . . . . . . . 6-7 6.6 Cold, Warm, and Hot Restarts with the Mode Selector Switch . . . . . . . . . . 6-10 6.7 Inserting a Memory Card . . . . . . . . . . . . . . . . . . . . . . . . . . . . . . . . . . . . . . . . . 6-11 6.8 Inserting a Backup Battery (Option) . . . . . . . . . . . . . . . . . . . . . . . . . . . . . . . . 6-13 6.9 Starting Up a PROFIBUS-DP Subnet . . . . . . . . . . . . . . . . . . . . . . . . . . . . . . . 6-17 6.10 Installing Interface Submodules (CPU 414-2, 414-3, 416-3, 417-4 and 417-4H) . . . . . . . . . . . . . . . . . . . . . . . 6-18 Maintenance . . . . . . . . . . . . . . . . . . . . . . . . . . . . . . . . . . . . . . . . . . . . . . . . . . . . . . . . . . . 7-1 7.1 Replacing the Backup Battery . . . . . . . . . . . . . . . . . . . . . . . . . . . . . . . . . . . . . 7-2 7.2 Replacing a Power Supply Module . . . . . . . . . . . . . . . . . . . . . . . . . . . . . . . . . 7-4 7.3 Replacing CPUs . . . . . . . . . . . . . . . . . . . . . . . . . . . . . . . . . . . . . . . . . . . . . . . . 7-5 7.4 Replacing Digital or Analog Modules . . . . . . . . . . . . . . . . . . . . . . . . . . . . . . . 7-7 7.5 Changing the Fuses in the Digital Modules . . . . . . . . . . . . . . . . . . . . . . . . . . 7-9 7.6 Replacing Interface Modules . . . . . . . . . . . . . . . . . . . . . . . . . . . . . . . . . . . . . . 7-11 7.7 Replacing the Fuse of the Fan Subassembly . . . . . . . . . . . . . . . . . . . . . . . . 7-13 7.8 Replacing Fans in the Fan Subassembly During Operation . . . . . . . . . . . . 7-14 7.9 Replacing the Filter Frame of the Fan Subassembly During Operation . . 7-16 7.10 Replacing the Power Supply PCB and Monitoring PCB of the Fan Subassembly . . . . . . . . . . . . . . . . . . . . . . . . . . . . . . . . . . . . . . . . . . 7-18 7.11 Replacing Memory Cards . . . . . . . . . . . . . . . . . . . . . . . . . . . . . . . . . . . . . . . . . 7-19 7.12 Replacing Interface Submodules . . . . . . . . . . . . . . . . . . . . . . . . . . . . . . . . . . 7-22 S7-400 and M7-400 Programmable Controllers Hardware and Installation A5E00069481-04 xiii Contents 8 xiv Assembling the M7-400 . . . . . . . . . . . . . . . . . . . . . . . . . . . . . . . . . . . . . . . . . . . . . . . . . 8-1 8.1 Mechanical Configuration . . . . . . . . . . . . . . . . . . . . . . . . . . . . . . . . . . . . . . . . . 8-2 8.2 Addressing the M7-400 Modules . . . . . . . . . . . . . . . . . . . . . . . . . . . . . . . . . . . 8-5 8.3 Electrical Configuration . . . . . . . . . . . . . . . . . . . . . . . . . . . . . . . . . . . . . . . . . . . 8-6 8.4 8.4.1 8.4.2 8.4.3 8.4.4 8.4.5 8.4.6 8.4.7 8.4.8 Installing the M7-400 . . . . . . . . . . . . . . . . . . . . . . . . . . . . . . . . . . . . . . . . . . . . . Checklist for Installation . . . . . . . . . . . . . . . . . . . . . . . . . . . . . . . . . . . . . . . . . . Module Accessories . . . . . . . . . . . . . . . . . . . . . . . . . . . . . . . . . . . . . . . . . . . . . Fitting Memory Cards in the CPU . . . . . . . . . . . . . . . . . . . . . . . . . . . . . . . . . . Installing Interface Submodules . . . . . . . . . . . . . . . . . . . . . . . . . . . . . . . . . . . Fitting the Short AT Card . . . . . . . . . . . . . . . . . . . . . . . . . . . . . . . . . . . . . . . . . Assembling Expansion Modules on a Central Rack . . . . . . . . . . . . . . . . . . . Installing a Module Assembly in the Rack . . . . . . . . . . . . . . . . . . . . . . . . . . . Inserting/Removing a Memory Card . . . . . . . . . . . . . . . . . . . . . . . . . . . . . . . . 8-8 8-9 8-10 8-11 8-13 8-15 8-17 8-24 8-28 8.5 Connecting a Module Assembly . . . . . . . . . . . . . . . . . . . . . . . . . . . . . . . . . . . 8-29 8.6 Assembling an MPI Subnet or PROFIBUS-DP Subnet . . . . . . . . . . . . . . . . 8-30 8.7 8.7.1 8.7.2 8.7.3 8.7.4 8.7.5 8-32 8-33 8-36 8-39 8-40 8.7.6 8.7.7 Preparing for Operation . . . . . . . . . . . . . . . . . . . . . . . . . . . . . . . . . . . . . . . . . . Connecting the Operator Panels and I/O Devices . . . . . . . . . . . . . . . . . . . . Connecting a Programming Device (PG) to the COM Interface . . . . . . . . . Connecting a Programming Device (PG) to the M7-400 . . . . . . . . . . . . . . . Connecting a Programming Device (PG) to Two or More Nodes . . . . . . . . Connecting a Programming Device (PG) to Ungrounded Nodes of an MPI Subnet . . . . . . . . . . . . . . . . . . . . . . . . . . . . Starting Up a PROFIBUS-DP Subnet . . . . . . . . . . . . . . . . . . . . . . . . . . . . . . . Checking the Status and Error Indicators . . . . . . . . . . . . . . . . . . . . . . . . . . . 8.8 8.8.1 8.8.2 8.8.3 8.8.4 Replacing Modules and Submodules/Cards . . . . . . . . . . . . . . . . . . . . . . . . . Replacing an Interface Module . . . . . . . . . . . . . . . . . . . . . . . . . . . . . . . . . . . . Replacing the CPU or Expansion Modules of a Module Assembly . . . . . . Replacing Memory Cards in a CPU . . . . . . . . . . . . . . . . . . . . . . . . . . . . . . . . Replacing a Short AT Card . . . . . . . . . . . . . . . . . . . . . . . . . . . . . . . . . . . . . . . . 8-46 8-47 8-49 8-54 8-56 8-43 8-44 8-45 S7-400 and M7-400 Programmable Controllers Hardware and Installation A5E00069481-04 Contents A B Assembling and Installing Systems . . . . . . . . . . . . . . . . . . . . . . . . . . . . . . . . . . . . . . A-1 A.1 General Rules and Regulations for Operating the S7-400 . . . . . . . . . . . . . A-2 A.2 Principles of System Installation for EMC . . . . . . . . . . . . . . . . . . . . . . . . . . . A-5 A.3 Installation of Programmable Controllers for EMC . . . . . . . . . . . . . . . . . . . . A-9 A.4 Examples of EMC-Compatible Assembly . . . . . . . . . . . . . . . . . . . . . . . . . . . A-10 A.5 Shielding Cables . . . . . . . . . . . . . . . . . . . . . . . . . . . . . . . . . . . . . . . . . . . . . . . . A-13 A.6 Equipotential Bonding . . . . . . . . . . . . . . . . . . . . . . . . . . . . . . . . . . . . . . . . . . . . A-15 A.7 Cabling Inside Buildings . . . . . . . . . . . . . . . . . . . . . . . . . . . . . . . . . . . . . . . . . . A-17 A.8 Cabling Outside Buildings . . . . . . . . . . . . . . . . . . . . . . . . . . . . . . . . . . . . . . . . A-19 A.9 A.9.1 A.9.2 A.9.3 A-20 A-21 A-23 A.9.4 Lightning Protection and Overvoltage Protection . . . . . . . . . . . . . . . . . . . . . Lightning Protection Zone Concept . . . . . . . . . . . . . . . . . . . . . . . . . . . . . . . . . Rules for the Transition between Lightning Protection Zones 0 and 1 . . . Rules for the Transitions between Lightning Protection Zones 1 <-> 2 and Greater . . . . . . . . . . . . . . . . . . . . . . Sample of a Surge Protection Circuit for Networked S7-400 PLCs . . . . . . A.10 How to Protect Digital Output Modules against Inductive Surge . . . . . . . . A-30 A.11 Safety of Electronic Control Equipment . . . . . . . . . . . . . . . . . . . . . . . . . . . . . A-32 A.12 Interference-Free Connection of Monitors . . . . . . . . . . . . . . . . . . . . . . . . . . . A-34 Guidelines for Handling Electrostatically-Sensitive Devices (ESD) . . . . . . . . . . B-1 B.1 What is ESD? . . . . . . . . . . . . . . . . . . . . . . . . . . . . . . . . . . . . . . . . . . . . . . . . . . . B-2 B.2 Electrostatic Charging of Persons . . . . . . . . . . . . . . . . . . . . . . . . . . . . . . . . . . B-3 B.3 General Protective Measures Against Electrostatic Discharge Damage . B-4 A-25 A-28 Glossary Index S7-400 and M7-400 Programmable Controllers Hardware and Installation A5E00069481-04 xv Contents Figures 2-1 2-2 2-3 2-4 2-5 2-6 2-7 2-8 2-9 4-1 4-2 4-3 4-4 4-5 4-6 4-7 4-8 4-9 4-10 4-11 4-12 4-13 4-14 4-15 4-16 4-17 4-18 4-19 4-20 4-21 4-22 4-23 4-24 4-25 5-1 5-2 5-3 5-4 5-5 5-6 5-7 5-8 5-9 5-10 5-11 5-12 5-13 5-14 xvi Rack Fitted with Modules in the S7-400 System . . . . . . . . . . . . . . . . . . . . . Max. Cabinet Ambient Temperature as a Function of Power Dissipation of Equipment in the Cabinet . . . . . . . . . . . . . . . . . . . . Fitting Memory Cards in the CPUs . . . . . . . . . . . . . . . . . . . . . . . . . . . . . . . . . Memory Card . . . . . . . . . . . . . . . . . . . . . . . . . . . . . . . . . . . . . . . . . . . . . . . . . . . Removing the Cover . . . . . . . . . . . . . . . . . . . . . . . . . . . . . . . . . . . . . . . . . . . . . Attaching the Modules . . . . . . . . . . . . . . . . . . . . . . . . . . . . . . . . . . . . . . . . . . . Screwing the Modules in Place . . . . . . . . . . . . . . . . . . . . . . . . . . . . . . . . . . . . Inserting the Key in the CPU . . . . . . . . . . . . . . . . . . . . . . . . . . . . . . . . . . . . . . Fitting a Slot Label . . . . . . . . . . . . . . . . . . . . . . . . . . . . . . . . . . . . . . . . . . . . . . . Operating the S7-400 from a Grounded Supply . . . . . . . . . . . . . . . . . . . . . . An S7-400 Configured with Grounded Reference Potential . . . . . . . . . . . . An S7-400 Configured with Ungrounded Reference Potential . . . . . . . . . . Simplified Representation of Configuration with Isolated Modules . . . . . . . Parallel Wiring of a Digital Output with Different Rated Load Voltages . . . Parallel Wiring of a Digital Output with Identical Rated Load Voltages . . . Grounded connection load voltage . . . . . . . . . . . . . . . . . . . . . . . . . . . . . . . . . Shielding and Grounding the Connecting Cable for a Remote Connection . . . . . . . . . . . . . . . . . . . . . . . . . . . . . . . . . . . . . . . . . . . . Setting the voltage selector . . . . . . . . . . . . . . . . . . . . . . . . . . . . . . . . . . . . . . . Disconnecting power supply connector . . . . . . . . . . . . . . . . . . . . . . . . . . . . . Wiring the power supply connector . . . . . . . . . . . . . . . . . . . . . . . . . . . . . . . . . Plugging the power supply connector . . . . . . . . . . . . . . . . . . . . . . . . . . . . . . . Preparing to wire the front connector . . . . . . . . . . . . . . . . . . . . . . . . . . . . . . . Wiring a Front Connector with Crimp Snap-On Terminals . . . . . . . . . . . . . . Wiring a Front Connector with Screw-Type Terminals . . . . . . . . . . . . . . . . . Wiring a Front Connector with Spring-Type Terminals . . . . . . . . . . . . . . . . . Principle of the spring contact . . . . . . . . . . . . . . . . . . . . . . . . . . . . . . . . . . . . . Fitting a Strain Relief (Viewed from Below) . . . . . . . . . . . . . . . . . . . . . . . . . . Fitting the Labels on the Front Connector . . . . . . . . . . . . . . . . . . . . . . . . . . . Fitting a Label in the Front Connector . . . . . . . . . . . . . . . . . . . . . . . . . . . . . . Attaching the Front Connector . . . . . . . . . . . . . . . . . . . . . . . . . . . . . . . . . . . . . Screwing On the Front Connector . . . . . . . . . . . . . . . . . . . . . . . . . . . . . . . . . . Plugging a Connecting Cable into a Send IM . . . . . . . . . . . . . . . . . . . . . . . . Connection Between a Send IM and Two Receive IMs . . . . . . . . . . . . . . . . Wiring the Fan Subassembly . . . . . . . . . . . . . . . . . . . . . . . . . . . . . . . . . . . . . . Communication between Programming Device/Operator Panel and a Module without MPI . . . . . . . . . . . . . . . . . . . . . . . . . . . . . . . . . . . . . . . . Data Exchange . . . . . . . . . . . . . . . . . . . . . . . . . . . . . . . . . . . . . . . . . . . . . . . . . Terminating resistor on bus connector . . . . . . . . . . . . . . . . . . . . . . . . . . . . . . Terminating resistor on RS 485 repeater . . . . . . . . . . . . . . . . . . . . . . . . . . . . Terminating resistor on MPI network . . . . . . . . . . . . . . . . . . . . . . . . . . . . . . . Example of an MPI network . . . . . . . . . . . . . . . . . . . . . . . . . . . . . . . . . . . . . . . Example of a PROFIBUS DP network . . . . . . . . . . . . . . . . . . . . . . . . . . . . . . Example with CPU 414-2 . . . . . . . . . . . . . . . . . . . . . . . . . . . . . . . . . . . . . . . . . Programming device access beyond network limits . . . . . . . . . . . . . . . . . . . Configuration of an MPI network . . . . . . . . . . . . . . . . . . . . . . . . . . . . . . . . . . . Bu s connector . . . . . . . . . . . . . . . . . . . . . . . . . . . . . . . . . . . . . . . . . . . . . . . . . . Strip bus cable . . . . . . . . . . . . . . . . . . . . . . . . . . . . . . . . . . . . . . . . . . . . . . . . . . Inserting cores into the screw termninal blocks . . . . . . . . . . . . . . . . . . . . . . Switch on terminating resistant . . . . . . . . . . . . . . . . . . . . . . . . . . . . . . . . . . . . 2-2 2-28 2-32 2-32 2-34 2-35 2-35 2-36 2-37 4-6 4-7 4-8 4-11 4-12 4-12 4-14 4-16 4-19 4-20 4-22 4-23 4-25 4-26 4-27 4-28 4-29 4-30 4-31 4-32 4-36 4-37 4-38 4-39 4-41 5-5 5-6 5-9 5-9 5-10 5-11 5-12 5-13 5-14 5-17 5-19 5-20 5-21 5-22 S7-400 and M7-400 Programmable Controllers Hardware and Installation A5E00069481-04 Contents 5-15 5-16 5-17 6-1 6-2 6-3 7-1 7-2 7-3 8-1 8-2 8-3 8-4 8-5 8-6 8-7 8-8 8-9 8-10 8-11 8-12 8-13 8-14 8-15 8-16 8-17 8-18 8-19 8-20 8-21 8-22 8-23 8-24 8-25 8-26 8-27 8-28 8-29 8-30 Turning back braided shield over cable . . . . . . . . . . . . . . . . . . . . . . . . . . . . . Optical PROFIBUS-DP Network with Nodes that have an Integrated Fiber-Optic Cable Interface . . . . . . . . . . . . . . . . . . Simplex Connectors and a Special Connector Adapter for the IM 153-2 FO and IM 467 FO (installed) . . . . . . . . . . . . . . . . . . . . . . . Connecting PG to an S7-400 . . . . . . . . . . . . . . . . . . . . . . . . . . . . . . . . . . . . . . Inserting a Memory Card in a CPU . . . . . . . . . . . . . . . . . . . . . . . . . . . . . . . . . Inserting Interface Submodules in the CPU . . . . . . . . . . . . . . . . . . . . . . . . . . Fitting Memory Cards in the CPUs . . . . . . . . . . . . . . . . . . . . . . . . . . . . . . . . . Memory Card . . . . . . . . . . . . . . . . . . . . . . . . . . . . . . . . . . . . . . . . . . . . . . . . . . . Inserting an Interface Submodule in a CPU . . . . . . . . . . . . . . . . . . . . . . . . . Fitting Memory Cards in the CPUs . . . . . . . . . . . . . . . . . . . . . . . . . . . . . . . . . 3.3 V Memory Card . . . . . . . . . . . . . . . . . . . . . . . . . . . . . . . . . . . . . . . . . . . . . . Inserting an Interface Submodule in an Expansion Module . . . . . . . . . . . . Fitting an AT Card in the ATM 478 AT Adapter Module . . . . . . . . . . . . . . . . Locations of the Expansion Socket and Plug . . . . . . . . . . . . . . . . . . . . . . . . EXM 478 Expansion Module Fitted with Connecting Clips . . . . . . . . . . . . . Removing the Cover . . . . . . . . . . . . . . . . . . . . . . . . . . . . . . . . . . . . . . . . . . . . . Interconnecting a CPU and Expansion Modules . . . . . . . . . . . . . . . . . . . . . Module Assembly Comprising CPU and Expansion Modules . . . . . . . . . . . Connecting Clip . . . . . . . . . . . . . . . . . . . . . . . . . . . . . . . . . . . . . . . . . . . . . . . . . Securing the Modules with Connecting Clips (Schematic Diagram) . . . . . Attaching a Module Assembly Comprising CPU and Expansion Modules and Swinging it into Position . . . . . . . . . . . . . . . . . . . . . . . . . . . . . . . . . . . . . . Screwing the Modules On . . . . . . . . . . . . . . . . . . . . . . . . . . . . . . . . . . . . . . . . Inserting the Key in the CPU . . . . . . . . . . . . . . . . . . . . . . . . . . . . . . . . . . . . . . Inserting a Memory Card in a CPU . . . . . . . . . . . . . . . . . . . . . . . . . . . . . . . . . Example of a Configuration with the CPU in an MPI Subnet and PROFIBUS-DP Subnet . . . . . . . . . . . . . . . . . . . . . . . . . . . . . . . . . . . . . . . Connecting a Programming Device to the M7-400 . . . . . . . . . . . . . . . . . . . . Connecting a Programming Device to Two or More M7-400s . . . . . . . . . . Connecting a Programming Device to an M7-400 Subnet . . . . . . . . . . . . . Ungrounded Operation of the M7-400 Network . . . . . . . . . . . . . . . . . . . . . . Removing an Interface Submodule from the Card Slot of an Expansion Module . . . . . . . . . . . . . . . . . . . . . . . . . . . . . . . . . . . . . . . . . . Removing the Cover . . . . . . . . . . . . . . . . . . . . . . . . . . . . . . . . . . . . . . . . . . . . . Unscrewing Modules . . . . . . . . . . . . . . . . . . . . . . . . . . . . . . . . . . . . . . . . . . . . . Swinging a Module Assembly Out and Lifting it Up and Out . . . . . . . . . . . . Module Assembly Comprising CPU and Expansion Modules . . . . . . . . . . . Removing the Connecting Clips from the Module to be Replaced . . . . . . . Separating the Modules, for Example When the Mass Storage Module is to be Replaced . . . . . . . . . . . . . . . . . . . . . . . . . . . . Removing Memory Cards from the CPUs . . . . . . . . . . . . . . . . . . . . . . . . . . . 3.3 V Memory Card . . . . . . . . . . . . . . . . . . . . . . . . . . . . . . . . . . . . . . . . . . . . . . Removing an AT Card from the ATM 478 AT Adapter Module . . . . . . . . . . S7-400 and M7-400 Programmable Controllers Hardware and Installation A5E00069481-04 5-24 5-26 5-30 6-5 6-12 6-19 7-20 7-21 7-23 8-12 8-12 8-14 8-16 8-18 8-19 8-20 8-21 8-22 8-23 8-23 8-25 8-26 8-27 8-28 8-31 8-39 8-41 8-42 8-43 8-48 8-49 8-50 8-51 8-51 8-52 8-53 8-55 8-55 8-57 xvii Contents A-1 A-2 A-3 A-4 A-5 A-6 A-7 A-8 A-9 A-10 A-11 B-1 xviii The Possible Routes for Electromagnetic Interference . . . . . . . . . . . . . . . . Example of Cabinet Installation for EMC . . . . . . . . . . . . . . . . . . . . . . . . . . . . Wall Mounting an S7-400 for EMC . . . . . . . . . . . . . . . . . . . . . . . . . . . . . . . . . Mounting Cable Shields . . . . . . . . . . . . . . . . . . . . . . . . . . . . . . . . . . . . . . . . . . Routing Equipotential Bonding Conductor and Signal Line . . . . . . . . . . . . . Lightning Protection Zones of a Building . . . . . . . . . . . . . . . . . . . . . . . . . . . . Sample Circuitry for Networked S7-400 PLCs . . . . . . . . . . . . . . . . . . . . . . . Relay Contact for EMERGENCY OFF in the Output Circuit . . . . . . . . . . . . Suppression for DC-Operated Coils . . . . . . . . . . . . . . . . . . . . . . . . . . . . . . . . Suppression with AC-Operated Coils . . . . . . . . . . . . . . . . . . . . . . . . . . . . . . . Shielding and Grounding with a Great Distance between Monitor and Programmable Controller . . . . . . . . . . . . . . . . . . . . . . . . . . . . . . . . . . . . . Electrostatic Voltages which can Build up on a Person . . . . . . . . . . . . . . . . A-5 A-10 A-12 A-14 A-16 A-22 A-28 A-30 A-31 A-31 A-36 B-3 S7-400 and M7-400 Programmable Controllers Hardware and Installation A5E00069481-04 Contents Tables 2-1 2-2 2-3 4-1 4-2 4-3 4-4 5-1 5-2 5-3 5-4 5-5 5-6 5-7 6-1 6-2 8-1 8-2 8-3 8-5 8-6 8-7 8-8 8-9 8-10 A-1 A-2 A-3 A-4 A-5 A-6 Types of Cabinet . . . . . . . . . . . . . . . . . . . . . . . . . . . . . . . . . . . . . . . . . . . . . . . . Modules in the different racks . . . . . . . . . . . . . . . . . . . . . . . . . . . . . . . . . . . . . Accessories for Modules and Racks . . . . . . . . . . . . . . . . . . . . . . . . . . . . . . . VDE Specifications for Assembling a Programmable Controller . . . . . . . . Methods of Protective Grounding . . . . . . . . . . . . . . . . . . . . . . . . . . . . . . . . . . Grounded connection load voltage . . . . . . . . . . . . . . . . . . . . . . . . . . . . . . . . . Front connector coding elements . . . . . . . . . . . . . . . . . . . . . . . . . . . . . . . . . . Permitted Cable Length of a Segment in an MPI Network . . . . . . . . . . . . . Permitted Cable Length of a Segment in the PROFIBUS-DP Network Depending on the Transmisson Rate . . . . . . . . . . . . . . . . . . . . . . . . . . . . . . Lengths of Spur Lines per Segment . . . . . . . . . . . . . . . . . . . . . . . . . . . . . . . Features of the Fiber-Optic Cables . . . . . . . . . . . . . . . . . . . . . . . . . . . . . . . . Order Numbers - Fiber-Optic Cables . . . . . . . . . . . . . . . . . . . . . . . . . . . . . . . Order Numbers - Simplex connectors and connector adapters . . . . . . . . Permissible Cable Lengths on the Optical PROFIBUS-DP Network (Partyline Topology) . . . . . . . . . . . . . . . . . . . . . . . . . . . . . . . . . . . . . . . . . . . . . Checklist to be Used Before Switching On for the First Time . . . . . . . . . . Setting the Battery Monitoring Switch . . . . . . . . . . . . . . . . . . . . . . . . . . . . . . . Sequence in the Module Subassembly . . . . . . . . . . . . . . . . . . . . . . . . . . . . . Possible Applications of the M7-400 Modules . . . . . . . . . . . . . . . . . . . . . . . . Dimensions of Modules in the M7-400 System . . . . . . . . . . . . . . . . . . . . . . . Accessories for Modules and Racks . . . . . . . . . . . . . . . . . . . . . . . . . . . . . . . Maximum Cable Lengths for Operator Panels and I/O Devices . . . . . . . . . Null Modem Cable for Connecting a CPU via IF to the COM Interface of a Programming Device with 9-pin Sub. D Male Connector . . . . . . . . . . Null Modem Cable for Connecting a CPU via IF to the COM Interface of a Programming Device with 25-pin Sub. D Male Connector . . . . . . . . . . Pin Assignments of the Cable for Connecting a CPU via IF to the COM Interface of a Programming Device with 9-pin Sub. D Male Connector . . . . . . . . . . . . . . . . . . . . . . . . . . . . . . . . . Pin Assignments of the Cable for Connecting a CPU via IF to the COM Interface of a Programming Device with 25-pin Sub. D Female Connector . . . . . . . . . . . . . . . . . . . . . . . . . . . . . . . . . . . . . . . . Key for Example 1 . . . . . . . . . . . . . . . . . . . . . . . . . . . . . . . . . . . . . . . . . . . . . . Cabling Inside Buildings . . . . . . . . . . . . . . . . . . . . . . . . . . . . . . . . . . . . . . . . . High-Voltage Protection of Cables with the Help of Surge Protection Equipment . . . . . . . . . . . . . . . . . . . . . . . . . . . . . . . . . . . . Low-Voltage Protection Components for Lightning Protection Zones 1 <–> 2 . . . . . . . . . . . . . . . . . . . . . . . . . . . . . Surge Protection Components for Lightning Protection Zones 2 <–> 3 . . Example of a Circuit Conforming to Lightning Protection Requirements (Legend to Figure A-7) . . . . . . . . . . . . . . . . . . . . . . . . . . . . . . . . . . . . . . . . . . . S7-400 and M7-400 Programmable Controllers Hardware and Installation A5E00069481-04 2-27 2-30 2-39 4-5 4-13 4-14 4-35 5-15 5-15 5-16 5-27 5-29 5-30 5-31 6-3 6-5 8-3 8-3 8-4 8-10 8-35 8-36 8-37 8-38 8-38 A-11 A-17 A-23 A-26 A-27 A-29 xix Contents xx S7-400 and M7-400 Programmable Controllers Hardware and Installation A5E00069481-04 Product Overview 1 Overview of the S7-400 The S7-400 is a programmable controller. Almost any automation task can be implemented with a suitable choice of S7-400 components. S7-400 modules have a block design for swing-mounting in a rack. Expansion racks are available to extend the system. In this chapter, we show you the most important components with which you can assemble an S7-400. Features of the S7-400 The S7-400 programmable controller combines all the advantages of the previous system with those of a new system and new software. These are: • A graded CPU platform • Upwardly-compatible CPUs • Enclosed modules of rugged design • Convenient terminal system for the signal modules • Compact modules with a high component density • Optimum communication and networking facilities • Convenient incorporation of operator interface systems • Software parameter assignment for all modules • Extensive choice of slots • Operation without fans • Multicomputing in the non-segmented rack S7-400 and M7-400 Programmable Controllers Hardware and Installation A5E00069481-04 1-1 Product Overview Overview of the M7-400 The SIMATIC S7 programmable controller is extended by the SIMATIC M7 automation computer with its AT-compatible computer functionality. This enables the SIMATIC user to make use of the open software world, either as an extension to an S7 programmable controller or as a stand-alone M7 computer system. The entire SIMATIC S7 range of I/O devices is available to the M7 user. Features of the M7-400 The M7-400 automation computer is suitable for the following typical tasks: • Process data acquisition • Storage of large volumes of data • Control of local process I/Os • Communication • Closed-loop control, positioning, counting • Operator interface systems. It offers the following features: • Running of DOS/Windows software available on the market • Free programming (high-level language) • RMOS real-time multitasking operating system – running of real time-capable software – event-driven program processing – multitasking • A standard, short AT card can be plugged in • Multicomputing in the non-segmented rack • Full incorporation in S7-400 systems. 1-2 S7-400 and M7-400 Programmable Controllers Hardware and Installation A5E00069481-04 Product Overview Components of an S7-400 The most important components of the S7-400 and their functions are given in the following tables: Components Function Racks (UR: Universal Rack) (CR: Central Rack) (ER: Expansion Rack) ... provide the mechanical and electrical connections between the S7-400 modules. Power Supply Modules (PS = Power Supply) ... convert the line voltage (120/230 VAC or 24 VDC) to the 5 VDC and 24 VDC operating voltages required to power the S7-400. Accessories: Backup battery CPUs Central Processing Units (CPUs) ... execute the user program; communicate via the multipoint interface (MPI) with other CPUs or with a programming device (PG). Memory cards ... store the user program and parameters. IF 964-DP interface module ... used to connect distributed I/Os via PROFIBUS-DP Signal Modules (SM = Signal Module) (digital input modules, digital output modules, analog input modules, analog output modules) Accessories: Front connector with three different terminal systems ... match the different process signal levels to the S7-400. ... form the interface between PLC and process. Interface modules (IM = Interface Module) Accessories: Connecting cable Terminator ... interconnect the individual racks of an S7-400. Cable ducts ...are used for routing cables and as ventilation. PROFIBUS bus cables ...connect CPUs to programming devices. S7-400 and M7-400 Programmable Controllers Hardware and Installation A5E00069481-04 Illustration 1-3 Product Overview Components Function PG cables ...connect a CPU to a programming device. PROFIBUS components for example, PROFIBUS bus terminal ... connect the S7-400 to other S7-400 devices or programming devices. RS 485 repeaters ...amplify data signals on bus lines and links bus segments. Programming device (PG) or PC with the STEP 7 software package ...configures, programs, debugs, and assigns parameters to the S7-400. Fan subassemblies (for special areas of application) ...ventilates modules in special cases; can be operated with or without a filter. Illustration Additional components of the S7-400 such as communications processors, function modules, etc., are described in separate manuals. Components of an M7-400 The most important components of the M7-400 and their functions are given in the following tables: Components Function Central Processing Units (CPUs) ... function as AT-compatible processing units; execute the user program; communicate via the MPI with other CPUs or with a programming device / PC; serve to accommodate two interface submodules (IFs). Accessories: Memory Card DRAM Cards Application Modules (FMs) Accessories: Memory Card DRAM Cards On-Board Silicon Disk 1-4 Illustration ... are ISA-compatible processing units to support the CPU. (They are described in a separate manual.) S7-400 and M7-400 Programmable Controllers Hardware and Installation A5E00069481-04 Product Overview Components Function Expansion Modules (EXMs) ... serve to accommodate three interface submodules (IFs). AT Adapter Modules (ATMs) ... provide a slot for a 16-bit AT module (up to 164 mm long). Mass Storage Modules (MSMs) ... serve to store programs and data on a hard disk (2.5”) or floppy disk (3.5”). Interface Submodules (IFs) ... for connecting I/O devices such as VGA monitor, mouse, keyboard, printer. Illustration Applicable Modules in the S7-400 Range The following modules from the S7-400 range can be used with the M7-400: • Power supply modules (PSs) • Function modules (FMs) • Signal modules (SMs) • Interface modules (IMs) • Fan subassemblies Suitable I/O Devices The following I/O devices can be connected via the appropriate interface submodules: • VGA monitor • Keyboard • Mouse • Printer • Sensors and actuators • Distributed I/Os S7-400 and M7-400 Programmable Controllers Hardware and Installation A5E00069481-04 1-5 Product Overview Connecting the M7-400 to a Programming Device / PC For the remote setup of the M7-400, you can connect a programming device or PC to the CPU of the M7-400 via a V.24 cable. A PC/PG cable is used to connect a programming device or PC and CPU of the M7-400 via the multipoint interface (MPI). Location of Order Number and Product Version The order number and product version are printed on every module of the SIMATIC S7-400/M7-400. The firmware version is also printed on the CPUs. The following figure shows their locations on a module. For the product version, an X is entered instead of the valid number. The following figure shows a module with Product Version 1. Module designation CPU 412Ć1 X 2 3 4 Type label 412Ć1XF03Ć0AB0 V 3.0.1 Product version Abbreviated order number (6ES7 ...) Firmware version (in CPUs) Example of a Rating Plate SIMATIC M7 6ES7 488Ć3AA00Ć0AB0 CPU 488Ć3 FM SVP JM123456 APPROVED CLASS 1 BE4 2 Made in Germany Order no. MAX. 1BC X 2 3 4 5 6 7 8 T4 Product version Approvals and marks Module designation 1-6 S7-400 and M7-400 Programmable Controllers Hardware and Installation A5E00069481-04 2 Installing the S7-400 Chapter Overview Section Description Page 2.1 Assembling an S7-400 2-2 2.2 Assembling the Central Rack (CR) and Expansion Rack (ER) 2-6 2.3 Segmented CR 2-8 2.5 Mounting and Grounding the Racks 2-10 2.6 Chassis Terminal Connection in the Non-Isolated Configuration 2-16 2.7 Methods of Ventilation 2-19 2.8 Changing the Ventilation with the Cable Duct and Fan Subassembly 2-21 2.9 Installing the Fan Subassembly 2-23 2.10 Installing the Cable Duct 2-25 2.11 Choosing and Setting up Cabinets with the S7-400 2-26 2.12 Rules for the Arrangement of Modules 2-30 2.13 Fitting Memory Cards in the CPU 2-31 2.14 Installing Modules in a Rack 2-33 2.15 Marking the Modules with Slot Labels 2-37 2.16 Methods of Expansion and Networking 2-38 2.17 Accessories 2-39 S7-400 and M7-400 Programmable Controllers Hardware and Installation A5E00069481-04 2-1 Installing the S7-400 2.1 Assembling an S7-400 Introduction An S7-400 programmable controller consists of a central rack (CR) and one or more expansion racks (ERs), as required. You use ERs when there are insufficient slots in the CR for your application, or when you wish to operate signal modules separated from the CR (e.g. in the immediate vicinity of your process). When using ERs, you need interface modules (IMs) as well as the additional racks, and additional power supply modules if necessary. When using interface modules, you must always use the appropriate partners: you insert a send IM in the CR, and the matching receive IM in each connected ER (see Reference Manual, Chapter 7). The M7-400 modules function similarly to the S7-400 modules and also use the racks in the S7-400 range. Any differences in function or data can be found directly at the relevant point or in Section 8.1 “Mechanical Configuration.” Central Rack (CR) and Expansion Rack (ER) The rack containing the CPU is known as the central rack (CR). The racks containing modules in the system and connected to the CR are the expansion racks (ERs). Shown in Figure 2-1 is a rack with 18 slots configured as a CR. PS CPU Figure 2-1 2-2 SMs Rack Fitted with Modules in the S7-400 System S7-400 and M7-400 Programmable Controllers Hardware and Installation A5E00069481-04 Installing the S7-400 Connecting the CR and ER(s) To connect one or more ERs to a CR, you must fit one or more send IMs in the CR. The send IMs have two interfaces. You can connect one chain of up to four ERs to each of the two interfaces of a send IM in the CR. Different IMs are available for local connection and remote connection. Connecting with a 5 V Supply For a local connection with the IM 460-1 and IM 461-1, the 5 V supply voltage is also transferred via the interface modules. There must therefore be no power supply module inserted in an ER connected to an IM 460-1/IM 461-1. Up to 5 A may flow through each of the two interfaces of an IM 460-1. This means that each ER connected via an IM 460-1/461-1 can be powered with a maximum of 5 A at 5 V. For further details, see the Reference Manual, Chapter 7. Overview of the Connections Observe the connection rules at the end of this section. Local Connection Remote Connection Send IM 460-0 460-1 460-3 460-4 Receive IM 461-0 461-1 461-3 461-4 4 1 4 4 Max. distance 5m 1.5 m 102.25 m 605 m 5 V transfer No Yes No No – 5A – – Yes No Yes No Max. number of connectable EMs per chain Max. current transfer per interface Communication bus transmission S7-400 and M7-400 Programmable Controllers Hardware and Installation A5E00069481-04 2-3 Installing the S7-400 Ways of Connecting Central and Expansion Racks Central rack CR IM 460-4 IM 460-3 IM 460-1 IM 460-0 Expansion without 5 V local transfer Expansion rack ER 1 Expansion rack ER 4 IM 461-0 IM 461-0 Chain length max. 3 m Expansion with 5 V local transfer Expansion rack ER 1 IM 461-1 Chain length max. 1.5 m Remote expansion Expansion rack ER 4 Expansion rack ER 1 IM 461-3 IM 461-3 Chain length max. 102.25 m Expansion rack ER 4 Expansion rack ER 1 IM 461-4 IM 461-4 Chain length max. 605 m 2-4 S7-400 and M7-400 Programmable Controllers Hardware and Installation A5E00069481-04 Installing the S7-400 Rules for Connection When you connect a central rack to expansion racks, you must observe the following rules: • You can connect up to 21 ERs of the S7-400 to one CR. • The ERs are assigned numbers to identify them. The rack number must be set on the coding switch of the receive IM. Any rack number between 1 and 21 may be assigned. Numbers must not be duplicated. • You may insert up to six send IMs in one CR. However, only two send IMs with 5 V transfer are allowed in one CR. • Each chain connected to the interface of a send IM can comprise up to four ERs (without 5 V transfer) or one ER (with 5 V transfer). • The exchange of data via the communication bus is limited to 7 racks, meaning the CR and ER numbers 1 to 6. • The maximum (total) cable lengths specified for the type of connection must not be exceeded. Type of Connection Local connection with 5 V transfer via IM 460-1 and IM 461-1 Local connection without 5 V transfer via IM 460-0 and IM 461-0 Maximum (Total) Cable Length 1.5 m 5m Remote connection via IM 460-3 and IM 461-3 102.25 m Remote connection via IM 460-4 and IM 461-4 605 m S7-400 and M7-400 Programmable Controllers Hardware and Installation A5E00069481-04 2-5 Installing the S7-400 2.2 Assembling the Central Rack (CR) and Expansion Rack (ER) Function of the Racks The racks of the S7-400 system form the basic framework which accepts the individual modules. The modules exchange data and signals and are powered via the backplane bus. The racks are designed for wall mounting, for mounting on rails, and for installation in frames and cabinets. Racks in the S7-400 System Rack No. of Slots Available Buses Application Characteristics UR1 18 UR2 9 I/O bus Communication bus CR or ER Rack for all module types in the S7-400 and as central rack for CPUs and their expansion modules from the M7-400 range (see Section 8.1). ER1 Racks for signal modules (SMs), receive IMs, and all power supply modules. The I/O bus has the following restrictions: 18 • Interrupts from modules have no effect because no interrupt lines exist. Restricted I/O bus ER2 2-6 • Modules are not supplied with 24 V, i.e. modules requiring 24 V cannot be used (see technical data of the modules). • Modules are neither backed up by 9 the battery in the power supply module nor by the voltage applied externally to the CPU or receive IM (EXT.BATT. socket). CR2 18 I/O bus, segmented Communication bus, continuous CR3 4 I/O bus Communication bus 2*9 I/O bus, segmented Communication bus, segmented UR2-H ERs Segmented CR CR in standard systems Subdivided CR or ER for compact installation of a fault– tolerant system Rack for all module types in the S7-400 except receive IMs and for the CPUs and their expansion modules from the M7-400 range (see Section 8.1). The I/O bus is subdivided into 2 I/O bus segments of 10 and 8 slots respectively. Racks for all S7-400 module types except receive IMs. CPUs 41x-H only in stand-alone operation. Rack for all module types in the S7-400. The I/O bus and communication bus are divided into 2 bus segments, each with 9 slots. S7-400 and M7-400 Programmable Controllers Hardware and Installation A5E00069481-04 Installing the S7-400 Electrical Supply The modules inserted in the rack are supplied with the required operating voltages (5 V for logic, 24 V for interfaces) via the backplane bus and base connector, by the power supply module fitted in the slot on the extreme left in the rack. For local connections, ERs can also be supplied with power via the IM 460-1 / IM 461-1 interface modules. 5 A may flow through each of the two interfaces of a send IM 460-1, meaning each ER in a local connection can be supplied with up to 5 A. I/O Bus The I/O bus is a parallel backplane bus designed for the fast interchange of I/O signals. Each rack has an I/O bus. Time-critical operations to access the process data of the signal modules take place via the I/O bus. Communication Bus (C Bus) The communication bus (C bus) is a serial backplane bus designed for the fast exchange of large volumes of data parallel to the I/O signals. Except for racks ER1 and ER2, each rack has a communication bus. Rack with I/O Bus and Communication Bus The following figure shows a rack with an I/O bus and a communication bus. The I/O bus connector and communication bus connector can be seen at each slot. When the rack is delivered, these connectors are protected by a cover. 1 2 3 4 5 6 7 8 9 10 11 12 13 14 15 16 17 18 I/O bus connector Communication bus connector S7-400 and M7-400 Programmable Controllers Hardware and Installation A5E00069481-04 2-7 Installing the S7-400 2.3 Segmented CR Properties The “segmented” characteristic relates to the configuration of the CR. In the (non-segmented) CR the I/O bus is continuous and interconnects all 18 or 9 slots; in the segmented CR, however, the I/O bus consists of two I/O bus segments. A segmented CR has the following important characteristics: • The communication bus is continuous (global), whilst the I/O bus is divided into two I/O bus segments of 10 and 8 slots respectively. • One CPU can be inserted per local bus segment. • The two CPUs in a segmented CR may be in different operating states. • The two CPUs can communicate with each other via the communication bus. • All the modules inserted in a segmented CR are powered by the power supply module at slot 1. • Both segments have a common backup battery. The following figure shows a segmented CR with divided I/O bus and continuous communication bus. 1 11 SEG1 SEG2 1 2 3 4 SEG1 SEG1 SEG1 SEG1 5 SEG1 6 SEG1 7 SEG1 I/O bus Segment 1 8 SEG1 9 SEG1 10 SEG1 11 SEG2 12 SEG2 13 SEG2 14 SEG2 15 SEG2 16 SEG2 17 SEG2 18 SEG2 I/O bus Segment 2 Communication bus 2-8 S7-400 and M7-400 Programmable Controllers Hardware and Installation A5E00069481-04 Installing the S7-400 2.4 Subdivided CR Characteristics The ”subdivided” characteristic relates to the configuration of the CR. In the (non-divided) CR the I/O bus and communication bus are continuous and interconnect all the slots; in the subdivided CR, however, the I/O bus and communication bus consist of two segments each. The UR2-H rack used here functions as two electrically isolated UR2 racks on the same rack profile. A subdivided CR has the following important characteristics: • The communication bus and I/O bus are subdivided into two segments with 9 slots each. • Each segment represents a self-contained CR. The following figure shows a divided CR with a divided I/O bus and communication bus. Division I Division II 1 2 3 4 5 6 7 8 9 1 2 3 4 5 6 7 8 9 1 2 3 4 5 6 7 8 9 1 2 3 4 5 6 7 8 9 I/O bus Segment 1 Communication bus Segment 1 S7-400 and M7-400 Programmable Controllers Hardware and Installation A5E00069481-04 I/O bus Segment 2 Communication bus Segment 2 2-9 Installing the S7-400 2.5 Mounting and Grounding the Racks Important Notes on Installation The S7-400 racks are designed for wall mounting, mounting on rails, and for installation in frames and cabinets. Their mounting dimensions comply with DIN 41 494. According to the UL/CSA and the EU Directive 73/23/EEC (low-voltage directive), installation in a cabinet, a casing, or a closed operations room is necessary in order to fulfil the requirements for electrical safety (see Reference Manual, Chapter 1). In principle, the M7-400 is mounted like an S7-400 except that preassembly is required (see Section 8.4 “Installing the M7-400”). Step 1: Retaining Distances Between Devices You must observe the minimum distances between the rack and neighboring devices. You need these minimum clearances during installation and operation. • For fitting and removing modules • For fitting and disconnecting the module front connectors • To ensure the air flow required for cooling the modules during operation The following figure shows the minimum space you must provide for a rack. 40 mm 1 2 3 4 5 6 7 8 9 10 11 14 15 16 17 18 20 mm 20 mm 352 mm 12 13 * 22 mm 522.5 mm (18 slots) 297.5 mm ( 9 slots) 172.5 mm (4 slots) * 40 mm facilitates the mounting of a fan subassembly Mounting depth, fitted: max. 237 mm 2-10 S7-400 and M7-400 Programmable Controllers Hardware and Installation A5E00069481-04 Installing the S7-400 Space Required When Using Cable Channels and Fan Subassemblies A cable duct or fan subassembly must be installed in the 19-inch pitch immediately below the rack. Additional space for cable routing must be provided on both sides. The following figure shows how much space you need to allow for when using a cable duct or fan subassembly. 1 2 3 4 5 6 7 8 9 10 11 12 13 14 15 16 17 18 440 mm Cable duct/fan subassembly 522.5 mm (with cable duct) 542.5 mm (with fan subassembly) Mounting depth, fitted: max. 237 mm 19-inch reference level Dimensions of the Racks The following figure shows the dimensions for racks with 18, 9 and 4 slots and the positions of cutouts for screw mounting. The cutouts are arranged according to the 19-inch standard. S7-400 and M7-400 Programmable Controllers Hardware and Installation A5E00069481-04 2-11 Installing the S7-400 60 mm 1 2 3 4 5 6 7 8 9 10 11 12 13 14 15 16 6 7 9 17 18 290 mm 190 mm 40 mm 465 mm 482.5 mm 1 2 3 4 1 2 3 4 1 2 3 4 5 8 290 mm 190 mm Depth = 27.5 mm without modules Depth = 237.0 mm with modules 40 mm 115 mm 240 mm 132.5 mm 257.5 mm Step 2: Mounting the Rack Screw the rack to the base. Is the base material a grounded metal plate or a grounded equipment plate? If so: Establish a low-impedance connection between rack and base material. With painted and anodized metals, for example, use a suitable contact agent or special contact washers. If not: No special measures are required. 2-12 S7-400 and M7-400 Programmable Controllers Hardware and Installation A5E00069481-04 Installing the S7-400 Mounting Screws You have a choice of the following types of screw for securing a rack: Screw Type Explanation M6 cylinder-head screw to ISO 1207/ISO 1580 (DIN 84/DIN 85) M6 hex. screw to ISO 4017 (DIN 4017) Choose the screw length according to your assembly. You also need “6.4” washers to ISO 7092 (DIN 433). Step 3: Connecting the Rack to the Chassis Ground Connect the rack to the chassis ground. A threaded bolt is provided for this purpose on the bottom left of the rack. Minimum cross-section of the conductor to the chassis ground: 10 mm2. If the S7-400 is mounted on a mobile rack, you must provide a flexible conductor to the chassis ground. Note Always ensure that there is a low-impedance connection to the chassis ground (see the figure below). You achieve this with the shortest possible, low-resistance conductor with a large surface to establish large-area contact. M6 threaded bolt Contact washer Terminal Plain washer M6 nut To chassis ground S7-400 and M7-400 Programmable Controllers Hardware and Installation A5E00069481-04 2-13 Installing the S7-400 Step 4: Mounting Additional Racks If you assemble an S7-400 with two or more racks, you must allow additional clearance between the individual racks or install a fan subassembly or cable duct. The figure below shows the clearance you must allow between two racks of the S7-400 during installation. 1 2 3 4 5 6 7 8 9 10 11 12 13 14 15 16 17 18 1 2 3 4 5 6 7 8 9 10 11 12 13 14 15 16 17 18 110 mm 2-14 S7-400 and M7-400 Programmable Controllers Hardware and Installation A5E00069481-04 Installing the S7-400 The figure below shows how much space you must allow for when assembling an S7-400 from two racks with a cable duct or fan subassembly. This requirement is increased by a height of 400 mm for each additional rack with a cable duct or fan subassembly. 1 2 3 4 5 6 7 8 9 10 11 12 13 14 15 16 17 18 Cable duct/fan subassembly 840 mm 1 2 3 4 5 6 7 8 9 10 11 12 13 14 15 16 17 18 Cable duct/fan subassembly Mounting depth, fitted: max. 237 mm 19-inch reference level Note A minimum clearance as shown in the above figure between rack and cable duct or fan subassembly must not be provided, but is essential between two adjacent racks and between racks and other equipment. S7-400 and M7-400 Programmable Controllers Hardware and Installation A5E00069481-04 2-15 Installing the S7-400 2.6 Chassis Terminal Connection in the Non-Isolated Configuration Reference Point The racks offer the option of connecting the 24-V load voltage ground in the non-isolated configuration to the 5-V ground (reference potential M, logic ground). Connect the chassis ground to the reference point for non-isolated modules. The reference point is metallically connected to the reference potential M. Note The position of the reference point on the racks was changed in 10/99. The following figure shows the position of the reference point on a rack up until 10/99. 1 2 3 4 5 6 7 Reference point Chassis ground terminal Connecting to the Reference Point until 10/99 For the connection to the reference point, use a cable lug for M4, a suitable spring washer (for example, strain washer to DIN 6796) and an M4 x 6 cylinder-head screw. 2-16 S7-400 and M7-400 Programmable Controllers Hardware and Installation A5E00069481-04 Installing the S7-400 Note Do not use any cyclinder-head screws longer than 6 mm for the connection to the reference point. Otherwise, you may create an undesired connection between the reference point and the rack profile behind it and therefore the connection for the chassis ground. The following figure shows the position of the reference point on a rack up after 10/99. 1 2 3 4 5 6 7 Metallic connection, undo from above in the case of ungrounded configuration Load voltage ground connection (reference point) Chassis ground terminal The following figure shows the ground connection to the reference point. Threaded hole Terminal Spring washer M4 screw S7-400 and M7-400 Programmable Controllers Hardware and Installation A5E00069481-04 2-17 Installing the S7-400 Connection to the Reference Point After 10/99 For the connection to the reference point, use a cable lug for M4, a suitable spring lock washer (for example, clamping washer to DIN 6796) and the cylinder-head screw supplied. Ungrounded configuration: Undo the fixing screws of the metallic connection on the rack. Tilt the connection downwards. For the connection to the reference point, use the original M4 x 8 supplied. Use the tilted metallic connection as a washer. Grounded configuration: Leave the metallic connection on the rack. For the connection to the reference point, use the original M4 x 8. Ungrounded configuration Grounded configuration Rack Metallic connection Reference point Connection Connection Spring lock washer Spring lock washer Original screw with spring lock washer M4 x 8 Original screw with spring lock washer M4 x 8 Note Do not use any cylinder-head screws that are longer than 6 mm for the connection to the reference point. Otherwise, you may create an undesired connection between the reference point and the rack profile behind it and therefore the connection for the chassis ground. For this reason as well, leave the metallic connection on the rack and use it as a washer in an ungrounded configuration. 2-18 S7-400 and M7-400 Programmable Controllers Hardware and Installation A5E00069481-04 Installing the S7-400 2.7 Methods of Ventilation Methods of Ventilation Under extreme ambient conditions, particularly when operating the S7-400 modules in cabinets, you can use the cable duct or fan subassembly to optimize ventilation. There are two methods of supplying air to the modules. You draw in air either from the back or from below. The cable duct and fan subassembly can be converted for this purpose. The following figure shows the ventilation when air is drawn in from the back. Wall ÇÇ ÇÇ ÇÇ ÇÇ ÇÇ ÇÇ ÇÇ ÇÇ ÇÇ ÇÇ ÇÇ ÇÇ ÇÇ ÇÇ ÇÇ ÇÇ ÇÇ ÇÇ ÇÇ ÇÇ ÇÇ ÇÇ ÇÇ Exhaust air Modules Cable duct or fan subassembly Exhaust air Modules Supply air S7-400 and M7-400 Programmable Controllers Hardware and Installation A5E00069481-04 2-19 Installing the S7-400 The following figure shows the ventilation when air is drawn in from the bottom. Wall 2-20 Ç Ç Ç Ç Ç Ç Ç Ç Ç Ç Ç Ç Ç Ç Ç Ç Ç Ç Ç Ç Ç Ç Exhaust air Modules Cable duct or fan subassembly Modules Supply air S7-400 and M7-400 Programmable Controllers Hardware and Installation A5E00069481-04 Installing the S7-400 2.8 Changing the Ventilation with the Cable Duct and Fan Subassembly Changing the Ventilation At the base of the cable duct and the fan subassembly, there is a cover that you can move in order to change the air duct. To do this, proceed as follows: 1. Using a screwdriver, make a quarter turn counter-clockwise to open the two quick-release locks at the front of the cable duct or fan subassembly. 2. Grasp the base with both hands; press it gently downward and pull it fully out of the cable duct or fan subassembly. 3. The cover is secured to the base with snap catches. Press the cover from below, close to the snap catches, and remove the cover. 4. At approximately right angles to the base, insert the cover in the snap hinges at the rear edge of the base. 5. Slide the base in again and push it up. 6. Use a screwdriver to make a quarter turn clockwise and close the two quick-release locks. The following figure shows both methods of selecting the ventilation by appropriately fitting the cover in the base of the cable duct or fan subassembly. S7-400 and M7-400 Programmable Controllers Hardware and Installation A5E00069481-04 2-21 Installing the S7-400 Cover Delivered state: Cover fitted at bottom (supply air from the rear) Base Quick-release locks Snap catches Cover Cover fitted at back (supply air from below) Base Snap hinges State When Shipped The cover is fitted in the base of the cable duct or fan subassembly. Air is supplied from the back. Filter Mat (Optional) To filter the air supply, you can fit a filter mat for the cable duct and fan subassembly. The filter mat is optional and is not part of the cable duct or fan subassembly. Like the cover, the filter mat can be inserted flat in the base or at its rear edge in the corresponding snap hinges or quick-release locks. 2-22 S7-400 and M7-400 Programmable Controllers Hardware and Installation A5E00069481-04 Installing the S7-400 2.9 Installing the Fan Subassembly Procedure 1. Remove the left cover from the fan subassembly. Using a 17 mm open-ended wrench, slacken the quick-release lock a quarter turn. Pull out the left cover of the fan subassembly. To do this, move the left cover parallel to the fan subassembly in order to avoid damaging the plug-in contact on the other side. The following figure shows you how to remove the left cover. Snap-in mechanism of dummy covers Plug-in contact Back of cable routing Direction for pulling off Left cover Quick-release lock Note Provide the fan subassembly with dummy plates beneath free slots, this will ensure optimum ventilation. The fan subassembly is supplied with 18 dummy plates, arranged as 2 units, each with 9 individual dummy plates. By breaking at one of the rupture joints, you can split up the individual plates as required. 2. Remove the dummy plates which are not required by slackening the snap-in mechanisms of the covers and pulling them off. 3. Break off as many dummy plates as required. S7-400 and M7-400 Programmable Controllers Hardware and Installation A5E00069481-04 2-23 Installing the S7-400 4. Attach the dummy plates to the free slots: – Place the dummy plates on the rear wall of the cable routing, – Push the dummy plates back so that the noses of the dummy plates will fit into the cutouts provided, – Push the dummy plates in until the snap-in mechanism engages in the openings on the back of the cable routing. 5. Then install the fan assembly in the 19-inch pitch directly under the rack or between two racks. Use M6 size screws for mounting. The following figure shows how to mount the fan subassembly between two racks. 9 10 11 12 13 14 15 16 17 18 Blanking cover 9 10 11 12 13 14 15 16 17 18 19-inch reference level 6. Refit the left cover. 7. Secure the left cover with the quick-release lock. Monitoring the Fan Subassembly To monitor the functioning of the fan subassembly via your program, connect the outputs to a digital module. Further details on the monitoring concept can be found in the Reference Manual, Chapter 9. 2-24 S7-400 and M7-400 Programmable Controllers Hardware and Installation A5E00069481-04 Installing the S7-400 2.10 Installing the Cable Duct Procedure 1. Install the cable duct in the 19-inch pitch directly under the rack or between two racks. Use M6 size screws for mounting. The following figure shows how to mount the cable duct between two racks. 9 10 11 12 13 14 15 16 17 18 9 10 11 12 13 14 15 16 17 18 19-inch reference level S7-400 and M7-400 Programmable Controllers Hardware and Installation A5E00069481-04 2-25 Installing the S7-400 2.11 Choosing and Setting up Cabinets with the S7-400 Why Cabinets are Required With larger installations and in an environment subject to interference or pollution, you can install the S7-400 in cabinets. The requirements of UL/CSA are met, for example, by an installation in cabinets. Types and Dimensions of Cabinets Observe the following criteria when selecting cabinet types and their dimensions: • Ambient conditions at the point of installation of the cabinet • Required clearances for the racks • Total power dissipation of components contained by the cabinet The ambient conditions at the point of installation of the cabinet (temperature, humidity, dust, effects of chemicals, explosion hazard) govern the required degree of protection of the cabinet (IP xx). Further information on degrees of protection can be found in IEC 529 and DIN 40050. 2-26 S7-400 and M7-400 Programmable Controllers Hardware and Installation A5E00069481-04 Installing the S7-400 Table 2-1 provides an overview of the most common types of cabinet. You will also find the principle of heat removal, as well as the estimated, maximum achievable power loss removal and the degree of protection. Table 2-1 Types of Cabinet Open Cabinets Closed Cabinets Through-ventilatio n by natural convection Increased through-ventilation Natural convection Forced circulation using fan subassembly, enhanced natural convection Forced circulation using heat exchanger, external ventilation inside and outside Heat removal primarily by natural thermal convection, small portion via the cabinet wall Increased heat removal through increased air movement Heat removal only through the cabinet wall; only low power dissipation permissible. Heat accumulation usually occurs in the top of the cabinet. Heat removal only through the cabinet wall. Forced ventilation of the internal air results in improved heat removal and prevention of heat accumulation. Heat removal through exchange between heated internal air and cold external air. The increased surface of the folded-area sectional wall of the heat exchanger and forced circulation of internal and external air permit good heat output. Degree of protection IP 20 Degree of protection IP 20 Degree of protection IP 54 Degree of protection IP 54 Degree of protection IP 54 Typical removable power dissipation under the following boundary conditions: • Cabinet size 2200 x 600 x 600 mm • Difference between external and internal temperature of the cabinet: 20° C (for other temperature differences, you must refer to the temperature characteristics of the cabinet manufacturer) up to 700 W up to 2700 W (1400 W with very fine filter) up to 260 W up to 360 W S7-400 and M7-400 Programmable Controllers Hardware and Installation A5E00069481-04 up to 1700 W 2-27 Installing the S7-400 Removable Power Dissipation from Cabinets (Example) The removable power dissipation from a cabinet is governed by the type of cabinet, its ambient temperature, and the arrangement of equipment in the cabinet. Figure 2-2 shows a diagram with guide values for the permissible ambient temperature of a cabinet measuring 600 x 600 x 2000 mm as a function of power dissipation. These values only apply if you observe the specified installation dimensions and clearances for racks. Further information can be found in Siemens catalogs NV21 and ET1. Ambient temperature in °C 60 50 1 40 2 30 3 20 200 400 600 800 1000 1200 1400 W Power dissipation Figure 2-2 Max. Cabinet Ambient Temperature as a Function of Power Dissipation of Equipment in the Cabinet Legend for Figure 2-2: 1. Closed cabinet with heat exchanger; heat exchanger size 11/6 (920 x 460 x 111 mm) 2. Cabinet with through-ventilation by natural convection 3. Closed cabinet with natural convection and forced circulation by equipment fans ! Warning Modules can be damaged. Modules can be damaged by subjecting them to excessively high ambient temperature. In the case of modules with hard drives, in particular, ensure that they are not subjected to an excessively high ambient temperature. 2-28 S7-400 and M7-400 Programmable Controllers Hardware and Installation A5E00069481-04 Installing the S7-400 Example for Determining the Type of Cabinet The following example clarifies the maximum ambient temperature which is permissible for a particular power dissipation with various types of cabinet. The following equipment configuration is to be installed in a cabinet: 1 central rack 150 W 2 expansion racks of 150 W power dissipation each 300 W 1 load current power supply under full load 200 W Total power dissipation 650 W From Figure 2-2, with a total power dissipation of 650 W, the ambient temperatures obtained are as follows: Type of Cabinet Max. Permissible Ambient Temperature Closed, with natural convection and forced circulation (Curve 3) (no operation possible) Open, with through-ventilation (Curve 2) approx. 38° C Closed, with heat exchanger (Curve 1) approx. 45° C Dimensions of Cabinet To determine the dimensions of a cabinet suitable for assembling an S7-400, you must take the following into account: • Space requirement of the racks • Minimum clearances between racks and cabinet walls • Minimum clearances between racks • Space requirement of cable ducts or fan subassemblies • Locations of rails S7-400 and M7-400 Programmable Controllers Hardware and Installation A5E00069481-04 2-29 Installing the S7-400 2.12 Rules for the Arrangement of Modules Rules for S7-400 and M7-400 Given in this section are the rules you must observe when arranging modules in the S7-400. The rules for M7-400 modules can be found in Section 8.1 “Mechanical Configuration”. Arrangement of Modules You need observe only two rules for the arrangement of modules in a rack: • In all racks, the power supply module must always be inserted on the extreme left (beginning with slot 1). In the UR2-H from slot 1 in both segments. • The receive IM in the ER must always be inserted on the extreme right. In the UR2-H at slot 9 once per segment. Note Establish whether there are additional regulations applying to all modules not described in this manual. The following table shows which modules can be used in the different racks: Table 2-2 Modules in the different racks Racks Modules UR1, UR2 UR2-H as CR UR1, UR2 as ER UR2-H as ER* Power Supply Modules CPUs Send IMs Receive IMs Signal Modules * Racks CR2, CR3 ER1, ER2 No IM 463–2, no adapter module, no power supply module along with the IM 461-1. Space Requirement of the Racks In the S7-400 system, there are modules occupying one, two, or three slots (width 25, 50, or 75 mm). Refer to the technical specifications of the module under the keyword “dimensions” to see how many slots a module occupies. The mounting depth of a rack fitted with modules is 237 mm maximum. 2-30 S7-400 and M7-400 Programmable Controllers Hardware and Installation A5E00069481-04 Installing the S7-400 2.13 Fitting Memory Cards in the CPU Memory Expansion With the CPU 417-4 and CPU 417-4 H you can expand the work memory with memory submodules. The following points are important: 1. If only one submodule is inserted, l must be in slot 1. 2. You may only insert a second submodule if a 4 Mbyte-submodule is inserted in slot 1. The following combinations are then possible: Slot 1 Slot 2 2 Mbytes - 4 Mbytes - 4 Mbytes 2 Mbytes 4 Mbytes 4 Mbytes Note Only use the memory cards intended for the particular CPU. ! Warning The modules can be damaged. Failure to observe ESD guidelines can result in damage to both the CPU and memory cards. Observe the ESD guidelines when fitting memory cards. Fitting Memory Cards in the CPU Proceed as follows: 1. Remove the cover from the left side of the CPU by loosening the three screws. 2. Push the first memory card down through an angle of approximately 45o into slot 1 (see Figure 2-3). Note the cutout at the front of the card (polarity reversal protection). 3. Push the memory card down until the tabs in the slot slide into the corresponding cutouts on the side of the card. Make sure that the metal flag at the end of the card lies on the metal edge of the module. 4. If necessary, insert the second memory card in slot 2 in the same way (see Figure 2-3). S7-400 and M7-400 Programmable Controllers Hardware and Installation A5E00069481-04 2-31 Installing the S7-400 5. Fit the cover on the upper left side of the CPU by securing it with three screws. Note The connectors to accept the memory cards are coded (see Figure 2-4). Do not apply force when fitting the memory cards. Lightly press the guide supports out to remove the memory cards (see Figure 2-4). Slot 1 Slot 2 Figure 2-3 Fitting Memory Cards in the CPUs Copper flag Memory card Cutout Cutout Guide support Polarity reversal protection Guide support Slots 1 and 2 2-32 S7-400 and M7-400 Programmable Controllers Hardware and Installation A5E00069481-04 Installing the S7-400 Figure 2-4 Memory Card 2.14 Installing Modules in a Rack Introduction All modules are installed in a rack using the same procedure. ! Caution Modules and racks can be damaged. If you use force when installing modules in a rack, these components may be damaged. Carefully follow the steps described below for the installation sequence. Tool The tool needed to install the modules is a cylindrical screwdriver with 3.5 mm blade width. Installation Sequence To install modules in a rack, follow the steps outlined below: 1. Remove the dummy plates from the slots at which you intend to insert modules. Grasp the dummy plate at the points marked and pull it forward and off. With double and triple-width modules, you must remove the dummy plates from all the slots to be covered by the relevant module. 2. Remove the cover, if applicable, from the module (see Figure 2-5). 3. Disconnect the power supply connector at the power supply module. 4. Attach the first module and swing it downwards (see Figure 2-6). If you feel a resistance when swinging the module down, raise it slightly and then continue. S7-400 and M7-400 Programmable Controllers Hardware and Installation A5E00069481-04 2-33 Installing the S7-400 5. Tighten the module screws top and bottom with a torque of 0.8 to 1.1 Nm (see Figure 2-7). Triple-width modules are secured with two screws at the top and at the bottom. 6. Refit the module cover, if applicable. 7. Fit the remaining modules in the same way. 8. Insert the key into the keyswitch in the CPU when you have installed all the modules (see Figure 2-8). The individual steps for installation are explained in the following. The method of removing modules is described in Chapter 7. Removing the Cover With modules which have a cover (for example, power supply modules and CPUs), you remove this before installing the module in the rack. Proceed as follows: 1. Press the locking lever down (1). 2. Swing the cover forward and off (2). (1) (2) Figure 2-5 2-34 Removing the Cover S7-400 and M7-400 Programmable Controllers Hardware and Installation A5E00069481-04 Installing the S7-400 Attaching the Modules Attach the modules one by one (1) and swing them carefully downwards (2). If you feel a resistance when swinging the module down, raise it slightly and then continue. (1) (2) Figure 2-6 Attaching the Modules Screwing the Modules in Place Tightening torque 0.8 to 1.1 Nm Figure 2-7 Screwing the Modules in Place S7-400 and M7-400 Programmable Controllers Hardware and Installation A5E00069481-04 2-35 Installing the S7-400 Inserting the Keyswitch You can insert the key in the CPU in the STOP position of the switch. You can remove the key in the STOP or RUN settings. Figure 2-8 2-36 Inserting the Key in the CPU S7-400 and M7-400 Programmable Controllers Hardware and Installation A5E00069481-04 Installing the S7-400 2.15 Marking the Modules with Slot Labels Slot Number Once the modules are installed, you should mark each one with its slot number to avoid the risk of mixing up modules during operation. If modules do get mixed up, you may have to reconfigure the assembly. The slot number is printed on the rack. Double-width modules occupy two slots and are assigned the consecutive slot numbers of both slots. Triple-width modules occupy three slots and are assigned the consecutive slot numbers of these three slots. Fitting Slot Labels You use slot labels to mark a module with its slot number. The slot labels are provided with the rack as a “number wheel”. To fit the slot labels, follow the steps outlined below: 1. Hold the “number wheel” on the module and rotate it to the slot number for the module inserted at this slot. 2. Use your finger to press the slot label into the module. The label will break away from the “number wheel”. Figure 2-9 Fitting a Slot Label S7-400 and M7-400 Programmable Controllers Hardware and Installation A5E00069481-04 2-37 Installing the S7-400 2.16 Methods of Expansion and Networking Introduction Apart from the structures mentioned in this chapter, other expansions are possible, for example, by connecting distributed I/Os or by networking. The modules with which you can connect an M7-400 to PROFIBUS DP can be found in Section 6.9 “Starting Up a PROFIBUS-DP Subnet.” Distributed I/Os When an S7-400 is configured with a distributed I/O system, the inputs/outputs operate in a distributed local arrangement and are directly connected via PROFIBUS DP to a CPU. One of the master-capable CPUs of the S7-400 is used. You can use the following devices, for example, as slaves, i.e. as local inputs/outputs: • ET 200M • ET 200 U/B/C • All DP standard slaves Networking Two or more S7-400s can be arranged in a network for communication via the multipoint interface. For networking the individual S7-400s, you must interconnect their CPUs with PROFIBUS-DP bus cables. The S7-400 is connected to the communication network via the multipoint interface (MPI) of the CPU via: • Bus connectors • A PROFIBUS-DP RS 485 bus terminal See Chapter 7 for further details. Other networking methods require special modules. 2-38 S7-400 and M7-400 Programmable Controllers Hardware and Installation A5E00069481-04 Installing the S7-400 2.17 Accessories Accessories Some of the accessories needed for fitting the modules in the rack are provided in the packaging of the modules and racks. The front connectors of the signal modules must always be ordered separately. There are also optional accessories for some modules. The accessories for modules and racks are listed and briefly explained in Table 2-3. A list of spare parts for SIMATIC S7 can be found in the Reference Manual, Appendix C as well as in the current ST 70 catalog. The accessories for installing the M7-400 can be found in Section 8.4. Table 2-3 Accessories for Modules and Racks Module Rack (UR, CR, ER) Accessories Supplied Number wheel with slot labels Power Supply Module (PS) CPU 2 keys 1 or 2 backup batteries - Signal Module (SM) Accessories Not Supplied 2 labels Memory cards - Purpose of the Accessory For identifying the modules with slot labels For central backup of RAM areas in the CPU To operate the mode selector of the CPU Load memories required for the CPU For labeling the inputs and outputs on the front connector Plate with pinout To identify the pinout of the front connectors - Front connector with strain relief for screw, crimp or spring-type terminal For wiring the SMs - Extraction tool (for crimp terminals) For rewiring SMs with a front connector with crimp terminals - Crimp contacts Crimping tool S7-400 and M7-400 Programmable Controllers Hardware and Installation A5E00069481-04 2-39 Installing the S7-400 2-40 S7-400 and M7-400 Programmable Controllers Hardware and Installation A5E00069481-04 3 Addressing the S7-400 Chapter Overview Section Description Page 3.1 Geographical and Logical Addresses 3-2 3.2 How to Determine the Default Address of a Module 3-4 3.3 How to Determine the Default Address of a Channel 3-6 S7-400 and M7-400 Programmable Controllers Hardware and Installation A5E00069481-04 3-1 Addressing the S7-400 3.1 Geographical and Logical Addresses Addresses In order to control a process, you must address the channels (inputs and outputs) of the signal modules from the user program. You must establish a unique assignment between the (geographical) location of a channel and an address in the user program. Information on addressing M7-400 modules can be found in Section 8.2. Geographical Addresses The geographical address of a particular channel is permanently assigned. It is governed by the physical location of the input or output. In particular, this depends on the following basic conditions: • In which rack (0 to 21) is the signal module fitted? • At which slot (1 to 18 or 1 to 9) in this rack is the signal module inserted? • Which channel (0 to 31) of this signal module is addressed? Section 3.2 describes the method of establishing the geographical address of a channel. Logical Addresses The logical address of a module and, therefore, of a channel is freely selectable. It is used in the program to address (read or write to) a particular input or output. The physical location of the relevant module need not be known during programming. You establish the assignment between logical and geographical address with STEP 7. The Two Stages of Addressing You perform the addressing of a channel, or the assignment between its location and its address, in two stages: • Determine the geographical address of the channel from its location in the entire configuration. • Assign a logical address to the geographical address under STEP 7. This logical address is used for addressing the channel in the user program. Note If your S7-400 comprises only a CR without ER, you can also use default addressing. 3-2 S7-400 and M7-400 Programmable Controllers Hardware and Installation A5E00069481-04 Addressing the S7-400 Default Addressing Under certain conditions, the CPU can handle the assignment between logical address and geographical address for you (default addressing). The logical addresses are then permanently assigned to the slots (default address). Distributed I/Os are not taken into account. Conditions for Default Addressing The CPU assigns default addresses under the following conditions: • If only signal modules are inserted (no IM, CP, FM inserted; no expansion racks connected) • If signal modules are used with their default settings (measuring ranges, interrupt processing, etc.) • If modules are inserted in STOP mode or during power off (modules inserted in RUN mode will not be taken into account, nor during the change from RUN STOP RUN) S7-400 and M7-400 Programmable Controllers Hardware and Installation A5E00069481-04 3-3 Addressing the S7-400 3.2 How to Determine the Default Address of a Module Default Addressing You determine the default address of a module from the number of the slot of the module in the CR. The algorithms used to calculate the default address are different for analog and digital modules. The following figure shows the numbering of slots in a rack with 18 slots. You can also read off the slot numbers directly from the rack. 1 2 3 4 5 6 7 8 9 10 11 12 13 14 15 16 17 18 1 2 3 4 5 6 8 9 7 10 11 12 13 14 15 16 17 18 Default Addresses of Digital Modules On the S7-400, the default addresses for digital modules start from 0 (First slot in the central rack which is usually occupied by the power supply module) up to 68 (18th slot). The algorithm used to calculate the default address of a digital module is: Default address = (slot number - 1) x 4 Example The default address of a digital module in the 12th slot is as follows: Default address = (12 - 1) x 4 = 44 3-4 S7-400 and M7-400 Programmable Controllers Hardware and Installation A5E00069481-04 Addressing the S7-400 Default Addresses of Analog Modules On the S7-400, the default addresses for analog modules start from 512 (first slot in the central rack which is usually occupied by the power supply module) up to 1600. The algorithm used to calculate the default address of an analog module is: Default address = (slot number - 1) x 64 + 512 Example The default address of an analog module in the 6th slot is as follows: Default address = (6 - 1) x 64 + 512 = 832 S7-400 and M7-400 Programmable Controllers Hardware and Installation A5E00069481-04 3-5 Addressing the S7-400 3.3 How to Determine the Default Address of a Channel Channel on a Digital Module A channel on a digital module is addressed bit-wise. For a digital input module with 32 inputs, four bytes (starting with the default address of the module) are used to address the inputs, and for a digital input module with 16 inputs, two bytes are used. Bits 0 to 7 in these bytes are then reserved by the individual inputs (from top to bottom). This is clarified by the following figure with the example of a digital input module with 32 channels at slot 12 (default address 44). With a digital output module, the first character is a Q instead of an I. Channel addresses I 44.0 I 44.1 I 44.2 I 44.3 I 44.4 I 44.5 I 44.6 I 44.7 I 45.0 I 45.1 I 45.2 I 45.3 I 45.4 I 45.5 I 45.6 I 45.7 I 46.0 I 46.1 I 46.2 I 46.3 I 46.4 I 46.5 I 46.6 I 46.7 I 47.0 I 47.1 I 47.2 I 47.3 I 47.4 I 47.5 I 47.6 I 47.7 3-6 S7-400 and M7-400 Programmable Controllers Hardware and Installation A5E00069481-04 Addressing the S7-400 Channel on an Analog Module Channels on analog modules are addressed word-wise. Starting with the default address of the module, which also represents the address of the uppermost channel of the module, the addresses of the individual channels (from top to bottom) increase by two bytes (= one word). This is clarified by the following figure with the example of a digital input module with 8 channels at slot 6 (default address 832). With an analog input module, the first characters are IW instead of QW. Channel addresses QW 832 QW 834 QW 836 QW 838 QW 840 QW 842 QW 844 QW 846 S7-400 and M7-400 Programmable Controllers Hardware and Installation A5E00069481-04 3-7 Addressing the S7-400 3-8 S7-400 and M7-400 Programmable Controllers Hardware and Installation A5E00069481-04 4 Wiring the S7-400 Chapter Overview Section Description Page 4.1 Supplying Power to Modules 4-2 4.2 Choosing the Power Supply Module 4-3 4.3 Choosing the Load Current Power Supply 4-4 4.4 Assembling an S7-400 with Process I/Os 4-5 4.5 Assembling an S7-400 with Grounded Reference Potential (M) 4-8 4.6 Assembling an S7-400 with Ungrounded Reference Potential (Ungrounded Configuration) 4-9 4.7 Assembling an S7-400 with Isolated Modules 4-11 4.8 Parallel Wiring of Digital S7-400 Outputs 4-13 4.9 Grounding 4-14 4.10 Interference-Free Configuration for Local and Remote Connections 4-16 4.11 Wiring Rules 4-18 4.12 Setting the VAC Power Supply Module to the Line Voltage 4-19 4.13 Wiring the Power Supply Module 4-21 4.14 Wiring the Signal Modules 4-25 4.15 Wiring the Front Connector, Crimp Snap-On Terminals 4-27 4.16 Wiring the Front Connector, Screw-Type Terminals 4-28 4.17 Wiring the Front Connector, Spring-Type Terminals 4-29 4.18 Fitting the Strain Relief 4-31 4.19 Labeling a Front Connector 4-32 4.20 Fitting the Front Connector 4-36 4.21 Interconnecting the CR and ER(s) 4-39 4.22 Setting the Fan Subassembly to the Line Voltage and Wiring It 4-41 4.23 Routing Cables Using Cable Ducts or Fan Subassemblies 4-43 4.24 Routing Cables Using Fiber-Optic Cables 4-43 S7-400 and M7-400 Programmable Controllers Hardware and Installation A5E00069481-04 4-1 Wiring the S7-400 4.1 Supplying Power to Modules Power Supply Modules and Load Current Power Supplies The modules of the S7-400 system are supplied with all the required operating voltages by a power supply module, via the backplane bus of the rack. Which power supply module you use in a rack depends on your system requirements (line voltage, current consumption of the modules used). You must provide load voltages and currents via external load current power supplies. The following figure shows how the individual modules of the S7-400 are supplied with current and voltage. Operating voltages S7-400 power supply module 5 VDC and 24 VDC via backplane bus S7-400 modules (DC or AC) Load current via front connector Line voltage: 120/230 VAC with supply isolator or 24 VDC Load current power supply Note The power supply modules must not be connected in parallel on their secondary sides. 4-2 S7-400 and M7-400 Programmable Controllers Hardware and Installation A5E00069481-04 Wiring the S7-400 4.2 Choosing the Power Supply Module Estimating the Power Requirement You should make an estimate of the power requirement for each rack of your S7-400 system in order to select the appropriate power supply module for the rack. Selection of the power supply for an M7-400 configuration is described separately in Section 8.3 “Electrical Configuration.” Current consumption and power dissipation of the individual modules can be found in the relevant data sheets. Calculation Example The following modules are to be fitted in a CR with 18 slots: • 1 CPU 414-1 • 3 analog input modules SM 431, AI 16 x 16 bits • 5 digital input modules SM 421;DI 32 x 24 VDC • 6 digital input modules SM 422;DO 32 x 24 VDC/0.5A • 1 send IM, IM 460-0 You can calculate Current Consumption I in this rack as follows, with the data from the individual data sheets: Module Quantity +5 VDC (Max. Current Consumption Values) I / Module I Total CPU 414-1 1 1800 mA 1800 mA SM 431; AI 16 x 16 bits 3 700 mA 2100 mA SM 421;DI 32 x 24 VDC 5 30 mA 150 mA SM 422;DO 32 x 24 VDC/0.5A 6 200 mA 1200 mA IM 460-0 1 140 mA 140 mA Total 5390 mA From the data in the table, you can see that you must install a power supply module PS 407 10A (for connection to 120/230 VAC) or PS 405 10A (for connection to 24 VDC) in the rack, to cover the current consumption calculated here. Note If you wish to connect an ER to the CR via a send IM with current transfer, you must also take the current consumption of this ER into account when choosing the power supply module. S7-400 and M7-400 Programmable Controllers Hardware and Installation A5E00069481-04 4-3 Wiring the S7-400 4.3 Choosing the Load Current Power Supply Choosing the Load Current Power Supply The input and output circuits (load current circuits) as well as sensors and actuators are powered by the load current power supply. Listed in the following are the characteristics of the load current power supplies required in special applications for choosing the load current power supplies. Characteristics of the Load Current Power Supply Safe isolation Required for ... Modules which must be supplied with voltages 60 VDC or 25 VAC. Remarks The Siemens SITOP power load current supplies have this characteristic. 24 VDC load circuits Tolerances of the output voltages: 20.4 V to 28.8 V 24 VDC load circuits 40.8 V to 57.6 V 48 VDC load circuits 51 V to 72 V 60 VDC load circuits If the output voltage tolerances are exceeded, you should provide an energy storage capacitor. Rating: 200 µF per 1 A load current (with bridge rectification). Load Current Power Supplies The DC load current power supply must meet the following requirements: Only a safe, isolated extra-low voltage of 60 VDC may be used as the load current supply. Isolation may be implemented according to the requirements of the following, amongst other publications: VDE 0100-410 / HD 384-4-41 S2 / IEC 60364-4-41 (as a functional extra-low voltage with isolation) or VDE 0805 / EN 60950 / IEC 60950 (as a safety extra-low voltage SELV) or VDE 0106 Part 101. 4-4 S7-400 and M7-400 Programmable Controllers Hardware and Installation A5E00069481-04 Wiring the S7-400 Determining the Load Current The required load current is governed by the total current of all sensors and actuators connected to the outputs. During a short-circuit, a current of two to three times the rated output current flows briefly at DC outputs before the switched electronic short-circuit protection becomes effective. When selecting the load current power supply, therefore, you must ensure that the increased short-circuit current is available. With unregulated load current power supplies, this excess current is generally ensured. With regulated load current power supplies, particularly at low output levels (up to 20 A), you must ensure a suitable excess current. 4.4 Assembling an S7-400 with Process I/Os Definition of a Grounded Supply (TN-S Network) In grounded supplies, the neutral conductor of the system is grounded. A single fault between a live conductor and ground or a grounded part of the installation results in tripping of the protective devices. Components and Protective Measures Various components and protective measures are specified for assembling a full installation. The types of components and whether the protective measures are mandatory or recommended depends on the VDE specification applying to your installation, VDE 0100 or VDE 0113. The following table relates to Figure 4-1. S7-400 and M7-400 Programmable Controllers Hardware and Installation A5E00069481-04 4-5 Wiring the S7-400 Table 4-1 VDE Specifications for Assembling a Programmable Controller Compare ... Ref. to Figure 4-1 VDE 0100 VDE 0113 Disconnection element for control system, sensors, and actuators ... Part 460: Main switches ... Part 1: Isolating switches Short-circuit and overload protection: in groups for sensors and actuators ... Part 725: Single-pole protection of circuits ... Part 1: • With grounded secondary circuit: single-pole protection • Otherwise: all-pole protection Load current PS for AC power circuits with more than five items of electromagnetic apparatus Isolation by transformer is recommended Isolation by transformer is required Rule: Grounding the Load Current Circuits Load current circuits should be grounded. Reliable functional safety is provided by the common reference potential (ground). Provide a detachable connection to the protective ground conductor at the load current power supply (Terminal L- or M) or on the isolating transformer (Figure 4-1, ). In the event of faults in the power distribution, this will facilitate the locating of ground faults. 4-6 S7-400 and M7-400 Programmable Controllers Hardware and Installation A5E00069481-04 Wiring the S7-400 S7-400 in the Overall Installation Shown in Figure 4-1 is the position of the S7-400 in the overall installation (load current power supply and grounding concept) with supply from a TN-S system. Note: The arrangement of supply terminals shown is not the actual arrangement; it has been chosen for reasons of clarity. L1 L2 L3 N PE Low-voltage distribution e.g. TN-S system (3 x 400 V) Cabinet Racks PS CPU SM L+ Data M L1 N Signal modules P E Ground bus in cabinet AC AC AC DC Figure 4-1 Load circuit 24 to 230 VAC for AC modules Load circuit 5 to 60 VDC for isolated DC modules Operating the S7-400 from a Grounded Supply S7-400 and M7-400 Programmable Controllers Hardware and Installation A5E00069481-04 4-7 Wiring the S7-400 4.5 Assembling an S7-400 with Grounded Reference Potential (M) Application You use an S7-400 with grounded reference potential in machines or industrial plants. Discharge of Interference Currents When the S7-400 is configured with a grounded reference potential, any interference currents are discharged to the chassis ground. Terminal Connection Model When delivered, the racks have a detachable metallic connection between the internal reference potential M of the modules and the frame element of the racks. Situated behind this connection is an RC network which is placed in the circuit for the ungrounded configuration. This connection is located at the left edge of the rack. The terminal for the chassis ground also has an electrical connection to the frame element. Shown in Figure 4-2 is an S7-400 configured with grounded reference potential. To ground the reference potential M, you must connect the chassis ground terminal to the chassis ground and you must not remove the jumper between reference potential M and the frame element terminal on the rack. RC network Detachable jumper 6.8 nF 10 MΩ M Frame element terminal Metallic connection Reference potential M Chassis ground terminal Figure 4-2 4-8 An S7-400 Configured with Grounded Reference Potential S7-400 and M7-400 Programmable Controllers Hardware and Installation A5E00069481-04 Wiring the S7-400 4.6 Assembling an S7-400 with Ungrounded Reference Potential (Ungrounded Configuration) Application In large installations, it may be necessary to configure the S7-400 with an ungrounded reference potential, for example, for ground fault monitoring. This is the case in the chemical industry or in power plants, for example. Discharge of Interference Currents With the S7-400 in an ungrounded configuration, any interference currents are discharged to the chassis ground via an RC network integrated in the rack. Terminal Connection Model Shown in Figure 4-3 is an S7-400 configured with ungrounded reference potential. In this case you must remove the jumper between reference potential M and the frame element terminal on the rack. The reference potential M of the S7-400 is then connected via the RC network to the chassis ground terminal. When you connect this terminal to the chassis ground, RF interference currents will be discharged and static charges will be avoided. RC network Detached jumper 6.8 nF 10 MΩ M Frame element terminal Reference potential M Chassis ground terminal Figure 4-3 An S7-400 Configured with Ungrounded Reference Potential S7-400 and M7-400 Programmable Controllers Hardware and Installation A5E00069481-04 4-9 Wiring the S7-400 Power Supply Units When using power supply units, ensure that the secondary winding is not connected to the protective ground conductor. Filtering the 24 VDC Supply When you power the S7-400 from a battery with the ungrounded configuration, you must provide interference suppression for the 24 VDC supply. Use a Siemens power cable filter, such as the B84102-K40. Insulation Monitoring If a double fault could cause a hazardous state in the installation, you must provide insulation monitoring. Example of Ungrounded Operation If you have configured an S7-400 with a local connection and you only wish to ground the overall installation at the CR, you can operate the ERs in an ungrounded configuration. Note If you connect an ER via a local connection with 5 V transfer, ungrounded operation is mandatory for the ER. Connecting a Programming Device with Ungrounded Configuration To connect a programming device to an S7-400 in ungrounded configuration, please observe the following note: Note To connect a programming device to an S7-400 in ungrounded configuration, you must connect the programming device via an RS 485 repeater. 4-10 S7-400 and M7-400 Programmable Controllers Hardware and Installation A5E00069481-04 Wiring the S7-400 4.7 Assembling an S7-400 with Isolated Modules Definition In a configuration with isolated modules, the reference potentials of the control circuit (Minternal) and the load circuit (Mexternal) are isolated (see also Figure 4-4). Application Isolated modules are used for: • All AC load circuits • DC load circuits with a separate reference potential Examples of load circuits with a separate reference potential: – DC load circuits whose sensors have different reference potentials (for example, when grounded sensors are used far from the programmable controller and equipotential bonding is not possible). – DC load circuits whose positive terminal (L+) is grounded (battery circuits). Isolated Modules and Grounding Concept You can use isolated modules, regardless of whether or not the reference potential of the programmable controller is grounded. S7-400 and M7-400 Programmable Controllers Hardware and Installation A5E00069481-04 4-11 Wiring the S7-400 Configuration with Isolated Modules Shown in Figure 4-4 are the potentials of an S7-400 configured with isolated input and output modules. Racks PS CPU DI DO Uinternal Data Reference potential M L1 N PE Ground bus in cabinet L+ L1 Mexternal N 230 VAC load current PS 24 VDC load current PS Figure 4-4 4-12 Simplified Representation of Configuration with Isolated Modules S7-400 and M7-400 Programmable Controllers Hardware and Installation A5E00069481-04 Wiring the S7-400 4.8 Parallel Wiring of Digital S7-400 Outputs Parallel Wiring of a Digital Output with Different Rated Load Voltages The parallel wiring of a digital output (rated load voltage 1L+) with another digital output (rated load voltage 2L+) or a rated load voltage 3L+ is only possible using series diodes. 1 L+ Figure 4-5 2 L+ 3 L+ Parallel Wiring of a Digital Output with Different Rated Load Voltages Parallel Wiring of a Digital Output with Identical Rated Load Voltages If the L+ supplies of the digital output modules and the L+ voltage connected in parallel to the output are always the same (difference < 0.5 V), there is no need to use diodes, see figure 4-6. L+ Figure 4-6 Parallel Wiring of a Digital Output with Identical Rated Load Voltages S7-400 and M7-400 Programmable Controllers Hardware and Installation A5E00069481-04 4-13 Wiring the S7-400 4.9 Grounding Introduction Grounding in accordance with regulations and conscientiously implemented is the prerequisite for proper functioning of a programmable controller. Each individual component of the S7-400 and of the controlled system must be properly grounded. Ground Connections Low-resistance ground connections reduce the risk of electric shock in the event of a short-circuit or faults in the system. Moreover, proper grounding (low-impedance connections: large surface area, wide-area bonding) together with the effective shielding of lines and devices reduces the effect of interference on the system and the interference signal emissions. Note Always ensure that operating currents do not flow via ground. Protective Ground All equipment of Safety Class I and all large metal parts must be connected to the protective ground. This is essential to ensure that the user of the installation is reliably protected from electric shock. Furthermore, this serves to discharge interference transferred via external power supply cables, signal cables, or cables to I/O devices. Shown in Table 4-2 are the grounding methods required for the individual components. Table 4-2 Methods of Protective Grounding Device 4-14 Grounding Method Cabinet/frame Connection to central ground point, e.g. ground bus, via cable with protective conductor quality Racks Connection to central ground point via cable with 10 mm2 min. cross-section, when racks are not installed in a cabinet and not interconnected via large metal parts Module None; automatically grounded via backplane bus when fitted I/O device Grounded via power plug Shields of connecting cables Connection to rack or central ground point (avoid ground loops) Sensors and actuators Grounding according to specifications applying to the system S7-400 and M7-400 Programmable Controllers Hardware and Installation A5E00069481-04 Wiring the S7-400 Connecting the Load Voltage Ground Many output modules require an additional load voltage to switch the actuators. Two different modes are possible for this load voltage: • Non-isolated operation • Floating operation The following table shows how the load voltage ground is connected in the individual modes. Table 4-3 Grounded connection load voltage Connection of Load Voltage Mode Non-isolated operation • Grounded configuration To the reference point of the rack; metallic connection between frame element and chassis ground must be fitted. • Ungrounded configuration To the reference point of the rack; metallic connection between frame element and chassis ground must be fitted. Floating operation • Grounded and ungrounded configuration Left open or to any point, but not to protective ground or reference potential M of operating voltages The following figure shows how the load voltage ground is connected for non-isolated operation. Metallic connection, remove for ungrounded configuration Ground terminal for load voltage Figure 4-7 Grounded connection load voltage S7-400 and M7-400 Programmable Controllers Hardware and Installation A5E00069481-04 4-15 Wiring the S7-400 4.10 Interference-Free Configuration for Local and Remote Connections Use only Approved Components Note If you use components which are not approved for setting up local and remote connections, interference rejection may be impaired. Interference-Free Configuration for Local Connections If you connect the CR and ER via suitable interface modules (send IM and receive IM), no particular shielding and grounding need be implemented. Ensure, however, that • All racks have a low-impedance connection to each other • The racks in a grounded arrangement have a star grounding configuration • The contact springs of the racks are clean and not bent and will therefore ensure the discharge of interference currents. 4-16 S7-400 and M7-400 Programmable Controllers Hardware and Installation A5E00069481-04 Wiring the S7-400 Interference-Free Configuration for Remote Connections If you connect the CR and ER via suitable interface modules (send IM and receive IM), normally no particular shielding and grounding need be implemented. Special shielding and grounding may become necessary if you operate your system in an environment with an extremely high level of interference. In that case, observe the following points: • In the cabinet, connect the cable shields to the shield bus immediately after entry. – Strip the outer cable insulation in the region of the shield bus without damaging the braided shield. – Ensure that the braided shield has the greatest possible contact area on the shield bus, for example, with metal hose clamps surrounding the shield over a large area. • Connect the shield bus(es) over a large area to the frame or cabinet wall. • Connect the shield bus(es) to the chassis ground. In a remote connection, ensure that the VDE regulations for laying the protective ground are not infringed. Figure 4-8 shows the methods described here. If the permissible potential difference between grounding points is exceeded, you must install an equipotential bonding conductor (copper conductor with a cross-section of 16 mm2). ER CR Send IM Figure 4-8 Shield/ protective ground bar ÎÎ ÎÎ ÎÎ <7V Receive IM Î Î Î Shielding and Grounding the Connecting Cable for a Remote Connection Special Cases For remote connections, you must use precut/preassembled connecting cables of fixed length. When the connecting cables are laid, therefore, there may be excess lengths. These must be coiled with a bifilar winding and deposited. S7-400 and M7-400 Programmable Controllers Hardware and Installation A5E00069481-04 4-17 Wiring the S7-400 4.11 Wiring Rules Lines and Tools For wiring the S7-400 modules, there are some rules for the cables and for the tool you use. Information on connecting an M7-400 module assembly can be found in Section 8.5. Rules for ... Power Supply ... Front Connectors Crimp terminal Screw-type terminal Spring-type terminal Conductor cross-sections: Outer diameter: 3 to 9 mm Flexible cond. without wire end ferrule no 0.5 to 1.5 mm2 0.25 to 2.5 mm2 0.08 to 2.5 mm2 Flexible cond. with wire end ferrule 230 VAC: flexible sheathed cable 3 1.5 mm2 no 0.25 to 1.5 mm2 0.25 to 1.5 mm2 1* 24 VDC: flexible sheathed cable 3 1.5 mm2 or individual wires 1.5 mm2 No. of conductors per terminal 1 1 1* Stripping length of single conductors 7 mm 5 mm 8 to 10 mm without 8 to 10 mm without ferrule ferrule 10 mm with ferrule 10 mm with ferrule Wire end ferrules 230 VAC: with insulating collar to DIN 46228 E1,5-8 - with or without insulating collar to DIN 46228 Part 1 or 4, Shape A, normal version with or without insulating collar to DIN 46228 Part 1 or 4, Shape A, normal version 24 VDC: without insulating collar to DIN 46228, shape A, short version * Blade width and shape of the screw driver 3.5 mm (cylindrical shape) - 3.5 mm (cylindrical shape) 0.5 mm x 3.5 mm DIN 5264 Tightening torque: for connecting conductors 0.6 to 0.8 Nm - 0.6 to 0.8 Nm - You can also connect a combination of two conductors of up to 1.0 mm each to a screw-type or spring-type terminal. You must use special wire end ferrules for this purpose. Two types and manufacturers of such ferrules are given below: • Phoenix TWIN Type no. 32 00 81 0, for 2 x 1 mm2 • AMP Order no. 966 144-4, for 2 x 1 mm2 4-18 S7-400 and M7-400 Programmable Controllers Hardware and Installation A5E00069481-04 Wiring the S7-400 Note You must use shielded cables for the analog modules (see Section 4.5). 4.12 Setting the VAC Power Supply Module to the Line Voltage Set the voltage selector with 6ES7 407-0DA00-0AA0 and 6ES7 407-0RA00-0AA0 An S7-400 with VAC power supply can be operated from either a 120 V or 230 V line voltage. Check whether the voltage selector switch is set to your line voltage. To set the VAC power supply module to the correct line voltage, follow the steps outlined below: 1. Open the cover of the power supply module. 2. Remove the window of the voltage selector switch by levering it off with a screwdriver. 3. Set the voltage selector switch to your available line voltage. 4. Refit the window. 5. Close the cover. The following figure shows how to set the voltage selector switch to the available line voltage. S7-400 and M7-400 Programmable Controllers Hardware and Installation A5E00069481-04 4-19 Wiring the S7-400 Figure 4-9 Setting the voltage selector 4-20 S7-400 and M7-400 Programmable Controllers Hardware and Installation A5E00069481-04 Wiring the S7-400 4.13 Wiring the Power Supply Module Power Supply Connector You use the power supply connector to connect a power supply module to your supply. When delivered, the power supply connector is plugged into the power supply module. There are two versions (AC and DC) of power supply connector. The two versions are coded, meaning an AC connector can only be plugged into an AC power supply module, and a DC connector can only be plugged into a DC power supply module. Disconnecting the Power Supply Connector Before wiring, you must unplug the power supply connector from the power supply module. 1. Open the cover of the power supply module. 2. Detach the connector by levering it off with a suitable tool, for example, a screwdriver, at the opening provided (1). 3. Pull the connector forward and out of the power supply module (2). (1) (2) Figure 4-10 Disconnecting power supply connector S7-400 and M7-400 Programmable Controllers Hardware and Installation A5E00069481-04 4-21 Wiring the S7-400 Wiring the Power Supply Connector To wire the power supply connector, follow the steps outlined below: ! Warning There is a risk of personal injury. If you wire the connector with voltage applied, you may suffer a shock and personal injury. Only wire the connector with power disconnected. 1. Switch off the line voltage at your VAC supply disconnector. Note The standby switch of the power supply module does not disconnect the power supply module from the supply. 2. Are you using a flexible sheathed cable with outer insulation (with 230 VAC)? If so: Strip the outer insulation over a length of 70 mm. Note that an overall cable diameter of between 3 mm and 9 mm must be present under the strain relief after connection. If not: Wrap the cores with insulating tape so that an overall cable diameter of between 3 mm and 9 mm will be present under the strain relief after connection. As an alternative to insulating tape, you can use a shrink-on sleeve. 3. Shorten the two cores which are not needed for connection to protective ground (PE) by 10 mm. 4. Strip the cores over a length of 7 mm. 5. Slacken the screw in the cover of the power supply connector and open the connector. 4-22 S7-400 and M7-400 Programmable Controllers Hardware and Installation A5E00069481-04 Wiring the S7-400 6. Slacken the screw of the strain relief and insert the cable. 7. Connect the cores according to the illustration on the cover of the power supply connector. Connect the longer core to PE. Screw on the cores with a torque of 0.6 to 0.8 Nm. Terminals Cable AC L1 DC L+ N L– PE PE Strain-relief assembly Screw for the strainrelief assembly Figure 4-11 Wiring the power supply connector 8. Tighten the screw of the strain relief, so that the cable is secured properly. 9. Close the power supply connector and screw on the cover. ! Caution The power supply module or power supply connector can be damaged. If you plug in or disconnect the connector with voltage applied, the power supply module or the connector may be damaged. Only plug in or disconnect the power supply connector with power removed. S7-400 and M7-400 Programmable Controllers Hardware and Installation A5E00069481-04 4-23 Wiring the S7-400 Plugging In the Power Supply Connector You can only plug in the connector when the power supply module is installed (lower mounting screw tightened). ! Caution An AC power supply module with the order number 6ES7 407-0DA00-0AA0 or 6ES7 407-0RA00-0AA0 can be damaged. If you set the voltage selector switch of an AC power supply module to 120 V and connect the power supply module to a 230 V supply, a fault may develop on the power supply module. In this case the warranty will be void. Set the voltage selector switch of an AC power supply module to the available line voltage. To plug the wired power supply connector into the power supply module, follow the steps outlined below: 1. Open the cover of the power supply module. 2. Insert the power supply connector into the guide groove in the module housing. 3. Slide the power supply connector into the power supply module as far as it will travel. 4. Close the cover of the power supply module. The following figure shows how to plug the power supply connector into the power supply module. Figure 4-12 Plugging the power supply connector 4-24 S7-400 and M7-400 Programmable Controllers Hardware and Installation A5E00069481-04 Wiring the S7-400 4.14 Wiring the Signal Modules Procedure There are two steps for providing the connection between the signal modules of your S7-400 and the sensors and actuators of your plant: 1. Wiring the front connector. This serves to connect the cables to and from the sensors/actuators to the front connector. 2. Plugging the front connector into the module. The Three Types of Front Connector There are three types of front connector for signal modules in the S7-400 series: • Front connector with crimp snap-on terminals • Front connector with screw-type terminals • Front connector with spring-type terminals. S7-400 and M7-400 Programmable Controllers Hardware and Installation A5E00069481-04 4-25 Wiring the S7-400 Preparing to Wire the Front Connector 1. Insert a screwdriver at the point marked on the bottom left of the front connector and lever the lower corner of the cover off the front connector. 2. Open the cover completely. 3. Pull the opened cover forward at the bottom and swing it upwards and off. Levering the cover off Opening the cover Pulling the cover off Figure 4-13 Preparing to wire the front connector 4. Cut the wires to the right lengths so that no loops are created in the front connector after wiring. 5. Isolate the wires according to the table in Section 4.11. Note The front connectors contain a jumper needed for functioning of some signal modules. Do not remove this jumper. 4-26 S7-400 and M7-400 Programmable Controllers Hardware and Installation A5E00069481-04 Wiring the S7-400 4.15 Wiring the Front Connector, Crimp Snap-On Terminals Procedure To wire the prepared front connector, follow the steps outlined below: 1. Strip the conductors over approx. 5 mm. 2. Crimp the contacts onto the conductors. You can use a crimping tool which can be ordered as an accessory for your signal modules. 3. Insert the crimp contacts into the cutouts in the front connector. Start at the bottom of the front connector. The order number for crimp contacts can be found in Appendix C of the Reference Manual. ÂÂ ÂÂ Figure 4-14 Wiring a Front Connector with Crimp Snap-On Terminals S7-400 and M7-400 Programmable Controllers Hardware and Installation A5E00069481-04 4-27 Wiring the S7-400 4.16 Wiring the Front Connector, Screw-Type Terminals Procedure To wire the prepared front connector, follow the steps outlined below: 1. Are you using wire end ferrules? If so: Strip the conductors over 10 mm. Press-fit the wire end ferrules onto the conductors. If not: Strip the conductors over 8 to 10 mm. 2. Position the cores. Start at the bottom of the front connector. 3. Screw the ends of the conductors onto the front connector with a tightening torque of 0.6 to 0.8 Nm. Also tighten the unwired terminals. 0.6 ... 0.8 Nm ÂÂÂ ÂÂÂ ÂÂÂ Figure 4-15 4-28 Wiring a Front Connector with Screw-Type Terminals S7-400 and M7-400 Programmable Controllers Hardware and Installation A5E00069481-04 Wiring the S7-400 4.17 Wiring the Front Connector, Spring-Type Terminals Procedure To wire the prepared front connector, follow the steps outlined below: 1. Are you using wire end ferrules? If so: Strip the conductors over 10 mm. Press-fit the wire end ferrules onto the conductors. If not: Strip the conductors over 8 to 10 mm. 2. Use a screwdriver (0.5 x 3.5 mm DIN 5264) to release the spring contact of the first terminal. Start at the bottom of the front connector. You can release the individual spring contacts at three points: from the front, from the side or from the back (see Figure 4-16 ). 3. Push the first wire into the released spring contact and withdraw the screwdriver. 4. Repeat steps 3 and 4 for all other wires. ÂÂÂ ÂÂÂ Releasing a spring contact from the back Releasing a spring contact from the front Releasing a spring contact from the side Figure 4-16 Wiring a Front Connector with Spring-Type Terminals S7-400 and M7-400 Programmable Controllers Hardware and Installation A5E00069481-04 4-29 Wiring the S7-400 Principle of the Spring Contact The following figure shows the principle of spring contacts. Releasing and engaging from the front is illustrated. 1. nsert the screwdriver 2. Insert the wire into the spring contact as far as it will go 3. Withdraw the screwdriver: the wire is trapped by the contact Figure 4-17 Principle of the spring contact 4-30 S7-400 and M7-400 Programmable Controllers Hardware and Installation A5E00069481-04 Wiring the S7-400 4.18 Fitting the Strain Relief Cable Ties as Strain Relief When you have wired the front connector, the cable tie provided should be fitted at the bottom of the front connector as a strain relief for the connected cable. There are three ways of fitting the strain relief, according to the thickness of the cable. Three openings are provided at the bottom of the front connector. Figure 4-18 Fitting a Strain Relief (Viewed from Below) S7-400 and M7-400 Programmable Controllers Hardware and Installation A5E00069481-04 4-31 Wiring the S7-400 4.19 Labeling a Front Connector Labels and Terminal Diagram Each signal module is provided with three labels: two blank labels and one printed label showing the terminal diagram for inputs and outputs. Figure 4-19 shows the locations for fitting the individual labels on the front connector. Label in front connector Terminal diagram interior Label exterior Figure 4-19 Fitting the Labels on the Front Connector To label a front connector, follow the steps outlined below: 1. Enter the addresses of the individual channels on the two labels. Note the slot numbers on the labels to record the assignment of front connector to module. 2. Place a label on the left of the opened front connector. The label has a T-shaped blank in the middle with which you can fix the label onto the front connector housing. Bend the blank slightly to one side and push it behind the corresponding cutout of the front connector whilst sliding in the label (see Figure 4-20). 3. Refit the cover on the front connector. 4. Slide the label with the terminal diagram of the inputs or outputs into the interior of the cover of the front connector. 5. Slide a label externally into the cover of the front connector. 4-32 S7-400 and M7-400 Programmable Controllers Hardware and Installation A5E00069481-04 Wiring the S7-400 Figure 4-20 shows details for fitting a label in the front connector. Label with blank Cutout in front connector Figure 4-20 Fitting a Label in the Front Connector Labeling Sheets • Labeling sheets that can be printed by machine for the I/O modules of SIMATIC S7-400, including FMs, are the prerequisite for professional, convenient labeling of SIMATIC modules. • The labeling strips are already perforated on DIN A4 sheets and can be easily separated without the use of a tool. This makes them easy to use and ensures a clean cut. • The labeling sheets are single-color, tear-proof and dirt-resistant. They are available in petrol, light beige, red, and yellow. • SIMATIC S7-400 I/O modules can be easily labeled application-specifically by machine using a standard laser printer in one of the following two ways: – Using templates that can be downloaded free from the Internet – Using the “S7-SmartLabel” add-on tool for SIMATIC STEP7 S7-400 and M7-400 Programmable Controllers Hardware and Installation A5E00069481-04 4-33 Wiring the S7-400 Notes on Ordering Labeling Sheets for S7-400 Order Number 4-34 Description 6ES7492-2AX00-0AA0 SIMATIC S7-400, 10 A4 LABELING SHEETS, COLOR PETROL, 4 LABELING STRIPS/SHEETS FOR SIGNAL MODULES, MATERIAL: FOIL, PERFORATED FOR PRINTING WITH A LASER PRINTER, 10 SHEETS PER PACKAGE 6ES7492-2BX00-0AA0 SIMATIC S7-400, 10 A4 LABELING SHEETS, COLOR LIGHT BEIGE, 4 LABELING STRIPS/SHEETS FOR SIGNAL MODULES, MATERIAL: FOIL, PERFORATED FOR PRINTING WITH A LASER PRINTER, 10 SHEETS PER PACKAGE 6ES7492-2CX00-0AA0 SIMATIC S7-400, 10 A4 LABELING SHEETS, COLOR YELLOW, 4 LABELING STRIPS/SHEETS FOR SIGNAL MODULES, MATERIAL: FOIL, PERFORATED FOR PRINTING WITH A LASER PRINTER, 10 SHEETS PER PACKAGE 6ES7492-2DX00-0AA0 SIMATIC S7-400, 10 A4 LABELING SHEETS, COLOR RED, 4 LABELING STRIPS/SHEETS FOR SIGNAL MODULES, MATERIAL: FOIL, PERFORATED FOR PRINTING WITH A LASER PRINTER, 10 SHEETS PER PACKAGE S7-400 and M7-400 Programmable Controllers Hardware and Installation A5E00069481-04 Wiring the S7-400 How to Label S7-400 Modules Method 1: Using Templates 1. Find the templates on the Internet You can download the templates from the Internet free of charge. You can search for the templates on the initial Customer Supports page (try entering the keyword ”label”, for example). 2. Download The download contains templates for the labeling of S7-400 modules. The templates for S7-400 make the labeling strips available for the outside of the front connector cover and the terminal diagrams for the inside of the front connector cover. 3. How to Print the Labeling Sheets Using the Templates The idea is to use the templates to print directly onto the foil sheets. You can use a laser printer to label the foil sheets. Proceed as follows: a) Select page layout view in WORD to enter the information in the form templates. b) Label the module by clicking in the text boxes and entering the application-specific designation. c) We recommend that you first print the label out on white paper and compare the dimensions of the paper printout with those of the original labeling sheets. Because there are differences between the different printers and printer drivers and their accuracy, the dimensions may vary and adjustment may be necessary. If the line and column spacing is not set correctly, you can adjust the position of the entire template under “Header>Graphics>Position” and “File>Page Setup>Margins”. d) When some templates are printed, a message reporting that the margins are outside of the print area appears. This message can be ignored. e) Once you have printed the foil sheets, make sure that you fold the labeling strips along the perforation before separating them. This will ensure that the edges of the strips are even. You can then apply the labeling strips to the corresponding module. Method 2: Using the “S7-SmartLabel” Add-On Tool for SIMATIC STEP 7 You can initiate the labeling directly from the STEP 7 project. The basis for application-specific labeling is the symbol table in STEP 7. You will find more detailed information at http://www.s7-smartlabel.de/ . S7-400 and M7-400 Programmable Controllers Hardware and Installation A5E00069481-04 4-35 Wiring the S7-400 4.20 Fitting the Front Connector Principle of a Coding Key To reduce the risk of a wired front connector being plugged into the wrong type of module after rewiring or module replacement, the signal modules have a coding key for front connectors. A coding key comprises two parts: one part is permanently connected to the module; the second part is still connected to the first part when delivered (see Figure 4-21). When you plug in a front connector, the second part of the coding key engages in the connector, becoming detached from the part connected to the signal module. Both parts of the coding key are mating elements and a front connector with the wrong mating element cannot be plugged into this signal module. Front Connector Coding on the Signal Modules Shown in the following table is the allocation between the different front connector coding keys and individual signal modules. Table 4-4 Front connector coding elements Signal Modules Color of Front Connector Coding Key red yellow green Digital inputs, outputs > 60 VDC or > 50 VAC 1. Digital inputs, outputs 60 VDC or 50 VAC Analog inputs, outputs Plugging In the Front Connector You can only plug in the connector when the power supply module is installed (lower mounting screw tightened). ! Caution Modules can be damaged. If, for example, you plug the front connector of a digital input module into a digital output module, the module can be damaged. If, for example, you plug the front connector of an analog input module into an analog output module, the module can be damaged. When plugging in the front connector, ensure that the module and front connector are matched. 4-36 S7-400 and M7-400 Programmable Controllers Hardware and Installation A5E00069481-04 Wiring the S7-400 To plug in the front connector, follow the steps outlined below: 1. Hold the front connector horizontally and engage the front connector with the coding key. After an audible click, the front connector will engage with the mount and can be swung upwards. 2. Swing the front connector upwards. The two parts of the coding key will then be separated. 3. Screw the front connector on. Coding key 2 1 Figure 4-21 Attaching the Front Connector S7-400 and M7-400 Programmable Controllers Hardware and Installation A5E00069481-04 4-37 Wiring the S7-400 Figure 4-22 shows how to screw on the front connector. Figure 4-22 4-38 Screwing On the Front Connector S7-400 and M7-400 Programmable Controllers Hardware and Installation A5E00069481-04 Wiring the S7-400 4.21 Interconnecting the CR and ER(s) Interconnecting the Interface Modules When you assemble a programmable controller comprising a CR and one or more ERs, you connect the racks via the connecting cables of the interface modules. To interconnect the interface modules, follow the steps outlined below: 1. Ensure that all the connecting cables needed for the programmable controller are ready. Allow for the maximum cable lengths permitted for your assembly (see Chapter 2) and check that you have the correct cables (see Reference Manual Module Specifications, Chapter 6). 2. Start with the send IM (the interface module in the central rack). 3. Open the cover of the send IM. 4. Plug the male connector of the first connecting cable into one of the female connectors of the send IM and screw the connector on. Figure 4-23 Plugging a Connecting Cable into a Send IM 5. If you wish to connect two chains with ERs to this send IM, plug the connector of the second connecting cable into the other port of the send IM. 6. Close the cover of the send IM. S7-400 and M7-400 Programmable Controllers Hardware and Installation A5E00069481-04 4-39 Wiring the S7-400 7. Open the cover of the first receive IM (interface module in the ER). 8. Plug the free end of the connecting cable into the upper male connector (receive interface) of the receive IM and screw the connector on. 9. Connect the remaining receive IMs by connecting one send interface (lower female connector X2) to one receive interface (upper male connector X1) in each case. Send IM Receive IM Receive IM Terminator Figure 4-24 Connection Between a Send IM and Two Receive IMs 10.Plug the terminator into the lower female connector of the receive IM in the last ER of the chain (see Reference Manual Module Specifications, Chapter 6). 4-40 S7-400 and M7-400 Programmable Controllers Hardware and Installation A5E00069481-04 Wiring the S7-400 4.22 Setting the Fan Subassembly to the Line Voltage and Wiring It Setting the Fan Subassembly to the Line Voltage Check whether the voltage selector switch in the fan subassembly is set to your line voltage (see Figure 4-25). Fuse The fan subassembly has two standard fuses: • A 250 mA slow blow fuse for the 120 V range • A 160 mA slow blow fuse for the 230 V range. The fuse for the 230 V range is fitted before delivery. Note If you change the voltage range, you must also fit the fuse for this voltage range in the fan subassembly. Replacing the fuse is described in Chapter 7. Wiring the Fan Subassembly 1. Strip the cores of the power cable and press-fit wire end ferrules to the cores. 2. Insert the cores in the power terminals of the fan subassembly. Use a suitable screwdriver to release the spring contacts of the power terminals. 3. The small cover serves as a strain relief for the power cable. Choose one of the three sizes provided to suit your cable cross-section. 4. Screw the strain relief on. S7-400 and M7-400 Programmable Controllers Hardware and Installation A5E00069481-04 4-41 Wiring the S7-400 Fit the small cover as a strain relief Power terminals (spring contacts) Voltage selector switch Fuse cap Figure 4-25 4-42 Wiring the Fan Subassembly S7-400 and M7-400 Programmable Controllers Hardware and Installation A5E00069481-04 Wiring the S7-400 4.23 Routing Cables Using Cable Ducts or Fan Subassemblies Cable Routing Depending on the number of cables and plug-in lines merging at the particular rack, the cross-section of the cable duct or fan subassembly may not be sufficient to accept all cables. You should therefore route half the cables toward each side via the cable duct or fan subassembly. Securing Cables There are eyes for securing cables on both sides of the cable duct or fan subassembly (see Reference Manual Module Specifications, Chapter 6). You can secure the cables to these eyes with cable ties, for example. Shield Contact The cable duct and fan subassembly offer the facility of electrical contact for cable shields. You can use the shield clamps provided (see Reference Manual Module Specifications, Chapter 6). To establish contact for the cable shields, strip the outer insulation in the region of the shield clamp, and trap the cable shield under the shield clamp. 4.24 Routing Cables Using Fiber-Optic Cables Cable Routing Indoor fiber-optic cables (for example, for connecting synchronization submodules) are permitted for use in buildings, cable ducts, and channel trunking. The maximum strain load when assembling is 1000 N and during operation 150 N. Bending Radius When laying cables, you should maintain the following minimum bending radii: • Next to connector: 55 mm • Otherwise: 30 mm S7-400 and M7-400 Programmable Controllers Hardware and Installation A5E00069481-04 4-43 5 Networking Chapter Overview Section Description Page 5.1 Configuring a Network 5-2 5.2 Fundamentals 5-3 5.3 Rules for Configuring a Network 5-7 5.4 Cable Lengths 5-15 5.5 PROFIBUS-DP Bus Cables 5-18 5.6 Bus Connectors 5-19 5.7 RS 485 Repeater 5-23 5.8 PROFIBUS-DP Network with Fiber-Optic Cables 5-25 S7-400 and M7-400 Programmable Controllers Hardware and Installation A5E00069481-04 5-1 Networking 5.1 Configuring a Network Subnets You can connect an S7-400 device to various subnets: • Via a Simatic Net CP Ethernet to an Industrial Ethernet subnet • Via a Simatic Net CP PROFIBUS to a PROFIBUS-DP subnet • Via the integrated multipoint interface to an MPI subnet • Via the integrated PROFIBUS-DP interface to a PROFIBUS-DP subnet With the M7-400, an MPI or PROFIBUS-DP network can be configured in the same way. Only the modules required for connection to the PROFIBUS-DP network are different (see Section 8.7.6). Same Configuration We recommend you use the same bus components as for a PROFIBUS-DP network configuration when configuring an MPI network. The same configuration rules apply. Multipoint Interface (MPI) This interface of the CPU uses a Simatic S7-specific protocol for data exchange with programming devices (via STEP 7), operator panels, and other S7 CPUs. The bus structure corresponds to that of the PROFIBUS. Configuring Communication In order that the individual nodes of an MPI or PROFIBUS-DP network can communicate with each other, you must assign MPI or PROFIBUS-DP addresses to them. The Manual Configuring Hardware and Communication Connections STEP 7 V 5.2 describes how to assign these addresses and what you must take into account. All the CPU-related data you need to know to configure communication can be found in the Reference Manual CPU Data, Chapter 4. 5-2 S7-400 and M7-400 Programmable Controllers Hardware and Installation A5E00069481-04 Networking 5.2 Fundamentals Station = Node Declaration: All the stations you connect in a network are referred to as nodes in the following. Segment A segment is a bus cable between two terminating resistors. A segment can contain up to 32 nodes. Furthermore, a segment is limited by the permissible cable length according to the transmission rate. Baud Rate The baud rate (transmission rate) is the speed at which data is transmitted, expressed in terms of bits per second. • Baud rates of 19.2 kbps to 12 Mbps are possible for interfaces of the type MPI/DP. • Transmission rates of 9.6 kbps to 12 Mbps are possible for interfaces of the type PROFIBUS-DP. Note If you change the parameter assignment of the MPI/DP interface transmission rate, the new transmission rate remains set even after memory reset, voltage failure or removing/inserting the CPU. Connectable Nodes MPI Programming devices (PGs) PROFIBUS DP Programming devices (PGs) Operator interfaces (SIMATIC-OP), Operator panels (OPs)* WinCC S7-400/M7-400 PROFIBUS-DP master S7-300/M7-300 PROFIBUS-DP slaves * Not recommended in DP operation S7-400 and M7-400 Programmable Controllers Hardware and Installation A5E00069481-04 5-3 Networking Number of Nodes MPI PROFIBUS DP 127 127 * (default: 32) of which: 1 PG port (reserved) 1 master (reserved) 1 PG port (reserved) 125 slaves or other masters * Observe the CPU-related maximum numbers in the Reference Manual CPU Data, Chapter 4 MPI/PROFIBUS-DP Addresses In order for all nodes to be able to communicate with one another, you must assign them an address: • In the MPI network, an MPI address • A PROFIBUS-DP address in the PROFIBUS-DP network Default MPI Addresses The following table shows the default MPI address and the max. MPI address with which the devices are shipped: Node (Device) Default MPI Address Default Highest MPI Address Programming device 0 32 OP 1 32 CPU 2 32 Note If you change the parameter assignment of the highest MPI address of the MPI/DP interface, the new address remains set even after memory reset, voltage failure or removing/inserting the CPU. Rules for MPI Addresses Observe the following rules before assigning MPI addresses: • All MPI addresses in an MPI network must be different. • The highest possible MPI address must be the highest actual MPI address and must be set to the same value for all nodes. (Exception: connecting a programming device to two or more nodes.) 5-4 S7-400 and M7-400 Programmable Controllers Hardware and Installation A5E00069481-04 Networking Communication from PG/OP to Module without MPI If one of the programming devices or operator panels connected to a multipoint interface (MPI) communicates with an S7-400 module which does not have an MPI connection (for example, SIMATIC NET CPs, FM 456 etc.), this module can be reached via the CPU to whose MPI the programming device or operator panel is connected. In this case, the CPU simply acts as an intermediary for the transfer. This type of connection between a programming device or operator panel and a module only communicating via the communication bus occupies two connection resources in the CPU. CPU CP or FM PG or OP C bus MPI One connection resource occupied Figure 5-1 Two connection resources occupied in the CPU S7-400 station One connection resource occupied Communication between Programming Device/Operator Panel and a Module without MPI Maximum Number of Connections via MPI When configuring the connections of a CPU 416 via MPI, remember to include the PG connection in the maximum number of possible connections. S7-400 and M7-400 Programmable Controllers Hardware and Installation A5E00069481-04 5-5 Networking PG Access A CPU exchanges data with other systems using communication mechanisms, for example with other programmable controllers, with operator interface stations (OP, OS) or with programming devices (see Figure 5-2). PLC OS PG SIMATIC NET CPU MPI PG Figure 5-2 DP network OS PLC PG OS Slave Data Exchange Process communication, including communication services for data exchange between programmable controllers (PLC - PLC) and between programmable controllers and operator interface stations (PLC - OS/OP), has priority in CPUs over communication between programming devices and CPUs. The CPUs have different characteristics. One of these characteristics is their communication performance. If the communication resources of a CPU are occupied completely by process communication, this can severely hamper access to the CPU from the programming device. 5-6 S7-400 and M7-400 Programmable Controllers Hardware and Installation A5E00069481-04 Networking 5.3 Rules for Configuring a Network Rules Observe the following rules for connecting the nodes of a network: • Before you interconnect the individual nodes of the network, you must assign to each node the MPI address and the highest MPI address or PROFIBUS-DP address. Tip: Mark the address of each node in a network on the housing. To do this, use the adhesive labels enclosed with the CPU. You can then always see which address is assigned to which node in your plant. • Before you insert a new node in the network, you must switch off its supply voltage. • Connect all the nodes in the network in a row. In other words, include the fixed programming devices and operator panels directly in the network. Only use spur lines for connecting the programming devices / OPs to the network which are needed for startup or maintenance. • If you operate more than 32 nodes in a PROFIBUS-DP network, you must connect the bus segments via RS 485 repeaters. In a PROFIBUS-DP network, all bus segments together must have at least one DP master and one DP slave. • You connect ungrounded bus segments and grounded bus segments via RS 485 repeaters (see Reference Manual CPU Data, Chapter 10). • The maximum number of nodes per bus segment decreases with each RS 485 repeater. This means that if there is an RS 485 repeater in a bus segment, there may only be a maximum of 31 other nodes in a bus segment. However, the number of RS 485 repeaters has no effect on the maximum number of nodes on the bus. Up to ten segments can be connected in series. • Switch on the terminating resistor at the first and last node of a segment. To ensure the bus operates without interference, you should not switch off these nodes. S7-400 and M7-400 Programmable Controllers Hardware and Installation A5E00069481-04 5-7 Networking Data Packets in the MPI Network Observe the following feature in the MPI network: Note If you connect an additional CPU to the MPI network during operation, data may be lost. Remedy: 1. Disconnect power from the nodes to be connected. 2. Connect the nodes to the MPI network. 3. Switch on the nodes. Recommendation for MPI Addresses Reserve MPI address “0” for a service programming device and “1” for a service OP, which will later be briefly connected to the MPI network as required. Thus you assign different MPI addresses to the programming devices / OPs incorporated in the MPI network. Reserve MPI address “2” for a new CPU. You thus avoid the duplication of MPI addresses after a CPU with a default setting has been installed in the MPI network (for example, when replacing a CPU). Thus you assign an MPI address higher than “2” to all CPUs in the MPI network. Recommendation for PROFIBUS-DP Addresses Reserve PROFIBUS-DP address “0” for a service programming device, which will later be briefly connected to the PROFIBUS-DP network as required. Thus you assign other PROFIBUS-DP addresses to all the programming devices incorporated in the PROFIBUS-DP network. Components You connect the individual nodes via bus connectors and the PROFIBUS-DP bus cable. Remember to provide a bus connector with PG female port for nodes into which a programming device may be plugged if required. Use RS 485 repeaters for the connection between segments and for extending the cable. 5-8 S7-400 and M7-400 Programmable Controllers Hardware and Installation A5E00069481-04 Networking Terminating Resistor on the Bus Connector Terminating resistor switched on Terminating resistor switched off on off on off Figure 5-3 Terminating resistor on bus connector Terminating Resistor on the RS 485 Repeater DC 24 V L+ M PE M 5.2 A1 B1 A1 B1 ON ON SIEMENS RS 485-REPEATER A2 B2A2 B2 Terminating resistor for bus segment 1 Terminating resistor for bus segment 2 Figure 5-4 Terminating resistor on RS 485 repeater S7-400 and M7-400 Programmable Controllers Hardware and Installation A5E00069481-04 5-9 Networking Example: Terminating Resistor in the MPI Network The figure below shows where you have to connect the terminating resistor in a possible configuration for an MPI network. S7-400 PG S7-400 S7-400 OP RS 485 repeater OP S7-300 Spur line Programming device Terminating resistor switch on Figure 5-5 Terminating resistor on MPI network 5-10 S7-400 and M7-400 Programmable Controllers Hardware and Installation A5E00069481-04 Networking Example of an MPI Network S7-400** S7-400 S7-400 S7-400 PG OP** 2 1 3 4 5 S7-400 S7-400 OP 11 6 10 S7-300 OP 9 8 7 0 Programming device * Only connected via spur line for startup/maintenance (with default MPI address) ** Connected to the MPI later on (with default MPI address) 0 ... x MPI address of nodes Terminating resistor switch on Figure 5-6 Example of an MPI network S7-400 and M7-400 Programmable Controllers Hardware and Installation A5E00069481-04 5-11 Networking Example of a PROFIBUS-DP Network S7-400 with CPU 414-2-DP as DP master ET 200M ET 200M S5-95U PG 1 2 ET 200B OP PG* 0 8 3 7 4 5 ET 200B 6 * Only connected via spur line for startup/maintenance (with default PROFIBUS-DP address = 0) 0 ... x PROFIBUS DP addresses of nodes Terminating resistor switched on Figure 5-7 Example of a PROFIBUS DP network 5-12 S7-400 and M7-400 Programmable Controllers Hardware and Installation A5E00069481-04 Networking Example Using a CPU 414-2 The figure below shows an example of a configuration with CPU 414-2 DP which is integrated in an MPI network and simultaneously used as DP master in a PROFIBUS-DP network. In both networks, the node numbers can be assigned separately without conflicts resulting. S7-400 PG* OP S7-300 S7-300 S7-400 with CPU 414-2 as DP master S7-400 ET 200M ET 200M OP RS 485 repeater S7-400 OP S7-200 ET 200B MPI network PROFIBUS-DP network * Only connected via spur line for startup/maintenance ET 200B Terminating resistor switched on Figure 5-8 Example with CPU 414-2 S7-400 and M7-400 Programmable Controllers Hardware and Installation A5E00069481-04 5-13 Networking Programming Device Access Beyond Network Limits (Routing) You can access all modules beyond network limits using a programming device. S7-400 with CPU 416 Programming device / PC 3 S7-400 with CPU 417 MPI network 3 MPI network 1 S7-300 with CPU 318 S7-300 with CPU 318 Programming device / PC 1 PROFIBUS-DP network 2 ET 200 Programming device / PC 2 Figure 5-9 Programming device access beyond network limits Requirements : • Use STEP 7 from version 5.0 onwards • Assign STEP 7 to a programming device or PC on the network (SIMATIC Manager, Assign programming device/PC) • The network limits are bridged by modules with routing capability. 5-14 S7-400 and M7-400 Programmable Controllers Hardware and Installation A5E00069481-04 Networking 5.4 Cable Lengths Segment in the MPI Network In a segment of an MPI network, you can use cable lengths of up to 50 m. This 50 m applies from the first node to the last node in the segment. Table 5-1 Permitted Cable Length of a Segment in an MPI Network Transmission Rate Maximum Cable Length of a Segment (in m) 187.5 Kbps 50 19.2 Kbps 50 12 Mbps 50 Segment in the PROFIBUS-DP Network In a segment of a PROFIBUS-DP network, the cable length depends on the transmission rate (see Table 5-2). These lengths only apply if you connect a CPU to a PROFIBUS-DP network via an MPI interface configured as a DP interface. Table 5-2 Permitted Cable Length of a Segment in the PROFIBUS-DP Network Depending on the Transmisson Rate Transmission Rate Maximum Cable Length of a Segment (in m) 9.6 to 187.5 Kbps 1000 500 Kbps 400 1.5 Mbps 200 3 to 12 Mbps 100 Longer Cable Lengths If you have to implement cable lengths which are longer than permissible in one segment, you must use RS 485 repeaters. The maximum possible cable length between two RS 485 repeaters is the same as the cable length of a segment (see Tables 5-1 and 5-2). With these maximum cable lengths, however, note that no other nodes may be situated between the two RS 485 repeaters. You can connect up to ten RS 485 repeaters in series. Note that you must count an RS 485 repeater as a node of the MPI network in the total number of all nodes to be connected, even if it is not assigned its own MPI number. The use of RS 485 repeaters reduces the number of nodes. S7-400 and M7-400 Programmable Controllers Hardware and Installation A5E00069481-04 5-15 Networking Lengths of Spur Lines If you do not fit the bus cable directly at the bus connector (for example, when using a PROFIBUS-DP bus terminal), you must take into account the maximum possible spur line length. The following table gives the maximum lengths of spur lines allowed per bus segment: Table 5-3 Lengths of Spur Lines per Segment Transmission Rate Maximum Length of a Spur Line Number of Nodes per Spur Line Length of ... 1.5 m and 1.6 m 3m Maximum Length of Spur Lines per Segment 9.6 to 93.75 kbps 3m 32 32 96 m 187.5 kbps 3m 32 25 75 m 500 kbps 3m 20 10 30 m 1.5 Mbps 3m 6 3 10 m A spur line is not permissible with transmission rates greater than 1.5 Mbps. To connect a programming device or PC, use the connecting cable for the programming with theorder number 6ES7 901-4BD00-0XA0. You can use several connecting cable with this order number for programming devices in one bus configuration. 5-16 S7-400 and M7-400 Programmable Controllers Hardware and Installation A5E00069481-04 Networking Example The figure below shows a possible configuration of an MPI network. This example clarifies the maximum possible distances in an MPI network. S7-400 S7-400 S7-400 OP 3 4 5 PG* Programming device* 7 6 RS 485repeater max. 1000m Spur line 0 max. 50m S7-400 OP 11 S7-400 OP 10 RS 485repeater 9 8 max. 50m Terminating resistor switched on Programming device connected via spur line for maintenance 0 ... x MPI addresses of nodes Figure 5-10 Configuration of an MPI network S7-400 and M7-400 Programmable Controllers Hardware and Installation A5E00069481-04 5-17 Networking 5.5 PROFIBUS-DP Bus Cables PROFIBUS-DP Bus Cables Siemens supply the following PROFIBUS-DP bus cables (see catalog ST 70): PROFIBUS-DP bus cable 6XV1 830-0AH10 PROFIBUS-DP cable for burying in ground 6XV1 830-3AH10 PROFIBUS-DP trailing cable 6XV1 830-3BH10 PROFIBUS-DP bus cable with PE sheath (for foodstuffs and luxury food industry) 6XV1 830-0BH10 PROFIBUS-DP bus cable festoons 6XV1 830-3CH10 Characteristics of the PROFIBUS-DP Bus Cable The PROFIBUS-DP bus cable is a twisted, shielded pair with the following characteristics: Characteristics Values Impedance approx. 135 to 160 Ω (f = 3 to 20 MHz) Loop resistance 115 Ω/km Working capacitance 30 nF/km Attenuation 0.9 dB/100 m (f = 200 kHz) Permissible core cross-section 0.3 mm2 to 0.5 mm2 Permissible cable diameter 8 mm 0.5 mm Rules for Laying Cables When you lay the PROFIBUS-DP bus cable, you should not: • Twist it, • Stretch it, or • Compress it. Furthermore, when installing the indoor bus cable, you must observe the following basic conditions (dA = outer diameter of the cable): Characteristics 5-18 Boundary Conditions Bending radius for single bend 80 mm (10dA) Bending radius for repeated bends 160 mm (20dA) Permissible temperature range for installation - 5 C to + 50 C Storage and stationary operating temperature range - 30 C to + 65 C S7-400 and M7-400 Programmable Controllers Hardware and Installation A5E00069481-04 Networking 5.6 Bus Connectors Purpose of the Bus Connector The bus connector is used to connect the PROFIBUS-DP bus cable to the MPI or PROFIBUS-DP interface. In this way, you establish the connection to other nodes. There are two different bus connectors: • Bus connector without PG connector (6ES7 972-0BA20-0XA0) • Bus connector with PG connector (6ES7 972-0BB20-0XA0) Appearance (6ES7 972-0B.20 ...) Screws for mounting on station 9-pin sub. D male connector for connection to MPI or PROFIBUS-DP interface Switch for terminating resistor PG connector (only with 6ES7 972-0BB20-0XA0) Housing screw Clamp hinge for vertical or 30° cable routing Figure 5-11 Bu s connector S7-400 and M7-400 Programmable Controllers Hardware and Installation A5E00069481-04 5-19 Networking Connecting Bus Cables to Bus Connectors (6ES7 972-0B.20 ...) 1. Strip the bus cable according to the following figure. 11 5.5 Without PG connector 2 13 6 2 13 2 8 2 5.5 5.5 A B 7 A B A B 7.5 5.5 11 Angled outgoing cable unit AB With PG connector Figure 5-12 Strip bus cable 2. Open the housing of the bus connector by slackening the housing screw and swinging the cover upwards. 3. Slacken the clamp hinge cover. 4. The bus connector with order number 6ES7 972-0B.20 is supplied with an angled outgoing cable unit and used as it is in the S7-400. If the cable is to be routed vertically out of the housing: – Slacken the left-hand screw on the clamp hinge, – Raise the clamp hinge slightly, and – Turn the clamp hinge inward. – Screw the left-hand screw tight again. 5-20 S7-400 and M7-400 Programmable Controllers Hardware and Installation A5E00069481-04 Networking 5. Insert the green and red cores in the screw terminal block as shown in the following figure. Ensure that the same cores are always connected to the same terminals A or B (for example, green conductor always wired to terminal A, and red conductor to terminal B). Bus cable connection for first and last station on the bus Bus cable connection for all other stations on the bus A B A B ÇÇ A B A B The bus cable can be connected either right or left. Figure 5-13 Inserting cores into the screw termninal blocks 6. Retighten the clamp hinge cover. Ensure that the bare cable shield is under the shield clamp. 7. Tighten the screw terminals for the green and red cores. 8. Close the cover of the bus connector. 9. Screw the housing on. S7-400 and M7-400 Programmable Controllers Hardware and Installation A5E00069481-04 5-21 Networking Connecting the Bus Connector To connect the bus connector, proceed as follows: 1. Plug the bus connector into the module. 2. Screw the bus connector into the module. 3. If the bus connector, order no. 6ES7 972-0B.20-0XA0, is situated at the beginning or end of a segment, you must switch on the terminating resistor. Terminating resistor switched on on off Terminating resistor not switched on on off Figure 5-14 Switch on terminating resistant Ensure that power is always applied to the stations at which the terminating resistor is situated, during startup and operation. Removing the Bus Connector With a looped-through bus cable you can remove the bus connector from the PROFIBUS-DP interface at any time, without interrupting data traffic on the bus. ! Warning Interference to the data traffic on the bus is possible. A bus segment must always be terminated with the terminating resistor at both ends. This is not the case, for example, when the last slave with bus connector is not under power. Since the bus connector is powered by the station, the terminating resistor has no effect. Ensure that the stations at which the terminating resistor is switched on are always under power. 5-22 S7-400 and M7-400 Programmable Controllers Hardware and Installation A5E00069481-04 Networking 5.7 RS 485 Repeater Purpose of the RS 485 Repeater The RS 485 repeater enhances data signals on bus cables and links bus segments. You need an RS 485 repeater when: • More than 32 nodes are connected in the network, • A grounded segment is to be connected to an ungrounded segment, or • The maximum cable length of a segment is exceeded. Description of the RS 485 Repeater A detailed description and technical data of the RS 485 repeater can be found in the Reference Manual Module Specifications, Chapter 10. Assembly You can install the RS 485 repeater on a 35 mm standard profile rail. Wiring the Power Supply Unit To wire the power supply unit of the RS 485 repeater, proceed as follows: 1. Slacken the screw for “M” and “PE”. 2. Strip the cable for the 24 VDC supply. 3. Connect the cable to terminals “L+” and “M” or “PE”. Terminal “M5.2” Terminal “M5.2” should not be wired because it is only needed during maintenance. Terminal “M5.2” is the reference ground you require when measuring the voltage between terminals “A1” and “B1”. S7-400 and M7-400 Programmable Controllers Hardware and Installation A5E00069481-04 5-23 Networking Connecting the PROFIBUS-DP Bus Cable Connect the PROFIBUS-DP bus cable to the RS 485 repeater as follows: 1. Cut the PROFIBUS-DP bus cable to the required length. 2. Strip the PROFIBUS-DP bus cable according to the following figure. The braided shield must be turned back over the cable. This is essential so that the shielding point can serve later for strain relief and as a securing element. 6XV1 830-3AH10 6XV1 830-0AH10 6XV1 830-3BH10 8.5 16 10 ÇÇ ÇÇ 16 16 10 ÇÇ ÇÇ 8.5 Braided shield must be turned back over cable Figure 5-15 Turning back braided shield over cable 3. Connect the PROFIBUS-DP bus cable to the RS 485 repeater: Connect the same cores (green/red for PROFIBUS-DP bus cable) to the same terminal A or B (for example, green conductor always connected to terminal A and red conductor to terminal B). 4. Tighten the shield clamps so that the bare shield makes contact under the shield clamp. 5-24 S7-400 and M7-400 Programmable Controllers Hardware and Installation A5E00069481-04 Networking 5.8 PROFIBUS-DP Network with Fiber-Optic Cables Electrical/Optical Conversion If you want to use the field bus for larger distances irrespective of the transmission rate, or if the data traffic on the bus is not to be impaired by external interference fields, use fiber-optic cables rather than copper cables. There are two ways to convert electrical cables to fiber-optic cables: • PROFIBUS nodes with a PROFIBUS-DP interface (RS 485) are connected to the optical network via an Optical Bus Terminal (OBT) or via the Optical Link Module (OLM). • PROFIBUS nodes with an integrated fiber-optic cable interface (e.g. ET 200M (IM 153-2 FO), S7-400 (IM 467 FO)) can be directly integrated in the optical network. How to set up optical networks with the Optical Link Module (OLM) is described in detail in the SIMATIC NET PROFIBUS Networks manual. You will find below the most important information on setting up an optical PROFIBUS-DP network with PROFIBUS nodes that have an integrated fiber-optic cable interface. Benefits and Areas of Application Fiber-optic cables have the following advantages over electrical cables: • Electrical isolation of the PROFIBUS-DP components • Insensitivity to electromagnetic interference (EMC) • No electromagnetic emission into the environment • Thus no need for additional grounding and shielding measures • No adherence to minimum clearances from other cables necessary for EMC • No need for equipotential bonding conductors • No need for lightning conductors • Maximum permissible cable lengths independent of the transmission rate • Easy installation of the fiber-optic cable connections of the PROFIBUS-DP components by means of standard fiber-optic cable connectors (Simplex connectors) S7-400 and M7-400 Programmable Controllers Hardware and Installation A5E00069481-04 5-25 Networking Optical PROFIBUS-DP Network in Partyline Topology The optical PROFIBUS-DP network with nodes that have an integrated fiber-optic cable interface has a partyline topology. The PROFIBUS nodes are interconnected in pairs by means of Duplex fiber-optic cables. Up to 32 PROFIBUS nodes with a fiber-optic cable interface can be series-connected in an optical PROFIBUS-DP network. If a PROFIBUS node fails, as a result of the partyline topology none of the downstream DP slaves can be accessed by the DP master. Programming device/PC/OP S7-400 with IM 467 FO ET 200M with Other field devices without IM 153-2 FO fiber-optic cable interface PROFIBUS cable Distances between 2 nodes: Plastic fiber-optic cable up to 50 m PCF fiber-optic cable up to 300 m Optical PROFIBUS-DP OBT Figure 5-16 OBT Other nodes Optical PROFIBUS-DP Network with Nodes that have an Integrated Fiber-Optic Cable Interface Transmission Rate The following transmission rates are possible when the optical PROFIBUS-DP network is operated with a partyline topology: 9.6 kbps, 19.2 kbps, 45.45 kbps, 93.75 kbps, 187.5 kbps, 500 kbps, 1.5 Mbps and 12 Mbps PROFIBUS Optical Bus Terminal (OBT) A PROFIBUS node can be connected to the optical PROFIBUS-DP network via a PROFIBUS Optical Bus Terminal (OBT) (6GK1 500-3AA00) without an integrated fiber-optic cable interface (e.g. programming devices (PGs) or operator panels (OPs), see Figure 5-16). The programming device/PC is connected to the RS 485 interface of the OBT by means of the PROFIBUS cable. The OBT is integrated in the optical PROFIBUS-DP line by means of its fiber-optic cable interface. 5-26 S7-400 and M7-400 Programmable Controllers Hardware and Installation A5E00069481-04 Networking 5.8.1 Fiber-Optic Cables Features of the Fiber-Optic Cables Use Siemens plastic and PCF fiber-optic cables with the following features: Table 5-4 Features of the Fiber-Optic Cables Description Standard designation Area of application SIMATIC NET PROFIBUS Plastic Fiber-Optic Duplex Conductor Plastic Fiber-Optic Standard Cable PCF Fiber-Optic Standard Cable I-VY2P 980/1000 150A I-VY4Y2P 980/1000 60A I-VY2K 200/230 10A17+8B20 Indoors with a low mechanical load, such as laboratory test assemblies or in cabinets: Indoors: Indoors: Cable lengths up to 50 m Cable lengths up to 300 m Cable lengths up to 50 m Fiber type Step-index fiber Core diameter 980 µm 200 µm Core material Polymethyl methacrylate (PMMA) Quartz glass 1000 µm 230 µm Cladding outer diameter Cladding material Fluorinated special polymer Inner sheath • Material • Color • Diameter 2.2 PVC PA - Gray Black and orange (Without inner sheath) 0.01 mm 2.2 0.01 mm Outer sheath • Material • Color - Number of fibers PVC Purple 2 Attenuation at wavelength Cable grip PVC Purple 230 dB/km 10 dB/km 660 nm 660 nm - Kevlar fibers Kevlar fibers 50 N 100 N 500 N Not suitable for continuous tensile load Not suitable for continuous tensile load 100 N (At cable grip only, 50 N at connector or single conductor) Maximum permissible tensile force • Short-term • Continuous S7-400 and M7-400 Programmable Controllers Hardware and Installation A5E00069481-04 5-27 Networking Table 5-4 Features of the Fiber-Optic Cables, continued Description SIMATIC NET PROFIBUS Plastic Fiber-Optic Duplex Conductor Plastic Fiber-Optic Standard Cable PCF Fiber-Optic Standard Cable 35 N/ 10 cm 100 N/ 10 cm 750 N/ 10 cm 30 mm 100 mm 75 mm 50 mm (flat side only) 150 mm 75 mm -30 _C to +70 C -30 C to +70 C -30 C to +70 C 0 C to +50 C 0 C to +50 C -5 C to +50 C -30 C to +70 C -30 C to +70 C -20 C to +70 C Conditional 1) Conditional 1) Conditional 1) • UV radiation Not UV-resistant Conditional 1) Conditional 1) Flame retardance Flame retardant in accordance with the VW-1 flame test to UL 1581 Resistance to lateral pressure per 10 cm cable length (short-term) Bend radii • Single bend (without tensile force) • Multiple bends (with tensile force) Permissible environmental conditions • Transport/storage temperature • Laying temperature • Operating temperature Resistance against • Mineral oil ASTM no. 2, grease or water External dimensions 2.2 4.4 mm 0.01 mm Weight 1 7.8 kg/km Diameter: 0.3 mm 7.8 65 kg/km Diameter: 4.7 0.3 mm 22 kg/km Please ask your Siemens contact about specific applications. 5-28 S7-400 and M7-400 Programmable Controllers Hardware and Installation A5E00069481-04 Networking Order Numbers You can order the fiber-optic cables specified in Table 5-4 as follows. Table 5-5 Order Numbers - Fiber-Optic Cables Fiber-Optic Cables Form Order Number 50 m ring 6XV1821-2AN50 per meter 6XV1821-0AH10 I-VY4Y2P 980/1000 160A 50 m ring 6XV1821-0AN50 Robust round cable with 2 plastic fiber-optic cable conductors, PVC outer sheath and PA inner sheath, without connectors, 100 m ring 6XV1821-0AT10 SIMATIC NET PROFIBUS PCF fiber-optic, standard cable 50 m 6XV1821-1CN50 I-VY2K 200/230 10A17 + 8B20 75 m 6XV1821-1CN75 PCF fiber-optic cable with 2 conductors, PVC outer sheath, fitted with 4 Simplex connectors, whip length 30 cm each, for distances up to 300 m 100 m 6XV1821-1CT10 150 m 6XV1821-1CT15 200 m 6XV1821-1CT20 250 m 6XV1821-1CT25 300 m 6XV1821-1CT30 SIMATIC NET PROFIBUS plastic fiber-optic, duplex conductor I-VY2P 980/1000 150A Plastic fiber-optic cable with 2 conductors and a PVC sheath, without connectors, for use in environments with low mechanical stress (e.g. in a cabinet or for test assemblies in the laboratory) SIMATIC NET PROFIBUS plastic fiber-optic, standard cable for use indoors (Other lengths on request) 5.8.2 Simplex Connectors and Connector Adapter Definition Simplex connectors allow you to connect the fiber-optic cable to the integrated fiber-optic cable interface on the PROFIBUS device. In some Siemens modules (e.g. IM 153-2 FO, IM 467 FO) two Simplex connectors (one for the sender and one for the receiver) are inserted in the module by means of a special connector adapter. Prerequisite The PROFIBUS device must be equipped with a fiber-optic cable interface, such as the ET 200M (IM153-2 FO) or the IM 467 FO for S7-400. S7-400 and M7-400 Programmable Controllers Hardware and Installation A5E00069481-04 5-29 Networking Structure Two Simplex connectors (a sender and a receiver) and a connector adapter with the following attributes are required for a fiber-optic cable connection: • IP 20 protection • Transmission rates of 9.6 kbps to 12 Mbps Connector adapter Receiver Sender Simplex connectors Figure 5-17 Fiber-optic cables Simplex Connectors and a Special Connector Adapter for the IM 153-2 FO and IM 467 FO (installed) Order Numbers You can order Simplex connectors and connector adapters as follows: Table 5-6 Order Numbers - Simplex connectors and connector adapters Accessories SIMATIC NET PROFIBUS plastic fiber-optic Simplex connector/polishing set Order Number 6GK1901-0FB00-0AA0 100 Simplex connectors and 5 polishing sets for fitting SIMATIC NET PROFIBUS plastic fiber-optic cables with connectors Connector adapters 6ES7195-1BE00-0XA0 Pack of 50 for fitting plastic Simplex connectors with the IM 467 FO and the IM 153-2 FO 5-30 S7-400 and M7-400 Programmable Controllers Hardware and Installation A5E00069481-04 Networking 5.8.3 Connecting a Fiber-Optic Cable to the PROFIBUS Device Cable Lengths With fiber-optic cables, the length of the cable segment does not depend on the transmission rate. Each bus node in the optical PROFIBUS-DP network has repeater functionality. The distances specified below are the distances between two neighboring PROFIBUS nodes in the partyline topology. The maximum cable length between two PROFIBUS nodes depends on the type of the fiber-optic cable used. Table 5-7 Permissible Cable Lengths on the Optical PROFIBUS-DP Network (Partyline Topology) SIMATIC NET PROFIBUS Fiber-Optic Cable Maximum cable Lengths Between Two Nodes (in m) Projected for 1 Network (= 32 nodes) (in m) Plastic fiber-optic duplex conductor 50 1.550 Plastic fiber-optic standard cable 50 1.550 PCF fiber-optic standard cable 300 9.300 Mixed Use of Plastic Fiber-Optic and PCF Fiber-Optic Cable To gain the maximum benefit from the different cable lengths you can mix the plastic and PCF fiber-optic cables. For example, you can use plastic fiber-optic cable for connections between DP slaves locally (distances 50 m) and PCF fiber-optic cable for the connection between the DP master and the first DP slave in the partyline topology (distance 50 m). Laying PCF Fiber-Optic Cable You can order PCF fiber-optic cables fitted with 2x2 connectors in specific lengths from Siemens. Lengths and order numbers: See Table 5-5 Laying Plastic Fiber-Optic Cable You can easily fit connectors to and install plastic fiber-optic cables yourself. Please read the following information on how to do this and on the rules for laying the cable. S7-400 and M7-400 Programmable Controllers Hardware and Installation A5E00069481-04 5-31 Networking Installation Instructions for Plastic Fiber-Optic Cable (with Photos) You will find detailed installation instructions and a series of photographs on fitting plastic fiber-optic cables with Simplex connectors: • In the appendix of the SIMATIC NET PROFIBUS Networks manual • On the Internet – German: http://www.ad.siemens.de/csi/net – English: http://www.ad.siemens.de/csi_e/net Click SEARCH on this page, enter the number “574203” under “Entry-ID” and start the search function. • Enclosed with the Simplex connector/polishing set Title: Assembly instructions for SIMATIC NET PROFIBUS Plastic Fiber Optics with Simplex connectors Rules for Laying Cable When you lay plastic fiber-optic cable, please adhere to the following rules: • Use only the Siemens fiber-optic cables specified in Section 5.8.1 • Never exceed the maximum permissible stresses (tensile load, crushing, etc.) of the cable you are using specified in Table 5-4. Impermissible crushing can occur, for example, when screw clamps are used to fix the cable in place. • Follow the steps specified in the installation instructions, and use only the tools specified there. Grind and polish the fiber ends carefully. Note Polishing the fiber ends of the fiber-optic cable, as described in the installation instructions, reduces attenuation by 2 dB. • Grind and polish by pressing the connector only lightly against the abrasive paper or polishing foil in order to prevent the connector fusing with the fiber. • Ensure that you maintain the bend radii specified in Table 5-4 during grinding and polishing, particularly when cables are supported for mechanical strain relief. In this case, ensure an adequate whip length. • Ensure that there are no loops when cables are cut to length. Under tensile load, loops can cause kinks to form in the cable and thus damage it. • Ensure that the outer and conductor sheathing of the cable and the fibers are not damaged. Scoring and scratches can let light escape and thus lead to higher attenuation values and line failure. • Never insert dirty connectors or connectors with protruding fibers in the device sockets. This can destroy the optical sending and receiving elements. Installing the Connector Adapter The installation of the cut fiber-optic cable with connector on the PROFIBUS devices is module-specific, and it is therefore described in the manual for the PROFIBUS device with an integrated fiber-optic cable interface. 5-32 S7-400 and M7-400 Programmable Controllers Hardware and Installation A5E00069481-04 6 Starting Up Chapter Overview Section Description Page 6.1 Recommended Procedure for First Startup 6-2 6.2 Checks Prior to Switching On for the First Time 6-3 6.3 Connecting a Programming Device (PG) to an S7-400 6-5 6.4 Switching On an S7-400 for the First Time 6-6 6.5 Resetting the CPU with the Mode Selector Switch 6-7 6.6 Cold, Warm, and Hot Restarts with the Mode Selector Switch 6-10 6.7 Inserting a Memory Card 6-11 6.8 Inserting a Backup Battery (Option) 6-13 6.9 Starting Up a PROFIBUS-DP Subnet 6-17 6.10 Installing Interface Submodules (CPU 414-2, 414-3, 416-3, 417-4 and 417-4H) 6-18 S7-400 and M7-400 Programmable Controllers Hardware and Installation A5E00069481-04 6-1 Starting Up 6.1 Recommended Procedure for First Startup Recommended Procedure Due to the modular assembly and the many expansion options, an S7-400 can be very extensive and complex. A first startup of an S7-400 with two or more racks and all modules inserted is therefore not advisable. Instead, a startup in stages is recommended. When commissioning an H system, you should first start up each subsystem separately, as described in this chapter, before connecting both subsystems together to form a complete system. The following procedure is recommended for the first startup of an S7-400: 1. Carry out the checks listed in Table 6-1. 2. First start the CR with the power supply module and CPU inserted (see Section 6.4). If you are setting up your assembly in a segmented rack, you must insert both CPUs at the beginning for the first startup. Check the LED indicators on the two modules. The meanings of these LED indicators can be found in the Reference Manual Module Specifications, Chapters 3 and in the reference manual CPU Data. 3. Insert additional modules in the CR, one at a time, and start them up one at a time. 4. If required, connect the CR to ERs by inserting one or more send IMs in the CR and the matching receive IM in the ER. In the case of ERs with their own power supply modules, switch them on first and then the power supply module of the CR. 5. Insert additional modules in the ERs one at a time and start them up one after the other. How to Proceed in the Case of an Error If an error occurs, you can proceed as follows: – Check your system by means of the checklist in Section 6.2. – Check the LED indicators on the modules. Meanings of these indicators can be found in the chapters containing the descriptions of the relevant modules. – If necessary, remove individual modules to locate faults. 6-2 S7-400 and M7-400 Programmable Controllers Hardware and Installation A5E00069481-04 Starting Up 6.2 Checks Prior to Switching On for the First Time Checks Prior to Switching On for the First Time After installing and wiring your S7-400, it is advisable to check the steps carried out so far, before switching on for the first time. Table 6-1 contains a guide in the form of a checklist for your S7-400, and refers to the chapters containing additional information on the subject. Table 6-1 Checklist to be Used Before Switching On for the First Time Points to be Checked See Installation Manual Chapter Are the racks secured on the wall, in the frame or cabinet? 2 Have the necessary clearances been allowed? 2 Are cable ducts or fan subassemblies correctly installed? 2 Is the ventilation in order? 2 See Reference Manual “Module Specifications ” Chapter See Reference Manual “CPU Data” Chapter Racks Grounding and Chassis Ground Concept Is there a low-impedance connection (large surface, large-area contact) to the chassis ground? 2 On all racks, is the connection between reference ground and chassis ground correct (metallic connection or ungrounded operation?) 4 Are all grounds of the non-isolated ded modules and the grounds of the load current power supplies connected to the reference points? 2 Mounting and Wiring Modules Are all modules correctly inserted and screwed on? 2 Are all front connectors correctly wired, plugged into the right modules, and screwed on? 4 Are any necessary cable ducts or fan subassemblies fitted correctly? 2 S7-400 and M7-400 Programmable Controllers Hardware and Installation A5E00069481-04 6-3 Starting Up Table 6-1 Checklist to be Used Before Switching On for the First Time, continued Module Settings Is the CPU mode switch set to STOP? 6 Are the numbers of the racks correctly set on the coding switches of the receive IMs and not duplicated? 1 7 If measuring range modules are fitted on the analog input modules, are they correctly set? 5, 6 Have the rules for connection been observed? 2 Have the correct cables been used for connections to existing ERs? 2, 4 Is the last receive IM of each connection chain terminated with the right terminator? 7 7 Power Supply Module Is the power supply connector correctly wired? 4 On AC PS modules, is the voltage selector switch set to the available line voltage? 4 3 On fan subassemblies, is the voltage selector switch set to the available line voltage? 4 9 Are all power supply modules switched off (Standby switch set to )? 3 Is the BATT INDIC switch for battery monitoring correctly set (see Table 6-2)? 3 Has the connection to the supply been made? Line Voltage Is the available line voltage correct? 3 According to the backup concept, Table 6-2 shows how you must set the battery monitoring switch on the different power supply modules. 6-4 S7-400 and M7-400 Programmable Controllers Hardware and Installation A5E00069481-04 Starting Up Table 6-2 Setting the Battery Monitoring Switch ...Then If You ... 6.3 do not use battery monitoring, set the BATT INDIC switch to OFF. use battery monitoring with a single-width power supply module, set the BATT INDIC switch to BATT. want to monitor a backup battery with a double or triple-width power supply module, set the BATT INDIC switch to 1BATT. want to monitor two backup batteries with a double or triple-width power supply module, set the BATT INDIC switch to 2BATT. Connecting a Programming Device (PG) to an S7-400 Connecting a Programming Device (PG) to an S7-400 You must connect the programming device via a connecting cable to the MPI of the CPU. This allows access via the communication bus to all CPUs and programmable modules. S7-400 PG cable Programming device Figure 6-1 Connecting PG to an S7-400 Note The programming device is not ungrounded. To operate the S7-400 in an ungrounded configuration, you must connect the programming device via an RS 485 repeater (see Reference Manual Module Specifications, Chapter 10). S7-400 and M7-400 Programmable Controllers Hardware and Installation A5E00069481-04 6-5 Starting Up Communication between Programming Device and CPU The following conditions apply when communicating between a programming device and a CPU: • You need a programming device with STEP 7. • The CPU can communicate with the programming device in the following modes: RUN-P, RUN, STOP, STARTUP, and HOLD. Operator Control A description of operator control of communication between CPUs and programming devices can be found in the STEP 7 manuals. 6.4 Switching On an S7-400 for the First Time Switching On an S7-400 for the First Time First switch on the power cutout. Then set the standby switch of the power supply module from the standby setting to the I setting (output voltages at rated value). Result: • On the power supply module, the green 5 VDC and 24 VDC LEDs light up. • On the CPU – The yellow CRST LED lights up; – The yellow STOP LED flashes for three seconds at 2 Hz. During this time the CPU automatically executes a reset. – The yellow STOP LED lights up after the automatic reset. If the red BAF LED and one of the yellow LEDs (BATTF or BATT1F or BATT2F) light up on the power supply module, check the backup battery/batteries, the setting of the BATT INDIC switch, or read the section on controls and indicators of the power supply modules in Chapter 3 of the Reference Manual, Module Specifications. Switching On an H System for the First Time First switch on the master device and then the standby device. In each case, proceed as described above. 6-6 S7-400 and M7-400 Programmable Controllers Hardware and Installation A5E00069481-04 Starting Up 6.5 Resetting the CPU with the Mode Selector Switch How to Carry Out a Memory Reset When you reset a CPU, you place the memories of the CPU in a defined initial state. The CPU also initializes its hardware parameters and some of the system program parameters. If you have inserted a Flash card with a user program in the CPU, the CPU transfers the user program and the system parameters stored on the Flash card into the main memory after the memory reset. When Should a CPU be Reset? You must reset the CPU: • Before transferring a new, complete user program to the CPU. • When the CPU requests a reset. Your recognize this request by slow flashing of the STOP LED at 0.5 Hz. How to Perform a Memory Reset There are two ways of resetting the CPU: • Reset with the mode selector switch • Reset from the programming device (see STEP 7) Resetting the CPU with the mode selector is described in the following section. S7-400 and M7-400 Programmable Controllers Hardware and Installation A5E00069481-04 6-7 Starting Up Resetting the CPU with the Mode Selector Switch The mode selector switch is designed as a keyswitch. The following figure shows the possible positions of the mode selector switch. RUN-P RUN STOP MRES Proceed as follows to reset the CPU using the mode switch: Case A: You want to transfer a new, complete user program to the CPU. 1. Turn the switch to the STOP setting. Result: The STOP LED lights up. 2. Turn the switch to the MRES setting and keep it at this setting. Result: The STOP LED is dark for one second, bright for one second, dark for one second and then remains lit. 3. Turn the switch back to the STOP setting, then to the MRES setting again within the next 3 seconds and back to STOP. Result:The STOP LED flashes for at least 3 seconds at 2 Hz (reset is being executed) and then remains lit. Case B: The CPU requests a reset by slow flashing of the STOP LED at 0.5 Hz (system reset request, for example, when a memory card has been removed or inserted). Turn the switch to the MRES setting and back to the STOP setting. Result:The STOP LED flashes for at least 3 seconds at 2 Hz (reset is being executed) and then remains lit. 6-8 S7-400 and M7-400 Programmable Controllers Hardware and Installation A5E00069481-04 Starting Up What Happens in the CPU During a Memory Reset When you carry out a memory reset, the following process occurs in the CPU: • The CPU deletes the entire user program from the main memory and load memory (integrated RAM and, if applicable, RAM card). • The CPU clears all counters, bit memory, and timers (except for the time of day). • The CPU tests its hardware. • The CPU initializes its hardware and system program parameters, (internal default settings in the CPU). Some programmed default settings will be taken into account. • If no Flash card is inserted, a reset CPU has a memory utilization level of 0. You can read out the memory utilization level with STEP 7. • If a Flash card is inserted, the CPU copies the user program and the system parameters stored on the Flash card into the main memory after the reset. What Remains Following the Memory Reset... After the CPU has been reset, the following remains: • The contents of the diagnostic buffer The contents can be read out with the programming device using STEP 7. • Parameters of the MPI (MPI address and highest MPI address). Note the special cases in the following table. • The time of day • Status and value of the operating hours counter Special Case MPI Parameters The MPI parameters have a special function during a memory reset. The following table describes which MPI parameters are valid following a memory reset. Memory Reset ... MPI Parameters ... with Flash card inserted ... on the Flash card are valid. without Flash card inserted ... are retained in the CPU and are valid. S7-400 and M7-400 Programmable Controllers Hardware and Installation A5E00069481-04 6-9 Starting Up 6.6 Cold, Warm, and Hot Restarts with the Mode Selector Switch Sequence of Events During a Cold Restart (CPU 417 and 417 H) 1. Turn the switch to the STOP setting. Result: The STOP LED lights up. 2. Turn the switch to the RUN/RUNP setting. Sequence of Events During a Warm Restart (CPU 417 and 417 H) 1. Turn the switch to the STOP setting. Result: The STOP LED lights up. 2. Turn the switch to the MRES setting and keep it at this setting. Result: The STOP LED is dark for one second, bright for one second, dark for one second and then remains lit. 3. Turn the switch to the RUN/RUNP setting. 6-10 S7-400 and M7-400 Programmable Controllers Hardware and Installation A5E00069481-04 Starting Up 6.7 Inserting a Memory Card The Memory Card as Load Memory You can insert a memory card in all CPUs of the S7-400. It is the load memory of the CPU. Depending on the type of memory card, the user program is retained on the memory card even when power is removed. What Type of Memory Card Should You Use? There are two types of memory card: RAM cards and Flash cards. Whether you use a RAM card or a Flash card depends on how you intend to use the memory card. If You ... only intend to expand the integrated load memory of the CPU, ...Then you should use a RAM card. want to store your user program you should use a Flash card. permanently on the memory card, even with power removed (without backup or outside the CPU), Further information on the memory cards can be found in the CPU Manual, Chapter 1. S7-400 and M7-400 Programmable Controllers Hardware and Installation A5E00069481-04 6-11 Starting Up Inserting a Memory Card To insert a memory card, follow the steps outlined below: 1. Set the mode selector switch on the CPU to STOP. 2. Insert the memory card in the submodule slot of the CPU and push the memory card in as far as it will go. Note the position of the marker dot. You can only insert the memory card in the card slot in the direction shown in Figure 6-2. Result: The CPU requests a memory reset by slow flashing of the STOP LED at 0.5 Hz. 3. Perform a memory reset on the CPU by turning the mode switch to the MRES setting and back again to STOP. Result: The STOP LED flashes for at least 3 seconds at 2 Hz (reset is being executed) and then remains lit. Marker dot Figure 6-2 Inserting a Memory Card in a CPU Note If you insert or remove the memory card with the controller switched on, the CPU requests a memory reset by slow flashing of the STOP indicator at 0.5 Hz. If you insert or remove the memory card with the controller switched off, the CPU will execute an automatic reset after power on. 6-12 S7-400 and M7-400 Programmable Controllers Hardware and Installation A5E00069481-04 Starting Up 6.8 Inserting a Backup Battery (Option) Backup Depending on the power supply module, you can use one or two backup batteries: • To back up a user program and save it without loss in the event of a power failure. • For retentive storage of bit memory, timers, counters, and system data as well as data in variable data blocks. You can also provide this backup with an external battery (5 to 15 VDC). You achieve this by connecting the external battery to the EXT. BATT. socket on the CPU (see Reference Manual, CPU Data Section 1.2). You can also back up modules in an expansion rack via the EXT. BATT socket on the receive IM. Inserting a Backup Battery To insert the backup battery (batteries) in the power supply module, proceed as follows: 1. Discharge any static charge by touching a grounded metal part of the S7-400. 2. Open the cover of the power supply module. 3. Insert the backup battery/batteries in the battery compartment. Ensure correct polarity of the battery. 4. Switch on battery monitoring with the BATT INDIC slide switch, as shown in the following table. If You ... ...Then have a single-width power supply module, set the BATT INDIC switch to BATT. have a double or triple-width power supply module and want to monitor a backup battery, set the BATT INDIC switch to 1BATT. have a double or triple-width power supply module and want to monitor both backup batteries, set the BATT INDIC switch to 2BATT. 5. Close the cover. S7-400 and M7-400 Programmable Controllers Hardware and Installation A5E00069481-04 6-13 Starting Up The following figure shows how to insert a backup battery in the single-width power supply module. 6-14 S7-400 and M7-400 Programmable Controllers Hardware and Installation A5E00069481-04 Starting Up The following figure shows how to insert two backup batteries in a double-width power supply module. ! Warning Hazardous to persons and property, risk of pollutant emission. A lithium battery can explode if treated incorrectly; improper disposal of old lithium batteries can result in pollutant emission. The following instructions should therefore be observed without fail: • Do not throw new or discharged batteries into a fire and do not solder onto the cell body (max. temperature 100° C). Do not recharge, there is a risk of explosion. Do not open the battery, and only replace it with one of the same type. Obtain the replacement via Siemens (see the Reference Manual, Module specifications Chapter 11 for the order number). This will ensure that you have a short-circuit protected type. • Old batteries should be disposed of with battery manufacturers/recyclers if possible, or as hazardous waste. S7-400 and M7-400 Programmable Controllers Hardware and Installation A5E00069481-04 6-15 Starting Up Reducing the Passivation Layer Lithium batteries (lithium/thionyl chloride) are used as backup batteries for the S7-400. In lithium batteries of this technology, a passivation layer can develop after storage for a very long time, and the immediate functional capability of the battery may not be certain. This may result in an error message when the power supply module is switched on. The power supply modules of the S7-400 are capable of reducing the passivation layer of the lithium battery with a defined load on the battery. This process may take some minutes. When the passivation layer has been reduced and the lithium battery has reached its rated voltage, the error message of the power supply module can be acknowledged with the FMR button. Since the storage time of the lithium battery is not usually known, we recommend the following procedure: • Insert the backup battery/batteries in the battery compartment. • Acknowledge any battery error message of the power supply module with the FMR button. • If the battery error cannot be cleared, try again after a few minutes. • If the battery error still cannot be cleared, remove the battery/batteries and short-circuit it/them for one to three seconds maximum. • Reinsert the battery/batteries and try to acknowledge with the FMR button again. • If the battery error message goes off, the battery/batteries is/are operational. • If the battery error message does not go off, the battery/batteries is/are discharged. Removing a Backup Battery Chapter 7 describes how to remove the backup battery (batteries). 6-16 S7-400 and M7-400 Programmable Controllers Hardware and Installation A5E00069481-04 Starting Up 6.9 Starting Up a PROFIBUS-DP Subnet Introduction This section describes the procedure for starting up a PROFIBUS-DP subnet with an S7-400 CPU as the DP master. Requirements Before you can start up the PROFIBUS-DP subnet, the following requirements must be met: • The PROFIBUS-DP subnet has been set up (see Chapter 5). • With STEP 7, you have configured the PROFIBUS-DP subnet and assigned a PROFIBUS-DP address and the address area to all nodes (see manual Configuring Hardware and Communication Connections with STEP 7 V 5.1). Note that for some DP slaves, address switches must also be set (see the reference manuals for the particular DP slaves). Starting Up 1. Use the programming device to load the configuration of the PROFIBUS-DP subnet created under STEP 7 (preset configuration) in the CPU. This procedure is described in the manual Configuring Hardware and Communication Connections with STEP 7 V 5.1. 2. Switch on all DP slaves. 3. Switch the CPU from STOP to RUN. Behavior of the CPU During Startup During startup, the CPU compares the preset and actual configurations. You set the duration of the test with STEP 7 in the “Startup” parameter block with the “module time limits” parameter. (See also Reference Manual, Chapter 4, the manual Configuring Hardware and Communication Connections with STEP 7 V 5.2, and the STEP 7 online help). If the preset configuration = actual configuration, the CPU goes to RUN. If the preset configuration actual configuration, the CPU’s reaction depends on the setting of the parameter for “Startup if preset configuration actual configuration”: Startup if Preset Config. Actual Config. = Yes (Default) CPU goes into RUN Startup if Preset Config. Actual Config. = No The CPU remains at STOP and, after the timeset in the “module time limits” parameter, the BUSF LED flashes. Flashing of the BUSF LED indicates that at least one slave will not respond. In this case, check whether all slaves are switched on or display the content of the diagnostic buffer (see Configuring Hardware and Communication Connections with STEP 7 V 5.2). S7-400 and M7-400 Programmable Controllers Hardware and Installation A5E00069481-04 6-17 Starting Up 6.10 Installing Interface Submodules (CPU 414-2, 414-3, 416-3, 417-4 and 417-4H) Available Interface Submodules Note Only use interface submodules that are explicitly released for use in S7-400 devices. Installing Interface Submodules ! Warning The modules can be damaged. When inserting or removing interface submodules with power applied, the CPU and interface submodules can be damaged (exception: using synchronization submodules in an H system). Never insert or remove the interface submodules while power is being supplied (exception: synchronization submodules). Always switch off the power supply before inserting or removing interface submodules. ! Caution Danger of damage to persons and property. Interface submodules contain electronically-sensitive components that may be damaged if they are touched. The surface temperatures on the components can reach up to 70o C and there is a risk of burning. For this reason, you should always hold the interface submodules on the longest sides of the front panel. Observe the ESD guidelines when installing interface submodules. To fit an interface submodule in a card slot, follow the steps outlined below: 1. Undo the additional front plate with the IF 964-DP or IF 960 HF (synchronization submodule). 2. Make all the required settings on the submodule (for example, setting the rack number on a synchronization submodule). 3. Hold the interface submodule on the long sides of the front plate. 4. Insert the PCB end of the interface submodule in the lower and upper guides of the card slot, as shown in Figure 6-3. 6-18 S7-400 and M7-400 Programmable Controllers Hardware and Installation A5E00069481-04 Starting Up 5. Slowly push the interface submodule into the slot until the front plate rests on the frame of the card slot. 6. Important! Secure the front plate with the two fitted, captive M2.5 x 10 slot-head screws on the left frame of the card slot. 7. Attach the additional front plate for an IF 964-DP and for an IF 960 HF (synchronization module). Guide rails Figure 6-3 Inserting Interface Submodules in the CPU Covering Unused Submodule Slots On delivery, all the submodule slots are secured with a submodule cover. The cover is attached to the frame of the card slot with screws. Leave unused submodule slots secured. S7-400 and M7-400 Programmable Controllers Hardware and Installation A5E00069481-04 6-19 Starting Up 6-20 S7-400 and M7-400 Programmable Controllers Hardware and Installation A5E00069481-04 7 Maintenance Chapter Overview Section Description Page 7.1 Replacing the Backup Battery 7-2 7.2 Replacing a Power Supply Module 7-4 7.3 Replacing CPUs 7-5 7.4 Replacing Digital or Analog Modules 7-7 7.5 Changing the Fuses in the Digital Modules 7-9 7.6 Replacing Interface Modules 7-11 7.7 Replacing the Fuse of the Fan Subassembly 7-13 7.8 Replacing Fans in the Fan Subassembly During Operation 7-14 7.9 Replacing the Filter Frame of the Fan Subassembly During Operation 7-16 7.10 Replacing the Power Supply PCB and Monitoring PCB of the Fan Subassembly 7-18 7.11 Replacing Memory Cards 7-19 7.12 Replacing Interface Submodules 7-22 S7-400 and M7-400 Programmable Controllers Hardware and Installation A5E00069481-04 7-1 Maintenance 7.1 Replacing the Backup Battery Replacing the Backup Battery 1. Discharge any static charge by touching a grounded metal part of the S7-400. 2. Open the cover of the power supply module. 3. Using the loop(s), pull the backup battery/batteries out of the battery compartment. 4. Insert the new backup battery/batteries in the battery compartment of the power supply module. Ensure correct polarity of the battery/batteries. 5. Switch on battery monitoring with the BATT INDIC slide switch. If You ... ...Then have a single-width power supply module, set the BATT INDIC switch to BATT. have a double or triple-width power supply module and want to monitor a backup battery, set the BATT INDIC switch to 1BATT. have a double or triple-width power supply module and want to monitor both backup batteries, set the BATT INDIC switch to 2BATT. 6. Press the FMR button. 7. Close the cover of the power supply module. 7-2 S7-400 and M7-400 Programmable Controllers Hardware and Installation A5E00069481-04 Maintenance Note If you store the batteries for a long period, a passivation layer may form. Please read Section 6.8, Inserting a Backup Battery. Using Backup Batteries You should change the backup battery once a year. Observe the usual regulations/guidelines for disposing of lithium batteries in your country. Backup batteries should be stored in a cool, dry place. Backup batteries can be stored for ten years. If they are stored for a longer period, however, a passivation layer may form. Rules for the Care of Backup Batteries You must observe the following rules to avoid hazards in the care of backup batteries: ! Warning The improper care of backup batteries can result in injury and damage. Backup batteries can ignite or explode if they are heated or damaged. Backup batteries must not be • Recharged • Heated • Burned • Drilled into • Crushed Store the backup batteries in a cool, dry place. S7-400 and M7-400 Programmable Controllers Hardware and Installation A5E00069481-04 7-3 Maintenance 7.2 Replacing a Power Supply Module Slot Numbering If you have provided the modules in your system with slot numbering, you must remove the number from the old module when replacing it and apply the number to the new module. Removing the Module (Ignore Steps 1 and 2 When Using Redundant Power Supply Modules) 1. Set the CPU mode switch to STOP. When you replace the power supply module in an ER, the CR may remain in the RUN state, depending on CPU programming. You can back up the data in the ER via the EXT. BATT. socket of the receive IM. 2. If you wish to back up the data in the CPU, you can use the EXT. BATT. socket of the CPU (see Reference Manual, Chapter 4). 3. 4. 5. 6. 7. 8. 9. (0 V output voltages). Set the standby switch of the power supply module to Set the line disconnector to OFF. Remove the cover. Remove the backup battery/batteries if applicable. Disconnect the power supply connector from the power supply module. Loosen the mounting screws of the module. Swing the module out. Installing a New Module 1. Check the voltage selector switch. 2. Attach the new module of the same type and swing it downwards. 3. Screw the module on. 4. Check that the power disconnector is set to OFF and the standby switch to . 5. Plug in the power supply connector at the power supply module. 6. Insert the backup battery/batteries, if applicable. 7. Close the cover. 8. Set the power disconnector to ON. 9. Set the standby switch of the power supply module to I (output voltages at rated value). 10.Set the CPU mode switch to RUN if applicable. How the S7-400 Behaves after Exchanging Modules If an error occurs after replacing a module, you can read out the cause of the error from the diagnostic buffer. 7-4 S7-400 and M7-400 Programmable Controllers Hardware and Installation A5E00069481-04 Maintenance 7.3 Replacing CPUs Slot Numbering If you have provided the modules in your system with slot numbering, you must remove the number from the old module when replacing it and apply the number to the new module. Saving the Data Save the user program including configuration data. Removing the Module 1. Set the CPU mode switch to STOP. 2. Set the standby switch of the power supply module to (0 V output voltages). 3. Remove the cover of the CPU. 4. Disconnect the MPI connector, if applicable. 5. Disconnect the connector at the EXT. BATT. socket, if applicable. 6. Remove the memory card. 7. Loosen the mounting screws of the module. 8. Swing the module out. S7-400 and M7-400 Programmable Controllers Hardware and Installation A5E00069481-04 7-5 Maintenance Installing a New Module 1. Attach the new module of the same type and swing it downwards. 2. Screw the module on. 3. If applicable, plug the connector for the external battery supply into the socket. 4. Set the CPU mode switch to STOP. 5. Insert the memory card. 6. Set the standby switch of the power supply module to I (output voltages at rated value). The remaining procedure depends on whether you use a Flash card and whether or not you have configured your system for networking. 7. Proceed as follows to operate with a Flash card: Transfer the user and configuration data. Set the CPU mode switch to RUN. Close the cover. 8. If your system is not configured for networking, proceed as follows: Transfer the user and configuration data by means of the programming device, via the programming device cable (see Section 6.3). Set the CPU mode switch to RUN. Close the cover. 9. If your system is configured for networking, proceed as follows: Transfer the user and configuration data by means of the programming device, via the programming device cable (see Section 6.3). Set up your network by plugging in the MPI connector. Set the CPU mode switch to RUN. Close the cover. How the S7-400 Behaves after Exchanging Modules If an error occurs after replacing a module, you can read out the cause of the error from the diagnostic buffer. 7-6 S7-400 and M7-400 Programmable Controllers Hardware and Installation A5E00069481-04 Maintenance 7.4 Replacing Digital or Analog Modules Slot Numbering If you have provided the modules in your system with slot numbering, you must remove the number from the old module when replacing it and apply the number to the new module. Installing a Module 1. You can replace analog and digital modules in RUN mode. You must have taken the appropriate action in your STEP 7 program to ensure correct responses from your system. If you are not sure whether your program will react correctly, set the CPU mode switch to STOP. ! Warning Improper handling of the front connectors can result in injury and damage. If the front connector is removed and inserted during operation, hazardous voltages of >25 VAC or >60 VDC may be present at the pins of the module. When such voltages are present at the front connector, modules with power applied may only be replaced by electrical specialists or trained personnel in such a way that the pins of the module are not touched. 2. Loosen the mounting screw of the front connector and pull it off. 3. Loosen the mounting screws of the module. 4. Swing the module out. Note In order that the removal and insertion of digital or analog modules can be detected by the CPU, a minimum time of two seconds must elapse between removal and insertion. S7-400 and M7-400 Programmable Controllers Hardware and Installation A5E00069481-04 7-7 Maintenance Removing the Front Connector Coding Key Before fitting the front connector, you must remove (break off) the front part of the coding key, because this part is already fitted in the wired front connector. ! Caution The module can be damaged. If, for example, you insert a front connector of a digital module in an analog module, the module may be damaged. Only operate modules with their complete front connector coding key. Installing a New Module 1. Attach the new module of the same type at the appropriate slot and swing it downwards. 2. Screw the module on with both mounting screws. 3. Fit the front connector. 4. If you have set the CPU to STOP, you must now set it to RUN again. 5. After fitting, each programmable module will be reinitialized by the CPU with parameters. How the S7-400 Behaves after Exchanging Modules If an error occurs after replacing a module, you can read out the cause of the error from the diagnostic buffer. Exchanging the Front Connector 1. Switch off all load power supplies for the module. 2. Loosen the screw of the front connector and pull it off. 3. Remove the labels from the front connector and insert them into the new front connector. 4. Wire the new front connector. 5. Insert the front connector in the module. 6. Screw the front connector on. 7. Switch on the load voltage. 7-8 S7-400 and M7-400 Programmable Controllers Hardware and Installation A5E00069481-04 Maintenance 7.5 Changing the Fuses in the Digital Modules Modules with Fuses The following modules have fuses which you can change yourself if they are defective: • Digital output module SM 422; DO 16 x AC 20-120 V/2A (6ES7422-5EH00-0AB0) • Digital output module SM 422;DO 8 x AC 120/230 V/5A (6ES7422-1FF00-0AA0) • Digital output module SM 422;DO 16 x AC 120/230 V/2A (6ES7422-1FH00-0AA0) Check the Plant Correct the faults which led to the fuses blowing. Changing the Fuses To change the fuses in a digital module, you must remove the front connector from the digital module and remove the module from the rack. Warning ! Improper handling of the digital modules can result in injury and damage. Hazardous voltages of >25 VAC or >60 VDC may be present below the covers on the right-hand side of the module. Before you open these covers, ensure that either the front connector for the module is removed or the module is disconnected from the voltage supply. S7-400 and M7-400 Programmable Controllers Hardware and Installation A5E00069481-04 7-9 Maintenance ! Warning Improper handling of the front connectors can result in injury and damage. If the front connector is removed and inserted during operation, hazardous voltages of >25 VAC or >60 VDC may be present at the pins of the module. When such voltages are present at the front connector, modules with power applied may only be replaced by electrical specialists or trained personnel in such a way that the pins of the module are not touched. To change the fuses, follow the steps outlined below: 1. You must have taken the appropriate action in your STEP 7 program to ensure correct responses from your system. If you are not sure whether your program will react correctly, set the CPU mode switch to STOP. 2. Loosen the mounting screw of the front connector and pull it off. 3. Loosen the mounting screws of the module. 4. Swing the module out. Note In order that the removal and insertion of digital modules can be detected by the CPU, a minimum time of two seconds must elapse between removal and insertion. 5. Remove the covers on the right-hand side of the module by levering them out with a screwdriver. 6. Replace the defective fuses with new fuses of the same type. 7. Place the guides on the covers into the appropriate cutouts in the module casing and close the covers until they click into place. 8. Attach the module onto its slot and swing it down. 9. Screw the module on with both mounting screws. 10.Fit the front connector. 11. If you have switched the CPU to STOP, you must now switch it to RUN again. 12.After fitting, each programmable module will be reinitialized by the CPU with parameters. How the S7-400 Behaves after Replacing the Fuse If an error occurs after replacing a fuse, you can read out the cause of the error from the diagnostic buffer. 7-10 S7-400 and M7-400 Programmable Controllers Hardware and Installation A5E00069481-04 Maintenance 7.6 Replacing Interface Modules Slot Numbering If you have provided the modules in your system with slot numbering, you must remove the number from the old module when replacing it and apply the number to the new module. Fitting and Removing Modules During Operation Observe the following warning when fitting and removing the interface modules and the corresponding connecting cables. ! Caution Data can be lost or corrupted. If you remove or insert the interface modules and/or corresponding connecting cables with power applied, data may be lost or corrupted. Switch off the power supply modules of the CR and ERs on which you are working before carrying out any actions. Removing Modules / Exchanging Cables 1. If you wish to back up your data in the CPU, you can do this with a backup battery or via an external battery supply at the CPU (see Reference Manual, Chapter 4). 2. Set the CPU mode switch to STOP. 3. Set the standby switches of both power supply modules (in the CR and the ER) to (0 V output voltages). 4. Remove the cover. 5. Disconnect the connecting cables. 6. Disconnect the terminator, if applicable. 7. Loosen the mounting screws of the module. 8. Swing the module out. S7-400 and M7-400 Programmable Controllers Hardware and Installation A5E00069481-04 7-11 Maintenance Installing a New Module 1. Set the number of the rack at receive IMs. 2. Attach the new module of the same type and swing it downwards. 3. Screw the module on. 4. Fit the connecting cables. 5. Plug in the terminator, if applicable. 6. Secure the cover. 7. First switch on the power supply module in the ER. 8. Then switch on the power supply module in the CR. 9. Set the CPU mode switch to RUN mode. How the S7-400 Behaves after Exchanging Modules If an error occurs after replacing a module, you can read out the cause of the error from the diagnostic buffer. 7-12 S7-400 and M7-400 Programmable Controllers Hardware and Installation A5E00069481-04 Maintenance 7.7 Replacing the Fuse of the Fan Subassembly Fuse Type The fuse of the fan subassembly is a standard 5 x 20 mm cartridge fuse to DIN and not a spare part. Use the following fuse: • 160 mA slow blow if the voltage selector switch is set to 230 V • 250 mA slow blow if the voltage selector switch is set to 120 V Replacing the Fuse To replace the fuse of the module, follow the steps outlined below: 1. Disconnect the power cable of the fan subassembly from the supply. 2. Use a screwdriver to unscrew the fuse cap. Voltage selector switch Fuse cap 3. Remove the blown fuse from the fuse cap. 4. Insert the new fuse in the fuse cap and screw the cap into the fan subassembly. 5. Connect the power cable of the fan subassembly to the supply. S7-400 and M7-400 Programmable Controllers Hardware and Installation A5E00069481-04 7-13 Maintenance 7.8 Replacing Fans in the Fan Subassembly During Operation Removing the Fans 1. Use a screwdriver to make a quarter turn counter-clockwise and open the two quick-release locks on the front of the fan subassembly. ÄÄÄÄÄ ÄÄÄÄÄÄ ÄÄÄÄÄ ÄÄÄÄÄÄÄÄÄÄÄÄÄÄÄÄ Fan 1 Fan 2 Fan 3 Base Quick-release locks Reset button LEDs: F 1 = Fan 1 F 2 = Fan 2 F 3 = Fan 3 7-14 S7-400 and M7-400 Programmable Controllers Hardware and Installation A5E00069481-04 Maintenance 2. Grasp the base with both hands, press it down slightly and pull it fully out of the fan subassembly. 3. Release the fan to be replaced by pressing the fan grip away from the housing with your thumb. Fan Fan grip Base 4. Pull out the fan to be replaced. 5. Slide the new fan in until it engages. 6. Slide the base in again and press it up. 7. Use a screwdriver to make a quarter turn clockwise and close the two quick-release locks. 8. Use a pointed object to press the RESET button. The fault LED will go off and the fan will start running. S7-400 and M7-400 Programmable Controllers Hardware and Installation A5E00069481-04 7-15 Maintenance 7.9 Replacing the Filter Frame of the Fan Subassembly During Operation Replacing the Filter Frame 1. Use a screwdriver to make a quarter turn counter-clockwise and open the two quick-release locks on the front of the fan subassembly. 2. Grasp the base with both hands, press it down slightly, pull it first fully forward and then up at an angle out of the fan subassembly. 3. The filter frame is secured either in the bottom of the base or at its rear edge with snap hinges and snap catches. The individual filter mats are joined with the filter frame. Remove the filter frame as follows: – The filter frame is fitted in the bottom of the base: Near the snap catches, press against the filter frame from below and remove the filter frame. – The filter frame is secured at the rear edge of the base: With the flat of your hand, press the filter frame away from the base of the fan subassembly. This will release the filter frame from the snap hinges. 7-16 S7-400 and M7-400 Programmable Controllers Hardware and Installation A5E00069481-04 Maintenance Filter mat Filter frame Cover Snap catches Base with cover and filter frame (optionally fitted at bottom or rear) Snap hinges Quick-release locks 4. Fit the new filter frame: – Fitting the filter frame at the bottom of the base: Insert the filter frame in the snap hinges at the base cutout and engage it with the snap catches. – Fitting the filter frame at the rear edge of the base: At about a right angle to the base, insert the filter frame in the snap hinges at the rear edge of the base. 5. Slide the base in again and press it up. 6. Use a screwdriver to make a quarter turn clockwise and close the two quick-release locks. 7. Replacing the filter frame will not trigger an interrupt. There is therefore no need to press the RESET button. S7-400 and M7-400 Programmable Controllers Hardware and Installation A5E00069481-04 7-17 Maintenance 7.10 Replacing the Power Supply PCB and Monitoring PCB of the Fan Subassembly Exchanging the Mother Board 1. Disconnect the power cable of the fan subassembly from the supply. 2. Use a screwdriver to make a quarter turn counter-clockwise and open the two quick-release locks on the front of the fan subassembly. 3. Remove the base of the fan subassembly (see Section 7.9). Shown in the following figure is a front view of the fan subassembly. You can also see the locations of the printed-circuit boards (PCBs). ÄÄÄÄÄÄÄÄÄÄÄÄÄÄÄÄ Fan 1 Quick-release lock Power supply PCB Fan 2 Monitoring PCB Fan 3 Quick-release lock Reset button 4. Pull the faulty PCB forward and out of the fan subassembly. 5. Slide the new PCB in until it engages. 6. Slide the base in again and press it up. 7. Use a screwdriver to make a quarter turn clockwise and close the two quick-release locks. 8. Connect the power cable of the fan subassembly to the supply. 9. Use a pointed object to press the RESET button. The fans will start running. ! Caution Electronic components can be damaged. If you do not observe the ESD guidelines when handling printed-circuit boards with electronic components, the components can be damaged by a static discharge. Observe the ESD guidelines (see Appendix). 7-18 S7-400 and M7-400 Programmable Controllers Hardware and Installation A5E00069481-04 Maintenance 7.11 Replacing Memory Cards Memory Expansion The CPU 417-4 and CPU 417-4 H memory modules are expandable. Take note of the following rules for the expansion procedure: 1. If you are inserting only one module, it has to be inserted on slot 1. 2. A second module may only be inserted if a module of 4 Mbytes is inserted on slot 1. The following combinations are thus possible: Slot 1 Slot 2 2 Mbytes – 4 Mbytes – 4 Mbytes 2 Mbytes 4 Mbytes 4 Mbytes In order to be able to replace memory cards in a central processing unit, you have to remove the CPU from the rack (see section 7.3). ! Warning The modules can be damaged. Failure to observe ESD guidelines can result in damage to both the CPU and memory cards. Observe the ESD guidelines when fitting memory cards. Only use the memory cards intended for the particular CPU. Fitting Memory Cards in the CPU Proceed as follows: 1. Remove the cover from the left side of the CPU by loosening the three screws. 2. Push the first memory card down through an angle of approximately 45o into slot 1 (see Figure 7-1). Note the cutout at the front of the card (polarity reversal protection). 3. Push the memory card down until the tabs in the slot slide into the corresponding cutouts on the side of the card. Make sure that the metal flag at the end of the card lies on the metal edge of the module. 4. If necessary, insert the second memory card in slot 2 in the same way (see Figure 7-1). 5. Fit the cover on the upper left side of the CPU by securing it with three screws. S7-400 and M7-400 Programmable Controllers Hardware and Installation A5E00069481-04 7-19 Maintenance 6. If necessary, insert the second memory card in slot 2 in the same way. 7. Fit the cover on the upper left side of the CPU by securing it with three screws. Slot 1 Slot 2 Figure 7-1 7-20 Fitting Memory Cards in the CPUs S7-400 and M7-400 Programmable Controllers Hardware and Installation A5E00069481-04 Maintenance Note The connectors to accept the memory cards are coded (see Figure 7-2). Do not apply force when fitting the memory cards. Lightly press the guide supports out to remove the memory cards (see Figure 7-2). Copper flag Memory card Cutout Cutout Guide support Polarity reversal protection Guide support Slots 1 and 2 Figure 7-2 Memory Card S7-400 and M7-400 Programmable Controllers Hardware and Installation A5E00069481-04 7-21 Maintenance 7.12 Replacing Interface Submodules Available Interface Submodules Note Only use interface submodules that are explicitly released for use in S7-400 devices. Installing Interface Submodules ! Warning The modules can be damaged. When inserting or removing interface submodules with power applied, the CPU and interface submodules can be damaged (exception: using synchronization submodules in an H system). Never insert or remove the interface submodules while power is being supplied (exception: synchronization submodules). Always switch off the power supply before inserting or removing interface submodules. ! 7-22 Caution Danger of damage to persons and property. Interface submodules contain electronically-sensitive components that may be damaged if they are touched. The surface temperatures on the components can reach up to 70o C and there is a risk of burning. For this reason, you should always hold the interface submodules on the longest sides of the front panel. Observe the ESD guidelines when installing interface submodules. S7-400 and M7-400 Programmable Controllers Hardware and Installation A5E00069481-04 Maintenance You can replace an interface submodule with another one without having to remove the associated CPU from the rack. Follow the steps outlined below: 1. Switch the CPU to STOP. 2. Disconnect the CPU module from the network (unless it is a synchronization submodule). 3. Loosen the screws of the sub-D-connector and remove all connectors. 4. Loosen the two captive slot-head screws which secure the front plate of the interface submodule to the left frame of the card slot so that the screws can be removed by 6 mm. 5. Carefully remove the interface submodule from the guide support of the card slot (see figure 7-3). Hold the interface module on the long sides of the front plate. Guide rails Figure 7-3 Inserting an Interface Submodule in a CPU Installing Interface Submodules In order to install an interface submodule, proceed in reverse order. For further information, see section 6.10 ”Installing Interface Submodules”. S7-400 and M7-400 Programmable Controllers Hardware and Installation A5E00069481-04 7-23 Maintenance 7-24 S7-400 and M7-400 Programmable Controllers Hardware and Installation A5E00069481-04 8 Assembling the M7-400 This Chapter The assembling of an M7-400 automation computer is largely identical to that of an S7-400 programmable controller. Most of the instructions in the S7-400 chapters can therefore be applied to the M7-400. Wherever details relate specifically to the M7-400, these are pointed out to you at the beginning of each S7-400 chapter with a cross-reference to the corresponding M7-400 section. The headings of the second-digit sections of this chapter are largely the same as those of the corresponding S7-400 chapter to guide you through the text. Chapter Overview Section Description Page 8.1 Mechanical Configuration 8-2 8.2 Addressing the M7-400 Modules 8-5 8.3 Electrical Configuration 8-6 8.4 Installing the M7-400 8-8 8.5 Connecting a Module Assembly 8-29 8.6 Assembling an MPI Subnet or PROFIBUS-DP Subnet 8-30 8.7 Preparing for Operation 8-32 8.8 Replacing Modules and Submodules/Cards 8-46 S7-400 and M7-400 Programmable Controllers Hardware and Installation A5E00069481-04 8-1 Assembling the M7-400 8.1 Mechanical Configuration Introduction Explained in this section are the rules you must observe for arranging modules in the M7-400 automation computer. All other information which is important for the mechanical configuration applies both to the S7-400 and the M7-400, and is described in Chapter 2. Rules for the Arrangement of Modules You must observe the following rules for the arrangement of modules in a rack: • The power supply module must be inserted in slot 1 in all racks. • The receive IM in the expansion rack must always be inserted on the extreme right. • A module assembly comprising CPU and expansion units must be configured in a particular sequence. Shown in Table 8-1 are the possible configurations of a module assembly with a specified sequence for the expansion units. 8-2 S7-400 and M7-400 Programmable Controllers Hardware and Installation A5E00069481-04 Assembling the M7-400 Table 8-1 Sequence in the Module Subassembly CPU Slot Slot Slot Slot n and n + 1 for Double-Width CPUs n+2 n+3 n+4 EXM 478 - - EXM 478 EXM 478 - EXM 478 EXM 478 EXM 478 EXM 478 EXM 478 ATM 478 EXM 478 ATM 478 ATM 478 EXM 478 ATM 478 - ATM 478 - - ATM 478 ATM 478 - CPU 486-3, CPU 488-3 ATM 478 ATM 478 ATM 478 MSM 478 - - EXM 478 MSM 478 - EXM 478 EXM 478 MSM 478 EXM 478 MSM 478 ATM 478 MSM 478 ATM 478 ATM 478 MSM 478 ATM 478 - Note Establish whether there are additional regulations applying to all modules not described in this manual. Table 8-2 shows which modules can be used in the different racks. Table 8-2 Possible Applications of the M7-400 Modules Racks Modules UR1, UR2 as Central Rack Central Processing Units (CPUs) Expansion Module (EXM) * AT Adapter Module (ATM) * Mass Storage Module (MSM) * * UR1, UR2 as Expansion Rack CR2 ER1, ER2 - - - * - - * - - * - Can only be inserted in conjunction with the CPU. S7-400 and M7-400 Programmable Controllers Hardware and Installation A5E00069481-04 8-3 Assembling the M7-400 Dimensions of Modules in the M7-400 There are modules of 25 mm and 50 mm in width in the M7-400 system. Table 8-3 contains a summary of dimensions of the modules used in the M7-400. Table 8-3 Dimensions of Modules in the M7-400 System Slots Occupied Module Height CPU 486-3 (incl. mode switch) CPU 488-3 (incl. mode switch) Mass Storage Module MSM 478 AT Adapter Module ATM 478 219 mm (236.5 mm) 2 Expansion Module EXM 478 Depth (Depth when Fitted) 290 mm 210 mm (227.5 mm) 1 230 mm* (247.5 mm*) * The mounting depth is governed by the installed AT card and its connector. 8-4 S7-400 and M7-400 Programmable Controllers Hardware and Installation A5E00069481-04 Assembling the M7-400 8.2 Addressing the M7-400 Modules Which Modules Can Be Reached Via a Start Address? Out of the M7-400 modules, only the application modules can be addressed directly via an address. The EXM 478 expansion module, ATM 478 AT adapter module and MSM 478 mass storage module cannot be accessed via the S7-400 backplane bus. Communication between these modules and the CPU is exclusively via the ISA bus. Addressing Application Modules In contrast to the signal modules which have a default address at least in the central rack, the application modules have no default address. This means that you must configure the addresses for the application modules in STEP 7. The procedure can be found in the manual Configuring Hardware and Communication Connections with STEP 7 V 5.1. Addressing Interface Submodules Addresses of interface submodules, which are operated in a module assembly with an application module, are only visible locally for the corresponding application module. The CPU can only address the interface submodules that are installed in the same rack or an expansion rack belonging to the CPU and that can be reached via the ISA bus. The addresses of these interface submodules must be configured via STEP 7. There are no default addresses. Local access of the CPU to interface submodules allocated to an application module is not directly possible. However, the interface submodules can be accessed indirectly via programmed communication between CPU and application module (see also System Software for M7-300 and M7-400, Program Design Programming Manual). Addressing for Operation in the Segmented Rack If you assemble M7 modules in a CR2 rack with a divided I/O bus (segmented rack), the same applies to addressing of the application modules and interface submodules as in a non-segmented rack. S7-400 and M7-400 Programmable Controllers Hardware and Installation A5E00069481-04 8-5 Assembling the M7-400 8.3 Electrical Configuration Introduction This section contains the important information you need for the electrical configuration of an M7-400. You will learn: • How to calculate the current consumption of an M7-400, based on a configuration example, and how to select the required power supply module. • The additional facilities for expansion with PROFIBUS DP. All other important information for the electrical configuration applies both to the S7-400 and to the M7-400 modules and is described in Chapter 4. Choosing the Power Supply Module This section uses an example to show how you can estimate the current consumption of a rack. You should make this estimate for each rack of your M7-400 system, in order to select the appropriate power supply module for the rack. Current consumption and power dissipation of the individual modules can be found in the relevant data sheets. Calculation Example The following modules are to be fitted in a CR with 18 slots: • 1 CPU 488-3 • 1 interface submodule IF 962-VGA • 1 interface submodule IF 962-COM • 1 expansion module EXM 478 • 2 interface submodules IF 961-DIO • 1 interface submodule IF 961-AIO • 1 mass storage module MSM 478 • 1 AT adapter module ATM 478 • 1 short AT module (LAN) • 3 analog input modules SM 431, AI 16 x 16 bits • 3 digital input modules SM 421, DI 32 x 34 VDC • 3 digital output modules SM 422, DO 32 x 34 VDC • 1 send IM 8-6 S7-400 and M7-400 Programmable Controllers Hardware and Installation A5E00069481-04 Assembling the M7-400 With the details from the individual data sheets, you can calculate Current Consumption I in this rack as follows: Table 8-4 Calculation Example for Power Supply Module Module Slots Occupied +5 VDC (Max. Current Consumption Values) I / Module I Total 4500 mA 4500 mA IF 962-VGA 600 mA 600 mA IF 962-COM 100 mA 100 mA 200 mA 200 mA IF 961-DIO 85 mA 170 mA IF 961-AIO 85 mA 85 mA CPU 488-3 EXM 478 2 1 MSM 478 1 1000 mA 1000 mA ATM 478 1 120 mA 120 mA 1400 mA 1400 mA Short AT Module (LAN) SM 431; AI 16 x 16 bits 3 700 mA 2.100 mA SM 421; DI 32 x 34 VDC 3 30 mA 90 mA SM 422; DO 32 x 34 VDC 3 200 mA 600 mA IM 460-0 1 110 mA 110 mA Total 15 10075 mA From the data in Table 8-4, you see that to cover the current consumption calculated here, you must install a power supply module PS 407 20A (for a 120/230 VAC supply) or PS 405 20A (for a 24 VDC supply) in the rack. Note If you wish to connect an expansion rack to the central rack via a send IM with current transfer, you must take into account the current consumption of this expansion rack when choosing the power supply module. S7-400 and M7-400 Programmable Controllers Hardware and Installation A5E00069481-04 8-7 Assembling the M7-400 8.4 Installing the M7-400 Introduction This section contains the important information you need for installing the M7-400. You will learn: • The sequence for installation from a checklist • Which module accessories were already provided and which ones you can order as options • How to install the DRAM memory cards of the main memory in the CPU • How to insert an interface submodule in a CPU or expansion module • How to insert a short AT card in an AT adapter module • How to fit expansion modules on a CPU • How to install a module assembly in a rack All other important information for installation applies both to S7-400 and M7-400 modules and is described in Chapter 5. 8-8 S7-400 and M7-400 Programmable Controllers Hardware and Installation A5E00069481-04 Assembling the M7-400 8.4.1 Checklist for Installation Checklist for Installation This section explains the procedure in stages for installing the M7-400. You should proceed as follows: 1. Install the rack and remove the dummy plates from the required slots (Chapter 5). 2. Remove, if applicable, the cover of the module and refit it after wiring. 3. Check that the power supply on the rack is correctly rated (page 8-7). 4. Insert the power supply module in the first slot of the rack (Chapter 5). 5. Fit the required MEM 478 memory cards in the CPU (page 8-11). 6. Insert the interface submodules in the card slots of the CPU or EXM 478 expansion modules (page 8-13). 7. If you intend to use an ATM 478 AT adapter module, you must fit the short AT card in the ATM 478 before the next step (page 8-15). 8. If applicable, assemble the CPU with expansion modules to create a complete module assembly outside the rack (page 8-17). 9. Attach the preassembled module(s) or module assembly to the rack and screw it on (page 8-24). 10.Insert the memory card, if applicable, in the memory card slot of the CPU (page 8-28). 11. Fit and wire the required S7-400 modules (Chapters 5 and 6). 12.Mark the installed modules with a slot number (Chapter 5). S7-400 and M7-400 Programmable Controllers Hardware and Installation A5E00069481-04 8-9 Assembling the M7-400 8.4.2 Module Accessories Introduction The module packaging contains the basic accessories you need to install the M7-400 modules in the rack. There are optional accessories for some modules. Accessories The accessories for the modules are listed and briefly explained in Table 8-5. A list of spare parts for the SIMATIC M7-400 can be found in the Reference Manual, Chapter 11. Table 8-5 Accessories for Modules and Racks Module CPUs Accessories Provided (Basic Accessories) Accessories not Provided Purpose of the Accessory 2 keys - The key serves to actuate the mode switch for the CPU. - Memory card For storing the user program with power removed from the CPU. - MEM 478 Main memory size is defined by inserting the MEM 478 (DRAM or flash EPROM) memory cards. Expansion Modules (EXM 478) 2 connecting clips 2 module covers (fitted) 12 module covers To cover unused card slots; two module covers are already fitted with screws All Expansion Modules 2 connecting clips - 8-10 per expansion unit. To secure the modules in a module assembly, top and bottom. S7-400 and M7-400 Programmable Controllers Hardware and Installation A5E00069481-04 Assembling the M7-400 8.4.3 Fitting Memory Cards in the CPU Introduction For the CPUs of the M7-400 automation computer, the MEM 478 memory cards are supplied separately. Before the module with its expansion modules is inserted in the rack, the memory cards must be fitted. Note With a CPU, a DRAM memory card of the same size must be inserted at Slot 1 and Slot 2. Only use the memory cards intended for the particular CPU. ! Warning The modules can be damaged. Failure to observe ESD guidelines can result in damage to both the CPU and memory cards. Observe the ESD guidelines when fitting memory cards. Fitting Memory Cards in the CPU To install a memory submodule in a slot on the central rack, proceed as follows: 1. Remove the cover from the upper left side of the CPU by loosening the three screws. 2. Insert the first DRAM memory card of the required size at an angle of about 45° into Slot 1 as far as it will go (see Figure 8-1). 3. Press the protruding side of the DRAM memory card toward the PCB until the memory card engages with the two lateral retaining springs (see Figure 8-1). 4. Insert the second DRAM memory card of the same size in the same way into Slot 2 (see Figure 8-1). 5. Fit the cover on the upper left side of the CPU by securing it with three screws. Note The connectors to accept the memory cards are coded (see Figure 8-2). Do not apply force when fitting the memory cards. S7-400 and M7-400 Programmable Controllers Hardware and Installation A5E00069481-04 8-11 Assembling the M7-400 3 4 4 2 Slot 1 Slot 2 Figure 8-1 Fitting Memory Cards in the CPUs 3.3 V DRAM memory card (for main memory) Recess Slots 1 and 2 Figure 8-2 8-12 3.3 V Memory Card S7-400 and M7-400 Programmable Controllers Hardware and Installation A5E00069481-04 Assembling the M7-400 8.4.4 Installing Interface Submodules Installing Interface Submodules The following modules have card slots to accept interface submodules: • CPU 486-3, two card slots • CPU 488-3, two card slots • EXM 478 expansion module, three card slots. ! ! Warning The modules can be damaged. When inserting or removing interface submodules with power applied, the CPU and expansion modules as well as the interface submodules can be damaged. Never insert or remove interface submodules with power applied. Always switch off the power supply before inserting or removing interface submodules. Caution Damage to persons and property may occur. Interface submodules contain electonically-sensitve components that may be damaged if they are touched. The surface temperatures on the components can reach up to 70o C and there is a risk of burning. For this reason, you should always hold the interface submodules on the longest sides of the front panel. Observe the ESD guidelines when installing the interface submodules. To fit an interface submodule in a card slot of the CPU or expansion module, follow the steps outlined below: 1. Hold the interface submodule on the long sides of the front plate. 2. Insert the PCB end of the interface submodule in the lower and upper guides of the card slot, as shown in Figure 8-3. 3. Slowly push the interface submodule into the slot until the front plate rests on the frame of the card slot. 4. Secure the front plate with the two fitted, captive M2.5 x 10 slot-head screws on the left frame of the card slot. S7-400 and M7-400 Programmable Controllers Hardware and Installation A5E00069481-04 8-13 Assembling the M7-400 Guides Frame of card slot with mounting hole EXM 478 Figure 8-3 Inserting an Interface Submodule in an Expansion Module Covering Unused Submodule Slots On delivery, only the upper submodule slot is open in the central and expansion racks. All other card slots are covered. The cover is secured to the frame of the card slot with screws. Loosen the screws and remove the cover to insert more than one interface submodule in an expansion module. 8-14 S7-400 and M7-400 Programmable Controllers Hardware and Installation A5E00069481-04 Assembling the M7-400 8.4.5 Fitting the Short AT Card Installing the AT Card A short AT card can be used with the AT adapter module ATM 478. Only short AT cards with a slot in the mounting bracket can be fitted (see also the chapter on M7-400 expansion in the Reference Manual). To assemble an AT card in an AT adapter module ATM 478, proceed as follows: ! Warning The modules can be damaged. When inserting or removing the AT card with power applied and without observing the ESD guidelines, the CPU, AT adapter modules and AT card can be damaged. Never insert or remove the AT card with power applied. Always switch off the power supply before inserting or removing the AT card. Observe the ESD guidelines. 1. If the ATM 478 AT adapter module is installed in the rack, you must remove the module assembly and remove the ATM 478 AT adapter module from this assembly. 2. Remove the cover from the upper left side of the ATM 478 (see Figure 8-4). 3. Remove the mounting bracket for the AT module from the upper front of the ATM 478 (see Figure 8-4). 4. Insert the AT card into the slot from the front (see Figure 8-4). 5. Press the AT card through the side opening and at the front downward into the ISA bus connector until it engages. Ensure that the support plate of the AT card slides under the metal spring on the front of the ATM 478 (see Figure 8-4). 6. Fit the mounting bracket over the angled part of the support plate of the AT card and screw it onto the support plate of the AT card and to the ATM 478. 7. Fit the cover on the upper left side of the ATM 478. S7-400 and M7-400 Programmable Controllers Hardware and Installation A5E00069481-04 8-15 Assembling the M7-400 5 6 5 2 7 3 5 4 Figure 8-4 8-16 Fitting an AT Card in the ATM 478 AT Adapter Module S7-400 and M7-400 Programmable Controllers Hardware and Installation A5E00069481-04 Assembling the M7-400 8.4.6 Assembling Expansion Modules on a Central Rack Introduction Before installing the M7-400 in the rack, you must preassemble the programmable modules with all the required expansion modules. This section contains the information you need to create a module assembly using a central rack with expansion modules such as the EXM 478 expansion module, ATM 478 AT adapter module, and MSM 478 mass storage module. Order of Assembly Proceed in the following order when assembling: 1. Remove the connector and socket covers from modules. 2. Remove the connecting clips fitted at the top and bottom of the module. 3. Remove module covers. 4. Position the modules on a level surface and plug them into each other. 5. Use connecting clips top and bottom to interconnect the modules. The individual stages for installing an expansion assembly are explained below. S7-400 and M7-400 Programmable Controllers Hardware and Installation A5E00069481-04 8-17 Assembling the M7-400 Removing the Connector and Socket Covers On the right-hand side of a central rack, there is a 120-pin socket for connecting expansion racks to the ISA bus (see Figure 8-5). This socket is protected by a screw-mounted metal cover. The EXM 478, ATM 478, and MSM 478 expansion modules contain • The matching plug on the left side, • An expansion socket on the right side so that other expansion modules can be plugged in. Remove the transport protection from the expansion plugs and unscrew the metal covers from the module expansion sockets which are to accept other expansion modules. e. g. CPU 488-3 e. g. EXM 478 Expansion plug Expansion socket Figure 8-5 8-18 Locations of the Expansion Socket and Plug S7-400 and M7-400 Programmable Controllers Hardware and Installation A5E00069481-04 Assembling the M7-400 Removing the Connecting Clips Connecting clips are fitted at the top and bottom of expansion modules. Pull these off upward and downward respectively. Figure 8-6 EXM 478 Expansion Module Fitted with Connecting Clips S7-400 and M7-400 Programmable Controllers Hardware and Installation A5E00069481-04 8-19 Assembling the M7-400 Removing the Cover For modules with a cover (for example, CPUs), remove these before fitting the modules together. Proceed as follows: 1. Press the locking lever down (1). 2. Swing the cover forward and off (2). Figure 8-7 shows how to remove the cover. (1) (2) Figure 8-7 8-20 Removing the Cover S7-400 and M7-400 Programmable Controllers Hardware and Installation A5E00069481-04 Assembling the M7-400 Interconnecting Modules Take the CPU and first expansion module, position them on a level surface and press them carefully together so that all pins of the expansion module plug are precisely inserted into the CPU socket. Then plug the other modules successively into the assembled group (see Figure 8-8). e. g. CPU 488-3 e. g. EXM 478 e. g. MSM 478 e. g. ATM 478 1. 2. 3. Level surface Figure 8-8 Interconnecting a CPU and Expansion Modules Note Note that there are rules on the number of connectable expansion modules and on the sequence of the modules following the CPU. These rules are listed in the Reference Manual under the chapter on M7-400 expansion. S7-400 and M7-400 Programmable Controllers Hardware and Installation A5E00069481-04 8-21 Assembling the M7-400 This completes all the expansion on the ISA bus of the CPU (see Figure 8-9). Level surface Figure 8-9 ! Module Assembly Comprising CPU and Expansion Modules Warning The connector pins can be damaged. If the modules are not exactly lined up for interconnecting, the pins can be damaged. Line up the modules precisely when interconnecting. Latching Modules with Connecting Terminals Latch the interconnected modules with the two enclosed connecting terminals (Figure 8-10), in order to protect them against being shifted or becoming skewed. To do this, proceed as follows: 1. As shown in Figure 8-11, slide a connecting clip from above between the two modules to be secured until the bent clip ends touch the housing cover of the modules. 2. Align the connecting clips so that each bent clip end is situated over a grid hole of the module housing cover. Here, the first bent terminal end should be over the fifth notch space, counting from the back of the modules. 8-22 S7-400 and M7-400 Programmable Controllers Hardware and Installation A5E00069481-04 Assembling the M7-400 3. Press the connecting clip on its two 90° ends downward until it engages. Figure 8-11 shows a connecting clip in its final position. 4. Carry out steps 1 to 3 similarly on the bottom of the modules to be secured. Clip end bent 90° Bent clip end Figure 8-10 Connecting Clip Fifth grid hole Figure 8-11 Securing the Modules with Connecting Clips (Schematic Diagram) S7-400 and M7-400 Programmable Controllers Hardware and Installation A5E00069481-04 8-23 Assembling the M7-400 8.4.7 Installing a Module Assembly in the Rack Introduction The installation of an M7-400 CPU together with modules from the S7-400 series in a rack is carried out as described in Chapter 5. If the M7-400 central rack has expansion racks, this must be preassembled with its expansion racks into a module group (see also Section 8.4.6 ”Assembling Expansion Modules on a Central Rack”). The installation of such a module group in the rack is the subject of this section. Tool The tool needed to install the module assembly is a cylindrical screwdriver with 3.5 mm blade width. Installation Sequence To install modules in a rack, follow the steps outlined below: 1. Remove the dummy plates from the slots of the rack at which you wish to insert the module assembly. Grasp the dummy plate at the points marked and pull it forward and off. 2. Disconnect the power supply module from the supply. 3. Attach the module assembly and swing it downward (see Figure 8-12). 4. Screw on the modules of the module assembly top and bottom with a torque of 0.8 to 1.1 Nm (see Figure 8-13). 5. Fit the remaining modules. 6. Insert the key of the CPU mode switch when you have fitted all modules (see Figure 8-14). 7. Refit the module covers after wiring. Described in the following section are the most important stages in installing a module assembly. Removal of the modules is described in Section 8.8 from page 8-46 onward. 8-24 S7-400 and M7-400 Programmable Controllers Hardware and Installation A5E00069481-04 Assembling the M7-400 Attaching the Module Assembly Attach the module assembly (1) and swing it downwards (2). Figure 8-12 shows how to attach a module assembly onto a rack and swing it into position. Note Do not push the module assembly down whilst swinging it into position. 1 2 Figure 8-12 Attaching a Module Assembly Comprising CPU and Expansion Modules and Swinging it into Position S7-400 and M7-400 Programmable Controllers Hardware and Installation A5E00069481-04 8-25 Assembling the M7-400 Screwing On the Modules Figure 8-13 shows how to screw on the modules. Tightening torque 0.8 to 1.1 Nm Figure 8-13 8-26 Screwing the Modules On S7-400 and M7-400 Programmable Controllers Hardware and Installation A5E00069481-04 Assembling the M7-400 Inserting the Mode Selector Switch Figure 8-14 shows how to insert the key in the CPU at the STOP position of the switch. You can remove the key at the STOP or RUN settings. Figure 8-14 Inserting the Key in the CPU S7-400 and M7-400 Programmable Controllers Hardware and Installation A5E00069481-04 8-27 Assembling the M7-400 8.4.8 Inserting/Removing a Memory Card Purpose of the Memory Card You can do the following with a memory card: • Store the operating system, user programs, and data (similarly to using a floppy disk), • Transport the programs and data stored on the memory card, • Retain the programs and data, even during Power Off. Inserting/Removing the Memory Card A memory card should only be inserted or removed when no access to the memory card is taking place, meaning the “SD” indicator on the CPU must be OFF. Figure 8-15 shows how to insert a memory card in a CPU. ! Warning Data can be lost by inserting and removing the memory card. If a write operation onto the memory card is taking place during insertion or removal of the card, data consistency cannot be guaranteed. If you are not sure whether write operations onto the memory card are taking place, only change it with power removed. Figure 8-15 8-28 Inserting a Memory Card in a CPU S7-400 and M7-400 Programmable Controllers Hardware and Installation A5E00069481-04 Assembling the M7-400 8.5 Connecting a Module Assembly Introduction The individual modules and interface submodules of a module assembly can be connected via commercially-available cables and connectors. Requirements The connector housings and cables must meet the following requirements: • Connector housing The height of the connector housing should not be more than 43 mm, the width up to 19 mm. It must have a 45° side outlet for the cable. These requirements are met by the connector housings of cables and lines listed in the chapter on spare parts and accessories in the Reference Manual. • Cables You should only use cables that are shielded using a braided screen. The shield must be connected to the housing ground with low resistance. Components to be Connected A module assembly can comprise the following components to be connected: • CPU with MPI and interface submodules • EXM expansion module with interface submodules • ATM AT adapter module with short AT card • Mass storage module with parallel interface Connecting the CPU Connecting the MPI for particular applications is explained in Chapter 5, “Networking.” Connecting Interface Submodules (IFs) The interface submodules are equipped with subminiature D female or male connectors. To connect devices to the interface submodules, you must fabricate cables with the appropriate mating connectors or obtain preassembled, commercially available cables. The pin assignments of the subminiature D connectors can be found in the description of the relevant interface submodule in the chapter on interface submodules of the Reference Manual. S7-400 and M7-400 Programmable Controllers Hardware and Installation A5E00069481-04 8-29 Assembling the M7-400 Connecting Mass Storage Modules (MSM) Pin assignments of the parallel interface of the MSM 478 mass storage module can be found in the chapter on M7-400 expansion of the Reference Manual. Connecting the Short AT Card The interface pin assignments of short AT cards which you intend to use can be found in the corresponding documentation. 8.6 Assembling an MPI Subnet or PROFIBUS-DP Subnet 2 Subnets With the M7-400, you can • Assemble an MPI subnet via the MPI; • Assemble a PROFIBUS-DP subnet with an M7-400 master. Chapter 7 explains how to assemble one of these subnets and what you must take into account. Note Relating to the M7-400 To be able to connect an M7-400 to a PROFIBUS-DP subnet as the master, it is necessary to plug an IF 964-DP interface submodule either directly into the CPU 486-3/CPU 488-3, or into an EXM 478 expansion module belonging to the CPU. Example of Operation in 2 Subnets Shown in Figure 8-16 is an example of a configuration with M7-400 CPU, integrated in an MPI subnet, and simultaneously acting as DP master in a PROFIBUS-DP subnet. 8-30 S7-400 and M7-400 Programmable Controllers Hardware and Installation A5E00069481-04 Assembling the M7-400 Programming device* S5-95U M7-400 S5-95U M7-400 S5-95U M7-400 with CPU as DP master M7-400 ET 200M ET 200M OP 25 M7-400 RS 485 repeater ET 200B ET 200B ET 200B ET 200B OP 25 MPI subnet PROFIBUS-DP subnet * Only connected via spur line for startup/maintenance Terminating resistance switched on Figure 8-16 Example of a Configuration with the CPU in an MPI Subnet and PROFIBUS-DP Subnet S7-400 and M7-400 Programmable Controllers Hardware and Installation A5E00069481-04 8-31 Assembling the M7-400 8.7 Preparing for Operation Contents Listed briefly in this section is information on the steps required for preparing an M7-400 for operation: You will learn the following: • A checklist with the order in which preparations must be made • How to connect operator panels and I/O devices • How to connect a programming device via the COM interface • How to connect a programming device via the MPI to a single M7-400, to two or more nodes in a network or to ungrounded nodes • How to check the status and error display by switching on for the first time All other information which is important for preparing for operation applies (except for the reset) both to the S7-400 and M7-400 modules and is described in Chapter 8. Checklist for Preparing for Operation: You should proceed as follows: 1. Ensure that the power supply is switched off. 2. Insert the backup batteries in the power supply module (see Chapter 8). 3. Set the key of the mode switch to STOP. 4. Connect the required operator panels and I/O devices (see page 8-33). 5. Switch on the I/O devices. 6. Switch on the power supply of the rack. 7. Set the key of the mode switch to RUN. 8. Check that the status and error indicators are correct (see page 8-45). Steps for Complete Commissioning Carry out the following steps in order to completely commission an M7-400 device: 1. Configure your M7-400 with the S7 software. 2. Transfer the operating system; if applicable, execute BIOS setup. 3. Load the user software from the programming device/PC to the CPU, test it, and start it. A description of the BIOS setup for your CPU can be found in the chapter on CPUs for the M7-400 in the Reference Manual. For other activities, refer to the M7-SYS User Manual. 8-32 S7-400 and M7-400 Programmable Controllers Hardware and Installation A5E00069481-04 Assembling the M7-400 8.7.1 Connecting the Operator Panels and I/O Devices Introduction The operator panels and I/O devices which can be connected to your M7-400 depend on its configuration. Extensive information on all connection options of the M7-400 can be found in the appropriate sections of the technical data. To prepare for operation, you need either a PC/programming device or the M7-400 configuration with monitor, keyboard, expansion module, and mass storage module as well as interface submodules. For reasons of noise immunity of the entire system, we recommend that you use the standard connecting cables available from Siemens for connecting the I/O devices. Note If the monitor cable and connecting cables between the CPU and the keyboard or printer, etc. are laid parallel to high-voltage lines, screen interference and interruptions in the M7-400 complete system may occur. You should not lay the monitor cable and connecting cables between the M7-400 and the keyboard or printer, etc. parallel to high-voltage lines. If necessary, install a separate cable rack with a minimum clearance of 50 cm from the power cables. Connecting the VGA Monitor Locally To be able to connect a VGA monitor locally to the central rack, you must insert an interface submodule IF 962-VGA in the submodule slot of the central rack or in one of the corresponding expansion racks. Connect the monitor to the 15-pin high-density subminiature D female connector of the IF 962-VGA interface submodule (up to 2.5 m). Connecting the Keyboard Connect the keyboard to the 6-pin mini-round socket of the interface submodule IF 962-VGA. S7-400 and M7-400 Programmable Controllers Hardware and Installation A5E00069481-04 8-33 Assembling the M7-400 Notes for Setting Up Monitors Please observe the following notes when setting up monitors: • Ensure that the clearance between two monitors in asynchronous operation is at least 15 cm, otherwise video interference may occur. Exception: Monitors with a mu-metal shield. • Provide sufficient space between the monitor and extraneous magnetic sources. • Do not set up the monitors in steel shelving or on steel benches. Magnetization of the surrounding sheet steel can result in false colors or video shifting. • Avoid setting up monitors in the vicinity of transformers, radio transmitters, magnets, and power cables. • The effects of extraneous magnetic fields can be attenuated by using a mu-metal shield. Special Conditions when Using Office Monitors Additionally, you should observe the following notes when setting up office monitors: • Office monitors with an internal metallized plastic housing should not be used in an environment subject to electromagnetic interference, because the internal metal surface cannot subsequently be connected to the external ground bus. The required isolation of the electronic ground from the housing ground of the monitors - essential for an environment subject to electromagnetic interference is not possible with most office monitors. • You can only use such monitors in conjunction with conventional VGA cables. For this reason, only restricted connection to the M7-400 is possible, because you can only cover short distances with these cables. Connecting Printers You can connect printers with a serial or parallel port. • A printer with a parallel port should be connected with the appropriate connecting cable to the IF 962-LPT interface submodule. • A printer with a serial port should be connected with the appropriate connecting cable to the IF 962-COM interface submodule. We recommend you use a Siemens printer. Note Only a connecting cable with the shield grounded at both ends should be used between an M7-400 component and a printer. 8-34 S7-400 and M7-400 Programmable Controllers Hardware and Installation A5E00069481-04 Assembling the M7-400 Connecting a Mouse Connect the mouse to the IF 962-COM interface submodule. Maximum Cable Length The following table shows you where the maximum cable lengths of the connecting cables of the individual devices are. A requirement is a hardware configuration with interference immunity. Table 8-6 Maximum Cable Lengths for Operator Panels and I/O Devices Device Maximum Length Keyboard • via IF 962-VGA 2.5 m Monitor • via IF 962-VGA 2.5 m Printer • via IF 962-LPT parallel port S7-400 and M7-400 Programmable Controllers Hardware and Installation A5E00069481-04 3.0 m 8-35 Assembling the M7-400 8.7.2 Connecting a Programming Device (PG) to the COM Interface Introduction To operate your M7-400 without monitor and keyboard, you need a programming device or PC for initial settings in the BIOS Setup. This section explains how to connect a programming device via the COM1 interface of an IF 962-COM interface submodule to your M7-400. However, it is also possible to connect a programming device via the MPI of the M7-400 CPU. In this case, please refer to Sections 8.7.3 to 8.7.5. Connecting the M7-400 to a Programming Device Connect the 9-pin subminiature D connector of the COM1 interface of the interface submodule fitted in your CPU to the connector of a free COM interface of your programming device. The following types of connection are possible: • Connection without using control cables • Connection using control cables Connecting with Control Cables When the interface control cables are used for data traffic via the COM1 interface, you need a null modem cable. This may be necessary when, for example, you enter a console redirection in the AUTOEXEC.BAT of your CPU: : CTTY COM1 : If the free COM interface of your programming device has a 9-pin subminiature D connector, you can use Table 8-7 below for the pin assignments of the null modem cable. This cable can also be obtained preassembled (see V.24 cables in the chapter on spare parts and accessories of the Reference Manual). Table 8-7 8-36 Null Modem Cable for Connecting a CPU via IF to the COM Interface of a Programming Device with 9-pin Sub. D Male Connector Signal Pin E1 / GND U M5 / DCD Connection Pin Signal connected to U E1 / GND 1 - 1 M5 / DCD D2 / RxD 2 connected to 3 D1 / TxD D1 / TxD 3 connected to 2 D2 / RxD S7-400 and M7-400 Programmable Controllers Hardware and Installation A5E00069481-04 Assembling the M7-400 Table 8-7 Null Modem Cable for Connecting a CPU via IF to the COM Interface of a Programming Device with 9-pin Sub. D Male Connector, continued Signal Pin S1 / DTR 4 E2 / GND Pin Signal connected to 6 M1 / DSR 5 connected to 5 E2 / GND M1 / DSR 6 connected to 4 S1 / DTR S2 / RTS 7 connected to 8 M2 / CTS M2 / CTS 8 connected to 7 S2 / RTS M3 / RI 9 - 9 M3 / RI 9-pin sub. D female conn. (COM1 for IF) Connection Pin U = housing (shield) Length: 10 m max. 9-pin sub. D female conn. (COMx for programming device) If the free COM interface of your programming device has a 25-pin subminiature D connector, you can use Table 8-8 below for the pin assignments of the null modem cable. Table 8-8 Null Modem Cable for Connecting a CPU via IF to the COM Interface of a Programming Device with 25-pin Sub. D Male Connector Signal Pin Connection Pin Signal E1 / GND U connected to U E1 / GND M5 / DCD 1 - 8 M5 / DCD D2 / RxD 2 connected to 2 D2 / RxD D1 / TxD 3 connected to 3 D1 / TxD S1 / DTR 4 connected to 6 M1 / DSR E2 / GND 5 connected to 7 E2 / GND M1 / DSR 6 connected to 20 S1 / DTR S2 / RTS 7 connected to 5 M5 / CTS M2 / CTS 8 connected to 4 S2 / RTS M3 / RI 9 - 22 M3 / RI 9-pin sub. D female conn. (COM1 for IF) Pin U = housing (shield) Length: 10 m max. S7-400 and M7-400 Programmable Controllers Hardware and Installation A5E00069481-04 25-pin sub. D male conn. (COMx for programming device) 8-37 Assembling the M7-400 Connecting without Control Cables If the data traffic via the COM interface is to be controlled exclusively via the data lines, a connecting cable as described below is sufficient for connecting your CPU to a programming device. If the free COM interface of your programming device has a 9-pin subminiature D male connector, you can use Table 8-9 below for the pin assignments of the connecting cable. Table 8-9 Pin Assignments of the Cable for Connecting a CPU via IF to the COM Interface of a Programming Device with 9-pin Sub. D Male Connector Pin Signal Connection Pin Signal E1 / GND U U E1 / GND D2 / RxD 2 2 D2 / RxD D1 / TxD 3 3 D1 / TxD E2 / GND 5 5 E2 / GND 9-pin sub. D female conn. Pin U = housing (shield) (COM1 for IF) Length: 10 m max. 9-pin sub. D female conn. (COMx for programming device) If the free COM interface of your programming device has a 25-pin subminiature D female connector, you can use Table 8-10 below for the pin assignments of the connecting cable. Table 8-10 Pin Assignments of the Cable for Connecting a CPU via IF to the COM Interface of a Programming Device with 25-pin Sub. D Female Connector Signal Pin Pin Signal E1 / GND U U E1 / GND D2 / RxD 2 2 D1 / TxD D1 / TxD 3 3 D2 / RxD E2 / GND 5 7 E2 / GND 9-pin sub. D female conn. (COM1 for IF) 8-38 Connection Pin U = housing (shield) Length: 10 m max. 25-pin sub. D male conn. (COMx for PG) S7-400 and M7-400 Programmable Controllers Hardware and Installation A5E00069481-04 Assembling the M7-400 8.7.3 Connecting a Programming Device (PG) to the M7-400 Connecting a Programming Device (PG) to the M7-400 You can connect the programming device via a preassembled programming device cable to the MPI of the CPU. Alternatively, you can fabricate the connecting cable with the PROFIBUS-DP bus cable and bus connectors (see Chapter 5). Shown in Figure 8-17 are the components for connecting a programming device to the M7-400. M7-400 PG cable Programming device Figure 8-17 Connecting a Programming Device to the M7-400 S7-400 and M7-400 Programmable Controllers Hardware and Installation A5E00069481-04 8-39 Assembling the M7-400 8.7.4 Connecting a Programming Device (PG) to Two or More Nodes Two Arrangements To connect a programming device to two or more nodes, you must distinguish between two arrangements: • A programming device permanently installed in the MPI subnet • A programming device connected for startup and maintenance Depending on this, you connect the programming device to the other nodes as follows (see also Chapter 5). Arrangement 8-40 Connection Programming device permanently installed in the network Directly incorporated in the MPI subnet Programming device connected for startup or maintenance Programming device connected via spur cable to a node S7-400 and M7-400 Programmable Controllers Hardware and Installation A5E00069481-04 Assembling the M7-400 Permanently-Installed Programming Device in the MPI Subnet The programming device permanently installed in the MPI subnet should be connected directly via bus connectors to the other nodes of the MPI subnet, according to the rules in Chapter 5. Figure 8-18 shows an M7-400 subnet with two M7-400s. They are interconnected via bus connectors. M7-400 Programming device PROFIBUS-DP bus cable M7-400 PROFIBUS-DP bus cable Figure 8-18 Connecting a Programming Device to Two or More M7-400s Connecting a Programming Device for Servicing If no stationary programming device is present, we recommend the following: To connect a programming device to an MPI subnet with “unknown” node addresses for servicing, set the following address on the service programming device: • MPI address: 0 • Highest MPI address: 126. Then determine, via M7 Configuration, the highest MPI address in the MPI subnet and adjust the highest MPI address in the programming device to that of the MPI subnet. S7-400 and M7-400 Programmable Controllers Hardware and Installation A5E00069481-04 8-41 Assembling the M7-400 Programming Device for Commissioning or Servicing For commissioning or servicing purposes, connect the programming device via a spur line to a node on the MPI subnet. The bus connector of this node must have a programming device socket for this (see also Chapter 5). Figure 8-19 shows a network with two M7-400s, to which a programming device is connected. Programmin g device M7-400 PG cable = spur line M7-400 PROFIBUS-DP bus cable Figure 8-19 8-42 Connecting a Programming Device to an M7-400 Subnet S7-400 and M7-400 Programmable Controllers Hardware and Installation A5E00069481-04 Assembling the M7-400 8.7.5 Connecting a Programming Device (PG) to Ungrounded Nodes of an MPI Subnet Connecting a Programming Device to Ungrounded Nodes If you configure the nodes of an MPI subnet or an M7-400 as ungrounded devices (see Chapter 4), you should only connect an ungrounded programming device to the MPI subnet or M7-400 device. Connecting a Grounded Programming Device to the MPI You want to operate the nodes as ungrounded devices (see Chapter 4). However, the MPI at the programming device is grounded. To be able to operate the nodes without grounding, you must connect an RS 485 repeater between the nodes and programming device. The ungrounded nodes must be connected to bus segment 2 if the programming device is connected to bus segment 1 (terminals A1 B1) or the programming device/OP interface (see Reference Manual, Chapter 10). Figure 8-20 shows the RS 485 repeater as an interface between a grounded and an ungrounded node of an MPI subnet. Bus Segment 1 Grounded signals M7-400 Programming device Bus Segment 2 Grounded signals Figure 8-20 Ungrounded Operation of the M7-400 Network S7-400 and M7-400 Programmable Controllers Hardware and Installation A5E00069481-04 8-43 Assembling the M7-400 8.7.6 Starting Up a PROFIBUS-DP Subnet This Chapter This section contains the procedures for starting up a PROFIBUS-DP subnet with a CPU 486-3 or CPU 488-3 as the DP master. Requirements Before you can start up the PROFIBUS-DP subnet, the following requirements must be met: • The PROFIBUS-DP subnet has been set up (see Chapter 7). • The M7 system software is installed (see M7-SYS User Manual). • The central rack is fitted with an interface submodule IF 964-DP. The interface submodule is connected to the PROFIBUS-DP subnet. • With STEP 7, you have configured the PROFIBUS-DP subnet and assigned a PROFIBUS address and the address area to all nodes (see the manual Configuring Hardware and Communication Connections STEP 7 V 5.2). Note that for some DP slaves, address switches must also be set (see the reference manuals for the particular DP slaves). Starting Up To start up the PROFIBUS-DP subnet, follow the steps outlined below: 1. Use the programming device to load the configuration of the PROFIBUS-DP subnet (preset configuration) created with STEP 7 into the CPU. This procedure is described in the manual Configuring Hardware and Communication Connections STEP 7 V 5.2. 2. Switch on all DP slaves. 3. Switch the CPU from STOP to RUN. 8-44 S7-400 and M7-400 Programmable Controllers Hardware and Installation A5E00069481-04 Assembling the M7-400 Behavior of the CPU During Startup During startup, the CPU compares the preset and actual configurations. You set the duration of the test with STEP 7 in the “Startup” parameter block with the “module time limits” parameter. If the preset configuration = actual configuration, the CPU goes to RUN. If the preset configuration actual configuration, the reaction of the CPU depends on the setting of the parameter for “Startup if preset configuration actual configuration”: Starting if Preset Actual Config. = No Starting if Preset Actual Config. = Yes (Default) CPU goes into RUN CPU remains in STOP. In this case, check whether all slaves are switched on or display the content of the diagnostic buffer (see Configuring Hardware and Communication Connections with STEP 7 V 5.2). To set the parameters in the “Startup” parameter block, see the M7-SYS User Manual, the Configuring Hardware and Communication Connections with STEP 7 V 5.2 manual, and the online help of STEP 7. 8.7.7 Checking the Status and Error Indicators Switching On an M7-400 for the First Time When the supply voltage is switched on, all status and error indicators of the CPU of your M7-400 light up briefly. If the mode switch is set to STOP, the STOP status/error indicator lights up after switching on. Otherwise the module boots up. In the event of a fault, the INTF indicator lights up. If this is not the case with your modules, please consult your Siemens contact at a maintenance and repair center or call the SIMATIC hotline. This completes preparations for operation as covered in this manual. The remaining stages, such as installing the operating system and the user program, can be found in the “M7-SYS” User Manual. S7-400 and M7-400 Programmable Controllers Hardware and Installation A5E00069481-04 8-45 Assembling the M7-400 8.8 Replacing Modules and Submodules/Cards Contents This section explains • How to replace interface submodules, • How to replace CPUs or expansion modules of a module assembly, • How to replace memory cards, • How to replace a short AT card. All other important information for replacing modules applies both to the S7-400 and the M7-400 modules and is described in Chapter 7. Tool To replace modules and submodules/cards, you need a cylindrical screwdriver with 3.5 mm blade width. 8-46 S7-400 and M7-400 Programmable Controllers Hardware and Installation A5E00069481-04 Assembling the M7-400 8.8.1 Replacing an Interface Module Removing an Interface Submodule You can replace an interface submodule without needing to remove the corresponding CPU or expansion module from the rack. Proceed according to the following sequence: ! Warning The modules can be damaged. When inserting or removing interface submodules with power applied, the CPU and expansion modules as well as the interface submodules can be damaged. Never insert or remove interface submodules with power applied. Before inserting or removing interface submodules, always disconnect the power supply from the AC supply. Observe the ESD guidelines. ! Caution There is a risk of personal injury and damage to property. Interface modules contain electrostatically sensitive components that may be irreparably damaged if touched. The surface temperature of the components can reach as high as 70° C, which means there is a risk of you burning yourself. You should therefore always hold the interface modules by the long sides of the front plate. Always adhere to the guidelines for electrostatically sensitive components (ESD) when installing the interface modules. 1. Switch the CPU and all function modules in your M7-400 to STOP with the mode switch. 2. Switch off the load voltage for the modules. 3. Disconnect the automation computer from the supply. 4. Loosen the screws of the subminiature D connectors and disconnect all connectors. 5. Loosen the two captive slot-head screws which secure the front plate of the interface submodule to the left frame of the card slot, until the front plate can be pulled out about 6 mm. 6. Carefully withdraw the interface submodule from the guide of the card slot (see Figure 8-21). S7-400 and M7-400 Programmable Controllers Hardware and Installation A5E00069481-04 8-47 Assembling the M7-400 ! Warning The interface submodules can be damaged. If you replace two or more interface submodules simultaneously and interchange their front connectors, the interface submodules can be damaged. Mark the front connectors so that they are assigned to the corresponding interface submodules. Guides Frame of card slot with mounting hole EXM 478 Figure 8-21 Removing an Interface Submodule from the Card Slot of an Expansion Module Fitting an Interface Submodule Fit the new interface submodule in the reverse order. Further information can be found in Section 8.4.4, “Installing Interface Submodules” from page 8-13. 8-48 S7-400 and M7-400 Programmable Controllers Hardware and Installation A5E00069481-04 Assembling the M7-400 8.8.2 Replacing the CPU or Expansion Modules of a Module Assembly Removing a Module To remove a module from a module assembly, follow the steps outlined below: 1. Switch the CPU and all function modules in your M7-400 to STOP with the mode switch. 2. Switch off the load voltage for the modules. 3. Disconnect the automation computer from the supply. 4. Remove the covers from the modules, if applicable. Figure 8-22 shows how to remove the cover. – Press the locking lever down (1). – Swing the cover forward and off (2). (1) (2) Figure 8-22 Removing the Cover 5. Disconnect the interface connections at the module assembly, including all interface submodules. S7-400 and M7-400 Programmable Controllers Hardware and Installation A5E00069481-04 8-49 Assembling the M7-400 6. Loosen the mounting screws of all modules in the module assembly. Figure 8-23 shows the locations of mounting screws on a module. Figure 8-23 Unscrewing Modules 7. Ensure that all the mounting screws of the module assembly are undone. 8. Swing the module assembly forward out of the bus connectors and lift it upward and out of the guides of the rack (Figure 8-24). 8-50 S7-400 and M7-400 Programmable Controllers Hardware and Installation A5E00069481-04 Assembling the M7-400 2 1 Figure 8-24 Swinging a Module Assembly Out and Lifting it Up and Out 9. Place the module assembly on a level surface (Figure 8-25). Level surface Figure 8-25 Module Assembly Comprising CPU and Expansion Modules S7-400 and M7-400 Programmable Controllers Hardware and Installation A5E00069481-04 8-51 Assembling the M7-400 10.Remove the connecting clips, top and bottom, from the module to be replaced (as shown in Figure 8-26). Figure 8-26 Removing the Connecting Clips from the Module to be Replaced 11. Carefully withdraw the adjacent modules from the module to be replaced. The modules to be separated should be held above the bus connector and pulled apart at the side walls of the modules, so that the ISA bus connection is disconnected (Figure 8-27). ! Warning The connector pins can be damaged. If you misalign the modules when pulling them apart, the connector pins may be damaged. Pull the modules apart carefully without misaligning them. 8-52 S7-400 and M7-400 Programmable Controllers Hardware and Installation A5E00069481-04 Assembling the M7-400 1. 2. Level surface Figure 8-27 Separating the Modules, for Example When the Mass Storage Module is to be Replaced Fitting a Module Fit the new module in the reverse order. Further details can be found in Section 8.4.6, “Fitting Expansion Modules to a CPU” and Section 8.4.7, “Installing a Module Assembly in the Rack” on pages 8-17 and 8-24. Reactions of the M7-400 After Replacing a Module After replacing a module, the CPU goes to the RUN state if there are no errors. If the CPU remains in the STOP state, you can use STEP 7 to display the cause of the error (see manual Configuring Hardware and Communication Connections with STEP 7 V 5.1). If the cause of the error is not displayed, check the BIOS Setup or reinstall the system software if necessary. Note If a data medium such as the on-board silicon disk, memory card, or hard disk has been replaced with the module replacement, it may be necessary to reinstall the operating system, user programs, etc. (see the corresponding sections in the M7-SYS User Manual). S7-400 and M7-400 Programmable Controllers Hardware and Installation A5E00069481-04 8-53 Assembling the M7-400 8.8.3 Replacing Memory Cards in a CPU Introduction To be able to replace MEM 478 memory cards in a CPU, you must remove the module assembly from the rack (see Section 8.8.2, page 8-49). It is not necessary to disassemble the module assembly because the CPU is always situated on the left end of the assembly, and the slot for the memory cards is therefore accessible. Note With both CPUs, a DRAM card of the same size must be inserted in each of Slots 1 and 2. Only use the memory cards intended for the particular CPU. ! Warning The modules can be damaged. Failure to observe ESD guidelines can result in damage to both the CPU and memory cards. Observe the ESD guidelines when replacing memory cards. Replacing Memory Cards for Main Memory and OSD To remove a memory card from a CPU slot, follow the steps outlined below: 1. Remove the cover from the upper left side of the CPU by loosening the three screws. 2. Press both lateral retaining springs to release the lock of the desired memory card. The card is raised at an angle of 45° (see Figure 8-28). 3. Remove the memory card from the connector (see Figure 8-28). 4. Push the new memory card at an angle of about 45° into the free connector as far as it will go (see Figure 8-28). 5. Press the new memory card on the protruding side in the direction of the PCB until it engages with the two retaining springs (see Figure 8-28). 6. Fit the cover on the upper left side of the CPU by securing it with three screws. 8-54 S7-400 and M7-400 Programmable Controllers Hardware and Installation A5E00069481-04 Assembling the M7-400 4 3 Slot 1 2 5 Figure 8-28 Slot 2 Removing Memory Cards from the CPUs Note The connectors to accept the memory cards are coded (see Figure 8-29). Do not apply force when fitting the memory cards. 3.3 V DRAM memory card (for main memory) Recess Slots 1 and 2 Figure 8-29 3.3 V Memory Card S7-400 and M7-400 Programmable Controllers Hardware and Installation A5E00069481-04 8-55 Assembling the M7-400 8.8.4 Replacing a Short AT Card Removing an AT Card Before you can replace a short AT card, you must remove the module assembly and remove the ATM 478 AT adapter module from the assembly (see Section 8.8.2, from page 8-49). ! Warning The modules can be damaged. If the AT card is inserted or removed with power applied and without observing the ESD guidelines, the CPU, AT adapter module, and the AT card can be damaged. Never insert or remove the AT card with power applied. Always switch off the power supply before inserting or removing the AT card. Observe the ESD guidelines. To remove a short AT card, follow the steps outlined below (see Figure 8-30): 1. Remove the cover from the upper left side of the ATM 478. 2. Unscrew the fixing bracket from the support plate of the AT card and from the ATM 478 and remove it. 3. Remove the AT card from the side opening and from the front panel upwards out of the plug-in contact. 4. Pull the AT card out of the slot from the front. Fitting an AT Card Fit the new AT card in the AT adapter in the reverse order (see Section 8.4.5 “Fitting the Short AT Card”, page 8-15). Then refit the AT adapter module in the module assembly and install the latter in the rack (see Section 8.4.6 “Assembling Expansion Modules on a Central Rack” and Section 8.4.7 “Installing a Module Assembly in the Rack” on pages 8-17 and 8-24). 8-56 S7-400 and M7-400 Programmable Controllers Hardware and Installation A5E00069481-04 Assembling the M7-400 3 2 3 1 3 4 Figure 8-30 Removing an AT Card from the ATM 478 AT Adapter Module S7-400 and M7-400 Programmable Controllers Hardware and Installation A5E00069481-04 8-57 Assembling the M7-400 8-58 S7-400 and M7-400 Programmable Controllers Hardware and Installation A5E00069481-04 Assembling and Installing Systems A Chapter Overview Section Description Page A.1 General Rules and Regulations for Operating the S7-400 A-2 A.2 Principles of System Installation for EMC A-5 A.3 Installation of Programmable Controllers for EMC A-9 A.4 Examples of EMC-Compatible Assembly A-10 A.5 Shielding Cables A-13 A.6 Equipotential Bonding A-15 A.7 Cabling Inside Buildings A-17 A.8 Cabling Outside Buildings A-19 A.9 Lightning Protection und Overvoltage Protection A-20 A.9.1 Lightning Protection Zone Concept A-21 A.9.2 Rules for the Transition between Lightning Protection Zones 0 and 1 A-23 A.9.3 Rules for the Transitions between Lightning Protection Zones 1 <-> 2 and Greater A-25 A.9.4 Sample of a Surge Protection Circuit for Networked S7-400 PLCs A-28 A.10 How to Protect Digital Output Modules against Inductive Surge A-30 A.11 Safety of Electronic Control Equipment A-32 A.12 Interference-Free Connection of Monitors A-34 S7-400 and M7-400 Programmable Controllers Hardware and Installation A5E00069481-04 A-1 Assembling and Installing Systems A.1 General Rules and Regulations for Operating the S7-400 General Basic Rules On account of the many possible applications of the S7-400, this chapter can only cover the basic rules for the electrical configuration. You must at least comply with these basic rules to ensure fault-free operation of the S7-400. The M7-400 modules operate similarly to the S7-400 modules. Differences in operation or data can be found at the appropriate point or in Section 8.3 “Electrical Configuration.” Specific Application Observe the safety and accident prevention regulations applying to specific applications, for example, the Machine Protection Guidelines. EMERGENCY OFF Devices EMERGENCY OFF devices complying with IEC 60204-1 (which corresponds to VDE 0113-1) must remain effective in all operating modes of the plant or system. Reactions of the Plant after Certain Events The following table shows how you must respond to the reactions of a plant to certain events. Event A-2 Requirement Failure of the operating or supply voltage of the S7-400 Hazardous operating states must not occur. Tripping of the Emergency Off device Hazardous operating states must not occur. Restoration of the operating or supply voltage of the S7-400 Hazardous operating states must not occur. No uncontrolled or undefined restart of the system must occur. Restart after release of the Emergency Off device Hazardous operating states must not occur. No uncontrolled or undefined restart of the system must occur. S7-400 and M7-400 Programmable Controllers Hardware and Installation A5E00069481-04 Assembling and Installing Systems 120/230 VAC Supply The following table shows which points you must observe when connecting the S7-400 to a 120/230 VAC supply. With ... ... You Must Ensure ... buildings that suitable external lightning protection measures are provided. supply cables and signal lines that suitable internal and external lightning protection measures are provided. stationary equipment and systems without all-pole disconnector that a supply disconnector (switch) is installed in the building. load power supplies and power supply modules that the set line voltage range corresponds to the local line voltage. all circuits of the S7-400 that fluctuations of line voltage from the rated value are within permissible tolerances (see Technical Data of the modules). residual-current devices (RCDs) that the RCD is suitable for the total discharge currents of the power supply module. 24 VDC Supply The following table shows the points you must observe when connecting the S7-400 to a 24 VDC supply. With ... ... You Must Ensure ... buildings that suitable external lightning protection measures are provided. 24 VDC supply cables and signal lines that suitable internal and external lightning protection measures are provided. 24 V supply that the supply voltage produced is an isolated extra-low voltage. load power supplies that only isolated load current power supplies are used. Protection Against External Electrical Effects The following table shows what you must observe for protection against external electrical effects. With ... ... You Must Ensure ... all plants and systems in which the S7-400 is installed that the plant and all system sections are properly connected to protective ground to discharge electromagnetic interference. connecting cables and signal lines that all cables are correctly routed and connected. signal lines that an open circuit in a signal line does not place the equipment in an undefined state. S7-400 and M7-400 Programmable Controllers Hardware and Installation A5E00069481-04 A-3 Assembling and Installing Systems Protection Against Other Electrical Effects The following table shows the other external effects against which you must provide protection. Protection against ... A-4 ... by Means of ... inadvertent actuation of operator controls a suitable arrangement or covering of keyboard and operator controls or a recessed arrangement of operator controls. splashing and surging water suitable protective devices or installation in waterproof housings. direct solar radiation suitable shading or installation in appropriately sheltered locations. mechanical damage suitable demarcation, protective devices, or installation in rugged housings. S7-400 and M7-400 Programmable Controllers Hardware and Installation A5E00069481-04 Assembling and Installing Systems A.2 Principles of System Installation for EMC Definition: EMC EMC (electromagnetic compatibility) describes the capability of electrical apparatus to operate without faults in a given electromagnetic environment, without being affected by the environment and without affecting it in an unacceptable manner. Introduction Although the S7-400 and its components were developed for operation in an industrial environment and meet high EMC requirements, you should carry out EMC planning before installing your control system, taking possible interference sources into account and incorporating them in your observations. Possible Effects of Interference Electromagnetic interference can affect the programmable controller in different ways: • Electromagnetic fields which directly affect the system • Interference picked up via bus signals (PROFIBUS DP, etc.) • Interference acting via the process wiring • Interference reaching the system via the power supply and/or protective ground Figure A-1 shows the possible routes for electromagnetic interference. Electromagnetic fields Bus signal Process wiring Protective ground Figure A-1 Power supply module The Possible Routes for Electromagnetic Interference S7-400 and M7-400 Programmable Controllers Hardware and Installation A5E00069481-04 A-5 Assembling and Installing Systems Coupling Mechanisms Interference can reach the programmable controller via four different coupling mechanisms, depending on the transmission medium (conducted or non-conducted) and distance between interference source and the equipment. Coupling Mechanism Direct Coupling Cause Direct or metallic coupling always occurs when two circuits have a common conductor. Typical Interference Sources • Switched devices (supply affected by inverters and external power supply units) • Motors being started • Different potentials of component cases with a common power supply • Static discharges Capacitive Coupling Capacitive or electrical coupling occurs between conductors which are at different potentials. • Interference pickup via parallel signal cables • Static discharge of the operator The degree of coupling is proportional • Contactors to the voltage variation as a function of time. Inductive Coupling Radiated Interference A-6 Inductive or magnetic coupling occurs between two conductor loops through which current is flowing. Interference voltages are induced by the magnetic fluxes associated with the currents. The degree of coupling is proportional to the current variation as a function of time. • Transformers, motors, electric There is a radiation path when a conductor is subjected to an electromagnetic wave. Impinging of the wave results in induced currents and voltages. • Local transmitters (for example, welders • Parallel AC supply cables • Cables with switched currents • Signal cables with a high frequency • Unconnected coils two-way radios) • Spark gaps (spark plugs, collectors of electric motors, welders) S7-400 and M7-400 Programmable Controllers Hardware and Installation A5E00069481-04 Assembling and Installing Systems Five Basic Rules for Ensuring Electromagnetic Compatibility In many cases, you can ensure electromagnetic compatibility by observing the following five basic rules: Rule 1: Large Area Grounding When installing the programmable controllers, provide large-area good quality grounding of the inactive metal parts (see Section A.3). • Make a large-area low-impedance connection of all inactive metal parts to chassis ground. • For screw connections on painted or anodized metal parts, either use special contact washers or remove the insulating protective layers from the contact points. • If possible, do not use aluminum parts for grounding. Aluminum oxidizes easily and is therefore less suitable for grounding. • Make a central connection between chassis ground and the ground/protective ground conductor system. Rule 2: Correct Cable Routing Ensure proper routing of lines when wiring (see Sections A.7 and A.8). • Arrange the cabling in line groups (AC power cables, power supply cables, signal lines, data lines). • Always install AC power cables and signal or data lines in separate ducts or bunches. • Route the signal and data lines as closely as possible to grounded surfaces such as cabinet elements, metal bars and cabinet panels. Rule 3: Secure Cable Shields Ensure that cable shields are properly secured (see Section 4.9). • Only use shielded data lines. The shield must have a large-area connection to ground at each end. • Analog lines must always be shielded. For the transfer of signals with low amplitudes, it may be advisable to connect the shield to ground at only one end. • Provide the line shields with a large-area connection to a shield/protective ground bar immediately after the cabinet inlet, and secure the shields with cable clamps. Route the grounded shield as far as the module without interruption, but do not ground it there again. • There must be a low-impedance connection between shield/protective ground bar and cabinet/housing. • Use metal or metallized connector cases for shielded data lines. S7-400 and M7-400 Programmable Controllers Hardware and Installation A5E00069481-04 A-7 Assembling and Installing Systems Rule 4: Special EMC Measures Employ special EMC measures for particular applications (see Section 4.11). • Fit suppressors to all inductors which are not controlled by S7-400 modules. • Use incandescent bulbs or suppressed fluorescent lamps in the immediate vicinity of your controller for illuminating cabinets or housings. Rule 5: Standard Reference Potential Create a standard reference potential; ground all electrical apparatus if possible (see Sections 4.10 and 4.12). • Install equipotential bonding conductors of sufficient rating when potential differences exist or are expected between sections of your system. • Use specific grounding measures. Grounding the control system is a protective and functional measure. • Connect the system sections and cabinets containing central racks and expansion racks to the grounding/protective ground system in a star configuration. This prevents the formation of ground loops. See also Cable shielding, page A-13 Cabling outside buildings, page A-19 Cabling inside buildings, page A-17 Mounting of programmable controllers for EMC, page A-9 A-8 S7-400 and M7-400 Programmable Controllers Hardware and Installation A5E00069481-04 Assembling and Installing Systems A.3 Installation of Programmable Controllers for EMC Introduction Measures for suppressing interference are often only applied when the control system is already operational, and the proper reception of a useful signal is found to be impaired. The cause of such interference is often due to insufficient reference potentials which can be attributed to errors during assembly. This section tells you how to avoid such errors. Inactive Metal Parts Inactive parts are all the conductive parts which are electrically isolated from active parts by basic insulation, and can only develop a potential in the event of a fault. Grounding of Inactive Metal Parts During Installation When installing the S7-400, ensure large-area grounding of all inactive metal parts. Properly implemented chassis grounding creates a standard reference potential for the control system, and reduces the effects of picked-up interference. The chassis ground provides the electrical interconnection between all inactive parts. The entirety of all interconnected inactive parts is known as the chassis ground. Even in the event of a fault, the chassis ground must not develop a dangerous touch potential. It must therefore be connected to the protective ground conductor via an adequate conductor cross-section. To prevent ground loops, locally separated ground elements such as cabinets, structural and machine parts must always be connected to the protective ground system in star configuration. Ensure the following when chassis grounding: • Connect the inactive metal parts with the same degree of care as the active parts. • Ensure low-impedance connections between metal parts, for example, with large-area good quality contact. • With painted or anodized metal parts, the insulating protective layer must be penetrated or removed at the contact point. Use special contact washers or scratch the layer off fully at the contact point. • Protect the connection points from corrosion, for example, with suitable grease. • Use flexible grounding strips to connect movable grounded parts such as cabinet doors. The grounding strips should be short and have a large surface, because the surface is decisive in providing a path to ground for high-frequency interference. S7-400 and M7-400 Programmable Controllers Hardware and Installation A5E00069481-04 A-9 Assembling and Installing Systems A.4 Examples of EMC-Compatible Assembly Introduction Below you will find two examples of configurations for programmable controllers for EMC. Example 1: Cabinet Configuration for EMC Figure A-2 shows a cabinet installation in which the measures described above (grounding of inactive metal parts and connection of cable shields) have been applied. However, this example only applies to grounded operation. Observe the points marked in the figure when installing your system. 2 1 3 4 5 6 7 8 Figure A-2 A-10 Example of Cabinet Installation for EMC S7-400 and M7-400 Programmable Controllers Hardware and Installation A5E00069481-04 Assembling and Installing Systems Key for example 1 The numbers in the following list refer to the numbers in Figure A-2. Table A-1 No. Key for Example 1 Key Meaning 1 Grounding strips If there are no large-area metal-to-metal connections, you must interconnectinactive metal parts such as cabinet doors or support plates via grounding strips or to ground. Use short grounding strips with a large surface. 2 Supporting bars Connect the supporting bars and the cabinet housing over a large area (metal-to-metal connection). 3 Secure the rack There must be a large-area metal-to-metal connection between supporting barand rack. 4 Signal lines Use cable clamps on the protective ground bar or an additional shield bus forlarge-area connection of the shield of signal lines. 5 Cable clamp The cable clamp must surround the braided shield over a large area and ensuregood quality contact. 6 Shielding bus Provide a large-area connection between the shield bus and supporting bars(metal-to-metal connection). The cable shields are connected to the shield bus. 7 Protective ground bar Provide a large-area connection between the protective ground bar and supporting bars(metal-to-metal connection). Connect the protective ground bar to the protective conductor system via a separate conductor (minimum cross-section 10 mm2). 8 Conductor to the Provide a large-area connection between the conprotective conductor ductor and the protective conductor system (grounsystem (grounding ding point). point) Example 2: Wall Mounting for EMC If you operate your S7-400 in a low-interference environment in which the permissible ambient conditions are complied with (see Reference Manual, Chapter 1), you can mount your S7-400 in frames or on the wall. Picked-up interference must be given a path to large metal surfaces. You should therefore secure standard mounting channels, shield, and protective ground bars to metal structural elements. For wall mounting in particular, installation on reference potential surfaces made of sheet steel has proved advantageous. Provide a shield bus for connecting the cable shields if you install shielded cables. The shield bus can simultaneously serve as the protective ground bar. S7-400 and M7-400 Programmable Controllers Hardware and Installation A5E00069481-04 A-11 Assembling and Installing Systems Ensure the following for frame and wall mounting: • Use special contact washers with painted and anodized metal parts, or remove the insulating protective layers. • Provide large-area, low-impedance metal-to-metal connections when securing the shield/protective ground bar. • Cover the AC supply conductors in a shockproof arrangement. Figure A-3 shows an example of wall mounting for EMC Figure A-3 A-12 Wall Mounting an S7-400 for EMC S7-400 and M7-400 Programmable Controllers Hardware and Installation A5E00069481-04 Assembling and Installing Systems A.5 Shielding Cables Purpose of the Shielding A cable is shielded to attenuate the effects of magnetic, electrical, and electromagnetic interference on this cable. Principle of Operation Interference currents on cable shields are discharged to ground via the shield bus which is electrically connected to the housing. To prevent these interference currents themselves from becoming an interference source, a low-impedance connection to the protective ground conductor is particularly important. Suitable Cables If possible, only use cables with a braided shield. The coverage density of the shield should be at least 80%. Avoid cables with a foil shield because the foil can be easily damaged by tensile and compressive stress at the securing points; this can reduce the shielding effect. Grounding the Cable Shields Generally, you should always connect both ends of the shield to the chassis ground (that is, at the beginning and end of the cable). Grounding the shields at both ends is essential to achieve a good degree of suppression of interference in the higher frequency region. In exceptional cases, you can connect only one end of the shield to the chassis ground (for example, at the beginning or end of the cable). However, you only achieve attenuation of lower frequencies. Single-ended connection of the shield may be advantageous when • An equipotential bonding conductor cannot be laid • Analog signals of a few mA or mA are transmitted • Foil shields (static shields) are used. For data cables in serial communication, only use metallic or metallized connectors. Secure the shield of the data cable to the connector housing. Do not connect the shield to Pin 1 of the connector. For stationary operation, you should strip the shielded cable without damaging the shield and connect it to the shield/protective ground bar. Note In the event of potential differences between grounding points, a circulating current may flow via the shield connected at both ends. In this case, install an additional equipotential bonding conductor (see Section A.6). S7-400 and M7-400 Programmable Controllers Hardware and Installation A5E00069481-04 A-13 Assembling and Installing Systems Handling the Shields Observe the following points with regard to the shield: • Only use cable clamps made of metal to secure braided shields. The clamps must surround the shield over a large area and provide good contact. • Connect the shield to a shield bus immediately after entry of the cable into the cabinet. Route the shield to the module but do not connect it there again to the chassis ground or the shield bus. • For installation other than in cabinets (for example, wall mounting), you can provide contact between the cable shields and the cable duct. Shown in the figure A-4 are some methods of securing shielded cables with cable clamps. Figure A-4 A-14 Mounting Cable Shields S7-400 and M7-400 Programmable Controllers Hardware and Installation A5E00069481-04 Assembling and Installing Systems A.6 Equipotential Bonding Potential Differences Potential differences can occur between separate system components, leading to high transient currents; for example, if cable shields are fitted on both sides and grounded at different system components. Potential differences can be caused by different electrical supplies. ! Caution This can result in damage. Cable shields are not suitable for equipotential bonding. Use the prescribed cables exclusively (e.g. those with a 16 mm2 cross-section). Ensure also that the cable cross-section is adequate when installing MPI/DP networks, since otherwise the interface hardware may be damaged or even destroyed. Equipotential Bonding Conductor You must reduce the potential differences by laying equipotential bonding conductors to ensure that the electronic components used function correctly. Observe the following points for installing an equipotential bonding conductor: • The lower the impedance of the equipotential bonding conductor, the higher the efficiency of the equipotential bonding. • Where two sections of an installation are interconnected via shielded signal lines whose shields are connected to the ground/protective conductor at both ends, the impedance of the additional equipotential bonding conductor must not exceed 10% of the shield impedance. • The cross-section of an equipotential bonding conductor must be rated for the maximum circulating current. In practice, equipotential bonding conductors with a cross-section of 16 mm2 have proved to be effective. • Use equipotential bonding conductors made of copper or zinc-plated steel. Provide a large-area contact between the cables and the ground/protective conductor and protect them from corrosion. • Lay the equipotential bonding conductor in such a way that the surface between the conductor and the signal lines is as small as possible. (see Figure A-5). S7-400 and M7-400 Programmable Controllers Hardware and Installation A5E00069481-04 A-15 Assembling and Installing Systems Figure A-5 A-16 Routing Equipotential Bonding Conductor and Signal Line S7-400 and M7-400 Programmable Controllers Hardware and Installation A5E00069481-04 Assembling and Installing Systems A.7 Cabling Inside Buildings Introduction Inside buildings, clearances must be observed between groups of different cables to achieve the necessary electromagnetic compatibility (EMC). Table A-2 provides you with information on the general rules governing clearances to enable you to choose the right cables. How to Read the Table If you want to know how two lines of different types should be laid, proceed as follows: 1. Look up the type of the first cable in column 1 (Cables for ...). 2. Look up the type of the second cable in the corresponding field in column 2 (and Cables for ...). 3. Read off the guidelines to be observed from column 3 (Run ...). Table A-2 Cabling Inside Buildings Connect Cables for ... and Cables for ... LAN signals, shielded (SINEC L1, PROFIBUS DP) Data signals, shielded (programming devices, operator panels, printers, counter inputs, etc.) Analog signals, shielded DC voltage (60 V), unshielded Process signals (25 V), shielded AC voltage (25 V), unshielded Monitors (coaxial cable) LAN signals, shielded (SINEC L1, PROFIBUS DP) Data signals, shielded (programming devices, operator panels, printers, counter inputs, etc.) Analog signals, shielded DC voltage (60 V), unshielded Process signals (25 V), shielded AC voltage (25 V), unshielded Monitors (coaxial cable) Run ... in common bundles or cable ducts DC voltage in separate bundles or cable (60 V and400 V), unshielded ducts (no minimum clearance necessary) AC voltage (25 V and400 V), unshielded DC and AC voltages (400 V), unshielded S7-400 and M7-400 Programmable Controllers Hardware and Installation A5E00069481-04 Inside cabinets: in separate bundles or cable ducts (no minimum clearance necessary) Outside cabinets: on separate cable racks with a clearance of at least 10 cm (3.93 in.) A-17 Assembling and Installing Systems Table A-2 Cabling Inside Buildings, continued Connect Cables for ... DC voltage (60 V and400 V), unshielded AC voltage (25 V and400 V), unshielded and Cables for ... LAN signals, shielded (SINEC L1, PROFIBUS DP) Data signals, shielded (programming devices, operator panels, printers, counter inputs, etc.) Analog signals, shielded DC voltage (60 V), unshielded Process signals (25 V), shielded AC voltage (25 V), unshielded Monitors (coaxial cable) Run ... in separate bundles or cable ducts (no minimum clearance necessary) DC voltage in common bundles or cable (60 V and400 V), unshielded ducts AC voltage (25 V and400 V), unshielded DC and AC voltages (400 V), unshielded DC and AC voltages (400 V), unshielded Inside cabinets: in separate bundles or cable ducts (no minimum clearance necessary) Outside cabinets: on separate cable racks with a clearance of at least 10 cm (3.93 in.) LAN signals, shielded (SINEC L1, PROFIBUS DP) Data signals, shielded (programming devices, operator panels, printers, counter inputs, etc.) Analog signals, shielded DC voltage (60 V), unshielded Process signals (25 V), shielded AC voltage (25 V), unshielded Monitors (coaxial cable) Inside cabinets: in separate bundles or cable ducts (no minimum clearance necessary) Outside cabinets: on separate cable racks with a clearance of at least 10 cm (3.93 in.) DC voltage (60 V and400 V), unshielded AC voltage (25 V and400 V), unshielded DC and AC voltages (400 V), unshielded DC and AC voltages (400 V), unshielded in common bundles or cable ducts ETHERNET ETHERNET in common bundles or cable ducts Others in separate bundles or cable ducts with a clearance of at least 50 cm (19.65 in.) A-18 S7-400 and M7-400 Programmable Controllers Hardware and Installation A5E00069481-04 Assembling and Installing Systems A.8 Cabling Outside Buildings Rules for EMC When installing cables outside buildings, the same EMC rules apply as for inside buildings. The following also applies: • Run cables on metallic cable supports (racks, trays etc.). • Establish a metallic connection between the joints in the cable supports • Ground the cable supports • If necessary, provide adequate equipotential bonding between the various items of equipment connected. • Take the necessary (internal and external) lightning protection and grounding measures applying to your particular application (see below). Rules for Lightning Protection Outside Buildings Lay your cables either: • In metallic conduits grounded at both ends, or • In concrete cable ducts with continuous end-to-end armoring Overvoltage Protection Devices An individual appraisal of the entire plant is necessary before initiating any lightning protection measures (see Section A.9). Further Information on Lightning Protection You will find further information in the following sections. S7-400 and M7-400 Programmable Controllers Hardware and Installation A5E00069481-04 A-19 Assembling and Installing Systems A.9 Lightning Protection and Overvoltage Protection Overview Failures are very often the result of overvoltages caused by: • Atmospheric discharge or • Electrostatic discharge. First of all, we want to introduce you to the lightning protection zone concept, on which the protection against overvoltage is based. At the end of this section, you will find rules for the transitions between the individual lightning protection zones. Note This section can only provide information on the protection of a programmable logic controller against overvoltages. However, a complete protection against overvoltage is guaranteed only if the whole surrounding building is designed to provide protection against overvoltages. This refers especially to constructional measures for the building already in the planning phase. If you wish to obtain detailed information on overvoltage protection, we therefore recommend you to address your Siemens contact or a company specialized in lightning protection. A-20 S7-400 and M7-400 Programmable Controllers Hardware and Installation A5E00069481-04 Assembling and Installing Systems A.9.1 Lightning Protection Zone Concept Principle of the Lightning Protection Zone Concept According to IEC 61312-1/DIN VDE 0185 T103 The principle of the lightning protection zone concept states that the volume to be protected, for example, a manufacturing hall, is subdivided into lightning protection zones in accordance with EMC guidelines (see Figure A-6). The individual lightning protection zones are constituted by the following measures: The external lightning protection of the building (field side) Lightning protection zone 0 The shielding of buildings Lightning protection zone 1 The shielding of rooms Lightning protection zone 2 The shielding of devices Lightning protection zone 3 Effects of a Lightning Strike Direct lightning strikes occur in lightning protection zone 0. The lightning strike creates high-energy electromagnetic fields which can be reduced or removed from one lightning protection zone to the next by suitable lightning protection elements/measures. Surges In lightning protection zones 1 and higher, surges can result from switching operations and interference. S7-400 and M7-400 Programmable Controllers Hardware and Installation A5E00069481-04 A-21 Assembling and Installing Systems Diagram of the Lightning Protection Zones The following diagram illustrates a lightning protection zone concept for a detached building. Lightning Protection Zone 0, Field Side Building Shield External Lightning Protection (Steel Reinforcement) Lightning Protection Zone 1 Room Shield Lightning Protection Zone 2 EnergyTechnical Cable (Steel Reinforcement) Lightning Device Shield Protection (Metal Housing) Zone 3 Device NonElectrical Cable (Metal) Metal Component Internal Cable Information-Technical Cable Lightning Protection Equipotential Bonding Local Equipotential Bonding Galvanic Connection Figure A-6 Lightning Protection Zones of a Building Principle of Transitions between the Lightning Protection Zones At the transition points between the lightning protection zones, you must take measures to prevent surges being conducted further. The lightning protection zone concept also states that all lines at the transitions between the lightning protection zones that can carry lightning stroke current must be included in the lightning protection equipotential bonding. Lines that can carry lightning stroke current include: • Metal pipelines (for example, water, gas and heat) • Power cables (for example, line voltage, 24 V supply) • Data cables (for example, bus cable). A-22 S7-400 and M7-400 Programmable Controllers Hardware and Installation A5E00069481-04 Assembling and Installing Systems A.9.2 Rules for the Transition between Lightning Protection Zones 0 and 1 Rule for the Transition 0 <-> 1 (Lightning Protection Equipotential Bonding) The following measures are suitable for lightning protection equipotential bonding at the transition between lightning protection zone 0 <-> 1: • Use grounded, spiralled, current-conducting metal strips or metal braiding, for example, NYCY or A2Y(K)Y, as a cable shield at the start and end • Lay the cables in one of the following ways: – in continuous metal pipes that are grounded at the start and end – in ducts of armored concrete with continuous armoring – on closed metal cable racks grounded at the start and end • Use fiber-optic cables instead of lightning stroke current-carrying cables. Additional Measures If you cannot take the measures listed above, you must install a high-voltage protector at transition 0 <->1 with a relevant lightning conductor. Table A-3 contains the components you can use for high-voltage protection of your plant. Table A-3 Ser. No. 1 High-Voltage Protection of Cables with the Help of Surge Protection Equipment Cables for ... ... equip transition point 0 <–> 1 with: Order No. 3-phase TN-C system 1 piece of DEHNbloc/3 lightning conductor phase L1/L2/L3 to PEN 900 110* 5SD7 031 3-phase TN-S system 1 piece of DEHNbloc/3 lightning conductor phase L1/L2/L3 to PE 900 110* 5SD7 031 1 piece of DEHNbloc/1 lightning conductor N to PE 900 111* 5SD7 032 1 piece of DEHNbloc/3 lightning conductor phase L1/L2/L3 toN 900 110* 5SD7 031 1 piece of DEHNgap B/n N-PE lightning conductor N to PE 900 130* 3-phase TT system AC TN-S system 2 pieces DEHNbloc/1 lightning conof ductor phase L1 + N to PE S7-400 and M7-400 Programmable Controllers Hardware and Installation A5E00069481-04 900 111* 5SD7 032 A-23 Assembling and Installing Systems Table A-3 Ser. No. High-Voltage Protection of Cables with the Help of Surge Protection Equipment, continued Cables for ... ... equip transition point 0 <–> 1 with: Order No. AC TN-C system 1 piece of DEHNbloc/1 lightning conductor phase L to PEN 900 111* 5SD7 032 AC TT system 1 piece of DEHNbloc/1 lightning conductor phase to N 900 111* 5SD7 032 1 piece of DEHNgap B/n N-PE lightning conductor N to PE 900 130* 2 24 VDC Power Supply 1 piece of Blitzductor VT lightning con- 918 402* ductor, type A D 24 V – 3 MPI bus cable, RS 485, RS 232 (V.24) 1 piece of Blitzductor CT lightning con- 919 506* and ductor, type B 919 510* 4 Inputs/outputs of digital modules 24 V 5 24 VDC power supply module 6 Inputs/outputs of digital modules and 2 pieces DEHNbloc/1 lightning con120/230 VAC power supply of ductor 7 Inputs/outputs of analog modules up to 12 V +/– * DEHNrail 24 FML 1 piece of 1 piece of You can order these components directly at: A-24 901 104* Blitzductor VT lightning con- 918 402* ductor, 900 111* type AD 24 V – 5SD7 032 900 111* 5SD7 032 Blitzductor CT lightning con- 919 506* and ductor, 919 510* type B DEHN + SÖHNE GmbH + Co. KG Elektrotechnische Fabrik Hans-Dehn-Str. 1 D-92318 Neumarkt S7-400 and M7-400 Programmable Controllers Hardware and Installation A5E00069481-04 Assembling and Installing Systems A.9.3 Rules for the Transitions between Lightning Protection Zones 1 <-> 2 and Greater Rules for Transitions 1 <-> 2 and Above (Local Equipotential Bonding) for all lightning protection zone transitions 1 <-> 2 and greater: • Set up local equipotential bonding at each subsequent lightning protection zone transition. • Include all cables (also metal pipelines, for example) in the local equipotential bonding at all subsequent lightning protection zone transitions. • Include all metal installations located within the lightning protection zone in the local equipotential bonding (for example, metal part within lightning protection zone 2 at transition 1 <-> 2). Additional Measures We recommend you ensure low-voltage protection for the following elements • for all lightning protection zone transitions 1 <-> 2 and greater and • for all cables that run within a lightning protection zone and are longer than 100 m. Lightning Protection Element for the 24 VDC Supply You should only use the lightning conductor KT, type 24 VAD SIMATIC for the 24 VDC power supply of the S7-400. All other surge protection components do not meet the required tolerance range of 20.4 V to 28.8 V of the S7-400’s power supply. Lightning Protection Element for Signal Modules You can use standard overvoltage protection components for the digital I/O modules. However, please note that these only permit a maximum of 1.15 VNom = 27.6 V for 24 VDC nominal voltage. If the tolerance of your 24 VDC power supply is higher, use the surge protection components for 30 VDC nominal voltage. You can also use the VT lightning conductor, Type AD 24 V SIMATIC. However, this can result in the following restrictions: • Digital inputs: An increased input current can flow in the case of negative input voltages. • Digital outputs: Dropout time of contactors can increase significantly. S7-400 and M7-400 Programmable Controllers Hardware and Installation A5E00069481-04 A-25 Assembling and Installing Systems Low-Voltage Protection Elements for 1<–> 2 For the transition points between lightning protection zones 1 <–> 2 we recommend the surge protection components listed in table A-4 Table A-4 Ser. No. 1 Low-Voltage Protection Components for Lightning Protection Zones 1 <–> 2 Cables for ... ... equip transition point 1 <–> 2 with: Order No. 3-phase TN-C system 3 pieces of DEHNguard 275 surge arresters 900 600* 5SD7 030 3-phase TN-S system 4 pieces of DEHNguard 275 surge arresters 900 600* 5SD7 030 3-phase TT system 3 pieces of DEHNguard 275 surge arresters phase L1/L2/L3 to N 900 600* 5SD7 030 1 piece of DEHNgap C N-PE surge N to PE 900 131* AC TN-S system 2 pieces of DEHNguard 275 surge arresters 900 600* 5SD7 030 AC TN-C system 1 piece of DEHNguard 275 surge arresters 900 600* 5SD7 030 AC TT system 1 piece of DEHNguard 275 surge arresters phase L to N 900 600* 5SD7 030 1 piece of DEHNgap C, N-PE surge arrester, 900 131* N to PE 2 24 VDC Power Supply 3 Bus cable • MPI RS 485 • RS 232 (V.24) 1 piece of Blitzductor VT lightning conductor, 918 402* type AD 24 V • Blitzductor CT surge arrester, type MD/HF 919 506* and 919 570* 1 piece of • per conductor pair surge arrester Blitzductor CT type ME 15 V 919 506* and 919 522* 4 Inputs of digital modules 24 VDC 1 piece of Low-voltage surge arrester, type FDK 2 60 V 919 993* 5 Outputs of digital modules 24 VDC 1 piece of Low-voltage surge arrester FDK 2D5 24 919 991* 6 Inputs/outputs of digital modules 2 pieces of 7 * • 120 VAC • 230 VAC Inputs of analog modules up to 12 V +/– • DEHNguard 150 900 603* • DEHNguard 275 900 600* 1 piece of Surge arrester Blitzductor CT type MD 12 V You can order these components directly at: A-26 Surge arresters 919 506* and 919 541* DEHN + SÖHNE GmbH + Co. KG Elektrotechnische Fabrik Hans-Dehn-Str. 1 D-92318 Neumarkt S7-400 and M7-400 Programmable Controllers Hardware and Installation A5E00069481-04 Assembling and Installing Systems Low-Voltage Protection Elements for 2<–> 3 For the transition points between lightning protection zones 2 <–> 3 we recommend the surge protection components listed in the table below. This low-voltage protection must be used in S7-400 for CE compliance. Table A-5 Cables for ... Ser. No. 1 Surge Protection Components for Lightning Protection Zones 2 <–> 3 ... .. equip transition point 2 <–> 3 with: 3-phase TN-C-System 3 pieces of DEHNguard 275 surge arresters 900 600* 5SD7 030 3-phase TN-S system 4 pieces of DEHNguard 275 surge arresters 900 600* 5SD7 030 3-phase TT system 3 pieces of DEHNguard 275 surge arresters phase 900 600* L1/L2/L3 to N 5SD7 030 1 piece of DEHNgap C N-PE surge N to PE 900 131* AC TN-S system 2 pieces of DEHNguard 275 surge arresters 900 600* 5SD7 030 AC TN-C system 1 piece of DEHNguard 275 surge arresters 900 600* 5SD7 030 AC TT system 1 piece of DEHNguard 275 surge arresters phase 900 600* L to N 5SD7 030 1 piece of DEHNgap C N-PE surge N to PE 2 24 VDC Power Supply 3 Bus cable 4 • MPI RS 485 • RS 232 (V.24) 900 131* 1 piece of Blitzductor VT lightning conductor, type 918 402* AD 24 V • Blitzductor CT surge arrester, type MD/HF 919 506* and 919 570* 1 piece of • per conductor pair low-voltage protection FDK 2 12 V 919 995* Inputs of digital modules • 24 VDC 1 piece of Low-voltage surge arrester, type FDK 2 60 V on insulated rail 2 pieces of • 120 VAC • 230 VAC 919 993* Surge arresters • DEHNrail 120 FML 901 101* • DEHNrail 230 FML 901 100* 1 piece of Low-voltage protection FDK 2 D 5 24 919 991* 5 Outputs of digital modules 24 VDC 6 Outputs of analog modu- 1 piece of Low-voltage protection, les up to 12 V +/– type FDK 2 12 V on insulated rail connected with M– of the power supply for the modules. * Order No. You can order these components directly at: 919 995* DEHN + SÖHNE GmbH + Co. KG Elektrotechnische Fabrik Hans-Dehn-Str. 1 D-92318 Neumarkt S7-400 and M7-400 Programmable Controllers Hardware and Installation A5E00069481-04 A-27 Assembling and Installing Systems A.9.4 Sample of a Surge Protection Circuit for Networked S7-400 PLCs Sample Circuit The sample in the figure A-7 shows you how install an effective surge protection for 2 networked S7-400 PLCs: L1 L2 L3 NPE Lightning-protection 0, field side zone Lightning-protection zone 1 Switchgear cubicle1 Lightning-protection zone 2 SV CPU MPI SM Switchgear cubicle 2 Lightning-protection zone 2 SV CPU MPI SM PE 10 mm2 PE 10 mm2 Figure A-7 Sample Circuitry for Networked S7-400 PLCs A-28 S7-400 and M7-400 Programmable Controllers Hardware and Installation A5E00069481-04 Assembling and Installing Systems Components in figure A-7 The table A-6 explains consecutive numbers in the figure A-7: Table A-6 Ser. No. from figure A-7 Example of a Circuit Conforming to Lightning Protection Requirements (Legend to Figure A-7) Components Description 1 Lightning arrestor, depending on the mains system, e.g. TN-S system: 1 piece DEHNbloc/3, order number: 900 110* and 1 piece DEHNbloc/1, order number: 900 111* High-voltage protection against direct lightning strike and surge voltage as of transition 0 <–> 1 2 surge arrestors, 2 pieces DEHNguard 275; order number: 900 600* High-voltage surge protection at transition 1 <–> 2 3 Surge arrestor, Blitzductor CT type MD/HF, order number: 919 506* and 919 570* Low-voltage surge protection for RS 485 interfaces at transition 1 <–> 2 4 Digital input modules: FDK 2 D 60 V, order number: 919 993* Low-voltage surge protection, signal modules I/O at transition 1 <–> 2 Digital output modules: FDK 2 D 5 24 V, order number: 919 991* Analog modules: MD 12 V Blitzductor CT, order number: 919 506 and 919 541 * 5 Bus cable shielding mounting de- Discharge of interference current vice with EMC spring clamp on the basic unit of Blitzductor CT; order No.: 919 508* 6 Cable for equipotential bonding 16 mm 7 Blitzductor CT, type B for building High-voltage surge protection for RS 485 transitions; interfaces at transition 0 <–> 1 order number: 919 506* and 919 510* Standardization of reference potentials You can order these components directly at: S7-400 and M7-400 Programmable Controllers Hardware and Installation A5E00069481-04 DEHN + SÖHNE GmbH + Co. KG Elektrotechnische Fabrik Hans-Dehn-Str. 1 D-92318 Neumarkt A-29 Assembling and Installing Systems A.10 How to Protect Digital Output Modules against Inductive Surge Inductive Surge Voltage Overvoltage occurs when inductive devices are switched off. Examples are relay coils and contactors Integrated Surge Arrester S7-400 digital output modules are equipped with an integrated surge arrester Additional Overvoltage Protection Inductive devices require additional surge arresters only in following cases: • If SIMATIC output circuits can be switched off by additionally installed contacts (e.g. relay contacts). • If the inductive loads are not controlled by SIMATIC modules. Note: Consult the supplier of the inductors for the ratings of surge suppression devices. Example Figure A-8 shows an output circuit that requires additional surge arresters. Contact in output circuit Inductivitys requires a circuiting (see Figures A-9 and A-10) Figure A-8 A-30 Relay Contact for EMERGENCY OFF in the Output Circuit S7-400 and M7-400 Programmable Controllers Hardware and Installation A5E00069481-04 Assembling and Installing Systems Suppression for DC-Operated Coils DC-operated coils are interconnected to diodes or Zener diodes. With diode With Zener diode + + - - Figure A-9 Suppression for DC-Operated Coils Suppression with Diodes / Zener Diodes Suppression with diodes or Zener diodes exhibits the following characteristics: • Switching overvoltages can be avoided entirely. A Zener diode has a higher turn-off voltage. • High turn-off delay (6 to 9 times higher than without suppressor circuits) The Zener diode switches off more quickly than a diode circuit. Suppression with AC-Operated Coils AC-operated coils are suppressed with varistors or RC elements. With varistor With RC element ~ ~ ~ ~ Figure A-10 Suppression with AC-Operated Coils Suppression with a varistor exhibits the following characteristics: • The amplitude of the switching overvoltage is limited but not attenuated. • The steepness of the surge voltage remains the same. • Low turn-off delay. Suppression with an RC element exhibits the following characteristics: • The amplitude and steepness of the switching overvoltage are reduced. • Low turn-off delay. S7-400 and M7-400 Programmable Controllers Hardware and Installation A5E00069481-04 A-31 Assembling and Installing Systems A.11 Safety of Electronic Control Equipment Intoduction The notes below apply independent of the type or manufacturer of the electronic control. Reliability Maximum reliability of SIMATIC devices and components is achieved by implementing extensive and cost-effective measures during development and manufacture: • Use of high-quality components; • Worst-case design of all circuits; • Systematic and computer-aided testing of all components; • Birm-in of all large-scale integrated circuits (e.g. processors, memory, etc.); • Measures preventing static charge when handling MOS ICs; • Visual checks at different stages of manufacture; • Continuous heat-run test at elevated ambient temperature ove a period of several days; • Careful computer-controlled final testing; • Statistical evaluation of all returned systems and components to enable the immediate initiation of suitable corrective measures; • Monitoring of major control compoments, using on-line tests (watchdog for the CPU, etc.). These measures are referred to in safety technology as basic measures. They prevent or rectify a large proportion of possible faults. A-32 S7-400 and M7-400 Programmable Controllers Hardware and Installation A5E00069481-04 Assembling and Installing Systems Risks In all cases where the occurrenced of failures can failures can result in material damage or injury to persons, special measures must be taken to enhance the safety of the installation - and therefore also of the situation. System-specific and special regulations exist for such applications. They must be observed on installing the control system (e.g. VDEE 0116 for burner control systems). For electronic control equipment with a safety function, the measures that habe to be taken to prevent or rectify faults are based on the risks involved in the installation. As of a certain degree of hazard the basic measures mentioned above are no longer sufficient. That is, additional measures (e.g. redundant configurations, tests, checksums, etc.) must be implemented and certified for the control equipment (DIN VDE 0801). The prototype of the fail-safe PLC S5-95F was tested by TÜV (German Institute for Technological Suirveillance), BIA and G EM III; several certificates have been granted. Thus, it is suitable in the same way as the previously tested fail-safe PLC S5-115F to control and monitor safety-relevant system areas. Splitting the group into safety-relevant areas and areas which are not savety-relevant Most plants contain equipment performing safety-relevant operations (e.g. EMERGENCY-OFF switch, protective gates, two-hand controls). To avoid the need to examine the entire controller from the aspect of safety, the controller is usually divided into an area that is saftey-relevant and an area that is not safety-relevant. In the non-safety-related area, no special demands are placed on the safety of the control equipment because any failure in the electronics will have no effect on the safety of the installation. In the safety-relevant area, however, it is only allowed to operate controllers or circuits compliant with corresponding regulations. The following divisions are common in practical situations: • For control equipment with few safety-related functions (e.g. machine controls) The conventional PLC is responsible for machine control, whereas safety-related functions are implemented with a fail-safe mini PLC (e.g. S5-95F). • For controllers with balanced areas (e.g. chemical installations, cable cars) In this case also, the area that is not safety-relevant is controlled with a standard PLC, whereas a tested fail-safe controller (S7-400F, S7-400FH, S5-115F, or multiple S5–95F) controls the safety-relevant areas. The entire installation is implemented with a fail-safe control system. • For control equipment with mainly safety-relevant functions (e.g. burner control systems) The entire control system is implemented with fail-safe technology S7-400 and M7-400 Programmable Controllers Hardware and Installation A5E00069481-04 A-33 Assembling and Installing Systems Important Information Even when electronic control equipment has been configured for maximum design safety – e.g. with a multi-channel structure – it is imperative conform with instructions given in the operating manual. Incorrect handling can render measures intended to prevent dangerous faults ineffective, or generate additional sources of danger. A.12 Interference-Free Connection of Monitors Introduction You can use operator interfaces with monitor ports from the COROS product family. The layout of apparatus and the interference content of the environment significantly affect the interference-free connection of monitors to a programmable controller. The choice of monitor and video cables is governed by whether the monitor and programmable controller are to be operated under low-interference conditions or under industrial conditions. Operation under Low-Interference Conditions Where a monitor and the programmable controller operate in a low-interference environment and there is only a short distance between monitor and programmable controller, they are at almost the same ground potentials. Interference and disturbance by ground loops are therefore not expected. In these cases, you can use either TTL or analog signals to drive the monitor. Digital cables or single-shielded coaxial cables can be used to transmit the video signals. Note that the braided shield of the coaxial cable serves as the return conductor and must not be connected to the shield bus. The monitor and communications processor (CP) are interconnected without additional shielding and grounding. A-34 S7-400 and M7-400 Programmable Controllers Hardware and Installation A5E00069481-04 Assembling and Installing Systems Operation under Industrial Conditions Where the monitor and programmable controller are operated under harsh industrial conditions or there is a great distance between monitor and programmable controller, the apparatus may be at different ground potentials; this, in turn, can result in interference and disturbances caused by ground loops. In these cases, double-shielded coaxial cable (triaxial cable) must be used to transmit the video signals. The inner braided shield of this cable serves as the return conductor and must not be connected to the shield bus. The outer braided shield serves to discharge interference currents and must be incorporated in shielding and grounding measures. To avoid ground loops, the electronics ground and housing ground of the monitor must be separate. This requirement is considered to be met when one of the following conditions is fulfilled: • Electronic and housing grounds of the monitor are isolated from each other. • Electronic and housing grounds of the monitor are interconnected via a voltage-dependent resistor (VDR) fitted by the manufacturer of the monitor. Shielding and Grounding under Industrial Conditions If the monitor and programmable controller are operated under harsh industrial conditions, you must observe the following: On the side of the programmable controller: • Connect the cable shields in the cabinet to the shield bus immediately after cabinet entry. The following points are important: – Strip the video cables without damaging the conductors. – Secure the outer braided shield with the largest possible area to the shield bus of the programmable controller (for example, with metal hose clamps which surround the shield, or with cable clamps). • Provide large-area contact between the shield buses and the frame or cabinet wall. • Connect the shield bus to the ground point of the cabinet. On the side of the monitor: • Isolate the electronic ground and housing ground from each other. Proceed as follows: – Remove the jumper on the monitor to separate the two grounds. – Fit touch protection to the video sockets, because when the grounds have been separated, a dangerous touch voltage of more than 40 V may be present at the sockets. S7-400 and M7-400 Programmable Controllers Hardware and Installation A5E00069481-04 A-35 Assembling and Installing Systems ! Caution There is a risk of personal injury. Dangerous touch voltages may be present at the video sockets of the monitor. Fit suitable touch protection to the sockets. • Connect the ground clamp of the monitor to the chassis ground. • Connect the cable shields to the ground clamp of the monitor as follows: Proceed as follows: – Strip the outer cable insulation of the video cables in the region of the ground clamp of the monitor, without damaging the braided shield. – Secure the outer braided shield over a large area to the ground clamp of the monitor. Figure A-11 shows a simplified representation of shielding and grounding for monitor and S7-400. CR Monitor with separate electronic ground and housing ground CP Ó Ó Ó Figure A-11 A-36 Shield bus Outer shield connected to ground clamp Shielding and Grounding with a Great Distance between Monitor and Programmable Controller S7-400 and M7-400 Programmable Controllers Hardware and Installation A5E00069481-04 Guidelines for Handling Electrostatically-Sensitive Devices (ESD) B Chapter Overview Section Description Page B.1 What is ESD? B-2 B.2 Electrostatic Charging of Persons B-3 B.3 General Protective Measures Against Electrostatic Discharge Damage B-4 S7-400 and M7-400 Programmable Controllers Hardware and Installation A5E00069481-04 B-1 Guidelines for Handling Electrostatically-Sensitive Devices (ESD) B.1 What is ESD? Definition: All electronic modules are equipped with large-scale integrated ICs or components. Due to their design, these electronic elements are very sensitive to overvoltages and thus to any electrostatic discharge. These Electrostatically-Sensitive Devices are commonly referred to by the abbreviation ESD. Electrostatically-sensitive devices are labeled with the following symbol: ! B-2 Caution Electrostatically-sensitive devices are subject to voltages that are far below the voltage values that can still be perceived by human beings. These voltages are present if you touch a component or the electrical connections of a module without previously being electrostatically discharged. In most cases, the damage caused by an overvoltage is not immediately noticeable and results in total damage only after a prolonged period of operation. S7-400 and M7-400 Programmable Controllers Hardware and Installation A5E00069481-04 Guidelines for Handling Electrostatically-Sensitive Devices (ESD) B.2 Electrostatic Charging of Persons Charging Every person with a non-conductive connection to the electrical potential of its surroundings can be charged electrostatically. Figure B-1 shows you the maximum values for electrostatic voltages which can build up on a person coming into contact with the materials indicated in the figure. These values are in conformity with the specifications of IEC 61000-4-2. Voltage in kV (kV ) 16 15 14 13 12 11 10 9 8 7 6 5 4 3 2 1 1 Synthetic material 2 Wool 3 Antistatic material, for example, wood or concrete 1 2 3 5 10 20 30 40 50 60 70 80 90 100 Figure B-1 Relative air humidity in % Electrostatic Voltages which can Build up on a Person S7-400 and M7-400 Programmable Controllers Hardware and Installation A5E00069481-04 B-3 Guidelines for Handling Electrostatically-Sensitive Devices (ESD) B.3 General Protective Measures Against Electrostatic Discharge Damage Ensure Sufficient Grounding Make sure that the personnel, working surfaces, and packaging are sufficiently grounded when handling electrostatically-sensitive devices. You thus avoid electrostatic charging. Avoid Direct Contact You should touch electrostatically-sensitive devices only if it is unavoidable (for example, during maintenance work). Hold modules without touching the pins of components or printed conductors. In this way, the discharged energy cannot affect the sensitive devices. If you have to carry out measurements on a module, you must discharge your body before you start the measurement by touching grounded metallic parts. Use grounded measuring devices only. B-4 S7-400 and M7-400 Programmable Controllers Hardware and Installation A5E00069481-04 Glossary A Accumulator (ACCU) The accumulators are registers in the CPU and are a buffer for load, transfer and comparison, math and conversion instructions. Address An address is the identifier for a specific area of memory on which an instruction acts. Examples: Input I 12.1; Memory Word MW24; Data Block DB3. Analog Module Analog modules convert analog process variables (for example, temperature) into digital values that can be processed in the CPU or they convert digital values into analog manipulated variables. Application Module Application modules are function modules from the M7 range. AT Adapter Module The ATM 478 AT adapter module provides a slot for a short AT card. B Backup Battery The backup battery ensures that the user program in the CPU is not lost in the event of a power failure and that defined data areas, bit memory, timers, and counters are also retained. S7-400 and M7-400 Programmable Controllers Hardware and Installation A5E00069481-04 Glossary-1 Glossary BIOS Basic Input Output System BIOS is understood to mean the part of the software which creates the link between hardware and the operating system, for example, MS-DOS. This software is stored in an EPROM.Basic Input Output System Examples of important sections are the loader for the operating system, the (hardware) setup for defining the hardware configuration and for setting the time. Bit Memory (M) A memory area in the system memory of a SIMATIC CPU. This area can be accessed using write or read access (bit, byte, word, and double word). The bit memory area can be used by the user to store intermediate results. It can be accessed bit by bit, byte by byte, word by word, or double word by double word. Building Ground The connection between data processing equipment and ground, whereby no unacceptable functional interference to data processing equipment is caused by external effects, such as interference caused by power systems. The connection must be in the form of a low-noise ground. Bus A bus is a transfer medium which interconnects several nodes. Data transmissions can be serial or parallel over electical conductors or fiber-optic cables. C Chassis Ground The chassis ground comprises all interconnected inactive parts of an apparatus, which even in case of a fault cannot take dangerous touch voltages. Communications Processor Communications processors are modules for point-to-point and bus connections. Compress The PG online function “Compress” is used to shift all valid blocks in the RAM of the CPU evenly and without any gaps to the beginning of the user memory. All gaps caused by deleting or correcting blocks are thus removed. Glossary-2 S7-400 and M7-400 Programmable Controllers Hardware and Installation A5E00069481-04 Glossary Configuration The configuration is the selection and putting together of the individual components of a programmable logic controller (PLC). Configuring Configuring is the assigning of modules to racks or slots and (with signal modules) addresses. Connecting Clip These are the clips with which the modules are mechanically interconnected within an M7 module assembly. Counters Counters are an area in the system memory of the CPU. The contents of these counters can be changed using STEP 7 instructions (for example, up counter, down counter). CP Communications Processor CPU Central processing unit of the S7 or M7 programmable controller with processor, arithmetic unit, memory, operating system, and programming device interface. Cyclic Interrupt A cyclic interrupt is generated by the S7-400 CPU periodically according to a programmable time interval. A corresponding organization block is then executed. D Data Block (DB) Data blocks are areas in the user program which contain user data. There are shared data blocks which can be accessed by all logic blocks, and there are instance data blocks which are associated with a particular function block (FB) call. S7-400 and M7-400 Programmable Controllers Hardware and Installation A5E00069481-04 Glossary-3 Glossary Data, Static Static data are data which are used only within a function block. These data are stored in an instance data block belonging to the function block. The data stored in the instance data block are retained until the next function block call. Data, Temporary Temporary data are local data of a block that are stored in the L stack during processing of the block and that are not retained after processing. Default Setting A default setting is an expedient basic setting which is always used when no other value is preset by a parameter. Diagnostics System Diagnostics Diagnostic Buffer The diagnostic buffer is a retentive area of memory within the S7-400 CPU which stores the diagnostic events in the order they occurred. Diagnostic Interrupt Modules with diagnostics capability signal system errors to the S7-400 CPU by means of diagnostic interrupts. E Electromagnetic Compatibility (EMC) Electromagnetic compatibility is understood to mean the capability of electrical apparatus to operate without faults in a given environment, without affecting that environment in an unacceptable manner. Equipotential Bonding An electrical connection (equipotential bonding conductor) that ties the exposed conductive parts of an item of electrical equipment and extraneous conductive parts to the same, or approximately the same, potential in order to prevent disturbing or dangerous voltages between these parts. Glossary-4 S7-400 and M7-400 Programmable Controllers Hardware and Installation A5E00069481-04 Glossary Error Display Error display is one of the possible responses of the operating system to a run-time error. The other possible responses include: error response in the user program, STOP mode of the CPU. Error Handling via OB When the operating system detects an error (for example, STEP 7 access error), it calls the specific organization block (error OB) for this error, where the further response of the CPU can be specified. Error Response Response to a run-time error. The operating system can respond to the following types: transferring of the programmable controller to STOP mode, calling of an organization block where the user can program a response, or displaying of the error. Expansion Module The expansion module of M7-400 is connected with the CPU via an ISA bus interface and accommodates up to three interface submodules. F FB Function Block FC Function Flash EPROM With regard to their characteristic to retain data in the case of a power failure, FEPROMs correspond to the electrically erasable EEPROMs, but can be erased much faster (FEPROM = Flash Erasable Programmable Read Only Memory). They are used on the memory cards. S7-400 and M7-400 Programmable Controllers Hardware and Installation A5E00069481-04 Glossary-5 Glossary Function According to IEC 61131-3, a function is a code block that contains no static data. A function allows parameters to be passed in the user program. Functions are therefore suitable for programming complex functions, e.g. calculations, which are repeated frequently. Functional Grounding Grounding whose only purpose is to ensure the intended function of the electrical equipment concerned. Functional grounding short-circuits any noise that might otherwise have a detrimental effect on the equipment. Function Block (FB) According to IEC 61131-3, a function block is a code block that contains static data. An FB allows parameters to be passed in the user program. Function blocks are therefore suitable for programming complex functions, e.g. closed-loop controls, mode selections, which are repeated frequently. Function Module (FM) A programmable module which, in contrast to the CPU, has no multipoint interface and can only be operated as a slave. G GD Circle A GD circle comprises a number of CPUs which exchange data via global data communication and are used as follows: • A CPU sends a GD packet to the other CPUs. • A CPU sends and receives a GD packet from another CPU. A GD circle is identified by a GD circle number. GD Element A GD element is created through assigning the global data to be exchanged and is clearly identified in the global data table by the GD identifier. GD Packet A GD packet can consist of one or more GD elements which are transmitted together in a message frame. Glossary-6 S7-400 and M7-400 Programmable Controllers Hardware and Installation A5E00069481-04 Glossary Global Data Global data are data which can be accessed from each logic block (FC, FB, OB). These include bit memory M, inputs I, outputs Q, timers T, counters C, and data blocks DB. Global data can be accessed either absolutely or symbolically. Global Data Communication Global data communication is a procedure with which global data are transferred between CPUs (without communication function blocks (CFBs)). Ground The conductive mass of the ground whose potential can be assumed to be zero at any point. In the vicinity of ground electrodes, the ground may have a potential other than zero. The term “reference ground” is often used in this situation. Ground (verb) To ground means connecting an electrically conductive part via a grounding system to ground (one or more electrically conductive parts that have good contact with the soil). H Hardware The hardware is understood to be the entire physical and technical equipment of a programmable controller. Hardware Interrupt Interrupt-triggering modules trigger a hardware interrupt in the case of a certain event in the process. The hardware interrupt is signalled to the CPU. In accordance with the priority of this interrupt, the corresponding organization block is then executed. S7-400 and M7-400 Programmable Controllers Hardware and Installation A5E00069481-04 Glossary-7 Glossary I Instance Data Block With the S7-400, each call of a function block in the STEP 7 user program is assigned a data block which is generated automatically. In the instance data block, the values of the input, output and in/out parameters as well as the local block data are stored. Interface, Multipoint Multipoint Interface. Interface Submodules Submodules which provide the automation computer with additional interfaces, such as VGA, COM, PROFIBUS DP, etc. Interrupt The operating system of the S7-400 CPU has 10 different priority classes which control the processing of the user program. These priority classes include interrupts, such as hardware interrupts. When an interrupt occurs, the relevant organization block is called automatically by the operating system in which the user can program the required reaction to the interrupt (for example, in a function block (FB)). Interrupt, Cyclic Cyclic Interrupt Interrupt, Diagnostic Diagnostic Interrupt Interrupt, Hardware Hardware Interrupt Interrupt, Time-Delay Time-Delay Interrupt Interrupt, Time-Of-Day Time-Of-Day Interrupt Glossary-8 S7-400 and M7-400 Programmable Controllers Hardware and Installation A5E00069481-04 Glossary ISA Bus The ISA bus is the standard bus in the AT-compatible PC. It is looped through the M7-400 module assembly via the 120-pin expansion sockets and plugs of the individual M7-400 modules. Isolated In the case of isolated I/O modules, the reference potentials of the control and load circuits are galvanically isolated from each other, for example, by optocouplers, relay contacts, or transformers. The I/O circuits can be connected to a common potential. K Keyswitch The keyswitch is the mode selector switch of the CPU. The keyswitch is operated with a key which can be withdrawn. L Load Memory The load memory is part of the S7-400 CPU. It contains objects created by the programming device. It can be either a plug-in memory card or an integrated memory. Load Power Supply Power supply for the signal and function modules and the process I/O connected to them. Local Data Data, Temporary Logic Block In SIMATIC S7, a logic block is a block that contains part of the STEP 7 user program. The other type of block is a data block which contains only data. S7-400 and M7-400 Programmable Controllers Hardware and Installation A5E00069481-04 Glossary-9 Glossary M Mass Storage Module An expansion of the M7-400 programmable controller. It is connected to the CPU via an ISA bus interface and contains a floppy disk drive and a hard disk drive. Measuring Range Submodule Measuring range submodules are plugged onto the analog input module for adapting to various measuring ranges. Memory Card Memory cards are storage media in credit-card format for CPUs and CPs. They are available as RAM or FEPROM. Mode Selector Switch Keyswitch Module Parameters Module parameters are used to set the module reactions. A difference is made between static and dynamic module parameters. Multipoint Interface (MPI) The multipoint interface is the programming device interface in SIMATIC S7/M7. It enables the simultaneous operation of a number of nodes (programming devices, text display operator interfaces, and operator panels) from one or more CPUs. Each node is identified by an address (MPI address). MPI Address Multipoint Interface (MPI) N Nesting Depth A block can be called from another block by means of block calls. The nesting depth is the number of simultaneously called logic blocks. Glossary-10 S7-400 and M7-400 Programmable Controllers Hardware and Installation A5E00069481-04 Glossary Network In communications, a network is the connection between two or more S7-400s/M7-400s and other terminals such as a programming device, via a connecting cable. Data are exchanged over the network between the connected stations. Node Number The node number represents the accessing address of a CPU or programming device or of another intelligent I/O module when they communicate with each other via a network. The node number is assigned by the CPU or programming device using the STEP 7 software. Non-Isolated In the case of non-isolated I/O modules, the reference potentials of the control and load circuits are electrically connected to each other. O OB Organization Block OB Priority The operating system of the S7-400 CPU differentiates between various priority classes, for example, cyclic program processing, process interrupt-controlled program processing. Each priority class is assigned organization blocks (OBs), where the S7 user can program a reaction. As a standard, the OBs have different priorities to which they are processed when they occur simultaneously or when they interrupt each other. On-Board Silicon Disk The on-board silicon disk is a memory unit in which all or part of the software of a CPU 488-4 is stored retentively, including static data. Operating State The SIMATIC S7 programmable controllers recognize the following operating states: STOP, STARTUP, RUN. S7-400 and M7-400 Programmable Controllers Hardware and Installation A5E00069481-04 Glossary-11 Glossary Operating System of the CPU The operating system of the CPU organizes all functions and sequences of the CPU which are not connected to a specific control task. Organization Block (OB) Organization blocks form the interface between the operating system of the S7-400 CPU and the user program. The sequence in which the user program should be processed is laid down in the organization blocks. P Parameter 1. Variable of a STEP 7 logic block 2. Variable for setting the reaction of a module (one or more per module). Parameters can be static or dynamic. Parameters, Dynamic In contrast to static parameters, dynamic parameters of modules can be changed during operation by calling an SFC in the user program, for example, limit values of an analog signal input module. Parameters, Static In contrast to dynamic parameters, static parameters of modules cannot be changed by means of the user program, but only via STEP 7 (not in the RUN state); for example, input delay of a digital signal input module. PG Programming Device PLC Programmable Logic Controller Glossary-12 S7-400 and M7-400 Programmable Controllers Hardware and Installation A5E00069481-04 Glossary Process Image The process image is a component part of the system memory of the S7-400 CPU. At the beginning of the cyclic program, the signal states of the input modules are transferred to the process-image input table (PII). At the end of the cyclic program, the process-image output table (PIQ) is transferred to the output modules as the signal state. Programmable Logic Controller (PLC) Programmable controllers are electronic control devices whose functions are stored in the controller in the form of a program. The structure and wiring of a PLC therefore do not depend on the actual functions of the controller. Programmable controllers and computers have similar structure: they consist of a CPU (central processing unit) with memory, input/output modules, and an internal bus system. The I/O and programming language are tailored to the requirements of open-loop control technnology. Programming Device (PG) A personal computer with a special compact design, suitable for industrial conditions. A Siemens programming device is completely equipped for programming the SIMATIC programmable logic controllers. Protective Ground Connection via protective conductor to a common ground conductor for the exposed, conductive parts of electrical apparatus which are not normally live, but at which a voltage may be present in the event of a fault, and which are jointly protected via a protective device. R RAM The RAM (Random Access Memory) is a semiconductor memory with random access (read/write memory). Reference Ground Ground S7-400 and M7-400 Programmable Controllers Hardware and Installation A5E00069481-04 Glossary-13 Glossary Reference Potential The potential on which the voltages of the various circuits are based and according to which they are measured. Retentive Data Retentive data are not lost after a power failure, if a backup battery is provided. Revision Level Products with the same order number are differentiated by their revision level. The revision level is increased for upwardly-compatible function expansions, for changes due to production reasons (use of new components) and for fault correction. Run-Time Error Errors that occur in the programmable controller (that is, not in the process) during execution of the user program. S Scan Cycle Time The scan cycle time is the time the CPU takes to run the user program once through. Scan Rate The scan rate defines how often GD packets are sent and received on the basis of the CPU cycle. SFB System Function Block SFC System Function Glossary-14 S7-400 and M7-400 Programmable Controllers Hardware and Installation A5E00069481-04 Glossary Signal Module Signal modules (SMs) are the interface between the process and the programmable controller. Signal modules comprise digital input and output modules (I/O module, digital) and analog input and output modules (I/O module, analog). SRAM Backup A static RAM: with the programmable modules of the M7-400 programmable controller, part of the main memory is backed up as an SRAM. STARTUP The CPU goes through the STARTUP state during the transition from STOP to RUN mode. It can be set using the mode selector on the CPU, following power-on, or by an operation on the programming device. STEP 7 Programming language for writing user programs for SIMATIC S7 programmable controllers. Substitute Value Substitute values are values which are output to the process in the case of faulty signal output modules or which are used in the user program instead of a process variable in the case of faulty signal input modules. The substitute values can be specified in advance by the user (for example, maintain old value). System Diagnostics System diagnostics is the detection, evaluation, and reporting of errors occurring within the programmable controller. Examples of such errors are: program errors or failures on modules. System errors can be indicated with LED indicators or by STEP 7. System Function (SFC) A system function (SFC) is a function integrated in the CPU operating system which can be called in the user program when required. System Function Block (SFB) A system function block (SFB) is a function block integrated in the CPU operating system which can be called in the STEP 7 user program when required, just like a function block (FB). S7-400 and M7-400 Programmable Controllers Hardware and Installation A5E00069481-04 Glossary-15 Glossary System Memory The system memory is integrated in the CPU and executed in the form of RAM. The address areas (timers, counters, bit memory, etc.) and data areas required internally by the operating system (for example, backup for communication) are stored in the system memory. T Time-Delay Interrupt The time-delay interrupt belongs to one of the priority classes in SIMATIC S7-400 program processing. It is generated after expiry of a time started in the user program. A corresponding organization block is then executed. Time-Of-Day Interrupt The time-of-day interrupt belongs to a priotity class in SIMATIC S7-400 program processing. It is generated depending on a certain date (or daily) and time of day (for example, 9:50 or hourly, per minute). A corresponding organization block is then executed. Timer (T) Timers are an area in the system memory of the CPU. The contents of these timers are updated by the operating system asynchronously to the user program. You can use STEP 7 instructions to define the exact function of the timer (for example, on-delay timer) and start processing it (Start). Total Current Sum of currents of all output channels of a digital output module. Transmission Rate Speed of data transmission in bits per second U Ungrounded Without galvanic connection to ground. Glossary-16 S7-400 and M7-400 Programmable Controllers Hardware and Installation A5E00069481-04 Glossary User Memory The user memory contains logic blocks and data blocks of the user program. The user memory can either be intergrated in the CPU or can be plugged in on memory card or memory submodules. In general, however, the user program is executed from the work memory (RAM) of the CPU. User Program With SIMATIC a difference is made between the operating system of the CPU and user programs. The latter are generated by means of the STEP 7 programming software in the possible programming languages (Ladder Logic, Statement List, Function Block Diagram) and are stored in logic blocks. Data are stored in data blocks. V Varistor Voltage-dependent resistor W Warm Restart When a CPU starts up (for example, when the mode selector is moved from STOP to RUN or when power is turned on), before cyclic program processing starts (OB1), OB100 (complete restart) is processed first. In a warm restart, the process-image input table is read in and the STEP 7 user program processed starting with the first statement in OB1. Work Memory The work memory is the RAM (Random Access Memory) in the CPU to which the STEP 7 user program is automatically reloaded from the load memory. The processor executes the program in the work memory in RUN mode. S7-400 and M7-400 Programmable Controllers Hardware and Installation A5E00069481-04 Glossary-17 Glossary Glossary-18 S7-400 and M7-400 Programmable Controllers Hardware and Installation A5E00069481-04 Index A C Accessories, 2-39 Addresses geographical, 3-2 logical, 3-2 Addressing modules, M7-400, 8-5 Analog modules, replacing, 7-7 Assembling the bus cable, on a bus connector with order number 6ES7 ..., 5-20 Assembling, M7-400 MPI subnet, 8-30 PROFIBUS-DP subnet, 8-30 Assembly central, 2-2 distributed, 2-2 Assembly, M7-400 interface submodules, 6-18, 8-13 module accessories, 8-10 AT card, M7-400, fitting, 8-56 ATM 478, M7-400 fitting the short AT card, 8-15 replacing a short AT card, 8-56 C bus, 2-7 Cable lengths, maximum, 5-15 Cabling, inside buildings, A-17 Changing fuse, digital modules, 7-9 Channel on a digital module, 3-6 on an analog module, 3-7 Checklist, M7-400 installation, 8-9 preparing for operation, 8-32 Choosing the Power Supply Module, M7-400, 8-6 COM interface, M7-400, connecting a PC/programming device, 8-36 Commissioning, M7-400 checklist, 8-9 sections, 8-32 Communication, programming device – CPU, 6-6 Communication bus (C-bus), 2-7 Components for MPI network, 5-8 of the S7-400, 1-1 PROFIBUS-DP network, 5-8 Configuration electrical, A-2 interference-free, 4-15 Connecting a mouse, M7-400, 8-35 Connecting a programming device, 6-5 Connecting terminal, M7-400, 8-22 Connecting, M7-400 module assembly, 8-29 operator panels and I/O devices, 8-33 PC, 8-36 programming device, 8-36 Connection, rules, 2-5 Connection, M7-400 keyboard, 8-33 VGA monitor, 8-33 Connector, M7-400, removing the cover, 8-18 B Backup battery disposing, 7-3 inserting, 6-13 removing, 7-2 replacing, 7-2 using, 7-3 Baud Rate, 5-3 Bus cable, length of spur lines, 5-16 Bus connector connecting to the module, 5-22 purpose, 5-19 removing, 5-22 setting the terminating resistor, 5-22 terminating resistor, 5-9 Bus connectors, assembling bus cables, 5-20 Bus segment. See Segment S7-400 and M7-400 Programmable Controllers Hardware and Installation A5E00069481-04 Index-1 Index Coupling capacitive, A-6 direct, A-6 inductive, A-6 CPU, 1-3 resetting the, 6-7, 6-10 restarting the, 6-10 CPU, M7-400, replacing a module assembly, 8-49 CPUs, replacing, 7-5 CPUs, M7-400, covering unused submodule slots, 6-19, 8-14 D Digital modules fuses, 7-9 replacing, 7-7 Distributed I/Os, 2-38 Fitting, M7-400 AT adapter module, 8-15 ATM 478, 8-15 extension modules, 8-17 memory cards, 2-31, 7-19, 8-11 Front connector coding key, 4-35 labeling, 4-31 plugging in, 4-35 wiring, 4-26 with crimp snap-on terminals, 4-24 with screw-type terminals, 4-24 with spring-type terminals., 4-24 Front connector coding, 4-35 Fuse of the fan subassembly, replacing, 7-13 G Grounded configuration, M7-400, connecting a programming device, 8-43 E Electrical configuration, M7-400, 8-6 EMC-compatible mounting – examples, A-10 EMERGENCY OFF devices, A-2 Equipotential bonding, A-15, A-22 Error, how to proceed if an error occurs, 6-2 Expansion connector, M7-400, removing the cover, 8-18 Expansion module, M7-400, covering unused submodule slots, 6-19, 8-14 Expansion modules, M7-400, replacing a module assembly, 8-49 Expansion socket, M7-400, removing the cover, 8-18 Extension modules, M7-400, fitting to a CPU, 8-17 F Fan subassembly replacing fans, 7-14 replacing the filter frame, 7-16 replacing the fuse, 7-13 replacing the monitoring PCB, 7-18 replacing the power supply PCB, 7-18 Index-2 H Highest MPI address, 5-4 I I/O bus, 2-7 I/O devices, M7-400, connecting, 8-33 Installation for EMC, A-5 of cabinets, 2-26 Installing, M7-400, 8-8 checklist, 8-9 module assembly, 8-24 Insulation monitoring, 4-9 Interface module, M7-400, replacing, 8-47 Interface modules inserting, 8-13 replacing, 7-11 Interface submodules, M7-400, installing, 6-18, 7-22, 8-13 Interference, radiated, A-6 S7-400 and M7-400 Programmable Controllers Hardware and Installation A5E00069481-04 Index K Keyboard, M7-400, connecting the, 8-33 Keyboard, M7-400, maximum line length, 8-35 L Lightning protection, A-19, A-20 for 24 VDC supply, A-25 for signal modules, A-25 high-voltage protector, A-23 low-voltage protection, A-26 Lightning protection zones, A-21 Lightning strike, A-21 Load current circuit, 4-5 Load current power supplies, 4-4 Location, M7-400 module designation, 1-6 order number, 1-6 product release, 1-6 M M7-400 electrical configuration, 8-6 mechanical configuration, 8-2 Main power supply, A-3 Mechanical configuration, M7-400, 8-2 Memory card, inserting, 6-11, 6-12 Memory card, M7-400, inserting/removing, 8-28 Memory cards, M7-400, replacing, 8-54 Methods of ventilation, 2-19 Mode selector switch, M7-400, inserting the key, 8-27 Module accessories, M7-400, 8-10 Module assembly, M7-400 connecting, 8-29 installing in the rack, 8-24 Modules installing, 2-33 isolated, 4-10 signal, 2-7 slot numbers, 2-37 Modules, M7-400 interconnecting, 8-21 latching, 8-22 removing the cover, 8-20 replacing, 8-46 screwing on, 8-26 Monitor, M7-400 connecting the, 8-33 maximum line length, 8-35 setting up, 8-34 MPI, definition, 5-2 MPI address, 5-4 highest, 5-4 rules, 5-4 MPI addresses, recommendation, 5-8 MPI network components, 5-8 configuration example, 5-11, 5-13 configuration rules, 5-7 data packets in, 5-8 segment, 5-15 MPI parameters, 6-9 MPI subnet, M7-400, assembling, 8-30 MPI, M7-400 connecting a programming device to a node, 8-39 connecting a programming device to ungrounded nodes, 8-43 connecting the programming device to several nodes, 8-40 Multipoint interface, 8-43 N Networking, possibilities, 2-38 Node, 5-3 Nodes, number of, 5-4 O Operator panels, M7-400, connecting, 8-33 Overall installation, in the TN-S system, 4-6 Overvoltage, A-20 S7-400 and M7-400 Programmable Controllers Hardware and Installation A5E00069481-04 Index-3 Index Overvoltage protection, A-30 R Rack, 1-3 clearances, 2-10 P mounting dimensions, 2-10 Power supply connector segmented, 2-8, 2-9 disconnect, 4-20 subdivided, 2-9 plugging in, 4-23 with I/O bus and C bus, 2-7 wiring, 4-21 Racks Power supply module, 1-3 grounding, 2-10 choosing, 4-3 mounting, 2-10 replacing, 7-4 of the S7-400 system, 2-6 Preparing for operation, M7-400, 8-32 Rating plate, M7-400, 1-6 checking status and error indicators, 8-45 Reference potential checklist, 8-32 grounded, 4-7 connecting a PC/programming device to the ungrounded, 4-8 COM interface, 8-36 Regulations, for operating the S7-400, A-2 connecting the operator panels and I/O Replacing interface submodules, 7-22 devices, 8-33 Replacing memory cards, 7-19 starting up a PROFIBUS-DP, 8-44 RS 485 repeater, 5-7, 5-23 Printer, M7-400 assembly, 5-23 connecting, 8-34 connecting the PROFIBUS-DP bus cable, maximum line length, 8-35 5-24 PROFIBUS-DP, starting up, 6-17 terminating resistor, 5-9 PROFIBUS-DP address, 5-4 wiring the power supply unit, 5-23 PROFIBUS-DP addresses, recommendation, Rules 5-8 for configuring a network, 5-7 PROFIBUS-DP bus cable, 5-18 for ensuring electromagnetic compatibility, characteristics, 5-18 A-7 rules for laying the, 5-18 general, A-2 PROFIBUS-DP network wiring, 4-17 components, 5-8 Running cables, outside buildings, A-19 configuration example, 5-12, 5-13 configuration rules, 5-7 segment, 5-15 S PROFIBUS-DP subnet, M7-400 Segment, 5-3 assembling, 8-30 MPI network, 5-15 starting up, 8-44 PROFIBUS-DP network, 5-15 Programming device, connecting, 6-5 Setting up, M7-400, monitor, 8-34 Programming device, M7-400 Short AT card, M7-400, fitting, 8-15 connecting to a grounded configuration, Signal module, 1-3 8-43 Socket, M7-400, removing the cover, 8-18 connecting to an ungrounded configuration, Space requirements 8-43 of cabinets, 2-29 in the MPI subnet, 8-41 of the racks, 2-30 via spur line to MPI subnet, 8-42 with fan subassembly, 2-11 Protection against overvoltage, A-20 Protective measures, 4-5 Index-4 S7-400 and M7-400 Programmable Controllers Hardware and Installation A5E00069481-04 Index Spur lines, 5-7 lengths, 5-16 Start address of analog modules, 3-5 of digital modules, 3-4 Startup, procedure, 6-2 Station. See Teilnehmer Status and error indicators, checking, 8-45 Submodules, M7-400, replacing, 8-46 Supply, grounded, 4-5 Surge protection, components, A-26 Surge voltages, inductive, A-30 Surges, A-21 Switching on, checks prior to switching on for the first time, 6-3 Switching on an S7-400, for the first time, 6-6 T Terminating resistor, 5-7 example, 5-10 on the bus connector, 5-9 on the RS 485 repeater, 5-9 setting at the bus connector, 5-22 Transmission rate, 5-3 Types of cabinets, 2-28 U Ungrounded configuration, M7-400, connecting a programming device, 8-43 S7-400 and M7-400 Programmable Controllers Hardware and Installation A5E00069481-04 Index-5 Index Index-6 S7-400 and M7-400 Programmable Controllers Hardware and Installation A5E00069481-04