1
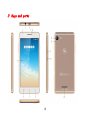
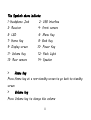
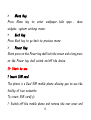
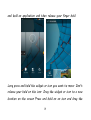
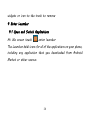
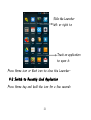
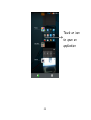
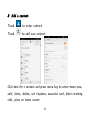
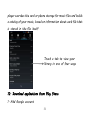
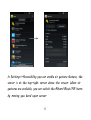
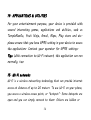
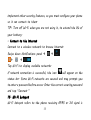
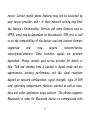
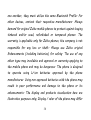
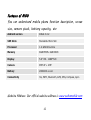
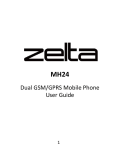
1 Zelta A100 Mobile Phone User Guide Preface Please read the following guidelines before using your new Zelta Mobile phone. Utmost compliance with the following is highly recommended for your safety. Non-compliance may pose danger to you and your mobile phone, and may be illegal. The Zelta A100 is packed with features to satisfy your needs such as Phonebook, Music Player, Video Player, Digital Camera, among others. It is Wi-Fi and Bluetooth capable and also meets the GSM/GPRS technical criteria. It is certified by both local and international authorities. Zelta reserves the right to modify technical specifications without prior notice. Some content in this manual, i.e. software, images, accessories and more, may vary from that in the actual device. Please refer to your unit for accuracy. This guide aims to help you get started on your new Zelta Mobile phone. You will find the following icons periodically present to help you make better use of your device. 2 Contents I. Warning 6 1 Safety information 6 1.1 Traffic safety first 6 1.2 Turn off in hospital 6 1.3 Turn off in airplane 7 1.4 Turn off when refueling 7 1.5 Turn off near blasting sites 7 2 Cautions on mobile phone use 7 2.1 Interference 7 2.2Reasonable use 8 2.3 Qualified maintenance service 8 2.4 Water-resistance 8 2.5 Emergency calls 8 3 Precautions for use of battery 8 4 Cautions for children 9 3 II. Keys and parts 10 III. Start to use 12 1 Insert SIM card 12 2 Insert Memory card 14 3 Charge the battery 15 IV. Basic functions 16 1 Lock and unlock the screen 16 2 Make it yours 17 3 Add Widgets and more icons to Home Screen 18 4 Enter Launcher 20 4.1 Open and Switch Applications 20 4.2 Switch to Recently Used Application 21 5 Make a call 23 6 Call log 24 7 Reject a call by SMS 25 8. Add a contact 26 9. Send and Receive message(s) 27 4 10. Browser the Web 29 11. Enjoy music 30 12.Download applications from android market 13. Manage Applications 30 31 32 14. Applications & Utilities 34 15. Wi-Fi networks 34 16. Wi-Fi 35 hotspot 17. Features of A100 42 5 I. Warning Please read the concise rules. The breach of the rules may result in danger or violation of law. 1 Safety information 1.1 Traffic safety first Please use the mobile phone carefully when you drive a car. Park your car at roadside and then use the mobile phone if the driving condition is bad. 1.2 Turn off in hospital Please abide by relevant provisions or regulations. Please turn off your mobile phone near medical equipment. 6 1.3 Turn off in airplane Wireless equipment has disturbance to the airplane, so the use of the mobile phone in airplane is dangerous and illegal. 1.4 Turn off when refueling Please don’t use the mobile phone in gas station or near fuels or chemicals. 1.5 Turn off near blasting sites Don’t use the mobile phone in blasting sites. Please observe relevant restrictions and carry out rules or regulations. 2 Cautions on mobile phone use 2.1 Interference All phones may be interfered, which affect phone calls. 7 2.2Reasonable use Use only in the normal position. Do not touch the antenna area unnecessarily. 2.3 Qualified maintenance service Only qualified personnel may install or repair this product. 2.4 Water-resistance Your device is not water resistant. Keep it dry. 2.5 Emergency calls Ensure the phone is switched on and in service. Enter the emergency number and press the Dial icon. 3 Precautions for use of battery 3.1 Do not dispose of batteries near or in a fire to avoid dangers. 8 3.2 Do not dispose of batteries in the garbage. Dispose of batteries to assigned battery recycling center. 4 Cautions for children Keep your device out the reach of children in case of accidental injury caused by incorrect use of the device as toys. 9 II. Keys and parts 10 The Symbols above indicate: 1. Headphone Jack 2. USB Interface 3. Receiver 4. Front camera 5. LED 6. Menu Key 7. Home Key 8. Back Key 9. Display screen 10. Power Key 11. Volume Key 12. Flash Light 13. Rear camera 14. Speaker Home key Press Home key at a non-standby screen to go back to standby screen Volume key Press Volume key to change the volume. 11 Press Menu Key Menu key to enter wallpaper、hide apps 、 show widgets、system settings menu. Back Key Press Back key to go back to previous menu. Power Key Short press on the Power key shall lock the screen and a long press on the Power key shall switch on/off the device. III. Start to use 1 Insert SIM card The phone is a Dual SIM mobile phone allowing you to use the facility of two networks. To insert SIM card(s): 1. Switch off the mobile phone and remove the rear cover and 12 battery. 2. Insert the SIM card correctly in the card slot(s) (See figure below) 3. Finally insert the battery and replace the rear cover of the mobile phone. 13 Note: SIM support Micro SIM which is a new kind of SIM for you. You can get it from operator or ask for changing a Micro SIM in a mobile shop. 2 Insert Memory card 1. Power off the mobile phone and remove the rear cover and battery. 2. Insert the Micro SD card into the slot. 3. Finally insert the battery and the rear cover of the mobile 14 phone. Note: Use only compatible memory cards for use with this device. Incompatible memory cards may damage the card or the device and corrupt the data stored in the card. 3 Charge the battery During charging, the battery indicator on the phone is a thunder icon. If the device is switched off during charging, there will still be a charging indication on the screen that shows the phone is being charged. If the device is overused --when the battery is low, the charging icon might take some time to appear. When the battery indicator on the screen says ' charged', thunder icon will disappear, which means the completion of charging. During charging, the battery, the device and the charger will get hot. This is normal. Unplug the charger from the AC electrical 15 outlet and disconnect the wiring between the phone and the charger after charging. . Cautions: Charge the phone in a well-ventilated place in which the temperature is between -10℃ to +55℃. Use the charger provided by the manufacturer only. The use of unconfirmed charger may lead to dangers and violate the manufacturer's warranty clause. If the temperature is too high or too low during charging, the device will automatically send a warning and stop charging to avoid damage to the battery or any danger. IV. Basic functions 1 Lock and unlock the screen Press power button to enter Sleep mode and meanwhile the screen will be locked; press power button again to wake up and then drag to the right to unlock. 16 2 Make it yours 1. Home screen: It is your starting point to access all the features on your phone. It displays application icons, widgets, shortcuts, and other features. 2. Notification Bar: At the top of the screen, the Status Bar displays the time, status, and notifications. If there is a new message, missed call or something in the notification bar, you can 17 drag it down to open notification panel and click the desired one to have a view. When you finished, you can close it by dragging the panel up or pressing “Back”. 3 Add Widgets and more icons to Home Screen Press menu key, and then you can Modify Wallpaper; long press 18 and hold an application and then release your finger hold Long press and hold the widget or icon you want to move. Don’t release your hold on the icon. Drag the widget or icon to a new location on the screen Press and hold on an icon and drag the 19 widgets or icon to the trash to remove. 4 Enter Launcher 4.1 Open and Switch Applications At idle screen touch enter launcher The Launcher holds icons for all of the applications on your phone, including any application that you downloaded from Android Market or other sources 20 Slide the Launcher left or right to bring more icons Touch an application to open it Press Home icon or Back icon to close the Launcher. 4.2 Switch to Recently Used Application Press Home key and hold the icon for a few seconds. 21 Touch an icon to open an application 22 5 Make a call Choose and enter a complete phone number to make a call. Your phone supports smart search. Touch to view call log 23 6 Call log Press Contact icon to call directly Press this point enter menu, you can call, video call, view contact etc. 24 7 Reject a call by SMS While there is an incoming call, and you are inconvenient to accept the call, therefore you can send a message for rejecting the call. Drag this icon for select and send SMS 25 8. Add a contact Touch to enter contact Touch to add new contact Click here for a contact and press menu key to enter menu view, edit, share, delete, set ringtone, associate card, block incoming calls, place on home screen. 26 9. Send and Receive message(s) Touch enter messaging, touch compose new message. Tap this icon to select desired contact from phonebook. Touch once to capitalize the next letter you type. Touch and hold for caps. Press space or a punctuation mark to enter the highlighted suggestion When you are composing a new text message, you can select text for cutting or copying. The selected text is highlighted in blue. 27 To add “Attach” including Pictures, Videos, Audios, etc. to send MMS. When a new message comes, you can read by dragging notification panel and click the message, or entering Message to read it directly. Long press one of the all message thread, you can delete thread”. 28 10. Browser the Web 1. Set up Internet/Data connection Enter Settings > More…, scroll down to find out Mobile network, and then enter “Access Points Names, choose the desired WAP account. 2. Switch on Data connection or Wi-Fi 29 Touch it to switch on or off Data connection To browse the web, you need to switch on Data connection. If there is Wi-Fi around, you can switch on Wi-Fi to use it browse the web. 11. Enjoy music When you keep music to your SD card or phone storage, the Music 30 player searches the card or phone storage for music files and builds a catalog of your music, based on information about each file that is stored in the file itself. Touch a tab to view your library in one of four ways 12. Download applications from Play Store 1. Add Google account 31 2. Enter play store (Android Market) and download apps 13. Manage Applications Enter Setting > App. As you install downloaded Apps, you need to switch on “Unknown sources” in security settings. Select one app, you can uninstall, clear data, move to phone/SD card. 32 In Settings->Accessibility you can enable air gesture feature, the sensor is at the top-right corner above the screen. When air gestures are available, you can switch the Album/Music/FM items by moving you hand upon sensor. 33 14. APPLICATIONS & UTILITIES For your entertainment purpose, your device is provided with several interesting games, applications and utilities, such as TempleRun0z, Fruit Ninja, Gmail, Maps, Play store and etc. please ensure that you have GPRS setting in your device to access the applications. Contact your operator for GPRS settings. Tips: With connection to Wi-Fi network, this application can run normally, too. 15. Wi-Fi networks Wi-Fi is a wireless networking technology that can provide internet access at distance of up to 20 meters. To use Wi-Fi on your phone, you access a wireless access point, or “hotspot”. Some hotspots are open and you can simply connect to them. Others are hidden or 34 implement other security features, so you must configure your phone so it can connect to them. TIP: Turn off Wi-Fi when you are not using it, to extend the life of your battery. • Connect to the Internet Connect to a wireless network to browse Internet. Swipe down Notifications panel . Tap Wi-Fi to display available networks. If network connection is successful, the icon will appear on the status bar. Some Wi-Fi networks are secured and may prompt you to enter a password before access. Enter the correct security password and tap “Connect.” 16. Wi-Fi hotspot Wi-Fi hotspot refers to the phone receiving GPRS or 3G signal is 35 converted into a Wi-Fi signal sent out again, this mobile phone has become a Wi-Fi hotspot • Connect to the Wi-Fi hotspot 1. Click "Settings" - "more wireless connections" 2. Click "Tethering & portable hotspot” 3. Enter the Wi-Fi hotspot to "Set up Wi-Fi hotspot" 4. Enter the name of the WLAN hotspots, such as "My Zelta A100", choose the Wi-Fi signal in the "security" encryption, such as WAP2 PSK, then enter the password, click on the [save] 5. If network connection is successful, the icon will appear on the status bar. Disclaimer © Zelta. All rights reserved. Features and specifications are subject to change without prior 36 notice. Certain mobile phone features may not be activated by your service provider, and / or their network setting may limit the feature's functionality. Services and some features such as GPRS, email may be dependent on the network, SIM card, as well as on the compatibility of the devices used and content formats supported and may subscription/solutions. Data require transfers network/service speeds are network dependent. Always contact your service provider for details or help. Talk and standby time is quoted in digital mode and are approximate; battery performance and the signal reception depend on network configuration, signal strength, type of SIM card, operating temperature, features selected as well as voice, data and other application usage pattern. The phones supports Bluetooth, in order for Bluetooth devices to communicate with 37 one another, they must utilize the same Bluetooth Profile. For other devices, contact their respective manufacturers. Always demand for original Zelta mobile phones to protect against buying tinkered and/or used, refurbished or tampered phones. The warranty is applicable only for Zelta phones; the company is not responsible for any loss or theft. Always use Zelta original Enhancements (including batteries) for safety. The use of any other type may invalidate and approval or warranty applying to the mobile phone and may be dangerous. The phone is designed to operate using Li-ion batteries approved by the phone manufactures. Using non approved batteries with the phone may result in poor performance and damage to the phone or its enhancements. The display and products visualization here are illustrative purposes only; Display / color of the phone may differ 38 from that shown on the manual. All features, functionality and other product specifications are based on the latest available information and are correct at the time of printing; however such product specifications are subject to change without notice. INFORMATION UNDER E-WASTE (MANAGEMENT AND HANDLING) RULES, 2011 1. Do’s for disposal of product a) Always drop your used electronic products, batteries, and packaging materials after the end of their life in nearest collection point or collection center b) Separate the packaging material according to responsible waste disposal options and sorting for recycling. c) The battery can easily be removed from the product for 39 recycling. 2. Don’t disposal of equipment a) Never dump E-waste in garbage bins or municipal solid waste stream. b) Do not dispose of your product as unsorted municipal waste. c) Do not throw used batteries into household waste. d) Do not dispose damaged or leaking Lithium Ion (Li-Ion) battery with normal household waste. 3. Information on the consequences of improper handling, 40 accidental breakage damage and improper recycling of the end of life product. a) If batteries are not properly disposed of, it can cause harm to human health or the environment. b) Placing of batteries or devices on or in heating devices, such as microwave ovens, stoves, or radiators and improper disposal of batteries may lead to explosion. c) If the battery terminals are in contact with metal objects, it may cause a fire. Note: When you will insert SIM & start to use Handset, within 24 hours you will get a sms for online warranty activation. For this service operator’s sms charge will be applicable. 41 Features of A100 You can understand mobile phone function description, screen size, camera pixels, battery capacity, etc. Android version Kitkat 4.4.2 SIM Slots Standard+Micro Sim Processor 1.4 GHz Octa-Core Memory 8GB EMCP+1GB DDR3 Display 5.0'' HD,1280*720 Camera 8MP AF + 2MP Battery 2000mAh Li-ion Connectivity 3G, WIFI, Bluetooth, GPS, OTG, Compass, Gyro Website Address: Our official website address is www.zeltamobile.com 42


![[ENG] – User Manual – Infinity 3G](http://vs1.manualzilla.com/store/data/005684047_1-eeeaf4fee2be19f7818c1d37bfef1f10-150x150.png)