1
HIGH PERFORMANCE
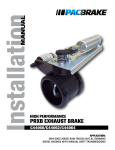
PRXB EXHAUST BRAKE
C44059, C44061, C44063, C44065
APPLICATION
1994 - 2002 DODGE RAM AUTOMATIC TRUCKS EQUIPPED WITH
47RE TRANSMISSIONS WITH 5.9L, 24 VALVE CUMMINS DIESEL ENGINES
INSTALLATION
- C44059
/ C44061
C44063L1234
/ C44065, L5855
INSTALLATIONMANUAL
MANUAL
- INSERT
TITLE/ HERE,
GETTING STARTED
Thank you and congratulations on your purchase of a Pacbrake exhaust retarder.
Before starting the installation, please read the entire installation manual carefully and be sure you have a full understanding of the installation. Check that your Pacbrake kit is correct for the application and contains all the necessary parts.
Pacbrake C44059 Kit is a high performance PRXB exhaust brake designed
to provide maximum retarding throughout the RPM range of your 1994-1995
Dodge 12 valve Cummins with an automatic 47RH transmission.
Heavy duty exhaust valve springs ARE MANDATORY for all 12 valve engines.
Pacbrake C14010 Spring Kit is included in the C44059 Kit. Failure to install the
heavy duty springs WILL result in engine damage!
Pacbrake C44061 Kit is a high performance PRXB exhaust brake designed
to provide maximum retarding throughout the RPM range of your 1996-1998
Dodge 12 valve Cummins with an automatic 47RE transmission.
Heavy duty exhaust valve springs ARE MANDATORY for all 12 valve engines.
Pacbrake C14010 Spring Kit is included in the C44061 Kit. Failure to install the
heavy duty springs WILL result in engine damage!
Pacbrake C44063 Kit is a high performance PRXB exhaust brake designed to
provide maximum retarding throughout the RPM range of your 1998½ Dodge
24 valve Cummins with an automatic 47RE transmission.
Installation of heavy duty exhaust valve springs is not required on
24 valve engines.
Pacbrake C44065 Kit is a high performance PRXB exhaust brake designed
to provide maximum retarding throughout the RPM range of your 1999-2002
Dodge 24 valve Cummins with an automatic 47RE transmission.
Installation of heavy duty exhaust valve springs is not required on
24 valve engines.
ADDITIONAL MOUNTING GROUP REQUIRED
Vehicles with aftermarket exhaust systems require a different mounting group.
- Vehicles with a 3" factory downpipe and an HX 35 turbo, use Pacbrake Part # C11430
- Vehicles with a 4" aftermarket exhaust and a 5 bolt HX 35 turbo outlet, use Pacbrake Part # C11431
- Vehicles with a 4" aftermarket exhaust and an HX 40 or equivalent turbo with a half marmon flange, use Part # C11432
PG
PG11
INSTALLATION
- C44059
/ C44061
C44063L1234
/ C44065, L5855
INSTALLATIONMANUAL
MANUAL
- INSERT
TITLE/ HERE,
C44059, C44061, C44063 & C44065 ELECTRICAL INSTALLATION
1
1
Remove the lower dash panel and locate an ignition power supply
at the base of the steering column.
1994-1997 models use a medium blue 14 gage wire and blue “T” tap
1998-2002 models use a black with orange tracer 18 gage wire and
a red “T” tap.
Check the wire with a voltmeter to ensure it is 12 volts and an
ignition power source. Attach the supplied “T” tap to this wire and
insert the red 16 gage 3 amp fused wire to this “T” tap.
2
2
Mount the Pacbrake control unit to the provided bracket on the inside
tory stud and nut for the steering column. Once the Pacbrake control
unit is fastened to the stud, connect the grey and black connectors of
the harness to the Pacbrake control unit.
Secure the harness with the provided tie-straps.
3
3
large enough to feed the Pacbrake harness through. Then, feed the
harness into the engine compartment from the cab side. Apply silicon sealant around the loom to provide a seal.
4
ON/OFF SWITCH INSTALLATION: ALL KITS
Provided on the last pages of this manual are 2 templates for dash
switch locations. The 2 switch locations are suggestions only for spe-
4
¼" hole to accommodate the dash switch.
Install the dash switch and route the wires to the control unit. Secure
the wires with the supplied tie-straps. At the control unit, locate the
matching wire colors and connect them using the supplied heat
shrinkable red butt connectors. Once crimped, heat the connector to
provide a water tight seal.
Re-install the lower dash panel.
PG
PG22
INSTALLATION
- C44059
/ C44061
C44063L1234
/ C44065, L5855
INSTALLATIONMANUAL
MANUAL
- INSERT
TITLE/ HERE,
5
Route the black wire with the eye terminal to the negative battery terminal or a good chassis ground. Secure with the supplied tie-
straps.
Remove both the positive battery terminals. Route the red fused wire
with the eye terminal to the positive battery terminal (leaving the positive lead disconnected).
The battery leads are connected in step 21.
6
Route the remaining harness along the firewall to the passen
gerside and then route it forward along the fender to the pas
senger side battery. Make sure it is secured away from heat sources and moving parts using the supplied tie-straps.
C44063 & C44065 kits proceed to step 8.
7
THROTTLE SWITCH INSTALLATION: C44059 & C44061 KITS ONLY
Locate the stud shown in the photo and remove the nut. Install the switch assembly with the switch arm horizontal. Re-install the stud nut
and tighten, making sure the switch arm is behind the accelerator lever.
Adjust the switch by loosening the screws and positioning it to “click” just as the throttle returns to its released position. Cycle the throttle and listen for the “click” each time the throttle returns to idle. Tighten the screws when adjustment is complete. Locate the black and white wires of the Pacbrake harness originating at the control unit. Attach the black wire to the terminal connected to the diode on the throttle switch. Connect the white wire to the other terminal on the throttle switch. Make sure it is secured away from heat and moving parts using the supplied tie-straps. Consult the wiring schematic pertaining to your kit #, found on page 10-12.
5
6
7
PG
PG33
INSTALLATION
- C44059
/ C44061
C44063L1234
/ C44065, L5855
INSTALLATIONMANUAL
MANUAL
- INSERT
TITLE/ HERE,
PCM AND TRANSMISSION CONNECTIONS
8
8
C44063 & C44065 KITS ONLY:
Under the hood, beside the fuel filter, locate the factory 3 pin
Weather-Pac connector on the driver side of the engine (shown
by the arrow). Remove the protective cap and install the mating connector in the Pacbrake harness. Install the removed protective cap on the unused connector on the Pacbrake harness - unless
you have a performance module connected to it. If so, it connects
to the Pacbrake connector.
NOTE: Some 1999 model year trucks and all 1998½ will require
the use of a 3 pin triangular jumper harness to connect to the data link connector. See schematic pertaining to your kit #, found on page 10-12. Proceed to step 10.
9
C44061 KIT ONLY:
Locate the diagnostic connector under the dash on the drivers side. Connect the male plug of the Pacbrake harness to the factory diag-
nostic connector. Secure the Pacbrake connector to the diagnostic connector using the supplied tie straps.
9
10
C44061, C44063 & C44065
Remove the air filter housing to access the passenger side firewall and locate the PCM (shown in fig 10B). Remove the C2 and C3 con-
nectors. Remove the plastic cover to access the wires. Pull back the conduit to give access for attaching wires into the factory harness. Use fig 10BB as a guide to the pin locations.
10
B
C2 CONNECTIONS
Locate the orange/black wire in pin 11 of the C2 connector. Cut this
wire. Attach the brown wire of the Pacbrake harness to the PCM side.
Attach the orange wire to the harness side of the orange/black wire.
These connections are done using the supplied red heat shrinkable
butt connectors.
10
BB
Locate the brown wire in pin 21 of the C2 connector. Cut this wire and
splice the blue wire of the Pacbrake harness into it using the supplied
red heat shrinkable butt connectors.
C3 CONNECTIONS
Locate the orange/white wire in pin 13 of the C3 connector. Cut this
wire and splice the yellow wire of the Pacbrake harness into it using
the supplied red heat shrinkable butt connectors.
Using the heat gun, heat the connectors to provide a water tight seal
on all heat shrinkable butt connectors. See the wiring diagram pertaining to your kit #, found on page 10-12.
PG
PG44
INSTALLATION
- C44059
/ C44061
C44063L1234
/ C44065, L5855
INSTALLATIONMANUAL
MANUAL
- INSERT
TITLE/ HERE,
11a C44059 KITS ONLY:
11
A
Route the brown, orange, blue, yellow and the OBD1 connector of the
Pacbrake harness along the firewall to the passenger side firewall.
Locate the factory OBD1 connector and apply electrical tape to secure them together. Remove the air filter housing to gain access
to the PCM.
11b C44059 KITS ONLY:
11
B
On the passenger side firewall, locate the PCM (shown in fig 11B).
Remove the connector by loosening the bolt in the center. Remove
the plastic cover to access the wires. Pull back the conduit to give
access for attaching wires into the factory harness. Use fig 11BB as a
guide to the pin locations.
Locate the orange/black wire in pin 54 of the PCM connector. Cut this
wire. Attach the brown wire of the Pacbrake harness to the PCM side.
Attach the orange wire to the harness side of the orange/black wire.
These connections are done using the supplied red heat shrinkable
butt connectors.
11
BB
Locate the brown wire in pin 55. Cut this wire and splice the blue wire
of the Pacbrake harness into it using the supplied red heat shrinkable
butt connectors.
Locate the orange/white wire in pin 10. Cut this wire and splice the
yellow wire of the Pacbrake harness into it using the supplied red
heat shrinkable butt connectors.
See wiring diagram pertaining to your kit #, found on page 10-12.
12
Connector view shown is of
the PCM side, connector removed.
12
Consult with the customer for their preferred location to mount the
quick disconnect for the airline. The mounting location should be in
a clean, dry area with easy access to the operator.
Using the two self tapping screws mount the “L” bracket. Insert the
bulkhead airline fitting into the “L” bracket and tighten the jam nut to
secure it. Apply thread sealant to prevent air leaks. Follow the airline
installation procedures in the next step.
PG
PG55
INSTALLATION
- C44059
/ C44061
C44063L1234
/ C44065, L5855
INSTALLATIONMANUAL
MANUAL
- INSERT
TITLE/ HERE,
13
Shown in the photo is a suggested location marked “A”. Connect one end of the remaining air line into the quick connect
assembly and route this to the remaining fitting at the compressor. Mount the air inlet filter in a cool, dry location. A suggested
location is shown in photo, marked with a “B”. Locate the blue
nylon airline provided and route to the filter housing. Route the
other end to the compressor inlet fitting located on the compressor body (the compressor is installed in next step). Make sure
the nylon hose is cut square on each end and is pushed into the
fittings until it clicks.
14
Remove the passenger side battery.
Place the compressor and bracket assembly into the battery
box as shown in the photo. Place and secure the battery on top
of the compressor bracket. Reinstall the hold down assembly.
Connect the corresponding weather pac connectors of the Pacbrake harness to the compressor.
Do not connect the battery cables at this time.
15
Install the 90° fitting in the top of the tank and the provided hex
plug (or drain valve if desired) into the bottom, as shown in the
photo. Use thread sealant on all fittings to prevent air leaks. The
air tank requires 2 - 5/16" holes on a 3¼" center.
For fastening to the frame, use one of the pre-existing holes in
the frame and drill the second hole. Using the fasteners provided, mount the air tank on the outside of the frame. Connect the
nylon airline to the air tank and route the other end to the fitting
at the solenoid (shown in the photo below) and connect. A
B
PG
PG66
INSTALLATION
- C44059
/ C44061
C44063L1234
/ C44065, L5855
INSTALLATIONMANUAL
MANUAL
- INSERT
TITLE/ HERE,
16
Compressor and Airline Routing
Connect to
quick connect
Connect to air
intake filter
Connect to
air tank
17
Connect to
exhaust brake
Exhaust Brake Installation
All vehicles, remove the two capscrews that attaches the cast
elbow to the header pipe.
1994-1998 vehicles, remove the V clamp between the elbow and
the turbo charger. Remove the cast elbow. Removal of the 5 bolt flange is not required.
1999-2002 vehicles, remove the 5 capscrews securing the elbow
to the turbocharger. Remove the cast elbow.
NOTE: 12 valve engines REQUIRE H.D. exhaust valve springs to
be installed. Contact Pacbrake Customer Service @ 800.663.0096 for installation procedure, if required.
PG
PG77
INSTALLATION
- C44059
/ C44061
C44063L1234
/ C44065, L5855
INSTALLATIONMANUAL
MANUAL
- INSERT
TITLE/ HERE,
18
From below the vehicle, remove the header pipe by removing the exhaust clamp at the header pipe connection to the
intermediate pipe. Once the header pipe is removed from the
vehicle, loosely install the elbow back onto the header pipe.
Loosely assemble the Pacbrake to the adapters for measuring
purposes. Lay the two assemblies side by side to determine the
correct location to cut the header pipe. The Pacbrake adapter is
expanded to fit over the header pipe, consider this
in your measurement. Cut the pipe to length.
19
1999-2002 vehicles, at the turbocharger check the gasket surface for imperfections. If okay, install the new gasket and turbo
flange provided. Replace the 5 capscrews removed earlier.
Torque the capscrews to 110 in-lbs in a star pattern, then retorque to 220 in-lbs in a star pattern. After a road test, retorque
to 220 in-lbs.
in-lbs
in-lbs
20
Install the Pacbrake as an assembly (exhaust brake and both
exhaust adapters). The exhaust brake cylinder must be on the
bottom to attain correct clearances. Do not fully tighten the
turbo “V” clamp, as adjustment may be necessary. Install the
shortened header pipe into the rear Pacbrake flange and intermediate exhaust pipe. Adjust the assembly to attain maximum
clearance and a good pipe fit. Torque the turbo “V” clamp to 6
ft-lbs and then the exhaust brake pressure side “V” clamp to 12
ft-lbs. Tack weld the rear Pacbrake adapter to the header pipe
and remove the “V” clamp and header pipe for welding. Reinstall the header pipe and torque the “V” clamp to 12 ft-lbs.
21
Using the nylon airline provided connect the solenoid valve port
marked “CYL” to the air cylinder. (Fitting installed in step 26)
Reconnect both positive battery terminals with the positive
lead of the Pacbrake harness. Reconnect both negative battery
terminals. Connect the black wire (Pacbrake ground) to the
negative battery terminal. Secure all electrical harnesses and
nylon airlines with the supplied tie-straps.
PG
PG88
INSTALLATION
- C44059
/ C44061
C44063L1234
/ C44065, L5855
INSTALLATIONMANUAL
MANUAL
- INSERT
TITLE/ HERE,
TESTING THE SYSTEM - C44059, C44061, C44063 & C44065
With the Pacbrake switch in the OFF position, start the engine and allow to idle. The Pacbrake compressor should
pump air for approximately 2 minutes (this will fill the air tank from empty). Once the Pacbrake control unit confirms
the air tank has reached maximum air pressure, the control unit will perform a Self Test Cycle which will activate and
release the exhaust brake two times with the vehicle stationary.
Vehicles with 47RH/RE transmissions which have aftermarket valve bodies and aftermarket lock-up torque converters which are able to hold lock-up during exhaust braking in 1st and 2nd gears can use the later 48RE programming.
To change the existing program within the Pacbrake control unit, simply locate the orange wire with a spade connection approximately 6 inches from the control unit. Disconnect this connection. Turn the ignition ON. The exhaust
brake should cycle 3 times confirming the 48RE program has been loaded. This difference between the two programs is that the 48RE transmission will allow exhaust braking in 2nd and 1st gears, where the factory 47RH/RE
transmission will not.
Test drive the vehicle. If lock-up will not hold during exhaust braking in 2nd or 1st gear, re-connect the orange wire.
LED SWITCH OPERATION
RED - Brake enabled and ready for activation
GREEN - Parameters are achieved, and the Pacbrake controller is now commanding torque converter lock-up
ORANGE - Brake currently active
No Illumination - Brake disabled/OFF
FEATURES - C44059, C44061 & C44065
The Pacbrake control unit has a built in warm-up feature. This feature will activate the exhaust brake at idle with the
vehicle stationary when the Pacbrake switch is turned ON. When the coolant temperature reaches 170°F or 75°C,
the control unit will disable the warm-up feature at idle. When performing a road test, the O.D. (overdrive) switch
must be in the OFF position and the Pacbrake switch in the ON position. Attain road speed above 40 MPH or 65km/h
and release the accelerator pedal. The exhaust brake should apply, slowing the vehicle. Once the exhaust brake has
brought the vehicle’s engine speed below 900 RPM, the exhaust brake will disengage. When using the auxiliary coil
hose for inflation, the Pacbrake switch must be turned ON with the engine running.
PG
PG99
INSTALLATION
- C44059
/ C44061
C44063L1234
/ C44065, L5855
INSTALLATIONMANUAL
MANUAL
- INSERT
TITLE/ HERE,
ELECTRICAL SCHEMATIC:
C44073 1994-1995 12 VALVE ENGINES, AUTOMATIC TRANSMISSION ONLY
Pacbrake
Switch
Pacbrake
Control Unit
Exhaust
brake
Orange/Black
Orange
Pin 5
Yellow
7
Pin 1 5
2
6
5
Orange
Transmission
Soleniod
3
Connector
8
4
Orange/White
Orange/White
Black
Splice
PIN 54
White
PIN 1 0
Throttle
Switch
Black
Diode
20
40
POWERTRAIN
CONTROL
MODULE
To Quick
Connect
Pressure
Switch
Black
Air Inlet Port
Red
To Cylinder
To Battery
(negative)
Pacbrake
Solenoid
Blue
Blue
To Air Tank
Connector
30 Amp
Inline Fuse
Compressor
Grey
B la c k
60
Red
Red
Pin 1 8
Pin 23
Pin 4
Brown
Pin 6
1
Cut Here
Pin 22
Blue
Pin 13
Br o wn
1
PIN 55
Red
Pin 9
Pin 1 0
Black
Brown
Yellow
Orange
Pin 1 9
Ignition Power Source
3 Amp Fuse
Grey
41
21
Pin 14
Pin 16
O BD I
Plug
Pin 1
AB
Pin 21
Pin 24
White
Red
Pin 2
Orange
Green
Black
Connector
Red
Orange
Driver’s Side Battery
+
Pos.
Neg.
-
PG
PG 10
10
INSTALLATION
- C44059
/ C44061
C44063L1234
/ C44065, L5855
INSTALLATIONMANUAL
MANUAL
- INSERT
TITLE/ HERE,
ELECTRICAL SCHEMATIC:
C44076 1996-1998 12 VALVE ENGINES, AUTOMATIC TRANSMISSION ONLY
Pacbrake
Switch
Pacbrake
Control Unit
Exhaust
brake
6
3
5
4
Orange with White Wire
Splice
Powertrain Control
Module C3 (Diesel)
White
Throttle
Switch
32
21
11
Red
Red
Pin 13
Black
Diode
To Quick
Connect
Pressure
Switch
Connector
Air Inlet Port
Red
Orange
To Battery
(negative)
To Cylinder
Pacbrake
Solenoid
Blue
Connector
30 Amp
Inline Fuse
Compressor
Blue
Grey
To Air Tank
Black
PIN 13
Pin 23
Transmission
Soleniod
Connector
Orange
8
Orange with
White Wire
22
12
1
Pin 15
2
Black
Pin 6
Yellow
7
32
21
11
Pin 5
1
Cut Here
22
12
1
Orange
Pin 22
Pin 19
Orange/Black
Red
Pin 16
Brown
Powertrain Control
Module C2 (Diesel)
Pin 4
Pin 8
Pin 7
Grey
Ignition Power Source
Blue
Brown
Bro wn
Splice
Green
Yell o w
3 Amp Fuse
Pin 18
Pin 14
Pin 15
Pin 7
O BD II Plug
AB
Pin 21
P in 24
Green
Red
Pin 2
Pin 1
Orange
Black
Black
White
Driver ’s Side Battery
+
Pos.
Red
Orange
Neg.
-
PG
PG 11
11
INSTALLATION
- C44059
/ C44061
C44063L1234
/ C44065, L5855
INSTALLATIONMANUAL
MANUAL
- INSERT
TITLE/ HERE,
ELECTRICAL SCHEMATIC:
C44075 1998½ - 2002 24 VALVE ENGINES, AUTOMATIC TRANSMISSION ONLY
Pacbrake
Switch
Pacbrake
Control Unit
Exhaust
brake
8
Connector
3
5
Transmission
Soleniod
Connector
4
Splice
32
21
11
Module C3 (Diesel)
Powertrain Control
Connector
Pin 13
Orange with
White Tracer
Splice
Pin 18
Pin 13
Pin 4
Pin 15
Pin 24
Orange
Brown
Pin 6
2
6
Module C2 (Diesel)
Powertrain Control
Pin 22
1
7
Cut Here
Orange
Pin 5
Pin 11
Pin 12
Blue
Yellow
Orange with White Tracer
To Quick
Connect
Pressure
Switch
30 Amp
Inline Fuse
Compressor
Connector
Air Inlet Port
Red
Orange
To Cylinder
To Battery
(negative)
Driver ’s Side Battery
Pacbrake
Solenoid
Blue
Grey
Blue
Black
32
21
11
Red
Green
Yell o w
3 Amp Fuse
Pin 23
Ignition Power Source
Bro wn
Orange/Black
Pin 7
22
12
1
Pin B
Pin A
Diagnostic Connector
for ’98½-’99 Model
Year Trucks
22
12
1
Pin 14
Grey
Jumper Switch
Pin 1
AB
Pin 21
Black
White
Green
Red
Pin 2
Pin 19
Black
+
Pos.
To Air Tank
Red
Orange
Neg.
-
PG 12
L5855_REV9.07.27.2012
DASH SWITCH TEMPLATE
1994-1998
DODGE
RAM
DASH S WITCH TEMPLATE
MODEL YEARS 1994-1998
1/2" Drill For C44072 and C44074 kits
NOT using a shifter switch
C44075
1/4"
1/4"Drill
Drill -For
ForC44073,
C44059,
C44061
and
C44076
kitsC44065 kits
C44063
and
Flush
withed
edge
panel
Flush with
ge of of
pane
l
Hood release handle cut-ou
t
Hood release handle cut-out
CutCut
outout
templ
ate along
outer
an
align
asas
shown.
template
along
outeredge
edged
and
align
shown
Flushwith
with
center
screw
Flush
center
of scof
rew
hole hole
DASH SWITCH TEMPLATE
1999-2002
Align with bottom of dash bezel
NOTE: Template location is
only a suggestion. Access
to back of this location is
NOTE: and
Templwires
ate location
difficult
mustisbe
only a suggestion
. Access
installed
on switch
terminals
to back of this loc
ation is
prior
to installation.
difficult
and wires must be
Cigarette Lighter
Cut out template
along
outer
edge
and
shown
Cut out templ
ate along
outer
edge
andalign
align as
asown.
sh
installed onswitch terminals
prior to install
ation.
1/2" Drill
* Alternate Location
At Bottom Of Page
For C44072 and C44074 kits
NOT using a shifter switch
1/4" Drill
1/4" Drill
For C44073, C44075
For C44059,
C44061,
and C44076
kits
C44063 and C44065 kits
Flush with edge of panel
1/2" Drill or 1/4" Drill