1
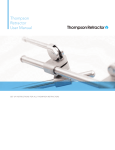
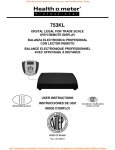
User Manual TABLE OF CONTENTS Preface -‐-‐-‐-‐-‐-‐-‐-‐-‐-‐-‐-‐-‐-‐-‐-‐-‐-‐-‐-‐-‐-‐-‐-‐-‐-‐-‐-‐-‐-‐-‐-‐-‐-‐-‐-‐-‐-‐-‐-‐-‐-‐-‐-‐-‐-‐-‐-‐-‐-‐-‐-‐-‐-‐-‐-‐-‐-‐-‐-‐-‐-‐-‐-‐-‐-‐-‐-‐-‐-‐-‐-‐-‐-‐-‐-‐-‐-‐-‐-‐-‐-‐-‐-‐-‐-‐-‐-‐-‐-‐-‐-‐ 3 User Requirements and Training -‐-‐-‐-‐-‐-‐-‐-‐-‐-‐-‐-‐-‐-‐-‐-‐-‐-‐-‐-‐-‐-‐-‐-‐-‐-‐-‐-‐-‐-‐-‐-‐-‐-‐-‐-‐-‐-‐-‐-‐-‐-‐-‐-‐-‐-‐-‐-‐-‐-‐-‐-‐-‐-‐-‐-‐-‐-‐-‐ 3 Intended Use -‐-‐-‐-‐-‐-‐-‐-‐-‐-‐-‐-‐-‐-‐-‐-‐-‐-‐-‐-‐-‐-‐-‐-‐-‐-‐-‐-‐-‐-‐-‐-‐-‐-‐-‐-‐-‐-‐-‐-‐-‐-‐-‐-‐-‐-‐-‐-‐-‐-‐-‐-‐-‐-‐-‐-‐-‐-‐-‐-‐-‐-‐-‐-‐-‐-‐-‐-‐-‐-‐-‐-‐-‐-‐-‐-‐-‐-‐-‐-‐-‐-‐-‐-‐ 3 Patent and Trademark -‐-‐-‐-‐-‐-‐-‐-‐-‐-‐-‐-‐-‐-‐-‐-‐-‐-‐-‐-‐-‐-‐-‐-‐-‐-‐-‐-‐-‐-‐-‐-‐-‐-‐-‐-‐-‐-‐-‐-‐-‐-‐-‐-‐-‐-‐-‐-‐-‐-‐-‐-‐-‐-‐-‐-‐-‐-‐-‐-‐-‐-‐-‐-‐-‐-‐-‐-‐-‐-‐-‐-‐ 3 Introduction -‐-‐-‐-‐-‐-‐-‐-‐-‐-‐-‐-‐-‐-‐-‐-‐-‐-‐-‐-‐-‐-‐-‐-‐-‐-‐-‐-‐-‐-‐-‐-‐-‐-‐-‐-‐-‐-‐-‐-‐-‐-‐-‐-‐-‐-‐-‐-‐-‐-‐-‐-‐-‐-‐-‐-‐-‐-‐-‐-‐-‐-‐-‐-‐-‐-‐-‐-‐-‐-‐-‐-‐-‐-‐-‐-‐-‐-‐-‐-‐-‐-‐-‐-‐-‐-‐ 5 Labeling -‐-‐-‐-‐-‐-‐-‐-‐-‐-‐-‐-‐-‐-‐-‐-‐-‐-‐-‐-‐-‐-‐-‐-‐-‐-‐-‐-‐-‐-‐-‐-‐-‐-‐-‐-‐-‐-‐-‐-‐-‐-‐-‐-‐-‐-‐-‐-‐-‐-‐-‐-‐-‐-‐-‐-‐-‐-‐-‐-‐-‐-‐-‐-‐-‐-‐-‐-‐-‐-‐-‐-‐-‐-‐-‐-‐-‐-‐-‐-‐-‐-‐-‐-‐-‐-‐-‐-‐-‐-‐-‐ 6 Warnings -‐-‐-‐-‐-‐-‐-‐-‐-‐-‐-‐-‐-‐-‐-‐-‐-‐-‐-‐-‐-‐-‐-‐-‐-‐-‐-‐-‐-‐-‐-‐-‐-‐-‐-‐-‐-‐-‐-‐-‐-‐-‐-‐-‐-‐-‐-‐-‐-‐-‐-‐-‐-‐-‐-‐-‐-‐-‐-‐-‐-‐-‐-‐-‐-‐-‐-‐-‐-‐-‐-‐-‐-‐-‐-‐-‐-‐-‐-‐-‐-‐-‐-‐-‐-‐-‐-‐-‐-‐ 6 Components -‐-‐-‐-‐-‐-‐-‐-‐-‐-‐-‐-‐-‐-‐-‐-‐-‐-‐-‐-‐-‐-‐-‐-‐-‐-‐-‐-‐-‐-‐-‐-‐-‐-‐-‐-‐-‐-‐-‐-‐-‐-‐-‐-‐-‐-‐-‐-‐-‐-‐-‐-‐-‐-‐-‐-‐-‐-‐-‐-‐-‐-‐-‐-‐-‐-‐-‐-‐-‐-‐-‐-‐-‐-‐-‐-‐-‐-‐-‐-‐-‐-‐-‐-‐-‐ 7 Specifications -‐-‐-‐-‐-‐-‐-‐-‐-‐-‐-‐-‐-‐-‐-‐-‐-‐-‐-‐-‐-‐-‐-‐-‐-‐-‐-‐-‐-‐-‐-‐-‐-‐-‐-‐-‐-‐-‐-‐-‐-‐-‐-‐-‐-‐-‐-‐-‐-‐-‐-‐-‐-‐-‐-‐-‐-‐-‐-‐-‐-‐-‐-‐-‐-‐-‐-‐-‐-‐-‐-‐-‐-‐-‐-‐-‐-‐-‐-‐-‐-‐-‐-‐-‐ 7 Set-‐up -‐-‐-‐-‐-‐-‐-‐-‐-‐-‐-‐-‐-‐-‐-‐-‐-‐-‐-‐-‐-‐-‐-‐-‐-‐-‐-‐-‐-‐-‐-‐-‐-‐-‐-‐-‐-‐-‐-‐-‐-‐-‐-‐-‐-‐-‐-‐-‐-‐-‐-‐-‐-‐-‐-‐-‐-‐-‐-‐-‐-‐-‐-‐-‐-‐-‐-‐-‐-‐-‐-‐-‐-‐-‐-‐-‐-‐-‐-‐-‐-‐-‐-‐-‐-‐-‐-‐-‐-‐-‐-‐-‐-‐-‐ 8 Pre-‐Positioning -‐-‐-‐-‐-‐-‐-‐-‐-‐-‐-‐-‐-‐-‐-‐-‐-‐-‐-‐-‐-‐-‐-‐-‐-‐-‐-‐-‐-‐-‐-‐-‐-‐-‐-‐-‐-‐-‐-‐-‐-‐-‐-‐-‐-‐-‐-‐-‐-‐-‐-‐-‐-‐-‐-‐-‐-‐-‐-‐-‐-‐-‐-‐-‐-‐-‐-‐-‐-‐-‐-‐-‐-‐-‐-‐-‐-‐-‐-‐-‐ 11 Patient Transfer -‐-‐-‐-‐-‐-‐-‐-‐-‐-‐-‐-‐-‐-‐-‐-‐-‐-‐-‐-‐-‐-‐-‐-‐-‐-‐-‐-‐-‐-‐-‐-‐-‐-‐-‐-‐-‐-‐-‐-‐-‐-‐-‐-‐-‐-‐-‐-‐-‐-‐-‐-‐-‐-‐-‐-‐-‐-‐-‐-‐-‐-‐-‐-‐-‐-‐-‐-‐-‐-‐-‐-‐-‐-‐-‐-‐-‐-‐ 12 Patient Positioning -‐-‐-‐-‐-‐-‐-‐-‐-‐-‐-‐-‐-‐-‐-‐-‐-‐-‐-‐-‐-‐-‐-‐-‐-‐-‐-‐-‐-‐-‐-‐-‐-‐-‐-‐-‐-‐-‐-‐-‐-‐-‐-‐-‐-‐-‐-‐-‐-‐-‐-‐-‐-‐-‐-‐-‐-‐-‐-‐-‐-‐-‐-‐-‐-‐-‐-‐-‐-‐-‐-‐-‐-‐-‐-‐ 13 Patient Removal -‐-‐-‐-‐-‐-‐-‐-‐-‐-‐-‐-‐-‐-‐-‐-‐-‐-‐-‐-‐-‐-‐-‐-‐-‐-‐-‐-‐-‐-‐-‐-‐-‐-‐-‐-‐-‐-‐-‐-‐-‐-‐-‐-‐-‐-‐-‐-‐-‐-‐-‐-‐-‐-‐-‐-‐-‐-‐-‐-‐-‐-‐-‐-‐-‐-‐-‐-‐-‐-‐-‐-‐-‐-‐-‐-‐-‐-‐ 15 Cleaning & Maintenance -‐-‐-‐-‐-‐-‐-‐-‐-‐-‐-‐-‐-‐-‐-‐-‐-‐-‐-‐-‐-‐-‐-‐-‐-‐-‐-‐-‐-‐-‐-‐-‐-‐-‐-‐-‐-‐-‐-‐-‐-‐-‐-‐-‐-‐-‐-‐-‐-‐-‐-‐-‐-‐-‐-‐-‐-‐-‐-‐-‐-‐-‐-‐-‐-‐-‐-‐ 15 Warranty -‐-‐-‐-‐-‐-‐-‐-‐-‐-‐-‐-‐-‐-‐-‐-‐-‐-‐-‐-‐-‐-‐-‐-‐-‐-‐-‐-‐-‐-‐-‐-‐-‐-‐-‐-‐-‐-‐-‐-‐-‐-‐-‐-‐-‐-‐-‐-‐-‐-‐-‐-‐-‐-‐-‐-‐-‐-‐-‐-‐-‐-‐-‐-‐-‐-‐-‐-‐-‐-‐-‐-‐-‐-‐-‐-‐-‐-‐-‐-‐-‐-‐-‐-‐-‐-‐-‐ 16 USER MANUAL Preface This manual provides operating instructions and guidelines for the use of the OR Safety, FlexFrameTM Spine Platform. The final disposition of each patient’s care as related to the use of this equipment rests with the attending physician. This symbol is used throughout this manual to denote warnings and cautions. It is intended to alert the user to the presence of important operating and safety instructions. User Requirements and Training The instructions in this manual assume that the user has been trained in the proper use of surgical tables and positioning aids commonly used in spinal surgery and that they have received the required medical education and experience to operate the device safely and effectively. All users need to read and be familiar with this Manual. If you need additional training, please contact OR Safety. Intended Use The FlexFrameTM Spine Platform is intended for patient positioning to achieve surgeon specific lordosis of the spine during surgery. Patent and Trademark FlexFrameTM, ClearAccessTM and Revolution® are Trademarks of OR Safety. © OR Safety, LLC 2012 ORS-‐IFU-‐002, Rev A Page 3 of 17 USER MANUAL Contact Information OR Safety, LLC. 850 Cassatt Road, 100 Berwyn Park, Suite 220 Berwyn, PA 19312 [email protected] Phone: 866-‐498-‐6882 Fax: 610-‐644-‐5265 To purchase supplies, accessories, or additional OR Safety Products, call 866-‐498-‐6882 or visit our website at www.orsafety.com. Copyright © 2012 OR Safety, LLC., All rights reserved. © OR Safety, LLC 2012 ORS-‐IFU-‐002, Rev A Page 4 of 17 USER MANUAL Introduction Overview of the FlexFrameTM Spine Platform and the related features The FlexFrame™ Spine Platform is a portable, easy to use positioning frame that allows surgeon specific lordosis or reverse lordosis of the spine during surgery. The adjustable, convex shape allows for separation of the vertebral bodies and provides direct access to problematic tissue between vertebrae. The FlexFrame™ is designed to work with the OR Safety ClearAccess™ Surgical table and the Revolution® Surgical System and is provided in models that can be used on general surgical tables, or other flat surface surgical platforms. The FlexFrame™ is engineered to provide the following key benefits: • Strength: Durable, solid design and material selection ensures safety and stability for patients weighing up to 600 lbs, while being nimble enough for a single caregiver to transport and position with minimal effort • Low Profile: Designed to minimize patient positioning height during surgery, while offering benefits in patient transfer and removal • Precision: Three planes of adjustment provide greater adjustability: 1) Dial-‐in lordosis or reverse lordosis with easy to use and store rotational crank 2) One touch lever adjustment of lateral pads up to 11 inches in width 3) Pad skew, convergence and divergence to accommodate a range of human factors relating to hip and shoulder widths • Comfort: Fabricated with specialized foam comfort pads to increase patient comfort and minimize the risk of pressure sores during extended procedures. • Imaging: Radiolucent materials in the imaging window allow for clear imaging of the surgical site. © OR Safety, LLC 2012 ORS-‐IFU-‐002, Rev A Page 5 of 17 USER MANUAL Labeling The FlexFrame™ Spine Platform is labeled at the foot end with catalog number and serial number. Figure 2. FlexFrame™ Spine Platform, Product Label Warnings To ensure the safe operation of the OR Safety FlexFrame™, the following warnings have been summarized for review. Additional Procedural warnings are provided throughout the manual Use of the FlexFrame™ models with patients weighing more than 600 pounds could result in damage to the Frame and possible injury to the patient. Improper positioning and incorrect use of protective padding can result in post-‐ surgery patient discomfort and injury Before use, inspect the device for possible damage, excessive wear, or non-‐ functioning parts. Carefully inspect all critical, inaccessible areas, joints, and all moving parts for possible damage or non-‐function. Damaged or defective parts should not be used or processed. Contact OR Safety for repair or replacement. Use of the FlexFrame™ models with parts and components provided and/or recommended by OR Safety. The performance of the FlexFrame™ cannot be guaranteed if other parts or components are used. © OR Safety, LLC 2012 ORS-‐IFU-‐002, Rev A Page 6 of 17 USER MANUAL Components The OR Safety FlexFrame™ comprises the following Models, accessories, disposables and Options ORS-‐31176 FlexFrame™ Spine Platform -‐01 With Platen Attachment Feet -‐02 With OR Table Retaining Straps ORS-‐28990-‐01 FlexFrame™ Comfort Pads ORS-‐28990-‐04 FlexFrame™ Spine Platform Lift Handle ORS-‐TBD FlexFrame™ Disposable Hygiene Barrier Specifications Basic assembled specifications of the OR Safety FlexFrame™ Capacity 600lbs (227kg), Even Distribution Controls 1 Rotational Crank – Lordosis Adjustment 2 Head End Lateral Adjustment Levers 2 Foot End Lateral Adjustment Levers Motion Limits TBD Pad Skew 11” lateral adjustment TBD Lordosis © OR Safety, LLC 2012 ORS-‐IFU-‐002, Rev A Page 7 of 17 USER MANUAL Set-‐up The following are the initial set-‐up instructions for mounting and preparing the FlexFrame™ for use 1) Mount the The FlexFrame™ on to the surgery table by looping the orange OR Safety retaining straps around the side rail, through the d-‐rings and pull to secure. If using the OR Safety RevolutionTM or ClearAccessTM tables, the FlexFrameTM will be equipped with retention feet that connect securely to the table platens. This feature replaces the need for the retaining straps. Consult the applicable manual for more information. Before use, inspect the device for possible damage, excessive wear, or non-‐ functioning parts. Carefully inspect all critical, inaccessible areas, joints, and all moving parts for possible damage or non-‐function. Damaged or defective parts should not be used or processed. If necessary contact OR Safety for repair or replacement. © OR Safety, LLC 2012 ORS-‐IFU-‐002, Rev A Page 8 of 17 USER MANUAL Set-‐up (Continued) 2) Once the FlexFrame™ has been secured to the table, remove the rotational crank from the retention well. For convenience a crank retention well has been placed on both support rails. 3) Unfold the rotational crank and locate the lordosis adjustment hub at the foot end of the FlexFrame™. The FlexFrame™ is designed with hubs on each support rail for convenient lordosis adjustment from multiple positions. © OR Safety, LLC 2012 ORS-‐IFU-‐002, Rev A Page 9 of 17 USER MANUAL Set-‐up (Continued) 4) Install the rotation crank in the lordosis adjustment hub in the side of the FlexFrame™. Rotate the crank to move the pads to the lowest position with the least amount of flex. 5) Once lowered, install the disposable hygiene barriers over the pads. Care should be used to prevent damage to the hygiene barriers during installation. Elastic must be facing the bottom to ensure proper installation. © OR Safety, LLC 2012 ORS-‐IFU-‐002, Rev A Page 10 of 17 USER MANUAL Pre-‐ Positioning The following are the instructions for positioning the FlexFrame™ to ensure that the pad skew and widths are properly set 1) The patient should be measured to ensure that the comfort pads are adjusted to align properly with the patient shoulders and pelvis. 2) Physician preference for alignment should also be considered along with patient anatomy. 3) The pads are adjusted with the 2 one-‐touch adjustment levers at the head and foot ends of the FlexFrame™. Push and hold the levers to move the pads to the desired location along the positioning rails. 4) The levers will engage the positioning rail once the desired setting has been reached and the levers are released. Verification of proper engagement should be checked by testing the lateral movement of the pads. 5) Once positioned, place the provided protective pads over positioning rails for added patient protection. © OR Safety, LLC 2012 ORS-‐IFU-‐002, Rev A Page 11 of 17 USER MANUAL Patient Transfer The following are the instructions for transferring the patient from the gurney to the OR table mounted with the FlexFrame™ 1) Ensure pads are at the the lowest position with the least amount of flex. Orient the gurney alongside the OR table and engage floor locks. Elevate the gurney so that the patient is level with the FlexFrame™ pad surface. 2) It is suggested that the anesthetist prepare the patient prior to transferring the anesthetized patient onto the FlexFrame™ to ensure that the proper flow of oxygen is uninterrupted during surgery. 3) Using adequate help, transfer the patient onto the frame by carefully rolling the supine patient from the gurney into the prone position on top of the frame. Make sure that the neck is in a neutral or dependent position. Inadequate lifting help can result in injury to both patient and staff. 4) Lift the patient up on each side, individually, just enough to smooth the pad covers and eliminate any skin folds that may have occurred as a result of transfer. Make certain that breasts or areas of pannus are positioned in a comfortable and natural position. Verify that genital area is clear of compression or impingement. Folds, impingements, and compression of skin, breasts, and genitals can result in patient injury and post surgery discomfort 5) Carefully check to make sure that the patient is not in contact with the positioning rails at either the head or foot end of the FlexFrame™. Place the provided comfort pads over positioning rails for added patient protection. © OR Safety, LLC 2012 ORS-‐IFU-‐002, Rev A Page 12 of 17 USER MANUAL Patient Positioning The following are the instructions for positioning the patient once transferred to the FlexFrame™ 1) The pads may be adjusted to optimize alignment with the patient’s anatomy by using the one-‐touch levers at the head and foot ends of the FlexFrame™. Push and hold the levers to move the pads to the desired location along the positioning rails. Verify proper pad width setting to ensure there will be no excessive pressure on the brachial plexus and that the patient cannot migrate downward between the pads. Either occurrence may result in injury to the patient. 2) Engage the rotational crank and turn until the desired level of lordosis is achieved. As the pads are flexed and un-‐flexed, the patient’s head will shift. Failure to maintain appropriate alignment of the patient’s head could result in undue strain and injury to the patient. © OR Safety, LLC 2012 ORS-‐IFU-‐002, Rev A Page 13 of 17 USER MANUAL Patient Positioning (Continued) 3) Once the desired position has been achieved, remove the rotational crank. The rotational crank may be set aside or returned to the secure crank retention well in the lower rail. 4) Some patients will naturally bear weight at the knees, while for others pillows or rolled gel pads may be needed. If the knees are weight bearing, a gel table pad is recommended under the knees. Additional pillows may be used to elevated the legs and achieve the desired hip flexion. If needed an OR Safety AnkleRest (ORS-29572) or pillow may be placed under the lower leg to elevate the toes off the table surface. 5) The patient should then be secured with the application of a circumferential patient safety strap under the pad supports and around the patient’s thighs. Larger patients may need to be secured by applying an additional circumferential patient safety strap around the shoulders. Failure to properly secure the patient in the desired position for surgery may cause undesirable movement of the patient resulting in injury to the patient and or healthcare providers. 6) If imaging is required during surgery, the FlexFrame™ is constructed with radiolucent materials to allow for clear imaging of the surgical site. X-‐Ray cassettes may be placed between FlexFrame™ support rails. © OR Safety, LLC 2012 ORS-‐IFU-‐002, Rev A Page 14 of 17 USER MANUAL The following are the instructions for transferring the patient from the OR table to the gurney Patient Removal 1) Orient the gurney alongside the OR table and engage floor locks. Elevate the gurney so that it is level with the FlexFrame™ pad surface. 2) With a patient attendant present, remove any restraints and positioning aids that were used, such as pillows and/or pads. 3) Using adequate help, transfer the patient onto the gurney by carefully rolling the supine patient from the FlexFrame™ to the gurney. Make sure that the neck is in a neutral or dependent position and should be monitored by the anesthetist. Inadequate lifting help can result in injury to both patient and staff. Cleaning & Maintenance The following are the instructions for cleaning and Maintaining the OR Safety FlexFrame™™. 1) After each use, remove and properly dispose of all hygiene barriers and comfort pads. 2) Clean the entire unit with a quaternary disinfectant (ammonium chloride) and wipe it dry. Avoid alcohol or other strong, undiluted disinfectants. 3) Care should be taken to not use excess liquid. Do not submerge, soak, or clean the device in an automated cleaner or washer. Damage due to the use of harsh detergents and improper cleaning techniques will not be covered under warranty 4) Return the FlexFrame™ to the lowest position using the rotational crank. The rotational crank may be set aside until after cleaning and then returned to the secure crank retention well in the lower rail. 5) It is recommended that a post use inspection be performed to ensure that all the components are free of damage and that the FlexFrame™ operates as intended. If any damage or malfunction is observed contact OR Safety. © OR Safety, LLC 2012 ORS-‐IFU-‐002, Rev A Page 15 of 17 USER MANUAL Warranty The following is the OR Safety Limited Warranty for the FlexFrame™ Spine Platform. Initial-‐Limited Warranty OR Safety warrants that the entire FlexFrame™ Spine Platform (“FlexFrame™™”) will confirm with the product specification set forth in this Instruction/Maintenance Manual and will be free from defects due to workmanship and materials for 12 months from the date of the FlexFrame™’s delivery. A FlexFrame™ that does not comply with this warranty will be repaired or replaced at OR Safety’s option and at OR Safety’s costs, including labor. Moving Parts Limited Warranty OR Safety also warrants all moving parts (“Parts”), which are required as a result of defects of these Parts due to workmanship and materials for three years from the date of the FlexFrame™’s delivery. Parts which do not comply with this limited warranty will be repaired or replaced at OR Safety’s option. The customer is solely responsible for any labor costs associated with replacing or repairing Parts after the initial-‐limited warranty above. Damage or Shortage Customer has five-‐business days from the date of the FlexFrame™’s delivery to inspect the FlexFrame™™, and notify OR Safety of any equipment shortages or damage. Reservation of Rights OR Safety must be given the reasonable opportunity to investigate any customer claim under this warranty. Non-‐Transferable All warranties apply only to the first owner or lessee of the FlexFrame™, and are not transferable. © OR Safety, LLC 2012 ORS-‐IFU-‐002, Rev A Page 16 of 17 USER MANUAL Warranty (continued) What to do in case of a Warranty Issue Should problems or defects arise, please contact OR Safety as follows: email: [email protected] phone: 866.498.6882 Please provide or have available the following: • Part number/serial number • Date of purchase • Description of product failure (with photos, if possible) • Name and contact information (email and phone) of person filing the claim Limitation of Warranty OR Safety makes no warranty of merchantability or fitness for a particular purpose with respect to any FlexFrame™ or its parts, and all other warranties, express or implied, except those expressly stated above, are excluded. OR Safety does not accept responsibility for any consequential damage or commercial loss to the owner or lessee, or any incidental expenses, loss of time, or inconvenience. If or safety cannot repair or replace a FlexFrame™™, or determines that it is not practical to do so, the price that the customer paid for a FlexFrame™ will be refunded or credited toward future purchases, at OR Safety’s option. This warranty is the sole and exclusive remedy against OR Safety and its authorized dealers for the repair or replacement of defective parts as detailed above. This exclusive remedy may not be deemed to have failed its essential purpose if OR Safety, or through its authorized dealers, is willing and able to repair or replace a FlexFrame™ or defective parts as detailed above. What is not Covered Damage Caused By: • accident, negligence, alteration or misuse of the FlexFrame™ • failure to maintain the FlexFrame™ according to the this manual parts and accessories on your FlexFrame™ that are not OR Safety approved or authorized (this may void the warranty). © OR Safety, LLC 2012 ORS-‐IFU-‐002, Rev A Page 17 of 17