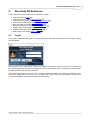
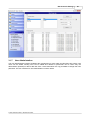
1
BurnCase 3D User Manual Johannes Dirnberger Michael Giretzlehner Robert Owen Herbert Haller Christian Rodemund www.burncase.at [email protected] Copyright by RISC Software GmbH, All rights reserved Softwarepark 35 / A-4232 Hagenberg / Austria Tel.: +43 (0)7236-3343-672 / E-Mail: [email protected] BurnCase 3D User Manual © RISC Software GmbH - Medical Informatics This work is protected by copyright. All rights, also those of translation, reproduction and duplication of this document, or parts of it, are reserved. No part of this work may be reproduced in any form (photocopy, microfilm or another procedure) or processed, duplicated or distributed using electronic systems without written authorization by the RISC Software GmbH and the authors, not even for teaching purposes. All information contained in this document were arranged to the best of our knowledge and tested with care. Nevertheless errors cannot be completely excluded. For this reason the information contained in this document are not connected with obligation or warranty of any kind. The authors and the RISC Software GmbH consequently take no responsibility and won't assume any resultant or other liability, which in some way arise from the use of these information - or parts of them - and also not for the violation of patent laws, which might result from it. In addition, the authors and the RISC Software GmbH do not take over any guarantee for the fact that the procedures described etc. are free from intellectual property rights of third parties. The use of custom names, trade names, trade marks etc. in this work does not permit, not even without special marking, the assumption, that such names could be regarded as free in the sense of registered trademarks and trademark protection laws and that they therefore could be used by everyone. Printed: März 2012 in Austria Table of Contents I Table of Contents Part I Introduction 2 1 What is BurnCase ................................................................................................................................... 3D? 2 Features ......................................................................................................................................................... 2 Additional ......................................................................................................................................................... Features 4 Standard Models ......................................................................................................................................................... 5 2 System Requirements ................................................................................................................................... 6 3 Install BurnCase ................................................................................................................................... 3D 6 Installation......................................................................................................................................................... scenarios 7 4 Product License ................................................................................................................................... Agreements 8 5 Disclaimer................................................................................................................................... 9 Part II BurnCase 3D Reference 1 Login 11 ................................................................................................................................... 11 2 User Interface ................................................................................................................................... at a Glance 13 3 Main Menus ................................................................................................................................... 15 4 Toolbars................................................................................................................................... 18 5 Patient Management ................................................................................................................................... 19 Patient Information ......................................................................................................................................................... 19 Merge Patients ......................................................................................................................................................... 21 HIS Interface ......................................................................................................................................................... 23 6 Treatment ................................................................................................................................... Process 24 Levels ......................................................................................................................................................... 24 Time Panel ......................................................................................................................................................... 29 7 3D Model................................................................................................................................... View 29 Model Navigation ......................................................................................................................................................... 30 Quickview ......................................................................................................................................................... 31 Marking Areas ......................................................................................................................................................... 32 Patient Data ......................................................................................................................................................... 34 Indices and ......................................................................................................................................................... Areas 34 Align Model ......................................................................................................................................................... 36 Model Alignment .................................................................................................................................................. 36 Wound Area .................................................................................................................................................. Transfer 37 8 Burn Case ................................................................................................................................... Data 38 Complementary ......................................................................................................................................................... Data 39 Course of.................................................................................................................................................. Accident 40 Accident .................................................................................................................................................. Related Facts 40 First Aid ........................................................................................................................................... 40 State Place ........................................................................................................................................... Accident 41 Measures........................................................................................................................................... 42 External Clinical ........................................................................................................................................... Treatment 43 Admission .................................................................................................................................................. 43 Condition ........................................................................................................................................... on Admission 43 © RISC Software GmbH - Medical Informatics Table of Contents II Former Illnesses ........................................................................................................................................... 44 Additional........................................................................................................................................... Injuries 45 Progression .................................................................................................................................................. 46 Outcome.................................................................................................................................................. 46 Complications .................................................................................................................................................. 47 State Definition ......................................................................................................................................................... 48 ICD-10 Acquisition ......................................................................................................................................................... 49 9 Reporting ................................................................................................................................... System 50 Patient Record ......................................................................................................................................................... 52 Medical Codes ......................................................................................................................................................... 52 Complementary ......................................................................................................................................................... Accident Data 53 ICD 10 (International ......................................................................................................................................................... Classification of Diseases) 57 Table List......................................................................................................................................................... Containing All Acquired States 57 OPS (Surgery......................................................................................................................................................... and Procedurekey) 57 ABSI (Abbreveated ......................................................................................................................................................... Burn Severity Index) 58 Graphical......................................................................................................................................................... Report on Current Patient State 59 Injury List......................................................................................................................................................... Grouped by Body Region 60 Injury List......................................................................................................................................................... Grouped by Characteristic 61 Lund & Browder ......................................................................................................................................................... Chart 62 10 Digital Pictures ................................................................................................................................... 63 Pictures in ......................................................................................................................................................... File System 64 Pictures in ......................................................................................................................................................... BurnCase System 66 Superimpose ......................................................................................................................................................... 69 11 Queries ................................................................................................................................... 70 Generate ......................................................................................................................................................... Analysis 70 Multi Center ......................................................................................................................................................... Study 75 12 Data Transfer ................................................................................................................................... 76 Import/Export ......................................................................................................................................................... of Patients 76 Export Model ......................................................................................................................................................... View 77 NTRACS Export ......................................................................................................................................................... 78 Part III BurnCase 3D Settings 81 1 System Settings ................................................................................................................................... 81 Available ......................................................................................................................................................... Doctors 81 Configuration ......................................................................................................................................................... Manager 82 Characteristics ......................................................................................................................................................... 84 Patterneditor ......................................................................................................................................................... 85 Picture Settings ......................................................................................................................................................... 85 View Change ......................................................................................................................................................... Log 86 User Administration ......................................................................................................................................................... 87 HIS Settings ......................................................................................................................................................... 88 2 Local Settings ................................................................................................................................... 89 Index © RISC Software GmbH - Medical Informatics 96 Part I Introduction 1 2 Introduction Welcome to the help system of BurnCase 3D! Here you will find information about the software and its graphical user interface. For further information about the software or the licensing model contact the Research Unit Medical-Informatics of the RISC Software GmbH (www.risc-software.at). Homepage: http://www.burncase.at Email: [email protected] 1.1 What is BurnCase 3D? BurnCase 3D is a comprehensive application to facilitate documentation and archiving of patient information like standing data, pictures and diagnoses in a database. Right now there are a lot of different programs for documentation and archiving on the market, but where does BurnCase 3D stand out in comparison to similar products? The most significant advantage is the possibility to place pictures and diagnoses directly on a virtual three-dimensional human body and as a consequence to be able to document the exact circumstances and spatial spread of the injury. Apart from the advantage mentioned, there are a lot more, which emphasize the system against comparable competitive products: 1.1.1 Exact spatial documentation Automatic total body surface area (TBSA) calculation with an accuracy of ~1 square centimeter Excellent chronological traceability of patient's healing process Realtime classification in terms of the scoring system (ABSI, BMI, BAUX, ...) and calculation of primary medication quantities (infusion quantum by Parkland-Baxter, ...) Possibility of assigning pictures to a certain part of the body at a particular time during the treatment process Possibility of aligning the model position with the position of a patient on a picture Automatic encoding of the diagnosis to international standards (ICD, OPS, Lund&Browder, etc.) Possibility of comparing different burn cases Electronic documentation of the treatment process with the possibility of surveying individual diagnoses in the chronological sequence Central data persistence in a relational database Definable queries of all documented patient's data Automatic analysis in respect of the criteria of the "Multi center study" of the DAV Features The basic features of BurnCase 3D, which emphasize its advantages as a diagnostic tool: Registering of wounded areas on a virtual 3-dimensional human model Calculation of body surface areas of various body regions Realtime calculation of scores and indices Output of queries and reports Storage in a relational database These features are part of the system and they are integrated to ensure a simple and intuitive appliance in the normal course of an injured patient to his complete convalescence. The documentation consists of the following steps: 1. Patient Standing Data © RISC Software GmbH - Medical Informatics Introduction 3 First of all the patient to be documented needs to be defined by either selecting an existing one or creating a new one. In case of creating a new patient the essential information (date of birth, insurance number, etc) has to be entered into the according form. Each patient has to be identified by at least his name or social insurance number and age. All data can be completed or changed at anytime. 2. Burn Case After the patient has been chosen, a specific burn case has to be selected. In case of an already existing burn case the information may easily be completed. If a new burn case has to be created, the forms have to be filled out appropriately, specifying all collectable data related to the incident (course of accident, physical influences, pre-existing illnesses, etc.). Fields which have to be filled out mandatory, may be defined in the Configuration Manager 82 . 3. Choose Work Step A set of interactions with the model (changes of the patient) are grouped into work steps. Since current states are the only interactions in the current version, every work step will contain a current state. With the creation of the first work step, a primary current state in terms of a first diagnosis has to be entered. If a new interaction is created, a new work step will be generated automatically. This new interaction inherits the model from the previous current state with all the marked areas, whereby only the new one can be edited. Beside the current state, the implementation of the following new interaction types is scheduled for the future: 1. 2. 3. 4. Excision surgery: necrotomy, fasciotomy, amputation, etc. Reconstructive surgery: overlay Dressing: bandage, ointment, mediation Nursing instructions 4. Choose Interaction The selection of an interaction will display the appropriate 3D model. As described in the previous paragraph changes, which took place after the prior current state can be added to the 3D model and the appropriate data fields. 5. Enter Interaction Data For every interaction certain information may be entered; these are in case of a current state: responsible doctor, height, weight etc. The patient's height and weight are, depending on their sex, predefined with some default values, which may be changed at any time. The alteration of these values also change the appearance of the 3D model accordingly, as they are responsible for the size and shape of the model and consequently for the total body surface area (TBSA). 6. Choose 3D Model As people's bodies have different shapes, BurnCase 3D offers a variety of different standard models 5 to offer the best virtual approximation of the patient's body. The application adapts the standard model according to the parameters weight and height with the standard formulas from Mosteller, DuBois & DuBois, Haycock, Gehan & George, Boyd and Lam&Leung, etc., which can be defined in the main menu [Extras Settings]. 7. Add Pictures BurnCase 3D offers the user to assign pictures to certain parts of the virtual body within an interaction, which saves the time of tedious searching for the corresponding pictures in the local file system (see Chapter Digital Picture 63 ). © RISC Software GmbH - Medical Informatics Introduction 1.1.2 4 Additional Features These additional features support the flexibility and usability of BurnCase 3D as a diagnosis and documentation tool: Digital picture to assign pictures to specific body regions at different points of time Cross fading of pictures and model to simplify the exact assigning of the wounds onto the model Automatic alignment of the 3D model and the patient's position on the picture Possibility of exporting the complete patient's data (e.g. NTRACS) and additionally save the current model-view as pictures or animations Time panel for easy navigation through the chronological steps of the treatment or healing process Undo function Preview and printing of reports Save and load of model positions Definable queries of all documented data All these functions are completely integrated into the current system, and therefore offer the optimal premises for an easy and fast documentation of burned patients. The most important functions are described briefly in the following paragraphs; details can be found in subsections of this document. Digital Picture This feature can be found by pressing the button [Pictures] in the toolbar or in the main menu [Extras][Digital pictures...] and stores all pictures, that are relevant for the current diagnosis or operation of a patient, in the BurnCase picture system. There are two possibilities to display the picture files: as a textual list or as thumbnails. After importing the pictures into the current patient's picture library by pressing [Import] or using Drag&Drop, they can be assigned [Assign] to any desired point of the model. The designated pictures are represented by pins on the model in the [Pins] mode, whereby clicking onto these pins opens a detailed view of the connected pictures. The size of the pins may be varied by using the slider on the right hand side [Pin size]. More detailed information can be found in Digital Pictures 63 . Superimpose Pictures assigned to a current state can be superimposed with the virtual patient's model. This is very useful to map the wounds exactly onto the specific parts of the model. The function can be found in the digital pictures dialog with the button [Superimpose], as well as in the picture preview [View] or by clicking on one of the pins on the model in the Pins mode and choosing the according button. The transparency of the image can be varied by the slider on the right, which is only enabled if a picture is superimposed [Transparency]. More detailed information can be found in Superimpose 69 . Export Function BurnCase 3D offers the option of saving the documented data of a patient to an encrypted file. This file can be transmitted by email, which then can be imported and used by other institutions. The results of queries can also be saved and imported by statistical or spreadsheet programs. The data may also exported as an XML-file, enabling an import in the NTRACS software from Digital Innovation, Inc. The current model-view can be copied into the Windows clipboard, for subsequent usage in other applications; found in the menu [Edit] [Copy]. Another possibility is to export a picture file or video file (avi) found in the main menu [File][DataTransfer][Export model view]. More detailed information can be found in Data Transfer Time Panel © RISC Software GmbH - Medical Informatics 76 . Introduction 5 This function facilitates a fast overview of the patient's healing process, enabled by pressing the [Timeline] button in the toolbar or [View][Rollup menus][Show timeline] in the main menu. By using the Time Panel, placed at the bottom of the window, the user can quickly jump from one current state to another one, surveying the respective treatment details and the corresponding model. 1.1.3 Standard Models BurnCase 3D offers a flexible and expandable model library, from which the most appropriate model for the respective patient can be chosen. Depending on sex and age only relevant models will be displayed to make the selection easier for the user. This choice is obligatory, because the model will be the reference for any further calculations. Depending on the weight and height of the patient the standard model will be adapted to ensure an exact total body surface area (TBSA) calculation. These standard models are offered in this version of BurnCase 3D: baby male 1-5 years baby female 1-5 years adolescent male 5-12 years adolescent female 5-12 years adult male adult corpulent male adult female adult corpulent female All models are defined as triangular-meshes, with a maximal size of 1cm² per triangle, hence the limitation of the resolution of the marked wound regions. The models are displayed by the OpenGL (tm) Rendering-Pipeline. Models with a higher resolution can be generated on demand. One has to be aware of the fact that the number of polygons are relevant to the performance, noticeable in navigation and marked burned regions. The default standard models are an optimal compromise between resolution and performance. © RISC Software GmbH - Medical Informatics Introduction 1.2 6 System Requirements The following hardware and software is required to run BurnCase 3D successfully: Operating System: Recommended: Microsoft Windows XP SP3 Further supported: Microsoft Windows 2000 Microsoft Vista Microsoft Windows 7 Minimum System Requirements: Intel Pentium III Processor or better 3D video/graphics card with OpenGL support 256 MB of RAM 400 MB available hard disk space Microsoft Desktop Engine© is a integrative part of BurnCase 3D in the basic, standard and professional version. Due to complex representation of 3D models etc., the following hardware is strongly recommended: System Recommendations: 1 GB of RAM (or more) 2 GHz Intel Pentium 4 or AMD Processor, or better NVIDIA GeForce 4 or equivalent ATI Radeon video/graphics card or higher 1.3 Install BurnCase 3D BurnCase 3D comes with a setup wizard. With help of this wizard, you can easily install client and database of the BurnCase 3D system. BurnCase 3D uses a Microsoft SQL Server database. Prior to the installation process, you have to decide how to host the database. The system offers the following possibilities: 1. You already have an instance of Microsoft-SQL-Server 2000/2005/2008 and you want to use it. In this case we recommend to create a new instance on the MS-SQL-Server named "BC". You don't have to use the setup wizard. On the CD you can find a folder named "BurnCaseDB", where you can find the files "BC_20.ldf" and "BC_20.mdf". Contanct your database administrator to copy and attach those files to the existing MS-SQL-Server. The "database owner" should be set to "sa". We recommend to use MS Enterprise Manager to attach the database files. For installing the BurnCase 3D clients you have to use the option "Network version" of the setup wizard. 2. You want to use the included database MSDE 2000 (Microsoft Desktop Engine 2000) as a central database server. Use the setup wizard and choose "Database Only" in the version option. This will install the database server with a local instance named "BC" and automatically attach the BurnCase database to this instance. For installing the BurnCase 3D clients you have to use the option "Network version" of the setup wizard. 3. You want to use the included database MSDE 2000 (Microsoft Desktop Engine 2000) as a local database server. © RISC Software GmbH - Medical Informatics Introduction 7 Use the setup wizard and choose "Stand-alone version" in the version option. This will install both database and BurnCase 3D client on the local computer. You do not need any network access for this option. 4. You want to install the BurnCase 3D client only, the database is already available in the local area network. Use the setup wizard and choose "Network version" in the version option. In this case the system will show you the following dialog to configure the database connection. Be sure to provide the name of the database instance with a slash additional to the database host name. Please provide the sa (database administrator login) password. At the first start of BurnCase 3D use the following credentials to login: Username: bcadmin Password: default The user bcadmin is the only user who is allowed to add further users. To do so, start BurnCase 3D and go to Extras => Settings => System settings => User administration. You should change the "bcadmin" password immediately after first login. BurnCase 3D always asks to change your password as long as it is set to "default" for security reasons. 1.3.1 Installation scenarios BurnCase 3D offers the following installation scenarios: Stand-alone version: BurnCase 3D system with local database In this version the client BurnCase 3D and the database will be installed on the same computer. If you plan to install BurnCase 3D on not more than one computer this is the best choice. Technical announcement: In case of an available network connection there is still the possiblity to configure other clients to use this database. If no Microsoft SQL Server can be found on the local © RISC Software GmbH - Medical Informatics Introduction 8 computer, the installer installs automatically the Microsoft SQL Server Desktop Engine (MSDE) 2000. Network version: BurnCase 3D system with connection to central database In this version the client BurnCase 3D installs without a local database. In order to use the client the configuration for a database server and a network connection have to be provided. Database only: Install database server with BurnCase database without BurnCase 3D This version only installs a local database without the BurnCase 3D client. Thus, this installation acts as a central database server for all BurnCase 3D clients that can reach this machine on the local network (TCP/IP ethernet network required). 1.4 Product License Agreements Software Licenses The cooperation agreement permits the use of BurnCase 3D within the entire contracted institution. During the cooperation period the institution has access to all available updates. The licensing of BurnCase 3D is controlled by a license file. ICD-10 Codes BurnCase 3D contains an ICD-10 browser, which was created, with the machine-readable version from the "Deutsches Institut für Medizinische Dokumentation und Information (DIMDI)": registration code: 915001014869 OPS Codes BurnCase 3D contains an OPS browser, which was created, with the machine-readable version from the "Deutsches Institut für Medizinische Dokumentation und Information (DIMDI)". © RISC Software GmbH - Medical Informatics Introduction 1.5 9 Disclaimer BurnCase 3D Disclaimer Warranty, Disclaimer, Assumption of Risk, and Indemnification Definition: The term "person" as used in this section includes not only a natural person but any entity, (including natural persons), who holds a copyright in, or published, developed, designed, modified, distributed, redistributed, or in any way contributed to this software or program. NO WARRANTIES: TO THE EXTENT PERMITTED BY APPLICABLE LAW, NEITHER RISC SOFTWARE GMBH, NOR ANY PERSON, EITHER EXPRESSLY OR IMPLICITY, WARRANTS ANY ASPECT OF THIS SOFTWARE OR PROGRAM, INCLUDING ANY OUTPUT OR RESULTS OF THIS SOFTWARE OR PROGRAM. UNLESS AGREED TO IN WRITING. THIS SOFTWARE AND PROGRAM IS BEING PROVIDED "AS IS", WITHOUT ANY WARRANTY OF ANY TYPE OR NATURE, EITHER EXPRESS OR IMPLIED, INCLUDING, BUT NOT LIMITED TO, THE IMPLIED WARRANTIES OF MERCHANTABILITY AND FITNESS FOR A PARTICULAR PURPOSE, AND ANY WARRANTY THAT THIS SOFTWARE OR PROGRAM IS FREE FROM DEFECTS. ASSUMPTION OF RISK: THE RISK OF ANY AND ALL LOSS, DAMAGE, OR UNSATISFACTORY PERFORMANCE OF THIS SOFTWARE OR PROGRAM RESTS WITH YOU AS THE USER. TO THE EXTENT PERMITTED BY LAW, NEITHER RISC SOFTWARE GMBH, NOR ANY PERSON EITHER EXPRESSLY OR IMPLICITLY, MAKES ANY REPRESENTATION OR WARRANTY REGARDING THE APPROPRIATENESS OF THE USE, OUTPUT, OR RESULTS OF THE USE OF THIS SOFTWARE OR PROGRAM IN TERMS OF ITS CORRECTNESS, ACCURACY, RELIABILITY, BEING CURRENT OR OTHERWISE. NOR DO THEY HAVE ANY OBLIGATION TO CORRECT ERRORS, MAKE CHANGES, SUPPORT THIS SOFTWARE OR PROGRAM, DISTRIBUTE UPDATES, OR PROVIDE NOTIFICATION OF ANY ERROR OR DEFECT, KNOWN OR UNKNOWN. IF YOU RELY UPON THIS SOFTWARE OR PROGRAM, YOU DO SO AT YOUR OWN RISK, AND YOU ASSUME THE RESPONSIBILITY FOR THE RESULTS. SHOULD THIS SOFTWARE OR PROGRAM PROVE DEFECTIVE, YOU ASSUME THE COST OF ALL LOSSES, INCLUDING, BUT NOT LIMITED TO, ANY NECESSARY SERVICING, REPAIR OR CORRECTION OF ANY PROPERTY INVOLVED. DISCLAIMER: IN NO EVENT, UNLESS REQUIRED BY APPLICABLE LAW OR AGREED TO IN WRITING, SHALL RISC SOFTWARE GMBH, OR ANY PERSON BE LIABLE FOR ANY LOSS, EXPENSE OR DAMAGE, OF ANY TYPE OR NATURE ARISING OUT OF THE USE OF, OR INABILITY TO USE THIS SOFTWARE OR PROGRAM, INCLUDING, BUT NOT LIMITED TO, CLAIMS, SUITS OR CAUSES OF ACTION INVOLVING ALLEGED INFRINGEMENT OF COPYRIGHTS, PATENTS, TRADEMARKS, TRADE SECRETS, OR UNFAIR COMPETITION. INDEMNIFICATION: TO THE EXTEND PERMITTED BY LAW THROUGH THIS LICENSE, YOU, THE LICENSEE, AGREE TO INDEMNIFY AND HOLD HARMLESS OF RISC SOFTWARE GMBH, ITS OFFICIALS AND EMPLOYEES, AND ANY PERSON FROM AND AGAINST ALL CLAIMS, LIABILITIES, LOSSES, CAUSES OF ACTION, DAMAGES, JUDGMENTS, AND EXPENSES, INCLUDING THE REASONABLE COST OF ATTORNEYS' FEES AND COURT COSTS, FOR INJURIES OR DAMAGES TO THE PERSON OR PROPERTY OF THIRD PARTIES, INCLUDING, WITHOUT LIMITATIONS, CONSEQUENTIAL DAMAGES AND ECONOMIC LOSSES, THAT ARISE OUT OF OR IN CONNECTION WITH YOUR USE, MODIFICATION, OR DISTRIBUTION OF THIS SOFTWARE OR PROGRAM, ITS OUTPUT, OR ANY ACCOMPANYING DOCUMENTATION. © RISC Software GmbH - Medical Informatics Part II BurnCase 3D Reference 2 11 BurnCase 3D Reference In this chapter the following functions are described in detail: 2.1 Login (see chapter Login 11 ) User interface (see chapter User Interface 13 ) Treatment process (see chapter Treatment Process 24 ) 3D model view (see chapter 3D Model View 29 ) Burn case data (see chapter Burn Case Data 38 ) Reporting system (see chapter Reporting System 50 ) Digital pictures (see chapter Digital Pictures 63 ) Statistics and analysis (see chapter Queries 70 ) Data transfer (see chapter Data Transfer 76 ) Login To log onto the BurnCase 3D system, you must specify your username and password, in the "Login..." dialog as shown below: The drop down menu "User name" contains the available usernames, whereby one has to be chosen and the according password needs to be entered correctly for a successful login. The button [Connect] verifies the input data and starts the login procedure. If the system administrator needs to view or change detailed information concerning the database server connection, simply click on the button [>>]. This button can only be seen by the administrator; if users have connections problems, they should contact their administrator. © RISC Software GmbH - Medical Informatics BurnCase 3D Reference 12 Database server: UNC path of BurnCase 3D database Database name: name of currently used database Timeout: period of time BurnCase 3D is allowed to take for connecting to the database Lock time: Interval of patient locking Import licence: Imports a license specified by the license file located in the BurnCase 3D folder. If the license file on the database is updated or deleted at some stage and the client's file hasn't been changed as well, the following warning will appear: © RISC Software GmbH - Medical Informatics BurnCase 3D Reference 2.2 13 User Interface at a Glance The following picture shows the complete user interface of BurnCase 3D (after a patient has been opened): The user interface can be divided into different zones: Main Menus and Toolbars: The most important functions can be found in menu entries and buttons. For more detailed information have a look at the chapters Main Menus 15 and Toolbars 18 . Treatment Process: A complete chronological order of the injury-based treatment process is shown in terms of a hierarchical tree. More details can be found in chapter Treatment Process 24 . 3D Model: This area is the largest one and displays the virtual 3D model of the patient, with all the marked burned regions, including assigned picture pins and their superimposition. Detailed information can be found in 3D Model View 29 and Digital Pictures 63 . © RISC Software GmbH - Medical Informatics BurnCase 3D Reference 14 Back View: The rear view of the model, supporting a better control in marking the model with the draw mode option [All] is placed in the lower left corner of the model view. A click on the symbol in the lower left corner of the model area toggles the visibility of the rear view. Quickview: The section on the upper right of the application helps to focus on certain parts of the body. The following predefined regions can be chosen: Head Right hand as well as right arm Left hand as well as left arm Thorax Pelvis Right leg as well as right foot Left leg as well as left foot Complete model (click aside of the body) Depending on the body part chosen, the according context menu will facilitate the perspective to the front, back, right, left, top or bottom of the model. More detailed information can be found in the chapter Quickview 31 . Patient data, Indices and areas: These tables hold the major patient data and the resulting indices and TBSA and TBSA-B information. More details on this topic can be found in Patient Data 34 and Indices and Areas 34 . Comment field: One can enter textual information concerning the respective current state, which will be listed on the [Table list containing all acquired states] report (see Reporting System 50 ). Obligatory field indicator: This Button indicates if not all obligatory fields of the current patient/burncase have been filled out. Time Panel: The time panel contains all current states chronologically sorted along the panel horizontally. This facilitates a fast and easy survey of all data gathered during the treatment process. For more detailed information have a look at chapter Time Panel 29 . Status messages: This list only contains system internal information, which do not influence documented data and can be enabled in the main menu [View][Rollup menus][Status messages]. "Extras" dialog: © RISC Software GmbH - Medical Informatics BurnCase 3D Reference 15 The "Extras" dialog unites various functions such as data acquisition, settings etc.: Patient - patient's data Burn case - circumstances of the incident (see Burn Case Data 38 ) Reporting system - automatic generation of reports (see Reporting System Digital pictures - management of digital pictures (see Digital Pictures 63 ) Queries - creation of freely defined statistics and analysis (see Queries 70 ) Data transfer - export/import of patient's data (see Data Transfer 76 ) Settings - configuration of BurnCase 3D (see BurnCase 3D Settings 81 ) 50 ) Depending on the chosen main topic on the left hand side of the dialog, the according form will be displayed on the right. 2.3 Main Menus The main menu of BurnCase 3D contains the following entries: [Open patient...] opens the according patient dialog to create a new patient or open an existing one. [Save patient] saves the current state to the database. Please note, that after you have saved your changes [Undo] is disabled. To close the current patient simply click on [Close patient]. [File][Data transfer] offers the possibility to export the complete data of a patient (including all areas marked on the 3D model and all of the gathered additional information, but no pictures), which can be imported by any instance of BurnCase 3D. [Logoff user] loggs off the current user from the system and opens the Login dialog 11 . [Quit] closes BurnCase 3D. © RISC Software GmbH - Medical Informatics BurnCase 3D Reference 16 [Undo] cancels the last action carried out on the model. This operation can be used more than once sequentially. [Redo] restores the last action canceled by [Undo]. The [Copy] function copies the current view of the 3D model into the Windows clipboard, and makes this picture available for other applications (e.g. Microsoft Powerpoint®). [New...] creates a new patient, a new burn case or a new current state, depending on the position of the focus in the patient's Treatment Process tree (left). [Full Screen] broadens the area of the 3D model view by removing the planes on each side (Treatment Process tree, quickview and patient information). A reuse of this option restores the panels. [Rollup menus] contains a submenu, shown below. [Auto-rotate model] enables and disables an automatic rotation along the vertical axis of the body. If the rotation is activated you can vary the rotation velocity using the slider [Rotation speed] placed on the right hand side of the interface. To be able to distinguish the specific body regions, [Show colored body regions] colors the body parts in different colors. [Reset model view] restores the default appearance of the user interface, which is shown at startup. With this submenu additional tool bars, rollup menus and areas in the user interface can be displayed: [Quick selection]: This rollup menu contains all the possible colors to mark a region of the body. A click on a specific color activates the related characteristic, which then can be drawn onto the 3D model. [Selected Characteristic]: This rollup menu indicates the characteristic. If you select a marked area on the body, this menu will appear and facilitates the modification of marked areas (e.g. Burn degree 2a to Burn degree 3). Marked areas can be selected by: Toolbar->[Select], click on any marked area on the 3D model Toolbar->[Look-At], click on any marked area on the 3D model Treatment Process, select region (rollup appears on context menu->[Properties]) © RISC Software GmbH - Medical Informatics BurnCase 3D Reference 17 [Show timeline]: This option enables the timeline, shown at the bottom of the application. All the current states within the current burn case are placed in chronological order along this panel horizontally, enabling fast and easy switching between them. [Status messages]: This menu item enables a status window, shown below the 3D model view. These messages only concern system internal information, with no influence on the documented data. [3D Model Alignment]: This menu item displays the dialog to align the position of the model to the position of a patient on an image. By using superimposition it becomes very easy to map injuries onto the model. It is even possible to assign burns of different degrees by using false color images automatically onto the model. The [Extras] menu contains all functions besides 3D data acquisition: [Patient]: patient data [Dataset]: contains burn case relevant additional information [Reports]: generation of reports [Digital pictures]: digital picture library [Queries]: freely defined statistics and analyses [Data transfer]: import and export of patient's data, picture and video [Settings]: local and system-wide settings [ICD Acquisition]: ICD browser and current ICD list The [Window] menu contains all currently opened BurnCase 3D windows, enabling to switch between them. The [?] menu contains all functions related to BurnCase 3D help system: [Help topics]: This document. [Frequently asked questions (FAQ)]: Answers to major questions related to BurnCase 3D. [OpenGL version]: Displays the OpenGL version installed on your system. [Database version]: Displays the current database version. [Info]: Displays general information concerning BurnCase 3D. © RISC Software GmbH - Medical Informatics BurnCase 3D Reference 2.4 18 Toolbars The following chapter explains the various icons in the toolbar. The [Patient] button opens the dialog for patient standing data (see chapter Patient Information 19 ). To edit all the information concerning the circumstances of the burn case click on the [Record] button (more in chapter Burn Case Data 38 ). BurnCase 3D automatically generates reports. This option can be found by using the [Reports] button (more in chapter Reporting System 50 ). The button [Pictures] opens the pictures dialog (more in chapter Digital Pictures 63 ). The usage of button [Queries] helps you to create statistics and analyses (more details in Queries 70 ). To open the dialog for importing or exporting patient data click the button [Transfer] (more in chapter Data Transfer 76 ). [Settings] displays the dialog to modify various settings within the application (more in chapter BurnCase 3D Settings 81 ). The button [New] has four different functions: 1. 2. 3. 4. If no patient has been opened, the dialog for creating or opening a patient will appear. In case a patient has already been opened and selected, BurnCase 3D will create a new burn case. If, like above, a burn case has been selected, a new current state will be created. In case there has not been one before you must fill out the according information in the state definition dialog (date, doctor, standard model,...). Details can be found in chapter State Definition 48 . As soon as this step has been completed with [New state], you can start marking characteristics on the 3D model. If the current burn case already contains one or more current states BurnCase 3D simply copies the chronologically latest current state and creates a new one. The new current state automatically gains the current date, time and copies of all marked characteristics. NOTE: Only the chronologically latest current state of a burn case can be modified and/or deleted! To save all the data referred to the current patient, click the [Save] button. Note that changes cannot be undone after this operation. [Undo] cancels the last action carried out on the model and can be used more than once. This button is disabled after saving. [Redo] restores the last action canceled by [Undo]. The button [Timeline] enables the timeline, shown at the bottom of the application. Through choosing the different current states on the timeline, switching between them becomes very easy. (More details information in chapter Time Panel 29 ). With these modes you can interact with the 3D model in different ways: The button [Rotate] facilitates the navigation with the 3D model. You can rotate, move or zoom the model (see chapter Model Navigation 30 ). © RISC Software GmbH - Medical Informatics BurnCase 3D Reference 19 To ease navigation [Look-At] defines the reference point for rotation and it is placed in the center of the model view (more in Model Navigation 30 ). Furthermore, the corresponding region is selected in the Treatment Process. The simple selection without rotating the model can be accomplished by [Select]. [Select] mode enables the selection of marked areas on the model by simply clicking on the model surface. The corresponding region is automatically selected in the Treatment Process and the rollup "Current Characteristic" appears. In contrast to [Look-At] the model position is unchanged. The usage of [Pins] shows assigned picture pins on the model (in case any pictures have been assigned). If you click one of these pins, the according picture(s) will appear. If you click [Draw] a submenu will become visible, which contains different options to mark the body's surface. If you click [Erase] you can choose between the options [Entire surface] and [Marked surface only], whereby the latter only ignores areas, when other ones have been explicitly selected in the Treatment Process. More detailed information on marking and unmarking regions can be found in chapter Marking Areas 32 , including a further description on the buttons [Freehand] and [All], as well as all the available characteristics of an area (e.g. Burn degree 1). 2.5 Patient Management BurnCase3D comes with a complete patient management system, enabling the storage of numerous patient related data. 2.5.1 Patient Information In this dialog you can either create a new patient or edit an existing one. You can open this form in different ways: Press the button [Patient] in the toolbar. Press [Patient...] in the main menu [Extras]. Press the button [New] in the toolbar, if no patient has been opened. Press [New...] in the main menu [Edit], if no patient has been opened. Press the right mouse button in the Treatment Process region (left) of the user interface and choose [Patient...] in the context menu. Press [Patient][Edit patient] in the "Extras" dialog. Dialog for creating or editing patients: © RISC Software GmbH - Medical Informatics BurnCase 3D Reference 20 The [Edit patient] form is subdivided into two parts: The top region [Choose patient] contains functions for searching patients and a list of all inpatient and discharged patients. The option [Automatic search] seeks all patients (inpatient and discharged), which fulfill the specified criteria, as soon as the content of the text field has been changed (disabled by default). If this option is disabled you must click the [Search] button (see [2] in screenshot) to start the search. The criteria can be changed freely in [Search fields], where all data fields are selected by default. If the Option [Automatic search] is activated, a search result will be shown instantly as soon as text has been entered into the [Search] text field. The search will affect both patient lists - [Patients receiving treatment] and [Completed patients] To edit a patient simply choose the according entry in the list and change the data in the [Patient factsheet] area. A double click opens the selected patient. The content of the checkboxes in front of the patient's name in the list have different meanings: © RISC Software GmbH - Medical Informatics BurnCase 3D Reference 1. 2. 3. 4. 21 All the obligatory fields have been acquired in the according [Complementary data] forms. These obligatory fields are marked by special background color. These are patients receiving treatment, where at least one obligatory field is missing. These are completed patients, where at least one obligatory field is missing. This Symbol indicates, that this patient has been imported from the hospital information system. Updating large patient lists is quite time-consuming and therefore only is processed automatically at startup. However, it is possible to update the list manually by pressing the [Refresh] button (see [3] in screenshot). NOTE: Due to performance the list will not be refreshed after every modification of the patients; to update the list please click [Refresh]. [Delete] (see [4] in screenshot) will delete the selected patient after a confirmation dialog. For security reasons a separate dialog will ask for a confirmation before the patient will be irretrievably erased from the database. NOTE: If you confirm the deletion of a patient all the gathered data concerning this patient will be deleted irretrievably! The bottom region of the dialog contains [Patient factsheet] fields, in which standing data can be entered and edited. The button [New] (see [5] in screenshot) clears all the text fields and is subsequently disabled. After entering standing data of a new patient, a click on [Create] (see [6] in screenshot) creates a new patient and writes the data into the database. If you choose one of the patients in the list, the stored standing data will be displayed in the data fields and can be edited. To save the changes into the database click [Save] (see [7] in screenshot). [New case] (see [8] in screenshot) creates an new burn case for the patient selected, which will be inserted into the Treatment Process shown on the left hand side in the main window of the application. 2.5.2 Merge Patients This dialog enables the possibility of merging two patients. This may be useful, if one patient has been registered twice. Merging two patients will transfer all burncases of one patient to another and delete the according one. © RISC Software GmbH - Medical Informatics BurnCase 3D Reference 22 In order to merge patients the according ones have to be selected in both lists. The usage of the specific [Merge] button determines with of the two patients will be kept or deleted respectively. All the burncases of the right patient will be transferred to the patient on the left. The right patient will be deleted subsequently. All the burncases of the left patient will be transferred to the patient on the right. The left patient will be deleted subsequently. HINWEIS: This step cannot be undone! © RISC Software GmbH - Medical Informatics BurnCase 3D Reference 2.5.3 23 HIS Interface The hospital information system interface provides the possibility of using data from the institution's own information system within BurnCase3D. This feature is still in development. The design of this dialog is similar to the one providing the Patient Information 34 . It consists of the patient search and two patient lists. The upper list [1] shows patients with have been approved by the hospital information system to be processed by BurnCase3D. The lower list [2] shows BurnCase3D patients with are similar to the patient selected in the top list [1]. Consequently there are two possibilities of using data from the hospital information system within BurnCase3D: 1. New HIS Patient A double click on a patient in list [1] or selecting and pressing [Open] creates a completely new patient within BurnCase3D using the data from the hospital information system. 2. Using HIS data in existing patient By selecting a patient in the upper list [1] similar BurnCase3D patients will be shown in the lower list [2]. Activating the [Show all] checkbox all BurnCase patients will be shown in the lower list [2]. The hospital information system exports patient-, burncase- and state-related data. Therefore the data has to be assigned to a specific burncase and state. Consequently a burncase has to be selected in the combobox [Burn case]. After clicking the [Assign] button the HIS data is transferred to the BurnCase3D database and State Definition 48 dialog will be shown. The user may decide to use the data in the current state or rather create a new state. NOTE: Using and assigning data from the hospital information system for existing patients overwrites data entered by the user previously. This action cannot be undone! © RISC Software GmbH - Medical Informatics BurnCase 3D Reference 2.6 24 Treatment Process On the left hand side of the application you can find a hierarchical tree structure, which represents the treatment process of the currently opened patient. It offers a good chronological overview: The individual levels, including their context menus, are extensively explained in Levels 24 . The Time Panel is a slider shown at the lower region of the application and facilitates switching between the available current states in chronological order. More details in chapter Time Panel 29 . 2.6.1 Levels Level 0: No patient opened To open a patient click the [Patient] button of the toolbar. For information about opening the patient dialog see chapter Patient Information 19 . Level 1: Patient The first level of the Treatment Process is restricted to only one patient (left image below). If you click the patient entry with the right mouse button a context menu will appear (right image below). [Close patient] closes the current patient. If any changes haven't been saved up to this point, an appropriate dialog will be shown. To generate a report click [Reports...] (more in Reporting System © RISC Software GmbH - Medical Informatics 50 ). BurnCase 3D Reference 25 If you click [New burn case] a new burn case will be created. One patient may contain more than one burn case. [Properties] opens the "Extras" dialog to modify the gathered or missing standing data concerning the current patient. Furthermore you can also open and create new patients here. NOTE: If you choose [Reports...] in the context menu, only the "Patient record" report containing the patient's standing can be generated. All other kinds of reports are dependent on a specific burn case and/or a current state and are therefore only selectable at the corresponding levels. Level 2 - Burn case The second level is related to the burn cases, whereby an unlimited number of burn cases per patient may exist. A burn case displayed in the Treatment Process tree view and its context menu, opened by a click with the right mouse button, looks like this: To generate a report click [Reports...] (more in Reporting System 50 ). In case there is no current state within this burn case [New state] opens the dialog to create one (see chapter State Definition 48 for details). If there is already an existing current state the areas of the current one will be copied to a new one. A new work step will be created automatically in the course of this process. To rename a burn case simply click [Rename] and enter the desired name. Another possibility is to click onto the burn case a second time or press F2, when a burn case is selected. BurnCase 3D offers the possibility to delete (context menu item [Delete]) a complete burn case, but since all the data will be lost irretrievably, this option is only enabled if the referring burn case does not contain any work steps or current states. Otherwise all of them have to be deleted first. [Properties] opens the "Extras" dialog containing the possibility to modify all the data related to the incident (see Burn Case Data 38 ), as well as the possibility to generate reports (see Reporting System 50 ) and manage pictures in the Digital Pictures 63 . © RISC Software GmbH - Medical Informatics BurnCase 3D Reference 26 NOTE: A burn case can only be deleted, if it does not contain any work steps or current states, hence all work steps and current states must be deleted manually beforehand. This feature was implemented intentionally for security reasons, to make it impossible for users to delete a complete burn case accidentally. Level 3 - Work step Every work step contains the exact date and time of its creation. The image below shows a Treatment Process tree view with a burn case including work steps. Note that only the last current state created can be modified or deleted, subsequently the context menu shown below only contains all these menu entries, if the last current state has been selected. Prior current states selected will only display [Reports...] and [Properties] in their context menu, because the other options would not be possible. A new current state can be created by selecting [New state] from the context menu, whereby all marked surfaces of the latest current state are copied into the new one. To generate a report click [Reports...] (more in Reporting System 50 ). In case there is no current state within this burn case [New state] opens the dialog to create one (see chapter State Definition 48 for details). If there is already an existing current state the latest one will be copied into a new one, but with a new date. Since a work step can only contain one current state a new work step is created automatically. Due to the chronological order of the treatment process the new work step has to have a later date and time than the prior one. [Delete] deletes the selected work step, which erases all the according data irretrievably. Only the latest work step can be deleted to maintain the chronological order of the treatment process. To change the specific date and time of the selected work step, click [Properties] in the context menu and then OK in the "Work Step Date" dialog to confirm your changes. NOTE: The date and time can not be changed to a point of time before the previous work step or after the following one to maintain the original chronological order. Level 4 - Interaction Interactions are displayed as children of work steps. The only interaction supported in this version are © RISC Software GmbH - Medical Informatics BurnCase 3D Reference 27 current states, which document the patient's current state. If you click the current state label in the Treatment Process tree with the right mouse button, a context menu will appear. Whether it is the latest current state or some prior one the context menu contains different items. Both context menus contains the options: Reports... Add picture... Properties The latest current state additionally contains: New state Delete The following images show the Treatment Process tree with the chronologically last current state selected and the appropriate context menu. Above of the Treatment Process tree you can find the label [Surface], which indicates, depending on the selected item, the size of the marked surface area on the 3D model. If a current state is selected, the area of all marked regions is displayed; if you select a specific entry (lower level), then only the surface area of the related part will be displayed. The number shown between the two brackets indicate the number of pictures, that have been assigned to this state (see Digital Pictures 63 ). To create a report choose the [Reports...] option, which can also be found in the toolbar (see Reporting System 50 for details). [Add picture...] opens the Digital Pictures 63 to add pictures to the current work step. If you click [New state] BurnCase 3D executes the following operations: Creates a new work step with the current date and time The prior current state will be copied (all marked areas on the model) and transferred to the newly created current state. [Delete] deletes the complete current state, including all marked surfaces. You need to confirm the deletion for security reasons. The relevant properties of a current state (doctor, date of work step, height and weight) can be shown and edited by pressing [Properties]. NOTE: If you switch between current states in the Treatment Process tree, the according 3D model will be loaded and displayed. Depending on your hardware this may take a few seconds. If you select an entry on a higher level than current state (work step, burn case or patient), then instead of the model you will see the text "Choose an interaction". Once you have picked a current state or a marked region, the model will be displayed again. © RISC Software GmbH - Medical Informatics BurnCase 3D Reference 28 Level 5 - Regions (sorted by body parts) In this level all the marked regions, sorted by their related body region are listed. The marks are assigned to the area-related most affected body parts. The selected area, depending on your settings, is highlighted (default yellow) on the model or all other (not selected) areas will turn grey. You can change these settings in [Extras][Settings] by (un)checking [Highlight selected region] and changing [Color settings]. [Show] marks the selected areas in that region and rotates the model to get the best possible overview of the selected region. To delete a selected entry click [Delete]. This operation erases all corresponding marked areas on the model and saves this change to the database immediately, hence this cannot be undone. The info field, next to the label [Surface], displays the total surface area of the regions selected. Level 6 - Characteristic This level is (apart from possible sub-characteristics) the lowest level in the Treatment Process tree. The entries in this level specify the characteristics, like burn degree, chemical burns, etc., of a marked region. The different colors and patterns help you to distinguish the different characteristics on the model. If you select one of the characteristics, the "Selected Characteristic" rollup will be shown, which contains a textual description of the characteristic. A few characteristics have sub-categories, which help to define them in detail (e.g. Surgical Wound Cleaning). The surface area of the selected item is shown next to the label [Surface]. [Show] marks the selected region and rotates the model to get the best possible overview of the selected area. To delete a selected entry click [Delete]. This operation erases all relevant marks on the model and saves this to the database immediately, hence this cannot be undone. © RISC Software GmbH - Medical Informatics BurnCase 3D Reference 29 The [Properties] option opens the rollup "Selected Characteristics", where you can either change the characteristic or add sub-characteristics. [+] opens a list box, which contains the possible sub-categories and [-] deletes the selected ones. Changes will be saved to the database immediately and cannot be undone. Level 7 - Sub-Characteristic A few characteristics (e.g. Surgical Wound Cleaning, ...) offer a more detailed definition with the help of sub-characteristics. They cannot only be differentiated by pattern, since the color is fixed by the main characteristic. Consequently the context menu only has two options: [Show] has the same functionality as in Level 6. It marks the selected areas in that region and rotates the model to get the best possible overview of this area. [Delete] deletes the according sub-characteristic and saves the changes immediately to the database. By doing so the main characteristic remains unchanged. 2.6.2 Time Panel The time panel facilitates an easy switching between the different existing current states. They are chronologically ordered along the slider horizontally, with the according date and time, allowing a fast survey of the various states. The time panel can be enabled and disabled with the [Timeline] button in the toolbar or in the [View] menu, [Rollup menus][Show timeline]. The indicator defines the selected current state and consequently the 3D areas shown on the model. If you press the right mouse button within the time panel the context menu shown on the left will appear. This enables the modification of the information displayed for every entry on the time panel (date, time and interaction type). 2.7 3D Model View The largest area in the middle of the application displays a 3D representation of the patient's body. There are different modes to interact with this model, which can be chosen from the model interaction toolbar shown below. The selected button in the toolbar will remain pressed specifying the currently activated mode. [Rotate] is the default navigation mode, which enables you to rotate, zoom and move the model. If you choose the [Look-At] mode the point on the model selected will move to the center of the 3D model view and points in the viewers direction. More information on these modes can be found in Model Navigation © RISC Software GmbH - Medical Informatics 30 . BurnCase 3D Reference 30 Another possibility to quickly navigate the model is the [Quickview] area on the right. You can select various parts of the model and choose a particular view, which moves the model into a predefined position assuring the best possible overview of the selected body region. You can also define your own special model views for every patient (more details in chapter Quickview 31 ). BurnCase 3D offers a variety of different modes to mark regions on the model (Freehand, Rectangle, etc). More in chapter Marking Regions 32 . The major information on the patient is displayed separately on the right of the user interface. An extensive description can be found in Patient Data 34 and Indices and Areas 34 . 2.7.1 Model Navigation There are two possibilities to navigate the model in the model view: [Rotate] and [Look-At]. If the [Rotate] mode is enabled, the mouse buttons have different functions: Left mouse button pressed: rotate model Right mouse button pressed: move model horizontally and vertically Middle mouse button pressed: zoom function Left and right mouse button pressed: zoom function Scroll-wheel: zoom function Depending on the mouse button pressed, the cursor's shape indicates the current function of your movement. In case of a tablet PC, BurnCase 3D offers the option to enable a separate icon in the upper right corner of the model view, which changes the navigation function of the left mouse button. This feature can be enabled in the [Settings] menu, [Local settings][Activate Tablet PC extensions]. Rotation via Virtual Trackball The rotation of the model (by pressing the left mouse button) uses the Virtual Trackball. As shown in the image below it simulates a hemisphere inside of the blue circle, which can be disabled in the [Settings] menu. All the mouse movements in this zone concerning a rotation, will be calculated as a movement over this virtual hemisphere with the resulting rotation of the model. Rotation movements outside of the blue circle will only rotate the model round the Z axis (the users line of sight into the model view). This facilitates to rotate the model along the screen plane. The concept of the Virtual Trackball avoids the problem of current rotations influencing the following ones, which leads to severe interaction errors. © RISC Software GmbH - Medical Informatics BurnCase 3D Reference 31 Look-At Mode This mode focuses the selected point on the model and moves this spot to the center of the model view. It also rotates the model, so that the surface at the selected point and the user's line of sight are orthogonal. This mode enables the rotation of the model into the right position easily and fast. 2.7.2 Quickview [Quickview] is a very helpful tool to quickly find the right body position in order to mark or validate areas. If you move the cursor over the picture of the body, the separate zones will be marked red. Clicking onto one of those red fields opens the context menu, where you can choose the desired viewing direction to that zone. Clicking on any of these direction (front, back, left, right, top, bottom) will position the model so that the marked zone is in the center of the 3D model view, pointing in the chosen direction. If you open the context menu next to the body, you can choose predefined views of the complete model . You also have the possibility to define your own model positions. Move the model into the desired position, click button [3] and choose a name in the dialog. This model position will be added to the drop down menu [1]. Button 2: This opens the "Rename quick-view dialog" to rename or delete user defined quickview. To rename a quickview simply enter the new name in the text field. To delete a quickview, clear the text field and click [OK]. If you have not chosen an item from the drop down menu this dialog will not open! © RISC Software GmbH - Medical Informatics BurnCase 3D Reference 32 Button 3: Opens the dialog to create a new quickview, which will be added to the drop down menu (1). In order to redefine a quickview, select it first in the drop down, and click button [3]. 2.7.3 Marking Areas As soon as the model has been navigated into the correct position, you can start marking areas on the 3D model. First you have to choose the selection type (more details below) and the characteristic (burn degree,...). To mark a specific area on the model, outline the borders of the area with the left mouse button pressed. As soon as the mouse button is released BurnCase 3D will calculate the affected area and apply the according color and pattern. Incorrectly marked regions can either be erased by pressing [Erase] and applying the same technique as in drawing mode or simply click [Undo] in the toolbar to cancel the last performed action. NOTE: If the [Extras][Settings][Local Settings][Rotate on right mouse button in [Draw]/[Erase] mode] is checked, you can use the right mouse button to rotate the model while marking areas. Choose Selection Type [Draw] To mark areas, one of the selection types has to be chosen. Pressing the [Draw] button of the toolbar will open the menu shown on the left. The following selection modes are available: [Entire surface] In this mode the entire area within the outlined border will be marked, no matter whether it has been marked before. [Marked surface only] Only already marked areas within the outlined border will be marked with the selected characteristic. This is particularly useful, when applying a different characteristic to a part of an already existing area. [Unmarked surface only] This mode is the opposite to the [Marked surface only] mode. This mode only marks surfaces, that have not been marked before and is especially useful to mark regions on the edge of already marked areas, © RISC Software GmbH - Medical Informatics BurnCase 3D Reference 33 which should not be changed. After picking the selection type, a drawing mode has to be chosen by pressing either [Freehand],[Rectangle] or [Single Polygon] button in the toolbar. These following drawing modes are available: In the [Freehand] mode, you can outline the borders of the affected region freely by moving the cursor along the model with the left mouse button pressed. Note that the border outline is always closed automatically. As soon as the mouse button is released the according region will be marked, edges will be softened and gaps, due to the resolution, filled. The [Rectangle] mode enables you to draw rectangular regions, which may be useful to mark dressings or injuries of the extremities. Both of these drawing modes are available in [Front] and [All] mode. The first one just marks the front of the model (visible to the user), the latter also marks the polygons underneath (back of the model). These modes can also be changed by pressing the according button in the toolbar named either [Front] or [All]. To ensure that the [Freehand front] mode performs correctly, the anti-aliasing settings of the graphics card driver have to be either disabled or set to "Application controlled", whereby we recommend the latter. There also is a special mode for marking or erasing single polygons [Single Polygon]. This is particularly useful to refine area borders. Choose Deselection type [Erase] With the [Erase] mode selected you can erase marked areas. There are two possibilities: [Entire surface] All marked areas selected become unmarked. [Marked surface only] Only areas selected in the Treatment Process tree become unmarked. © RISC Software GmbH - Medical Informatics BurnCase 3D Reference 2.7.4 34 Patient Data A table containing the patient data can be found on the right side of the graphical user interface. If no patient has been opened, this field is not visible. In the patient's standing data (see Patient Information information can be changed: [ID] (e.g. within a hospital) [Sex] [Age] 19 ) the following In the fields [Height] and [Weight] can either be changed in the properties of the chosen interaction or directly by clicking on the value in the table. The fields [Inhalation] and [Electricity] are burn case related data, which can be modified in Complementary Data 39 . If you double click one of these text fields, the according dialog will open allowing to change this item. 2.7.5 Indices and Areas The image shown on the left contains information concerning indices and areas. Based on the total body surface area (TBSA), which is dependent on the chosen standard model, sex, height and weight, the indices and areas are automatically calculated. The computed percentage of each degree of burn is based on the TBSA of the model. The Body Mass Index (BMI) is a statistical measure of the weight of a person scaled according to height. Scientifically a BMI of 20-25 for men and 19-24 for women is considered as "normal". BurnCase 3D also calculates the Baux score (age + % TBSA-B) and the ABSI (Abbreviated Burn Severity Index) score automatically, as soon as any relevant data concerning the degree of the injuries or the marked © RISC Software GmbH - Medical Informatics BurnCase 3D Reference 35 areas on the model change. The score is computed as in the following: In case of burns an adequate liquid substitution is very important on the first day. The quantity can be estimated by the means of the Parkland-Formula modified by Baxter, which is based on TBSA-B and body weight. The first half of this amount is delivered in the first 8 hours, and the remaining half is delivered in the remaining 16 hours. BurnCase 3D calculates the initial fluid requirements of burn victims as in the following: Adults: (4 ml Lactated Ringer's solution) * (% TBSA-B II°/III°) * (kg body weight) in 24 h Children: (4 to 8 ml Lactated Ringer's solution or Bicarbonate Ringer's Solution) * (% TBSA-B II°/III°) * (kg body weight) in 24 h These calculations are only an estimation of the liquid substitution needed. Monitoring of the exact liquid supply has to be specified by the means of clinical parameters! The average daily energy-demand (basal energy expenditure) of patients with burns is calculated with the formula from Harris and Benedict (q.v. Harris J, Benedict F. A biometric study of basal metabolism in man. Washington D.C. Carnegie Institute of Washington. 1919) and displayed: Male: B.E.E. = 66.5 + (13.75 x kg) + (5.003 x cm) - (6.775 x age) kcal/d Female: B.E.E. = 655.1 + (9.563 x kg) + (1.850 x cm) - (4.676 x age) kcal/d The energy consumption also takes the activity and stress of a patient into account. The according formula is: Energy consumption = B.E.E. x (activity factor + stress factor) The activity factor is a constant of 1.2 and the stress factor is dependent on the burned surface area: 0.5: burned surface area between 0 and 19 percent 0.7: burned surface area between 20 and 40 percent 1.0: burned surface area larger than 40 percent © RISC Software GmbH - Medical Informatics BurnCase 3D Reference 2.7.6 36 Align Model In this mode it is possible to align the position of the model with the patient on the superimposed picture. By pressing [Align] in the toolbar a dialog to define reference points on the model and on the picture opens. In this dialog it is also possible to automatically assign burns to the model by using false color pictures. 2.7.6.1 Model Alignment [1. Define picture points] This area the reference points of the superimposed picture are defined. By pressing [Add] the cursor changes it's shape (cross with a "P" for picture points) and the reference points can be set by pressing the left mouse button on the according spots on the picture. These points are listed in the [Model alignment] tab and are represented on the picture by blue dots with their IDs in the middle. The defined points can either be deleted separately by selecting one and pressing the [Delete] button, which decrements other IDs automatically, or they all can be deleted at once by pressing [Delete all]. [2. Define model points] These points are the reference points on the model, which can be placed and deleted analogously to the processes explained above. The defined reference points are marked with red dots with their IDs and the cursor has an "M" (for model points) instead of a "P". Additionally, there are pre-defined significant model points. These can be added to the previously defined model points by selecting the according entry in the list [Pre-defined significant model points] and pressing the [Add] button. New pre-defined model points can be © RISC Software GmbH - Medical Informatics BurnCase 3D Reference 37 added by pressing the [Define] button and choosing a desired point on the model. After entering a name for the new pre-defined point, it will be added to the list. The assigned model points can be deleted by pressing the [Delete] button next to the [Model points] list or, in case it is one of the pre-defined model points, by pressing the [Delete] button next to the [Pre-defined significant model points] list. By using the right-hand mouse button, it is possible to switch between the [Picture points], [Model points] and the [Rotate] mode. [3. Model alignment] This part of the dialog displays the model alignment options. The accuracy combobox indicates the accuracy of the alignment process; a higher accuracy is more likely to find a better model position, but will take more time. To start the alignment process simply click the button [Align], whereby an activated [Process] checkbox shows every calculated model position during the alignment process. There is also the possibility to save the assigned reference points to the superimposed picture by pressing the [Save] button. These can be loaded at some later point of time by superimposing the same image and pressing the [Load] button. 2.7.6.2 Wound Area Transfer © RISC Software GmbH - Medical Informatics BurnCase 3D Reference 38 BurnCase 3D offers the possibility to transfer burns with the according degree onto the 3D model automatically. This saves a lot of work, allowing a precise assignment of the wounds. [1. Wound Area Recognition] These values decide, if a certain area should be recognized as a burn or not. BurnCase 3D takes each of the RGB channels of false color images into account, the highest channel intensity is defined as the dominant color and determines the classified burn degree. The following parameters influence the classification process: Color dominance: Defines the needed degree of the domination of the dominating color intensity over the other colors within one pixel. Threshold: Defines a certain value of the dominating color, which has to be exceeded within one pixel. Minimum size: Defines a minimum size of a connected burn area, to be recognized as such. After the termination of the recognition process, which can be started by pressing the [Recognize] button, the amount of pixels colored in red, green and blue are displayed next to [Found wound areas]. Depending on the used hardware and the resolution of the pictures this process may take some time. [2. Characteristic assignment] After an successful wound area recognition, these areas can be mapped onto the 3D model automatically. By assigning the 3 colors to 3 characteristics, BurnCase 3D has all the needed information to draw the recognized burns onto the model. [3. Wound Area Transfer] Pressing the button [Transfer] starts the wound area transfer process, where the recognized areas are drawn onto the model with the characteristics defined in [2. Characteristics assignment]. There are however three options to do so: map the recognized areas completely onto the model, only map recognized areas onto already marked surfaces of the model or only mark areas, that have not been marked before. 2.8 Burn Case Data BurnCase 3D offers comprehensive possibilities to specify additional, burn-relevant data concerning the injuries of a patient. The complementary data always refers to a specific burn case; hence it is possible to store different complementary data for each burn case of a patient. This additional data acquisition consists of these partitions: Course of accident Accident related facts: 1. First aid 2. State place accident 3. Measures 4. External clinical treatment Admission 1. Condition on admission 2. Former illnesses 3. Additional Injuries Progression Outcome Complications Furthermore the dialog contains the State definition 48 and the ICD Acquisition 49 form. These subsections are described in the following chapters, but only explicate the specific functionalities of © RISC Software GmbH - Medical Informatics BurnCase 3D Reference 39 the user interface and do not contain any information concerning the medical point of view. 2.8.1 Complementary Data All relevant data concerning a specific patient can be entered and modified in the Complementary Data dialog, which can be opened by either pressing the [Record] button in the toolbar or choosing [Burn case...] in the [Extras] menu. For every data field an ascertainment status can easily be defined by using the following buttons. There are these possibilities: (Acquired) The user has entered some information, which has already been saved. This status is automatically set by entering the required data in the associated field. (Not Acquired) The user needs to specify this status manually, if this data field has not been acquired during the treatment process. (Not acquirable) This specific information can not be acquired. This status has to be set manually. (No input) If this symbol is embossed, the according information has not been entered. All the parameters are specified with this status by default, when creating a new burn case. If you click this button after you have already entered some information, the information will be erased. The buttons [<<Last] and [Next>>] facilitate switching between the pages of this form. The small arrow in the navigation bar on the left indicates the current form shown in this dialog. A mouse click on the specific entry will bring up the desired form. If a red exclamation mark appears on the left hand side of an entry, obligatory text fields have not been filled in yet and the patient is marked as incomplete in the patient list (see chapter Patient Information 19 ). As soon as the missing data has been completed, a blue square will appear next to these form titles. The mandatory text fields are marked yellow and have to be filled out to finalize the patient. These data fields change color once the needed information has been entered. These colors can be defined in the [Extras] menu, under [Settings...] [Local Settings][Color settings]. More information on mandatory text fields in chapter Configuration Manager © RISC Software GmbH - Medical Informatics 82 . BurnCase 3D Reference 2.8.1.1 40 Course of Accident The user interface for the data acquisition concerning the course of the accident is shown below: 2.8.1.2 Accident Related Facts If any medical treatment has been performed before the patient reached the hospital (e.g. an emergency doctor), the relevant information can be entered in these forms: First aid (if carried out) State place accident Measures (before reaching the hospital) External clinical treatment (if took place) 2.8.1.2.1 First Aid The first entry on this form [First aid] defines, if a first aid treatment took place or not. Depending on the button chosen, more input fields may appear for a further specification on the carried out treatment. In this case the parameters "Alarm" and "Arrival at place of accident" are mandatory, which can be defined in the Configuration Manager 82 . © RISC Software GmbH - Medical Informatics BurnCase 3D Reference 41 2.8.1.2.2 State Place Accident The following picture shows the user interface for defining the patient's condition at the place of the accident. © RISC Software GmbH - Medical Informatics BurnCase 3D Reference 42 2.8.1.2.3 Measures The image below represents the form for entering the known treatment of the patient before reaching the hospital: © RISC Software GmbH - Medical Informatics BurnCase 3D Reference 43 2.8.1.2.4 External Clinical Treatment All the information concerning an external clinical treatment can be specified in this form. If the first input field's status is "no" the rest of the entries will not be shown. 2.8.1.3 Admission In these forms information concerning the state of the patient on admission are gathered. Additionally (former) illnesses and other (non burn relevant) injuries can be entered here (e.g. for later treatment). 2.8.1.3.1 Condition on Admission For each item on this form a separate date and time can be entered, when the parameter has been ascertained. There is a special button, next to [Timestamp], which applies the entered date and time to all filled in items. This saves some work, when all the data has been acquired at the same time. © RISC Software GmbH - Medical Informatics BurnCase 3D Reference 44 2.8.1.3.2 Former Illnesses This form specifies the former illnesses of the patient, whereby every parameter has it's according severity (ASA, American Society of Anesthesiologists) and a [ICD+] button to add ICD-10 Codes. All the ICD-10 Codes, including those defined with the 3D model, are shown at the end of the form. A textual diagnose can be entered for every listed ICD-10 Code by selecting the according Code and entering the plain text in [Diagnosis]. The buttons [Copy] and [Copy all] copy either the selected code or all codes including its description in the list into the system's clipboard. © RISC Software GmbH - Medical Informatics BurnCase 3D Reference 45 2.8.1.3.3 Additional Injuries The following illustration shows the user interface for acquiring the data concerning additional injuries. By entering data into one of those fields, the system automatically adds the corresponding ICD-10 code to the patient's ICD-10 list. © RISC Software GmbH - Medical Informatics BurnCase 3D Reference 2.8.1.4 46 Progression The user interface shown acquires data relevant to the treatment's progression: 2.8.1.5 Outcome The following illustration shows the user interface for acquiring the data concerning the outcome. If a date of discharge from hospital is provided, the patient is transferred to the discharged patient list in the Patient Information 19 dialog. © RISC Software GmbH - Medical Informatics BurnCase 3D Reference 47 The item [Patient completed] indicates if the current patient still receives any kind of treatment (inpatient or ambulatory). As soon as the [Patient completed] flag is set to positive, the according patient appears on the right patient list within the Patient Information 19 dialog. 2.8.1.6 Complications The following illustration shows the user interface for acquiring the data concerning occurred complications during the treatment. A specific time and date can be entered for the occurrence. Additionally IDC-10 Codes may be defined. © RISC Software GmbH - Medical Informatics BurnCase 3D Reference 2.8.2 48 State Definition To create a new current state the input fields displayed in this form have to be entered: Time and date of this work step Define visit number and location of the patient Choose a type of hospitalization Choose the state type Choose responsible doctor Choose the body surface area calculation formula Height and weight of the patient Choose an adequate 3D model (depending on the given height, weight, sex and age BurnCase 3D only displays applicable standard models in the list. By pressing [All models] all models available will be shown.) © RISC Software GmbH - Medical Informatics BurnCase 3D Reference 49 [New state] finalizes the data acquisition and a new current state according to the user input will be created. To modify and save the active current state click [Save state], but this is only possible if the last current statecreated is selected because previous ones cannot be changed. NOTE: The height and weight of the patient has influence on the calculation of the marked characteristics on the model and the various scores. Subsequently the modification of these two values has extensive consequences, even ICD-10 Codes may be changed. Caution is advisable! 2.8.3 ICD-10 Acquisition BurnCase 3D has it's own ICD-10 browser. You can do a full-text search on the catalog, combining the search terms with AND or OR. To find the desired item faster, it is possible to narrow down the number of returned [Results]. The [Browse] button clears the results in the [ICD Search] list and displays all of the ICDs again. The button [Add] assigns the selected ICD-10 Code to the currently opened burn case. © RISC Software GmbH - Medical Informatics BurnCase 3D Reference 50 Manually added ICDs can easily be deleted by selecting the ICD Code in the [Collected ICDs] in the list and pressing the [Delete] button. NOTE: ICDs assigned automatically by marking injuries on the 3D model cannot be deleted out of the list manually. It is necessary to erase the according injury on the model. The buttons [Copy] and [Copy all] copy either the selected code or all codes including its description in the list into the system's clipboard. A textual diagnose can be entered for every listed ICD-10 Code by selecting the according Code and entering the plain text in [Diagnosis]. The colors of the ICD Codes in the [Collected ICDs] list indicate their source. 2.9 Reporting System The Reporting System of BurnCase 3D automatically generates various reports from the gathered information, depending on the currently selected level in the current treatment process (patient, burn case, interaction,...). The according dialog to generate these reports can be opened by pressing [Reports] in the toolbar or the analog entry in the [Extras] menu: © RISC Software GmbH - Medical Informatics BurnCase 3D Reference 51 The current version offers the automatic generation of the following reports, but can be enhanced or modified by the BurnCase 3D development team on demand ([email protected]): Patient record Medical Codes Complementary accident data ICD 10 (International Classification of Diseases) Table list containing all acquired states OPS - Surgery- and Procedurekey (equivalent of ICPM) ABSI (Abbreveated Burn Severity Index) Graphical report on current patient state Injury list grouped by body region Injury list grouped by characteristic Lund & Browder chart To create the needed reports simply check the according boxes ([All] selects all reports) and either click the [Preview] button, which displays the reports in a separate window, or click the [Print] button, which sends the reports directly to the printer defined by clicking [Printer...]. Depending on the speed of your hardware, the generation of the reports may take a few moments. [Report settings] offers two more options: Database layer: The generated reports are dependent on the selected [Database layer], which can be changed by this drop down menu. Use patterns on reports: This option enables or disables the use of patterns of characteristics on the report printouts. This feature becomes useful either when printing black and white or due to the fact, that patterns are hard to recognize, if the marked area is small. The marked areas will be printed out in the plain color of the characteristic, in case this box has not been checked. All the reports are shown in the following chapters. (The patient and the marked injuries are fictitious) © RISC Software GmbH - Medical Informatics BurnCase 3D Reference 2.9.1 Patient Record 2.9.2 Medical Codes © RISC Software GmbH - Medical Informatics 52 BurnCase 3D Reference 2.9.3 Complementary Accident Data © RISC Software GmbH - Medical Informatics 53 BurnCase 3D Reference © RISC Software GmbH - Medical Informatics 54 BurnCase 3D Reference © RISC Software GmbH - Medical Informatics 55 BurnCase 3D Reference © RISC Software GmbH - Medical Informatics 56 BurnCase 3D Reference 2.9.4 57 ICD 10 (International Classification of Diseases) In the current version there is only the German modified version of the ICD-10-GM included. 2.9.5 Table List Containing All Acquired States 2.9.6 OPS (Surgery- and Procedurekey) In the current version there is only the OPS included which is the German modification of the ICPM (International Classification of Procedures in Medicine). © RISC Software GmbH - Medical Informatics BurnCase 3D Reference 2.9.7 ABSI (Abbreveated Burn Severity Index) © RISC Software GmbH - Medical Informatics 58 BurnCase 3D Reference 2.9.8 Graphical Report on Current Patient State © RISC Software GmbH - Medical Informatics 59 BurnCase 3D Reference 2.9.9 Injury List Grouped by Body Region © RISC Software GmbH - Medical Informatics 60 BurnCase 3D Reference 2.9.10 Injury List Grouped by Characteristic © RISC Software GmbH - Medical Informatics 61 BurnCase 3D Reference 2.9.11 Lund & Browder Chart © RISC Software GmbH - Medical Informatics 62 BurnCase 3D Reference 2.10 63 Digital Pictures BurnCase 3D has its own digital picture library, which offers an intuitive patient related picture management. This library can be accessed by the [Pictures] button in the toolbar or by the [Digital pictures...] entry in the [Extras] menu. The following image represents the user interface of the digital picture library: NOTE: Once the picture library has been opened, the system reads all the picture files located in the last chosen folder. This procedure may take some time, depending on the number of files in the specific folder and/or the speed of the network connection. The area on the left [Pictures in BurnCase system 66 ], lists the assigned images according to the currently chosen level in the [Level] drop down menu. If the current patient has been chosen, all pictures concerning this patient will be shown; if one of the interactions has been chosen, only the images referring to this specific interaction will be listed. Pictures always must be assigned to interactions. The area on the right [Pictures in file system 64 ], lists all picture files contained by the currently chosen folder of the local file system ([Folder] drop down menu). You can also use folders in network drives or enter a network path (UNC). You can transfer pictures from one area to the other by using Drag & Drop. Depending on the Local Settings 89 the images will either be saved in the picture library folder as a complete copy or just as a link. The according thumbnails may either be saved directly into the database or will be generated at start-up. NOTE: It is also possible to use Drag & Drop to import pictures from Windows Explorer into the library. © RISC Software GmbH - Medical Informatics BurnCase 3D Reference 64 2.10.1 Pictures in File System The right hand area of the digital picture library lists image files of a specific folder. The listbox [current directory in file system] displays the name of the current folder and holds a list of all the folders contained in this file system. Button [1] hides the [Pictures in BurnCase system] area and permits a clarified view on the desired items. An according screenshot is shown below: To restore the [Pictures in BurnCase system] area simply click button [2]. Buttons [3] - [7]: Button [3]: Back to previous folder: This button will only be enabled if the primary folder has been changed after the digital picture library has been opened. By pressing this button you jump to the previously chosen folder. Button [4] - Move up one folder: By pressing this button the current folder will be changed to the one, one level higher in the folder hierarchy. Button [5] - Folder history: To find the previously chosen folders faster this button displays a list, whereby choosing an item changes the current path to the desired folder. Button [6] - Choose view style: There are two different ways to display the items listed. [Details] shows all the information concerning the particular entry and [Thumbnails] only shows a small image including the according name. Button [7] - Start file search: As soon as the button is pressed additional text fields will appear to define the search criteria. A reuse of the button hides these fields again. Choose from the following criteria: © RISC Software GmbH - Medical Informatics BurnCase 3D Reference 65 1. Recurse sub-directories: This option checked searches the current directory including its sub-directories. 2. By file name: The name, which should be found, can be defined here. "*" acts as a wildcard (e.g. "*.jpg" searches for all the files with the extension ".jpg"). 3. By EXIF date: The EXIF (EXtended Image Fileformat) date is defined by the camera at the point of time when the picture was taken. Entering a specific date BurnCase 3D can search for pictures taken at a specific point of time or within a certain period. 4. By file size: The result will only contain files with the size within the defined range. [Start search] starts the search and [Clear search] clears the search result, listing the complete content of the currently chosen folder. Picture Import into the BurnCase System To import images into the the BurnCase system, these have to be selected first. Multiple pictures can be selected by either pressing [Ctrl] or [Shift] and the left mouse button (same as in Windows Explorer). By either pressing the [Import] button or using Drag & Drop the selected items are transferred to the BurnCase system. These pictures are not assigned to the 3D model yet. This can be done directly by dragging the file directly onto the model (which simultaneously adds the image to the BurnCase system), or by pressing the [Assign] button and clicking on the according position on the model. [View] opens the picture preview dialog, showing the selected image. © RISC Software GmbH - Medical Informatics BurnCase 3D Reference 66 2.10.2 Pictures in BurnCase System Importing pictures from the file system into the BurnCase system assigns them to a specific patient and current state. Like in [Pictures in file system 64 ] the second area of the dialog can be hidden [1] or restored [2], to make full use of the space. A screenshot of the user interface is shown below: Contrary to the list box in the file system form, the folder structure refers to the structure within BurnCase 3D (see Treatment Process 24 ). Depending on the assignment of the images, the ones referring to the current level (and below) will be listed. The current level can be changed by the list box [Level]. NOTE: Digital pictures can only be assigned to interactions (e.g. current state). If you try to assign an image without an opened patient or without an interaction selected, BurnCase 3D will display the according hint. Buttons [3] - [6] Button [3] - Move up one database level: By pressing this item the list box will navigate to the item one level above the current one. The highest level is the patient. Button [4] - Choose view style: There are two different ways to display the items listed. [Details] shows all the information concerning the particular entry and [Thumbnails] only shows a small image including the according name. Button [5] - Show picture categories: Each picture imported into the BurnCase system can be assigned to one or more picture categories, which can be managed in the [Extras][System Settings] form. Pressing button [5] enables the category list on the right. As soon as one of the images is selected you can assign it to one or more categories by checking the checkboxes next to them. It is also possible to assign more then one picture at once; simply selecting them by using [Ctrl] or [Shift] and the left mouse button and assign them to categories. © RISC Software GmbH - Medical Informatics BurnCase 3D Reference 67 Button [6] - Start picture search: There are various search criteria, which can be combined freely to achieve the desired results: 1. By EXIF date: The EXIF date is defined by the camera at the point of time the picture was taken. Entering a specific date BurnCase 3D can search for pictures taken at a specific point of time or within a certain period. 2. By work step date: The same as the search "By EXIF date" but only the date referred to is the one from the assigned work step. 3. By assigned body region: Pictures, which are assigned to the selected body regions are retrieved. 4. By assigned characteristic: Only pictures assigned to the selected characteristics on the model will be found (e.g. burn degree 3). 5. By picture category: Only pictures assigned to the selected picture categories will be found. 6. By patient: Only pictures which are assigned to selected patients are found. 7. By interaction type: The current version of BurnCase 3D only supports current states as interaction types, subsequently no other interaction types can be chosen. If a criterion has been specified, it is possible to define the way it should be combined with the other ones. They can be concatenated either with a logical AND [&] or with an OR [+]. The modes available can be switched by multiple clicking on the icon next to the criterion on the left (operator type). The selected items within one criterion are combined with a logical OR (e.g. abdomen OR face in the [By assigned body region] criterion). The search result is listed below. The context menu shown below opens if you press the right mouse button with the cursor on top of one of the pictures. This menu contains various useful options concerning the selected picture. © RISC Software GmbH - Medical Informatics BurnCase 3D Reference 68 Item [View] and button [View]: Opens the a detailed view of the image in a separate window. Item [Show state]: Shows the assigned current state in the main window. If the according current state is already the present one or only one current state exists within this patient, the operation has no influence on the application. Item [Rename]: This operation facilitates the possibility to edit the name of the picture selected. Item [Delete] and button [Delete]: This deletes the image from BurnCase system. Item [Export] and button [Export]: Exports the selected picture into any folder within the Windows file system. Item [View ] Switches the representation of the pictures between the detailed view and the thumbnails. Item [Categories]: Enables or disables the category list on the right. Categories can be assigned to each picture separately. Item [Cut picture]: This option facilitates the possibility to transfer the selected image(s) from one interaction to another. Item [Paste picture]: Inserts the picture previously cut from another interaction into the current one. Item [Select all]: Selects all listed pictures. Item [Show pin] and button [Show pin]: Activates the [Pins] mode and rotates the model into a position, which makes the according pin visible to the user. Item [Superimpose] and button [Superimpose]: Superimposes the specific image on top of the 3D model to facilitate the process of mapping the injuries exactly onto the model. The transparency can be varied by using the slider on the right. © RISC Software GmbH - Medical Informatics BurnCase 3D Reference 69 Item [Assign] and button [Assign]: By pressing one of these items the selected picture can be assigned to a specific spot on the 3D model. These options are disabled if any other item than a current state is selected in the main window (the model is not visible). Once this function has been chosen the cursor changes its shape when dragging it over the window with the 3D model, enabling to choose the right spot. Item [Remove assignment]: Removes the assignment (to the defined spot on the model) of the according picture. Item [Refresh]: Updated the pictures listed in the BurnCase system. 2.10.3 Superimpose BurnCase 3D offers the option to superimpose a picture with the 3D model to make it easier to draw the injuries exactly onto the model. By defining specific reference points on the model and in the picture the application rotates, moves and zooms the model automatically into the corresponding position, where both types of reference points overlap. Subsequently the model has the same position as the patient on the picture and the injuries can easily be matched between picture and model. A resulting superimposition is shown below: © RISC Software GmbH - Medical Informatics BurnCase 3D Reference 70 If a picture is superimposed, the buttons shown on the left become visible. The button [Save model position] saves the current position of the model to the currently superimposed picture. This position can be restored at any future time, provided that the same picture is superimposed again, by pressing the [Restore model position] button. If a specific model position has not been saved with the currently superimposed picture the [Restore model position] button remains disabled. [Hide picture] stops the superimposition and removes the picture from the model view window. During the superimposition there is a slider on the right, permitting to choose the degree of transparency. 2.11 Queries BurnCase 3D offers the possibility to freely define queries and automatically generate a Multi Center Study in terms of the DAV (Deutsche Arbeitsgemeinschaft für Verbrennungsverletzungen). These features can be found by pressing the [Queries] button in the toolbar or the analog item in the [Extras] menu. 2.11.1 Generate Analysis This dialog is split up into two main areas; the definition of the query criteria at the top and the results below. The criteria area again is spit up into the patient, the case and the surface criteria. Additionally the columns that should be displayed in the result area can be defined. The query interface is illustrated below. © RISC Software GmbH - Medical Informatics BurnCase 3D Reference 71 The different criteria, independent if they are patient, surface or case criteria, can be defined freely and independently from each other. They are queried by combining them with a logical AND, hence every selected criterion has to match the result. Patient criteria General criteria concerning the patient him/herself can be selected in this area. Sex: The list box contains all possible options concerning this criterion. They can be selected by checking the checkbox next to the description, whereby "All" automatically activates every criterion in the list. Age: A declaration in these text fields narrows down the results concerning the age within the defined range. Marital status and nationality: Like the other criteria, the result patients can be influenced by specifying a marital status or a particular nationality. An illustration of the patient criteria area: Surface criteria This category defines the search criteria concerning the characteristics, the burned body surface area and the affected body regions. Characteristics: This list box contains all the characteristics, which may be marked on the model. They can be checked to only search for patients, who show areas of the chosen type. If, for example, the [Burn degree 3] is checked, only patients with burn degree 3 will appear in the result box. Area: Defines the criterion concerning the percentage of the body surface area affected by the checked characteristics. Body regions: Specifies the criterion concerning the body regions affected by the characteristics. There is an additional checkbox to only apply the selected surface criteria to the primary diagnosis. The picked criteria may be combined freely and are linked with a logical AND. Subsequently, if [Burn degree 3] and an area of 10 to 35% TBSA-B are specified, only patients with a burn of the selected degree (3 in this case) and which have marked 10 to 35% of the TBSA-B will be displayed. © RISC Software GmbH - Medical Informatics BurnCase 3D Reference 72 An illustration of the patient criteria area: [Primary diagn. only] only applies the criteria to the first interaction of every patient. Case criteria In this area search criteria, defined in the burn case form, may be selected for a more detailed result. Depending on the selection in the drop down [Data field], which contains all items listed in the burn case form, the other interface items are either enabled or disabled. The case criteria user interface is shown below: All together there are four different types of input, which are only enabled if the selected item in [Data field] requires an according input: 1. 2. [Value range]: Define (plain text or numbers) a range to restrict the possible results. [Date range]: Defines a time range referring to the selected [Data field]. © RISC Software GmbH - Medical Informatics BurnCase 3D Reference 3. 4. 73 [Acquisition state]: Restricts the result to items, where the acquisition state is the same as the selected one. [Default values]: This box lists all possible options for the selected [Data field] item in case it is a drop down or a checklist. One or multiple options can be checked to limit the search results to the selected options. The buttons [>>] or [>|] either updates the selected criterion or adds a new one. All the criteria considered for this search are listed in the [Criteria:] box. An already existing criterion can easily be modified by selecting it, which displays the according [Data field] and range. By pressing [>>] the modified criterion will be stored to the [Criteria] list. [Delete] or [Delete all] either deletes the selected criterion or all of them. Saving / Loading of a specific analysis The button [Save] saves a definition of the current query, including patient criteria, surface criteria and case criteria to a file. This file can be loaded by clicking [Load] at any future time, saving the user from the trouble of entering all the criteria again. Results The search operation is either started automatically as soon as any criterion is changed or added ([Automatic refresh] has to be enabled) or manually by pressing the [Start] button. The results are listed in the grid [Records]. To reset all the entered criteria simply click the [Reset] button. © RISC Software GmbH - Medical Informatics BurnCase 3D Reference 74 To be able to import a specific result into other applications (e.g. Microsoft Excel, SPSS,...) [Export] generates a CSV (coma separated values) text file. The data fields to be exported can be adapted to the focus of interest by selecting the desired items in the tabs: [Patient data fields], [case query fields] and [surface query fields]. The items in case of the latter two mentioned have been grouped for better usability. If one of the groups are checked, every field contained by this group will be exported. Subsequently checking and unchecking has direct influence on the items in the levels below. In the surface query tab you can additionally choose if the items should be grouped by characteristics or by body regions. Selecting the [Records] tab displays the search results again. The different tabs of the user interface are shown below: The tab [Settings] facilitates options to define the separator and the date and time format, which vary on different importing applications and operating systems. To countervail this general problem the user is able to specify the format and the separator freely to adapt it to a particular program. These parameters are available: dd: day, double digit MM: month, double digit yy: year, double digit yyyy: year, four digit hh: hours (24-hour format) mm: minutes, double digit AMPM: additional term for correct english time format The separator between the date and time values can be defined freely, but must be different to the general CSV separator, otherwise the importing application cannot read a complete date or time. The checkbox [Show surface and case data fields in result table] sets, whether the items of the [case query fields] and of the [surface query fields] should be displayed in the results table. Keep in mind, that if these options are enabled, the query on the database is more complex and needs more time. We recommend to use this feature only, when it is necessary. The same can be applied for [Show indices and scores in results table]. © RISC Software GmbH - Medical Informatics BurnCase 3D Reference 75 After pressing the [Export] button a name and folder have to be specified, to start the query exporting operation. NOTE: All selected export fields (patient data, surface and case fields as well as indices and scores) will be written to the output file after pressing the [Export] button. The checkboxes [Show surface and case data fields in result table] and [Show indices and scores in results table] have no effect when exporting to external files. 2.11.2 Multi Center Study To create a special query in terms of the DAV (Deutsche Arbeitsgemeinschaft für Verbrennungsverletzungen), the [Multi center study] has to be activated in the navigation bar, which displays the according form. Then simply choose a specific year from the drop down menu an click [Run query], which will create a DAV conform query automatically. If the checkbox [Create/overwrite output file] is enabled the query will not only be shown in the text box [Results], but will also be saved to the CSV file specified in the [Output file] field. This file can then be sent to the responsible authority by email. NOTE: In case the output file already exists and [Create/overwrite output file] is enabled, the file will be overwritten without an explicit warning as soon as the [Run query] button has been pressed! © RISC Software GmbH - Medical Informatics BurnCase 3D Reference 2.12 76 Data Transfer Data transfer in the navigation bar groups all possibilities to import and export data from and to the BurnCase 3D system. This form can also be opened by pressing the [Transfer] button in the toolbar or [Data transfer...] in the [File] menu. A detailed explanation can be found in the following chapters. 2.12.1 Import/Export of Patients BurnCase 3D offers the option to export data of a patient anonymized and encoded. This exported file can be imported by any other BurnCase 3D system. The user interface is illustrated below: The [Search text] defines the forename and/or the surname of the patient, who should be searched for. To display all existing patients in the [Patient list] the search text field has to be empty when the search is being started with the button [Search]. To create an export file the specific patient must be selected in the [Patient list] and a file path and name must be entered, which can be easily done with the [Save as] dialog opened by pressing [...]. Depending on the performance of your system the export operation, started by the [Export] button, may take a few seconds. NOTE: The current version of BurnCase 3D only exports the standing data of the patient, the additional data as well as the areas drawn onto the model, but the pictures in the digital picture library, which might be assigned to the model, will NOT be exported. The buttons for importing a patient are placed in the [Choose patient import file] area. Simply choose the correct file using [...] and click the import button. This operation might take a few minutes, depending on the performance of your system. © RISC Software GmbH - Medical Informatics BurnCase 3D Reference 77 2.12.2 Export Model View BurnCase 3D additionally offers the possibility to export a view of the current model including all the areas drawn onto the model (e.g. for presentation). There are two types of export options: Picture of the model Movie showing a 360° view of the model This is the according user interface: Save model view as graphic file: The image can either be saved as Windows bitmap (*.bmp) or in the JPEG format (*.jpg), depending on [File format] selection. In the [Resolution] area the size/quality of the picture may be specified by defining amount pixels used for each side. After setting these options, a [File name] has to be chosen by opening according dialog with [...] and consequently pressing [Save] to create the picture. The small window on right represents a small preview. the the the the Save model view as video: It is fairly easy to export a video, similar to the option above, showing a 360° view of the desired model. By defining the amount of pixels used horizontally and vertically the resolution (size/quality) is set. The checkbox [square format] links the number of horizontal and vertical pixels and if [constrains to power of 2 (codec dep.)] is checked only according numbers of pixels (64, 128, 256, 512,...), depending on the video codec, can be chosen. In the [Video settings area] there are two checkboxes: [Show treatment history] and [Use polygon stipples]. If the first option is selected, then the areas drawn onto the model change during the video according to the areas in the various current states. Due to better burn area recognition (especially small areas) on the video, unchecking the second option does not use the patterns of the characteristics, but only the colors. NOTE: © RISC Software GmbH - Medical Informatics BurnCase 3D Reference 78 To display the treatment history in the video correctly, the patient and all current states have to be saved to the database before. There are different types of rotating the model during the video, which can be chosen in the [Rotation axes] area. The model can either be rotated vertically (longitudinal axis) or horizontally (frontal axis). These rotations can be combined by either one after another or combining the rotation movement directly. You may also disable the rotation, where the model will be shown for a certain amount of time, depending on the set [Rotation speed], which is actually used for setting the rotation speed in the different rotation types. Before creating the video file a valid file path and name have to be entered, using [...]. After pressing [Record] a dialog opens to set the type of video compression, shown in the illustration below: The video codecs (compression type) available are dependent on the codecs installed on the system and cannot be changed at all by BurnCase 3D. The options of the different video codecs differ a lot from each other and therefore cannot be discussed within this manual. For further information use the codec specific documentation. To confirm the selected codec and it's options and start the recording operation click [OK]. The video file can be opened with a applicable video player (e.g. Microsoft Media-Player). NOTE: The file size of the video exported strongly depends on the selected resolution as well as the selected video codec. The higher the resolution and the less data can be compressed by the codec, the larger the file size will get. The file may use up to several mega byte of space on the hard disk! 2.12.3 NTRACS Export NTRACS ("National Trauma Registry of the American Collage of Surgeons") is the burn registry within the United States of America. All the burn related data of hospitals have to be transferred to this central data repository. The data is usually acquired and transferred by a Software from the company Digital Innovation, Inc. The NTRACS interface allows to benefit from the advantages of BurnCase3D and also export for the NTRACS system. © RISC Software GmbH - Medical Informatics BurnCase 3D Reference 79 First the according patient [Patient list] and burncase [Burncase to export] have to be selected. In NTRACS only two states of the burns can be exported. Therefore the user has to select the appropriate states: [State for initial chart] and [State for subsequent chart]. Furthermore the completion time of the states have to be defined in the comboboxes. Pressing the [Export] button generates an XML-file, which then can be imported in the NTRACS software from Digital Innovation, Inc. © RISC Software GmbH - Medical Informatics Part III BurnCase 3D Settings 3 81 BurnCase 3D Settings All the settings concerning different options in BurnCase 3D can be changed using the [Settings] dialog, accessible over [Settings...] in the [Extras] menu. The separate forms, System settings, Configuration manager and Local settings, are explained in the following chapters. 3.1 System Settings These settings are saved in the database and are consequently valid for all BurnCase installations using this database. The separate adjustments of the system settings are explained in the specific sub-sections. 3.1.1 Available Doctors These doctors can be assigned as the attending doctor of a patient in the State definition 48 form ([Extras] menu, [Burn case], [State definition]). The form to manage the available doctors can be found in the [Extras] menu in [System settings], [Available doctors] shown below: © RISC Software GmbH - Medical Informatics BurnCase 3D Settings 82 The usage of the button [Delete] erases the selected doctor. To create a new doctor the according text fields have to be filled out after pressing the [New] button from the [Edit doctor] field. As soon as the [Create] button has been pressed the new doctor is saved to the database. A doctor can be edited by simply selecting it from the list and modifying the specific text fields. [Save] saves the changes to the database. 3.1.2 Configuration Manager The Configuration Manager defines input fields from the "Complementary data" form, which have to be filled out to be able to finalize a patient. Subsequently, e.g. a hospital may decide which information is absolutely necessary and therefore obligatory. The user interface of the Configuration manager is illustrated below: © RISC Software GmbH - Medical Informatics BurnCase 3D Settings 83 The item selected in the drop down menu sets the specific category, referring to the pages in the "Complementary data" form and the according input fields are listed in the [Data field:] check list. All checked items are marked as obligatory. These fields will be marked in the form with a different color. This configuration is saved to the database and is valid for all users using this specific database. The current configuration can also be exported to a file and be imported to have the same configuration on different BurnCase 3D systems. To do so choose either the button [Export] or the button [Import] and enter the particular file name. Additionally the BurnCase 3D administrator has the possibility to lock theses fields, and consequently make it impossible for "normal" users to change these obligatory fields. © RISC Software GmbH - Medical Informatics BurnCase 3D Settings 3.1.3 84 Characteristics The color and pattern, which is drawn onto the 3D model if a specific characteristic is selected, can be managed in this dialog. The following picture shows a screenshot of the according user interface: If a specific characteristic has been chosen from the list, the currently assigned transparency, color and pattern will be displayed in the [Edit characteristics] area. The transparency slider defines the degree of opacity of the marked region on the model. The desired color can be chosen from the palette, which opens by either pressing the large colored field or the [Change] button. A preview of the colored pattern (selected in the [Pattern] drop down) is shown at the bottom. © RISC Software GmbH - Medical Informatics BurnCase 3D Settings 3.1.4 85 Patterneditor BurnCase 3D has its own pattern editor, to be able to create any possible pattern desired: You can either modify already existing patterns or create completely new ones. By using the tools on the left a new pattern can easily be drawn, whereby the color cannot be defined here, because it is specified by the characteristic using it. A preview of the original and the modified pattern is displayed in the [Edit pattern] area. 3.1.5 Picture Settings Every picture imported into the Digital Pictures 63 can be assigned to one or more photo categories, which can be managed and edited directly in the BurnCase 3D system. The user interface, found in [System settings] -> [Available photo categories], is illustrated below: © RISC Software GmbH - Medical Informatics BurnCase 3D Settings 86 The functionality of creating, saving and deleting items is the same as in the management for the available doctors. Additionally a German and an English identification have to be defined. The categories "Category 1 - 4" are automatically created with the installation of the application and have to be adjusted by the clients to their needs. In the [Picture archive settings] the administrator (bcadmin) is able to define a system wide picture path. If the option [Central Picture Archive] is activated all the BurnCase clients are forced to use this picture path. 3.1.6 View Change Log The change log saves the exact time and date of all the changes, applied to the data of the BurnCase 3D database, by the different users. Depending on the current [Filter] settings in the upper area of the form, the according items will be displayed in the [ChangeLog Entries] list below. The following types of actions are logged: Creation of patient, burn case, work step, current state Deletion of patient, burn case, work step, current state Modification of patient, burn case, work step, current state Import of external patient data Export of patient data Insertion/Assignment/Deletion of pictures © RISC Software GmbH - Medical Informatics BurnCase 3D Settings 3.1.7 87 User Administration The user administration interface facilitates the management of users within the BurnCase 3D system: new users can be added, existing ones can be edited and deleted or passwords can be reset. Only the administrator (bcadmin) is able to add new users. Users themselves are only permitted to change their own password. The user interface for user administration is shown below: © RISC Software GmbH - Medical Informatics BurnCase 3D Settings 3.1.8 HIS Settings The interface for hospital information systems is still in development. The fields [Host] and [Port] define the interface to the BurnCase internal HIS-interface and have to be © RISC Software GmbH - Medical Informatics 88 BurnCase 3D Settings 89 defined by the user. The [Timeout] determines the time BurnCase tries to connect to the HIS-interface. The [Type] is defined automatically and is dependent on the institution BurnCase has been installed. To try the connection to the HIS-interface the button [Test Connection] has to be pressed. 3.2 Local Settings These settings only refer to the BurnCase 3D installation on the local system. This is a screenshot of the local settings user interface: [Language]: The currently available languages are English and German, which can be selected with the drop down menu. Switching between the languages requires a restart of the application, because the whole user interface has to be set up again in the different language. [Common]: Cache 3D models on local disk This option is especially useful, if the data is located on a central BurnCase database. In case this feature is being used, the 3D model will be transferred and stored on the local system. Subsequently this model does not need to be transferred again in the future, but can be loaded from the local cache, which is faster. Store imported pictures in picture directory This option is related to the digital picture library; it defines if pictures transferred to the digital picture © RISC Software GmbH - Medical Informatics BurnCase 3D Settings 90 library should be saved as a separate copy or just as link to the original. The latter possibility bears the risk, in case the original image is deleted or moved, that the picture is not available in the BurnCase 3D system anymore. Only a thumbnail would still be visible. If this option is enabled the pictures are saved to a specific directory and consequently does not bother the BurnCase system if the originals (e.g. on a memory card of a camera) are not accessible in the future. This option however is disabled if the administrator defines a central picture archive. Additionally the JPEG-Compression can be set (in %) to influence the size and quality of the archived pictures. This option cannot be changed if the administrator has set a central picture archive. Save picture thumbnails to database If this feature is enabled, the thumbnails of the imported pictures are saved to the database, which increases the speed of loading the pictures, but also increases the memory usage of the database dramatically. Restore last state on start-up If the option [Save application state for each user] is activated the last patient and current state is saved separately for every user, when the application is closed. Depending on the state of the [Restore last state on start-up] feature the specific current state will be restored for the user currently logging into BurnCase 3D. If the [Save application state for each user] is disabled, the last current state independent from the log in user will be restored. In case [Restore last state on start-up] is unchecked the application will not open a patient automatically. Save application state for each user This option provides the possibility to restore the last used patient and state for each BurnCase user independently. If the option is deactivated the restored state at application start-up is independent of the previous user login. The [Restore last state on start-up] option generally defines if a state should be loaded at startup. [View]: These options mainly influence the quality and the performance of the model view. 3D hardware acceleration Due to the large quantity of polygons in the model the calculations are quite computation-intensive, which leads to jerkily movements of the model when using older hardware, that does not support 3D hardware acceleration. To guarantee satisfying performance and working conditions, the computer should include a graphics card, that enables to activate the hardware acceleration. Use OpenGL display lists Use OpenGL double buffer Use OpenGL multisampling These three options influence the performance of displaying the model. If they are enabled the correct OpenGL version has to be installed, otherwise the model might be displayed wrongly. Use 3D fonts The text in the model view window can either be shown in a 2 dimensional font, which works on most systems, or with a 3 dimensional effect. Unfortunately not all graphics cards display this kind of font correctly. Fast model movements This enables or disables a few OpenGL effects and therefore speeds up the movements during any form of translation of the model. It is recommendable for slow computers and graphics cards without OpenGL support. Use virtual trackball This checkbox defines if a rotation along the Z-axis is permitted; for more information see chapter Model Navigation 30 . Disabling also hides the blue circle around the virtual trackball area. Show trackball © RISC Software GmbH - Medical Informatics BurnCase 3D Settings 91 Shows or hides the blue circle around the virtual trackball area. Animated rotations The model is moved to specific positions in various situations during the working process ([Look-At] in the toolbar). By activating this checkbox the model will move into this position with a constant movement. This option is not recommended on slow computers, to maintain a satisfying performance. Use polygon stipple Defines if the marked areas on the model should just be filled with a specific color or with the pattern defined for each characteristic in Available Patterns 85 . Activate tablet PC extensions If you use Tablet PC hardware, like a touchscreen or a digital pen, you can use this option to facilitate to switch between the different navigation modes (rotation, movement and zoom) by pressing the icon shown in the upper right corner of the model view window. Show indices and areas This checkbox enables and disables the small area on the right listing the various [Indices and areas]. Show region information as tooltip If you move the cursor over one of the marked regions on the model, a tooltip appears showing the information concerning this wound. This feature can be deactivated by unchecking the box. Show model interior This option influences the way the model is being displayed if the user/camera is inside of the model (e.g. high zoom rate). In case this option is deactivated, the model interior cannot be seen and consequently everything outside of the model is visible. This may become useful, if you want to mark regions on the model, which easily become occluded by other parts of the body (e.g. chin, between toes, etc.). Show splash screen Disables or enables the splash screen at the start-up of BurnCase 3D showing some general information. Use Windows XP Theme support If your system does not support Windows XP Themes you might experience some representation errors in the navigation bar on the left in the extras dialog. Disabling this option eliminates these errors, but slows down the performance. This option is only available when using the operating system Microsoft Windows XP. [Draw/Erase support]: These option influences the marking of areas on the model. Auto-focus on selected region This feature facilitates the location of characteristics, which have been drawn onto the model. If the according checkbox is activated the model will move into a position, where you can see the selected area, when you pick a particular item from the Treatment Process tree. Show characteristic in [Select] mode As soon as one of the marked areas on the model is selected, a small rollup opens allowing to change the characteristic (e.g. degree of burn) of the selected region. Highlight selected region This option defines the color scheme of the selected areas on the model . 1. Enabled In this case the selected area gains a distinct color, which has been set in [Color settings] (default color is yellow). © RISC Software GmbH - Medical Informatics BurnCase 3D Settings 2. 92 Disabled In this mode the selected area retains its original color and all others are set to the "Inactive" color defined in [Color settings] (default color is gray). This has the great advantage that the different characteristics are distinguishable more easily. Rotate on right mouse button in [Draw]/[Erase] mode If this option is activated the model will be rotated in various modes (e.g. [Draw]/[Erase], [Look-At], [Select]), when the right mouse button is pressed. If [Shift] is additionally pressed, then the model will be moved. If the [Rotate on right mouse button in [Draw]/[Erase] mode] is not enabled the model will move by pressing the right mouse button, and rotate if [Shift] is additionally pressed. © RISC Software GmbH - Medical Informatics BurnCase 3D Settings 93 [BSA approximations formula]: The drop down menu defines the formula used for the body surface area calculation. For every interaction a separate formula may be chosen (see chapter State Definition 48 ). These formulas are supported in the current version of BurnCase 3D: © RISC Software GmbH - Medical Informatics BurnCase 3D Settings © RISC Software GmbH - Medical Informatics 94 BurnCase 3D Settings 95 On the right hand side of the Local Settings form various colors, the logo of the institution and the language can be modified. Color settings This part of the form enables to set various colors used in the application (e.g. background, skin of the model etc.). If you select one of the color fields a dialog opens, which allows to pick one of the default colors or define new ones. Logo of institution In the current version the logo will be applied to the footer of all reports (see chapter Reporting System 50 for further information). The logo can be defined by pressing the [Change] button or erased by pressing the [Revert] button. BurnCase 3D supports the image formats JPEG and bitmap, whereby the current logo is displayed. Language If the language module is activated it is possible to edit the language files of BurnCase 3D, or even create a new version in a different language. If you load an existing language file all the GUI-items in the BurnCase 3D system will be listed in the [GUI-Components] tab with the original label and the label you can modify. The same can be done for messages, listed in the [Messages] tab. © RISC Software GmbH - Medical Informatics Index Index -<<< Vorherige 40 -33D Modellansicht 3D-Modell 13 11 -AAbfragen 18, 70 ABSI 34 ABSI (Abbreveated Burn Severity Index) 50, 58 Alle Modelle 48 Ansicht zurücksetzen 15 ASA 44 Assumption of Risk 9 Aufhebemodus festlegen 32 Aufheben 18, 32 Auflistung der Wundbereiche nach Charakteristik gegliedert 50, 61 Auflistung der Wundbereiche nach Körperregion gegliedert 50, 60 Auflösung der Grafiken 50 Aufnahme 38, 43 Ausgewählte Charakteristik 15 Auswahl 18 Auswahlmodus festlegen 32 Auswertungen 15, 70 Auswertungsbedingungen 70 Automatisch aktualisieren 70 Automatisch rotieren 15 -BBaxter 34 Becken 13 Bedingungen 70 Beenden 15 Behandlungsverlauf 11, 13, 24 © RISC Software GmbH - Medical Informatics Benutzer abmelden 15 Benutzerschnittstelle 11 Benutzerverwaltung 87 Berichte 15, 18 Berichtseinstellungen 50 Berichtswesen 11, 50 Betriebssystem 6 Bild überblenden 69 Bildarchiv 18 Bilder 18 Bilder im BurnCase-System 66 Bilder im Dateisystem 64 Bildschirm 50 Bildsuche 66 BMI 34 Body Mass Index 34 BurnCase 3D Core installieren 6 -DDatenbank Version 15 Datenbank-Ebene 50 Datenbankserver-Version 6 Datenfelder 70 Datentransfer 11, 76 Datumsformat 70 Diagnose 44 Digitales Bildarchiv 4, 11, 15, 63 Disclaimer 9 Drehen 18, 30 Drucken 50 Drucker 50 -EEinstellungen 15, 81 Einzeichnen von Verletzungen 32 Einzelnes Polygon 32 Einzelplatzversion 6 Ergebnisse 70 Erhebung des Istzustands 48 Erhebungszustände 40 Erhobene Unfallzusatzdaten 50, 53 Erstversorgung 38, 40 Exportdatei 70 96 Index -F- -K- Falldaten 18 Falldatenkriterien 70 Fokus 18 Formatparameters 70 Fotokategorien 66 Freihand alles 32 Freihand vorne 32 Freihand-Modus 32 Frequently Asked Questions Keine Eingabe 40 Klinische Vorversorgung 38, 43 Komplikationen 38, 47 Konfigurationsmanager 40, 82 Kopf 13 Kopieren 15 Körpermodell 5 Körperregionen einfärben 15 15 -L- -GGanzer Bildschirm 15 Gesamt KOF 34 Gesamt Körperoberfläche 34 Gesamte Körperoberfläche auswählbar 32 Gesamtes 3D-Modell 13 Grafischer Bericht des aktuellen Istzustands Linke Hand 13 Linker Arm 13 Linker Fuß 13 Linkes Bein 13 Lizenz 8 Lokale Einstellungen 89 50, 59 Lund & Browder Auswertung -HHardware 6 Häufig gestellte Fragen Hauptmenü 15 Hauptmenüs 13 Hierarchieebenen 24 Hilfe-Themen 15 97 50, 62 -M15 -IICD 10 (International Classification of Diseases) 50, 57 ICD-10 Browser 49 ICD-10 Code 44 ICD-10 Erfassung 49 Import und Export 15 Import/Export 18 Indemnification 9 Indizes und Oberflächen 13, 34 Info 15 Installationsassistent 6 Interaktion speichern 48 Istzustand 18 © RISC Software GmbH - Medical Informatics Maßnahmen 38, 42 Modellansicht als Grafik speichern 77 Modellansicht als Video speichern 77 Modellansicht exportieren 77 Modell-Bibliothek 5 Modellposition speichern 69 Musterdarstellung auf Berichten verwenden -NNach Fotodatum 66 Nach Fotokategorie 66 Nach Interaktionsdatum 66 Nach Interaktionstyp 66 Nach Patient 66 Nach zugeordneter Charakteristik Nach zugeordneter Körperregion Nächste >> 40 Navigation mit dem Modell 30 Navigationsmodus 18 Netzwerkversion 6 Neue Interaktion anlegen 48 66 66 50 Index Nicht erhebbar 40 Nicht erhoben 40 Notärztliche Daten 38, 40 Nur markierte Flächen auswählbar 32 Nur nicht markierte Flächen auswählbar -OOberflächenkriterien 70 OpenGL Version 15 Outcome 38, 46 Sprache 89 Statistik und Auswertungen 11, 18, 70 Statusfenster 13 Statusmeldungen 15 Suchergebnisse 70 Suchtext 76 Symbolleisten 13 Systemvoraussetzungen 6 Systemweite Einstellungen 81 -T- -PParkland-Formel 34 Patient 15, 18 Patient bearbeiten 19 Patienten importieren/exportieren 76 Patienteninformation 13 Patienteninformationen 34 Patienteninformationsblatt 50, 52 Patientenkriterien 70 Position wiederherstellen 69 -RRechte Hand 13 Rechteck alles 32 Rechteck vorne 32 Rechter Arm 13 Rechter Fuß 13 Rechtes Bein 13 Rechtliche Hinweise 8 Rollup Menüs 15 Rotation 30 Rotationsachsen 77 Rotationsgeschwindigkeit Rückgängig 15, 18 32 98 Tabellarische Übersicht aller erhobenen Istzustände 50, 57 Thorax 13 Transfer 18 Transparenz 66 Trennzeichen 70 -UÜberblenden 66 Überblenden von digitalen Fotos Überblendung ausblenden 69 Unfallhergang 38, 40 -V- 77 -SSchnellansichten 13 Schnellauswahl 15 Schweregrad 44 Skalieren 30 Speichern 18 © RISC Software GmbH - Medical Informatics Verbrennungsfall 15 Verbrennungsfalldaten 11 Verfügbare Ärzte 81 Verfügbare Charakteristiken 84 Verfügbare Fotokategorien 85 Verfügbare Muster 85 Verknüpfungsart 66 Verlauf 13, 18 Verlaufsdaten 38, 46 Verlaufsleiste 4, 13, 29 Verschieben 30 Video-Codec 77 Videokompressoren 77 Virtual Trackball 30 Volltextsuche 49 Vorerkrankungen 38, 44 Vorschau 50 4 Index -WWarranty 9 -Zzeitliche Gliederung 13 Zugeordnete Schnellansicht 66 Zuordnen 66 Zuordnung aufheben 66 Zusatzdatenerfassung 39 Zusatzverletzungen 18, 38, 45 Zustand am Unfallort 38, 41 Zustand bei Aufnahme 38, 43 © RISC Software GmbH - Medical Informatics 99