1
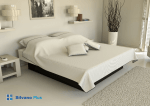
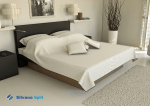
Silvano Box
1
© Copyright Silvano Online GmbH, all rights reserved
What you’ll need
Necessary tools:
(screws included by the manufacturer)
You’ll need these accessories to assemble your waterbed
© Copyright Silvano Online GmbH, all rights reserved
2
Silvano Box
Scan the QR-code to watch
the assembly video.
https://www.youtube.com/user/silvanowaterbeds
1.
2.
3.
QR code generated on http://qrcode.littleidiot.be
d
re
de ra!
r
t
if o ex
Place the headboard on the floor with the steel
slide-in brackets at the bottom.
4.
5.
Use the attachment points on the underside to fix
the bases to one another at the head and foot.
3
Lay the left and right bases on the floor. There
are attachment points on the undersides of both
bases for fixing them together later. Position the
bases in such a way that the attachment points
are opposite each other.
Tilt one of the bases on its side and screw six legs
into it. Carefully turn it right way up onto the legs.
Do the same with the other base.
6.
Now attach the headboard to the bases using the
slide-in brackets.
Lay the base cover onto the bases.
Make sure that the zip is at the head of the bed.
© Copyright Silvano Online GmbH, all rights reserved
7.
8.
The shorter foam borders run along the width, while
the longer foam borders run along the length.
Use a sharp knife to make a small 0’6” (15 cm)
incision in the base cover in the left corner of the
head side. If you have a Duo-system, do the same
in the right corner.
Place the 4 foam borders inside the base cover on the
foam border underlays, making sure that the corners
match precisely. Then use screws to secure each foam
border to the bases with the strips attached to the
foam borders.
11.
Make sure that the corners of the lining snugly fit
the corners of the foam borders and that the lining
sits smoothly on the heating element.
The thermo divider (if ordered extra) can only
be used with a Duo-system. Place the divider
underneath and between the mattresses with the
wider side towards the bottom.
12.
Now place the water mattress inside the safety
lining (with its fill nozzle at the foot).
Fill the water mattress with lukewarm water at a
temperature of app. 27 °C.
Open the nozzle(s) so that air enters the water
mattress. Do this by pulling up the nozzle(s) with
a twisting motion, unscrewing the cap(s) and
removing the stopper(s).
Before using the hose, rinse it with hot water to
eliminate bacteria that may be present.
Smoothen the water mattress thoroughly,
removing all folds. Make sure that the 4 corners
snugly fit the corners of the foam borders.
Now place the safety lining inside the four softside
foam borders and pull its edges over the foam
borders.
Now position the heating element. Make sure
that the heating element is placed at least 15 cm
from the border. It must rest fully on a single base
and never overlap the two bases. Run the lead
out of the waterbed through the incision in the
corner. The thermostat should now be outside the
waterbed.
(Secure each foam border with five long screws.)
10.
9.
Connect the hose and fill coupling.
Please note: If you have a duo configuration, fill the
water mattresses simultaneously.
Close the tap after 10 minutes and check once again
that the 4 corners of the water mattress snugly fit the
corners of the foam borders. Turn the tap back on.
The water mattress is full once the water level is 0’0”
(0,5 cm) below the edge of the bed.
© Copyright Silvano Online GmbH, all rights reserved
4
Silvano Box
13.
14.
15.
d
re
de ra!
r
t
if o ex
Attach the Air Extractor to the nozzle using a
twisting motion.
Now add 1x 150 ml bottle of Silvano conditioner
to the water.
Now bleed the air from the waterbed by pushing
the air from the head of the bed towards the
nozzle. Move the handle of the Air Extractor up
and down to pump out the air. Repeat until all
the air is removed from your water mattress.
If you have a Duo-system, divide 1x 150 ml bottle
of Silvano conditioner between both water
mattresses.
16.
Zip the mattress topper undercover (0’2” (5 cm)
border) to the softside base cover.
5
Make sure that the elastic trim goes underneath
the foam borders (just like a fitted sheet).
Place the stopper back inside the nozzle, replace
the cap and push the nozzle back into the
mattress.
17.
ed
er a!
d
r tr
if o ex
Stretch the topliner over the foam borders. Make
sure that the 4 corners snugly fit the corners of
the foam borders.
18.
ed
er a!
d
r tr
if o ex
Place the mattress topper into the undercover.
Set the thermostat to the desired temperature.
We recommend a temperature of 28 °C. Now zip
the top mattress cover to the mattress topper
undercover.
© Copyright Silvano Online GmbH, all rights reserved
19.
Your waterbed is ready for use. Silvano
Waterbedden wishes you pleasant dreams!
© Copyright Silvano Online GmbH, all rights reserved
6
Silvano waterbed warranty
When you buy a Silvano waterbed and (one or more) below items/accessories, you are guaranteed an excellent asset covered by
a warranty of many years:
warranty
2 years
5 years
10 years
EN71water mattress seams and vinyl messamoll2
Heating elements
Safety lining, cover, foam border
Base and optional bedroom furnishings
Duvets, pillows
Linen: duvet covers, fitted sheets
Scope of warranty
Seams:
We are so convinced of the quality of our products that we offer a 10-year warranty on the durability of the seams on the Silvano
water mattress. In the event of leaks resulting from material or manufacture faults, you are covered by a 100% warranty for the
first five years. From the 6th to the 10th years, the warranty amounts to 50%, 40%, 30%, 20% and 10% respectively.
Safety lining, cover, foam border, base and optional bedroom furnishings:
100% warranty covering material and manufacture faults for 2 years.
Heating elements:
There is a straightforward 5-year manufacturer warranty that covers heating systems. The warranty conditions of the relevant
manufacturers apply.
Other products:
Linen is covered by a two-year warranty. This obviously excludes wear-and-tear resulting from regular use.
7
© Copyright Silvano Online GmbH, all rights reserved
Warranty period
The warranty period commences as of the date on the purchase invoice. To claim on the basis of this warranty, the buyer must be able to produce proof of purchase that
clearly displays the purchase date. The warranty cannot be transferred to a different party.
This warranty is exclusively offered on condition that the installation instructions are followed and the product receives regular care. Replaced and repaired goods are
likewise covered by the ongoing warranty. In case of repairs or the replacement of components, the warranty period will not be extended or renewed. If damage cannot
be repaired, Silvano will replace the item with an identical or equivalent product within the warranty period.
Warranty stipulations
Silvano is committed to correcting material and manufacture faults in accordance to what has been stipulated in the section ‘Scope of warranty’. If a product is no longer
available, Silvano reserves the right to supply an equivalent product as a replacement.
Warranty limitations
Damage, resulting directly or indirectly from improper use, incorrect operation, excessive load, incompetent installation or relocation, repairs or modifications carried out
by the buyer, and defects resulting from regular wear-and-tear or from inadequate care, are not covered by the warranty. Care implies the biannual addition of Silvano
conditioner to the water in the water mattress and cleaning of the mattress every two months using special Silvano cleaner. You are, in any event, advised to safeguard
your purchase invoices for these products. If you take advantage of the automatic Silvano care products delivery service, your orders are registered in our system and it is
not necessary for you to keep your purchase documents.
The above warranty stipulations in no way affect the legal guarantee period to which you as a consumer are entitled to in accordance with European directives.
Contact
Silvano Online GmbH
Availability
Wehrstr. 28
46399 Suderwick
Weekdays from 8 am to 9 pm
Saturdays from 8 am to 8 pm
Email: [email protected]
Jurisdiction: Coesfeld
Chamber of Commerce : HRB14497 ( DE )
VAT number: DE289507183
Tax number: 307/5707/1116
© Copyright Silvano Online GmbH, all rights reserved
8
Care and hints
To extend the lifespan of your waterbed, we recommend that you urgently follow the below care instructions.
Air extraction
Once your waterbed has been installed and the mattresses are filled with (oxygenated) water, it is important that your frequently
extract the air from the water mattresses over the period of a few weeks. Air bubbles are revealed by a sloshing sound made by
the water! This means that it is time to take action.
Method
To remove the air from your water mattress, you use a special pump called an Air Extractor. This pump fits the fill nozzle. You
can extract the air from the waterbed by pushing the air from the head of the mattress towards the fill nozzle. By pumping it
out with the Air Extractor, you remove any air that might be present. Do this once a week over 3 to 4 weeks after installation of
your waterbed. This will ensure that the water mattress is completely free of air, which will restrict bacterial growth or leaks to a
minimum.
Vinyl cleaner
Our waterbeds are made of a vinyl film that requires simple care once every month using our vinyl cleaner. You can do this by
spraying the cleaner onto the water mattress and rubbing it in until absorbed. Doing this will keep the water mattress supple and
clean and will prevent the vinyl from perishing.
Attention: Do not use general cleaning substances for the care of your water mattress!
Conditioner
To keep the quality of the water in your mattress at ideal levels, conditioner must be added to the water every six months. As a
rule, the water should never need replacement.
Method
Before adding the conditioner, pull the fill nozzle out of the mattress and remove the cap. At the same time, carefully push down
the mattress around the fill nozzle to keep the water level high in the nozzle and prevent air from entering the mattress. Then add
the contents of a bottle of conditioner, close the fill nozzle and push it back into the mattress. If you have a Duo-waterbed system,
divide the contents of a bottle of conditioner between both mattresses.
Unpleasant odours
Odours can occur when the biological balance of the water is disturbed or if conditioner is not added according to instructions.
The use of care substances other than the recommended vinyl cleaner can also cause odours.
Method
If you notice that your water mattress has an unpleasant odour, we recommend that you drain the mattress, refill it and then drain
and refill it again. Then you must, of course, extract the air from your waterbed over a period of 3 to 4 weeks as described above.
9
© Copyright Silvano Online GmbH, all rights reserved
Draining the water mattress
It may become necessary to drain your water mattress. We recommend that two persons take on this task and that
you consult the user manual supplied with your water mattress. You can use our special waterbed pump to safely
and efficiently drain your waterbed. It is also possible to use a drill pump (not battery-powered). Different fill hoses
are available for both systems. Below, we briefly explain how to drain your waterbed.
Method
Remove the plug from the socket to disable the heating system, remove the mattress cover, extract the air from the
water mattress and then connect the pump and hose. Make sure that the hose is long enough to reach as suitable
drain outlet. Turn on the pump.
Your water mattress will be empty once the suction has created an airtight vacuum. This has been achieved when
the upper and lower vinyl layers have been sucked tightly together. Then, you can disconnect the hose and quickly
replace the cap on the fill nozzle. Make sure that the mattress does not fill itself with air again!
Mattress cover
The mattress cover must regularly be washed and aired. It is not intended to directly be slept on and must always
be covered with a fitted sheet. We recommend that duvets are pulled back every morning to release possible
condensation.
Leaks
Silvano waterbeds are made in such a way that there is no reason to fear serious leaks. If a small leak does occur, the
water is contained within the safety lining. You can simply repair minor leaks yourself with the help of our special
repair kit, and without the need to drain the waterbed.
Method
Remove the plug from the socket to disable the heating system. Then try to trace the leak by systematically
checking the entire water mattress. Do this by pressing every section down by 0’4” (10 cm) to 0’6” (15 cm) to make
the edge bulge slightly. Once you have located the leak, you can mark it and repair it with a drop of adhesive in case
of a small hole, or a glued patch in case of a larger hole. Allow the adhesive to dry properly.
© Copyright Silvano Online GmbH, all rights reserved
10